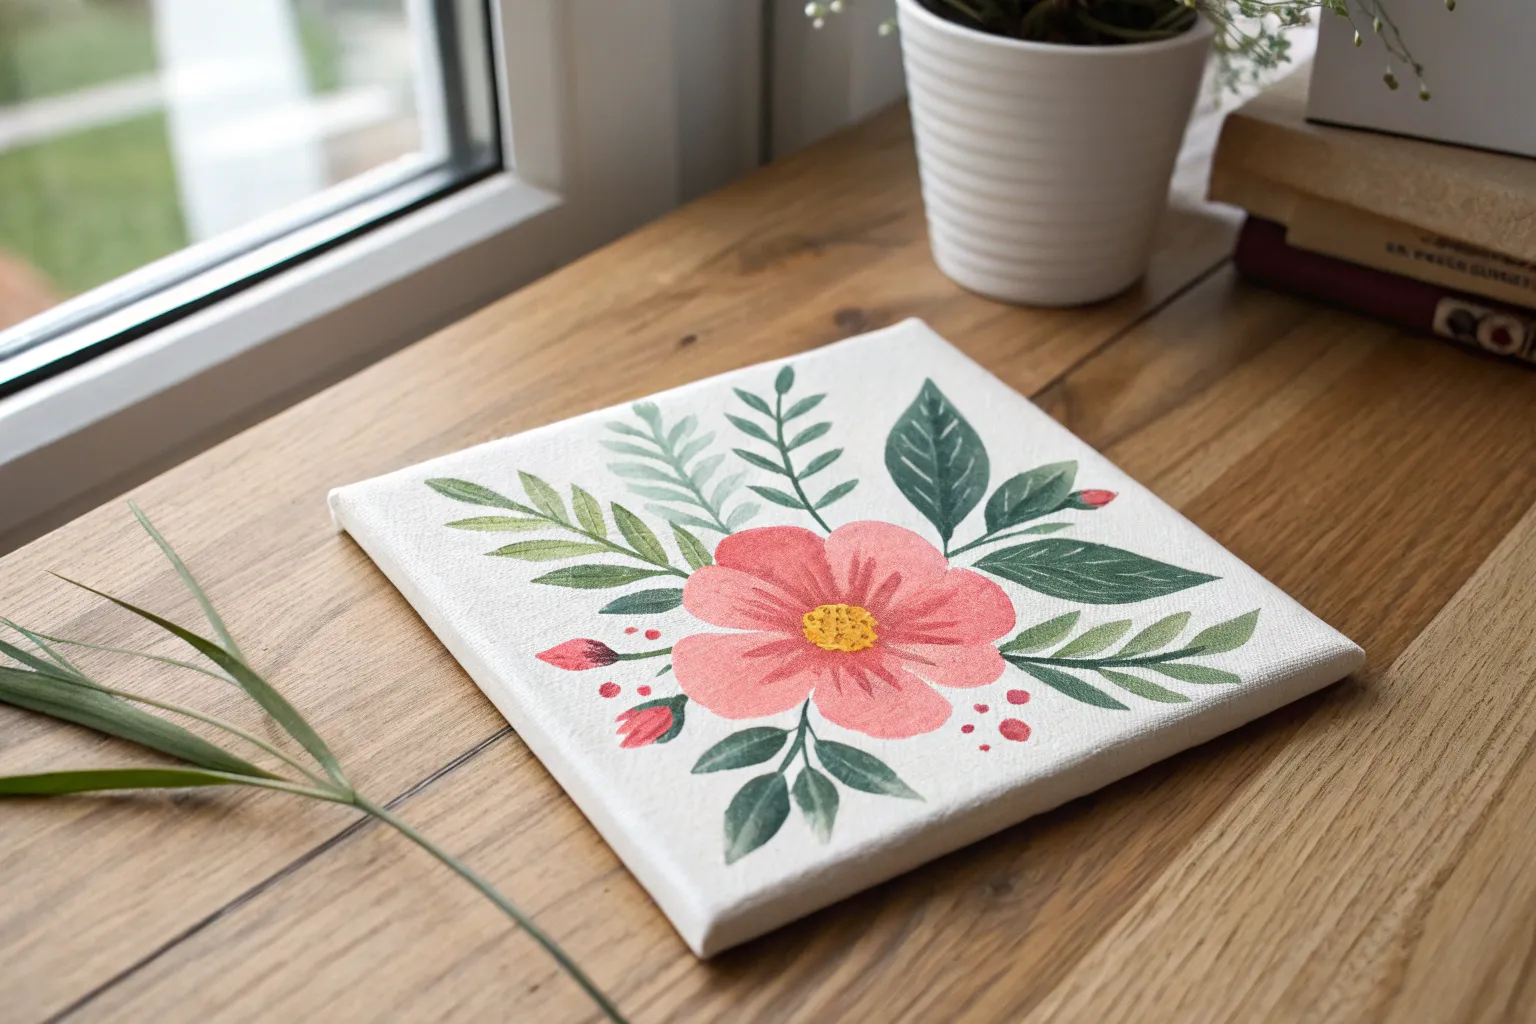
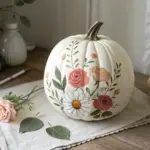
When I want something relaxing and satisfying, I reach for small flower paintings—they’re quick, forgiving, and ridiculously cute when you line a bunch up together. These mini floral ideas are perfect for tiny canvases, sketchbook corners, and little gifts you can finish in one cozy painting session.
Single Daisy Stem on a Mini Canvas
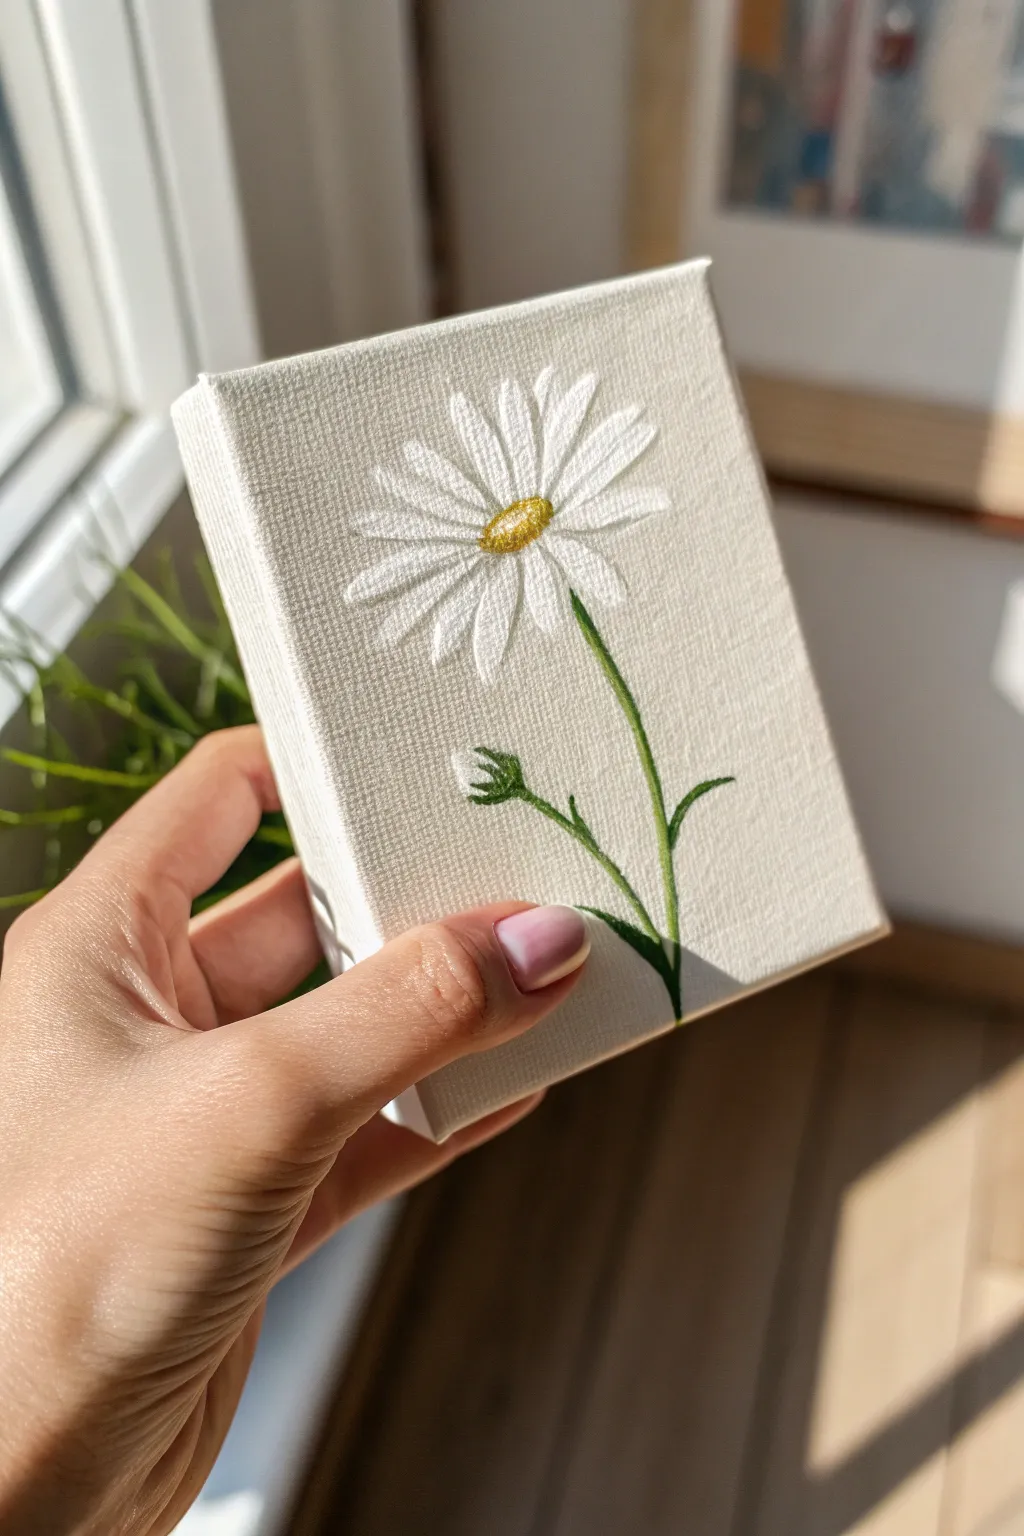
This delicate project combines the texture of embroidery with the structure of a stretched canvas for a beautiful 3D effect. The satin-stitched white petals and textured French knot center create a lifelike daisy that pops right off the fabric surface.
Detailed Instructions
Materials
- Small stretched mini-canvas (approx. 3×4 inches)
- White embroidery floss
- Golden yellow embroidery floss
- Dark green embroidery floss
- Medium green embroidery floss
- Embroidery needle (sharp tip)
- Pencil or disappearing ink fabric pen
- Thimble (essential for pushing through canvas)
- Small scissors
Step 1: Preparation & Sketching
-
Lightly sketch the design:
Using a pencil or disappearing ink pen, draw a simple outline directly onto the canvas. Start with a small oval for the flower center near the top third. -
Draw the petals:
Sketch radiating petals around the center oval. Aim for about 12-15 petals that are slightly irregular in shape—some overlapping, some slightly shorter—to make it look organic. -
Mark the stem and bud:
Draw a thin, slightly curved line extending downwards for the main stem. Add a second, shorter branch off to the left side and top it with a small teardrop shape for the unbloomed bud.
Needle won’t go through?
Primed canvas is tough! Use a sharp chenille needle rather than a blunt tapestry needle. Keep a thimble handy to protect your fingers when pushing through the stiff backing.
Step 2: Stitching the Flower
-
Prepare your thread:
Cut a length of white embroidery floss. Use 3-4 strands for a nice, plump petal look. Knot the end securely. -
Start the satin stitch:
Bring your needle up through the canvas at the base of a petal (near the center oval) and down at the tip of the petal. Getting through the primed canvas takes a bit of force, so a thimble is helpful here. -
Fill the petals:
Continue making parallel stitches close together to fill each petal shape completely. I find it helpful to stitch from the center outward to keep the edges neat. -
Layering petals:
If you sketched overlapping petals, stitch the ‘background’ petals first, then stitch the foreground ones on top to create depth. -
Create the center:
Switch to the golden yellow floss (use all 6 strands for volume). Fill the center oval with French knots. -
French knot technique:
Bring the needle come up, wrap the thread around the needle twice, and insert it back down very close to where you came up. Pack these knots tightly to simulate pollen.
Add a mixed media twist
Paint the background of the canvas a soft sky blue using acrylics before you start stitching. Let it dry completely for 24 hours to avoid getting paint on your thread.
Step 3: Stems & Greenery
-
Stitch the main stem:
Thread your needle with medium green floss. use a stem stitch or a split stitch to follow your pencil line down from the flower head to the bottom edge. -
Add dimension to the stem:
For a thicker stem, you may need to do a second row of stitching right next to the first. -
Create the small bud:
Move to the side branch. Use a few straight stitches in dark green to create the sepals (the green cup) at the base of the bud. -
Fill the white bud:
Use a tiny amount of white floss to make two or three small satin stitches emerging from the green cup, showing the petals just starting to peek out. -
Add leaves:
using the dark green floss, stitch small, slender leaves attached to the lower part of the stem using simple satin stitches. -
Finishing touches:
Inspect the back of the canvas. Trim any loose threads and secure your final knots. Since the back is open, you can dab a little fabric glue on the knots for extra security.
Place your mini masterpiece on a small easel or a windowsill where it catch the light


Simple Tulip Duo With Clean Negative Space
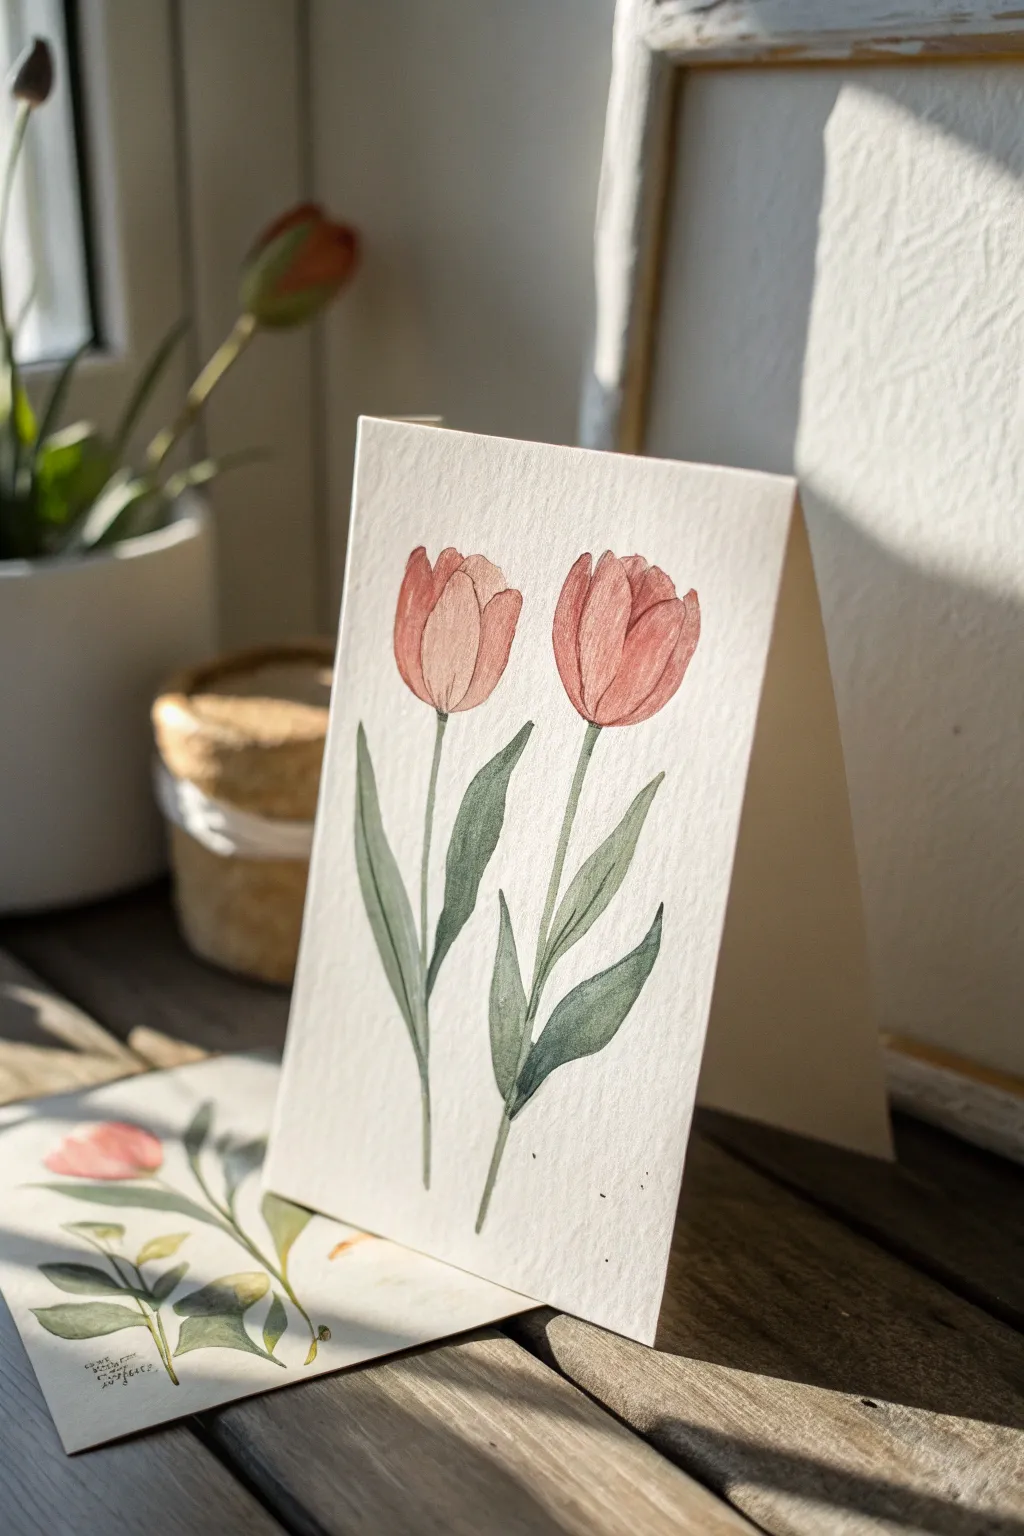
Capture the elegance of spring with this minimal watercolor card featuring a pair of soft red tulips. The design embraces clean white space to highlight the delicate petals and gentle green foliage, making it a perfect handmade greeting for any occasion.
Step-by-Step Tutorial
Materials
- Cold press watercolor paper (folded into a card)
- Watercolor paints (Alizarin Crimson, Sap Green, Burnt Umber)
- Round brushes (size 4 and size 0 or 2 for details)
- Pencil (H or HB)
- Kneaded eraser
- Clean water jar
- Paper towel
Step 1: Planning the Composition
-
Prepare the card:
Begin with a piece of high-quality cold press watercolor paper. Fold it carefully in half to create your card base, ensuring the fold is crisp. -
Sketch the flower placement:
Using an H pencil, lightly sketch two oval shapes for the tulip heads in the upper half of the card. Place the right one slightly lower than the left to create a natural rhythm. -
Draft the stems and leaves:
Draw faint lines extending downward from the flower heads for stems. Sketch long, lance-shaped leaves that curve gently outward and upward. -
Refine the outlines:
Add the definition of the petals inside your ovals—tulips usually have a central petal flanked by side petals. Keep these lines extremely faint so they won’t show through the paint. -
Lighten the sketch:
Roll your kneaded eraser over the entire drawing. You want the graphite to be barely visible, just enough to guide your brush.
Muddy Greens?
If your green looks unnatural, mix in a tiny dot of the RED you used for the flowers. Complementary colors neutralize each other, creating realistic botanical tones.
Step 2: Painting the Blooms
-
Mix the petal color:
Create a watery wash of Alizarin Crimson. You want a soft, translucent red, so use plenty of water. -
Paint the first wash:
Fill in the overall shape of the tulip heads with this pale wash. Let the watercolor settle into the paper’s texture naturally. -
Add wet-on-wet shading:
While the first layer is still slightly damp, drop in a more concentrated mix of the red at the base of the petals and where the petals overlap. -
Separate the petals:
I like to wait for the paint to dry completely here. Once dry, use a slightly darker red mix to paint thin, crisp lines that define the edges of individual petals, giving the flower dimension. -
Soften the edges:
If any lines look too harsh, rinse your brush, blot it, and gently run the damp bristles along the edge to soften the transition.
Pro Tip: Hard Edges
To get that crisp edge on the tulip petals, ensure the paper is 100% dry before painting the overlapping petal lines. Wet paper will cause the lines to bleed and blur.
Step 3: Stems and Foliage
-
Mix the green:
Combine Sap Green with a tiny touch of Burnt Umber or the red from your palette to de-saturate it slightly. This creates a natural, earthy green rather than a bright artificial one. -
Paint the stems:
Using the tip of your round brush or a smaller detail brush, paint the thin stems. Start right at the base of the flower head and pull the stroke purposefully downward. -
Fill the leaves:
Load your size 4 brush with the green mix. Start at the bottom of a leaf with light pressure, press down to widen the stroke for the leaf body, and lift up at the tip. -
Create variation:
While the green paint is wet, you can drop in a slightly darker green (add a bit more blue or brown) at the bottom of the leaves for shadow. -
Leave a highlight:
For a realistic look, try to leave tiny slivers of white paper unpainted along one edge of the leaves to suggest light hitting the surface.
Step 4: Final Details
-
Check connections:
Ensure the stems connect seamlessly to the leaves. If there are gaps, fill them in carefully with the tip of your brush. -
Evaluate contrast:
Step back and look at your card. If the flowers look too pale, add a very delicate glaze of red over the shadowed areas once everything is bone dry. -
Optional splatter:
If you enjoy a loose style, you can tap a tiny amount of watered-down paint against a brush handle to add a few microscopic speckles, though this design works beautifully clean as well.
Allow your beautiful work to dry flat completely before writing your message inside


Tiny Rosebud Study in Soft Layers
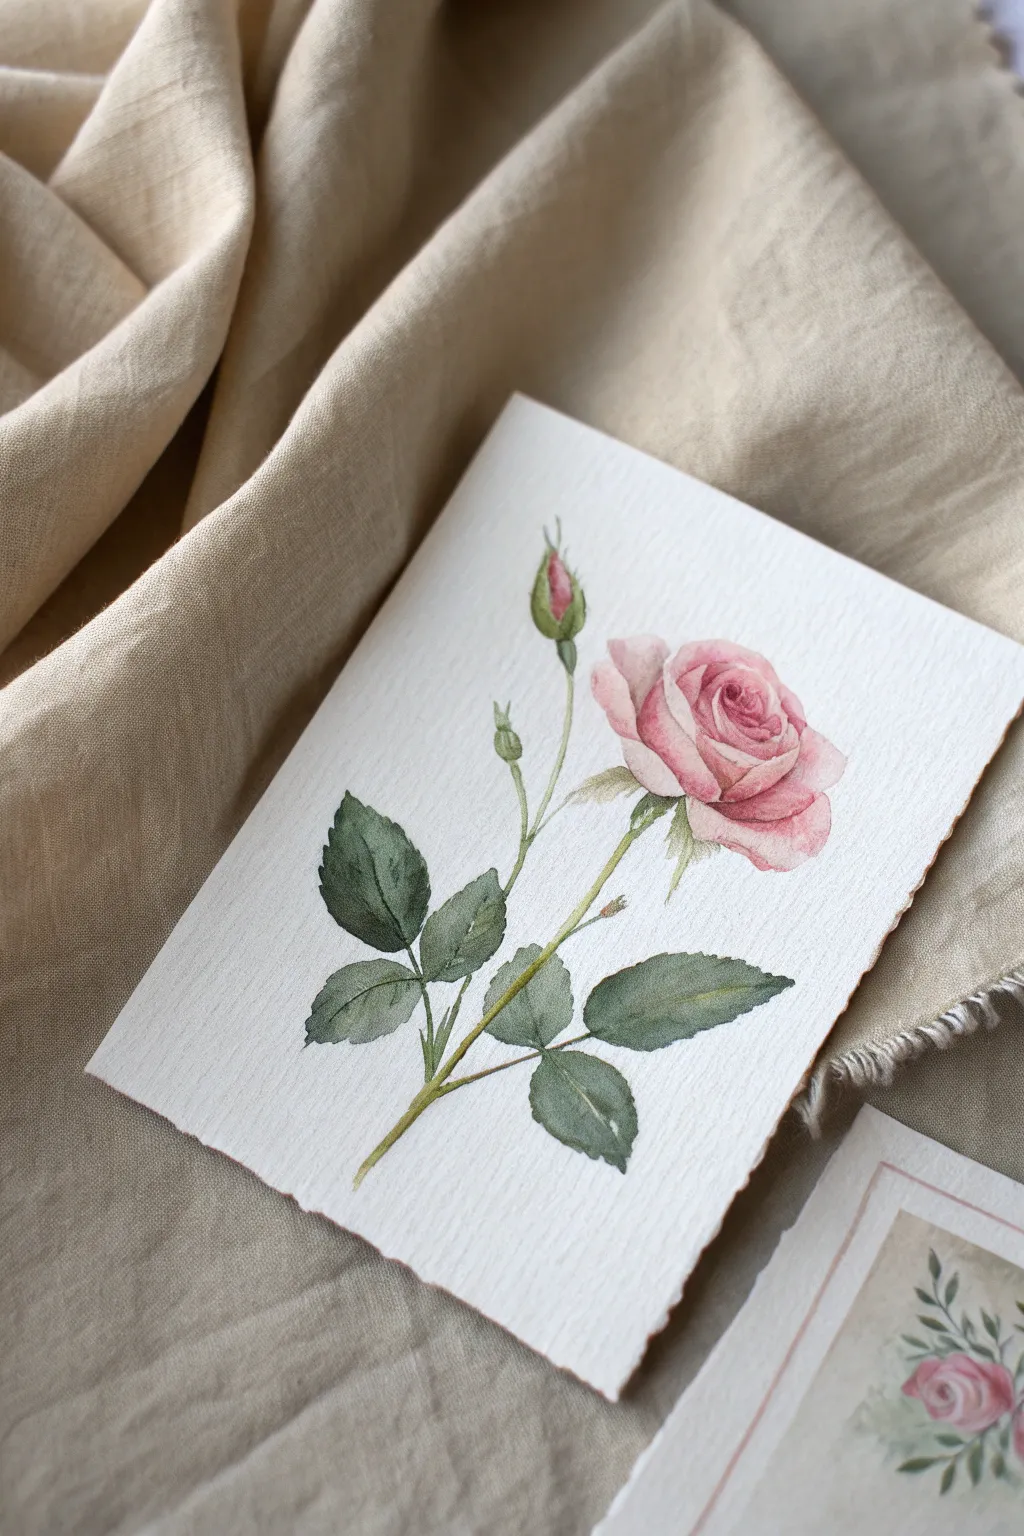
Capture the fragile beauty of a blooming pink rose and its budding companion in this soft watercolor study. Using layered washes and precise brushwork on textured paper, you will build depth and realism petal by petal.
How-To Guide
Materials
- Cold press watercolor paper (300 gsm or heavier, with prominent texture)
- Watercolor paints: Alizarin Crimson, Sap Green, Burnt Umber, Yellow Ochre, and a touch of Opera Pink
- Pointed round watercolor brushes (Size 4 for washes, Size 0 or 1 for details)
- Pencil (HB or H) for light sketching
- Kneaded eraser
- Two jars of water
- Paper towels
- Palette or white ceramic plate
Step 1: Sketching & Initial Washes
-
Outline the Composition:
Begin by lightly sketching the main rose bloom using simple geometric shapes—a cup shape for the base and an oval for the opening. Draw a curving stem extending downwards and add the smaller bud branching off to the upper left. Keep your pencil lines extremely faint so they disappear under the paint. -
Sketch the Petals:
Refine the main bloom by drawing the spiral of the inner petals and the wider curve of the outer petals. Sketch the jagged edges of the leaves and the small sepals hugging the base of the flower and bud. -
Prepare the Pink Mix:
Mix a very dilute wash of Alizarin Crimson with plenty of water to create a pale blushing pink. If you want a brighter pop, add the tiniest speck of Opera Pink. -
First Pink Layer:
Apply this pale wash to the entire rose head and the tip of the bud, avoiding the very whitest highlights on the curled petal edges. This establishes the base glow. -
Base Greenery:
Mix Sap Green with a touch of Yellow Ochre for a warm, natural green. Paint the stems, the sepals, and a flat wash over the leaf shapes. Let everything dry completely.
Muddy colors?
If your pinks look brown, you’re mixing complementaries too early. Ensure the green layers are 100% dry before painting pink near them to stop bleeding.
Step 2: Building Form & Depth
-
Deepening the Rose Center:
Mix a slightly more concentrated version of your Alizarin Crimson. With your size 4 brush, carefully paint the shadows deep inside the rose’s spiral center, softening the edges with a clean, damp brush to create a smooth transition. -
Defining Outer Petals:
Use the same mid-tone pink to shade the base of the outer petals where they attach to the flower, leaving the upper edges pale. This creates the cup-like volume. -
Painting the Bud:
Add a darker pink stroke to the left side of the rosebud to make it look round, blending it gently toward the right side. -
Layering the Leaves:
Mix Sap Green with a little Alizarin Crimson or Burnt Umber to create a darker, shadowed green. Paint the second layer on the leaves, leaving the central veins the lighter base color you painted earlier. -
Stem Shadows:
Run a thin line of the darker green mix down one side of the main stem and the smaller bud stem to give them a cylindrical appearance.
Step 3: Refining Details
-
Darkest Accents:
Create your darkest pink by mixing Alizarin Crimson with a tiny bit of Burnt Umber. Switch to your size 0 or 1 detail brush. -
Petal Separation:
Paint very thin, crisp lines in the deepest crevices between the petals to separate them clearly. Be sparing—too many dark lines can flatten the image. -
Leaf Texture:
Using the dark green mix and your detail brush, paint fine veins branching out from the center of each leaf. I like to keep these lines broken and organic rather than perfectly straight. -
Enhancing the Sepals:
Add tiny spikes of dark green to the sepals (the green leaves under the flower head) to emphasize their textural, leafy quality. -
Final Glazing:
If the rose looks too pale, wait for it to be bone dry, then apply a very watery glaze of pink over the shadowed areas to unify the layers. -
Deckled Edge (Optional):
To mimic the look in the photo, tear the edges of your watercolor paper against a ruler for a soft, deckled finish.
Vintage Vibe
Soak the finished painting in strong black tea for 5 minutes. This tints the bright white paper to a warm beige for an instant antique botanical look.
Now step back and admire how a few simple layers of color have bloomed into a timeless botanical study.


Mini Lavender Sprig Using Dot-and-Dab Petals
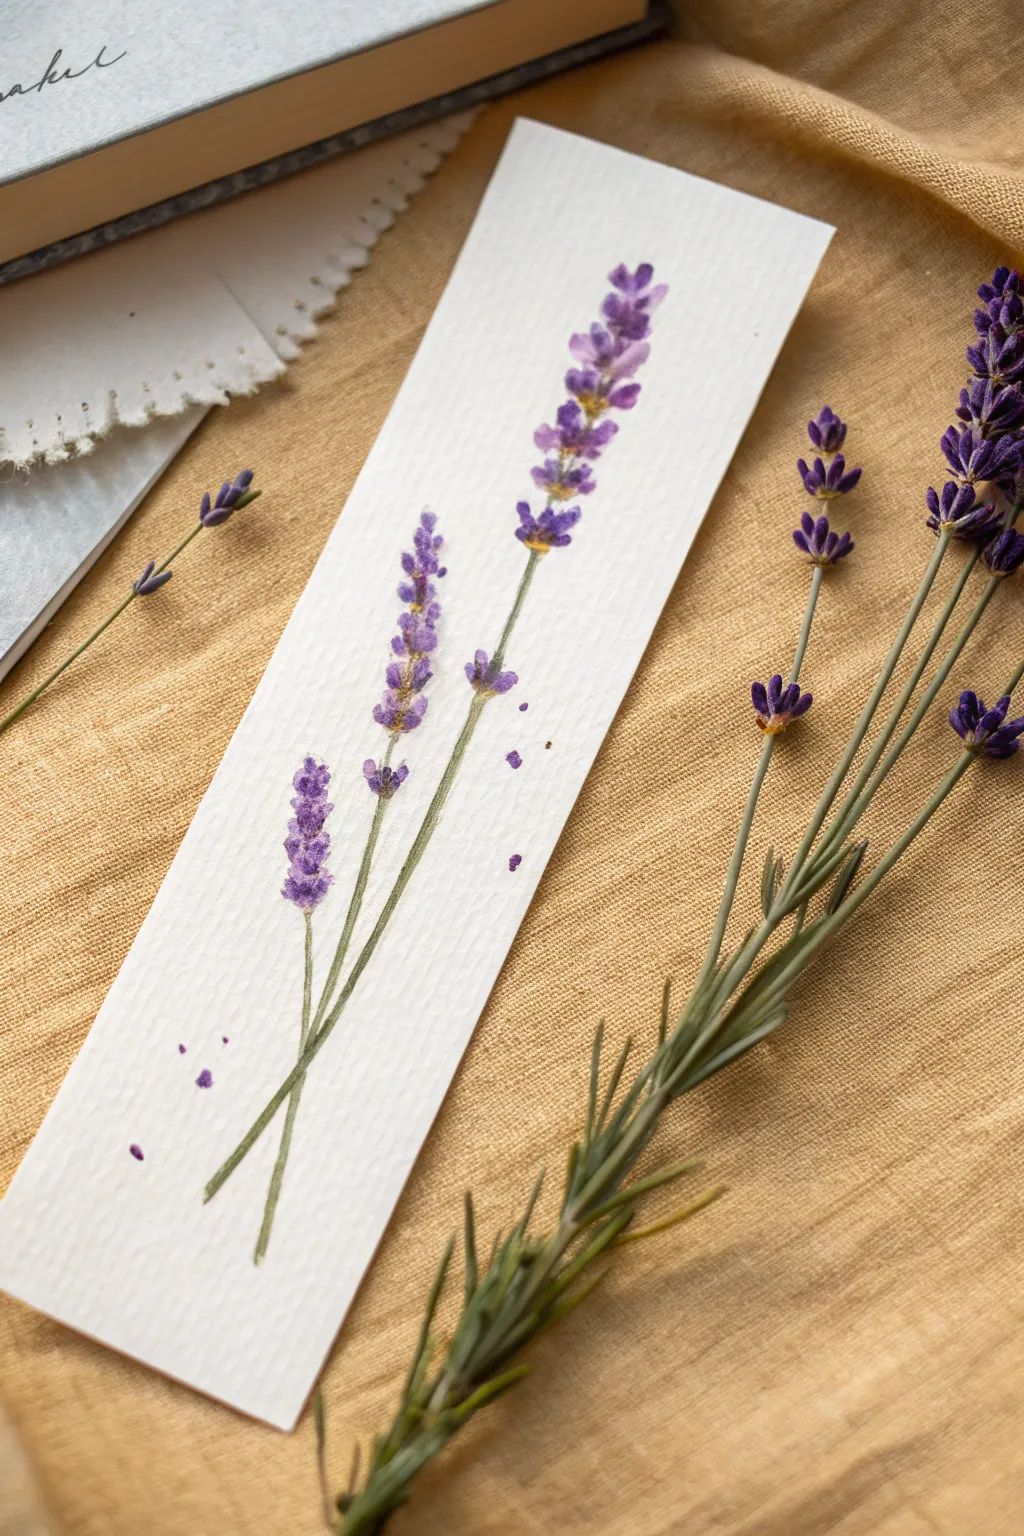
Capture the delicate beauty of dried herbs with this simple watercolor project perfect for marking your place in a favorite novel. Using a gentle dot-and-dab technique, you’ll create soft purple blooms on a textured paper strip that mimics the feel of vintage botanical illustrations.
Step-by-Step Guide
Materials
- Cold-pressed watercolor paper (cut to 2.5″ x 7″ bookmark size)
- Watercolor paints (Ultramarine Blue, Alizarin Crimson or Quinacridone Magenta, Sap Green, Burnt Umber)
- Small round watercolor brushes (size 0 or 1 for details, size 3 for stems)
- Jar of clean water
- Paper towels
- Optional: Pencil for very light sketching
Step 1: Planning the Composition
-
Prepare the Paper:
Cut your watercolor paper into a tall, narrow rectangle. The texture of cold-pressed paper is ideal here because the little bumps help the pigment pool naturally, mimicking the organic texture of lavender buds. -
Visualize the Stems:
Before painting, visualize or very lightly sketch three intersecting lines for your stems. They should start near the bottom center and fan out slightly, with one standing taller than the other two to create a pleasing asymmetry.
Muddy Purple?
If your purple looks dull or brown, you may be overworking it on the paper. Let the blue and red mix on the palette or paper, and don’t stir them too much once applied.
Step 2: Painting the Stems
-
Mix the Green:
Create a muted green mixture by combining sap green with a tiny touch ofburnt umber or purple. This dulls the green so it looks natural and dried, rather than neon bright. -
Draw the First Stem:
Load your size 3 brush with the watery green mix. Starting from the bottom, pull a long, very thin line upwards. Use the very tip of the brush and lift pressure as you reach the top so the stem tapers off. -
Add the Crossing Stems:
Paint the second and third stems, allowing them to cross over the first one near the bottom. This intersection adds realism, as wildflowers rarely stand perfectly parallel. -
Add Tiny Leaves (Optional):
While the stems are still slightly damp, you can add tiny, needle-like leaves protruding from the lower sections using just the tip of your brush, but keep them irregular and sparse.
Step 3: Creating the Blooms
-
Mix the Purple Hues:
Prepare two puddles of purple paint: a blue-violet (ultramarine + magenta) and a slightly darker, redder violet. Having two variations adds depth to the tiny buds. -
Start the Top Bud:
Switch to your smallest brush (size 0 or 1). On the tallest stem, start near the very top tip. Paint small, teardrop-shaped dabs of the lighter purple on alternating sides of the imaginary stem line. -
The Gap Technique:
As you work your way down the stem, leave tiny gaps of white paper between clusters of purple dots. I like to leave these little breathing spaces because they represent light hitting the flower spike. -
Layering Colors:
While the first dots are wet, drop tiny amounts of the darker purple into the bottom edge of some buds. The colors will bleed together softly, creating instant shadow and volume. -
Building the Lower Sections:
Lavender grows in tiers. Create distinct clusters of petals further down the stem, leaving a visible gap of green stem between the main flower head and these lower ‘satellite’ blooms. -
Repeat for Other Sprigs:
Paint the flower heads on the remaining two stems. Vary the height and density—make one sprig look a bit fuller and another a bit more sparse to suggest different stages of blooming.
Scented Bookmark
Once fully dry, place your bookmark in a sealed bag with actual dried lavender buds for a week. The paper will absorb the scent, making your reading experience fragrant.
Step 4: Final Details
-
Yellow Highlights:
Once the purple is partially dry but not bone dry, you can add an extremely tiny dot of yellow ochre or dirty yellow into the center of a few blooms to mimic pollen, though this should be very subtle. -
Connect the Blooms:
If any flower clusters look like they are floating, use your fine brush with a very pale green to draw a whisper-thin line connecting them back to the main stem. -
Fallen Petals:
To enhance the artistic composition, paint three or four stray purple specks falling away from the stems. These ‘fallen petals’ give the piece movement and a gentle, impermanent feel. -
Final Splatter:
Load your brush with watery purple paint and tap it gently over the paper to create a few microscopic speckles around the flowers, adding texture and loosening up the style. -
Let it Dry:
Allow the bookmark to dry completely flat. If the paper buckles slightly, you can place it under a heavy book overnight once it is fully dry to flatten it out.
Slide this lovely handmade piece into your current read and enjoy a touch of nature every time you open the book
BRUSH GUIDE
The Right Brush for Every Stroke
From clean lines to bold texture — master brush choice, stroke control, and essential techniques.
Explore the Full Guide
Cherry Blossom Twig With a Light Pink Wash
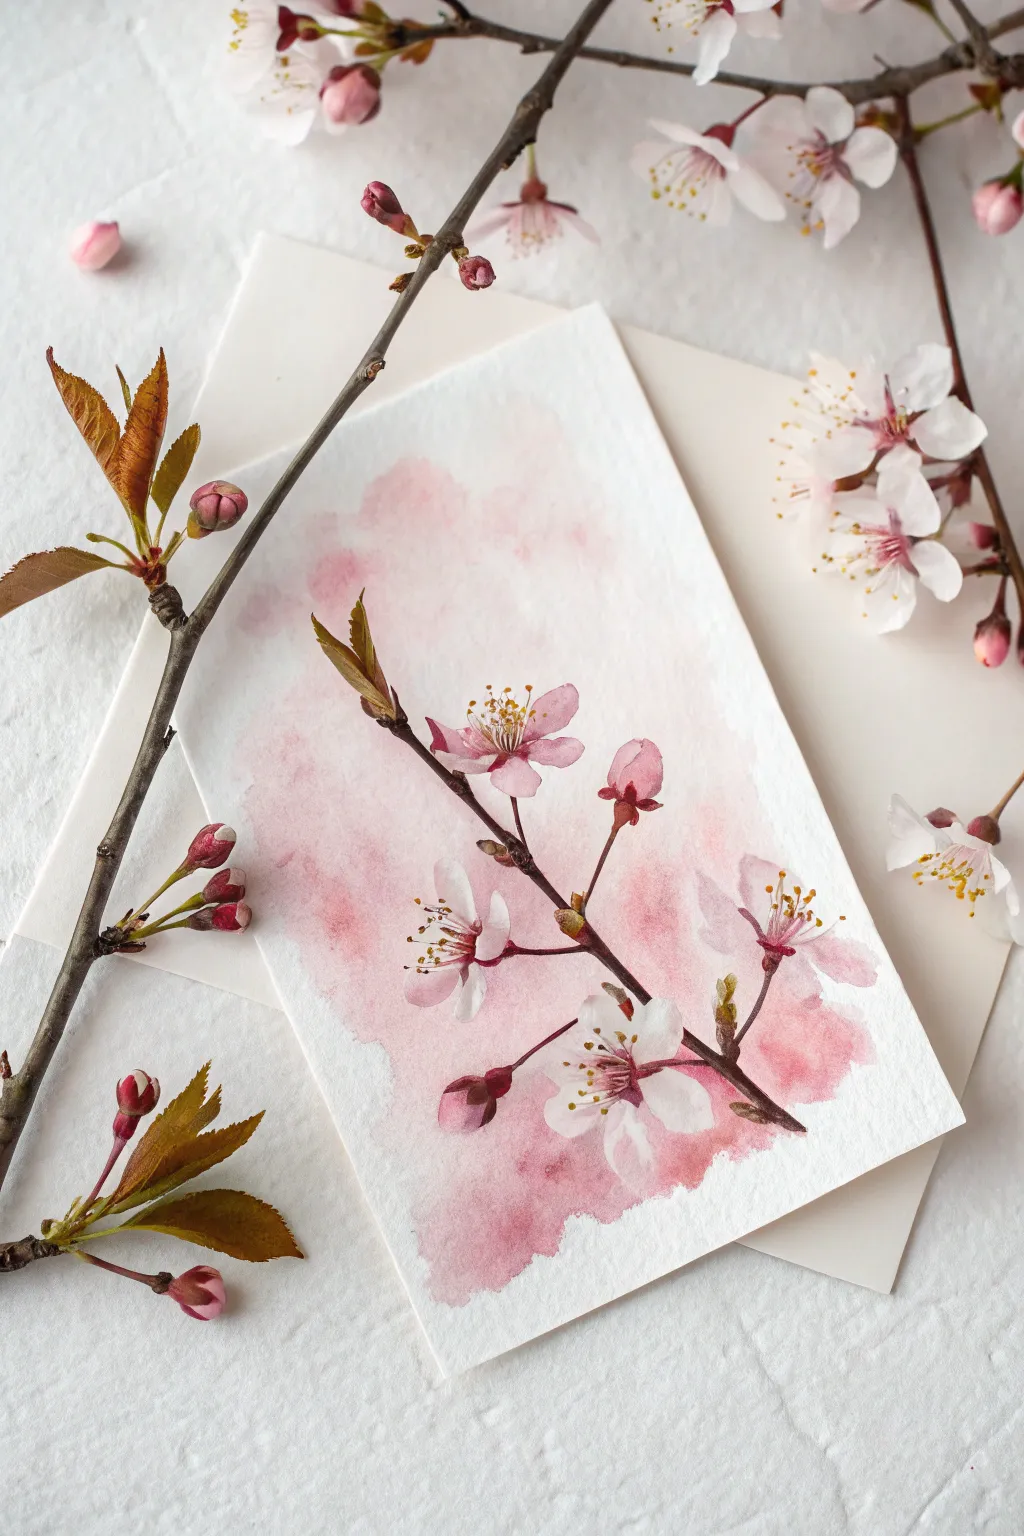
Capture the ephemeral beauty of spring with this delicate watercolor study. Featuring a soft, diffused pink background and crisp botanical details, this card makes a lovely gift or a framed miniature artwork.
Detailed Instructions
Materials
- Cold press watercolor paper (cut to 5×7 inches or A6 size)
- Watercolor paints (Alizarin Crimson, Sap Green, Burnt Umber, Yellow Ochre)
- Round watercolor brushes (size 6 for wash, size 2 for details)
- Pencil (HB or H)
- Jar of clean water
- Paper towel
- Masking tape (optional, to secure paper)
Step 1: Preparation & Background
-
Paper readiness:
Begin by taping down your watercolor paper to a board if you want perfectly flat edges, though for this loose style, a little buckling adds charm. Ensure your surface is clean and dry. -
Mixing the wash:
Dilute a small amount of Alizarin Crimson with plenty of water to create a very pale, tea-like rose color. You want this to be faint and translucent. -
Applying the wash:
Using your size 6 brush, paint an irregular patch of this pale pink in the center of the paper. Keep the edges wet and ragged; don’t try to make a perfect rectangle. -
Adding texture:
While the wash is still wet, drop in slightly more concentrated pink spots randomly. Let these bleed and bloom naturally to create that dreamy, clouded texture seen in the background. -
Patience is key:
Let this background layer dry completely. If you paint over it while it’s damp, your crisp twig lines will blur into the pink wash.
Step 2: Drawing the Structure
-
Sketching the twig:
Lightly sketch the main diagonal branch using an H pencil. Keep the line faint. Mark positions for three main flower clusters and a few buds. -
Flower placement:
Draw the basic five-petal shapes lightly. Don’t worry about perfect symmetry; natural flowers have varied angles and overlapping petals.
Wet-on-Wet Magic
For soft petal gradients, wet the petal shape with clean water first, then touch just the center with pink paint. The color will flow outward but stop at the water’s edge.
Step 3: Painting the Botanicals
-
Main branch color:
Mix Burnt Umber with a touch of Alizarin Crimson to get a reddish-brown hue. Using the size 2 brush, paint the main twig, thickening the line slightly at the joints. -
Adding thorns and buds:
Add small, sharp protrusions for thorns and the tiny sepals at the base of the flowers. Use a darker mix of brown for the shadows on the underside of the twig. -
Painting petals:
Dilute your pink mixture again. Paint the petals with very watery paint, leaving tiny slivers of white paper showing between them to define shapes. -
Shadowing white petals:
For the white flowers near the bottom, use an extremely pale grey-pink wash (water with a dirty brush works well here) just to give the white petals subtle dimension without darkening them. -
The centers:
Once petals are dry, mix a deeper pink-red. Dab this into the very center of the open flowers to create depth. -
Fresh leaves:
Mix Sap Green with a little brown for a natural, olive tone. Paint the small, pointed leaves emerging from the buds. I like to lift the brush at the very end to get a sharp tip. -
Defining the stamens:
With your smallest brush point or a fine liner, draw tiny filaments radiating from the center. Dot the tips with Yellow Ochre to represent pollen. -
Final highlights:
If your white flowers got too dark, you can use a tiny dab of white gouache to restore brilliance to the petal edges or pollen dots.
Add Realism
To make the branch look 3D, run a very thin line of darker brown along the bottom edge of the twig while the first layer is still slightly damp.
Once dry, you can sign your name in the corner or mount it onto an envelope for a beautiful handmade correspondence
Petite Sunflower Head With a Textured Center
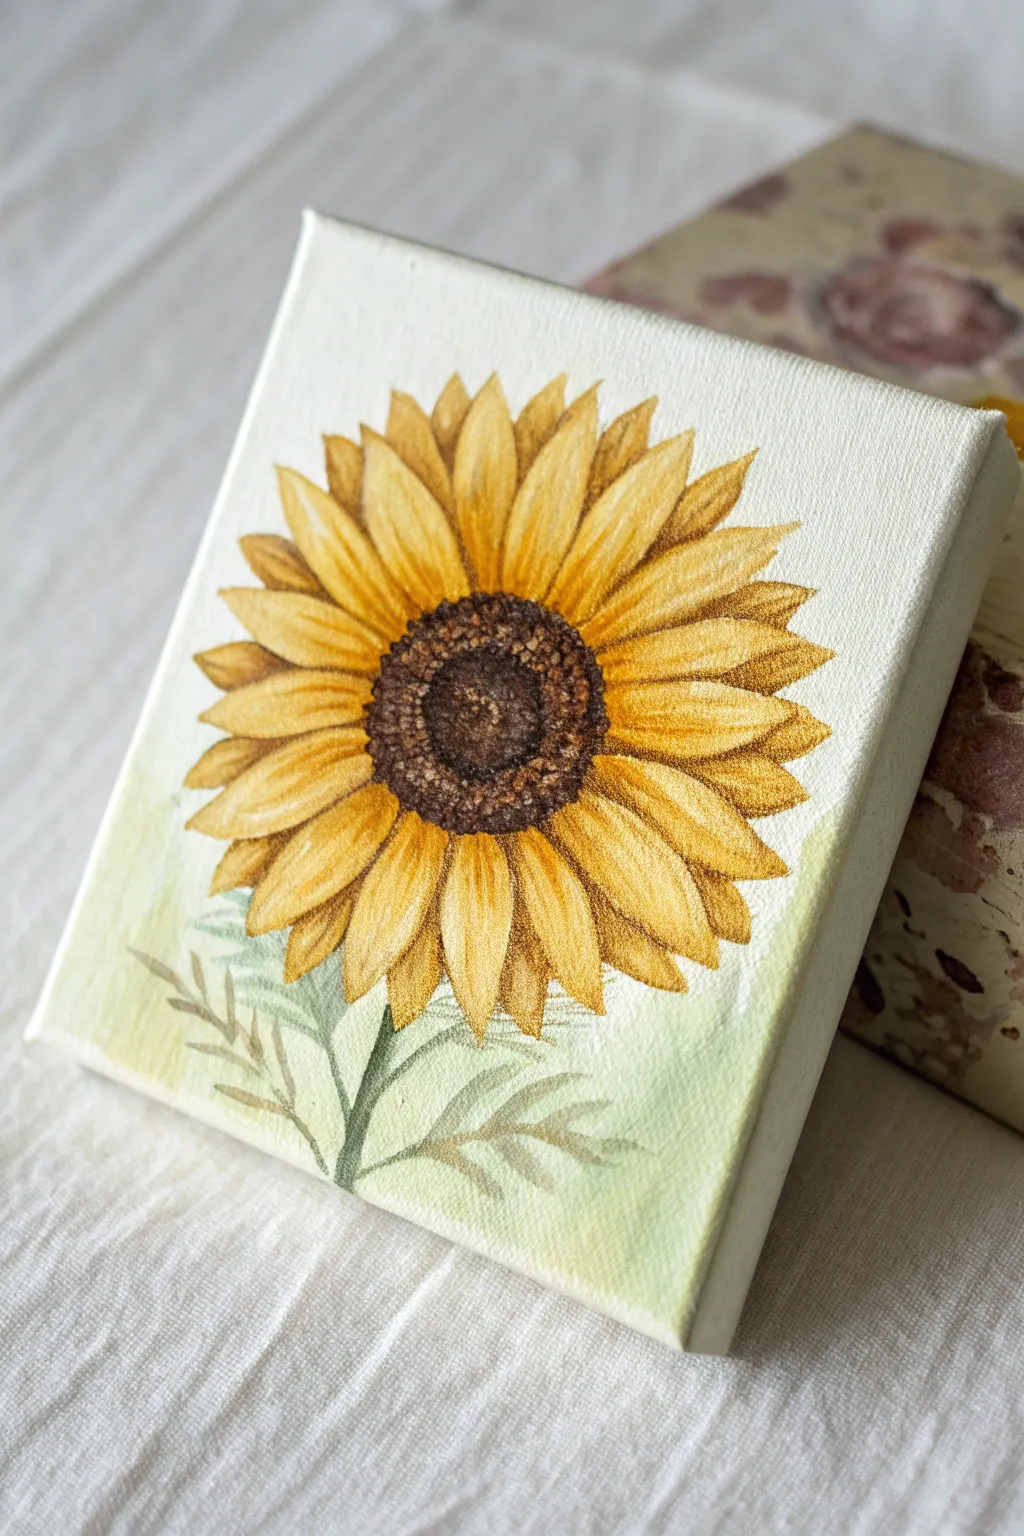
Capturing the intricate beauty of a sunflower on a small scale creates a charming piece of art perfect for shelf styling. This project focuses on building depth in the flower’s center through texture and layering warm yellows for the petals.
Step-by-Step
Materials
- Small square canvas (e.g., 4×4 or 6×6 inches)
- Acrylic paints (Titanium White, Cadmium Yellow, Yellow Ochre, Burnt Sienna, Burnt Umber, Sap Green)
- Round synthetic brushes (size 0, 2, and 4)
- Pencil (HB or similar light graphite)
- Palette for mixing
- Water cup and paper towels
- Matte spray varnish (optional)
Step 1: Sketching and Background
-
Prepare the canvas:
Ensure your small canvas is clean and dust-free. If the weave is very rough, you might want to apply a thin coat of gesso to smooth it out for detailed work. -
Outline the center:
Lightly draw a circle in the middle of the canvas using your pencil. It doesn’t need to be perfectly round; a slight oval shape often looks more natural. -
Sketch the petals:
Draw the petal shapes radiating from the center circle. Sketch a layer of front petals first, which are wider, and then fill in the gaps with pointed tips of petals peeking from behind. -
Add stem and leaves:
At the very bottom, sketch a thin stem and a few serrated leaf shapes drifting upwards. Keep the pencil pressure extremely light here so lines won’t show through the pale paint later. -
Apply the background wash:
Mix a large amount of Titanium White with a tiny dot of Sap Green and water to create a very pale, transparent wash. Apply this freely to the background corners and bottom area, letting it fade out near the petals.
Use a rigger brush
For the finest lines on the petals, try a rigger or liner brush. Its long bristles hold more paint and allow for incredibly smooth, continuous thin strokes.
Step 2: Painting the Flower Head
-
Base coat the petals:
Mix Cadmium Yellow with a touch of White. Paint all the petals with this solid opaque color to block them in, ignoring the shading for now. -
Base coat the center:
Paint the central disk with a flat layer of Burnt Sienna. Don’t worry about texture yet; just get the dark color down to cover the white canvas. -
Shadowing the petals:
Mix Yellow Ochre with a small amount of Burnt Sienna. Using a size 2 brush, paint delicate streaks from the base of each petal moving outward to create the ribbed texture. -
Defining the overlaps:
Use the same ochre mixture to paint thin lines between the petals, clearly separating the petals that are in front from those in the back. -
Highlighting petal tips:
Clean your brush and pick up pure Titanium White mixed with a little yellow. Add highlights to the very tips and edges of the petals to make them look sunkissed. -
Deepening contrast:
For the deepest shadows where the petals meet the center disk, use a tiny amount of Burnt Umber to create a dark ring at the base of the petals.
Pencil lines showing?
If your pencil sketch is visible under the yellow paint, don’t erase it. Instead, layer a thicker mixture of white and yellow over it before reapplying your final color.
Step 3: Adding Texture and Details
-
Stippling the outer ring:
Mix Burnt Umber with a little black or dark blue. Using the tip of a size 0 brush, dab tiny dots (stippling) in a ring around the outer edge of the center disk. -
Texturing the middle center:
Switch to pure Burnt Sienna. Continue the stippling motion moving inward toward the center, but slightly less dense than the outer ring. -
Highlighting the center:
Mix Burnt Sienna with a little Yellow Ochre. Dab a few lighter dots right in the middle of the sunflower’s face to create a domed effect. -
Painting the greenery:
Mix Sap Green with White and a touch of Burnt Sienna to get a muted, sage green. Fill in the stem and leaf sketches with soft, watery strokes. -
Refining leaf details:
I like to use a slightly darker green mix to add a central vein to the leaves and lightly define the serrated edges, keeping the look soft rather than sharp. -
Final assessment:
Look at the painting from a distance. If the petals look too flat, add a few more thin, dark lines at their base to enhance the cupped shape.
Allow your mini masterpiece to dry completely before displaying it on a small easel or shelf

PENCIL GUIDE
Understanding Pencil Grades from H to B
From first sketch to finished drawing — learn pencil grades, line control, and shading techniques.
Explore the Full Guide
Small Hydrangea Cluster Built From Tiny Dots
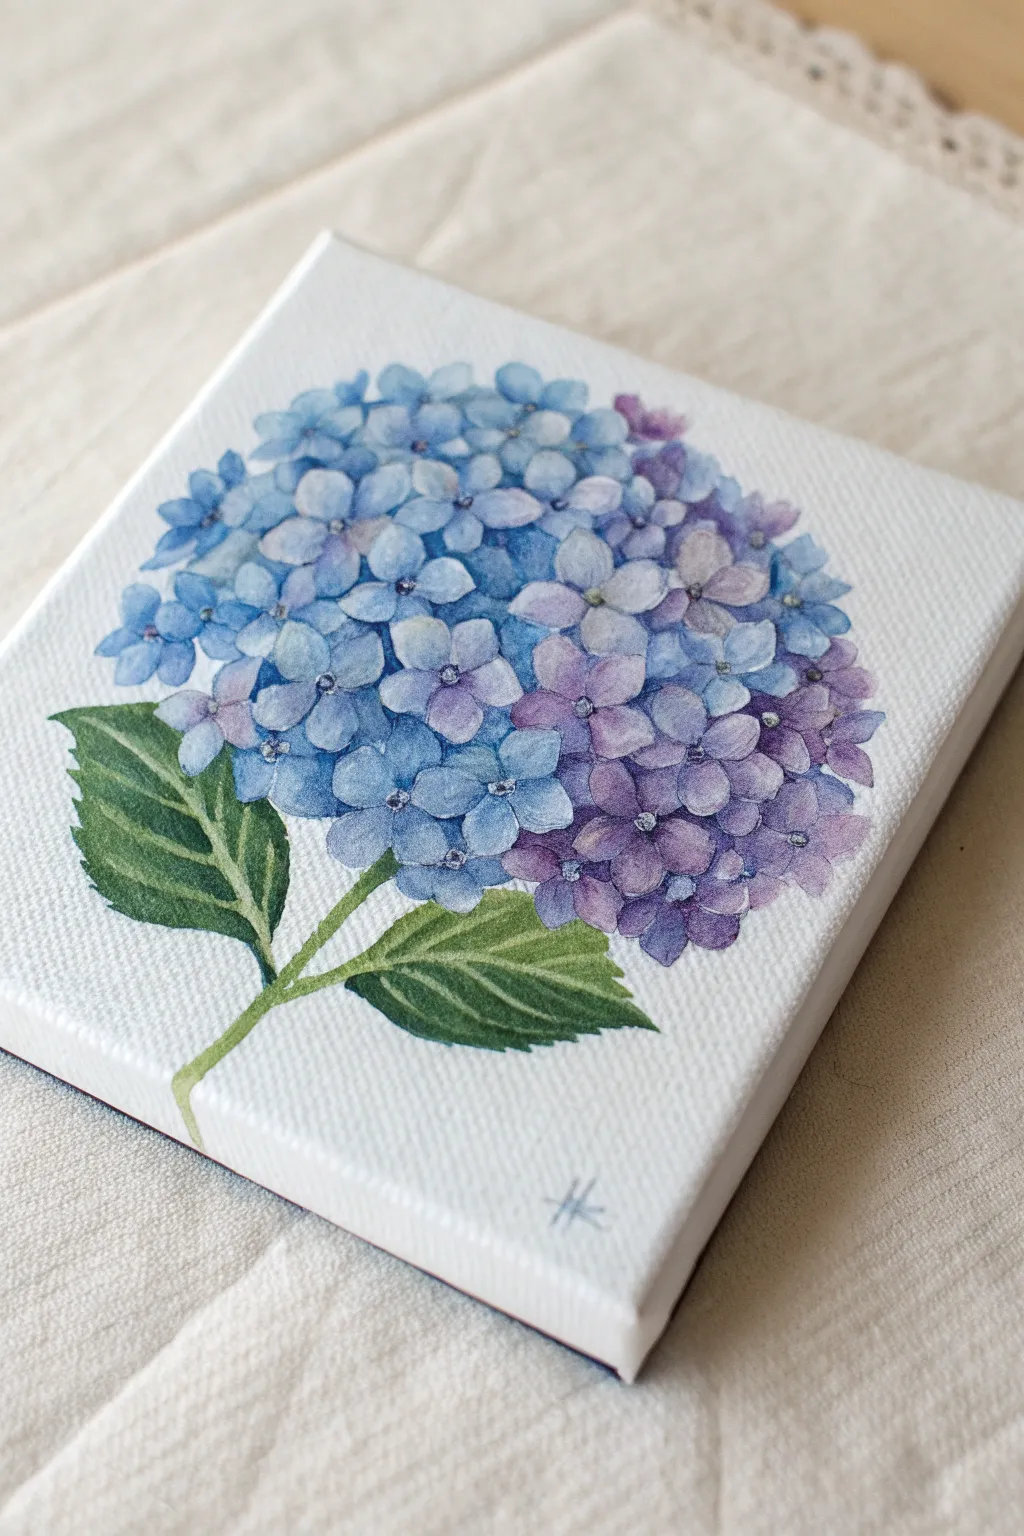
This project captures the intricate beauty of a hydrangea flower by breaking down its complexity into small, manageable four-petal florets. The result is a soft, shifting gradient of blues and purples on a crisp white canvas that feels simultaneously realistic and dreamy.
How-To Guide
Materials
- Small square stretched canvas (e.g., 6×6 inches)
- Watercolor paints (Cobalt Blue, Ultramarine, purple/violet, Sap Green)
- Watercolor ground (essential for painting watercolor on canvas)
- Small round brushes (sizes 0, 2, and 4)
- Mixing palette
- Paper towels
- Pencil (HB or H for light lines)
- Jar of clean water
Step 1: Preparation & Sketching
-
Prime the surface:
Since standard canvases are primed for acrylics or oils, apply 2-3 coats of watercolor ground first. Let each coat dry completely. This creates an absorbent surface that allows the paint to bloom and flow rather than bead up. -
Outline the head:
Using an H pencil, lightly sketch a large, slightly irregular circle in the upper center of the canvas. This will define the overall shape of the flower cluster so you don’t paint off the edge. -
Sketch the leaves:
Draw a thin stem extending from the bottom center. Add two serrated, pointed oval shapes for leaves branching off the bottom of the stem, ensuring the edges look naturally jagged. -
Map the florets:
Inside your large circle, sketch a few key four-petal florets. You don’t need to draw every single one perfectly; just establish the size and direction of the main ones near the center and edges.
Fixing “Muddy” Colors
If your purples look brown, stop! Let the blue layer dry 100% before glazing red/pink over it. Wet-on-wet mixing of complementary colors often causes mud.
Step 2: Painting the Florets
-
Mix your blues:
Prepare a watery wash of Cobalt Blue. On your palette, also mix a slightly deeper blue using Ultramarine to have varying tonal values ready. -
Start with the base layer:
Begin painting the individual florets on the left side using the lighter blue. Paint four small teardrop shapes meeting in the center for each floret. Keep the paint quite wet and transparent. -
Introduce purple tones:
As you move toward the right side of the flower head, gradually mix violet into your blue wash. Paint these florets with the purple-tinged mixture to create a natural gradient across the bloom. -
Layering for depth:
Once the first layer of petals feels dry to the touch, mix a slightly more saturated version of your blue and purple paints. Glaze over some of the petals, leaving others pale, to create the illusion of overlapping flowers. -
Fill the gaps:
Paint partial petals in the empty spaces between the defined florets. These represent flowers that are tucked behind the visible ones, adding density to the sphere. -
Define the centers:
Using your smallest brush (size 0) and a concentrated dot of dark blue or purple paint, add the tiny center seed to each floret. This small detail immediately brings the cluster into focus.
Step 3: The Foliage
-
Base coat for leaves:
Mix a Sap Green wash and fill in the leaf shapes. I like to keep the edges crisp here to contrast with the soft flower petals. -
Adding shadow:
While the green is still slightly damp, drop in a darker green (mixed with a touch of blue) near the stem and the central vein area to create curvature. -
Vein details:
Once the leaves are fully dry, verify your brush is clean and dry. Use a ‘lifting’ technique with a damp, stiff brush to scrub away thin lines for the veins, or carefully paint around them with a second darker layer of green. -
Stem work:
Paint the stem with a mix of green and a tiny bit of brown for realism. Ensure it connects naturally to the base of the flower head.
Add Dew Drops
Lift a tiny circle of paint with a clean wet brush, then add a crescent of white gouache and a tiny dark shadow underneath for a realistic water droplet.
Step 4: Final Touches
-
Deepen shadows:
Look for areas within the flower cluster that feel too flat. Add tiny touches of dark indigo or violet in the deepest recesses between petals to make the lighter petals pop forward. -
Sign and seal:
Add your initials in a light wash of blue in the bottom corner. Once fully dry (give it 24 hours), spray with a UV-resistant fixative to protect the watercolor on the canvas surface.
Now you have a charming botanical piece that brings a permanent garden bloom into your home.
Anemone Mini Portrait With a Dark Center
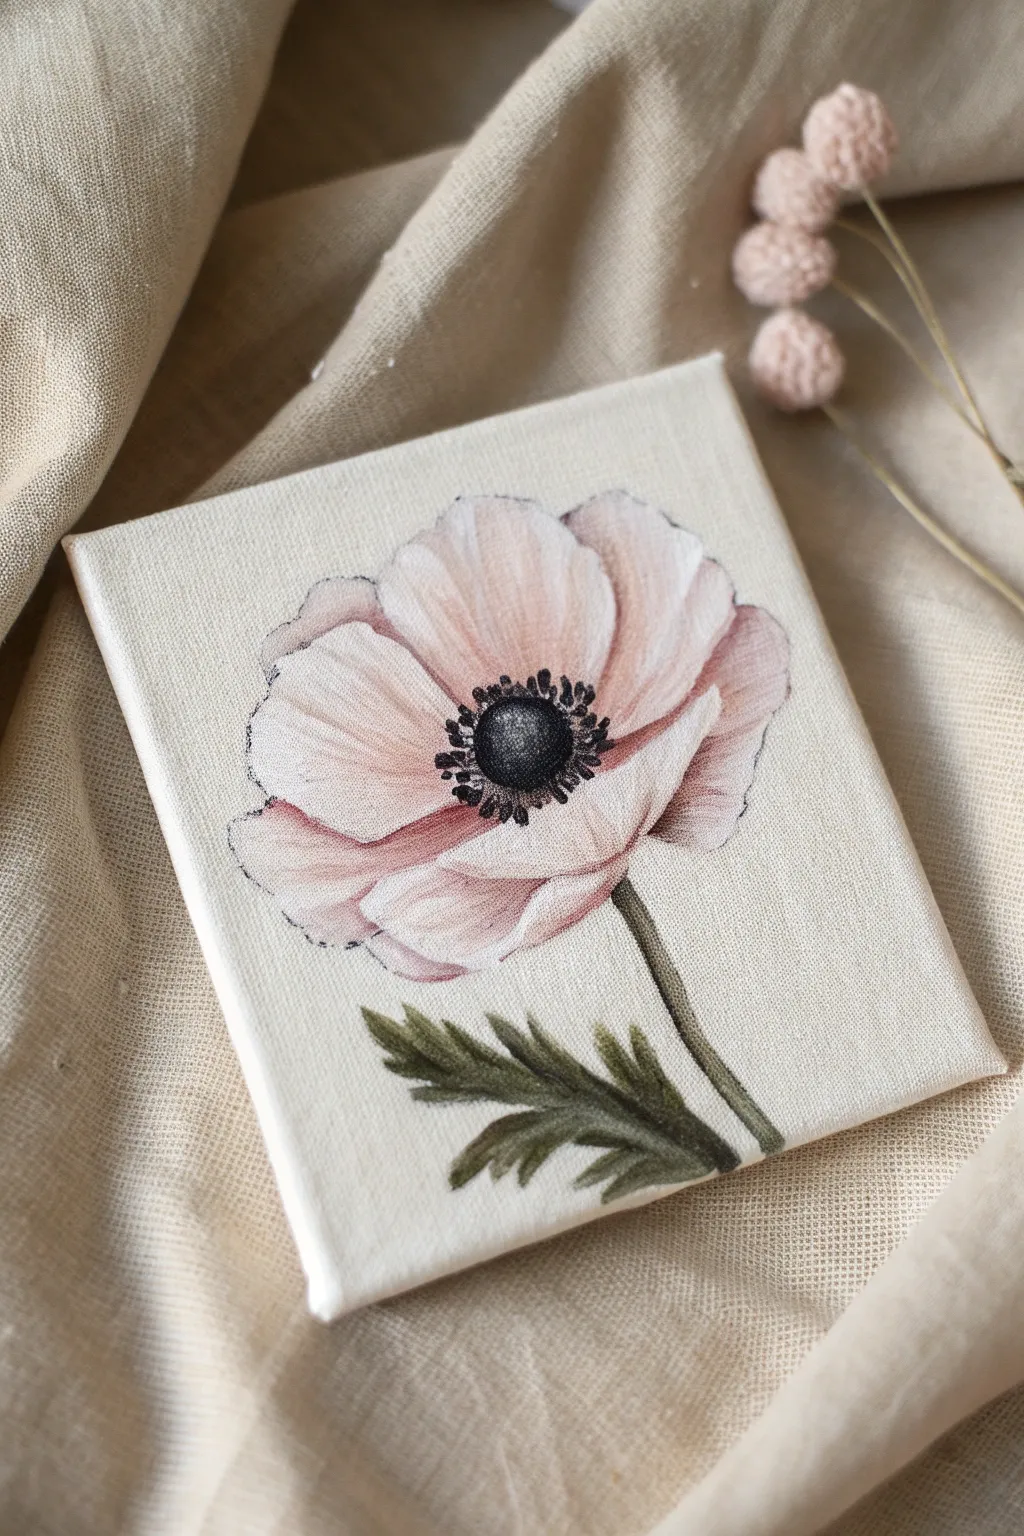
Capture the delicate beauty of a pale pink anemone on a small canvas, focusing on the dramatic contrast between its soft petals and striking dark center. This project explores gentle blending techniques to achieve a translucent, airy feel perfect for miniature art.
Detailed Instructions
Materials
- Small square stretched canvas (e.g., 6×6 inch)
- Acrylic paints: Titanium White, Alizarin Crimson, Burnt Umber, Mars Black, Sap Green, Yellow Ochre
- Soft synthetic brushes: Flat wash (1/2 inch), Round (size 4), Fine liner (size 00)
- Palette for mixing
- Cup of water and paper towels
- Pencil for sketching (HB)
Step 1: Sketching the Composition
-
Define the Center:
Start by lightly drawing a small oval slightly off-center on your canvas. This will be the dark heart of the anemone. -
Map the Petals:
Draw large, overlapping organic shapes radiating from the central oval. Anemones have wide, papery petals, so keep the edges slightly wavy rather than perfectly round. -
Add the Stem and Leaf:
Sketch a thin, slightly curved line extending downward from the flower head for the stem. Add a jagged, fern-like leaf shape near the bottom right to balance the composition.
Step 2: Painting the Flower Head
-
Mix the Base Pink:
Create a very pale pink by mixing a large amount of Titanium White with a tiny dot of Alizarin Crimson. You want a color that is almost off-white. -
Apply the Base Layer:
Using the size 4 round brush, fill in the petal shapes with your pale pink mix. Don’t worry about perfect coverage; a little transparency adds to the delicate look. -
Shadow Mixing:
While the base is drying, mix a slightly darker, muted pink. Add a touch more Alizarin Crimson and a microscopic speck of Burnt Umber to your original white mix to desaturate it. -
Define Petal Overlaps:
Use the muted pink to paint along the edges where one petal sits behind another. This creates depth and separates the individual petals. -
Highlighting Edges:
Load your brush with pure Titanium White. dry-brush the outer tips of the petals to catch the light and create that feathery texture. -
Deepen Inner Shadows:
Mix a small amount of watered-down Alizarin Crimson. Glaze this gently near the center of the flower where the petals meet the dark core to create a glowing effect.
Fixing “Heavy” Petals
If your petals look too solid or heavy, mix a glazing medium or water with white paint and apply a thin veil over the dry petals to soften the colors.
Step 3: The Center Details
-
Paint the Button:
Fill the central oval with a mix of Mars Black and a touch of Burnt Umber. Ideally, apply this in a stippling motion to suggest texture. -
Highlight the Core:
Mix a dark grey (Black + White). Dab a small highlight on the upper left side of the black center to make it look spherical and shiny. -
Create the Stamens:
Switch to your fine liner brush (size 00). Using pure Mars Black, paint tiny dots in a ring surrounding the central button. -
Connect the Stamens:
Draw incredibly thin, short lines connecting those black dots back to the center button. Keep your hand loose to ensure the lines look natural and not too stiff.
Frame It Up
Since this is a mini canvas, try mounting it inside a deep shadow box frame or placing it on a miniature wooden easel for a charming display.
Step 4: Stem and Foliage
-
Mix Green Tones:
Combine Sap Green with a little Burnt Umber for a deep, natural green. Mix a second lighter shade by adding Yellow Ochre and White to the base green. -
Paint the Stem:
Use the dark green mix to paint the thin stem line. Add a highlight on one side using the lighter green mix while the paint is still wet. -
Fill the Leaf:
Paint the jagged leaf shape with the dark green. Use the fine tip of your round brush to flick the paint outward, mimicking the sharp edges of anemone foliage.
Step 5: Final Touches
-
Outline Accent:
I like to take a very watered-down grey or muddy pink and loosely outline just a few select edges of the petals. This emphasizes the sketch-like quality shown in the reference. -
Clean Up Background:
If you smudged any paint onto the background, use Titanium White (or an unbleached titanium if you prefer a creamier look) to tidy up the negative space around the flower.
Step back and admire the contrast between the soft petals and the bold center of your creation


Mini Bouquet Inside a Simple Glass Jar Silhouette
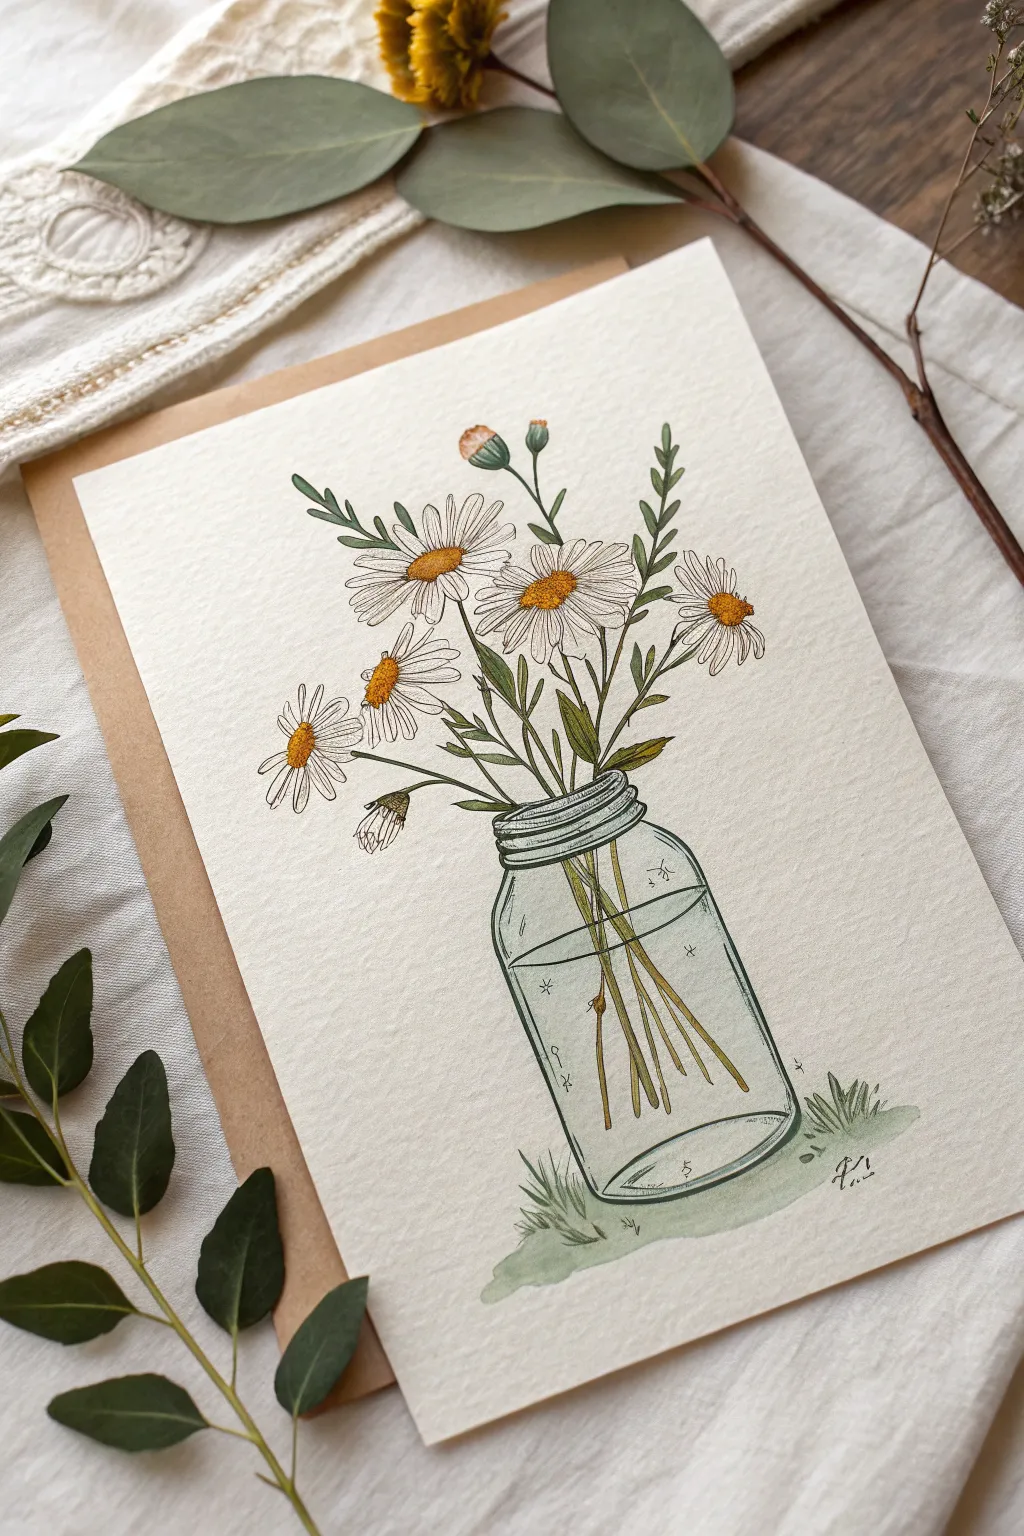
Capture the charm of fresh-picked wildflowers with this delicate illustration of daisies in a classic glass jar. Using a combination of fine ink lines and soft watercolor washes, you’ll create a piece that feels both vintage and refreshingly simple.
Step-by-Step
Materials
- Cold press watercolor paper (approx. 5×7 inches)
- Finer liner pen (black, waterproof, size 01 or 03)
- Watercolors (Yellow ochre, sap green, olive green, faint blue/grey)
- Round watercolor brush (size 4 or 6)
- Pencil and eraser
- Jar of water and paper towels
- Kraft paper envelope or card backing (optional)
Step 1: Sketching the Composition
-
Outline the jar:
Begin by lightly sketching the mason jar shape in the lower center of your paper. Draw an oval for the rim, a slightly wider neck, and curved shoulders leading down to a cylindrical body. Don’t worry about perfect symmetry; a hand-drawn look adds character. -
Add the waterline:
About two-thirds of the way down the jar, sketch an ellipse to represent the surface of the water. Just below that, add a faint curved line for the bottom of the jar. -
Place the main blooms:
Sketch three to four large ovals for the main daisy heads floating above the jar rim. Position them at slightly different heights and angles to create a natural, gathered look. -
Add stems and buds:
Draw thin lines connecting your flower heads down into the jar, letting them cross over each other inside the glass. Add a few smaller, unopened buds reaching upward on thinner stems. -
Fill with foliage:
Sketch simple, leafy fronds tucked between the flowers to fill out the bouquet. I like to keep these shapes loose and organic rather than stiff.
Step 2: Inking the details
-
Ink the flower centers:
Using your waterproof fine liner, draw the centers of the daisies using small, stippled dots to create texture. Keep the shapes rounded but slightly irregular. -
Draw the petals:
Outline the long, narrow petals radiating from the centers. Some petals can overlap or fold slightly. For the side-facing flowers, remember that the petals closer to you will appear shorter. -
Define the jar:
Go over your jar sketch with the pen. Use broken lines or lighter pressure on the sides of the glass to suggest reflection and transparency rather than a solid, heavy outline. -
Detail the stems:
Ink the stems, being careful to ‘break’ the lines where they pass through the water surface line or the jar rim. This trick helps sell the illusion of refraction. -
Erase pencil marks:
Once the ink is completely dry—give it a good few minutes—gently erase all your underlying pencil sketches for a clean base.
Ink Smearing?
Even ‘waterproof’ pens can smudge if the paper is damp. Wait until the paper is bone dry before erasing sketches. If in doubt, test your pen on scrap paper with water first.
Step 3: Adding Watercolor
-
Paint the centers:
Load your brush with a warm yellow ochre and dab it into the flower centers. Leave a tiny speck of white paper showing in each center for a highlight. -
Add depth to centers:
While the yellow is still damp, touch a tiny bit of brown or darker orange to the bottom edge of each center to create a shadow effect. -
Greenery wash:
Mix a sap green with plenty of water. Paint the leaves and stems loosely. It’s okay if the color doesn’t stay perfectly inside the ink lines; this loose style is part of the charm. -
Darker foliage accents:
Use a darker olive green to paint the stems that are inside the water or in shadow. This contrast helps distinguish the submerged parts from the dry parts. -
Glass tinting:
Dilute a touch of blue-grey or teal paint with a lot of water until it’s very faint. Paint the water inside the jar, keeping the wash transparent so the stems show through clearly. -
Grounding shadow:
Add a soft wash of muted green or grey under the jar, suggesting grass or a shadow to ground the object so it isn’t floating in space. -
Final touches:
Once everything is dry, you might want to add tiny white gel pen dots to the glass for extra sparkle, or simply leave it matte for a vintage botanical feel.
Make it a Gift
Mount your finished painting onto a blank folded kraft card using double-sided tape. It makes a perfect, handmade greeting card for birthdays or thank-yous.
Step back and admire your lovely, everlasting bouquet that requires no water change
Bright Flowers on a Black Background
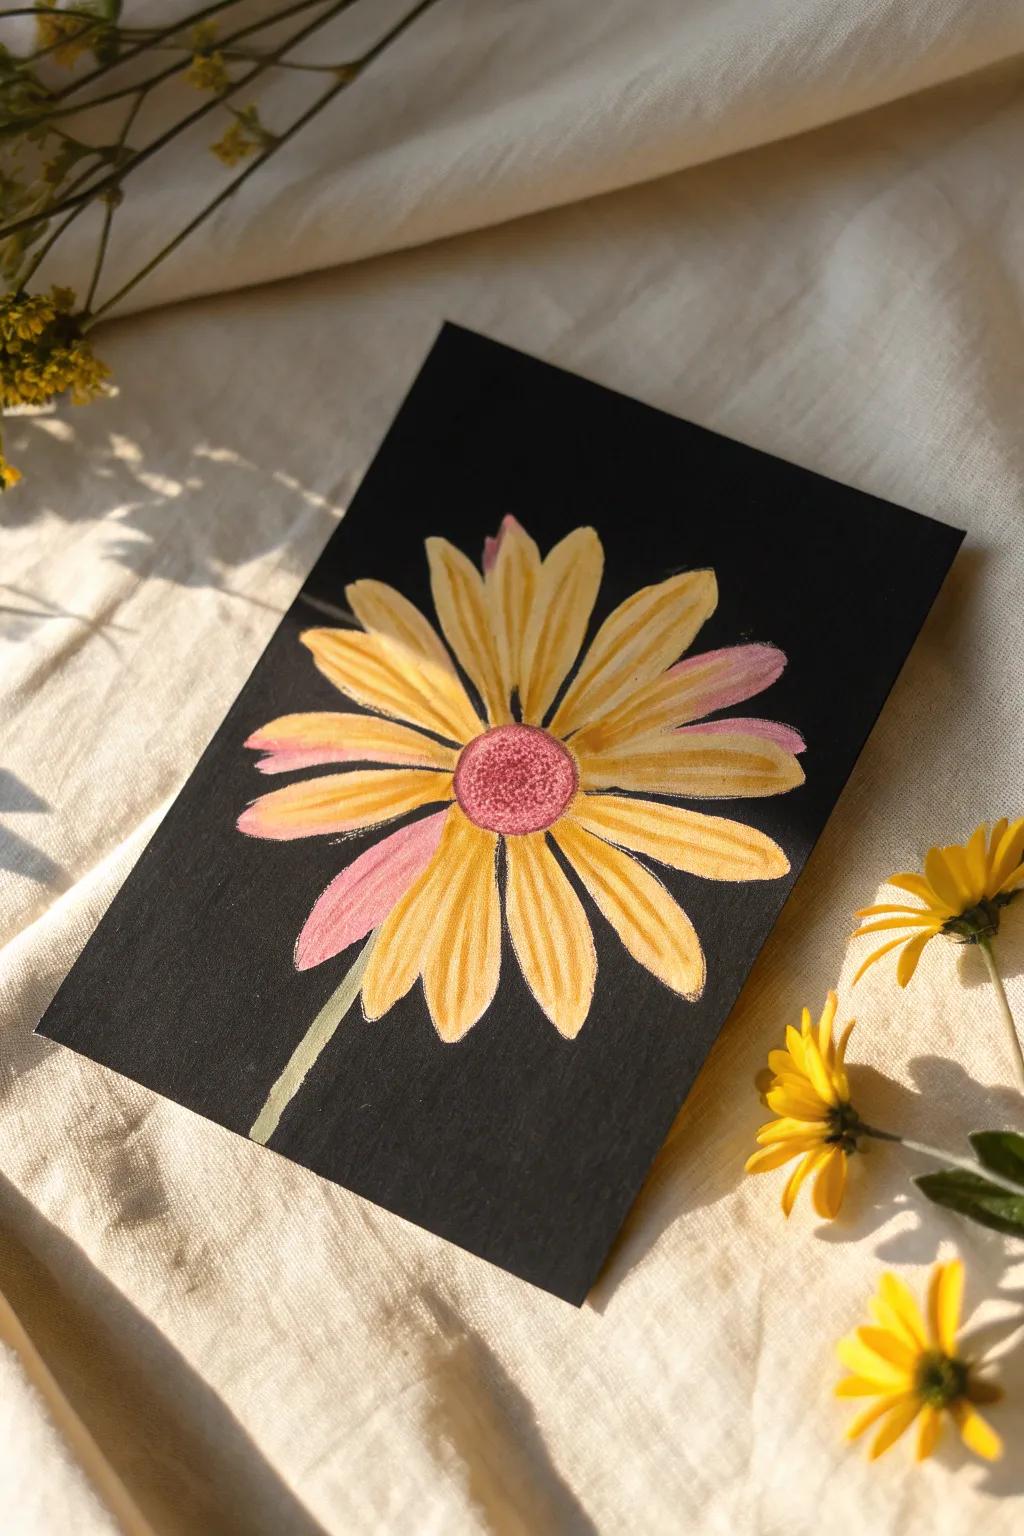
This vibrant small painting features a cheerful yellow daisy popping against a dramatic black background, creating a high-contrast look that feels modern and fresh. The soft pink accents on the petals and center add a delicate, painterly touch to the bold composition.
Step-by-Step
Materials
- Black watercolor paper or heavy black cardstock (postcard size)
- Opaque gouache or acrylic gouache paints (Yellow Ochre, Lemon Yellow, Rose Pink, White, Titanium White, Sap Green)
- Round synthetic brushes (sizes 2 and 4)
- Pencil (white or metallic for sketching on black)
- Palette for mixing
- Water cup and paper towel
Step 1: Sketching the Flower
-
Center Placement:
Begin by finding the center of your black paper. Using a white charcoal pencil or a very light regular pencil touch, draw a small circle slightly below the exact middle to act as the flower’s center. -
Petal Guidelines:
Sketch light lines radiating outward from that center circle, like the spokes of a wheel. These don’t need to be perfect, but they will help you space your petals evenly. -
Drafting Petals:
Draw the petal shapes over your radiating lines. Make them long and tear-drop shaped, with slightly rounded tips. Vary the lengths slightly so it looks natural and not too uniform. -
Adding the Stem:
Draw a thin, slightly curved line extending from the bottom left side of the flower head down to the bottom edge of the paper for the stem.
Opacity is Key
For bright colors on black paper, gouache or acrylic gouache works best. Standard watercolors will likely disappear into the dark background.
Step 2: Painting the Petals
-
Yellow Base Mix:
Mix a warm, opaque yellow using Yellow Ochre and a touch of Titanium White. The white is crucial to make the yellow pop against the dark black paper. -
First Layer:
Fill in the majority of the petals with this yellow mix. You don’t need to cover every single petal perfectly; leave a few blank for the pink accents later. I like to keep my brush strokes directional, pulling from the center outward. -
Pink Accents:
Mix Rose Pink with a generous amount of White to create a soft pastel pink. Paint the remaining blank petals with this color, and add streaks of this pink to the edges of a few yellow petals for variety. -
Petal Texture:
Once the base layers are dry, mix a slightly darker, more orange-yellow tone. Use a smaller size 2 brush to paint thin lines down the center of the yellow petals to create texture and depth. -
Highlighting:
Mix a very pale Lemon Yellow (almost white). Carefully paint the very tips of the yellow petals where the “light” would hit them, giving the flower a sunlit feel.
Step 3: Center and Stem
-
Painting the Center:
Fill the center circle with a mix of Rose Pink and a tiny dot of Red or Brown to deepen it. It should be darker than the pink petals. -
Stippling details:
Once the center base is dry, mix a lighter pink. Use the very tip of your brush to tap small dots (stippling) over the center area, focusing on the left side to simulate a light source. -
Stem Base:
Mix Sap Green with White to create a pale, sage-like green. Paint the stem with a steady, single stroke if possible. -
Stem Shadow:
Add a thin line of unmixed Sap Green along the right side of the stem to give it a cylindrical roundness.
Colors Look Dull?
If your yellow looks muddy or transparent, let it dry completely and apply a second coat. Adding a tiny bit more white to the mix increases opacity.
Step 4: Final Touches
-
Cleaning Edges:
With the black paper, any stray paint marks will show. If you made mistakes, you can use black paint to carefully ‘erase’ messy edges and reshape the petals. -
Final Highlights:
Add tiny, pure white accents to the very brightest highlight points on the pink petals to permit them to shine.
Place your finished piece in a small frame or use it as a striking handmade card for a friend
One-Brush Two-Color Petals for Quick Dimension
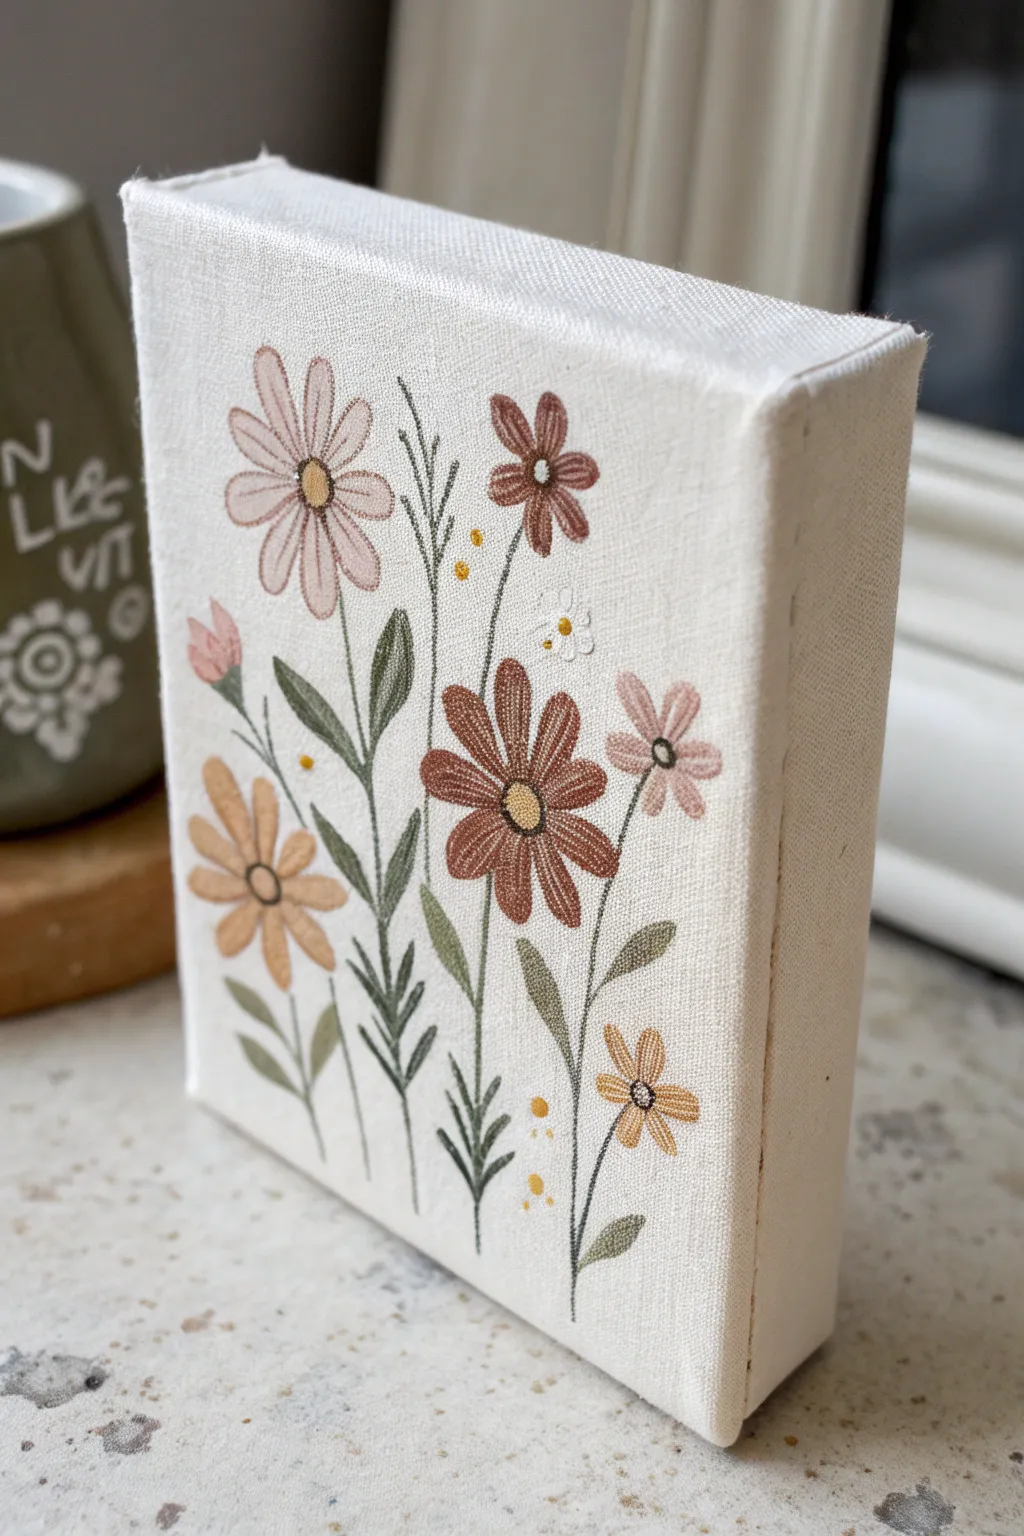
This charming project mimics the delicate look of needlework using paint to create a whimsical wildflower meadow on a small canvas. By using a clever double-loading technique, you’ll achieve instant dimension on the petals without needing a needle and thread.
How-To Guide
Materials
- Small stretched canvas (4×6 or 5×7 inch, deep edge preferred)
- Acrylic paints (muted pink, burnt orange, mustard yellow, sage green, dark green, warm white, dark brown)
- Small filbert brush (size 2 or 4)
- Fine liner brush (size 00 or 0)
- Small round brush (size 1)
- Textile medium (optional, for smoother flow)
- Palette
- Pencil for sketching
Step 1: Preparation & Sketching
-
Prepare the canvas:
Ensure your small canvas is clean and dust-free. If the canvas grain is very rough, a layer of clear gesso can help, but leaving it raw enhances the rustic, fabric look. -
Plan the composition:
Using a pencil, very lightly sketch vertical stems rising from the bottom. Vary their heights—place the tallest stems in the center and shorter ones on the sides. -
Mark flower centers:
Draw small circles where your main flower heads will go. Include a mix of large daisy shapes and smaller filler flowers to create a balanced meadow scene.
Step 2: Painting the Foliage
-
Mix your greens:
Create two shades of green: a lighter sage color and a deeper forest green. This variety adds depth to the bouquet. -
Paint the main stems:
Using the fine liner brush and the darker green, trace your pencil lines with confident, thin strokes. Let the lines taper off naturally at the top. -
Add simple leaves:
Switch to the small round brush. Press down and lift up quickly to create teardrop-shaped leaves along the lower parts of the stems. -
Create fern-like details:
For the central fern stalk, use the liner brush to make short, upward-flicking dashes on either side of the stem, getting smaller as you reach the tip. -
Layering foliage:
Intersperse the sage green leaves among the darker ones. Don’t worry about perfect symmetry; overlapping leaves make the bunch look fuller.
Uneven Petals?
Don’t panic! Uneven petals look more organic. If a petal looks too thin, wait for it to dry completely, then simply paint a second layer right over it to widen the shape.
Step 3: Creating the Petals
-
Load the filbert brush:
Now for the magic technique. Dip one corner of your filbert brush into muted pink and the other corner into warm white. Don’t mix them on the palette. -
Paint the pink daisy:
Press the brush down at the flower center and pull outward. The two colors will streak together naturally, creating a highlighted edge instantly. Repeat around the circle. -
Paint the orange focal flower:
Clean your brush and repeat the double-loading process with burnt orange and a touch of white or lighter orange. Create the petals for the large central flower, ensuring they slightly overlap the stem. -
Add side blossoms:
Use the mustard yellow to paint the smaller, lower flowers. For these, simple single-stroke ‘dabs’ with a round brush work best to distinguish them from the main daisies. -
Paint the buds:
Add tiny teardrop shapes in pink near the top of outer stems to represent closed buds waiting to open. -
Dry check:
Let the petals dry completely before moving to the centers. This prevents the colors from muddying.
Faux-Stitch Effect
To really sell the embroidery look, paint tiny, short dash marks along the stems and leaf veins in a slightly lighter green to mimic running stitches.
Step 4: Details & Centers
-
Fill the centers:
Using the small round brush, dab mustard yellow into the center of the pink flowers and dark brown into the orange flower. -
Add texture dots:
Once the center base color is tacky, use the very tip of your liner brush to add tiny white or dark brown dots inside the flower centers. This mimics the texture of French knots in embroidery. -
Paint tiny filler flowers:
With pure white paint and a liner brush, add clusters of three or four tiny dots floating near the upper stems to look like baby’s breath. -
Add pollen specs:
I like to flick a few tiny yellow dots floating in the empty white space around the bouquet to add whimsy and movement. -
Final outlines:
If you want a sharper, illustrative look, you can use a very watered-down brown paint to outline a few key petals, though keeping it soft creates a more textile vibe.
Display your mini meadow on a shelf or mantelpiece to bring a permanent touch of spring indoors
Cotton Swab Blossoms for Soft, Round Flower Heads

Capture the delicate, fuzzy texture of chrysanthemum blooms using a simple household item. This tutorial shows you how to stipple soft pink and dusty rose petals onto textured paper for a charming, rustic botanical illustration.
Step-by-Step Guide
Materials
- Cold-pressed watercolor paper (heavy texture)
- Cotton swabs (Q-tips)
- Watercolor paints (dusty rose, magenta, sap green, olive green, brown)
- Small round paintbrush (size 2 or 4)
- Palette for mixing
- Water jar
- Paper towel
Step 1: Painting the Blooms
-
Prepare your palette:
Mix a watery puddle of light dusty pink on your palette, along with a slightly darker, more saturated magenta for depth. -
First cotton swab layer:
Dip a cotton swab directly into the lighter pink mixture. Gently dab it onto the paper to form a rough circle shape. -
Shape the flower head:
Continue dabbing around the edges of your circle to create a fluffy, imperfect outline that mimics the soft petals of a chrysanthemum. -
Add darker centers:
While the first layer is still slightly damp, dip a fresh cotton swab into the darker magenta mix. Dab this into the center of your flower shapes to create volume and shadow. -
Create variation:
Repeat this process to create 4-5 flower heads of varying sizes. Make some smaller ‘buds’ by using less paint and pressing lighter with the swab.
Pro Tip: Texture Trick
Don’t over-saturate the cotton swab. Blot it once on a paper towel before stamping to ensure a ‘dry brush’ look that reveals the beautiful grain of the paper underneath.
Step 2: Stems and Leaves
-
Mix your greens:
Create a natural olive green by mixing sap green with a tiny touch of brown or red. This keeps the foliage looking organic rather than fluorescent. -
Draw the main stems:
Using your small round brush, paint thin, slightly curved lines extending downward from the base of each flower head while the flowers are dry or nearly dry. -
Connect the bouquet:
Bring the stems together at the bottom of the page so they cross, mimicking a hand-tied bouquet arrangement. -
Add leaves:
Paint elongated, lance-shaped leaves along the stems. Press down on the belly of the brush to widen the leaf, then lift up as you drag to create a pointed tip. -
Vary leaf placement:
Paint some leaves overlapping the stems and others pointing outward. I like to add a few smaller leaves near the flower heads for a fuller look.
Step 3: Fine Details
-
Add delicate filler:
Mix a very watery brown-pink shade. Using the very tip of your brush, draw ultra-thin, branching stems poking out from the main bouquet. -
Tiny accents:
Add tiny dots or seed pods at the ends of these thin stems using the tip of your brush or a lightly loaded cotton swab. -
Texturize the petals:
Once the flower heads are thoroughly dry, use a slightly damp brush with a bit of darker pink paint to add tiny radiating lines inside the flower heads for petal definition. -
Refine the stems:
Add a slightly darker green line along one side of the main stems to suggest a shadow and roundness. -
Final assessment:
Check your composition. If a certain area looks too empty, add a small floating leaf or a tiny bud to balance the white space.
Level Up: Mixed Media
Once the watercolor is completely dry, use fine-point colored pencils to sketch loose outlines or add veins to the leaves for a detailed botanical illustration style.
Now you have a beautifully textured floral painting that requires no advanced brush skills to achieve


Have a question or want to share your own experience? I'd love to hear from you in the comments below!