If your crew wants a night that’s equal parts paint and sip and heartfelt chaos, a bachelorette session hits the sweetest spot. Here are my favorite bachelorette paint and sip ideas that feel bridal, beginner-friendly, and seriously fun to make together.
Sunset Toast Canvas
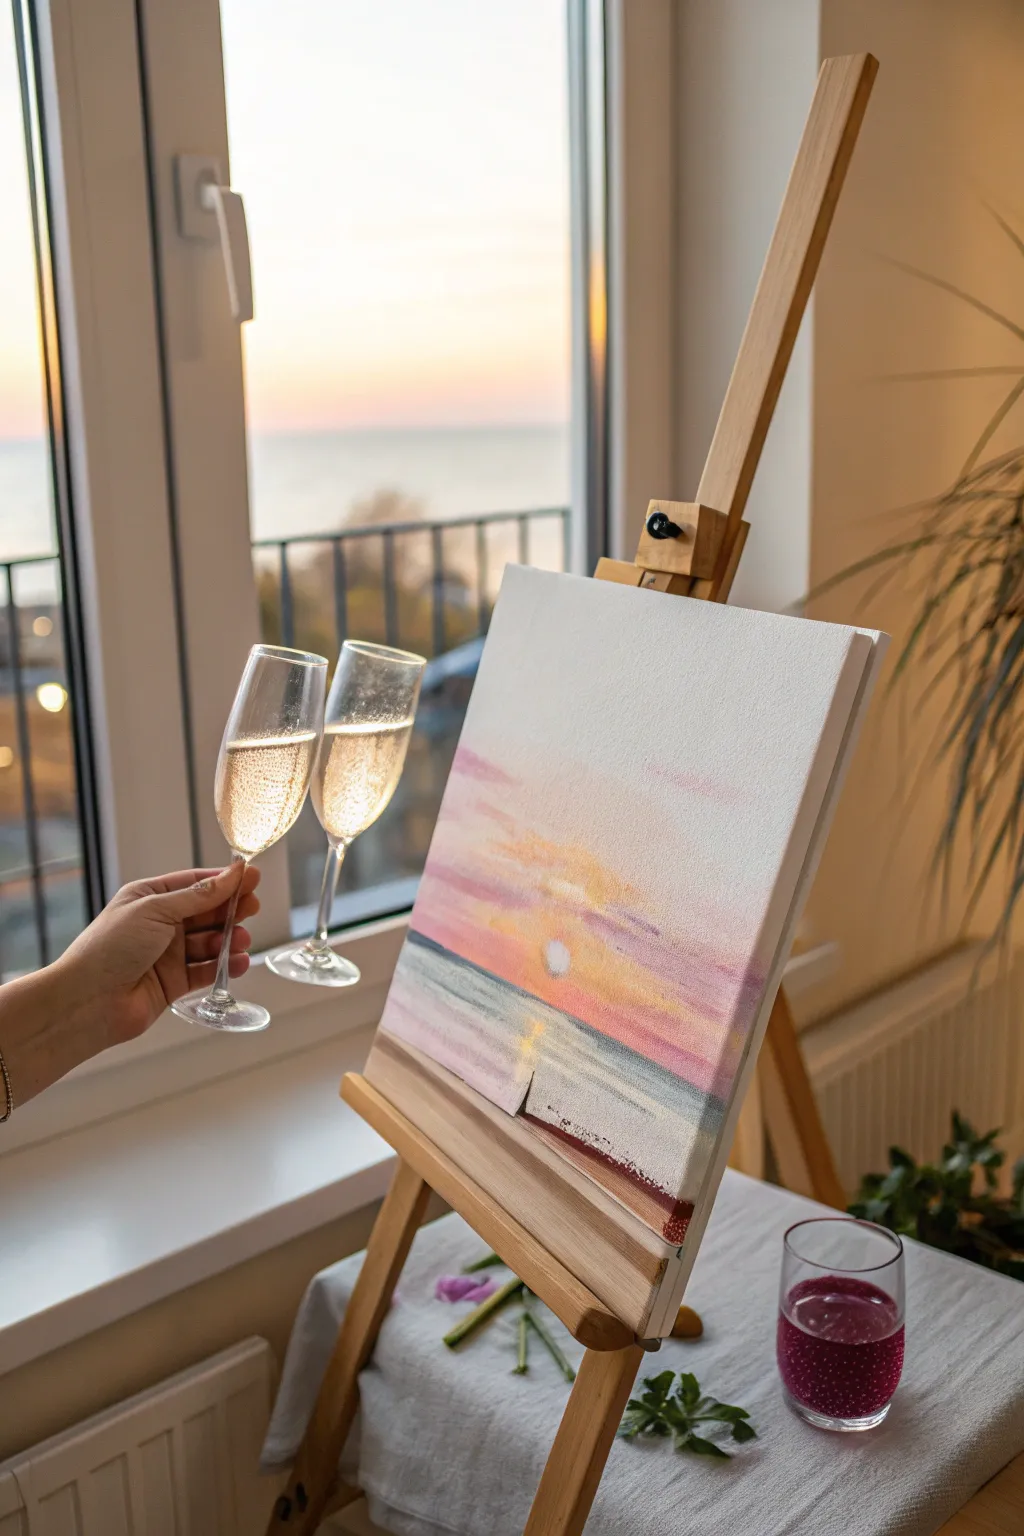
Capture the serene beauty of golden hour with this soft, impressionistic seascape painting that perfectly mirrors the view outside your window. Using gentle pastel tones and loose brushwork, you’ll create a glowing sunset over calm waters, ideal for a relaxing paint and sip session.
How-To Guide
Materials
- Stretched canvas (rectangular, approx. 11×14 or 12×16 inches)
- Acrylic paints: Titanium White, Cadmium Yellow, Rose Madder (or similar pink), Ultramarine Blue, Burnt Umber
- Flat shader brushes (1-inch and 1/2-inch)
- Small round brush for details
- Palette or paper plate
- Cup of water and paper towels
- Easel
Step 1: Setting the Horizon
-
Establish the horizon line:
Mix a very light wash of Ultramarine Blue and Titanium White. Using your 1/2-inch flat brush, paint a straight horizontal line across the lower third of your canvas to separate the sky from the sea. Don’t worry if it’s faint; this is just a guide. -
Base the sky:
For the upper sky, mix a large amount of Titanium White with just a whisper of Rose Madder. Paint the top third of the canvas with horizontal strokes, keeping the color very pale and airy. -
Warm up the lower sky:
As you move down toward the horizon line, blend in a touch of Cadmium Yellow into your wet white paint. You want a seamless gradient where the cool pinkish-white transitions into a soft, glowing peach tone near the water.
Master Your Gradient
Work quickly while the acrylics are wet! Blending the sky directly on the canvas creates that soft, dreamy transition from pink to yellow.
Step 2: Painting the Sunset Clouds
-
Mix your cloud colors:
Prepare two shades on your palette: a soft lavender (Ultramarine Blue + Rose Madder + White) and a warm coral (Rose Madder + Cadmium Yellow + White). -
Add floating clouds:
Using the corner of your flat brush, dab elongated, horizontal cloud shapes across the middle of the sky. Keep the strokes loose and feathery. I like to let the coral tones sit closer to the sun area and the lavender tones drift further away. -
Create the sun:
Right above the horizon line in the center, paint a small, soft circle using pure Titanium White mixed with a tiny dot of yellow. Gently blend the edges outward so it glows rather than looking like a sticker. -
Intensify the sunset:
While the paint is still damp, add streaks of slightly stronger pink and orange right around the sun and just above the horizon. This simulates that intense band of color you see as the sun dips low.
Muddy Colors?
If your clouds turn grey or brown, you’re over-mixing. Let the base layer dry completely before adding fresh cloud layers on top.
Step 3: Creating the Sea
-
Block in the water:
Mix a muted teal-grey using Ultramarine Blue, a touch of Burnt Umber, and plenty of White. Fill in the area below the horizon line with long, horizontal strokes, leaving a space in the center for the reflection. -
Darken the horizon:
Add a slightly darker, cooler blue line right along the horizon to show depth and distance. Ensure this line is perfectly straight to keep the water looking calm. -
Paint the sun’s reflection:
Directly under the sun, use your yellow-white mix to paint vertical, dashed strokes down the water. These strokes should be wider near the bottom and narrower near the horizon. -
Add water movement:
Take a clean, dry brush and very lightly sweep horizontally across the reflection while the paint is wet to blur the edges, making it look like light shimmering on ripples.
Step 4: Foreground and Details
-
Suggest the shoreline:
At the very bottom right and climbing slightly up, mix Burnt Umber with a little White and Pink to create a sandy, wet shoreline color. Apply this in a diagonal wedge shape. -
Texture the sand:
Stipple (dab repeatedly) a darker brown along the very bottom edge to give the impression of wet, textured sand or small pebbles. -
Final highlights:
Using your smallest round brush and pure White, add a few tiny, sharp glints of light on the water’s surface and the brightest part of the sun. -
Inspect and refine:
Step back from your easel. If any cloud edges look too hard, soften them with a clean, damp brush. Ensure the transition between sky and sea is distinct but not like a cartoon outline.
Raise your glass for a celebratory toast to your beautiful new seascape masterpiece


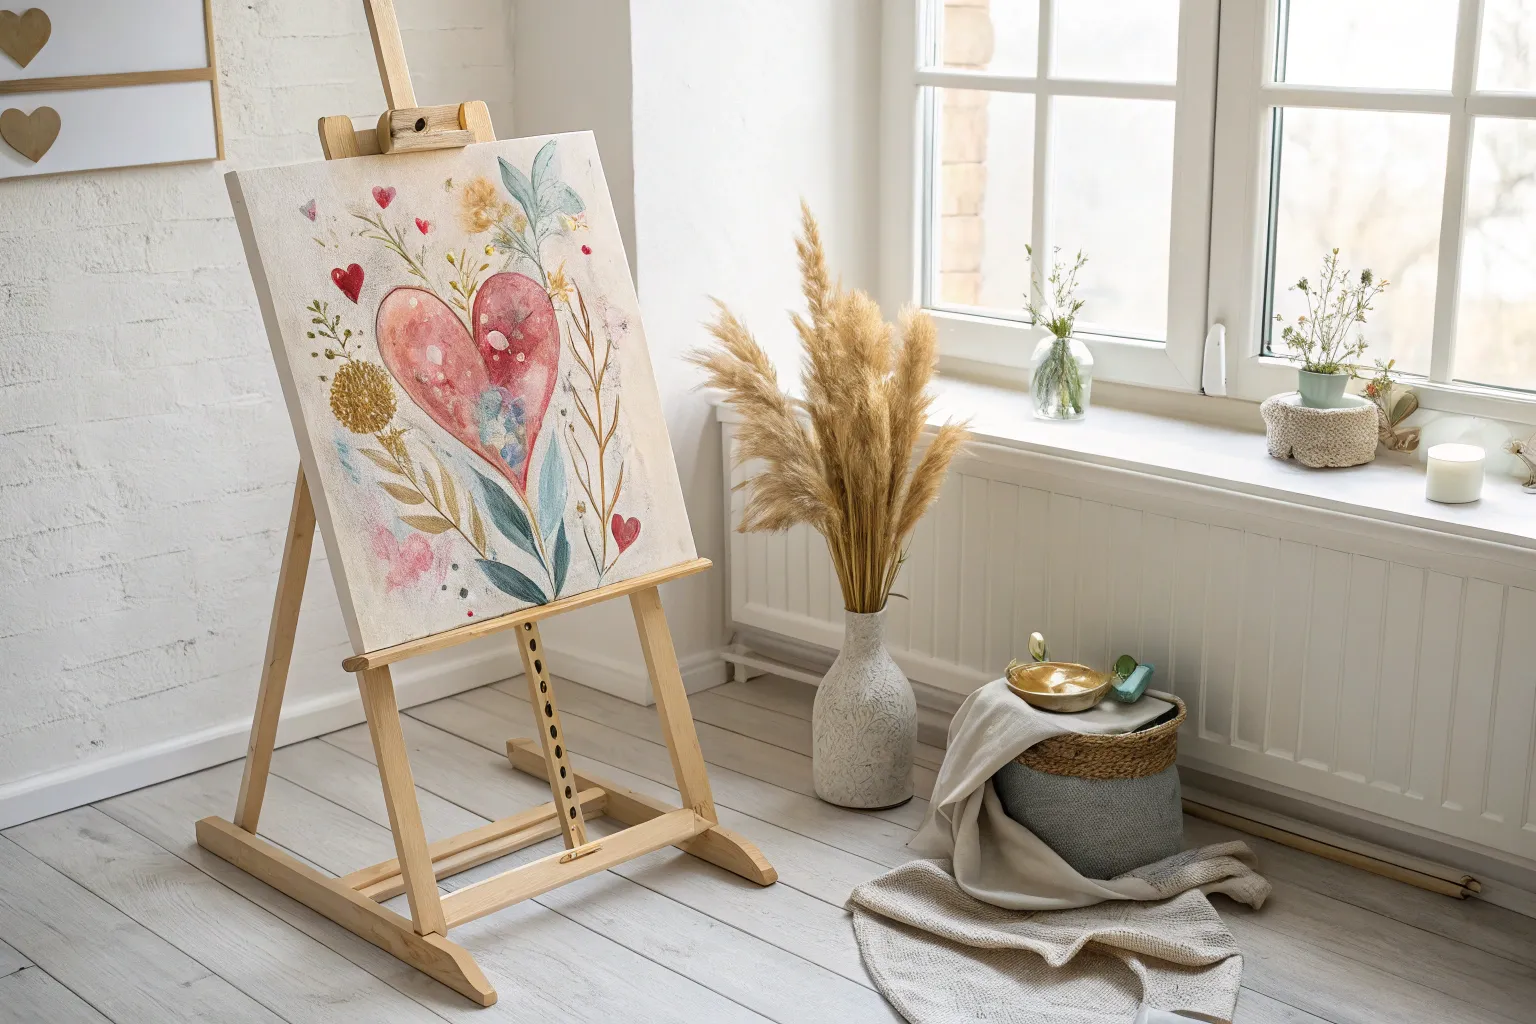
Soft Floral Bouquet for the Bride

Create a dreamy, romantic centerpiece for your home with this gentle floral arrangement. Using soft washes and layered petals, this project mimics the translucent beauty of watercolor on a forgiving canvas surface.
Step-by-Step Tutorial
Materials
- Square stretched canvas (12×12 or 16×16 inches)
- Acrylic paints: Titanium White, Alizarin Crimson, Yellow Ochre, Burnt Sienna, Sap Green, Phthalo Green
- Watercolor medium or glazing liquid (to thin acrylics)
- Round synthetic brushes (sizes 4, 8, and 12)
- Liner brush (size 0 or 1)
- Palette or paper plate
- Jar of water
- Paper towels
- Pencil (HB or H)
Step 1: Sketching the Composition
-
Map out the focal point:
Begin by lightly sketching a large circle just below the center of the canvas. This will be your main central rose. Don’t press too hard; you want these lines to disappear under the paint. -
Add supporting blooms:
Sketch two slightly smaller circles to the right and top-left of the main bloom for the secondary roses. Add a few smaller oval shapes scattered around for buds and white filler flowers. -
Establish the flow:
Draw faint, curved lines extending outward from the center cluster. These will guide where your leaves and stems will flow, creating a balanced, fan-like shape.
Stay Loose
Hold your brush further back on the handle rather than near the ferrule. This prevents you from painting too tightly and helps achieve that relaxed, organic ‘watercolor’ style.
Step 2: Painting the Roses
-
Mix your base blush:
Combine a generous amount of Titanium White with a tiny touch of Alizarin Crimson and Yellow Ochre. You want a very pale, creamy peach color. Add a drop of glazing liquid to make it semi-transparent. -
Paint the first layer:
Using the size 12 round brush, paint the outer shape of the main rose using loose, curved C-strokes. Leave plenty of white canvas showing between the strokes to keep it airy. -
Deepen the centers:
Mix a slightly darker version of your peach color by adding a bit more Alizarin Crimson and a speck of Burnt Sienna. Apply this to the center of the roses with smaller, tighter C-curves to suggest unfolding petals. -
Define the shadows:
Once the first layer is tacky but not fully dry, take a size 8 brush with a darker russet tone (more Burnt Sienna) and paint small, comma-shaped strokes deep in the center of the blooms for contrast. -
Paint the buds:
Use the same peach mixtures to fill in the rosebuds. Keep the tops lighter and the bottoms slightly darker to give them volume.
Step 3: Adding White Florals & Greens
-
Create soft white blooms:
For the white flowers, use pure Titanium White thinned with water or medium. Paint five simple, rounded petals for each flower. If they look too stark, tint the center very slightly with green or yellow. -
Mix your greens:
Prepare three shades of green on your palette: a pale sage (Sap Green + White), a medium olive (Sap Green + Yellow Ochre), and a deep forest green (Phthalo Green + Burnt Sienna). -
Paint the main leaves:
Using the size 8 brush and your medium olive mix, paint the larger leaves tucked closely around the roses. Press the belly of the brush down and lift up to create a tapered point. -
Add wispy foliage:
Switch to your pale sage mix. Paint long, slender leaves extending upward and outward. I like to keep these strokes very fluid to mimic the movement of ferns or eucalyptus. -
Create depth with darks:
Use the deep forest green to paint leaves that sit behind the main flower cluster. This dark value will make the pale pink roses pop forward visually.
Add Metallic Foil
Once the paint is 100% dry, apply small flecks of gold leaf glue to the center of the flowers or edges of leaves. Press on gold foil for a chic, sparkling finish.
Step 4: Details & Refining
-
Add flower centers:
Dip the back of a small brush or a liner brush into dark brown or grey paint. Dot the centers of the white flowers to create stamens. -
Include berries and buds:
Mix a soft coral red and use the tip of your size 4 brush to dab small round berries or tiny buds among the greenery for a pop of color. -
Paint fine stems:
With the liner brush and watery green paint, connect floating leaves to the main bouquet with very thin, delicate lines. -
Highlighting petals:
Mix a nearly pure white with just a hint of pink. Add highlights to the top edges of the rose petals where the light would hit them. -
Final assessment:
Step back from your canvas. If any area feels too empty, add a small floating leaf or a wispy stem to balance the composition.
Allow your beautiful bouquet to dry completely before framing or gifting it to the bride-to-be


“Miss to Mrs” Lettering Art
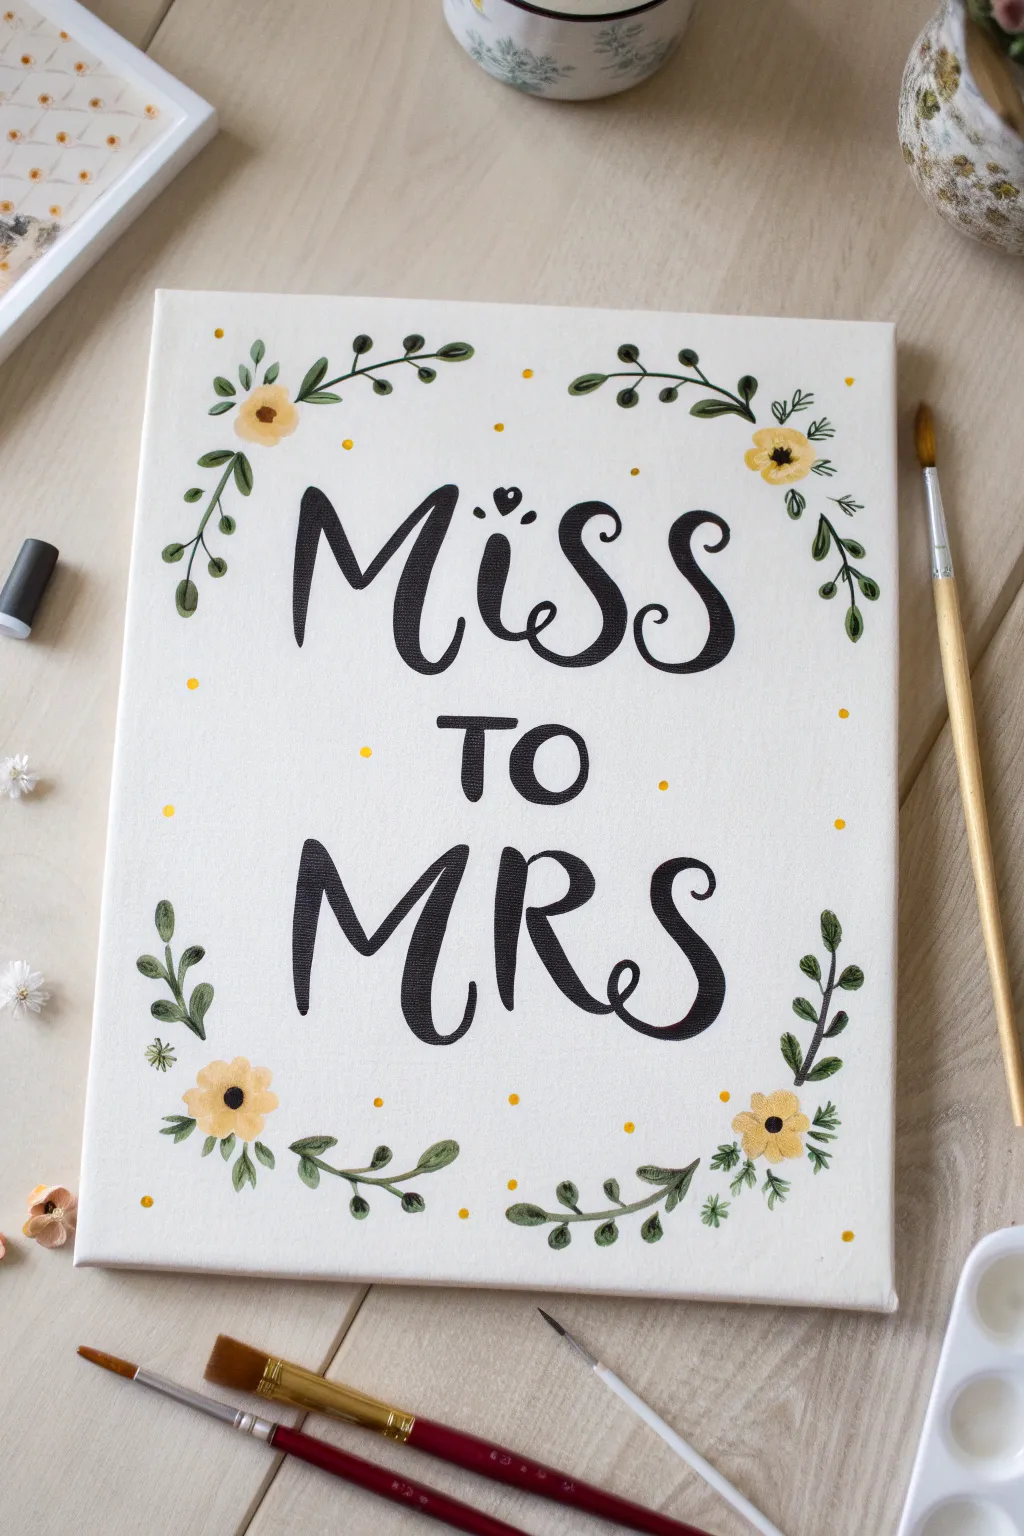
Celebrate the bride-to-be with this elegant canvas art featuring bold, whimsical lettering surrounded by delicate greenery and sunny yellow blooms. It’s the perfect blend of modern calligraphy and botanical charm, making for a lovely keepsake or party decoration.
Step-by-Step Guide
Materials
- White stretched canvas (8×10 or 9×12 inch)
- Black acrylic paint
- Yellow ochre or golden yellow acrylic paint
- Olive green acrylic paint
- Forest green acrylic paint
- Small round detail brush (size 0 or 1)
- Medium round brush (size 4 or 6)
- Pencil and eraser
- Ruler
- Palette or paper plate
- Water cup and paper towels
Step 1: Planning and Sketching
-
Find the center:
Begin by finding the vertical center of your canvas. Use your ruler to lightly mark the midpoint at the top and bottom. -
Layout the text:
Lightly sketch three horizontal guide lines to keep your text straight. ‘Miss’ will go on the top line, ‘TO’ in the middle, and ‘MRS’ on the bottom line. -
Lettering:
Sketch the words ‘Miss’, ‘TO’, and ‘MRS’. Use a playful, serif style for ‘Miss’ and ‘MRS’, giving the letters ‘M’ and ‘S’ expressive curly tails. Keep ‘TO’ smaller and in a simple block font. -
Dot the i:
Instead of a simple dot for the ‘i’ in ‘Miss’, draw a small, cute heart. -
Sketch the florals:
Lightly draw vines curving around the four corners of the text block. I like to make them curve inward, bracketing the words. Add small circles where the yellow flowers will be placed.
Step 2: Painting the Lettering
-
Prepare black paint:
Load your small round detail brush with black acrylic paint. If the paint feels too thick, add a tiny drop of water to help it flow smoothly for crisp lines. -
Outline the letters:
Carefully trace over your pencil lines for ‘Miss’ and ‘MRS’. Focus on keeping the edges smooth and consistent. -
Add weight:
Thicken the downstrokes of your letters—the parts where your pen would naturally move downward—to create a faux-calligraphy look. The upstrokes should remain thin. -
Paint the middle word:
Fill in the block letters for ‘TO’ with solid black paint. Complete the small heart over the ‘i’ as well. -
Let it dry:
Allow the black paint to dry completely before moving on to avoid smudging the text with your hand.
Uneven Letters?
If your lettering looks shaky, don’t worry. Wait for the black paint to dry, then use a white paint pen or white acrylic to touch up and ‘erase’ wobbly edges.
Step 3: Adding the Botanicals
-
Paint vines:
Using the medium round brush and olive green paint, trace the main stems of your corner vines. -
Add leaves:
Paint small, almond-shaped leaves along the vines using the olive green. Press down on the brush to widen the leaf belly and lift up to create a sharp point. -
Darken details:
Mix a little forest green or add a touch of black to your green to create a darker shade. Add a few darker leaves or vein details for depth. -
Flower base:
Clean your medium brush and switch to yellow ochre. Paint the flowers using simple, rounded brush strokes that radiate from a center point. -
Flower centers:
Once the yellow paint is dry, use the tip of your small brush to add a tiny black dot in the center of each flower. -
Confetti dots:
Dip the back end of a paintbrush handle into the yellow paint. Stamp small, random dots around the empty white spaces of the canvas to create a festive confetti effect. -
Erase sketch lines:
Wait until everything is absolutely dry—usually about 15 minutes—then gently erase any visible pencil marks.
Add Sparkle
For a bridal touch, trace over the yellow dots with gold metallic paint or replace the black flower centers with small adhesive rhinestones after drying.
Hang this cheerful piece up at the celebration or gift it to the bride as a lasting memory of her transition to married life


Clinking Glasses Silhouette Painting
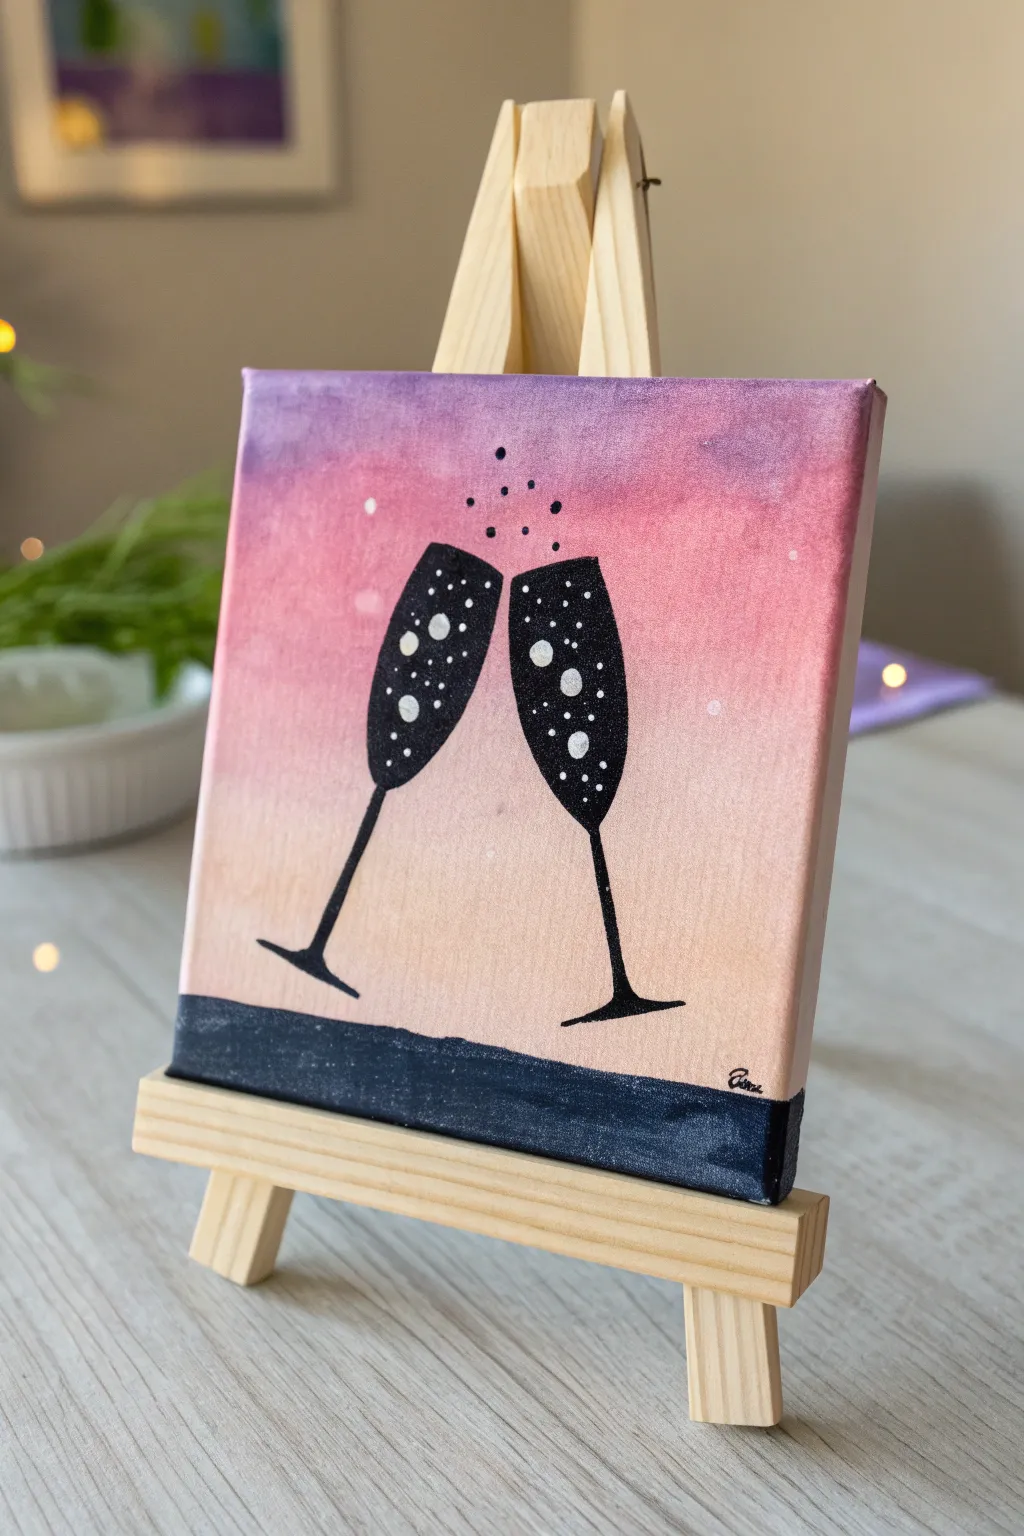
Celebrate friendship with this vibrant small-scale painting featuring two clinking flutes against a dreamy gradient sky. This project is perfect for beginners, relying on simple silhouettes and a forgiving blended background to create a sophisticated finished look.
Detailed Instructions
Materials
- Small square canvas (e.g., 6×6 inch)
- Mini wooden easel
- Acrylic paints: Purple/Violet, Magenta/Hot Pink, Peach/Light Orange, Titanium White, Carbon Black
- Flat shader brush (medium width)
- Small round detail brush (size 0 or 1)
- Dotting tool or the back of a paintbrush handle
- Cup of water
- Paper palette or plate
- Paper towels
- Pencil (optional)
Step 1: Painting the Sunset Gradient
-
Prepare your colors:
Squeeze out small amounts of purple, pink, peach, and white onto your palette. You want these ready to go immediately so you can blend while the paint is still wet. -
Start at the top:
Using your flat brush, load up the violet paint. Paint a horizontal band across the top quarter of the canvas, ensuring you wrap the color around the top and side edges for a professional finish. -
Add the middle pink layer:
Without cleaning your brush thoroughly (wipe off excess purple but don’t wash it), pick up the magenta or hot pink paint. Apply this directly below the purple band. -
Blend the transition:
While both colors are wet, gently brush back and forth where the purple and pink meet to create a soft, seamless haze. I like to use long, horizontal strokes for the smoothest gradient. -
Apply the bottom peach tone:
Wipe your brush clean on a paper towel. Pick up the peach/light orange paint and apply it to the bottom section of the canvas, stopping about an inch from the very bottom edge. -
Final blend:
Blend the peach upward into the pink layer. You can add a tiny touch of white to your brush here if you want the horizon to look a bit brighter and softer. -
Let it dry completely:
Allow the background to dry fully before moving on. This usually takes about 10-15 minutes, or you can blast it with a hair dryer on a cool setting to speed things up.
Step 2: Creating the Silhouettes
-
Outline the glass shapes:
If you aren’t comfortable painting freehand, lightly sketch the two tilted champagne flute shapes with a pencil. Place them in the center, angled toward each other as if they are clinking. -
Paint the glass bowls:
Switch to your small round detail brush and load it with black acrylic paint. Carefully fill in the main bowl shape of the glasses, keeping the edges as crisp as possible. -
Add the stems:
Using the very tip of your detail brush, pull a thin line downwards from the center of each bowl. Try to keep the pressure light so the line stays slender. -
Anchor the glasses:
Paint the bases of the glasses at the bottom of the stems. These should look like flattened triangles or ovals depending on the angle. -
Paint the ground:
Using either brush, paint a solid black band across the very bottom of the canvas to create the ground or table surface. Make sure this black area covers the bottom edge of the canvas as well.
Clean Lines Hack
To get perfectly straight stems on your glasses, place two pieces of painter’s tape close together to create a stencil guide, paint between them, and peel away.
Step 3: Adding the Sparkle Details
-
Create large bubbles:
Dip a dotting tool or the back end of a paintbrush handle into white paint. Stamp a few larger dots randomly inside the black silhouette of the glass bowls. -
Add medium bubbles:
Using a slightly smaller tool or a toothpick, add smaller white dots interspersed among the larger ones to create variety in the fizz. -
Add tiny fizz:
With the very tip of your detail brush or a needle, add the tiniest specks of white inside the glasses and a few floating just above the rim where the glasses meet. -
Add distant stars (optional):
If desired, add two or three extremely faint, tiny white dots in the background sky to suggest distant stars or bokeh lights. -
Add black floating bubbles:
Using the tip of your smallest brush and black paint, add five or six tiny black dots rising vertically from the point where the glasses touch, mimicking the spray of champagne. -
Sign your masterpiece:
Once dry, use a thin brush or a fine-tip paint pen to sign your initials in the bottom corner of the black area.
Metallic Magic
Swap the white bubbles for metallic gold or silver paint. It catches the light beautifully and makes the champagne look even more celebratory.
Place your finished mini-canvas on the wooden easel and enjoy the festive atmosphere it brings to your space
BRUSH GUIDE
The Right Brush for Every Stroke
From clean lines to bold texture — master brush choice, stroke control, and essential techniques.
Explore the Full Guide
Floral Wedding Dress Painting

Capture the romance of the big day with this ethereal wedding dress illustration. Using soft washes and delicate floral details, you’ll create a dreamy keepsake that beautifully balances a classic gown silhouette with blooming botanicals.
Step-by-Step Tutorial
Materials
- Stretched canvas or canvas panel (approx. 16×20 inches)
- Watercolor ground (if using regular canvas) or acrylic paints thinned with glazing medium
- Pencil (HB or H)
- Kneaded eraser
- Round brushes (sizes 2, 6, and 10)
- Fine liner brush (size 0 or 00)
- Palette
- Paper towels
- Water container
- Paint colors: Titanium White, Burnt Sienna, Yellow Ochre, Alizarin Crimson, Sap Green, Hooker’s Green
Step 1: Preparation & Sketching
-
Prime surface:
If you are using a standard acrylic-primed canvas but want that watercolor look, apply two smooth coats of watercolor ground first. Let this dry completely (at least 24 hours) to ensure the texture is absorbent. -
Map the composition:
Lightly sketch a vertical centerline to keep the dress symmetrical. Mark the position for the hanger near the top and determine the hemline near the bottom third, leaving room for the large floral cluster. -
Draw the bodice:
Sketch a heart-shaped neckline and fitted bodice. Keep your pencil lines very faint; watercolor is transparent, and dark lines will show through later. -
Flow the skirt:
Draw the skirt flowing outwards in an A-line shape. Use long, fluid strokes to suggest folds in the fabric rather than rigid straight lines. -
Sketch the hanger:
Add a fancy wooden hanger shape at the top, ensuring the straps of the dress look like they are hanging naturally from it. -
Outline floral zones:
Roughly sketch circle placeholders for the roses: a cluster at the bottom hem, a grouping on the left, and a smaller accent on the right. Don’t draw individual petals yet, just the general shapes.
Bleeding Lines?
If your paint is spreading uncontrollably, your brush is too wet or the previous layer hasn’t dried. Dab with a paper towel and let the layer dry completely before adding crisp details.
Step 2: Painting the Dress
-
Base wash:
Mix a very watery wash of Yellow Ochre and a tiny touch of Burnt Sienna to create a warm champagne or cream color. Fill in the entire dress shape with this pale wash. -
Define the folds:
While the base is still slightly damp, mix a slightly darker, cooler beige (add a dot of brown or purple to your cream mix). Paint vertical stripes where the fabric folds would be shadow, softening the edges with a clean, damp brush. -
Hanger details:
Paint the hanger with Burnt Sienna. Use a liner brush to add wood grain texture with a darker brown once the first layer dries. -
Waist accent:
Add a thin band of diluted Alizarin Crimson at the waistline to define the silhouette.
Step 3: Blooming Details
-
Rose centers:
For the flowers, start with the rose centers using a saturated mix of Alizarin Crimson and White (or red watercolor). Paint tight C-shaped swirls in the middle of your floral circles. -
Outer petals:
Dip your brush in water to lighten the pigment on your brush. Paint larger, looser C-shapes around the dark centers, leaving white space between strokes to create the look of unfolding petals. -
Vary the colors:
Make some roses more pink, others more peach (mix yellow into your red), and keep some very pale white/cream, like the ones near the bottom hem. -
Leaf foundations:
Mix Sap Green with a little Burnt Sienna for a natural olive tone. Paint simple leaf shapes tucking out from under the roses. Vary the sizes—some large at the bottom, smaller near the top. -
Darker foliage:
I like to drop a darker green (Hooker’s Green) into the base of the wet leaves to create depth and shadow instantly. -
Wispy greenery:
Using your size 2 brush and a very watery green mix, paint long, thin stems and small leaves extending outward from the main clusters to create movement. -
Splatter texture:
Load a brush with watery pink or green paint. Tap the handle against another brush over the canvas to create subtle speckles around the floral areas for a magical effect. -
Final highlights:
Use Titanium White (or white gouache for opacity) to add sharp highlights to the hanger hook and the very brightest tops of the dress folds.
Bridal Customization
Personalize the hanger by painting the bride’s new last name or the wedding date in the center using a fine liner brush and dark brown or gold paint.
Step back and admire the soft, romantic elegance of your custom wedding dress portrait
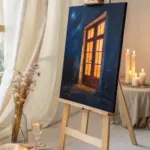
Couple Silhouette Under String Lights
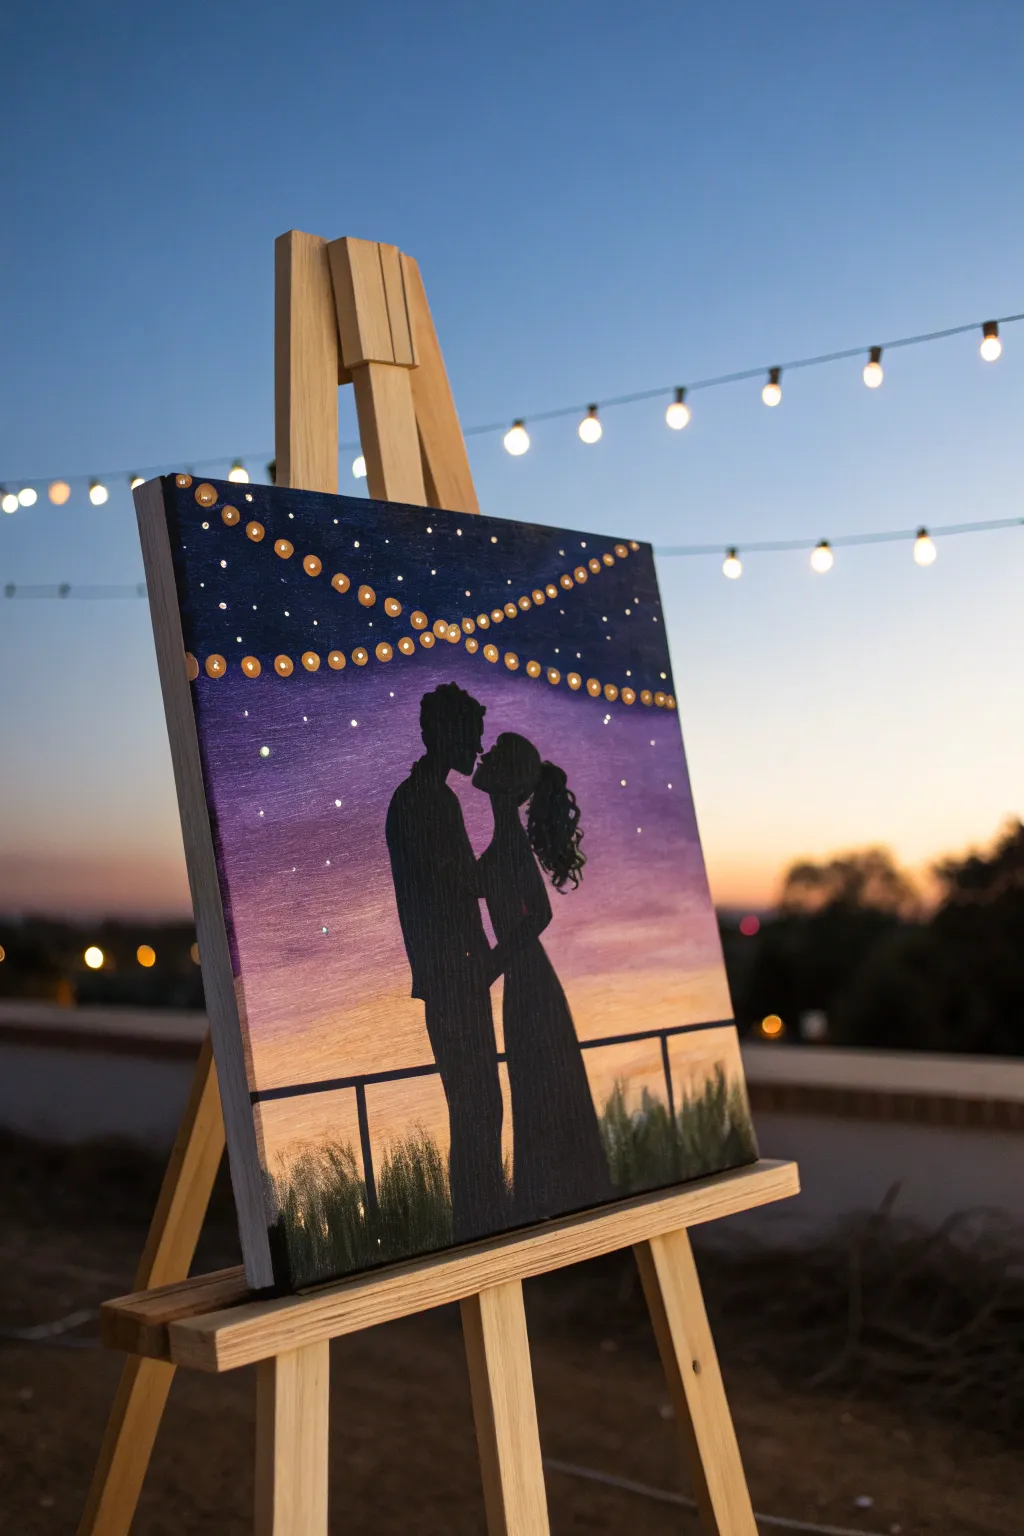
Capture the magic of a romantic evening with this stunning silhouette painting featuring a couple embracing under twinkling string lights. The vibrant sunset gradient from deep violet to warm peach creates the perfect backdrop for this bachelorette party centerpiece.
Step-by-Step Guide
Materials
- Canvas (square or rectangular)
- Acrylic paints (dark blue, purple, magenta, peach, yellow, black, white, gold)
- Wide flat brush (1 inch)
- Medium flat brush
- Small round detail brush
- Paint palette or paper plate
- Cup of water
- Pencil
- Paper towels
Step 1: Setting the Scene
-
Prep your canvas:
Before dipping into color, visualize where your horizon line will be. It should sit low on the canvas, roughly the bottom quarter, to leave plenty of room for the dramatic sky and string lights. -
Mix the twilight colors:
Squeeze out your dark blue, purple, magenta, peach, and a touch of yellow onto the palette. You want a spectrum that moves from a night sky at the top to a glowing sunset at the bottom. -
Paint the top sky:
Using the wide flat brush, start at the very top edge with your darkest blue mixed with a little purple. Paint horizontal strokes back and forth, covering the top 2-3 inches of the canvas. -
Blend the mid-tones:
Without cleaning your brush fully, pick up the purple and magenta paint. Blend this into the bottom wet edge of your dark blue section, working your way down the canvas. Allow the colors to mix slightly on the surface for a smooth transition. -
Add the sunset glow:
Rinse your brush and switch to the peach and yellow tones. Paint the lower section of the sky, blending the peach upwards into the purple/magenta layer. The goal is a soft, gradient fade where no harsh lines are visible. -
Create the ground:
The very bottom strip needs to be ready for the silhouette. You can paint this a simple dark peach or let the yellow fade out. Let the entire background dry completely for about 10-15 minutes before moving on.
Step 2: The Silhouette & Details
-
Sketch the couple:
Once the paint is dry to the touch, use a pencil to lightly sketch the outline of the couple. Start with the heads and shoulders; focus on the shape of the negative space between their faces to get the profile right. -
Outline the body:
Continue sketching down, drawing the arms and the sweep of the dress. Don’t worry about internal details like buttons or facial features; since it’s a silhouette, only the outer shape matters. -
Fill in the silhouette:
Load your medium flat brush with solid black paint. Carefully fill in the couple’s shape. Use the small round brush for the delicate areas like noses, chins, and the ponytail hair texture. -
Paint the railing:
Using the small round brush and black paint, add two horizontal lines behind the couple to create the railing. Add vertical posts spaced out evenly, but don’t draw through the couple’s bodies. -
Add grassy texture:
At the very bottom, use a dry or almost-dry brush with a tiny bit of black and dark green paint. Flick the brush upward in short, quick strokes to create the illusion of tall grass in the foreground.
Clean Edges Only
If your silhouette edges look fuzzy or messy, wait for the black paint to dry fully. Then, use a fine detail brush with the background sunset color to ‘erase’ and reshape the bumps.
Step 3: Lights & Sparkle
-
Plot the light strings:
Switch back to your small detail brush. Mix a tiny bit of white into the gold paint. Paint two swooping, curved lines draped across the top dark section of the painting to act as the wires. -
Paint the bulbs:
Dip the back end of your paintbrush handle into the gold paint. Dot it onto the ‘wire’ lines to create perfectly round light bulbs. Space them somewhat evenly along both strings. -
Add the glow:
Wipe the brush handle clean, then dip a smaller tip or a toothpick into pure white paint. Place a tiny white dot in the center of each gold circle to make the bulbs look like they are shining. -
Sprinkle the stars:
For the finishing touch, dip your small brush in watered-down white paint. Tap the brush handle against your finger over the painting to splatter tiny stars across the dark upper sky. -
Final touches:
Check your silhouette edges for sharpness and touch up with black if needed. I sometimes add a tiny distinct star or glint near the couple for extra romance.
Pro Tip: Glowing Lights
To make the string lights really pop, mix a tiny drop of neon yellow or orange into your gold paint. It adds a translucent warmth that mimics real incandescent bulbs at twilight.
Sign your masterpiece in the corner and enjoy your romantic creation

PENCIL GUIDE
Understanding Pencil Grades from H to B
From first sketch to finished drawing — learn pencil grades, line control, and shading techniques.
Explore the Full Guide
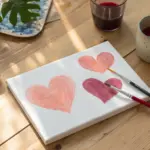
Mini Canvas Party Favor Series
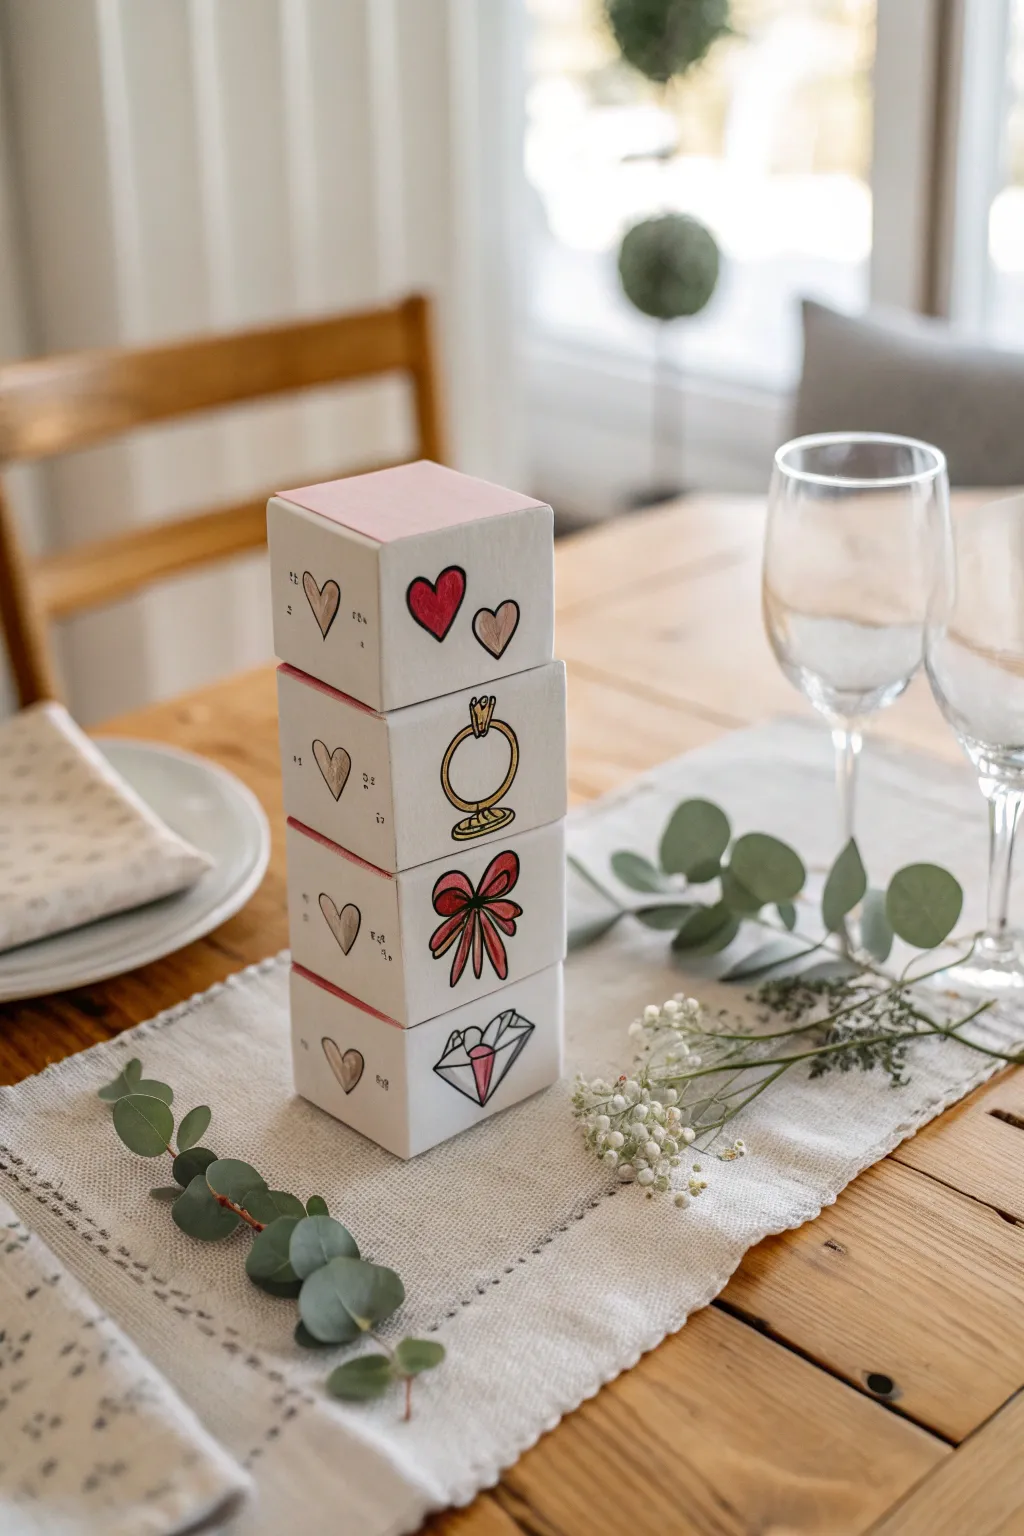
These adorable stacked cubes serve as both a sweet centerpiece and a memorable party favor for your bachelorette guests. By combining simple line art with soft metallic touches on 3D mini canvases, you create a modular sculpture that celebrates love in a modern, playful way.
Step-by-Step
Materials
- 4 mini stretched canvases (cube shape, approx. 3×3 inches)
- Acrylic paint markers (black, fine tip)
- Acrylic craft paint (light pink, deep red, gold, metallic silver)
- Fine detail paintbrush (size 0 or 1 round)
- Pencil for sketching
- Eraser
- Clear matte varnish spray (optional)
Step 1: Preparation & Base Color
-
Prepare your workspace:
Set up a clean, flat surface covered with paper or a drop cloth. Lay out your four mini cube canvases so you can access all sides easily. -
Paint the tops (optional):
For the very top cube, mix a soft blush pink using white and a tiny dot of red. Carefully paint just the top face of the canvas block to give it a finished look. Let this dry completely before handling. -
Plan the stacking order:
Decide which cube will go where. I prefer to lightly number the bottom of each cube with a pencil so I don’t mix up the order while I’m working on the design continuity.
Step 2: Sketching the Design
-
Sketch the side profile hearts:
On the left face of each cube, use your pencil to sketch a small, uniform heart. Try to align them vertically so they create a consistent column when stacked. Add tiny ‘sparkle’ dots around them for extra flair. -
Sketch the main icons:
On the front face, sketch a different wedding-themed icon for each tier. Start from the top: two floating hearts, then a solitaire ring, followed by a tied ribbon bow, and finally a diamond gem at the bottom. Keep the lines simple and clean. -
Refine the sketches:
Take a moment to step back and look at your pencil work. Does the ring look centered? Is the bow symmetrical? Gently erase and redraw any lines that feel off-balance.
Wobbly Lines?
If your hand shakes while outlining, steady your pinky finger against the table or the canvas itself to act as an anchor. Draw lines by moving your whole arm, not just your wrist.
Step 3: Adding Color & Detail
-
Outline the drawings:
Using a black fine-tip acrylic paint marker, carefully trace over your pencil lines. Go slowly to ensure steady, crisp lines. This high-contrast outline gives the project its modern, illustrative style. -
Paint the red details:
Switch to your deep red paint and a fine detail brush. Fill in the top-left heart on the top cube and the ribbon bow on the third cube. Apply thin coats to keep the texture smooth. -
Add metallic touches:
Dip your brush into the gold paint. Fill in the band of the ring and the smaller heart on the top cube. Use metallic silver or a very transparent grey wash for the diamond gem at the bottom. -
Fill the side hearts:
For the column of hearts on the left side, use a soft metallic champagne or diluted gold color. You don’t need to fill them solidly; a loose, sketchy fill technique adds artistic charm. -
Add highlights:
Once the filled colors are dry, use a white paint pen or tiny brush to add a ‘shine’ mark on the red heart and the ring. This small detail brings dimension to the flat illustrations.
Make It Interactive
Turn this into a puzzle game! Paint different icons on all four sides of the cubes so guests can rotate the blocks to mix and match different wedding stories.
Step 4: Finishing Touches
-
Clean up sketch lines:
Wait until the paint and marker are 100% dry. Take your eraser and gently remove any visible pencil marks that are peeking out from under the paint. -
Seal the artwork:
To protect your party favors from scuffs, take the cubes outside and give them a light misting with clear matte varnish. This will also unify the sheen of the different paints. -
Stack and display:
Once dry, stack your cubes in the correct order. You can leave them loose for guests to play with, or use a tiny dab of hot glue between layers if you want a permanent sculpture.
Guests will love dismantling these stacks to discover the charming details on every level
Two-Round “Before and After” Paint-Off
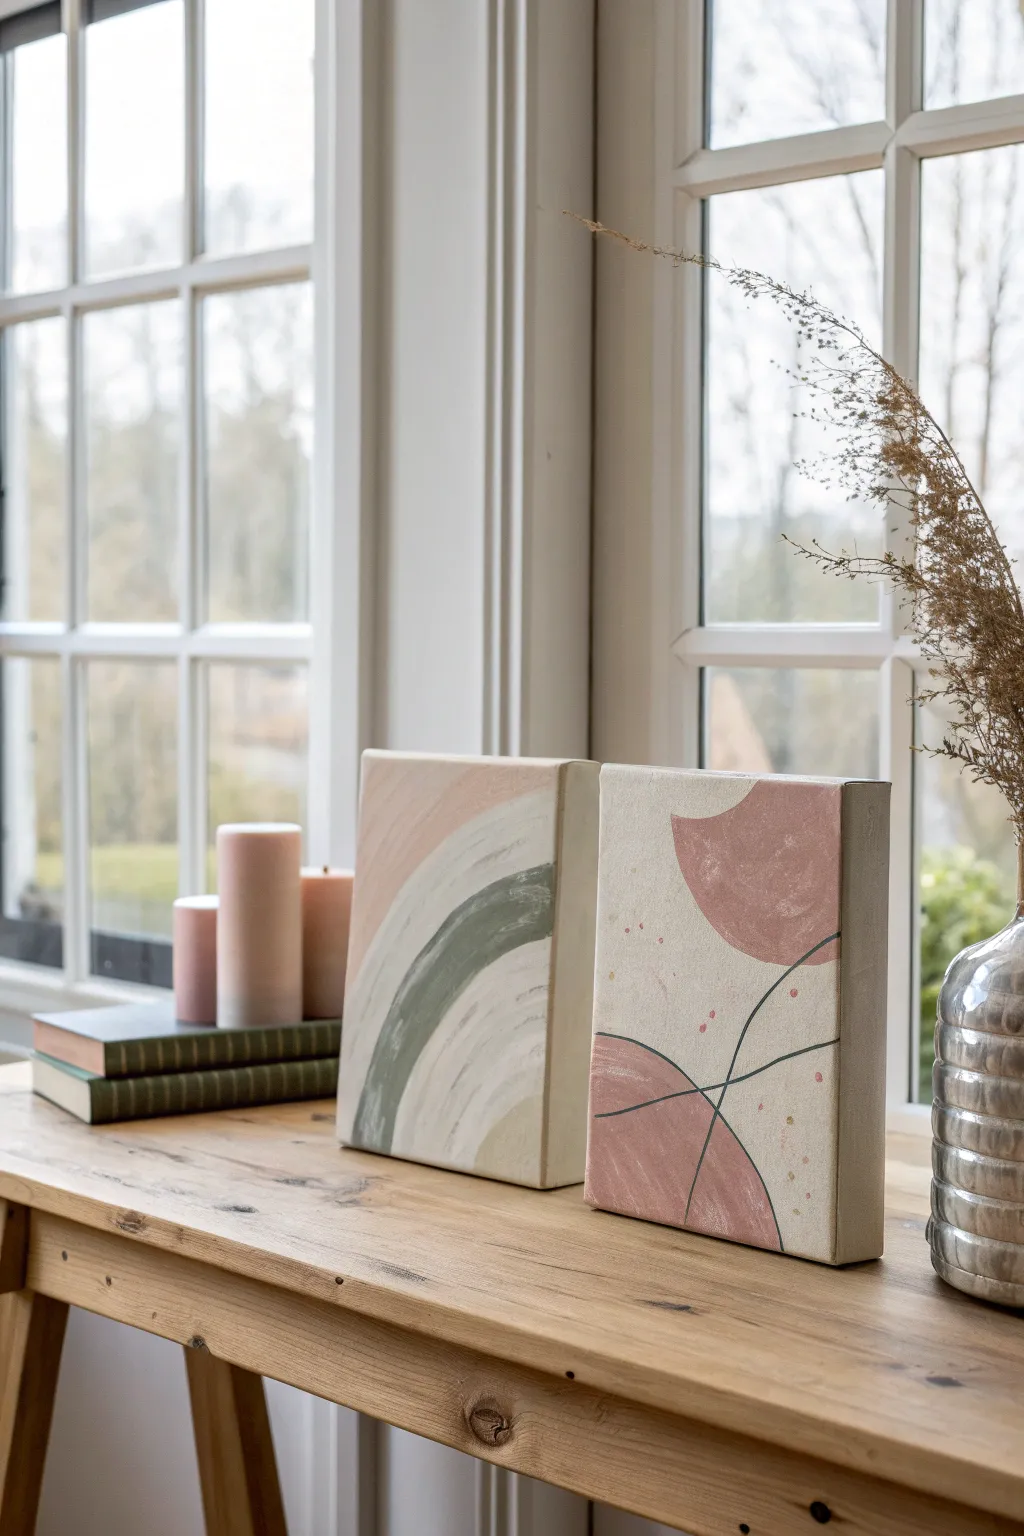
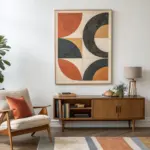
These trendy, minimalist canvases channel a calm, bohemian aesthetic perfect for a relaxing paint and sip session. With soft, muted tones of dusty rose, sage green, and cream, these simple geometric and arch designs are beginner-friendly yet look effortlessly chic as a pair.
Step-by-Step Guide
Materials
- Two 8×10 inch stretched canvases (deep edge profile preferred)
- Acrylic paints: Titanium White, Burnt Sienna, Yellow Ochre, Sap Green, Deep Red or Alizarin Crimson
- Medium flat brush (approx. 1/2 to 3/4 inch)
- Small round detail brush (size 2 or 4)
- Palette or paper plate for mixing
- Cup of water and paper towels
- Pencil for sketching
- Ruler (optional)
Step 1: Preparation & Color Mixing
-
Prepare your background color:
Start by mixing a large amount of a warm, creamy off-white. Combine Titanium White with a tiny dot of Yellow Ochre and the smallest speck of Burnt Sienna to knock back the brightness. It should look like unbleached cotton. -
Base coat the canvases:
Using your medium flat brush, apply this creamy mix over the entire front surface of both canvases. Don’t forget to paint the deep edges for a professional, finished look. -
Create the dusty rose palette:
While the background dries, mix your accent colors. For the pink, mix White with a touch of Deep Red and a little Burnt Sienna to create a muted, earthy rose tone. -
Create the sage green palette:
For the green, mix Sap Green with White and a tiny bit of Burnt Sienna or black to desaturate it into a soft sage.
Clean Lines Hack
For the straight edges of the rainbow or geometric shapes, use masking tape. Press it down firmly to prevent bleed-through, then peel it off while the paint is still wet.
Step 2: Canvas 1: The Muted Rainbow
-
Sketch the arches:
Lightly sketch three concentric arches on the first canvas. Start from the bottom left corner, curving up towards the top right, but stopping midway to create an organic, partial rainbow look. -
Paint the outer arch:
Using the flat brush turned on its narrow side or face, fill in the largest, outermost arch with your dusty rose mixture. Keep the edges relatively clean, but a little hand-painted wobble adds charm. -
Paint the middle arch:
Rinse your brush thoroughly and pick up the creamy background color again. Paint the middle negative space stripe to ensure the separation is crisp. -
Paint the inner arch:
Fill the innermost arch with your sage green mixture. Apply a second coat if the canvas texture is showing through too much. -
Paint the center arch:
Fill the central arch stripe with a slightly lighter version of the background cream or a very pale grey-green for subtle contrast. -
Add texture:
Once the paint is tacky but not fully dry, I like to execute a ‘dry brush’ technique over the arches with white paint to give it a worn, vintage feel.
Add Metallic Flair
Once the matte paint is dry, paint a thin line of gold leaf or metallic gold paint along one edge of the rainbow arch or the abstract lines for a touch of glam.
Step 3: Canvas 2: Abstract Geometry
-
Sketch the shapes:
On the second canvas, lightly draw two large semi-circles coming in from opposite edges—one from the top right and one from the bottom left. -
Fill the geometric shapes:
Paint these semi-circles with the dusty rose mixture. You may need two coats for solid opacity. -
Draft the connecting lines:
Once the rose shapes are dry, use your pencil to draw two organic, intersecting curved lines that connect the shapes and cross the canvas. -
Paint the lines:
Switch to your small round detail brush. Mix a dark, charcoal green (Sap Green plus more Burnt Sienna/Black) and carefully trace over your pencil lines. Keep the pressure light for thin lines. -
Add the speckled details:
Dip the handle end of a small brush or a toothpick into the rose and green paints. Gently dot small decorative specks around the curved lines for a terrazzo-inspired effect. -
Final touches:
Step back and look at both canvases together. Touch up any background areas with your cream mix to clean up messy edges.
Let your beautiful minimalist pieces dry completely before displaying them side-by-side on a mantel or shelf


Playful Figure Study (Tasteful and Cheeky)
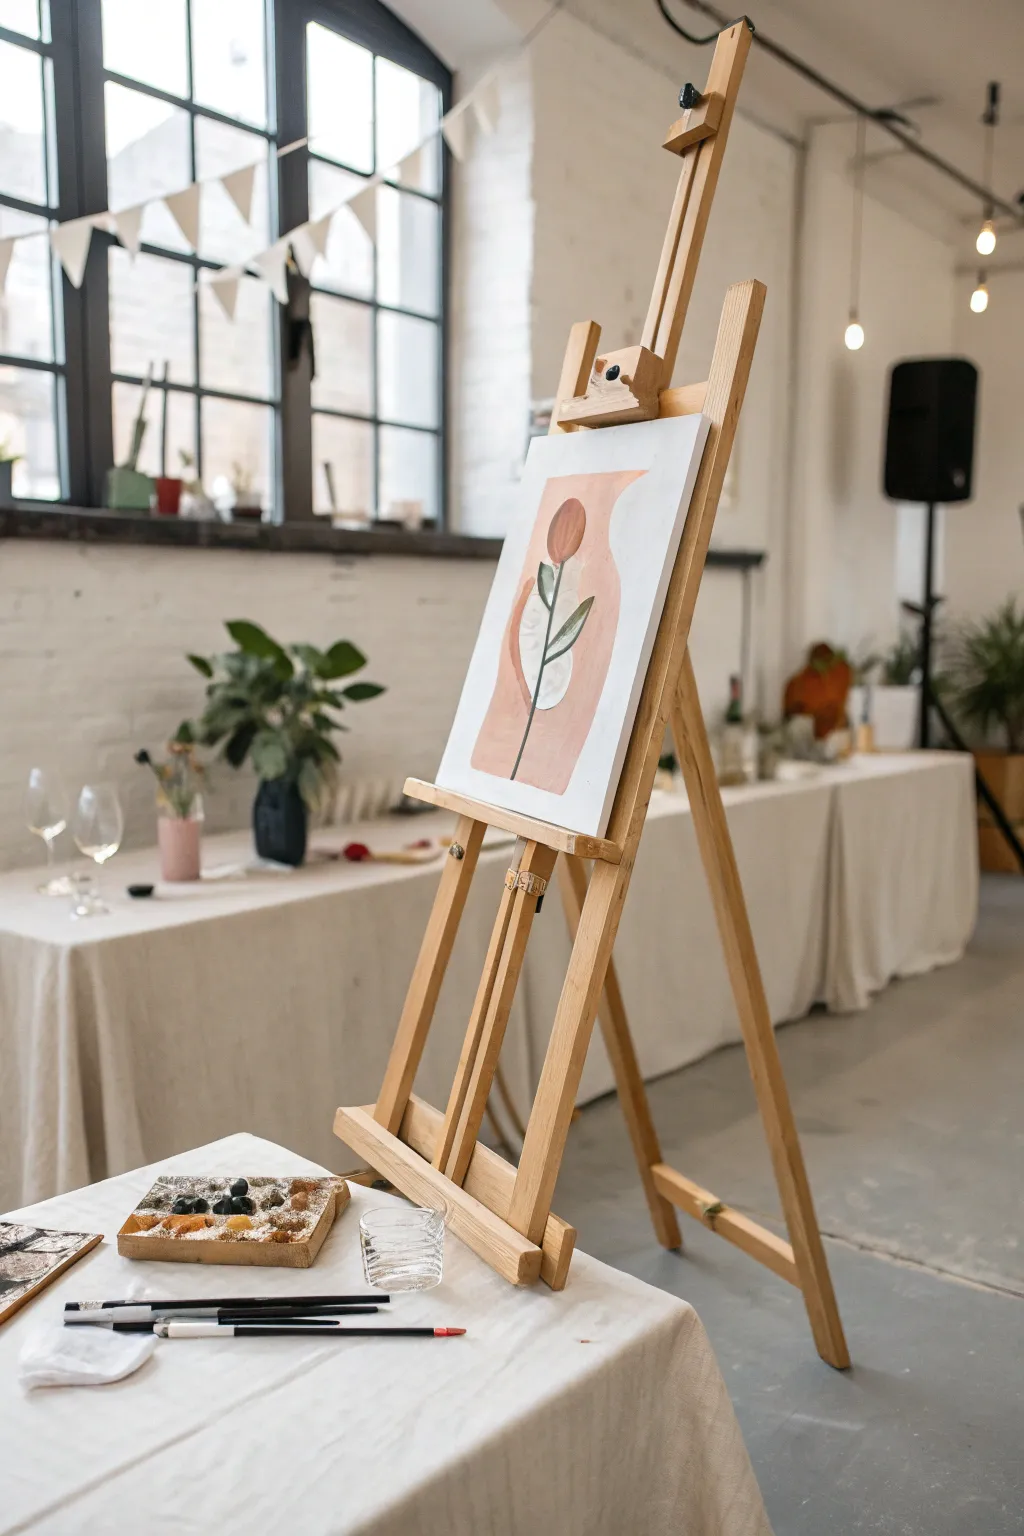
This project combines soft, organic shapes with a playful hint of the human form, creating a piece that is both a modern botanical study and a cheeky silhouette. The warm, terracotta tones play beautifully against the stark white canvas, making it a stylish addition to any bachelorette paint party.
Step-by-Step
Materials
- 12×16 inch Stretched Canvas
- Acrylic Paints (Terracotta/Burnt Sienna, Titanium White, Black, Olive Green)
- Flat Brush (1 inch)
- Round Detail Brush (Size 2 or 4)
- Pencil for sketching
- Palette or paper plate
- Cup of water and paper towels
Step 1: Planning the Composition
-
Analyze the shapes:
Before picking up a brush, look closely at the main shape. It resembles a curvaceous vase or a stylized female torso. Notice specifically how the left side has a rounded ‘hip’ shape and the top right extends upward like a shoulder or vessel neck. -
Sketch the silhouette outline:
Using your pencil lightly, draw the large central shape. Start near the bottom center, curve out to the left to create a rounded bulge, then bring the line in and up. For the right side, keep the line straighter but slightly angled outward. -
Mark the negative space:
This is crucial: sketch a smaller, organic oval shape inside the left ‘hip’ area. This will remain white later—it serves as a cutout or negative space that adds depth and abstraction to the figure. -
Add the botanical element:
Draw a simple vertical line straight up the middle for the stem. Add a circle near the top for the flower head, and sketch two simple almond-shaped leaves branching off the stem.
Steady Hand Trick
Rest your pinky finger on a dry part of the canvas to stabilize your hand while painting the thin black stem and outlines.
Step 2: Painting the Background
-
Mix your base color:
Create a warm, dusty pink-terracotta shade. Mix a large amount of Titanium White with a dollop of Burnt Sienna. If it’s too orange, add a tiny touch of red; if it’s too dark, add more white. -
Careful outlining:
Use the edge of your flat brush or a smaller round brush to paint the outline of your pencil sketch. Go slowly around the curves to keep the edges crisp. -
Fill in the main shape:
Switch to your larger flat brush. Fill in the entire terracotta silhouette area. Ensure your brushstrokes follow the contours of the shape for a smoother look. -
Preserve the white zones:
Be very careful to paint *around* the internal oval shape on the left side and the central flower stem area. These need to stay white for now. The contrast is what makes the image pop. -
Refine the edges:
While the paint is wet, smooth out any ridges. If you accidentally painted over a line, use a damp paper towel to wipe it back or wait for it to dry and touch up with white paint later. -
Let it dry completely:
Step away for a few minutes. Acrylics dry darker, so check if the color is consistent. If it looks streaky, apply a second coat of the terracotta mix once the first layer is dry to the touch.
Step 3: Adding the Botanical Details
-
Paint the stem:
Load your small round brush with black paint. Dilute it slightly with water so it flows like ink. Paint a thin, steady line over your pencil mark for the central stem, starting from the bottom of the shape. -
Create the flower head:
Mix a darker version of your background color—use pure Burnt Sienna or mix a little red into your previous terracotta pile. Paint a solid circle at the top of the black stem. -
Outline the flower:
Once the flower circle is dry, outline it thinly with your black paint to define it against the background. -
Paint the leaves:
Mix a muted olive green. If you don’t have green, mix yellow and black with a touch of white. Paint the two almond-shaped leaves you sketched earlier. -
Outline the leaves:
Using the tip of your smallest brush and black paint, outline the green leaves. Add a central vein line down the middle of each leaf for a graphic, illustrative touch. -
Refining the negative space:
Return to that white oval inside the terracotta shape. If you have messy paint edges, use pure Titanium White to clean up the shape, making it look like a deliberate cutout. -
Final touch-ups:
Step back and look at the balance. If the black lines look shaky, you can thicken them slightly to smooth them out. Ensure the white canvas background is clean of any stray smudges.
Uneven Background?
If the large terracotta area looks streaky after drying, don’t worry. Apply a second thin coat in the opposite direction (cross-hatching) for solid coverage.
Allow your cheeky masterpiece to dry completely before displaying it alongside your favorite bubbly
Paint the Groom From Memory Challenge
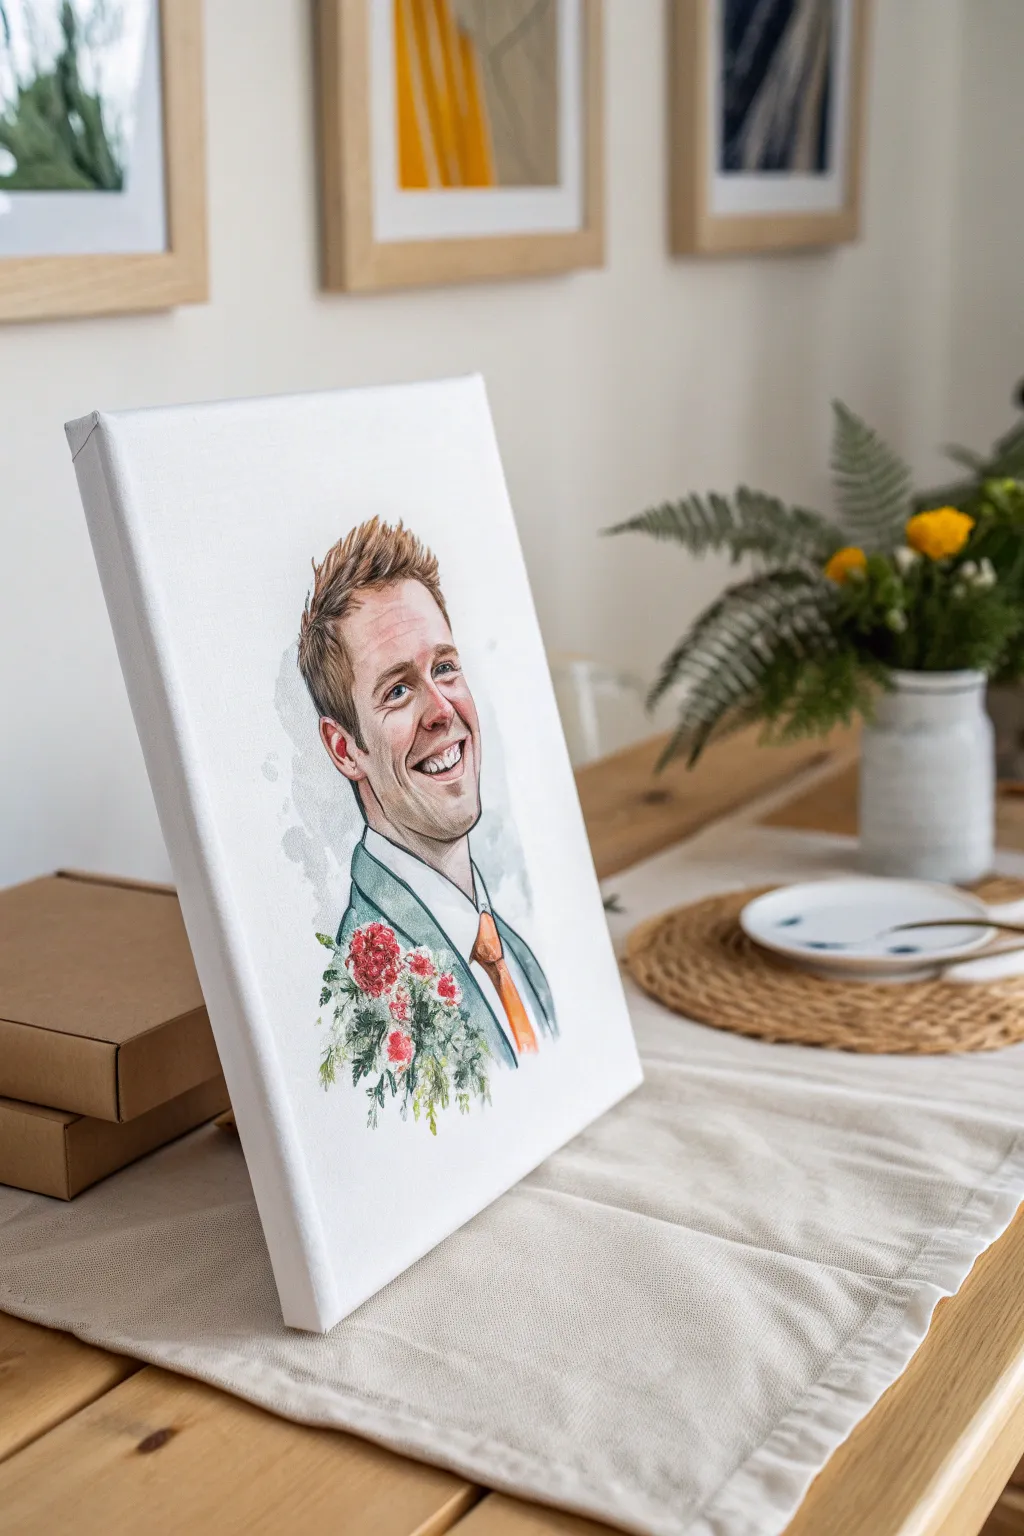
Capture the groom’s likeness with a charming, illustrative touch that mimics the fluidity of watercolors using accessible acrylics. This portrait features loose, expressive brushwork and a soft floral accent, perfect for creating a memorable keepsake at a bachelorette party.
Step-by-Step Tutorial
Materials
- Small stretched canvas (e.g., 8×10 or 11×14 inch)
- Acrylic paints (Titanium White, Burnt Sienna, Yellow Ochre, Cadmium Red, Ultramarine Blue, Hooker’s Green, Sap Green)
- Water/glazing medium or flow improver
- Pencils (HB or 2B) and eraser
- Round synthetic brushes (sizes 2, 6, and 10)
- Palette or paper plate
- Cup of water and paper towels
- Reference photo of the groom
Step 1: Sketching the Foundation
-
Prepare the canvas:
Since we are aiming for a watercolor effect on canvas, start by applying a very thin, watered-down wash of white acrylic over the entire surface to prime it slightly differently, or use a specific watercolor ground if available. Let this dry completely. -
Outline the head shape:
Using your HB pencil, lightly sketch an oval shape for the head. Don’t press too hard; you want these lines to be barely visible later. -
Mark features guidelines:
Draw faint horizontal lines where the eyes, nose base, and mouth will sit. Add a vertical line down the center to help with symmetry, especially if the face is turned slightly. -
Draft the facial features:
Sketch the eyes, nose, and smiling mouth. Focus on capturing the main shapes rather than tiny details like individual eyelashes. -
Add hair and clothing:
Outline the hair shape, noting the spiky texture on top. Sketch the collar, tie, and shoulders of the suit jacket below the neck.
Water Control is Key
Since you’re using acrylics to mimic watercolor, use a flow medium instead of just water. Too much water breaks down the acrylic binder.
Step 2: Painting Skin Tones
-
Mix a base skin tone:
Combine White, a touch of Yellow Ochre, and a tiny dot of Red. Dilute this mixture significantly with water or flow improver until it behaves like watercolor. -
Apply the first wash:
Using the size 10 brush, lay down a splash of color behind the head as a loose background, using a cool grey or light blue wash. Then, paint the base skin tone over the face, leaving the eyes and teeth white. -
Define shadows:
Mix a slightly darker skin tone by adding a bit of Burnt Sienna. While the first layer is still tacky, dab this into the shadow areas: under the chin, the side of the nose, and the eye sockets. -
Deepen the contrast:
Create a stronger shadow tone with Burnt Sienna and a tiny touch of Blue. Use the size 6 brush to add distinct lines around the jawline and smile lines to give the face structure. -
Add warmth to cheeks:
Glaze a very watered-down red over the cheeks and nose tip and ears to give him a healthy, flushed look.
Custom Wedding Colors
Swap the tie color and the floral accent colors to match the actual wedding palette for a thoughtful, personalized touch.
Step 3: Hair and Eyes
-
Block in hair color:
Mix your brown hair color (Burnt Sienna + Blue for dark, or Ochre + Sienna for light). Apply this in loose strokes, following the direction of hair growth. -
Create texture:
I like to use a fairly dry size 2 brush here to flick upward strokes at the top of the head, creating that spiky, styled look. -
Detail the eyes:
With your smallest brush, paint the iris color. Add the pupil with black (or dark brown). Crucially, leave a tiny white dot in each eye for the ‘catchlight’ to bring him to life.
Step 4: Suit and Florals
-
Paint the suit jacket:
Mix a muted green or grey and wash it over the jacket area. Keep the edges loose and uneven to maintain the artistic style. -
Add the tie:
Use a bright orange or the groom’s favorite color for the tie. Apply it boldly, letting it contrast against the white shirt collar. -
Start the floral cluster:
At the bottom corner of the jacket, dab small spots of red and pink paint to represent flowers. Keep them abstract. -
Add greenery:
Using a mix of Sap Green and Hooker’s Green, paint small leaves and stems extending from the flowers, feathering them out into nothingness. -
Final outlines:
Once everything is dry, mix a dark, watery brown-black. Use your finest liner brush to loosely outline key features—the lapel, the jaw, the eyes—to give it that illustrative pop.
Allow your masterpiece to dry fully before displaying it on a mini easel for everyone to admire the resemblance.
Collaborative “Bride Quilt” Canvas Grid
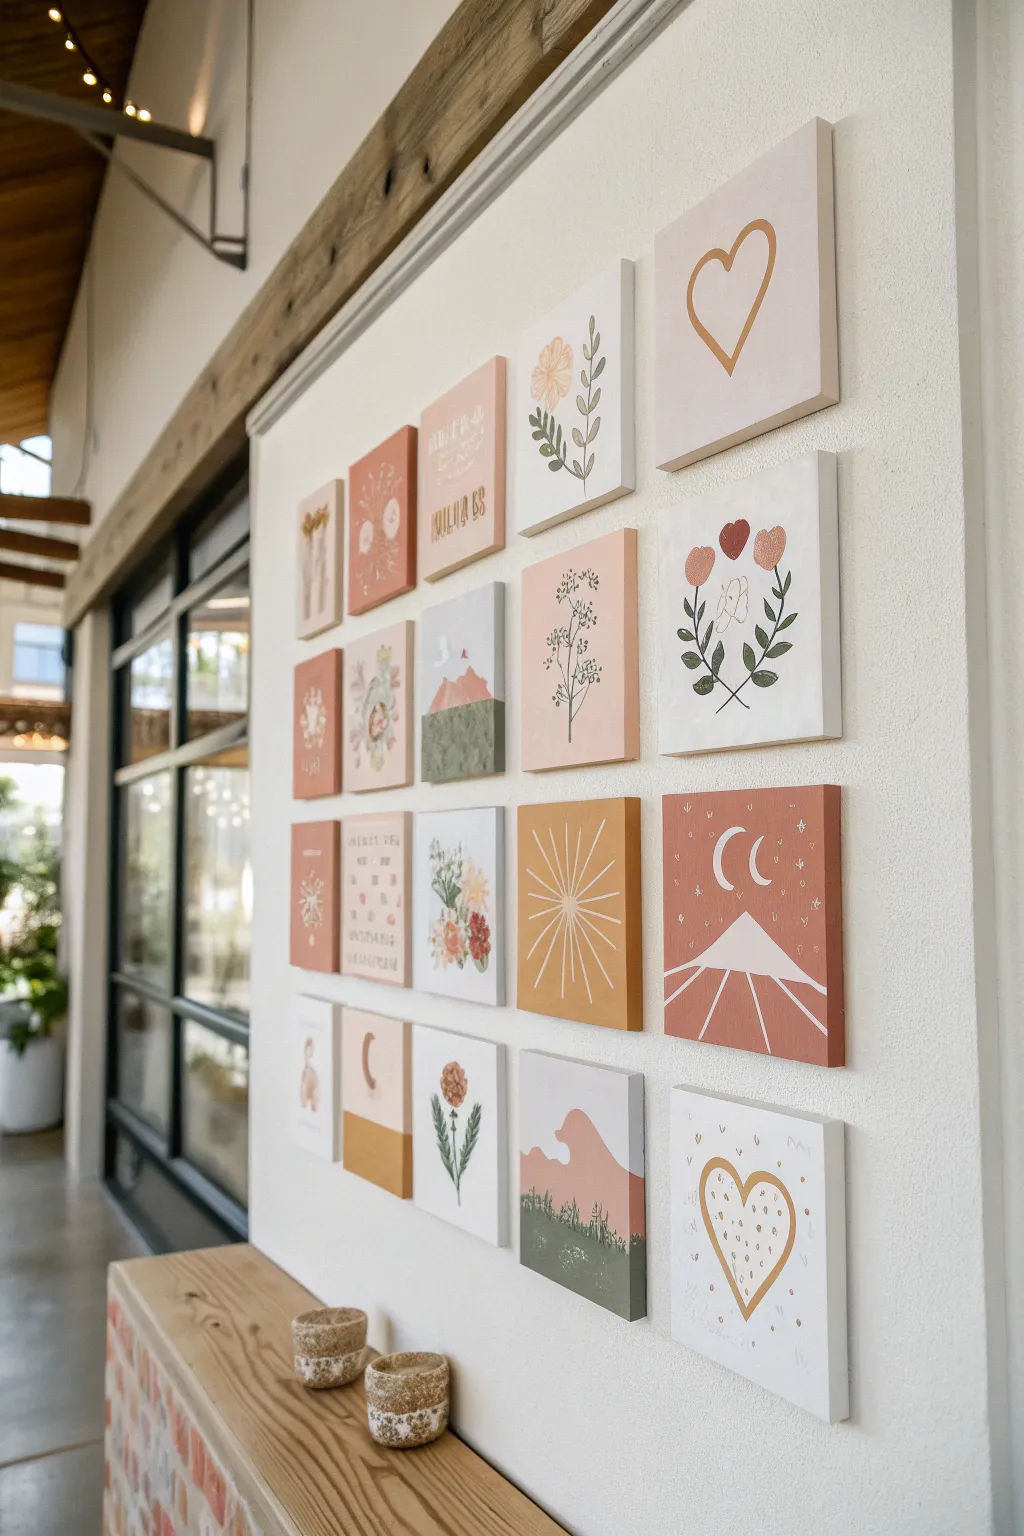
Create a stunning collaborative art piece where each guest paints a small canvas, contributing to a cohesive gallery wall for the bride-to-be. This grid design uses a unified palette of earthy pinks, warm terracottas, and sage greens to ensure every individual tile harmonizes perfectly with the others.
Step-by-Step
Materials
- 20-25 small square canvases (6×6 inch or 8×8 inch)
- Acrylic paints (Terracotta, Blush Pink, Sage Green, Mustard Yellow, Cream/White, Burnt Umber)
- Assorted brushes (flat wash, small round for details, fine liner)
- Pencil and eraser
- Palette paper or paper plates
- Water cups and paper towels
- Printed reference sheet with simple boho icons (optional)
Step 1: Preparation & Palettes
-
Establish the palette:
Before the party starts, pre-mix or select your acrylic colors. To achieve that cohesive ‘boho’ look seen in the photo, limit the options to specific shades: a deep rust/terracotta, a soft blush pink, a muted sage green, a warm mustard yellow, and plenty of creamy white. -
Prime the canvases:
Assign a background color to each canvas ahead of time to ensure a balanced grid later. Paint roughly 1/3 of the canvases in cream, 1/3 in blush pink, and the rest in varied accent tones like terracotta or sage. Let these base coats dry completely before guests arrive. -
Set up stations:
Place one pre-painted canvas at each seat. Provide a pencil for sketching and a small palette with dollops of the approved accent colors so guests don’t go rogue with neon brights.
Uneven Grid Spacing?
Cut a small block of wood or cardboard to use as a spacer. Place it between canvases as you hang them to ensure every gap is exactly the same width without constant measuring.
Step 2: Designing the Tiles
-
Sketch the motifs:
Encourage guests to lightly sketch a simple design in the center of their canvas. Good beginner prompts include simple heart outlines, a sun with radiating lines, a crescent moon, or a single botanical sprig. -
Paint the botanical icons:
For guests painting leaves or flowers, suggest using the tip of a round brush. Press down and lift up to create leaf shapes in sage green. Simple vertical lines with small dots can mimic lavender or wildflowers. -
Create the celestial tiles:
For the sunburst designs, use a fine liner brush and mustard yellow or white paint. Start from a central point or semi-circle and pull line strokes outward. These don’t need to be perfectly straight; a hand-painted look adds charm. -
Add abstract landscapes:
A few tiles can feature simplified landscapes. I like to instruct painters to just use wavy horizontal lines to create ‘hills’ in different shades of pink and terracotta, perhaps topping one with a small triangle mountain cap. -
Include text elements:
Dedicate 2-3 canvases for words. Use a small flat brush to stencil or freehand block letters saying things like ‘LOVE’ or ‘BRIDAL’. Use a contrasting color like white on terracotta so it pops.
Step 3: Details & Assembly
-
Add fine details:
Once the main shapes are dry, use the smallest liner brush to add tiny accents. White dots inside a heart, little stars around a moon, or veins on leaves bring the designs to life. -
Checks and balances:
Have guests step back and look at the canvases together on a table. If a design feels too simple, add a few ‘sparkle’ stars or dots in the empty negative space. -
Clean the edges:
Paint the sides of each canvas to match its background color. This gives the final grid a professional, gallery-quality finish when viewed from an angle. -
Plan the layout:
Arrange the dried canvases on the floor to find the best composition. Try to disperse the colors evenly so you don’t have a cluster of terracotta tiles all in one corner. -
Mounting the grid:
To display them at the event or in the bride’s home, use removable adhesive hanging strips. Ensure even spacing between each canvas—about 1 to 2 inches creates a breathable, organized look.
Keep it Cohesive
Only put out the specific pre-chosen paint colors for guests to use. Hiding the other tubes prevents accidental clashes and guarantees the final grid looks curated.
Step back and admire how individual simple paintings come together to form a beautiful, unified tapestry of art for the bride
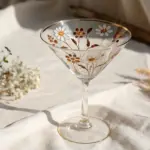
Personalized Glass and Coaster Painting
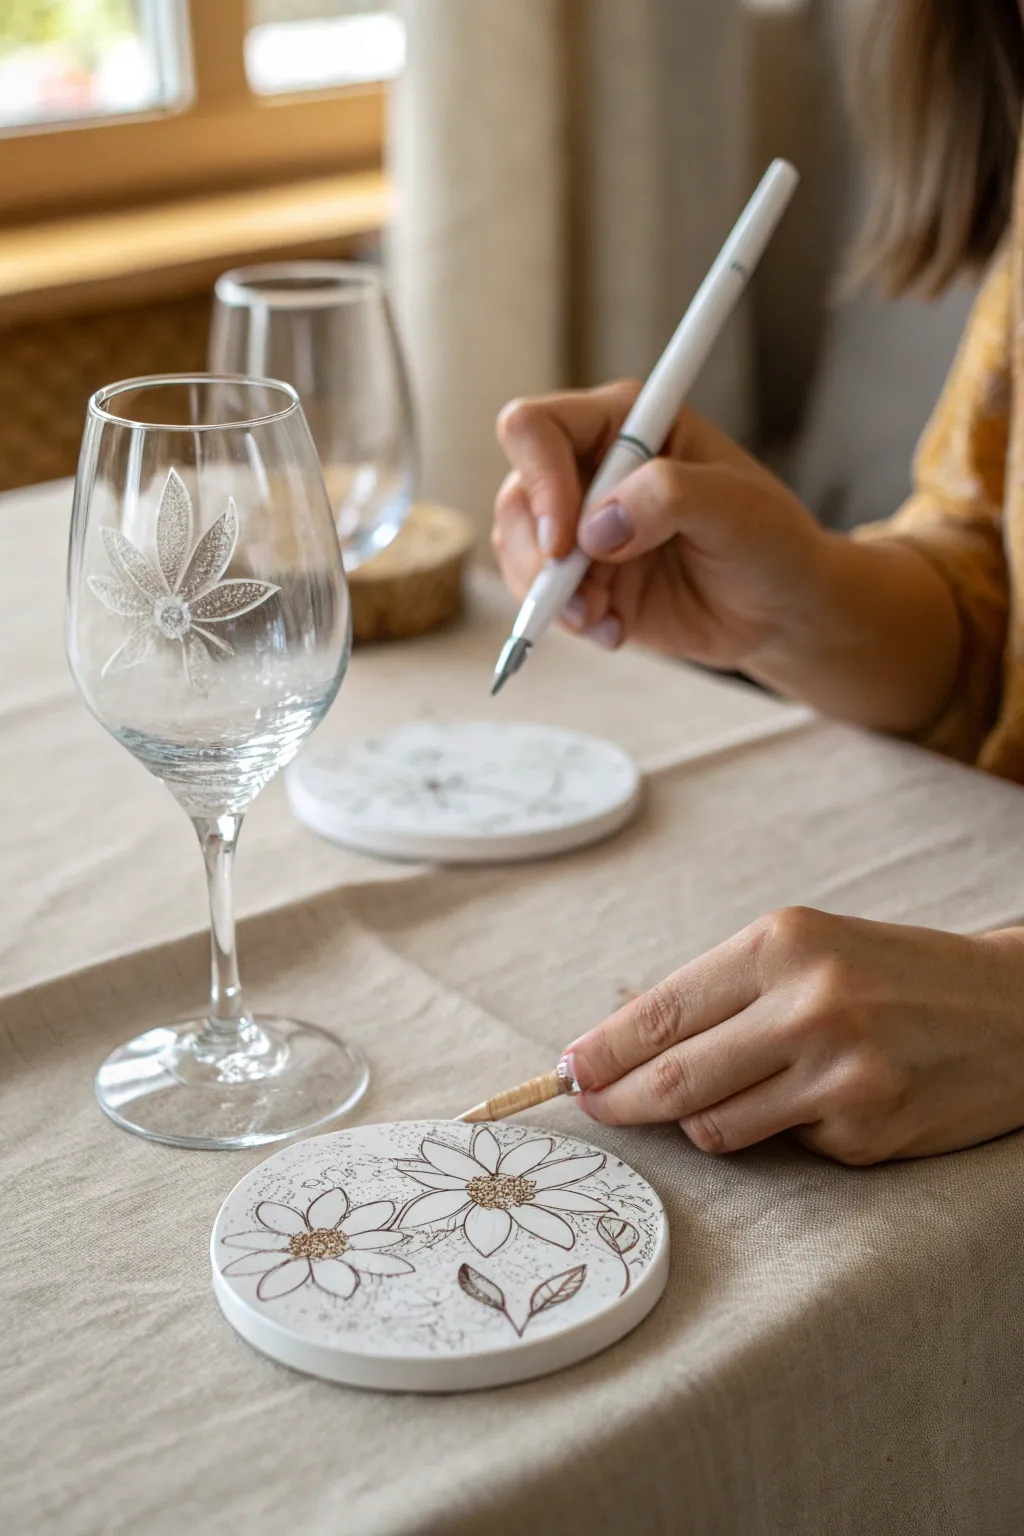
Elevate your next gathering with this dual-project workshop featuring elegant etched glassware and matching hand-drawn ceramic coasters. The result is a cohesive, nature-inspired table setting that looks professionally crafted but is surprisingly achievable at home.
Step-by-Step Tutorial
Materials
- Clear stemmed wine glasses
- Round white ceramic coasters (unglazed or matte finish)
- Glass etching cream
- Adhesive stencil vinyl or contact paper
- Hobby knife (e.g., X-Acto)
- Small paintbrush (for etching cream)
- Protective gloves
- Glass cleaner and lint-free cloth
- Fine-tip permanent markers in brown and black
- Metallic gold paint pen (fine tip)
- Pencil and eraser
- Painter’s tape
Step 1: Etching the Wine Glass
-
Clean surface:
Begin by thoroughly cleaning your wine glass with glass cleaner and a lint-free cloth. Any oils or fingerprints can prevent the etching cream from working evenly, so ensure the surface is pristine. -
Create stencil:
Draw a simple six-petaled flower shape onto a piece of adhesive vinyl. Using your hobby knife, carefully cut out the flower design, creating a negative space stencil. You want the glass to show where the flower will be. -
Apply stencil:
Peel the backing off your vinyl stencil and adhere it firmly to the bowl of the wine glass. Smooth out any air bubbles, especially right around the cut edges of the flower design, to prevent cream from bleeding underneath. -
Mask surrounding area:
Use painter’s tape to cover the glass area immediately surrounding your stencil. Etching cream is potent, and you don’t want accidental drips marking the clear parts of your glass. -
Apply etching cream:
Put on your protective gloves. Using a small brush, apply a thick, even layer of etching cream over the stencil opening. I find that dabbing it on rather than brushing helps get into all the corners. -
Wait and rinse:
Let the cream sit for the time recommended on your specific bottle (usually 1-5 minutes). Once time is up, rinse the cream off under running water while the stencil is still on. -
Reveal design:
Peel away the vinyl stencil and painter’s tape to reveal your frosted flower design. Dry the glass completely to see the full effect. -
Optional detail:
If you want the subtle inner lines seen in the photo, you can use a white oil-based paint pen to gently sketch vein details over the etched area once it is fully dry.
Clean Lines
For sharper etching edges, leave the cream on longer than directed by 1-2 minutes, but check frequently to ensure it hasn’t dried out.
Step 2: Designing the Coasters
-
Sketch layout:
Take your round ceramic coaster and lightly sketch a floral design using a pencil. Aim for two or three large blooms, perhaps a daisy or coneflower style, with a few leaves. -
Outline in brown:
Trace over your main flower petals using a brown fine-tip permanent marker. Keep your lines steady but organic; imperfect lines add to the hand-drawn charm. -
Add texture:
Use the brown marker to add small dots or stippling to the center methods of the flowers. This creates depth and mimics the pollen area of real blooms. -
Draw leaves:
Sketch simple leaf shapes attached to the blooms. Draw a central vein in each leaf, but keep the interior mostly open for a clean look. -
Golden details:
Take your metallic gold paint pen and carefully add accents to the center of the flowers, right over your brown stippling. This adds a lovely shimmer that catches the light. -
Fill background:
To create the subtle textured background shown in the image, use a very fine black or grey pen. create loose, scribbly, vine-like patterns in the empty white space around the flowers. -
Let ink set:
Allow the ink to dry completely for at least 30 minutes to prevent smudging. -
Bake to cure:
Place the coasters in a cool oven, set the temperature to 350°F (175°C), and bake for 30 minutes. Turn off the oven and let them cool inside to permanently set your design.
Mix & Match
Personalize the set by adding initials inside the flower centers or etching unique flower types for each guest’s glass.
Now you have a stunning custom set ready for your next toast
Wedding Weekend Sign Painting
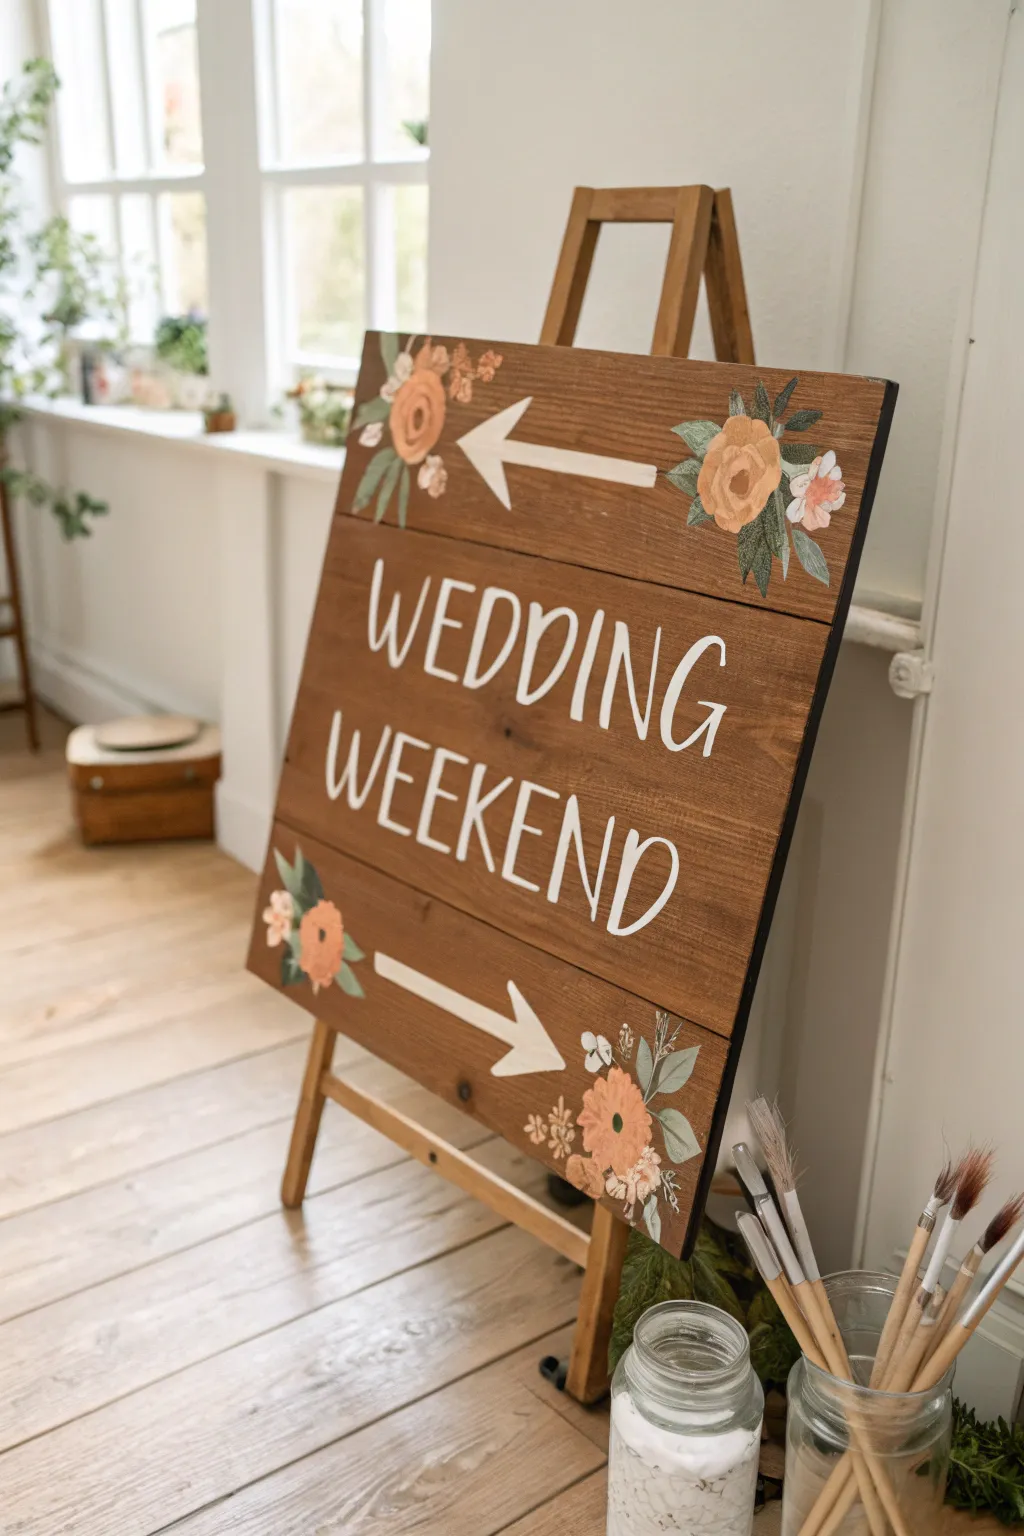
Guide your guests in style with this charming directional sign, featuring hand-lettered typography on stained wood. The warm floral accents and crisp white arrows create a welcoming, rustic aesthetic perfect for a wedding weekend entrance.
Step-by-Step Guide
Materials
- Large rectangular wood panel (approx. 18×24 inches) or three joined planks
- Dark walnut wood stain
- Lint-free cloth or staining sponge
- White acrylic paint
- Peach, sage green, and cream acrylic paints
- Round synthetic brushes (sizes 2, 6, and 10)
- Flat brush (1 inch)
- Pencil
- Ruler or straight edge
- Graphite transfer paper (optional)
- Small cup of water
- Paper towels
- Easel for display
Step 1: Base Preparation
-
Sand the Wood:
Begin with a clean wooden surface. If you are using a raw wood board or joining three smaller planks together, give the entire surface a light sanding with fine-grit sandpaper to remove any splinters or rough patches. -
Wipe Clean:
Thoroughly wipe away all sanding dust with a damp cloth or tack cloth. Any remaining dust will get trapped in the stain and create a gritty texture. -
Apply Stain:
Using a lint-free cloth or a staining sponge, apply a generous coat of dark walnut wood stain. Rub it into the grain in long, even strokes. -
Wipe and Dry:
Quickly wipe off any excess stain with a clean rag to ensure the color penetrates without becoming opaque. Allow this to dry completely, typically for at least 2-4 hours depending on humidity.
Paint Bleeding?
If paint bleeds into the wood grain, let it dry completely. Then, use a fine-grit sandpaper to gently buff away the mistake, or touch it up with a bit of stain on a Q-tip.
Step 2: Drafting the Design
-
Mark Guidelines:
Once dry, use a ruler and pencil to lightly mark horizontal guidelines for your text. Position ‘WEDDING’ in the upper middle section and ‘WEEKEND’ in the lower middle section, ensuring they are centered. -
Sketch Text:
Sketch the letters in a casual, tall serif font. I like to make the vertical lines slightly thicker to mimic calligraphy. If you aren’t confident freehanding, print your text on paper and transfer it using graphite paper. -
Outline Arrows:
Draw raw outlines for your arrows. Placement is key here: place a left-pointing arrow near the top and a right-pointing arrow near the bottom to balance the composition. -
Map Florals:
Lightly sketch circles in the corners to represent where your main flowers will go, adding rough lines for leaves extending outward.
Step 3: Painting the Elements
-
Arrow Base Coat:
Using a flat brush and white acrylic paint, fill in the arrow shapes. You will likely need two coats to get a crisp, opaque white against the dark wood background. -
Lettering:
Switch to a size 6 round brush for the lettering. Carefully paint over your pencil lines with white paint. For a more polished look, go over the downstrokes a second time to thicken them slightly. -
Flower Base Shapes:
Mix a soft peach color and paint slightly irregular circles in the corners where you marked your flowers. These don’t need to be perfect; they are just the base for the petals. -
Adding Leaves:
While the flowers dry, mix a muted sage green. Using a size 6 or 10 brush, paint elongated leaf shapes extending from the flowers. Vary the size and direction for a natural look. -
Flower Detail – Shadows:
Mix a slightly darker orange-brown shade. Add curved, C-shaped strokes inside your peach flowers to create the illusion of swirling petals and depth. -
Flower Detail – Highlights:
Add tiny touches of cream or very light peach to the edges of the petals to make them pop. -
Secondary Florals:
Paint small cream-colored accent flowers or buds near the main peach blooms to fill out the bouquet clusters. Use the tip of your smallest brush for delicate petals. -
Final Touches:
Review your white lettering. If the wood stain is bleeding through, add a final top coat of white to the text and arrows for maximum contrast.
Brush Control Pro Tip
Add a drop or two of water to your acrylic paint to improve ‘flow.’ This helps you paint long, smooth lines for the lettering without the brush dragging or skipping on the wood texture.
Place your finished sign on an easel and enjoy the beautiful welcome you’ve created for the celebration
Neon Glow Paint-and-Sip After Dark

Capture the electric vibe of the night with this simple yet striking neon chalkboard art. Using vibrant neon chalk markers or paints on a dark surface creates an instant pop that looks like a glowing sign.
Step-by-Step Tutorial
Materials
- Small black canvas (8×10 inches)
- Wooden tabletop easel
- Neon blue chalk marker (or acrylic paint pen)
- Neon pink chalk marker (or acrylic paint pen)
- White pastel pencil or thin chalk stick
- Damp cloth or paper towel
Step 1: Preparation
-
Set the Stage:
Place your black canvas securely on the wooden tabletop easel. Ensure the surface is clean and free of dust so your neon colors will adhere smoothly. -
Prime Your Markers:
If you are using chalk markers or paint pens, shake them vigorously with the cap on. Press the nib down on a scrap piece of paper until the ink flows fully to the tip.
Neon Brightness Hack
To make colors truly neon, draw a base layer in white first, let it dry, then layer your neon pink or blue on top. The white base reflects light through the color.
Step 2: The Blue Heart
-
Outline the Shape:
Start in the upper left quadrant of the canvas. Using the neon blue marker, draw the outline of a medium-sized heart. Don’t worry about perfect symmetry; a hand-drawn look adds charm. -
Thicken the Outline:
Go over the outline again to thicken the line weight. A bolder line helps simulate the look of a neon tube. -
Add Texture:
Instead of coloring it in solid, use quick, scribbly shading motions inside the heart. Leave some black space visible to make the blue appear to be glowing and vibrating against the dark background.
Date Night Twist
Instead of abstract shapes, paint you and your partner’s initials inside the glowing hearts for a personalized touch unique to your celebration.
Step 3: The Pink Heart
-
Position the Centerpiece:
Move slightly to the right and center of the canvas. Draw a larger heart using the neon pink marker. This should overlap the imaginary space next to the blue heart slightly. -
Layer the Color:
Just like the blue heart, go over your initial line work several times. I like to press a bit harder on the curves to deposit more ink, making those areas pop. -
Create the Glow:
Use a light, sketchy motion to fill in the borders of the pink heart, keeping the center largely empty. This negative space is crucial for the neon sign effect.
Step 4: The White Accents
-
Draw the Outline Heart:
In the lower left area, use your white pastel pencil or thin chalk stick. Draw a simple, thin-lined heart. -
Stylize the Cross:
At the bottom point of this white heart, extend the lines slightly so they crisscross. This creates a casual, sketched aesthetic distinct from the bolder neon hearts.
Step 5: Final Touches
-
Add the Symbol:
In the bottom right corner, switch back to the neon pink marker. Draw a small circle. -
Double the Circle:
Draw a larger circle around the first one to create a concentric ring or ‘bullseye’ shape. -
Clean Up:
If you have any smudges, use a barely damp cloth to tidy up the black background, but be careful not to touch your fresh neon ink. -
Display:
Allow the ink to dry completely for about 5-10 minutes before moving the easel to your display area.
Place your easel under some string lights to really see those neon colors shine


Have a question or want to share your own experience? I'd love to hear from you in the comments below!