Green is one of those colors that can feel instantly calming, magical, or dramatic—depending on how you push it. Here are my favorite green painting ideas that keep things beginner-friendly while still looking bold and finished.
Monochrome Green Mountain Landscape

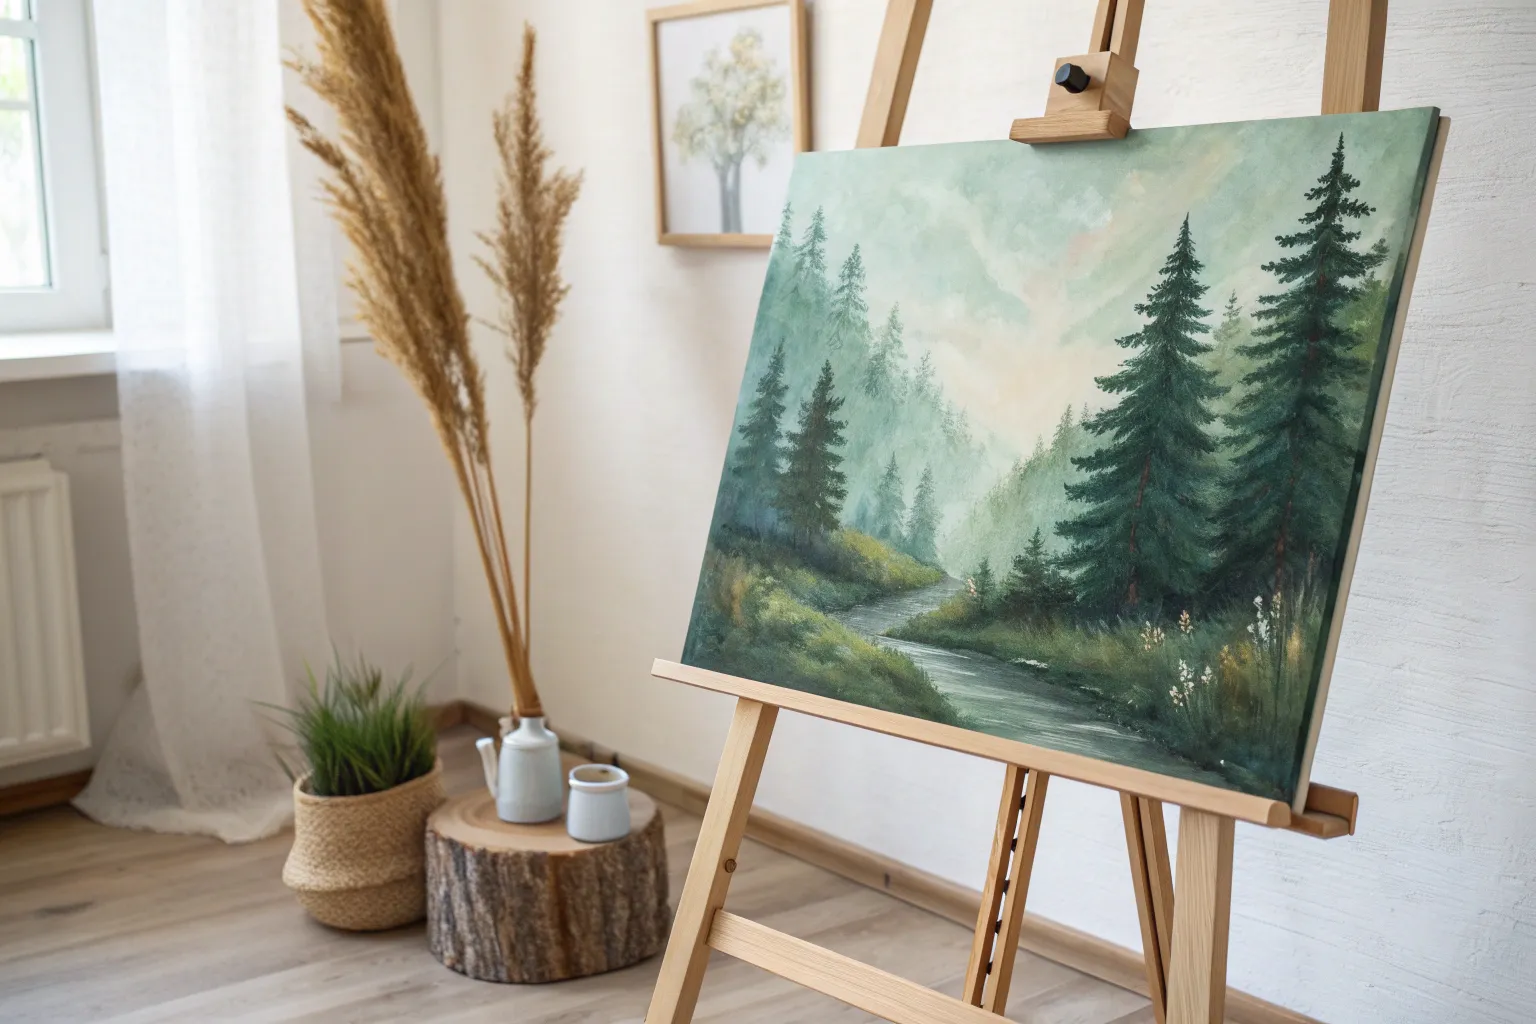
Capture the serene beauty of a mountain range fading into the distance with this atmospheric watercolor project. Using a limited palette of greens and yellows, you’ll master the art of aerial perspective by layering washes from light to dark.
Step-by-Step Guide
Materials
- Cold press watercolor paper (300 gsm)
- Watercolor paints (Sap Green, Hooker’s Green, Indigo, Lemon Yellow)
- Masking tape
- Large flat wash brush
- Medium round brush (size 6 or 8)
- Small detail brush (size 0 or 2)
- Mixing palette
- Two jars of water
- Paper towels
Step 1: Preparation and Sky
-
Secure the paper:
Tape down all four edges of your watercolor paper to a board or table. This prevents buckling and creates that crisp white border you see in the finished piece. -
Mix the sky gradient:
Prepare a very watery mix of Lemon Yellow with a tiny touch of Sap Green. You want this to be extremely pale and translucent. -
Wet-on-wet sky wash:
Thoroughly wet the top third of your paper with clean water. While shiny, brush your pale yellow-green mix across the top, fading it out into clear water as you move about a third of the way down the page. -
Let it dry completely:
Before painting any mountains, the sky must be bone dry. If the paper feels cold to the touch, it’s still wet.
Watermarks forming?
Bloom marks happen when wet paint touches drying paint. Avoid this by ensuring each mountain layer is 100% dry before painting the next one on top of it.
Step 2: Painting the Distant Hills
-
Mix the lightest green:
Create a tea-strength mixture of Sap Green and plenty of water. It should be barely darker than the sky. -
Paint the first ridge:
Using your medium round brush, paint a wavy, organic line across the paper, overlapping the bottom of the sky wash slightly. Fill the space below this line with the same pale wash. -
Soften the bottom edge:
While the paint is still wet, rinse your brush and run damp, clean bristles along the bottom edge of this layer to fade it out. This creates the misty effect. -
Dry and darken:
Let that layer dry. Now, add a tiny bit more pigment to your existing green puddle to make it slightly darker. -
Paint the second ridge:
Paint a new mountain silhouette below the first one. Vary the shape—make some peaks higher or lower than the previous layer to create interest. -
Repeat the fade:
Again, drag clean water along the bottom of this new shape to fade it into white paper near the bottom. Allow this to dry completely.
Make it moody
Swap the yellow sky for a pale violet or gray wash. It creates a stormy, deeper atmosphere while keeping the monochromatic green mountain theme.
Step 3: Building Depth
-
Introduce cooler tones:
For the third and fourth layers, mix Hooker’s Green into your puddle. This cooler, bluer green suggests distance and shadow. -
Add texture to ridges:
As you paint these middle-ground mountains, slightly wiggle your brush on the top edge to suggest tiny distant trees, rather than a smooth line. -
Layering downward:
Paint two more distinct layers, making each mixture progressively less watery and more pigmented. Ensure the previous layer is dry before adding the new one to keep hard edges. -
Create valley mist:
If a layer looks too solid, you can lift color out while it’s wet with a thirsty brush or paper towel to simulate fog rolling through the valleys.
Step 4: The Foreground Forest
-
Mix the darkest shadow color:
Combine Hooker’s Green with a touch of Indigo. You want a very saturated, creamy consistency paint—much less water than before. -
Paint the tree line:
Fill the bottom area with this dark mix. Use the tip of your brush to flick upward, creating jagged shapes for the treetops. -
Add individual pines:
Switch to your small detail brush. Paint specific pine trees standing above the main dark mass. Use a distinct zig-zag motion, starting narrow at the top and widening at the base. -
Refine the details:
Add tiny vertical lines for tree trunks within the mass and layer a few darker trees in front of lighter sections to create density. -
Final touches:
Once everything is absolutely dry, carefully peel off the masking tape at a 45-degree angle to reveal your crisp border.
Step back and admire the deep depth you’ve created with just a few simple layers of green


Silhouetted Tree Against a Green Glow
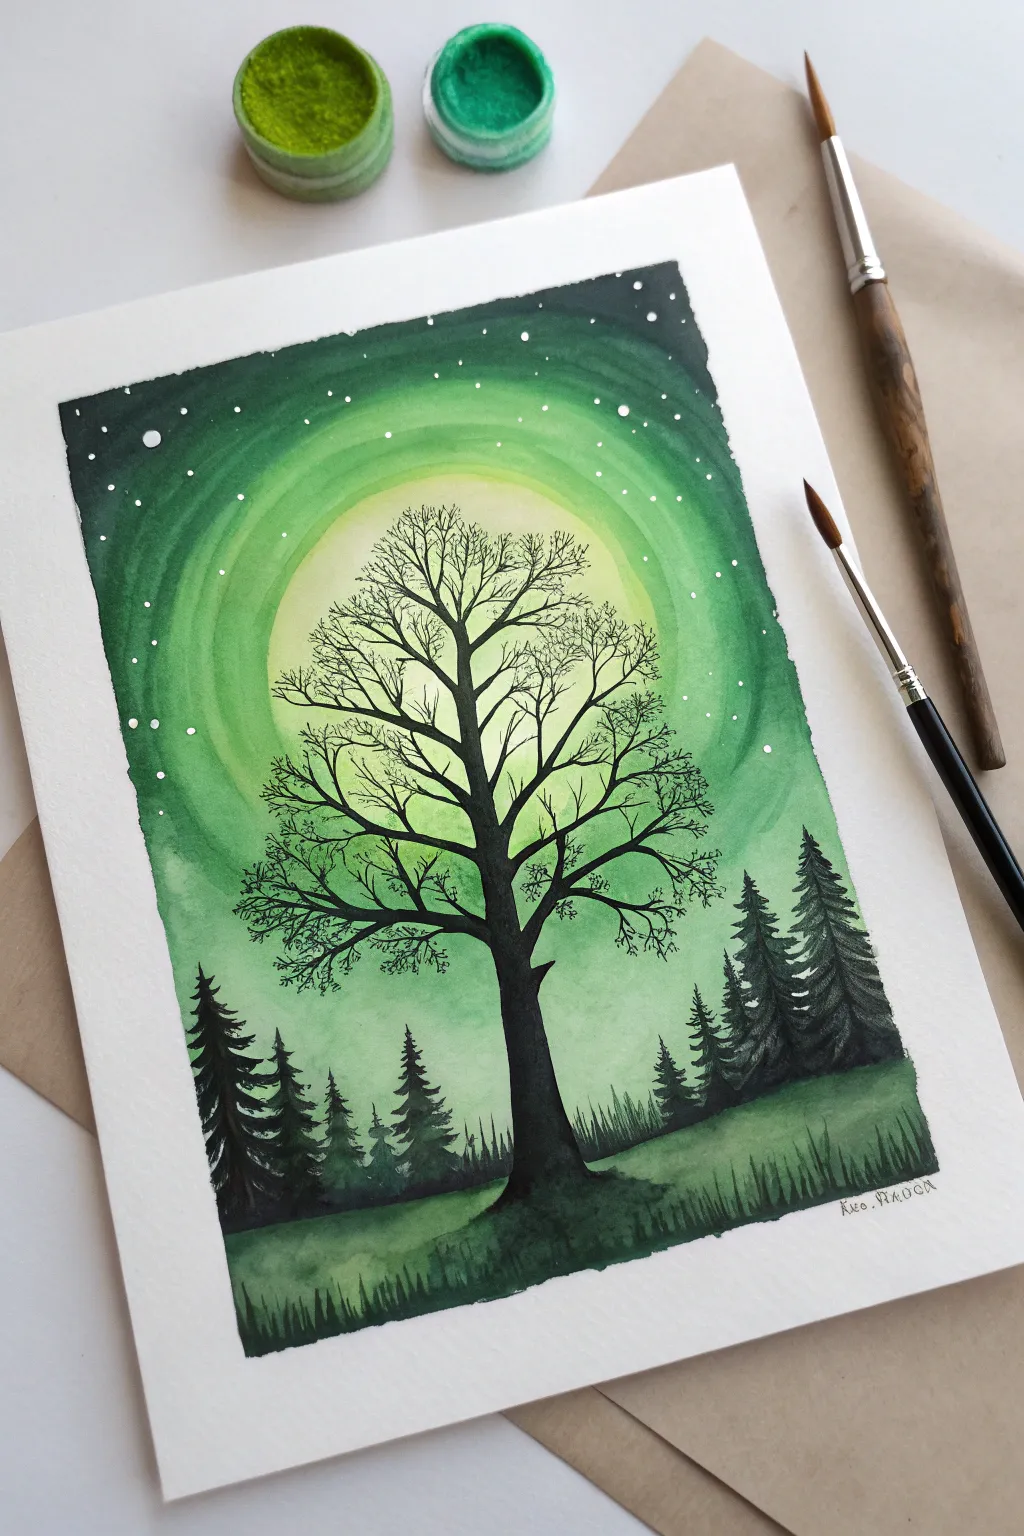
Capture the mystic beauty of a forest at night with this luminous painting featuring a central silhouette against a glowing green aura. You will learn to blend concentric circles of light and create stark, detailed contrasts for a striking composition.
How-To Guide
Materials
- Cold press watercolor paper (300 gsm)
- Watercolor paints (Emerald Green, Sap Green, Lemon Yellow, Lamp Black, Indigo)
- White gouache or white gel pen
- Round brushes (Size 8 or 10 for washes, Size 0 or 1 for details)
- Jars of water
- Masking tape (optional)
- Paper towels
- Pencil for light sketching
Step 1: Creating the Glowing Background
-
Outline the light source:
Start by lightly drawing a large circle in the upper center of your paper using a pencil. This will define the brightest part of your glowing aura behind the tree. -
Paint the center light:
Load a clean brush with water and wet the area inside your circle. Drop in a very pale wash of Lemon Yellow mixed with a tiny bit of lime green. Keep this area very light and watery. -
Begin the gradient:
While the yellow center is still damp, mix a brighter lime green. Paint a ring around the yellow center, allowing the wet edges to touch and bleed slightly into each other for a soft transition. -
Deepen the green:
Move outward with successive rings of darker greens. Mix Emerald Green into your lime mixture and paint the next concentric circle. The paint should get darker and less watery as you move away from the center. -
Darken the corners:
For the outermost edges and corners of the sky, mix Indigo with your Emerald Green to create a deep, dark teal. Apply this to the borders to create a vignette effect that frames the light. -
Blend the transitions:
Use a clean, slightly damp brush to gently soften any harsh lines between your color rings. The goal is a smooth, radiating glow. -
Add the stars:
Once the background is completely dry, splatter small dots of white gouache or undiluted white watercolor across the sky. I like to tap the handle of a messy brush against a clean one to get random splatter patterns. Add a few larger specific stars with a fine brush.
Step 2: Painting the Foreground
-
Draft the horizon:
Lightly sketch a low horizon line and the rough placement of your central tree. Keep the horizon relatively flat but organic. -
Paint the grass base:
Mix a medium-dark green using Sap Green and a touch of Black. Paint the ground area, using upward flicking strokes at the top edge to simulate grass blades. -
Darken the foreground:
While the grass layer is wet, drop cooler, darker green (Sap Green + Indigo) into the bottom corners and very bottom edge to add depth and weight to the painting.
Fixing “Blooms”
If water pushes pigment away creating a cauliflower edge, let it dry completely. Then, gently scrub the edge with a damp stiff brush to soften it.
Step 3: Detailed Silhouettes
-
Paint the main trunk:
Using Lamp Black (or a very dark, thick mix of green and black), paint the trunk of the central tree. Make the base wider and taper it as it goes up. -
Branch structure:
Switch to your smallest detail brush (size 0 or 1). Extend main branches outward from the trunk. Remember that trees often split into ‘V’ shapes. -
Fine twigs:
Add smaller and smaller twigs growing off the main branches. Keep your hand loose and slightly shaky to make the lines look organic and twiggy rather than stiff. -
Background pines:
On the left and right sides of the horizon, paint varying heights of pine trees. Use a dark black-green mix. Start with a vertical line, then zigzag your brush horizontally downward to create the pine boughs. -
Detailing the pines:
Ensure the tops of the pine trees are sharp and pointy. Vary their heights so they don’t look like a uniform fence; some should be taller and overlapping others. -
Foreground grass texture:
Once the ground color is dry, take your black paint and flick tiny, sharp grass blades along the very bottom edge and around the base of the main tree to root it into the scene. -
Final touches:
Evaluate your contrast. If the central tree looks faded after drying, apply a second coat of black to ensure it is a true, opaque silhouette against the glowing light.
Make it Sparkle
Use a metallic silver or iridescent medium mixed with the white gouache for the stars. They will catch the light when viewed from different angles.
Step back and admire the moody, atmospheric depth you have created in your forest scene


Dense Pine Forest With Depth Layers
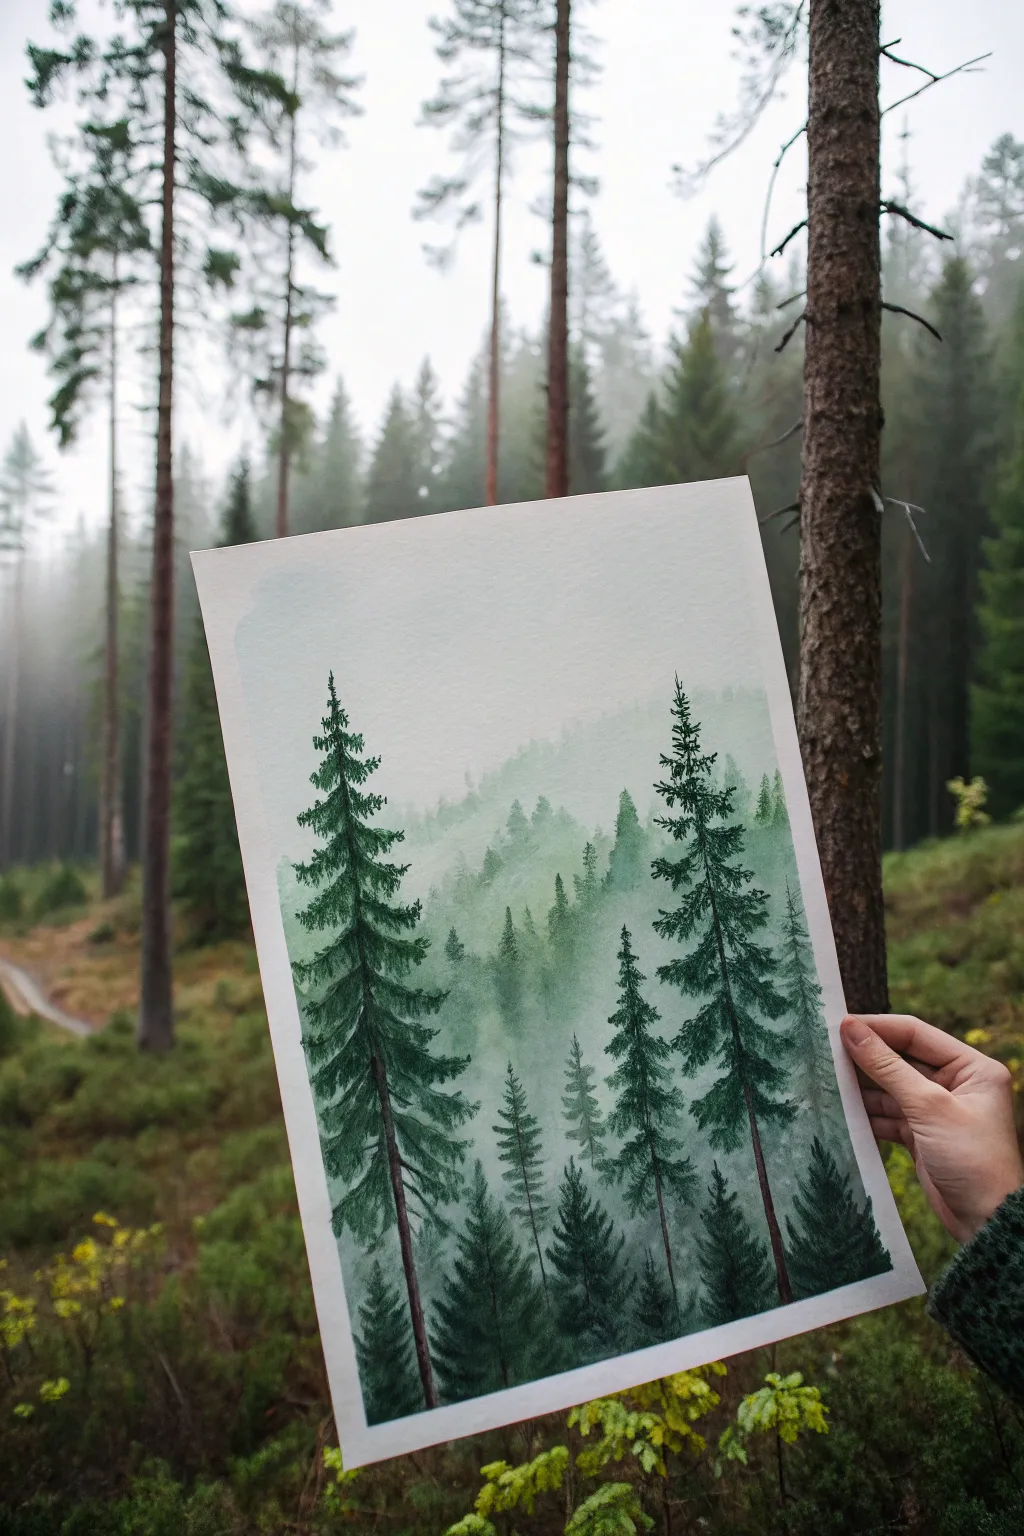
Capture the serene mood of a foggy woodland with this watercolor tutorial that emphasizes depth through atmospheric perspective. By building up layers from faint washes to crisp darks, you will create a convincing illusion of a forest stretching into the distance.
Step-by-Step
Materials
- Cold Press Watercolor Paper (300 gsm)
- Watercolor paints (Hooker’s Green, Sap Green, Paynes Grey, Indigo)
- White Gouache (for mixing misty tones)
- Round brushes (sizes 2, 6, and 8)
- Jar of clean water
- Paper towel
- Washi tape or masking tape
Step 1: Preparation and Background
-
Secure Your Paper:
Tape down all four edges of your paper to a flat board using washi tape. This prevents the paper from buckling when you add water and creates a clean, crisp border for your finished piece. -
Mix the Sky Tone:
Create a very dilute wash of Paynes Grey with a tiny touch of green. The goal is an almost-white, chilly mist color. -
Paint the Sky Wash:
Using your largest brush, apply this pale wash across the top third of the paper. Let it fade out as you move downward, keeping the bottom area damp but unpainted.
Muddy Layers?
If your trees are blending into one big blob, you likely didn’t let the previous layer dry enough. Ensure the paper is bone dry to the touch before starting a new row of trees.
Step 2: The Misty Distance
-
Mix the Distant Color:
Mix a light, milky green using Sap Green, a little Paynes Grey, and a drop of white gouache or plenty of water. This color should be very faint. -
First Layer of Trees:
Paint a silhouette of a treeline about midway down the paper. These shapes should be indistinct—just simple vertical strokes with rough edges to suggest pine tops. -
Soften the Edges:
While the paint is still wet, gently blur the bottom edges of these trees with a clean, damp brush so they fade into the white of the paper below. -
Let it Dry Completely:
This is crucial for the layering effect. Wait until the paper is bone dry before moving to the next layer.
Add Winter Magic
Once everything is dry, splatter opaque white gouache over the scene with an old toothbrush to create a gentle snowfall effect over your forest.
Step 3: Building the Middle Ground
-
Darken the Mix:
Add a bit more pigment to your green mixture. It should be slightly darker than the previous layer but still look somewhat faded. -
Paint Secondary Trees:
Paint a second row of trees slightly lower than the first, overlapping them. Start adding a tiny bit more texture to the branches here, using small dabs of the brush. -
Create the Fog Effect:
Just like before, wash out the bottom stems of these trees with water so they disappear into a ‘mist’ at the bottom of the page. -
Dry Again:
Allow this layer to dry fully. I like to use a hairdryer on a low setting if I’m feeling impatient.
Step 4: The Foreground Details
-
Prepare the Darkest Green:
Mix a strong concentration of Hooker’s Green and Indigo. This should be a deep, rich forest color with very little water. -
Establish Foreground Giants:
Choose placements for two or three large, prominent trees in the immediate foreground. Draw a thin vertical line for the trunk using your smallest brush. -
Paint Detailed Branches:
Starting from the top of the trunk, paint downward swooping branches. Use a jagged, zig-zag motion, making the branches wider as you move down the tree. -
Add Texture:
Dab the tip of your brush to create the look of needle clusters on the ends of the branches. Leave gaps between branches to let the background layers peek through. -
Fill the Lower Forest:
Add a few smaller, sharp trees at the bottom to fill in the forest floor, using the same dark mixture. -
Ground the Composition:
Paint the very bottom edge of the paper with your darkest green to anchor the trees, ensuring they don’t look like they are floating. -
Final Reveal:
Once the painting is completely dry, slowly peel away the tape at a 45-degree angle to reveal your clean edges.
Now you have a tranquil forest scene that draws the viewer deep into the woods


Birch Trees in a Green Mist
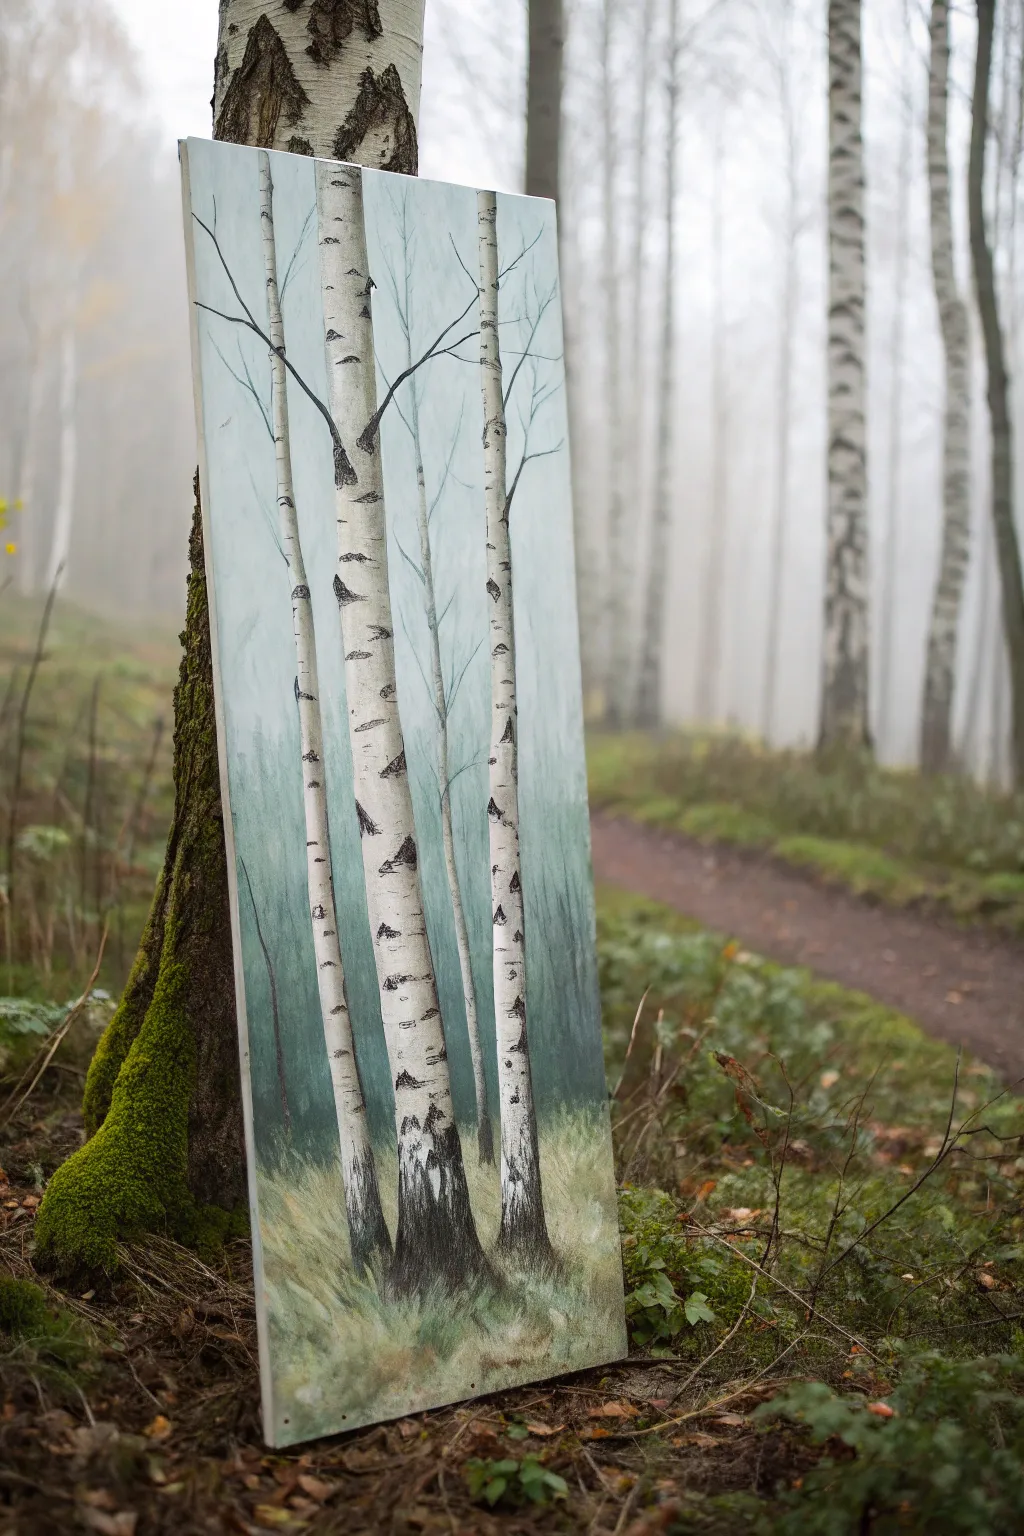
Capture the serene solitude of a foggy woodland with this atmospheric acrylic painting. You will learn to layer soft greens and greys to create depth before bringing the scene to life with the stark, textured beauty of white birch trunks.
Detailed Instructions
Materials
- Tall rectangular canvas (e.g., 12×24 or 10×30 inches)
- Acrylic paints: Titanium White, Mars Black, Sap Green, Burnt Umber, Phthalo Blue
- Large flat brush (2 inch)
- Medium filbert brush
- Small round brush (size 2 or 4)
- Palette knife
- Water container
- Paper towels
- Easel or flat work surface
Step 1: Setting the Atmosphere
-
Prepare the Gradient:
Mix a large amount of Titanium White with a tiny touch of Sap Green and a pinhead of Mars Black to create a very pale, misty grey-green. -
Initial Wash:
Using the large flat brush, cover the top two-thirds of the canvas with this pale mix. Keep your strokes vertical to mimic the upward growth of the forest. -
Darken the Lower Forest:
While the top is still wet, mix a slightly darker, cooler green using Sap Green, a touch of Phthalo Blue, and White. Blend this into the bottom third of the canvas, creating a soft transition where the distant trees disappear into the fog. -
Add Ghost Trees:
With a diluted version of your background grey-green (slightly darker than the sky), use your filbert brush to paint faint, vertical lines in the background. These are the distant trees; they should be barely visible to enhance the foggy effect. -
Let it Dry:
Allow this background layer to dry completely. A hairdryer on a cool setting can speed this up if you are eager to proceed.
Clean Lines
If your birch trunks look too wobbly, use painter’s tape to mask off the vertical borders of the trees. Peel the tape away while the white paint is still slightly wet for a crisp edge.
Step 2: Constructing the Foreground
-
Map the Main Trunks:
Load a medium filbert brush with pure Titanium White. Paint three or four main trunks extending from the very bottom edge toward the top. Make them slightly uneven in width—nature isn’t perfect. -
Refine the Shapes:
Thicken the trucks slightly as they reach the bottom to show weight and perspective. Let these white pillars dry fully before adding details. -
Painting the Ground Cover:
Mix Sap Green with a little Burnt Umber and White. Using the medium brush, dab in a grassy texture at the base of the trees. Use an upward flicking motion to simulate blades of grass. -
Add Depth to the Grass:
I like to mix a darker shadow green (Sap Green + tiny bit of Black) and add pockets of shadow near the roots of the birches to ground them. -
Highlights on the Floor:
Add touches of yellow ochre or a lighter green to the tips of the grass for sunlight variation.
Step 3: Detailing the Birch Bark
-
Create the Shadow Side:
Mix a light grey wash. Paint a thin strip of shadow along the left or right side of each trunk (choose one light source direction) to give the trees a cylindrical shape. -
The Palette Knife Technique:
Mix Mars Black with a tiny bit of Burnt Umber. Load the edge of a palette knife or a flat credit card with this dark paint. -
Applying the Markings:
Gently scrape the knife horizontally across the white trunks. Press harder in some areas and skip others to create the characteristic peeling bark texture of birch trees. -
Add Notches and Knots:
Use the corner of the palette knife or a small round brush to create diamond-shaped knots or ‘eyes’ on the trunk where branches might grow. -
Branching Out:
Switch to your smallest round brush. Using a thinned black-brown mix, paint delicate branches extending from the trunks. Remember that birch branches often start moving upward rather than straight out. -
Connecting Branches:
Start the branches thicker near the trunk and let the brush lift off the canvas as you move outward to create fine, tapering tips.
Level Up: 3D Texture
Mix modeling paste into your white paint for the tree trunks. Apply it thickly with the palette knife to create actual raised ridges that mimic real bark texture.
Step 4: Final Touches
-
Root Shadows:
Darken the base of the trees where they meet the grass with your darkest black-green mix to really plant them in the scene. -
Mist Glaze (Optional):
If background trees look too stark, apply a very watery wash of white paint over them to push them further back into the distance. -
Review and Sign:
Step back five feet to view the painting as a whole. Add any final dark marks to the bark for contrast, let it dry, and sign your name in the corner.
Place your finished canvas in a well-lit spot to bring a breath of fresh forest air into your home
BRUSH GUIDE
The Right Brush for Every Stroke
From clean lines to bold texture — master brush choice, stroke control, and essential techniques.
Explore the Full Guide
Green Lake Reflection Scene

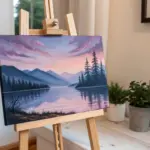
Capture the stillness of a Scandinavian-inspired summer evening with this tranquil watercolor painting. Soft sky gradients meet sharp evergreen details and glassy reflections in a piece that brings immediate calm to any room.
Step-by-Step
Materials
- Cold press watercolor paper (300 gsm)
- Watercolor paints: Sap Green, Hooker’s Green, Perylene Green, Indigo, Yellow Ochre, Burnt Sienna, Payne’s Grey
- Large flat wash brush (1-inch)
- Round brushes (sizes 4, 8, and 12)
- Rigger brush or fine liner (size 0)
- Masking fluid (optional)
- Painter’s tape and drawing board
- Two jars of water
- Paper towels
Step 1: Preparation and The Sky
-
Secure the paper:
Tape your watercolor paper down firmly on all four sides to a board using painter’s tape. This prevents buckling and creates that clean white border around the finished edge. -
Light sketch:
Using a hard pencil (H or 2H), very faintly sketch the horizon line about one-third up from the bottom. Outline the general shape of the tree line on the right, dipping down towards the water. -
Pre-wet the sky:
With your large flat brush and clean water, wet the entire sky area down to the horizon line. Avoid puddles; just ensure an even sheen. -
Paint the first wash:
Drop in a very diluted wash of faint blue (hint of Indigo) at the top, blending into a warm, pale glow (Yellow Ochre mixed with a tiny bit of faint pink) near the horizon. -
Add distant trees:
While the sky is nearly dry but cool to the touch, mix a pale, desaturated grey-green. Paint the distant, small tree line on the far left horizon, letting the edges stay slightly soft to suggest atmospheric perspective.
Step 2: The Forest Layer
-
Mix your greens:
Prepare three puddles of green: a light yellow-green (Sap Green + Yellow Ochre), a mid-tone forest green (Hooker’s Green), and a deep shadow green (Perylene Green + Payne’s Grey). -
Start with light foliage:
Using a size 8 round brush, dab in the lighter green tops of the deciduous trees. Use a stippling motion to mimic leaf clusters, leaving some white paper showing through for airiness. -
Add the evergreens:
Switch to the mid-tone green and a slightly smaller brush. Paint the classic triangular shapes of the pine trees rising above the deciduous ones. Don’t make them too uniform; vary their heights. -
Deepen the shadows:
While the previous layers are damp, drop the darkest shadow green into the lower sections of the trees and the spaces between trunks to create depth and volume. -
Paint the trunks:
With a fine liner or rigger brush and a mix of slightly watered-down brown-grey, carefully paint thin vertical lines suggesting tree trunks peaking through the foliage. -
Ground the bank:
Paint a thin, dark brown strip along the waterline where the trees meet the lake. This shoreline anchors the vegetation.
Brush Technique Tip
For realistic pine trees, use the side of your brush rather than the tip. Press down and wiggle slightly as you move down the tree shape to create jagged, natural branches.
Step 3: Reflections and Water
-
Mirror the forest:
Turn your board upside down if it helps you visualize the symmetry. Using the same green mixes, paint the reflection directly below the shoreline. Keep the shapes looser and slightly elongated. -
Soften the reflection:
While the reflection paint is wet, take a clean, slightly damp brush and run it horizontally across the painted area to blur the edges and mimic the effect of still water. -
Create water texture:
Mix a watery grey-blue. Using horizontal strokes, paint the open water area on the left, dragging the brush lightly (dry brush technique) to leave white sparkles on the water surface. -
Refine the surface:
Add horizontal streaks of the dark reflection color into the lighter water area to show ripples disrupting the mirrored image. -
Foreground grasses:
Once the water layer is dry, use your rigger brush with a rich green to flick upward strokes in the bottom left corner, creating a small tuft of marsh grass for foreground interest. -
Final touches:
Assess the contrast. If the dark water reflection needs more depth, glaze over it with a transparent dark wash once fully dry. -
Remove tape:
Wait until the paper is completely bone dry. peel the tape away slowly at a 45-degree angle to reveal your crisp white border.
Level Up: Morning Mist
To change the mood, lift pigment from the water line with a damp paper towel while wet. This creates a specialized ‘mist’ effect hovering right above the water surface.
Frame your tranquil landscape in a simple white frame to emphasize the delicate watercolor textures
Bamboo Stalks With Simple Highlights
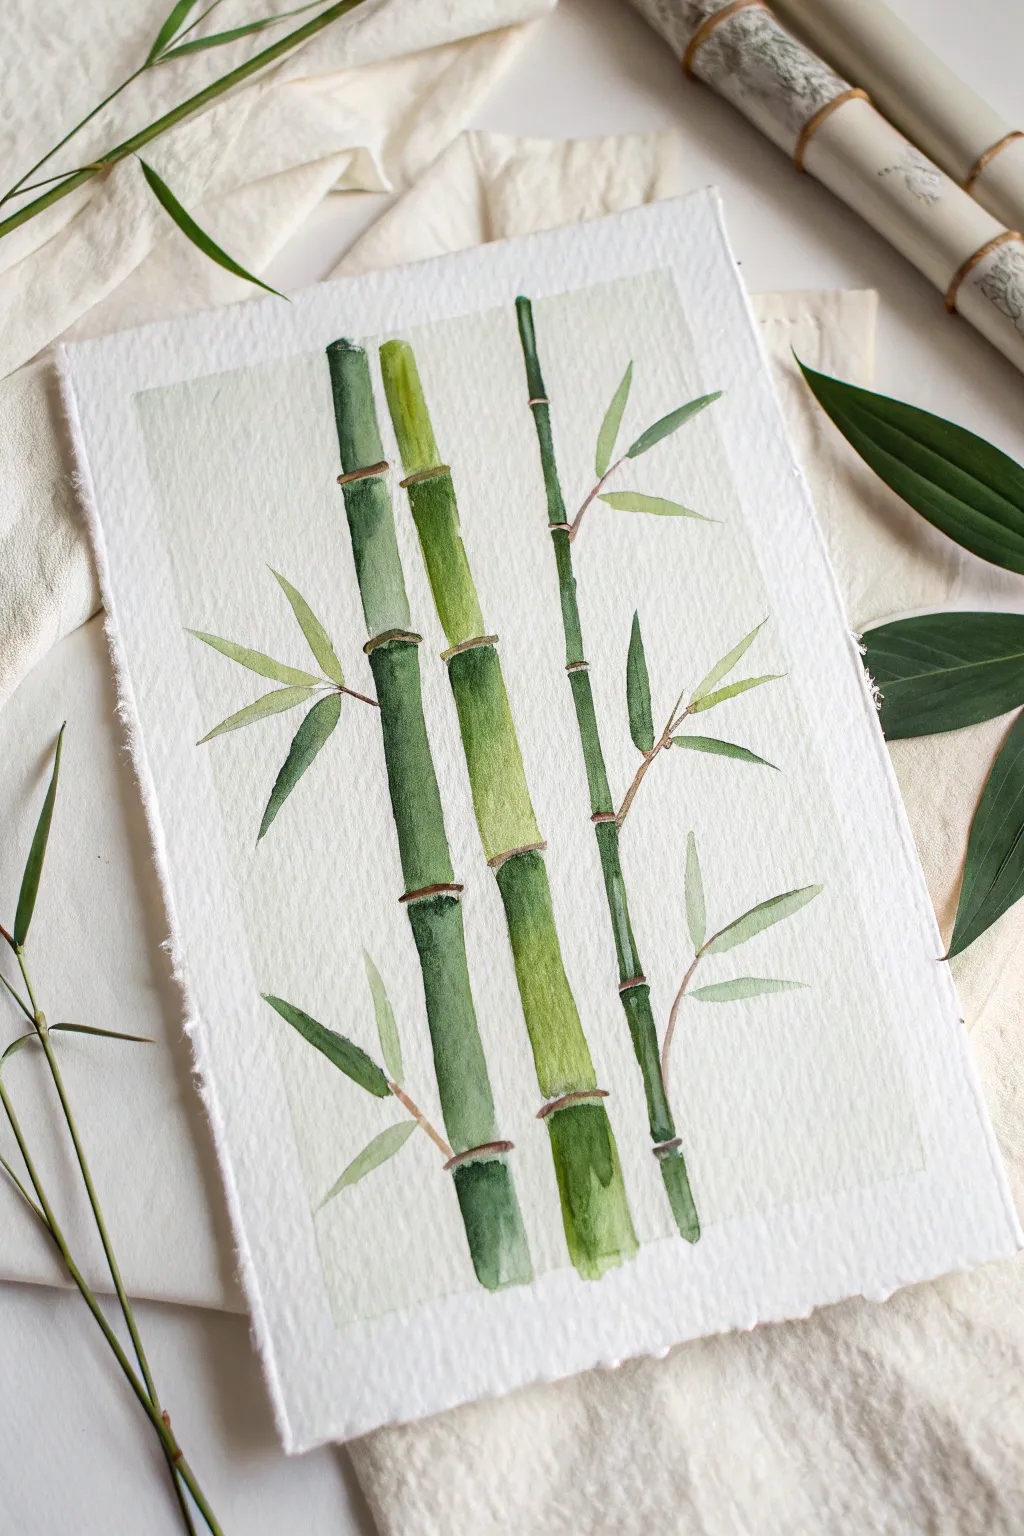
Capture the serene elegance of bamboo with this beginner-friendly watercolor tutorial. Using simple wet-on-dry techniques and varied greens, you’ll create a structured yet organic composition that emphasizes light and shadow.
How-To Guide
Materials
- Cold-pressed watercolor paper (300 gsm)
- Watercolor paints (Sap Green, Hooker’s Green, Burnt Umber)
- Round brushes (size 6 and size 2)
- Pencil (HB or H)
- Clean water jar
- Paper towels
- Washi tape or masking tape
Step 1: Preparation and Sketching
-
Prepare your paper:
Tape down all four edges of your watercolor paper to a board or table to prevent buckling and create a crisp white border. -
Create a background wash:
Mix a very watery, pale wash of green. Apply this to a rectangular area in the center of your paper, leaving a wide uneven border around the edges to mimic the look in the reference. Let this dry completely before proceeding. -
Sketch the stalks:
Lightly draw three vertical lines for the bamboo stalks. Vary their thickness, making the left two thicker and the right one slender. Use a ruler if you are nervous, but freehand lines look more natural. -
Mark the segments:
Add small horizontal curved lines across the stalks to mark the nodes (joints). Space them unevenly to avoid a rigid, ladder-like appearance.
Tip: Dry Brush Texture
For realistic texture, drag a slightly dry brush vertically down one side of the stalk. The paper’s tooth will catch the pigment, mimicking bamboo fibers.
Step 2: Painting the Stalks
-
Mix your greens:
Prepare two puddles of green: one lighter yellow-green (Sap Green mixed with a touch of yellow) and one darker, cooler green (Hooker’s Green). -
Base layer for the first stalk:
Starting with the left stalk, paint the segments using the darker green. Paint each segment individually, leaving a tiny gap of white paper between the nodes to define the structure. -
Add dimension:
While the paint is still wet, drop a slightly more concentrated dark green along the left edge of the stalk to create a cylindrical shadow effect. -
Paint the middle stalk:
For the middle stalk, use the lighter yellow-green mix. This color variation adds visual interest and suggests different ages of growth. Again, paint segment by segment. -
Paint the slender stalk:
Paint the thin right-hand stalk using a mix of both greens. Use the very tip of your size 6 brush or switch to the size 2 brush for better control here. -
Let it dry:
Allow the stalks to dry completely. If the paper feels cool to the touch, it is still wet.
Level Up: Metallic Touch
Once the painting is totally dry, add tiny accents of gold watercolor or ink to the nodes and leaf tips for an elegant, decorative finish.
Step 3: Details and Leaves
-
Define the nodes:
Mix a small amount of Burnt Umber with green to get a brownish-green. Using your size 2 brush, paint thin, curved lines across the nodes where you left the white gaps. -
Add branches:
Using the size 2 brush and the brownish-green mix, paint thin, swift lines extending from the nodes for the branches. Keep them delicate and angular. -
Practice leaf shapes:
On a scrap piece of paper, practice the leaf stroke: press down the belly of the brush, then lift quickly to create a tapered point. -
Paint the leaves:
Load your brush with different main green shades. Add clusters of leaves to the ends of your branches using the press-and-lift motion. -
Vary opacity:
Paint some leaves with a watery mix and others with more saturated pigment. I find this transparency creates a lovely sense of depth. -
Final leaf details:
Ensure the leaves point in different directions but generally upward, following the growth habit of bamboo. -
Final assessment:
Remove the tape carefully. If any areas look too flat, add a tiny bit of darker glaze to the shadowed side of the stalks.
Enjoy the calming process of painting these organic forms and watch your botanical garden grow on paper

PENCIL GUIDE
Understanding Pencil Grades from H to B
From first sketch to finished drawing — learn pencil grades, line control, and shading techniques.
Explore the Full Guide
Palm Tree Silhouettes in a Green Sunset
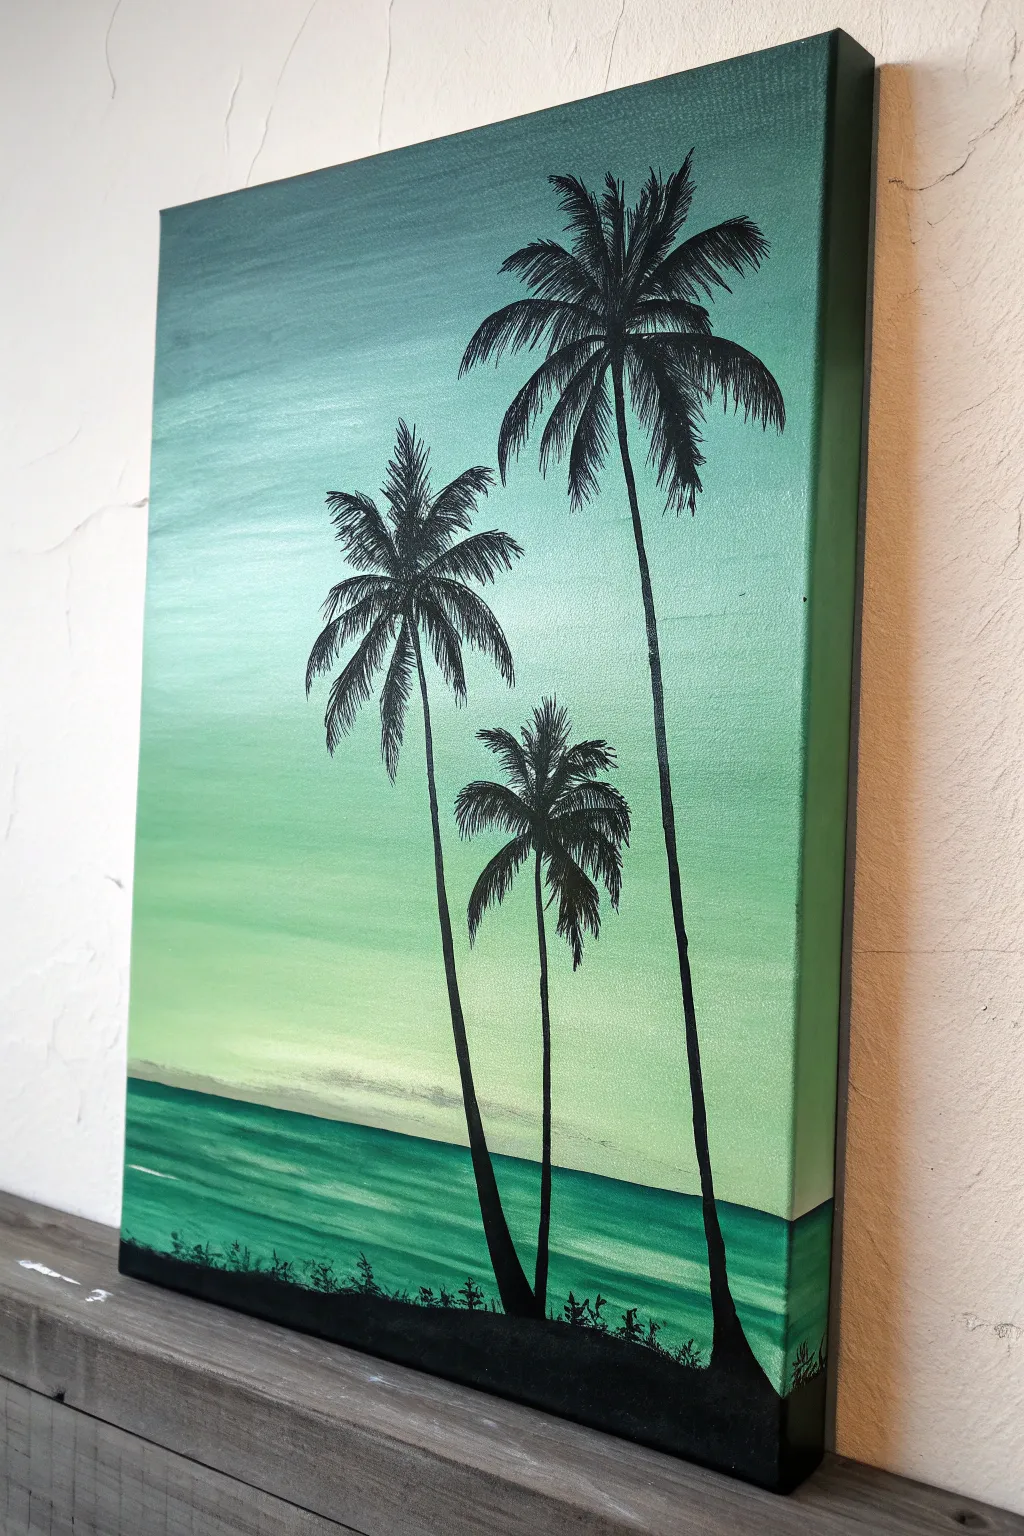
Capture the serene beauty of a tropical evening with this monochromatic landscape painting. Using a soothing palette of greens and teals, you’ll create a smooth gradient sky and crisp, contrasting palm tree silhouettes.
Detailed Instructions
Materials
- Stretched canvas (e.g., 11×14 or 16×20 inches)
- Acrylic paints: Dark Teal, Phthalo Green, Mint Green, Titanium White, Mars Black
- Large flat brush (1-2 inch) for blending
- Medium flat brush
- Small round brush or liner brush for details
- Palette or paper plate
- Cup of water and paper towels
- Pencil (optional)
Step 1: Creating the Ombre Sky
-
Prepare the palette:
Squeeze out your greens, teal, and white onto your palette. You want a range from darkest (teal/dark green) to lightest (white mixed with a touch of mint). -
Paint the top dark section:
Using your large flat brush, load up the Dark Teal mixed with a little Phthalo Green. Paint the top 2-3 inches of the canvas using long, horizontal strokes across the full width. -
Start the mid-tone transition:
Without cleaning your brush fully, pick up some Mint Green. Apply this directly below the dark band, overlapping slightly. Brushing back and forth horizontally will help merge the dark and medium tones. -
Lighten the gradient:
Clean your brush. Mix a significant amount of White with your Mint Green to create a very pale, bright green. Paint the middle and lower-middle section of the sky, blending upwards into the previous layer while the paint is still wet. -
Create the horizon glow:
For the area just above the ocean line (about a quarter up from the bottom), use almost pure White with a tiny dot of yellow or mint. This mimics the bright light of the setting sun. -
Paint the ocean base:
Switch to the medium flat brush. Use a mix of Phthalo Green and White to create a vibrant turquoise for the water. Paint a horizontal band at the bottom, leaving some space for the black foreground. -
Add water texture:
While the ocean paint is wet, streak in darker thin lines of Phthalo Green and lighter lines of White horizontally. This creates movement and waves. -
Paint the edges:
Don’t forget to extend your colors around the sides of the canvas for a finished, professional look without a frame.
Clean Lines Pro Tip
For super sharp palm fronds, slightly water down your black paint to an ink-like consistency. This helps the paint flow smoothly off the brush for crisp, pointy tips.
Step 2: Painting the Silhouettes
-
Dry the background:
Ensure the background is completely dry before proceeding. You can use a hair dryer on a cool setting to speed this up. -
Sketch the layout:
Lightly sketch the position of your three trees with a pencil. Place the tallest tree on the right, a medium one on the left, and the smallest in the center for a balanced composition. -
Paint the foreground land:
Using Mars Black and a medium brush, paint a solid, wavy strip along the very bottom of the canvas. This is the shoreline where your trees stand. -
Draw the trunks:
Switch to a smaller round brush dipped in Mars Black. Paint thin, slightly curved lines extending upwards for the tree trunks. Make the base slightly wider than the top. -
Outline the fronds:
From the top center of each trunk, paint 5 to 7 curved lines radiating outward like fireworks. These are the spines of your palm leaves. -
Flick the leaves:
Using your liner brush or the very tip of a round brush, make quick, flicking strokes hanging down from each spine line. Start from the spine and flick outward and down. -
Refine the foliage:
Go back over your fronds and add more flick marks to thicken them up. I find that varying the length of these strokes makes the leaves look more natural and tattered by the wind. -
Add ground details:
Use the liner brush to add tiny tufts of grass and small plants along the black shoreline. Just small upward flicks will do the trick. -
Final touches:
Check for any light patches showing through your black silhouettes and fill them in for solid coverage.
Rough Gradient?
If your sky colors aren’t blending smoothly, your paint might be drying too fast. Dip your brush tips in a tiny bit of water or blending medium to keep the acrylics wet longer.
Hang your new tropical artwork in a bright spot to enjoy those calming beach vibes every day
Emerald Night Sky With a Green Moon
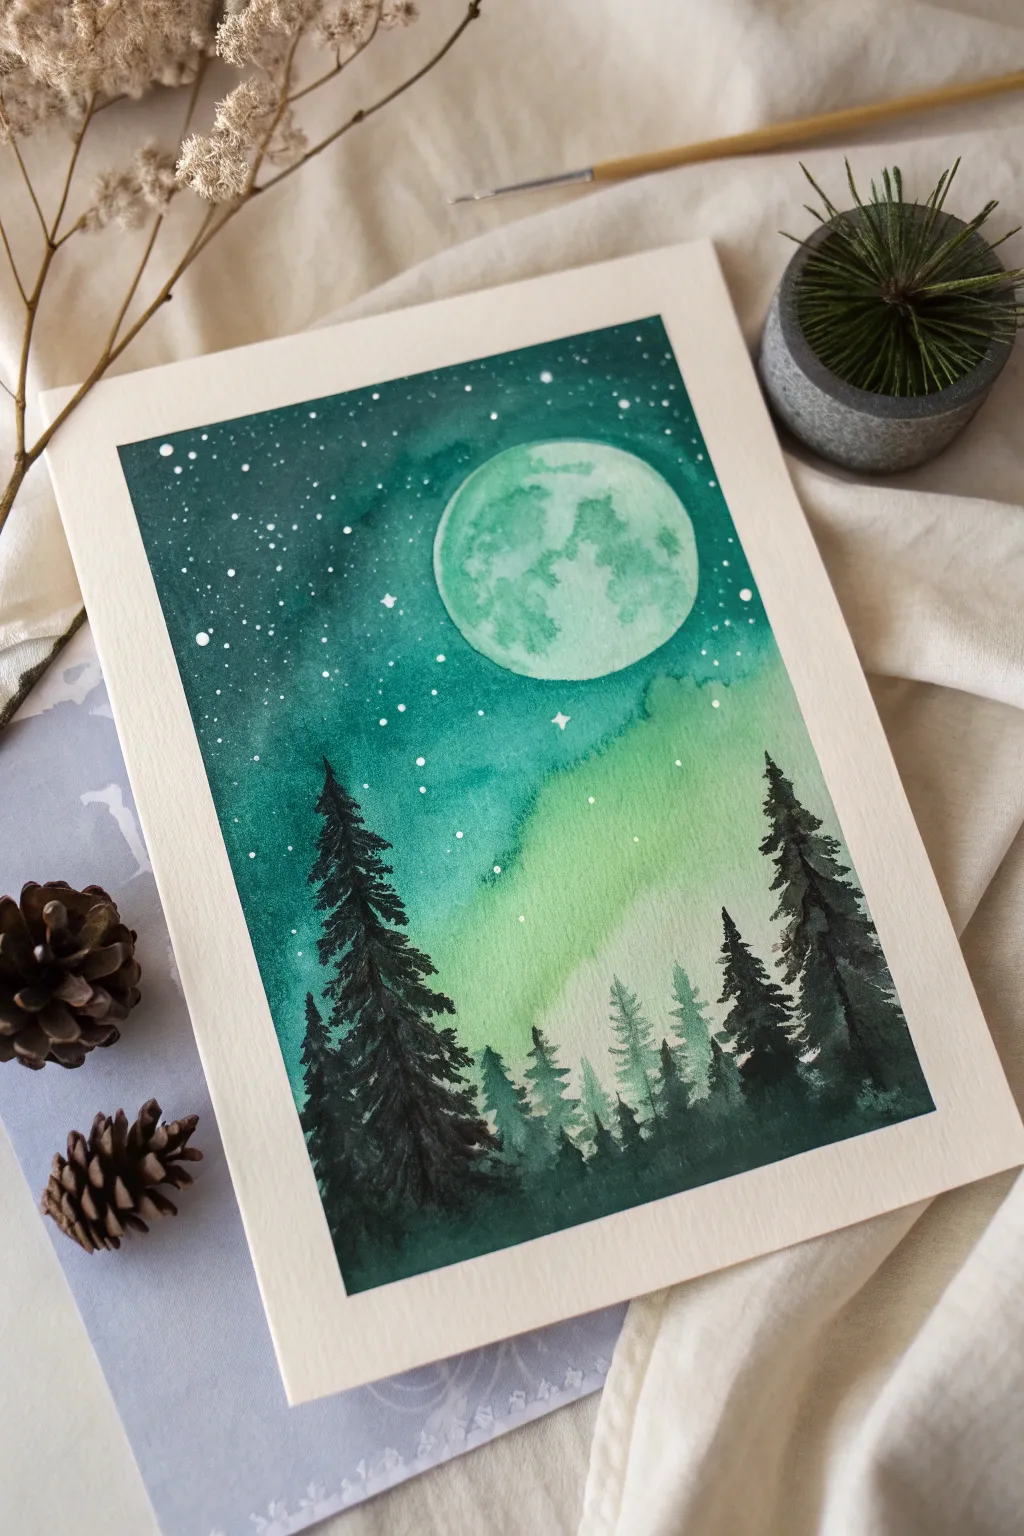
Capture the magic of a surreal, monochromatic night with this stunning watercolor piece featuring a giant emerald moon and shimmering auroras. This project balances mesmerizing wet-on-wet sky techniques with crisp, dry-brush silhouette work for a serene forest scene.
Step-by-Step Guide
Materials
- Cold press watercolor paper (300 gsm recommended)
- Watercolor paints: Emerald Green, Viridian Hue, Phthalo Green, Indigo, Payne’s Grey (or Black)
- White gouache or opaque white watercolor
- Masking fluid (drawing gum)
- Round brushes: Size 8 or 10 for washes, Size 0 or 2 for details
- Old toothbrush (for splatter)
- Compass or a circular object to trace
- Pencil and eraser
- Paper towels
- Two jars of water
Step 1: Preparation and The Moon
-
Trace the moon:
Begin by lightly tracing a large circle in the upper center-right portion of your paper using a circular object or compass. Keep the pencil lines very faint so they don’t show through the paint later. -
Prepare the moon surface:
Wet the inside of the circle with clean water using your larger round brush. Ensure the paper is glistening but not forming a puddle. -
Paint the moon texture:
Drop in a very diluted wash of Emerald Green mixed with water. While it’s still wet, dab in slightly more concentrated green pigment in random patches to create craters and lunar maira texture. Leave some areas nearly white for highlights. -
Mask the moon:
Allow the moon to dry completely. Once bone dry, carefully apply masking fluid over the entire moon shape. This protects your work while you paint the dark sky around it.
Moon Magic
Don’t overwork the moon texture. Let the water move the pigment naturally. If it looks too uniform, lift color out with a thirsty, clean brush while wet.
Step 2: The Emerald Sky
-
Wet the background:
Using a clean large brush, wet the entire paper around the masked moon. The paper should be evenly damp for a smooth wet-on-wet application. -
Apply the aurora base:
While the paper is wet, lay down a loose, sweeping wash of your lightest green (Emerald or a light yellowish-green) diagonally across the center, dipping below where the moon sits. This creates the glow of the aurora. -
Darken the upper sky:
Load your brush with a mix of Viridian and Indigo. Start painting the top corners and edges of the paper, letting the color bleed naturally into the lighter center wash but keeping the edges dark and moody. -
Deepen the contrast:
While everything is still wet, add touches of Payne’s Grey or intense Black-Green to the very top corners and the far left side to create depth. I find tilting the paper slightly helps the dark paint flow naturally toward the center without overwhelming the light. -
Create the stars:
Dilute a small amount of white gouache with water. Load on an old toothbrush or stiff brush and flick the bristles to splatter tiny white stars across the wet sky. Some will diffuse for a glowy effect; others will remain sharp. -
Dry and reveal:
Let the background dry completely. Once there are no cold spots on the paper, gently rub away the masking fluid to reveal your crisp, bright moon.
Step 3: The Forest Silhouette
-
Mix the darkest green:
Create a thick, remarkably dark mixture using Phthalo Green and Payne’s Grey (or Black). You want a creamy consistency, not too watery, to ensure opacity. -
Paint the background trees:
Using a medium brush and a slightly more diluted version of your dark mix, paint a row of smaller, faint trees near the bottom horizon. These should look misty and distant. -
Start the main pines:
Switch to your dark, creamy mixture and a smaller round brush (size 2 is good). Begin painting the vertical trunk lines for your foreground trees, placing the tallest one on the left. -
Detail the branches:
Starting from the top of the trunk, use the tip of your brush to tap in downward-sloping branches. Wiggle the brush slightly as you move down to create irregular, natural-looking pine textures. -
Fill the forest floor:
Continue adding trees of varying heights across the bottom. The trees on the right should be taller than the middle ones but shorter than the left giant. Blend their bases together into a dark, solid mass at the very bottom of the paper. -
Add final highlights:
Using a tiny detail brush and pure white gouache, add a few specific, larger stars manually in the darkest parts of the sky if the splatter missed any key spots. Add a tiny four-pointed star for extra sparkle.
Level Up: Metallic Touch
Swap white gouache for metallic silver or iridescent watercolor for the stars. This captures the light beautifully when viewed from different angles.
Peeling off the tape reveals a crisp border that frames your mystical green moon perfectly


Forest Floor With Firefly Sparkle
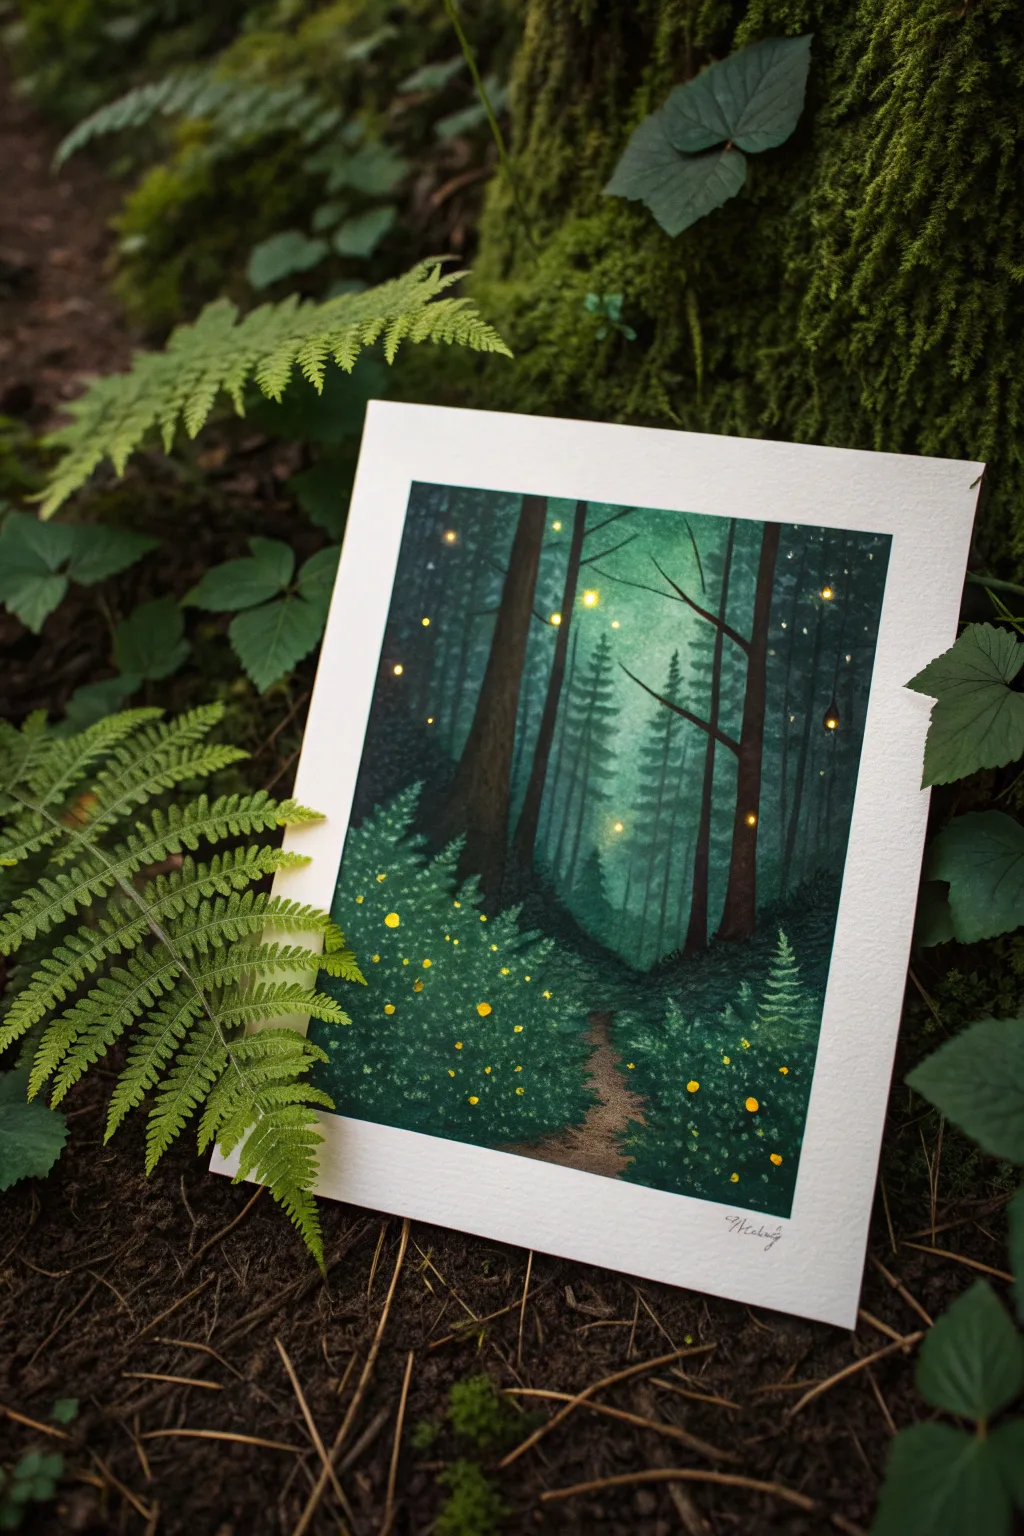
Transport yourself into a mystical woodland with this atmospheric gouache painting, featuring deep evergreen shadows and twinkling firefly lights. The technique creates a beautiful depth of field, making the glowing insects appear to float magically among the ancient trees.
Detailed Instructions
Materials
- Heavyweight watercolor paper or mixed media paper (300gsm)
- Himi or Winsor & Newton gouache paints (Deep Green, Prussian Blue, Black, Burnt Umber, White, Lemon Yellow)
- Painter’s tape
- Flat shader brush (size 6-8)
- Round detail brushes (size 0 and 2)
- Mixing palette
- Cup of water and paper towels
Step 1: Setting the Scene
-
Prepare your canvas:
Tape down all four edges of your paper to a sturdy board using painter’s tape to create the crisp white border seen in the final piece. -
Mix the background gradient:
Create a gradient for the foggy background. Mix white with a tiny dot of deep green for the center, and a slightly darker blue-green for the corners. -
Paint the base:
Using your flat brush, paint the background starting with the lightest pale green in the center and blending outwards to the darker tones at the edges. Let this layer dry completely. -
Sketch the layout:
Lightly sketch the vertical lines for the tree trunks and the winding path shape using a very diluted brown paint or a pencil.
Step 2: Building the Ancient Forest
-
Paint distant trees:
Mix a mid-tone teal-green (add white to your deep green) to paint the ‘ghost’ trees in the background. These should be lighter than the foreground trees to create atmospheric perspective. -
Add distant foliage:
Use a small round brush to dab horizontal, slightly drooping branches onto these background trees. Keep the paint somewhat watery so the background glow shows through slightly. -
Darken the mix:
Prepare a very dark mixture using deep green, burnt umber, and a touch of black. This will be for the foreground elements. -
Paint foreground trunks:
Paint the thick, prominent tree trunks in the immediate foreground. Make the edges slightly rough to suggest bark texture. -
Ground the forest:
Fill in the forest floor on either side of the path with the same dark green-black mixture, dabbing the brush to create uneven, organic ground textures. -
Create the path:
Mix burnt umber with a little white and ochre for the dirt path. Paint it using horizontal strokes, letting it fade into the darkness as it winds backward.
Muddy Greens?
If your greens look dull, switch water cups often. Green gets muddy quickly when mixed with brown residue. Let layers dry fully before painting over them.
Step 3: The Magical Details
-
Create fern textures:
Mix a fresh, medium-green tone. Using your smallest detail brush, paint tiny fern fronds on top of the dark forest floor. I find it easiest to paint a central stem and tiny V-shaped leaves coming off it. -
Layer the foliage:
Add a second layer of slightly lighter green ferns on top of the first ones to create volume and depth in the bushes. -
Add floating lights:
Mix lemon yellow with a tiny amount of white. Use the tip of your smallest brush or a dotting tool to place small dots throughout the air and settled on the bushes. -
Create the glow effect:
Wash your brush thoroughly. With a barely damp, clean brush, gently soften the edges of the larger fireflies in the background to make them look like glowing orbs. -
Highlight the fireflies:
Place a tiny pin-prick of pure white paint in the absolute center of the largest yellow dots to make them look bright and incandescent. -
Finalize tree details:
Mix a very thin black-brown wash and add faint vertical lines or knot holes to the nearest tree trunks for extra realism. -
Reveal the border:
Wait until the painting is 100% bone dry before carefully peeling away the painter’s tape at a 45-degree angle.
Level Up: Real Glow
For a truly magical effect, paint just the firefly centers with luminescent or glow-in-the-dark acrylic paint after the gouache has essentially dried.
Now you have a serene forest scene that captures the quiet magic of twilight woods
Palette Knife Greenery Texture Study
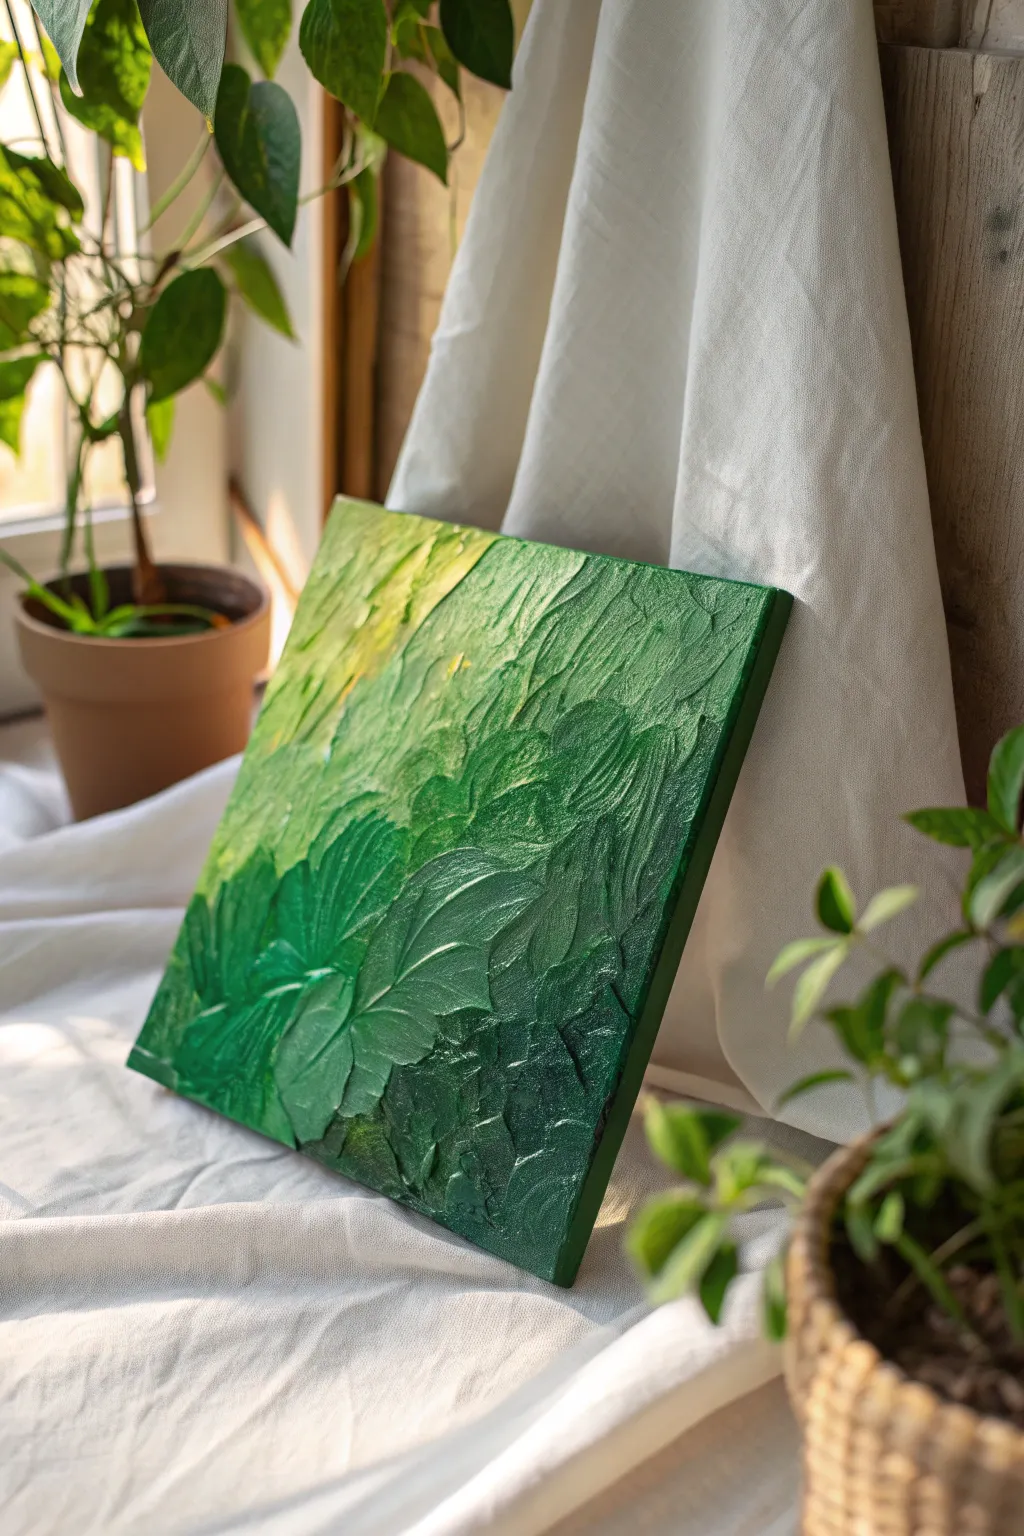
Capture the lush depth of a forest floor with this highly textured acrylic painting project. Using thick modeling paste and palette knives, you will sculpt organic leaf shapes directly onto the canvas before bringing them to life with a gradient of vibrant greens.
Detailed Instructions
Materials
- Square stretched canvas (approx. 8×8 or 10×10 inches)
- Heavy body acrylic paints: Sap Green, Phthalo Green, Hooker’s Green, Cadmium Yellow Light, Titan Buff (or Unbleached Titanium)
- Modeling paste (flexible/lightweight preferred)
- Palette knives (assorted shapes: teardrop, trowel, and diamond)
- Mixing palette or paper plate
- Paper towels for wiping
Step 1: Sculpting the Foundation
-
Prime the Surface:
Ensure your canvas is clean and ready. If it’s not pre-primed, apply a quick coat of gesso and let it dry completely to create a good tooth for the heavy paste. -
Mix Paste and Color:
On your mixing palette, combine a large dollop of modeling paste with a small amount of middle-tone green (like Hooker’s Green). The paste should be tinted but not fully saturated, as we’ll paint over it later. -
Apply base layer:
Using a larger trowel-shaped palette knife, spread a thin, uneven layer of the tinted paste across the entire canvas. Don’t smooth it out perfectly; rough ridges add character. -
Sculpt Leaf Shapes:
Load a teardrop-shaped palette knife with more tinted paste. Press the flat side of the knife into the wet base layer and pull it gently towards you, lifting at the end to create a leafy, pointed tip. -
Layer the Foliage:
Repeat the pressing and pulling motion, layering these ‘leaves’ over one another. Angle them in different directions to mimic natural growth patterns. -
Add Vein Details:
While the paste is still wet, use the very edge of a clean knife to score subtle central veins into the larger leaf shapes. Keep these lines loose and organic. -
Create Depth:
Build up thicker areas of paste in the lower right corner to establish a foreground, leaving the top left slightly flatter. This physical depth will enhance the color gradient later. -
Dry Thoroughly:
This is the most crucial patience test. Let the canvas sit for at least 12-24 hours until the paste is completely hard and dry to the touch.
Knife Angle Secrets
Hold the palette knife at a low angle (almost flat) to deposit more paste, and at a high 45-degree angle to scrape and create sharp leaf edges.
Step 2: Bringing the Color to Life
-
Prepare the Palette:
Squeeze out your paints: Cadmium Yellow Light and Titan Buff for highlights, Sap Green for mid-tones, and Phthalo Green mixed with a tiny touch of black or dark blue for the deepest shadows. -
Start Dark:
Using a stiff brush or a clean palette knife, apply the darkest green mixture to the bottom right corner. Push the paint into the crevices of the dried texture. -
Transition to Mid-tones:
Pick up the Sap Green and blend it into the dark area, moving diagonally towards the center. Allow the colors to mix slightly on the canvas for a soft transition. -
Apply Highlights:
Mix Cadmium Yellow Light with a little Sap Green. Apply this vibrant lime shade to the top left corner, brushing lightly so it catches the tops of the texture ridges. -
Enhance the Sunbeams:
Mix a tiny amount of Titan Buff into your yellow-green mix. Dab this on the very highest points of the texture in the top left corner to simulate sunlight hitting the leaves. -
Dry Brushing Step:
I like to wipe most of the paint off a dry brush and lightly sweep pure yellow over the transition areas. This highlights the texture without covering the green beneath. -
Refine Shadows:
If the texture looks too flat, go back with a small brush and watery dark green paint to deepen the recesses between the sculpted leaves. -
Final Glaze (Optional):
Once the paint is dry, you can apply a gloss varnish to make the leaves look wet and dewy, enhancing the rich greens.
Metallic Magic
Mix a small amount of iridescent medium or gold paint into your yellow highlights for a sun-kissed, shimmering finish.
Step back and admire how the light plays across your permanent garden
Abstract Green Botanicals With Loose Shapes
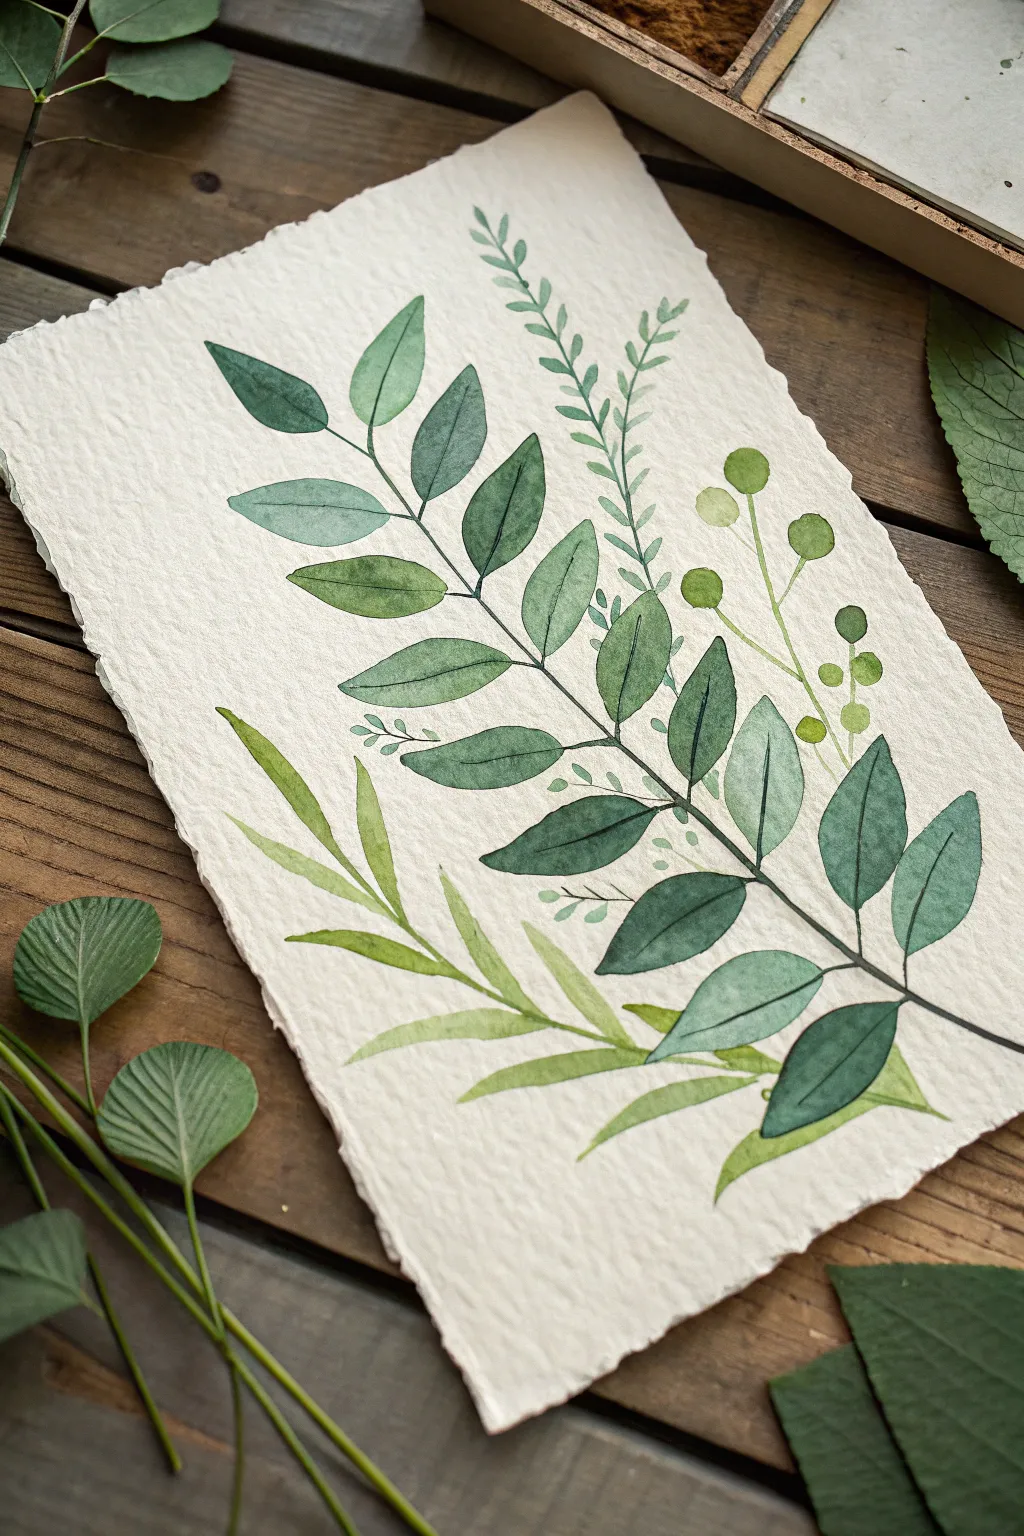
Capture the organic elegance of nature with this botanical watercolor study. Using distinct shades of green on beautifully textured handmade paper creates a piece that feels both rustic and refined.
Step-by-Step Guide
Materials
- Cold-pressed or handmade cotton rag paper (approx. 300gsm)
- Watercolor paints (Sap Green, Hooker’s Green, Olive Green, Burnt Umber)
- Round watercolor brushes (Size 4 and Size 0/00 for details)
- Pencil (HB or H)
- Kneaded eraser
- Two jars of water
- Paper towel or rag
- Micron pen or fine liner (dark grey or black, optional)
Step 1: Preparation & Sketching
-
Prepare your paper:
Select a sheet of heavy, textured cotton rag paper with deckled edges. If your paper is loose, tape it down to a board with artist’s tape, but for this specific rustic look, you can also leave it loose to paint edge-to-edge. -
Map the main stem:
Lightly sketch a central diagonal line curving gently from the bottom right corner towards the top left. This will serve as the spine for your primary branch. -
Outline the main leaves:
Draw the leaf shapes along the main stem. Make them elongated ovals that taper to points. Alternate their placement on the stem rather than placing them directly opposite each other for a more natural look. -
Add secondary elements:
Sketch a thinner, wispier vine curving alongside the top right of the main branch. Add a third, smaller leafy stem near the bottom left to balance the composition. -
Sketch the berries:
Draw thin, branching lines extending from the right side of the main stem, capped with small circles for the berries. Keep these pencil lines extremely faint so they vanish under the paint.
Bleeding Lines?
If paint bleeds on the textured paper, your mix is too watery. Blot the brush on a towel before painting to reduce moisture load.
Step 2: Painting the Foliage
-
Mix your base green:
Create a cool, deep green mix using Hooker’s Green and a touch of Burnt Umber to desaturate it slightly. This will be for the large, central leaves. -
Paint the first leaf layer:
Using your size 4 brush, fill in the large leaves. Use a ‘wet-on-dry’ technique to keep the edges crisp against the textured paper. Don’t worry about perfect uniformity; slight variations in water load add depth. -
Create a gradient effect:
While the paint is still wet on a leaf, drop a tiny amount of darker pigment near the base of the leaf and let it bleed slightly outward. This mimics natural shadowing. -
Paint the bottom stem:
Switch to a lighter, yellow-green mixture (Olive Green mixed with a little yellow). Paint the long, grassy leaves at the bottom left. These should feel lighter and more translucent than the main branch. -
Detail the wispy vine:
Using the very tip of your brush or a size 0, paint the delicate fern-like vine at the top right. Use a muted, sage green tone here. Press down for the tiny leaves and lift up for the thin stem connectors. -
Color the berries:
Mix a vibrant, yellowish-green. Fill in the small berry circles you sketched earlier. Keep the value lighter than the main leaves to make them pop.
Step 3: Defining Details
-
Connect the main branch:
Once the leaves are dry, use a fine liner brush or a size 0 with a very dark green-black mix (Pro tip: mix Green with a little Red to get a natural black). Paint the central stem line, carefully connecting the base of each leaf. -
Add leaf midribs:
With the same dark fine mixture, paint a thin central vein down the middle of each large leaf. You can break the line slightly for a more organic feel. -
Add side veins:
Paint delicate V-shaped veins branching from the midrib. Keep these lines incredibly thin; barely touch the paper with your brush tip. -
Connect the berries:
Draw very fine stems connecting the floating berries back to the main structure. These lines should be thin and crisp. -
Refine the edges:
Check the edges of your leaves. If the textured paper caused any jagged gaps you don’t like, smooth them out slightly with a damp brush, though preserving the rough texture is part of the charm. -
Final assessment:
Step back and look at the overall balance. If the bottom left feels too empty, add a wash of very pale green to the grassy leaves to build up opacity without darkening them too much.
Go Botanical
Once dry, use a gold gel pen to outline just one side of the leaves. This adds a subtle shimmer that catches the light beautifully.
Allow your painting to dry completely flat before mounting or framing to preserve the beautiful texture of the paper
Neon Green Aurora Over Dark Trees
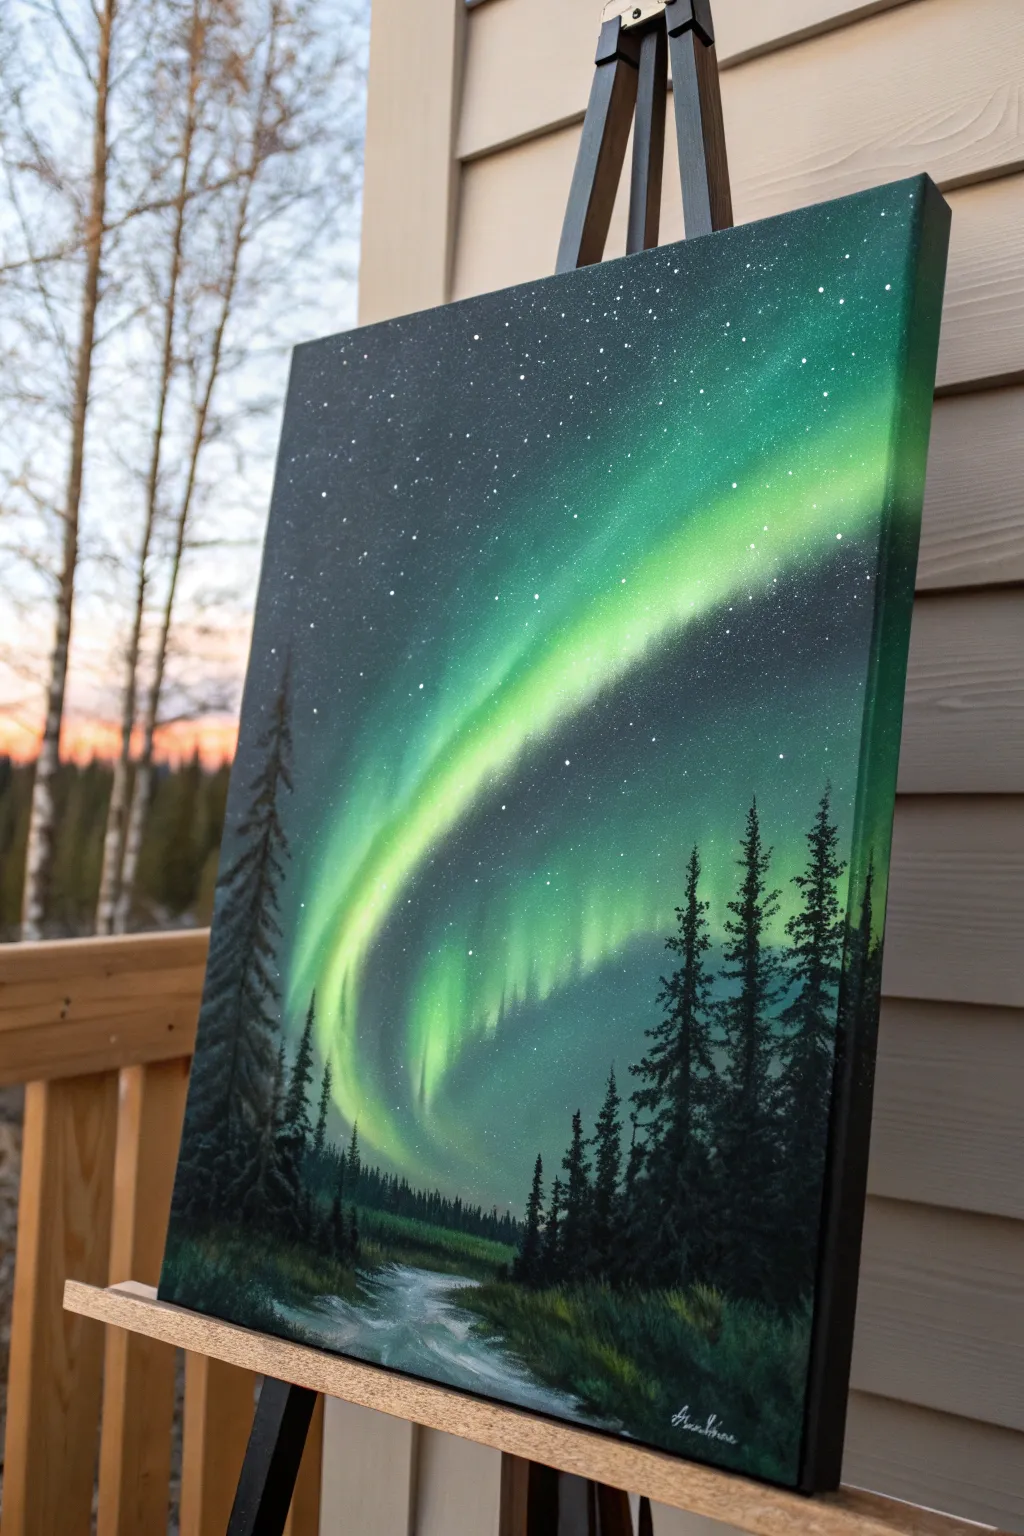
Capture the ethereal glow of the northern lights with this dramatic acrylic landscape painting. The contrast between the deep, starry void and the vibrant neon green swirl creates a mesmerizing focal point that leaps off the canvas.
Step-by-Step Tutorial
Materials
- Stretched canvas (16×20 or similar vertical format)
- Black gesso or black acrylic paint for the base
- Acrylic paints: Phthalo Green, Titanium White, Neon Green (or bright Lime Green), Prussian Blue or Paynes Grey, Burnt Umber
- Large flat brush (1-2 inch)
- Medium round brush
- Fan brush
- Small liner brush or rigger brush
- Old toothbrush (for stars)
- Mixing palette and water cup
- Paper towels
Step 1: Setting the Night Sky
-
Prime the canvas:
Start by coating your entire canvas with black gesso or black acrylic paint. Cover the edges as well for a finished look. Let this base layer dry completely before moving on. -
Establish the horizon line:
Imagine a line across the bottom third of your canvas. Everything above this will be sky. Mix a tiny amount of Prussian Blue with your black to create a very deep midnight color, and paint the upper two-thirds, keeping the bottom third slightly lighter for the ground. -
Create the starry field:
Mix Titanium White with water until it has an inky consistency. Dip an old toothbrush into this mixture, aim it at the black sky area, and gently flick the bristles with your thumb to spray tiny stars. Vary the pressure to create stars of different sizes.
Star Spatter Trouble?
If your stars turn into big blobs, your paint is too watery. Dab the excess moisture off the toothbrush onto a paper towel before flicking it at the canvas.
Step 2: Painting the Aurora
-
Map the aurora’s path:
Using a dry flat brush and a very small amount of white paint, lightly sketch the swooping curve of the aurora. Start from the top right and curve it down toward the middle left. Keep this stroke very faint and misty. -
Apply the first green glow:
Mix Phthalo Green with a little white to make a mid-tone teal. Using a dry-brush technique (wipe most paint off your brush), glaze over your white sketch. Scrub in circles gently so the edges fade into the black background seamlessly. -
Intensify the brightness:
Clean your brush and pick up your Neon Green or bright Lime. Apply this to the center of your aurora path, staying inside the darker green edges. This creates the ‘core’ of the light. -
Add the blinding highlights:
Mix pure white with just a touch of Neon Green. Using a smaller brush, paint a thin, strong line right through the center of the brightest green part. Soften the edges immediately with a clean, dry brush to make it look like glowing gas rather than a solid stripe. -
Create vertical curtains:
Use a dry fan brush or flat brush with a tiny amount of the mid-tone green. Flick the brush lightly upward from the main aurora band to simulate the vertical pillars of light often seen in northern lights.
Level Up: Color Shift
Real auroras have multiple colors. Try glazing a tiny amount of transparent magenta or purple at the very top edge of your green curtain for a rare, high-altitude look.
Step 3: Forest and Foreground
-
Block in the tree line:
Mix black with a touch of Phthalo Green for the trees—using pure black can look flat. Use a fan brush held vertically to tap in the distant treeline across the horizon, varying the heights slightly. -
Paint the tall pines:
Switch to a liner brush or the edge of a flat brush. Draw a straight vertical line for the trunk of a large foreground tree. Use the corner of a fan brush to tap on foliage, starting narrow at the top and getting wider towards the base. -
Add variety to the forest:
Repeat the tree process, placing a large dominant tree on the left and a cluster of medium trees on the right. Leave the center bottom somewhat open for the stream. -
Highlight the trees:
Mix a dark grey-green. Imagine the light coming from the aurora above. Gently tap this color only on the top-right edges of the tree branches that would catch that green glow from the sky. -
Establish the stream bed:
In the open gap at the bottom center, paint horizontal strokes of dark grey-blue to suggest water or an icy path. Allow the strokes to narrow as they recede back toward the treeline. -
Reflect the aurora:
Take a little of your neon green and white mix. Add horizontal streaks into the water area to reflect the sky above. Keep these muted; the reflection shouldn’t be brighter than the sky itself. -
Final foliage details:
Use a small round brush to dab in some grassy textures along the banks of the stream using deep greens and browns. This grounds the trees and hides the bottom of the trunks. -
Sign and seal:
Add your signature in the bottom corner with a liner brush and thinned white or light green paint so it stands out against the dark grass.
Step back and admire how a few simple colors can create such a luminous, magical atmosphere
Green Negative Space Leaf Silhouette
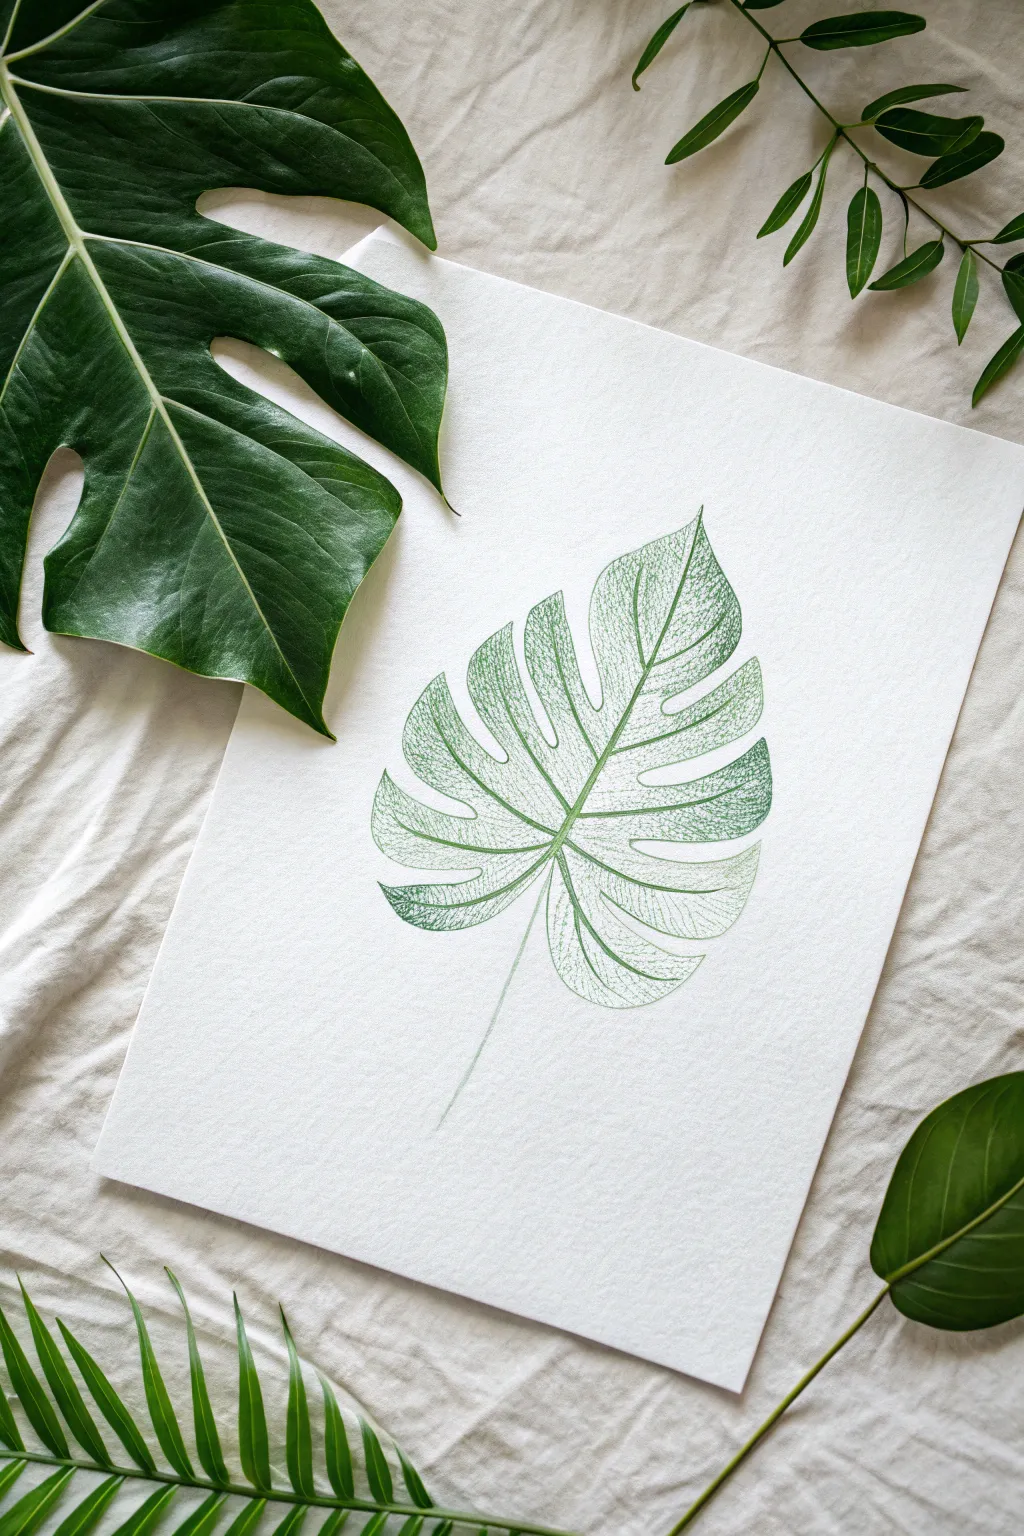
Capture the intricate beauty of nature with this refined printing project that emphasizes the delicate network of veins within a Monstera leaf. The result is a sophisticated, minimalist piece of botanical art that showcases subtle green textures against crisp white paper.
Step-by-Step Guide
Materials
- High-quality watercolor paper or heavy printmaking paper (cold press)
- Fresh Monstera leaf (medium size)
- Water-soluble block printing ink (sap green or forest green)
- Soft rubber brayer (roller)
- Plexiglass sheet or glass palette for rolling ink
- Clean newsprint or scrap paper
- tweezers
- Wooden spoon or clean baren
- Paper towels
Step 1: Preparation & Inking
-
Select the perfect leaf:
Choose a Monstera leaf that is relatively flat and not too waxy. If the leaf is very curled, you might want to press it under a heavy book for an hour or two beforehand to flatten it slightly, which ensures better contact with the paper. -
Prepare the workspace:
Lay down some protective newsprint on your table. Set up your ink palette, paper, and baren within easy reach so you can work quickly once the ink is applied. -
Roll out the ink:
Squeeze a small line of green block printing ink onto your plexiglass sheet. Use the brayer to roll the ink out until it sounds ‘tacky’—like velcro pulling apart—and has a velvety texture. Avoid over-inking the roller, as this will fill in the delicate veins. -
Ink the leaf underside:
Place your leaf vein-side up on a piece of scrap paper. Run the inked brayer over the leaf carefully. Start from the center stem and roll outward toward the edges to prevent the leaf from sticking to the roller or tearing. -
Check coverage:
Inspect the leaf. You want a thin, even layer of green ink sitting on the raised veins. If you see globs of ink in the flat spaces between veins, blot them gently with a paper towel.
Step 2: The Printing Process
-
Position the leaf:
Carefully lift the inked leaf by the stem. I like to use tweezers here to keep my fingers clean. Place it inked-side down onto the center of your watercolor paper. -
Protect the print:
Once the leaf is down, do not move it. Gently lay a clean sheet of scrap paper or newsprint directly on top of the leaf to act as a barrier between your rubbing tool and the artwork. -
Apply pressure:
Using the back of a wooden spoon or a baren, rub firmly in circular motions over the area where the leaf is hidden. Apply firm, consistent pressure, starting from the center stem and working your way out to the perforated edges. -
Focus on the edges:
Detailed edges are the first thing to get missed. Pay extra attention to the very tips of the leaf loves, tracing the outline with your spoon to ensure the ink transfers all the way to the perimeter. -
The reveal:
Remove the protective scrap paper. Hold the bottom of your watercolor paper down with one hand, and carefully peel the leaf up by the stem with the other in one smooth motion. -
Dry properly:
Let the print dry undisturbed on a flat surface for at least 24 hours. Block printing ink stays open longer than acrylics, so be patient to avoid smudging that crisp detail.
Too Smudgy?
If you lose the vein detail, you likely used too much ink or pressed too hard. Try rolling a thinner layer on your palette first, or blotting the leaf gently before printing.
Step 3: Adding Details (Optional)
-
Enhance weak areas:
If parts of the stem or faint veins didn’t transfer perfectly, wait until the print is fully dry. Then, use a very fine-tip green archival pen or colored pencil to lightly sketch in missing connections. -
Flatten the paper:
Sometimes the pressure of rubbing can slightly buckle the paper. Once the ink is cured, you can place the artwork under a clean sheet of paper and a heavy stack of books to flatten it completely before framing.
Vein Definition
For the most detailed prints, always ink the UNDER side of the leaf. The veins are naturally more raised and prominent there, acting like a natural rubber stamp.
Once framed, this natural monotype adds an organic, peaceful touch to any room


Have a question or want to share your own experience? I'd love to hear from you in the comments below!