
Whenever I’m stuck on what to paint, a church scene instantly gives me structure, mood, and that satisfying mix of straight lines and soft landscapes. Here are my favorite church painting ideas—starting with the classic, beginner-friendly looks and drifting into more playful, unexpected directions.
Front-Facing Symmetry Chapel
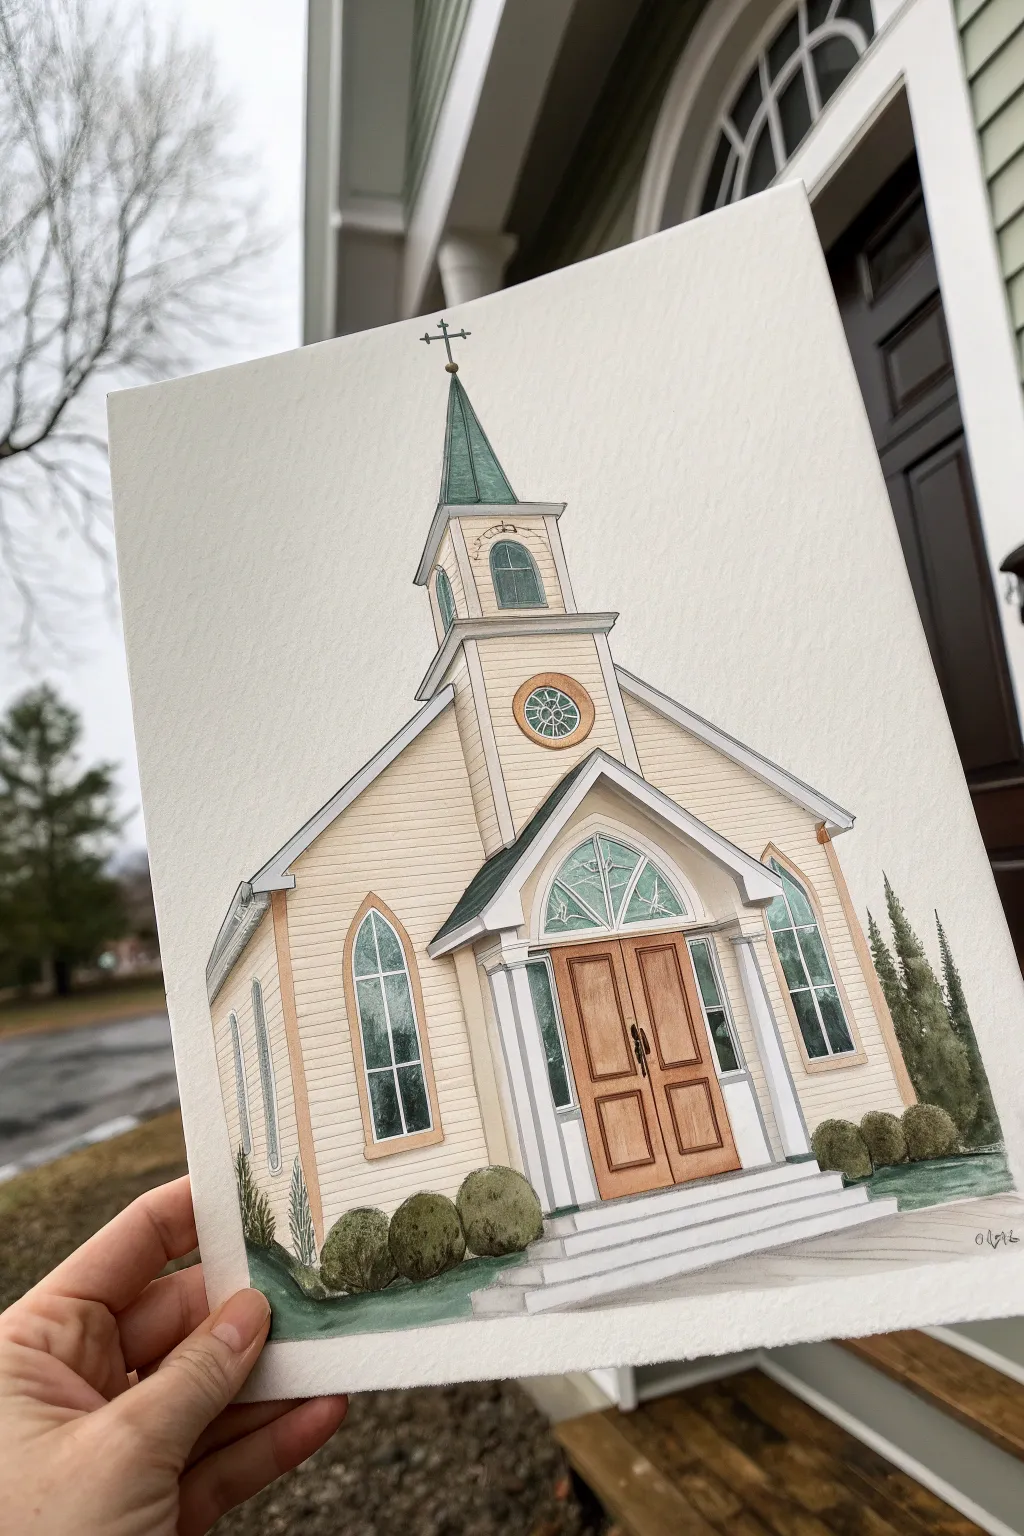
Capture the charm of traditional architecture with this delightful watercolor and ink illustration. This project combines precise line work with soft washes to create a warm, inviting church portrait that feels like a storybook illustration.
How-To Guide
Materials
- Cold press watercolor paper (140lb/300gsm)
- Pencil (HB or 2H)
- Waterproof fine liner pens (0.1, 0.3, and 0.5mm, black)
- Watercolor paints (Yellow Ochre, Burnt Sienna, Hooker’s Green, Indigo, Payne’s Grey, Sepia)
- Round watercolor brushes (Size 2, 4, and 8)
- Ruler
- Clean water and paper towels
- White gel pen (optional for highlights)
Step 1: Drafting the Structure
-
Establish the centerline:
Begin by lightly drawing a vertical line down the center of your paper with a ruler. This is crucial for symmetry. Mark the ground level near the bottom and the tip of the spire near the top to define your total height. -
Block in the main shapes:
Sketch the main rectangle of the building body first. Then, add the triangle for the roof pitch above it. On top of the roof peak, sketch the square base of the steeple, followed by the pointed spire shape. -
Add architectural details:
Draw the gabled entryway in the center bottom, protruding slightly forward. Sketch the large arched windows on either side of the door. Use your ruler to ensure the window sills align horizontally. -
Refine the sketch:
Add the double doors within the entryway. Draw the circular window above the door and the smaller arched windows on the steeple. Sketch the horizontal siding lines lightly—don’t make them too dark as you’ll want them subtle later. -
Landscape elements:
Sketch rounded shapes for the boxwood bushes flanking the steps and the taller cypress-style trees on the right side. Add the stairs leading up to the door in perspective.
Uneven Washes?
If your siding color looks blotchy, pre-wet the area with clean water first. Apply the pigment to the wet surface (wet-on-wet) for a seamless, smooth gradient.
Step 2: Inking the outlines
-
Main structural lines:
Using a 0.3mm waterproof pen, trace over your pencil lines for the main walls, rooflines, and door frame. Use a ruler for the straight edges to keep the look crisp. -
Fine details:
Switch to a 0.1mm pen to ink the horizontal siding. I find breaking the lines occasionally instead of drawing one continuous stroke makes the wood texture look more natural. Ink the window panes and the cross atop the spire. -
Organic textures:
Use a sketchy, slightly loose hand to ink the bushes and trees. Stipple or scribble slightly to suggest leaves rather than outlining a solid blob. Let the ink dry completely, then erase all pencil marks.
Step 3: Watercolor Washes
-
Painting the siding:
Mix a very dilute wash of Yellow Ochre with plenty of water. Paint the main body of the church. While wet, drop in a tiny touch of Burnt Sienna near the shadows under the eaves to create depth. -
Roof and spire:
Mix Hooker’s Green with a touch of Indigo for a deep, slightly weathered green. Paint the spire and the small roof sections. Let the color pool slightly at the bottom of the roof sections for natural shading. -
Wooden doors:
Use a mix of Burnt Sienna and Sepia for the double doors. Paint the panels, leaving tiny slivers of white paper unpainted to act as highlights on the wood ridges. -
Windows and glass:
Dilute Payne’s Grey to a watery ghost-gray. Fill in the window panes. Once dry, add a second layer to just one corner of each pane to suggest reflection and depth. -
greenery:
Paint the bushes with a mix of Sap Green and Sepia. While the paint is wet, dab in darker concentrated green on the bottom creating shadow volume. Use a dry brush technique for the tall trees on the right to simulate pine texture.
Make it Wintery
Add snow to your scene by leaving the tops of the roof pitch, the stairs, and the tops of the bushes unpainted white. Use blue-grey for shadows on the snow.
Step 4: Final polishes
-
Grounding shadows:
Mix a cool grey using Indigo and a touch of Burnt Sienna. Glaze this over the stairs and add a shadow beneath the bushes to ground the building. -
Deepening contrast:
Once everything is bone dry, go back with your smallest brush and dark grey paint to deepen the shadows inside the open doorway or under the deepest roof eaves.
Now your charming chapel is ready to frame or give as a thoughtful gift.


Autumn Trees Framing the Chapel
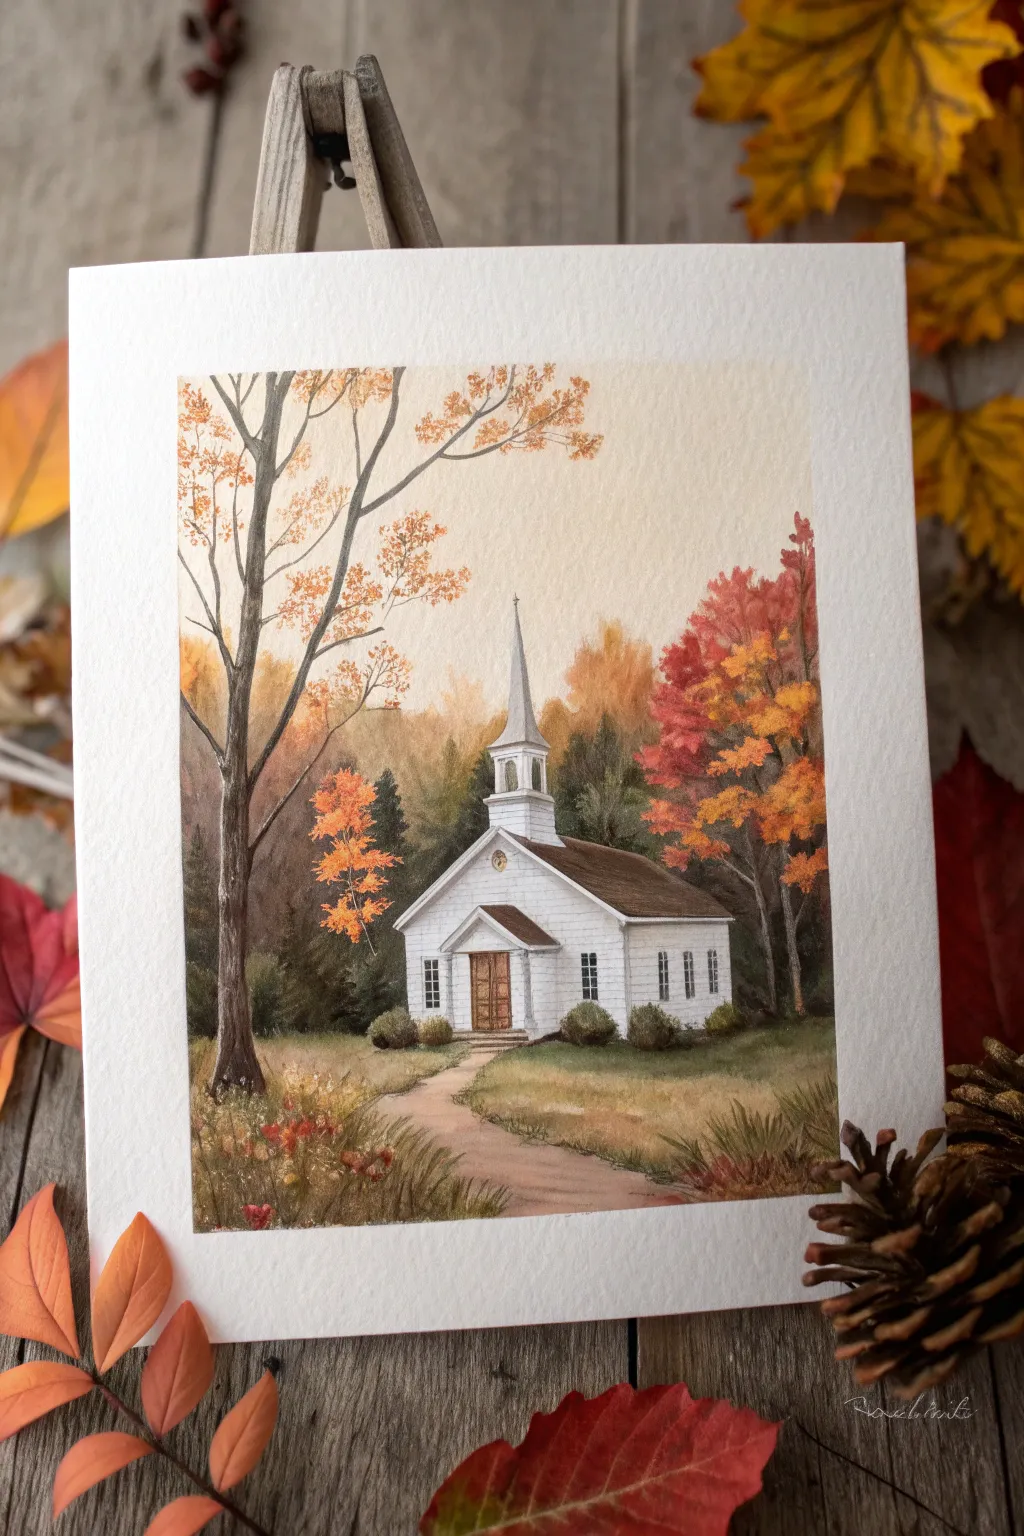
Capture the serenity of a country church nestled among vibrant fall foliage with this detailed watercolor tutorial. You will learn to balance warm and cool tones, create realistic architectural details, and layer translucent washes for a scene full of depth and seasonal charm.
Step-by-Step Guide
Materials
- Cold-pressed watercolor paper (140lb/300gsm)
- Watercolor paints (Ultramarine Blue, Burnt Sienna, Yellow Ochre, Alizarin Crimson, Cadmium Red, Sap Green, Sepia)
- White gouache or white gel pen (optional for highlights)
- Round brushes (sizes 2, 6, and 10)
- Fine liner brush (size 0 or 00)
- Pencil (HB or H) and kneaded eraser
- Masking fluid
- Two jars of water
- Paper towels
Step 1: Sketching and Masking
-
Draft the composition:
Begin with a light pencil sketch. Draw the horizon line about a third of the way up the paper. Place the church slightly off-center to the right, paying attention to the perspective of the roofline and the height of the steeple. -
Detail the architecture:
Sketch the windows (tall rectangles with arched tops on the steeple), the double doors, and the small circular window above the entrance. Outline the main tree on the left and the path winding toward the door. -
Preserve the whites:
Apply masking fluid carefully to the entire church structure, including the steeple, windows, and white siding. This is crucial for keeping the building crisp and bright against the colorful background washes.
Muddy Autumn Colors?
Wait for each layer of foliage to dry completely before adding another. If you paint red directly into wet green, you’ll get brown mud. Patience ensures vibrant fall hues.
Step 2: Soft Background Washes
-
Paint the sky:
Wet the sky area with clean water. Drop in a very pale wash of Yellow Ochre near the horizon, blending upward into a faint touch of grayish-blue. Keep this very subtle to suggest an overcast fall day. -
Create the distant treeline:
While the paper is still slightly damp but not soaking, mix Sap Green with a touch of Sepia for the distant pines. Paint soft, vertical shapes behind the church. Let these edges blur slightly into the background. -
Add autumn warmth:
Mix Cadmium Red and Yellow Ochre. Dab this loose mixture into the mid-ground areas behind the church to represent the deciduous forest, allowing the colors to bleed and mix on the paper for a natural foliage effect. -
Paint the grassy base:
For the lawn area surrounding the church, use a wash of Sap Green muted with a little Burnt Sienna. Keep the values light here, as we will add texture later. -
Tone the pathway:
Paint the winding path with a watery mix of Burnt Sienna and a tiny dot of Alizarin Crimson. I like to lift a little color from the center of the path with a paper towel to make it look worn and illuminated.
Simulate Siding Texture
For the clapboard siding, make your horizontal lines slightly broken and uneven. Perfect ruler-straight lines look artificial on a rustic country church.
Step 3: The Church Focus
-
Reveal the paper:
Once the background is completely bone-dry, gently rub off the masking fluid with your finger or a rubber cement pick. -
Shadow the structure:
Although the church is white, it needs form. Mix a cool shadow grey using Ultramarine Blue and a touch of Burnt Sienna. Paint shadows under the eaves, on the right side of the steeple, and the right side of the building itself. -
Roof and doors:
Paint the roof using a solid wash of Sepia or dark brown. For the double doors, use a lighter Burnt Sienna, adding tiny vertical lines with your smallest brush to suggest wood planks. -
Window details:
Use your fine liner brush and dark grey paint to carefully outline the window panes. Don’t fill them in completely black; leave tiny specks of white paper to mimic glass reflections. -
Siding texture:
With a very dilute grey and a fine brush, draw faint horizontal lines across the white walls to suggest clapboard siding. Break the lines up; don’t draw them continuously from corner to corner.
Step 4: Foreground and Details
-
Paint the main tree:
Mix a strong dark brown using Sepia and Ultramarine. Paint the large tree trunk on the left, tapering the branches significantly as they reach upward. Add characteristic knots and uneven edges for realism. -
Add right-side foliage:
Paint the vibrant tree on the right side using distinct dabs of Cadmium Orange and Alizarin Crimson. Leave gaps between the leaf clusters to let the sky or background show through. -
Foreground grasses:
Use a rigger brush or the tip of your round brush to flick upward strokes of Sap Green, Burnt Sienna, and Yellow Ochre at the very bottom of the painting. Vary the direction to show wild, unkempt grass. -
Scattered leaves:
Dot small touches of red and orange onto the grass and the path to simulate fallen leaves, and add a few hanging leaves on the bare branches of the main left tree. -
Final highlights:
Assess the contrast. If the white steeple isn’t popping enough, darken the trees directly behind it. Use white gouache sparingly to add crisp highlights to the roof edge or the tips of the foreground grass.
Step back and admire your tranquil autumn scene, perfect for a greeting card or seasonal display


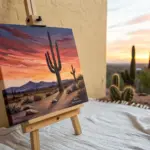
Snowy Church and Evergreen Pines
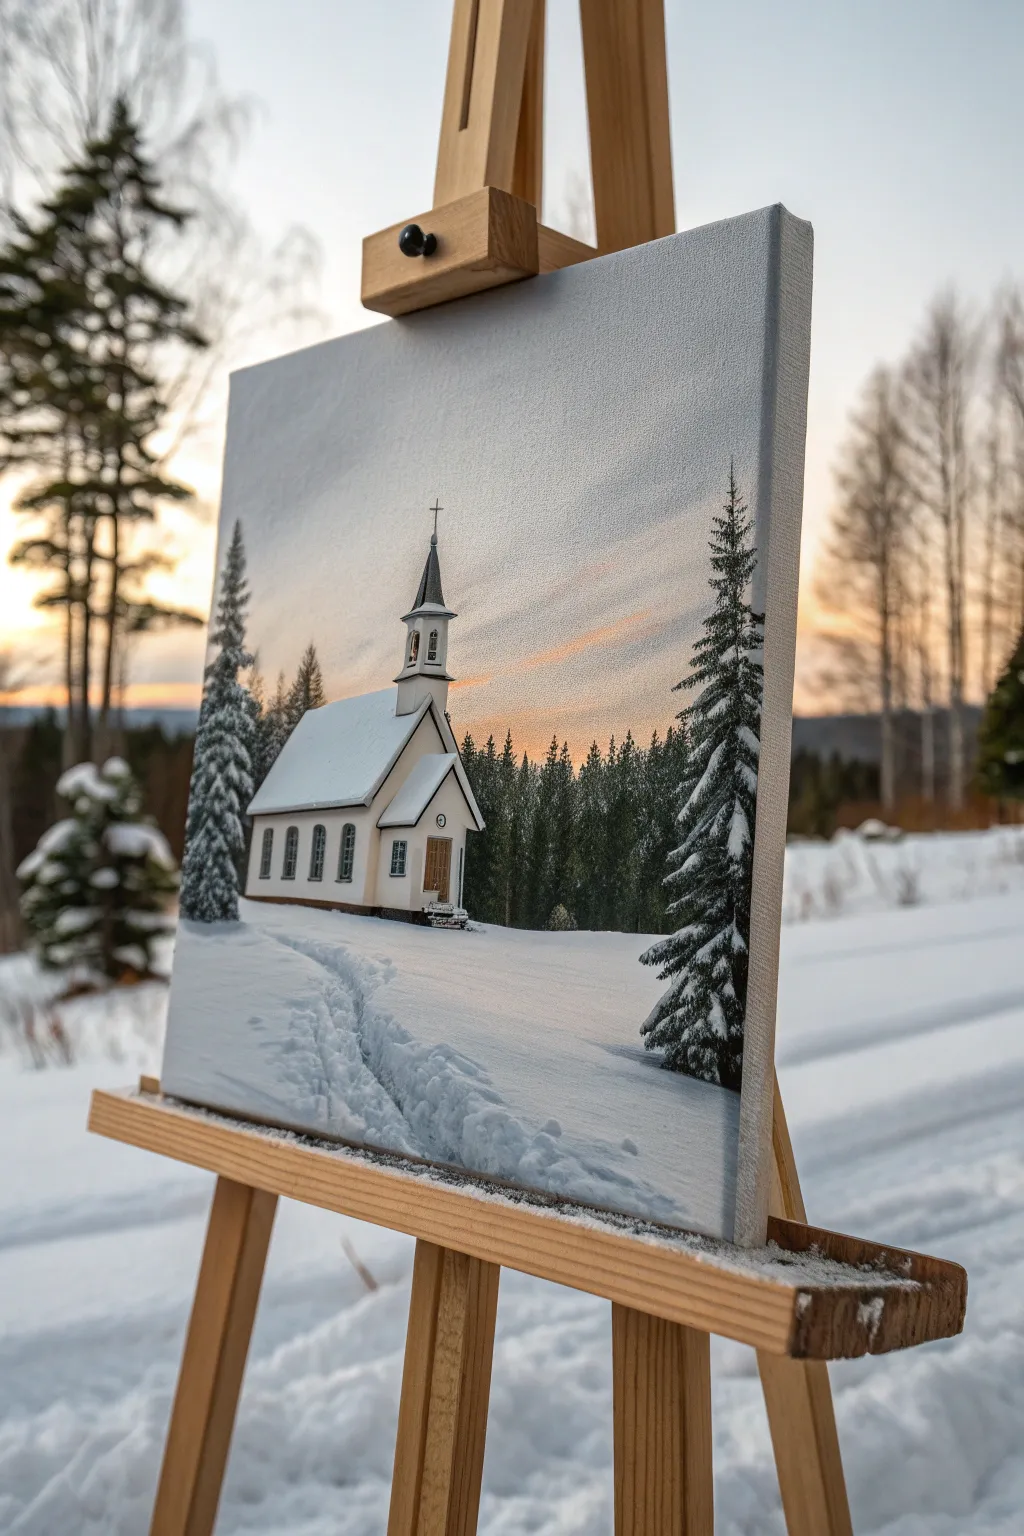
Capture the serene beauty of a lonely white chapel nestled in a winter wonderland with this acrylic painting tutorial. You will learn to blend a soft sunset sky, detail snow-laden pines, and create realistic shadows on pristine white snow.
Step-by-Step
Materials
- Stretched canvas (12×16 or similar)
- Acrylic paints (Titanium White, Mars Black, Ultramarine Blue, Burnt Umber, Cadmium Yellow, Cadmium Red, Phthalo Green)
- Flat brushes (1 inch, 1/2 inch)
- Round brushes (size 2, 4)
- Detail liner brush (size 0 or 00)
- Palette knife (optional for texture)
- Water container and paper towels
- Easel
Step 1: Setting the Sky and Background
-
Prime the canvas:
Start with a clean, white canvas. If your canvas isn’t pre-primed, apply a coat of gesso and let it dry completely to ensure a smooth painting surface. -
Paint the sunset gradient:
Mix Titanium White with a tiny touch of Cadmium Yellow and Cadmium Red to create a pale peach color. Paint this in horizontal strokes across the middle third of the canvas where the horizon will be. -
Blend the upper sky:
While the peach is still wet, mix a light slate blue using White, a dot of Ultramarine Blue, and a speck of Black. Apply this to the top third of the canvas, blending it downwards into the peach tone for a seamless transition. -
Block in the forest background:
Mix Phthalo Green with Burnt Umber and a touch of Black for a deep forest color. Using a 1/2 inch flat brush, tap in a dense line of distant trees right along the horizon line, letting the tops remain uneven to simulate tree peaks. -
Add snow to distant trees:
Mix a light grey-blue. Using a dry, smaller brush, lightly tap the tops of your background forest to suggest snow dusting the distant canopy.
Pro Tip: Heavy Snow
Don’t overmix your snow highlights on the trees. Leave the white paint thick and textured on the canvas to mimic the physical weight of real snow.
Step 2: Constructing the Church
-
Outline the structure:
Using a thin wash of Burnt Umber and a round brush, lightly sketch the outline of the church in the center-left foreground. Include the main body, the attached entryway, and the tall steeple. -
Base coat the walls:
Paint the church walls with Titanium White. Since the church is backlit by the soft sunset, add a tiny drop of yellow or ochre to warm up the white on the sun-facing side. -
Shadow the walls:
For the shadowed side of the church (the side facing us), mix White with a little Ultramarine Blue and a touch of purple. Glaze this over the wall to create depth. -
Paint the roof:
The roof is covered in snow. Use pure Titanium White for the top edges that catch the light, and a soft blue-grey mix for the slopes of the roof that are angled away from the light. -
Detail the steeple and windows:
Switch to your detail liner brush. Use dark grey (Black + White) to paint the roof tiles of the steeple spire and the window frames. Paint the window panes with a dark, cool grey to reflect the winter atmosphere. -
Add the cross:
With the finest point of your liner brush and black paint, carefully draw the cross atop the steeple. A steady hand is key here.
Step 3: Snowy Landscape and Foreground Trees
-
Lay down the snow base:
Cover the entire bottom third of the canvas with Titanium White. While wet, brush in streaks of very pale blue horizontally to suggest the lay of the land. -
Paint the left pine tree:
Mix a dark green-black color. Using a fan brush or the corner of a flat brush, tap in the evergreen tree on the far left. Start with a thin line for the trunk and tap branches extending outward, getting wider at the bottom. -
Paint the right pine tree:
Repeat the process for the large pine tree on the right foreground. Make this one taller and more prominent to frame the composition. -
Laden the branches with snow:
Load a round brush with thick Titanium White. Gently lay the paint on top of the dark pine branches you just painted. I like to use a ‘glob and lift’ motion to make the snow look heavy and fluffy. -
Create the snowy path:
To make the path leading up to the church, mix a shadow color (White + Ultramarine Blue). Paint irregular, choppy strokes starting from the bottom center, curving towards the church door to simulate trodden snow. -
Add texture to the foreground:
Add more blue-grey shadows in the immediate foreground to show drifts and tracks. Highlight the ridges of these drifts with pure Titanium White to make them pop against the shadows.
Level Up: Golden Hour
Glaze a very thin, transparent layer of diluted orange paint over the snow nearest the horizon to reflect the setting sun’s warmth.
Step back and admire the peaceful winter solitude you have captured on canvas.


Starry Night Over a Country Church
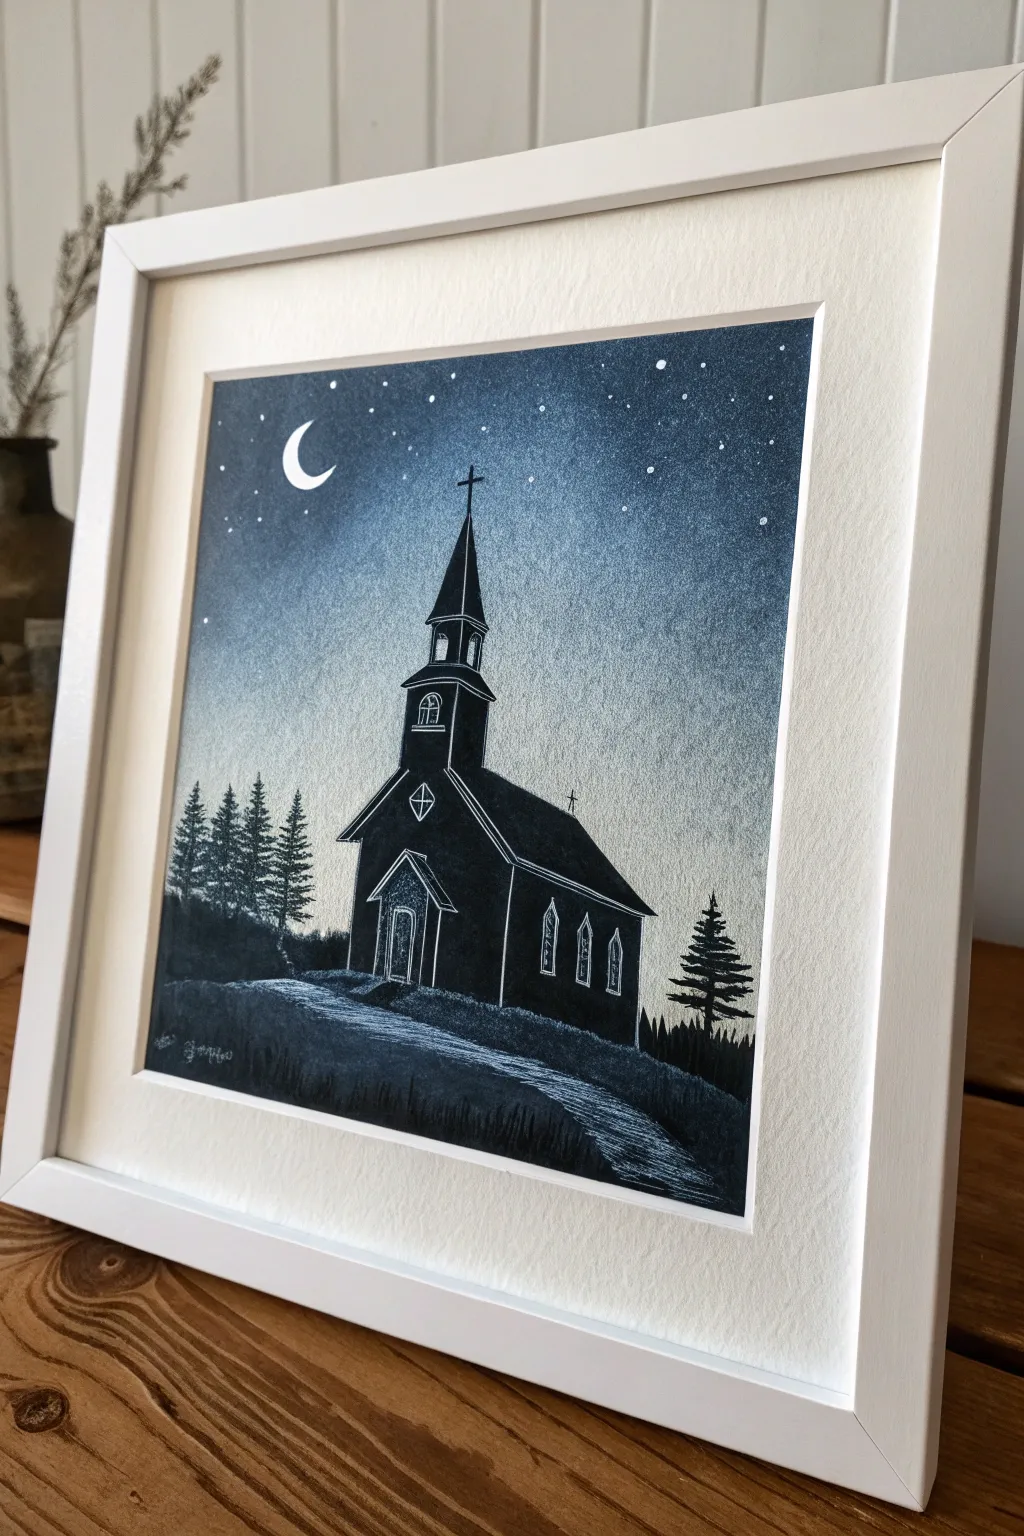
Capture the peaceful solitude of a country church under a starlit sky with this high-contrast painting tutorial. By combining a soft watercolor gradient with opaque black ink and precise white detailing, you can easily replicate the striking look of a linocut print.
Step-by-Step Tutorial
Materials
- Cold pres watercolor paper (approx. 300gsm)
- Painter’s tape or masking tape
- Watercolor paints (Indigo, Payne’s Grey, or Prussian Blue)
- Black gouache paint or India ink
- White gel pen (e.g., Sakura Gelly Roll or Uni-ball Signo)
- Flat wash brush
- Small round detail brush
- Pencil and eraser
- Ruler
Step 1: Setting the Atmosphere
-
Secure the canvas:
Begin by taping down all four edges of your watercolor paper to a board or table. This creates that crisp, professional white border seen in the framed example and prevents buckling. -
Mix the night sky:
Prepare a dark, moody blue on your palette. I usually mix Indigo with a touch of black to get that deep midnight hue. -
Paint the upper gradient:
Load your flat brush with the dark paint and apply it across the top third of the paper. You want this area to be the darkest part of the sky. -
Fade to the horizon:
Dip your brush in clean water to dilute the remaining paint on the bristles. Continue painting downward, blending the dark blue into a lighter, watery wash as you reach the bottom third of the paper where the horizon will be. -
Create texture:
Allow the paint to settle into the tooth of the paper. The ‘grainy’ look comes from the cold press texture showing through the wash, so don’t overwork it. -
The waiting game:
Let the background dry completely. The paper must be bone-dry before we add the silhouette, or the black ink will bleed into the sky.
Clean Lines
To keep the white gel pen flowing smoothly over the textured black paint, wipe the tip of the pen on a scrap piece of paper or your thumb every few strokes to remove dried gouache dust.
Step 2: Building the Silhouette
-
Draft the structure:
Lightly sketch the outline of the church with a pencil. Start with a simple rectangle for the nave, add a triangle for the roof, and stack two smaller rectangles and a triangle for the steeple. -
Add the landscape:
Sketch a rolling horizon line behind the church and define the winding path leading up to the door. Keep these lines faint. -
Outline in black:
Switch to your small round brush and black gouache (or ink). Carefully paint the outer edges of the church, the steeple, and the cross on top. -
Fill the void:
Fill in the entire shape of the church with solid black. The goal is a flat, matte silhouette with no paper showing through. -
Paint the foreground:
Fill in the grassy hills and the ground area in solid black. Paint over the path area entirely as well; we will define the path later using white ink. -
Plant the trees:
On the left and right sides, paint pine trees. Draw a straight vertical line for the trunk, then use short, dabbing horizontal strokes that get wider toward the bottom to mimic pine branches.
Level Up
Make the piece magical by mixing a tiny amount of silver mica powder into your black paint before applying it, giving the church a subtle shimmer when the light hits it.
Step 3: Illuminating the Details
-
Wait for opacity:
Ensure the black gouache is 100% dry. If it’s even slightly wet, it will clog your white gel pen instantly. -
Architectural highlights:
Using the white gel pen, draw thin lines to define the edges of the roof, the side of the steeple, and the corners of the building. This separates the structure from the dark background. -
Add windows and doors:
Draw small arched windows on the steeple and the main building. Add a diamond shape above the door and outline the arched doorway itself. -
Define the path:
To create the winding road, draw horizontal hatching lines across the black path area. Keep the lines somewhat loose and scratchy to suggest dirt or gravel. -
The crescent moon:
In the upper left corner of the sky, carefully draw a sharp crescent moon with the white pen, filling it in neatly. -
Starry details:
Dot the sky with stars. Press firmly for larger stars and lightly for distant ones. Group a few together to create constellations. -
The final reveal:
Once the ink is set, slowly peel away the painter’s tape at a 45-degree angle to reveal your crisp white borders.
Frame your finished silhouette in a simple white frame to let the deep blues and stark contrasts really shine.
BRUSH GUIDE
The Right Brush for Every Stroke
From clean lines to bold texture — master brush choice, stroke control, and essential techniques.
Explore the Full Guide
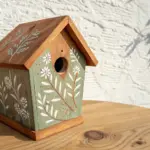
Minimalist Church in a Limited Palette
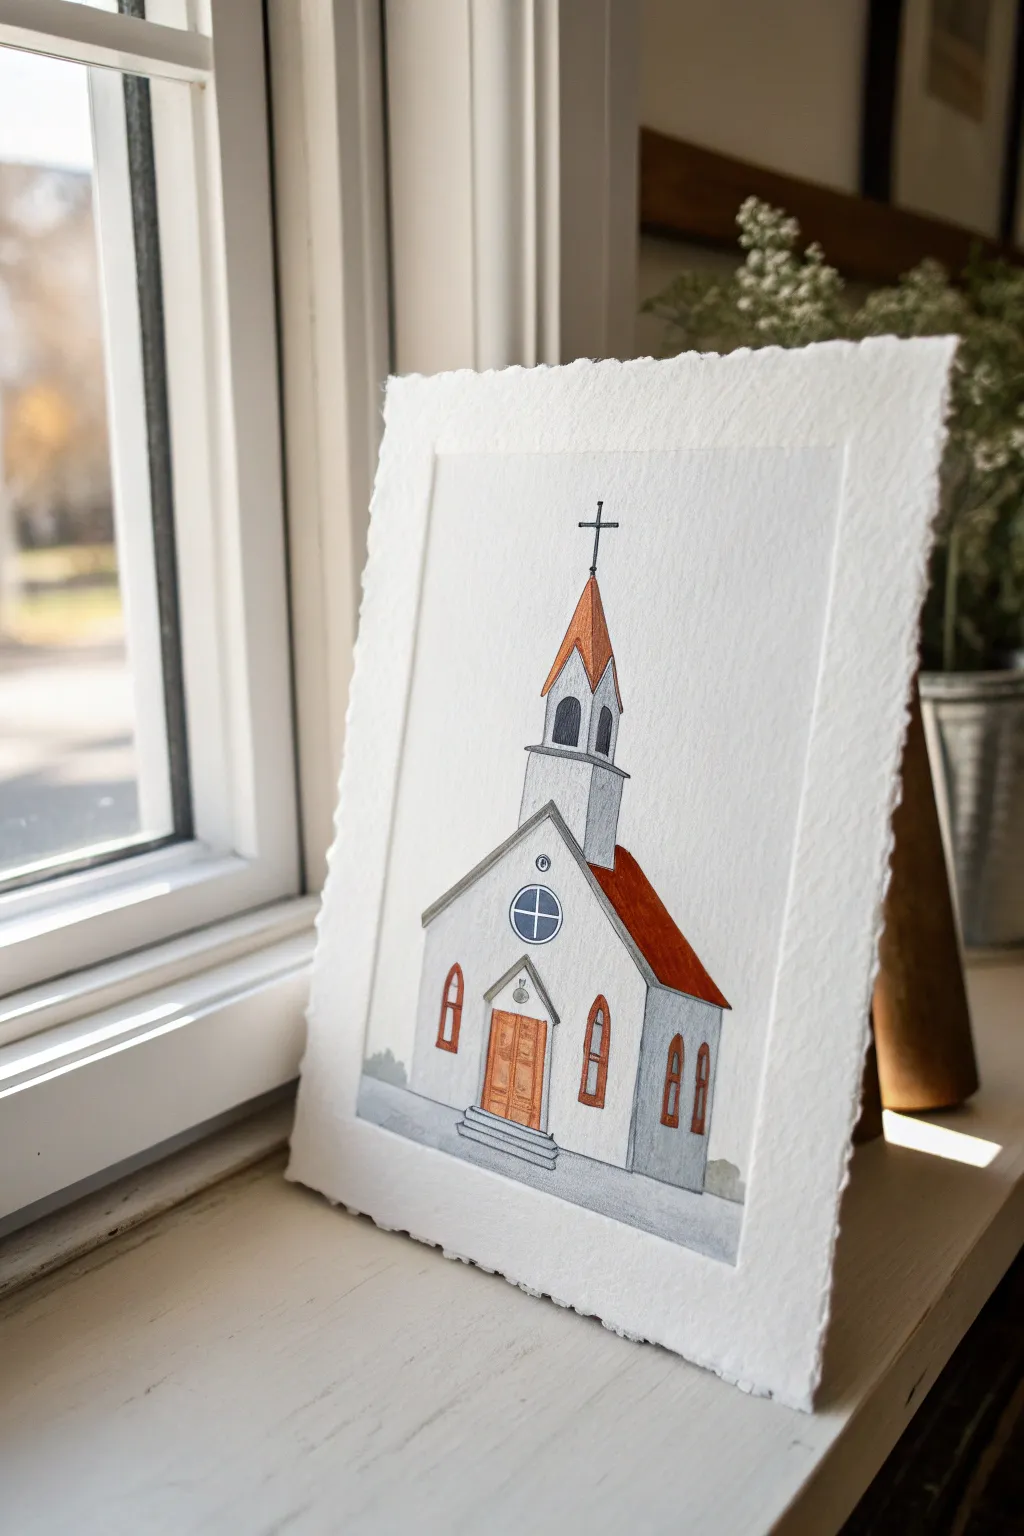
Capture the serene beauty of a classic white chapel with this minimalist illustration project. Using a restrained palette of greys and warm terracottas on lovely textured paper creates a piece that feels both modern and timeless.
How-To Guide
Materials
- Cold press watercolor paper (deckled edge preferred)
- Pencil (HB or H)
- Fine liner pen (black, waterproof, 0.1 or 0.3mm)
- Watercolor paints or watercolor markers
- Paintbrushes (small round size 2 and 4)
- Ruler
- Eraser
Step 1: Drafting the Structure
-
Establish the horizon:
Begin by lightly drawing a straight horizontal line near the bottom of your paper to serve as the ground level. This anchors the building so it doesn’t feel like it’s floating. -
Draw the main body:
Center a vertical rectangle on your paper for the main church body. Add a pitched roof by drawing a triangle on top, extending the eaves slightly past the walls. -
Add the tower:
On top of the roof’s peak, sketch a smaller, narrower rectangle for the bell tower. Top this with a steeper triangle for the spire. -
Sketch the details:
Using your ruler, lightly pencil in the vertical arched windows on the front and side. Center a round window above the door area. Sketch the double doors with an arched frame and steps leading up to them. -
Finalize lines with ink:
Trace over your pencil lines with a waterproof fine liner pen. Use a ruler for the straight architectural lines to keep everything crisp, but freehand the smaller curves like window arches for a softer touch. -
Erase guidelines:
Wait a few minutes to ensure the ink is completely dry, then gently erase all remaining pencil marks to leave a clean black-and-white outline.
Deckled Edge Effect
If you don’t have deckled paper, you can tear the edges of regular watercolor paper against a ruler to create that beautiful, rough antique look.
Step 2: Adding Color
-
Paint the spire and roof:
Mix a warm terracotta or burnt orange color. Carefully fill in the triangular spire roof and the main side roof section. I like to keep the paint slightly translucent to let the paper texture show through. -
Color the door and trim:
Using the same terracotta mix, paint the double doors. Then, dilute the color slightly and carefully fill in the frames of the arched windows. -
Apply grey tones:
Mix a light, cool grey. Paint the side wall of the church and the side of the bell tower to create a sense of shadow and dimension. -
Detail the roof tiles:
Use a slightly darker grey to shade the front-facing roof sections. If you want more texture, you can dab the brush to suggest shingles. -
Fill the windows:
Mix a deep slate blue-grey for the window panes themselves. Paint the round window and the arched windows carefully, leaving the small muntin bars white if possible, or paint over them and use a white gel pen later. -
Ground the building:
Paint the steps and the ground area with a wash of medium grey. Fade the edges of the ground wash outward so it disappears softly rather than ending in a hard line.
Paint Bleeding?
If your colors are running into each other, you are likely painting adjacent sections too quickly. Let each shape dry completely before painting its neighbor.
Step 3: Finishing Touches
-
Define the cross:
With your fine liner or a very small brush with black paint, draw the simple cross at the very peak of the spire. -
Add subtle shading:
Once the base layers are dry, glaze a very watery grey shadow under the eaves and overhangs to make the roof pop. -
Enhance the door:
Use a fine pen to add small wood grain lines or panel details to the door once the orange paint is bone dry.
Place your finished piece near a window or in a simple wooden stand to admire the quiet charm of your creation
Loose Brushwork Impressionist Church Scene
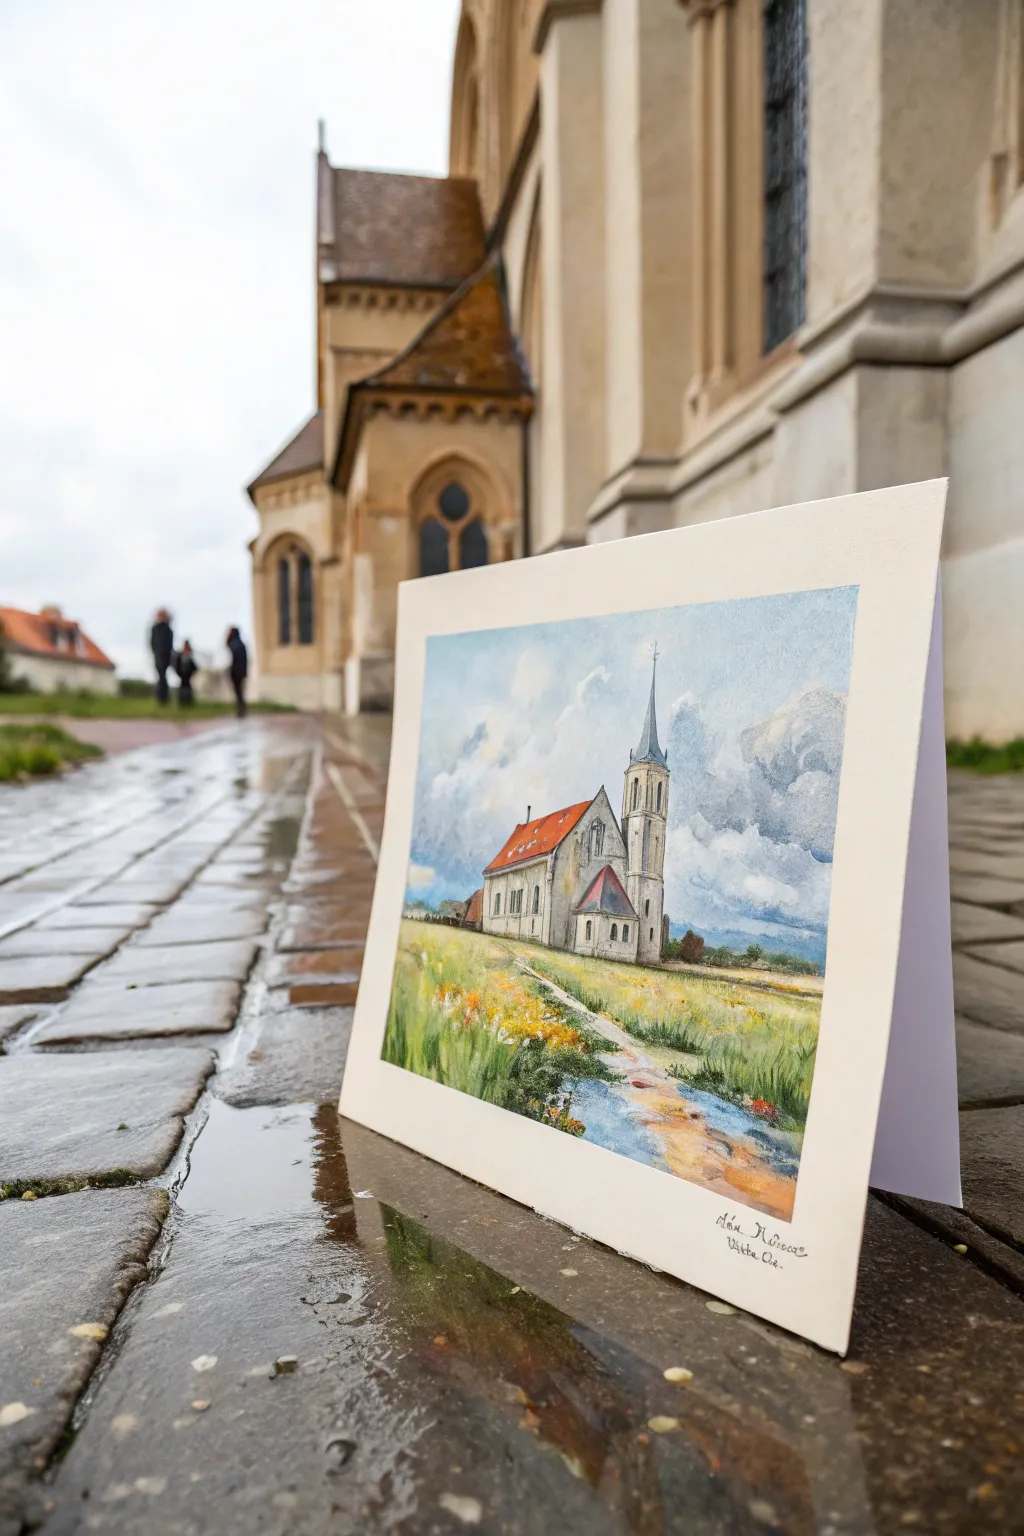
Capture the charm of a countryside chapel with this lovely watercolor study that balances architectural structure with loose, impressionistic surroundings. The scene features a bright, airy sky and a textured grassy foreground that leads the eye gently toward the focal point.
Detailed Instructions
Materials
- Cold press watercolor paper (140lb/300gsm)
- Watercolor paints (Ultramarine Blue, Burnt Sienna, Yellow Ochre, Sap Green, Alizarin Crimson, Cadmium Red)
- Masking fluid (optional but recommended for clouds)
- Round brushes (flats sizes 4, 8, and a rigger/liner brush)
- Pencil (HB or H for light sketching)
- Two jars of water
- Paper towels
- Hairdryer (optional for speeding up drying)
Step 1: Planning and Sketching
-
Establish the Horizon:
Start by lightly drawing a horizon line about one-third of the way up the paper. This leaves plenty of room for that expansive, dramatic sky. -
Outline the Church Structure:
Sketch the main body of the church using simple geometric shapes first. Look for the rectangular nave and the thinner, taller tower. Don’t press too hard with your pencil; you want the watercolor to shine, not the graphite. -
Add Architectural Details:
Refine your sketch by adding the pitched roof lines and the spire. Mark out the placement of the arched windows on the tower and the side of the building, keeping the lines loose rather than ruler-straight. -
Map the Foreground:
Lightly sketch a winding path leading from the bottom right corner toward the church entrance. Indicate a few jagged lines in the foreground to represent tall grasses and wildflowers.
Keep it Fresh
Don’t overwork the washes. Watercolor looks best when laid down and left alone. If you see a ‘mistake’ or bloom, try leaving it—it often adds character to the stone texture.
Step 2: Painting the Sky and Background
-
Prepare the Sky:
Wet the entire sky area with clean water, being careful to paint around the church roof and spire. If you used masking fluid to save white cloud shapes, apply it now and let it dry completely before wetting the paper. -
Wash in the Blue:
Load a large round brush with diluted Ultramarine Blue. Drop the color into the wet paper, allowing it to bloom softy. Leave patches of white paper unpainted to create fluffy cumulus clouds. -
Add Cloud Shadows:
While the blue is still damp, mix a tiny bit of Burnt Sienna or Alizarin Crimson into your blue to create a soft grey-purple. Dab this into the bottom edges of your clouds to give them volume and weight. -
Background Horizon:
Paint a very faint, cool purple-blue line along the distant horizon to suggest faraway hills or trees. Soften the top edge with a damp brush so it recedes into the distance.
Cloud Control
If your clouds look too hard-edged, use a clean, slightly damp brush to gently lift pigment and soften the boundaries while the sky wash is still workable.
Step 3: The Church Structure
-
Base Tone for Walls:
Mix a very watery wash of Yellow Ochre with a touch of blue for a warm, off-white stone color. Paint the sunlit sides of the church walls, keeping the wash uneven to suggest texture. -
Shadow Sides:
Once the base layer is dry, mix a cooler, darker grey using Ultramarine and Burnt Sienna. Paint the shadowed side of the tower and the building to create three-dimensional form. -
Roof Accents:
Use Cadmium Red mixed with a little Burnt Sienna for the roof tiles. Don’t paint a flat block of red; leave tiny flecks of white paper or vary the intensity to suggest individual tiles catching the light. -
Window Details:
Using a smaller brush (size 4), fill in the arched windows with a dark grey-blue. Don’t make them solid black; let the color variation suggest glass reflections.
Step 4: Foreground and Finishing Touches
-
Underpainting the Grass:
Lay down a wash of Yellow Ochre and Sap Green for the grassy field. Keep it lighter near the path and darker at the bottom edges. -
Adding Texture:
While the grass wash is still slightly damp, flick upward strokes of darker green and burnt sienna to create the illusion of tall blades of grass. -
Defining the Path:
Wash a pale, warm brown or sandy color along the path area. While wet, drop in hints of blue or purple in the low spots to suggest puddles or shadows. -
Wildflower details:
I like to splatter small drops of yellow and red paint onto the dry foreground grass to create the impression of a field of wildflowers without painting individual petals. -
Final Contrast:
Use your smallest brush or rigger to add final sharp details: the cross on the spire, the edges of the roof, and a few distinct grass blades in the immediate foreground.
Step back and admire your airy, peaceful landscape painting as it captures the quiet dignity of the architecture

PENCIL GUIDE
Understanding Pencil Grades from H to B
From first sketch to finished drawing — learn pencil grades, line control, and shading techniques.
Explore the Full Guide
Abstract Color-Block Church Shapes
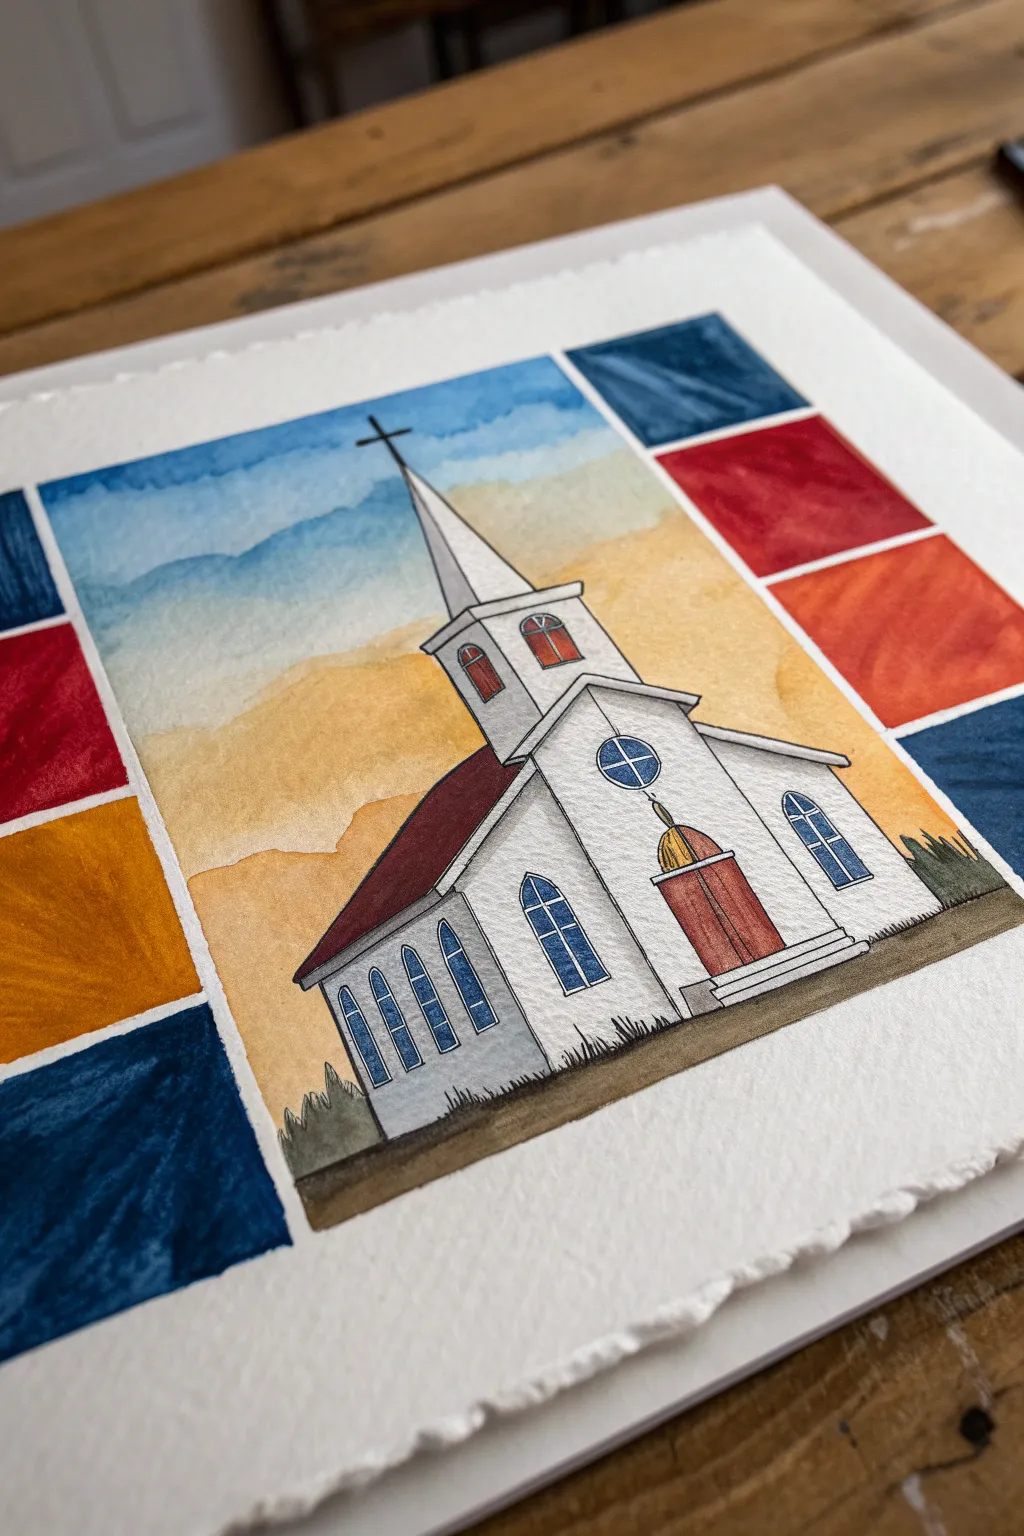
This unique watercolor project combines a traditional landscape subject with a contemporary geometric layout. By framing a classic white church with bold, abstract blocks of color, you create a striking contrast between old-world architecture and modern design.
Step-by-Step Guide
Materials
- Cold press watercolor paper (with deckled edge preferred)
- Masking tape or painter’s tape
- Pencil (HB) and eraser
- Fine-liner pen (black, waterproof, approx. 0.3mm)
- Watercolor paints (Cobalt Blue, Indigo, Crimson Red, Burnt Orange, Yellow Ochre, Burnt Umber)
- Round watercolor brushes (size 4 for details, size 8 or 10 for washes)
- Ruler
- Clean water and paper towels
Step 1: Planning the Layout
-
Establish the grid:
Begin by lightly measuring a central rectangle for the main scene using your ruler. Leave roughly a 1-inch border around this central space. -
Draw the color blocks:
Around the central rectangle, divide the border area into smaller square or rectangular sections. These will become your abstract color blocks later. -
Sketch the church outline:
Inside the central rectangle, lightly sketch the church. Start with the main body as a simple rectangle with a pitched roof, then add the nave extending to the side. -
Add architectural details:
Draw the steeple tower, adding a small triangular roof on top. Sketch in the arched windows, the circular window above the door, and the double doors themselves. -
Mask the borders:
Carefully apply masking tape along the inner edges of your drawn rectangle to separate the central scene from the outer blocks. This ensures crisp, clean lines.
Bleeding Lines?
If paint bleeds under the tape, wait for it to dry completely. Then, gently use a damp, stiff brush (an “eradicator” brush) to lift the excess color away from the white paper.
Step 2: Painting the Central Scene
-
Paint the sky gradient:
Wet the sky area with clean water. Apply a wash of diluted Cobalt Blue at the top, blending it down into Yellow Ochre near the horizon line to simulate a sunset. -
Create distinct clouds:
While the sky wash is still damp but not soaking, drop in horizontal streaks of slightly stronger blue to create soft cloud layers. -
Paint the roof:
Once the sky is dry, mix a deep Crimson Red with a touch of Burnt Umber. Carefully fill in the roof sections, keeping the color solid and even. -
Detail the windows:
Using a small size 4 brush, paint the interior of the windows with a clear, bright blue to reflect the sky. Leave tiny white slivers for the window panes. -
Fill the doors:
Paint the double doors with a warm reddish-brown mix. I like to let this dry briefly and add a second layer to the bottom half for shadow. -
Shadow the white walls:
The church walls should remain mostly white. Mix a very watery grey-blue and apply it to the left side of the building and under the eaves to create form and shadow. -
Ground the building:
Paint the ground using a mix of Green and Burnt Umber. Use short vertical strokes to suggest grass texture along the foundation.
Add Metallic Accents
For a special touch, paint the cross on the steeple or the circular window trim with gold gouache or metallic watercolor to make it catch the light.
Step 3: The Geometric Border
-
Remove the masking tape:
Ensure the center painting is completely bone-dry. Then, slowly peel away the tape revealing your crisp rectangle edge. -
Paint the blue blocks:
Select a few random blocks in your border grid. Fill them with deep Indigo or dark blue, using fully saturated paint for a bold look. -
Add warm blocks:
Choose other blocks to fill with Crimson Red and burnt orange. Allow the colors to be slightly uneven or textured to give them a hand-painted watercolor feel. -
Balance with yellow:
Fill the remaining blocks with Mustard or Yellow Ochre. Try to distribute the colors so no two identical colors are touching.
Step 4: Refining with Ink
-
Outline the architecture:
Once all paint is perfectly dry, take your waterproof fine-liner. Draw over your pencil lines on the church, keeping the hand steady. -
Add window details:
Draw the grid lines (mullions) inside the windows and the circular detail above the door. -
Texture the ground:
Use the pen to scribble loose grass textures along the base of the church and into the painted ground area. -
Define the color blocks (optional):
You can leave the color blocks soft-edged, or frame them with white space (negative space) between the colors as shown in the reference.
Remove any remaining pencil marks gently, and you have a stunning piece that bridges the gap between traditional illustration and modern art


Have a question or want to share your own experience? I'd love to hear from you in the comments below!