Bugs are basically tiny, living design prompts—bold shapes, shiny shells, wild legs, and patterns you can’t make up. These bug painting ideas will take you from classic, crowd-pleasing insects to playful, experimental approaches you can try today.
Bumblebee With Bold Stripes
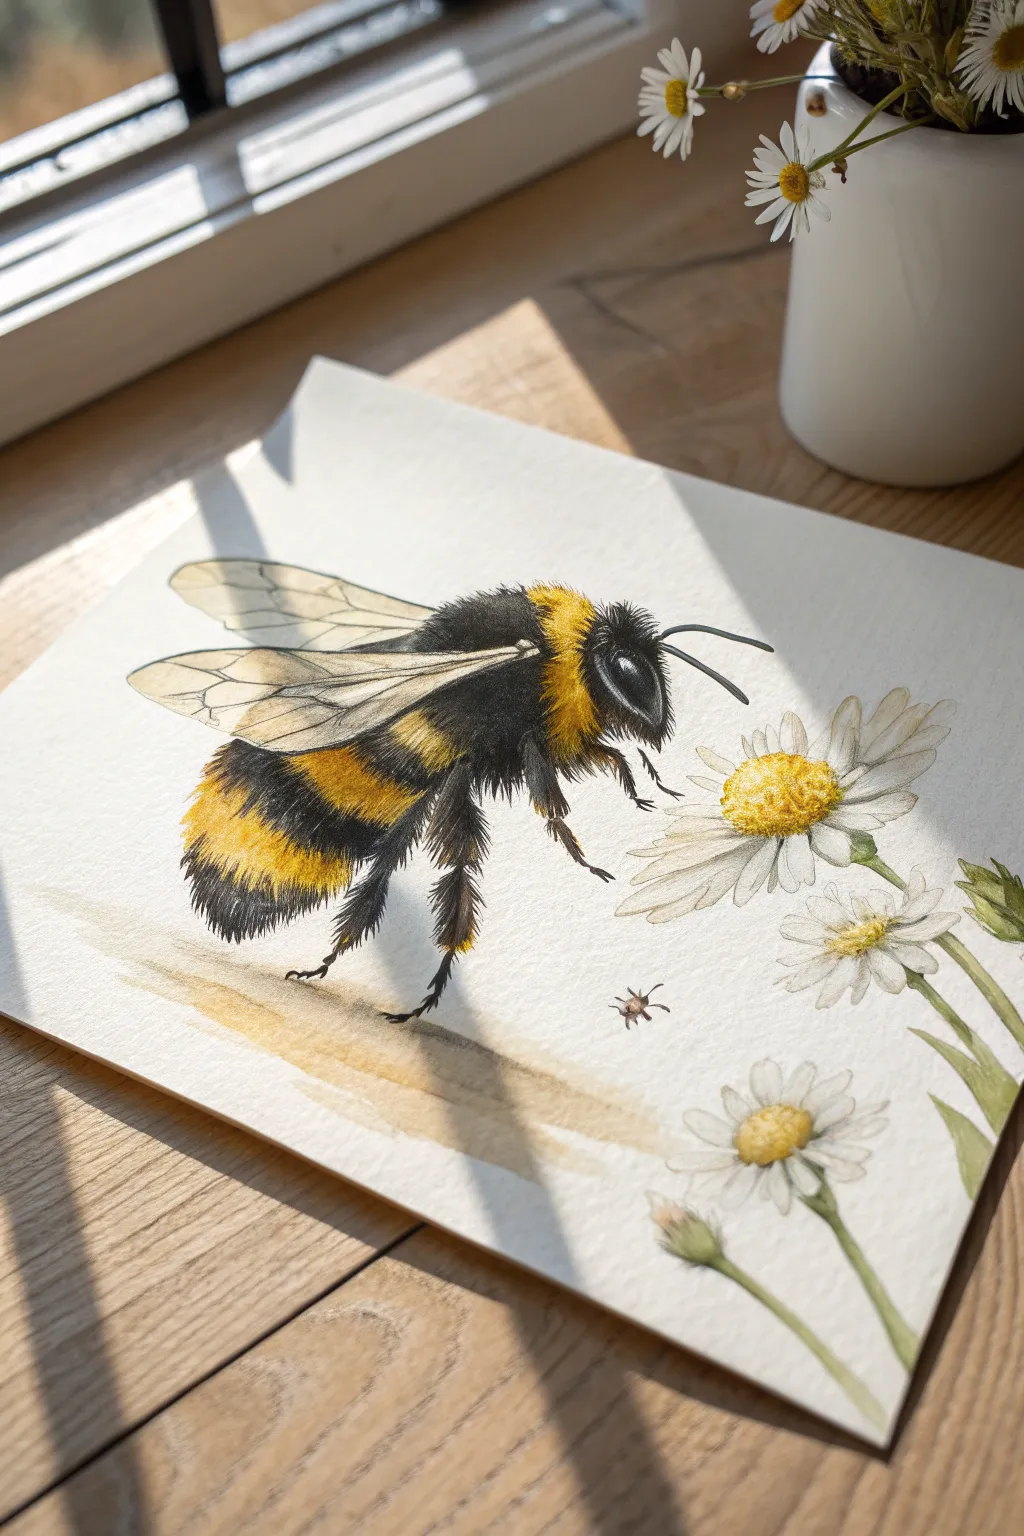
Capture the buzzing energy of a summer garden with this beautifully detailed watercolor painting. The combination of wet-on-wet techniques for the fuzzy texture and precise dry-brush strokes for the legs creates a stunningly realistic bumblebee.
Step-by-Step
Materials
- Cold-press watercolor paper (300 gsm)
- Watercolor paints (Cadmium Yellow, Lamp Black, Burnt Umber, Payne’s Grey, Sap Green)
- Round brushes (sizes 2, 4, and 6)
- Fine liner brush (size 0 or 00)
- Pencil (HB) and kneaded eraser
- Clean water and paper towels
- Masking fluid (optional)
Step 1: Sketching the Composition
-
Outline the bee body:
Begin by lightly sketching the main sections of the bumblebee’s body: a rounded head, a fuzzy thorax, and a segmented abdomen. Keep the shape plump and oval-like. -
Add wings and legs:
Draw the wings extending from the upper back, ensuring they look delicate and slightly overlapping. Sketch the jointed legs hanging down, positioning the back legs further down the abdomen. -
Sketch the flowers:
To the right of the bee, pencil in a few daisies at varying angles. Focus on the central disk florets and the radiating petals, intersecting some petals with the bee’s face. -
Lighten the lines:
Use your kneaded eraser to roll over the sketch, lifting most of the graphite so only faint guidelines remain, preventing dirty pencil marks from showing through the yellow paint.
Step 2: Painting the Bee
-
First yellow wash:
Load a size 4 brush with diluted Cadmium Yellow. Paint the yellow bands on the bee’s thorax and abdomen, using small stabbing motions at the edges to suggest fur texture. -
Darkening the yellow:
While the first layer is still slightly damp, drop in a mix of Yellow and a tiny touch of Burnt Umber near the bottom of each yellow stripe to create volume and shadow. -
Black sections base:
Mix Lamp Black with a touch of Payne’s Grey. Carefully paint the head and the black stripes on the body, leaving a tiny gap between the black and yellow initially to prevent bleeding. -
Creating the fuzzy texture:
Once the yellow is dry, use a size 2 brush with the black mixture to flick tiny hairs over the edges of the yellow stripes. This integrates the colors and creates that signature fuzzy bumblebee look. -
Detailing the legs:
Switch to your fine liner brush. Paint the legs with a dark, opaque black mixture. Add tiny, hair-like strokes along the legs to give them texture, rather than making them smooth lines. -
Painting the eye:
Paint the large compound eye using intense black. Leave a small sliver of white paper unpainted (or use white gouache later) for the specular highlight, which brings the bee to life.
Furry Edges
Don’t paint smooth outlines for the bee’s body. Always use short, flicking brushstrokes at the edges of your color blocks to mimic the texture of fur.
Step 3: Wings and Surroundings
-
Translucent wing wash:
Dilute a tiny amount of Payne’s Grey and Burnt Umber with lots of water. Paint the wings, keeping the wash very pale and transparent. -
Wing veins:
Using the size 0 brush and a slightly darker grey mix, paint delicate veins running through the wings. Keep your hand loose to avoid stiff lines. -
Painting the daisy centers:
Paint the centers of the daisies with Cadmium Yellow. While wet, tap in some Burnt Umber on the shadowed side to give the center a dome-like shape. -
Defining flower petals:
Use a very watery grey wash to outline the white petals and add subtle shadows where the petals overlap. I like to keep this minimal to maintain the brilliant white of the paper. -
Stems and greenery:
Mix Sap Green with a little yellow or brown for a natural tone. Paint the stems and the green sepals at the base of the flower buds with a size 4 brush. -
Ground shadow:
Mix a diluted wash of Burnt Umber and Yellow Ochre. Paint a broad, loose shadow beneath the bee to ground the subject, letting the edges fade out softly. -
Final touches:
Review the painting for contrast. Deepen the darkest blacks on the bee’s underside if needed, and add the tiny antennae with a single confident stroke.
Add Some Life
Paint a tiny, simple beetle in the background shadow using burnt sienna to add scale and a bit of narrative to your garden scene.
Step back and admire the soft textures and vibrant stripes of your garden visitor


Caterpillar on a Curving Branch
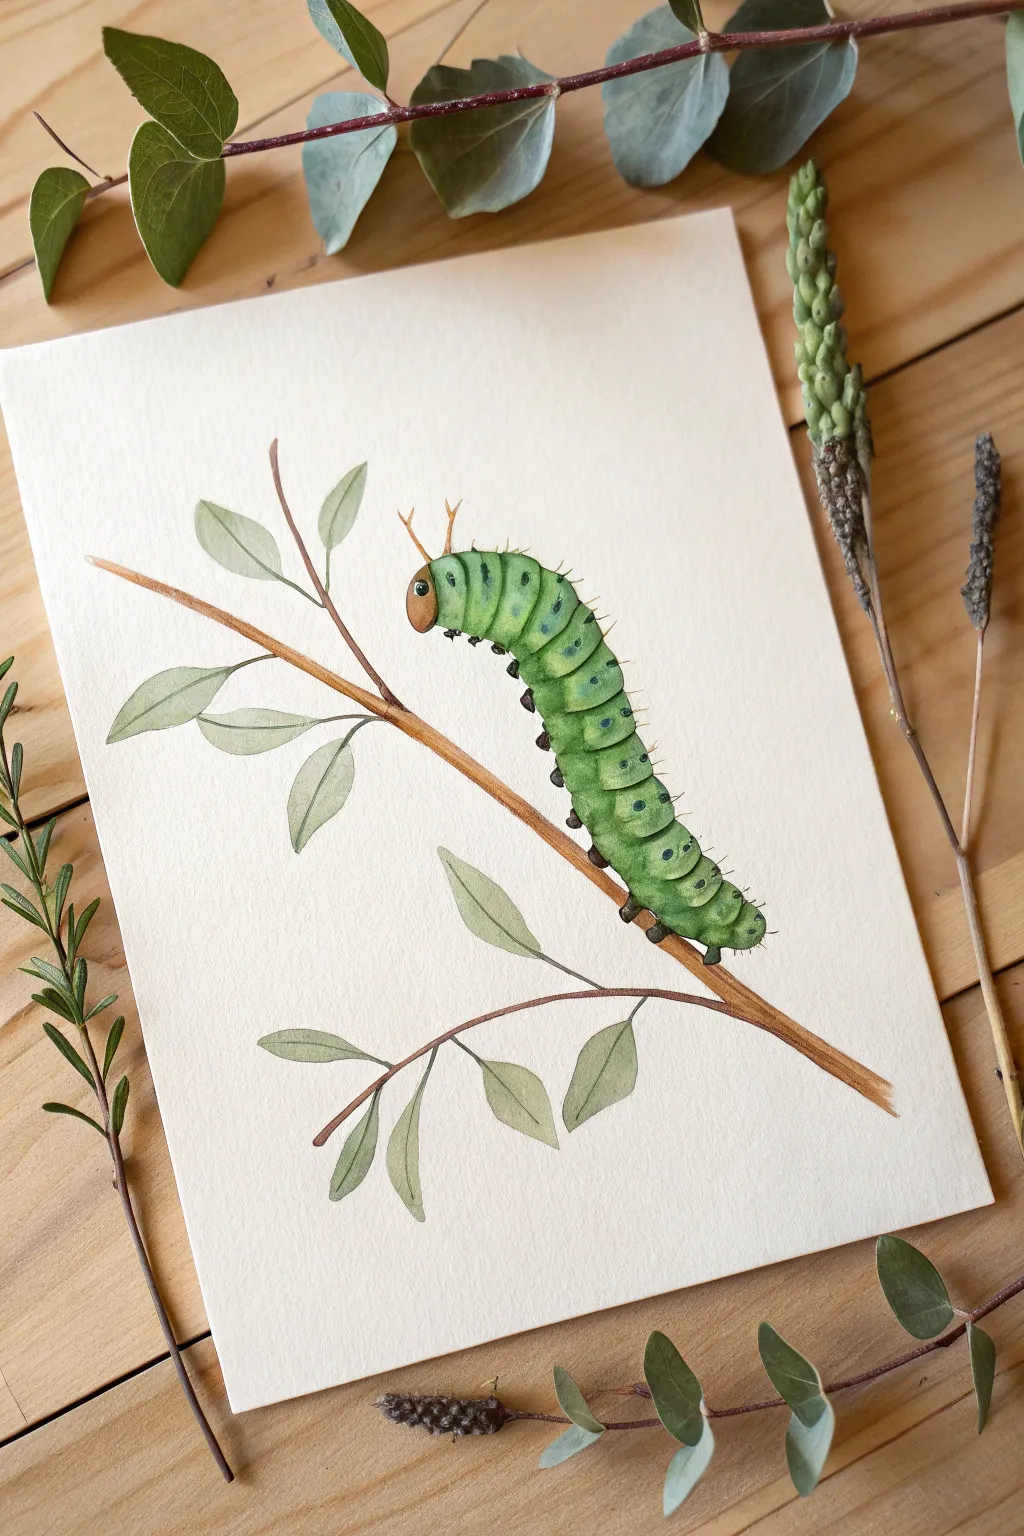
Capture the whimsical charm of a garden visitor with this detailed watercolor study. You will learn to layer translucent greens to build up the segmented body of a caterpillar as it inches along a delicate branch.
How-To Guide
Materials
- Cold press watercolor paper (300 gsm)
- HB pencil and kneaded eraser
- Watercolor paints (Sap Green, Hooker’s Green, Burnt Sienna, Yellow Ochre, Lamp Black, Indigo)
- Round brushes (sizes 2, 4, and 00 for details)
- Mixing palette
- Two jars of water
- Paper towels
Step 1: Sketching the Composition
-
Map the main branch:
Start by lightly drawing the main diagonal branch stretching from the bottom right towards the middle left. Keep the line slightly uneven to mimic natural wood texture. -
Add secondary twigs:
Branch off a few smaller twigs from the main stem, curving them gently upwards and outwards to fill the negative space on the left side. -
Outline the leaves:
Sketch small, oval-shaped leaves attached to the twigs. Keep them simple and spaced out to avoid cluttering the scene. -
Shape the caterpillar:
Draw the caterpillar resting on top of the main branch. Create a series of rounded, segmented humps that decrease slightly in size towards the tail. -
Add creature details:
Lightly sketch the small round head at the front, the tiny legs gripping the branch, and two small antennae. Use your kneaded eraser to lighten the pencil lines until they are barely visible.
Step 2: Painting the Greenery
-
Base layer for the caterpillar:
Mix a light wash of Sap Green and Yellow Ochre. Fill in the caterpillar’s body segments, leaving tiny gaps between them to define the shape. Let this dry completely. -
Shadows and volume:
Using a slightly darker mix of Hooker’s Green, paint the bottom half of each body segment. Soften the upper edge of this paint with a damp clean brush to create a smooth gradient, making the body look round. -
Leaf base coat:
While the caterpillar dries, use a very watery mix of Sap Green with a touch of Burnt Sienna to paint the leaves. Keep the color sheer and delicate. -
Branch structure:
Mix Burnt Sienna with a tiny dot of Indigo to create a warm brown. Paint the branches with a Size 4 brush, varying the pressure to make the lines taper naturally at the ends.
Natural gradients
To make the caterpillar look plump and 3D, lift a little paint from the top center of each segment with a thirsty brush while still wet to create a highlight.
Step 3: Adding Depth and Detail
-
Deepening the caterpillar green:
Glaze a third layer of pure Hooker’s Green over the middle and lower sections of the caterpillar segments to intensify the color. -
Painting the head:
Paint the head using a mix of Yellow Ochre and Burnt Sienna. Once dry, add a tiny dot of black for the eye, leaving a speck of white paper for the highlight. -
Adding the feet:
Switch to your Size 00 brush. Mix a dark grey using Indigo and Burnt Sienna to paint the tiny legs (prolegs) gripping the branch. -
Defining the segments:
With the same dark mixture, carefully paint the subtle creases between the green body segments to separate them clearly. -
Leaf veins:
Using a slightly darker, grayish-green mix, paint a thin central vein on each leaf. Keep these lines extremely faint and delicate.
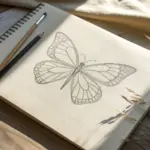
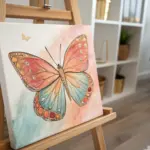
Try a butterfly pairing
Paint the adult butterfly form of this caterpillar on a separate sheet of paper or hovering above it to show the full lifecycle.
Step 4: Final Touches
-
Patterning the body:
I prefer to use the very tip of the 00 brush here. Dot small markings in dark green or indigo along the side of the caterpillar’s body to replicate its natural patterns. -
Adding texture hairs:
Mix a very faint, watery brown. Use quick, short strokes to add tiny ‘hairs’ or bristles sticking up from the top of the caterpillar’s back. -
Antennae details:
Paint the two antennae in a light brownish-orange tone, ensuring they curve gently. -
Branch shading:
Add a darker brown shadow along the bottom edge of the branch to give it cylindrical form. -
Grounding shadow:
Finally, paint a very thin, dark shadow right where the caterpillar’s legs meet the wood to weight the figure down so it doesn’t look like it’s floating.
Allow your painting to dry flat completely before framing or displaying your garden study


Ant Trail Across the Page
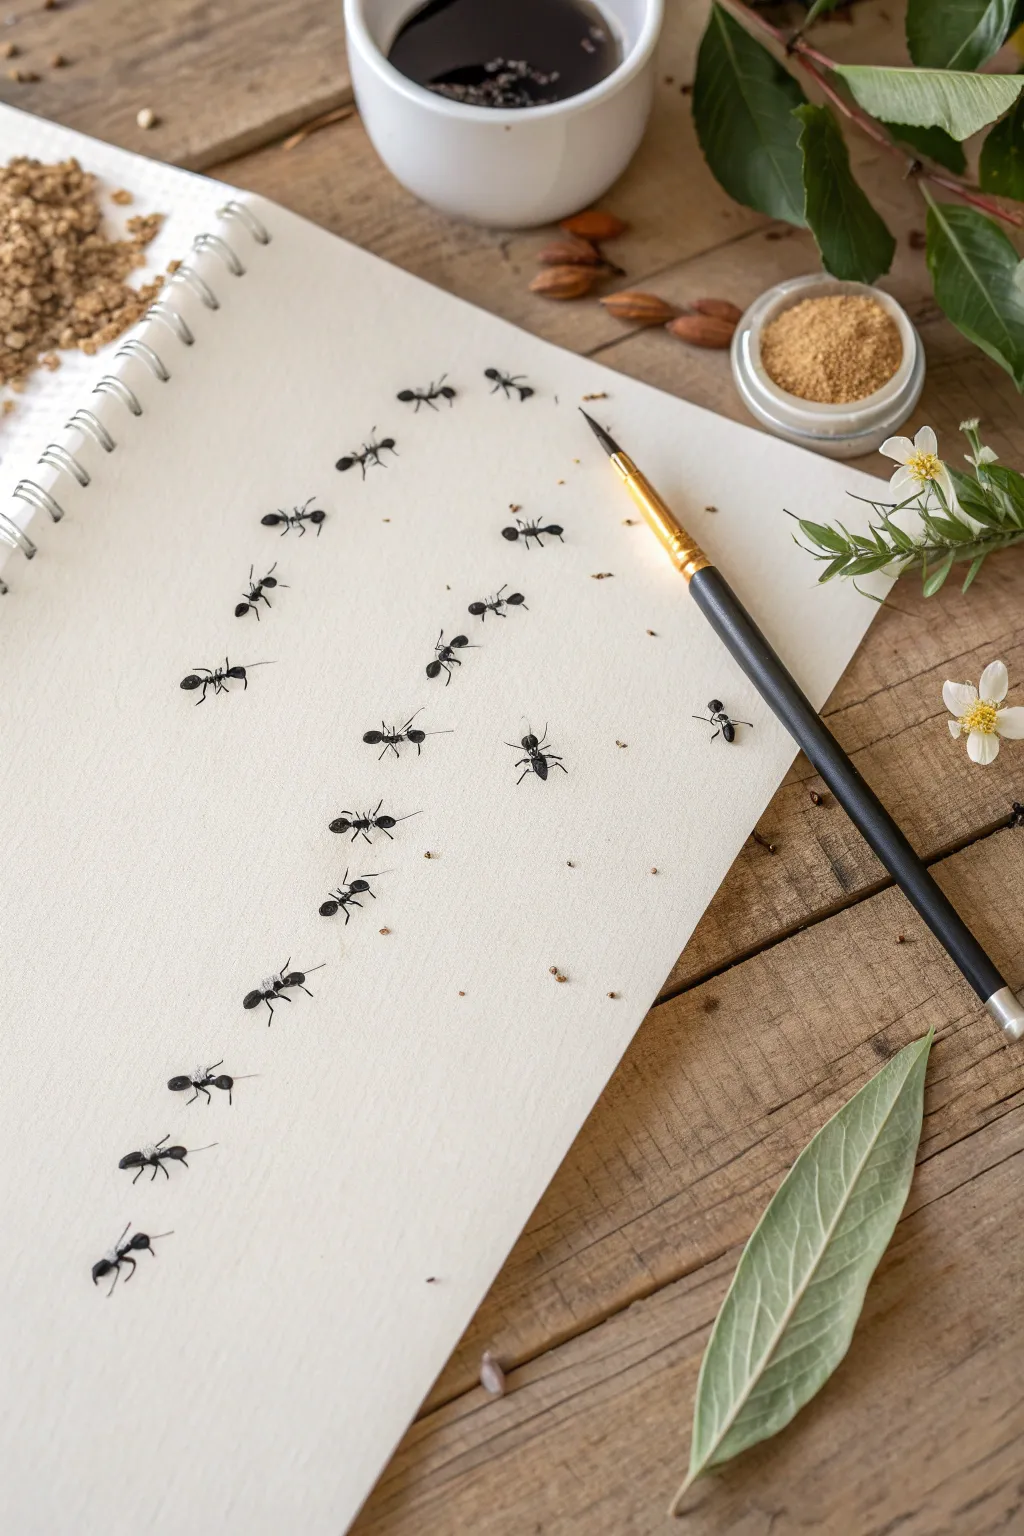
Create a whimsical and surprisingly realistic trail of ants marching across your sketchbook page. This simple yet effective painting exercise focuses on repetition and tiny details to bring a dynamic sense of movement to your paper.
Step-by-Step Guide
Materials
- Spiral-bound sketchbook featuring heavyweight or mixed-media paper
- Black acrylic paint or black gouache
- Fine liner brush (size 00 or 000)
- Small palette for paint mixing
- Water cup and paper towel
- Optional: White gel pen for highlights
- Reference photo of an ant anatomy
Step 1: Planning the Path
-
Visualize the route:
Before putting brush to paper, decide on the flow of your ant trail. For a natural look, avoid straight lines; instead, imagine a gentle S-curve or a meandering path that starts at the bottom left and winds towards the top right. -
Mark light guides:
If you’re worried about spacing, use a hard pencil to make incredibly faint dots where each ant body will sit. Spacing them irregularly adds realism, as real ants often bunch up or spread out.
Step 2: Painting the Bodies
-
Load your brush:
Dip your fine liner brush into the black paint. You want the consistency to be fluid like ink but opaque. If the acrylic is too thick, add a tiny drop of water to improve flow. -
Paint the first segment:
Start with the abdomen (the rear part) of the ant. Press the brush down gently and lift to create a teardrop or oval shape. This should be the largest of the three body segments. -
Add the thorax:
Directly in front of the abdomen, paint a slightly smaller oval for the thorax (the middle section). Leave a microscopic gap or just barely touch the previous segment to define the anatomy. -
Create the head:
Paint a small dot or tiny oval for the head at the front. Ensure the orientation follows your imaginary path so the ant looks like it’s walking forward. -
Repeat the process:
Continue painting these three-segment bodies along your entire trail. Vary the angles slightly—have some turning left or right as they navigate the ‘terrain’ of the paper. -
Check for consistency:
Step back and look at your line. The bodies should be relatively uniform in size, but slight variations are fine and look organic.
Leg Thickness Trouble?
If your painted legs look too thick, switch to a black 0.05 fineliner pen instead of a brush. It gives precise control for those hair-thin limbs.
Step 3: Adding the Details
-
Switch to precision mode:
Clean your brush and reload with just the very tip. For the legs and antennae, you need the sharpest point possible. I find resting my wrist on the table helps steady a shaky hand. -
Paint the middle legs:
Draw the middle pair of legs extending from the thorax. These usually angle slightly backward or straight out. -
Add the hind legs:
Paint the back legs stretching out from the rear of the thorax (not the abdomen), angling backward to show propulsion. -
Add the front legs:
Draw the front legs reaching forward from the thorax. They act almost like sensors as the ant moves. -
Joint the legs:
Instead of straight lines, give the legs a little ‘elbow’ bend. This angular look is key to insect anatomy. -
Draw the antennae:
From the head, pull two delicate lines curving forward. These are how the ants ‘smell’ their way across the page. Make them wispy and light. -
Refine the shapes:
Go back through your line. If any legs look too thick, you can carefully shape them with a bit of white paint later, or just leave them as bold style choices.
Sweeten the Deal
Paint a small ‘crumb’ or spill of honey (using amber watercolor) near the ants to give them a destination and a reason for their determined march.
Step 4: Finishing Touches
-
Add subtle highlights:
Once the black paint is 100% dry, take a white gel pen or a tiny dot of white paint. Add a microscopic speck of reflection on the abdomen and head of each ant to make them look shiny and carapace-like. -
Create interaction:
To make the scene tell a story, paint one or two ants breaking away from the line, or perhaps two ants facing each other as if communicating. -
Clean up stray marks:
If you dripped any paint or made a leg too long, wait for it to dry and then touch it up with white gouache or acrylic that matches the paper tone.
This charming monochromatic study proves that even the smallest subjects can create a captivating composition when viewed together


Praying Mantis Portrait Pose
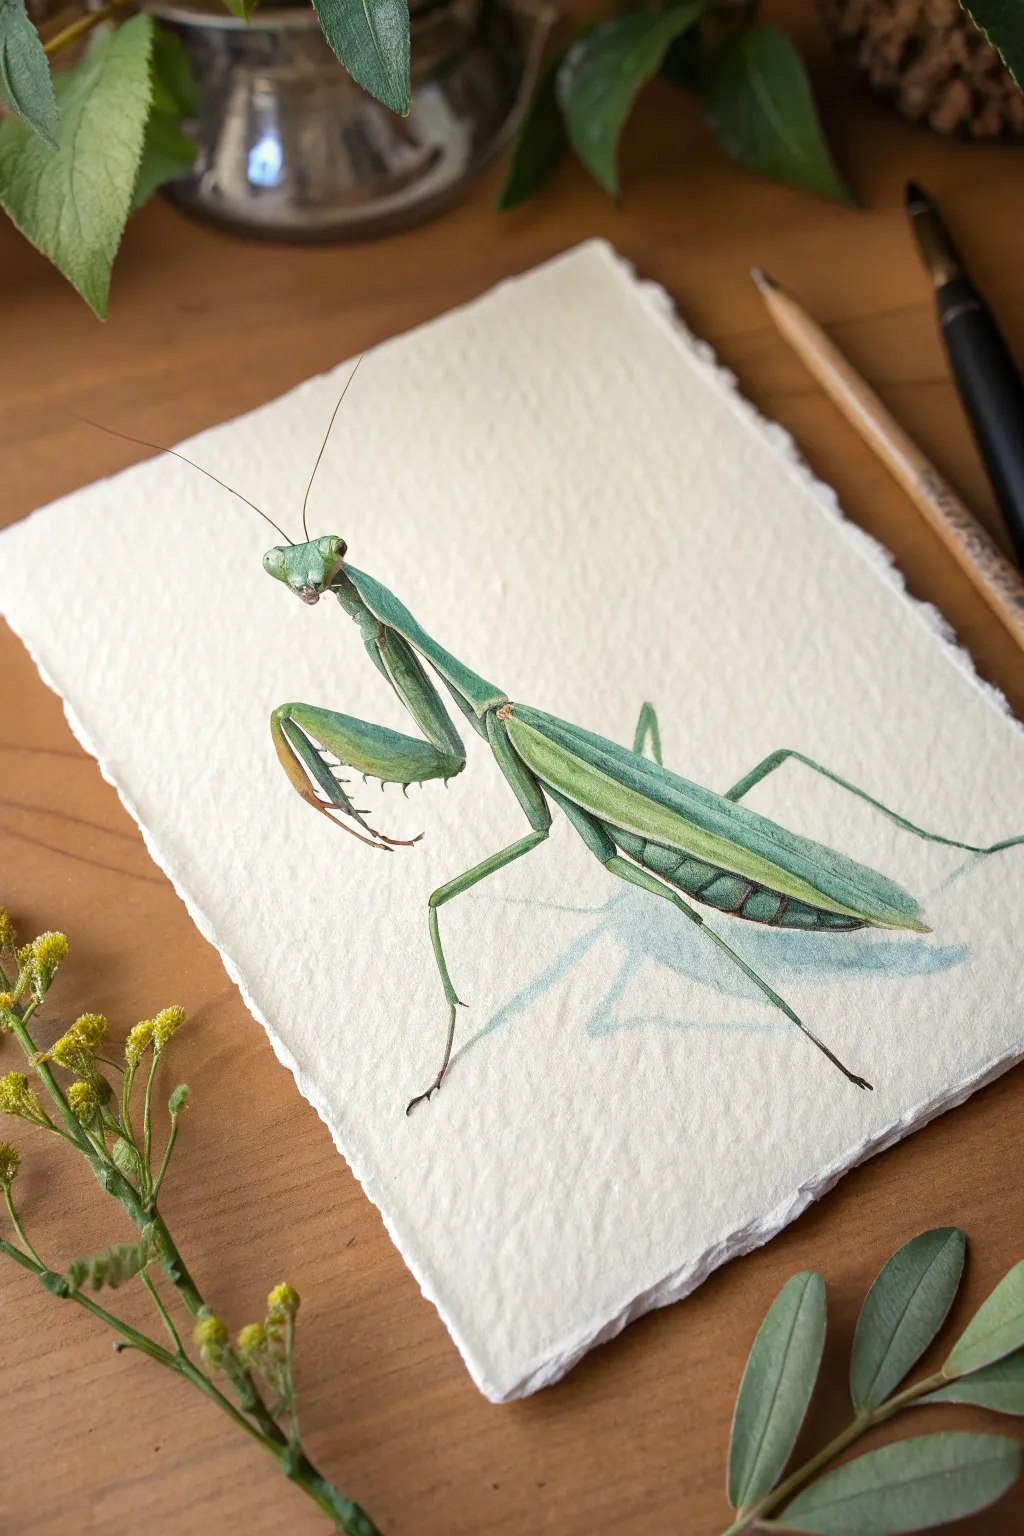
Capture the stillness and intricate structure of a praying mantis with this detailed watercolor study. By carefully layering translucent greens and adding precise shadows, you will bring this fascinating garden predator to life on textured paper as if it’s poised to strike.
Step-by-Step
Materials
- Heavyweight cold-press watercolor paper (300gsm or rough texture)
- Watercolor paints (Sap Green, Hooker’s Green, Burnt Umber, Yellow Ochre, Lamp Black, Prussian Blue)
- White Gouache or opaque white watercolor
- Pencil (HB or 2H for light sketching)
- Kneaded eraser
- Round brushes: Size 4 (for washes), Size 0 or 00 (for details)
- Mixing palette
- Clean water jars and paper towels
Step 1: Sketching the Structure
-
Map the body segments:
Start with a very light pencil sketch on your textured paper. Draw a small, inverted triangle for the head, a long, slender ‘neck’ (prothorax) extending backward, and a thicker oval shape for the folded wing abdomen. Keep the lines faint so they don’t show through the paint later. -
Add the raptorial legs:
Sketch the iconic front legs. Draw the upper ‘femur’ section folded back against the body and the lower ‘tibia’ snapping forward. The position should look like the mantis is praying or cleaning itself; visualize the joints clearly as hinges. -
Complete the limbs and antennae:
Draw the two long, thin middle walking legs and one visible hind leg extending backward for stability. Finish the sketch by adding two fine, sweeping lines for the antennae sprouting from the top of the head. -
Refine the outline:
Go over your sketch to ensure the proportions feel right. Use a kneaded eraser to gently lift up most of the graphite, leaving only a ghost image to guide your painting.
Muddy Greens?
If your greens look dull, stop adding black to darken them. Instead, mix red or purple into your green. It creates a rich, natural shadow tone without killing the vibrancy.
Step 2: Base Layers and Washes
-
Mix your base green:
Create a watery mix of Sap Green with a touch of Yellow Ochre. You want a light, fresh spring green for the initial wash. -
Paint the first wash:
Using your Size 4 brush, fill in the entire body shape with this light green mix. Don’t worry about shadows yet; just establish the silhouette. Let the paint soak into the textured paper. -
Add a cool shadow tone:
While the base layer is barely damp (not soaking), drop a slightly darker mix of Hooker’s Green and a tiny bit of blue into the underside of the abdomen and the lower edge of the neck. This creates a soft, rounded form. -
Define the wing separation:
Once the first layer is dry, mix a stronger green. Paint a distinct stripe along the side of the wings (the tegmina). This separates the rigid top wing from the segmented abdomen underneath.
Step 3: Building Detail and Form
-
Sculpt the head:
Switch to your smaller brush. Use a mix of green and a little burnt umber to paint the triangular face. Leave tiny slivers of the lighter base color visible around the eyes to suggest highlights. -
Detail the front legs:
Paint the inner sections of the forelegs. I like to add a subtle gradient here, moving from green at the shoulder to a slight brownish-orange at the tips of the claws using a thin wash of Burnt Umber. -
Paint the walking legs:
Using the Size 0 brush and a medium green, carefully trace the thin walking legs. Ensure the paint is consistent so these delicate lines don’t look broken. -
Enhance the abdomen segments:
Mix a dark, shadowy green (Hooker’s Green + small touch of Black or Prussian Blue). Paint curved, rhythmic lines along the lower abdomen to indicate the segmented plating. -
Add the wing vein texture:
With a very fine brush and diluted light green paint, draw hair-thin lines running parallel down the length of the folded wings. This texture is crucial for realism.
Level Up: Deckled Edge
For the authentic artifact look shown here, tear your paper against a ruler instead of cutting it. This creates a soft ‘deckled’ edge that complements the organic subject.
Step 4: Highlights and Shadows
-
Deepen the contact shadows:
Mix a concentrated dark green-black. Paint very thin, sharp shadows where body parts overlap—specifically where the folded front legs meet the chest and under the edge of the wing. -
Add the spikes:
Using your finest brush tip and a dark brown mix, tackle the serrated ‘spikes’ on the inner forelegs. Just tiny dots or dashes are enough to suggest the texture without overworking it. -
Paint the antennae:
With a confident hand, paint the antennae using a very thin, watery brown mix. Try to do this in single, smooth strokes. -
Create the cast shadow:
Mix a very watery, cool blue-grey (Water + Prussian Blue + tiny bit of Black). Paint a loose, purely decorative shadow underneath the mantis on the paper to ground the subject. Soften the edges with clean water so it fades out. -
Final highlights:
Use white gouache or undiluted white watercolor for the final touches. Add a tiny dot to each eye for a specular reflection and a few faint white lines along the top ridge of the back to simulate light hitting the exoskeleton.
Allow the painting to dry completely before carefully erasing any remaining pencil marks to reveal your crisp insect portrait
BRUSH GUIDE
The Right Brush for Every Stroke
From clean lines to bold texture — master brush choice, stroke control, and essential techniques.
Explore the Full Guide
Moth in a Night Garden
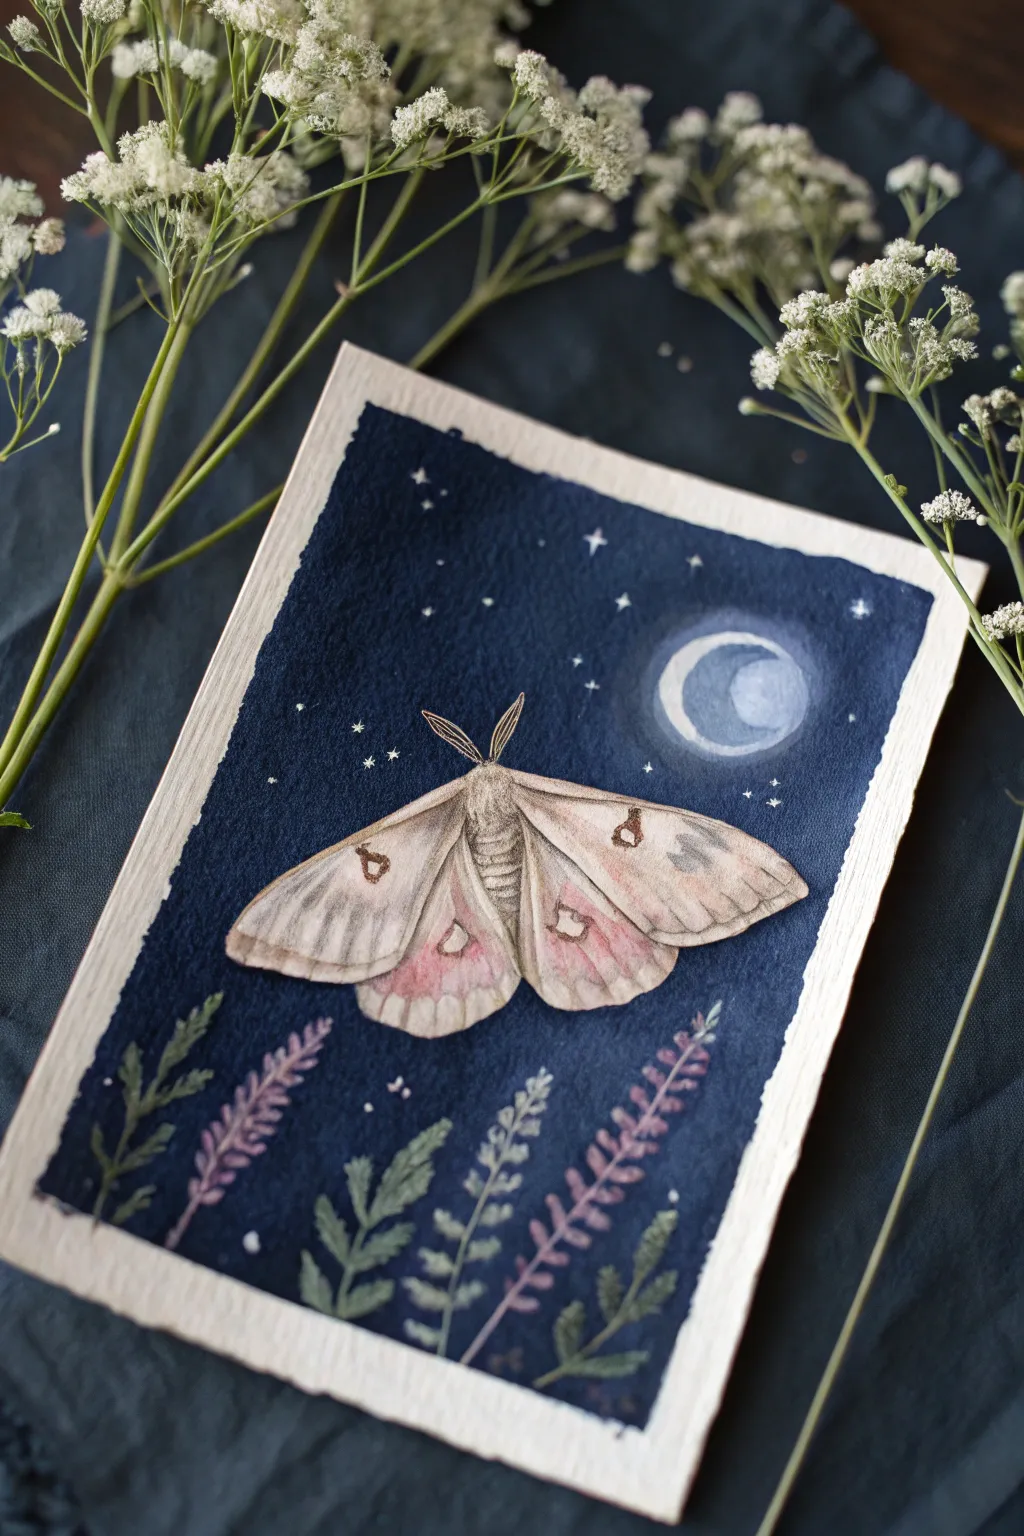
Capture the mystic beauty of a moth under moonlight with this enchanting watercolor and gouache project. You will learn to create a velvety night sky backdrop and overlay it with delicate botanical details and a fuzzy, intricate insect subject.
Step-by-Step Tutorial
Materials
- Cold press watercolor paper (with deckled edges preferred)
- Watercolor paints (Indigo, Payne’s Grey, Sap Green, Burnt Sienna, Quinacridone Rose)
- White opacity gouache or white gel pen
- Pencil (HB or lighter) and eraser
- Fine liner brush (size 0 or 00)
- Medium round brush (size 6 or 8)
- Rough texture brush (optional for moth fuzz)
- Masking fluid (optional)
- Palette and water jars
Step 1: Setting the Scene
-
Sketch the layout:
Begin by lightly sketching the outline of a large moth in the center of your paper. Add a crescent moon in the upper right. Don’t press too hard, as graphite can smear into light watercolor washes later. Mark the horizon line where the plants will grow. -
Observe the borders:
To achieve the look in the reference, leave a generous uneven border of white paper around the edges. You can define this boundary with masking tape for a crisp line, or paint freehand carefully to maintain that organic, deckled-edge feel. -
Masking (Optional):
If you are worried about painting around the moth, apply a thin layer of masking fluid over the moth shape and the crescent moon. Let it dry completely before touching it with paint.
Step 2: Painting the Midnight Sky
-
Mix the night blue:
Create a deep, rich navy color. I like to mix Indigo with a touch of Payne’s Grey for depth. You want this color to be highly saturated, so use minimal water. -
Apply the background wash:
Using your medium round brush, fill in the background area around your moth and moon sketches. Work fairly quickly to avoid harsh drying lines. The goal is a solid, velvety dark block of color. -
Lift the moon glow:
While the background paint is still damp but not soaking wet, use a clean, slightly damp brush to gently lift pigment around the crescent moon shape, creating a soft halo effect. -
Dry thoroughly:
This is crucial: allow the background to dry completely. If you applied masking fluid, gently rub it off now to reveal the white paper underneath.
Muddy Background?
If your night sky looks streaky, let the first layer dry 100%, then apply a second wash of the same dark blue. Don’t overwork wet areas or the paper will pill.
Step 3: Creating the Moth
-
Base layer for wings:
Mix a very watery, pale beige using Burnt Sienna heavily diluted. Wash this over the upper wings. As you move to the lower wings, drop in faint touches of diluted Quinacridone Rose while the paper is wet to create a soft pink gradient. -
Define the body:
Paint the moth’s body with a slightly darker mix of brown and grey. Use small, vertical strokes to mimic a fuzzy texture rather than a solid line. -
Add wing details:
Once the moth base is dry, switch to your fine liner brush. Mix a sepia tone and carefully draw the veins in the wings. Keep your hand loose so the lines look organic. -
The eye spots:
Paint the distinctive ‘eye’ markings on the wings. Use a darker brown for the outline and fill the center with a translucent wash of the wing color. -
Antennae and legs:
Using the very tip of your fine brush and dark brown paint, add the feathery antennae extending from the head.
Opacity Secret
Painting light colors over dark backgrounds is hard with just watercolor. Mix a dot of white gouache into your greens and pinks to make the plants stand out.
Step 4: Botanicals and Celestial Details
-
Painting the ferns:
Mix a semi-opaque green color. While the dark background is dry, layer fern leaves rising from the bottom. If your watercolors aren’t showing up against the dark blue, mix a little white gouache into your green to increase opacity. -
Adding lavender sprigs:
Mix a muted purple-pink using gouache or opaque watercolor. Paint small, teardrop shapes stacked on stems among the ferns to resemble lavender or heather. -
Painting the moon:
Using white gouache, fill in the crescent moon. You can water it down slightly for the shadowed part of the moon to make it look semi-transparent. -
Adding stars:
With a fine brush or a white gel pen, dot tiny stars into the dark blue sky. Add varying sizes, and turn a few into four-pointed sparkles for variety. -
Final highlights:
Add tiny touches of white gouache to the tips of the fern leaves and the edges of the moth wings to make them pop against the night sky.
Now step back and admire how the bright moth illuminates your dark garden scene
Ladybug Family Side by Side
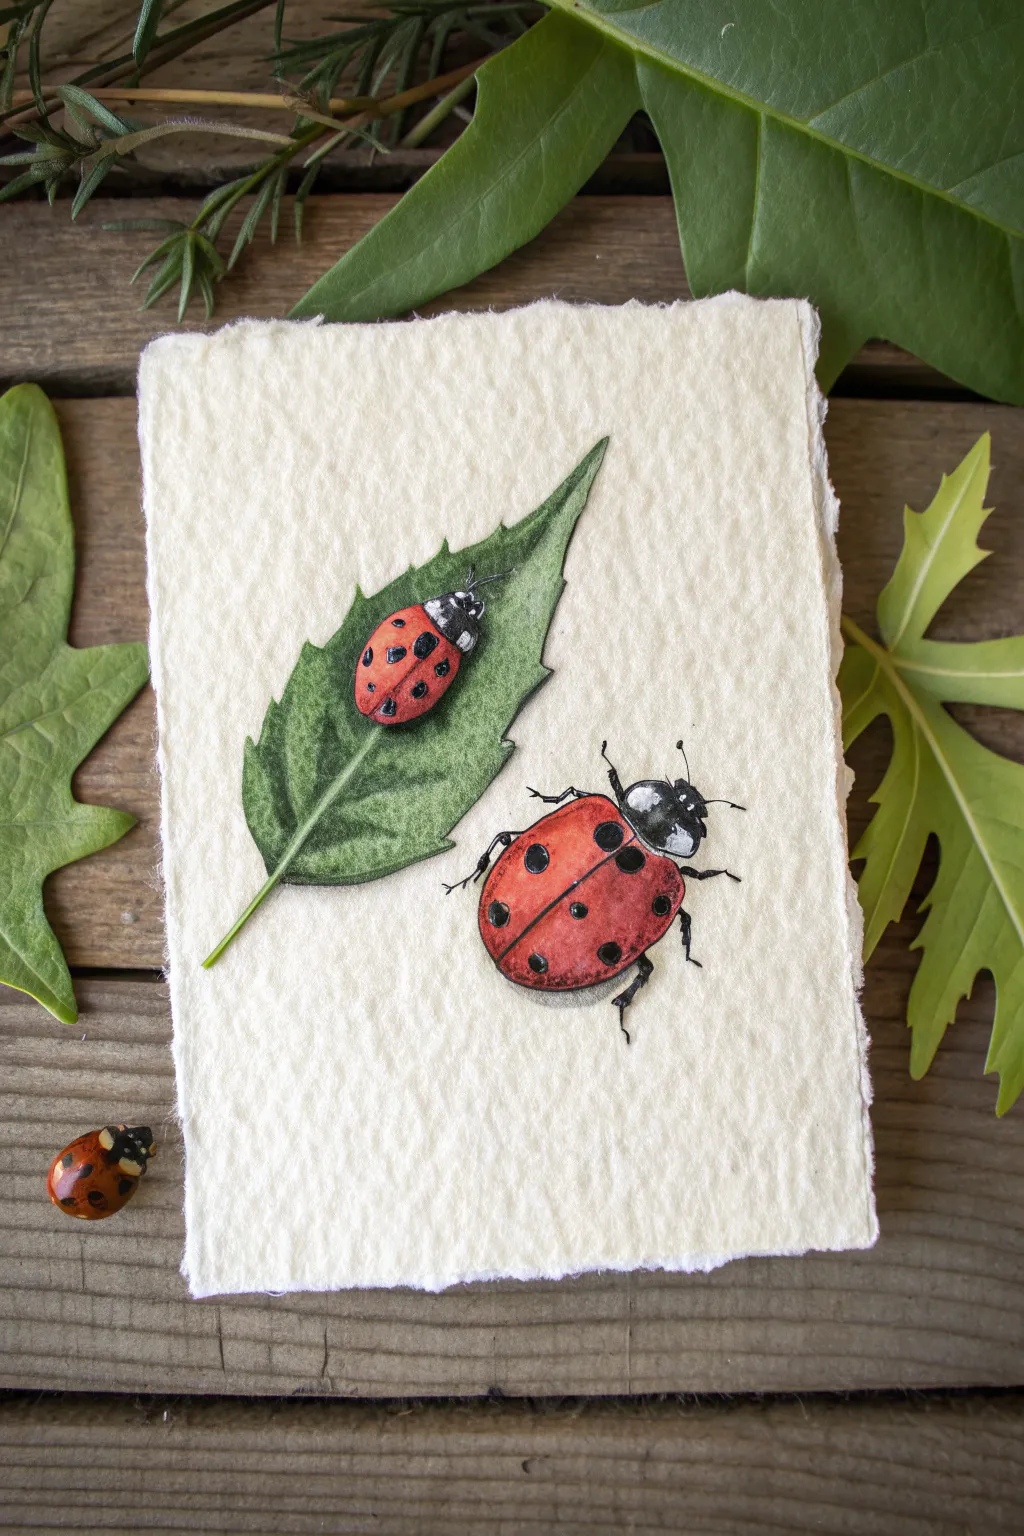
Capture the charm of garden life with this detailed watercolor study featuring two lifelike ladybugs, one perched on a green leaf and another roaming freely nearby. The project uses textured paper to enhance the organic feel, creating a delicate, scientific illustration style perfect for nature lovers.
Step-by-Step Tutorial
Materials
- Heavyweight watercolor paper with deckled edges (e.g., Khadi or handmade cotton paper)
- Pencil (HB or 2H)
- Kneaded eraser
- Watercolor paints (Alizarin Crimson, Cadmium Red, Sap Green, Hooker’s Green, Paynes Grey, Ivory Black)
- Fine detail brushes (sizes 00, 0, and 2)
- White gouache or white gel pen for highlights
- Clean water and paper towel
Step 1: Sketching the Layout
-
Paper Preparation:
Begin with a piece of handmade or deckled-edge watercolor paper. The heavy texture adds character to the final piece. -
Outline the Leaf:
Lightly sketch a pointed, serrated leaf shape angling diagonally from the bottom left toward the top right. Add a central vein line. -
Position the Ladybugs:
Sketch the first, smaller ladybug walking upward on the leaf. Draw the second, larger ladybug below and to the right of the leaf. Use simple ovals to define their bodies and small semicircles for heads. -
Refine Details:
Add the wing separation lines (elytra) down the center of their backs and indicate the position of the legs. Keep your pencil lines very light so they don’t show through the paint.
Bleeding Colors?
If black spots bleed into the red wings, the red base wasn’t dry enough. Wait longer or use a hair dryer before adding details.
Step 2: Painting the Leaf
-
First Green Layer:
Mix a watery Sap Green and fill in the leaf shape. Don’t worry about perfect evenness; the variation creates texture. -
Adding Depth:
While the first layer is slightly damp, drop in a darker Hooker’s Green mixture near the central vein and edges to create shadows. -
Defining Venation:
Once the base is dry, use your size 0 brush and the darker green mix to paint thin veins branching out from the center line. -
Leaf Shadow:
Add a very faint wash of Paynes Grey under the ladybug that is sitting on the leaf to ground it.
Step 3: Bringing the Ladybugs to Life
-
Base Red Coat:
Paint the main wing shells of both ladybugs with a mix of Cadmium Red and a touch of Alizarin Crimson. Leave tiny slivers of white paper for highlights if you can, or paint it solid for now. -
Body Mechanics:
Using a dark grey or black, paint the pronotum (the area just behind the head) and the head itself. Leave two small white spots on the pronotum for that classic ladybug look. -
Adding Spots:
Wait for the red paint to be completely bone-dry. Using a concentrated black and your finest brush, carefully dot the spots onto the red wings. Vary their sizes slightly for realism. -
Leg Work:
With a fine liner brush (size 00), paint the delicate, jointed legs extending from the bodies. Ensure the legs on the larger ladybug cast tiny shadows.
Go 3D
Carefully cut around the leaf’s edge with an X-Acto knife and lift it slightly off the backing for a subtle shadowbox effect.
Step 4: Final Details & Highlights
-
Deepening Shadows:
Mix a glazed red (lots of water) and run it along the bottom edge of the larger ladybug to give it a 3D rounded appearance. -
Grounding Shadows:
Paint a soft, diluted grey shadow underneath the larger ladybug’s body and legs. This is crucial for making it look like it’s walking on the paper, not floating. -
Crisp Highlights:
Using white gouache or a gel pen, add a crisp white reflection spot to the black head and the highest point of the red shell on both bugs. This wet look makes them pop. -
Final Assessment:
Step back and check your contrast. If the leaf looks too flat, add a little more dark green to the serrated edges.
Once dry, frame this delicate duo in a simple wood frame to let the textures shine

PENCIL GUIDE
Understanding Pencil Grades from H to B
From first sketch to finished drawing — learn pencil grades, line control, and shading techniques.
Explore the Full Guide
Scientific Illustration-Style Insect Study

Discover the delicate balance between scientific precision and whimsical design with this elegant moth study. By combining naturalistic watercolor techniques with fine ink constellations, you’ll create an artwork that feels like a vintage field guide with a magical twist.
How-To Guide
Materials
- Cold press watercolor paper (300 gsm)
- Watercolor paints (Yellow Ochre, Burnt Umber, Sepia, Ivory Black, Alizarin Crimson)
- Fine liner pen (0.1mm or 0.05mm, waterproof black or sepia)
- Round watercolor brushes (sizes 0, 2, and 4)
- H or HB pencil for sketching
- Kneaded eraser
- Reference image of an Emperor Moth or similar Saturniid
Step 1: Drafting the Specimen
-
Construct the framework:
Begin by lightly sketching a central vertical line to ensure symmetry, which is crucial for insect illustrations. Mark the top of the head, thorax, and abdomen along this axis. -
Map the wings:
Draw the basic triangular shapes of the forewings and the rounded hindwings. Pay close attention to where the wings attach to the thorax, ensuring the angles mirror each other on both sides. -
Detail the veins and patterns:
Refine your wing shapes, smoothing out straight lines into organic curves. Lightly sketch the major veins radiating from the body and place the characteristic eye-spots—circles within circles. -
Plan the constellations:
Lightly dot out the positions for your celestial elements. Draw tiny X-shapes or asterisks connected by dotted lines to frame the moth, but keep these pencil marks exceedingly faint.
Uneven Drying?
If you get ‘blooms’ or watermarks on the wings, dampen a clean brush and gently lift the pigment, or wait for it to dry and stipple ink over the imperfection to hide it.
Step 2: Watercolor Layers
-
Base wash:
Mix a very dilute wash of Yellow Ochre and a touch of Sepia. Using your size 4 brush, apply this pale cream color to the entire wing surface, carefully avoiding the eye-spots. -
Define the body:
While the wings dry, paint the thorax and abdomen. Use a thicker mix of Burnt Umber and Sepia to create a fuzzy texture. Short, dabbing strokes mimic the dense fur found on moth bodies. -
The eye-spots:
Switch to your size 0 brush. Paint the centers of the eye-spots with Ivory Black or dark Sepia. Add a ring of yellow ochre or orange around the center, leaving tiny white highlights if your reference shows them. -
Wing definition:
Mix a watery grey-brown using Sepia and a tiny drop of Black. With your size 2 brush, gently paint the shadow areas along the bottom edges of the wings and near the body to create depth. -
Subtle pink accents:
Some moths have hidden color. Add a very faint, watery glaze of Alizarin Crimson near the connection points of the wings or on specific decorative spots for a blush of life.
Step 3: Detailed Ink Work
-
Outline the veins:
Once the paint is bone dry, take your fine liner pen. Very delicately trace the main wing veins. The line should be broken and organic, not solid and heavy. -
Texturing the fur:
Use the pen to add tiny, directional hatch marks over the painted body. These ink strokes should flow in the direction the hair grows, adding realistic volume. -
Wing patterns:
Stipple (dot) the darker borders of the wings. Instead of drawing a solid line, use clusters of dots to create a soft, powdery transition that mimics moth scales. -
The antennae:
Draw the feathery antennae using the pen. Start with a central curve and add tiny comb-like strokes on either side, tapering them as you reach the tip.
Add Metallic Magic
For a truly magical touch, paint the constellation stars or the tiny center of the moth’s eye-spot using gold watercolor or a metallic gold gel pen.
Step 4: Celestial Finish
-
Inking the stars:
Go over your pencil sketches for the constellations. Draw small, six-pointed asterisks or simple stylized flowers for the stars. -
Connecting the dots:
Use a dashed line technique to connect your star points. Keep your hand loose; these lines don’t need to be ruler-straight, as a slight wobble adds to the vintage charm. -
Final cleanup:
Wait at least 15 minutes to ensure all ink is completely set. Gently erase any remaining pencil guidelines with your kneaded eraser to leave the paper pristine.
Now you have a timeless piece of nature study art ready to frame or gift
Cartoon Bug With Oversized Eyes
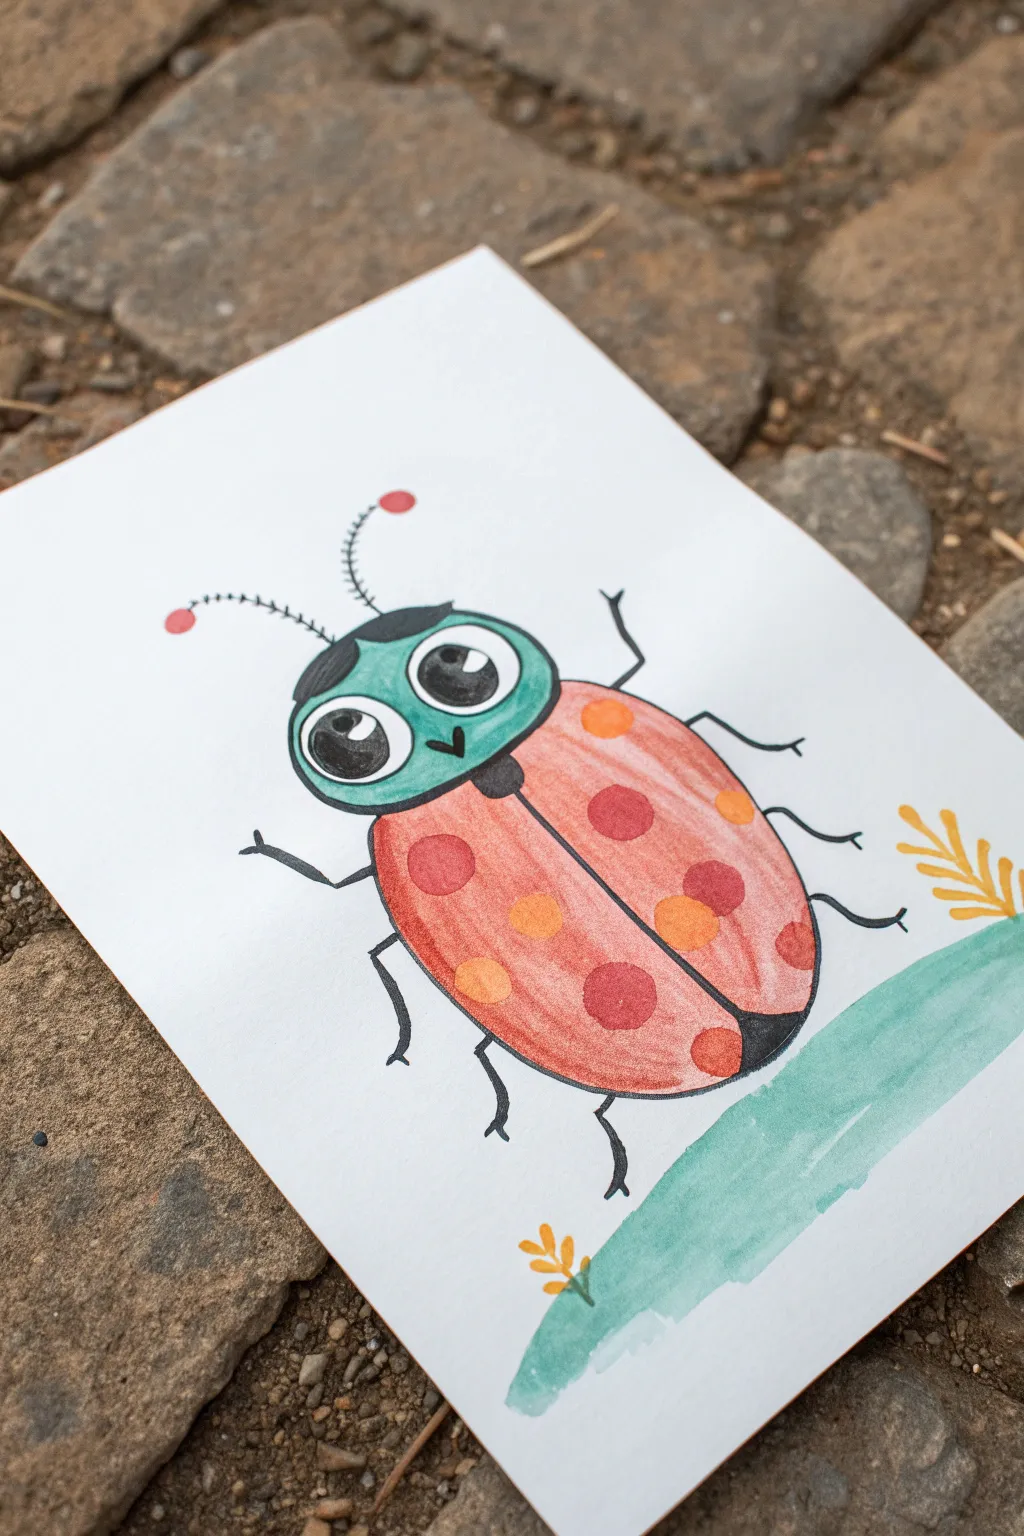
This cheerful ladybug project features massive, expressive eyes and a vibrant spotted shell that pops right off the page. Using a mix of markers and fine liners, you’ll create a friendly character that looks like it’s waving hello from a grassy hill.
Step-by-Step Tutorial
Materials
- White cardstock or heavy drawing paper
- Pencil and eraser
- Black fine liner pen (waterproof)
- Black marker (medium tip)
- Alcohol-based markers (Red, Orange, Teal/Turquoise, Green)
- White gel pen (optional for highlights)
Step 1: Sketching the Character
-
Draw the head shape:
Begin by drawing a wide, rounded oval shape near the top center of your paper for the ladybug’s head. Flatten the bottom edge slightly where it will connect to the body. -
Add the oversized eyes:
Inside the head shape, draw two very large circles that touch each other in the middle. These should take up most of the face to give that cute cartoon look. -
Outline the body:
Draw a large oval shape extending downward from the head. This will be the shell. Draw a straight vertical line right down the center to split the wings. -
Sketch the spots:
Lightly sketch various sizes of circles all over the shell. Make sure some are near the edges and some are central to create a natural pattern. -
Add legs and antennae:
Draw two curved lines coming off the top of the head for antennae. Skecth three spindly legs on each side of the body. Angle the top front legs upward as if the bug is waving.
Eye Highlight Tip
If you accidentally color over the eye shine, don’t worry. Just wait for the ink to dry and add a dot of white acrylic paint or white gel pen on top.
Step 2: Inking and Coloring
-
Outline the drawing:
Trace over all your pencil lines with a waterproof black fine liner. Be sure to trace the circles inside the eyes carefully. -
Detail the eyes:
Inside each large eye circle, draw a smaller circle for the pupil, and a tiny circle inside that for a highlight. Color the pupil black, leaving the highlight pure white. -
Color the head:
Use a teal or light turquoise marker to fill in the face area around the eyes. I like to color in small circular motions to keep the ink even. -
Darken the cap:
Color the very top sliver of the head (above the eyes) with a black marker to create a little ‘cap’ or forehead area. -
Fill the shell base:
Color the entire shell area with a light red or coral marker, carefully going around the circular spots you sketched earlier. -
Color the spots:
Now, fill in the spots. Alternate between a deep red and a bright orange to give the shell visual variety and depth. -
Thicken the lines:
Go back over your main outline with a slightly thicker black marker, especially around the outer edge of the shell and head, to make the cartoon bold. -
Add antennae details:
Draw small red circles at the tips of the antennae. Add tiny hash marks along the antennae stems for texture.
Make It 3D
Cut out the finished ladybug carefully with scissors and mount it on a second piece of painted paper using foam tape for a cool pop-up card effect.
Step 3: Setting the Scene
-
Paint the grass:
Using a broad green marker or a watercolor brush pen, sweep a wide, curved stroke of green across the bottom right corner of the paper. -
Add floral details:
With a yellow or orange marker, draw simple three-petaled shapes poking out of the green grass swoosh and one floating on the right side. -
Final touches:
Erase any remaining pencil marks once the ink is totally dry. If you want extra sparkle, add a dot of white gel pen to the antennae tips.
Your adorable bug is now ready to cheer up any space or serve as a cute greeting card cover


Patterned Doodle Bugs in a Swarm

Transform a blank sketchbook page into a buzzing collection of whimsical insects using just a single color. This monochromatic doodle study focuses on varying patterns and shapes to create a visually rich swarm that feels both scientific and charming.
How-To Guide
Materials
- Mixed media or watercolor paper sketchbook (spiral bound works great)
- Dark blue fine liner pen (0.5mm)
- Dark blue brush pen or broad marker
- Pencil (HB)
- Eraser
- Reference images of beetles (ladybugs, ground beetles, weevils)
Step 1: Planning the Swarm
-
Pencil placement:
Start by sketching very faint layout circles and ovals across your page with an HB pencil. Vary the sizes and spacing to ensure the page looks full but not cluttered. -
Defining segments:
Inside your basic shapes, lightly pencil in the three main body parts for each bug: the head, the thorax (middle), and the abdomen (the main body). -
Leg orientation:
Sketch the legs for each insect. Remember that insects have six legs attached to the thorax, though stylistically you can attach them lower on the body for a cuter look. Vary their angles to make some look like they are crawling and others resting. -
Adding filler elements:
In the larger gaps between your beetles, sketch simple outlines of fern-like leaves or botanical sprigs to balance the composition.
Step 2: Inking the Outlines
-
Initial tracing:
Using your fine liner pen, carefully trace over your pencil outlines for the bodies. Don’t worry about perfect symmetry; slight wobbles add hand-drawn character. -
Adding antennae:
Draw the antennae now. Experiment with different styles: some can be simple curved lines, others can be segmented or have little clubs at the ends. -
Detailing the legs:
Ink the legs, adding tiny jagged hairs or distinct joints on the larger beetles to give them a more realistic texture. -
Botanical lines:
Ink the botanical filler elements. Keep these lines simple and singular, perhaps adding a central vein to the leaves but leaving them mostly open. -
Erase pencil marks:
Wait until the ink is completely dry to the touch, then gently erase all your underlying pencil sketches to clean up the page.
Smudge Prevention
Place a scrap piece of paper under your drawing hand. This acts as a barrier, preventing your skin oils from warping the paper and stopping your hand from smearing fresh ink.
Step 3: Patterning and Filling
-
Striped textures:
Choose a few large oval beetles to be your ‘striped’ bugs. Using the fine liner, draw closely spaced vertical lines following the curve of the abdomen to create volume. -
Polka dots:
For ladybug-style beetles, draw small circles on their backs. You can leave the circles white and color the background, or simple outline the circles for a lighter look. -
Solid fills:
Switch to your brush pen or broad marker to fill in solid dark areas. I like to use this for the heads or specific body segments to create contrast against the line work. -
Cross-hatching:
On the wings of flying insects or the shells of smaller beetles, use tiny cross-hatching marks to suggest texture without making the area solid black. -
Leaf details:
Return to your botanical sprigs and add small hatching lines on one side of each leaf to suggest shadow and depth. -
Complex patterns:
Pick one or two ‘hero’ bugs to give complex patterns, like tiny scales, zig-zags, or a grid pattern on their backs. -
Contrast check:
Step back and look at the page. If a certain area looks too light, choose a beetle there and darken its legs or head with the brush pen.
Add Metallic Pop
Once the blue ink is fully dry, accent the beetle shells with a gold or silver gel pen. A few metallic dots or lines will make the insects look like they have iridescent shells.
Now you have a lively page of monochromatic entomology art ready to be admired
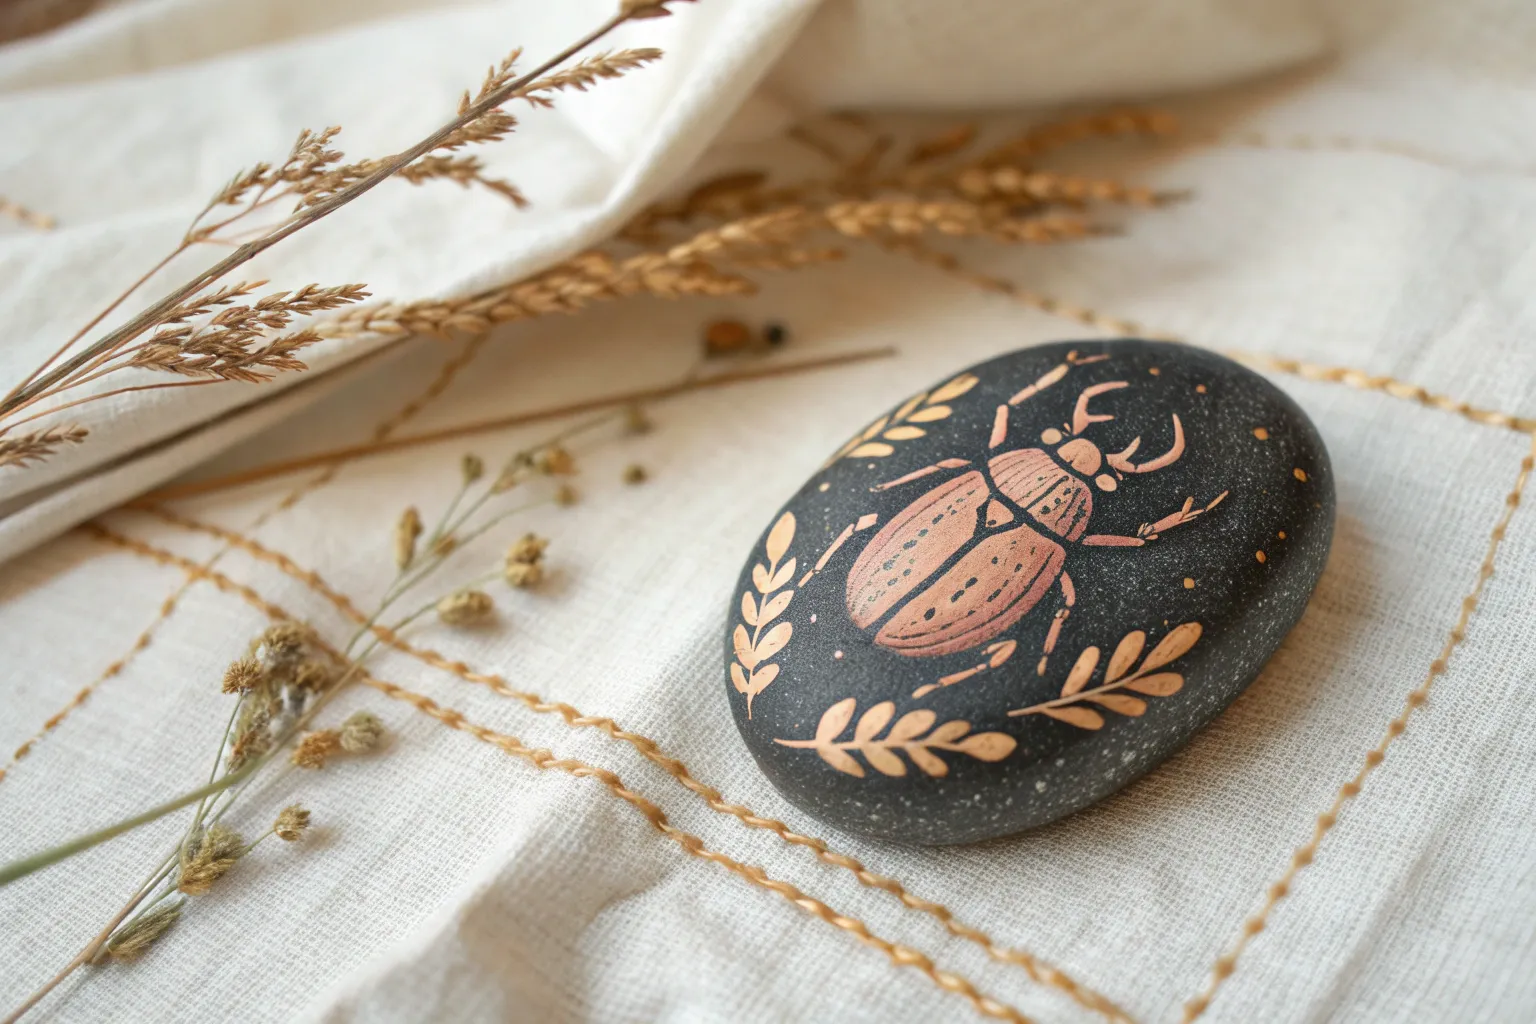
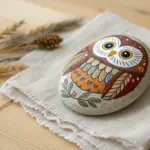
Rock Bugs for Garden Decor
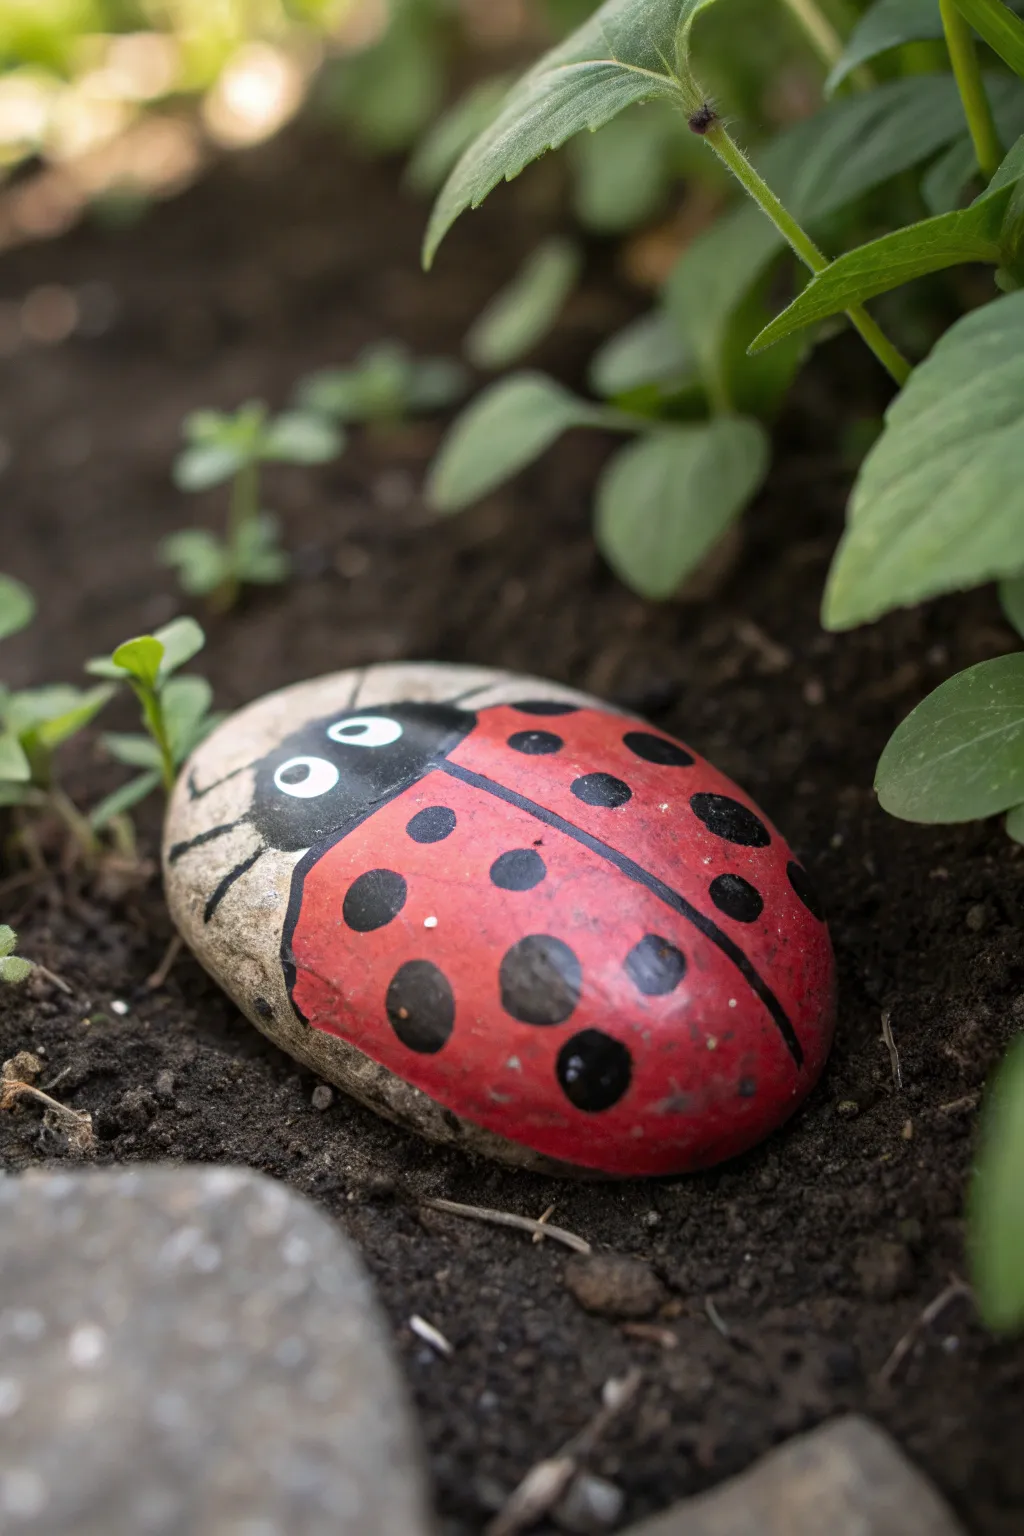
Transform a smooth, oval river rock into a charming garden companion with a few strokes of acrylic paint. This project keeps part of the natural stone visible for the face, giving the finished ladybug an organic, rustic look that blends perfectly into your flower beds.
Step-by-Step Guide
Materials
- Smooth, oval river rock (palm-sized)
- Mild soap and water
- Scrub brush
- Red acrylic patio paint or multi-surface paint
- Black acrylic paint
- White acrylic paint
- Pencil
- Flat paintbrush (medium)
- Small round paintbrush (fine tip)
- Dotting tool or toothpick
- Clear outdoor sealer (spray or brush-on matte finish)
Step 1: Preparation and Planning
-
Select the perfect stone:
Look for a rock that is naturally smooth and oval-shaped, resembling the domed back of a beetle. A slightly flattened bottom will help it sit securely in the soil. -
Clean the surface:
Wash your rock thoroughly with mild soap and warm water. Scrub away any dirt or grit with a brush to ensure the paint adheres properly, then let it dry completely in the sun. -
Sketch the outline:
Using a pencil, lightly draw a curved line across the top third of the rock. This separates the head (which will remain unpainted stone) from the wings.
Paint sliding off?
If acrylic paint peels off the smooth stone, the surface might be too slick. Lightly sand the area you plan to paint with fine-grit sandpaper to give it some ‘tooth’ for better adhesion.
Step 2: Painting the Body
-
Base coat the wings:
Paint the larger bottom section of the rock with bright red acrylic paint. Use your flat brush and carefully follow the curve of your pencil line. -
Apply a second coat:
Red pigment can sometimes be translucent, so once the first layer is dry to the touch, apply a second coat for a vibrant, solid finish. -
Paint the head shape:
Switch to black paint and create a semi-circle shape at the top of the red section, slightly overlapping onto the unpainted stone area to form the base of the head. -
Draw the center line:
Use a fine liner brush and black paint to draw a straight line down the center of the red back, starting from the black head shape and going all the way to the bottom edge of the rock. -
Add the wing outline (optional):
For extra definition, you can carefully outline the outer edge of the red wings with a very thin black line, creating a separation between the painted wing and the raw stone underneath.
Step 3: Details and Features
-
Create the spots:
Dip a round paintbrush or a large dotting tool into black paint. Press gently onto the red wings to create varying sizes of spots. Make sure they are randomly placed but somewhat symmetrical on either side of the center line. -
Paint the eyes:
Dip the handle end of a paintbrush into white paint to create two solid white circles on the black head area. These should be fairly close together. -
Dry the eyes:
Allow the white circles to dry completely before moving on—rushing this step can turn your crisp eyes gray. -
Add pupils:
Using a smaller dotting tool or a toothpick, place a small black dot inside each white circle. Positioning them slightly off-center can give the bug a cute, looking-sideways expression. -
Draw the feelers:
With your finest brush and thinned black paint (add a drop of water if needed for flow), paint two curved antennae extending from the front of the head onto the varying stone surface. -
Add legs:
Paint three small, stick-like legs on each side of the body. Start from the edge of the painted area and extend them outward onto the unpainted stone sides.
Add some sparkle
Mix a tiny amount of glitter medium into your final coat of red paint or the sealer. It gives the ladybug a dewy, morning-fresh shimmer when the sunlight hits it.
Step 4: Finishing Up
-
Allow to cure:
Let the rock sit undisturbed for at least 24 hours to ensure all layers of paint are fully hardened. -
Seal the artwork:
Apply a coat of clear outdoor sealer over the entire rock. A matte spray works well to maintain the natural look of the stone while protecting the paint from rain and sun.
Nestle your new creation among some low-growing plants for a delightful surprise

Have a question or want to share your own experience? I'd love to hear from you in the comments below!