A plain wooden frame is basically a tiny canvas with corners—and once you start painting it, it instantly turns into part of the art. Here are my favorite wooden hand painted picture frame ideas that feel doable, look intentional, and make your photos or sketches pop.
Classic Solid Color Frame
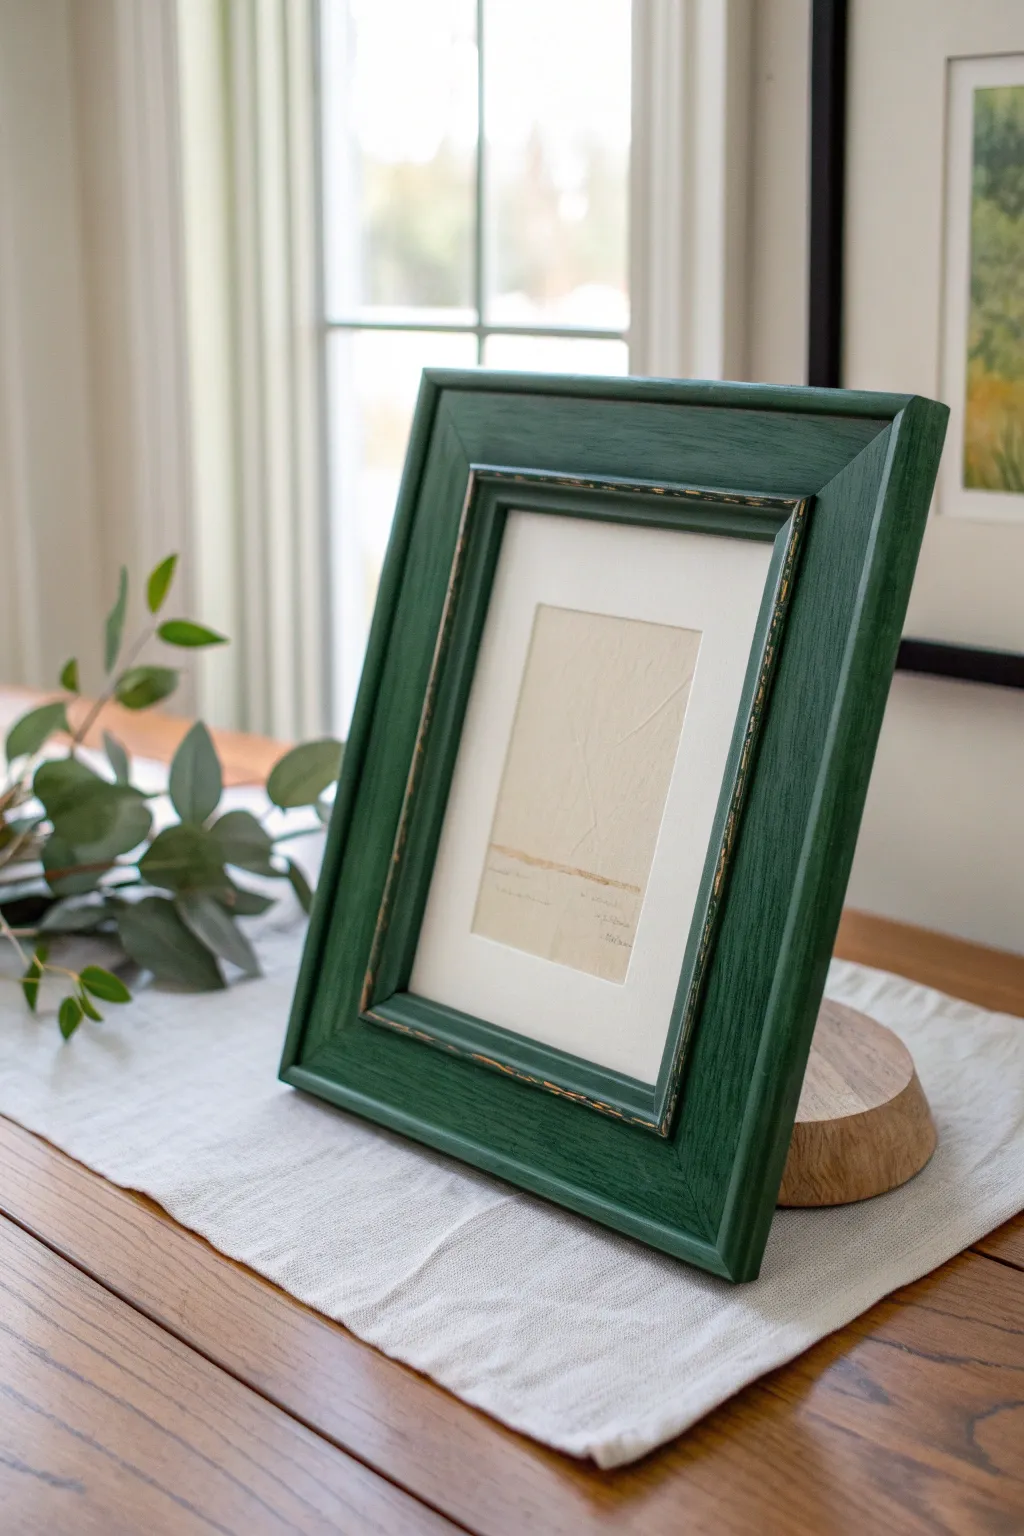
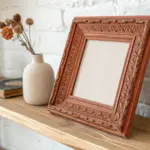
Bring a touch of timeless elegance to your photos with this rich, forest-green frame featuring subtle distressing. The matte finish combined with hints of exposed wood and gold creates a piece that feels both vintage and sophisticated.
Step-by-Step Tutorial
Materials
- Unfinished or old wooden picture frame (wide molding works best)
- Deep forest green chalk paint
- Gold gliding wax or metallic acrylic paint
- Dark furniture wax
- Fine-grit sandpaper (220 grit)
- Coarse-grit sandpaper (80 or 100 grit)
- Medium-sized synthetic paintbrush
- Small detail brush
- Clean, lint-free cloth or rag
- Painter’s tape (if the frame has glass attached)
Step 1: Preparation and Base Coat
-
Prepare the frame:
Remove the glass, backing, and any artwork from your frame. If the current finish is glossy, lightly scuff it with fine-grit sandpaper to help the new paint adhere. -
Clean surface:
Wipe the frame down thoroughly with a damp cloth to remove any dust or sanding residue. Let it dry completely. -
Apply first coat:
Stir your forest green chalk paint well. Apply a somewhat thin, even coat over the entire front and sides of the frame. Don’t worry about complete opacity yet. -
Let dry:
Allow this first coat to dry for approximately 30-45 minutes, or until it is dry to the touch. -
Apply second coat:
Apply a second slightly thicker coat of the green paint. Ensure you get into any crevices or molding details. Brush with the grain of the wood for a smooth finish. -
Full cure time:
Let this second coat dry thoroughly, preferably for 2-4 hours, to ensure the paint is hard enough for the distressing phase.
Step 2: Distressing and Detailing
-
Distress edges:
Take your coarse-grit sandpaper (80 or 100 grit) and focus on the raised edges, corners, and the inner lip of the frame. -
Sand strategically:
Rub gently back and forth until the natural wood underneath begins to peek through the green paint. I like to focus heavily on the corners where wear would naturally occur. -
Clean dust:
Use a dry brush or a tack cloth to completely remove all the paint dust created by the distressing process. -
Apply gold highlights:
Using your finger or a small detail brush, lightly rub a tiny amount of gold gilding wax onto the distressed inner lip of the frame. -
Feather the gold:
Work the gold sparingly into the exposed wood areas on the outer corners as well, blending it so it looks like an aged under-layer rather than a painted stripe.
Waxing Wisdom
Always apply clear wax before dark wax if you are nervous. The clear wax acts as an ‘eraser,’ allowing you to wipe away the dark wax if it gets too heavy.
Step 3: Sealing and Finishing
-
Apply dark wax:
Dip a clean lint-free cloth or wax brush into dark furniture wax. You want a very small amount on the cloth. -
Work in sections:
Rub the wax over the green paint, working it into the wood grain and any dents. This deepens the green color and adds an antique patina. -
Wipe back excess:
Immediately wipe off the excess wax with a fresh clean cloth, leaving behind just enough to shadow the crevices and seal the paint. -
Buff to sheen:
Once the wax has hazed over (usually after 15-20 minutes), use a soft cloth to buff the frame in circular motions until you achieve a subtle satin sheen. -
Reassemble:
Place your glass, mat board, and artwork back into the frame and secure the backing.
Inner Glow
Paint the very inner edge (the bevel that touches the glass) pure gold before applying the green. When you sand it back later, bright gold will shine through.
Now you have a beautifully aged frame ready to showcase your favorite print on a mantel or gallery wall

Soft Chalky Vintage Finish
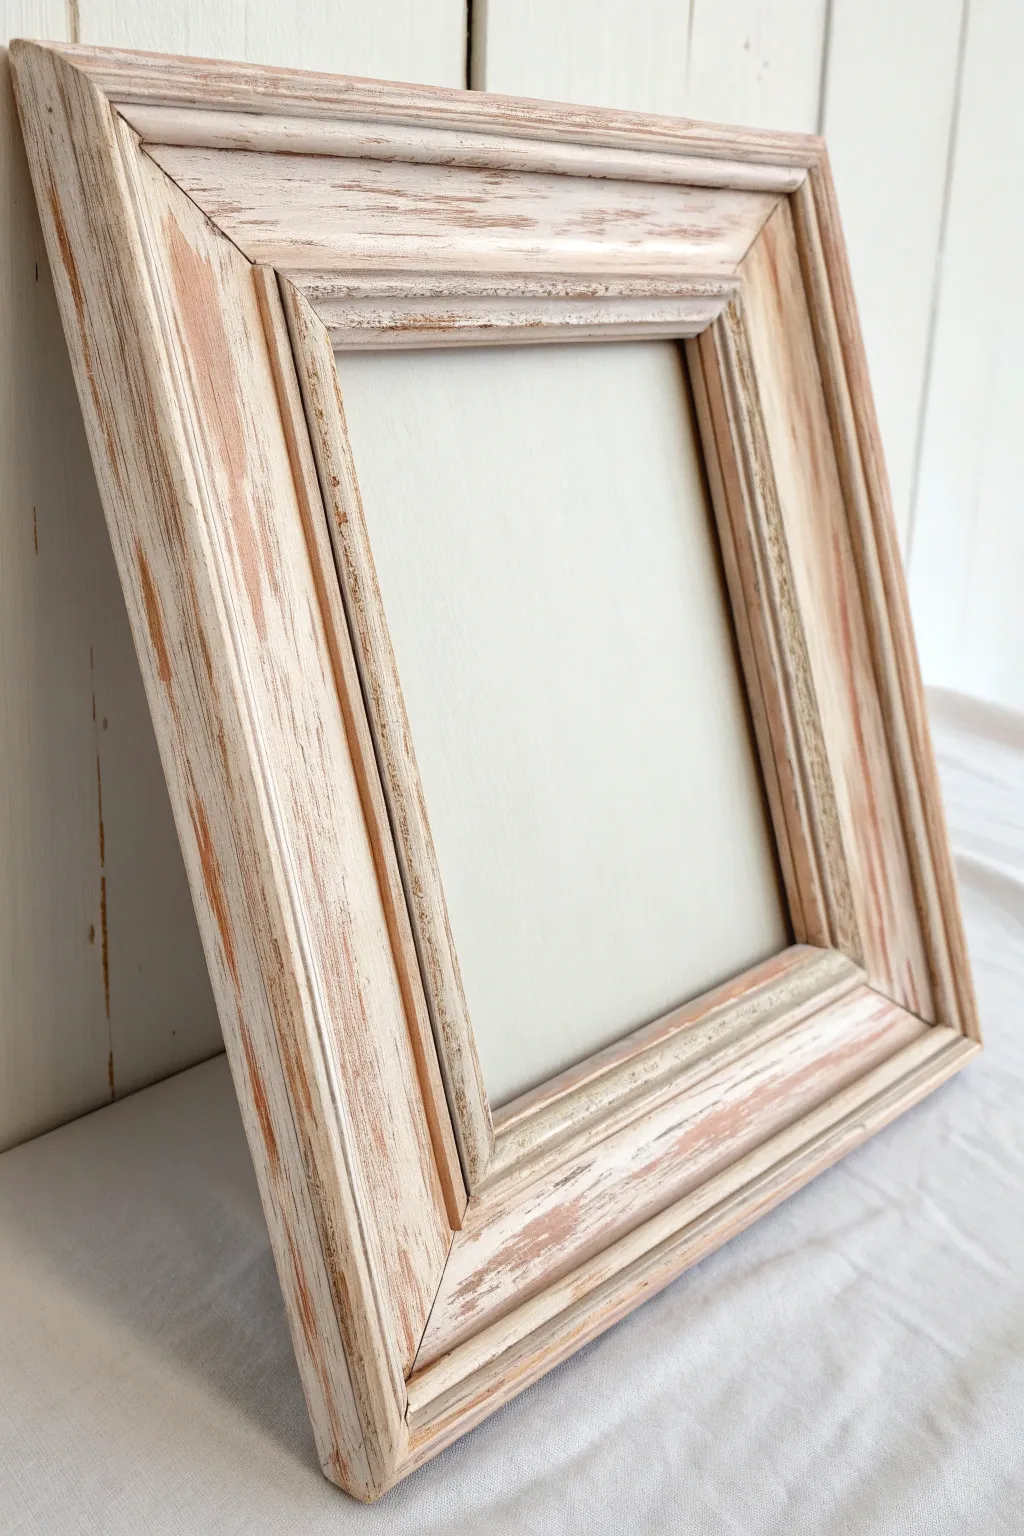
Achieve a beautifully aged, shabby chic aesthetic with this soft chalky vintage finish tutorial. By layering subtle warm tones under a creamy top coat and gently sanding them back, you’ll create a piece that feels like a beloved heirloom rather than a brand-new craft project.
Detailed Instructions
Materials
- Unfinished wooden picture frame with detailed molding
- Chalk-finish paint (Cream/Off-White)
- Chalk-finish paint (Soft Terracotta or Warm Beige)
- Coarse sandpaper (80 or 100 grit)
- Fine sandpaper (220 grit)
- Medium-sized flat synthetic brush
- Small detail brush
- Clear matte wax or polycrylic sealer
- Lint-free cloth
- Painter’s tape or masking tape
- Drop cloth or old newspaper
Step 1: Preparation & Base Coat
-
Prepare your workspace:
Lay down your drop cloth or old newspaper to protect your work surface from dust and paint drips. Ensure the area is well-ventilated, especially if you plan to use wax later. -
Protect the glass:
Remove the glass and backing board from the frame if possible. If they are glued in, carefully apply painter’s tape to the edges of the glass to prevent paint splatters. -
Sanding the raw wood:
Give the entire wooden frame a quick scuff with fine sandpaper (220 grit). You don’t need to strip it completely, but this helps open the wood grain to accept the base pigments better. -
Wipe it down:
Use a damp shop towel or lint-free cloth to remove every speck of sanding dust. Any leftover dust will create lumps in your smooth paint finish. -
Apply the warm undercoat:
Load your medium brush with the Soft Terracotta or Warm Beige chalk paint. This color will be the ‘peek-through’ layer that mimics aged wood or old primer showing through. -
Paint consistently:
Apply the base color over the entire frame. Don’t worry about perfect coverage; a slightly messy application adds to the vintage charm later on. -
Let it dry completely:
Allow this base layer to dry fully. Chalk paint dries quickly, usually within 30-45 minutes, but I like to give it an hour to be safe.
Wax Resist Trick
Rub a clear candle stick on edges *before* the top coat. The paint won’t stick there, making distressing effortless later.
Step 2: Layering & Distressing
-
Apply the resist wax (optional):
For easier distressing, you can rub a plain candle or beeswax stick lightly over the high points surfaces (corners, ridges). This prevents the top coat from sticking too hard in those spots. -
Apply the cream top coat:
Using a clean brush, apply the Cream/Off-White chalk paint over the dried terracotta layer. Use long, even strokes following the grain of the wood. -
Ensure good coverage:
Make sure you get into the crevices of the molding, but avoid letting paint pool in the corners, which can obscure the detail. -
Dry partially:
Wait until the paint is dry to the touch but hasn’t fully cured—usually about 20-30 minutes depending on humidity. -
Begin heavy distressing:
Take your coarse 80 or 100 grit sandpaper. Firmly sand along the raised ridges, corners, and edges of the frame. You want to sand aggressively enough to reveal the terracotta color and even some raw wood beneath. -
Refine the flat surfaces:
Switch to your finer 220 grit sandpaper for the flat sections of the frame. Use lighter pressure here to create soft, worn patches where the paint looks naturally thinned by time. -
Highlight the grain:
Sand in the direction of the wood grain. This technique helps the remaining white paint settle into the wood’s pores, creating that streaky, washed look seen in the reference image. -
Clean up dust:
Once you are happy with the level of distressing, use a clean, dry brush or a tack cloth to sweep away all the heavy chalk dust created by sanding.
Add Antique Depth
Mix a tiny drop of dark brown paint into your clear wax to darken the crevices and make the molding details pop.
Step 3: Sealing & Finishing
-
Apply clear wax:
Dip a lint-free cloth or a waxing brush into clear matte wax. Massage it into the paint in circular motions, working it deep into the texture. -
Buff the finish:
Let the wax sit for about 10-15 minutes, then buff it briskly with a clean cloth. This hardens the surface and gives it a subtle, professional sheen. -
Reassemble the frame:
Once the sealer feels dry and non-tacky, remove your painter’s tape or re-insert the glass and backing board.
Place your favorite photo inside and display your new vintage-style creation on a mantel or bedside table


Modern Tape Color Blocking
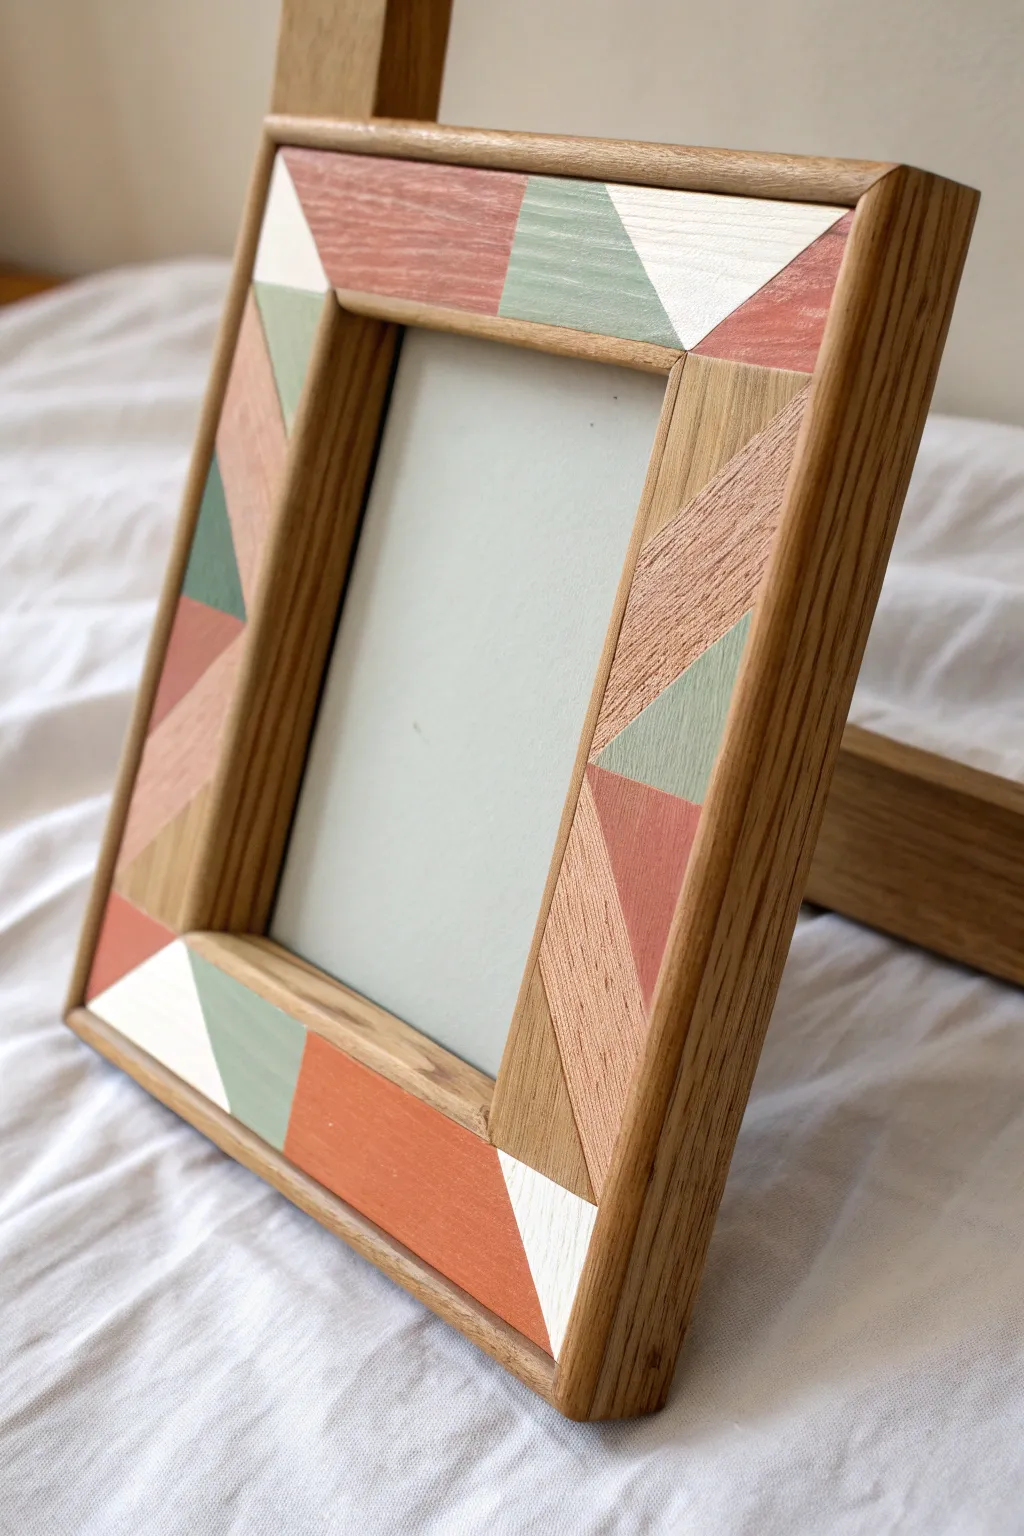
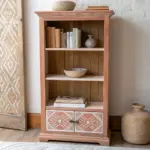
Transform a plain, flat-faced wooden frame into a piece of modern art using simple painter’s tape and a soft, earthy color palette. This project relies on crisp lines and color blocking to create visual texture that looks far more complicated than it actually is.
Step-by-Step Tutorial
Materials
- Unfinished flat wooden picture frame (wide border)
- Painter’s tape (blue or green)
- Precision craft knife
- Acrylic craft paints (sage green, terracotta, light peach, white)
- Small flat synthetic paintbrush
- Fine-grit sandpaper (220 grit)
- Clear matte varnish or sealant
- Pencil and ruler
Step 1: Preparation and Planning
-
Disassemble the frame:
Remove the glass, backing board, and any existing artwork from the frame. Set these aside in a safe spot so they don’t get scratched or covered in sawdust. -
Sand the surface:
Lightly sand the face of the wooden frame using 220-grit sandpaper. This smooths out any rough grain and ensures your paint will adhere cleanly without soaking in too irregularly. -
Wipe it clean:
Use a tack cloth or a slightly damp microfiber towel to remove all sanding dust. The surface needs to be perfectly clean for the tape to stick properly. -
Mark your grid:
Using a ruler and a light pencil, mark distinct sections along the frame. You don’t need a full grid, just reference points to help guide your diagonal tape lines later.
Crisp Line Secret
Before painting colors, brush a tiny amount of clear matte medium or white paint over the tape edge. This seals the gap, so any bleed is invisible.
Step 2: Creating the Geometry
-
Apply the first tape lines:
Lay down long strips of painter’s tape diagonally across the frame face. Vary the angles to create interesting triangles rather than uniform squares. -
Seal the tape edges:
Press down firmly on the edges of the tape with your fingernail or a credit card. This is the secret to getting those razor-sharp lines without paint bleeding underneath. -
Cut intersecting lines:
Use additional pieces of tape to cross-sect your initial diagonals. This creates the smaller triangular ‘zones’ seen in the design. -
Trim excess tape:
Carefully use a craft knife to trim any tape that overhangs the inner or outer edges of the frame to keep the sides clean.
Step 3: Painting the Pattern
-
Plan your palette:
Decide which triangles will be which color. I find it helpful to put a tiny pencil dot on the wood inside the shapes I plan to leave unpainted (natural wood) so I don’t accidentally paint them. -
Paint the lightest colors first:
Start with your white and light peach acrylics. Apply thin, even coats to the designated triangles. Brush away from the tape edge initially to prevent pushing paint under it. -
Apply darker accents:
Move on to the sage green and terracotta sections. These darker pigments might need two coats for full opacity, especially on absorbent raw wood. -
Let it dry completely:
Allow the paint to fully dry between coats and before removing any tape. If you rush this steps, you risk smudging fully wet paint.
Peeling Paint?
If paint lifts when removing tape, the paint may have formed a bridge over the tape. Score the edge lightly with a craft knife before peeling.
Step 4: The Reveal and Finish
-
Peel the tape:
Slowly peel back the painter’s tape at a 45-degree angle. Do this gently to avoid lifting the paint or splintering the wood. -
Touch up edges:
If there was minor bleeding, use your craft knife to gently scrape away excess paint, or touch up the line with a very fine detail brush. -
Seal the artwork:
Apply a coat of clear matte varnish over the entire face of the frame. This protects the unfinished wood sections and evens out the sheen between the wood and the paint. -
Reassemble:
Once the sealant is cured, clean the glass and place it back into the frame along with your favorite photo and the backing board.
Now you have a striking geometric frame ready to showcase your favorite memory on any shelf or mantel


Simple Stripes Around the Border
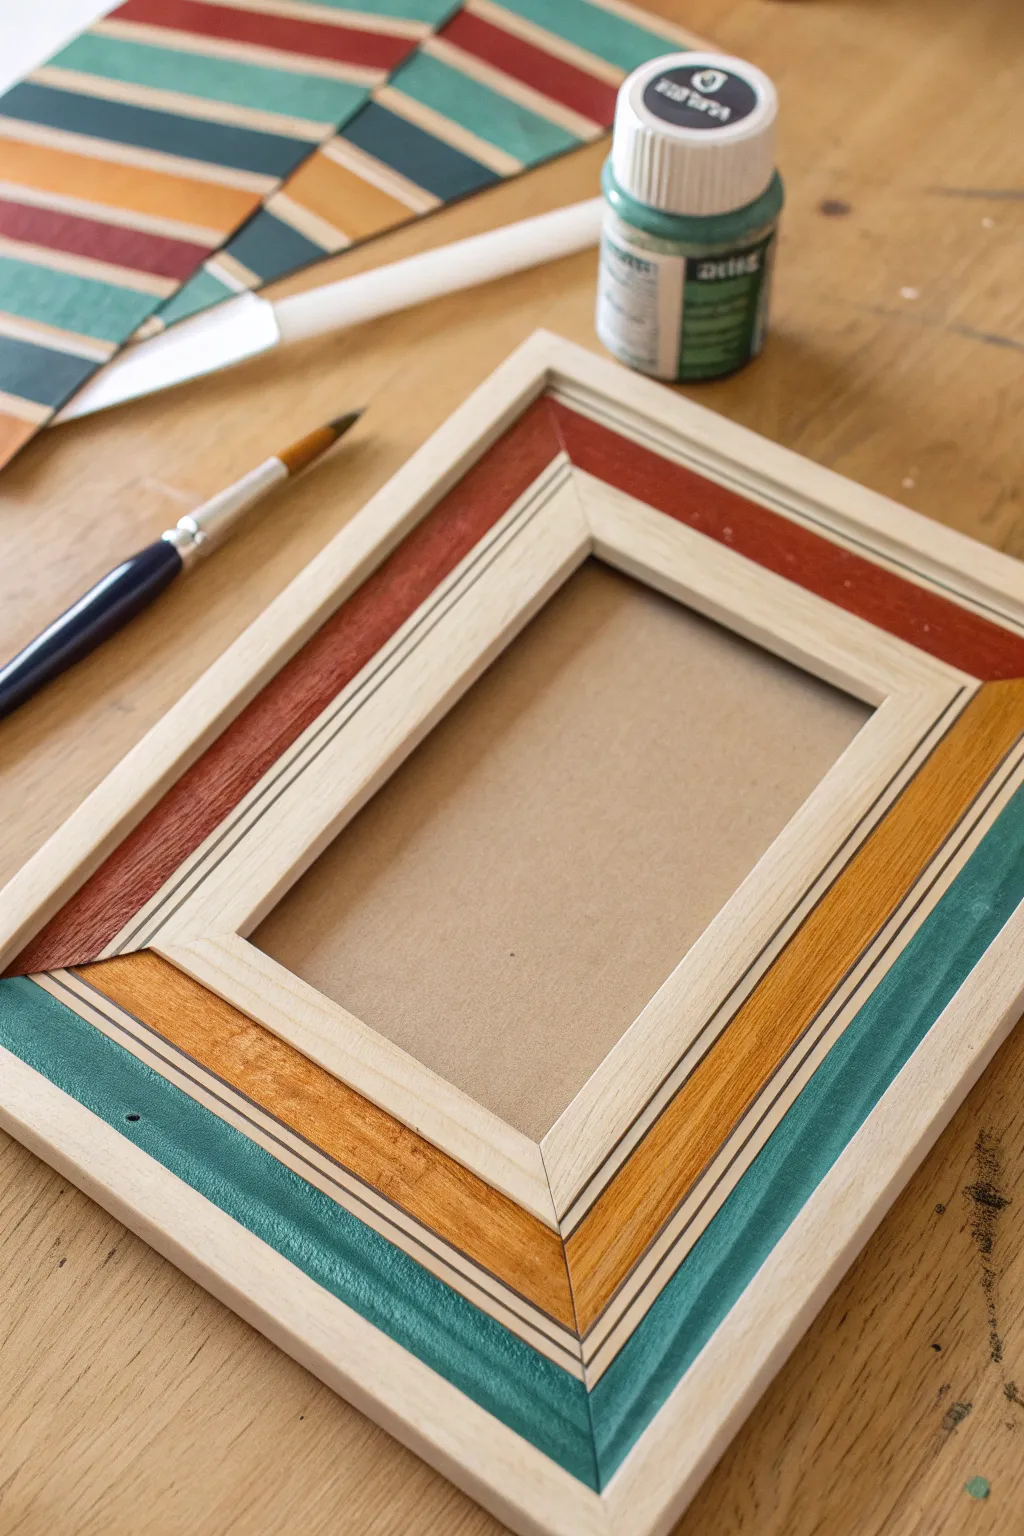
Transform a plain wooden frame into a modern accent piece with this bold, color-blocked design. By combining natural wood tones with crisp painted stripes, you’ll create a sophisticated geometric pattern perfect for showcasing your favorite photos.
Detailed Instructions
Materials
- Unfinished flat profile wooden picture frame
- Acrylic craft paints (Deep Teal, Terracotta Red, Mustard Yellow)
- Painter’s tape or fine masking tape (various widths)
- Flat shader brush (size 4 or 6)
- Fine liner brush (size 0 or 1)
- Ruler and pencil
- Fine-grit sandpaper (220 grit)
- Clear matte varnish or sealant
- Paper plate or palette
- Cup of water
Step 1: Preparation
-
Disassemble the Frame:
Begin by removing the glass, backing board, and any existing artwork from your wooden frame. Set these aside in a safe place where they won’t get scratched or dirty. -
Sand the Surface:
Lightly sand the entire face of the wooden frame using 220-grit sandpaper. This smooths out any rough grain and helps the paint adhere better without raising the wood fibers too much. -
Dust It Off:
Wipe the frame down thoroughly with a dry cloth or tack cloth to remove all sawdust. A clean surface is crucial for crisp paint lines.
Step 2: Design & Taping
-
Plan the Geometry:
Visualize the diagonal division of the frame. The design relies on mitered corners acting as natural dividing lines. You’ll be painting alternating sections of the frame border. -
Mark the Pin-Stripes:
Using a ruler and a very light pencil touch, mark two thin parallel lines near the inner edge of the frame. These will remain unpainted to create the thin black/wood pinstripe effect seen in the reference. -
Tape the Main Color Blocks:
Apply painter’s tape to block off the areas you want to keep as natural wood. Specifically, tape over the thin pinstripes you just marked to protect the wood underneath. -
Seal the Tape Details:
Run a fingernail or a burnishing tool firmly along the edges of your tape. This prevents paint from bleeding under the tape and ensures those super-sharp geometric lines.
Bleeding Lines?
If paint bleeds under the tape, wait for it to dry completely. Then, gently scrape the excess paint off the unpainted wood using an X-Acto knife or the edge of a credit card.
Step 3: Painting
-
Start with Teal:
Dip your flat shader brush into the Deep Teal paint. Apply this color to the bottom section and the lower right side of the frame, following the natural grain of the wood for a smooth finish. -
Apply the Mustard Yellow:
Clean your brush thoroughly. Paint the middle stripe section on the right side and lower left side with the Mustard Yellow. I find two thin coats usually look better than one thick, gloppy coat. -
Paint the Terracotta:
Finally, apply the Terracotta Red to the top section and upper left side. Be careful near the mitered corners where the colors might meet. -
Paint the Pinstripes (Optional):
If your frame didn’t have dark wood inlay, use a fine liner brush and black or very dark brown paint to carefully fill in the thin pinstripes between your color blocks and the inner wood rim. -
Remove Tape Carefully:
While the paint is still slightly tacky (not fully dry), gently peel back your painter’s tape at a 45-degree angle. This helps prevent the paint from chipping solely at the edge.
Go Metallic
Swap out the fine black pinstripes for a metallic gold or silver paint pen. The shimmer adds a luxurious, high-end touch that contrasts beautifully with the matte wood.
Step 4: Finishing Touches
-
Touch Up Edges:
Inspect your lines. If any paint bled, use a small craft knife to gently scrape it away, or use a tiny bit of sandpaper to clean up the wood sections. -
Let It Cure:
Allow the paint to limit-dry for at least one hour. Ensure no tackiness remains before moving on. -
Seal the Frame:
Apply a coat of clear matte varnish over the entire face of the frame. This protects the wood and unifies the sheen of the painted and unpainted areas. -
Reassemble:
Once the varnish is completely dry, place the glass, your chosen artwork, and the backing board back into position.
Now you have a custom, gallery-worthy frame that adds a pop of color to any wall
BRUSH GUIDE
The Right Brush for Every Stroke
From clean lines to bold texture — master brush choice, stroke control, and essential techniques.
Explore the Full Guide
Polka Dots and Speckle Texture
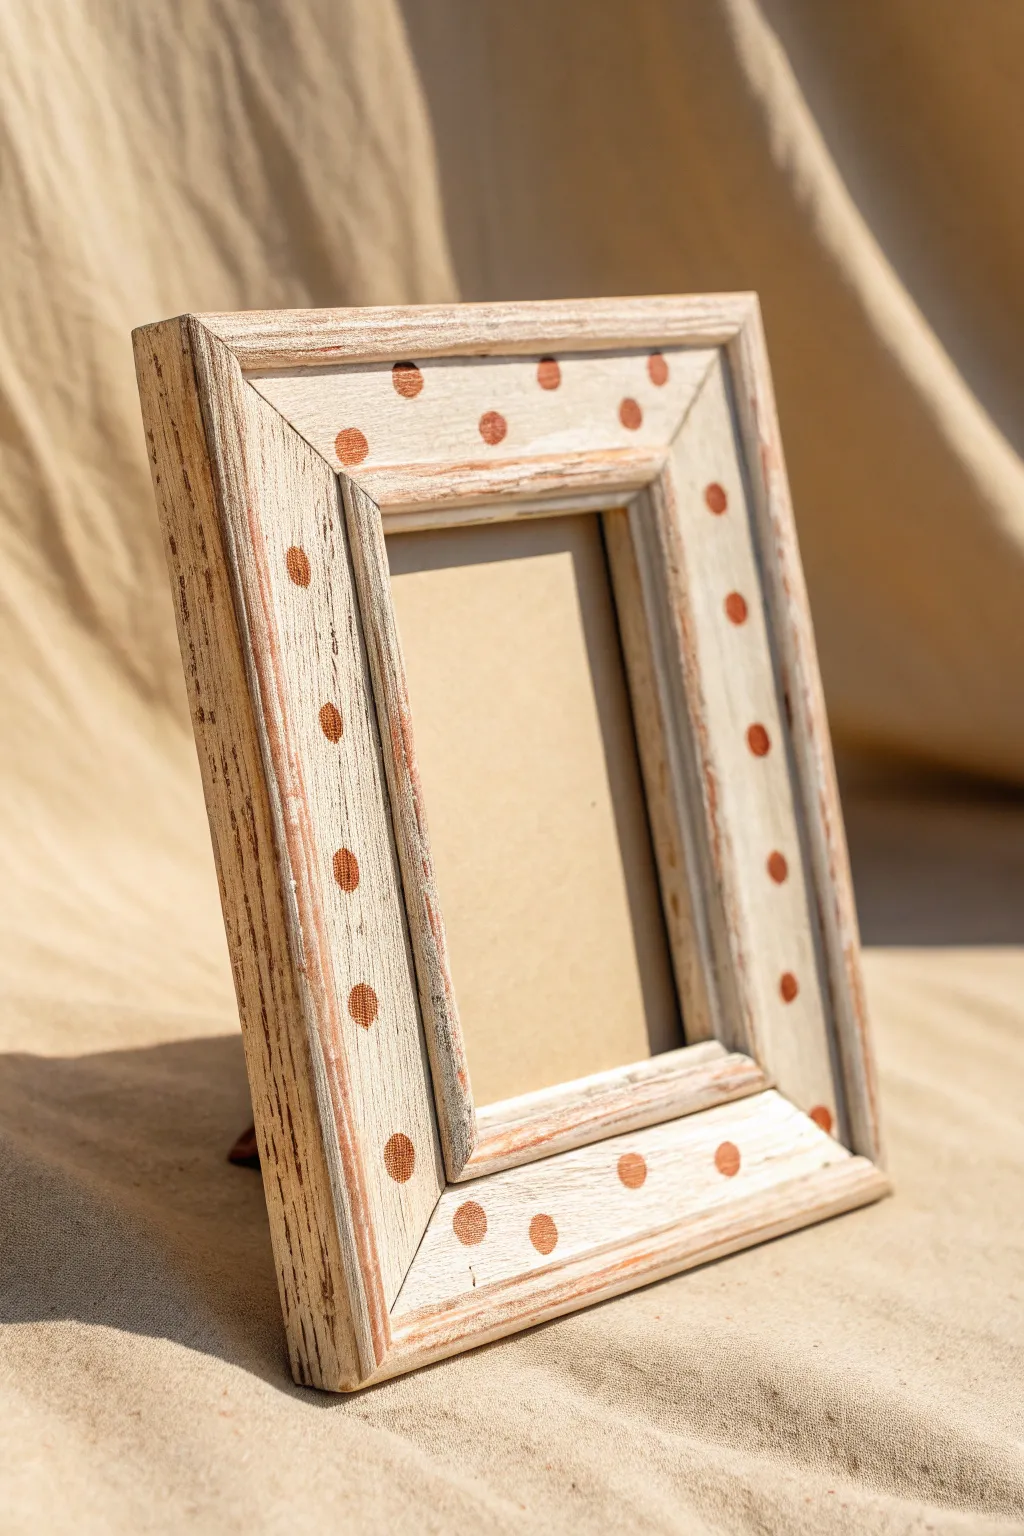
Transform a plain wooden frame into a charming, rustic piece with this simple polka dot technique. The distressed whitewash finish combined with warm terracotta accents creates a lovely, textured look perfect for cozy interiors.
Step-by-Step Guide
Materials
- Unfinished chunky wooden frame
- Sandpaper (medium and fine grit)
- Off-white or cream chalk paint
- Terracotta or rust-orange acrylic paint
- Wide flat paintbrush
- Round foam pouncer or small stencil brush
- Paper towel or rag
- Matte clear sealant spray
- Clean cloth
Step 1: Preparation & Base Coat
-
Prepare the surface:
Begin by removing the glass and backing from your wooden frame. Give the entire wood surface a light sanding with medium-grit sandpaper to remove any rough splinters and open up the wood grain. -
Clean the wood:
Wipe away all sanding dust thoroughly using a clean, dry cloth or a tack cloth to ensure your paint adheres well. -
Apply the whitewash:
Dip your wide flat brush into the off-white chalk paint. You don’t want the brush fully loaded; instead, wipe a significant amount off onto a paper towel until the brush is almost dry. -
Dry brush technique:
With your ‘dry’ brush, lightly sweep paint across the frame in the direction of the wood grain. The goal is to let the paint catch on the surface texture while leaving the deeper grain and some original wood color visible. -
Focus on the bevels:
Pay careful attention to the angled cuts and inner edges. You might want to apply a slightly heavier coat here, but keep the stroke light to maintain that distressed aesthetic. -
Distress the edges:
While the paint is just starting to set but still tacky, use a damp rag to gently rub back the paint on the sharp outer corners and high points, revealing more of the raw wood underneath. -
Let it dry:
Allow the base coat to dry completely. Since you used a dry brush technique, this should only take about 20-30 minutes.
Step 2: Adding the Polka Dots
-
Mix your dot color:
Prepare your terracotta acrylic paint. If the color feels too flat, I generally mix in a tiny drop of brown to give it an earthier, burnt-orange tone that matches the rustic wood. -
Test spacing:
Before painting on the frame, practice your spacing on a piece of scrap paper. Decide if you want a uniform pattern or a more random scatter. -
Load the pouncer:
Dip your round foam pouncer or stencil brush into the paint. Dab the excess off onto a paper towel—too much paint will cause the dots to bleed under the edges or look gloopy. -
Stamp the first dots:
Start applying dots in the corners first to anchor your design. Press the pouncer straight down and lift straight up to get a crisp circle. -
Fill the length:
Working along the long sides of the frame, add dots at regular intervals. Visual estimation usually works best for this rustic style rather than precise measuring. -
Complete the pattern:
Finish stamping dots along the shorter top and bottom edges, adjusting exactly where they land to keep the pattern balanced visually. -
Dry the dots:
Let the polka dots dry fully. Acrylic paint may take up to an hour to cure completely depending on how thick the application is.
Use a Q-Tip Guide
Don’t have a foam pouncer? A simple cotton swab (Q-tip) works perfectly for small, rustic dots. Twist it while stamping for a cleaner edge.
Step 3: Finishing Touches
-
Optional sanding:
For an extra worn-in look, very lightly run a piece of fine-grit sandpaper over the dried colored dots. This makes them look like they’ve been part of the wood for years. -
Dust off again:
Wipe the frame down one last time to remove any dust generated from the final distressing step. -
Seal the deal:
Take the frame to a well-ventilated area and apply a light coat of matte clear sealant spray. This protects the paint from chipping without adding an unwanted glossy shine. -
Reassemble:
Once the sealer is dry to the touch, place the glass, your favorite photo, and the backing board back into the frame.
Try Metallic Accents
Swap the terracotta paint for metallic gold or copper to give the frame a glam-rustic twist that catches the light beautifully.
Now you have a beautifully textured frame that adds a touch of handmade warmth to your decor
Whitewashed Beachy Wood Grain
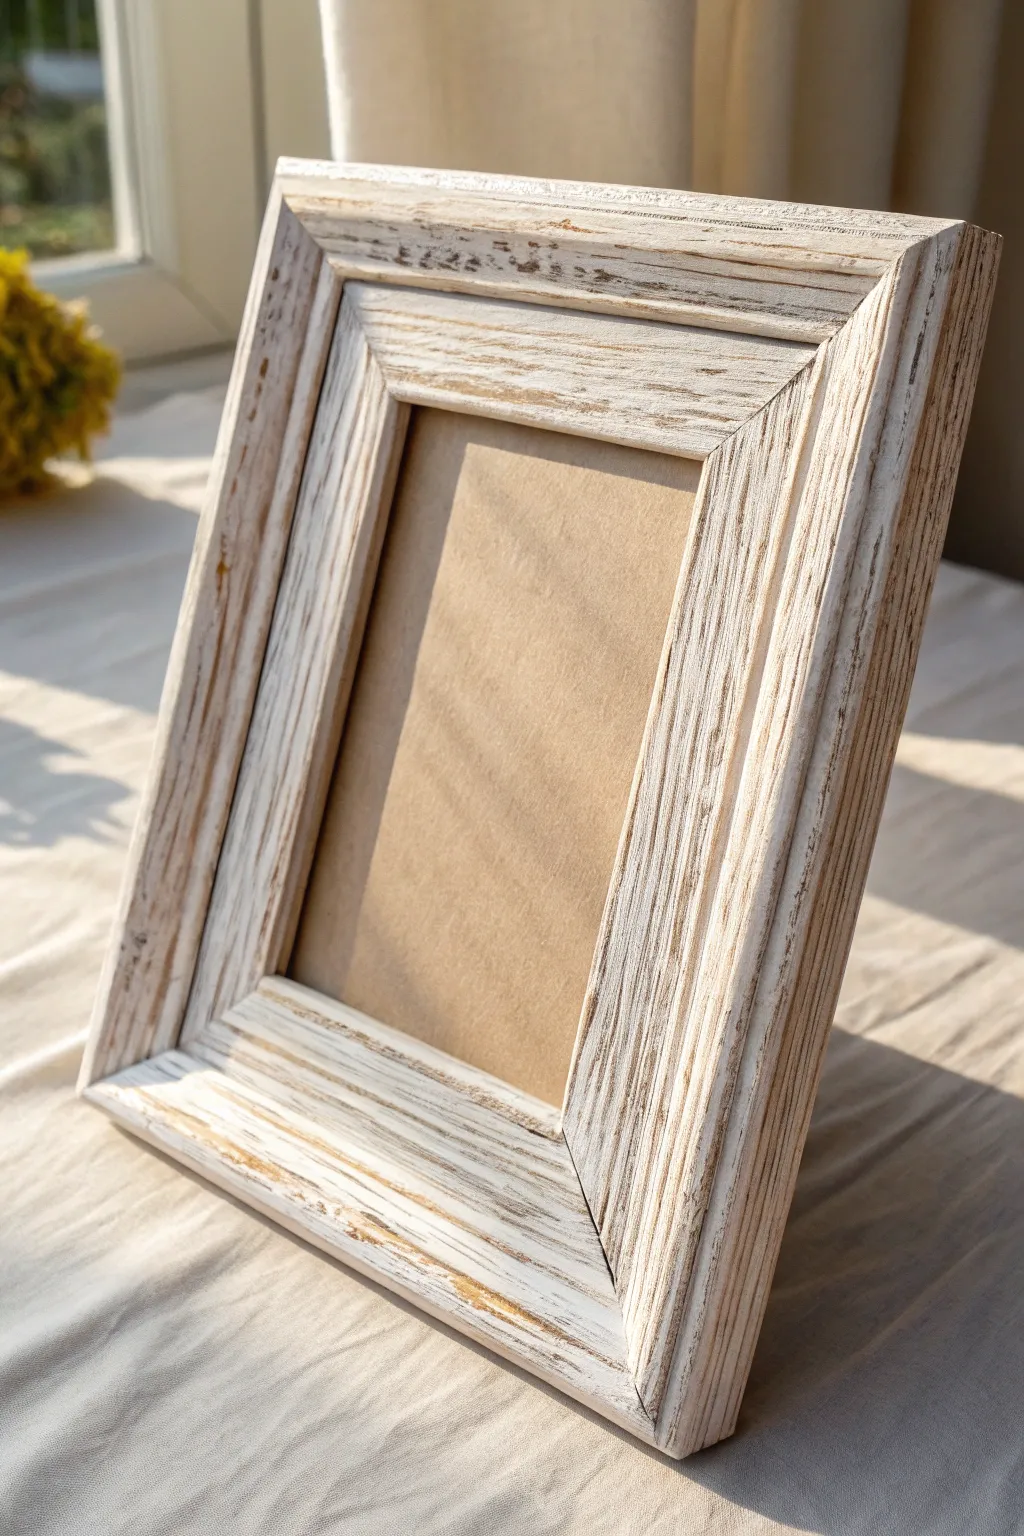
Transform a plain wooden frame into a breezy, sun-bleached treasure that looks like it belongs in a seaside cottage. By layering dry brush techniques over raw wood, you’ll achieve a textured, weathered finish that highlights natural grain without obscuring it.
Step-by-Step Tutorial
Materials
- Unfinished wood picture frame (wide profile works best)
- Medium-grit sandpaper (120-150 grit)
- Fine-grit sandpaper (220 grit)
- White acrylic paint or chalk paint
- Water (for diluting)
- Clean rag or lint-free cloth
- Stiff-bristled chip brush or old paintbrush
- Small container for mixing
- Drop cloth or newspaper
- Clear matte varnish or wax (optional)
Step 1: Preparation & Sanding
-
Remove hardware:
Begin by removing the glass, backing board, and any metal hardware from your unfinished frame. Keep these safe in a small bowl so they don’t get lost. -
Initial scuffing:
Take your medium-grit sandpaper and give the entire frame a solid sanding. You want to open up the pores of the wood and smooth out any factory imperfections or splinters. -
Enhance the grain:
To really get that deep texture seen in the photo, sand slightly more aggressively along the natural grain lines. This creates microscopic valleys that will catch the white paint later. -
Clean the surface:
Wipe the frame down thoroughly with a slightly damp cloth to remove every speck of sawdust. Dust is the enemy of a clean finish. -
Dry completely:
Let the wood dry out completely if you used a damp cloth. The wood needs to be thirsty to accept the whitewash properly.
Wire Brush Trick
Before painting, drag a wire brush firmly along the grain. This digs out soft wood fibers, creating deeper grooves that hold more white paint for high contrast.
Step 2: Creating the Whitewash
-
Mix the paint:
In your small container, mix white acrylic paint with water. I usually aim for a 1:1 ratio—you want a milky consistency, not a thick paste. -
Test the consistency:
Test your mixture on the back of the frame first. If it’s too opaque, add drops of water; if it’s too watery, add a smudge more paint.
Driftwood Grey
Mix a tiny drop of warm grey or tan paint into your whitewash mixture. This subtly ages the wood, preventing the white from looking too bright or sterile.
Step 3: Applying the Finish
-
Load the brush lightly:
Dip just the tips of your stiff-bristled brush into the paint mixture. Offload most of the paint onto a paper towel until the brush feels almost dry. -
First pass:
Drag the brush lightly along the length of the wood grain in long, confident strokes. Do not stop in the middle of a side, or you’ll get a visible line. -
Work into crevices:
Focus some attention on the recessed areas and corners of the molding, dabbing slightly to ensure the white settles into the deeper grooves. -
Wipe back:
Immediately after painting one side, take your lint-free rag and gently wipe over the surface in the direction of the grain. This removes excess paint from the high points. -
Assess the coverage:
Look at the frame from different angles. The goal is for the raw wood color to peek through the white streaks significantly, just like driftwood. -
Build layers:
Let the first coat dry for about 10 minutes. If you want a starker white look, repeat the dry-brush and wipe process a second time.
Step 4: Distressing & Finalizing
-
Distress for texture:
Once fully dry, take your fine-grit sandpaper (220) and lightly sand the raised edges and corners. This exposes the raw wood again and creates that authentic worn look. -
Refine the grain:
If any areas look too ‘painted,’ spot sand them specifically to break up the solidity of the white paint. -
Dust off again:
Use a dry bristle brush or a tack cloth to remove all the fine sanding dust from the grooves. -
Optional sealing:
If the frame will be in a high-humidity area, apply a very thin coat of matte clear wax or varnish. Keep it matte to preserve the natural, beachy vibe. -
Reassemble:
Replace the glass, backing, and hardware once everything is cured and dry to the touch.
Now you have a beautifully weathered frame ready to showcase your favorite memories with a touch of coastal elegance

PENCIL GUIDE
Understanding Pencil Grades from H to B
From first sketch to finished drawing — learn pencil grades, line control, and shading techniques.
Explore the Full Guide
Metallic Edge Highlights
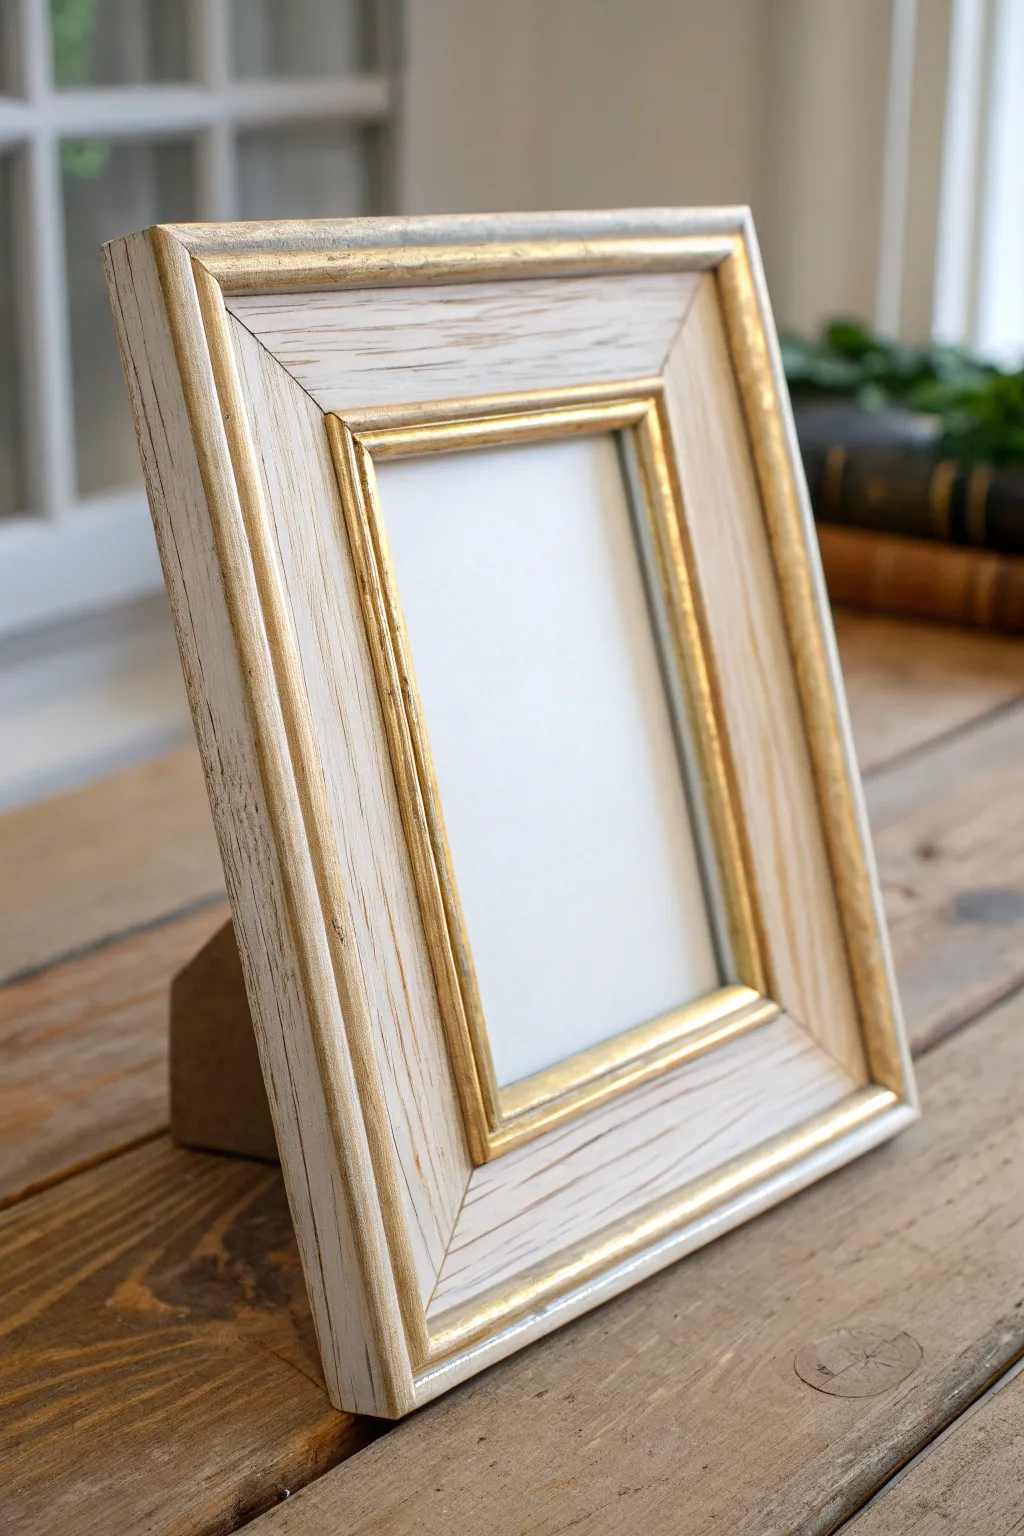
Transform a plain wooden frame into a sophisticated, vintage-inspired piece with this simple layering technique. The combination of a whitewashed base and rich metallic gold edges creates a timeless look that fits perfectly in both modern farmhouse and traditional interiors.
Step-by-Step Guide
Materials
- Unfinished wide wooden picture frame
- Medium grit sandpaper (120-150 grit)
- White chalk paint or matte acrylic paint
- Water (for thinning paint)
- Wide flat paintbrush
- Bright gold metallic paint or gilding wax
- Small angled detail brush
- Clean lint-free rags
- Clear matte sealer (optional)
Step 1: Preparation and Base Coat
-
Prepare the surface:
Begin by lightly sanding your unfinished wooden frame with medium grit sandpaper. You want to smooth out any rough splinters while opening up the wood grain to accept the paint. -
Clean the dust:
Wipe the entire frame down with a damp cloth or tack cloth to remove all sanding dust. Ensure the wood is completely dry before proceeding. -
Create a wash:
In a small container, mix your white chalk paint with water. I usually aim for a 1:1 ratio, creating a milky consistency that acts as a stain rather than an opaque coat. -
Apply the wash:
Using the wide flat brush, apply the watered-down paint to the entire face of the frame. Work in long strokes following the direction of the wood grain. -
Wipe back:
Immediately after applying the paint, take a lint-free rag and gently wipe off the excess. This allows the natural wood grain to show through, creating that weathered, whitewashed effect. -
Check coverage:
Assess the opacity. If you want a whiter look, let the first coat dry and repeat the wash and wipe process. For this specific look, one coat is usually sufficient. -
Dry thoroughly:
Allow the base coat to dry completely. Since it’s a thin wash, this should only take about 20-30 minutes.
Clean Lines
For perfectly crisp metallic lines, run a strip of painter’s tape along the wood section before painting the edges. Peel it off while the gold paint is still slightly wet.
Step 2: Distressing and Gilding
-
Light sanding:
Once dry, take your sandpaper and gently distress the white surface. Focus on the high points and corners where natural wear would occur. -
Clean specifically:
Wipe away the new sanding dust carefully. You need a clean surface for the metallic accents to adhere properly. -
Load the detail brush:
Dip your small angled brush into the gold metallic paint. You don’t need to overload it; a little goes a long way with metallics. -
Paint the inner lip:
Carefully run the brush along the innermost beveled edge of the frame, right next to where the glass will sit. Use the angle of the brush to keep a straight line. -
Paint the outer rim:
Apply a coordinating strip of gold to the outermost edge of the frame face. This frames the whitewashed wood section beautifully. -
Feather the edges:
If the gold line looks too perfect or manufactured, use a dry finger or cloth to lightly smudge the wet paint inward slightly for a more organic, aged appearance. -
Add random highlights:
Looking at the texture of the wood on the main face, use a very dry brush to lightly skim gold over any raised grain or knots. Keep this very subtle. -
Refine the corners:
Pay special attention to the mitered corners. Ensure the gold connects cleanly where the wood joints meet. -
Final drying time:
Let the metallic paint cure according to the manufacturer’s instructions, typically at least an hour. -
Seal the finish:
If the frame will be handled frequently, apply a thin coat of clear matte sealer over the paint to protect your handiwork without adding unwanted shine.
Antique Finish
Mix a tiny drop of dark brown or black paint into your gold, or use an antiquing wax over the dried gold edges to tone down the brightness for an older look.
Place your favorite photo inside and display your custom-finished frame on a mantel or desk for instant vintage charm
Hand-Painted Floral Corner Clusters
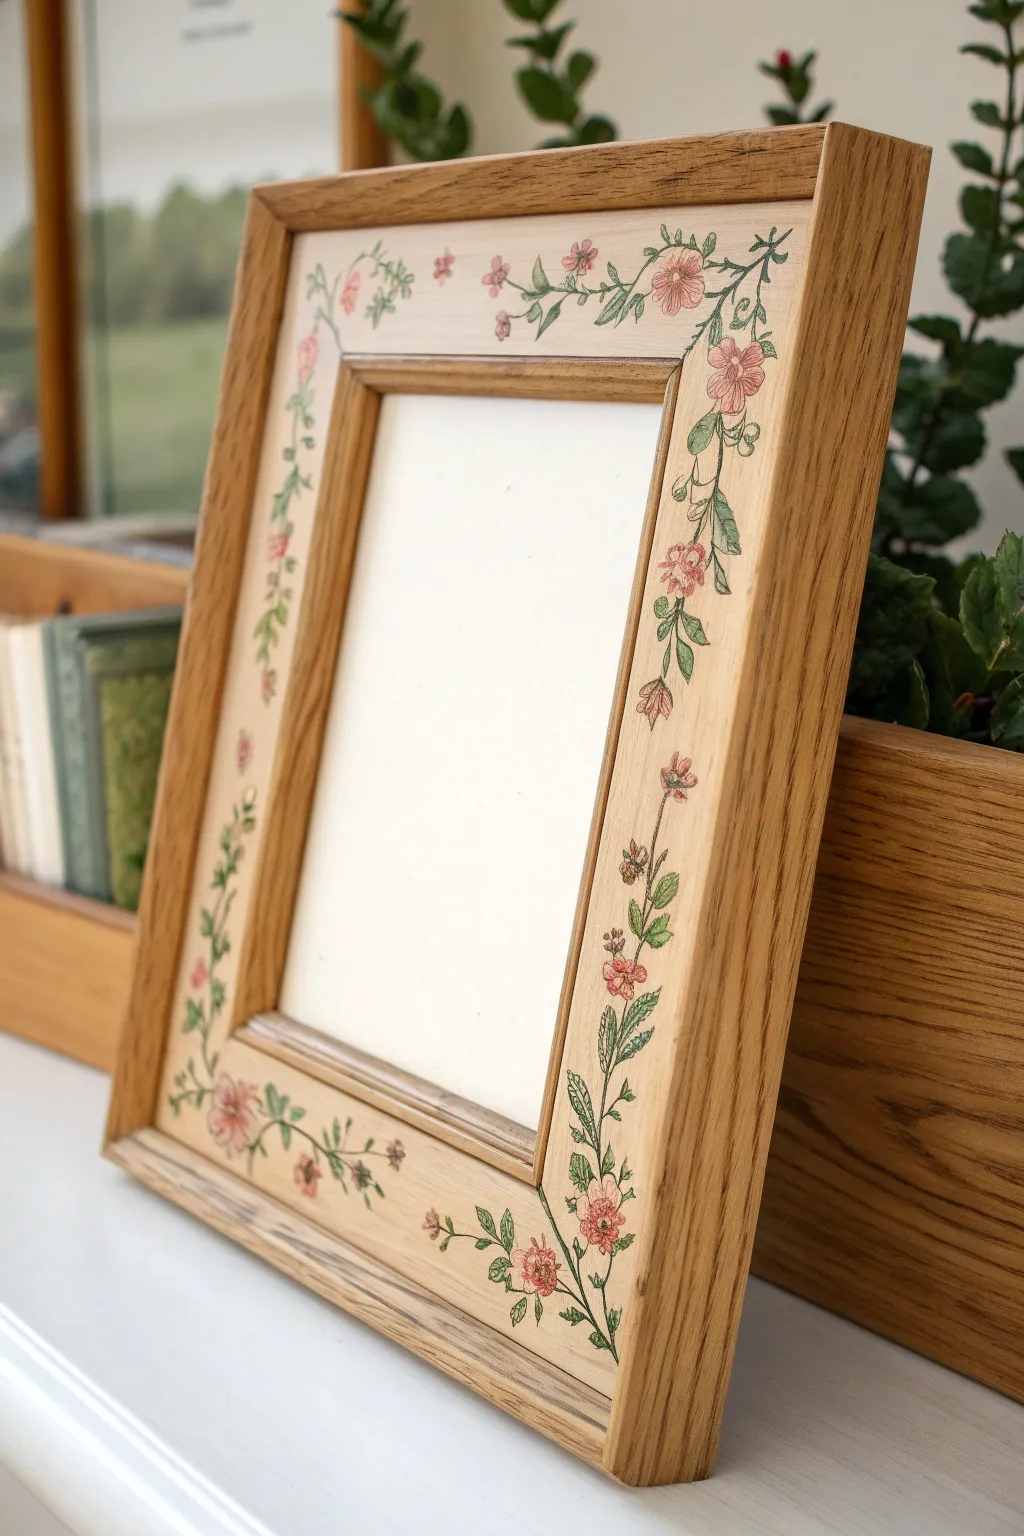
Transform a plain wooden frame into a delicate garden trelllis with this charming hand-painted project. The design features trailing vines of soft pink blossoms and sage green leaves that gently wrap around the frame’s border, creating a sweet, vintage-inspired look perfect for showcasing cherished memories.
Step-by-Step
Materials
- Unfinished wooden picture frame (light oak or pine)
- Fine-grit sandpaper (220-grit)
- Pencil
- Acrylic paints (Soft pink, deep rose, sage green, forest green, cream/off-white)
- Fine detail brushes (sizes 0/00 and 1)
- Matte or satin clear sealant spray
- Palette or small dish
- Paper towels
- Water cup
- Clear gesso (optional)
Step 1: Preparation and Planning
-
Sand the surface:
Begin by removing the glass and backing from your frame. Gently sand the entire front surface with 220-grit sandpaper to remove any rough fibers and create a ‘tooth’ for the paint to grip. Wipe away all dust with a slightly damp cloth or tack cloth. -
Prime the wood (optional):
If your wood is very porous, apply a thin layer of clear gesso. This seals the wood without hiding the grain, preventing your paint from bleeding into the fibers. Let it dry completely. -
Sketch the main vine:
Using a pencil very lightly, draw the main wandering vine stems. Start from the bottom left corner, trailing up the side and slightly onto the bottom edge. Repeat on the right side, letting the vines meander naturally rather than perfectly straight. -
Mark leaf and flower placement:
Lightly sketch small circles where your main flowers will sit and tiny dashes where leaf clusters will emerge from the vine. Aim for an organic balance; clusters should be denser near the corners and sparser in the middle sections.
Paint Consistency Tip
Add a drop of water to your acrylics until they have an ink-like consistency. This helps the paint flow smoothly for long vines without the brush dragging or skipping.
Step 2: Painting the Greenery
-
Mix your greens:
On your palette, mix sage green with a touch of cream to create a soft base color. Keep a bit of forest green separate for shading. -
Paint the stems:
Using your thinnest liner brush (size 0 or 00), trace over your pencil vine lines with the sage green mix. Use a light hand to keep the lines delicate and thin. -
Add base leaves:
Switch to a size 1 brush. Paint small, teardrop-shaped leaves along the vine wherever you made marks. Press the belly of the brush down and lift up to create the point of the leaf. -
Detail the leaves:
Once the base green is dry, use the thinnest brush and the darker forest green to add a tiny central vein to larger leaves or to darken the unexpected stems where they join the main vine. -
Add tendrils:
With watered-down green paint, add tiny, curly tendrils spinning off the main vine for a whimsical, wild-grown look.
Step 3: Blossoming the Frame
-
Base coat the flowers:
Mix your soft pink paint. Fill in the flower circles you sketched earlier. These appear to be small wild roses or dogwoods, so keep the shapes simple—five rounded petals per flower. -
Add depth to petals:
While the pink is still slightly wet, pick up a tiny amount of deep rose on your brush tip and blend it into the center of the petals, radiating outward to create depth. -
Paint buds:
Add small pink dots or teardrops at the ends of some smaller branches to represent un-opened flower buds. -
Define the centers:
Using a tiny dot of yellow or cream mixed with brown, stipple the very center of the open flowers. You can add tiny specks of white for highlights on the petals here too. -
Outline for crispness (optional):
For an illustration-style look like the image, use a very watered-down brown or dark green paint and your finest brush to loosely outline some petals and leaves. Don’t outline everything perfectly; broken lines look more natural.
Fixing Wobbly Lines
If a vine line gets too thick or wobbly, wait for it to dry completely. Then, use a damp Q-tip or a stiff brush with water to gently ‘erase’ or reshape the edge before repainting.
Step 4: Finishing Touches
-
Erase guidelines:
Once the paint is absolutely bone dry (give it an hour to be safe), gently erase any visible pencil marks. Be careful not to scrub the paint. -
Check for gaps:
Step back and look at the composition. If a section looks too empty, add a small floating leaf or a fallen petal to fill the space without cluttering it. -
Seal the artwork:
Take the frame to a well-ventilated area. Apply two light coats of matte or satin clear spray sealant. This protects your handiwork from dust and fading without making the wood look plastic. -
Reassemble:
Once the sealant is dry and no longer tacky, replace the glass and backing, and your frame is ready for a photo.
Now you have a beautifully personalized frame that brings a touch of nature indoors


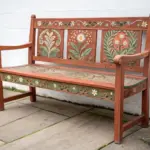
Folk Art Flowers and Vines
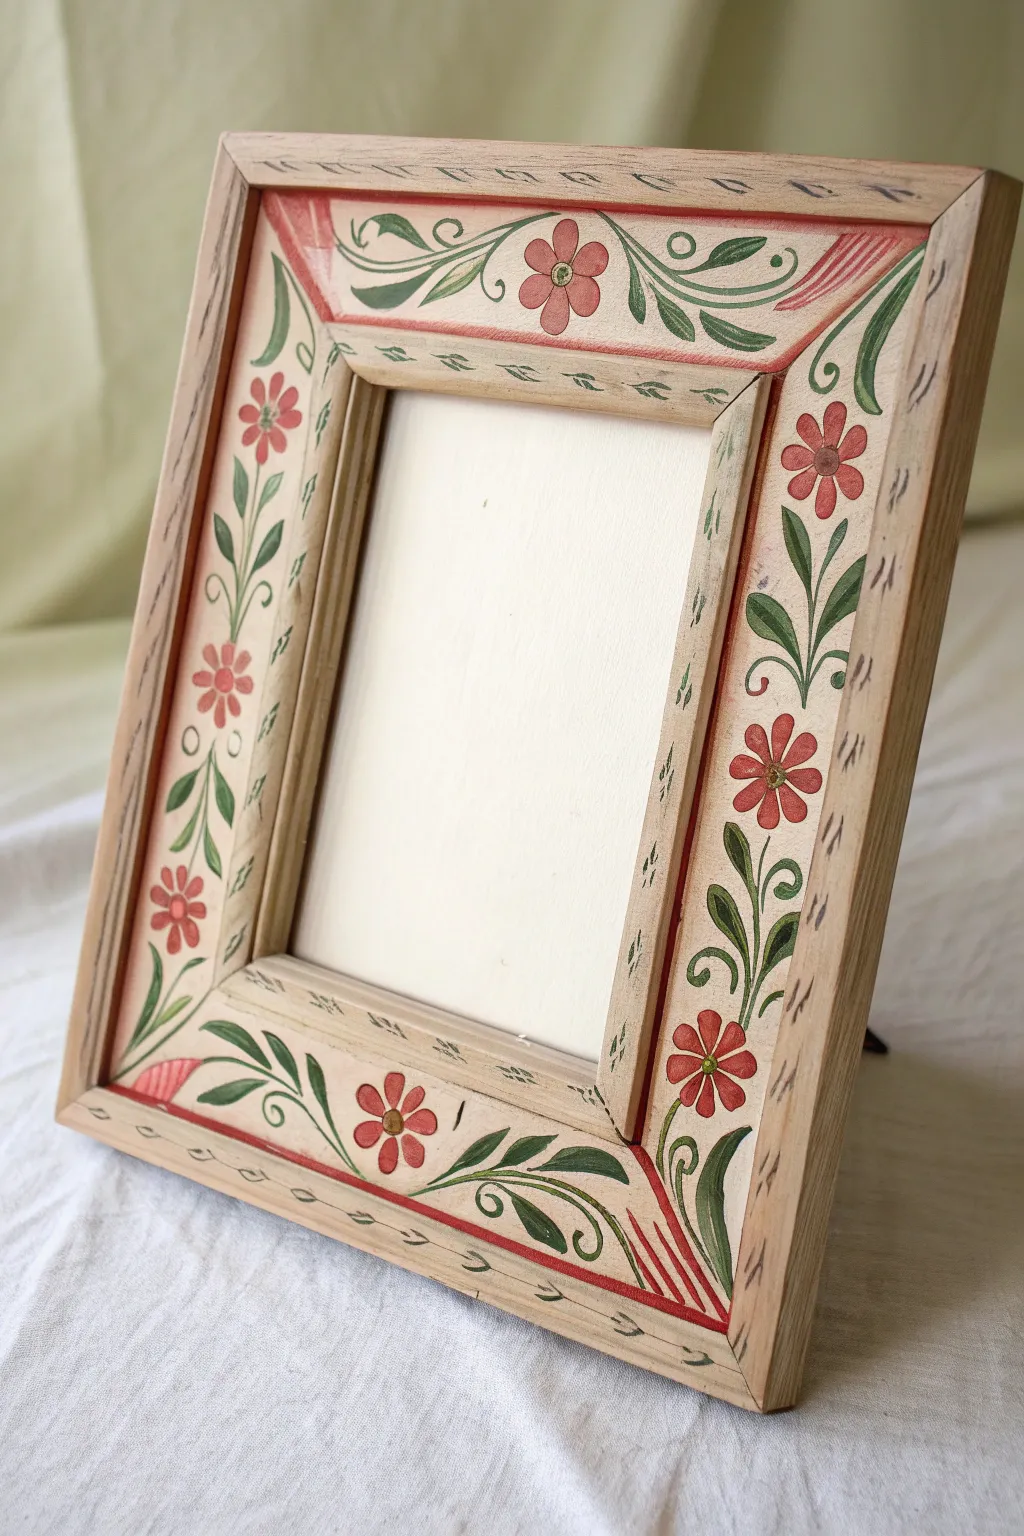
Bring a touch of old-world warmth to your photos with this hand-painted wooden frame featuring classic folk art motifs. The combination of gentle vines, symmetrical red florals, and rustic detailing creates a timeless piece that feels like a cherished family heirloom.
Step-by-Step Guide
Materials
- Unfinished raw wood picture frame (roughly 5×7 or 8×10)
- Sandpaper (220-grit)
- Acrylic craft paints: Cream/Antique White, Terracotta Red, Deep Forest Green
- Flat shader brush (approx. 1/2 inch)
- Small round paintbrush (size 2 or 3)
- Fine liner brush (size 0 or 00)
- Pencil and eraser
- Ruler or tape measure
- Matte spray varnish or brush-on sealer
- Paper palette or paint tray
- Water cup and paper towels
Step 1: Preparation and Base Layer
-
Sand the Wood:
Begin by lightly sanding your raw wood frame with 220-grit sandpaper. Focus on smoothing out any rough edges or splinters, especially on the corners, but leave a bit of the natural wood grain texture visible for character. -
Wipe Clean:
Use a dry cloth or a slightly damp paper towel to wipe away all sanding dust. The surface needs to be perfectly clean for the paint to adhere properly. -
Paint the Inset Panel:
Using your flat shader brush, paint the recessed flat panel of the frame with the Cream/Antique White acrylic paint. Apply two thin coats rather than one thick one, letting the first coat dry completely before adding the second to ensure opacity. -
Leave Margins Bare:
Be careful to keep the cream paint only on the flat face of the frame. Leave the raised outer and inner beveled edges as bare raw wood; this contrast is key to the rustic look.
Step 2: Drafting the Design
-
Mark Centers:
Using a ruler, lightly mark the center point of each side of the painted cream area with a pencil. This will guide your symmetrical floral placement. -
Sketch the Main Vines:
Lightly sketch a central vine stem running vertically up the sides and horizontally across the top and bottom. Curve the ends of the vines gently into scrolls or spirals as they approach the corners. -
Place the Flowers:
Sketch a small circle at the center point of each side to represent the main flower. Add smaller circles along the vine for secondary blooms if your frame size allows. -
Add Leaf Details:
Draw simple teardrop shapes along the vines to represent leaves. Keep the spacing balanced so the design feels airy, not cluttered.
Uneven Vines?
Don’t stress about perfect symmetry. Folk art is meant to look hand-done. If a vine is too thick, let it dry, paint over it with the background cream color, and try again.
Step 3: Painting the Motifs
-
Paint the Vines:
Switch to your fine liner brush and mix the Deep Forest Green with a tiny drop of water to help the paint flow. Paint over your pencil lines for the main vine stems, using a light hand to keep the lines delicate. -
Leaf Filling:
Using the small round brush, fill in the leaf shapes with the same green. I like to press the brush down at the base of the leaf and lift as I pull outward to create a natural tapered point. -
Create the Flowers:
Load your cleaned small round brush with Terracotta Red. Paint the flower petals using five or six simple strokes radiating from the center circle. Let these dry completely. -
Add Flower Centers:
Once the red petals are dry, dip the handle end of a paintbrush into yellow or gold paint (or mix cream with a touch of brown) and dot the center of each flower. -
Corner Accents:
In the corners where the cream paint meets the raw wood, use the red paint to add small decorative lines or hatch marks, adding to the geometric folk aesthetic.
Brush Control
For smooth vines, mix a tiny drop of water into your acrylic paint. It should be the consistency of heavy cream to flow off the liner brush without skipping or dragging.
Step 4: Rustic Details and Finishing
-
Border Outlining:
Use the liner brush and Terracotta Red to paint a very thin border line enclosing the painted cream area, separating it visually from the bare wood edges. -
Bevel Decoration:
On the bare wood beveled edges (both inner and outer), use your smallest brush and dark green paint to make tiny tick marks or ‘V’ shapes spaced evenly apart. This frames the painting nicely. -
Erase Guide Lines:
Wait until the paint is bone dry—give it at least an hour—then gently erase any visible pencil marks that weren’t covered by paint. -
Distress (Optional):
If you want an aged look, very lightly scuff the painted flowers with a high-grit sandpaper to reveal tiny bits of the cream background underneath. -
Seal the Work:
Apply a coat of matte spray varnish or brush-on sealer over the entire front of the frame. This unifies the sheen of the painted and unpainted areas and protects your handiwork.
Pop in your favorite memory and enjoy the cozy, handcrafted atmosphere this frame adds to your room
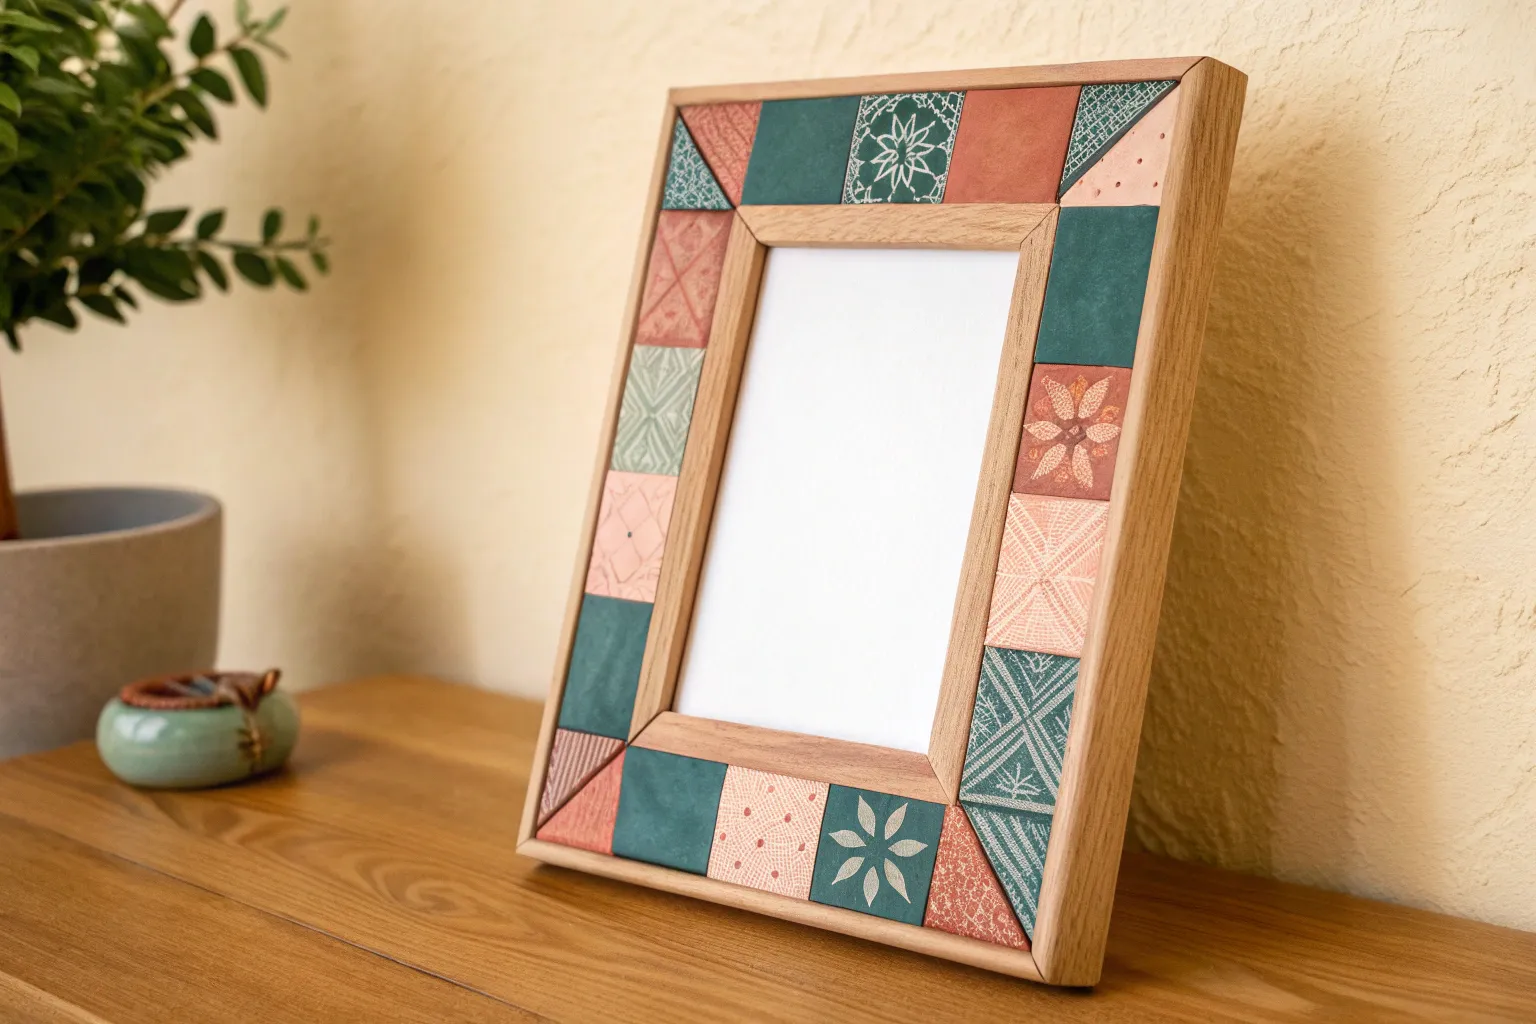
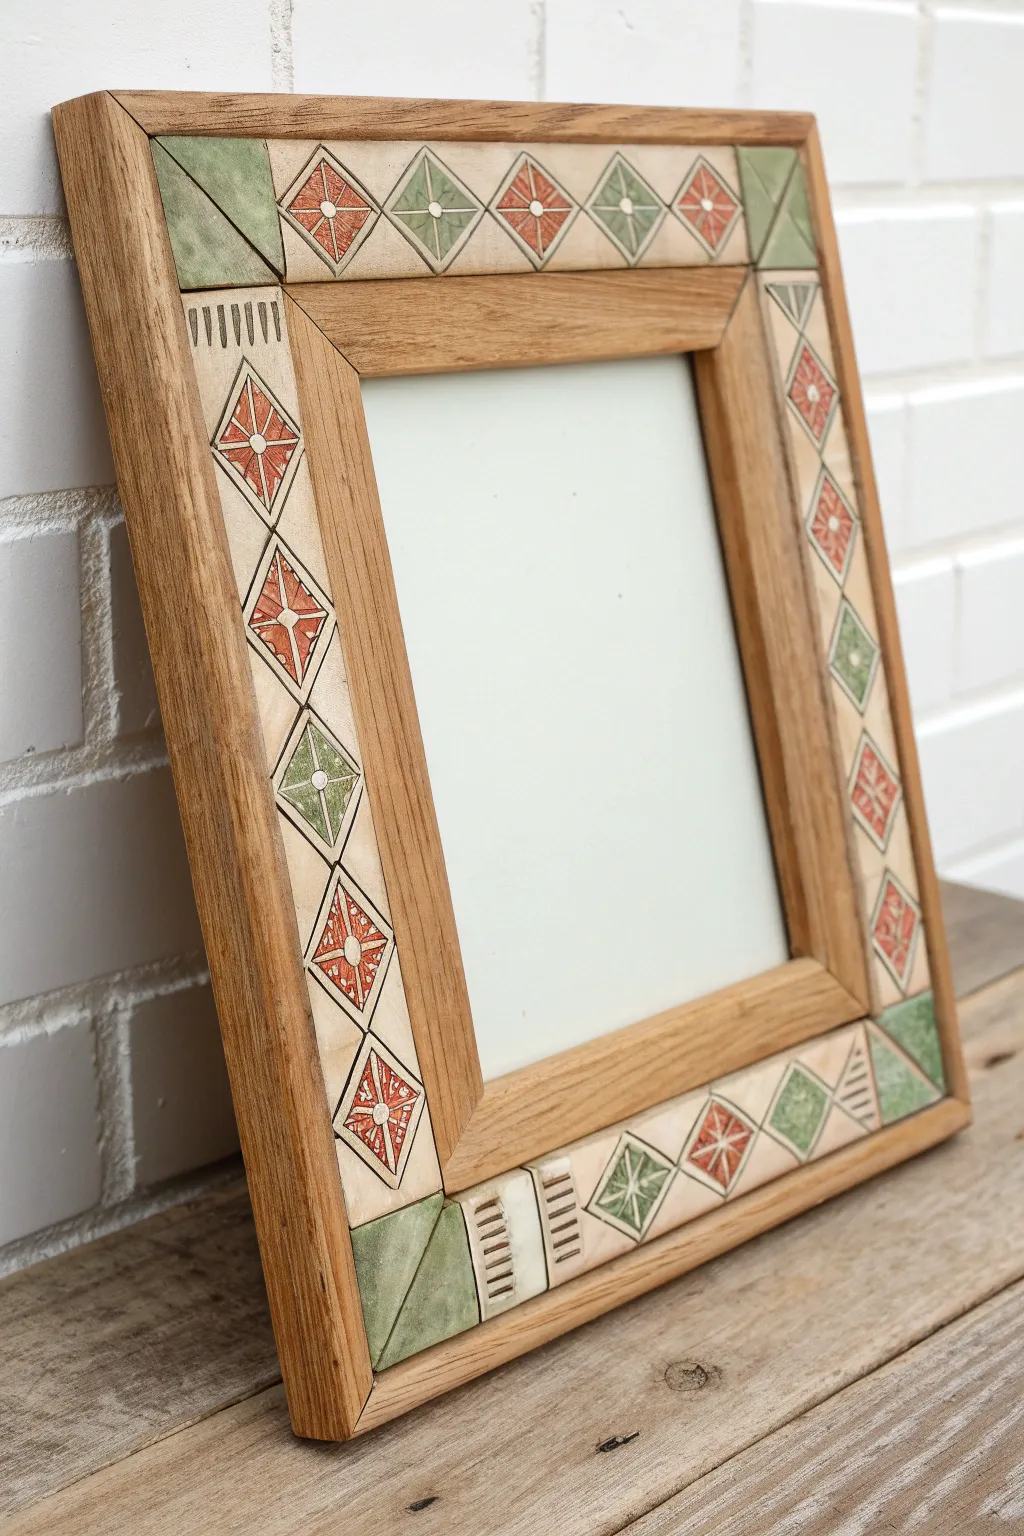
Stencil-Look Pattern (Freehand or Stenciled)
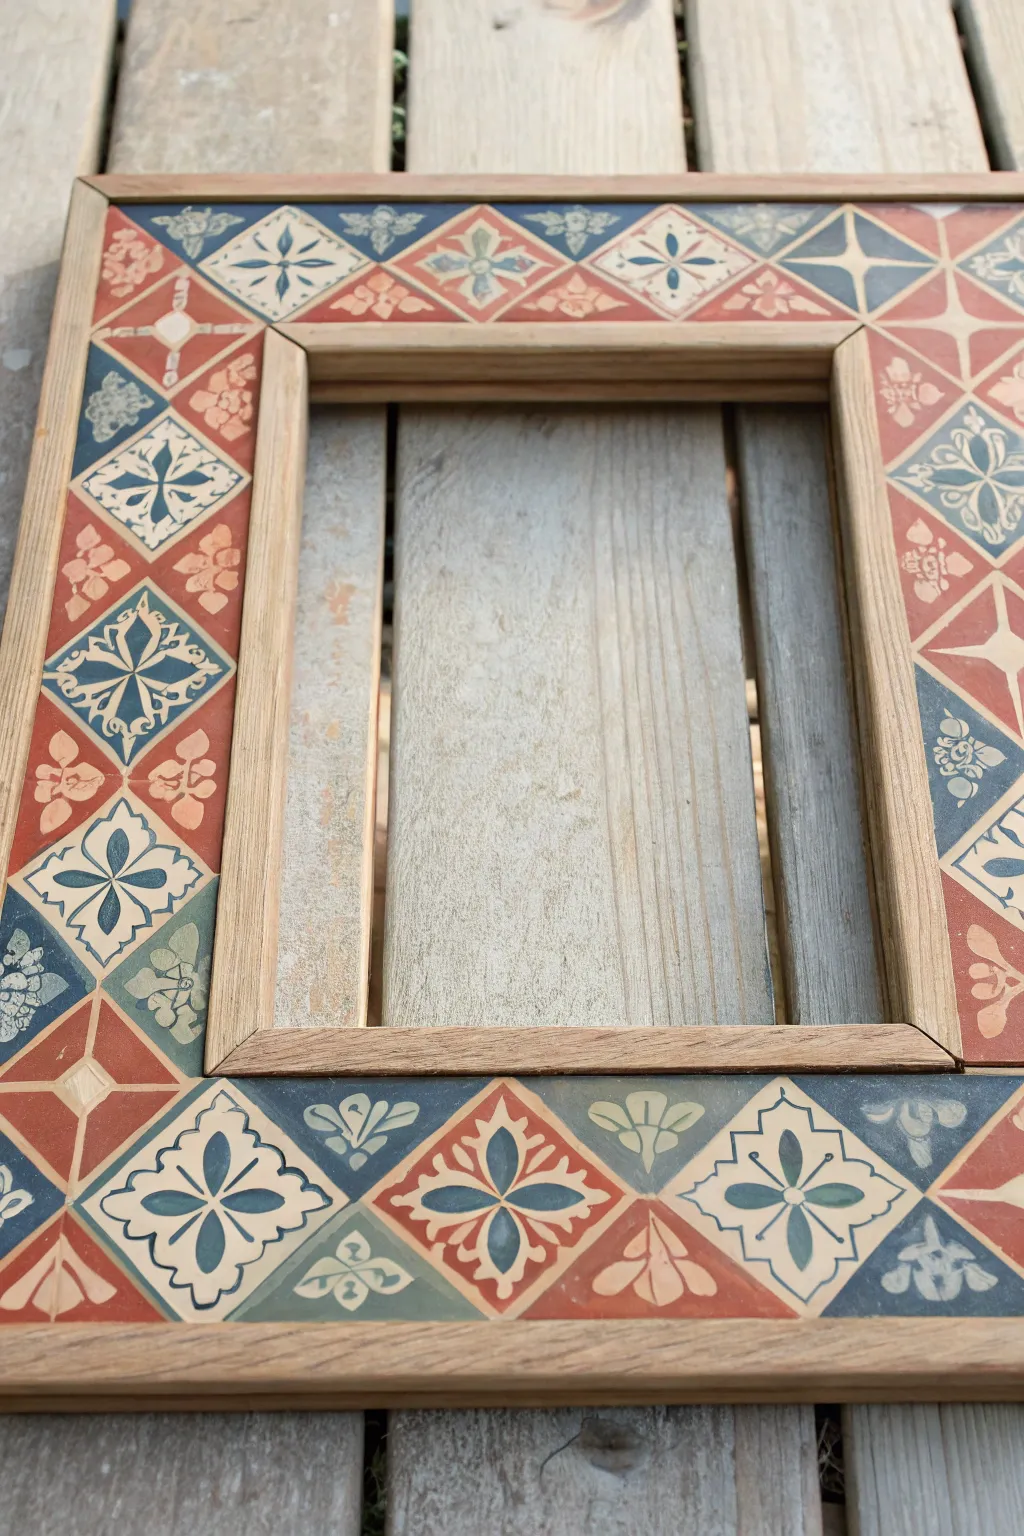
Transform a plain flat-profile wooden frame into a sophisticated piece of decor by mimicking the look of vintage ceramic tiles. This project uses a carefully measured geometric grid and a muted palette of terra cotta, sage, and navy to achieve a timeless, artisanal aesthetic.
Detailed Instructions
Materials
- Flat-profile wooden picture frame (unfinished or sanded)
- Pencil and ruler
- Painter’s tape (low tack)
- Acrylic craft paints: Cream/Off-white, Terra Cotta Red, Navy Blue, Sage Green
- Assorted small flat brushes (sizes 2-4)
- Fine liner brush (size 0 or 00)
- Matte clear coat sealer (spray or brush-on)
- Palette or small dishes for mixing
- Fine-grit sandpaper (220 grit)
Step 1: Preparation & Grid Layout
-
Prep the surface:
Begin with a clean, raw wood frame. If your frame has a finish, sand it lightly with 220-grit sandpaper to create a ‘tooth’ for the paint to grab. Wipe away all dust with a tack cloth. -
Measure the width:
Measure the width of the flat face of your frame. This measurement will dictate the size of your diamond grid. For example, if the face is 2 inches wide, your diamonds will be based on this scale. -
Mark the center points:
Mark the center of each side of the frame with a light pencil mark. This ensures your pattern stays symmetrical. -
Draw the zig-zag grid:
Using your ruler and pencil, lightly draw a continuous zig-zag line down the center of the frame face to create a series of diamonds. The points of the diamonds should touch the inner and outer edges of the frame. -
Add dividing lines:
Go back and draw straight lines connecting the points of your diamonds. This will create a grid of alternating triangles and diamonds, just like the reference photo. Keep pencil pressure very light so lines are easy to cover.
Clean Lines
Does your hand shake on straight lines? Use low-tack painter’s tape to mask off the geometric shapes before painting the base colors for crisp edges.
Step 2: Blocking in Color
-
Plan your palette:
Decide on your color rotation. The photo alternates between warm terra cotta diamonds and cooler blue or cream diamonds. Mapping code letters (R for Red, B for Blue) lightly in the shapes can save confusion later. -
Paint the background shapes:
Using a small flat brush, fill in the geometric shapes. Start with the cream/off-white sections. Apply thin layers to keep the texture smooth. -
Add the accent colors:
Paint the terra cotta triangles and the navy or sage diamonds. I find it helpful to paint non-touching sections first to avoid wet paint bleeding across the lines. -
Let it dry completely:
Allow the base layer of shapes to dry fully. If the wood grain is showing through too much for your liking, apply a second coat.
Paint Consistency
Thin your acrylic paint slightly with water for the fine line work. Ink-like consistency flows better from liner brushes than thick heavy-body paint.
Step 3: Detailing the Motifs
-
Outline the shapes:
Load your fine liner brush with a slightly thinned contrasting color (like cream on red, or blue on cream). Carefully paint thin borders around each geometric shape to evoke the look of grout or tile separation. -
Create the central flowers:
In the center of the square/diamond shapes, paint a simple four-petal flower. Start with a dot in the center and pull the brush outward four times. -
Add corner flourishes:
In the corners of the cream squares, paint small inward-facing V-shapes or tiny leaves using navy blue paint. -
Decorate the triangles:
For the solid color triangles (red or green), paint a simple three-petal motif (like a fleur-de-lis) in cream stemming from the flat edge. -
Refine with dots:
Use the very tip of your brush or a toothpick to place tiny dots in the center of flowers or along the border lines for extra detail.
Step 4: Finishing Touches
-
Clean up edges:
Check the inner and outer rim of the frame. If paint smeared over the edge, sand it off gently or paint the rim a solid coordinating wood tone. -
Seal the work:
Apply a clear matte sealer over the entire face of the frame. A matte finish looks more like authentic ceramic tile than a glossy one.
Enjoy styling your new frame with a black-and-white photo or a vintage botanical print to complement the hand-painted tile look
Thin Line Mandala Border
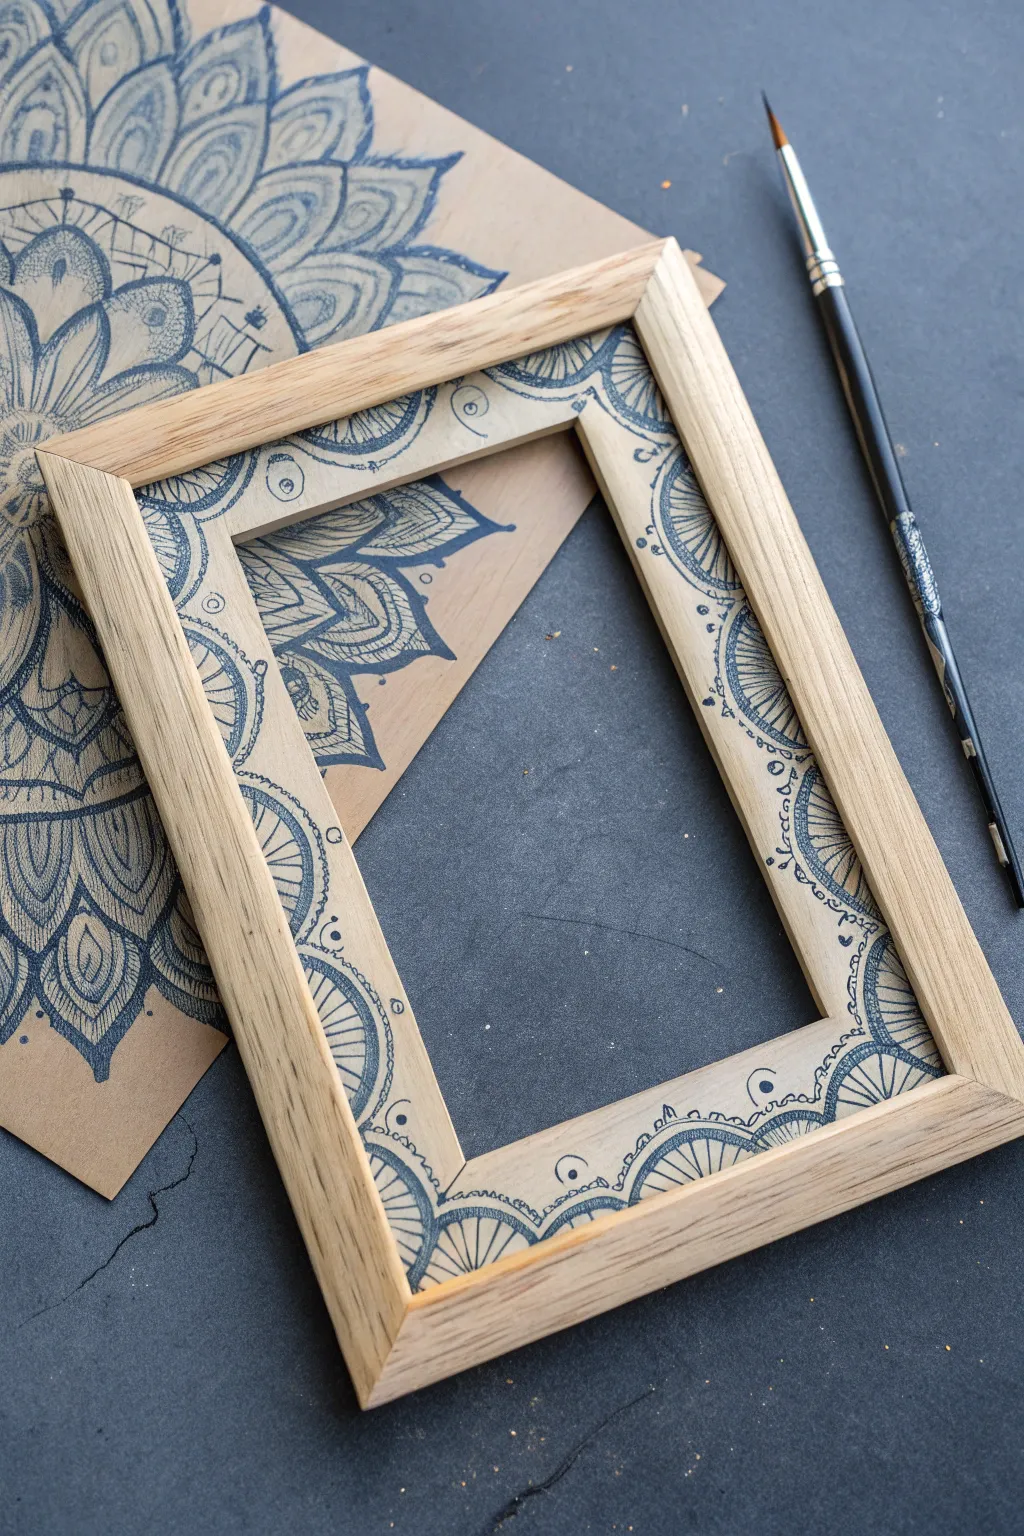
Transform a simple, unfinished wooden frame into a detailed work of art with this delicate mandala design. The contrast between the natural wood grain and the intricate, dark blue ink lines creates a sophisticated, bohemian look that feels both organic and structured.
Step-by-Step Tutorial
Materials
- Unfinished wooden picture frame (light wood like pine or birch)
- Fine-point permanent marker or archival ink pen (dark blue or black)
- Pencil (HB or H)
- White eraser
- Ruler
- Paper for practice sketching
- Fine detail paintbrush (round size 0 or 1)
- Acrylic ink or diluted acrylic paint (matching the marker color)
- Matte spray varnish or clear sealant
Step 1: Preparation & Planning
-
Sand the surface:
Before putting pen to wood, ensure your frame is incredibly smooth. Use fine-grit sandpaper (around 220 grit) to remove any rough patches or splinters, as these can snag your pen tip and ruin the clean lines. -
Wipe away dust:
Clean the frame thoroughly with a tacky cloth or a slightly damp paper towel. Any sawdust left behind will clog your marker. -
Sketch the center points:
Using your ruler and pencil so lightly that the lines are barely visible, mark the center point of each side of the frame. These will be the anchors for your mandala semi-circles. -
Practice your pattern:
On a separate sheet of paper, sketch out your mandala sequence. The design in the image uses radiating petal shapes, scallops, and small circles. Getting the rhythm down on paper first builds confidence.
Ink Bleed Prevention
If your wood is very porous and the ink spreads, apply a coat of clear matte medium or gesso first. Let it dry, sand it smooth, and then draw on top for crisp lines.
Step 2: Drawing the Base Structure
-
Draw the main semi-circles:
Using your fine-point pen, draw a large semi-circle anchored at the center mark of one frame side. The arch should reach about halfway into the frame’s width. -
Repeat on all sides:
Recreate this large semi-circle on the remaining three sides. Try to keep them relatively symmetrical, but don’t stress over imperfection—it adds to the hand-drawn charm. -
Add the first petal layer:
Inside each large semi-circle, draw a smaller concentric arch. Connect these two lines with vertical lines to create a ‘ladder’ effect or small rectangular segments. -
Create the sunburst effect:
Extend long, thin petal shapes outward from your main semi-circle toward the edges of the frame. These should look like elongated teardrops or sunflower petals.
Metallic Accent
Once the blue ink is dry, retrace just the outermost petals or the tiny center dots with a gold or copper gel pen for a subtle shimmer that catches the light.
Step 3: Adding Intricate Details
-
Fill the segments:
Inside the larger petal shapes you just drew, add interior details. You might draw a single distinct line down the middle of each petal or intricate cross-hatching. -
Connect the corners:
The corners of the frame will be empty gaps between your four main mandalas. I like to fill these voids with smaller, quarter-circle fan shapes or simple radiating lines that echo the main design. -
Add micro-details:
Look closely at your lines. Add tiny circles (dots) at the tips of petals or in the negative spaces between arches. These small dots add incredibly professional-looking texture. -
Check for balance:
Step back and look at the frame. If one area looks too light or empty, add a few more curved lines or dots to balance the visual weight.
Step 4: Shading & Sealing
-
Prepare a wash:
Mix a tiny drop of your acrylic ink or paint with water to create a very transparent wash. Test it on a scrap piece of wood first—it should be a ghostly shadow, not a solid color. -
Apply subtle shading:
Using your fine detail brush, gently paint this wash inside the base of the petals or along the inner edges of the arches. This gives the 2D drawing a slight 3D depth. -
Let it dry completely:
Allow the ink and wash to dry for at least an hour. Wood is porous and holds moisture longer than paper. -
Erase pencil marks:
Once you are certain the ink is bone-dry, gently erase your initial pencil guide marks with the white eraser. -
Seal the wood:
Finish by spraying the frame with a matte clear coat. Use light, even mists rather than one heavy coat to prevent the ink from bleeding.
Place your favorite photo or artwork inside and enjoy the custom handcrafted charm you’ve added to your decor
Name or Initials for a Gift Frame
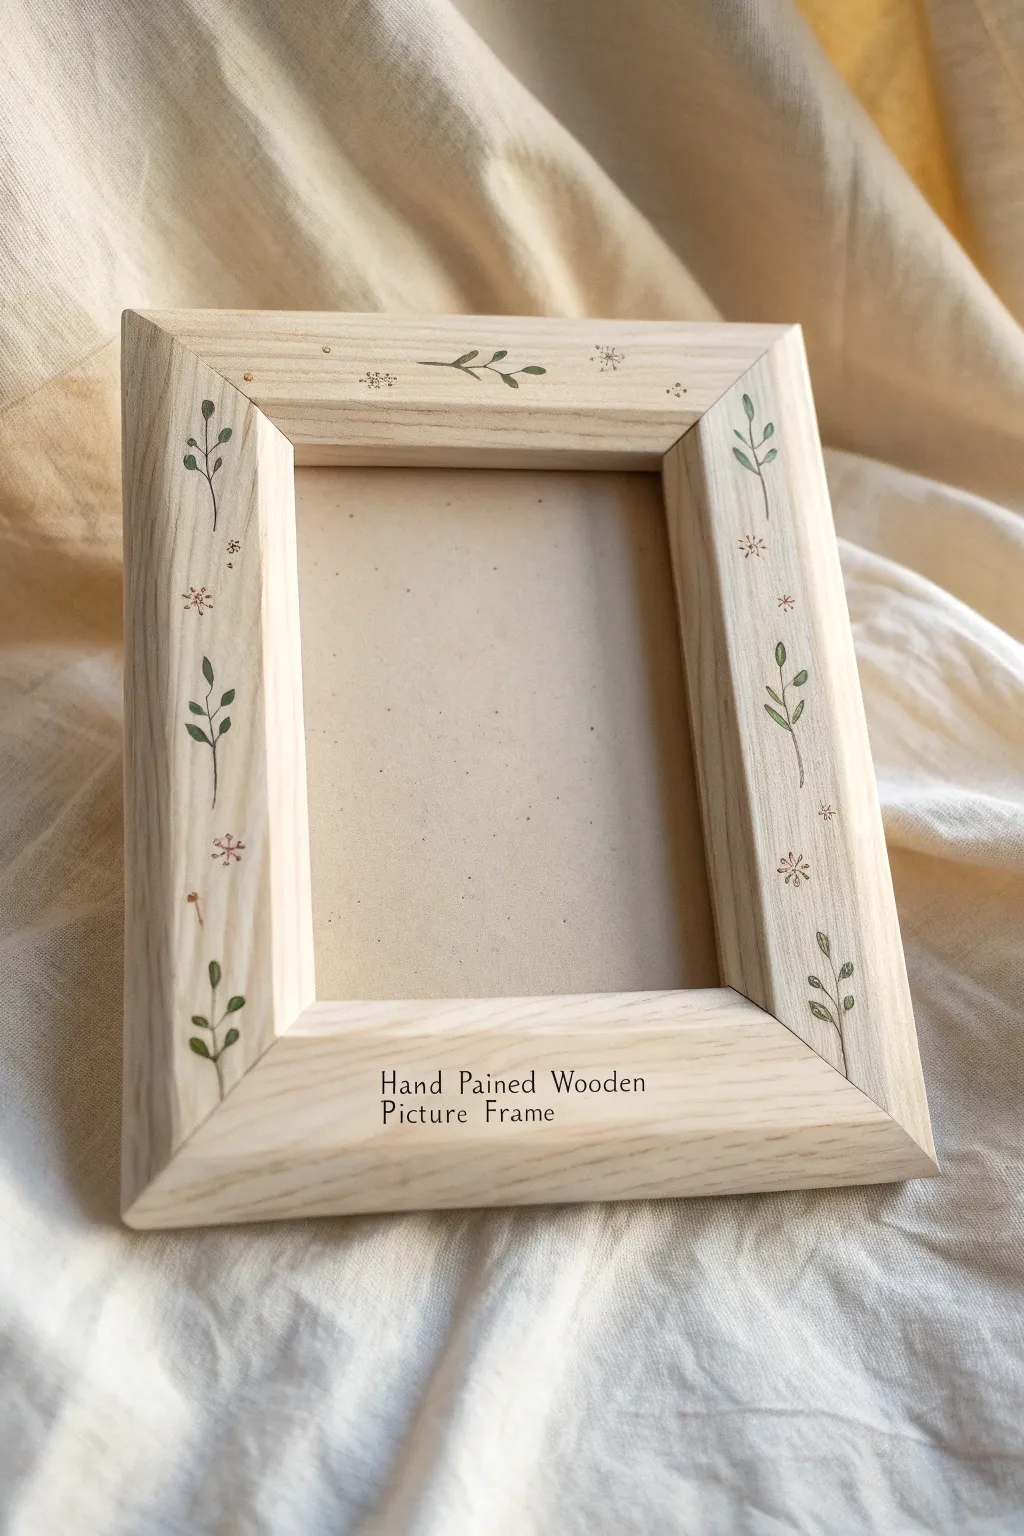
Transform a plain, unfinished wooden frame into a delicate keepsake with simple, airy botanical motifs. This minimalist design uses fine lines and subtle earth tones to create a piece that feels both rustic and refined.
Step-by-Step Guide
Materials
- Unfinished light wood smooth picture frame (flat profile preferred)
- Fine grit sandpaper (220-400 grit)
- Acrylic paints: Sage Green, Forest Green, Burnt Sienna, and a metallic Copper or Gold
- Detail brush (size 0 or 00)
- Small round brush (size 1)
- Palette or small dish
- Pencil with a dull point
- Eraser
- Clear matte acrylic sealer spray or varnish
- Paper towel
- Water cup
Step 1: Preparation and Planning
-
Sand the surface:
Begin by lightly sanding the entire face of the wooden frame. You want a very smooth surface since you will be painting fine details; any rough grain will catch your brush and disrupt the lines. -
Wipe clean:
Use a dry or very slightly damp cloth to remove all sanding dust from the frame. Let it dry completely if you used any moisture. -
Sketch the layout:
Using a pencil with a slightly dull point (to avoid scratching the soft wood), lightly mark where you want your vines to go. Don’t draw every leaf; just mark the main vertical stems on the sides and the horizontal placement for the top and bottom motifs.
Clean Lines Tip
Improve your fine lines by adding a drop of flow medium or water to your acrylics. The paint should be the consistency of heavy cream to glide smoothly.
Step 2: Painting the Greenery
-
Mix your greens:
On your palette, place a small amount of Sage Green and Forest Green. I like to slightly water down the paint to an ink-like consistency, which helps it flow off the detail brush more smoothly. -
Paint the stems:
Using your finest detail brush (size 00) and the darker Forest Green, paint thin, wavering lines over your pencil marks. These lines shouldn’t be perfectly straight; natural vines have a slight wiggle to them. -
Add first leaves:
Switch to a size 0 or 1 round brush. Dip the tip in the Sage Green and gently press it against the stem to create small, almond-shaped leaves. Stagger them up the stem rather than placing them directly opposite each other. -
Add darker leaves:
While the lighter leaves dry, mix a little Forest Green back in. Add a few darker, smaller leaves near the tips of the vines to create depth and variety. -
Create the top motif:
On the top rail of the frame, paint a small horizontal sprig or two, slightly angled, mirroring the style of the side vines but keeping it smaller and simpler.
Oops! Wobbly Hand?
If a line goes astray or gets too thick, quickly wipe it away with a damp Q-tip before it dries. You can gently sand off dried mistakes later.
Step 3: Adding Floral Accents
-
Paint starburst flowers:
Using the Burnt Sienna paint and your finest brush, paint tiny asterisks or starburst shapes in the empty spaces between vines. These represent small dried flowers or seeds. -
Add metallic dots:
Dip the very tip of a brush handle or a toothpick into your metallic Copper or Gold paint. Dot this randomly near the flower clusters and leaf tips to add a subtle shimmer. -
Incorporate lettering (optional):
If you wish to add a personalized message like the example image, use a very fine permanent marker or the 00 brush with thinned black-brown paint. Keep the text small and centered on the bottom rail.
Step 4: Finishing Touches
-
Erase guidelines:
Once the paint is absolutely bone dry (wait at least an hour), very gently erase any visible pencil marks. Be careful not to rub hard over the painted areas. -
Seal the wood:
To protect the unfinished wood from yellowing and the paint from scratching, apply a thin coat of clear matte sealer. A spray sealer is best here to avoid smearing your fine lines. -
Add the backing:
Once the sealer has cured, reassemble the glass and backing of the frame.
Now you have a charming, custom frame perfect for housing a cherished memory or giving as a thoughtful gift
Nursery Theme Doodles on Wood
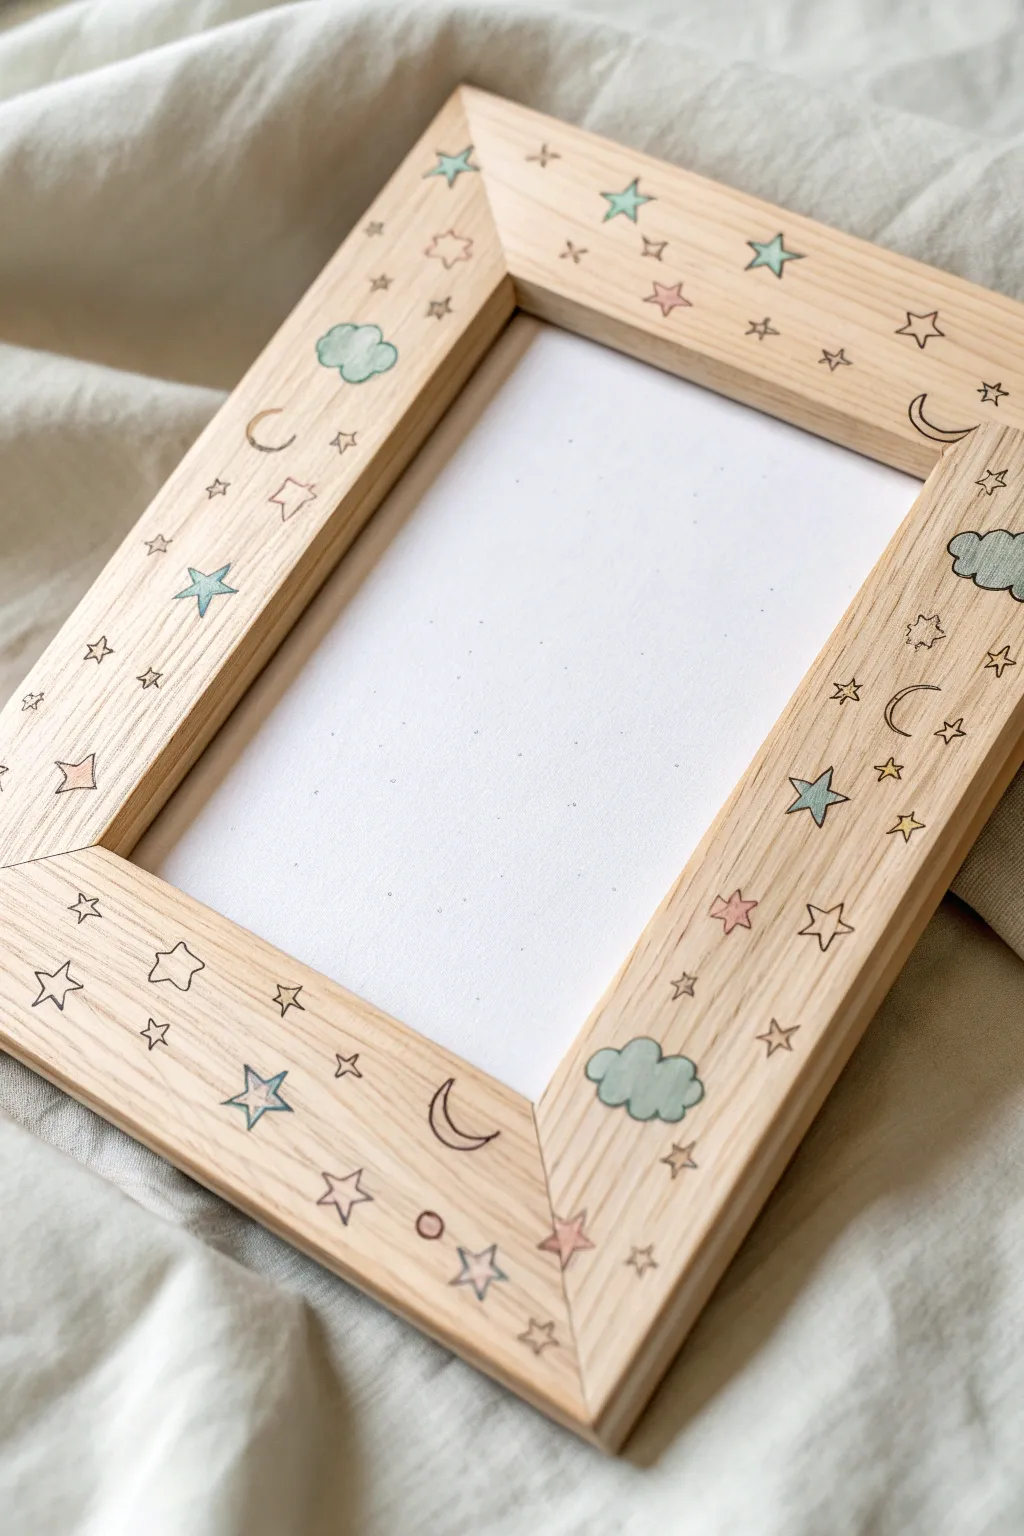
Transform a plain, unfinished wooden frame into a whimsical keepsake perfect for a baby’s room. This project uses soft pastel colors and simple line art to create a charming border of clouds, moons, and twinkling stars.
Detailed Instructions
Materials
- Unfinished wooden picture frame (flat profile works best)
- Fine grit sandpaper (220 grit)
- Pencil and eraser
- Fine-point black permanent marker or archival ink pen (0.5mm)
- Watercolor paints or diluted acrylics (colors: mint green, baby pink, sky blue)
- Small round paintbrush (size 2 or 4)
- Clear matte acrylic sealer spray or varnish
- Scrap paper for practice
Step 1: Preparation & Planning
-
Smooth the surface:
Before you begin drawing, lightly sand the entire front surface of the wooden frame using 220-grit sandpaper. This creates a smooth canvas for your pen work and prevents ink from bleeding into rough grain. -
Wipe clean:
Use a dry cloth or tack cloth to remove every bit of sawdust. Any lingering dust can get caught in your pen tip or paint. -
Sketch concepts:
On a piece of scrap paper, practice drawing simple five-point stars, crescent moons, and fluffy clouds. Try varying the sizes to create visual interest.
Bleed Prevention
If your ink feathers into the wood grain, apply a clear matte sealer to the raw wood first. Let it dry, then draw your ink lines on top of the sealed surface.
Step 2: Drawing the Design
-
Draft the layout:
Using a pencil with a very light touch, map out your larger elements first. Place a few clouds and crescent moons randomly around the frame borders. -
Fill the gaps:
Scatter large five-point stars in the empty spaces between the moons and clouds. Remember to rotate them so they face different directions. -
Add tiny details:
In the remaining negative space, draw tiny four-point stars or small ‘x’ shapes to act as distant twinkling stars. This fills the frame without making it look cluttered. -
Ink the outlines:
Take your fine-point black marker and carefully trace over your pencil lines. I prefer to work from the top left corner down to avoid smudging the fresh ink with my hand. Let the ink dry completely for at least 15 minutes. -
Erase guidelines:
Once you are certain the ink is dry, gently erase the visible pencil marks. Be gentle to avoid rubbing the ink into the wood grain.
Metallic Magic
For a magical touch, use metallic gold or silver watercolor paint for the stars instead of blue. It will catch the light beautifully in a nursery.
Step 3: Adding Color
-
Prepare the wash:
Mix your paints with a generous amount of water. You want a translucent wash, not opaque coverage, so the wood grain still shows through slightly. -
Paint the clouds:
Dip your small brush into the mint green wash. Carefully fill in the cloud shapes. Keep the wet edge moving so you don’t get hard drying lines in the middle of the shape. -
Color the stars:
Clean your brush and switch to the sky blue wash. Paint the larger five-point stars. Leave the tiny background stars unpainted for a subtle look. -
Tint the moons and accents:
Use the baby pink wash to fill in the crescent moons. You can also color a few select stars pink to balance the color palette across the frame. -
Let it dry:
Allow the paint to air dry completely. The wood will absorb the water quickly, but give it about 30 minutes to be safe.
Step 4: Finishing Touches
-
Add detail dots:
If a space feels too empty, use your black pen to add single dots or tiny circles randomly for texture. -
Seal the refined art:
In a well-ventilated area, spray a thin, even coat of clear matte acrylic sealer over the entire frame. This protects the wood and keeps the ink from fading over time.
Place your favorite photo inside and display this gentle artwork on a shelf or dresser
Botanical Leaf Garland Border
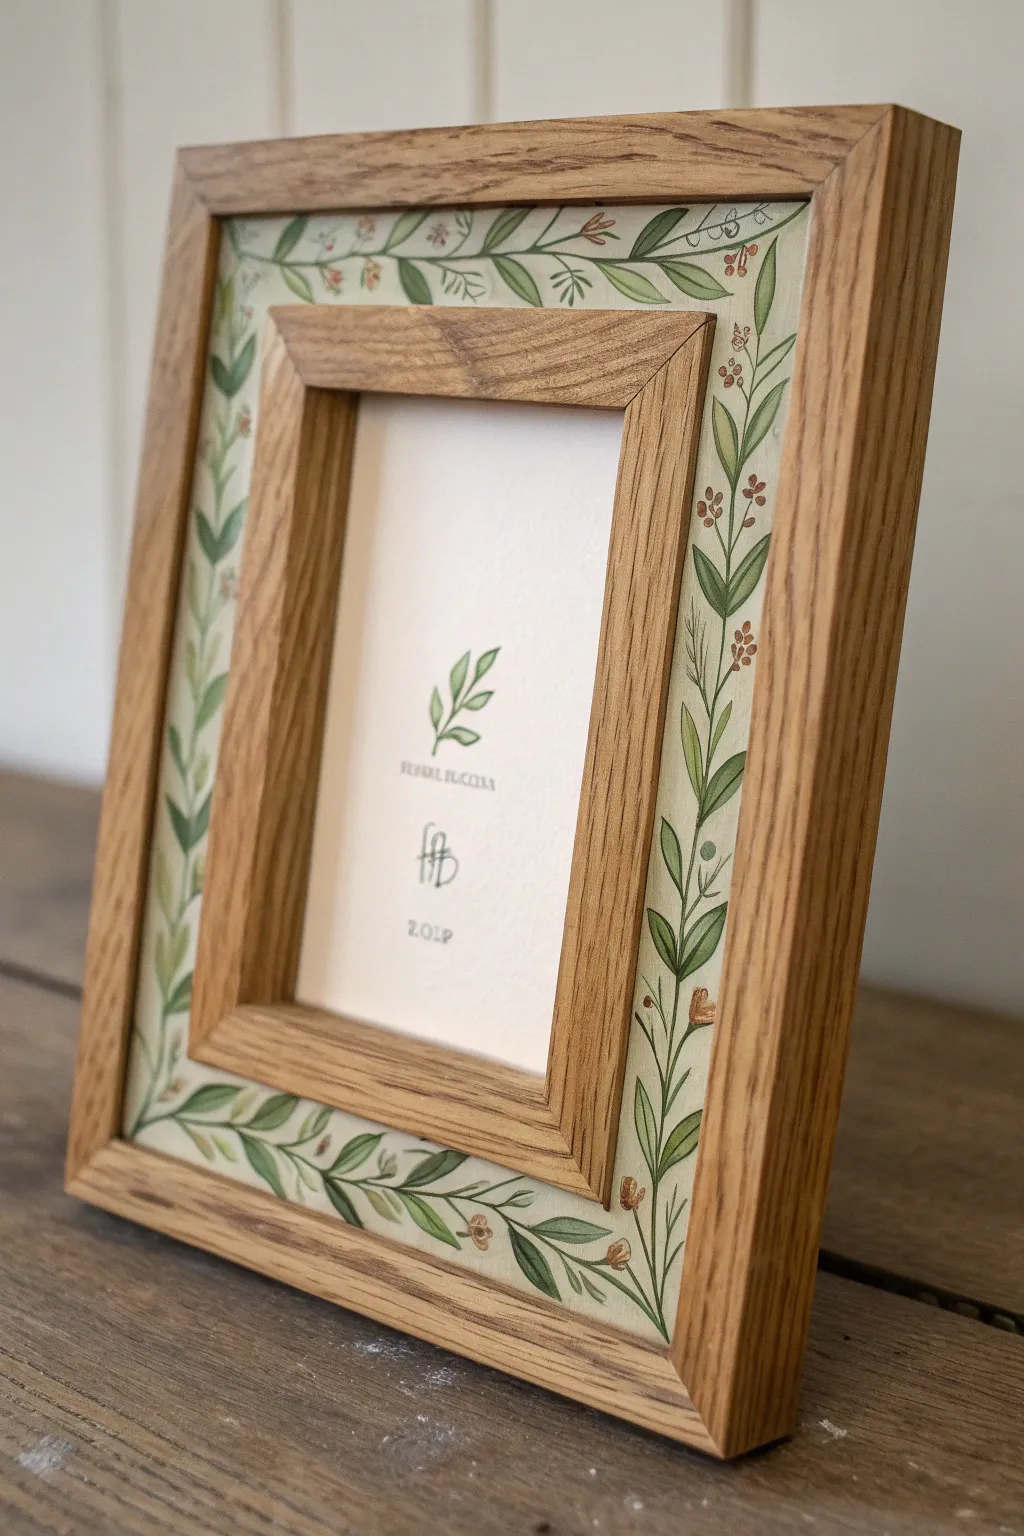
Transform a standard wooden frame into a bespoke piece of art by hand-painting the mat area with delicate botanical motifs. This project combines the warmth of natural wood grain with soft, leafy vines for a charming, rustic-chic aesthetic.
How-To Guide
Materials
- Unfinished wooden frame with wide flat profile (or a nested double frame)
- Fine grit sandpaper (220-320 grit)
- Acrylic paints (Sage Green, Forest Green, Olive Green, Cream/Off-White, Burnt Sienna)
- Matte acrylic medium or gesso
- Fine detail paintbrush (size 0 or 00 round)
- Small flat brush (size 4 or 6)
- Pencil and eraser
- Palette for mixing
- Clear matte varnish or spray sealant
- Painter’s tape
Step 1: Preparation & Base Coat
-
Disassemble the frame:
Begin by removing the glass, backing, and any existing artwork from your wooden frame. If your frame is a single piece with a wide flat area, you’re ready to go. If you are constructing a nested frame look like the photo, ensure you have your inner and outer frame components separated. -
Sand the surface:
Lightly sand the area you intend to paint—specifically the flat ‘mat’ section between the inner and outer edges—using fine-grit sandpaper to ensure a smooth painting surface. -
Mask the wood edges:
Apply painter’s tape carefully along the inner bevel and the outer rim to protect the natural wood areas you want to keep unpainted. Press the edges of the tape down firmly to prevent bleed. -
Prime the painting area:
Mix a small amount of cream or off-white acrylic paint with a touch of gesso or matte medium. Apply a smooth, opaque base coat to the sanded area. I prefer doing two thin coats rather than one thick one to avoid brush strokes. -
Allow to dry:
Let the base coat dry completely for at least 30-45 minutes. The surface should feel chalky and dry to the touch before sketching.
Natural Texture
Mix a tiny drop of water into your acrylics to create a semi-transparent wash. This allows a hint of the cream base to show through the leaves, mimicking watercolor texture.
Step 2: Sketching the Vine Pattern
-
Plan the flow:
Using a very light pencil, sketch a continuous, wavy line that meanders around the entire frame. This will be the central stem for your vine garland. -
Add leaf placements:
along the stem, mark small dashes or rough almond shapes where the leaves will go. Alternate sides of the stem for a natural, organic look. Don’t worry about perfection; nature is beautifully irregular. -
Sketch berries or buds:
Interperse tiny circles or enclosed teardrop shapes near the leaf junctions to represent small berries or floral buds.
Step 3: Painting the Botanicals
-
Mix your greens:
On your palette, prepare two or three shades of green. Mix a Sage Green for the lighter leaves and a Forest Green for darker accents. Blending a tiny bit of Burnt Sienna into the green tones will make them look more natural and earthy. -
Paint the main stem:
Using your finest detail brush (size 0 or 00), load it with a medium olive green. Carefully trace over your pencil line for the main stem. Keep your hand steady but allow thickness to vary slightly. -
Fill in the leaves:
Paint the leaf shapes using the Sage Green mix. Use a ‘press and lift’ motion with the brush to create the tapered point of each leaf naturally. -
Add depth and veins:
Once the base green is dry, use the darker Forest Green on the very tip of your brush to draw a fine central vein on larger leaves or to outline one side of a leaf for shadow. -
Paint the buds:
Dip the tip of a clean detail brush into a diluted Burnt Sienna or terracotta color. Dot the small berries or buds you sketched earlier. Keep the paint thin so it looks like a delicate watercolor wash. -
Refine the details:
Look for empty spots. If a section looks too sparse, add a tiny curling tendril or a small extra leaf to balance the composition.
Seasonal Switch
Customize the color palette for seasons: use burnt orange and reds for autumn leaves, or bright emerald and holly berries for a festive winter version.
Step 4: Finishing Touches
-
Let the artwork cure:
Allow the botanical painting to dry for a full hour to ensure no moisture remains in the paint layers. -
Erase guidelines:
Check for any visible pencil lines. Gently erase them with a white artist’s eraser, being careful not to scrub the paint. -
Seal the work:
Apply a coat of clear matte varnish or spray sealant over the painted area. This protects your artwork from dust and UV light while maintaining a low-sheen, natural finish. -
Remove the tape:
Slowly peel back the painter’s tape at a 45-degree angle to reveal the crisp lines between your painted botanical mat and the natural wood frame. -
Reassemble:
Place your glass, insert your photo or artwork, and secure the backing. Your custom hand-painted frame is complete.
Now you have a charming, one-of-a-kind frame that perfectly cradles your favorite memories.
Sunset Gradient With Silhouette Details

Capture the serene beauty of twilight with this glowing watercolor sunset project. The warm gradient sky contrasts beautifully with shadowy mountain silhouettes, all housed within a textured, rustic grey wood frame that complements the natural theme.
Step-by-Step
Materials
- Cold press watercolor paper (cut to 5×7 or 8×10 inches)
- Watercolor paints (Alizarin Crimson, Cadmium Orange, Cadmium Yellow, Indigo or Payne’s Grey)
- Flat wash brush (3/4 inch)
- Round brushes (size 4 and size 0 for details)
- Masking tape or painters tape
- Drawing board or hard surface
- Two jars of water
- Paper towels
- Unfinished wooden picture frame (wide profile)
- Grey wood stain (e.g., Weathered Oak or Classic Grey)
- Foam brush or rag for staining
- Fine grit sandpaper (220 grit)
Step 1: Preparing the Frame
-
Prepping the wood:
Remove the glass and backing from your unfinished wooden frame. Lightly sand the surface with 220-grit sandpaper to remove any rough splinters, wiping away the dust with a clean cloth. -
Applying the stain:
Dip a foam brush or rag into your grey wood stain. Apply an even coat over the entire front and sides of the frame, moving in the direction of the wood grain. -
Wiping back:
Let the stain sit for about 2-3 minutes, then wipe off the excess with a clean rag. The more you wipe, the lighter and more rustic the finish will be. I prefer to wipe heavily to let the natural grain show through. -
Drying time:
Set the frame aside to dry completely while you work on the painting. Ideally, let it cure for at least an hour before handling it again.
Uneven Watercolors?
If your sky gradient has harsh lines instead of a smooth blend, your paper likely dried too fast. Next time, use slightly more water in the initial wetting phase.
Step 2: Painting the Sunset Sky
-
Setting up the paper:
Tape your watercolor paper down to a board on all four sides. This creates a clean white border and prevents the paper from buckling when wet. -
Pre-wetting the sky:
Using your large flat brush and clean water, wet the top two-thirds of the paper. You want the surface to be shiny but not forming puddles. -
Starting the gradient:
Load your brush with a watered-down Alizarin Crimson (pinkish-red). Apply horizontal strokes at the very top of the wet paper allowing the color to bleed downwards slightly. -
Adding the middle tones:
Clean your brush and pick up Cadmium Orange. Paint horizontal strokes just below the red, blending the edges where they meet while the paper is still wet to create a soft transition. -
Finishing the horizon:
Clean the brush again and switch to Cadmium Yellow for the lowest part of the sky. Blend this into the orange above, leaving the bottom third of the paper unpainted for the mountains. -
Adding cloud texture:
While the sky is still damp (not soaking), take a slightly drier brush with a concentrated red-orange mix and add thin, horizontal streaks across the sky to mimic wispy clouds. -
Dry completely:
Let the sky layer dry completely. The paper must be bone dry before you start the mountains, or the sharp edges will bleed.
Step 3: Mountain Layers and Details
-
First mountain range:
Mix a very watery wash of Indigo or Payne’s Grey. Using a size 4 round brush, paint a distant mountain ridge shape overlapping the bottom of the yellow sky. Fill it in with the light wash. -
Drying the first layer:
Wait for this distant mountain range to dry. You can use a hair dryer on a low setting to speed this up. -
Second mountain range:
Add a bit more pigment to your Indigo mix to make a slightly darker value. Paint a second, closer mountain range that overlaps the first one, varying the peaks and valleys. -
Foreground foundation:
Once the second layer is dry, mix a concentrated, dark Indigo (nearly black). Paint the immediate foreground hills at the very bottom of the paper. -
Painting the trees:
Switch to your size 0 or fine liner brush. Using the dark Indigo mix, paint vertical lines extending up from the foreground hills to act as tree trunks. -
Adding texture to trees:
Use the tip of the brush to dab small, downward-sloping branches on either side of the trunks. Make the trees denser at the bottom and pointier at the top. -
Final assembly:
Once the painting is totally dry, carefully peel off the tape. Place the glass back into your dry, stained frame, insert your artwork, and secure the backing.
Add Some Sparkle
For a magical touch, lightly spatter tiny droplets of white gouache or acrylic ink over the darkest mountain layer to create effect of stars or distant fireflies.
Now you have a stunning piece of custom art that brings the warmth of a mountain sunset into your home
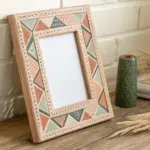
Faux Tile Corners on a Wooden Frame
Transform a plain, unfinished wooden frame into a piece of rustic art with this faux tile painting technique. By combining warm, muted earth tones with geometric patterns, you’ll create the illusion of inlaid ceramic tiles on a sturdy wood base.
Step-by-Step Tutorial
Materials
- Unfinished flat-profile wooden picture frame (wide border)
- Sandpaper (220 grit)
- Pencil
- Ruler
- Acrylic paints (Cream/Off-white, Terracotta Red, Muted Sage Green, Charcoal Grey)
- Fine liner brush (size 0 or 00)
- Flat shader brush (small)
- Matte acrylic varnish
- Palette
- Masking tape (optional)
Step 1: Preparation and Base Layout
-
Sand the surface:
Begin by lightly sanding the face of the wooden frame with 220-grit sandpaper to remove any rough fibers. Wipe away all dust with a tack cloth or slightly damp rag to ensure a smooth painting surface. -
Mark the border boundaries:
Using a ruler and pencil, lightly draw a border line about 1/4 inch inward from the outer edge and another 1/4 inch outward from the inner picture opening. This creates the ‘wood reveal’ zones that will remain unpainted. -
Grid the side panels:
Measure the length of your side panels. You need to divide this space into equal distinct sections. Mark horizontal lines to create rectangular blocks, leaving a small gap between them to simulate grout lines if you wish, or keep them touching like the reference. -
Sketch the diamonds:
Find the center point of each rectangular block you just defined. Lightly sketch a diamond shape that touches the top and bottom edges of your penciled boundary lines. Alternate the orientation or size if you want variety, but consistency looks best for this style.
Step 2: Painting the Background
-
Fill the ’tile’ background:
Mix a warm cream or off-white acrylic paint. Using your flat shader brush, carefully paint the rectangular areas around your diamond sketches. Do not paint inside the diamond shapes yet, or over the wood borders you marked earlier. -
Apply a second coat:
Acrylics can be translucent, especially lighter colors. Let the first coat dry for about 10 minutes, then apply a second coat of cream to get a solid, ceramic-like opacity. I find that brushing in slightly different directions adds a bit of texture. -
Paint the corner blocks:
Identify the square areas at the four corners of the frame. Paint these with a solid coat of your Muted Sage Green. These anchor the design visually.
Steady Hand Trick
Rest your pinky finger on a dry part of the frame while painting fine details. This anchors your hand and acts as a pivot point for smoother, more controlled lines.
Step 3: Adding the Geometric Motifs
-
Paint the red diamonds:
Select alternating diamond shapes on the sides and paint them with the Terracotta Red. Use a small brush to keep the edges sharp against the cream background. -
Paint the green diamonds:
Fill the remaining diamond shapes with the Muted Sage Green. Ensure the coverage is solid; you may need two thin coats for vibrant color. -
Create the starburst details:
Once the diamonds are dry, use your fine liner brush and the cream paint to add a small dot in the center of each diamond. Then, paint thin lines radiating from the dot to the diamond’s corners, creating a simple starburst effect. -
Add corner details:
On the solid green corner blocks, use the cream paint to add a simple diagonal line or a small triangle in the corner to break up the solid color.
Fixing Wobbly Lines
If your outlines get too thick or wobbly, wait for them to dry completely. Then, use the background cream color to carefully ‘cut back’ into the line and reshape it.
Step 4: Outlining and Finishing
-
Outline the shapes:
Mix a very watery charcoal grey or black paint. Use your finest liner brush to outline the diamonds and the rectangular blocks. The line should be thin and slightly imperfect to mimic hand-drawn ink or aged grout. -
Draw decorative hash marks:
In the spaces between certain tile blocks or near the corners, paint small series of parallel lines (hash marks) using the charcoal color. This adds to the tribal or folk-art aesthetic. -
Erase guide lines:
Once the paint is completely bone-dry (wait at least an hour), gently erase any visible pencil marks from the unpainted wood areas. -
Seal the wood:
Apply a coat of matte acrylic varnish over the entire face of the frame. This seals the raw wood and protects your painted design from scratches or fading. A matte finish keeps the look rustic rather than glossy.
Now step back and admire how simple geometric shapes have created a sophisticated, handcrafted look for your favorite photo
Starry Night Sky Frame
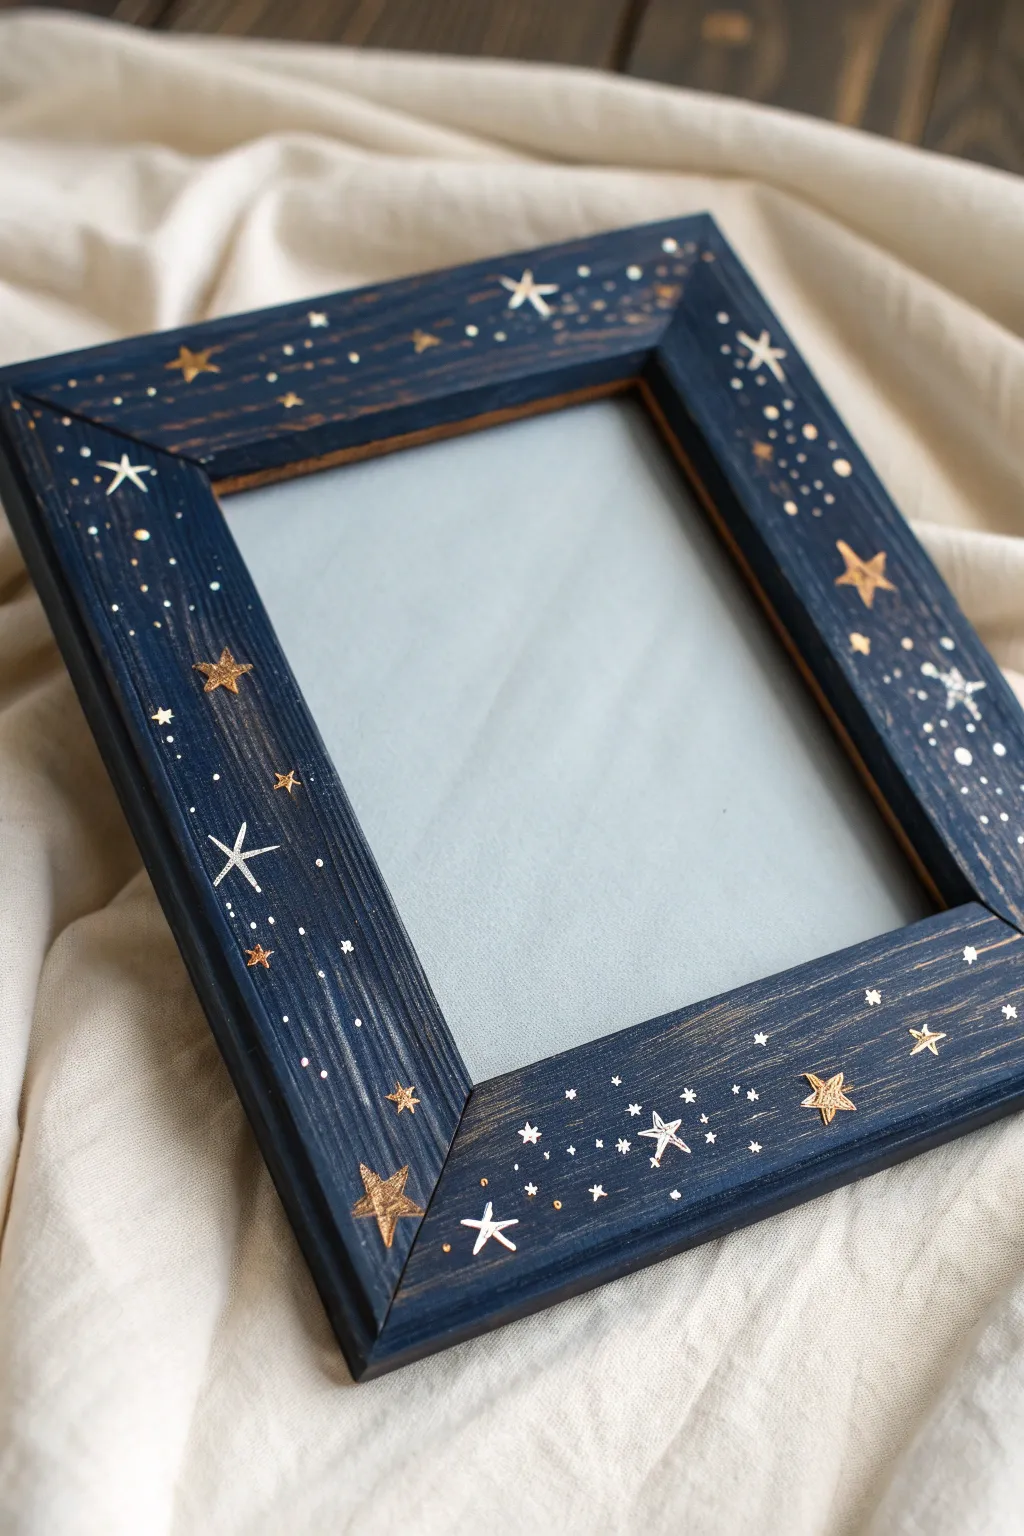
Transform a simple wooden frame into a dreamy window to the cosmos with this starry night design. The deep midnight blue background creates the perfect high-contrast canvas for shimmering metallic stars and delicate constellations.
Detailed Instructions
Materials
- Unfinished wooden picture frame (flat profile work best)
- Sandpaper (220 grit)
- Tack cloth or slightly damp rag
- Deep navy blue acrylic paint
- Flat paintbrush (medium size)
- Metallic gold paint pen (fine tip)
- Metallic silver paint pen (fine tip) or white gel pen
- Small round detail brush (size 0 or 1)
- Metallic gold acrylic paint
- Acrylic sealer (matte or satin finish)
- Old toothbrush (optional for splattering)
- Palette or paper plate
Step 1: Preparation & Base Coat
-
Prepare the surface:
Remove the glass and backing from your wooden frame. Lightly sand the entire front and sides with 220-grit sandpaper to remove any rough splinters and ensure a smooth painting surface. Wipe away all dust with a tack cloth. -
First coat of navy:
Using your medium flat brush, apply a generous layer of deep navy blue acrylic paint. Paint in the direction of the wood grain for the smoothest finish, covering the front face and both the inner and outer edges. -
Dry and assess:
Allow the first coat to dry completely, which typically takes about 20-30 minutes. If the wood grain is still showing through too much, apply a second coat to achieve a solid, opaque midnight color. -
Visible texture:
Notice how the example frame retains some wood grain texture despite the paint. Don’t worry about filling every pore; allowing that natural texture to remain adds a lovely rustic charm to the finished piece.
Uneven Stars?
If your hand-drawn stars look wobbly, don’t stress. Imperfection adds charm. You can also fix shapes by painting over mistakes with a tiny bit of navy blue, letting it dry, and trying again.
Step 2: Painting the Stars
-
Plan your larger stars:
Before committing to paint, you might want to lightly visualize where your largest stars will go. Aim for an asymmetrical sprinkling—clusters in some corners and sparser areas elsewhere look more natural than a uniform grid. -
Draw the 5-point stars:
Using a fine-tip metallic gold paint pen, draw several classic five-point stars. I find it easiest to draw the outline first and then fill it in. Vary the sizes, keeping most around half an inch or slightly smaller. -
Add simple crossed stars:
Switch to your silver or white pen. Create dazzling ‘twinkle’ stars by drawing a simple cross, then adding a smaller ‘X’ through the center. Lengthen the vertical line slightly for a glistening effect. -
Paint solid gold accents:
For a richer texture, use a small detail brush dipped in metallic gold acrylic paint to go over a few of your larger drawn stars. This brushwork catches the light differently than the flat marker ink.
Make it Zodiac
Personalize the frame by arranging the silver dots into actual constellations, like the Big Dipper or the recipient’s zodiac sign, connecting them with very faint lines.
Step 3: Creating the Galaxy
-
Add distant stars:
Use the tip of your silver pen or a very fine detail brush to dot tiny specks of light across the blue background. These represent distant stars and help fill the empty blue space without overwhelming it. -
Create star clusters:
Group tiny dots together in gentle waves or clouds. This technique mimics the Milky Way and adds movement to the frame’s composition. -
Mix your metals:
Go back in with the gold pen and add tiny golden dots interspersed among the silver ones. The mix of warm gold and cool silver gives the piece depth and vibrancy. -
Optional splatter effect:
If you want a very dense star field, dip an old toothbrush in watered-down white or silver paint. Run your thumb over the bristles to flick a fine mist of droplets onto the frame. Practice on a scrap paper first to control the spray.
Step 4: Finishing Touches
-
Review the composition:
Step back and look at the frame as a whole. If any area looks too empty, add a small 4-point star (just a simple cross shape) or a few extra dots to balance it out. -
Let it cure:
Ensure all paint and ink markers are completely dry. Metallic paint pens can sometimes smear if sealed too early, so waiting at least an hour is a safe bet. -
Seal the artwork:
Apply a coat of clear acrylic sealer. A matte or satin finish works best here, as gloss can compete with the shine of the metallic stars. -
Reassemble:
Once the sealer is dry and no longer tacky, place the glass, your photo, and the backing board back into the frame.
Now you have a stunning, celestial border that makes any photograph feel infinite and special
Negative Space With Natural Wood Showing
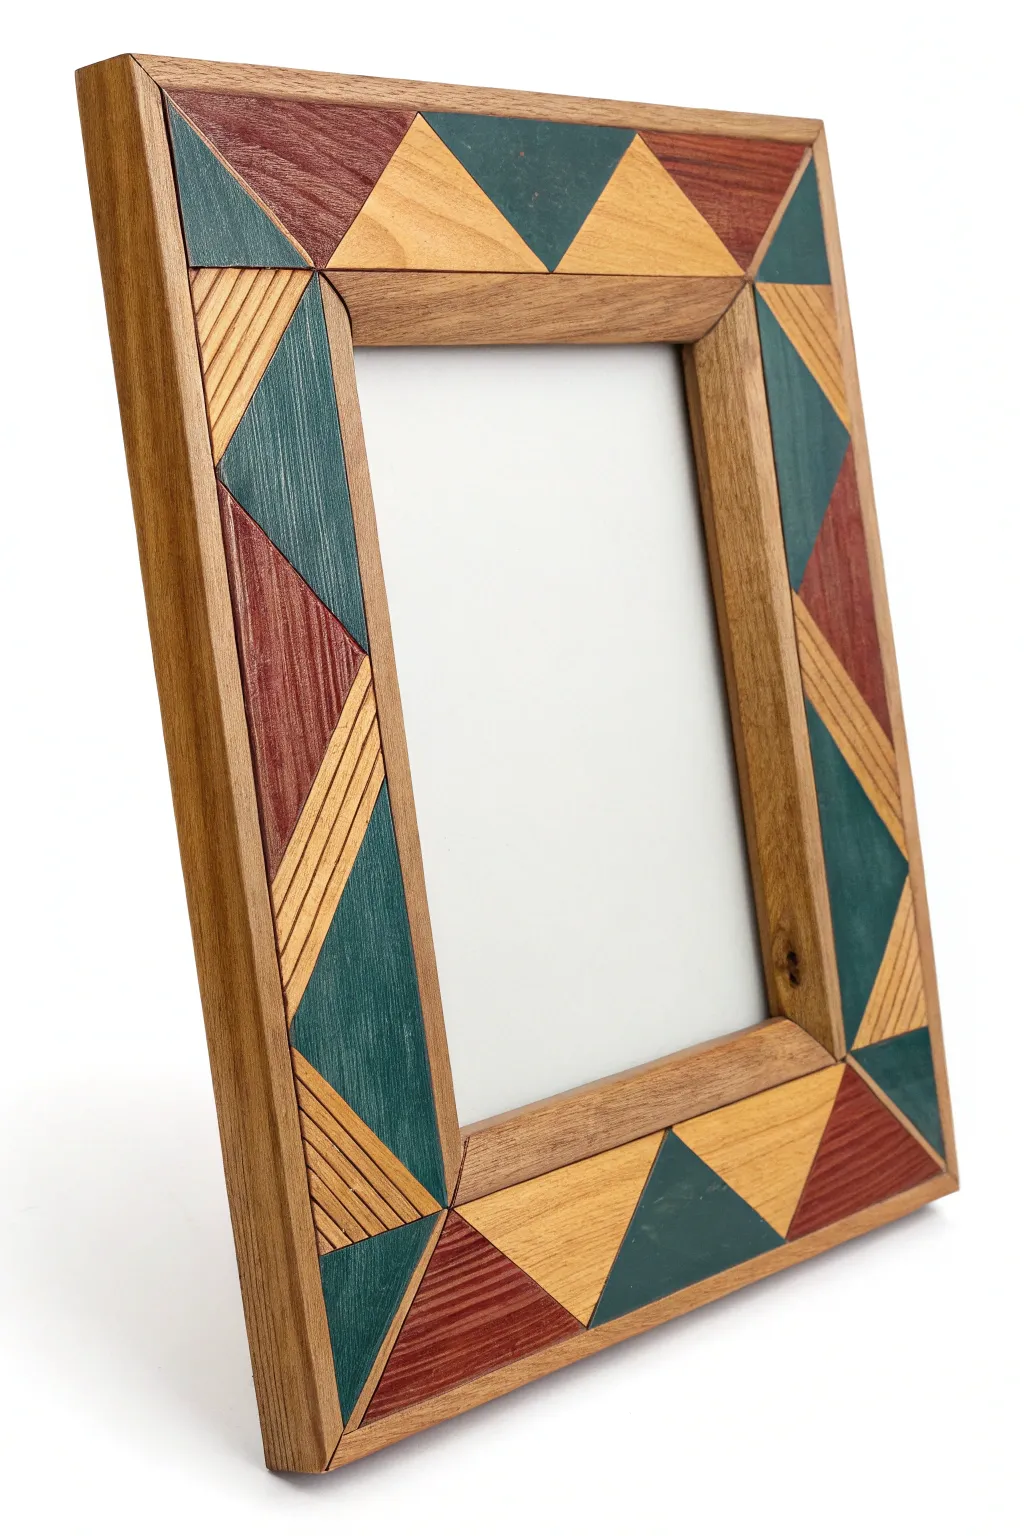
This project transforms a simple wooden base into a stunning piece of geometric art using careful measuring and vibrant colors. The design features a striking tessellation of triangles in teal, russet, and natural wood tones that brings warmth and modern style to any photograph.
How-To Guide
Materials
- Unfinished flat wooden picture frame (wide profile)
- Ruler
- Pencil
- Painter’s tape or masking tape (high quality)
- X-Acto knife or craft blade
- Acrylic paints (Teal/Dark Green, Russet Red)
- Small flat angled brushes
- Fine-grit sandpaper (220 grit)
- Clear wood varnish or sealant (matte or satin)
- Dark wood stain (optional, for the striped sections)
- Fine-point permanent marker or wood burning tool (optional for faux-grain)
Step 1: Preparation and Planning
-
Sand the Base:
Begin by lightly sanding the entire unfinished wooden frame with 220-grit sandpaper. This ensures a smooth surface for both the paint and the clear coat later. -
Wipe Clean:
Use a tack cloth or a slightly damp rag to remove all sawdust. The surface needs to be perfectly clean for the tape to adhere properly. -
Measure the Width:
Measure the width of the frame’s flat face. This measurement will dictate the size of your triangles to ensure they fit perfectly across the width. -
Draw the Grid:
Using a pencil and ruler, lightly mark out a zig-zag pattern along the length of each side. Connect the corners of your measured sections to form a continuous series of equilateral or isosceles triangles around the frame.
Bleed Prevention Trick
Before painting your color, brush a tiny amount of clear matte medium or sealant over the tape edge. This seals the gap so lines stay razor-sharp.
Step 2: Creating the Design
-
Define the Zones:
Decide on your color pattern. In this specific design, we are alternating between a teal green, a reddish-brown, a natural light wood tone, and a darker, textured wood tone. -
Tape the Teal Triangles:
Apply painter’s tape to block off the areas surrounding the triangles you intend to paint teal. Press the edges of the tape down firmly with your fingernail or a credit card to prevent paint bleed. -
Paint the Teal Sections:
Apply the teal acrylic paint. I prefer using a relatively dry brush here to avoid soaking the wood, which can cause bleeding under the tape. Apply two thin coats if necessary. -
Remove and Dry:
Carefully peel back the tape while the paint is still slightly tacky to keep lines crisp. Let these sections dry completely before moving on. -
Tape the Red Sections:
Once the teal is dry, mask off the triangles designated for the russet red color. Be sure to cover the adjacent dried teal paint to protect it. -
Paint the Red Sections:
Fill in these triangles with the russet red acrylic paint. Again, light coats are better than one thick , gloppy coat. -
Create the Faux Wood Grain:
For the darker, textured triangles that look like separate wood inlay, use a darker wood stain or a diluted brown paint. To mimic the intense grain lines seen in the image, carefully draw fine parallel lines using a fine-point permanent marker or a very thin liner brush over the dried stain.
Real Veneer Inlay Style
Instead of painting faux grain, buy sheets of adhesive wood veneer. Cut triangles from different wood species and stick them directly onto the frame base.
Step 3: Finishing Touches
-
Reveal Natural Wood:
The remaining triangles serve as ‘negative space.’ If you got any stray paint marks on these natural areas, very gently sand them away with a folded piece of sandpaper. -
Define the Borders:
The image shows distinct divisions between the triangles. You can lightly score the lines between colors with an X-Acto knife for a true inlaid look, or define them with a very faint pencil line. -
Clean Up Edges:
Check the inner and outer mitered edges of the frame. If paint dripped over the sides, sand it off or paint the edges a solid complimentary color to clean up the look. -
Apply Sealer:
Stir your clear varnish or sealant gently to avoid bubbles. Apply a smooth, even coat over the entire face of the frame. This seals the changing wood tones and protects the paint. -
Final Cure:
Let the frame sit undisturbed in a dust-free area for at least 24 hours to ensure the finish hardens completely. -
Insert Photo:
Once fully cured, flip the frame over, insert the glass and your chosen photo into the back recesses, and secure the backing clips.
Now step back and admire how a simple geometric pattern turned a plain frame into a sophisticated centerpiece for your shelf.
Connected Frame Set With One Flowing Design
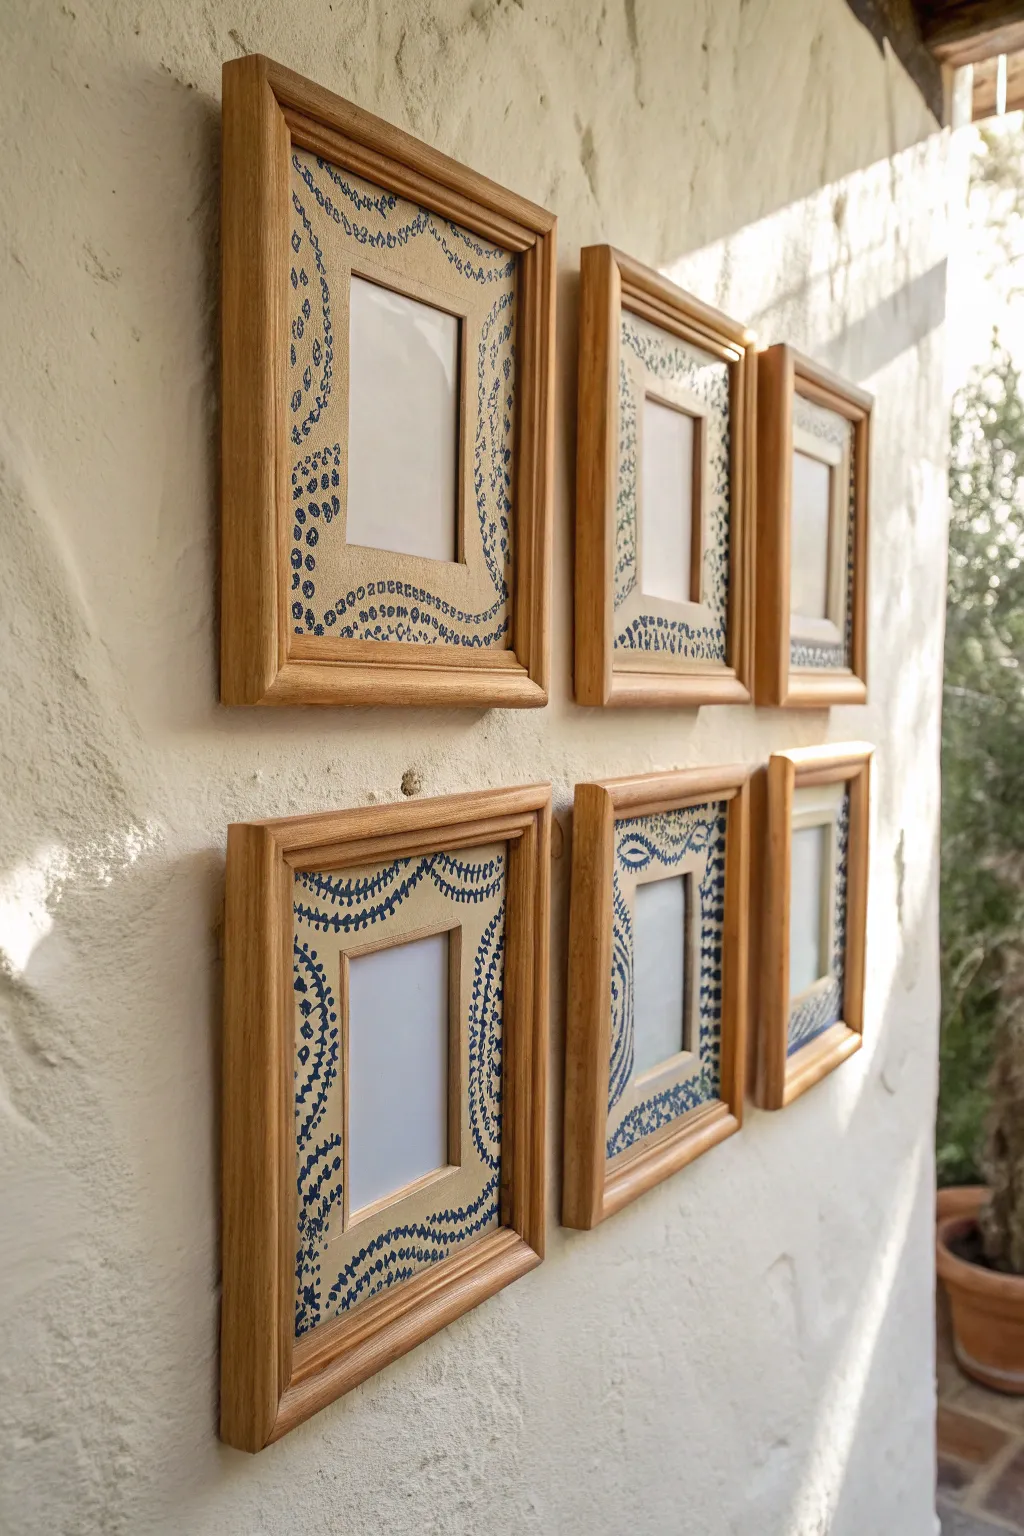
Create a stunning gallery wall illusion where a single design dances across multiple separate frames. This project uses hand-painted matting to unify six individual wooden frames into one cohesive, flowing masterpiece that feels organic and custom-made.
Step-by-Step Tutorial
Materials
- 6 matching light wood picture frames (approximately 8×10 or 5×7)
- Heavyweight watercolor paper or illustration board (large enough for the total layout)
- Blue acrylic paint or guache (indigo or navy)
- Fine detail paintbrush (size 0 or 1)
- Pencil
- Ruler or T-square
- Craft knife and cutting mat
- Masking tape or painter’s tape
- Large flat workspace
Step 1: Planning the Layout
-
Measure your spread:
Arrange your six empty frames on a large table in a 2×3 grid, spacing them exactly as you plan to hang them on the wall. A 2-inch gap between frames usually looks balanced. -
Create the master canvas:
Ideally, you want to draw the design on one large sheet first. Tape together multiple sheets of paper if necessary to match the total footprint of your frame arrangement, including the gaps. -
Mark the frame boundaries:
Place your frames face down on top of the paper arrangement. Use a light pencil to trace the *inside* opening of each frame onto the paper. These boxes are your active drawing zones. -
Mark the photo openings:
Inside each of those drawn boxes, measure and mark a rectangle for where the actual photograph will eventually sit. You want to paint the border area around this central photo space.
Alignment Secret
Use a large piece of cardboard or butcher paper as a template on the wall first to mark exactly where nails should go for perfect spacing.
Step 2: Drafting the Design
-
Sketch the primary flow:
With a pencil, lightly draw swooping, curved lines that travel from one frame box to the next. Imagine a ribbon weaving through the entire grid. The lines should ‘enter’ one frame and ‘exit’ to pick up in the neighboring frame. -
Add secondary patterns:
Along your main swooping lines, sketch small repeating motifs like leaves, dots, or scalloped edges. In the example, we see rows of tiny leaf-like shapes and dots following the curves. -
Refine the connections:
Double-check the gaps. Ensure that if a line exits the right side of the top-left frame, it lines up perfectly to enter the left side of the top-middle frame.
Level Up: Texture
Instead of paper, paint the design onto linen or burlap fabric stretched over cardstock for a rustic, textured look that mimics embroidery.
Step 3: Painting the Pattern
-
Mix your paint:
Prepare your indigo acrylic or gouache. Thining it slightly with a drop of water can help it flow better for detailed linework without losing opacity. -
Paint the main lines:
Using your fine detail brush, go over the long, swooping pencil lines first. Keep your hand steady and maintain an even pressure for a consistent line width. -
Add the details:
Work section by section to paint the small repetitive patterns—the little dashes, scallops, or ‘leaves’ attached to the main lines. I find it relaxing to do all the dots first, then the leaves. -
Let it dry completely:
Allow the paint to dry for at least an hour. If you brush against wet paint now, you’ll smudge the continuity of the design. -
Erase pencil marks:
Once the paint is bone dry, gently erase any visible pencil sketch lines. Be careful not to scrub too hard over the painted areas.
Step 4: Assembly
-
Cut the distinct mats:
Now, cut the large paper sheet down into the individual rectangles you traced earlier. You should now have six separate pieces of paper, each with a fragment of the design. -
Cut the photo windows:
Use your craft knife and a ruler to carefully cut out the central rectangle where the photo goes from each painted sheet. -
Mount and frame:
Place each custom painted mat into its corresponding frame. It helps to number the backs of the mats (1-6) so you don’t mix up their order. -
Hang with precision:
This step is crucial. Hang the frames on the wall using a level, ensuring the spacing matches exactly what you measured in step one. If the gap is off, the design won’t flow cleanly.
Step back and enjoy how your individual frames now work together as a unified piece of wall art
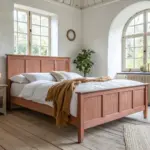

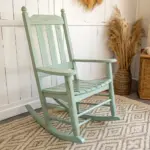
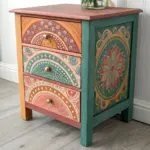
Have a question or want to share your own experience? I'd love to hear from you in the comments below!