Easter is basically made for watercolor—soft pastel washes, sweet little characters, and all the springy details that make your sketchbook feel like a garden. Here are my favorite Easter watercolor ideas that you can turn into quick studies or heartfelt greeting cards without overthinking it.
Patterned Easter Eggs
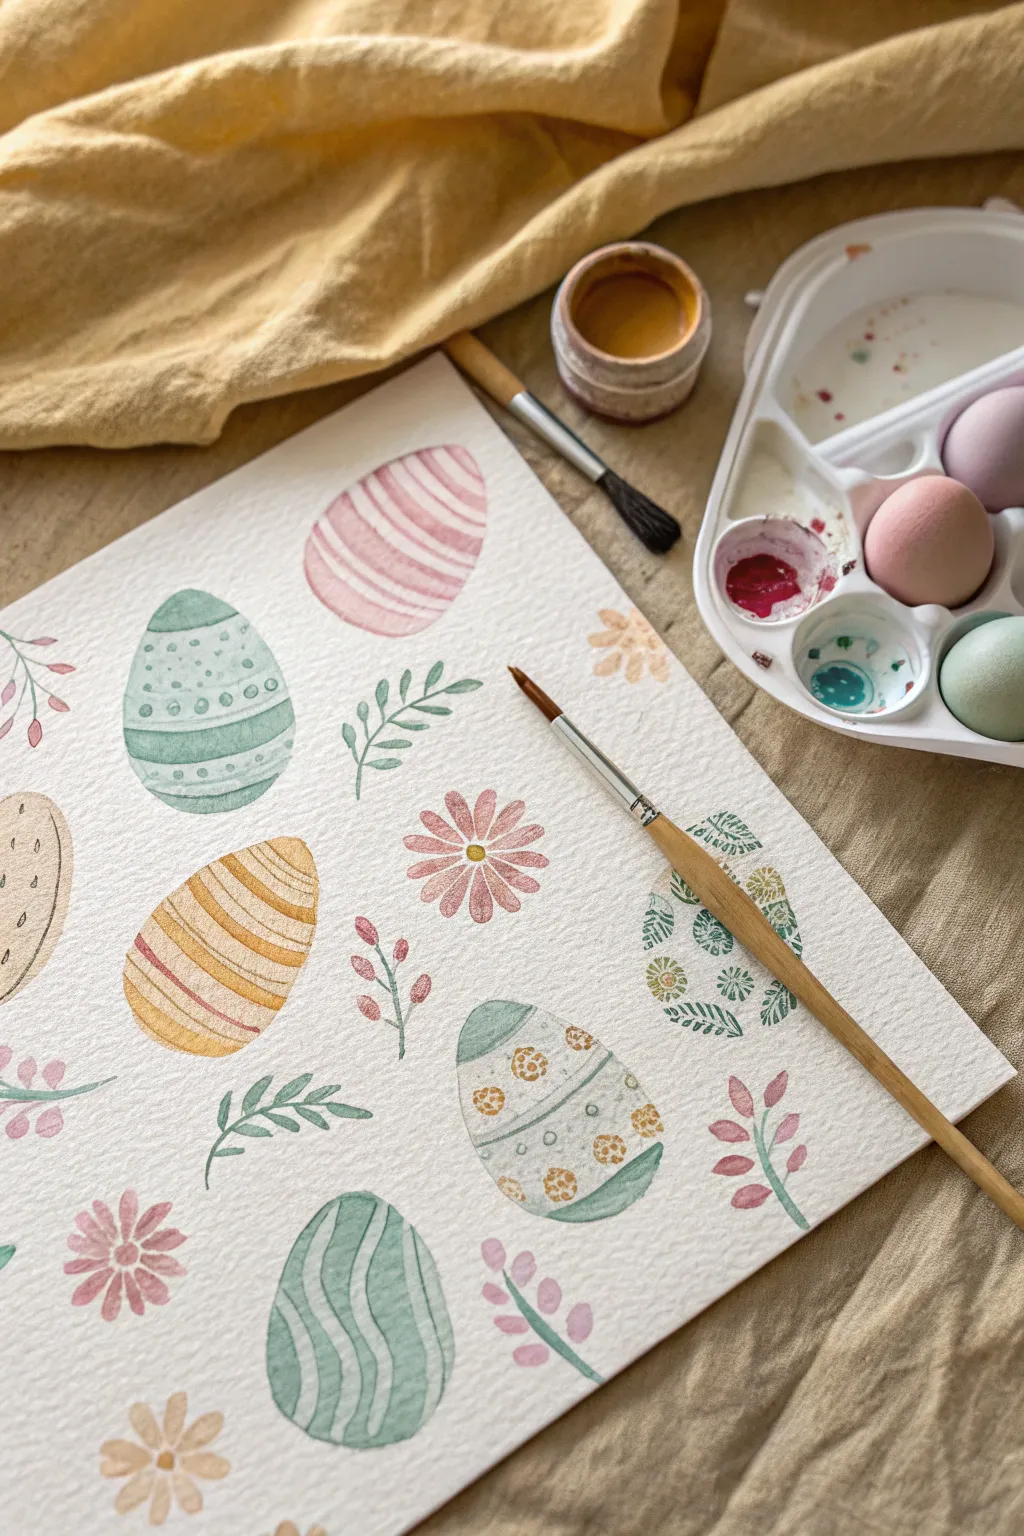
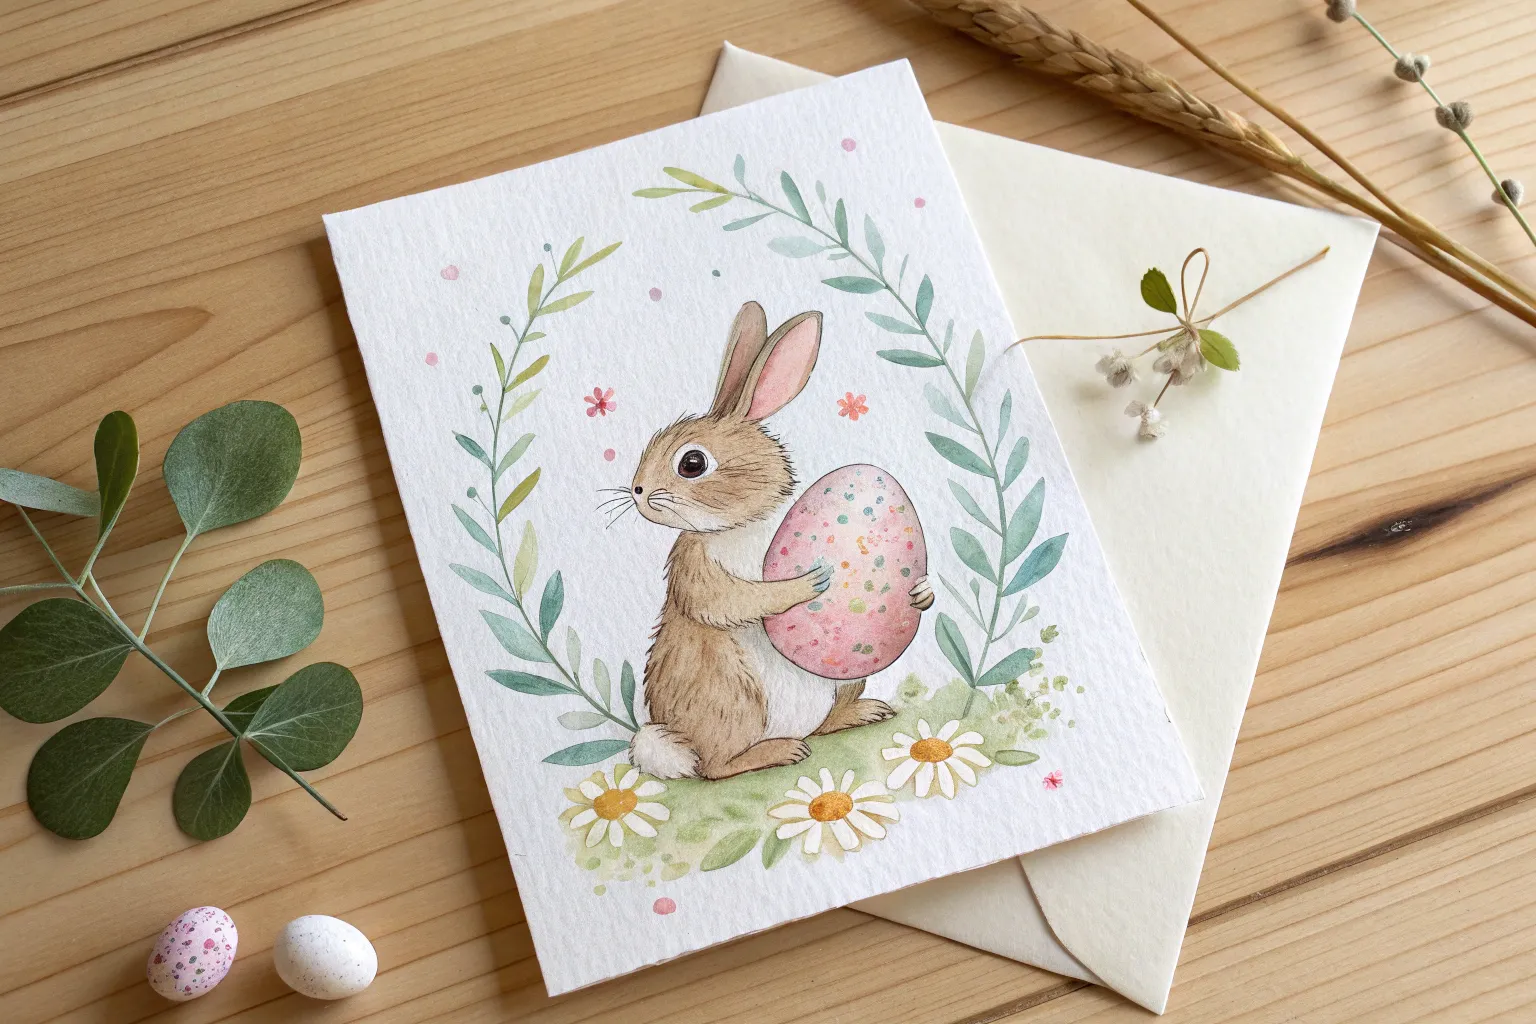
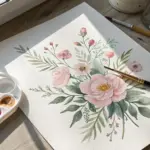
Celebrate spring with this charming composition of decorated Easter eggs and delicate florals. Using simple watercolor techniques, you’ll create a variety of patterned eggs surrounded by soft botanicals, perfect for a seasonal art print or handmade greeting card.
Step-by-Step Guide
Materials
- Cold press watercolor paper (A4 or similar size)
- Watercolor paints (Mint green, sage, pale pink, coral, mustard yellow, ochre)
- Round watercolor brushes (Size 4 for fills, Size 0 or 1 for details)
- Pencil (HB or H)
- Kneaded eraser
- Clean water jar
- Paper towels
- Palette or mixing tray
Step 1: Sketching the Layout
-
Draft the egg shapes:
Begin by lightly sketching roughly 6-8 egg shapes scattered across your paper. Vary their angles slightly so they aren’t all perfectly upright, giving the composition a natural, tossed look. -
Add botanical fillers:
In the spaces between the eggs, sketch simple floral motifs. Draw small sprigs of leaves, single daisy-like flowers, and tiny budding branches to fill the gaps without overcrowding. -
Lighten the lines:
Before painting, gently roll a kneaded eraser over your sketch. You want the graphite lines to be barely visible guides so they don’t show through the transparent watercolor layers later.
Fixing Bleeds
If detail paint bleeds into the base layer, the base wasn’t dry enough. Blot immediately with a clean tissue and let it dry completely before retrying.
Step 2: Painting the Egg Basics
-
Paint the first egg base:
Choose a mint green color. Paint the silhouette of one egg, keeping the wash relatively flat and even, but leave space for any white patterns if you aren’t planning to layer darker colors on top. -
Create a striped egg:
For the pink striped egg, don’t paint a solid base. Instead, paint curved bands of pale pink, leaving white paper showing between them to act as the white stripes. -
Paint a yellow base:
Mix a warm mustard yellow and fill in another egg shape completely. Keep the water-to-paint ratio high for a soft, translucent look. -
Add the botanical leaves:
While the eggs dry, move to the greenery. Using a sage green mix, paint the small leafy sprigs with a size 4 brush. Press the belly of the brush down and lift up to create tapered leaf shapes. -
Paint the flowers:
Use a coral or dusty pink shade for the flower petals. Paint simple strokes radiating from a center point for the daisies, and small teardrop shapes for the buds.
Steady Little Lines
For fine details like stripes or dots, hold your brush perpendicular to the paper and use only the very tip. Exhale as you make the stroke.
Step 3: Adding Patterns & Details
-
Detail the mint egg:
Once the mint egg is fully dry, use a darker teal or sage mix and a size 1 brush to paint horizontal bands. Add tiny dots or circles within the lighter bands for texture. -
Refine the pink stripes:
Go back to your pink striped egg. If the stripes look too flat, add a slightly darker pink to the edges of the colorful bands to give the egg some dimension and roundness. -
Decorate the yellow egg:
On the dry yellow egg, paint diagonal stripes using a darker ochre or light brown. You can add thin red or pink accent lines between the yellow stripes for contrast. -
Create a floral egg:
For the intricate floral egg seen on the right, paint tiny green leaf shapes directly onto the white paper within the egg outline. Fill the gaps with tiny yellow centers or dots, creating a negative space pattern. -
Paint the bottom patterned egg:
For the teal egg at the bottom, use a wet-on-dry technique to paint wavy, abstract lines. Leave uniform gaps of white paper to define the swirl pattern. -
Add flower centers:
Drop a tiny dot of mustard yellow into the centers of your pink daisy flowers to finish them off. -
Enhance the speckled egg:
For the egg with gold accents, paint a very pale grey or blue base. Once dry, paint geometric metallic or ochre shapes on top, organizing them in horizontal rows. -
Final assessment:
Step back and look at the composition. If any areas feel too empty, add a tiny floating leaf or a small pink bud to balance the white space.
Now your sheet is filled with a delightful array of hand-painted Easter motifs ready to be framed or gifted.


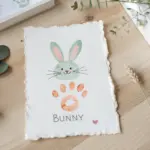
Bunny Ears Peeking Up
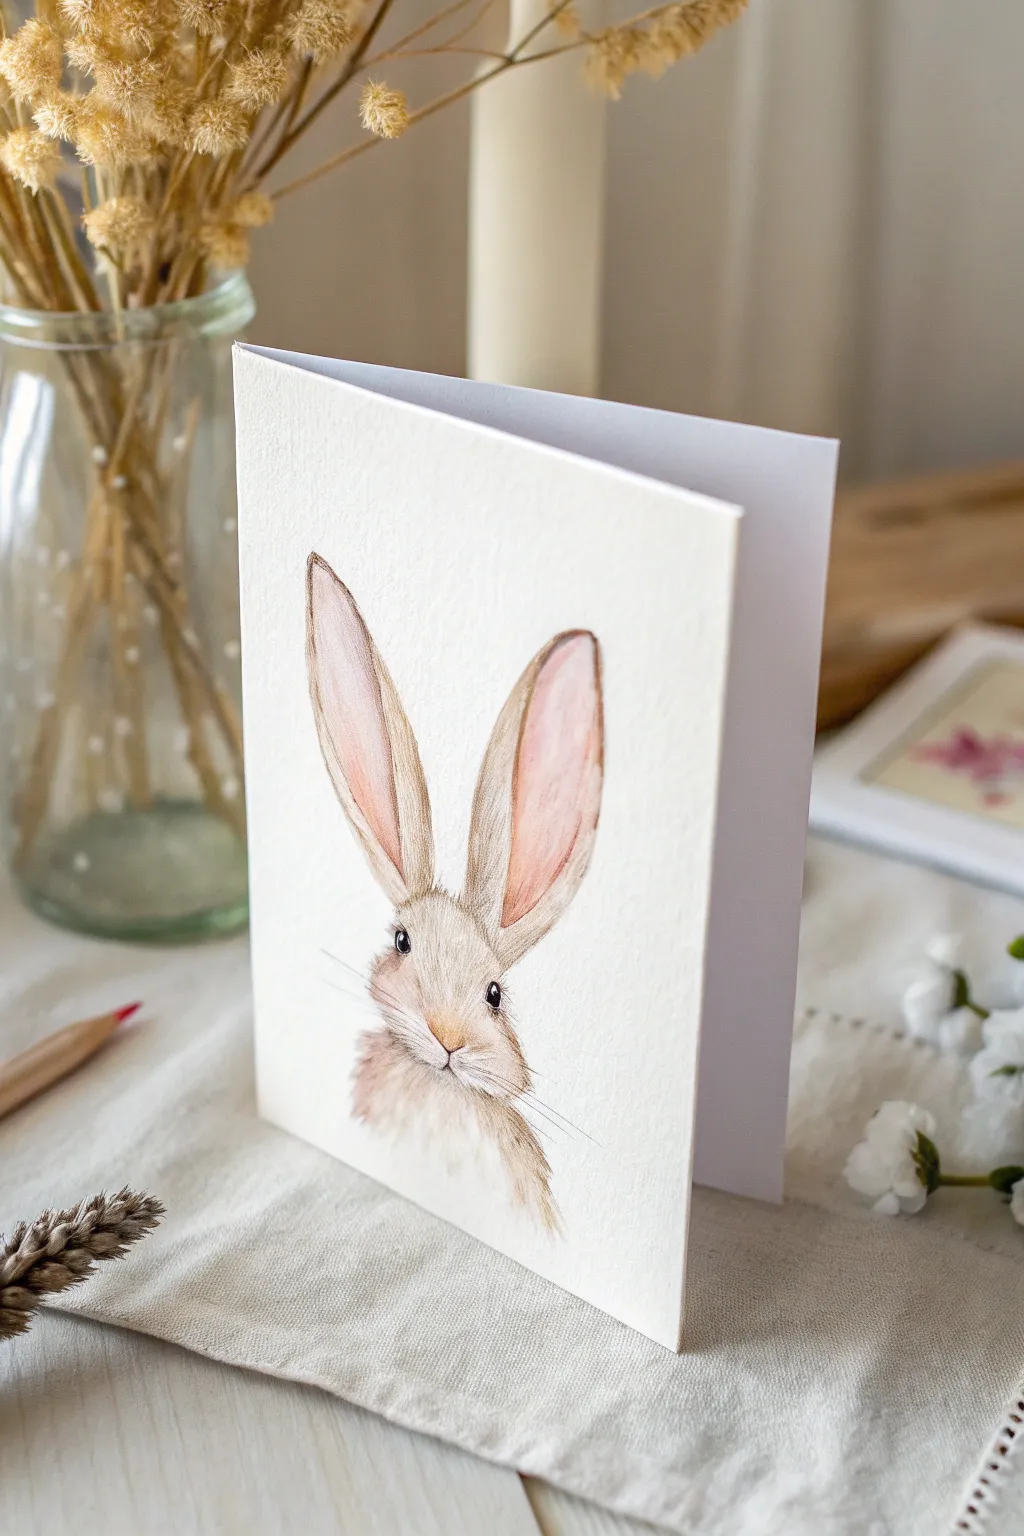
Capture the soft curiosity of spring with this delicate watercolor bunny portrait. The oversized ears and gentle expression make this the perfect centerpiece for a heartfelt Easter card or seasonal note.
Step-by-Step
Materials
- Cold press watercolor paper (300 gsm)
- Watercolor paints (Burnt Sienna, Yellow Ochre, Alizarin Crimson, Sepia, Ultramarine Blue)
- Round watercolor brushes (Size 4 and Size 0 or 00 for details)
- HB or 2H pencil for sketching
- Kneadable eraser
- Jar of clean water
- Paper towels
- Pre-folded card base (blank)
Step 1: Sketching the Outline
-
Draft the basic shapes:
Start by lightly drawing the central oval for the bunny’s head on your watercolor paper. Keep your pencil pressure very light so the graphite doesn’t show through the transparent paint later. -
Add the ears:
Above the head, sketch two long, tall ear shapes. They should be slightly wider at the top and taper as they connect to the head. Angle them slightly outward to create that alert, ‘listening’ look seen in the reference. -
Refine the features:
Mark the position of the eyes about halfway down the face oval. Draw the small ‘Y’ shape for the nose and mouth area just below the eyes. -
Prepare the paper:
Roll your kneadable eraser gently over the sketch to lift up excess graphite, leaving just a faint ghost image to guide your painting.
Fur Texture Trick
Use a “dry brush” technique for the fur. Wipe mostly dry paint on a paper towel before painting to create scratchy, realistic hair textures.
Step 2: Painting the Base Layers
-
Mix your ear color:
Create a watery wash of soft pink by mixing a tiny dot of Alizarin Crimson with plenty of water. You want this to be very pale. -
Wash the inner ears:
Using your size 4 brush, paint the fleshy interior of the ears. Drop a slightly more saturated pink into the center of the wet wash while it’s still damp to create a soft, natural gradient. -
Mix the fur color:
Combine Burnt Sienna with a touch of Yellow Ochre to create a warm, sandy brown. Dilute this well. -
Paint the outer ears:
Carefully paint the outer edges and backs of the ears with your sandy brown mix. Leave a tiny sliver of unpainted white paper between the pink inner ear and brown outer fur to act as a highlight. -
Base coat the face:
Apply a very light wash of the sandy brown to the forehead and cheeks, leaving the area around the eyes and the muzzle white for now.
Step 3: Adding Texture and Detail
-
Deepen the shadows:
Mix a small amount of Sepia into your brown mixture. While the base layer is dry, add shading inside the base of the ears where they meet the head to create depth. -
Texture the fur:
Switch to your smaller detail brush (size 0). Using short, flicking strokes with the darker brown mix, start building up fur texture along the edges of the ears and the top of the head. -
Paint the eyes:
Using distinct, concentrated Sepia or a dark mix of Sepia and Ultramarine Blue, carefully paint the eyes. Leave a tiny, crisp white dot in each pupil for the ‘catchlight’—this brings the bunny to life. -
Define the nose:
Use a slightly more concentrated version of your pink ear mix to paint the small triangle of the nose. Keep the edges soft. -
Build cheek fluff:
Add layers of short, directional strokes on the cheeks using various dilutions of brown. I like to let the strokes fade out at the bottom to give the painting a vignette effect, rather than painting the whole body.
Muddy Colors?
If your brows look muddy, let the layers dry completely between coats. Wet-on-wet blends colors; wet-on-dry layers them sharply.
Step 4: Final Touches
-
Add whiskers:
With your finest brush and a very light, watery grey-brown, paint long, confident strokes for the whiskers. Fast strokes usually result in smoother, more natural lines. -
Enhance contrast:
Look at the overall image. If the ears need more definition, add a few more dark fur strokes along the outer rims. -
Dry and mount:
Allow the painting to dry completely. Once dry, you can trim the watercolor paper to size and adhere it to your folded card stock using double-sided tape or crafting glue.
Now you have a charming, hand-painted card ready to brighten someone’s spring season


Cute Bunny Face Portrait
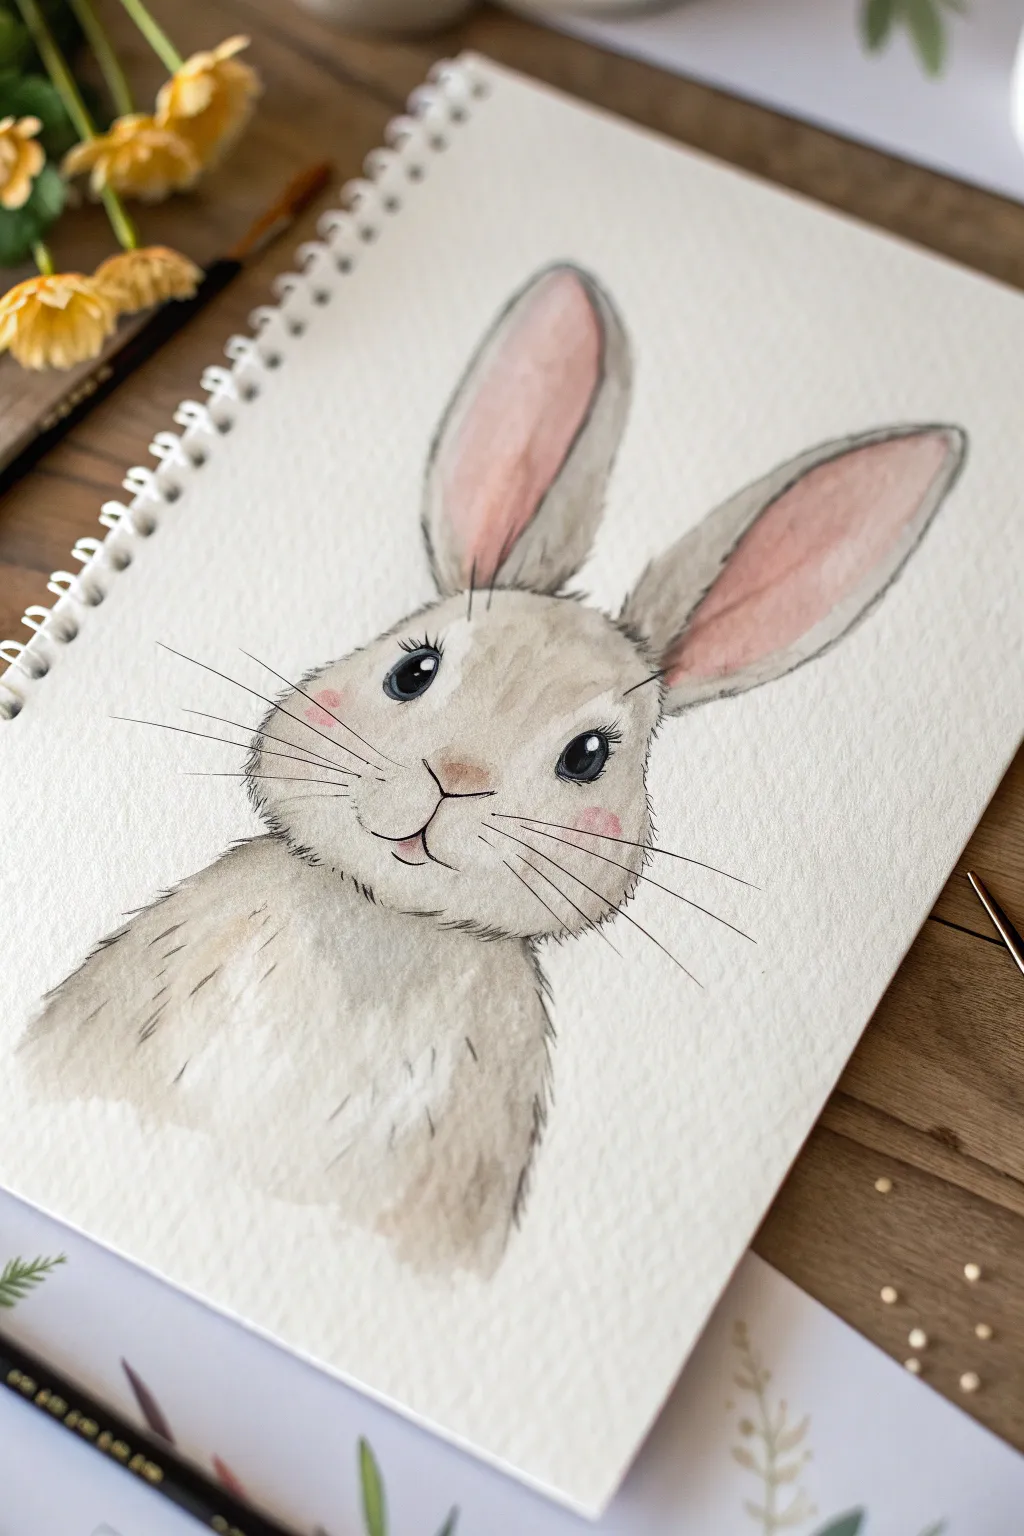
Capture the sweetness of spring with this endearing bunny portrait, featuring soft watercolor washes and precise fine-liner details. The gentle expression and large eyes make this piece perfect for Easter greeting cards or nursery wall art.
Step-by-Step Tutorial
Materials
- Cold-pressed watercolor paper (300gsm/140lb)
- Pencil (HB or H for light sketching)
- Kneaded eraser
- Watercolors (Burnt Umber, Yellow Ochre, Lamp Black, Alizarin Crimson)
- Round brushes (sizes 6 and 2)
- Fine-liner pen (black, waterproof, 0.1mm or 0.3mm)
- White gel pen or white gouache
- Clean water and paper towels
Step 1: Sketching the Outline
-
Basic Shapes:
Start by drawing a soft oval shape for the bunny’s head, slightly wider at the bottom for those chubby cheeks. Add a wider, curved shape below for the shoulders and chest. -
Adding Ears:
Draw two long, oblong ears extending from the top of the head. Position them slightly unevenly—one perhaps straighter and one angled slightly to the side—to give the bunny character. -
Facial Features:
Lightly mark placement for the large, expressive eyes about halfway down the face. Sketch a small ‘Y’ shape for the nose and mouth area just below the eyes. -
Refining Lines:
Go over your sketch to refine the shapes, ensuring the lines are faint. Use a kneaded eraser to lift excess graphite so it doesn’t dirty your watercolor washes later.
Step 2: Applying the Watercolor Base
-
Mixing the Fur Color:
Mix a diluted wash of Burnt Umber with a touch of Yellow Ochre and plenty of water to create a warm, light beige tone. Test it on a scrap piece of paper first; it should be very pale. -
First Wash – Body:
Using a larger round brush (size 6), apply this pale wash to the bunny’s face and body. Leave the area around the nose and the insides of the ears unpainted for now. -
Wet-on-Wet Texturing:
While the first layer is still damp, drop in slightly concentrated brown paint along the edges of the cheeks and the bottom of the chest to suggest shadow and fluffiness. -
Painting the Ears:
Mix a very watery Alizarin Crimson to make a soft pink. Paint the fleshy inner part of the ears with this pink tones, letting it touch the wet brown fur edge slightly for a soft blend. -
Cheek Blush:
Use that same watery pink mix to dab two soft circles on the cheeks. Keep the edges soft by using a clean, damp brush to feather the color outwards. -
Drying Time:
Allow the entire painting to dry completely. The paper must be bone dry before you add the fine details, or the ink will bleed.
Pro Tip: Fur Texture
When inking the fur, vary direction of your pen flicks. On the cheeks, flick outward; on the chest, flick downward. This mimics real fur growth patterns.
Step 3: Line Art and Details
-
Fur Texture Outline:
Switch to your waterproof fine-liner. Instead of tracing a solid line, use short, quick flicks to outline the head and body, mimicking the texture of fur. -
Defining the Ears:
Outline the ears with smoother lines, but break them up occasionally near the base where the fur would be tufted. -
Drawing the Eyes:
Carefully draw the large oval shapes of the eyes. Fill them in with solid black ink, leaving a small white circle empty in each for the catch-light. -
Nose and Mouth:
Draw the nose with a soft, rounded triangle shape and add a small vertical line connecting to the mouth curves. Add a tiny touch of pink paint to the nose tip. -
Adding Whiskers:
With a confident, quick motion, draw long whiskers extending from the muzzle area. Do this quickly to keep the lines smooth and natural rather than shaky. -
Eyelashes:
Add three or four curved eyelashes to the outer corner of each eye to enhance the sweet expression.
Level Up: Floral Crown
Paint small, simple flowers and leaves around the base of the ears before doing the pen outline to give your bunny a festive spring crown.
Step 4: Final Touches
-
Deepening Shadows:
Take a small brush (size 2) with a slightly darker brown mix. Add tiny, hair-like strokes over the dried wash, focusing on the chin and under the ears to build volume. -
Highlights:
Use a white gel pen to add extra sparkle to the eyes if the paper white wasn’t enough. You can also add tiny white dashes on the nose for a wet look. -
Cleaning Up:
Once you are certain the ink is 100% dry, gently erase any remaining pencil marks to leave a crisp, professional finish.
Now you have a charming bunny illustration ready to hop onto your Easter crafting projects


Fluffy Baby Chick Study
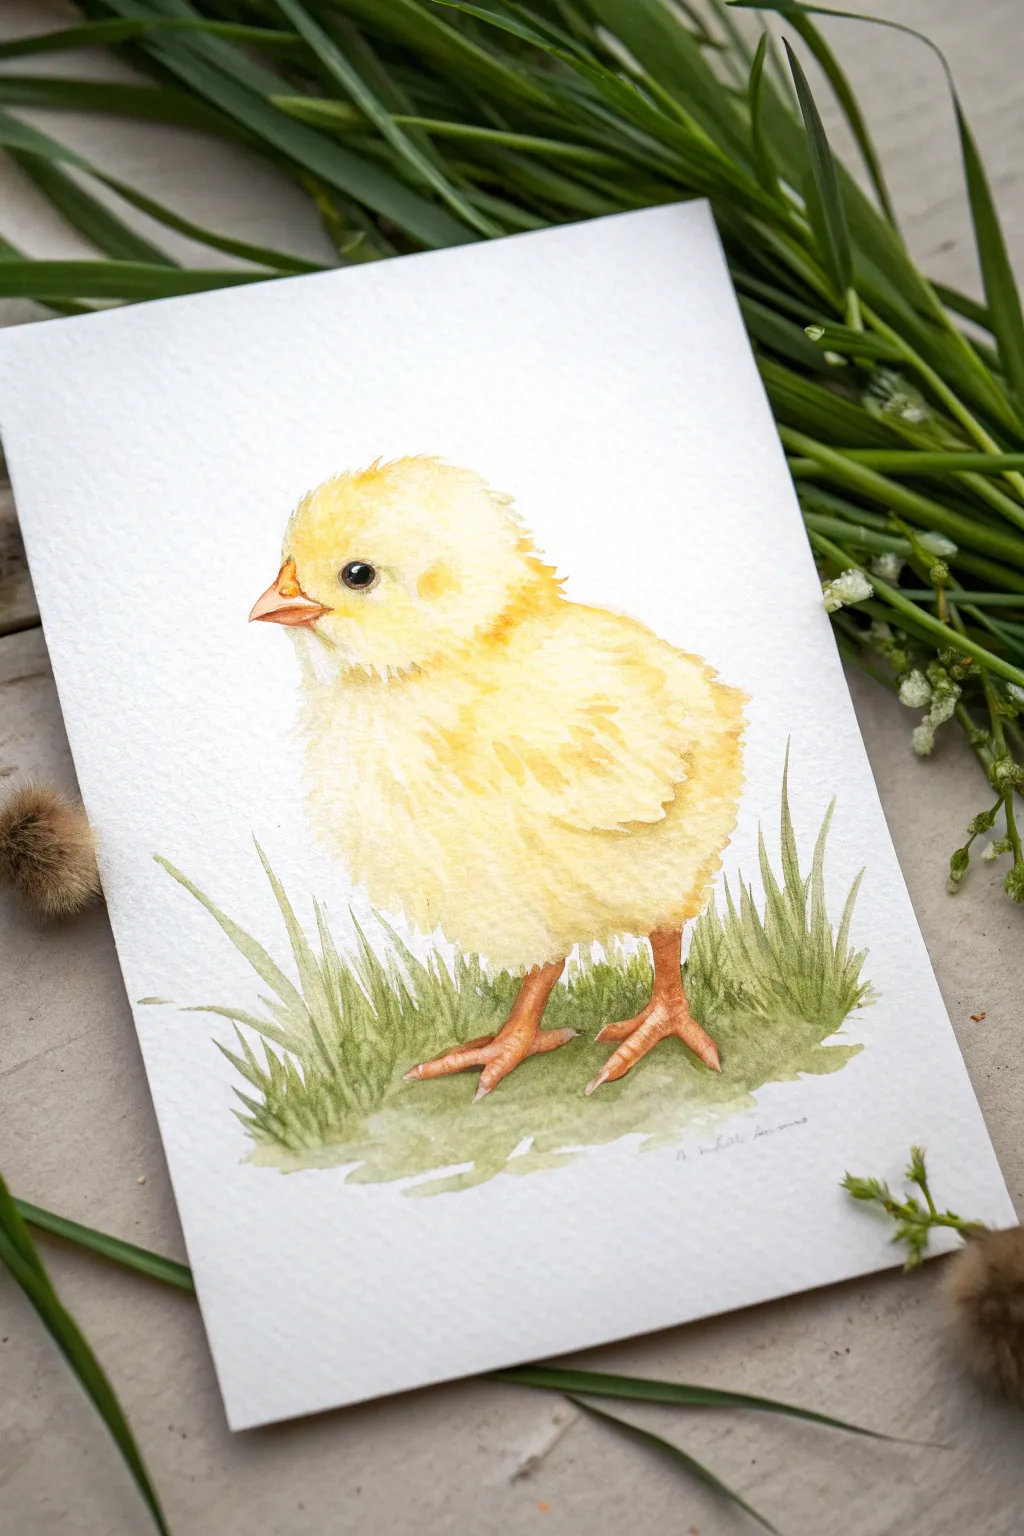
Capture the tender softness of spring with this delicate watercolor study of a baby chick. Using wet-on-wet techniques and careful layering, you’ll build up a realistic fluffy texture that looks ready to chirp.
Detailed Instructions
Materials
- Cold press watercolor paper (300 gsm)
- Watercolor paints (Lemon Yellow, Cadmium Yellow, Yellow Ochre, Burnt Sienna, Payne’s Grey, Sap Green)
- Round brushes (sizes 2, 4, and 6)
- HB pencil
- Kneaded eraser
- White gouache (optional)
- Two jars of water
- Paper towels
Step 1: Sketching and Base Layer
-
Outline the form:
Begin with a very light pencil sketch on your watercolor paper. Draw two circles—a smaller one for the head and a larger, slightly overlapping one for the body—then refine the contour to connect them. Keep your lines incredibly faint so they disappear under the yellow paint later. -
Add key features:
Lightly sketch the small triangular beak, the circular eye, and the spindly legs. Don’t worry about drawing individual feathers; just mark the general outline where the fluff ends. -
Prepare the first wash:
Mix a very watery puddle of Lemon Yellow. With your size 6 brush, wet the entire body of the chick with clean water first, avoiding the eye and beak. -
Apply the base color:
Drop the watery Lemon Yellow into the wet paper. Let the pigment spread naturally to create a soft, glowing base. Leave a few tiny spots of white paper near the top of the head for highlights.
Fixing Muddy Colors
Yellow gets dirty easily. If your shadows look green or brown, stop! Let it dry completely. Then glaze with a pure, clean orange/tangerine color to warm it back up without mixing more mud.
Step 2: Building Fluff and Form
-
Deepen the yellows:
While the paper is still slightly damp but not soaking, mix a warmer Cadmium Yellow. Dab this color onto the underside of the belly and the shadow area under the chin to start creating volume. -
Create texture:
Switch to a size 4 brush. Using a mix of Yellow Ochre and a touch of Cadmium, paint short, flicking strokes along the edges of the chick to suggest downy feathers sticking out. -
Paint the beak:
Mix a pale orange using Yellow and a tiny dot of Burnt Sienna. Fill in the beak, letting it dry, then add a thin line of darker orange between the upper and lower mandibles. -
Detail the eye:
Using a size 2 brush and a thick mix of Payne’s Grey (or black), carefully paint the eye. Leave a tiny speck of white paper unpainted for the reflection, or add it later with white gouache. This spark of life is crucial. -
Define the wing:
Mix a slightly darker shadow color using Yellow Ochre and a hint of purple or grey to desaturate it. Paint the shape of the small wing on the side, using jagged strokes to mimic layers of feathers.
Level Up: Soft Lighting
For a magical glow, wet the background around quality paper and drop in very faint distinct blue or violet. This cool tone makes the warm yellow of the chick pop intensely.
Step 3: Legs and Grass
-
Paint the legs:
Mix Burnt Sienna with a little red for a fleshy terracotta tone. Paint the legs and feet, keeping the edges crisp. Note how the upper leg disappears into the yellow belly fluff—soften this transition with a clean, damp brush. -
Add leg shadows:
Once the base leg color is dry, use a translucent wash of Payne’s Grey or purple to glaze over the underside of the toes and legs to give them roundness. -
Anchor with grass:
Mix Sap Green with a little Yellow for a fresh spring green. Using upward, flicking strokes with your size 6 brush, paint grass blades rising up around the chick’s feet. -
Ground the subject:
While the grass is wet, drop in some darker green (mixed with blue or brown) right at the base of the feet to create a ground shadow. This stops the chick from looking like it’s floating. -
Final texture touches:
Return to the yellow fluff with a fundamentally dry brush (remove most moisture on a towel). Drag a mix of Yellow Ochre lightly over the dried body to enhance the fuzzy texture.
Sign your name near the grass blades and enjoy your little sign of spring
BRUSH GUIDE
The Right Brush for Every Stroke
From clean lines to bold texture — master brush choice, stroke control, and essential techniques.
Explore the Full Guide
Happy Easter Hand Lettering

This elegant greeting card combines the fluidity of brush lettering with soft, botanical watercolors for a sophisticated Easter message. The contrast between the lowercase script and bold uppercase serif font creates a balanced, modern composition perfect for giving to loved ones.
Step-by-Step Guide
Materials
- Cold press watercolor paper (cut to 5×7 inches)
- Pencil (HB or H)
- Kneaded eraser
- Payne’s Grey or Indigo watercolor paint (mixed to a dark, inky consistency)
- Sap Green or Olive Green watercolor paint
- Prussian Blue or Phthalo Blue watercolor paint
- Round watercolor brush (size 2 or 4 for lettering)
- Round watercolor brush (size 6 for leaves)
- jar of water
- Paper towels
Step 1: Drafting the Design
-
Establish guides:
Begin by lightly sketching horizontal guidelines on your watercolor paper with a pencil. You will need a distinct area for the top word, a larger area for the middle word, and space at the bottom for the botanical element. Keep the lines extremely faint so they can be erased later. -
Sketch the lettering:
Using your pencil, draft the word ‘happy’ in a loose, bouncy lowercase script. Place ‘EASTER’ directly beneath it in a taller, all-caps serif style. Center the composition, ensuring the ‘p’ descenders don’t crash into the letters below. -
Outline the branch:
Sketch a gentle, curved line beneath the text for the branch stem. Add small oval shapes along the stem to plan where your leaves will go, keeping the arrangement somewhat symmetrical but organic.
Step 2: Painting the Lettering
-
Mix the lettering color:
In your palette, mix Payne’s Grey with a tiny touch of blue to create a deep, cool charcoal tone. You want a high pigment-to-water ratio so the text is bold and easy to read. -
Paint ‘happy’:
Load your smaller round brush (size 2 or 4). Starting with ‘happy,’ carefully paint over your pencil sketch. Apply more pressure on the downstrokes to make them thick, and lift your brush to the very tip for thin upstrokes. -
Connect the strokes:
Since watercolor dries quickly, try to complete each letter in one flow if possible, picking up wet edges promptly to avoid visible seams. -
Paint ‘EASTER’:
Switch techniques for the word ‘EASTER.’ These letters have a rougher, more hand-drawn serif look. Paint the vertical bars first, keeping them fairly thick. Add the horizontal crossbars afterward using just the tip of your brush. -
Refine the edges:
Check your lettering for any unevenness. You can gently correct shapes while the paint is still damp, but be careful not to overwork it or the paper might pill.
Clean Edges
If your paint bleeds outside the lines, wait for it to dry completely. Then, use a damp (not wet) stiff brush to gently scrub and lift the excess pigment.
Step 3: Adding the Botanical Illustration
-
Mix the greens:
Create a watery, transparent mix of Sap Green. Prepare a second puddle where you add a bit of blue to the green for a cooler, shadowy tone. -
Paint the stem:
Using your size 6 brush, paint the central curved stem with a very thin line of the lighter green mix. It should swoop gently from left to right. -
Create the first leaves:
Start painting the leaves using the ‘press and lift’ method. Touch the tip to the stem, press down to widen the belly of the brush, and lift up as you pull away to create a pointed tip. -
Vary the tones:
Dip your brush into the blue-green mix occasionally without rinsing it fully. This creates natural variation, giving some leaves a bluish tint while others remain pure green. -
Add blue accents:
While a few leaves are still wet, drop in a tiny amount of pure blue paint at the tips or bases. I love watching the color bleed naturally into the green creating a soft gradient. -
Final drying:
Let the entire card dry completely flat for at least 30 minutes. Once the paint is bone dry, gently use your kneaded eraser to lift any visible pencil guidelines.
Metallic Accent
Once the watercolor is dry, trace over the main branch stem with a gold gel pen or fine gold paint for a touch of festive elegance.
Your beautiful, handmade card is now ready to send a warm spring greeting
Floral Wreath With Easter Message
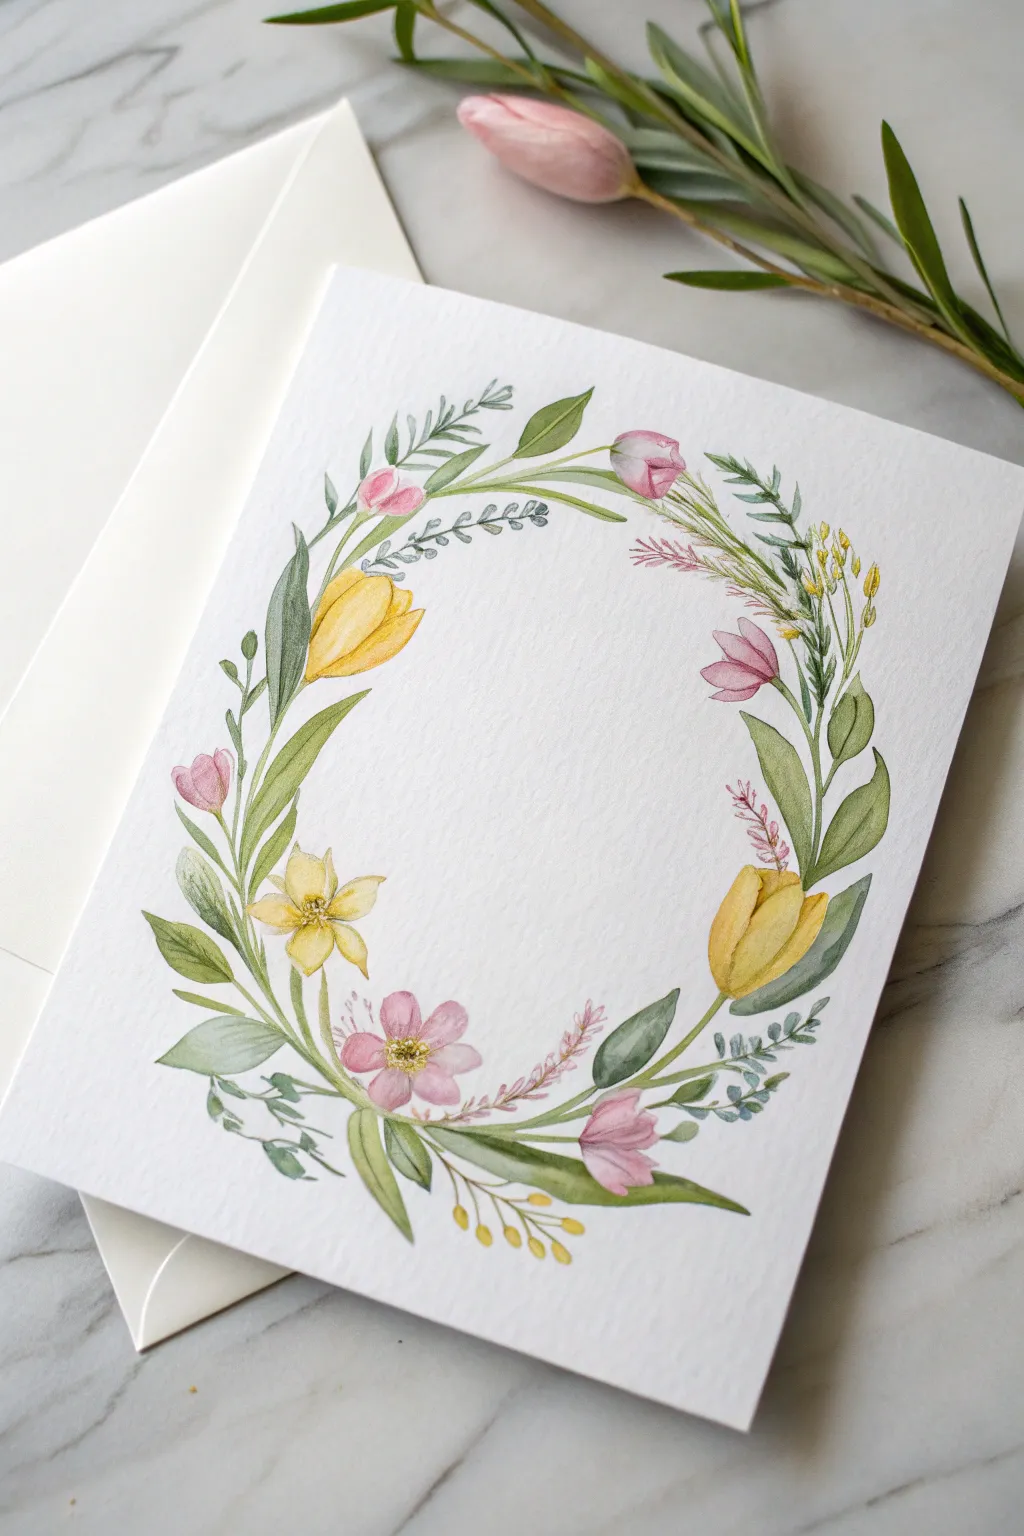
This delicate watercolor wreath combines soft yellow cornflowers, blushing tulips, and wild greenery in a graceful oval composition. It’s the perfect handmade touch for an elegant Easter greeting card, capturing the fresh, tender feel of early spring.
Step-by-Step
Materials
- Cold press watercolor paper (folded into a card size, approx 5×7 inches)
- Pencil (HB or 2H)
- Kneaded eraser
- Watercolor paints (Sap Green, Olive Green, Lemon Yellow, Cadmium Yellow, Rose Madder/Pink, Indanthrene Blue)
- Round watercolor brushes (Size 2 and Size 4)
- Jar of clean water
- Paper towels for blotting
Step 1: Planning the Layout
-
Sketch the oval guide:
Begin by lightly tracing a large oval shape in the center of your folded card stock paper with a pencil. This will serve as the spine for your wreath to ensure the shape stays consistent without needing perfect freehand skills. -
Place the main blooms:
Lightly sketch the outlines of the largest flowers first to establish balance. Place a large yellow tulip shape on the middle-left curve and another on the bottom-right curve. Add smaller pink tulip buds near the top right and bottom right. -
Add secondary flowers:
Sketch a five-petal yellow flower near the bottom left and a five-petal pink flower at the bottom center. Keep these lines very faint, as watercolor is transparent and pencil can show through. -
Fill in greenery and foliage:
Draw the main stems connecting these flowers along your oval guide. Add leaves curving outward from the stems, varying their sizes from large broad leaves to tiny sprigs. -
Refine and lighten:
Once you are happy with the botanical arrangement, take your kneaded eraser and gently roll it over the entire sketch. You want the graphic lines to be barely visible—just enough to guide your brush.
Natural Variation
Don’t just use one shade of green! Mix your greens with a tiny bit of red to mute them, or yellow to brighten them. Varied foliage makes the wreath look organic.
Step 2: Painting the Blooms
-
Paint the yellow tulips:
Load your Size 4 brush with a mix of Lemon Yellow and a touch of Cadmium. Paint the yellow tulip petals, leaving the very tips slightly lighter or unpainted for a highlight. While wet, drop a tiny bit of darker yellow or orange at the base for depth. -
Paint the pink details:
Using a watery Rose Madder or soft pink, fill in the small tulip buds and the five-petal wildflower at the bottom. For the small bud at the top left, keep the color sheer and delicate. -
Detail the open yellow flower:
Paint the star-shaped yellow flower on the left side. Use a slightly more saturated yellow in the center and let it fade out toward the petal tips. -
Add centers to the wild flowers:
Once the flower petals are dry, use a fine tip brush to add tiny stamen details. Use a brownish-yellow mixture for the center of the pink flower and the open yellow flower to make them pop.
Muddy Colors?
If your yellow tulips are turning green where they touch leaves, your Section 1 paint wasn’t dry. Let flowers dry completely before painting adjacent greenery.
Step 3: Adding Greenery and Accents
-
Base layer for leaves:
Mix a fresh Sap Green. Paint the larger leaves surrounding the tulips, using a ‘pressure-and-lift’ stroke: press down to widen the belly of the brush, then lift as you pull to create a sharp point. -
Varying the greens:
To create visual interest, mix a little blue into your green for the fern-like sprigs near the top left and bottom right. Paint these with quick, small dabs. -
Adding warm olive tones:
Mix an Olive Green or add a touch of brown to your green. Use this for the stems connecting the flowers and for the larger leaves at the bottom of the wreath. -
Painting filler stems:
Using your Size 2 brush, paint very thin, delicate stems sticking out from the main oval. Add tiny yellow dots to the ends of some stems to mimic mimosa or billy buttons. -
Feathery pink accents:
Mix a very pale, watery pink. Add feathery, fern-like sprigs tucked behind the main flowers, particularly near the top right and bottom center. -
Final leaf details:
Go back to your larger green leaves. If they are dry, you can paint a thin, darker green line down the center to suggest a vein, adding realistic detail to the illustration.
Step 4: Finishing Touches
-
Balance the composition:
Step back and look at the wreath as a whole. If there are empty white gaps that break the oval shape, fill them with tiny green leaves or small blue-grey berries. -
Erase stray marks:
Wait until the paint is completely bone-dry. Take your eraser and gently remove any remaining pencil sketch lines that might still be visible around the edges.
Now you have a beautiful, hand-painted card ready for a personalized Easter message in the center

PENCIL GUIDE
Understanding Pencil Grades from H to B
From first sketch to finished drawing — learn pencil grades, line control, and shading techniques.
Explore the Full Guide
Bunny in a Basket
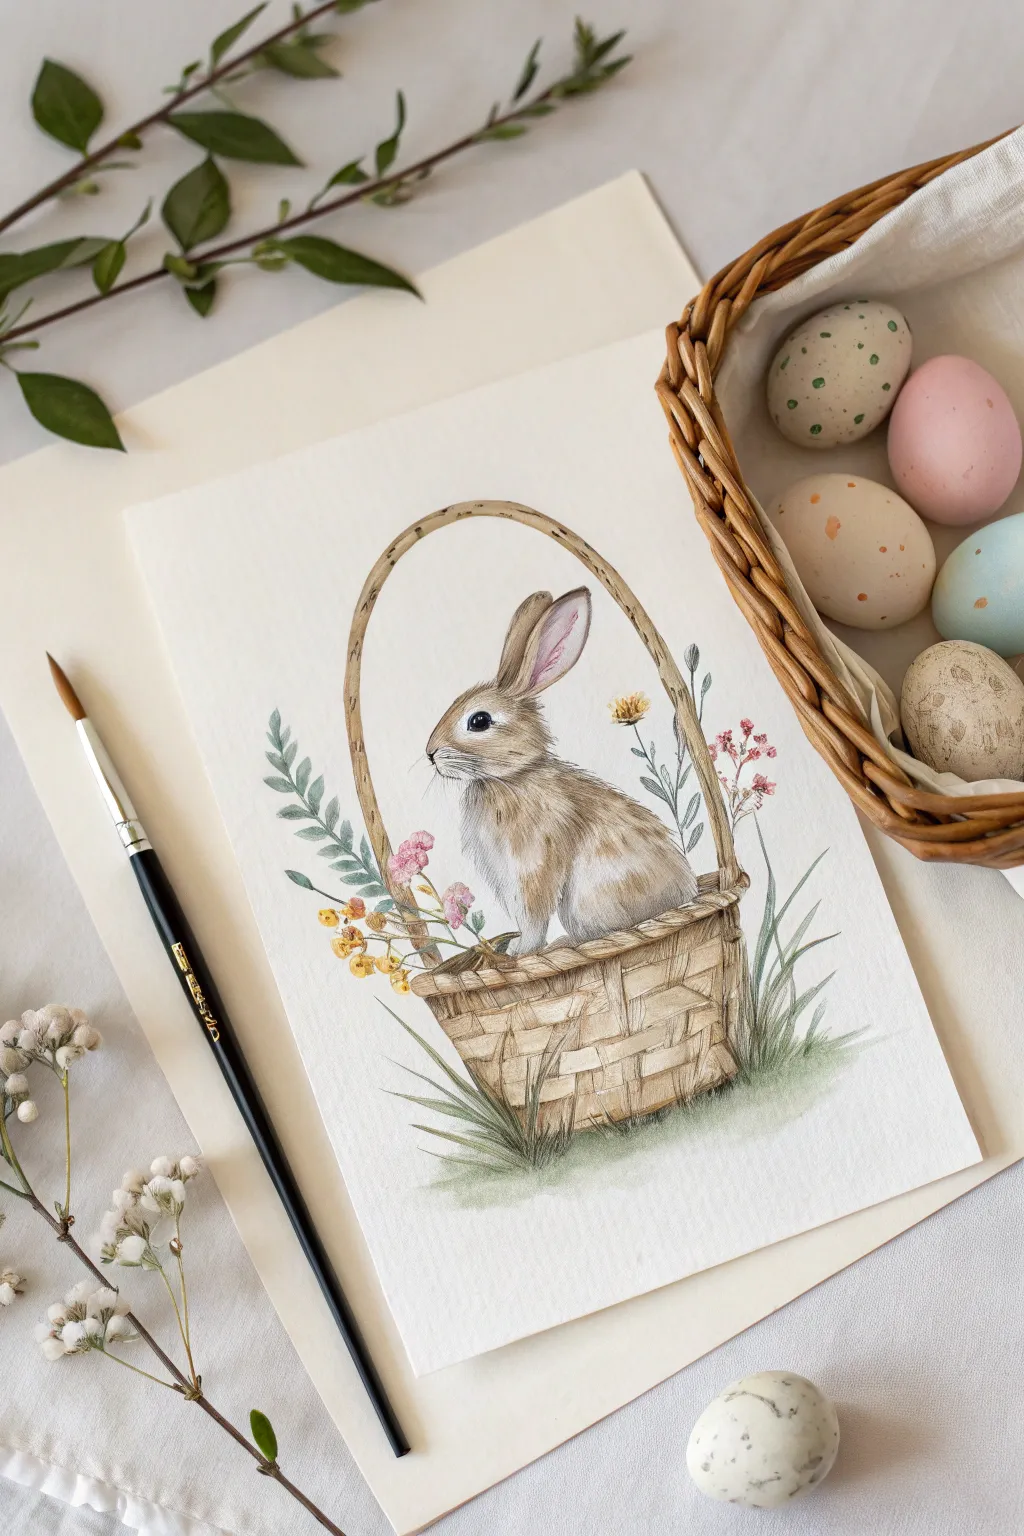
Capture the sweetness of spring with this delicate watercolor illustration featuring a charming rabbit nestled in a rustic basket. The soft fur textures and gentle floral framing make this piece a timeless addition to your Easter décor.
Detailed Instructions
Materials
- Cold press watercolor paper (300 gsm)
- Watercolor paints (burnt umber, yellow ochre, sap green, alizarin crimson, lamp black)
- Round watercolor brushes (sizes 2, 4, and 00 for details)
- HB pencil for sketching
- Kneaded eraser
- Clean water and paper towels
- White gouache or gel pen (optional for whiskers)
Step 1: Sketching the Composition
-
Outline the basket:
Begin by lightly sketching the basket shape near the center-bottom of your page. Draw a wide, shallow U-shape for the body and add a tall, arching handle that frames the space where the bunny will sit. -
Add the weave texture:
Draw intersecting horizontal and vertical lines across the basket body to suggest the wicker weave. Keep these lines loose and slightly curved to maintain the basket’s rounded form. -
Sketch the bunny:
Place the bunny inside the basket. Start with an oval for the body and a smaller circle for the head. Add the long ears perked up, with one slightly angled back. -
Detail the face and surroundings:
Define the eye, nose, and cheek area. Lightly pencil in sprigs of leaves and small flowers poking out from the basket and the ground below. Use your kneaded eraser to lighten all lines until they are barely visible.
Fur Texture Tip
Wait for each layer of fur strokes to dry completely before adding the next. This keeps individual hairs crisp. Painting wet-on-wet will blur them into a soft wash.
Step 2: Painting the Bunny
-
Initial wash:
Mix a very dilute wash of yellow ochre and apply it over the bunny’s fur areas, avoiding the pure white chest and belly area which should remain unpainted for now. -
Building fur texture:
Once the initial wash is dry, switch to a size 2 brush and burnt umber. Use short, flicking strokes to mimic fur, following the curvature of the bunny’s body. -
Deepening shadows:
Layer a darker brown mix under the chin, behind the ears, and where the legs meet the body to create dimension. I find that building these layers slowly prevents the fur from looking muddy. -
Painting the ears:
Mix a soft pink using alizarin crimson and plenty of water. Paint the inside of the ear, blending it gently into the brown fur at the edges. -
The eye detail:
Using your smallest brush (size 00) and lamp black, carefully paint the eye, leaving a tiny speck of white paper for the catchlight to bring the bunny to life.
Background Magic
Paint a very faint, watery blue oval behind the bunny’s head before painting the ears. This subtle halo effect makes the white highlights on the fur pop.
Step 3: The Basket and Botanicals
-
Basket base layer:
Wash the basket weave with a light brown mix. While still damp, drop in slightly darker pigment into the crevices of the weave to create instant shadow and depth. -
Defining the weave:
Once the base is dry, use a size 2 brush with a darker brown to outline the individual weave strips and the handle, emphasizing the overlapping sections. -
Painting greenery:
Mix sap green with a touch of blue for a cool tone. Paint the leaves using a single stroke motion—press down and lift up to create the tapered leaf shape. -
Adding florals:
Dab small dots of pink and yellow for the wildflowers. Keep these loose and impressionistic rather than trying to paint perfect petals. -
Grounding shadow:
Apply a watery wash of green and grey beneath the basket to ground the composition, flicking the brush upward slightly to suggest grass blades.
Step 4: Final Details
-
Whiskers and highlights:
Use a white gel pen or thin white gouache on a liner brush to add fine whiskers to the bunny’s snout. -
Final assessment:
Step back and check your contrast. Add small touches of dark brown to the deepest shadows in the basket or fur if the image looks too flat.
Once dry, frame your charming bunny painting to bring a touch of woodland magic to your home
Chick and Eggshell Moment
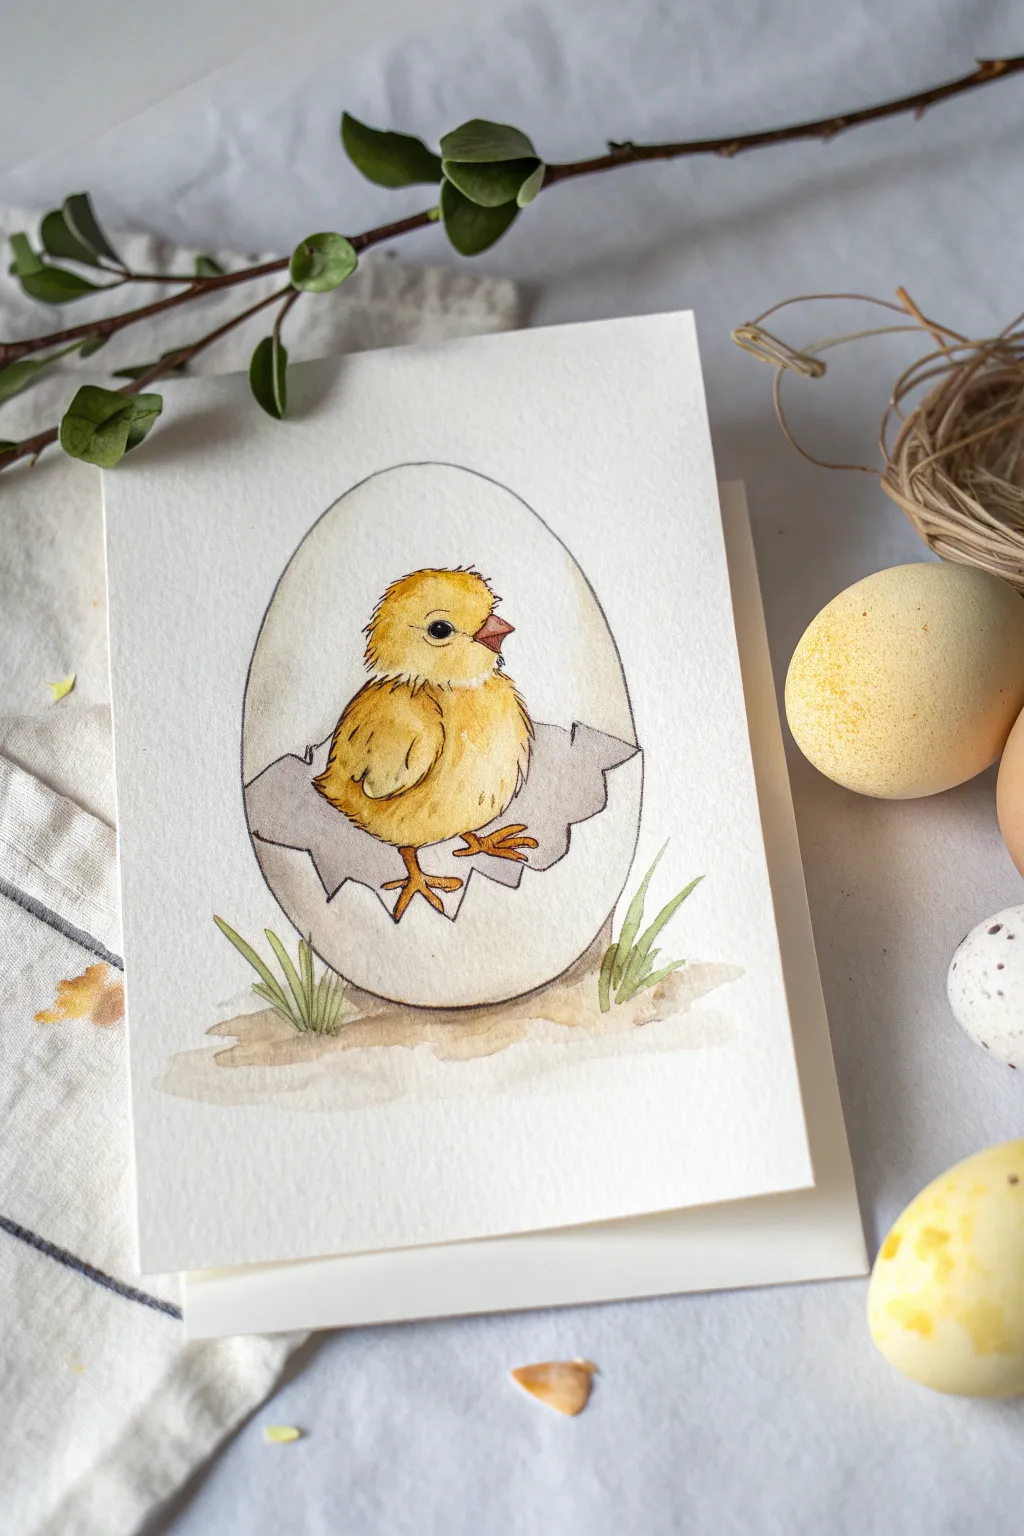
Capture the magic of new life with this adorable watercolor illustration featuring a fluffy chick emerging from its shell. The gentle outlines and soft yellow tones make this a heartwarming focal point for a handmade Easter greeting.
Step-by-Step Guide
Materials
- Cold press watercolor paper (cut to card size)
- Waterproof fine liner pen (black or sepia, 0.1mm and 0.3mm)
- Watercolor paints (Cadmium Yellow, Yellow Ochre, Burnt Sienna, Payne’s Grey, Sap Green)
- Round watercolor brushes (size 2 and 4)
- Pencil (HB) and eraser
- Jar of clean water
- Paper towels
Step 1: Sketching the Scene
-
Outline the egg shape:
Begin by lightly sketching a large oval shape in the center of your paper to represent the egg. Don’t worry if it’s not mathematically perfect; a slightly organic shape looks more natural. -
Define the opening:
Draw jagged, zig-zag lines across the lower-middle section of the egg to create the cracked shell opening where the chick sits. -
Sketch the chick:
Inside the opening, lightly draw the round form of the chick’s body and a smaller circle for the head above it. Add a tiny triangle for the beak and a small circle for the eye. -
Add environmental details:
Sketch a few simple blades of grass peeking out from behind the bottom of the egg on both the left and right sides to ground the composition.
Clean Lines
Wait at least 10 minutes for your ink drawing to dry before erasing pencil marks. Smudged ink can ruin the crisp illustrative look instantly.
Step 2: Inking the Design
-
Ink the main lines:
Using your 0.3mm waterproof pen, carefully trace over your pencil lines for the egg outline and the jagged shell edges. -
Texture the chick:
Switch to a finner 0.1mm pen for the chick. Instead of solid lines, use short, broken strokes to suggest fluffy down feathers around the contour of the body and head. -
Detail the face:
Ink the beak and the eye using the fine pen. Fill in the pupil of the eye, leaving a tiny white dot for a highlight to bring the character to life. -
Add feet and grass:
Draw the chick’s little feet resting on the jagged edge of the shell, then ink the grass blades. Once the ink is completely dry, gently erase all pencil marks.
Make it Sparkle
Once the paint is fully dry, add tiny dots of gold watercolor or metallic pen to the eggshell for a magical Easter touch.
Step 3: Bringing it to Life with Color
-
Base wash for the chick:
Dilute Cadmium Yellow with plenty of water. Paint the entire body of the chick with this pale wash, being careful to stay within your ink lines. -
Add depth and shadow:
While the yellow is still slightly damp, drop in a mix of Yellow Ochre and a touch of Burnt Sienna on the underside of the wings and the belly to create roundness. -
Paint the beak and feet:
Using a small brush, paint the beak with a diluted Burnt Sienna. Use a slightly darker mix of the same color for the feet and legs. -
Shadow the shell interior:
Mix a very watery grey using Payne’s Grey. Carefully paint the inside back wall of the eggshell behind the chick to make the yellow bird pop forward. -
Detail the shell fragments:
Use the same pale grey wash to add subtle shadows to the jagged pieces of the broken shell in the foreground. -
Paint the grass:
Use Sap Green to fill in the grass blades. I like to vary the intensity, making the base of the blades slightly darker than the tips. -
Ground the egg:
Mix a light wash of brown and grey. Paint a horizontal patch of ground beneath the egg, letting the color fade out at the edges for a vignette effect. -
Final touches:
Once everything is dry, you can add tiny strokes of darker yellow for extra feather texture or deepen the shadow under the egg for more contrast.
Allow your beautiful new card to dry flat before writing a special message inside to a loved one


Line-and-Wash Bunny Outline
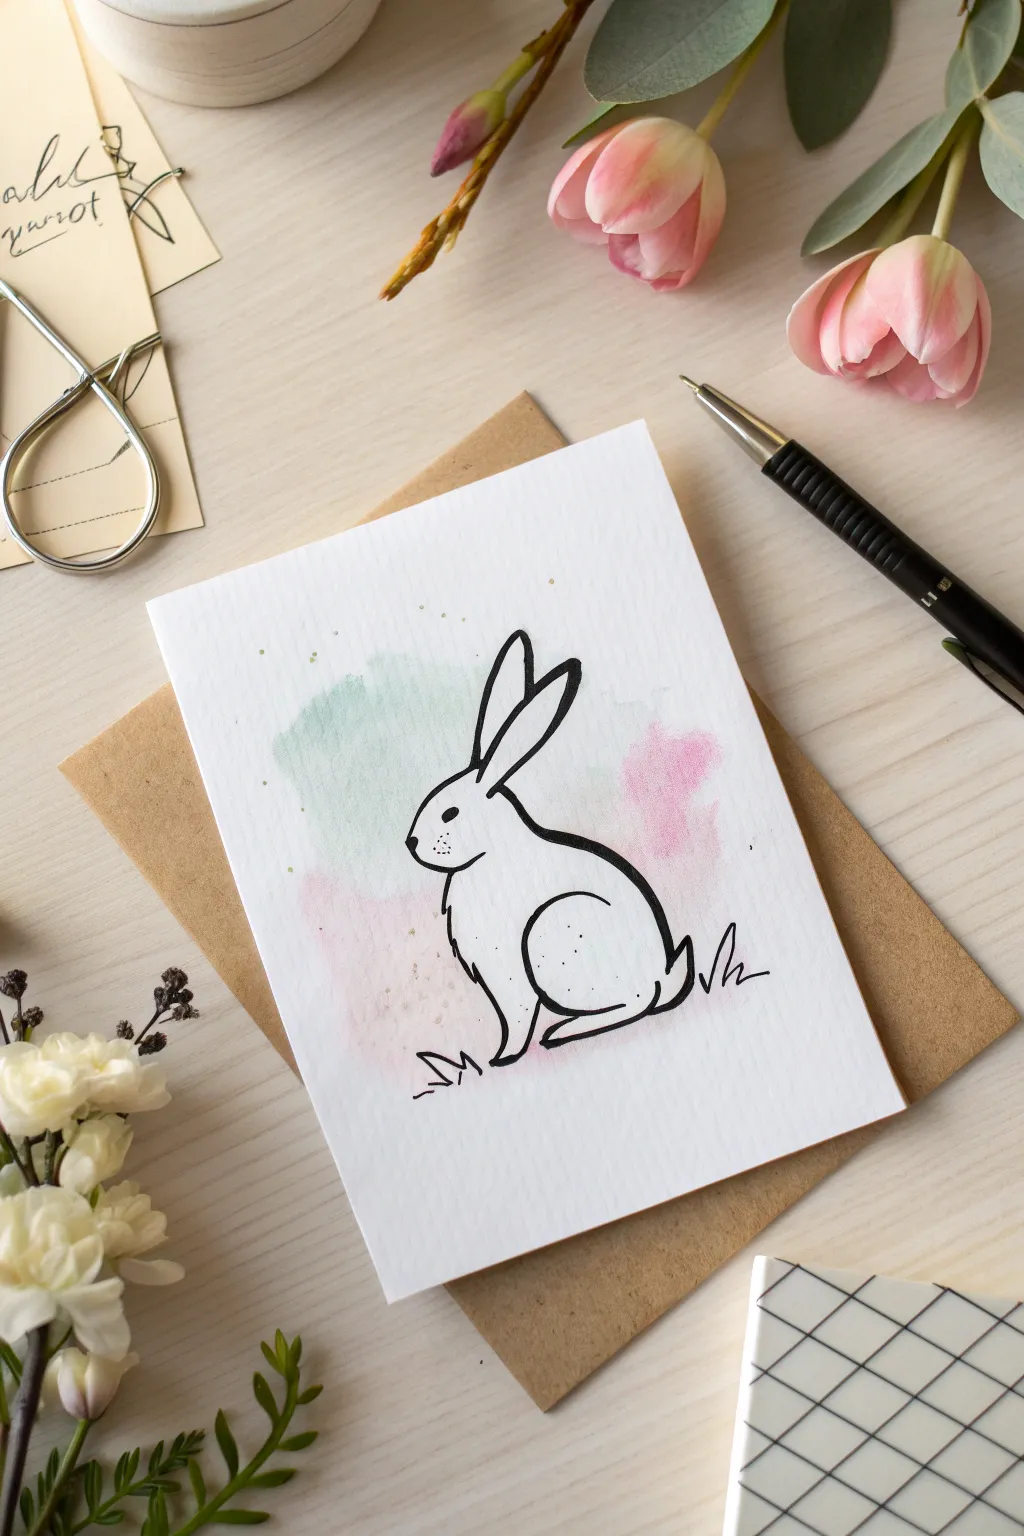
Capture the delicate charm of spring with this elegant line-and-wash bunny card. Combining loose, pastel watercolor splashes with crisp ink outlines creates a modern yet timeless greeting perfect for Easter.
Step-by-Step Tutorial
Materials
- Cold press watercolor paper (cut to card size, e.g., 5″x7″)
- Pencil (HB or similar lightweight)
- Black waterproof ink fineliner pen (size 05 or 08)
- Watercolor paints (Emerald/Sage Green and delicate Pink/Rose)
- Round watercolor brush (size 6 or 8)
- Cup of water
- Paper towel
- Kraft paper envelope (optional, for final presentation)
Step 1: Planning and Sketching
-
Fold the paper:
Begin by folding your watercolor paper carefully in half if you are making a folded card, or cut it down to size for a flat postcard style. Ensure the textured side is facing up. -
Visualize placement:
Look at the center of your card. You want the bunny to sit centrally but perhaps slightly towards the bottom half to leave room for the ears. -
Lightly sketch the body:
Using your pencil very lightly, draw a rounded oval shape for the bunny’s main body. It should angle slightly upward. -
Add the head:
Attach a smaller, rounded shape to the top left of the body for the head. Keep the lines faint so they can be erased later. -
Sketch the ears:
Draw two long, prominent ears extending from the top of the head. Make the front ear slightly shorter and the back ear longer and angled back for a dynamic look. -
Refine the tail:
Add a small, fluffy cloud shape at the back bottom of the body for the tail. Don’t worry about perfect details yet; just get the proportions right.
Ink Bleeding?
If your black lines are fuzzy or spreading, your paper wasn’t dry enough. Wait longer or use a hairdryer on a low, cool setting before inking.
Step 2: Watercolor Washes
-
Prepare the wash:
Wet your brush and mix a very watery puddle of sage or emerald green. You want the consistency to be like tea, very transparent. -
Apply the green wash:
Paint a loose, abstract shape behind where the bunny’s head and upper back are. Don’t try to stay inside any lines—in fact, going outside the sketch looks better. -
Mix the pink hue:
Rinse your brush thoroughly and pick up some soft pink or rose pigment. Again, keep it very diluted with water for a pastel effect. -
Apply the pink wash:
While the green might still be damp, add the pink wash near the bottom and rear of the bunny sketch. Let the colors touch and bleed slightly where they meet. -
Add gentle splatters:
Load a tiny bit of paint on your brush and tap the handle against your finger to create very fine splatters around the wash. I like to do this while the paper is wet for softer spots. -
Let it dry completely:
This step is crucial. Wait until the paper is bone dry and cool to the touch. If you ink while it’s damp, the pen will bleed.
Metallic Magic
Mix a tiny bit of gold watercolor or metallic ink into your splatters for a subtle Easter sparkle that catches the light.
Step 3: Inking the Outline
-
Outline the head:
Start with your waterproof fineliner at the nose. Draw a clean line up the forehead. -
Ink the ears:
Trace over your pencil lines for the ears. Vary your pressure slightly—pushing down a bit harder on the curves gives the line character. -
Define the back:
Draw a sweeping curve for the bunny’s back, allowing the line to break slightly near the tail for an organic feel. -
Draw the thigh:
Create a distinct curve inside the body outline to suggest the large rear thigh of the rabbit. This adds dimension without shading. -
Finalize the body and facial features:
Complete the outline at the chest and feet. Add a small solid dot for the eye and a few tiny dots on the snout for whiskers. -
Add ground details:
Draw a few jagged, grass-like zig-zags near the feet to ground the bunny so it doesn’t look like it’s floating. -
Erase pencil marks:
Once you are absolutely certain the ink is dry (give it a few minutes), gently erase the original pencil sketch to leave a crisp illustration.
Now slip your handmade masterpiece into a kraft envelope and get ready to brighten someone’s spring
Monogram in an Egg Frame
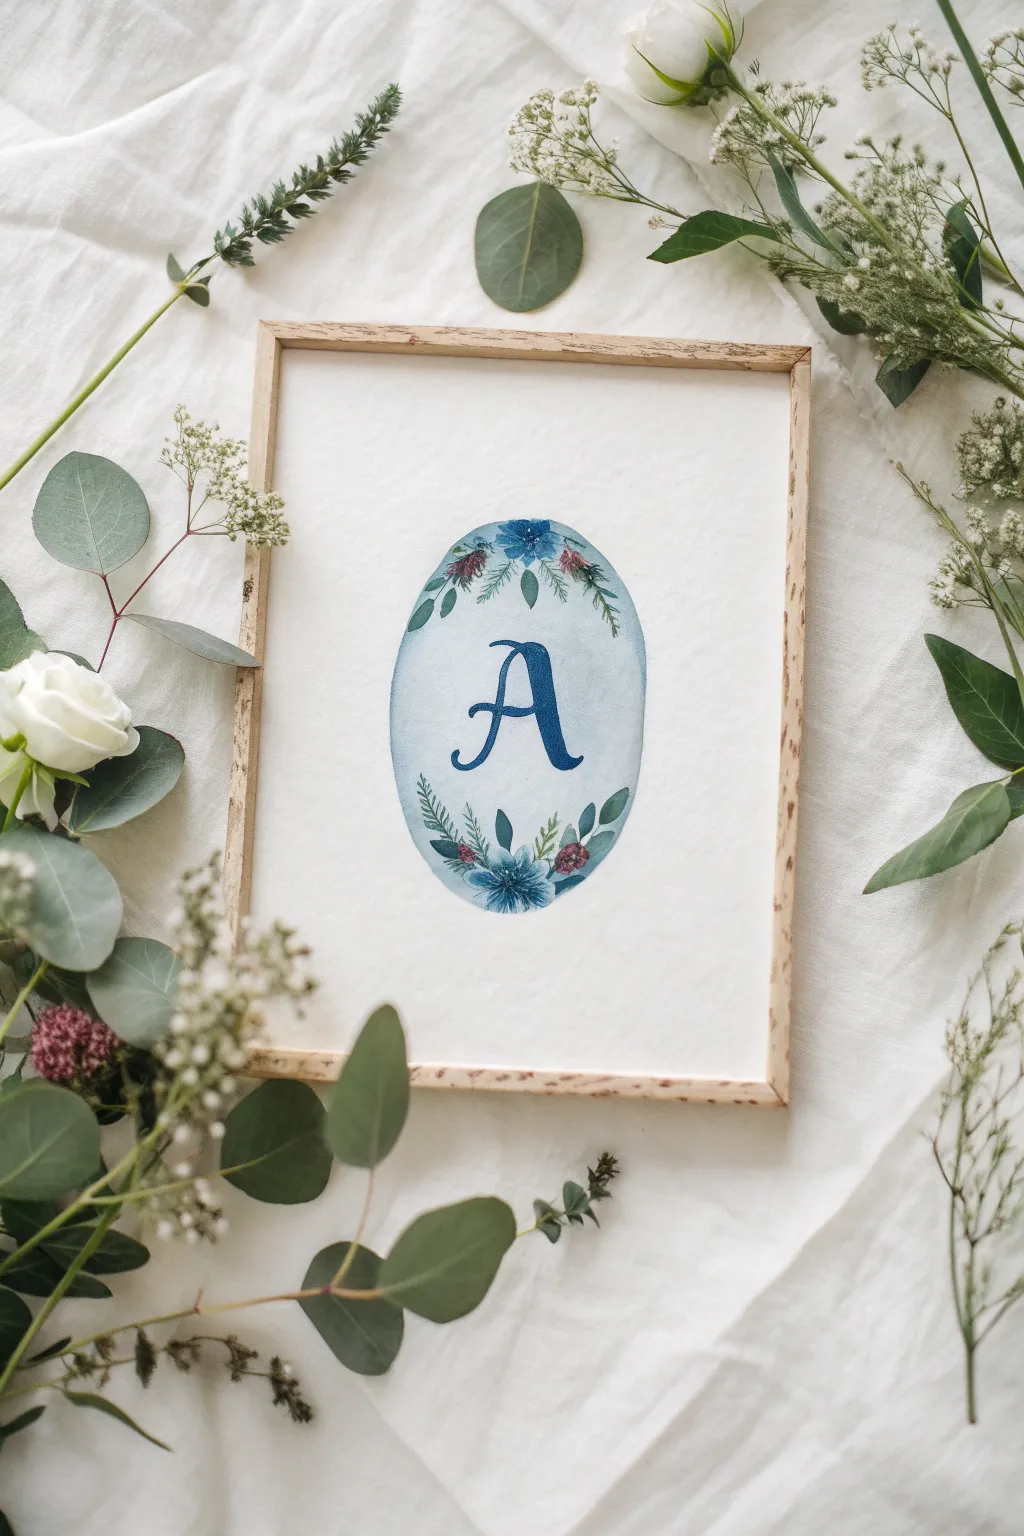
Celebrate the season with a personalized piece that combines the classic shape of an Easter egg with delicate botanical details. This project uses a soft, monochromatic blue palette to create a sophisticated monogram that looks lovely framed on a mantel or gifted to a loved one.
Step-by-Step
Materials
- Cold press watercolor paper (140 lb / 300 gsm)
- Watercolor paints (Indigo, Prussian Blue, and a touch of Crimson)
- Round watercolor brushes (Size 4 and Size 0 or 1 for details)
- Pencil and eraser
- Oval template or compass
- Clean water and paper towels
- Mixing palette
- Light wood frame (optional)
Step 1: Planning the Layout
-
Trace the shape:
Begin by lightly tracing an oval shape in the center of your watercolor paper. You can use a dedicated oval template, trace a real object like a small dish, or freehand it if you feel confident. Keystrokes should be very faint so they don’t show through the final paint. -
Sketch the letter:
In the direct center of your oval, lightly sketch your chosen initial. A serif font style works beautifully for this vintage look. Ensure the letter is centered both vertically and horizontally within the egg shape. -
Outline floral zones:
Mark small curves at the very top and very bottom inside the oval where your floral sprays will go. You don’t need to draw every leaf yet, just mark the boundaries so you don’t paint the background over these areas.
Step 2: Painting the Egg Background
-
Mix a pale wash:
Prepare a very watery, pale blue wash on your palette. I like to use Prussian Blue diluted significantly with water to get that soft, airy look. -
Apply the background wash:
Using your Size 4 brush, gently fill in the oval shape around the letter and the floral zones. Use the wet-on-dry technique here to keep the edges crisp against the white paper. -
Soften the interior edges:
The goal is an uneven, clouded look within the egg. While the paint is still wet, dab a clean, slightly damp brush into the center area to lift a tiny bit of pigment, creating a subtle texture. -
Let it dry completely:
Wait for this background layer to be bone dry. If you paint the next steps too soon, the dark blue will bleed into the pale background.
Uneven Wash?
If your background dries with harsh lines, re-wet the entire shape with clean water and drop in a little more pigment while wet to smooth it out.
Step 3: Inking the Monogram
-
Mix distinct blue:
Create a saturated, deep blue mix using Indigo. You want this to be bold and opaque, similar to the consistency of heavy cream. -
Paint the letter strokes:
Carefully fill in your sketched letter using the detailed brush. Focus on sharp edges and varying the thickness of your strokes—thick on the downstrokes and thin on the upstrokes. -
Refine the serifs:
Use the very tip of your smallest brush to pull out the delicate serif points at the ends of the letterforms.
Design Symmetry
Fold your sketch paper in half and trace one side of the oval and florals, then flip to trace the other side. This ensures perfect symmetry.
Step 4: Adding Floral Details
-
Base leaves:
Using a mid-tone blue-green mix, paint small, fern-like leaves curving along the bottom and top inner edges of the oval. -
Paint main blooms:
With a medium blue, add a central flower head at the bottom center and top center. Simple five-petal shapes or stylized star shapes work best here. -
Add accent buds:
Mix a tiny bit of Crimson into your blue to create a muted purple-maroon shade. Paint small, bud-like dots scattered among the greenery to add warmth and contrast. -
Layer darker foliage:
Once the first layer of leaves is dry, go back with your deep Indigo mix and add tiny, dark sprigs or veins to the leaves for dimension. -
Refine borders:
If the edge of your egg shape looks too wobbly, you can carefully outline the entire oval with a very thin line of your pale background color to tidy it up.
Once framed, this lovely botanical monogram serves as a timeless Easter decoration you can bring out year after year
Minimal Bunny Silhouette Wash
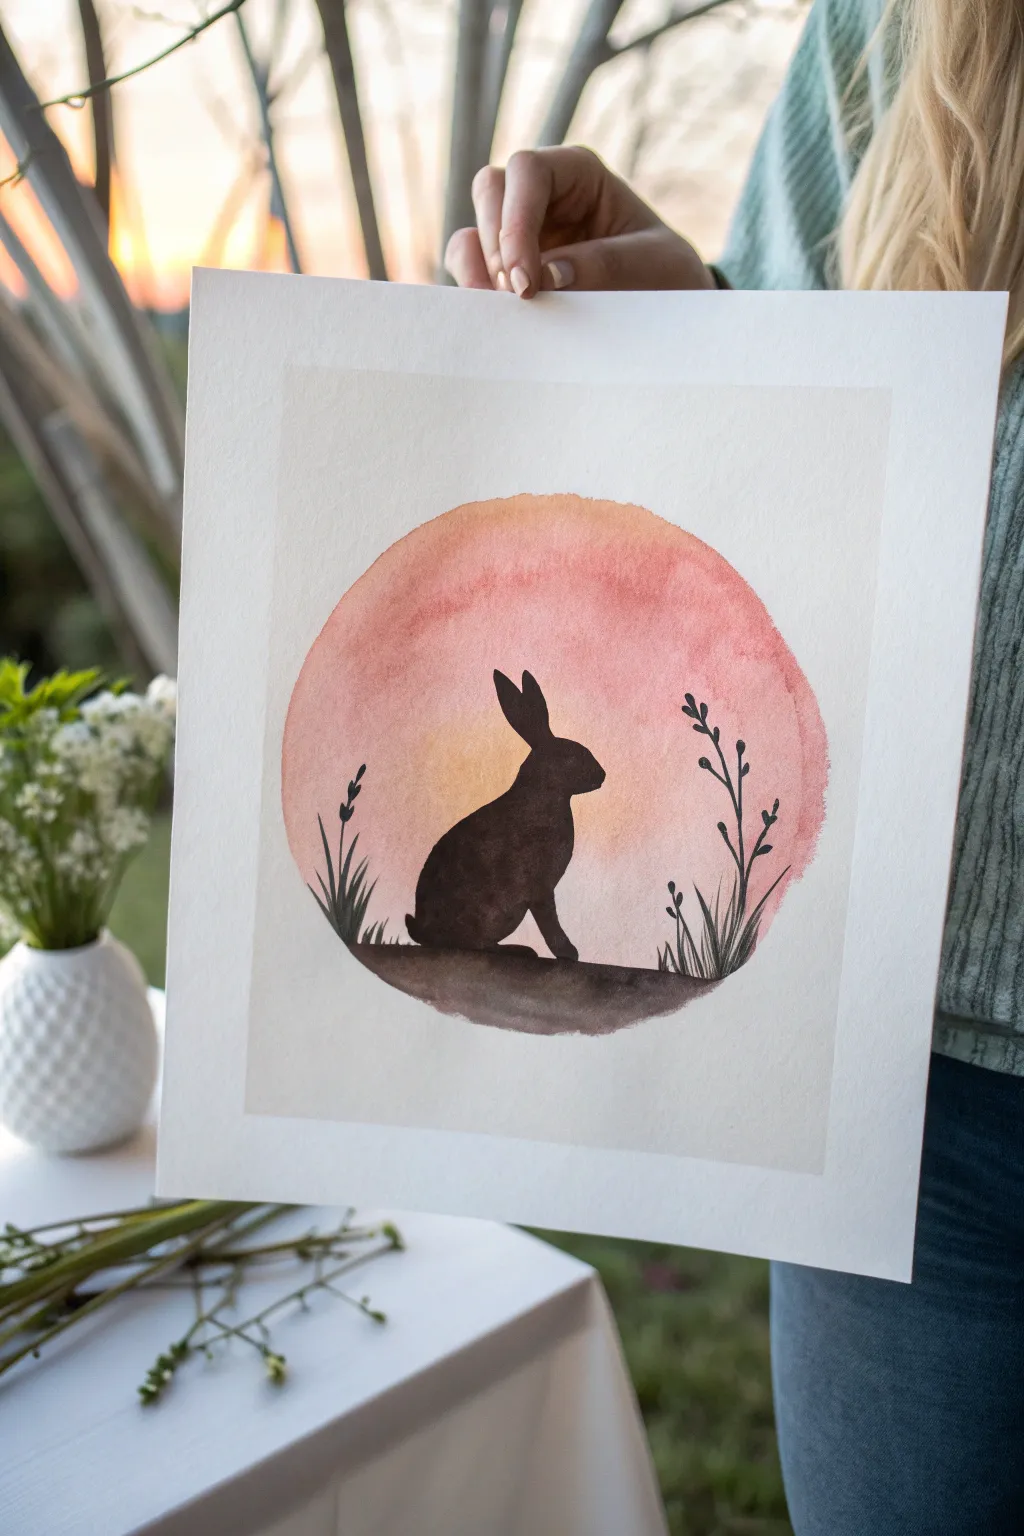
Capture the stillness of twilight with this serene watercolor project featuring a stark rabbit silhouette against a soft, glowing moon. The blend of warm salmon and peach tones creates a perfect backdrop for the crisp, dark details of the bunny and meadow grasses.
Step-by-Step Guide
Materials
- Cold press watercolor paper (140lb/300gsm)
- Pencil (HB or lighter)
- Round object (bowl, plate, or large tape roll) for tracing
- Watercolor paints: Salmon pink, warm yellow/ochre, Mars black or Payne’s gray
- Round brushes: Size 10 or 12 for wash, Size 2 or 4 for details
- Paper towels
- Clean water jar
- Masking tape (optional)
Step 1: Setting the Moon
-
Trace the Circle:
Begin by placing your round object in the center of your watercolor paper. Lightly trace around it with a pencil to create the boundary for your moon. Keep the line faint so it won’t show through the lighter paint later. -
Prepare Your Palette:
Mix a generous puddle of salmon pink and a separate puddle of warm yellow or ochre. You want these washes to be quite watery and transparent. -
Pre-wet the Paper:
Using your large round brush and clean water, carefully paint inside the circle you just traced. The paper should be glisten with moisture but not have standing puddles. -
Apply the Top Gradient:
Load your brush with the salmon pink mixture. Starting at the very top arc of the wet circle, gently touch the brush to the paper and let the color flow downward about two-thirds of the way. -
Blend the Horizon:
Rinse your brush and pick up the yellow/ochre mix. Apply this to the bottom third of the circle, allowing it to meet and naturally blend upward into the pink. Tilt the paper slightly if needed to encourage the colors to merge softly. -
The Granulation Wait:
Let this background layer dry completely. This step is crucial; if the paper is damp, your silhouette will bleed. I often use a hairdryer on a low setting to speed this up, but air drying preserves natural texture best.
Clean Circle Trick
If you struggle to paint a perfect circle freehand, use masking fluid along the pencil line before wetting the paper. Peel it off at the very end for a crisp edge.
Step 2: The Dark Silhouette
-
Sketch the Bunny:
Once the background is bone-dry, lightly sketch the outline of your bunny. Focus on the identifiable shape: long ears perked up, a curved back, and visible paws. -
Outline Grasses:
Add a few vertical lines on either side of the bunny to indicate where the tall grasses and foliage will go. Keep the composition balanced but asymmetrical. -
Mix the Black:
Create a thick mixture of black paint. You want a creamy consistency—think heavy cream—so it is opaque and creates a stark contrast against the soft background. -
Paint the Bunny:
Using your smaller detail brush, carefully fill in the bunny silhouette. Start with the ears to keep the edges sharp, then work your way down the body to the base. -
Grounding the Image:
Paint the ground beneath the bunny. Extend this dark shape curved slightly downwards to match the bottom curve of your circle, creating a little hill for the rabbit to sit on. -
Adding Grass Details:
Switch to your finest brush tip. Paint simple, sweeping upward strokes for the grass blades. Vary the height and thickness to make it look natural. -
Leafy Accents:
Add tiny teardrop shapes along some of the grass stems to create seed heads or leaves. These small details break up the solid black shapes and add delicacy. -
Final Retouches:
Look for any uneven patches in your black silhouette. If the background wash is showing through too much, apply a second layer of black once the first is dry to ensure deep opacity.
Starry Night Variation
Swap the pinks for indigo and violet washes. Once dry, flick white gouache over the circle to create stars before painting the black bunny silhouette.
Frame this piece with a wide white mat to really make the colors pop against the dark silhouette
Chocolate Bunny Still Life
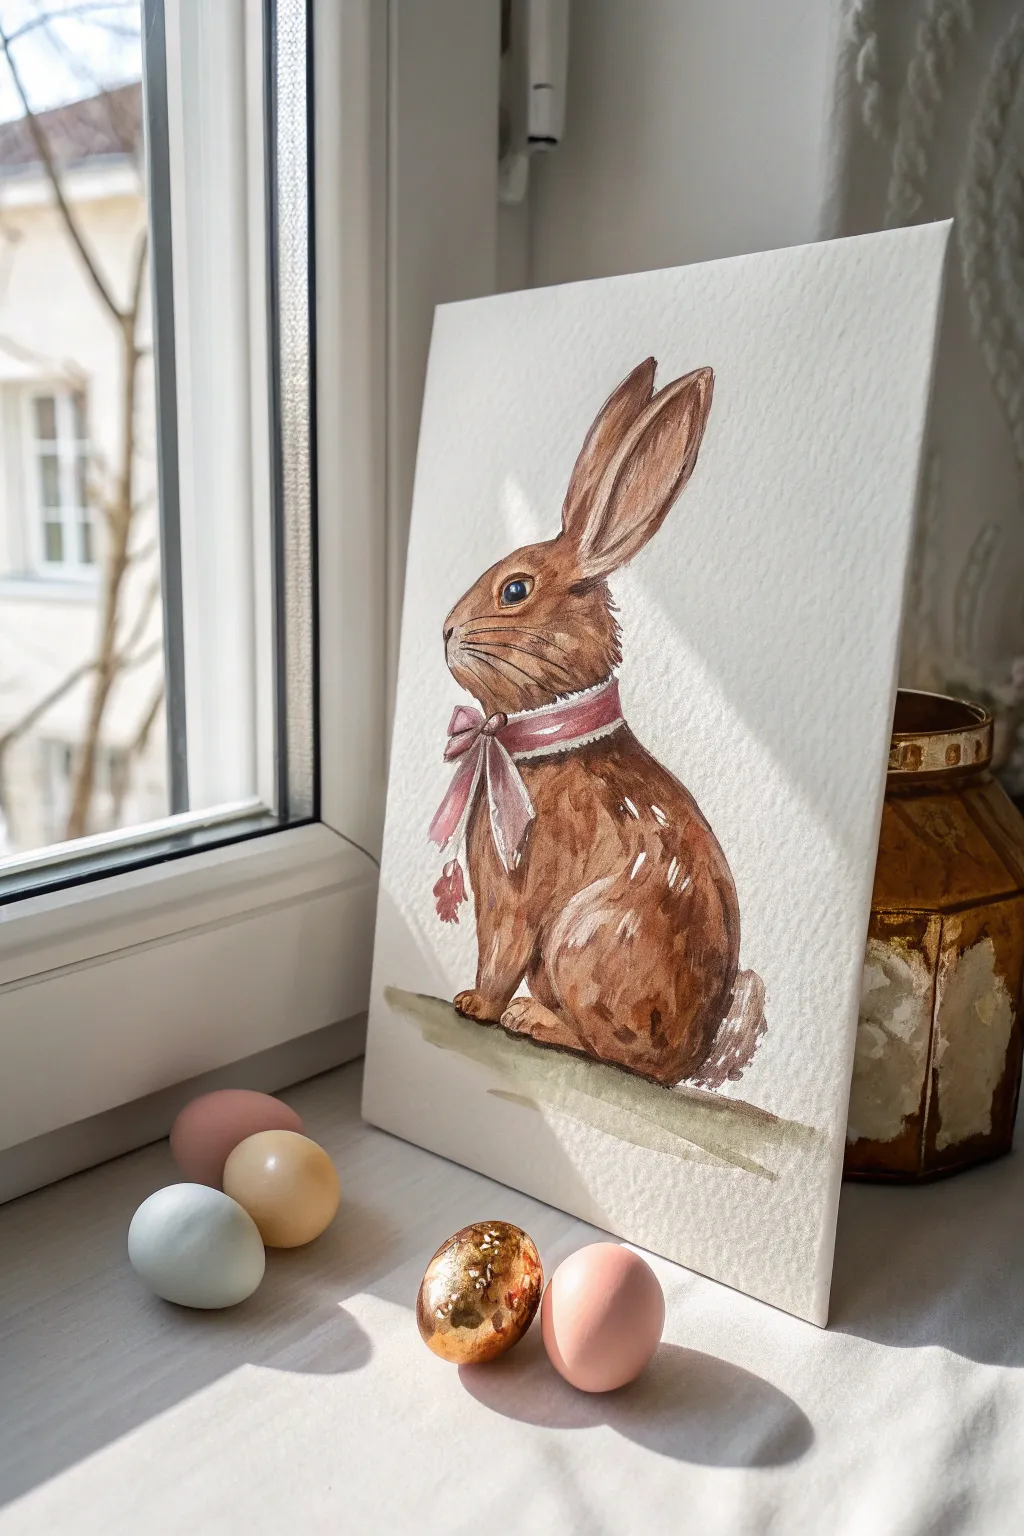
Capture the nostalgic charm of a classic chocolate Easter bunny with this detailed watercolor tutorial. The rich brown tones and delicate ribbon detail create a sweet, timeless piece that feels like it was discovered in an old sketchbook.
Step-by-Step
Materials
- Cold press watercolor paper (300 gsm)
- H or HB pencil for sketching
- Kneaded eraser
- Round watercolor brushes (Size 2, 4, and 6)
- Watercolor paints (Burnt Sienna, Burnt Umber, Sepia, Quinacridone Rose or Alizarin Crimson, Indigo or Payne”s Gray)
- White gouache or white gel pen
- Clean water and paper towels
- Masking tape (optional for edges)
Step 1: Sketching the Form
-
Outline the body:
Begin with a light pencil sketch. Draw a large oval for the body and a smaller, slightly tilted circle for the head, connecting them with a gentle curve for the neck. -
Add the ears:
Sketch two long, upright ears extending from the top of the head. Make them slightly tapered at the tips, ensuring the back ear is partially hidden by the front one for depth. -
Refine the face:
Define the bunny’s profile with a snub nose and a rounded cheek. Mark the position of the eye, placing it halfway down the head. -
Sketch the ribbon:
Draw a ribbon tied around the neck. Sketch the loops of the bow hanging down the chest, keeping the lines loose to suggest fabric movement. -
Lighten the lines:
Use your kneaded eraser to gently lift the graphite until the sketch is barely visible. This prevents heavy pencil marks from showing through the translucent watercolor layers.
Muddy colors?
Wait for each layer to dry completely before glazing a new color over it. If the paper is wet, layers mix into mud rather than building depth.
Step 2: Base Layers & Tone
-
First wash:
Mix a watery wash of Burnt Sienna with plenty of water. Paint the entire body of the bunny, carefully avoiding the eye, the ribbon, and a small patch on the chest for highlight. -
Initial shading:
While the first layer is still damp (wet-on-wet), drop in a slightly concentrated Burnt Umber along the back curve and the base of the ears to start building volume. -
Dry completely:
Allow this initial wash to dry fully before proceeding. The paper should be cool to the touch but not cold or damp.
Level Up
Mix a tiny amount of gold watercolor paint or gold ink into your final brown layer to give the bunny a foil-wrapper shimmer.
Step 3: Building Depth & Texture
-
Deepen the shadows:
Using a size 4 brush and a Sepia mixture, paint the darker areas: the inside of the ear, under the chin, and the shadow cast by the ribbon. -
Fur texture:
Switch to a dry brush technique. Blot your brush on a paper towel so it holds pigment but little water. Lightly drag it over the bunny’s back and thigh to create a rough, chocolate-like texture. -
Painting the eye:
Fill the eye with a dark mix of Sepia and Indigo. Leave a tiny speck of white paper for the catchlight, or add it later with white gouache. -
Defining the legs:
Use darker brown paint to outline the separation between the front paws and the haunch of the back leg, emphasizing the crouching posture.
Step 4: Details & Finishing
-
Paint the ribbon:
Mix a soft pink using Quinacridone Rose diluted with water. Paint the ribbon loops and knot. Wait for it to dry, then add a darker red shadow in the folds of the bow for dimension. -
Ribbon embellishment:
Once the pink paint is bone dry, use a very fine brush or white gel pen to draw a delicate stitched or lace edge along the top and bottom of the ribbon. -
Whiskers and highlights:
Use a rigger brush or the very tip of your smallest round brush to flick thin, brown lines for whiskers. Add small touches of white gouache on the bunny’s shoulder and thigh to simulate the glossy sheen of chocolate. -
Grounding shadow:
Mix a transparent green-grey using leftover brown and a touch of green. Paint a simple horizontal stroke underneath the bunny to ground it, preventing it from looking like it’s floating.
Prop your finished painting on a window ledge or mantelpiece for a subtle festive touch
Abstract Geometric Egg Pattern
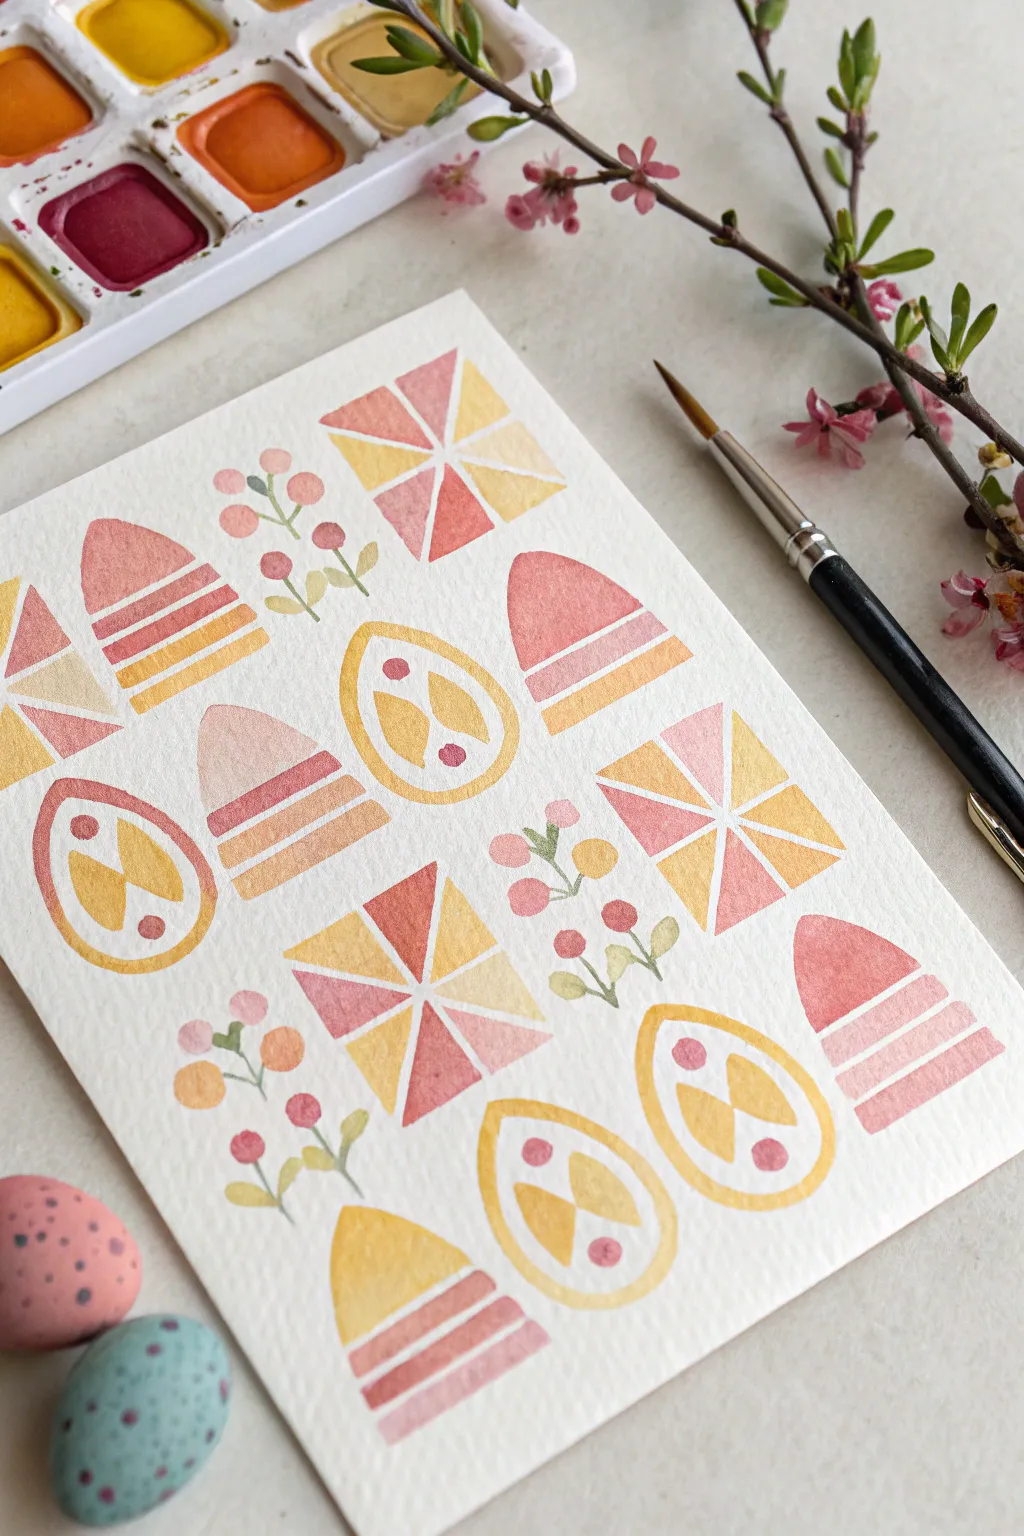
Trade traditional pastels for a modern, geometric take on Easter decor with this structured watercolor piece. Using a warm palette of peach, pink, yellow, and mustard, you’ll build a repeating pattern of stylized eggs and abstract florals that feels fresh and artistic.
Step-by-Step Tutorial
Materials
- Cold-press watercolor paper (140lb/300gsm)
- Watercolor paints (Yellow Ochre, Burnt Sienna, Alizarin Crimson, Sap Green, Cadmium Yellow)
- Round watercolor brush (size 2 and 6)
- Pencil (HB or H)
- Ruler
- Eraser
- Jar of clean water
- Paper towel
Step 1: Planning the Layout
-
Grid structure:
Begin by lightly sketching a loose grid on your paper using a ruler and a hard pencil (like an H). You don’t need perfect squares, but aim for roughly 2-inch by 2-inch spaces to keep your elements balanced. -
Sketching the motifs:
In the alternating squares, sketch three main shapes: a classic egg shape, a rectangle divided into triangles (like a quilt block), and small floral sprigs. -
Detailing the eggs:
Divide your egg sketches into two styles. For half of them, draw horizontal stripes across the body. For the others, draw a vertical diamond shape in the center with two dots, creating a folk-art look. -
Refining lines:
Lighten your sketch lines with a kneaded eraser until they are barely visible, as watercolor is transparent and won’t cover dark graphite marks.
Step 2: Painting the Geometric Elements
-
Mixing the palette:
Prepare your colors on a palette. You want a warm, cohesive look, so mix a dusty pink, a golden yellow, a deep peach, and a muted olive green. Keep the mixes watery but vibrant. -
The quilt blocks:
Start with the rectangular ‘quilt’ blocks. Using your size 2 brush, paint alternating triangles in pink and yellow. Leave a tiny hairline of white paper between the triangles to keep the colors from bleeding into each other. -
Striped eggs (Step A):
Move to the striped egg shapes. Paint the top dome in a pink or peach tone. Let this dry completely before moving to the next stripe to ensure crisp edges. -
Striped eggs (Step B):
Once the top is dry, paint the subsequent horizontal stripes, alternating between yellow and darker peach tones. I vary the width of the stripes to add visual interest. -
Folk art eggs (Step A):
For the patterned eggs, outline the main egg shape with a size 6 brush using a pale yellow wash, leaving the center diamond and dots unpainted (white) for now. -
Folk art eggs (Step B):
Once the yellow outline is dry, careful fill in the center diamond patterns with darker mustard or orange tones, adding the small decorative dots in pink.
Colors bleeding together?
If paints merge, your paper is too wet. Wait for adjacent shapes to be bone-dry before painting next to them, or leave intentional white gaps between shapes.
Step 3: Adding Flora and Finishing
-
Stem structure:
Using the very tip of your size 2 brush and the muted green mix, paint thin, delicate vertical lines in the remaining empty spaces to form the plant stems. -
Adding leaves:
Press the belly of the brush down gently and lift up to create small, almond-shaped leaves branching off the stems. Keep these loose and organic to contrast the geometric eggs. -
Berries and buds:
Dip into your pink or red mix and dab small circles at the ends of the stems or between leaves to create berries. Vary the saturation so some look translucent and others bold. -
Final assessment:
Step back and look for any gaps. If the composition feels unbalanced, add tiny standalone dots or small geometric triangles in the empty white spaces to tie everything together. -
Erase and dry:
Allow the painting to dry completely—give it at least 20 minutes. Once dry, gently erase any remaining visible pencil marks that weren’t covered by paint.
Add metallic flair
Once the watercolor is dry, accent the geometric patterns with gold ink outlines or gold leaf dots for a sophisticated, shimmering finish.
Frame this modern pattern in a simple light wood frame to bring a touch of structured spring cheer to your entryway


Have a question or want to share your own experience? I'd love to hear from you in the comments below!