When I’m in the mood for acrylic Christmas painting season, I reach for ideas that feel festive fast—bold color, crisp layers, and lots of cozy sparkle. Here are my go-to Christmas acrylic painting ideas, starting with the classics and drifting into more playful, unexpected winter magic.
Classic Snowy Evergreen Tree
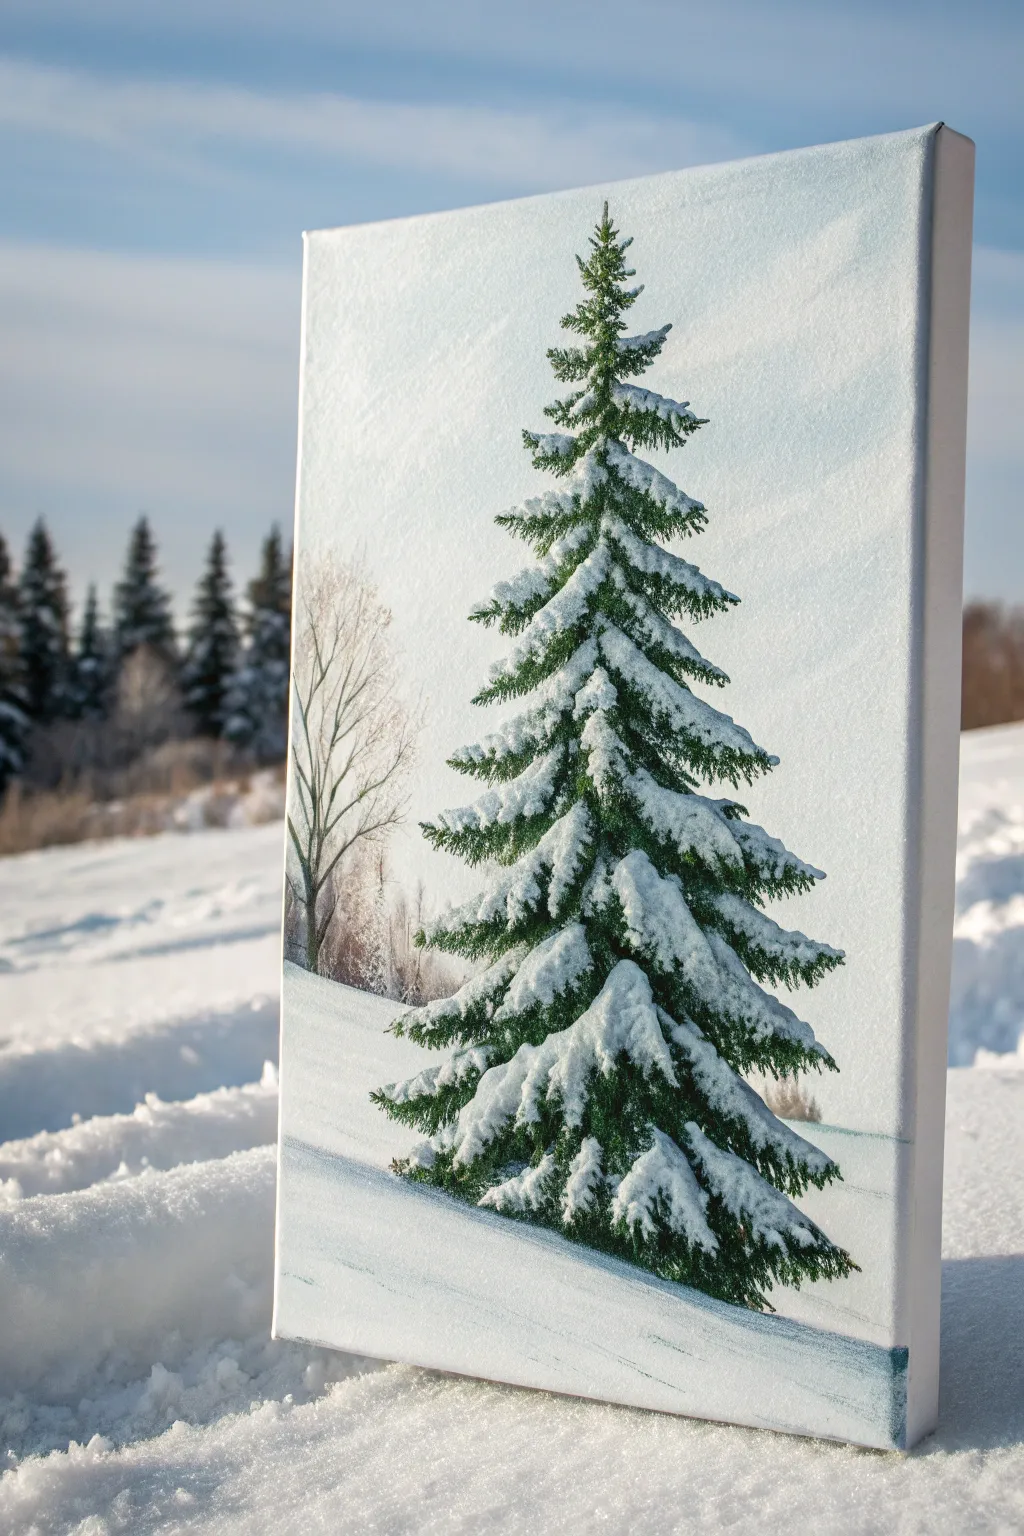
Capture the serene beauty of a crisp winter day with this detailed acrylic painting of a snow-laden evergreen. Using layers of deep greens and bright whites, you will build a realistic texture that practically pops off the canvas.
Step-by-Step Guide
Materials
- Stretched canvas (rectangular portrait orientation)
- Acrylic paints: Titanium White, Mars Black, Sap Green, Phthalo Green, Burnt Umber, Ultramarine Blue
- Gesso (optional for priming)
- Large flat brush (1 inch)
- Medium filbert brush
- Small round brush or rigger brush
- Fan brush (optional)
- Palette knife
- Cup of water and paper towels
Step 1: Setting the Scene
-
Prepare the Sky:
Begin by mixing Titanium White with a tiny touch of Ultramarine Blue to create a very pale, icy blue. Using your large flat brush, cover the top three-quarters of the canvas with horizontal strokes, blending slightly lighter as you move downward towards the horizon line. -
Paint the Snow Base:
For the bottom quarter of the canvas, use almost pure Titanium White. Create a gentle slope for the ground, blending it softly into the sky at the horizon line to suggest distance. -
Sketch the Foreground Tree:
Once the background is dry, mix a watery wash of Burnt Umber or Sap Green. Use a small round brush to lightly sketch a vertical line down the center of the canvas for the trunk, stopping a few inches from the bottom edge to leave room for the snowy base. -
Add Background Elements:
To the left of your main tree, paint a faint, bare deciduous tree using a diluted mix of Burnt Umber and White. Keep this very sheer and misty—almost like a ghost—so it recedes into the distance.
Muddy Snow?
If your white snow is turning green, the underlying paint is too wet. Let the dark green layer dry completely before applying the white snow highlights to keep them crisp.
Step 2: Building the Evergreen Structure
-
Mix the Deepest Greens:
Create a dark shadow color by mixing Sap Green, Phthalo Green, and a touch of Mars Black. You want a deep, forest green that is almost black but still reads as color. -
Block in the Branches:
Starting at the top of your central line, use the corner of a flat brush or a filbert brush to dab in the evergreen branches. Make narrow, short strokes at the very peak, gradually widening your strokes as you move down the tree. -
Shape the Silhouette:
Continue working downward, allowing gaps between the branches to let the sky peek through. Angle your strokes slightly downward to mimic the weight of heavy, snow-laden boughs. -
Fill the Lower Body:
As you reach the bottom third of the tree, make the branches significantly wider and denser. Ensure the bottom edge is somewhat irregular, as if the lowest branches are resting on or just above the snow. -
Add Mid-Tone Greens:
Mix a slightly lighter green using Sap Green and a little White. While the dark layer is tacky but not fully wet, dab this color onto the upper surfaces of the branches to create dimension before adding snow.
Add Sparkle
Mix a pinch of iridescent medium or fine silver glitter into your final white highlight layer. It will catch the light just like fresh frost on a sunny morning.
Step 3: Layering the Snow
-
Mix Shadowed Snow:
Snow isn’t just white; it has shadows. Mix Titanium White with a tiny spec of Ultramarine Blue (and maybe a touch of Grey). This will be the underside or shadowed part of the snow clumps. -
Apply the Under-Snow:
Using a clean filbert or round brush, apply this off-white mixture on top of your green branches. Focus on the center of the branches, leaving the dark green visible at the edges and underneath to act as a shadow. -
Highlighting with Pure White:
Load a small round brush or palette knife with thick, undiluted Titanium White. I find that using a palette knife here creates a lovely texture that looks like piled snow. -
Create Snow Caps:
Gently lay the thick white paint onto the very tops of the branches where sunlight would hit. Use a stippling or dabbing motion to build up texture, making the snow look fluffy and heavy. -
Detail the Peak:
Use your smallest brush to carefully add delicate touches of snow to the very tip of the tree ensuring it remains sharp and defined against the sky. -
Connect the Patches:
Look for areas where the snow might bridge two branches together. Add small dabs of white to connect these areas, creating a cohesive, heavy look.
Step 4: Final Touches
-
Ground Shadows:
Mix a watery blue-grey glaze. Paint a soft shadow on the ground directly underneath the tree and extending slightly to the right, anchoring the tree to the landscape. -
Refine the Edges:
Check the silhouette of the tree. If any green areas look too flat, add a tiny speck of dark green to deepen the recess, or a dot of white to bring a branch forward. -
Clean Up the Sky:
If your tree painting got messy near the edges, use your original sky color to carefully cut back in and tidy up the outline. -
Final Highlights:
Add a few final impasto (thick paint) highlights to the brightest snow clusters on the lower branches to maximize the 3D effect.
Step back and admire your serene winter masterpiece, now ready to bring a chill and a thrill to your holiday decor


Santa Sleigh Silhouette Across the Moon
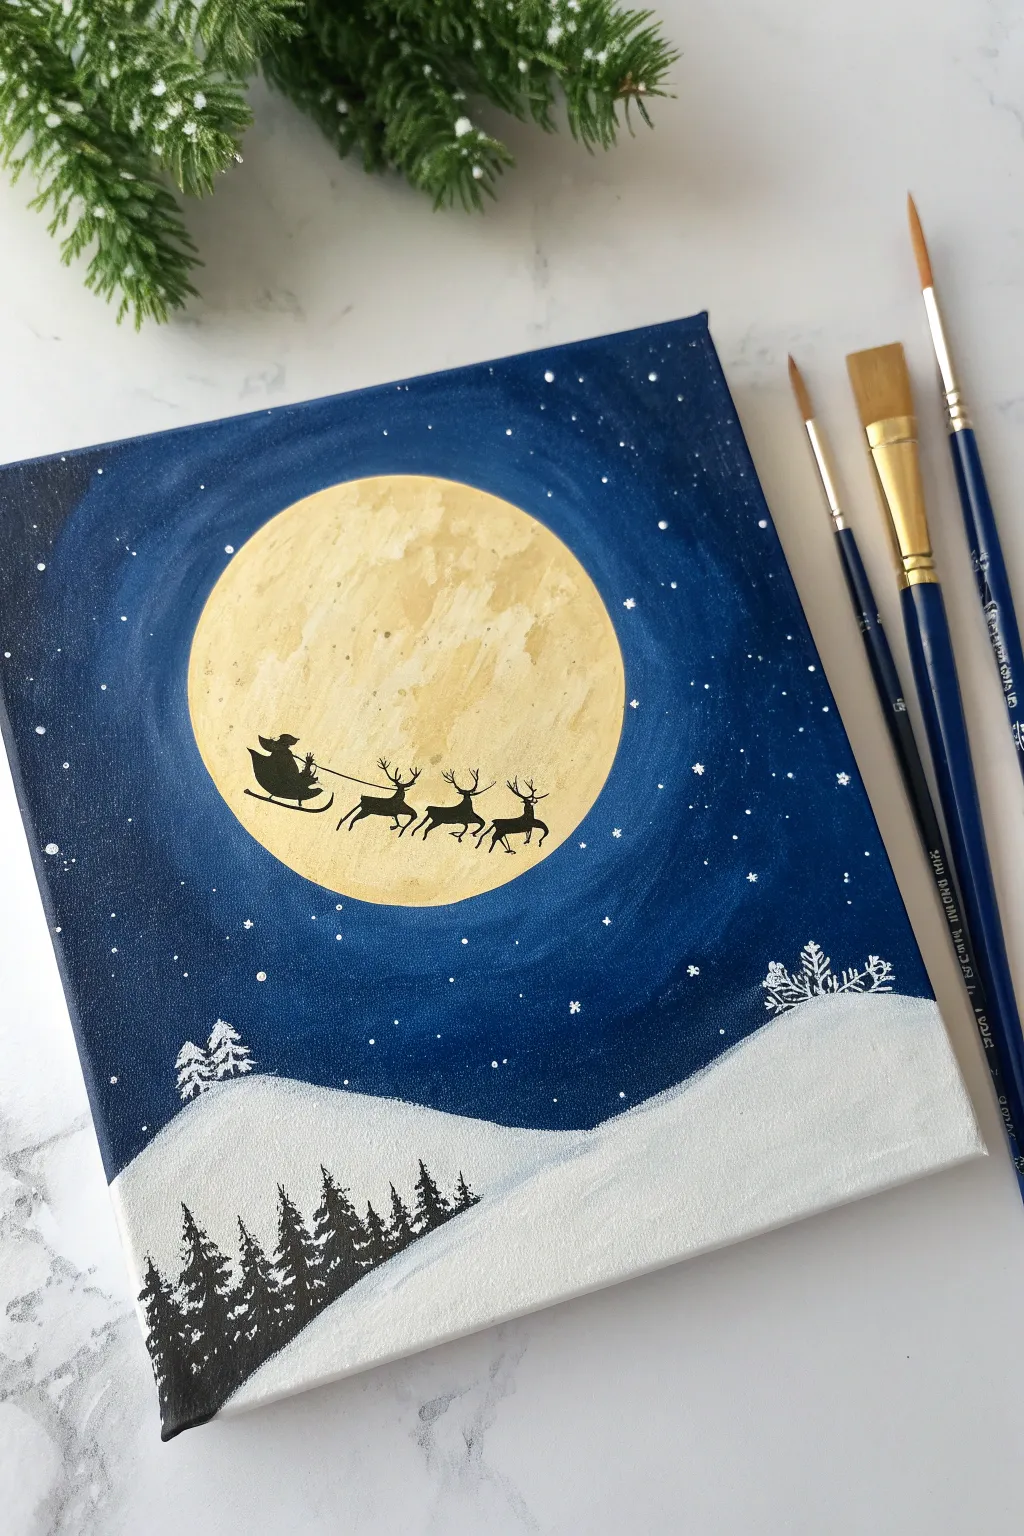
Capture the magic of Christmas Eve with this charming silhouette painting, featuring a bold, glowing moon against a deep winter sky. This project uses simple shapes and high contrast to create a striking festive scene that’s perfect for beginners.
Step-by-Step Tutorial
Materials
- Square canvas (approx. 8×8 or 10×10 inches)
- Acrylic paints: Dark Blue (Navy or Phthalo), Titanium White, Yellow Ochre, Lamp Black
- Flat shader brushes (medium and large)
- Round detail brushes (small and fine liner)
- Circular object for tracing (container lid or compass)
- Pencil
- Palette for mixing
- Cup of water and paper towels
Step 1: Setting the Sky
-
Trace the moon:
Place your circular object slightly above the center of the canvas. Use a pencil to lightly trace a perfect circle. This will reserve the space for your bright moon so the yellow paint stays vibrant. -
Paint the background:
Load a large flat brush with dark blue paint. Carefully paint around the outside of your pencil circle, filling the entire upper portion of the canvas with a solid, opaque coat of blue. -
Create a gradient glow:
While the blue is still slightly wet, mix a tiny dot of white into your blue. Paint a soft ring around the moon’s edge to create a subtle glow, blending it outward into the darker blue. -
Let it dry:
Allow the blue background to dry completely to the touch before moving on to the moon to avoid muddy colors.
Clean Moon Edges
If your blue paint accidentally crossed into your moon circle, wait for it to dry completely, then paint over the mistake with white gesso or thick white paint before applying the yellow.
Step 2: Painting the Moon & Snow
-
Base coat the moon:
Using a clean flat brush, fill in the circle with a mix of Titanium White and a touch of Yellow Ochre. You want a pale, creamy yellow base. -
Add moon texture:
While the base is wet, dab a little pure Yellow Ochre and White onto the moon in random blotches. Use a dry brush or even a crumpled paper towel to gently blot and blend these spots, creating craters and texture. -
Outline the snowy hills:
With a pencil, lightly sketch two rolling hill lines at the bottom of the canvas. Make the right hill slightly higher than the left for visual interest. -
Fill the snow:
Use a medium flat brush and pure Titanium White to paint the snowy hills. Apply two coats if necessary to ensure the dark blue doesn’t show through.
Step 3: Silhouettes & Details
-
Draft the sleigh:
Once the moon is dry, use a pencil to very lightly sketch the shape of the sleigh and the reindeer inside the moon’s circle. Keep the shapes simple; think of the reindeer as stick figures with bulk. -
Paint the sleigh:
Switch to your smallest liner brush and black paint. Carefully fill in the sleigh shape first, making the runner sharp and distinct. -
Paint the reindeer:
Paint the reindeer bodies. Focus on the legs being extended to show motion—front legs forward, back legs kicking back. -
Add the antlers:
Here I prefer to use the very tip of the liner brush with slightly watered-down black paint. This helps the paint flow smoothly for the tiny, delicate antlers. -
Paint the reins:
Connect the reindeer to the sleigh with a single, very thin black line. -
Foreground trees:
On the bottom left hill, use black paint to create a line of pine trees. Start with a vertical line for the trunk, then dab horizontal branches getting wider toward the bottom. -
Distant trees:
For the tiny white trees on the horizon line, use a small detail brush and white paint. Paint tiny stick-figure trees on the top edge of the right hill. -
Starry night:
Dip the handle end of a small brush into white paint. Dot random stars throughout the blue sky. Add a few tiny ‘cross’ shapes for twinkling stars.
Add Sparkle
Once the painting is fully dry, brush a thin layer of glitter glaze over the white snowy hills or the moon to make the winter scene shimmer in the light.
Hang your finished masterpiece on the wall and enjoy the peaceful winter atmosphere you have created


Candy Cane Stripes and Peppermint Swirls
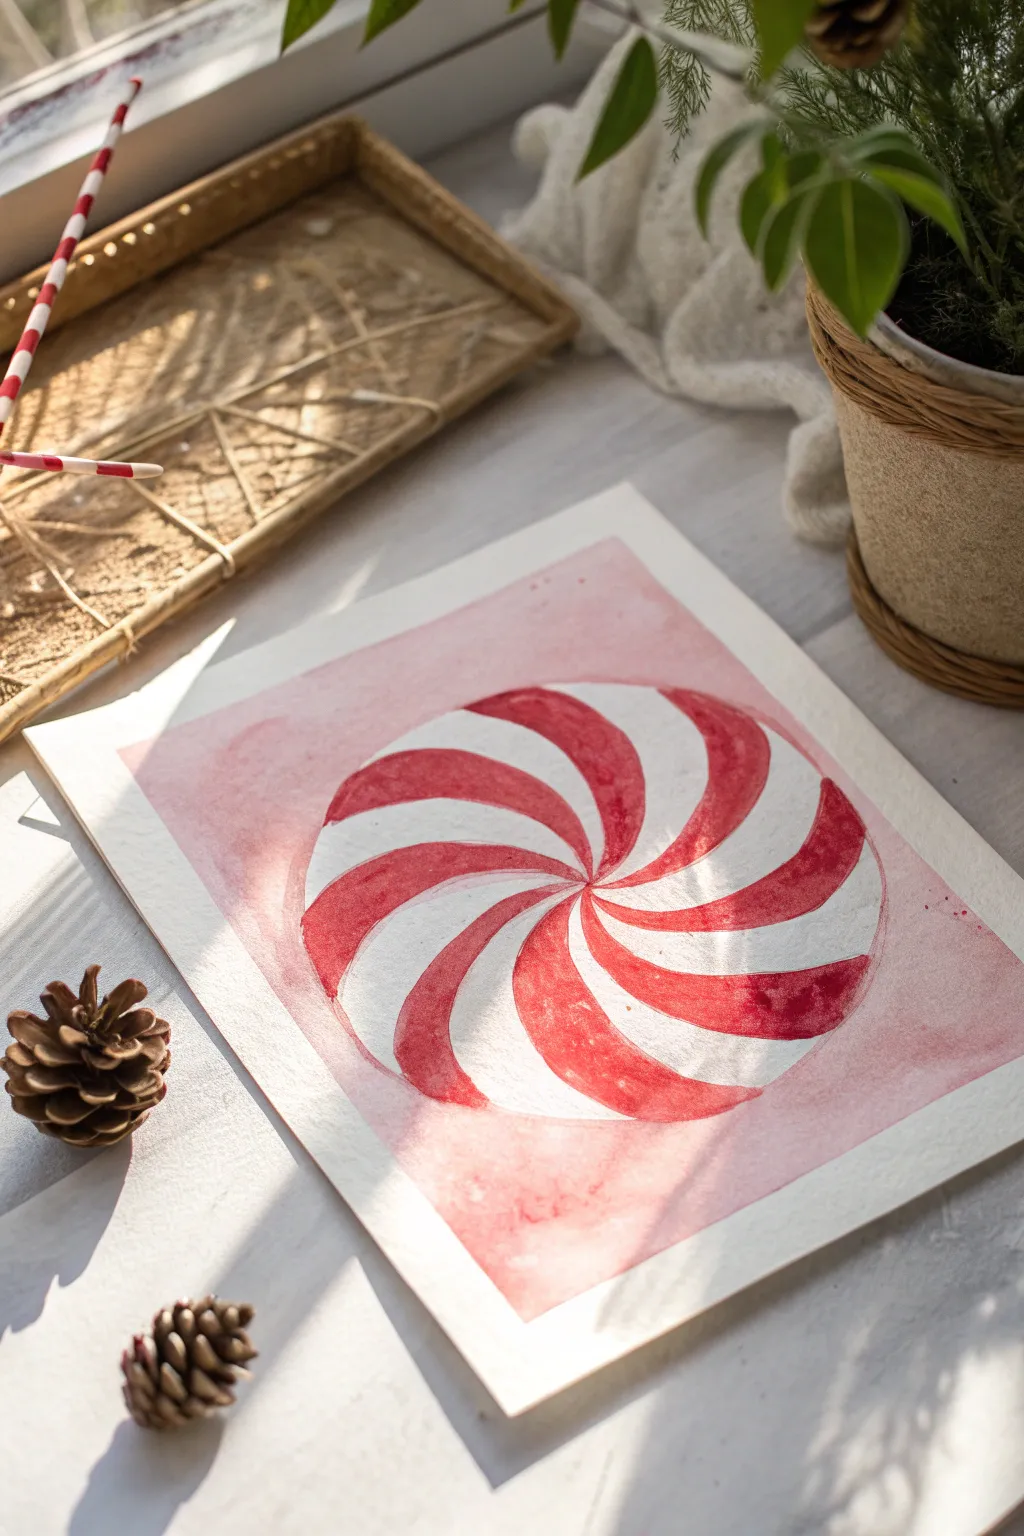
Capture the sweetness of the season with this deceptively simple watercolor painting that focuses on the classic spiral design of hard peppermint candy. Using soft washes of red and delicate masking, you’ll create a dimensional, glossy-looking treat perfect for holiday wall art.
Step-by-Step Tutorial
Materials
- Cold-press watercolor paper (140lb/300gsm)
- Watercolor paints (Alizarin Crimson, Cadmium Red, Titanium White)
- Masking fluid
- Compass or circular object (like a bowl)
- Pencil (HB or lighter)
- Kneaded eraser
- Round watercolor brushes (sizes 4 and 8)
- Old brush or masking fluid applicator
- Paper towels
- Water jar
- Painter’s tape
Step 1: Drafting the Design
-
Secure the paper:
Tape your watercolor paper down to a flat surface or drawing board on all four sides. This prevents buckling and leaves a crisp white border around the final piece. -
Draw the main circle:
Using a compass or by lightly tracing a round object, draw a large circle in the center of your paper. Keep your pencil pressure very light so the graphite doesn’t show through the paint later. -
Mark the center:
Locate the exact center of your circle. If you used a compass, the pinhole makes this easy. If you traced a bowl, measure to find the rough center point. -
Sketch the swirl curves:
Starting from the center point, draw curved lines radiating outward to the edge of the circle. Imagine a pinwheel spinning clockwise. Space them out so you have alternating thick stripes. -
Define the segments:
Review your sketch to ensure you have an even number of segments. You need alternating red and white stripes, so aim for roughly 12 to 16 distinct sections.
Clean Brush Tip
Coat your masking fluid brush in dish soap before dipping it. This creates a barrier that prevents the fluid from drying deep in the bristles and ruining the brush.
Step 2: The Background Wash
-
Prepare the wash color:
Mix a very dilute, watery version of your red bent slightly cool (Alizarin Crimson). You want a pale pink tint, not a solid red. -
Paint the background:
Using your larger round brush, lay down a loose wash over the entire background area around the candy circle. It doesn’t need to be perfectly smooth; a little texture adds character. -
Dry completely:
Wait for the background wash to be bone dry before proceeding. If the paper feels cool to the touch, it’s still damp.
Add Winter Magic
While the red paint is still wet, sprinkle a tiny pinch of table salt onto the pigment. As it dries, the salt pushes the pigment away, creating a frosty, crystalline texture.
Step 3: Painting the Candy
-
Mask the white stripes:
To keep your white stripes pristine while painting freely, apply masking fluid to every other stripe segment using an old brush you don’t care about. -
Let mask dry:
Allow the masking fluid to dry completely until it turns yellowish or transparent and feels rubbery. -
Mix your main red:
Create a vibrant candy red by mixing Cadmium Red with a touch of Alizarin Crimson. You want a saturated, juicy color. -
Paint the red stripes:
Fill in the exposed segments with your red mix. Start at the outer edge where the stripe is widest and pull the color in toward the center point. -
Add wet-on-wet depth:
While the red paint is still wet, drop a slightly darker, more concentrated red pigment along the outer edges and the bottom curve of each stripe to suggest shadow and dimension. -
Create center precision:
Switch to your smaller size 4 brush to carefully taper the red paint into the very center point. This area gets crowded, so precision is key here. -
Dry the red layer:
Let the red paint dry thoroughly. Impatience here can cause smearing when you remove the mask.
Step 4: Revealing and Refining
-
Remove masking fluid:
Gently rub your finger or a rubber cement pick up over the masking fluid to peel it away, revealing the crisp white paper underneath. -
Soften edges (optional):
If the edges between red and white look too harsh, take a clean, slightly damp brush and run it very gently along the border to soften the hard line just a tiny bit. -
Add highlights:
Mix a semi-opaque white (gouache or white acrylic works best here) and add tiny reflective curved lines across the red stripes to make the candy look glossy and hard. -
Add contact shadow:
Using a very dilute grey-purple wash, paint a thin shadow crescent under the bottom right edge of the entire candy circle to lift it off the page. -
Remove tape:
Slowly peel away the painter’s tape at a 45-degree angle away from the painting to reveal your clean edges.
Now you have a sweet piece of holiday art ready to frame or turn into a festive greeting card.


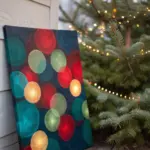
Christmas Lights Bokeh Background
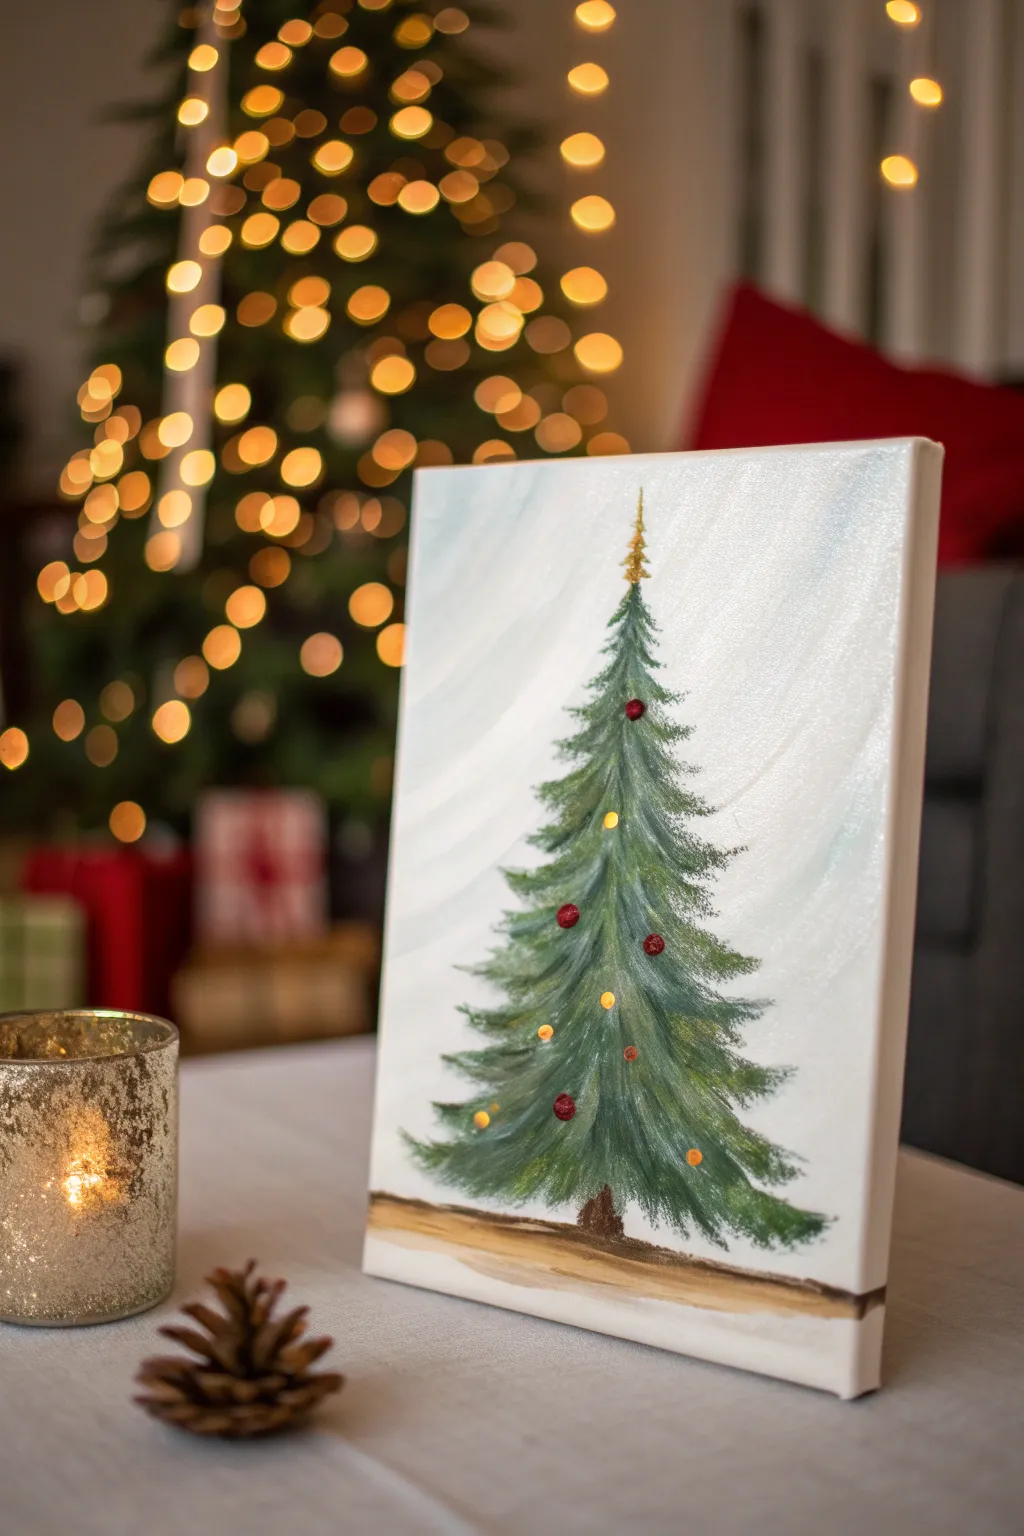
Capture the magic of the season with this elegant yet simple acrylic painting of a classic Christmas tree. The soft, wind-swept background contrasts beautifully with the textured pine needles, making the metallic ornaments truly shine.
How-To Guide
Materials
- Stretched canvas (e.g., 8×10 or 11×14 inches)
- Acrylic paints: Titanium White, Phthalo Blue (or similar light blue), Sap Green, Hooker’s Green, Burnt Umber, Cadmium Red, Metallic Gold
- Flat brush (1-inch)
- Fan brush or angled shader brush
- Small round detail brush
- Palette for mixing
- Water cup and paper towels
Step 1: Setting the Scene
-
Prepare the background:
Start by mixing a large amount of Titanium White with a tiny dot of Phthalo Blue. The goal is an extremely pale, icy blue that is almost white. -
Create sweeping motion:
Using your 1-inch flat brush, apply the paint to the canvas using long, diagonal strokes. Curve the strokes slightly to create a sense of movement, like wind blowing through snow. -
Add texture:
While the paint is still wet, go back over your strokes without adding more paint to soften any harsh lines, leaving a subtle, striated texture. -
Let it dry:
Allow the background to dry completely. Since acrylics dry fast, this should take about 15-20 minutes, or use a hair dryer to speed it up.
Muddy Greens?
If your tree highlights and shadows are blending into gray, let the bottom layer dry fully before adding the next shade. Crisp layers keep colors bright.
Step 2: Building the Tree
-
Mark the trunk:
Mix a small amount of Burnt Umber with a touch of water to make it fluid. Use your small round brush to paint a thin vertical line down the center of the canvas where you want your tree to stand, serving as a guide. -
Paint the base:
At the bottom of your guide line, paint a small, rough brown stump and a horizontal line of brown to suggest the ground beneath the tree. -
Mix your greens:
Prepare a mix of Sap Green and Hooker’s Green on your palette. Don’t overmix them; seeing streaks of both colors adds natural variation. -
Start the foliage:
Using an angled shader or a fan brush, start at the top of the tree frame. Make small, downward-angled tapping motions to create the narrow tip of the tree. -
Widen the branches:
Work your way down the trunk, making your horizontal strokes gradually wider. Use a ‘flicking’ motion at the ends of the branches to simulate pine needles pointing outward. -
Build layers:
Once the first layer of green is down, mix a little Titanium White into your green to create a lighter sage color. Lightly dab this over the centers of the branches to create volume and highlights. -
Add depth:
Now take pure Hooker’s Green or mix a tiny bit of blue into your green for a shadow tone. Tuck this darker color underneath the main branches to give the tree dimension.
Texture Tip
Use an old, frayed brush for the pine needles. The split bristles naturally create multiple fine lines with a single stroke, mimicking needles perfectly.
Step 3: Decorating the Details
-
Paint red ornaments:
Load your small round brush with Cadmium Red. I like to keep the paint thick here for texture. Dot small circles randomly onto the branches. -
Add gold lights:
Clean your brush and switch to Metallic Gold paint. Add slightly smaller dots interspersed among the red ones to represent glowing lights. -
Crown the tree:
Use the Metallic Gold to paint a simple spire or star at the very top of the tree. A few short, upward strokes work perfectly to mimic a topper. -
Highlight the ornaments:
If you want extra sparkle, add a tiny spec of pure Titanium White to the top-left curve of your red ornaments to make them look spherical and shiny. -
Final ground touch:
Run a very watered-down wash of brown right at the base of the tree to blend the trunk into the snowy ground.
Place your finished canvas on a mantle or side table to add a handmade touch to your holiday decor
BRUSH GUIDE
The Right Brush for Every Stroke
From clean lines to bold texture — master brush choice, stroke control, and essential techniques.
Explore the Full Guide
Night Sky With Falling Snow
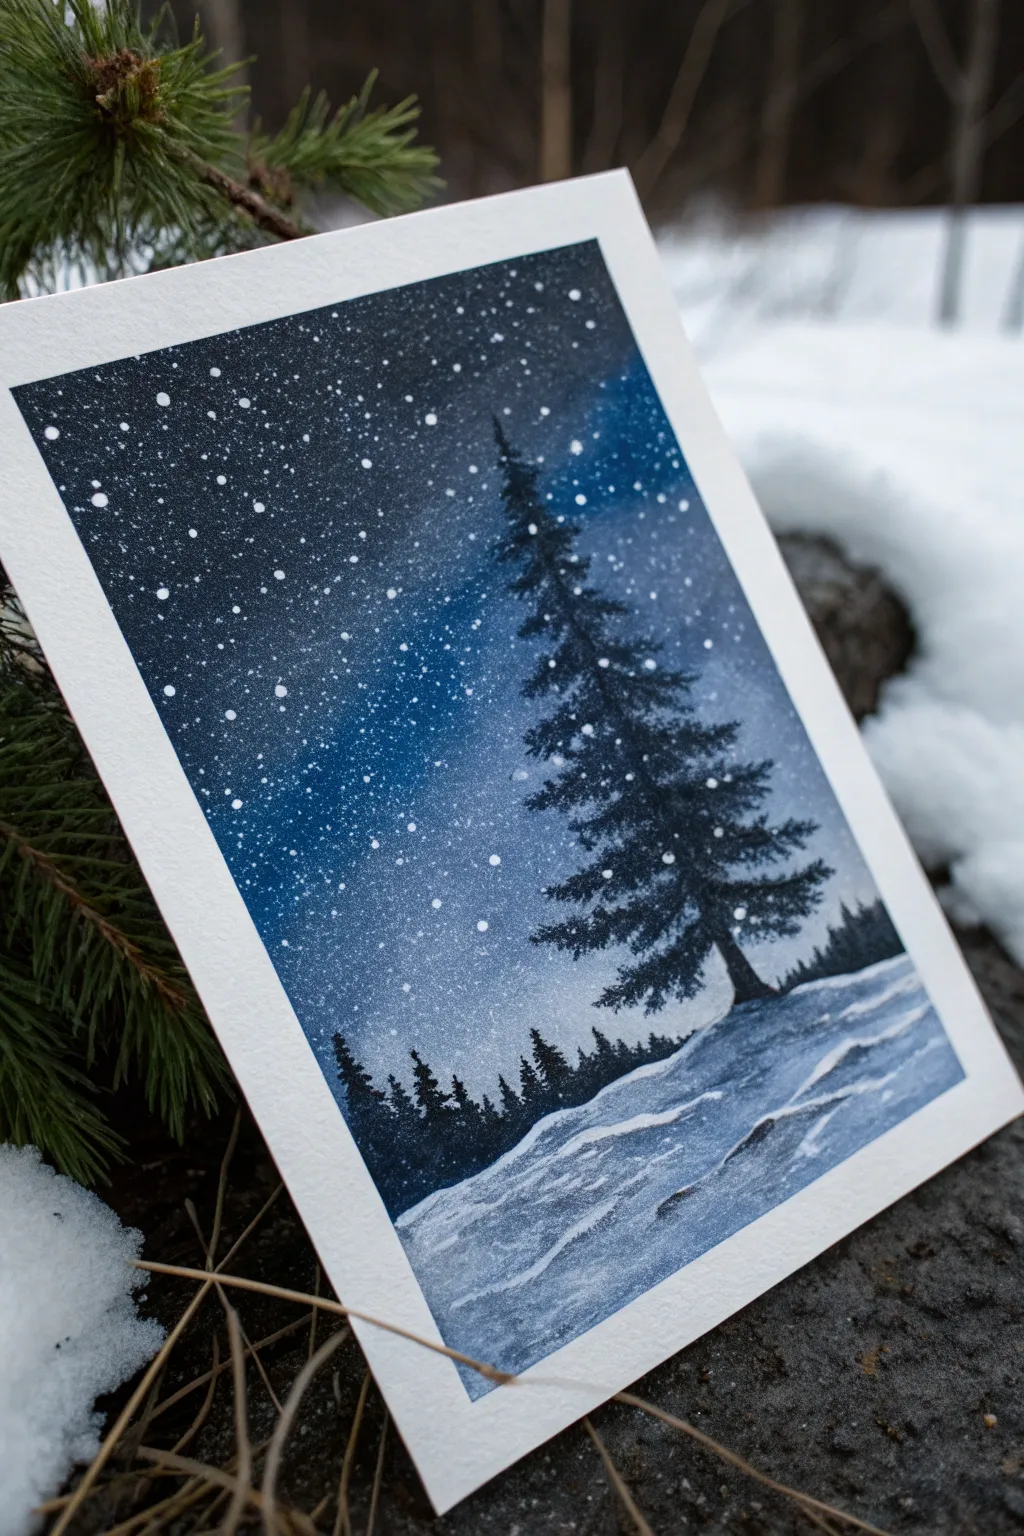
Capture the serene stillness of a winter evening with this moody, atmospheric painting featuring a lone evergreen standing watch beneath a star-filled sky. Using simple blending techniques and splatter effects, you’ll create a depth-filled backdrop that makes the white snowflakes truly pop.
Detailed Instructions
Materials
- Heavyweight watercolor paper or mixed media paper (at least 140lb)
- Masking tape
- Acrylic paints: Carbon Black, Phthalo Blue (or Prussian Blue), Titanium White
- Flat shader brush (3/4 inch or 1 inch)
- Small round brush (size 2 or 4) for trees
- Detail liner brush (size 0 or 00)
- Old toothbrush or stiff bristle brush for splatter
- Palette
- Water cup and paper towels
Step 1: Setting the Scene
-
Tape the edges:
Begin by taping down all four edges of your paper to a flat surface or drawing board. This creates the crisp white border seen in the final piece and prevents the paper from buckling when wet. -
Mix the sky gradient:
On your palette, prepare three pools of color: pure black, a deep mix of blue and black (midnight blue), and a lighter mix of blue and white. You want a smooth transition from dark to light. -
Paint the upper sky:
With your flat brush, apply the black paint to the top corners and very top edge of the paper, using horizontal strokes. -
Blend downward:
While the black is still wet, pick up your dark blue mixture. Blend it into the black, working your way down the paper. Allow the blue to become the dominant color as you move toward the middle. -
Create the horizon glow:
Switch to your lighter blue-white mixture for the area just above the horizon line. Blend this upwards into the dark blue to create a glowing effect where the sky meets the snowy ground. Leave the bottom quarter of the paper white for now. -
Dry the background:
Let this background layer dry completely. If you engage the next steps while the paint is tacky, you’ll muddy your crisp details.
Step 2: Creating the Stars and Snow
-
Prepare splatter paint:
Mix a small amount of Titanium White with water until it reaches the consistency of heavy cream or ink. It needs to be fluid enough to fly off bristles but thick enough to stay opaque. -
Splatter the stars:
Dip an old toothbrush or stiff brush into the thinned white paint. hold it over the dark sky area and flick the bristles with your thumb to spray tiny dots. Focus more density at the top where the sky is darkest. -
Add larger snowflakes:
Using the handle of a small brush or a dotting tool, manually place a few larger, distinct white dots primarily in the foreground area to represent closer falling snow.
Starry Mistakes?
If you accidentally splatter a giant blob of white ‘snow’ where you don’t want it, quickly dab it with a wet paper towel before it dries, or paint over it with your sky color once dry.
Step 3: The Forest & Foreground
-
Start the main tree:
Using black paint and a small round brush, paint a vertical line for the trunk of the large evergreen on the right side. It should start from the white ‘snow’ area and reach almost to the top. -
Add branches:
Stipple the branches using the tip of your brush. Start at the top with tiny horizontal taps, making the branches wider and heavier as you move down the trunk. Leave gaps to let the starry sky peek through. -
Highlight the tree:
Mix a dark grey-blue. Gently dab this onto the top edges of the main tree’s branches to give them volume and suggest moonlight hitting the needles. -
Paint the distant tree line:
With pure black or very dark blue, paint a small, jagged silhouette of a forest line along the horizon, behind the main tree. These should be much smaller and less detailed to show distance. -
Define the snow drifts:
Clean your brush and switch to a watered-down blue-grey mix. Paint sweeping, curved strokes in the bottom white area to define the shapes of snowbanks. -
Add shadows:
Deepen the shadows underneath the main tree and along the ridges of the snowdrifts using a slightly darker blue. Keep your strokes loose to mimic the texture of uneven snow. -
Final highlights:
Use pure white paint and a liner brush to add crisp highlights on the tops of the snow ridges and perhaps a tiny bit of accumulated snow on the tree branches. -
The reveal:
Wait for everything to look dry, and then carefully peel away the masking tape at a 45-degree angle to reveal your clean edges.
Pro Tip: Depth of Field
Make the distant background trees lighter in value (mixing more white/blue into the black) than the main foreground tree. This ‘atmospheric perspective’ pushes them further back.
Now you have a tranquil winter scene perfect for a holiday card or seasonal display
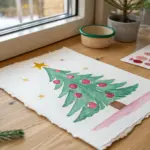
Simple Tree Made of Painted Dots
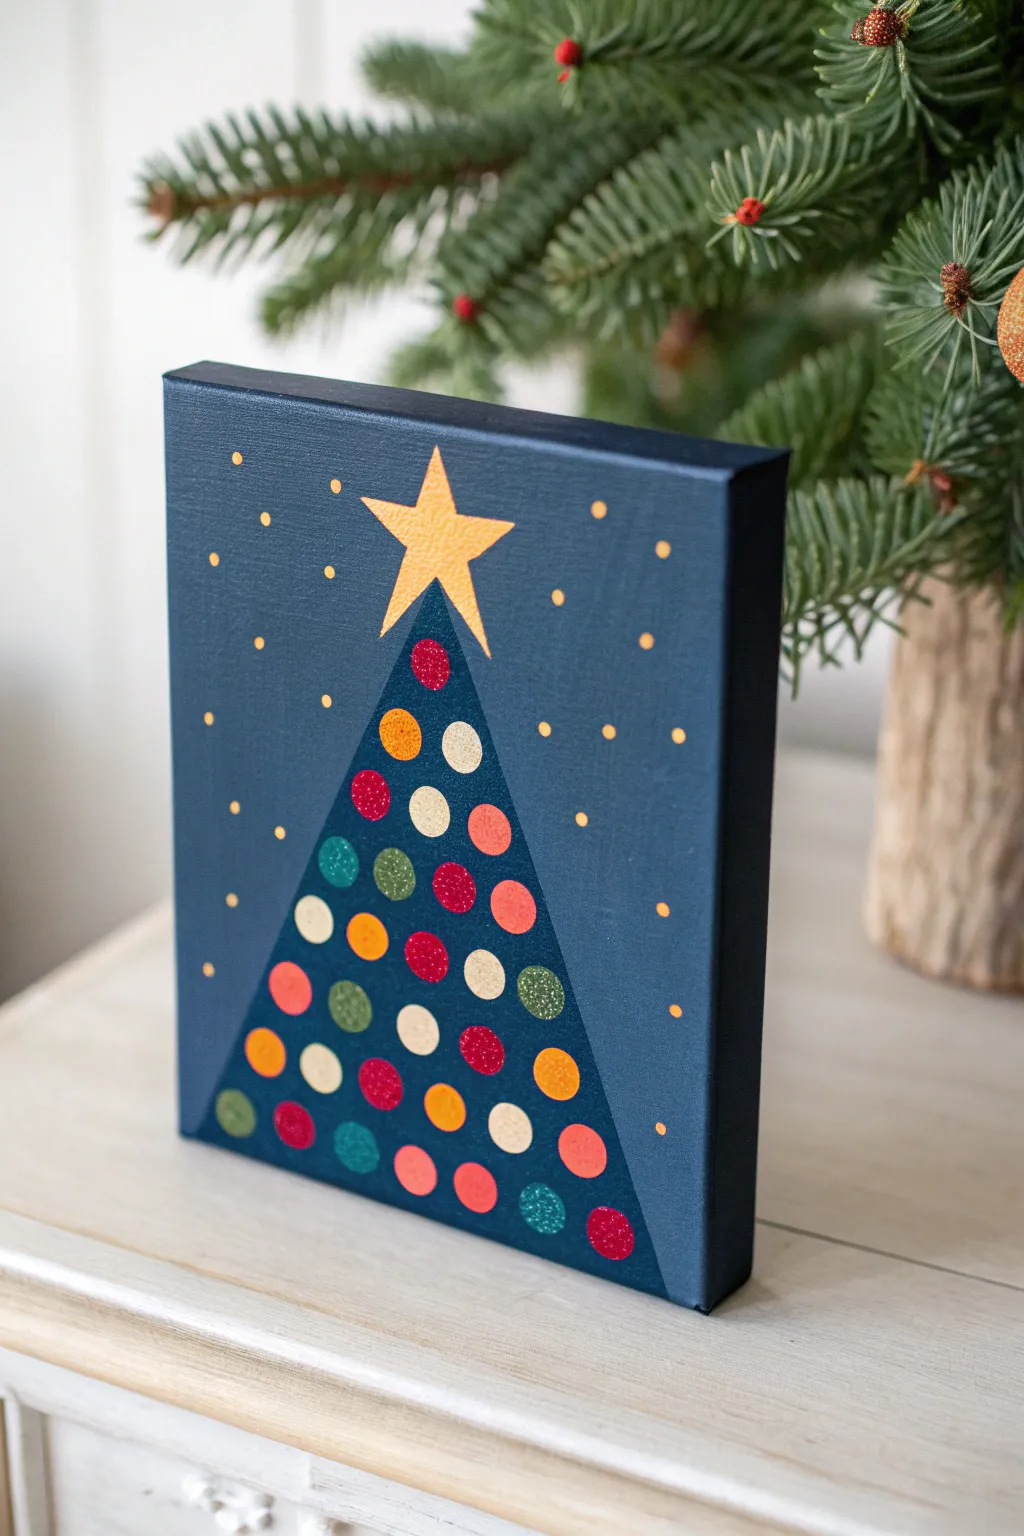
This charming holiday project transforms simple dots into a stylized Christmas tree, set against a deep midnight blue background. It’s a perfect beginner-friendly canvas that balances modern geometry with festive cheer.
Step-by-Step Guide
Materials
- Square stretched canvas (e.g., 8×8 or 10×10 inches)
- Acrylic paints: Navy blue, gold/yellow, red, orange, dark green, light green, cream/white
- Painter’s tape or masking tape
- Flat brush (1-inch width)
- Small round brush or liner brush
- Pencil and ruler
- circular foam pouncers (various small sizes) or the back end of paintbrushes
Step 1: Setting the Scene
-
Prepare the background:
Start by painting your entire canvas with the navy blue acrylic paint. Use your large flat brush for broad, even strokes. Don’t forget to paint the sides of the canvas for a polished, professional look. -
Let it dry completely:
Allow the base coat to dry fully. If the coverage looks streaky or uneven, apply a second coat of navy blue to ensure a rich, opaque background. -
Mask the tree shape:
Once the blue paint is completely dry to the touch, use painter’s tape to create a large triangle. Place two strips of tape meeting at a point near the top center of the canvas, widening out towards the bottom corners. -
Seal the edges:
Press down firmly on the inner edges of the tape with your fingernail or a clean card. This prevents paint from bleeding under the tape and ensures crisp lines for your tree. -
Paint the tree base:
Paint the inside of the triangle with a slightly lighter or darker shade of blue if you want subtle contrast, or simply use the existing background color as the base. The tape is mainly there to guide your dot placement perfectly.
Bleeding Lines?
If paint bled under your tape, wait for it to dry, then use a small flat brush and your background navy color to carefully paint over the mistake and straighten the line.
Step 2: Decorating the Tree
-
Plan your colors:
Squeeze out small amounts of your ornament colors: red, orange, dark green, light green, cream, and gold onto your palette. Having them ready helps keep a good flow. -
Start with larger dots:
Using a small foam pouncer or the handle end of a large paintbrush, dip into your first color. Press firmly inside the taped triangle area to create perfect circles. Space them out randomly, leaving room for other colors. -
Add variety:
Clean your tool or switch to a new one, and move on to the next color. I like to alternate between warm tones like orange and red, and cool tones like the greens, to keep the tree visually balanced. -
Layer in small details:
Use a smaller tool, like the back end of a thinner brush, to add smaller dots in cream and gold. Fill in the gaps between the larger ornaments without overcrowding the tree. -
Clean up edges:
Ensure that dots near the edge of the triangle overlap the tape slightly. This creates a clean, cut-off look when you remove the tape later, emphasizing the triangular shape. -
Remove the tape:
While the dots are still slightly tacky but not wet enough to run, carefully peel away the painter’s tape. Pull slowly at a 45-degree angle to reveal the sharp, straight edges of your tree.
Step 3: Finishing Touches
-
Paint the star:
At the very peak of your tree, use a small brush to hand-paint a five-pointed star in gold or yellow. You can sketch it lightly with a pencil first if you want ensure symmetry. -
Add background stars:
Dip the finest point of a small brush or a toothpick into gold or yellow paint. gently dot the dark blue background area around the tree to mimic distant stars or falling snow. -
Vary the star sizes:
Make some background dots tiny and others slightly larger to create depth in the night sky. -
Final inspection:
Check for any uneven paint on the main star or any accidental smudges on the background. Use a little navy blue paint to touch up errors if needed. -
Seal the artwork:
Once the entire painting is bone dry—usually overnight—apply a coat of clear acrylic varnish. A glossy finish works beautifully to make the colored dots pop like real ornaments.
Make It Sparkle
Mix a tiny pinch of loose glitter into your gold paint before applying the star and background dots for a shimmering effect that catches the holiday lights.
Now you have a festive, geometric decoration ready to brighten up a shelf or mantle

PENCIL GUIDE
Understanding Pencil Grades from H to B
From first sketch to finished drawing — learn pencil grades, line control, and shading techniques.
Explore the Full Guide
Metallic Gold Star on a Deep Background
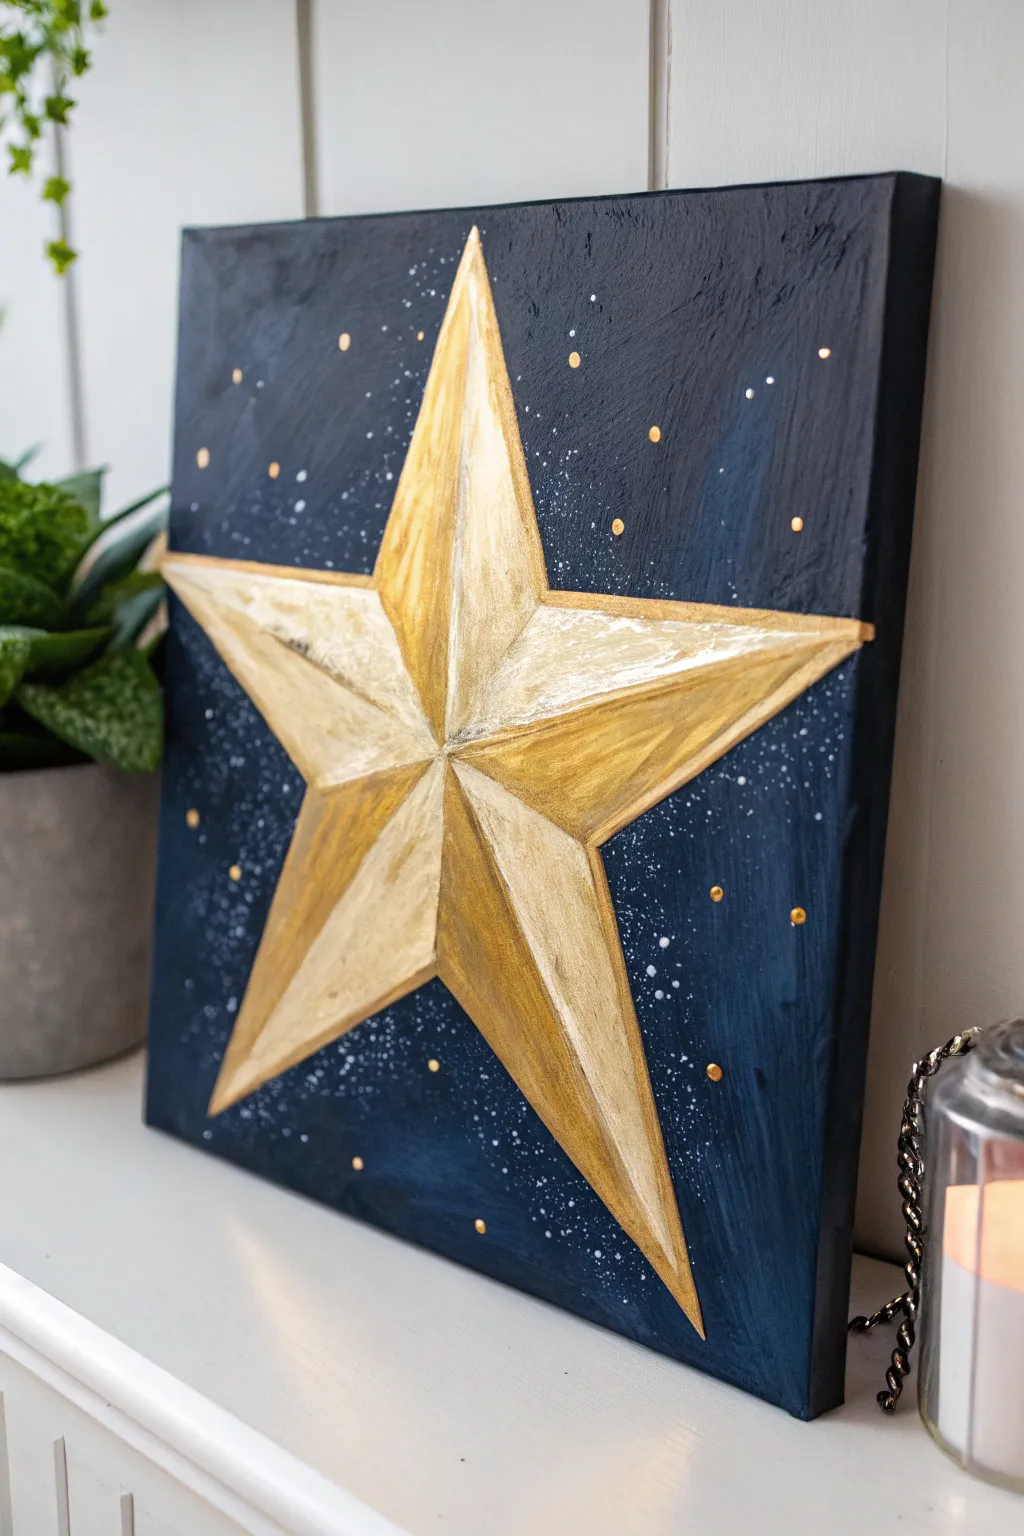
Create a striking focal point for your holiday decor with this dimensional gold star set against a deep, midnight blue sky. Despite looking like a complex relief sculpture, this project relies on clever shading and highlighting to achieve its impressive 3D illusion on a flat canvas.
Step-by-Step Guide
Materials
- Square stretched canvas (approx. 12×12 or 16×16 inches)
- Acrylic paints: Carbon Black, Phthalo Blue (or Prussian Blue), Titanium White, Metallic Gold, Bronze
- Large flat brush or sponge brush
- Medium flat brush
- Small round detail brush
- Ruler or straight edge
- Pencil
- Painter’s tape or masking tape
- Cup of water and paper towels
- Easel (optional)
Step 1: Setting the Scene
-
Base Color Mix:
Start by mixing a deep midnight blue on your palette. Combine a generous amount of Phthalo Blue with a touch of Carbon Black. You want a color that is almost black but retains a rich blue undertone. -
Apply Background:
Using your large flat brush, cover the entire canvas with your dark blue mix. Don’t worry about making it perfectly smooth; slight brush strokes add texture that mimics the night sky. -
Create Depth:
While the paint is still wet, blend in a tiny bit of pure black around the edges and corners to create a subtle vignette effect. -
Add Texture:
With a dry brush and a very small amount of lighter blue or white, gently scumble (scrub) over a few random areas to create faint nebulae or clouds in the background. -
Dry Time:
Let this background layer dry completely before moving on. This is crucial so your tape doesn’t peel up the paint later.
Clean Lines Secret
Before applying gold paint, brush a thin layer of matte medium over the tape edge. This seals the tape and prevents any gold from bleeding under.
Step 2: Drafting the Star
-
Mark the Center:
Using a ruler, lightly find the exact center of your canvas with a pencil mark. -
Draw the Star:
Sketch a large five-pointed star. Start by drawing an upside-down ‘V’ for the bottom legs, then connect the arms. Ensure the points extend almost to the edges of the canvas. -
Connect to Center:
From the tip of each of the five star points, draw a straight line directly to the center mark you made earlier. -
Create Valleys:
Now, draw lines from the inner ‘armpits’ (where the points meet) to the center mark. This divides each star point into two triangles—a left side and a right side, totaling ten distinct triangular sections.
Step 3: Painting the Gold Illusion
-
Tape Section One:
Select one triangular section of a star point. Use painter’s tape to mask off the surrounding lines perfectly so your paint edges stay crisp. -
Base Gold Layer:
Fill in this triangle with your metallic gold paint. You may need two coats for full opacity. -
Determine Light Source:
Decide that your light is coming from the top left. This means the top-left facets of the star points will be lightest, and the opposite facets will be darker. -
Add Highlights:
For the ‘light’ facets, mix a little Titanium White into your gold (or use a lighter champagne gold) and paint the center of the triangle, blending outward. -
Add Shadows:
For the ‘shadow’ facets, mix a tiny dot of black or bronze into your gold paint. Apply this to the darker sides of the star points to create the 3D ridge effect. -
Tape and Repeat:
Remove the tape while the paint is slightly tacky. let it dry, then move to a non-adjacent section. Repeat this taping and painting process until all ten triangles are filled. -
Edge Refinement:
Once the tape is gone and the star is dry, use a small detail brush to tidy up any bleed-through lines with your background blue color.
Add Real Sparkle
While the galaxy splatter is still wet, sprinkle a pinch of ultra-fine silver or iridescent glitter onto the dark blue paint for magical shimmer.
Step 4: Starry Details
-
Splatter Stars:
Dilute a small amount of white paint with water until it’s milky. Load an old brush or toothbrush, and flick the bristles with your thumb to create a spray of tiny white stars across the blue background. -
Avoid the Center:
Try to keep the majority of the splatter on the dark background, but don’t worry if a few specks land on the gold star—it adds to the galaxy feel. -
Gold Constellations:
Dip the handle end of a paintbrush into your metallic gold paint. Dot random larger ‘stars’ around the background to tie the color palette together. -
Final Varnish:
Once fully dry (give it at least 24 hours), apply a glossy varnish to make the dark blue pop and protect the metallic sheen.
Hang your masterpiece near some twinkle lights to really make that metallic paint shine
Swirly Christmas Sky Over a Tree
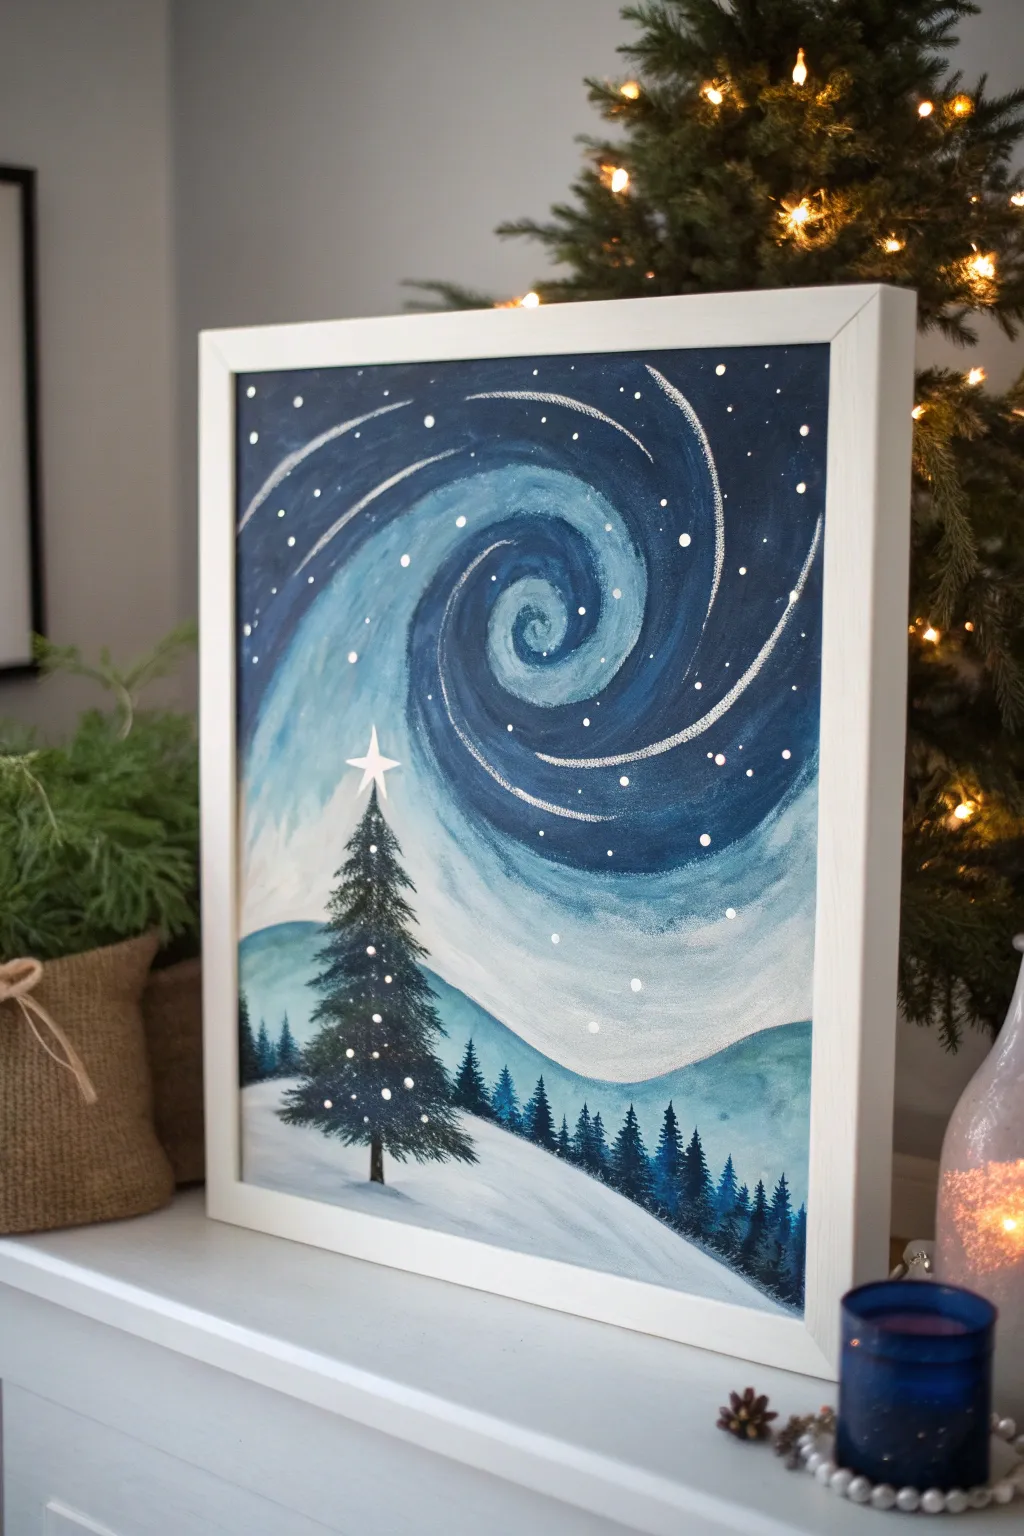
Capture the magic of a silent winter evening with this whimsical acrylic painting that features a mesmerizing, swirling sky inspired by classic impressionist styles. The cool blue palette and stark white snow create a peaceful atmosphere perfect for holiday decor.
Step-by-Step Tutorial
Materials
- Square canvas (e.g., 12×12 or 16×16 inches)
- Acrylic paints: Navy Blue, Phthalo Blue (or similar bright blue), White, and Black
- Large flat brush (1 inch)
- Medium round brush
- Small liner brush or detail brush
- Fan brush (optional, for texture)
- Cup of water and paper towels
- Palette or paper plate
Step 1: Setting the Background
-
Prepare the Sky Gradient:
Begin by painting the entire upper two-thirds of the canvas with a deep navy blue. While the paint is still wet, blend in some lighter blue towards the center-left area where the swirl will originate, creating a soft transition. -
Establish the Snowy Hills:
Use a mix of white with a drop of blue to paint the bottom third of the canvas. Create gentle, rolling curves to represent snow-covered hills. Don’t worry about perfect blending yet; just block in the shape. -
Add Distant Hills:
Mix a light blue-grey shade and paint a second, lower range of hills just behind your snowy foreground. This adds depth and separates the snow from the sky.
Smoother Swirls
Add a flow medium or a tiny drop of water to your acrylics when painting the sky. This helps create those long, unbroken swirl strokes without the brush dragging.
Step 2: Creating the Swirling Sky
-
Draft the Swirl:
Using a medium round brush and a mix of bright blue and plenty of white, paint a large spiral starting from the center and winding outwards. Keep your strokes loose and fluid. -
Layer the Blues:
Go back over your spiral with pure bright blue, painting alongside the lighter strokes. I like to let the colors mix slightly on the canvas to create a painterly, streaky effect rather than a solid line. -
highlight deeply:
Add deep navy streaks into the outer edges of the swirl to intensify the contrast. The goal is to make it look like the night sky is moving. -
Adding Stardust:
Load a liner brush with pure white paint (add a drop of water to make it flow). Paint thin, broken lines following the curve of your spiral to mimic wind or stardust trails. -
Splatter the Stars:
Dilute some white paint with water until it’s milky. Load a brush, hold it over the sky area, and tap the handle against another brush to splatter tiny white dots across the blue sky. -
Specific Star Placement:
Use a small brush to manually dot larger stars throughout the sky, specifically following the spiral path to emphasize the motion.
Step 3: Painting the Forest
-
Background Trees:
Mix a dark blue-green shade (blue + tiny bit of black). Using a small round brush, dab in a line of tiny, distant pine trees along the ridge of the background hills. Keep them small and somewhat indistinct. -
Mid-Ground Trees:
Mix a slighter darker shade and paint a row of slightly larger pine trees on the next hill forward. Use a tapping motion to simulate the texture of branches. -
The Main Tree Trunk:
For the focal tree in the foreground, mix black with a little dark blue. Paint a straight vertical line starting from the snow bank up towards the sky, establishing the height of your main tree. -
Building Branches:
Starting from the top of the trunk, use the corner of a flat brush or a fan brush to tap on branches. Start narrow at the top and flare out wider as you move down, creating a classic triangular Christmas tree shape. -
Adding Dimension:
While the tree is dark, mix a tiny bit of white into your dark green/blue mix. Gently tap this lighter color onto the tips of the branches to suggest moonlight catching the needles.
Glow Up
Mix a tiny bit of glow-in-the-dark medium with your white paint for the stars and the snow highlights. The painting will reveal a secret magic when the lights go out.
Step 4: Final Details
-
Tree Decorations:
Using the back of your brush handle dipped in white paint, dot ‘lights’ onto the main tree. Cluster them naturally rather than in perfect rows. -
The North Star:
Paint a bright white, four-pointed star at the very top of your main tree. Drag the paint out from the center to make the points sharp. -
Ground Shadows:
Mix a watery light blue and glaze a soft shadow on the snow underneath the tree, pulling it slightly to the right to match the light source. -
Final Highlights:
Add a few definitive streaks of pure white on the snowy hills to show the curves where the light hits most strongly.
Hang your masterpiece near some twinkle lights to really bring out the winter magic you just created


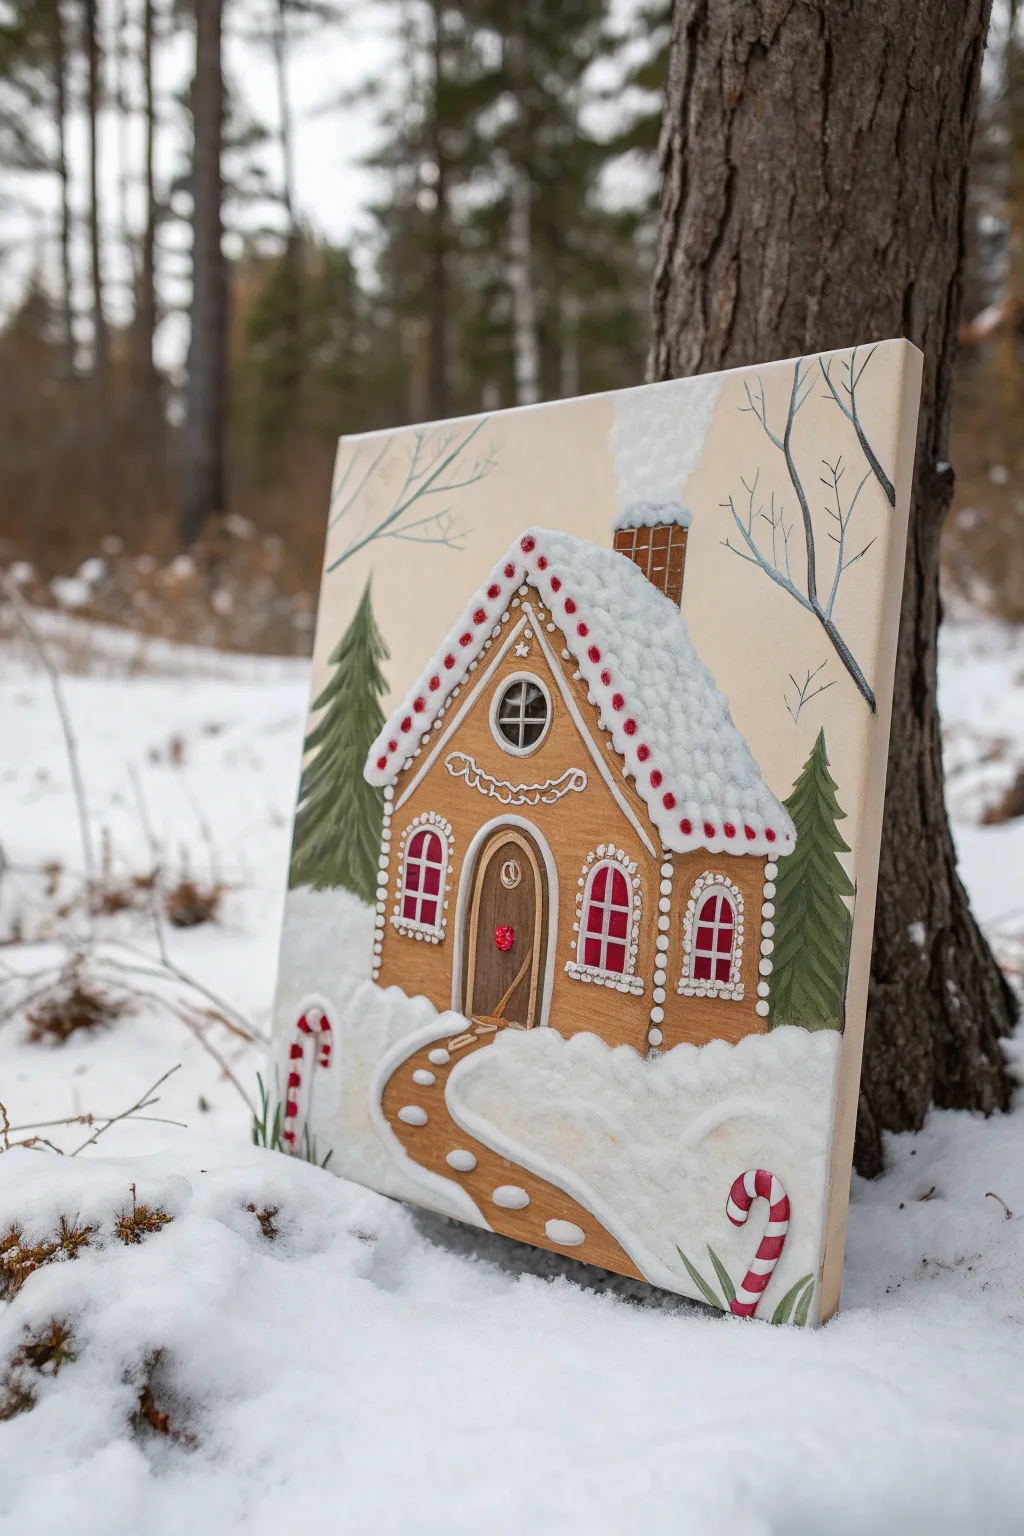
Gingerbread House With Icing Details

This whimsical painting combines warm, flat colors with heavy texture paste to mimic the look of real royal icing on a gingerbread cookie. The finished piece pops off the canvas, giving a delightful 3D effect that feels perfectly festive.
How-To Guide
Materials
- Square stretched canvas (approx 12×12 inches)
- Acrylic paints: Burnt Sienna, Yellow Ochre, Raw Umber, Titanium White, Deep Green, Red
- Texture paste or modeling paste (white)
- Piping bags or small plastic squeeze bottles with nibs
- Palette knives (small and medium)
- Flat shader brushes (medium)
- Detail round brushes (size 0 and 1)
- Pencil and eraser
- Ruler
Step 1: Planning and Base Coat
-
Sketch the outline:
Begin by lightly sketching the gingerbread house shape in the center of your canvas using a pencil. Use a ruler to ensure the rooflines and walls are straight, but keep the pathway and trees organic. -
Mix the gingerbread color:
On your palette, mix Burnt Sienna with a touch of Yellow Ochre and a tiny bit of Titanium White. You want a warm, golden-brown cookie color that feels inviting. -
Paint the background:
Paint the sky area behind the house with an off-white or very pale cream color, blending it smoothly. While you have this mixture, you can also block in the snowy ground at the bottom, though we will add texture to it later. -
Fill in the house:
Using your flat shader brush, fill in the house shape with your gingerbread mixture. Apply two coats if necessary to get a solid, opaque finish, letting the first coat dry completely before adding the second.
Step 2: Adding Landscape Elements
-
Paint the trees:
Mix a Deep Green with a smudge of Raw Umber to desaturate it slightly. Paint two pine trees flanking the house, using chopped, downward brushstrokes to simulate needle clumps. -
Add bare branches:
Using a thin detail brush and watered-down Raw Umber or grey, paint delicate, spindly bare tree branches extending from the top corners of the canvas towards the center. -
Establish the pathway:
Paint a winding path leading from the door to the bottom edge of the canvas using the same gingerbread brown mix used for the house, perhaps darkening it slightly with Raw Umber for contrast. -
Detail the door and windows:
Paint the arched door in a darker brown tone. Then, paint the window panes; use a dark grey or black for the glass to make the white frames pop later. -
Create the chimney:
Paint a rectangular chimney on the right side of the roof using a reddish-brown mix, adding tiny grid lines for bricks once the base color is dry.
Clogged Nozzle?
Texture paste dries fast. If your piping tip clogs, insert a sewing needle or paperclip into the tip to clear the blockage immediately so you can keep working smoothly.
Step 3: The 3D Icing Technique
-
Prepare the ‘Icing’:
Fill a piping bag or squeeze bottle with white texture paste. If the paste is too stiff, mix in a tiny drop of white acrylic paint to loosen it just enough to flow, but keep it thick enough to hold peaks. -
Pipe the roof snow:
Squeeze the texture paste thickly onto the roof area. Use a palette knife or the tip of the bottle to stipple and roughen the surface, making it look like heavy, fluffy fallen snow. -
Create the ground cover:
Apply the texture paste generously to the white snowy areas at the base of the painting. Use a palette knife to create drifts and banks, especially around the base of the house and the path. -
Pipe architectural details:
Carefully pipe thin lines of texture paste to outline the windows, the door frame, and the vertical edges of the house walls. Add small dots along the corners to mimic piped royal icing connections. -
Add decorative swirls:
Pipe a delicate scalloped garland design under the circular attic window. I find that holding the bottle slightly above the canvas allows the paste to drape naturally into curves. -
Detail the path and trees:
Add small dollops of paste along the edges of the pathway as ‘stepping stones’ or snow clumps, and gently dab a little texture onto the green pine trees to make them look snow-dusted.
Sparkle Finish
While the white texture paste is still wet on the roof and ground, sprinkle ultra-fine iridescent glitter over it to mimic the sparkle of fresh, frosty snow.
Step 4: Candy Details
-
Paint the roof candies:
Once the roof texture is dry to the touch, use a small brush to paint small red dots along the roofline, pressing them into the texture paste to look like embedded gumdrops. -
Window accents:
Add red paint to the window frames if desired, or paint small red hearts or shapes on the shutters. Paint a tiny red wreath or heart on the front door. -
Add candy canes:
At the bottom corners, paint curved candy cane shapes rising out of the snow. Start with white, let dry, and then carefully add diagonal red stripes. -
Smoke effect:
For the chimney smoke, dab a very dry brush with white paint (or a tiny bit of texture paste) above the chimney, blending it out softly to create a wispy, rising appearance.
Allow the texture paste to cure overnight before displaying your sweet masterpiece


Have a question or want to share your own experience? I'd love to hear from you in the comments below!