
If you’ve ever painted a checkerboard pattern, you already know it’s weirdly satisfying—simple squares, big impact. Here are my favorite ways to keep that classic grid feeling fresh, from crisp and traditional to delightfully unexpected.
Two-Tone Neutral Checkerboard Wall Block
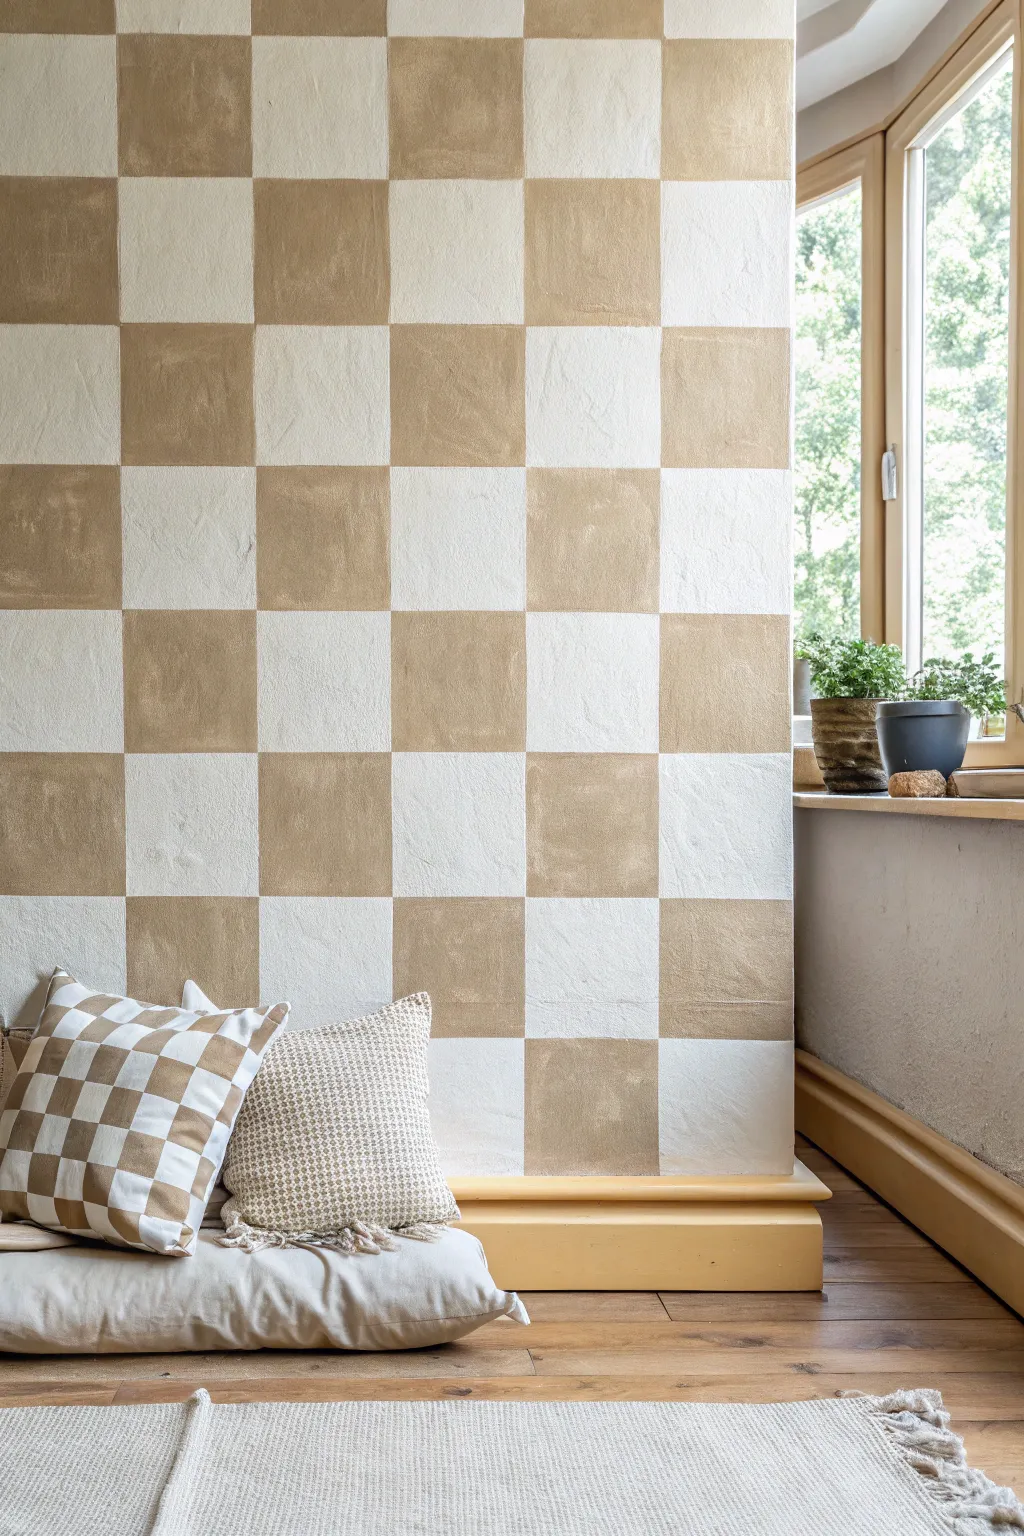
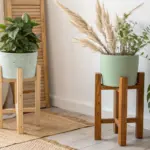
Transform a plain wall into a sophisticated focal point with this large-scale neutral checkerboard pattern. The textured, hand-painted finish gives it a warm, organic feel that perfectly balances the structured geometry of the design.
Step-by-Step Tutorial
Materials
- White or off-white latex wall paint (base coat and lighter squares)
- Beige or light terracotta latex wall paint (darker squares)
- Painter’s tape (1.5 or 2 inch width)
- Laser level or long spirit level
- Pencil
- Measuring tape
- Paint roller and tray
- 2-inch angled sash brush
- Drop cloth
- Damp rag
Step 1: Preparation and Base Coat
-
Clear and clean:
Begin by removing any furniture, outlet covers, or artwork from the wall. Wipe down the surface with a damp rag to remove dust, ensuring a clean canvas for your paint. -
Protect the area:
Lay down a drop cloth to protect your flooring and apply painter’s tape along the baseboards, ceiling line, and adjacent walls to keep your edges crisp. -
Apply the base color:
Roll on your chosen off-white base color over the entire wall. This will serve as the color for the lighter squares in your checkerboard. -
Ensure solid coverage:
Let the first coat dry completely, usually about 2-4 hours. Check for patchiness and apply a second coat if necessary to get a solid, opaque finish. Allow this to cure overnight if possible, so the tape won’t peel it off later.
Seal Avoids Bleeds
Always paint the base wall color over the tape edge before applying your accent color. This simple trick creates a perfect barrier against bleeding.
Step 2: Mapping the Grid
-
Measure the wall:
Measure the total width and height of your wall. Decide on the size of your squares; the example uses large squares, roughly 12-14 inches wide, for a bold look. -
Calculate square count:
Divide your wall measurements by your desired square size. Adjust the size slightly if needed to avoid having tiny slivers of squares at the edges, or plan for the partial squares to be at the bottom. -
Mark vertical lines:
Using a measuring tape, make small pencil marks along the top of the wall at your determined intervals. -
Draw vertical guides:
Use a laser level or a long spirit level to draw light vertical pencil lines all the way down the wall corresponding to your marks. Keep the pressure light so they are easy to cover. -
Mark horizontal lines:
repeat the process horizontally, marking intervals down the side of the wall and drawing light horizontal lines across to complete your grid.
Step 3: Taping and Painting
-
Mark the dark squares:
Before taping, place a tiny piece of tape or a light ‘X’ inside every other square. This visual guide is crucial so you don’t accidentally tape or paint the wrong block. -
Tape the vertical borders:
Apply painter’s tape along the vertical pencil lines. IMPORTANT: Adhere the tape on the *outside* of the square you intend to paint. This ensures the square stays the correct size. -
Seal the edges:
Press the tape edges down firmly with a credit card or putty knife. I like to paint a thin layer of the *base* color over the tape edge first; this seals the tape and prevents the darker color from bleeding under. -
Paint the first set:
Because the grid intersects, you cannot paint all defined squares at once without the tape overlapping. Start by painting the specific columns or rows that are fully taped off. -
Hand-painted texture:
Use a brush rather than a roller for the beige squares to replicate the textured look in the photo. Paint in multi-directional strokes to create subtle movement. -
Remove tape while damp:
Peel off the tape slowly at a 45-degree angle while the paint is still slightly tacky to avoid pulling up dried paint chips. -
Wait for drying:
Allow these painted sections to dry completely. This is the patience phase, but it’s vital for sharp lines. -
Tape remaining sides:
Once dry, tape off the horizontal lines (or remaining vertical sides) required to close off the rest of your ‘dark’ squares. You will be applying tape over your freshly painted work, so ensure it is fully dry. -
Paint remaining squares:
Fill in the rest of the marked squares with your beige paint, maintaining that hand-brushed texture. -
Final reveal:
Remove all remaining tape carefully. Step back and check for any pencil marks that might still be visible; gently erase them or touch up with a small artistry brush and base paint.
Wonky Lines?
If you peel the tape and find a jagged edge, wait for it to fully dry. Then, re-tape slightly inside the line and touch up with the correct color.
Enjoy the rhythmic calm your new feature wall brings to the space


Soft Pastel Checkerboard for a Gentle Look
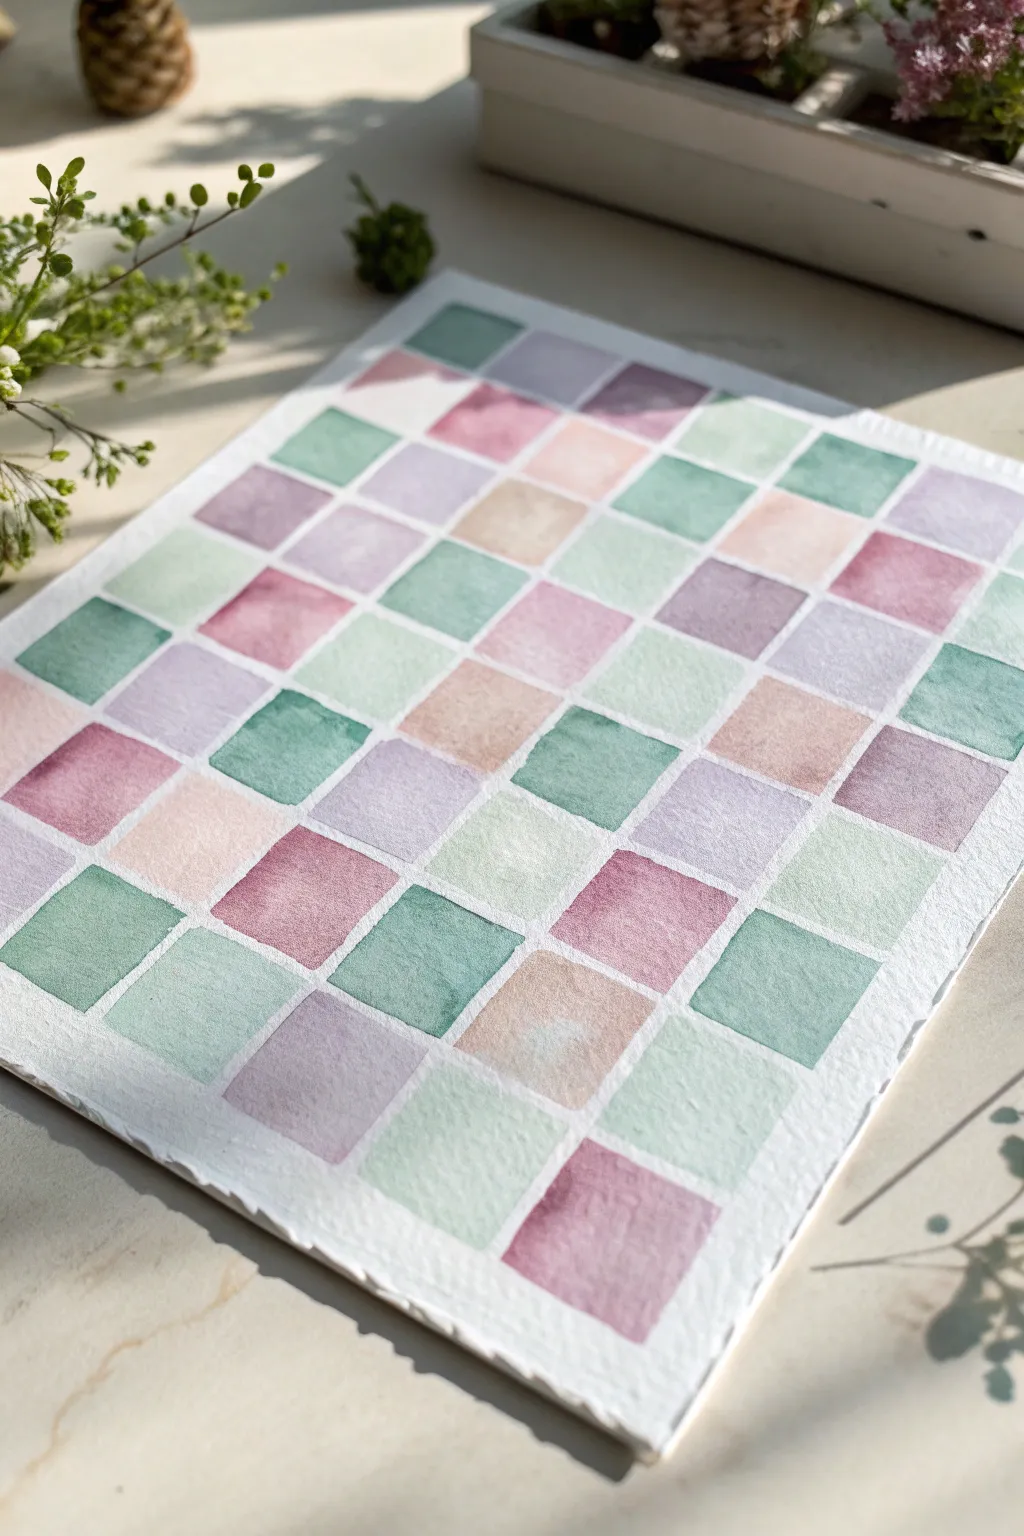
Embrace the soothing calm of soft pastels with this watercolor checkerboard project. The uneven washes and muted color palette create a gentle, organic look that feels more like a cozy quilt than a rigid game board.
Detailed Instructions
Materials
- Cold press watercolor paper (300 gsm)
- Watercolor paints (Sage Green, Dusky Rose, Mauve, Peach)
- Flat shader brush (size 6 or 8)
- Ruler
- Pencil (HB or lighter)
- Kneaded eraser
- Masking tape or Washi tape
- Two jars of water
- Paper towels
Step 1: Preparation & Grid
-
Prepare your paper:
Start by cutting a square sheet of high-quality watercolor paper. If you want that rustic look shown in the image, you can carefully tear the edges against a ruler to create a deckled effect. -
Secure the workspace:
Tape your paper down to a hard board or table. Even though we aren’t doing a full wash, this helps keep the paper flat as the individual squares get wet. -
Measure the grid:
Using a ruler, lightly mark out a grid of evenly spaced squares. For a standard sheet, 1-inch or 2cm squares work beautifully. Keep your pencil pressure extremely light so the graphite doesn’t show through the translucent paint later. -
Review the layout:
Double-check your grid. If any lines look too dark, gently roll a kneaded eraser over them to lift the excess graphite without erasing the guide completely.
Bleeding Edges?
If paint bleeds into a neighbor, stop immediately. Use a clean, damp brush to ‘thirsty lift’ the mistake, blotting on a paper towel. Let it dry fully before trying to fix the edge.
Step 2: Mixing & Painting
-
Create your palette:
Mix four distinct puddles of paint: a dusty rose, a sage green, a soft lavender-mauve, and a pale peach. Add plenty of water to each mix; you want these to be transparent and airy, not opaque. -
Test your transparency:
Before hitting the main paper, test your colors on a scrap piece. They should look soft and washed out when dry. If they are too vibrant, add more water to your palette. -
Start the first color:
Load your flat brush with the sage green. Choose scattered squares across the grid to fill, visualizing a random but balanced pattern. Leave plenty of empty squares between them for the other colors. -
Technique: The wet wash:
When filling a square, lay down a stroke of water first, then drop the pigment in. This encourages that beautiful ‘blooming’ effect where the color settles unevenly, creating natural texture within the shape. -
Respect the boundaries:
Paint carefully up to your pencil lines but try not to cross them. A little wobble adds character, but you want the grid structure to remain readable. -
Dry between colors:
Here I like to let the green squares dry completely before moving on. If wet squares touch, the colors will bleed into each other, ruining the crisp checkerboard effect. -
Add the second tone:
Once the green is dry, clean your brush thoroughly and pick up the dusty rose. Fill in a new set of scattered squares, maintaining that random distribution. -
Introduce the mauve:
Continue the process with your lavender-mauve mix. Allow the pigment to pool slightly in the corners of some squares to create those darker, concentrated edges seen in the reference. -
Finish with peach:
Fill the remaining empty squares with your pale peach tone. This warmth balances the cooler greens and purples perfectly.
Add Metallic Accents
Once fully dry, use a fine-tip gold paint pen or metallic watercolor to outline just a few select squares. This adds a subtle shimmer that catches the light.
Step 3: Finishing Touches
-
Assess the balance:
Step back and look at your composition. If some squares dried too pale, you can glaze a second, very watery layer over them to deepen the tint slightly. -
Wait for full cure:
Ensure the entire painting is bone dry. Watercolor paper can feel cool to the touch if it’s still damp inside, so give it extra time. -
Remove the grid:
Once you are certain the paper is dry, use your kneaded eraser to gently lift any visible pencil lines between the colored squares, leaving just the color blocks.
Now you have a serene piece of geometric art ready to bring a touch of calmness to your space


Ombre Checkerboard Squares That Fade Across
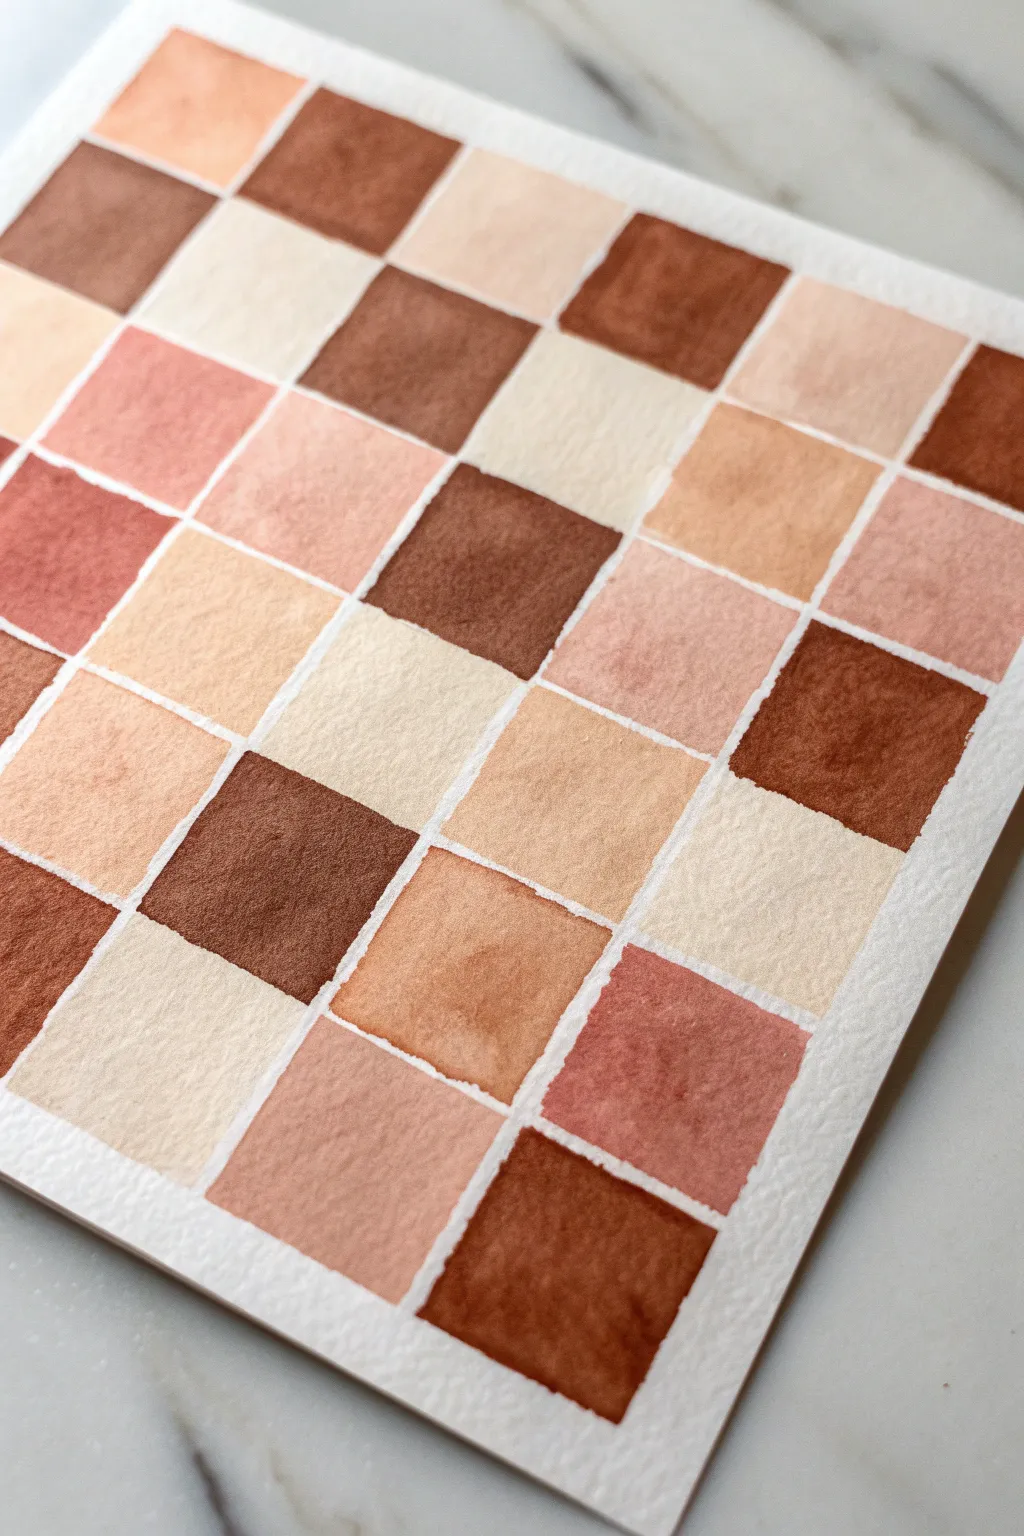
Embrace the warmth of natural skin tones and desert hues with this relaxing watercolor checkerboard. By carefully controlling your water-to-paint ratio, you can achieve a beautiful gradient of harmonious colors separated by crisp white lines.
Step-by-Step Tutorial
Materials
- Cold press watercolor paper (300 gsm)
- Watercolor paints (burnt sienna, yellow ochre, raw umber, crimson, white gouache optional)
- Flat shader brush (size 6 or 8)
- Rule and pencil
- Painter’s tape or masking fluid (optional)
- Mixing palette
- Two jars of water
- Paper towels
Step 1: Preparation & Grid
-
Tape the edges:
Begin by securing your watercolor paper to a flat surface using painter’s tape. This not only creates a clean white border around your finished piece but also helps prevent the paper from buckling as it gets wet. -
Measure the total area:
Decide on the size of your checkered area. For a square composition like the example, measure a perfect square on your paper lightly with a pencil. -
Calculate square sizes:
Divide your total width by the number of squares you want per row (for example, 6 squares across). Do the same for the height. -
Draw the grid:
Lightly sketch your grid using a ruler. Keep your pencil pressure very light so the graphite doesn’t show through the translucent watercolor later. -
Protect the gutters (optional):
The example relies on negative space for the white grid lines. If you have a steady hand, you can paint freehand. For guaranteed crisp lines, apply thin striping tape or masking fluid over your pencil lines now.
Edge Control
Use a flat shader brush rather than a round brush. The square shape of the bristles naturally fits into the corners of the grid, making crisp edges much easier.
Step 2: Mixing Palette
-
Prepare your base colors:
Squeeze out small amounts of Burnt Sienna, Yellow Ochre, Raw Umber, and a touch of Crimson onto your palette. These earth tones form the foundation of this palette. -
Mix the darkest tone:
Create a deep chocolate brown by mixing Burnt Sienna with a little bit of blue or black to desaturate it. This will be your darkest anchor color. -
Mix mid-tones:
Create variations of terracotta and tan. Mix Burnt Sienna with Yellow Ochre for a warm clay color, and dilute Raw Umber for a soft mushroom beige. -
Create the lightest shades:
For the palest squares, you don’t need white paint. Instead, heavily dilute your mixtures with water. Mix a tiny drop of crimson with plenty of water for a pale blush tone.
Add Metallic Flair
Mix a little metallic gold watercolor or gouache into a few random squares. When the light hits the finished piece, those specific blocks will shimmer against the matte earth tones.
Step 3: Painting the Squares
-
Plan the random distribution:
Before painting, visualize where your darks and lights will go. Aim for a balanced scatter so no two identical shades are directly touching. -
Load the brush:
Dip your flat shader brush into one of your mid-tone mixes. Ensure the brush is damp but not dripping to maintain control near the edges. -
Paint the first square:
Choose a square and carefully fill it in. If you aren’t using masking tape, leave a tiny sliver of dry white paper between your wet paint and the pencil line. -
Work in non-adjacent sections:
To prevent colors from bleeding into each other while wet, paint squares that do not touch. I like to hop around the board randomly to let sections dry. -
Add texture while wet:
For some squares, drop a tiny amount of clear water or a slightly different pigment into the wet square. This creates the beautiful ‘bloom’ texture seen in the example. -
Switch colors:
Clean your brush thoroughly and pick up a different shade—perhaps the deep chocolate tone. Fill in random squares across the grid. -
Fill the blush tones:
Move to your palest, watery pinks and beiges. These lighter squares provide essential contrast and ‘breathing room’ in the design. -
Complete the grid:
Continue until every square is filled. If you are painting freehand, take extra care to maintain consistent spacing for those white gutters.
Step 4: Finishing Touches
-
Let it dry completely:
Walk away and let the painting dry fully. Watercolor always looks different when dry, usually drying slightly lighter and less vibrant. -
Remove masking (if used):
If you used masking fluid or tape, gently peel it away at a 45-degree angle only after the paper is bone dry. -
Check the edges:
Examine your white lines. If you accidentally painted over a line, you can use a small stiff brush with clean water to gently lift the pigment, or use a white gel pen for a quick fix.
Once the tape is peeled away, you have a sophisticated geometric study ready to frame


Checkerboard That Transitions Into Stripes
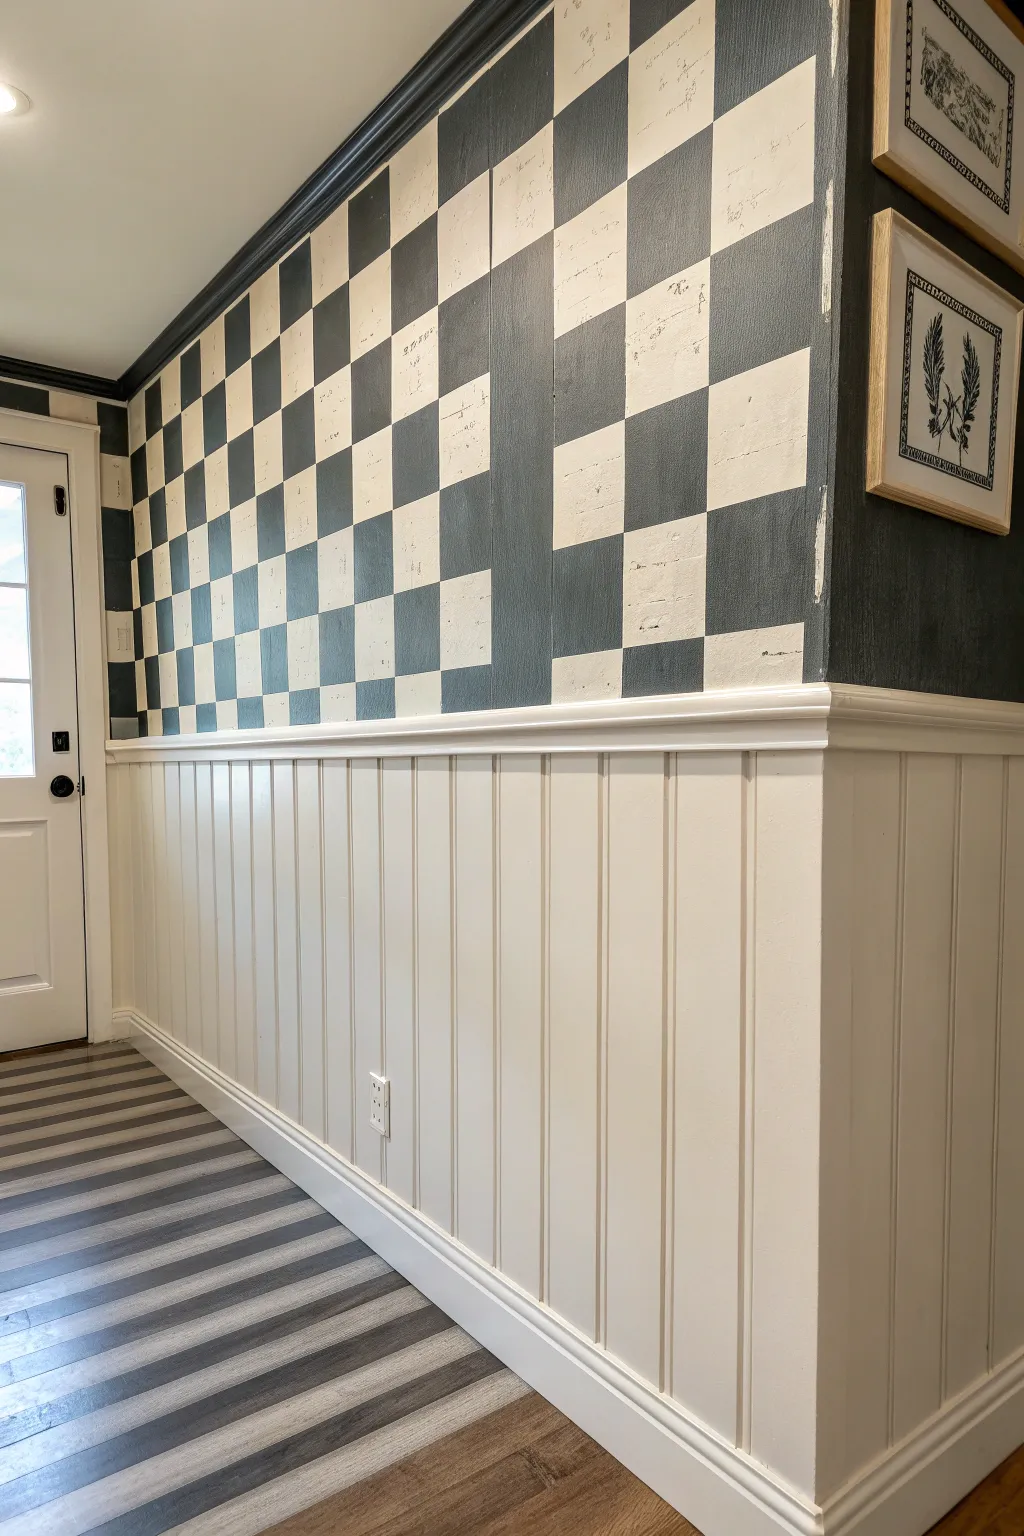
Transform a plain wall into a striking focal point by combining two classic patterns in a fresh, modern way. This project merges a hand-painted checkerboard upper wall with bold, striped flooring, grounded by crisp white wainscoting for a sophisticated transition.
Step-by-Step Guide
Materials
- Charcoal grey interior paint (eggshell or satin finish)
- Creamy white interior paint (eggshell or satin finish)
- White semi-gloss paint for trim
- Painter’s tape (various widths)
- Laser level or long spirit level
- Pencil
- Measuring tape
- Paint rollers and tray
- Angled sash brush (2-inch)
- Script stencil or rubber stamp (optional for texture)
- Beadboard paneling sheets or kit
- Chair rail molding
- Baseboard molding
- Construction adhesive
- Brad nailer and nails
- Caulk and caulk gun
- Wood filler
- Sandpaper (220 grit)
Step 1: Prepping the Canvas
-
Measure and Mark the Level Line:
Determine the height of your wainscoting. A standard chair rail height is usually between 32 and 36 inches from the floor. Use a laser level to project a straight horizontal line across the entire wall at this height, or mark it using a measuring tape and a long spirit level. -
Base Coat Application:
Paint the entire upper portion of the wall above your marked line with the creamy white base color. Apply two coats for even coverage, allowing sufficient drying time between layers as per the can’s instructions.
Bleed-Through Blues?
If paint bleeds under the tape, wait for it to dry completely. Then, use a small artist’s brush and the original base color to carefully touch up the line for a crisp correction.
Step 2: Creating the Grid
-
Calculate Square Sizes:
Measure the total width of the wall and divide it by the number of squares you want to fit across to determine your square size. Aim for squares between 6 to 10 inches for a balanced look similar to the image. -
Draw the Grid:
Using your calculated measurements, lightly pencil a grid of vertical and horizontal lines over the cream base coat. A laser level is invaluable here to keep lines perfectly straight over long distances. -
Tape the Vertical Lines:
Apply painter’s tape along the outside edges of the vertical pencil lines for every other column. Press the edges of the tape down firmly to prevent bleed-through. -
Tape the Horizontal Lines:
Tape the horizontal lines, creating a complete blocked-off grid. You’ll be painting alternating squares, so ensure you tape consistently to protect the squares that should remain cream.
Step 3: Painting the Checkerboard
-
Seal the Tape Edges:
I always take a minute to lightly paint over the tape edges with the *base* cream color first. This seals the tape and ensures that any seep-under is the base color, keeping your final lines razor-sharp. -
Apply the Charcoal Paint:
Once the seal coat is dry, paint the exposed squares with your charcoal grey paint. Use a small roller for the centers and a brush for corners. Two light coats often look better than one heavy one. -
Remove Tape Carefully:
Pull the tape off while the second coat of grey paint is still slightly tacky. Pull at a 45-degree angle away from the painted area for the cleanest edge. -
Add Texture Details (Optional):
To mimic the subtle pattern seen in the light squares in the photo, lightly stamp a script design or use a dry-brush technique with a slightly darker beige glaze over the cream squares once completely dry.
Level Up: Vintage Vibe
Mix a clear glaze with your charcoal paint for the wall squares. This creates a semi-transparent, hand-washed look rather than a solid block of color, adding instant age and character.
Step 4: Installing Wainscoting
-
Install the Beadboard:
Cut your beadboard panels to fit the space below your level line. Apply construction adhesive to the back of the panels and press them onto the wall. Secure them with a brad nailer, nailing into the studs where possible. -
Add Baseboards:
Measure and cut baseboard molding to run along the floor. Nail these into place at the bottom of the beadboard, covering any gaps between the paneling and the floor. -
Install the Chair Rail:
Cut the chair rail molding to length and install it directly on top of the beadboard edge. This cap piece hides the raw top edge of the paneling and creates a polished dividing line between the wood and the wallpapered section. -
Fill and Sand:
Fill all nail holes and seams with wood filler. Once dry, sand the filled areas smooth with 220-grit sandpaper. Caulk the seams between the molding and the wall for a seamless, professional finish. -
Paint the Trim:
Paint the beadboard, baseboard, and chair rail with white semi-gloss paint. This finish is durable and easy to clean, making it perfect for the lower wall.
Step 5: The Floor Transition
-
Preparing the Floor:
If painting a floor (wood or concrete), clean it thoroughly and sand lightly to promote adhesion. Apply a specialized floor primer. -
Tape for Stripes:
Mark out stripes on the floor that run parallel to the wall. Use painter’s tape to mask off alternating stripes. For the look in the image, keep stripes relatively narrow compared to the wall squares. -
Paint Floor Stripes:
Paint the exposed floor stripes with a durable floor paint in a dark grey that complements the wall’s charcoal. Remove tape carefully and allow to cure fully before walking on it.
Step back and admire how the crisp wainscoting anchors the playful geometry of your new walls.
BRUSH GUIDE
The Right Brush for Every Stroke
From clean lines to bold texture — master brush choice, stroke control, and essential techniques.
Explore the Full Guide
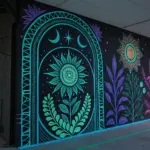
Corner-Wrap Checkerboard for Extra Depth
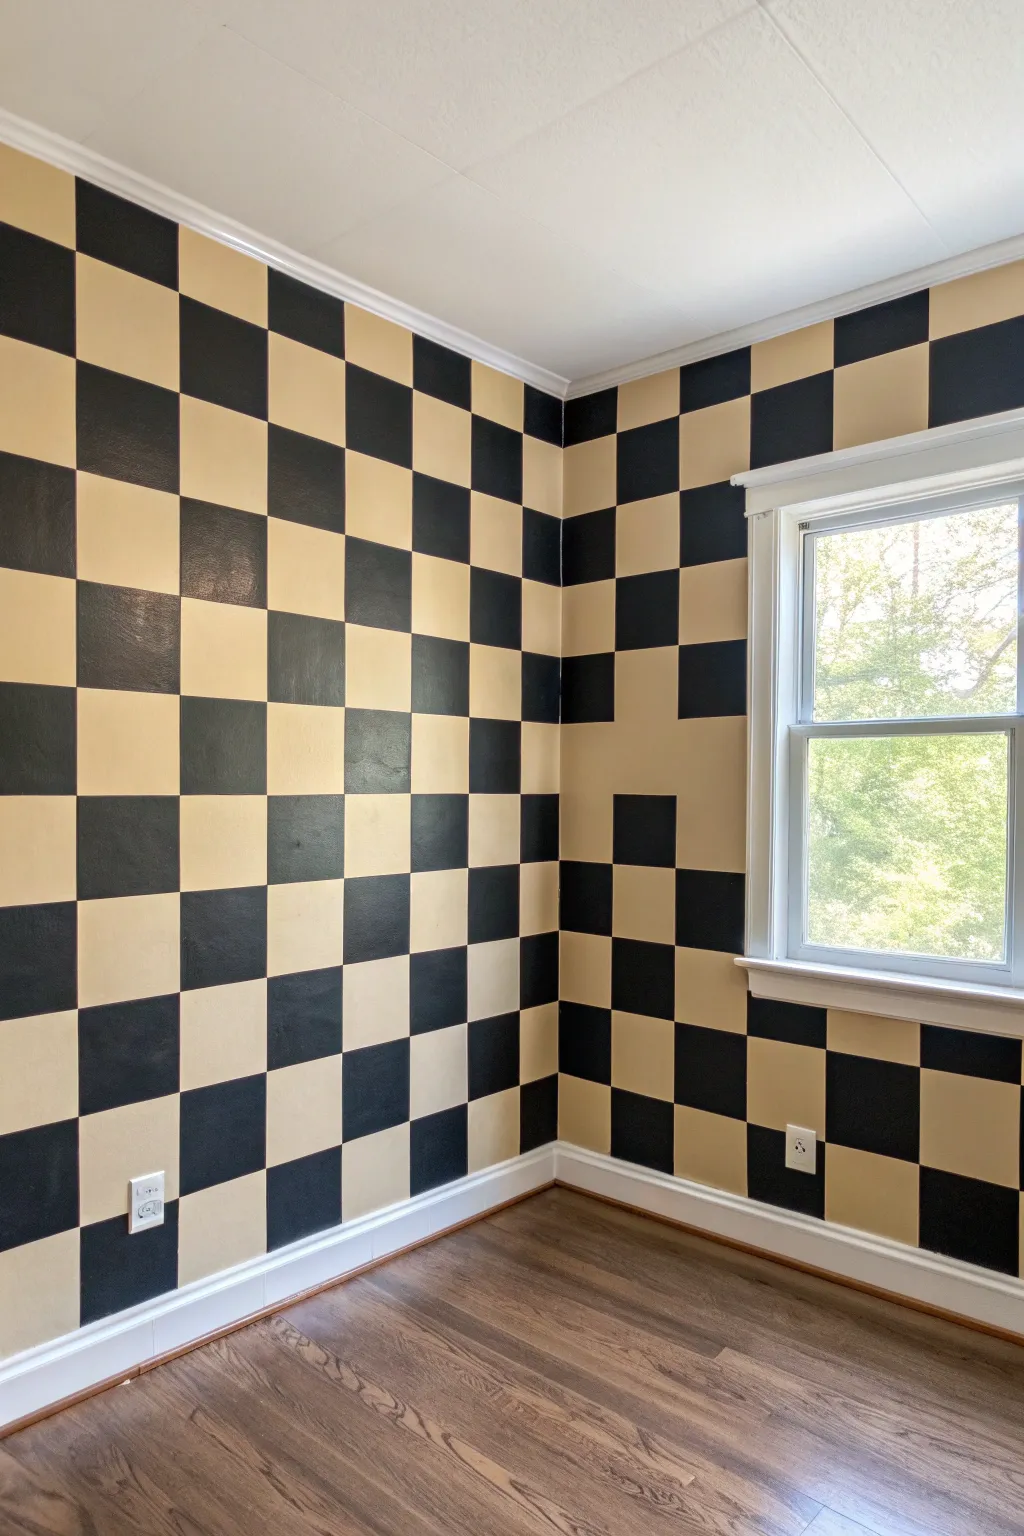
Transform a plain corner into an optical illusion with this bold, geometric checkerboard mural. By carefully aligning squares across intersecting walls, you create a seamless, retro-modern backdrop that adds surprising depth to any room.
How-To Guide
Materials
- Interior latex paint (Beige/Tan for base)
- Interior latex paint (Black for checks)
- Painter’s tape (high-quality, multi-surface)
- Laser level or long spirit level
- Measuring tape
- Pencil
- 4-inch foam roller and handle
- Small angled sash brush
- Paint tray and liners
- Drop cloths
- Putty knife or credit card
Step 1: Preparation and Base Coat
-
Clear and clean:
Remove any outlet covers, switch plates, and artwork from the walls. Wipe down the walls with a damp cloth to remove dust and let them dry completely. -
Protect the area:
Lay down drop cloths to protect your flooring. Tape off the baseboards, ceiling line, and window trim with painter’s tape to ensure crisp edges. -
Apply the base color:
Roll two coats of your lighter color (the beige/tan) over the entire wall surface. This will be the color of half your squares. Allow the paint to cure for at least 24 hours before applying tape over it to prevent peeling.
Bleeding Lines?
If paint bleeds under the tape, wait for it to dry fully. Then, place a new piece of tape precisely over the crisp line, and touch up the messy side with the correct color using a small detail brush.
Step 2: Measuring and Grid Layout
-
Determine square size:
Measure the total height of the wall between the baseboard and ceiling. Divide this number to find a square size that fits evenly, or choose a set size (e.g., 12 inches) and accept a partial row at the top or bottom. -
Mark vertical lines:
Starting from the corner, measure out your square width horizontally. Use a laser level to project a vertical plumb line at this mark. Lightly trace this line with a pencil from ceiling to floor. -
Continue vertical grid:
Move your laser level over by one square width and mark the next vertical line. Repeat this across both walls. It is crucial to start measuring from the corner outward on both walls so the pattern wraps seamlessly. -
Mark horizontal lines:
Measure from the ceiling down to mark your horizontal intervals. Use the level to draw these lines across both walls, ensuring they meet perfectly in the corner crease. -
Mark the ‘X’ spots:
To avoid confusion later, place a small piece of tape or make a light ‘X’ inside every square that will be painted black. Step back to double-check that you have a proper checkerboard pattern.
Step 3: Taping the Grid
-
Tape vertical lines first:
Apply painter’s tape along your vertical pencil lines. IMPORTANT: Apply the tape on the ‘outside’ of the square you plan to paint. You want the paint to cover the pencil line, so the tape edge must sit exactly on the line, preserving the square’s full width. -
Tape horizontal lines:
Apply tape along the horizontal lines, again being mindful to tape smoothly on the outside of the boxes marked with an ‘X’. -
Seal the tape edges:
Run a putty knife or a credit card firmly over all tape edges. This friction generates heat and helps seal the tape to the wall, minimizing bleed-under. -
The base coat trick:
Using a small brush, lightly paint over the tape edges using your *base color* (beige). This seals the tape with the existing color, so if any paint bleeds, it matches the background and won’t be visible.
Pro Tip: The Corner trick
When taping the corner vertical line, cut the tape lengthwise or use narrower tape. Thick tape can curve in the corner, ruining the sharp 90-degree angle needed for the optical illusion.
Step 4: Painting the Checks
-
Cut in the corners:
Use the angled sash brush to carefully paint the edges and corners of the squares marked with an ‘X’, specifically where the roller won’t reach. -
Roll the dark squares:
Use a 4-inch foam roller to fill in the squares marked with an ‘X’ using the black paint. A foam roller helps achieve a smooth, flat finish without heavy texture. -
Review coverage:
Let the first coat dry to the touch (usually 1 hour). If the black looks patchy, apply a second thin coat for solid opacity. -
Remove tape promptly:
While the final coat is still slightly tacky (do not wait for it to dry completely), slowly peel off the tape at a 45-degree angle. This prevents the dried paint ‘skin’ from ripping.
Step 5: Finishing Touches
-
Inspect the corner:
Check the corner crease where the walls meet. If the line isn’t perfectly sharp, use a tiny artist’s brush to carefully touch up the junction between the black and tan squares. -
Clean up lines:
If there was any bleed elsewhere, wait for the paint to harden fully, then use a tiny brush and the base color to correct the edges. -
Replace hardware:
Once the walls are fully dry (give it 24 hours), screw your outlet covers back in place.
Step back and enjoy the dramatic, seamless pattern you’ve created across your room’s corner
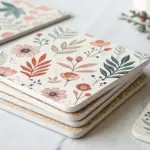
Floral Motifs Inside a Checkerboard Grid
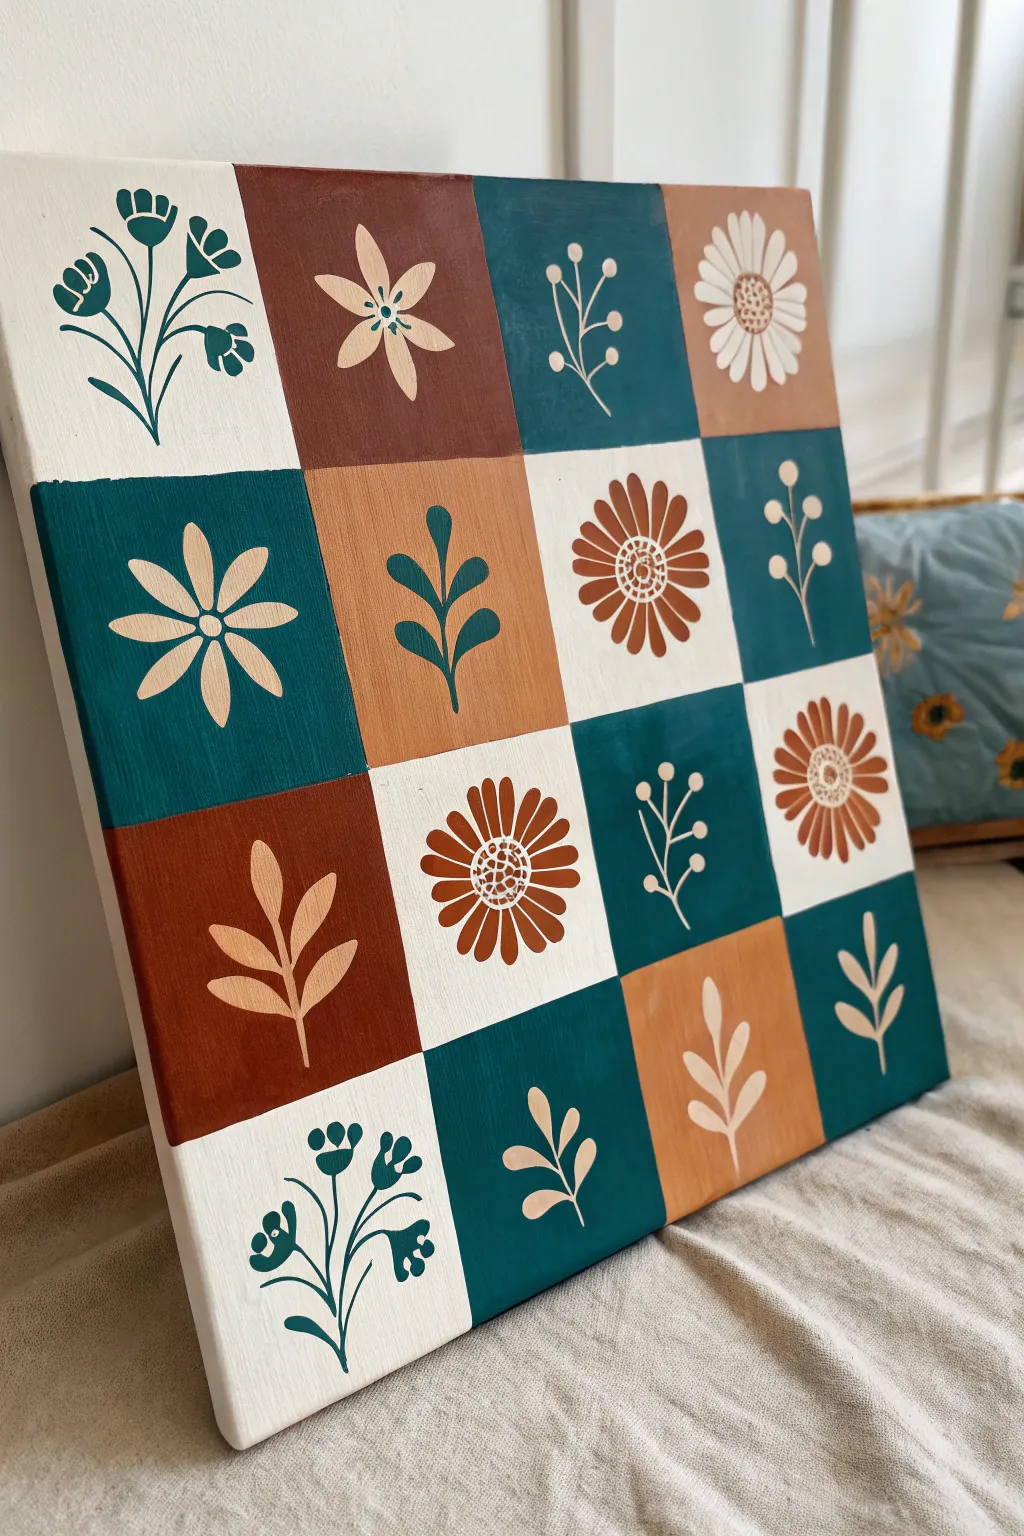
This project combines the geometric structure of a 4×4 grid with organic, free-flowing floral motifs in warm, earthy tones. The result is a harmonious balance between pattern and nature, perfect for adding a touch of modern bohemian flair to any wall.
Step-by-Step Guide
Materials
- Square stretched canvas (approx. 12×12 or 16×16 inches)
- Acrylic paints (White, Deep Teal/Petrol Blue, Burnt Sienna/Terracotta, Light Ochre/Caramel)
- Flat shader brush (medium width)
- Round detail brushes (size 0 and 2)
- Ruler or straight edge
- Pencil
- Painter’s tape (optional but helpful for crisp lines)
- Palette for mixing
- Water cup and paper towels
Step 1: Creating the Grid
-
Surface Prep:
Begin by ensuring your canvas surface is clean and dust-free. If it feels rough, a very light sanding with fine-grit paper can create a smoother base for your detailed linework later. -
Measuring the Quads:
Measure the total length and width of your canvas. Divide this number by four to determine the size of each square. For example, on a 16-inch canvas, each square will be 4 inches. -
Drawing the Grid:
Using your ruler and pencil, lightly mark the intervals on all four sides of the canvas. Connect these marks to draw a 4×4 grid, creating 16 total squares. Keep your pencil lines faint so they don’t show through the lighter paint colors.
Grid Master Tip
For perfectly straight edges between squares without a steady hand, use painter’s tape. Important: Peel the tape away while the paint is still slightly wet to prevent chipping.
Step 2: Blocking in Background Colors
-
Planning the Palette:
This design uses four distinct background colors: White, Deep Teal, Burnt Sienna, and Light Ochre. Distribute them strategically so no two colors touch directly side-by-side. You can reference the image to copy the exact layout or create your own balanced distribution. -
Painting White Squares:
Start with the white squares. Even if your canvas is already white, painting these sections gives the piece a consistent texture. Use your flat shader brush to fill in the designated squares. -
Painting Teal Squares:
Next, mix your Deep Teal. I like to paint all squares of one color at a time to ensure consistency. Carefully cut in along the pencil lines with the edge of your brush before filling the center. -
Painting Earth Tones:
Proceed to the Burnt Sienna (red-brown) squares, followed by the Light Ochre (tan/caramel) squares. Apply two coats if necessary to achieve an opaque, matte finish. -
Touching Up Edges:
Once all squares are dry, inspect the grid lines. If any paint bled over, use a small brush to tidy up the intersections. A clean grid is crucial for the polished look of this piece.
Step 3: Adding Floral Motifs
-
Sketching the Flowers:
Lightly sketch a different floral design in the center of each square. Alternate between broad daisies, leafy stems, simple sprigs, and multi-petaled blooms to create variety. -
Painting Light on Dark:
For the dark Teal squares, load a round brush with a creamy off-white paint. Paint your designs—such as large daisies or delicate fern-like leaves—right over the dark background. You may need a second coat to make the white truly pop. -
Painting Dark on Light:
For the white squares, switch to your Deep Teal paint. Create high-contrast botanicals, like the tulip-style flowers or simple dotted stems shown in the reference. -
Painting Tone-on-Tone:
For the Burnt Sienna and Light Ochre squares, use contrasting earth tones. Paint light cream flowers on the brown squares, and use the dark teal for leaves on the tan squares to tie the color palette together. -
Detailing the Centers:
Add centers to your flowers using contrasting colors. Use the tip of a small brush or a dotting tool to create stippled textures inside the daisy centers for a realistic pollen look. -
Refining Lines:
Go back over your stems and leaves with your smallest liner brush (size 0) to sharpen any blunt ends or thicken lines that look too wispy. The goal is a clean, illustration-style finish. -
Final Erasure:
Once the paint is completely bone-dry (wait at least an hour), gently erase any visible pencil grid lines that weren’t covered by paint.
Add Dimension
Mix a tiny amount of modeling paste into your acrylic paint for the flower petals. This adds a subtle 3D texture that makes the botanicals stand out physically from the flat grid.
Step back and admire how the rigid grid beautifully frames your organic floral collection

PENCIL GUIDE
Understanding Pencil Grades from H to B
From first sketch to finished drawing — learn pencil grades, line control, and shading techniques.
Explore the Full Guide
Mini Landscapes in Each Checkerboard Square
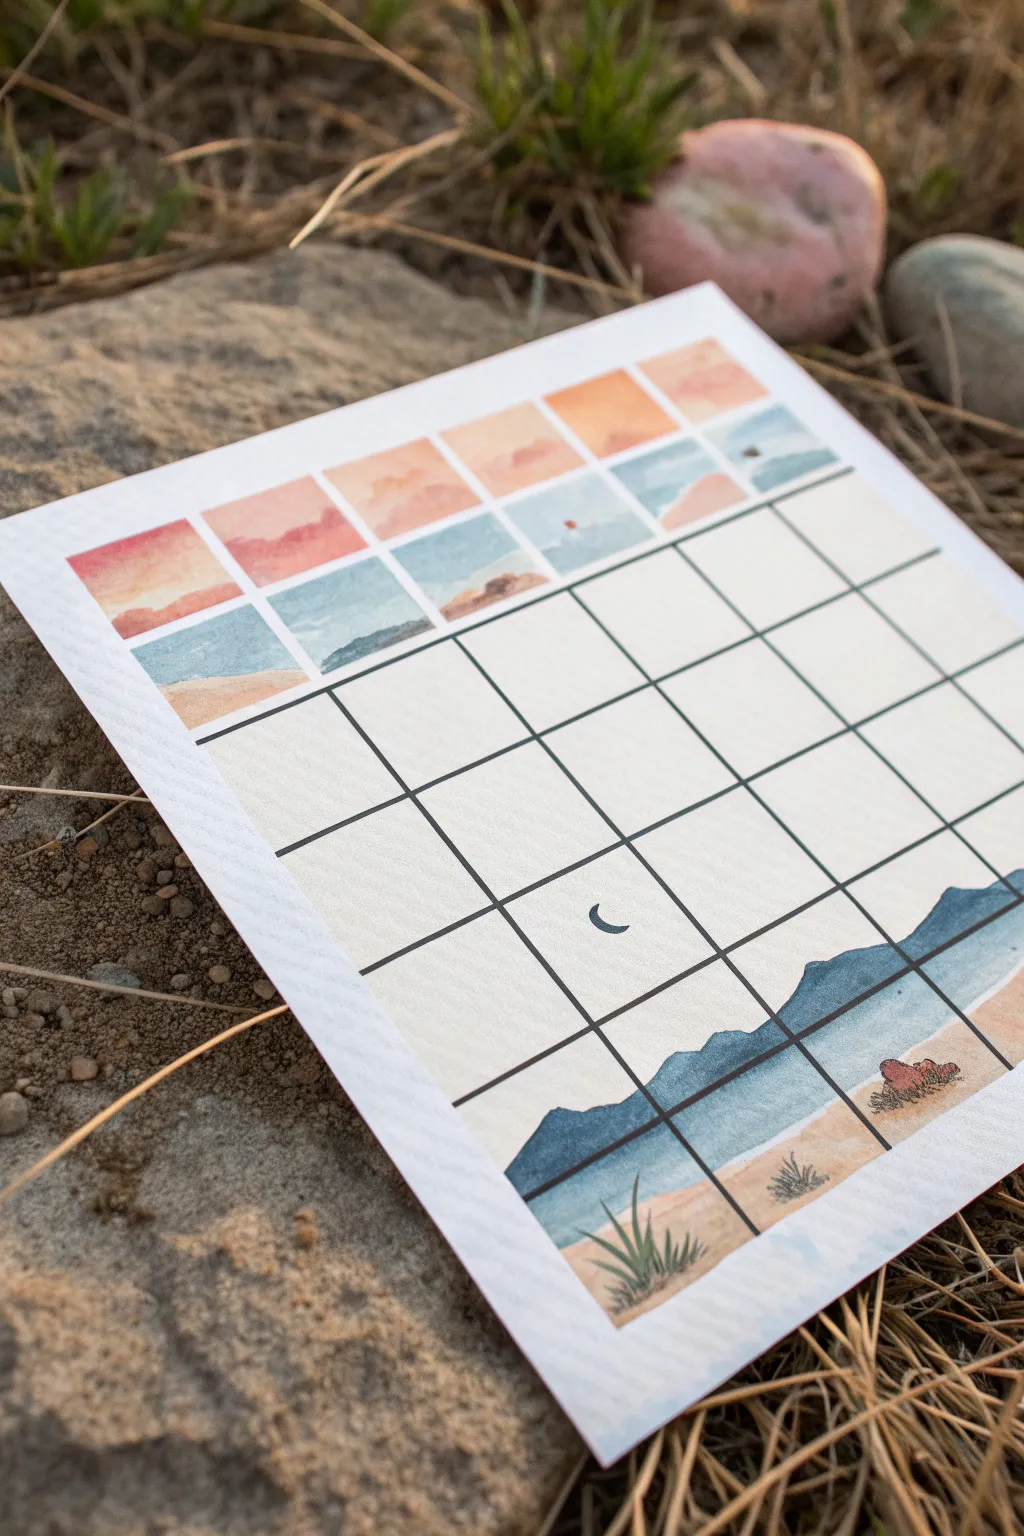
This meditative watercolor project transforms a simple grid into a fragmented, panoramic desert scene. By painting isolated snippets of sky and land, you create a beautiful optical illusion of a continuous landscape viewed through a windowpane.
Step-by-Step
Materials
- Square watercolor paper (cold press, 300gsm)
- Ruler
- Pencil (HB or lighter)
- Fine liner pen (black, waterproof, 0.3mm or 0.5mm)
- Watercolor paints (Indigo, Burnt Sienna, Yellow Ochre, Alizarin Crimson, Sap Green)
- Round watercolor brush (size 4 or 6)
- Jar of water
- Paper towels for blotting
Step 1: Preparation & Grid
-
Measure the paper:
Start with a square sheet of high-quality watercolor paper. Place it on a flat surface and decide on the size of your grid squares. For a standard postcard size, 1-inch squares work beautifully. -
Draft the grid:
Using a ruler and a light pencil touch, mark intervals along all four sides of the paper. Connect these marks to create a perfect checkerboard grid across the entire sheet. -
Ink the lines:
Carefully trace over your pencil grid lines with a black waterproof fine liner pen. Keep the ruler steady to ensure sharp, clean boundaries. This black framework is crucial for the ‘windowpane’ effect. -
Erase guidelines:
Once the ink is completely dry—wait at least five minutes to avoid smudging—gently erase any visible pencil marks to leave a stark black-and-white grid.
Grid Precision
Use artist’s tape to mask off the edges of the grid squares when painting. It helps keep corners perfect and prevents paint from accidentally bleeding into the planned white space.
Step 2: Painting the Sky
-
Mix your sunset palette:
Prepare a warm gradient on your palette. You’ll need a soft pink (diluted Alizarin Crimson) transitioning into a warm orange or peach tone. -
Paint the first row:
Focus on the top row of squares. Paint a wash of the pink-to-orange gradient in each square. Treat them as individual mini-paintings, but ensure the colors generally align from left to right. -
Add cloud details:
While the paint is still damp, dab in slightly stronger pigment to suggest drifting clouds. Let the water soften the edges naturally. -
Transition the horizon:
Move to the second row. Here, the sky meets the land or water. Use a diluted blue-grey mix for the distant horizon line, keeping the top half of these squares light to represent the lower sky.
Try Seasons
Adapt this grid concept for four seasons. Paint the top row as winter sky, transition to spring flowers, then summer greenery, and finish with autumn leaves at the bottom.
Step 3: The Middle Ground
-
Leave negative space:
The charm of this specific piece is the negative space. Deliberately leave the central rows (rows 3, 4, and 5) completely unpainted for now. This draws the eye to the distinct top and bottom sections. -
Add a focal point:
In the center of the blank grid area (around the intersection of the lower-middle squares), carefully paint a tiny, sharp crescent moon using a dark indigo or black paint. Keep it crisp and precise.
Step 4: Foreground Landscape
-
Sketch the mountain range:
Lightly visualize where your mountain range will sit in the bottom two rows. It should flow continuously across the grid lines, appearing broken only by the black ink. -
Paint the distant mountains:
Using a mix of Indigo and a touch of Burnt Sienna to gray it down, paint the mountain shapes in the second-to-last row. Keep the wash flat and even. -
Add foreground sand:
For the very bottom row and parts of the row above, mix Yellow Ochre with plenty of water. Paint the ‘ground’ area, ensuring it meets the base of your blue mountains. -
Detail vegetation:
Once the sandy wash is dry, use a detail brush and concentrated Sap Green or brown to flick in tiny desert shrubs and tufts of grass in the bottom corners. -
Final touches:
Add a small accent rock or bush in a reddish-brown tone (Burnt Sienna) in the bottom right corner to balance the composition. Ensure all paint stays strictly within the grid lines.
Now step back and admire how your simple squares combine to create a cohesive, peaceful view
Negative Space Checkerboard With a Base Coat Reveal
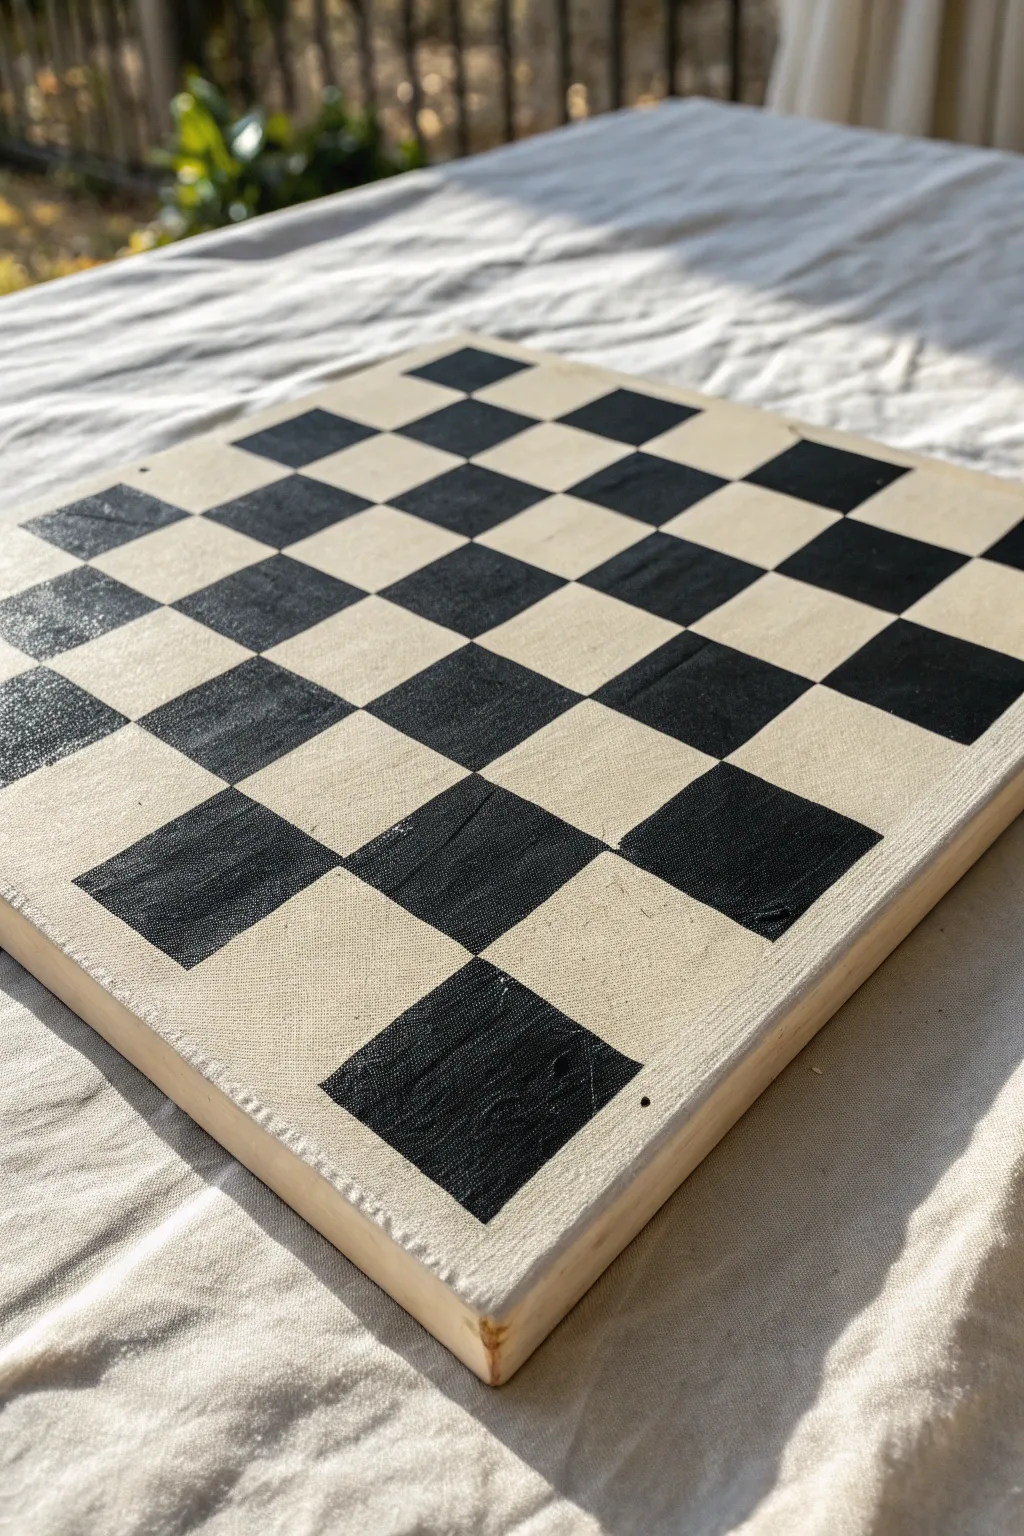
This minimalist checkerboard project plays with texture by leaving the natural canvas exposed as your light squares while defining the dark ones with glossy paint. The result is a tactile, modern game board that celebrates the raw beauty of its materials.
Step-by-Step Guide
Materials
- Square stretched canvas (12×12 or similar)
- Painter’s tape (1-inch width works well)
- Black acrylic paint (high gloss finish)
- Flat shader brush (medium size)
- Ruler or measuring tape
- Pencil
- Burnishing tool or credit card
- Clear matte medium (optional)
Step 1: Preparation & Grid Layout
-
Surface check:
Begin by inspecting your stretched canvas. Since half the board will remain unpainted, ensure there are no smudges or dirt marks on the fabric surface. If you spot any lint, a quick roll with a lint roller is a good idea. -
Measure the dimensions:
Measure the total width of your canvas precisely. Divide this number by 8 to determine the exact width of each square needed for a standard 64-square checkerboard. -
Mark the edges:
Using a pencil, make small, faint tick marks along all four edges of the canvas at your calculated intervals. Keep these marks very light so they don’t show through later. -
Connect the grid:
Use your ruler to lightly connect the corresponding tick marks across the canvas, drawing a complete 8×8 grid. Press very gently with the pencil; you want the graphite just visible enough to guide your tape, but not dark enough to smear.
Bleeding Lines?
If paint bleeds under the tape onto the raw canvas ‘white’ squares, use a tiny amount of white gesso on a detail brush to carefully patch over the mistake. It blends visually with the canvas texture.
Step 2: Taping Strategy
-
Visualize the pattern:
Before taping, place a small ‘x’ made of tape or a light pencil mark inside every square that needs to be painted black. This prevents the common mistake of painting the wrong square in the pattern. -
Tape the vertical columns:
Apply strips of painter’s tape along the vertical pencil lines. Place the tape on the *outside* of the squares you intend to paint first. Because the corners touch, you cannot paint all black squares at once without bridging the gap. -
Tape the horizontal rows:
Apply tape along the horizontal lines, creating a masked grid. At this stage, you are isolating specific squares. You will likely need to paint in two batches (painting half the black squares, letting them dry, and then re-taping for the rest) to get crisp corners. -
Clean corners:
Use an X-Acto knife or craft blade to carefully trim away any excess tape that overlaps into the areas you need to paint. You want perfect squares exposed. -
Seal the tape edges:
Run a burnishing tool or the edge of a credit card firmly over all tape edges. This is crucial on canvas because the texture of the weave creates tiny gaps where paint loves to bleed under the tape. -
The clear coat trick:
I highly recommend applying a very thin layer of clear matte medium along the edges of the tape first. This seals the tape line so that if anything leaks underneath, it’s clear instead of black.
Step 3: Painting & Revealing
-
Apply the first coat:
Dip your flat shader brush into the high-gloss black paint. Apply the paint to the exposed squares, brushing from the tape inward to further prevent bleeding. -
Ensure opacity:
Let the first coat dry to the touch, then apply a second coat if the canvas weave is still showing through too much. You want a solid, glossy finish. -
Remove tape (Batch 1):
While the paint is still slightly tacky (not fully cured), carefully peel back the tape at a 45-degree angle. This helps keep the lines sharp. -
Dry time:
Allow these squares to dry completely—wait at least a few hours. This is vital because you will need to place fresh tape over these painted areas to do the remaining squares. -
Re-tape for Batch 2:
Once the first set of black squares is fully hard and dry, repeat the taping process to expose the remaining squares that need to be painted black. Be gentle pressing tape onto the freshly painted surfaces. -
Paint remaining squares:
Apply your gloss black paint to the newly exposed squares, following the same inward brushing technique and layering for opacity. -
Final reveal:
Peel away the final batch of tape slowly. If you notice any tiny jagged edges where the paint lifed, you can smooth them down with your finger while the paint is soft. -
Touch ups:
Inspect the raw canvas squares. If any stray graphite lines are visible, very gently erase them with a white eraser, being careful not to rub the black paint.
Make it Magnetic
Before painting, apply several coats of magnetic primer to the specific squares you plan to paint black. This turns your wall art into a functional vertical game board for magnetic pieces.
Hang your new textural game board on the wall or place it on a coffee table for an interactive art piece


Layered Glaze Checkerboard for See-Through Color
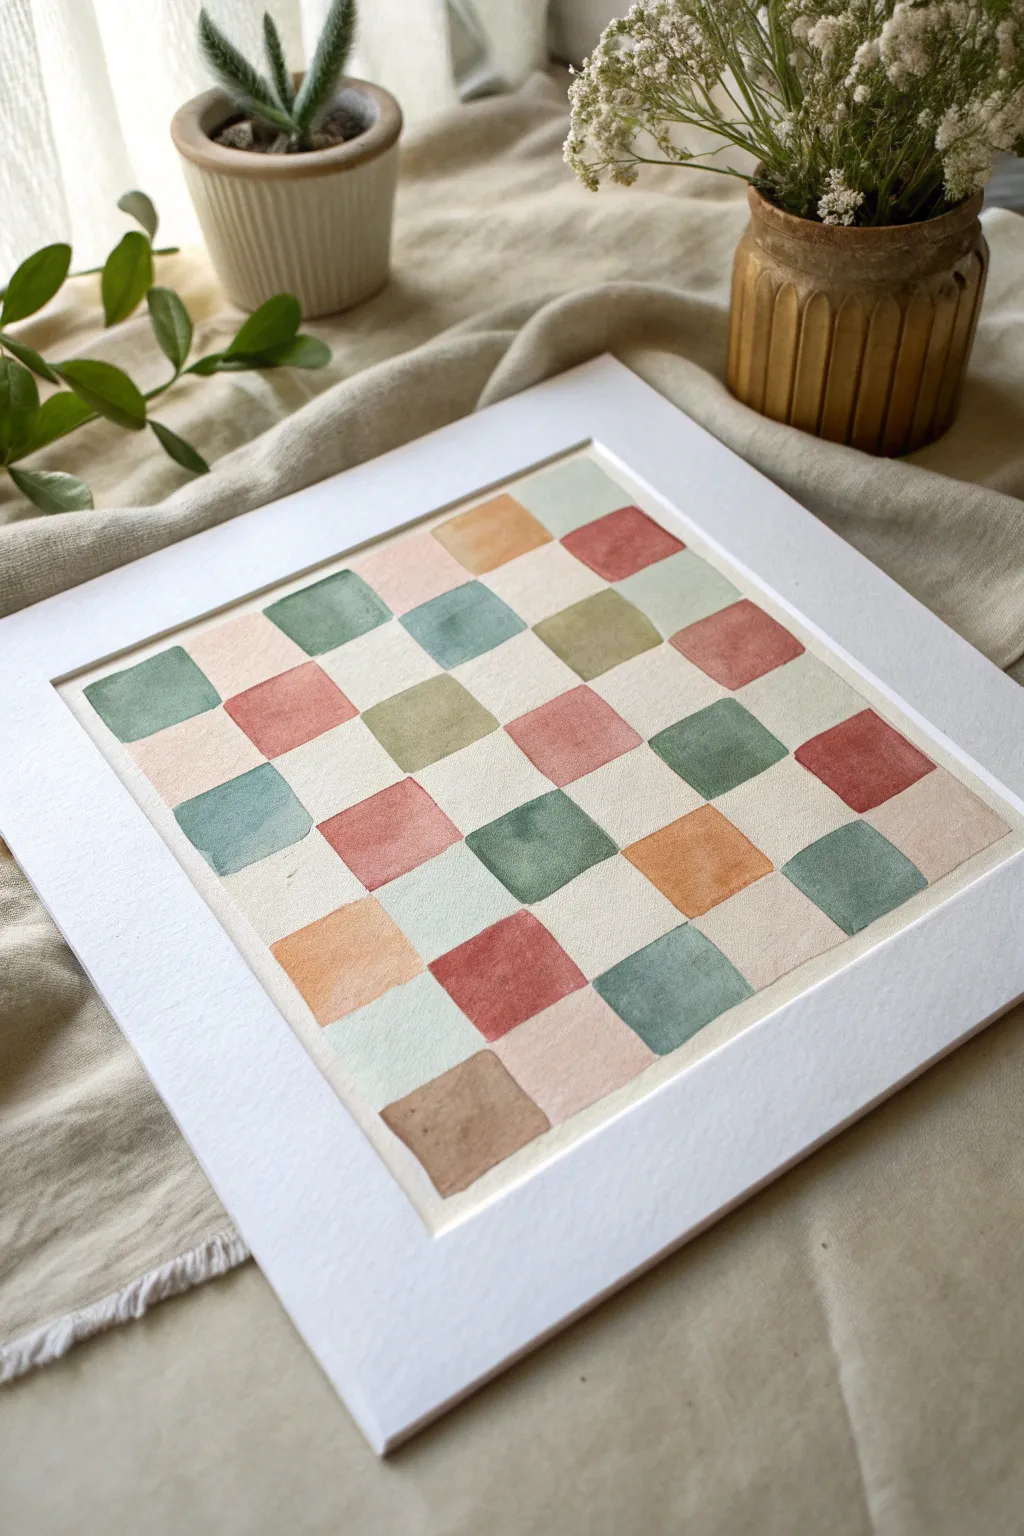
This project transforms the classic checkerboard motif into a soft, organic piece of art using muted watercolor glazes. The result is a calming grid of sage greens, terracottas, and sandy browns that feels hand-touched and beautifully imperfect.
Detailed Instructions
Materials
- Cold-press watercolor paper (300 gsm)
- Watercolor paints (sage green, burnt sienna, yellow ochre, dusty rose, burnt umber)
- Flat shader brush (size 6 or 8)
- Ruler
- Pencil (HB or H)
- Kneaded eraser
- Two jars of water
- Paper towels
- Masking tape or artist tape
- Picture frame with mat
Step 1: Grid Preparation
-
Tape the edges:
Begin by securing your watercolor paper to a board or table with masking tape. This prevents the paper from buckling when wet and creates a clean border. -
Define the painting area:
Measure the opening of your frame’s mat. Lightly mark this square area on your paper so you know exactly where your composition needs to sit. -
Mark the intervals:
Decide on the size of your squares (around 1-1.5 inches works well). Use a ruler to make small tick marks along the top and bottom edges of your defined area. -
Connect the lines:
Very lightly draw your vertical lines connecting the tick marks. Repeat the process horizontally to create a perfect grid. Keep your pencil pressure extremely light so the graphite doesn’t show through the transparent paint later. -
Identify the pattern:
To avoid painting the wrong squares, place a tiny dot with your pencil inside every other square where you intend to add color. This visual guide is a lifesaver once you start painting.
Step 2: Mixing the Palette
-
Prepare the green tones:
Mix a sage green by combining sap green with a touch of burnt umber and a lot of water. For variety, create a second, slightly bluer version by adding a pinhead amount of prussian blue or slate. -
Create the warm earth tones:
Dilute burnt sienna heavily for a terracotta look. Mix yellow ochre with a hint of brown for a sandy tone. Finally, water down a red or alizarin crimson with a touch of brown for a dusty rose color. -
Test your transparency:
Swipe each color on a scrap piece of paper. The goal is a wash, not opaque coverage, so add more water if the colors look too heavy or dark.
Uneven Drying?
If you get ‘cauliflower’ blooms in the paint, your brush might be too wet when you go back to fix a spot. Let the square dry completely, then glaze over it, rather than reworking wet paint.
Step 3: Painting the Grid
-
Start with the first color:
Choose your sage green mixture first. Paint several semi-random squares across the board, using your flat brush to define the edges. I like to vary the placement so no two identical colors touch diagonally. -
Focus on the edges:
Use the flat edge of your brush to carefully pull paint up to the pencil line, but don’t worry if it’s slightly wobbly; that hand-painted charm is essential to the look. -
Incorporate the warm tones:
Switch to your terracotta wash. Fill in scatterings of squares, allowing the water to pool slightly in corners for that characteristic watercolor texture. -
Add the sandy neutrals:
Paint the next set of squares with your ochre and sandy brown mixtures, balancing the warmer tones against the cooler greens. -
Fill the remaining spots:
Use the dusty rose or lighter green washes to fill in any remaining dotted squares. Step back occasionally to ensure the color distribution feels balanced. -
Let it dry completely:
Allow the painting to dry undisturbed for at least 30 minutes. The paper needs to be bone dry before you touch it again.
Create Texture
Sprinkle a tiny pinch of table salt onto a few wet squares before they dry. The salt absorbs pigment and leaves behind a beautiful, starry texture that adds organic depth.
Step 4: Finishing Touches
-
Erase the grid lines:
Once you are absolutely certain the paint is dry, gently roll a kneaded eraser over the pencil lines in the unpainted squares to clean up the white space. -
Check the perimeter:
If your paint went slightly outside the main grid border, you can cover it with your mat later, or gently lift the pigment with a damp clean brush. -
Remove the tape:
Peel the masking tape away slowly at a 45-degree angle to reveal your clean paper edges. -
Mount and frame:
Center your artwork behind the mat board, secure it with tape on the back, and place it into the frame to complete the polished look.
Hang your soft, geometric masterpiece in a spot that needs a touch of calm color
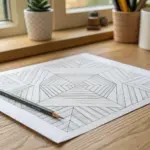
3D Trompe-l’Oeil Checkerboard Cubes
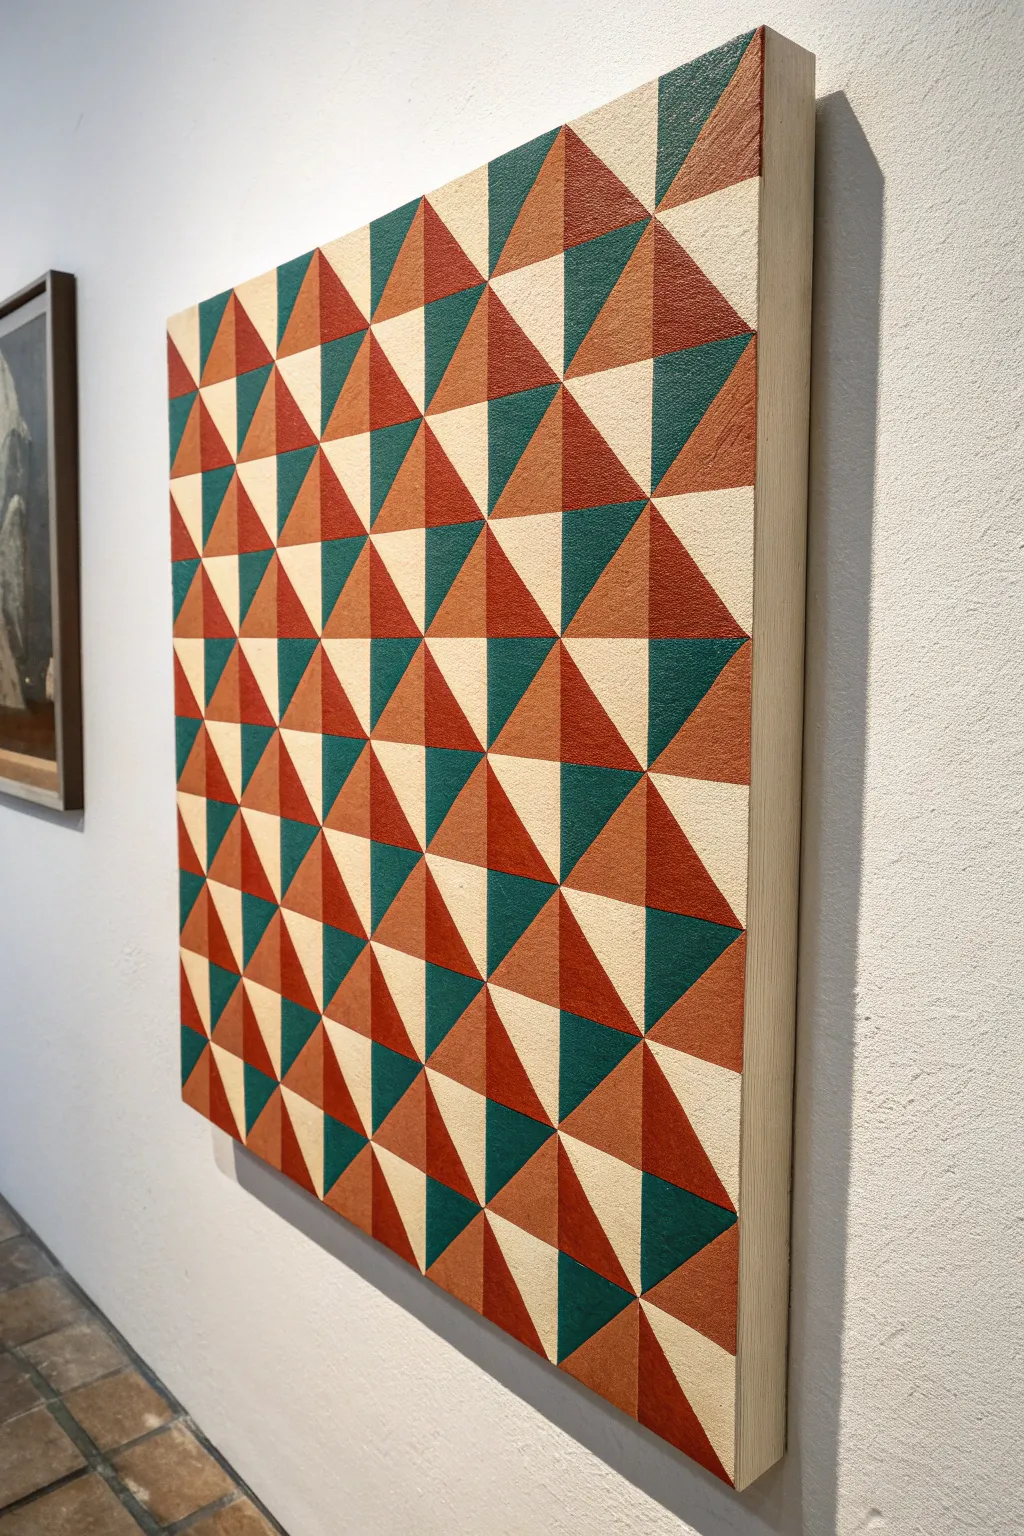
This captivating geometric painting uses simple triangles to create a stunning optical illusion of three-dimensional cubes stacking across the canvas. With its warm earthy tones mixed with cool teal, it adds a sophisticated, modern touch to any wall.
Step-by-Step
Materials
- Deep-edge wooden gallery panel or stretched canvas (square format, e.g., 24×24 inches)
- Acrylic paints: Cream/Off-white, Terracotta/Rust, Deep Teal/Emerald, Tan/Ochre
- Pencil and eraser
- Long ruler or T-square
- Painter’s tape (low tack, 1/4 inch or smaller width helps)
- Flat synthetic brushes (various sizes)
- Medium grit sandpaper (optional)
- Gesso (if panel is unprimed)
- Matte varnish
Step 1: Preparation & Grid Layout
-
Prepare the surface:
If you are using a wooden panel, lightly sand the surface to ensure it is smooth. Apply a coat of gesso if it’s raw wood, and let it dry completely. -
Base coat the canvas:
Paint the entire surface with your lightest color—the cream or off-white shade. This will serve as one of the triangle colors later and ensures no raw canvas shows through. -
Measure the grid:
Determine how many cubes you want across the width. For this intricate look, aim for a grid of 8×8 squares. Measure and mark faint ticks along all four edges of your canvas. -
Draw vertical and horizontal lines:
Connect your tick marks using a long ruler and a pencil. Draw very lightly; you just need a guide, and heavy graphite can be hard to cover with light paint. -
Add diagonal bisectors:
This is the crucial step for the pattern. In every square of your grid, draw a diagonal line from the top-left corner to the bottom-right corner. All diagonals must face the same direction. -
Create the second diagonal set:
Now, draw diagonals from top-right to bottom-left in every square. You should now have a grid where every square contains an ‘X’, creating four triangles per square.
Crisp Line Secret
Use a clear matte medium to seal your tape edges instead of base paint. It dries invisible, ensuring zero color bleed for razor-sharp geometric points.
Step 2: Painting the Pattern
-
Plan your color map:
Before painting, mark the triangles lightly with a letter code (e.g., T for Teal, R for Rust). The pattern relies on consistency: the top triangle in each ‘X’ is always the same color, the bottom is another, and so on. -
Tape the first color set:
To get crisp lines, tape off the boundaries for your first color group (let’s start with the dark teal triangles). Masking off non-adjacent triangles allows you to paint multiple sections without wet edges touching. -
Seal the tape edges:
I find it helpful to brush a tiny amount of the base color (cream) over the tape edge first. This seals the tape and prevents the dark teal from bleeding underneath. -
Paint the Teal sections:
Fill in the masked teal triangles. Use a flat brush to get smooth coverage. Apply two thin coats rather than one thick one for the best finish. -
Remove tape and dry:
Peel the tape off while the paint is still slightly tacky to avoid pulling up dried skin. Let these sections dry completely before moving to the next color. -
Mask and paint the Rust/Terracotta:
Repeat the taping process for the rust-colored triangles. These usually sit adjacent to the teal ones. Ensure your tape doesn’t stick to fresh paint—wait until it’s fully cured or stick the tape to your clothes first to reduce tackiness. -
Paint the Tan/Ochre sections:
Mask and paint the third set of triangles with your tan shade. This color often acts as the ‘shadow’ side of the cube illusion. -
Touch up the Cream sections:
Since your base coat was cream, the final set of triangles is technically done. However, use a small brush to touch up any edges where other colors might have strayed, or apply a fresh top coat to these specific triangles for texture consistency.
Level Up: Texture
Mix a fine sand texture gel or modeling paste into your acrylics before painting. This adds a tactile, architectural quality to the ‘blocks’.
Step 3: Finishing Touches
-
Refine the edges:
Check the sides of your deep canvas. You can wrap the pattern around the edges for a gallery feel, or paint the sides a solid neutral color like the cream or raw wood tone. -
Erase guidelines:
Once the paint is rock hard (give it 24 hours), gently erase any visible pencil lines that weren’t covered by paint. -
Apply varnish:
Finish with a coat of matte varnish. This unifies the sheen of the different paint colors and protects that crisp geometric work from dust.
Hang your finished piece in a well-lit area to let the geometric shadows play with the room’s depth

Have a question or want to share your own experience? I'd love to hear from you in the comments below!