
If you’ve ever wanted paint to look like it has its own little topography, palette knife painting is where the fun begins. I’m sharing my favorite palette knife painting ideas that lean into texture, layering, and those deliciously bold, scrape-and-swipe marks.
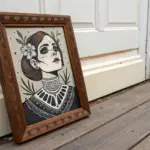
Autumn Tree Line With Stamped Foliage
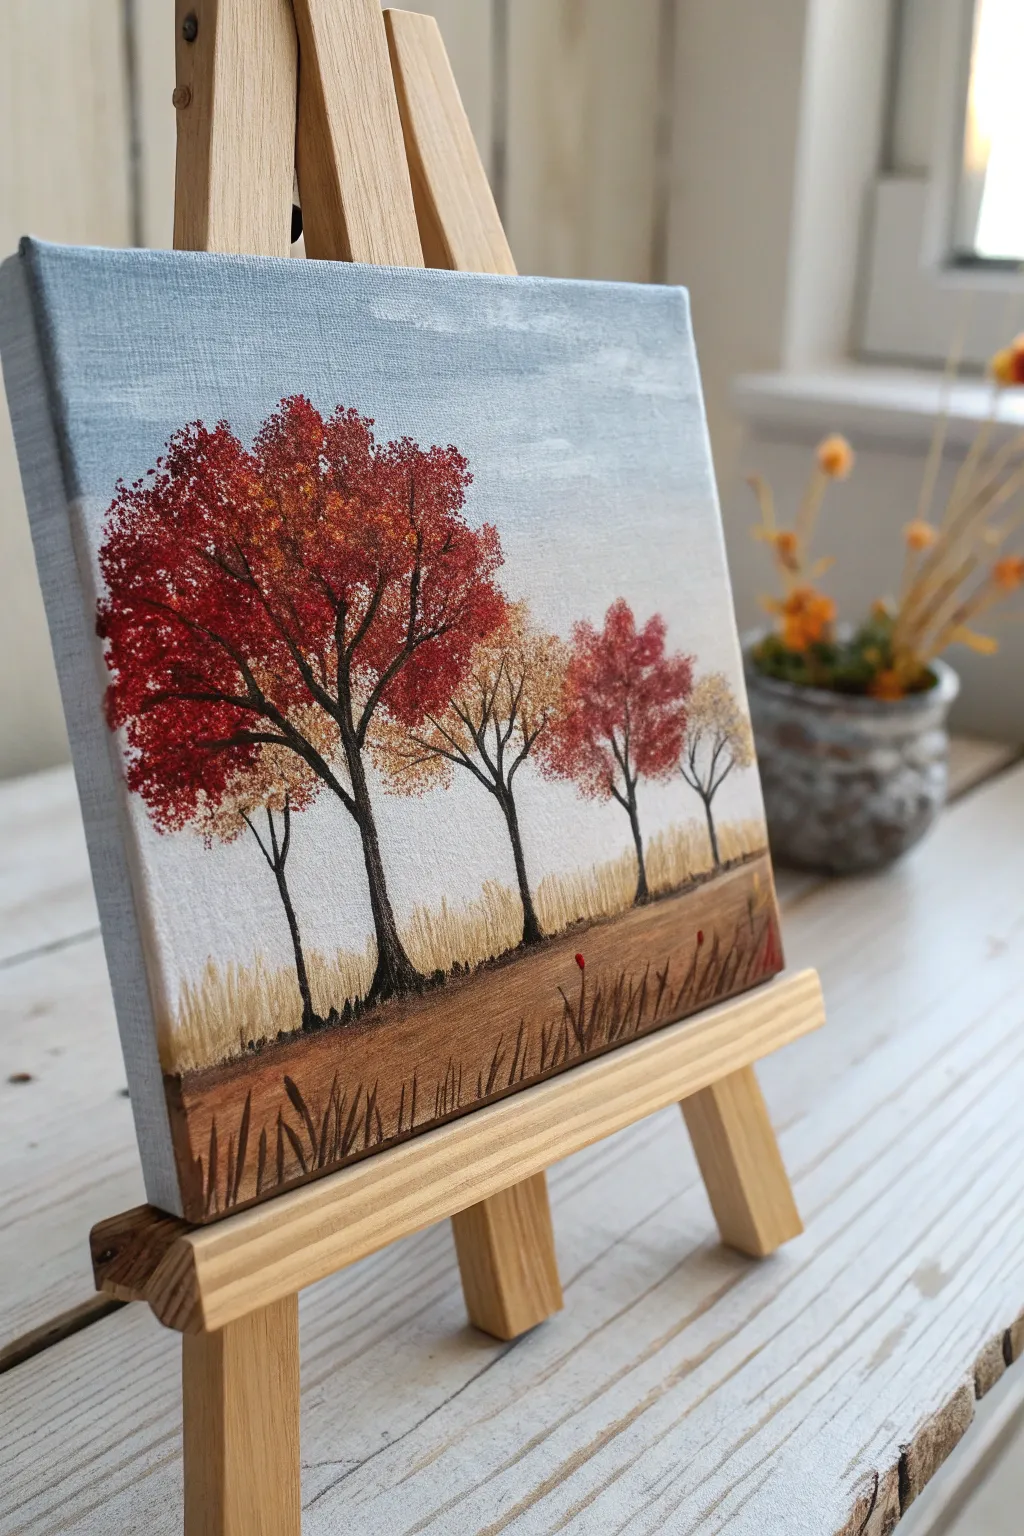
Capture the fiery hues of fall with this charming textured landscape, where dotting techniques bring the canopy to life. This project combines simple brushwork for the background with a clever stippling method to create dense, vibrant foliage.
Detailed Instructions
Materials
- Small square canvas (e.g., 6×6 or 8×8 inches)
- Acrylic paints: Titanium White, Sky Blue, Raw Umber, Burnt Sienna, Cadmium Red, Yellow Ochre, Deep Orange
- Flat shader brush (medium size)
- Detail liner brush (very fine, size 0 or 00)
- Stiff bristle fan brush, round stencil brush, or a small piece of natural sea sponge
- Palette
- Water cup and paper towels
- Miniature wooden easel (optional, for display)
Step 1: Setting the Scene
-
Prepare the Sky:
Begin by mixing Titanium White with a tiny touch of Sky Blue to create a very pale, muted blue. Paint the upper two-thirds of the canvas with horizontal strokes. Keep the color slightly uneven to suggest distant cloud cover or atmospheric depth. -
Establish the Horizon:
While the sky is still wet, fade the blue into pure white as you move downward toward the horizon line, which should sit at the lower third of the canvas. This creates a hazy, distant look. -
Paint the Lower Bleed:
Paint the canvas edges. Ensure your sky color wraps around the sides of the canvas for a finished, gallery-ready appearance. -
Base the Ground:
Mix Raw Umber with a little Yellow Ochre. Paint the bottom third of the canvas with horizontal strokes to establish the field. Don’t worry about grass texture yet; just get the base color down. -
Add Depth to the Ground:
Blend a darker mix of Burnt Sienna and Raw Umber right at the very bottom edge of the canvas, smoothing it upward to create a shadow foreground.
Step 2: Creating the Trees
-
Drafting the Trunks:
Using your fine liner brush and thinned Raw Umber (almost inky consistency), sketch the skeletal structures of five trees varied in height. I find it helpful to start with the largest tree on the left to anchor the composition. -
Adding Branches:
Extend thin, jagged branches outward from the main trunks. Keep these lines delicate; remember that the foliage will cover many of them, so you only need the suggestion of structure. -
Deepening the Bark:
Go back over the shadow side of the trunks (the right side) with a mix of Raw Umber and a tiny dot of black to give them cylindrical volume. -
Stippling the Gold Foliage:
Load your stiff bristle brush or sponge with Yellow Ochre and a touch of White. Use a vertical dabbing or stippling motion to stamp clusters of leaves on the smaller trees and underneath the red canopy of the main tree. -
Adding Orange Tones:
Without cleaning your brush fully, pick up Deep Orange. Stipple this over the yellow areas and onto the outer edges of the larger trees, blending the colors optically on the canvas. -
The Crimson Canopy:
Load a clean stippling brush heavily with Cadmium Red and a touch of Burnt Sienna. Stamp dense foliage onto the main tree on the left, building up a rounded, full shape. -
Highlighting Leaves:
Mix a bright orange-red and lightly dab it on the top left portions of the tree crowns where the sunlight would naturally hit. This pop of color creates instant dimension.
Pro Tip: Texture Trick
If you don’t have a stiff stencil brush, scrunch up a small piece of aluminum foil into a ball. Dip it in paint and stamp it for an amazing, unpredictable leaf texture.
Step 3: Foreground Details
-
Vertical Grass Strokes:
Switch back to your small flat shader brush. Using a mix of White and Yellow Ochre, use the very tip of the brush to flick quick, short vertical strokes upwards from the horizon line to simulate tall, dry grasses in the distance. -
Layering the Field:
Add a few touches of the red and orange foliage falling into the grass below the trees using the stippling technique, suggesting fallen leaves. -
Detailing the Foreground:
Use the liner brush with dark brown paint to flick distinct, taller blades of grass in the immediate foreground at the bottom edge. Vary the angles so they look natural and wind-blown. -
Final Touches:
Check your tree trunks. If the foliage covered too much of the trunk, carefully re-paint visible sections of the bark right over the dry leaves to bring the structure forward again.
Level Up: Metallic Glaze
Once the painting is completely dry, lightly glaze the yellow and orange sections with a transparent metallic gold paint. It will make the autumn leaves shimmer in the light.
Place your finished canvas on a mini easel to bring a cozy seasonal touch to any shelf or desk


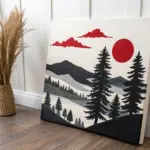
Simple Abstract Horizon Bands
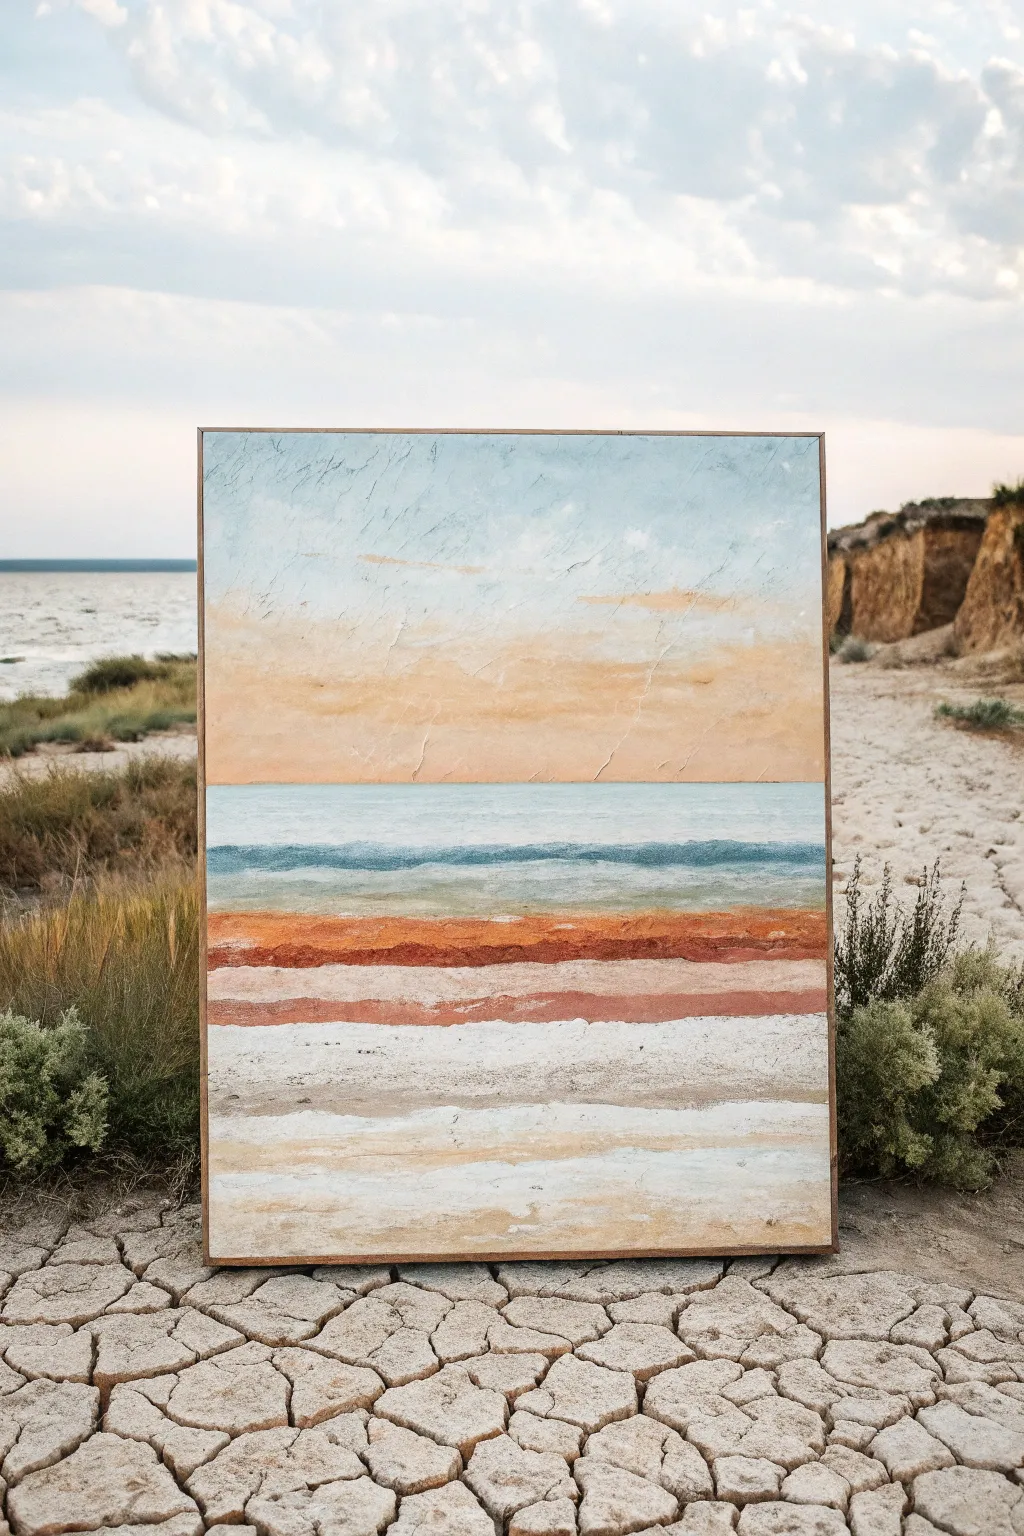
Capture the calm of a coastal landscape using simple horizontal bands and rich texture. This palette knife project focuses on layering soothing blues, warm rusts, and creamy whites to create a serene, abstracted horizon line.
Step-by-Step Tutorial
Materials
- Large stretched canvas (e.g., 24×36 inches)
- Acrylic paints: Sky Blue, Titanium White, Raw Sienna, Burnt Sienna, Burnt Umber, Teal or Turquoise
- Heavy body acrylic medium or modeling paste
- Large palette knife (trowel shape)
- Medium palette knife (diamond shape)
- Rags or paper towels
- Spray bottle with water
- Wooden floating frame (optional)
Step 1: Preparing the Foundation
-
Texture base:
Before adding any color, apply a generous layer of modeling paste or heavy body white paint to the entire canvas. Use your large palette knife to spread it unevenly, creating subtle ridges and peaks that will catch the paint later. -
Establish the horizon:
While the texture is still slightly tacky, lightly score a horizontal line across the middle of the canvas with the edge of your knife to mark your horizon. This doesn’t need to be perfectly straight; a natural wave adds character. -
Mix the sky gradient:
On your palette, mix a large amount of Titanium White with a touch of Sky Blue. In a separate pile, mix Titanium White with a small dot of Raw Sienna for a warm, creamy cloud color.
Step 2: Painting the Sky
-
Upper sky application:
Load the large knife with the pale blue mixture. Start at the very top edge of the canvas and pull the paint downward in broad, horizontal strokes, letting the texture underneath break up the coverage. -
Adding warmth:
Switch to your creamy Raw Sienna mix. Apply this in the middle section of the sky, blending it slightly into the wet blue above to create a soft, hazy transition. -
The sunset band:
Just above the horizon line, add a band of slightly darker Raw Sienna or a peach tone. Use the flat side of the knife to ‘butter’ this color on thick, creating a warm glow where the sun would meet the water. -
Softening the sky:
Wipe your knife clean. Gently skim the tool over the entire sky section horizontally to blur harsh lines and unify the colors, but be careful not to over-blend and lose the distinct bands.
Clean Knife, Clean Color
Wipe your palette knife clean between every single color change. Muddy colors happen when residue mixes on the blade. A clean tool ensures your horizontal bands stay distinct and vibrant.
Step 3: Creating the Ocean Band
-
Ocean base color:
Mix a cool ocean tone using Teal, Sky Blue, and White. Apply this directly below your horizon line, pressing firmly to get the paint into the canvas weave. -
Deep water accents:
Mix a darker version of the teal using a tiny bit of Burnt Umber. With the edge of a smaller knife, cut in thin horizontal lines within the blue band to suggest distant waves. -
Frothy texture:
Load a small amount of pure White on the tip of the knife. Lightly drag it over the blue section to create the look of sea foam or light hitting the water’s surface.
Paint Slipping?
If the paint slides around too much and won’t layer, let the bottom layer dry for 15-20 minutes. It needs to be ‘tacky’ rather than wet to accept a new layer of heavy texture on top.
Step 4: The Earthy Foreground
-
Rust-colored strata:
For the striking red-earth band, mix Burnt Sienna with a touch of Burnt Umber. Apply this boldly below the blue water line. I find that applying this layer thicker than the rest creates a wonderful dimensional focal point. -
Layering lighter earth tones:
Below the rust band, create a sandy mix using White and Raw Sienna. Apply this in a wide stripe, allowing the edges to overlap slightly with the rust color above. -
Adding the white sands:
For the bottom third of the canvas, use mostly Titanium White with tiny streaks of beige or grey. Apply this using long, continuous horizontal swipes from left to right. -
Creating separation:
Use the edge of a clean knife to scrape through the wet white paint in horizontal lines, revealing some of the underlayer or creating distinct ridges that look like layers of sediment. -
Final texture check:
Step back and look at the composition. If any area looks too flat, pick up a bit of thick paint on your knife and ‘stamp’ texture onto the surface by pressing the flat side against the canvas and pulling straight off. -
Drying and framing:
Let the painting dry completely—thick palette knife applications can take 24-48 hours. Once cured, install it in a simple wooden floating frame to complement the natural aesthetic.
Hang your new abstract landscape in a bright room and enjoy the tranquil vibe you’ve created

Crashing Waves With Foamy Knife Scrapes
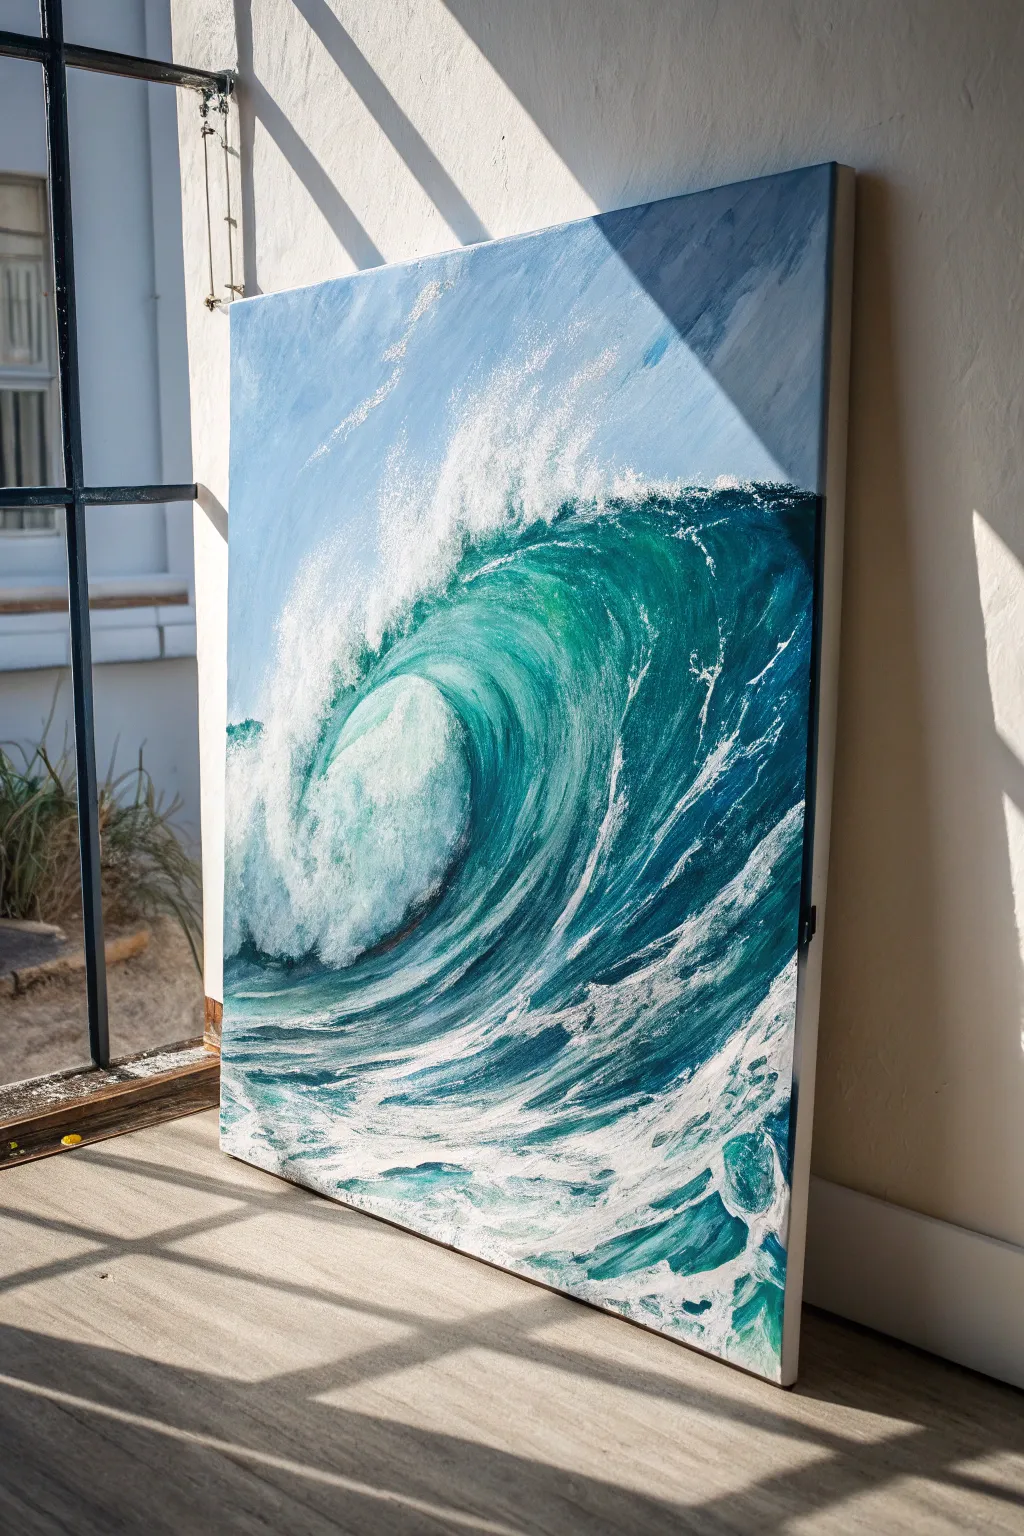
Capture the raw power of the ocean with this dynamic large-scale canvas project. Using heavy body acrylics and a palette knife allows you to sculpt the water’s movement, creating a deeply textured piece filled with translucent teals and churning white sea spray.
Step-by-Step Guide
Materials
- Large stretched canvas (24×36 or larger recommended)
- Heavy body acrylic paints (Phthalo Blue, Phthalo Green, Titanium White, Ultramarine Blue, Turquoise)
- Flow improver or glazing medium
- Texture paste or modeling paste (optional for extra grit)
- Assorted palette knives (large trowel shape, medium diamond, thin detail knife)
- Large flat brush (2-inch)
- Painter’s tape (optional to protect edges)
- Water container and rags
- easel or sturdy drop cloth for floor working
Step 1: Setting the Scene
-
Prime and Prepare:
Begin by ensuring your large canvas is clean. If you want a smoother flow for the first layer, apply a thin coat of gesso, though raw canvas can also grab the heavy paint nicely. -
Map the Wave:
Mix a very diluted wash of Ultramarine Blue. Using your large flat brush, sketch the basic composition: a large C-curve dominating the center for the barrel, the horizon line high up (about the top third), and the choppy foreground. -
Block in the Sky:
Mix Titanium White with a tiny touch of Phthalo Blue. Use the large brush to paint the sky area in the upper left corner. Keep this layer relatively flat and smooth so it doesn’t compete with the textured water later. -
Establish the Deep Water:
Mix Phthalo Blue and a touch of Phthalo Green to create a deep teal. Apply this to the dark ‘eye’ of the wave (under the crest) and the shadowed area on the right side of the canvas.
Step 2: Building the Wave’s Body
-
Create the Gradient:
While the dark paint is still wet, mix a lighter Turquoise using your Phthalo Green, Blue, and White. Blend this outwards from the dark eye towards the left, following the curve of the water. -
Simulate Translucency:
Where the sunlight hits the thinnest part of the wave (the top curve), use a very bright, almost neon lime-teal mix. Blend this smoothly into the darker body of the water to create that glowing ‘stained glass’ effect. -
Texture the Surf:
Switch to your medium diamond-shaped palette knife. Mix varied shades of blue and white (do not over-blend; let them stay marbled on the knife). Apply vertical scrapes along the foreground to represent the choppy water before the wave breaks. -
The Back of the Wave:
Use a darker blue mix on the far right edge of the wave to show the heavy volume of water pulling back. Use directional strokes that curve upward and backward to mimic the water’s flow.
Muddy Foam?
If your white foam is turning blue, the underlayer is too wet. Stop! Let the blue wave body dry completely before applying the white palette knife scrapes on top.
Step 3: The Foamy Scrapes
-
Prepare Heavy White:
Squeeze out a generous amount of Titanium White. I like to mix in a little modeling paste at this stage if I want the foam to physically stand off the canvas, but heavy body paint alone works well too. -
Crash the Crest:
Load the edge of a large trowel palette knife with thick white paint. Press the knife flat against the top of the wave where it breaks, dragging it downward rapidly to create the ‘falling’ curtain of spray. -
Create the Explosion:
At the bottom of the wave where the water hits the flat surface, pile on thick white paint. Use swift, upward flicking motions with the knife to simulate the splash and chaotic mist. -
Detailing the Barrel:
This is the signature move: Take a clean knife with a small amount of white. Lightly skim the surface of the green translucent area (the barrel). Don’t press hard; let the knife skip over the canvas weave to create delicate, lacy foam patterns. -
Adding Sea Spray:
Load a stiff bristle brush or an old toothbrush with thinned white paint. Use your thumb to flick fine contrasting speckles over the top of the crest and the darkest shadow areas to look like airborne mist. -
Refining the Foreground:
Return to the bottom foreground water. Use horizontal knife scrapes with pure white to create the patterns of sea foam floating on the surface of the water, following the perspective lines toward the wave.
Knife Angle Secrets
Hold the knife at a 45-degree angle for smooth blends, but flatten it almost parallel to the canvas to gently ‘skid’ the paint across the surface for that broken texture look.
Step 4: Final Touches
-
Highlights and Shadows:
Check your white foam. If it looks too flat, mix a tiny bit of grey-blue and add shadows underneath the thickest foam clusters to give them volume. -
Enhancing the Glow:
Once the main layers are dry, you can glaze a thin layer of transparent yellow or green over the sunlit curve purely to boost the saturation. -
Clean Edges:
Paint the sides of your deep canvas either a solid black or continue the image around the edges for a gallery-quality finish.
Step back and admire the refreshing energy your new seascape brings to the room.


City Skyline With Crisp Knife Geometry
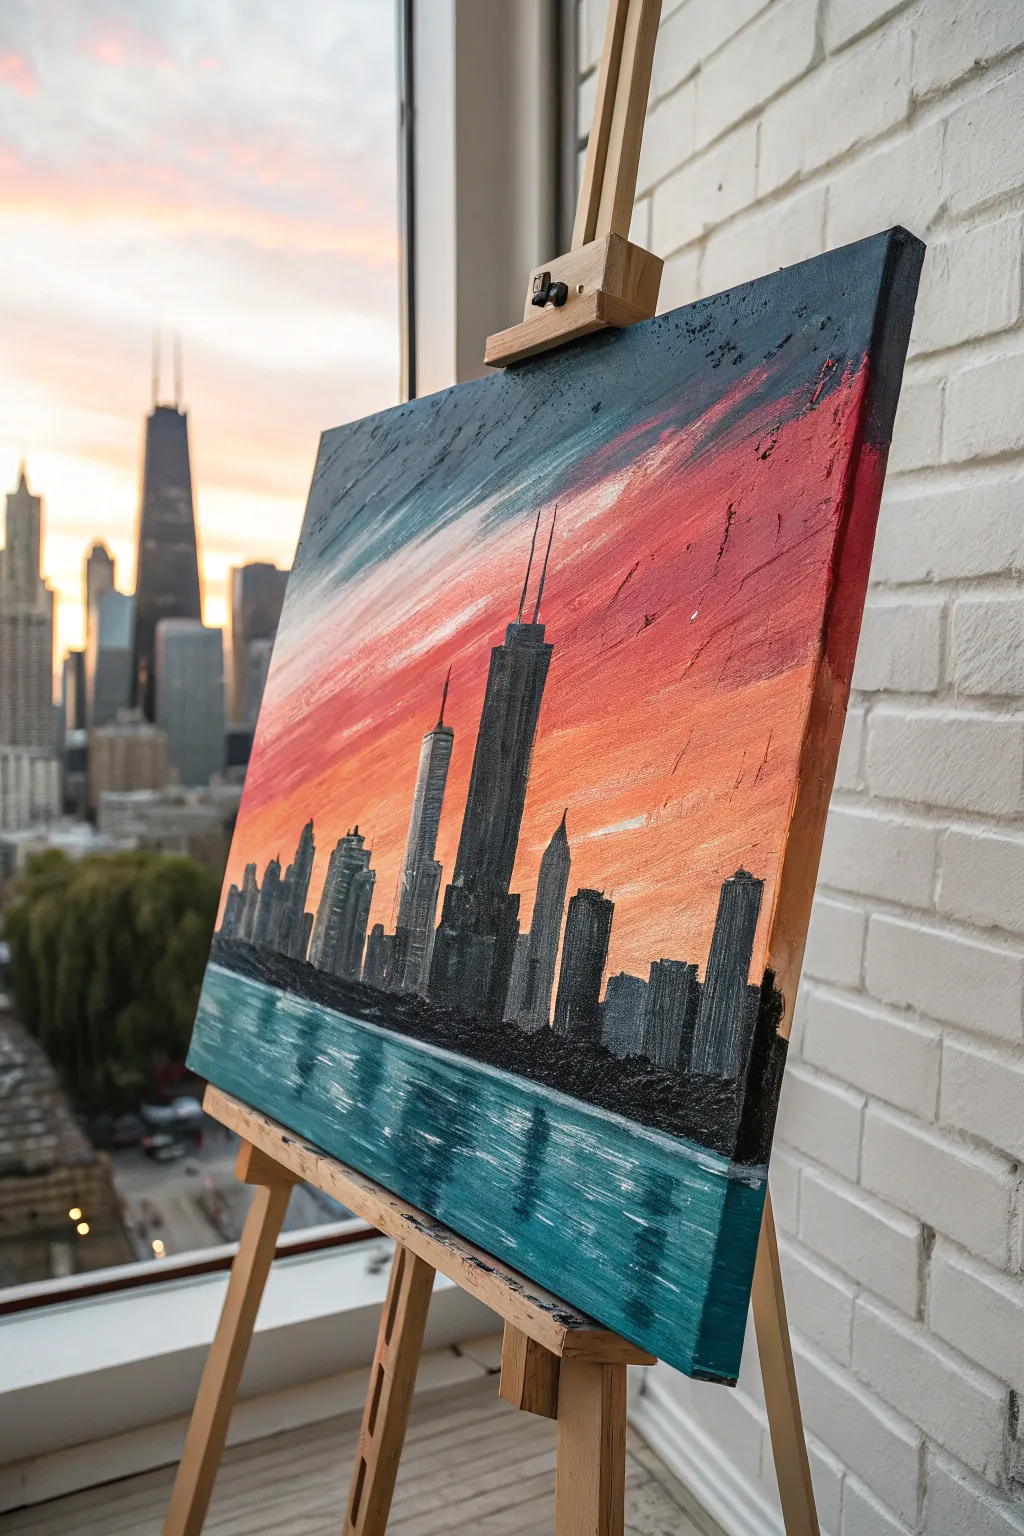
Capture the geometric beauty of the Chicago skyline against a blazing sunset using the distinct texture of palette knives. This project emphasizes bold, sweeping strokes for the sky and water contrasted with crisp, vertical architectural forms.
Step-by-Step Tutorial
Materials
- Stretched canvas (16×20 inches or similar vertical orientation)
- Heavy body acrylic paints (Phthalo Blue, Titanium White, Cadmium Red, Cadmium Orange, Mars Black, Neutral Grey)
- Set of palette knives (including a large trowel shape and a thin, elongated blade)
- Palette paper or mixing surface
- Paper towels for cleaning knives
- Ruler or straight edge (optional)
Step 1: Setting the Scene
-
Establish the horizon:
Visualize your canvas divided into thirds. Place your horizon line just below the bottom third mark. You can lightly sketch this with a pencil or just keep it in mind as you work. -
Mix the sky gradient:
Prepare three piles of paint for the sky: a deep teal (Phthalo Blue mixed with a touch of black), a vibrant reddish-pink (Cadmium Red and White), and a soft orange-peach. Don’t overmix; let slight streaks of pure color remain. -
Apply the upper sky:
Using a large trowel palette knife, load the teal mixture. Starting from the top left corner, sweep the paint diagonally downward towards the center. Apply heavy pressure to scrape the paint thin in some areas while leaving thick ridges in others. -
Blend the sunset transition:
Wipe your knife clean and load the reddish-pink mixture. Apply this band below the teal, mirroring the diagonal angle. Where the colors meet, gently scrape the knife back and forth to create a textured, merging seam rather than a smooth blend. -
Complete the sunset:
Fill the area just above your horizon line with the orange-peach tone. Use horizontal strokes here to suggest the flatness of the atmosphere near the horizon, blending slightly upward into the pink. -
Create the water base:
Mix a large amount of the deep teal color with a little more Phthalo Blue. Using horizontal, choppy strokes with the flat side of the knife, cover the bottom third of the canvas to represent Lake Michigan.
Muddy colors?
If your sky colors are mixing into a brown mess, stop and let the bottom layer dry completely. Acrylics dry fast, so a 15-minute break is usually all you need before adding the next layer.
Step 2: Constructing the City
-
Outline the silhouettes:
Allow the background to tack up (dry slightly) for about 10-15 minutes. This prevents the building colors from turning muddy when applied over the sky. -
Mix building greys:
Create a gradient of architectural tones: pure Mars Black, a dark charcoal grey, and a mid-tone slate grey. Texture is key here, so keep the paint thick. -
Place the main tower:
Locate the focal point—the John Hancock Center with its tapered shape and twin antennas. Using the thin edge of a smaller palette knife, load black paint and press it vertically into the canvas. I find it easiest to stamp the edge rather than drag it to get straight lines. -
Add secondary skyscrapers:
To the left of the main tower, add the shorter, blockier buildings using the charcoal grey. Vary the heights to create a realistic rhythm to the skyline. -
Fill the mid-ground buildings:
Continue adding structures to the right side, using the lighter slate grey for buildings that appear further back or are reflecting more light. Use the flat face of the knife to pull paint downward, creating solid blocks.
Level Up: Metallic Pop
Mix a small amount of metallic copper or gold paint into your orange sunset layer. It will catch the light and make the painting glow realistically when viewed from different angles.
Step 3: Details and Reflections
-
Add the antennas:
For the distinct antennas on the main tower, use the very tip of your smallest knife or the edge of a credit card dipped in black paint. Press firmly and lift quickly to create thin, sharp lines reaching into the sky. -
Create water reflections:
Clean your knife thoroughly. Pick up a small amount of the teal and white mixture. Using the very edge of the knife, cut horizontal lines across the dark water area, directly below the tall buildings. -
Refine the shoreline:
Darken the shoreline where the buildings meet the water with pure black paint. Use a stippling motion (tapping the knife tip) to create the rough texture of trees or rocks at the water’s edge. -
Add highlights to buildings:
To give the buildings form, take a tiny bit of light grey or white on the edge of the knife. Lightly graze the right side of the main towers to suggest looking-glass windows catching the sunset light. -
Enhance sky texture:
If the sky looks too flat, add ‘floating’ clouds by scraping a bit of white or light pink swiftly across the dried upper layers. Keep the movement fast to create a dry-brush effect. -
Final Contrast Check:
Step back and check your values. Ensure the black of the buildings is deep enough to stand out against the bright sunset. If needed, add a second layer of thick black paint to the silhouettes for maximum opacity.
Enjoy the process of sculpting your city with paint and watching the architectural forms emerge from the canvas
BRUSH GUIDE
The Right Brush for Every Stroke
From clean lines to bold texture — master brush choice, stroke control, and essential techniques.
Explore the Full Guide
Cozy Cottage With Chunky Roof Texture
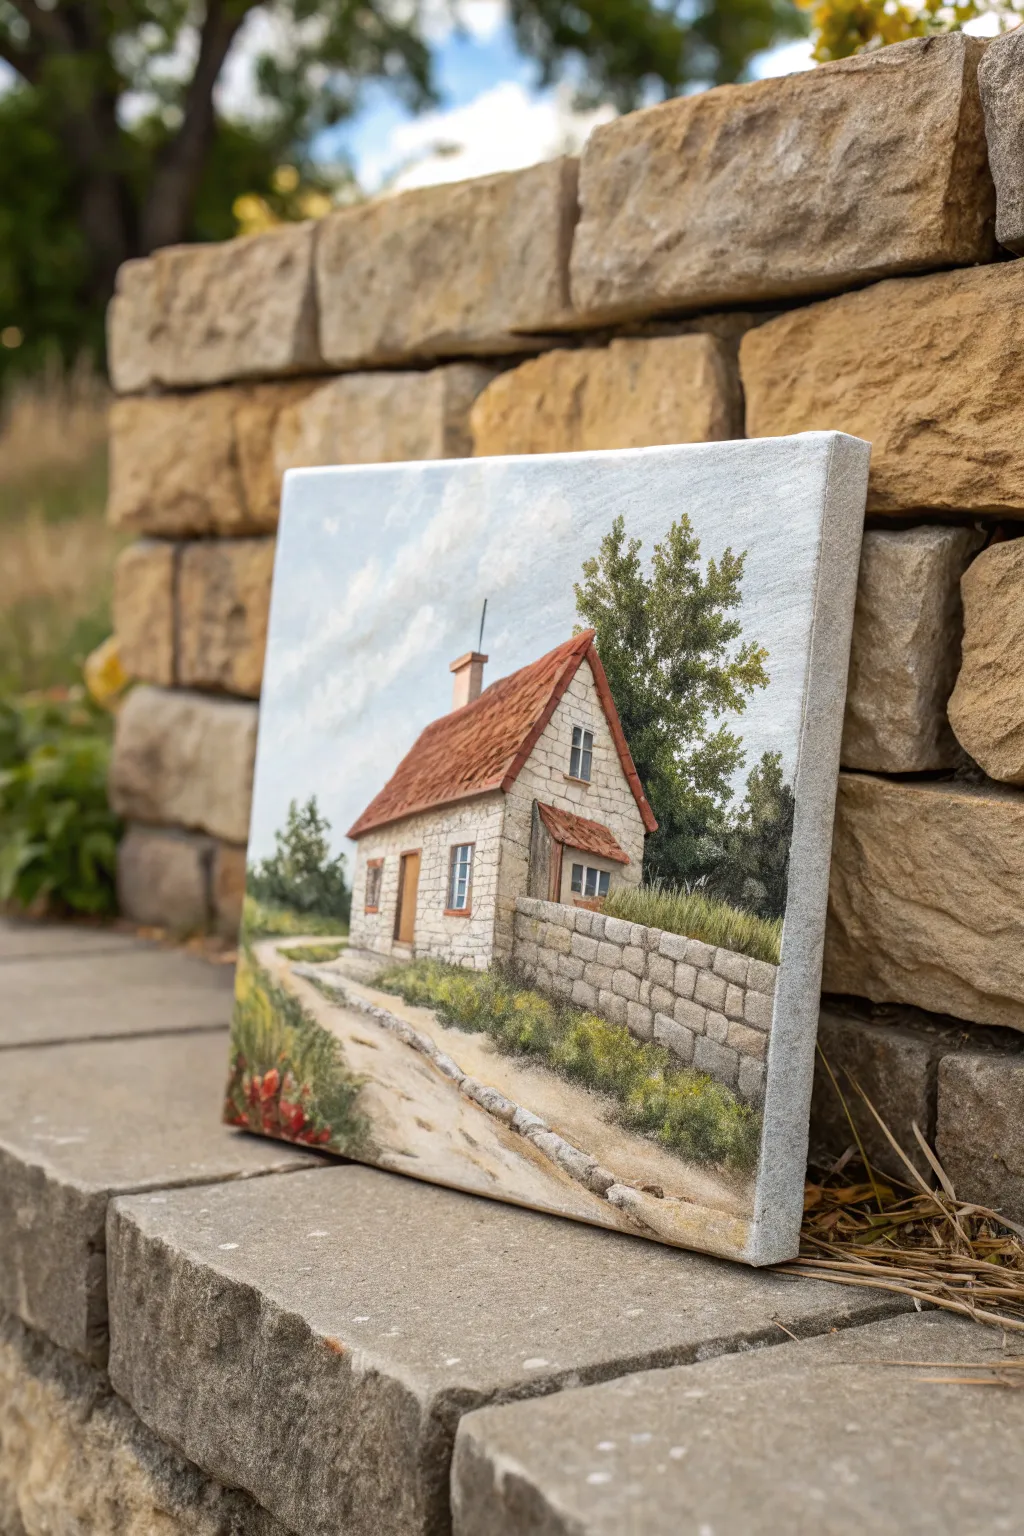
This charming project captures the rustic warmth of a stone cottage, using the unique capabilities of a palette knife to build literal and visual texture. You’ll layer thick paint to mimic rugged stonework and sun-baked roof tiles, creating a scene that feels like a peaceful countryside escape.
How-To Guide
Materials
- Stretched canvas (square or rectangular landscape format)
- Heavy body acrylic paints
- Palette knives (assorted shapes: diamond, trowel, and a small detailing knife)
- Small round bristle brush (for initial sketching)
- Palette for mixing
- Paper towels or rags
- Pencil
Step 1: Planning and Sky
-
Sketch the composition:
Begin by lightly sketching the main shapes with a pencil. Place the cottage slightly off-center for interest, mark the horizon line, and outline the stone wall extending into the foreground. -
Mix the sky colors:
Prepare a gradient of blues on your palette. Mix a bright cerulean blue with plenty of titanium white for the upper sky, and add a touch of warm grey or unbleached titanium for the horizon area. -
Apply the sky base:
Using a larger trowel-shaped knife, spread the sky mixture across the top half of the canvas. Don’t worry about perfect smoothness; slight ridges add to the atmosphere. -
Add cloud texture:
Pick up pure titanium white on the edge of your knife. Gently scrape and dab it over the wet blue paint to create fluffy, diagonal cloud formations that lead the eye toward the house.
Step 2: Building the Structures
-
Base coat the cottage:
Mix a warm, light beige using white, yellow ochre, and a tiny dot of brown. Apply a flat layer of this color where the cottage walls will be, smoothing it out with the flat side of your knife. -
Texture the roof:
Mix burnt sienna with a little cadmium red. Load a medium diamond-shaped knife with thick paint and apply it to the roof area using downward strokes. Layer the strokes slightly to mimic the overlap of clay tiles. -
Create the stone wall effect:
For the cottage walls, mix a slightly darker grey-beige. Use the very tip of a small knife to apply small, rectangular dabs of paint over your base coat, leaving thin gaps to suggest mortar. -
Build the garden wall:
Establish the foreground stone wall with a mix of grey, brown, and white. Use a ‘buttering’ motion to lay down thick blocks of paint, creating a chunky, three-dimensional texture that stands out from the flat canvas. -
Define the stones:
Once the wall paint is tacky but not dry, use the sharp edge of a clean knife to gently score lines into the paint, defining the individual stones of the garden wall.
Muddy colors?
If your knife strokes are turning into a brown mess, stop and wipe your knife completely clean between colors. Let the bottom layer dry to the touch before dragging a new color over it.
Step 3: Nature and Surroundings
-
Paint the background trees:
Mix sap green with a little black for a deep shadow color. Use the side of your knife to press irregular shapes behind the house. Layer lighter olive greens on top to suggest leaves catching the light. -
Lay the foreground path:
Mix a sandy color using white, ochre, and raw sienna. Spread this diagonally across the bottom of the canvas. I like to drag the knife horizontally here to simulate the texture of a dirt road. -
Add grassy verges:
Using a blend of yellow-green and olive, stipple paint along the base of the cottage and the stone wall. Use the tip of the knife to pull small strands upward, creating the look of tall grass. -
Add pathway details:
Along the edge regarding the path, dab small touches of grey and brown to suggest scattered pebbles or a rough curb.
Go 3D
Mix impasto medium or modeling paste into your acrylics for the stone wall and roof. This allows you to sculpt literal ridges that cast real shadows on the canvas.
Step 4: Details and refinements
-
Install windows and doors:
Using your smallest knife or the edge of a larger one, paint the windows with a dark blue-grey. Frame them with thin lines of white or light wood color. Add the door in a warm timber brown. -
Highlight the roof:
Mix a pale orange-pink highlight color. Lightly graze this over the raised ridges of your roof texture to make the tiles look sun-drenched. -
Deepen shadows:
Mix a transparent dark brown glaze or use heavy body paint sparingly to darken the area under the roof eaves and behind the bushes to add depth. -
Adding wildflowers:
Finally, load just the very tip of your knife with bright red or orange. Touch it gently to the grassy areas in the foreground to create tiny pops of wildflowers.
Step back and admire how the thick texture brings your rustic cottage to life
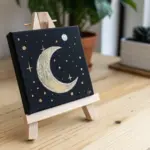
Swirled Night Sky With Thick Star Accents
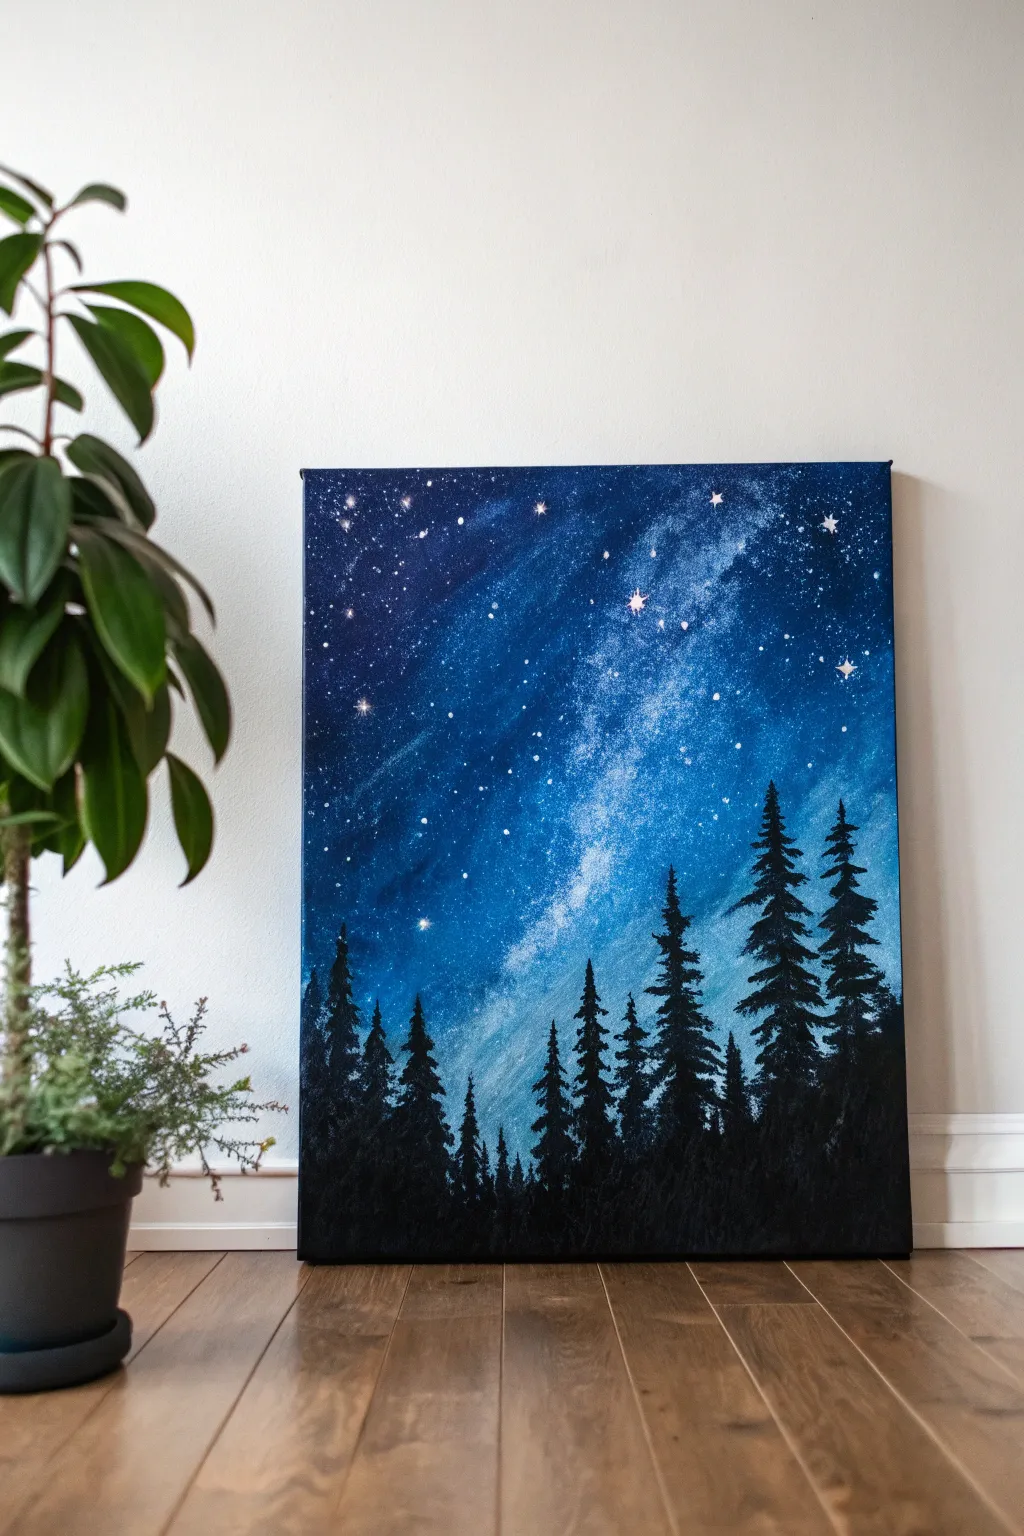
Bring the majesty of the Milky Way indoors with this striking palette knife landscape. You’ll create a deep, gradient sky full of texture and motion before grounding it with a silent, silhouetted pine forest.
Detailed Instructions
Materials
- Stretched canvas (16×20 or similar vertical format)
- Acrylic paints: Carbon Black, Phthalo Blue, Ultramarine Blue, Teal or Turquoise, Titanium White
- Large flat brush (2-inch) or large palette knife for background blending
- Small painting knife (diamond or trowel shape)
- Small round detail brush (size 0 or 1)
- Old toothbrush (optional for splatter)
- Paper towels
- Water cup
Step 1: Creating the Galaxy Base
-
Prime the darks:
Start by applying a mix of Ultramarine Blue and a touch of Black to the top corners and very bottom edge of your canvas. I like to use a large flat brush here to get the paint on quickly, scrubbing it into the weave. -
Establish the gradient:
While the dark paint is still wet, introduce Phthalo Blue below the dark corners, blending downwards towards the center. In the very middle diagonal strip (where the Milky Way will be), apply your Teal or Turquoise. -
Blend the transitions:
Using a clean, dry brush or a large palette knife, smooth out the transitions between the dark blues and the lighter teal center. The goal is a diagonal flow from top-left to bottom-right. -
Add milky swirls:
Mix a small amount of Titanium White with Teal. Using the flat side of your palette knife, gently drag this lighter color diagonally through the center teal section to create cloud-like nebula effects. -
Deepen the contrast:
Go back to the top left and right edges with pure Black mixed with a little blue. Apply this thickly with a knife to frame the bright center. -
Dry completely:
Let this background layer dry fully before moving on. This is crucial so your stars don’t turn muddy.
Too Muddy?
If your white stars turn blue, the background wasn’t dry enough. Wait for it to dry completely, then re-apply the white dots for a crisp, bright finish.
Step 2: Stars and Accents
-
Splatter texture:
Water down a small amount of Titanium White paint. Dip an old toothbrush into it and flick the bristles with your thumb to spray a fine mist of stars across the darker blue sections. -
Palette knife stars:
Load the very tip of your small painting knife with thick Titanium White straight from the tube. Gently touch the tip to the canvas to create larger, textured stars that stand off the surface. -
Add starbursts:
Identify 3-5 spots for major stars. Use a small detail brush to paint a tiny cross shape, dragging the paint outward from a center point to create a twinkling effect. -
Highlight the galaxy core:
Use your finger or a dry rag to lightly dab pure white into the very center of the teal nebula, softening the edges to make it glow.
Level Up
Mix a tiny amount of iridescent or glitter medium into your white paint for the stars. It catches the light beautifully when viewing the painting from different angles.
Step 3: The Silhouette Forest
-
Mix the forest color:
Create a large pile of pure Carbon Black. You want this paint slightly thick so it holds the texture of the trees. -
Paint the tree lines:
Using the edge of your palette knife, draw vertical lines along the bottom third of the canvas. Vary the heights, making the trees on the right side slightly taller to balance the composition. -
Form the tree tops:
Starting at the top tip of a vertical line, use the very point of your small knife to tap on tiny branches. Work in a zig-zag motion, getting wider as you move down the trunk. -
Build the canopy:
As you move lower on each tree, press the knife flatter against the canvas. This creates broader, messier shapes that mimic heavy pine boughs. -
Fill the undergrowth:
Once individual trees are defined, use plenty of black paint to fill in the bottom 2 inches completely solid. Scrape the knife upwards slightly to suggest smaller saplings and grass. -
Refine the edges:
Use your small detail brush to add very fine tips to the tallest trees, ensuring they look sharp against the glowing sky. -
Final texture check:
Look for areas in the trees that look too flat. Add a few extra globes of black paint with the knife to create a rich, tactile surface.
Step back and admire the depth of your personal galaxy as the thick textures catch the light

PENCIL GUIDE
Understanding Pencil Grades from H to B
From first sketch to finished drawing — learn pencil grades, line control, and shading techniques.
Explore the Full Guide
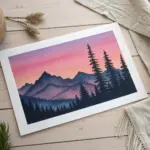
Foggy Landscape With Soft Knife Scumbling

Capture the ethereal beauty of a sunrise breaking over rolling hills with this peaceful landscape project. Using soft palette knife scumbling, you will build layers of atmospheric depth to create a sense of vast, quiet distance.
Step-by-Step Tutorial
Materials
- Stretched canvas (16×20 inches or larger)
- Oil or heavy body acrylic paints (Titanium White, Phthalo Blue, Paynes Gray, Sap Green, Burnt Umber, Alizarin Crimson, Yellow Ochre)
- Large flat brush (for initial wash)
- Medium diamond-shaped palette knife
- Small painting knife (for details)
- Clean rags or paper towels
- Palette for mixing
- Mist spray bottle (if using acrylics)
Step 1: Establishing the Atmosphere
-
Prime the sky:
Begin by applying a very thin, pale wash of Titanium White mixed with a tiny drop of Phthalo Blue across the top third of the canvas. Use a large brush for this step to get a clean gradient that fades to pure white as it moves down toward the horizon line. -
Map the furthest peaks:
Mix a very light blue-grey using White, a touch of Phthalo Blue, and a speck of Alizarin Crimson. Using the flat side of your palette knife, gently scrape in the shapes of the most distant mountains. Keep edges soft; these should look like phantoms in the mist. -
Create atmospheric perspective:
As you move slightly down the canvas to the next ridge, add a tiny bit more blue and grey to your mixture. The rule here is that objects become darker and more distinct closer to the viewer, but stick to cool tones for now. -
Scumble the mist:
Load a small amount of pure white on the knife edge. Turn the knife flat against the canvas where separate mountain ridges meet. Drag it lightly—scumbling—so the paint breaks over the texture of the canvas, creating the illusion of floating fog banks.
Fixing Muddy Colors
If colors obscure the mist, stop. Let the layer dry fully (1-2 days for oils). Then, apply a thin glaze of Titanium White over the area to restore the foggy look without lifting paint.
Step 2: Building the Middle Ground
-
Introduce subtle warmth:
Mix a darker slate blue using Paynes Gray and Phthalo Blue, but this time, fold in a minuscule amount of Burnt Umber. This warms the color slightly for the middle ridges. -
Shape the ridges:
Apply this darker mix with the palette knife, using the edge to carve out the sharper peaks of the mid-ground hills. Allow the bottom of these shapes to remain rough and uneven. -
Blend the hill bottoms:
While the paint is wet, wipe your knife clean. Drag the bottom edges of the mid-ground hills downward into the white mist you established earlier, softening the transition so mountains seem to rise out of nothing. -
Add tree texture:
Lightly tap the flat side of the knife, loaded with slightly thicker paint, along the ridges of these middle hills. The texture created mimics the look of thousands of distant treetops without needing to paint individual trees. -
Layer the fog:
Return to your Titanium White. Apply horizontal swipes of thick white paint between the middle ridges. I find that using the knife very gently here preserves the integrity of the paint layers underneath.
Add Golden Hour
Mix a tiny amount of Naples Yellow or pale orange into your white mist for the upper right corner to simulate the sun just beginning to peek through the heavy morning fog.
Step 3: Refining the Foreground
-
Mix deep forest greens:
Prepare your darkest value yet: Sap Green, Phthalo Blue, and Paynes Gray. This deep, cool green will anchor the entire painting at the bottom. -
Establish the treeline:
Using the tip of your small painting knife, press vertical shapes into the bottom foreground. Vary the height to create a natural-looking canopy of pine trees. -
Define individual pines:
For the distinct tall trees in the foreground, use the knife’s edge to draw a thin vertical line for the trunk. Then, use the tip to dab foliage outward from the trunk in a triangular shape, keeping the tops pointy. -
Introduce autumn accents:
Mix a muted orange using Yellow Ochre and a touch of Burnt Umber. Lightly dab this color onto a few select trees in the foreground to suggest the changing seasons or light hitting the canopy. -
Highlight the foliage:
Mix a light olive green (Sap Green + White + Yellow Ochre). Touche the sun-facing sides (left side) of the foreground trees with the very tip of your knife to add dimension and sunlight. -
Enhance the mist interaction:
Take a clean, dry knife and extremely lightly drag it horizontally across the base of the foreground trees. This ‘blurs’ their trunks into the mist, unifying the foreground with the background. -
Final adjustments:
Step back five feet. If any tree looks too sharp or dark against the mist, use a clean knife to softly scrape or scumble white over it to push it back into the atmosphere.
Now step back and admire the serene, atmospheric depth you have created on your canvas
Mixed-Media Knife Painting With Pastel Accents
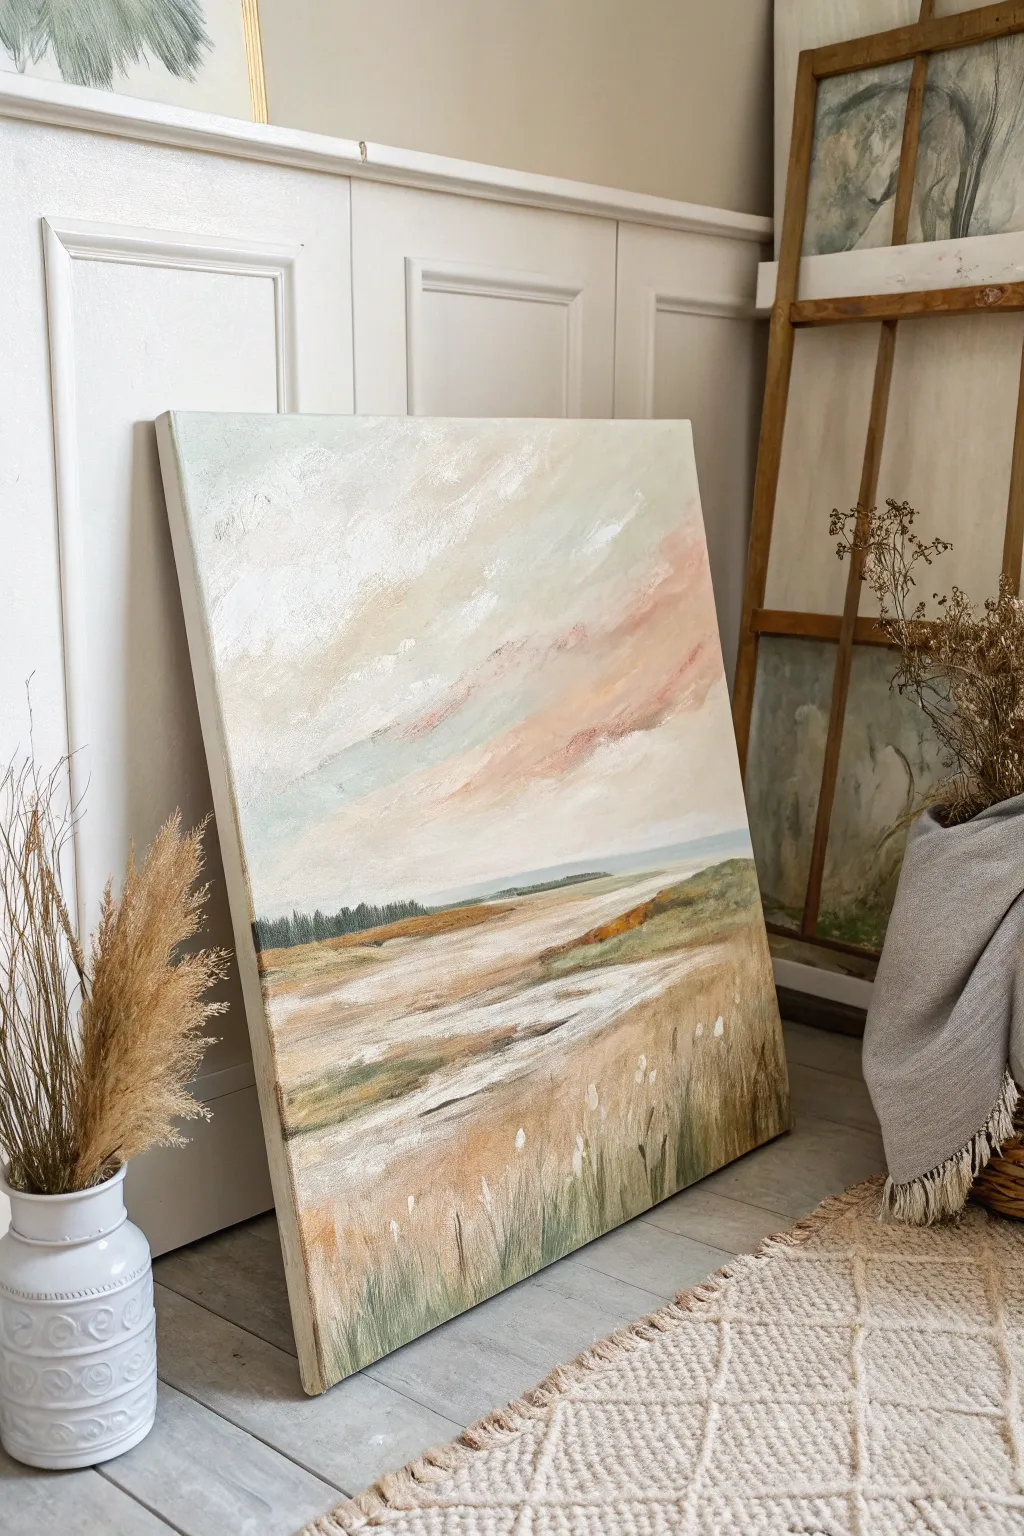
Capture the ethereal beauty of a coastal marsh with this mixed-media project that balances textured acrylics with soft, blended pastels. The result is a dreamy, layered landscape featuring gentle pink skies and windswept grasses.
Step-by-Step
Materials
- Large stretched canvas (approx. 24×30 inches)
- Heavy body acrylic paints (Titanium White, Unbleached Titanium, Raw Sienna, Olive Green, Phthalo Blue, Burnt Umber)
- Soft pastels (Light Pink, Peach, Baby Blue, Cream, White)
- Pastel fixative spray (workable)
- Large palette knife (trowel shape)
- Medium palette knife (diamond shape)
- Assorted flat brushes (1-inch and 2-inch)
- Matte medium or modeling paste
- Paper towels or shop rags
Step 1: Sky Foundation
-
Prime the sky:
Begin by covering the top two-thirds of your canvas with a mix of Titanium White and a touch of Phthalo Blue to create a very pale, atmospheric base. Keep the paint application thin and smooth using a large flat brush. -
Build texture:
Mix Titanium White with a dollop of modeling paste. Using your large palette knife, apply this mixture in sweeping, diagonal strokes across the sky area to create physical cloud structures, leaving some areas flatter for contrast. -
Apply warmth:
While the white texture is still slightly tacky, mix Unbleached Titanium with a tiny hint of Light Pink acrylic. Scrape this gently over the textured ridges of the clouds using the flat side of your knife to catch the high points.
Clean Swipes
Wipe your palette knife clean after almost every stroke. Dried or muddy paint on the blade destroys the clean, ‘broken’ effect you want for the textured clouds and water reflections.
Step 2: Pastel Integration
-
Dry completely:
Allow the acrylic sky layer to dry fully to the touch. This provides a gritty tooth for the pastels to grip onto. -
Add soft color:
Take a Light Pink soft pastel and sketch loose, horizontal clouds into the lower sky. Smudge these gently with your finger to blur the edges into the white acrylic background. -
Cool tones:
Introduce a Baby Blue pastel in the upper corners and between the pink clouds. Blend this softly to create a transition from cool atmosphere to warm sunset. -
Seal the layer:
Lightly spray the sky area with workable fixative. This is crucial so your pastel dust doesn’t muddy the subsequent paint layers.
Step 3: Middle Ground & Horizon
-
Establish the horizon:
Mix Phthalo Blue with Olive Green and White to create a muted, distant teal. Draw a straight horizon line about one-third up from the bottom using the edge of your palette knife. -
Paint the distant trees:
Using a small brush, tap in a dark green line of distant trees along the horizon. Keep the tops uneven to simulate a tree line, but keep the bottom edge straight against the water line. -
Create the waterways:
Mix a large amount of Titanium White with a touch of Burnt Umber. Using horizontal knife strokes, lay in the flat, reflective water channels that cut through the marshland. -
Add marsh texture:
For the land masses, mix Raw Sienna and Olive Green. Apply this thickly with a medium knife, dragging the paint horizontally to suggest flat, grassy banks.
Add Metallic Shimmer
Mix a tiny amount of iridescent mixing medium or gold paint into your foreground grass color. It will catch the light subtly, enhancing the magical twilight feeling of the marsh.
Step 4: Foreground Detail
-
Deepen the foreground:
At the very bottom of the canvas, paint a base of darker greens and warm browns to anchor the composition. This doesn’t need to be detailed yet, just a solid color foundation. -
Scrape in grasses:
While the foreground paint is wet, use the sharp edge of a clean palette knife to scrape upward lines through the paint, revealing the lighter canvas underneath to mimic grass blades. -
Paint tall stalks:
Load the edge of your medium palette knife with a mix of Unbleached Titanium and White. Press and flick upward rapidly to create crisp, lighter grasses standing out against the darker marsh. -
Final pastel highlights:
Once the foreground is dry, use a Cream or White pastel to add soft tops to the grasses, mimicking seed heads catching the light. I find this creates a lovely softness that pure paint lacks. -
Final seal:
Give the entire painting, especially the new pastel areas in the grass, a final coat of fixative spray to protect the surface.
Step back and admire the tranquil coastal atmosphere you have brought to life on canvas


Mini Grid of Quick Knife Landscapes
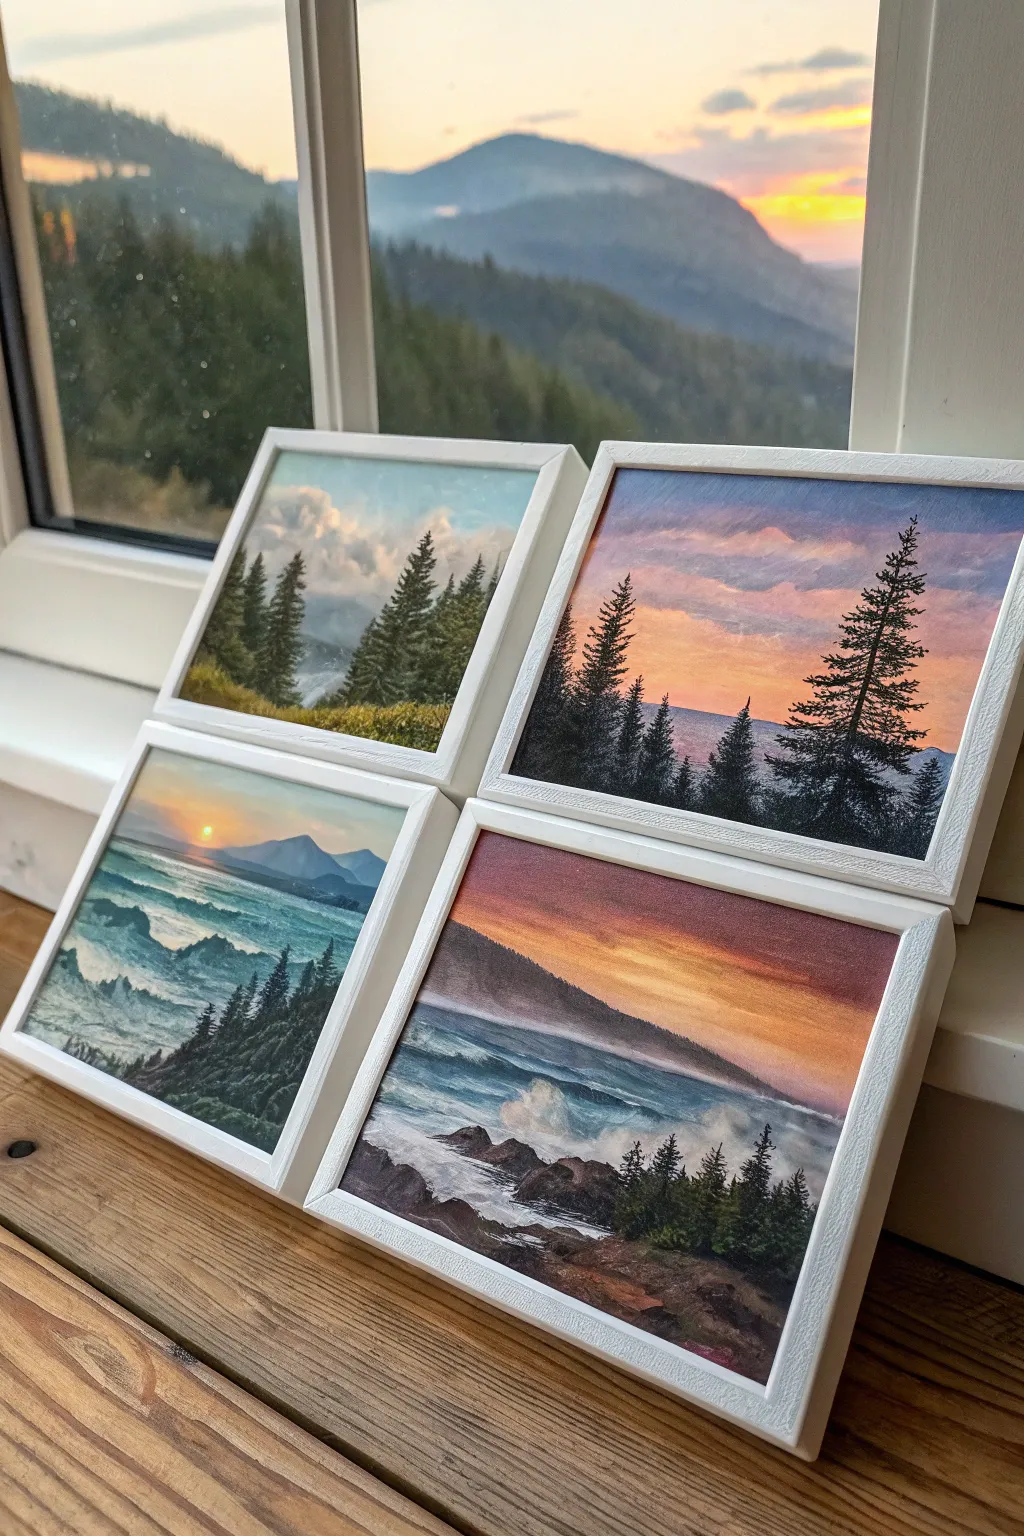
Capture the shifting moods of dusk and dawn with this quartet of miniature landscapes, perfect for displaying on a windowsill or arranging as a gallery wall. These small-scale paintings use palette knife techniques to create rich textures in the clouds, water, and silhouette trees.
How-To Guide
Materials
- 4 small canvas panels or wood boards (approx. 5×7 or 6×6 inches)
- Acrylic paints (Titanium White, Phthalo Blue, Ultramarine Blue, Cadmium Yellow, Cadmium Orange, Alizarin Crimson, Burnt Umber, Mars Black)
- Set of painting knives (one distinct trowel shape, one elongated flat blade)
- Small flat synthetic brush (for initial blocking)
- Rigger or liner brush (optional for fine branches)
- 4 white floating frames
- Palette paper or mixing plate
- Paper towels
Step 1: Setting the Sky Gradients
-
Prepare the surfaces:
Arrange all four canvases side-by-side. Since these are related landscapes, you want to ensure the color palettes harmonize. Prime them with a thin coat of white gesso if they aren’t pre-primed, creating a slight texture with horizontal strokes. -
Mix the twilight colors:
On your palette, create three distinct sky mixtures: a pale cool blue for the day scene, a vibrant orange-crimson blend for the sunsets, and a deep purplish-blue for the dusk scenes. Keep the paint body somewhat thick. -
Apply the upper sky:
Starting with the first panel, use a larger palette knife to spread the darkest sky color at the very top edge. Pull the color down about one-third of the way, using light pressure to keep the paint smooth. -
Blend the horizon:
Wipe your knife clean and pick up your lighter horizon color (pale yellow or soft pink). Apply this at the horizon line and work upwards into the wet top color so they blend directly on the canvas. -
Repeat for all panels:
Do this for all four panels, varying the intensity. Make one scene brighter with more yellow (sunrise), and others moodier with more violet and deep crimson (twilight). -
Create cloud texture:
While the sky is still tacky, load the tip of a smaller trowel knife with white mixed with a tiny touch of orange or pink. Gently scrape this across the sky area to suggest drifting clouds, letting the knife skip slightly over the canvas weave.
Step 2: Mountains and Water
-
Block in distant mountains:
Mix a hazy purple-grey using Ultramarine Blue, Alizarin Crimson, and White. With the flat edge of your knife, scrape in triangular shapes for mountains along the horizon line. Keep the edges soft to simulate atmospheric distance. -
Establish the water base:
For the two bottom seascapes, mix Phthalo Blue with a touch of Burnt Umber and White. Apply this horizontally below the horizon line, darkening the color as you move toward the bottom foreground. -
Add wave movement:
I like to use the side of the knife blade here. Load it with white paint and slice horizontally across the blue water to create the crests of waves. Vary the pressure to make some waves look like they are crashing and foaming. -
Paint the foreground land:
Mix a dark earthy tone using Burnt Umber and Mars Black. Build up the foreground rocks or grassy hills in the bottom corners of each painting. Use a dabbing motion with the knife to create a rough, rocky texture.
Clean Knife, Clear Color
Wipe your palette knife on a paper towel after almost every stroke. Since you are mixing directly on the canvas, a dirty blade will quickly turn your vibrant sunset gradients into muddy brown streaks.
Step 3: The Pine Silhouettes
-
Mix the tree color:
Create a very dark green-black mix. Pure black can look flat, so mix Mars Black with a little Phthalo Green or Blue to give it depth. -
Mark tree trunks:
Use the very edge of a thin palette knife or a liner brush to draw vertical lines where your trees will stand. Group them in uneven numbers—clusters of three or five look most natural. -
Build the foliage:
Switch to your smallest palette knife. Load the tip with the dark mixture and tap it against the canvas, starting at the top of the trunk and working down in a zig-zag motion to create pine branches. -
Create depth in foliage:
Make the trees in the foreground taller and darker with more defined branches. For trees further back, make them smaller, simpler, and slightly paler to push them into the distance. -
Add highlights to water interaction:
For the seascapes, add a tiny bit of white foam splashing up against the dark foreground rocks using the very tip of your knife. -
Frame the artwork:
Once the paintings are fully dry (give them at least 24 hours due to the thick paint), mount them into the white floating frames to give them that clean, modern gallery look.
Level Up: Gloss Finish
Apply a high-gloss varnish once the paint is cured. This mimics the look of oil paint and makes the water sections look wet and reflective, enhancing the contrast with the matte frames.
Arrange your finished quartet near natural light to watch how the real changing sky interacts with your painted horizons


Have a question or want to share your own experience? I'd love to hear from you in the comments below!