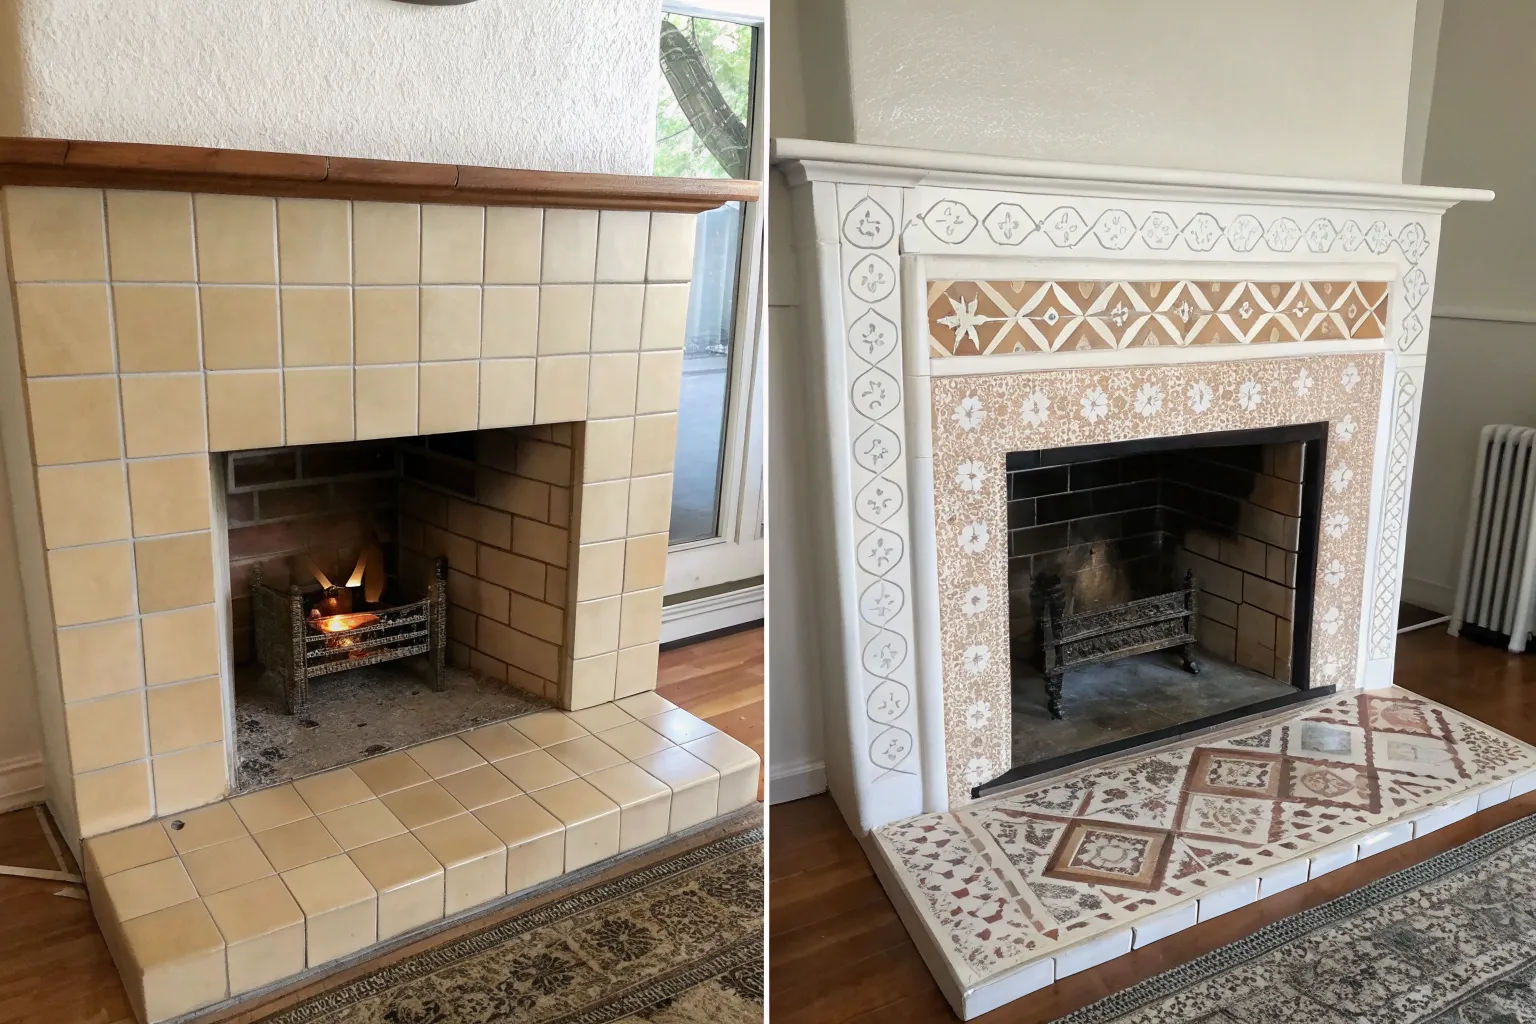
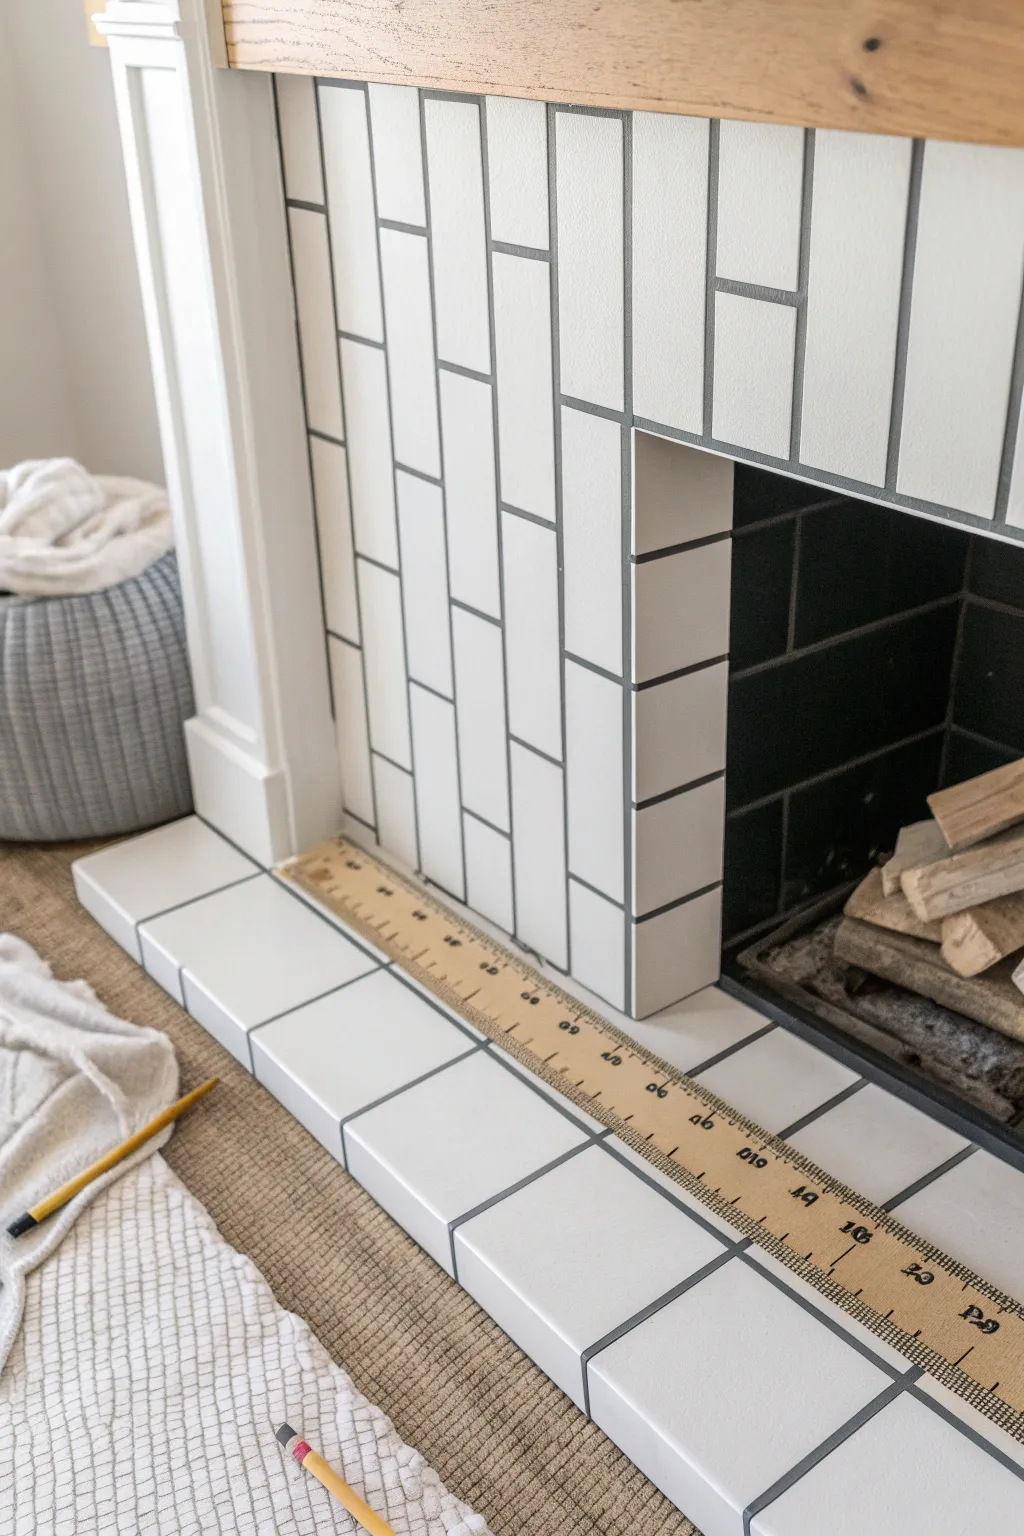
If your fireplace tile is stuck in a decade you don’t love, paint can totally flip the mood without any demolition drama. Here are my favorite painting fireplace tile ideas—starting with the classic go-tos and ending with a few artsy, “wait…that’s painted?” showstoppers.
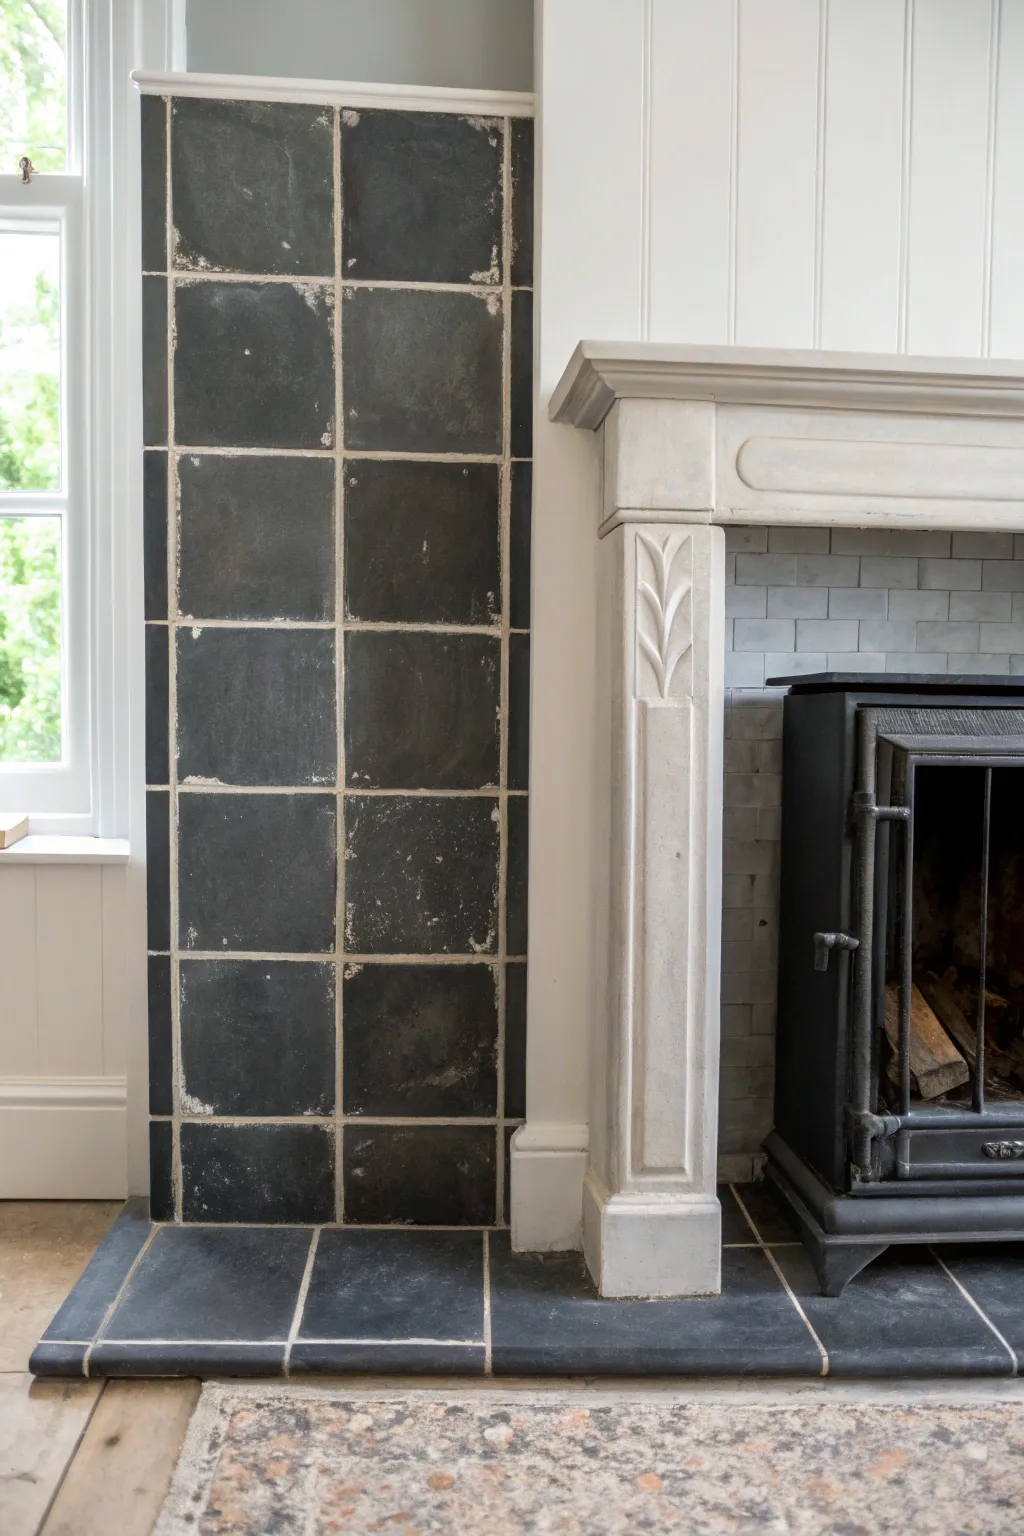
Solid Matte Black Tile Surround
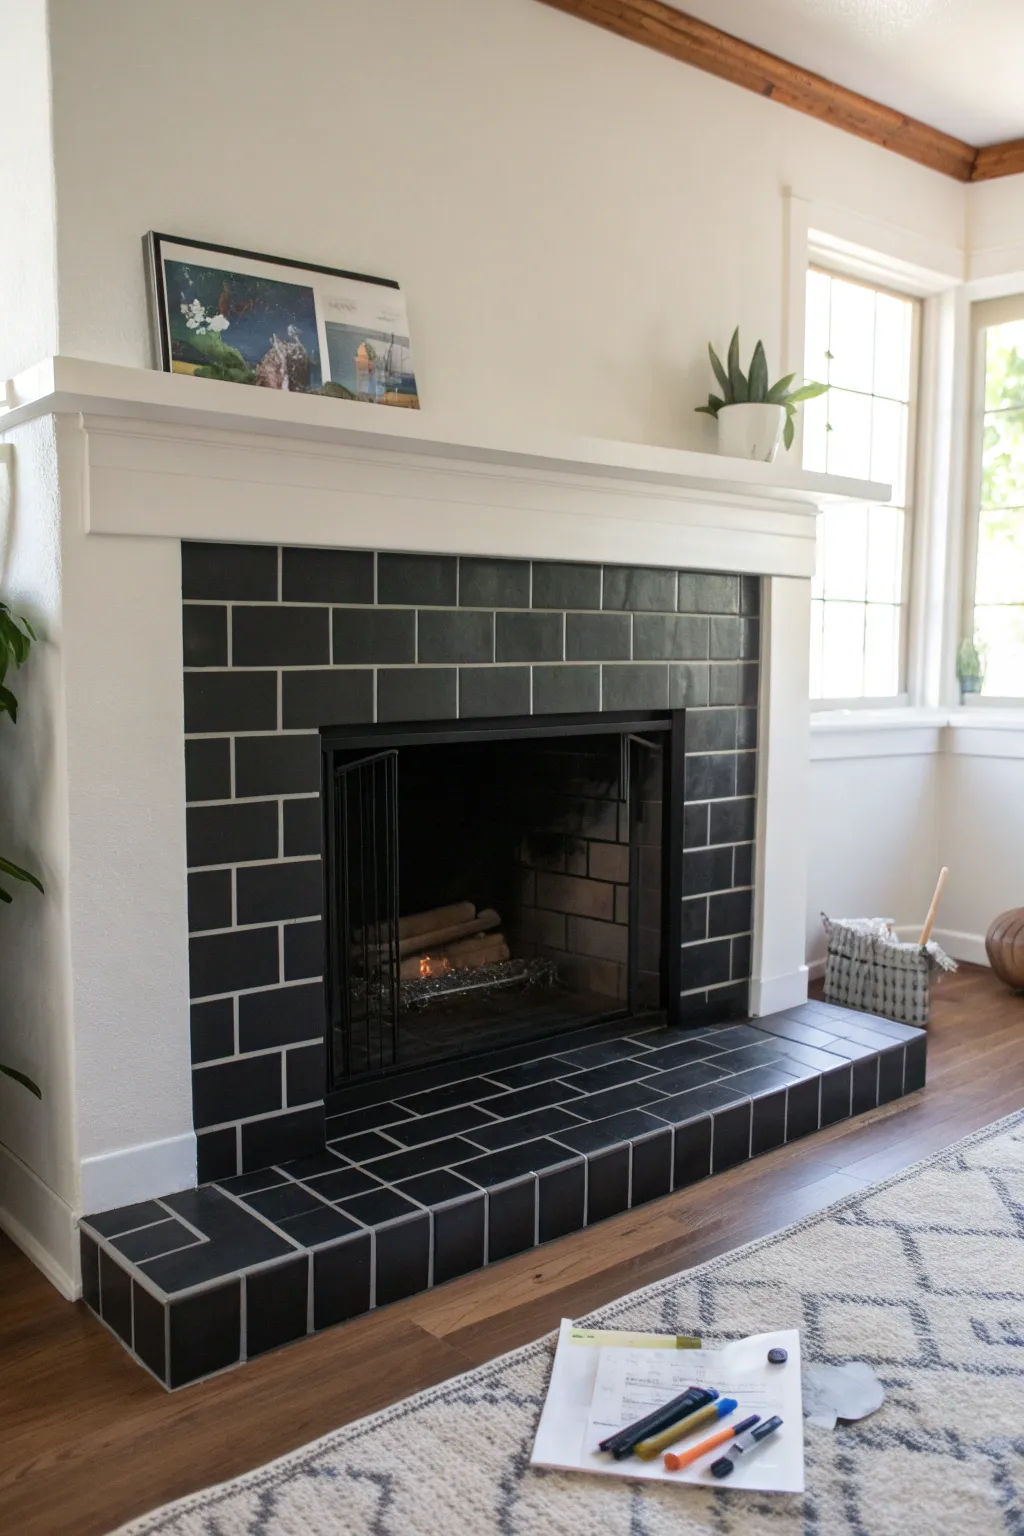
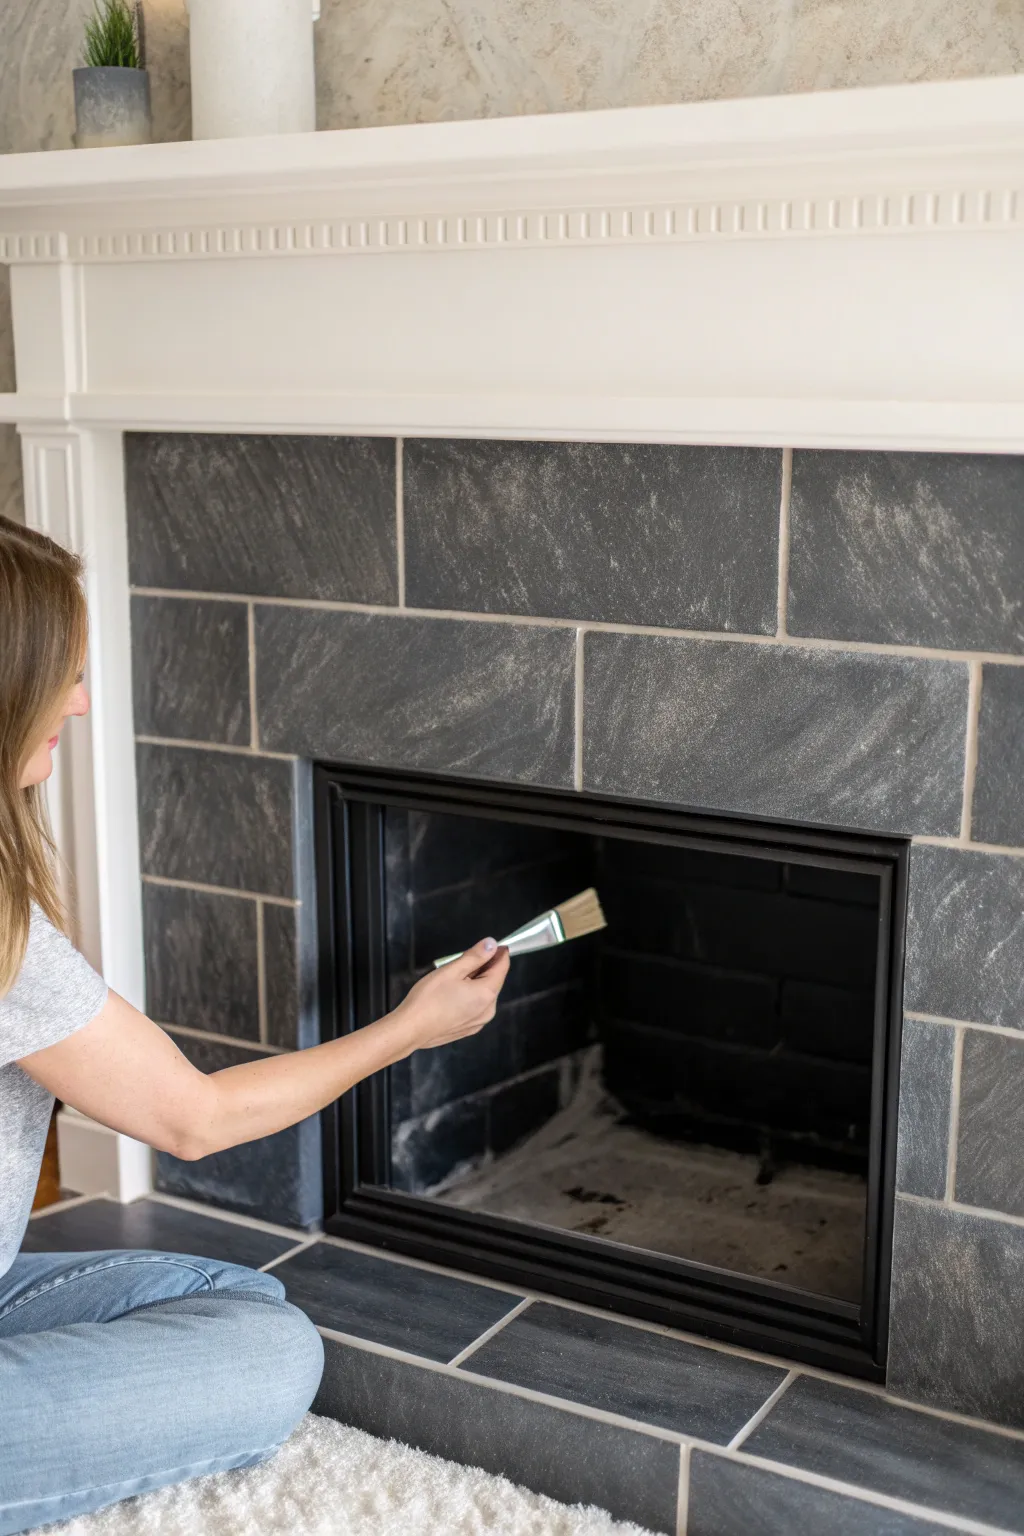
Transform outdated or mismatched fireplace tile into a sleek, modern focal point with this paint-based makeover. The result is a bold, matte black finish that contrasts beautifully with white trim, mimicking the look of expensive slate or soapstone.
Detailed Instructions
Materials
- High-quality bonding primer (stix or similar)
- High-heat enamel paint (matte black)
- Standard interior latex paint (matte black)
- Heavy-duty degreaser or TSP substitute
- Sanding sponge (medium grit)
- Painter’s tape (delicate surface)
- Small foam roller
- Synthetic angled sash brush (1.5 or 2 inch)
- Drop cloths
- Lint-free rags
- Paint tray and liners
Step 1: Preparation & Cleaning
-
Protect the area:
Lay down drop cloths around the hearth to protect your flooring. Use painter’s tape to carefully mask off the floor where it meets the hearth and the point where the wooden mantel meets the tile. -
Clean thoroughly:
Scrub the entire tile surface with a heavy-duty degreaser or TSP substitute. Fireplaces accumulate soot and oils that resist paint, so this step is critical for adhesion. -
Rinse and dry:
Wipe down the tiles with a clean, damp rag to remove any chemical residue, then dry them completely with a lint-free towel. -
Scuff sanding:
Lightly sand the glossy surface of the tiles using a medium-grit sanding sponge. You aren’t trying to remove the finish, just creating microscopic scratches to help the primer grip. -
Final dust removal:
Vacuum up the sanding dust and follow up with a tack cloth or damp rag to ensure the surface is perfectly clean.
Don’t Rush the Prep
Soot is paint’s enemy. If your rag shows any gray residue after cleaning, scrub again. If the primer doesn’t stick, the finish will peel later.
Step 2: Priming the Tile
-
Cutting in the primer:
Using your angled sash brush to apply a bonding primer to the grout lines and the edges where the tile meets the wood or floor. -
Rolling the flat surfaces:
Follow immediately with a small foam roller to apply primer to the faces of the tiles. The foam ensures a smooth, non-textured finish. -
Checking for drips:
Keep a close eye on the grout lines as you roll; smoothing out any pooling primer with your brush before it dries prevents unsightly bumps. -
Cure time:
Allow the primer to dry according to the manufacturer’s instructions. I usually let this sit overnight to ensure the bond is rock-solid before moving to the topcoat.
Heat Considerations
If this is a working wood-burning fireplace, use High-Heat Enamel spray or brush-on paint for the metal insert and the tiles immediately surrounding the opening.
Step 3: Applying the Matte Black Finish
-
Select your paint:
For the tile surround (the vertical part), a standard high-quality matte latex paint works well. For the hearth (the floor part), consider a porch and floor enamel for durability, or high-heat paint if you use the fireplace frequently. -
First coat: Grout lines:
Just like with the primer, start by brushing the black paint into the grout lines first. Be thorough here, as missed spots will show stark white against the black. -
First coat: Rolling:
Roll the flat tile surfaces with the foam roller. Apply a thin, even coat rather than trying to get full opacity immediately. -
Dry and assess:
Let the first coat dry completely. Don’t worry if it looks slightly streaky; the second coat will unify the color. -
Second coat application:
Repeat the cutting-in and rolling process. This second layer provides the rich, deep opacity and the velvety matte finish seen in the inspiration photo. -
Optional third coat:
Inspect the finish under good lighting. If you see any uneven sheen or light spots, apply a light third coat for perfection. -
Remove tape:
Peel off the painter’s tape slowly while the final coat is still slightly tacky to ensure crisp, clean lines. -
Final cure:
Allow the paint to cure fully for several days before placing any accessories or tools back on the hearth to prevent scratching the new finish.
Enjoy the dramatic and sophisticated atmosphere your new fireplace brings to the living space


Soft Whitewash to Brighten Dated Tile
Transform dark, heavy fireplace tiles into a soft, airy feature using a subtle whitewashing technique that mimics the look of aged limestone. The result is a sophisticated finish that retains the tile’s natural texture while brightening the entire room.
Step-by-Step Guide
Materials
- High-quality bonding primer (stix or equivalent)
- Chalk-style paint or matte latex paint (in a warm white or cream)
- Water (for diluting)
- Clean lint-free rags
- Medium-grit sandpaper (120-150 grit)
- TSP substitute or degreaser
- Painter’s tape
- 2-inch angled synthetic paintbrush
- Small chip brush (for distressing)
- Clear matte sealer (polycrylic or wax)
- Small mixing container
Step 1: Preparation
-
Clean thoroughly:
Begin by scrubbing the tiles with a TSP substitute or heavy-duty degreaser to remove soot, dust, and oils. -
Rinse and dry:
Wipe down the surface with clean water to remove any chemical residue and let the tiles dry completely overnight. -
Protect surroundings:
Apply painter’s tape to the walls, floor, mantel, and the metal insert to ensure crisp lines and protect adjacent surfaces. -
Light sanding:
Scuff the surface of the tiles gently with medium-grit sandpaper to give the primer something to grip onto. -
Apply primer:
Brush on a thin, even coat of high-quality bonding primer, ensuring you get into the grout lines but avoiding heavy drips.
Rag Management
Swap to a fresh, clean rag frequently during the wipe-back phase. A saturated rag will just smear paint around rather than lifting it for that textured look.
Step 2: Creating the Wash
-
Mix the whitewash:
In a small container, mix your chosen white paint with water. Start with a 1:1 ratio for a semi-transparent look; I prefer adding water slowly to test opacity. -
Test a small area:
Apply the wash to an inconspicuous spot to ensure it’s the transparency you desire, adjusting with more paint or water as needed. -
Paint the first section:
Working in small sections (about 4-6 tiles at a time), brush the wash generously over the tiles and grout lines. -
Wipe back:
While the paint is still wet, use a lint-free rag to gently wipe away excess paint. The goal is to leave pigment in the crevices and texture while revealing some of the dark base. -
Continue securely:
Move to the next section, blending the edges carefully with the wet edge of the previous section to avoid lap marks.
Step 3: Distressing and Sealing
-
Dry brushing:
Once the wash is dry, use a dry chip brush with a tiny amount of undiluted paint to highlight raised textures or edges for more dimension. -
Distress edges:
Using fine sandpaper, gently sand high spots and edges of the tiles to reveal the original dark color underneath, simulating natural wear. -
Clean dust:
Wipe the entire surface with a tack cloth or slightly damp rag to remove any sanding dust. -
Apply sealer:
Brush on a clear matte sealer (polycrylic is great for heat resistance) to protect the finish. -
Second coat:
After the first coat dries according to the manufacturer’s instructions, apply a second coat for added durability, especially on hearth tiles. -
Remove tape:
Carefully score the edge of the painter’s tape with a utility knife before pulling it away to prevent peeling any paint.
Trouble: Paint Drying Too Fast?
If the wash is drying before you can wipe it back, lightly mist the tiles with a water spray bottle just before applying the paint to extend working time.
Enjoy the lighter, refreshed atmosphere your renewed fireplace brings to the living space


Warm Greige for a Calm Modern Look

Transform dated fireplace tile into a serene focal point using a warm greige paint that instantly modernizes your living space. This project achieves a soft, matte finish that mimics the look of high-end ceramic tile without the demolition.
Step-by-Step
Materials
- TSP (Trisodium Phosphate) cleaner or degreaser
- Scrubbing sponge and bucket
- Painter’s tape (1.5 inch width)
- Drop cloths or masking paper
- High-adhesion bonding primer (specifically for glossy surfaces)
- High-quality latex or acrylic paint (matte or satin finish in Warm Greige)
- Small foam roller (4-inch)
- 2-inch angled sash brush
- Small fine-line craft brush (for grout lines)
- Fine-grit sandpaper (220-grit)
- Tack cloth
- Clear matte polyurethane sealer (optional but recommended for hearths)
Step 1: Preparation & Cleaning
-
Clear and Protect:
Begin by removing all decor from the mantel and hearth. Lay down drop cloths to protect your flooring, securing them with tape if necessary to prevent slipping. -
Deep Clean the Tile:
Mix TSP or a heavy-duty degreaser with warm water in a bucket. Scrub the tiles vigorously to remove soot, grease, and dust, as paint will not stick to a dirty surface. -
Rinse and Dry:
Wipe down the tiles with clean water to remove any chemical residue. Allow the surface to dry completely for at least an hour or use a fan to speed up the process. -
Light Sanding:
Scuff the glossy surface of your tiles gently with 220-grit sandpaper. You aren’t trying to remove the finish, just creating tiny grooves for the primer to grip. -
Dust Removal:
Wipe away the sanding dust thoroughly using a tack cloth or a damp microfiber rag, ensuring the surface is perfectly clean before priming. -
Masking Off:
Apply painter’s tape carefully along the edges where the tile meets the wood mantel, the walls, and the firebox insert. Press the tape edges down firmly to prevent bleed-through.
Paint Peeling?
If paint lifts during the second coat, you likely re-coated too soon. Let the area dry for 24 hours, lightly sand the trouble spot, wipe clean, and touch up carefully.
Step 2: Priming & Painting
-
Apply Bonding Primer:
Using your 2-inch brush, cut in the primer around the edges and in the grout lines first. This ensures these hard-to-reach areas get good adhesion. -
Roll the Flat Surfaces:
Switch to the foam roller to apply primer to the faces of the tiles. Use light pressure to avoid creating bubbles or roller marks. Let the primer cure according to the can’s instructions. -
First Coat of Greige:
Stir your warm greige paint thoroughly. Just like with the primer, use the angled brush to paint the grout lines and edges first. Ideally, paint the grout the same color as the tile for this modern, monolithic look. -
Rolling the Color:
Follow immediately with the foam roller on the tile faces to smooth out the brush marks while the paint is still wet. I like to work in small sections to keep a wet edge. -
Dry and Assess:
Allow the first coat to dry for at least 4-6 hours. Don’t rush this step, as tacky paint can lift off when you apply the next layer. -
Second Coat Application:
Apply a second coat using the same method—brushing grout lines then rolling faces. This coat provides the true depth of color and hides any streakiness from the first pass. -
Detail Work:
Inspect the grout lines for any missed spots or drips. Use a small fine-line craft brush to touch up these tiny areas for a crisp, professional finish.
Add Visual Texture
For a stone-like effect, try mixing a tiny amount of baking soda into your last coat of paint. It adds a subtle, gritty texture that mimics natural limestone.
Step 3: Finishing Touches
-
Remove Tape:
While the final coat is still slightly tacky (not fully dry), carefully peel away the painter’s tape at a 45-degree angle. This prevents the dried paint from pulling up with the tape. -
Optional Sealing:
If painting the hearth floor where wood or tools might sit, apply two thin coats of clear matte polyurethane for extra durability against scratches. -
Final Cure:
Let the paint cure fully for several days before placing heavy baskets or decorations back onto the hearth to ensure the finish hardens completely.
Enjoy the calming atmosphere of your beautifully updated fireplace, ready for cozy evenings year-round


Deep Charcoal for a Stone-Like Finish
Give your fireplace a modern, high-end facelift by transforming outdated tile into a sleek, stone-like surround. This deep charcoal finish mimics the texture and depth of slate, creating a dramatic focal point that feels both cozy and contemporary.
Step-by-Step Guide
Materials
- High-adhesion primer (specifically for glossy surfaces)
- Charcoal chalk-finish or matte paint
- Lighter grey acrylic paint (for texture)
- Clean painter’s tape
- Drop cloth or plastic sheeting
- Degreasing cleaner (like TSP substitute)
- Scrubbing sponge
- Angled sash brush (2-inch)
- Small foam roller
- Dry rag or lint-free cloth
- Sea sponge or crumpled plastic bag
- Matte clear topcoat (high-heat resistant if painting near firebox opening)
Step 1: Preparation & Cleaning
-
Protect the area:
Begin by laying down a drop cloth to protect your hearth and flooring. Tape off the walls, mantel, and the metal firebox insert with precision to ensure crisp lines later. -
Deep clean the tiles:
Scrub the existing tiles thoroughly with a degreasing cleaner like TSP. Fireplaces often accumulate hidden soot and grime that will prevent paint from sticking, so don’t skip this step. -
Rinse and dry:
Wipe down the tiles with clean water to remove any chemical residue from the cleaner. Allow the surface to dry completely before moving on. -
Prime the surface:
Apply a coat of high-adhesion primer designed for slick surfaces. Use your angled brush to get into the grout lines first. -
Roll the flat surfaces:
Follow up immediately with a small foam roller on the face of the tiles to smooth out brush strokes for an even base.
Natural Stone Look
Work in diagonal motions when applying the texture sponge. Natural stone veins rarely run perfectly horizontal or vertical.
Step 2: Base Color Application
-
Paint grout lines:
Once the primer is fully dry, start applying your deep charcoal base color. I prefer to paint all the grout lines first using the angled brush, ensuring full coverage in the crevices. -
Roll on the first coat:
While the grout paint is still wet, roll the charcoal paint onto the tile faces. This helps blend the texture so the grout doesn’t look like a separate entity. -
Let it cure:
Allow this first coat to dry according to the manufacturer’s instructions, usually about 2-4 hours depending on humidity. -
Apply second coat:
Repeat the painting process for a solid, opaque coverage. The deep charcoal color needs to be rich and consistent.
Add Metallic Depth
Mix a tiny drop of metallic silver or bronze paint into your grey texture wash for a subtle mineral shimmer that catches the light.
Step 3: Creating Stone Texture
-
Prepare texture glaze:
Mix a small amount of lighter grey paint with water until it has a thin, wash-like consistency. You want translucency here, not solid color. -
Dab and sponge:
Dip a sea sponge or a crumpled plastic bag lightly into your grey wash. Offload most of the paint onto a paper towel until almost dry. -
Apply texture subtly:
Gently dab the sponge randomly across the dried charcoal tiles. Focus on creating uneven, organic patterns rather than a uniform stamp. -
Soften the look:
Immediately lightly wipe or blot the sponged areas with a dry rag. This smears the lighter color slightly, mimicking natural slate veining and mineral deposits. -
Detail the edges:
Pay attention to the edges of individual tiles. Natural stone often has variation at the perimeter, so dab a tiny bit of extra texture there.
Step 4: Finishing Touches
-
Seal the work:
Once you are happy with the stone effect and it is fully dry, apply a matte clear topcoat. This protects the finish from ash and cleaning. -
Remove tape carefully:
Score the edge of the painter’s tape with a utility knife before pulling it off. This prevents your fresh latex paint from peeling up with the tape. -
Inspect and touch up:
Check for any spots where the original tile shows through or where the texture looks too heavy, and touch up with your base charcoal color as needed.
Step back and admire how a simple coat of paint has added dramatic weight and elegance to your living space
BRUSH GUIDE
The Right Brush for Every Stroke
From clean lines to bold texture — master brush choice, stroke control, and essential techniques.
Explore the Full Guide
Two-Tone Frame Around Painted Tiles
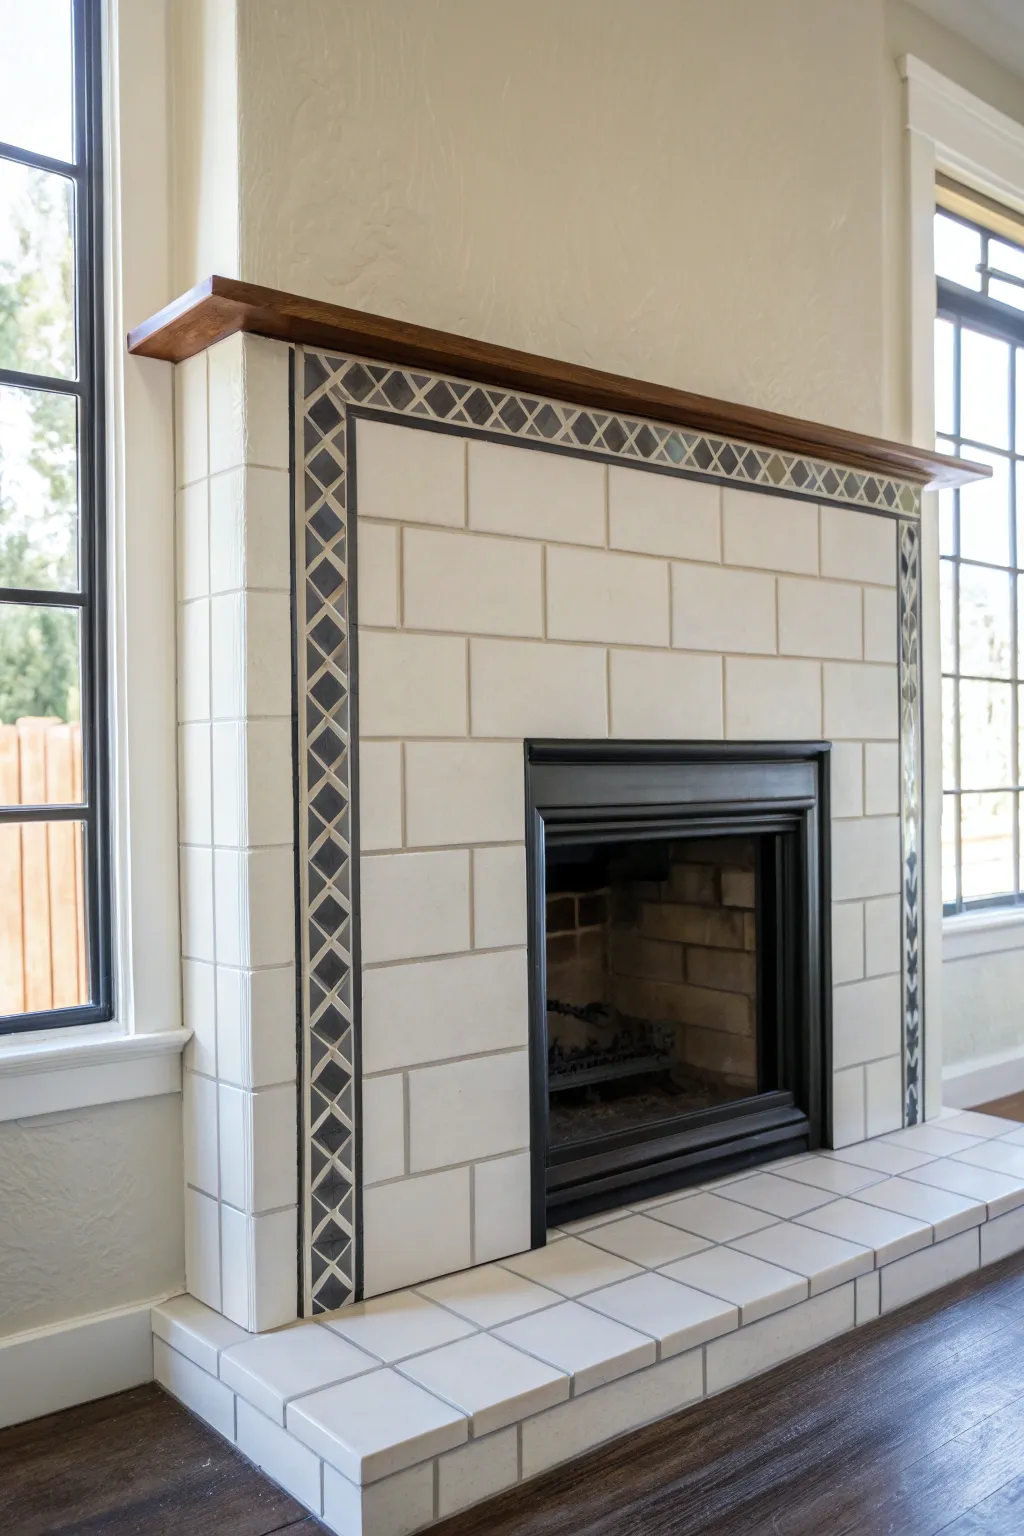
Transform a plain tiled fireplace into a custom focal point by hand-painting a sophisticated geometric border. This project mimics the look of high-end inlaid accent tiles using nothing more than stencils, tape, and durable tile paint.
Detailed Instructions
Materials
- High-quality bonding primer (Stix or similar)
- Semi-gloss tile or enamel paint (Warm White)
- Semi-gloss tile or enamel paint (Charcoal or Black)
- Semi-gloss tile or enamel paint (Greige/Taupe)
- Painter’s tape (multi-surface)
- Fine-grit sandpaper (220-grit)
- TSP cleaner or serious degreaser
- Small foam roller
- Detail artist brushes (fine liner and flat shaders)
- Custom diamond stencil (or mylar sheets to cut your own)
- Clear polycrylic sealer (optional for high traffic)
- Ruler and pencil
Step 1: Preparation & Base Coat
-
Clean thoroughly:
Scrub every inch of the existing tile with TSP or a heavy-duty degreaser to remove years of soot and residue. This is the most crucial step for paint adhesion. -
Light scuffing:
Sand the tile surfaces gently with 220-grit sandpaper to create a ‘tooth’ for the primer, then wipe away all dust with a tack cloth. -
Protect the area:
Tape off the walls, the wooden mantle, and the fireplace insert itself to protect them from stray roller marks. -
Apply primer:
Roll on a bonding primer designed specifically for glossy surfaces. I like to let this dry for a full 24 hours to ensure maximum durability. -
Paint the main tiles:
Apply two coats of your Warm White enamel paint to the entire fireplace using a small foam roller for a smooth finish, letting the paint dry fully between coats.
Clean Lines
For ultra-crisp edges on detailed borders, seal your painter’s tape by brushing a tiny amount of the *base* color over the tape edge before applying the accent color.
Step 2: Creating the Border Design
-
Box out the border:
Using painter’s tape, mask off the specific row of tiles that will become your frame. In this design, it’s the vertical columns flanking the opening and the horizontal row across the top. -
Paint the background:
Apply your darker background color (Charcoal/Black) inside the taped-off border area. Two thin coats are better than one thick one to prevent peeling. -
Measure the diamonds:
Once the dark base is cured, find the center point of your horizontal border row. You’ll want to start your stencil pattern here so it looks symmetrical. -
Position the stencil:
Secure your diamond lattice stencil over the dark border. If you don’t have a stencil that fits perfectly, you can cut a simple diamond shape from mylar to trace individually. -
Stipple the pattern:
Using a very dry stencil brush or foam pouncer, dab the Greige/Taupe paint over the stencil. Offload most of the paint on a paper towel first to prevent bleeding. -
Connect the lines:
Lift the stencil carefully and move to the next section, overlapping the registration marks slightly to keep the pattern continuous. -
Refine the edges:
Once the stenciling is done, remove the tape. Use a fine artist brush and your Warm White paint to sharpen the outer edges where the dark border meets the white tiles. -
Detail the grout lines:
To make it look like real tile installation, use a fine liner brush to paint the grout lines within the border area back to white (or gray), separating your painted ’tiles’.
Paint Peeling?
If paint lifts when removing tape, the layers may have bonded. Score the edge of the tape very gently with a sharp craft knife before pulling it away at a 45-degree angle.
Step 3: Finishing Touches
-
The hearth:
Don’t forget the floor tiles (hearth). Paint these in the solid Warm White to match the main fireplace body, keeping the texture clean and simple. -
Inspect and touch up:
Look closely for any paint bleed or uneven lines. A tiny bit of the background color on a small brush can fix stencil smudges easily. -
Seal for protection:
If you plan to place items on the hearth, apply a non-yellowing clear polycrylic sealer over the painted surfaces for extra scratch resistance.
Enjoy the warmth of your newly updated fireplace that looks completely custom-tiled without the demolition mess
Monochrome Tiles and Grout for a Seamless Look
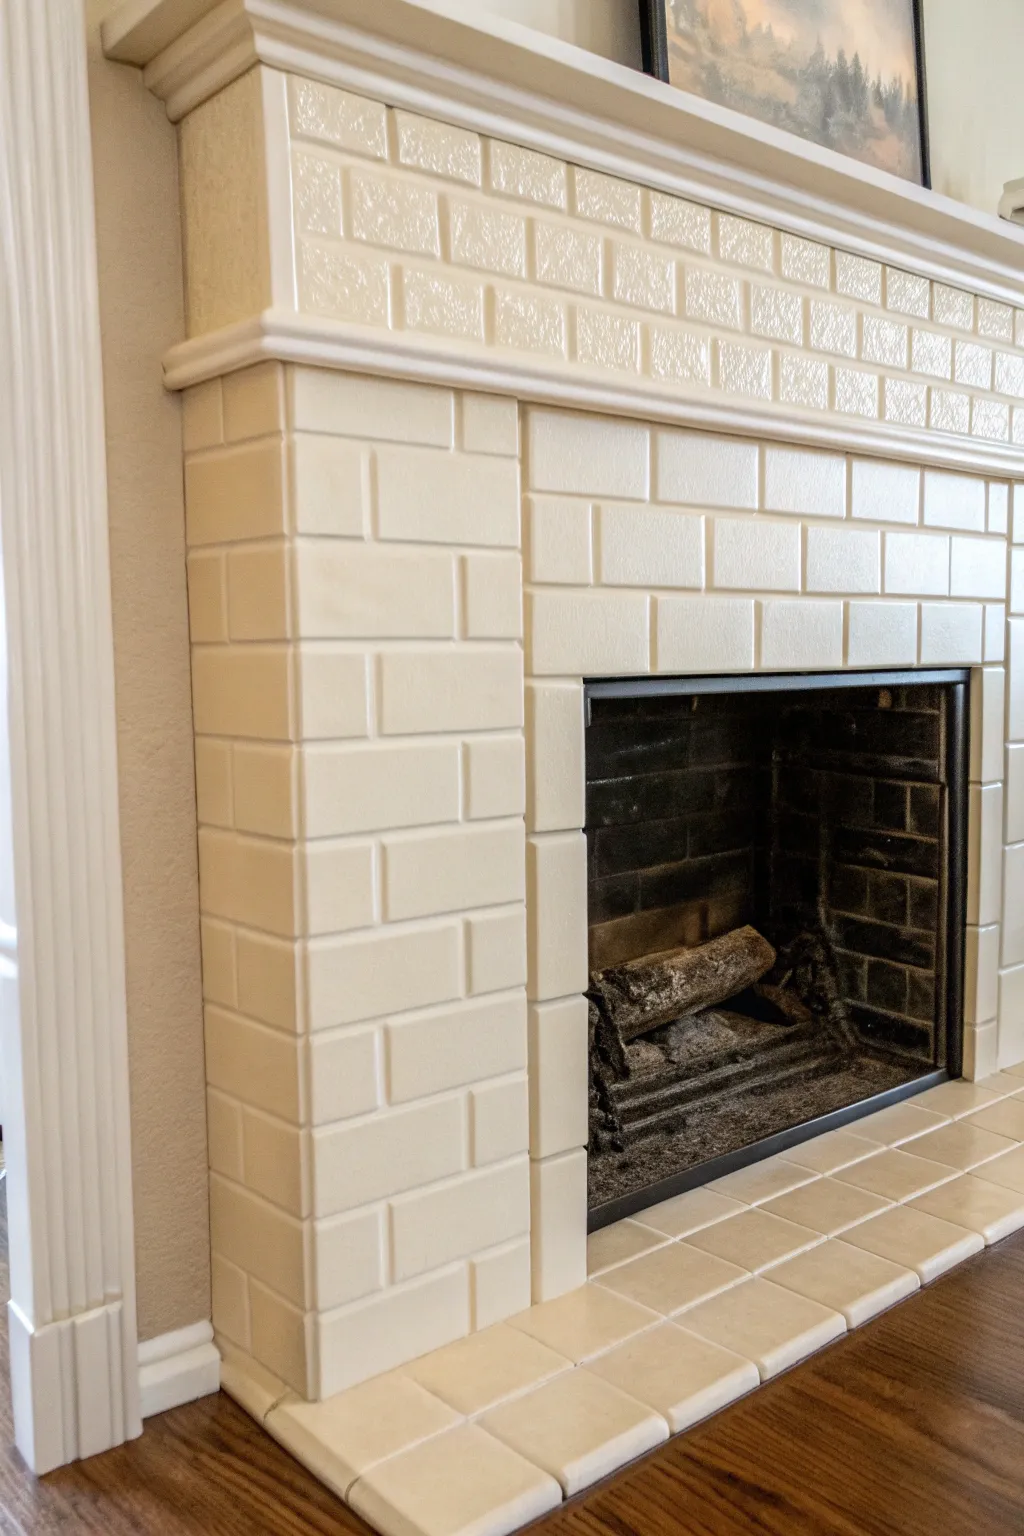
Transform outdated or busy fireplace tile into a sophisticated, unified feature with this monochrome painting technique. By covering both the tile and grout in the same warm cream shade, you create a modern, structural look that instantly brightens the room.
Step-by-Step
Materials
- High-quality bonding primer (oil-based or specific for sleek surfaces)
- Urethane-alkyd enamel paint (Satin or Semi-Gloss finish)
- Warm Cream or Beige color (e.g., similar to ‘Navajo White’)
- Heavy-duty degreaser (TSP or similar)
- Scrubbing sponges and abrasive pads
- Painter’s tape
- Synthetic angled sash brush (2-inch)
- Small foam roller (4-inch) with a smooth surface nap
- Fine-grit sandpaper (220-grit)
- Drop cloths
- Tack cloth
Step 1: Preparation & Cleaning
-
Protect the area:
Begin by laying down drop cloths to protect your flooring. Use painter’s tape to carefully mask off the wall edges, the metal firebox insert, and any mantel pieces you don’t intend to paint. -
Deep clean the tiles:
Mix your heavy-duty degreaser with warm water. Scrub the tiles and grout lines vigorously to remove years of soot, dirt, and residue. This step is critical for paint adhesion, so don’t rush it. -
Rinse and dry:
Wipe the tiles down multiple times with clean water to remove all cleaning chemical residue. Allow the surface to dry completely. -
Scuff the surface:
Lightly sand the glossy tile surface with 220-grit sandpaper. You aren’t trying to remove the finish, just creating tiny scratches for the primer to grip. -
Dust removal:
Wipe away the sanding dust with a damp rag, followed by a tack cloth to ensure the surface is perfectly clean.
Sticky Situation?
If the tape pulls paint up with it, the paint may have dried too hard over the tape line. Score the edge gently with a fresh razor blade before peeling to sever the bond.
Step 2: Priming
-
Detail priming:
Using your angled sash brush, apply the bonding primer specifically to the grout lines and the corners first. Work the primer into the crevices to ensure complete coverage. -
Roll the flat surfaces:
While the brushwork is still wet, follow up with the small foam roller to apply primer to the faces of the tiles. This helps smooth out brush marks. -
Curing time:
Let the primer dry according to the manufacturer’s instructions. I usually like to let oil-based primers cure overnight to ensure they are rock hard before painting.
Add Visual Texture
For a softer, less ‘plastic’ look, skip the roller on the final coat. Instead, use a high-quality brush to create long, distinct brushstrokes that mimic a hand-glazed ceramic finish.
Step 3: Painting
-
First coat application:
Just like with the primer, start by brushing your warm cream enamel into the grout lines. Because we want a monolithic look, don’t worry about keeping paint off the tile faces. -
Rolling the tiles:
Immediately smooth out the paint using your foam roller on the tile surfaces. Apply a thin coat to avoid drips forming on the vertical grout lines. -
Check for drips:
Scan the surface for any runs or drips, especially around the edges and beneath the mantel shelf, and smooth them out gently with the brush tip. -
Drying period:
Allow the first coat to dry completely. Consult your paint can, as enamel paints often have longer recoat times than standard latex. -
Light sanding:
Once dry, very lightly run fine-grit sandpaper over the surface to knock down any bumps or dust nibs, then wipe clean with a tack cloth. -
Second coat:
Apply the second coat of enamel using the same brush-then-roll technique. This coat should provide full opacity and a rich, solid color. -
Remove tape:
Carefully score the edge of the painter’s tape with a utility knife before pulling it off while the paint is still slightly tacky. This prevents peeling. -
Final cure:
Allow the paint to cure fully for several days before placing any decor on the hearth or lighting a fire, ensuring the finish hardens completely.
Enjoy the clean, modern elegance of your refreshed fireplace surround

PENCIL GUIDE
Understanding Pencil Grades from H to B
From first sketch to finished drawing — learn pencil grades, line control, and shading techniques.
Explore the Full Guide
Contrasting Grout Lines for Faux New Tile Definition
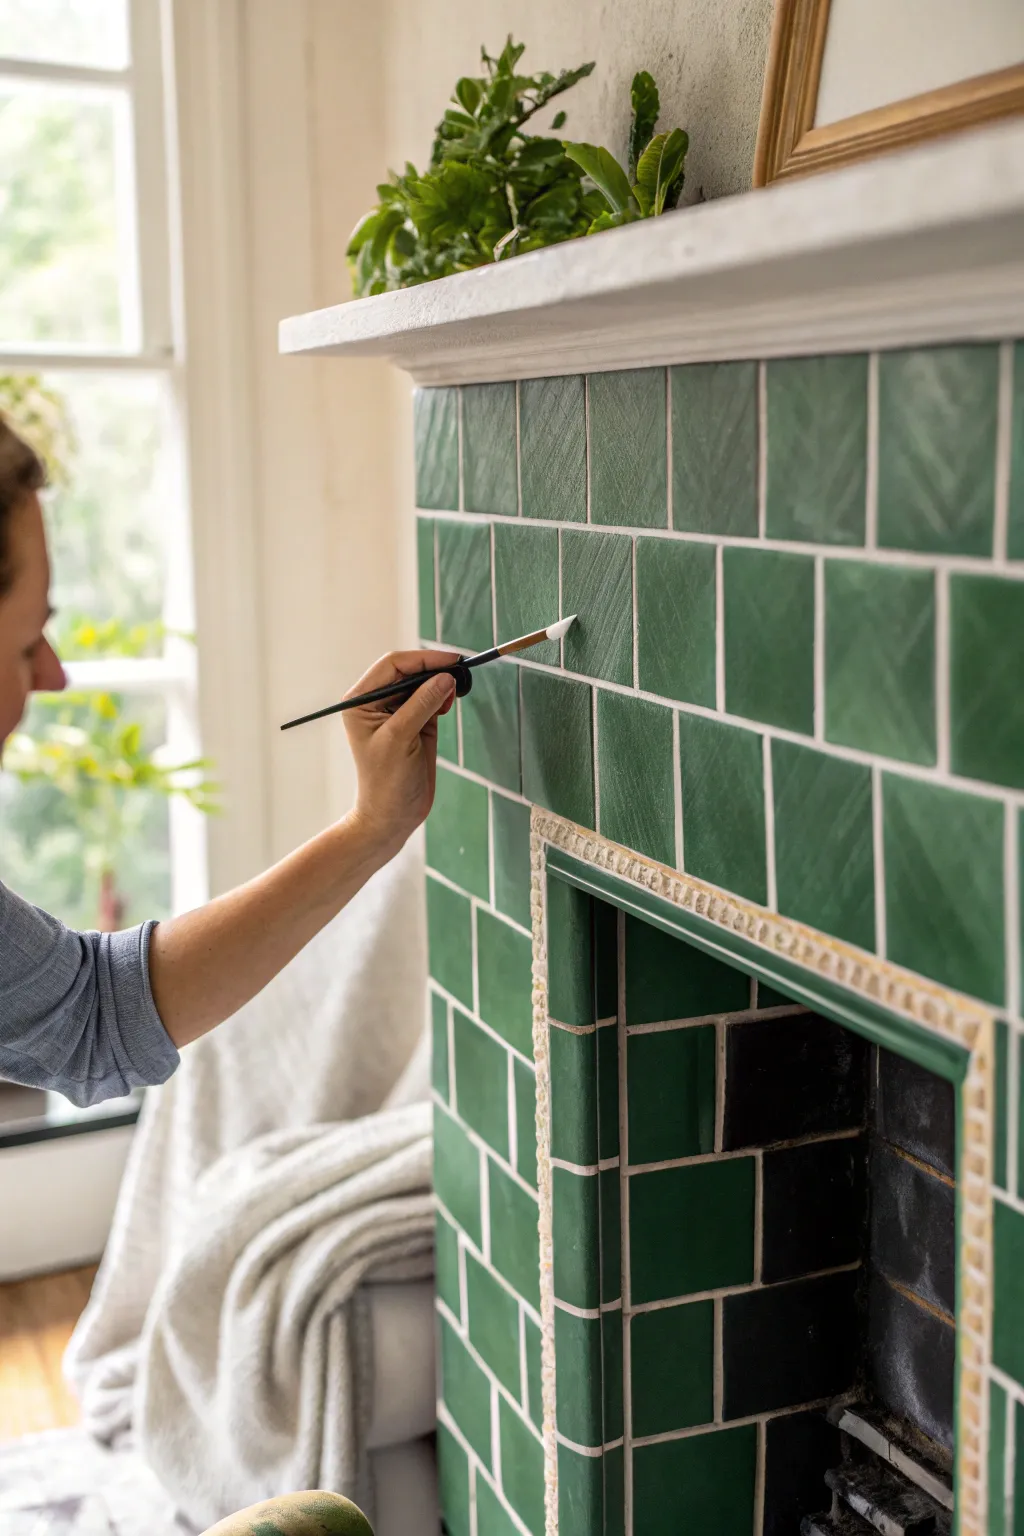
Transform a tired, dated fireplace into a stunning focal point by simply refreshing the grout lines. This project creates the crisp, clean look of brand-new tile installation, highlighting the geometric beauty of your existing surround with high-contrast definition.
Detailed Instructions
Materials
- High-quality bonding primer
- Porcelain or tile paint (white or light cream)
- Small angled artist’s brush (size 2 or 4)
- Painter’s tape
- Degreaser or TSP substitute
- Scrubbing sponge
- Clean lint-free rags
- Small mixing container
Step 1: Preparation & Cleaning
-
Clean the surface thoroughly:
Before any paint touches the tile, you need a pristine surface. Mix your degreaser or TSP substitute with warm water and scrub the entire tiled area vigorously. Pay special attention to the grout lines where soot and dust like to settle. -
Rinse and dry:
Wipe down the tiles with clean water and a rag to remove any soapy residue. Let the fireplace dry completely, waiting at least a few hours to ensure no moisture is trapped in the porous grout. -
Protect surrounding areas:
Apply painter’s tape to the walls, floor, and the inner firebox edge to protect them from accidental drips. Lay down a drop cloth at the base of the hearth.
Steady Hand Trick
Rest your pinky finger on a dry section of the tile while you paint to stabilize your hand. This acts as an anchor and helps you draw straighter lines without shaking.
Step 2: Priming the Lines
-
Select your brush:
Choose a small, angled artist’s brush that fits comfortably within the width of your grout lines. An angled tip gives you better control for straight lines. -
Load the primer:
Dip just the tip of your brush into the bonding primer. You don’t want to overload it, as this can cause drips on the tile face. -
Apply primer to vertical lines:
Start by painting the vertical grout lines first. Use a steady hand and pull the brush down in smooth strokes. If you get primer on the tile, wipe it immediately with a damp rag. -
Apply primer to horizontal lines:
Once the verticals are done, move on to the horizontal lines. I find working from the top down prevents smudging your previous work. -
Check for coverage:
Inspect your work. The primer doesn’t need to be perfect, but it should cover the old grout color. Let this layer dry according to the manufacturer’s instructions.
Go Bold
Instead of classic white, try a light grey or even a metallic gold paint for the grout lines. This adds a modern or glamorous twist that makes the green tile pop even more.
Step 3: Painting the Definition
-
Prepare the topcoat:
Pour a small amount of your white tile paint into a small container. This makes it easier to manage than dipping into the can. -
Paint the first coat:
Just like with the primer, use your small angled brush to carefully apply the white paint over the primed grout lines. Keep a wet rag handy for quick corrections. -
Focus on the intersections:
Pay extra attention where vertical and horizontal lines meet. Dab a little extra paint here to ensure crisp corners, which really helps the ‘new tile’ illusion. -
Let it cure:
Allow the first coat of paint to dry completely. This usually takes longer than primer, often 4-6 hours depending on humidity. -
Assess opacity:
If the old grout color is still peeking through, you’ll need a second coat. Repeat the painting process, moving carefully to keep those lines sharp. -
Clean up edges:
Once the paint is dry to the touch, gently peel away the painter’s tape. If any paint bled under the tape, carefully scrape it away with a fingernail or plastic scraper.
Step 4: Finishing Touches
-
Inspect the final look:
Step back and look at the fireplace as a whole. Check for any missed spots or uneven lines. -
Touch up if needed:
Use a tiny detail brush to fix any small imperfections. A little bit of patience here makes a huge difference in the final professional look.
Enjoy the fresh, crisp look of your updated fireplace and the brightness it brings to your room
Painted Subway-Tile Illusion With Simple Grid Lines
Transform a dated or plain fireplace surround into a modern farmhouse feature with just paint and precision. This technique creates a convincing illusion of clean, white subway tile with contrasting grout lines without the hassle of actual tiling.
Step-by-Step
Materials
- High-heat primer (if painting metal) or standard primer
- High-quality interior paint (white enamel or semi-gloss recommended)
- Grey acrylic paint or marking pen (for grout lines)
- Yardstick or long level
- Pencil
- Measuring tape
- Assorted artist brushes (fine tip and angled)
- Foam roller
- Painters tape
- Clear sealant (optional, for durability)
Step 1: Preparation & Base Coat
-
Clean surface thoroughly:
Begin by removing all dust, soot, and grease from your fireplace surround and hearth using a degreasing cleaner. A clean surface is crucial for paint adhesion. -
Sand for texture:
If your surface is glossy tile or smooth metal, lightly scuff it with fine-grit sandpaper. This helps the primer grip the surface better. -
Apply primer:
Roll on a coat of high-quality primer. If you are covering dark colors, you might need a second coat once the first is dry. Let this cure fully according to the can’s instructions. -
Paint the base color:
Apply your white base paint using a foam roller for a smooth finish. I prefer using a semi-gloss enamel because it mimics the sheen of real ceramic tile. -
Add a second coat:
Once the first coat is dry, apply a second coat of white paint to ensure solid, opaque coverage. Allow this to dry completely—ideally overnight—before starting any line work.
Step 2: Measuring & Layout
-
Mark vertical guides:
Using your yardstick and pencil, lightly mark vertical lines across the surround. For a standard subway tile look, space these lines about 3 to 4 inches apart. -
Plan the horizontal offset:
Subway tiles act like bricks, meaning the vertical joints are staggered. Decide on your tile length (e.g., 6 or 8 inches) and map out where the horizontal breaks will happen. -
Draw the grid:
Lightly pencil in your full grid pattern directly onto the white paint. Double-check your measurements frequently to ensure your ’tiles’ remain consistent in size. -
Create the hearth grid:
Don’t forget the floor section (hearth). Continue your grid pattern down, ensuring the lines align with the vertical lines on the surround for a seamless transition.
Wobbly Lines?
If you struggle painting straight lines freehand, use painter’s tape to create a thin channel, or use a paint pen and a ruler for guided precision.
Step 3: Painting the Faux Grout
-
Test your grey paint:
Mix your grey paint to get the desired shade of grout. Test it on a piece of scrap paper first to ensure it provides enough contrast against the white. -
Load a fine brush:
Dip a thin artist’s liner brush into the grey paint. You want just enough paint to create a solid line without dripping. -
Paint vertical lines first:
Carefully trace over your vertical pencil marks with the grey paint. Use a steady hand and pull the brush slowly towards you for the straightest line. -
Paint horizontal staggered lines:
Fill in the horizontal lines next. Be mindful to stop and start cleanly at the vertical intersections to maintain the staggered brick pattern. -
Clean up edges:
If any lines look shaky or too thick, wait for the grey to dry, then use a small angled brush with white paint to touch up the edges and square off the corners. -
Address the corners:
Pay special attention to the inside corners of the firebox opening. Ensure the lines wrap around the corner convincingly to enhance the 3D illusion. -
Seal the surface:
Once the artwork is fully dry (give it 24 hours), apply a clear, non-yellowing polycrylic sealer, especially on the hearth where objects might scratch the paint.
Level Up: Shadow Play
Add a very thin line of lighter grey on one side of each ‘grout’ line and a darker grey on the other to create a subtle 3D shadow effect.
Step back and enjoy the fresh, bright focal point you’ve created for your living space


Geometric Stencil Pattern for Faux Cement Tile
Transform dated fireplace surrounds with the timeless elegance of faux cement tiles using paint and clever stenciling. This geometric pattern pairs striking charcoal motifs with a creamy limestone base for a high-end, custom look.
Step-by-Step Tutorial
Materials
- TSP cleaner or heavy-duty degreaser
- Fine-grit sandpaper (220-grit)
- High-adhesion bonding primer (specifically for tile)
- Creamy off-white chalk or latex paint (base color)
- Charcoal grey or soft black chalk paint (stencil color)
- Geometric tile stencil (diamond layout with floral accents)
- Low-tack painter’s tape
- High-density foam roller
- Stencil brush (stiff bristle)
- Small artist’s detail brush
- Paper towels
- Matte polycrylic sealer
Step 1: Preparation & Priming
-
Deep clean the surface:
Begin by scrubbing the existing tile thoroughly with TSP or a heavy-duty degreaser. Fireplace surrounds often have hidden soot or wax buildup that will prevent paint adhesion, so don’t skip this step. -
Scuff sand the tiles:
Once the tiles are dry, lightly scour the shiny surface with 220-grit sandpaper. You aren’t trying to remove the finish, just creating enough ‘tooth’ for the primer to grab onto. -
Tape off edges:
Apply painter’s tape carefully around the mantel, firebox insert, and walls. Press the edges down firmly with a credit card to prevent any primer from bleeding onto your trim. -
Apply bonding primer:
Roll on a coat of high-quality bonding primer designed for slick surfaces like tile. Allow this to cure fully according to the manufacturer’s instructions, as this is the most critical layer for durability.
Dry Brush Technique
The #1 mistake is too much paint. Your roller should be so dry that barely any color comes off on a paper towel before you touch the wall.
Step 2: Base Coat Application
-
Paint the first base coat:
Using a fresh foam roller, apply your creamy off-white base color. Move in smooth, even strokes to avoid creating heavy texture. -
Sand lightly between coats:
If you notice any bumps or roller debris after the first coat dries, give it a very quick pass with fine sandpaper and wipe away the dust. -
Apply the second base coat:
Roll on a second layer of the base color to ensure varied opacity is covered and the finish looks like solid stone. Let this dry completely—preferably overnight—before attempting to stencil.
Add an Aged Look
For an authentic cement tile look, lightly sand the stenciled pattern after it dries to distress the charcoal paint before sealing.
Step 3: Stenciling the Pattern
-
Plan your layout:
Find the visual center of your fireplace header. It is best to start stenciling in the middle and work outward so the partial tiles on the left and right sides are symmetrical. -
Secure the stencil:
Position your stencil at the center point and secure it with spray adhesive or low-tack tape. Ensure the stencil lies perfectly flat against the surface to minimize bleed. -
Load the roller sparingly:
Dip your foam roller or stencil brush into the charcoal paint, then offload almost all of it onto a paper towel. The tool should feel nearly dry to the touch. -
Apply the darker color:
I like to roll over the stencil with very light pressure. If using a brush, use a vertical swirling motion. Multiple thin, misty layers are always better than one thick, blotchy one. -
Move and repeat:
Carefully peel back the stencil and reposition it for the next tile. Many stencils have registration marks (little cutouts of the previous design) to help you align the pattern perfectly. -
Tackle the corners:
When you reach the edges or the floor, the stencil won’t fit flat. You may need to bend the flexible plastic into the corner or cut the stencil to finish the awkward partial tiles.
Step 4: Finishing Touches
-
Touch up by hand:
Once the stencil work is done, inspect your work. Use a small artist’s brush and your base color to erase any major bleeds, or use the charcoal color to crisp up the geometric points. -
Seal for protection:
Apply two to three thin coats of clear, matte polycrylic sealer. This mimics the raw finish of cement tile while protecting your hard work from heat and cleaning.
Step back and admire how a simple paint job has completely redefined the focal point of your living room
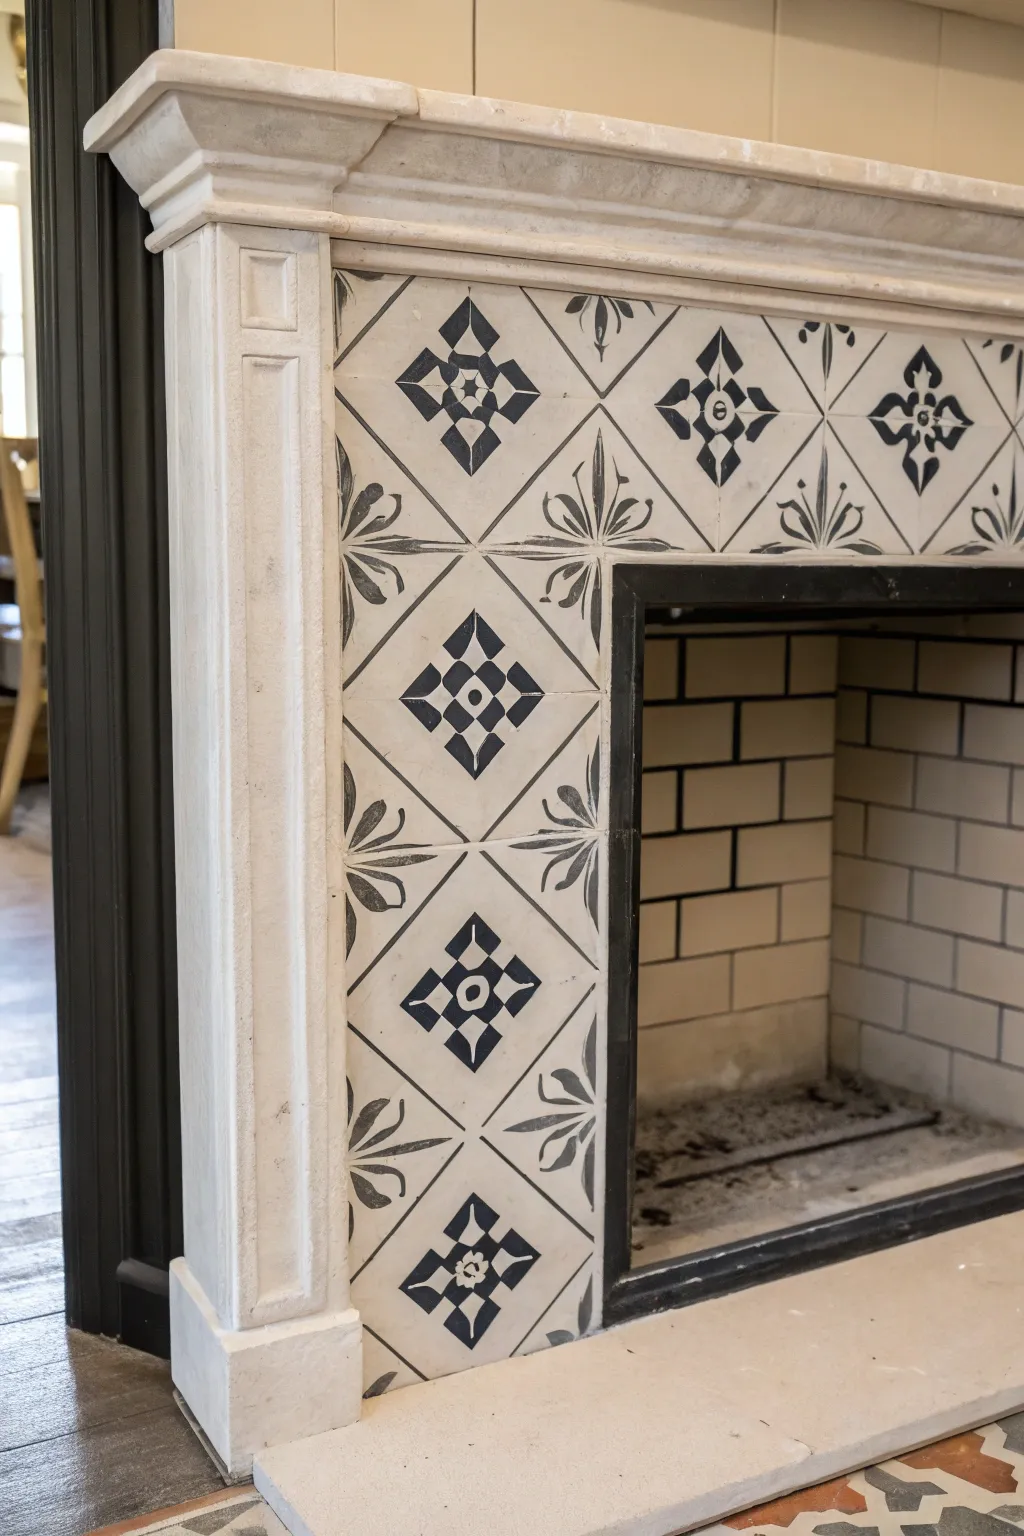
Bold Medallion Stencil for a Vintage Tile Vibe
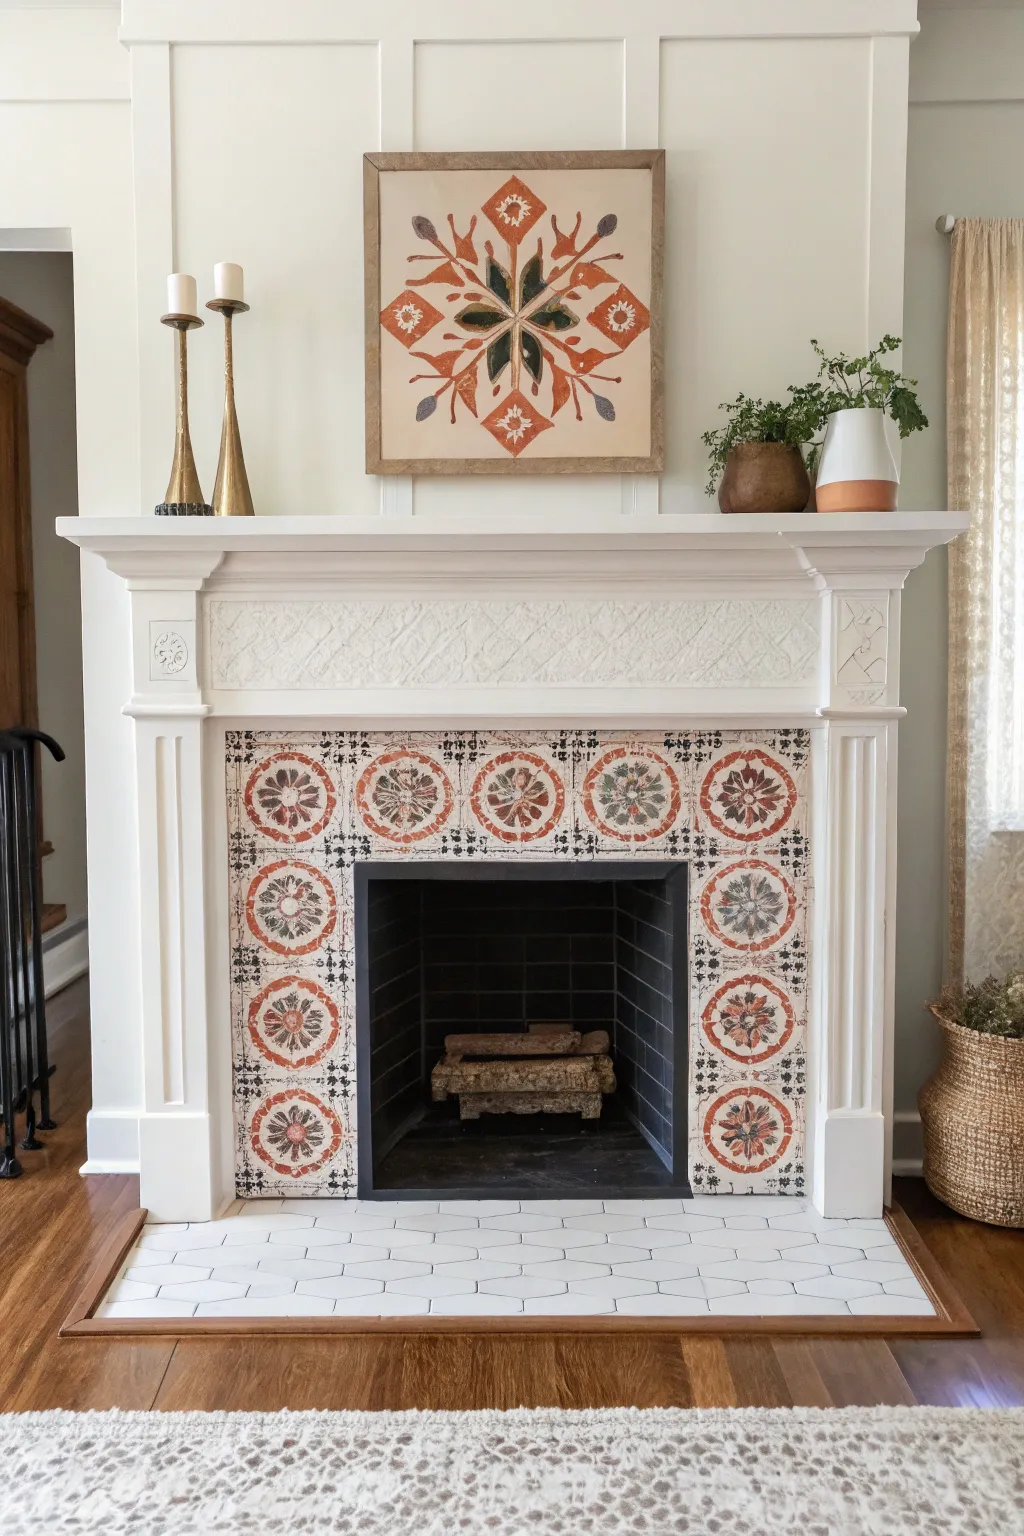
Transform a plain or dated fireplace surround into a stunning focal point using paint and high-contrast stencils. This project mimics the charm of old-world encaustic tiles with a warm, distressed finish that feels curated rather than brand new.
Step-by-Step
Materials
- High-quality bonding primer (tintable if needed)
- Chalk paint or matte paint in Cream/Off-White (base)
- Chalk paint in Terracotta/Rust Orange
- Chalk paint in Charcoal/Dark Grey
- Chalk paint in Dusty Blue/Grey
- Decorative medallion stencil (sized to your tiles)
- Stencil brushes (various sizes)
- Small artist detail brushes
- Painter’s tape
- Sandpaper (220-grit)
- Matte clear sealer (polycrylic or wax)
- Cleaning supplies (TSP or degreaser)
- Paper towels
Step 1: Prep & Prime
-
Deep clean the surface:
Scrub the existing tile surround thoroughly with a TSP substitute or heavy-duty degreaser. Fireplaces accumulate soot and oils that will repel paint, so this step is critical for adhesion. -
Sand for grip:
Lightly scuff the shiny surface of your existing tiles with 220-grit sandpaper. You just want to break the gloss, not grind them down. Wipe away all dust with a damp cloth. -
Mask the area:
Use painter’s tape to meticulously mask off the mantel, the floor, and the metal firebox insert. Press the tape edges down firmly to prevent bleed-through. -
Apply bonding primer:
Roll on a coat of high-quality bonding primer designed for glossy surfaces. Let this cure according to the can’s instructions—usually overnight is best for maximum durability around a heat source.
Step 2: Base Coat & Layout
-
Paint the base color:
Apply two coats of your Cream or Off-White chalk paint. Aim for a matte finish to mimic the texture of unglazed vintage tile. Allow full drying time between coats. -
Plan the pattern:
Hold your stencil up against the existing tile grid. Whether you are painting over a flat surface or individual tiles, ensure your stencil aligns with the center of each square for a symmetrical look. -
Secure the stencil:
Starting with the top center tile, tape your stencil firmly in place. Spray adhesive can also help, but tape often suffices for small areas like this.
Bleeding Lines?
If paint bleeds under the stencil, don’t panic. Wait for it to dry, then use a small artist brush and your base cream color to touch up and ‘erase’ the blurry edges.
Step 3: Stenciling the Design
-
Load the brush minimally:
Dip your stencil brush into the Terracotta paint, then offload almost all of it onto a paper towel until the brush feels dry. This ‘dry brush’ technique prevents paint from bleeding under the stencil edges. -
Apply the primary color:
Stipple or swirl the Terracotta paint over the main floral medallion sections of the stencil. Keep the application somewhat uneven to create a naturally aged, hand-painted appearance. -
Add secondary colors:
Use a smaller brush for the detail elements. Apply the Charcoal Grey to the center points and the outer intricate borders. I like to blend the edges slightly where colors meet for a softer transition. -
Lift and repeat:
Carefully peel the stencil straight back to reveal the design. Wipe the back of the stencil clean if paint accumulates, then move to the next tile. Work in a checkerboard pattern (every other tile) to avoid smudging wet paint. -
Fill the gaps:
Once your first set of tiles is dry to the touch, fill in the remaining squares, repeating the stenciling process across the entire surround.
Level Up: Faux Grout
Use a thin artist brush and grey paint to draw faux grout lines between your stenciled squares. It adds dimension and makes the ’tiles’ look like separate installations.
Step 4: Distressing & Sealing
-
Hand-paint corner details:
Using a small artist brush and the Charcoal paint, add four small dots or flourishes in the corners of each tile to connect the pattern visually, mimicking the look of traditional encaustic designs. -
Simulate aging:
Once the paint is completely dry, lightly sand high-traffic spots or edges of the design with fine-grit sandpaper. This reveals bits of the base coat and gives that authentic ‘worn-in’ vibe. -
Antique the surface (optional):
If the white feels too bright, mix a tiny amount of water with grey or brown paint to create a wash. Lightly brush it over the tiles and wipe it back immediately with a rag to dirty up the recesses. -
Seal the work:
Apply two to three coats of a matte, heat-resistant sealer. A polycrylic is generally good, but ensure it is non-yellowing. This protects your artwork from soot and cleaning.
Step back and admire how a little paint and patience have completely reinvented the character of your room.
Checkerboard Tiles Using Tape and Patience
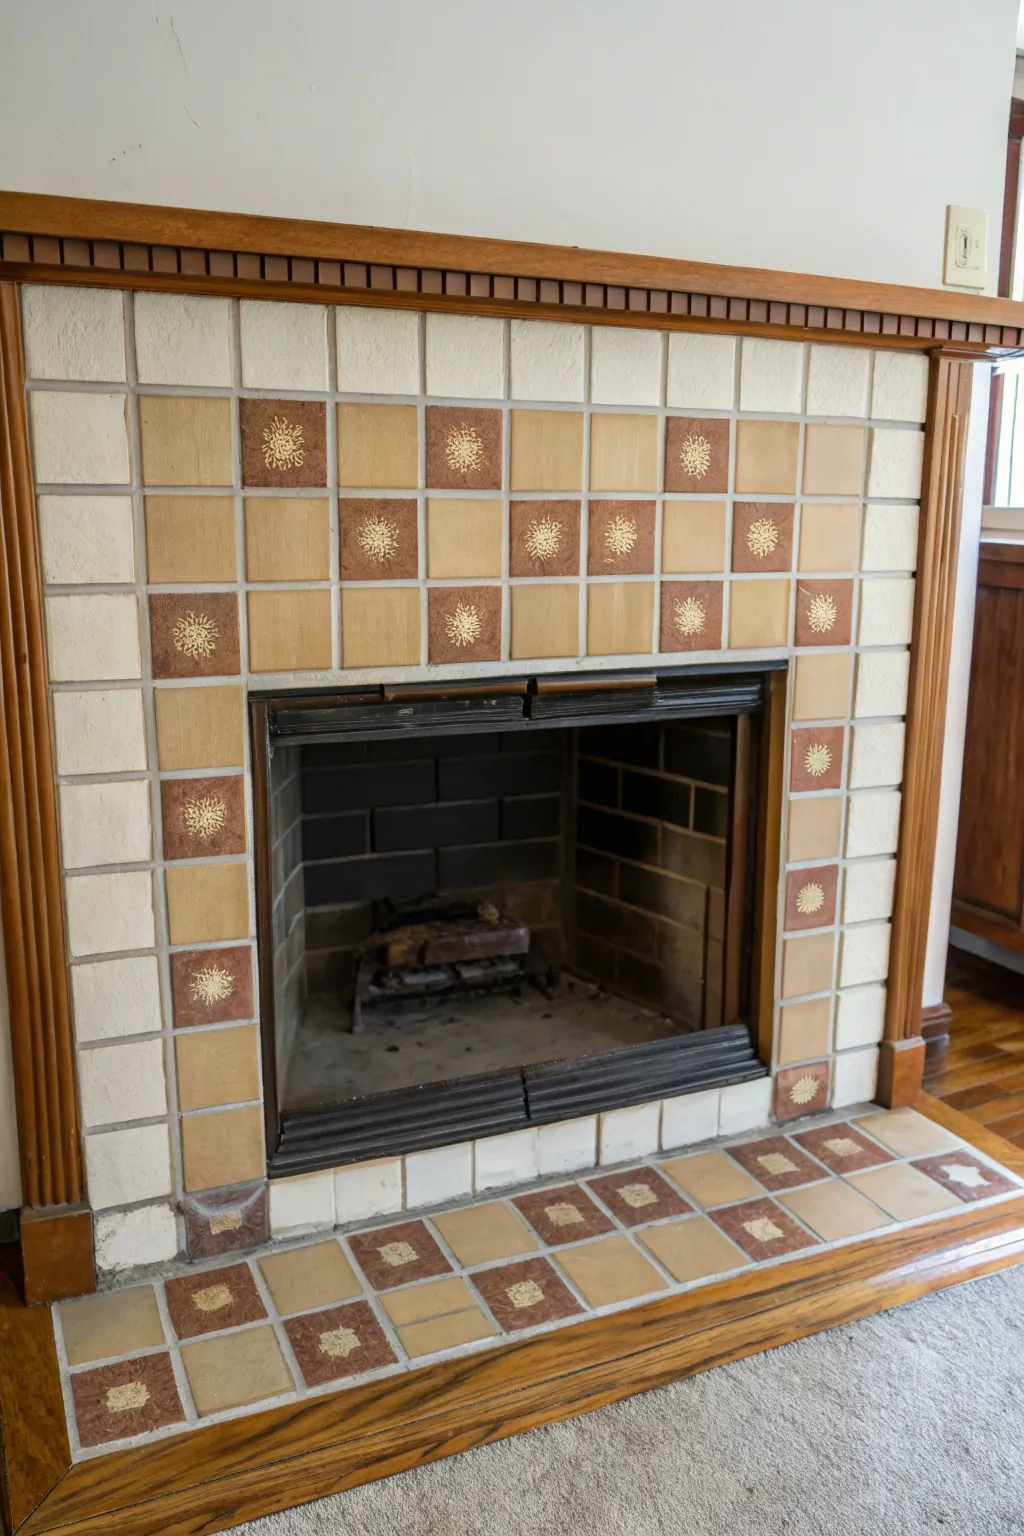
Transform plain or dated fireplace tiles into a stunning, warm checkerboard design featuring intricate sunburst motifs. This technique relies on strategic taping and stenciling to mimic the look of custom-fired ceramic tiles without any demolition.
How-To Guide
Materials
- High-quality bonding primer (like STIX)
- Latex or acrylic paint (Cream/Off-White base)
- Latex or acrylic paint (Warm Terracotta/Rust)
- Latex or acrylic paint (Soft Mustard/Ochre)
- Gold metallic acrylic paint
- Painter’s tape (various widths)
- Small foam roller and tray
- Detail stencil brush
- Small flat artist’s brush
- Small sunburst or floral stencil (approx. 2-3 inches)
- Polyurethane sealer (satin or matte finish)
- Sandpaper 220-grit
- TSP or heavy-duty degreaser
- Lint-free rags
Step 1: Preparation & Base Coat
-
Clean the surface:
Scrub every inch of the existing tile and grout with TSP or a heavy-duty degreaser. Fireplaces accumulate soot and oils that will repel paint, so this step is critical for adhesion. -
Sand for grip:
Lightly scuff the shiny surface of the tiles with 220-grit sandpaper. You don’t need to remove the old finish, just dull it enough so the primer has something to bite into. -
Wipe away dust:
Use a damp, lint-free rag to remove all sanding dust. Let the surface dry completely before moving to the next step. -
Apply bonding primer:
Roll on a thin, even coat of high-quality bonding primer over the tiles and grout. Let this cure according to the manufacturer’s instructions, as rushing here can lead to peeling later. -
Paint the background:
Apply two coats of your cream or off-white base color over everything, including the grout lines. This refreshes the grout and provides a neutral canvas for the pattern.
Step 2: Creating the Grid
-
Map the design:
Decide on your checkerboard layout. The goal is to alternate between the cream background, the mustard squares, and the terracotta squares. -
Tape off the grout:
Apply thin painter’s tape directly over the grout lines to preserve that fresh cream color. Press the edges down firmly to prevent bleed-through. -
Isolate the first set of squares:
Tape around the edges of the tiles designated for the mustard color. Paint these squares with the soft ochre paint using a small foam roller for a smooth finish. -
Apply second coat:
Once the first coat is dry to the touch, apply a second coat of mustard to ensure solid, opaque coverage. -
Remove tape and re-tape:
Carefully peel up the tape around the mustard squares while the paint is slightly tacky. Allow them to dry fully (I usually wait overnight to be safe) before taping off the tiles destined for the terracotta color. -
Paint the accent squares:
Paint the remaining squares with the warm terracotta color, applying two coats as needed.
Tape Trick
To prevent bleeing, paint over the tape edge with the *base* color first. This seals the gap so your accent color goes on perfectly crisp.
Step 3: Details & Sealing
-
Prepare the stencil:
Select a small sunburst or floral stencil that fits comfortably in the center of your tiles. Spray the back lightly with stencil adhesive to keep it stable. -
Stencil the terracotta tiles:
Position the stencil in the center of a terracotta square. Dip your stencil brush into the gold metallic paint, offloading most of it onto a paper towel first. -
Dab, don’t brush:
Lightly dab the gold paint through the stencil using an up-and-down pouncing motion. This prevents paint from seeping under the stencil edges. -
Repeat the pattern:
Move the stencil to the next terracotta tile and repeat. Clean the stencil periodically if paint buildup starts to affect the crispness of the lines. -
Touch-ups:
Once the stenciling is dry, remove all remaining tape. Use a small flat artist’s brush and your base cream paint to clean up any messy edges where paint might have bled onto the grout lines. -
Seal the work:
Protect your beautiful faux tiles with two coats of clear, water-based polyurethane in a satin or matte finish.
Rustic Texture
For a more authentic ‘handmade tile’ look, use a sponge instead of a roller for the colored squares. It adds subtle texture and variation.
Enjoy the cozy warmth your new custom-look fireplace brings to the room
Faux Marble Veining on Fireplace Tile
Achieve the high-end look of Carrara marble without the hefty price tag using paint techniques that mimic natural stone. This project transforms a plain fireplace surround into a sophisticated focal point with realistic grey veining on a crisp white background.
Step-by-Step
Materials
- High-quality primer (Bonding primer recommended for tile)
- Pure white satin or semi-gloss latex paint
- Grey acrylic craft paint (dark charcoal and medium grey)
- Glazing medium
- Small artist brushes (fine liner and small round)
- Sea sponge or feather (optional for texture)
- Clean lint-free rags
- Spray bottle with water
- Water-based polyurethane topcoat (satin or gloss)
- Painter’s tape
- Sandpaper (220 grit)
Step 1: Preparation and Base Coat
-
Clean surface thoroughly:
Scrub the existing tile or surround with a degreaser or TSP substitute to remove all soot, dust, and oils. This step is critical for proper adhesion. -
Protect surrounding areas:
Use painter’s tape to mask off the mantle, floor, and the metal firebox insert to ensure crisp lines and protect them from splatter. -
Light sanding:
Scuff the surface gently with 220-grit sandpaper to give the primer something to grip onto, then wipe away all sanding dust with a damp cloth. -
Apply bonding primer:
Roll or brush on a coat of high-quality bonding primer. Allow it to dry completely according to the manufacturer’s instructions, usually at least 24 hours for maximum durability. -
Paint the white base:
Apply two to three coats of your pure white base paint, letting each coat dry fully in between. Aim for a solid, opaque coverage that completely hides the old surface.
Step 2: Creating the Veining
-
Mix your glaze:
Combine one part grey paint with four parts glazing medium. I like to keep a small cup of water nearby to further thin the mixture if it feels too heavy. -
Plan the vein path:
Look at the reference photo or real marble to understand how veins travel. Notice how they often branch out like lightning or tree roots rather than just straight lines. -
Paint the primary veins:
Dip a fine liner brush into your grey glaze mixture. Using a shaky hand (don’t try to be perfect!), drag the brush diagonally across the surface to create the main vein structures. -
Soften the lines:
Immediately after painting a vein, blot it gently with a damp sea sponge or a crumpled rag to soften the edges so they look embedded in the stone rather than painted on top. -
Add secondary veins:
Use a slightly lighter grey mix to add smaller, fainter offshoots connecting to your main veins. These should be very subtle to create depth. -
Mist and manipulate:
Lightly mist a painted vein with water from your spray bottle while the paint is still wet. This causes the paint to bleed slightly, mimicking the organic diffusion seen in real marble. -
Intensify key areas:
Go back with a slightly darker grey mix and accent just a few specific spots along the main veins to add contrast and focal interest. -
Create background texture:
Dip your rag into very watered-down grey glaze and dab it randomly in the white empty spaces, then wipe most of it away. This leaves a barely-there ghosting effect that makes the white look less like plastic.
Feather Technique
For ultra-fine veins, dip the edge of a turkey feather in paint and drag it across the tile. Roll the feather as you drag for random, organic shapes.
Step 3: Sealing and Finishing
-
Dry thoroughly:
Allow your faux marble work to dry for at least 24 hours. The glaze extends the drying time, so patience is key here. -
Apply first topcoat:
Brush or roll on a thin layer of water-based polyurethane. A satin finish usually looks most like honed marble, while gloss mimics polished stone. -
Lightly sand between coats:
Once dry, very lightly run fine-grit sandpaper over the clear coat to knock down any dust nibs, then wipe clean. -
Final topcoat:
Apply a second and final coat of polyurethane for durable protection, especially if the fireplace gets regular use. -
Remove tape:
Carefully score the edge of the painter’s tape with a utility knife before peeling it off to prevent lifting any fresh paint.
Gold Leaf Accent
For a luxe Calacatta gold look, trace partially over a few dried grey veins with very diluted gold metallic paint for a warm, shimmering detail.
Step back and admire how a simple paint technique has completely elevated the elegance of your living space
Ombre Fade Across the Tile Field
Achieve a sophisticated, modern look by creating a soft, vertical gradient on your existing fireplace tiles. This project uses multiple shades of charcoal and slate paint to mimic the natural variation of handmade ceramic tile.
Step-by-Step Tutorial
Materials
- High-adhesion tile primer
- Latex or enamel paint in satin finish (Black)
- Latex or enamel paint in satin finish (Dark Gray)
- Latex or enamel paint in satin finish (Medium Gray)
- Clear polyurethane topcoat (matte or satin)
- TSP substitute cleaner
- Sanding sponge (medium grit)
- Painter’s tape
- Small foam rollers (4-inch)
- Small angled sash brush
- Sea sponge or rag (for texture)
- Paint tray and liners
Step 1: Preparation
-
Clean the Surface:
Begin by scrubbing the existing tiles thoroughly with a TSP substitute cleaner to remove all soot, grease, and dust. This is crucial for paint adhesion. -
Establish Protection:
Carefully tape off the surrounding wood mantel, the floor, and the metal firebox insert to protect them from stray paint marks. -
Scuff Sanding:
Lightly sand the surface of the tiles with a medium-grit sanding sponge. You don’t need to remove the old finish, just roughen it up so the primer grips well. -
Remove Dust:
Wipe down the entire area with a damp tack cloth or microfiber rag to ensure absolutely no sanding dust remains on the surface.
Step 2: Priming and Base Coat
-
Apply Primer:
Roll on a thin, even coat of high-adhesion tile primer using a foam roller. Use your angled brush to get into the grout lines first. -
Dry and Inspect:
Allow the primer to dry according to the manufacturer’s instructions. If the old color is still showing through significantly, apply a second coat. -
Paint Grout Lines:
Using the darkest black paint, brush specifically into all the grout lines first. This creates a clean framework and ensures no white primer peeks through later. -
Apply Base Color:
Roll the darkest black shade over the bottom two or three rows of tiles. This anchors the design and grounds the fireplace visually.
Uneven Texture?
If roller marks appear, lightly sand with fine-grit paper between dried coats. Use a high-quality self-leveling additive (like Floetrol) to help the paint lie flatter.
Step 3: Creating the Ombre Effect
-
Mix the Transition Shade:
On a paper plate or tray, mix roughly 70% black paint with 30% dark gray. This creates your first transition color for a gradual fade. -
Paint the Lower Middle:
Apply this mixed transition shade to the next two rows of tiles moving upward. Use a fresh foam roller to keep the application smooth. -
Feather the Edges:
While the paint is still slightly wet, gently dab the boundary between the black rows and the transition rows with a dry sea sponge to soften the line. -
Mid-Tone Application:
Paint the central rows near the firebox opening with the pure dark gray paint. I find working in small sections helps maintain a wet edge for blending. -
Upper Transition Mix:
Mix 50% dark gray with 50% medium gray. Apply this to the rows just below the mantel header. -
Top Row Highlight:
Paint the very top row of tiles with the pure medium gray paint. This catches the light near the mantel and completes the vertical gradient. -
Final Blending Check:
Step back and look for harsh lines. If any transitions look too striped, lightly glaze over them with a very dry brush and a blend of the two adjacent colors.
Faux Glaze Effect
For a hand-fired ceramic look, mix clear glazing medium with a slightly lighter gray and dab it randomly on tile centers before sealing to create depth and variation.
Step 4: Finishing Touches
-
Cure Time:
Allow the paint to fully dry for at least 24 hours. The ombre effect looks best when the sheen has settled. -
Apply Topcoat:
Roll on two thin coats of clear polyurethane sealer in a matte or satin finish. This protects the painted finish from heat and soot cleaning. -
Remove Tape:
Carefully score the edge of the painter’s tape with a utility knife before peeling it off to prevent lifting your fresh paint job. -
Re-style:
Once fully cured (usually 3-5 days), replace your fireplace screen and style the mantel.
Enjoy the warmth of your newly updated fireplace feature.
Trompe L’Oeil 3D Tile With Painted Shadows
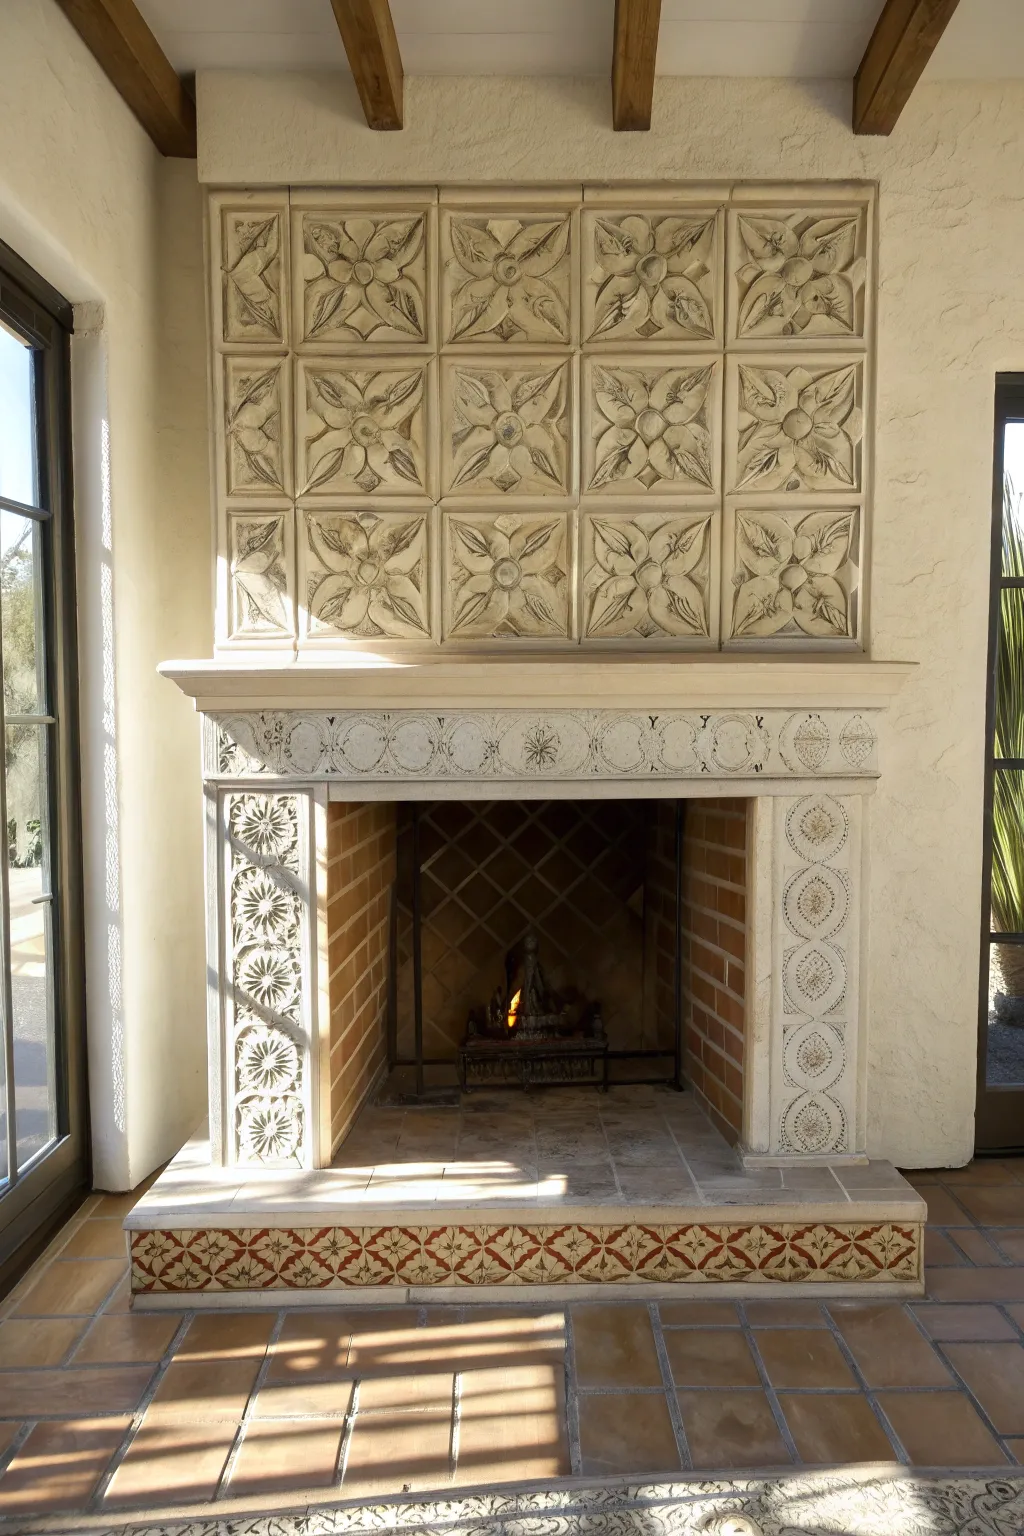
Transform flat, boring fireplace tiles into an architectural masterpiece using the art of trompe l’oeil. By layering specific shades of cream and grey, you’ll create painted shadows and highlights that mimic the depth and texture of carved stone reliefwork.
Step-by-Step Tutorial
Materials
- High-quality adhesion primer (like STIX)
- Latex or chalk paint (Cream/Off-white base)
- Acrylic glazing medium
- Acrylic paints (Raw Umber, Cool Grey, Titanium White)
- Assorted brushes (1-inch flat, small angled shader, fine liner)
- Painter’s tape (various widths)
- Reference stencil or large square sponge stamp (floral motif)
- Pencil and ruler
- Matte clear topcoat
Step 1: Preparation & Base Coat
-
Clean thoroughly:
Scrub the existing fireplace surface with a heavy-duty degreaser like TSP. Any soot or grease left behind will prevent your faux finish from adhering properly. -
Prime the surface:
Apply a coat of high-adhesion primer designed for slick surfaces. This is crucial for painting over existing tile or stone to ensure durability. -
Apply base color:
Paint the entire upper chimney breast with your cream or off-white base color. Two coats are usually best for solid coverage; let it dry fully overnight. -
Grid layout:
Using a ruler and pencil, lightly draw a grid of large squares on the upper section. These will simulate the individual relief tiles seen in the inspiration photo. -
Tape the grout lines:
Apply thin painter’s tape (or cut standard tape into strips) along your pencil lines to mask off the ‘grout’ areas between your faux tiles.
Step 2: Creating the 3D Motif
-
Position the stencil:
Center your floral stencil or sponge stamp within the first taped-off square. A dense, symmetrical floral pattern works best for this relief look. -
Stipple the base shape:
Lightly stipple a mixture of your base cream paint and a tiny drop of grey through the stencil. You want a faint, ghostly image, not a high-contrast print. -
Repeat the pattern:
Continue this stenciling process for every square in your grid, ensuring the orientation remains consistent. Let this layer dry to the touch. -
Mix your shadow glaze:
Combine acrylic glazing medium with a small amount of Raw Umber and Cool Grey. The glaze makes the paint translucent, which is the secret to realistic shadows. -
Define the light source:
Decide where your imaginary light is coming from (usually top-left). This means shadows will always fall on the bottom and right edges of every raised shape.
Shadows look muddy?
If your shadows look like dirt rather than depth, you’re using too much paint. Add more glazing medium to your mix to increase transparency ensuring the base color shows through.
Step 3: Painting Dimensions
-
Paint deep shadows:
Using a small angled shader brush and your dark glaze, paint the ‘shadow side’ of your floral petals and the inner edges of the square frames. Keep the glaze thin and build up darkness slowly. -
Add highlights:
Mix a bright Titanium White with a little glazing medium. Paint the ‘light side’ (top and left edges) of the petals and frame borders to simulate the raised stone catching the light. -
Soften the edges:
I find it helpful to use a clean, dry brush to gently feather the wet glaze and highlights. This blurs harsh lines and makes the ‘carving’ look worn and natural. -
Remove tape:
Peel off the tape revealing the grid lines. If they look too stark, wash over them with a very diluted creamy glaze to push them back visually. -
Detail the mantel:
For the mantel shelf and legs, use a simpler repeating circle or geometric stencil. Apply the same shadow/highlight technique but with less intensity to keep the focus on the upper tiles. -
Seal the work:
Once fully cured (give it 24 hours), apply two coats of a dead-flat or matte clear sealer. A glossy finish ruins the illusion of porous stone.
Pro Tip: Color Temp
Match your paint undertones. Use warm greys (like ‘greige’) for the shadows on cream tiles. Cool, blue-based greys will look artificial against a warm white background.
Step back and admire how a flat surface has been transformed into a grand, sculptured focal point simply by tricking the eye with light and shadow


Have a question or want to share your own experience? I'd love to hear from you in the comments below!