
If you’ve been staring at your cupboards thinking, “You could be so much cuter,” you’re in the right headspace. A fresh coat of cupboard paint can completely shift the mood of your kitchen (or any space) once you start playing with color, finish, and contrast.
Timeless White Cupboards
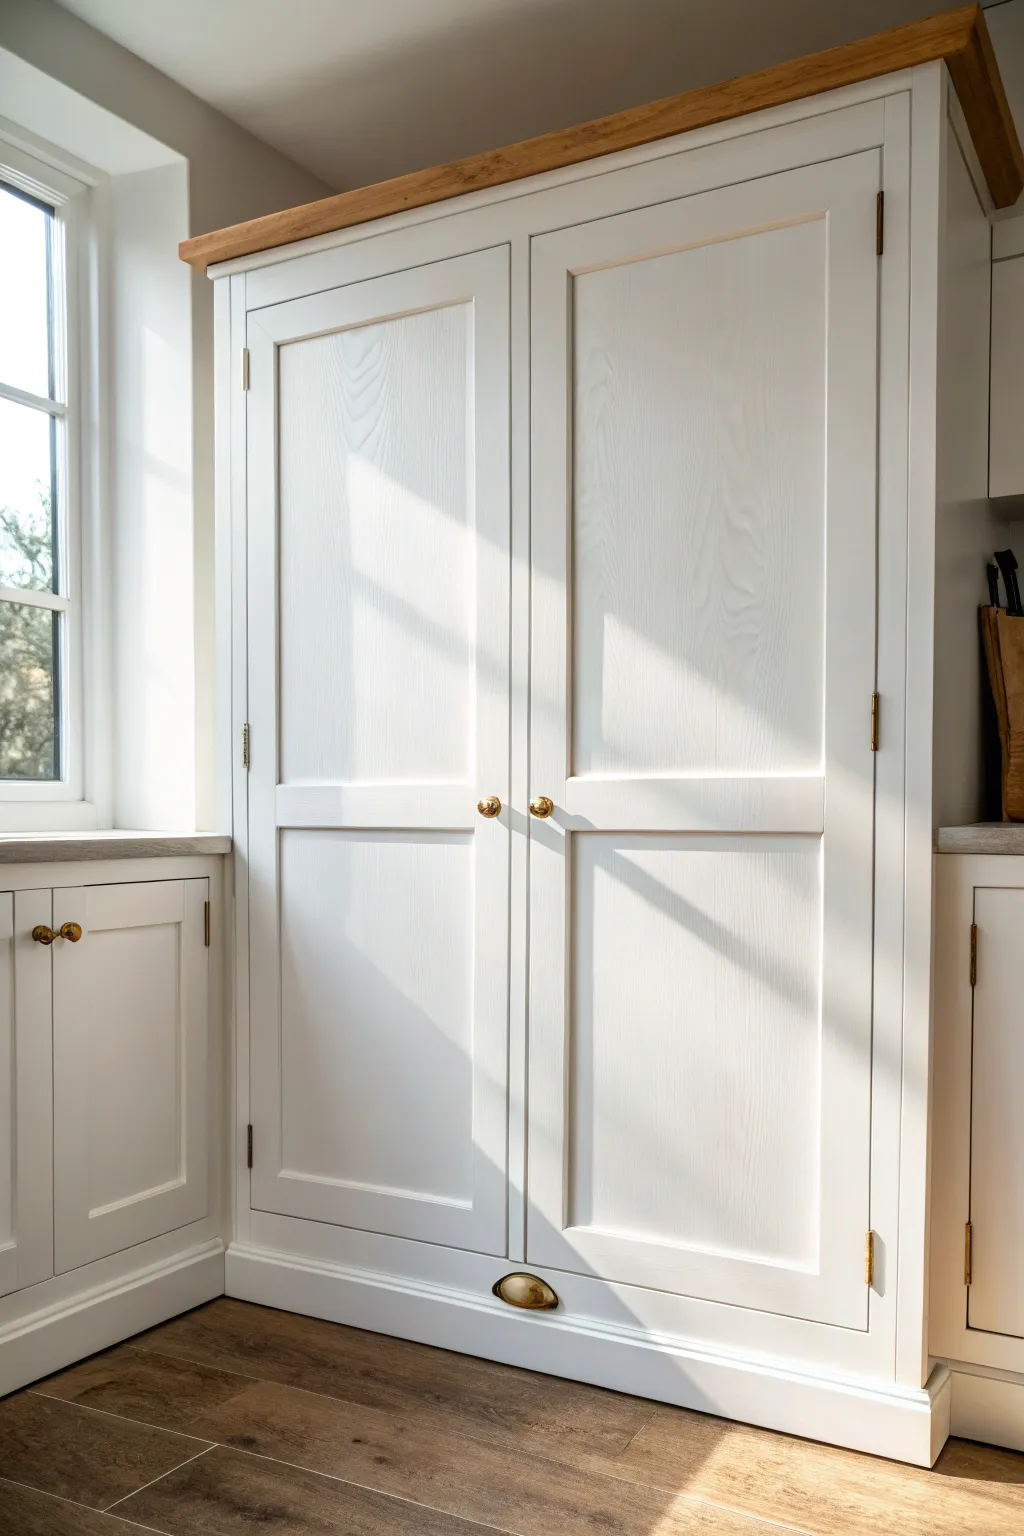
Achieve a pristine, built-in look with this tutorial on refreshing a tall wooden cupboard in a classic, soft white. The finish allows just a hint of natural wood grain to show through, creating a piece that feels both modern and rooted in tradition.
How-To Guide
Materials
- Tall wooden cupboard or wardrobe (unfinished or stripped)
- Sandpaper (120 and 220 grit)
- Tack cloth
- High-quality interior wood primer (stain-blocking)
- Satin or eggshell finish paint (off-white or soft cream)
- Synthetic bristle brush (2-inch)
- Small foam roller
- Painter’s tape
- Brass knobs (2)
- Brass cup pull handle
- Screwdriver and drill
- Wood filler (if needed)
- Drop cloths
Step 1: Preparation & Sanding
-
Clear the area:
Begin by removing all contents from the cupboard and clearing enough floor space to work comfortably. Lay down drop cloths to protect your flooring from dust and drips. -
Remove hardware:
Use a screwdriver to take off any existing handles, knobs, or latches. Keep the screws in a labelled baggie so you don’t lose them. -
Initial cleaning:
Wipe down the entire surface with a damp cloth and mild detergent to remove grease or grime, which is crucial for paint adhesion. -
Inspect for damage:
Check for any deep scratches or holes. If you find them, apply a small amount of wood filler, let it dry, and sand it flush. -
Sand the surfaces:
Using 120-grit sandpaper, scuff-sand all the wood surfaces. You don’t need to remove old finishes entirely, just dull the shine to give the primer something to grip. -
Dust removal:
vacuum up the sanding dust, then wipe every nook and cranny with a tack cloth to ensure a perfectly smooth base. -
Masking edges:
Apply painter’s tape carefully along walls, the floor trim, and especially the top wooden cornice if you plan to keep that natural wood look shown in the image.
Step 2: Priming & Painting
-
Apply primer:
Brush a stain-blocking primer into the recessed corners and molding of the doors first. Use the foam roller for the large flat panels to avoid brush marks. -
Sand the primer:
Once the primer is fully dry, lightly sand it with fine 220-grit sandpaper. This feels minimal, but I find it makes a huge difference in getting that professional, silky finish. -
First coat of paint:
Stir your satin white paint thoroughly. Begin by cutting in the detailed areas—the shaker panel edges and door frames—using your angled synthetic brush. -
Roll the flats:
Immediately follow the brushing by rolling the paint onto the flat door panels and side panels. Maintain a ‘wet edge’ to prevent lap marks. -
Drying time:
Allow the first coat to dry completely according to the manufacturer’s instructions, typically 2-4 hours. -
Second coat:
Apply the second coat using the same method: brush the details, then roll the flats. A second coat ensures true opacity and durable coverage. -
Remove tape:
Carefully peel away the painter’s tape while the final coat is still slightly tacky to ensure crisp lines against the wall and the natural wood top.
Pro Tip: Grain Visibility
To keep the wood grain visible like the photo, thin your paint slightly with water (for water-based) or mineral spirits (oil-based) and avoid heavy coats.
Step 3: Finishing Touches
-
Install main hardware:
Once the paint has cured for at least 24 hours, install the brass knobs on the center stiles of the doors. -
Install the cup pull:
Mark the center point on the bottom drawer or lower panel frame. Drill pilot holes and screw in the brass cup pull for that classic vintage touch. -
Adjust hinges:
If you painted over the hinges or removed the doors, rehang them now and adjust the hinge screws to ensure the gap between the doors is even. -
Final polish:
Give the new brass hardware a quick buff with a soft cloth to remove fingerprints and make them shine against the fresh white paint.
Troubleshooting: Sticky Doors
If doors stick after painting, rub a clear candle or apply silicone spray along the contact points once the paint is fully cured to reduce friction.
Enjoy the bright, airy transformation this classic white finish brings to your room.


Soft Greige or Light Gray Cupboards
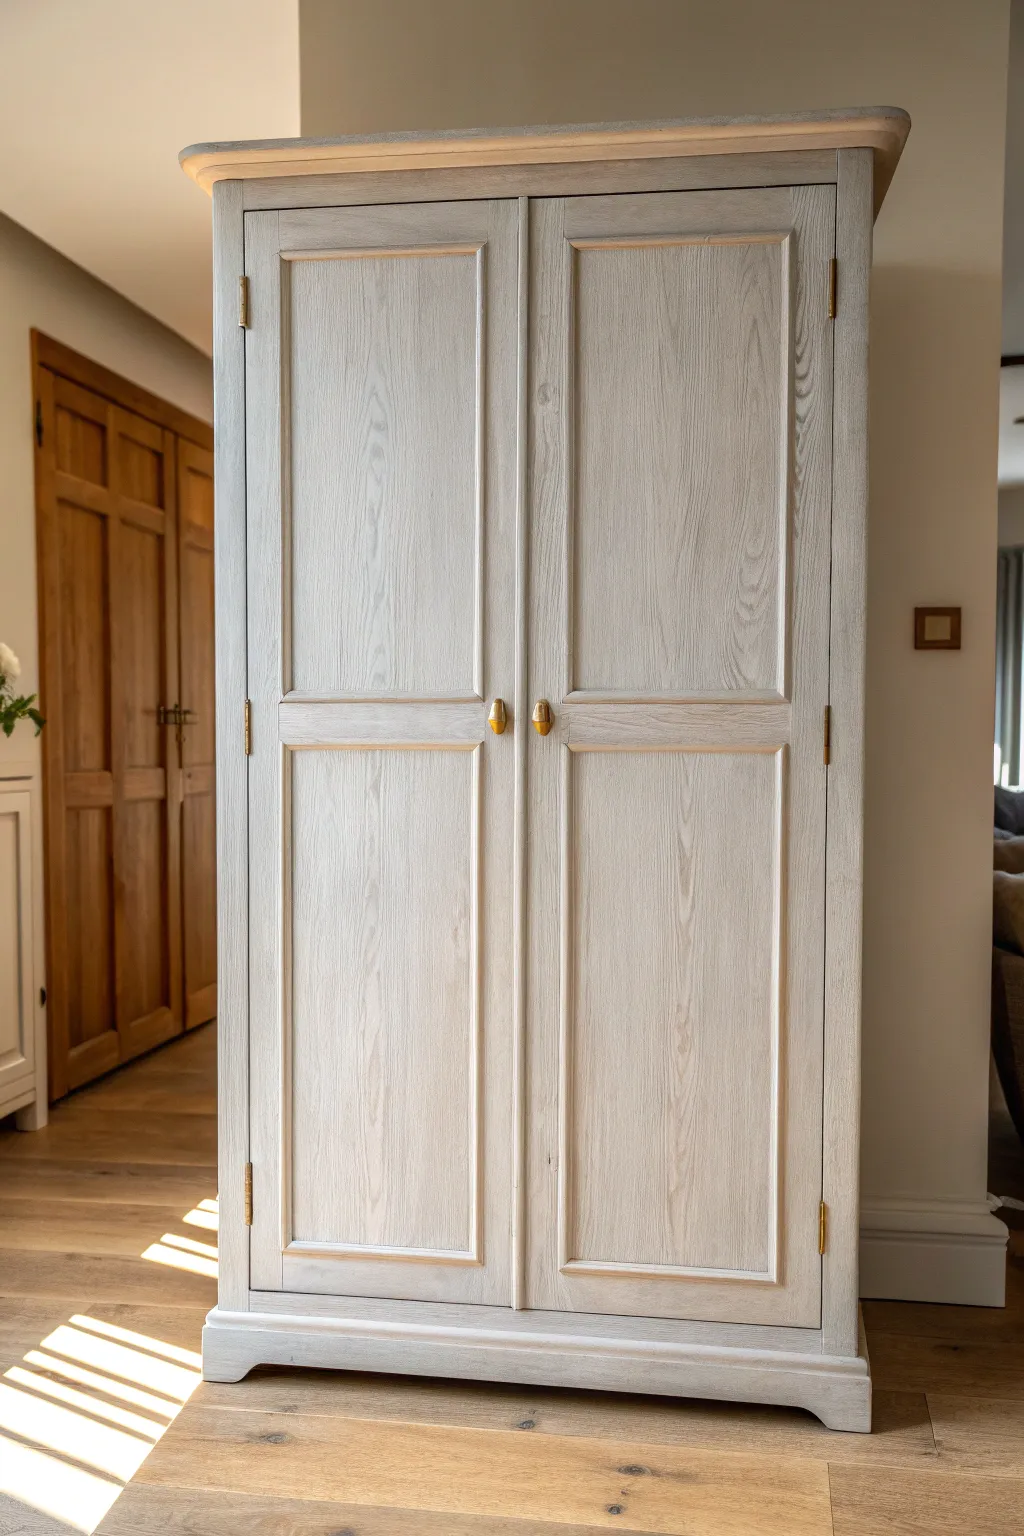
Transform a dated or plain wooden wardrobe into a modern, airy piece with this soft greige makeover. By using a wash technique rather than solid paint, you allow the natural wood grain to peek through, creating textural depth and a sophisticated, organic feel.
Step-by-Step Tutorial
Materials
- Wooden wardrobe (sanded slightly to raw wood)
- Orbital sander with 120 and 220 grit pads
- Tack cloth or microfiber rags
- Sugar soap or degreaser
- Water-based chalk paint or furniture paint (warm pale grey/greige)
- Water for dilution
- Mixing container
- Wide synthetic brush (2-3 inch)
- Lint-free cotton rags
- Clear matte furniture wax or water-based polycrylic matte varnish
- Wax brush (if using wax)
- Screwdriver
- Painters tape
- Drop cloth
Step 1: Preparation & Stripping
-
Remove hardware:
Begin by removing all knobs, handles, and hinges with a screwdriver. Label each piece and screw in a small bag so you remember exactly where they go later. -
Dismount doors:
It is much easier to work on the doors when they are lying flat. Take the doors off their hinges and place them on sawhorses or a protected flat surface. -
Clean surface:
Wipe down the entire piece with a sugar soap solution or degreaser to remove old polish, oils, and dirt. Let it dry completely. -
Sand the finish:
Using an orbital sander with 120-grit paper, sand away the existing varnish or topcoat. You want to get down to the raw wood so the wash can soak in. -
Refine the surface:
Switch to 220-grit sandpaper for a final pass. This smooths out any harsh swirl marks but leaves the wood pores open. -
Remove dust:
Vacuum up the sanding dust thoroughly. Wipe the wood with a tack cloth or a slightly damp microfiber rag to ensure a perfectly clean surface.
Step 2: Creating the Wash
-
Mix the paint wash:
In your container, mix your chosen greige chalk paint with water. I usually start with a 1:1 ratio—equal parts paint and water. Stir until fully combined and consistency is like thin cream. -
Test the opacity:
Apply a small amount of the wash to an inconspicuous spot (like the inside of a leg). If it’s too opaque, add more water; if it’s too sheer, add a touch more paint.
Grain Direction Pro Tip
Always wipe off the paint in the exact direction of the wood grain. Circular wiping will leave unnatural swirls that ruin the organic ‘washed’ effect.
Step 3: Application Technique
-
Apply the wash:
Dip your wide synthetic brush into the wash and apply it generously to one section of the wardrobe, working in the direction of the wood grain. -
Wipe back:
While the paint is still wet, take a lint-free cotton rag and wipe the surface in long, smooth strokes along the grain. This removes excess pigment and reveals the wood texture. -
Handle moldings:
For the recessed panels and corners, use the brush to push the wash into the crevices. Wipe gently with the rag to ensure paint doesn’t pool in the corners. -
Continue section by section:
Work your way around the wardrobe, completing one panel or side at a time to prevent the wash from drying before you can wipe it back. -
Second coat:
Allow the first layer to dry for about 2-4 hours. Inspect the color; if you want a more solid grey look, repeat the apply-and-wipe process for a second layer.
Patchy Finish?
If the wash looks blotchy, the wood may have absorbed it unevenly. Lightly mist the raw wood with water right before painting to help the wash glide on smoothly.
Step 4: Sealing & Finishing
-
Light sanding:
Once fully dry, lightly run a fine-grit sanding pad over the surface. This knocks down any raised wood grain fibers for a buttery smooth touch. -
Apply protection:
To seal the finish without yellowing it, apply a clear matte protective coat. You can use a clear furniture wax buffed on with a brush, or a matte water-based polycrylic. -
Buff the wax:
If using wax, let it cure for 15 minutes, then buff vigorously with a clean soft cloth to create a subtle sheen. -
Reattach hardware:
Once the sealant is dry and cured, screw your hinges and knobs back into place. Re-hang the doors carefully.
Enjoy the calm elegance your refreshed furniture brings to the room


Deep Navy Statement Cupboards
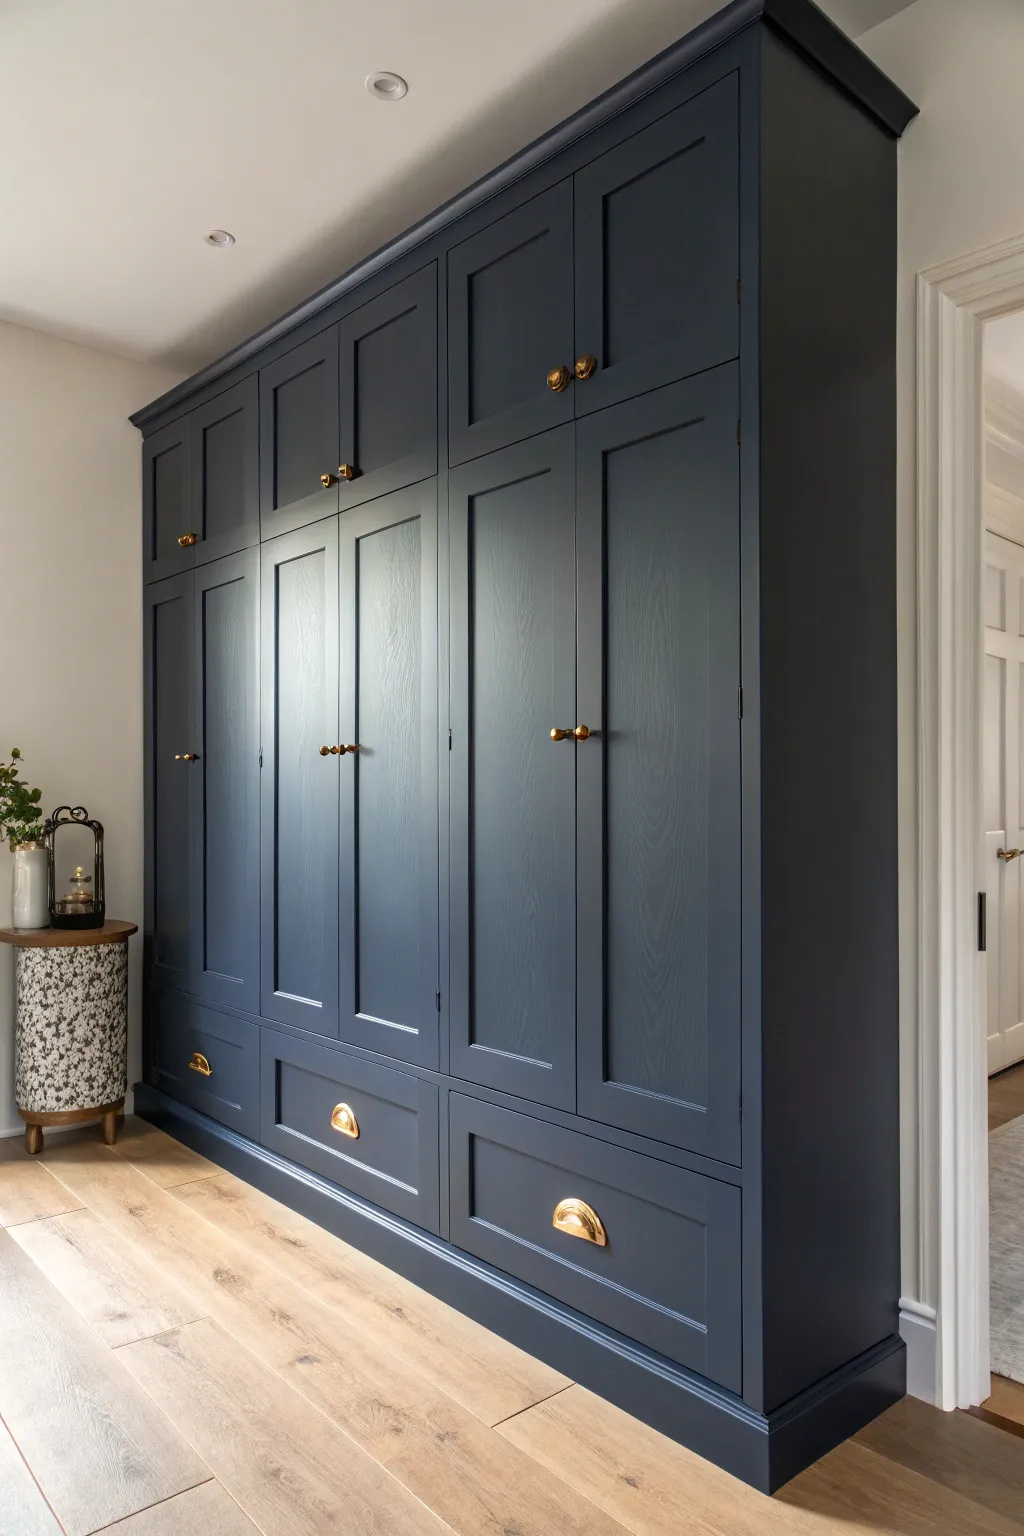
Transform a plain fitted wardrobe into a striking architectural feature with this deep navy paint project. The rich, velvety finish brings dramatic depth to the room while highlighting the classic shaker-style paneling and warming brass hardware.
Detailed Instructions
Materials
- High-quality furniture paint (Deep Navy/Midnight Blue, eggshell or satin finish)
- White specialized wood primer/undercoat
- Sugar soap or degreaser
- Fine-grit sandpaper (180-220 grit)
- Detail sandpaper or sanding sponge
- Tack cloths
- masking tape (low-tack painter’s tape)
- Synthetic angled sash brush (1.5 – 2 inch)
- Flock or high-density foam mini roller and tray
- Screwdriver or drill for hardware removal
- Dust sheets/drop cloths
- Wood filler (if filling old hardware holes)
Step 1: Preparation
-
Clear the area:
Begin by removing all contents from the cupboards to ensure nothing gets dusty or accidentally painted. Lay down dust sheets to protect your flooring completely. -
Remove hardware:
Using a screwdriver, carefully remove all existing handles, knobs, and latches. If you plan to change the hardware style or position, now is the time to fill old screw holes with wood filler; let it dry according to the package instructions. -
Clean thoroughly:
Wash every surface of the cupboard doors and frames with sugar soap and warm water. This step is crucial to remove invisible grease or oils that can prevent paint adhesion. -
Sand the surfaces:
Lightly sand all surfaces using fine-grit sandpaper (180-220). You aren’t trying to strip it back to bare wood, just scuffing the surface to create a ‘key’ for the paint to grip. I find sanding sponges work best for getting into the recessed corners of shaker panels. -
Dust off residue:
Vacuum up the bulk of the dust, then wipe every inch down with a tack cloth to ensure the surface is completely dust-free. -
Mask edges:
Apply low-tack painter’s tape to the walls, ceiling, and floor edges where they meet the cabinetry. Press the tape edges down firmly to prevent bleed-through.
Step 2: Priming
-
Cut in the primer:
Stir your white wood primer thoroughly. Use your angled brush to apply primer into the recessed corners of the panels, around hinges (if they weren’t removed), and along detailed edges. -
Roll the flat surfaces:
Switch to a mini foam or flock roller to prime the large flat panels and frame stiles. Apply a thin, even coat. Don’t worry if it looks patchy; the goal is adhesion, not perfect coverage yet. -
Light sand between coats:
Once the primer is fully dry, lightly run a fine sandpaper over the surface to smooth out any raised wood grain or brush marks, then wipe with a tack cloth again.
Smooth Operator
For the smoothest shaker door finish, always paint the center panel first, then the horizontal rails (top/bottom), and finally the vertical stiles (sides).
Step 3: Painting
-
Cut in the first coat:
Open your deep navy paint and stir well. Just like with priming, start by brushing the paint into the recessed panel moulding, corners, and edges. Avoid overloading your brush to prevent drips in the corners. -
Roll the first coat:
Immediately follow up with the mini roller on the flat center panels and outer frames. Maintain a ‘wet edge’ by working efficiently so brush marks blend seamlessly with the rolled texture. -
Allow to cure:
Let this first coat dry completely. Dark pigments can sometimes take a little longer to set than lighter colors, so be patient. -
Apply the second coat:
Repeat the cutting-in and rolling process for a second coat. This layer will provide that true, deep opacity and rich color saturation visible in the reference image. -
Check for consistency:
inspect the finish in different lighting. If you see any patchiness, a third thin coat might be necessary for this specific deep navy hue. -
Remove tape carefully:
While the final coat is still slightly tacky (not fully dry), gently peel away the painter’s tape at a 45-degree angle to ensure a crisp clean line against the wall.
Sticky Situation?
If doors are sticking after painting, rub a plain white candle or clear wax along the inside edge where the door meets the frame to reduce friction.
Step 4: Finishing Touches
-
Install new hardware:
Once the paint has cured for at least 24 hours locally (or longer if possible), install your brass knobs and cup pulls. The contrast of the gold against the navy is what really makes this look pop. -
Final clean up:
Remove drop cloths and give the hardware a quick polish with a soft cloth to remove any fingerprints from installation.
Now step back and admire how this bold colour choice completely redefines the atmosphere of your room


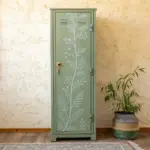
Sage Green Cozy Cupboards
Transform a plain wooden wardrobe into a calming focal point with this sage green makeover. The soft, matte finish combined with warm brass hardware creates a cozy, nature-inspired look perfect for bedrooms or living spaces.
How-To Guide
Materials
- Wooden wardrobe or cupboard
- Sage green furniture paint (eggshell or satin finish)
- Primer suitable for wood
- Medium-grit sandpaper (120-grit)
- Fine-grit sandpaper (220-grit)
- Tack cloths
- Sugar soap or TSP cleaner
- Synthetic angled brush (2 inch)
- Small foam roller and tray
- Painter’s tape
- Screwdriver
- Wood filler (optional)
- New brass knobs (optional)
Step 1: Preparation & Dismantling
-
Assess the piece:
Begin by inspecting your cupboard. If it’s an old piece, check for any loose joinery or damage that needs repair before you start painting. -
Remove hardware:
Use a screwdriver to carefully remove all knobs, handles, and hinges. Place them in a labeled bag so you don’t lose any small screws. -
Take off the doors:
For the best finish, remove the doors completely. This allows you to paint them horizontally, preventing drips and runs. -
Clean thoroughly:
Wash the entire surface with sugar soap or a TSP cleaner to remove grease, dust, and old wax. This step is crucial for paint adhesion. -
Fill imperfections:
If there are deep scratches or old hardware holes you want to hide, fill them with wood filler. Let it dry completely according to the package instructions.
Step 2: Sanding & Priming
-
Sand for grip:
Sand the entire piece with 120-grit sandpaper. You don’t need to strip it to bare wood, just scuff up the glossy surface to give the new paint something to hold onto. -
Remove dust:
Wipe away all sanding dust using a tacked cloth. Any leftover dust will create a gritty finish in your final paint. -
Tape off edges:
Apply painter’s tape to any areas you want to protect, such as the inside edges of the frame or glass panes if your doors have them. -
Apply primer:
Using your brush for corners and the roller for flat flat areas, apply a coat of primer. I advise using a stain-blocking primer if you are painting over dark wood to prevent bleed-through. -
Light sand:
Once the primer is fully dry, give it a very light sand with 220-grit paper to smooth out any brush marks.
Smooth Operator
For a factory-smooth finish, lightly sand with ultra-fine 400-grit paper between your final coats of paint, wiping away dust carefully before the next layer.
Step 3: Painting & Finishing
-
Cut in edges:
Open your sage green paint and stir well. Use the angled brush to ‘cut in’ around the recessed panels, corners, and intricate trim details first. -
Roll the flats:
Take your small foam roller and apply paint to the large, flat surfaces of the doors and sides. Work in long, smooth strokes to ensure an even coat. -
Allow to dry:
Let the first coat dry completely. Don’t rush this stage; painting over tacky paint will pull it up and ruin the texture. -
Apply second coat:
Repeat the cutting-in and rolling process for a second coat to achieve full, opaque coverage. Sage green can sometimes require a third light coat for depth. -
Reattach hardware:
Once the paint has cured for at least 24 hours, carefully screw the hinges back onto the frame and re-hang the doors. -
Add the knobs:
Install the brass knobs. Their warmth contrasts beautifully with the cool sage tones, completing the look.
Interior Surprise
Line the back panel or drawers with a vintage floral wallpaper or paint the interior in a soft cream color for a delightful contrast when opened.
Step back and admire how this fresh coat of color completely revitalizes the room with a sense of calm elegance
BRUSH GUIDE
The Right Brush for Every Stroke
From clean lines to bold texture — master brush choice, stroke control, and essential techniques.
Explore the Full Guide
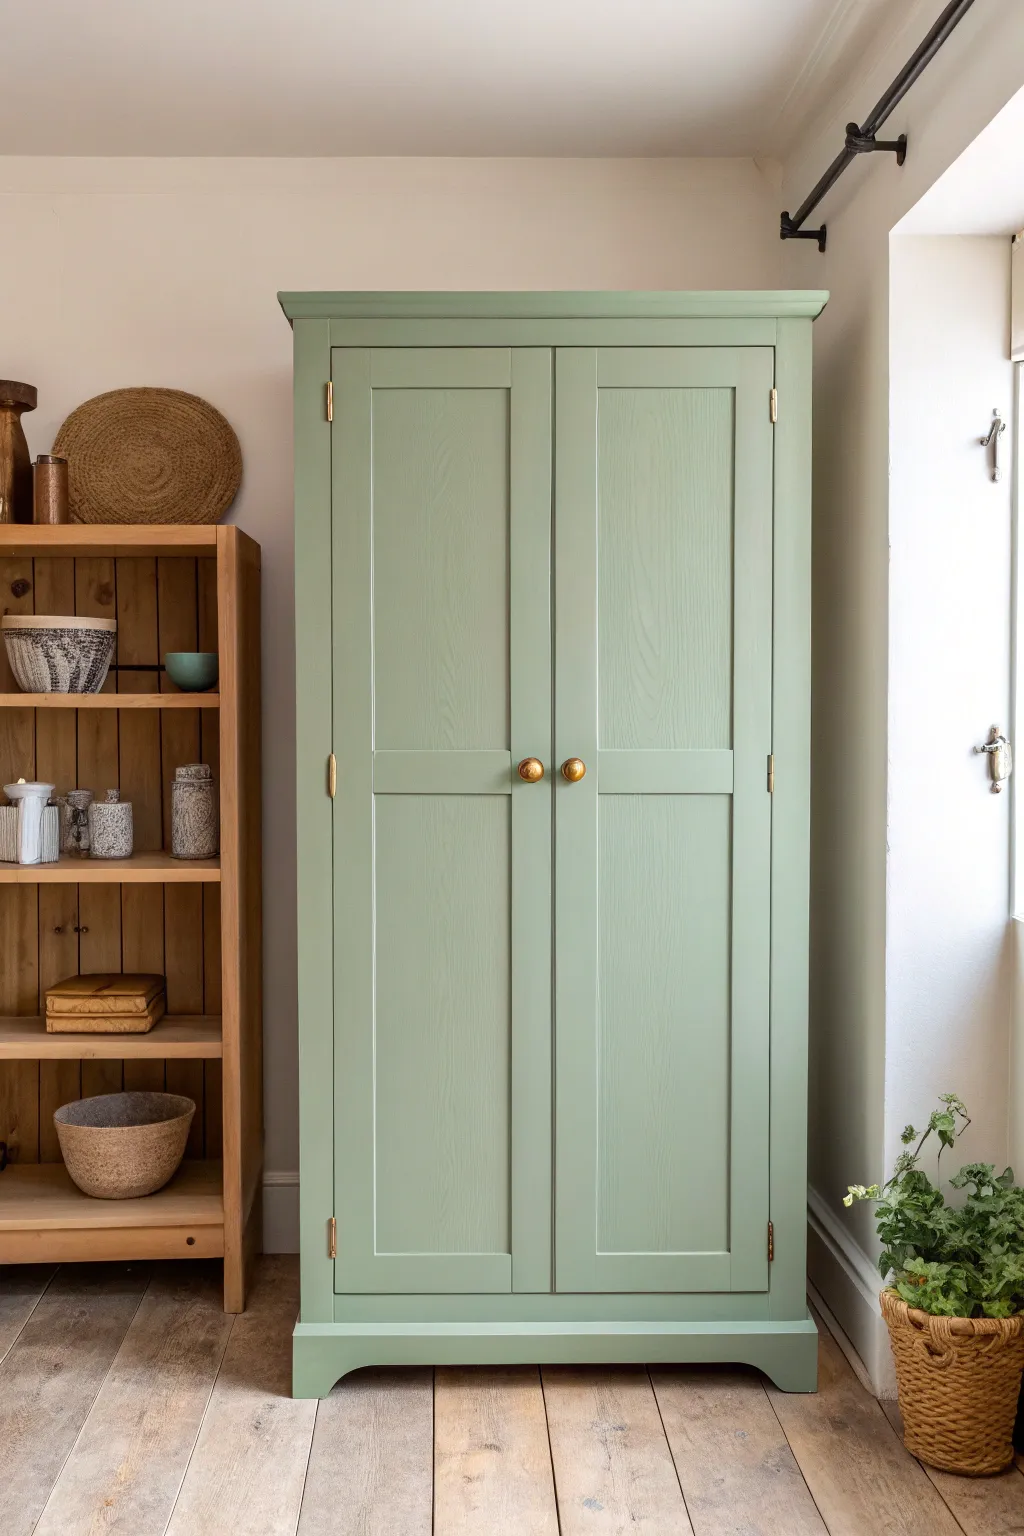
Two-Tone Upper and Lower Cupboards
Transform a standard wooden dresser or built-in unit into a modern focal point using a sophisticated two-tone palette. By combining crisp white faces with deep charcoal accents and exposed natural wood, you create a piece that feels both grounded and airy.
Step-by-Step Tutorial
Materials
- Built-in cupboard or standalone hutch
- Medium-grit sandpaper (120-grit)
- Fine-grit sandpaper (220-grit)
- Wood filler
- Painter’s tape (high quality)
- Zinsser BIN or similar shellac-based primer
- Satin finish furniture paint (White/Cream)
- Satin finish furniture paint (Dark Charcoal/Navy)
- Clear matte polyurethane varnish
- Small foam roller
- High-quality angled sash brush
- Screwdriver
- Cleaning degreaser (like TSP or sugar soap)
- Tack cloths
Step 1: Preparation & Dismantling
-
Remove hardware:
Begin by removing all handles, knobs, and hinges using your screwdriver. Bag these up carefully if you plan to reuse them. -
Take off doors and drawers:
Detach the upper and lower cabinet doors. Pull out the drawers completely so you can paint the faces on a flat surface. -
Deep clean:
Scrub the entire unit with a degreaser like sugar soap or TSP to remove kitchen grease and grime, then wipe with clear water and let dry. -
Protect natural wood areas:
If you are keeping the wooden countertop and back panel natural like in the example, carefully mask these areas off with high-quality painter’s tape. Spend extra time pressing down the edges to prevent bleed-through.
Clean Lines Only
If you get paint bleed on the natural wood, wrap a putty knife in a damp rag and gently scrape it while wet, or wait until dry and lightly sand it off with fine grit paper.
Step 2: Sanding & Priming
-
Sand for adhesion:
Scuff sand all paintable surfaces with 120-grit sandpaper. You aren’t trying to strip it to bare wood, just de-glossing the old finish to help the new paint stick. -
Repair imperfections:
Fill any dings or unwanted holes with wood filler. Once dry, sand these spots flush using 220-grit paper. -
Remove dust:
Vacuum up the sanding dust and follow up with a tack cloth to ensure the surface is perfectly clean. -
Apply primer:
Roll or brush on a coat of stain-blocking primer. This is crucial for stopping tannins from bleeding through your white paint. Let it cure fully according to the can’s instructions. -
Light send:
Once the primer is dry, give it a very light pass with fine sandpaper to knock down any raised grain or brush marks.
Interior Upgrade
For a surprise pop of color, paint the interior back of the upper glass cabinet in a soft sage green or the same charcoal used on the lower side panels.
Step 3: Painting the Two-Tone Scheme
-
Paint the dark frame:
Using the dark charcoal paint, cut in the edges of the lower side panels and the bottom kickplate (plinth) with an angled brush. -
Roll the dark sections:
Use a foam roller to fill in the larger flat areas of the side panels. Apply 2-3 thin coats for a smooth, deep finish, letting each coat dry thoroughly. -
Paint the white uppers:
Move to the upper cabinet frame. Brush the white satin paint onto the face frame, working from the inside edges out. -
Paint doors and drawers:
Lay the doors and drawer fronts flat. I find applying the white paint here works best with a combination of brush work for molded details and rolling for flat centers. -
Assess coverage:
White paint over dark wood often needs three coats. Don’t rush it by applying thick layers; multiple thin layers yield a factory-like finish.
Step 4: Finishing Touches
-
Seal the wood:
If the exposed oak countertop needs refreshing, apply a coat of clear matte polyurethane varnish to protect it from kitchen spills. -
Remove tape:
Carefully peel away the painter’s tape while the final coat of paint is still slightly tacky to ensure a crisp line against the wood. -
Reassemble:
Once the paint has cured for at least 24 hours, reattach the hinges and hang the doors back in place. -
Install hardware:
Finally, screw in the brass cup pulls and knobs. The metallic gold tone pops beautifully against both the white and the dark grey.
Step back and admire the balance of modern color and natural warmth in your newly refreshed kitchen piece
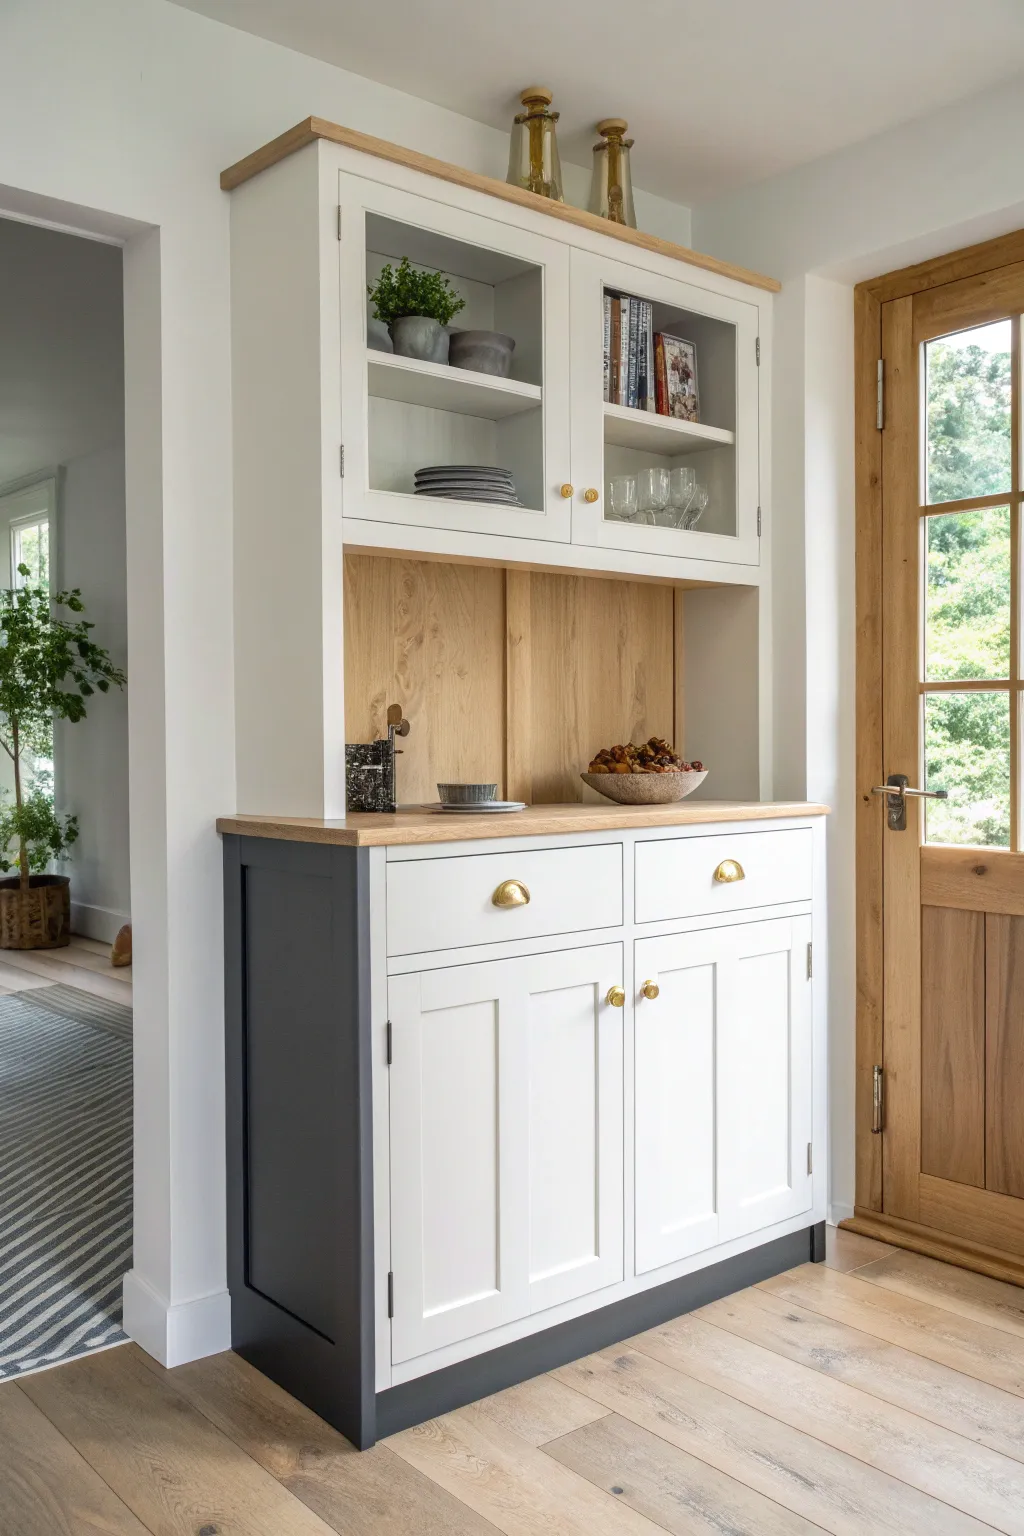
Painted Island Cupboards as a Focal Point
Transform a plain kitchen island into a warm, grounding focal point with a rich rusty-red hue and classic brass hardware. This project balances the earthiness of terracotta paint with the natural grain of oak countertops for a sophisticated, lived-in feel.
Step-by-Step Guide
Materials
- TSP or heavy-duty degreaser
- Fine-grit sandpaper (120 and 220 grit)
- Tack cloth
- High-quality bonding primer
- Self-leveling cabinet paint (Terracotta/Rust color)
- Angled sash brush (2-inch)
- Small foam roller
- Butcher block oil or wood sealer
- Brass cup pulls
- Brass knobs
- Painter’s tape
- Drill and drill bits
- Screwdriver
Step 1: Preparation & Surface Work
-
Clear and clean:
Begin by removing all items from the drawers and cabinets. Take off the old hardware using a screwdriver and set the doors and drawers aside on a flat work surface. -
Degrease thoroughly:
Kitchen cabinets accumulate oils over time. Scrub the doors, drawer fronts, and the island frame with TSP or a heavy-duty degreaser to ensure the new paint adheres properly. -
Address the countertop:
If your butcher block top is looking tired, sand it down gently with 120-grit paper to remove old stains or scratches, wiping away dust immediately. -
Sand the cabinetry:
Using 120-grit sandpaper, lightly scuff all surfaces of the island frame, doors, and drawers. You aren’t trying to remove the old finish entirely, just creating a ‘tooth’ for the primer. -
Dust check:
Vacuum up the sanding dust, then wipe every nook and cranny with a tack cloth to ensure a perfectly smooth base.
Step 2: Priming & Painting
-
Tape protection:
Apply painter’s tape carefully along the floor where it meets the island, and along the underside of the countertop overhang to protect the wood. -
Apply primer:
Coat the frame, door fronts, and drawer fronts with a high-quality bonding primer. Use a brush for recessed corners and a foam roller for flat areas to minimize texture. -
Sand the primer:
Once the primer is fully dry (consult the can’s instructions), lightly sand everything with 220-grit paper. This is my secret interactive step for getting that factory-finish smoothness. -
Cut in the color:
Open your terracotta cabinet paint. Using the angled sash brush, paint the recessed panels of the shaker doors and the corners of the frame first. -
Roll the flats:
While the brushed areas are still wet, use a small foam roller to apply paint to the flat rails, stiles, and side panels. Rolling immediately helps blend brush marks into a smooth texture. -
Second coat:
Allow the first coat to dry completely. Apply a second coat using the same method—brushing corners first, then rolling finishes—for full opacity and richness. -
Treat the countertop:
While the cabinet paint cures, apply a coat of butcher block oil or sealer to the wooden countertop using a clean rag, following the grain direction.
Paint Choice Matter
Use “cabinet enamel” or “alkyd” paint. These cure much harder than standard wall latex, resisting scuffs and grease in high-traffic kitchen zones.
Step 3: Hardware & Reassembly
-
Measure for pulls:
For the top drawers, find the center point. If you are switching from knobs to cup pulls, you may need to mark and drill new pilot holes. -
Install drawer hardware:
Attach the brass cup pulls to the drawer fronts. Ensure they are level before tightening the screws fully. -
Install door knobs:
Attach the small round brass knobs to the cabinet doors. A template tool can help ensure the placement is identical on every door. -
Re-hang doors:
Carefully re-attach the hinges to the island frame and hang the doors. Adjust the hinge screws if necessary so the gaps between doors are even. -
Insert drawers:
Slide the drawers back onto their tracks. Check that they open smoothly and align perfectly with the frame. -
Final polish:
Peel away the painter’s tape and give the brass hardware a quick buff with a soft cloth to remove any fingerprints.
Sticky Door Syndrome?
If doors stick after painting, small clear bumper pads on the inside corners prevent paint-on-paint contact while the finish cures fully (upto 30 days).
Enjoy the warmth and character your newly painted island brings to the heart of your home

PENCIL GUIDE
Understanding Pencil Grades from H to B
From first sketch to finished drawing — learn pencil grades, line control, and shading techniques.
Explore the Full Guide
Hardware-as-Jewelry Cupboard Color Pairings
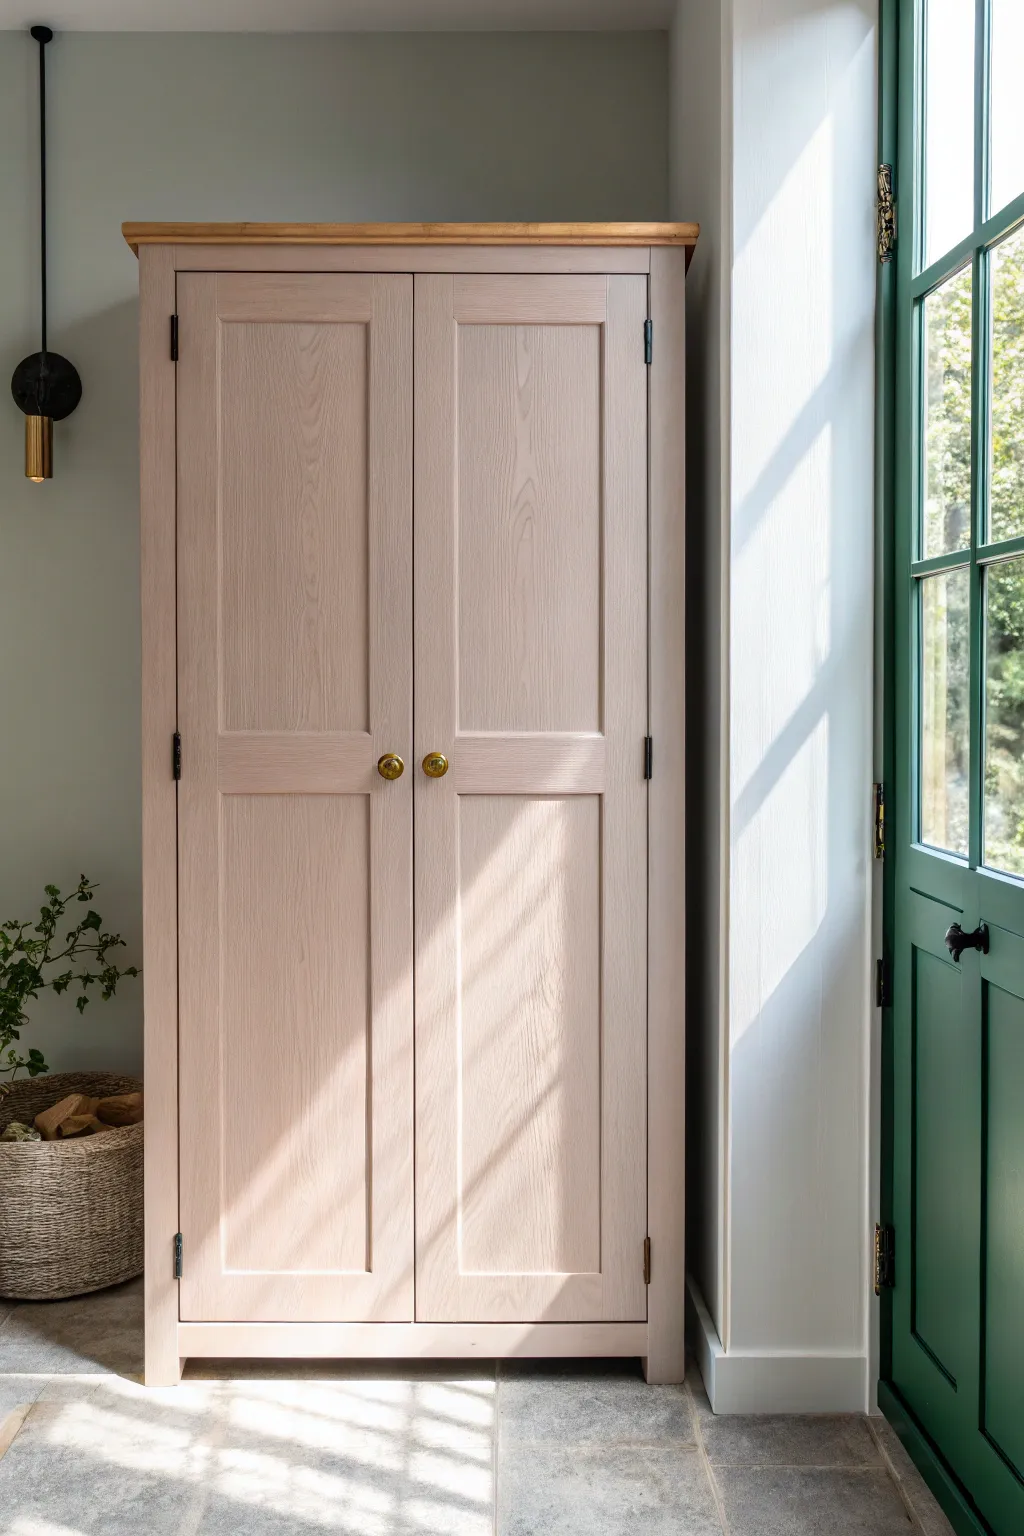
Transform a standard wooden wardrobe into a soft, romantic statement piece by pairing a delicate pale pink finish with warm brass hardware. This project focuses on achieving a smooth, professional finish that lets the subtle wood grain peek through while highlighting the ‘jewelry’ of the piece.
Detailed Instructions
Materials
- Wooden wardrobe (unfinished or previously painted)
- High-quality furniture paint in Pale Pink or ‘Setting Plaster’
- Stain-blocking primer (water-based)
- Course (80-grit) sandpaper
- Fine (220-grit) sandpaper
- Tack cloth
- Screwdriver set
- Brass knobs (round, burnished finish)
- Small foam roller
- 2-inch synthetic angled sash brush
- Painter’s tape
- Wood filler (if repairing holes)
- Drop cloths
- Clear matte protective topcoat (optional)
Step 1: Preparation and Hardware Removal
-
Clear and clean:
Begin by removing all contents from the wardrobe. Wipe down the entire exterior with a damp cloth and mild degreaser to remove dust, oils, and grime. -
Remove hardware:
Use your screwdriver to carefully remove the existing knobs and hinges. Bag these up immediately so no screws get lost. If you are keeping the hinges, label them (top/bottom) to ensure they go back in the same spot for a perfect fit. -
Prep the door:
Ideally, take the doors off the hinges for painting. Lay them flat on a drop cloth or sawhorses. This helps prevent drips and makes it easier to reach tricky corners. -
Patch imperfections:
If you are changing the knob placement or fixing dings, apply a small amount of wood filler. Let it dry completely according to the package instructions.
Sticky Door Syndrome?
If doors stick after painting, sand the edges where they meet. Paint adds thickness; you may need to shave the wood down slightly to accommodate the new layers.
Step 2: Sanding and Priming
-
Initial sanding:
Scuff sand the entire surface using 80-grit sandpaper. You aren’t trying to strip it to bare wood, just creating a ‘tooth’ for the primer to grip. Pay special attention to the recessed panels. -
Clean the dust:
Vacuum up the sanding dust, then wipe everything down thoroughly with a tack cloth to ensure a debris-free surface. -
Tape edges:
If there are areas you aren’t painting, such as the very top shelf edge or the interior rim, mask them off precisely with painter’s tape. -
Apply primer:
Apply a coat of stain-blocking primer. Use the angled sash brush to get into the corners of the panels first, then use the foam roller for the flat surfaces to ensure an even coat. -
Light sanding:
Once the primer is fully dry, lightly sand with fine 220-grit paper. This step is crucial for that super-smooth, professional feel. Wipe away the dust again.
Level Up: Interior Pop
Line the back panel of the cupboard interior with a vintage floral wallpaper or paint it a contrasting sage green to surprise anyone who opens the doors.
Step 3: Painting and Finishing
-
First coat: Edges:
Dip your angled brush into the pale pink paint. Start by painting the recessed grooves and corners of the door panels. Use long, smooth strokes to avoid pooling paint in the corners. -
First coat: Flat surfaces:
Immediately switch to your foam roller or a large flat brush for the main stiles, rails, and flat panels. Work with the grain of the wood for a seamless look. -
Let it dry:
Allow the first coat to dry completely. Resist the urge to touch up wet paint, as this can mar the finish. -
Second coat:
Apply a second coat using the same method (brush for details, roller for flats). This color looks best when opaque, so a second coat ensures deep, true coverage. -
Inspect the finish:
Check for any uneven spots or drips. If necessary, a third light coat might be needed, especially with lighter pink shades which can sometimes be translucent. -
Protective topcoat:
If the wardrobe will see heavy use, apply a clear matte protective topcoat. I find this helps keep the pink looking fresh and prevents finger marks. -
Reinstall hardware:
Once the paint has cured (ideally 24-48 hours later), reattach the hinges and hang the doors. Finally, screw in your beautiful brass knobs to complete the jewelry-like effect.
Enjoy the gentle warmth this updated piece brings to your room
Sheen Mixing on Cupboards and Walls
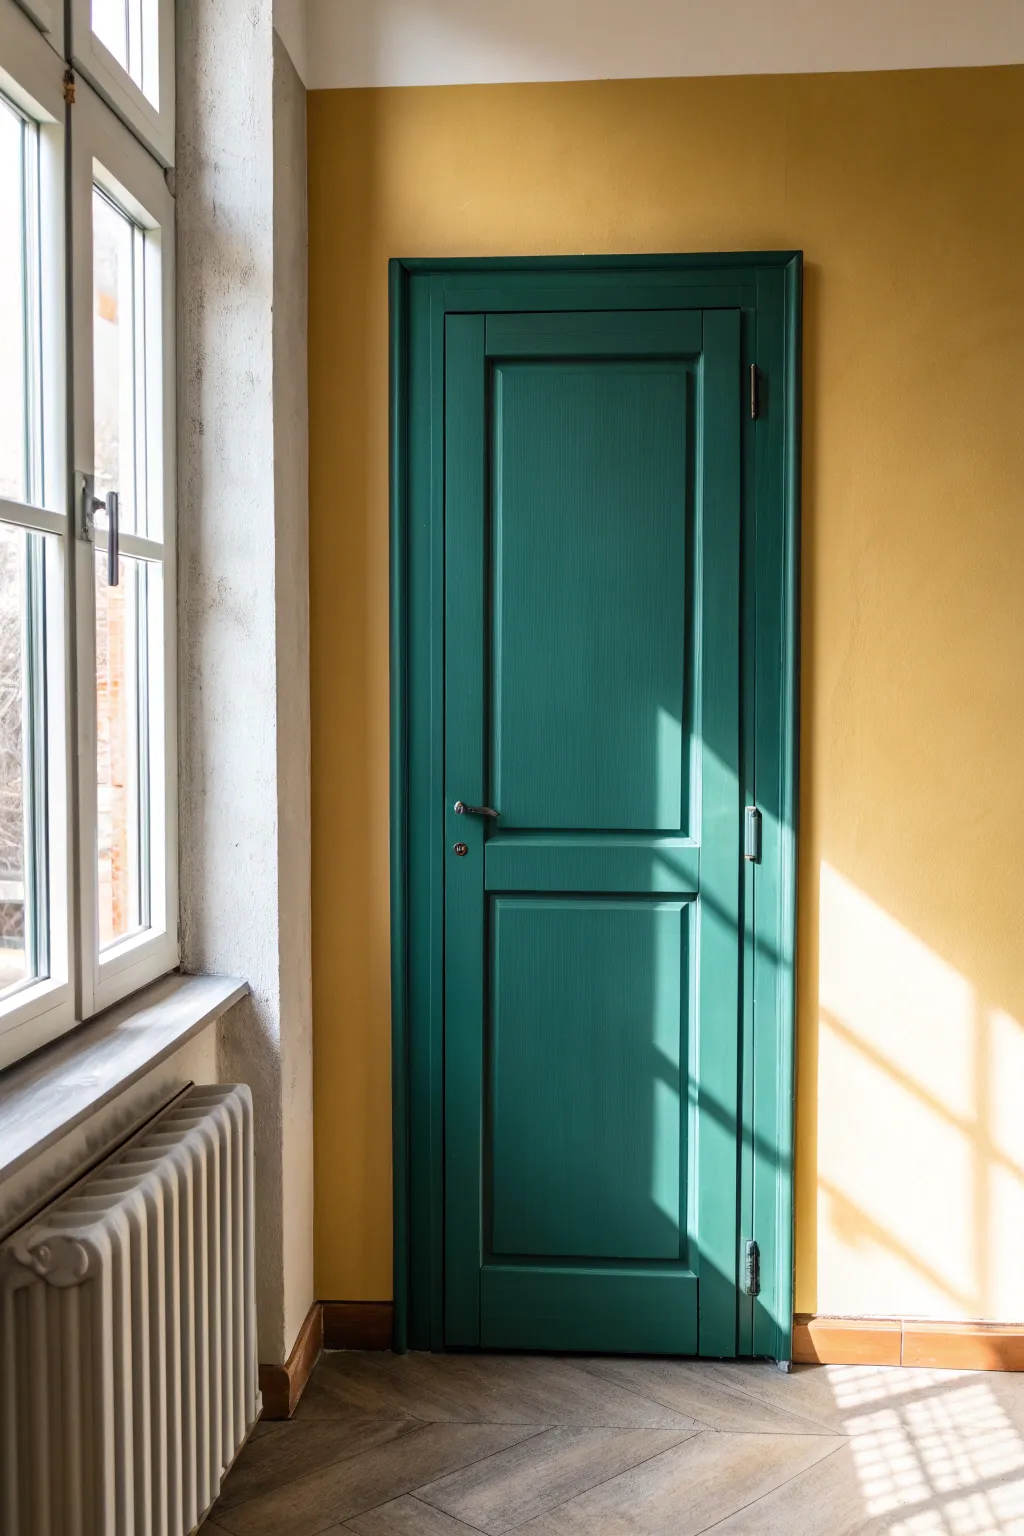
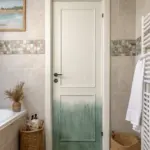
Play with light and texture by pairing velvety matte walls with a high-gloss cupboard door in a striking shade of emerald. This tutorial guides you through achieving that sophisticated contrast, perfect for adding depth to a hallway or bedroom corner.
Step-by-Step Guide
Materials
- Mustard yellow interior wall paint (Matte finish)
- Emerald green interior wood/trim paint (High-Gloss or Satin finish)
- White trim paint (Semi-gloss)
- Sandpaper (120 and 220 grit)
- Painter’s tape (delicate surface)
- Drop cloths
- Screwdriver
- Degreasing cleaner/TSP substitute
- High-quality synthetic angular sash brush
- Small foam roller and tray
- Wood filler (if needed)
- Primer (bonding primer highly recommended)
Step 1: Preparation & Hardware Removal
-
Clear the area:
Begin by removing any furniture or obstacles near the cupboard or door area. Lay down drop cloths to protect your beautiful floors from splatters. -
Remove hardware:
Use a screwdriver to carefully take off the door handles, lock plates, and if possible, the hinges. Label these pieces and store them in a baggie so nothing gets lost. -
Clean surfaces:
Wipe down both the wall and the cupboard door with a degreasing cleaner. This is especially vital for the door, as oils from hands can prevent paint adhesion. -
Fill imperfections:
Inspect the wood for deep scratches or dents. Fill them with wood filler, allow it to dry completely, and sand flush.
Brush Maintenance
Between coats on the door, wrap your brush and roller tightly in plastic wrap or a plastic bag. This keeps the gloss paint from drying out so you don’t have to clean them fully until the end.
Step 2: Priming & Wall Painting
-
Sand the door:
Lightly scuff sand the entire door surface with 120-grit sandpaper. You aren’t trying to remove all old paint, just dulling the surface to help the new coat stick. -
Tape edges:
Apply painter’s tape to the floor trim and around the window frame to protect them from the wall paint color. -
Prime the door:
Apply a coat of high-quality bonding primer to the door. This step ensures your glossy green finish will look uniform and won’t peel later. -
Cut in the wall color:
Using an angled brush, paint the mustard yellow matte paint along the edges, ceiling line, and around the door frame. -
Roll the wall:
Fill in the rest of the wall area using a roller. Matte paint can dry quickly, so I like to work in smaller sections to keep a wet edge. -
Second coat:
Once the first coat is dry, apply a second coat of yellow for a rich, fully opaque finish. Let this cure for at least 24 hours before putting tape on it.
Step 3: Painting the Gloss Cupboard
-
Sand the primer:
Once the door primer is fully dry, give it a very light pass with 220-grit sandpaper to knock down any bumps. Wipe away the dust with a tack cloth. -
Tape the wall:
Protect your fresh yellow wall by carefully taping around the door frame with delicate-surface tape. -
Paint recesses first:
Dip your sash brush into the emerald green paint. Start by painting the recessed panels and molding details first, smoothing out any drips in the corners immediately. -
Roll the flat surfaces:
Use a small foam roller for the flat panels and vertical styles. This helps achieve that glass-smooth finish without heavy brush marks. -
Dry and recoat:
Gloss paints often need longer to cure between coats. Wait the full time recommended on the can, then apply a second thin coat for depth of color. -
Remove tape:
Carefully peel away the painter’s tape while the final coat is still slightly tacky to prevent pulling up dried paint film. -
Reinstall hardware:
Once the door is fully cured (give it a day or two if you can), screw the handle and lock plates back into place.
Upgrade the Hardware
Since you removed the handle, consider replacing it with an antique brass or matte black lever. The contrast against the glossy emerald green adds an incredibly luxurious feel.
Step back and admire how the sunlight plays differently across your matte walls and that brilliant glossy door


Coastal Blue Cupboards With Natural Wood
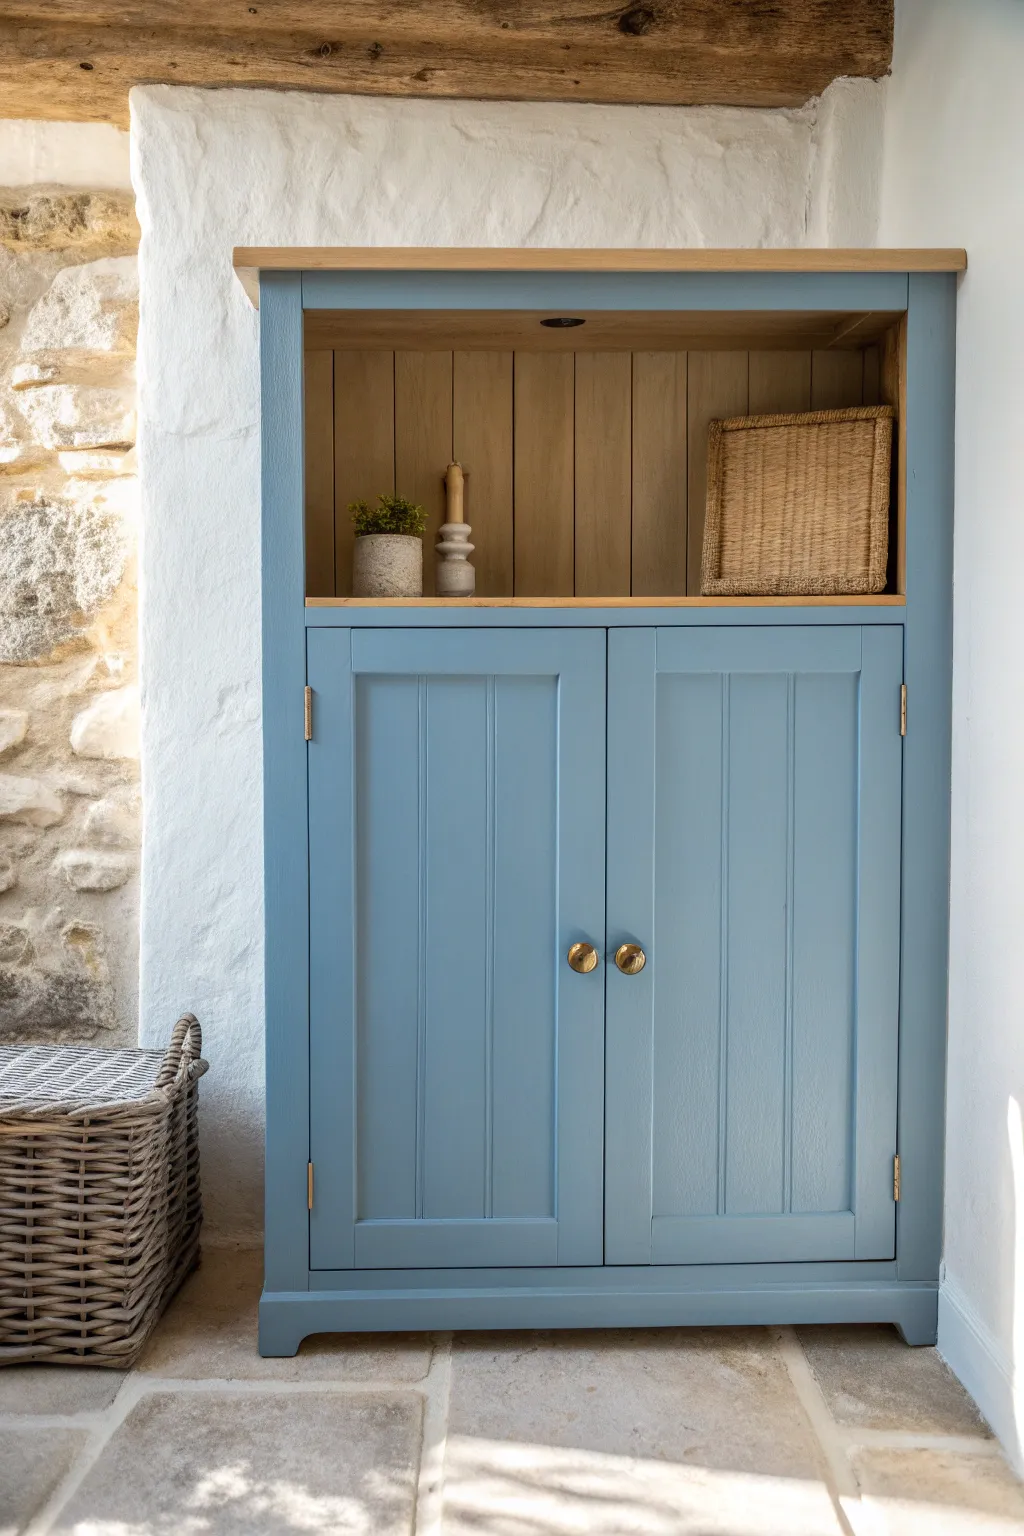
Transform a simple pine cabinet into a bespoke coastal statement piece by combining a soothing mid-tone blue exterior with the warmth of natural wood. This project balances the crisp, clean finish of modern furniture paint with the rustic texture of unpainted timber for an effortlessly breezy aesthetic.
How-To Guide
Materials
- Wooden cabinet (preferably pine or oak)
- Medium-grit sandpaper (120-grit)
- Fine-grit sandpaper (220-grit)
- Tack cloths
- Painter’s tape (delicate surface)
- Zinsser BIN or similar shellac-based primer
- Coastal blue furniture paint (satin or eggshell finish)
- Clear matte polyurethane varnish or furniture wax
- 2-inch synthetic angled brush
- 4-inch foam roller and tray
- Screwdriver (for hardware removal)
- Clean rags
- Brass knobs (optional replacement)
Step 1: Preparation & Dismantling
-
Remove hardware:
Begin by unscrewing any existing knobs, handles, or latches. Keep these safe in a labeled bag if you plan to reuse them, though swapping for brass instantly elevates the look. -
Detach the doors:
Carefully unscrew the hinges to take the cupboard doors off the frame. Painting doors while they are lying flat prevents drips and ensures a smoother professional finish. -
Clean everything:
Wipe down the entire unit with a degreaser or mild soapy water to remove dust and oils. Let it dry completely before moving on. -
Sand for adhesion:
Scuff sand the exterior surfaces (frame and doors) with 120-grit paper. You don’t need to strip it back to bare wood; you just need to create a ‘key’ for the primer to grip. -
Sand the interior wood:
Since the interior back panel and top shelf will remain unpainted, sand these areas thoroughly with 120-grit and then 220-grit sandpaper to reveal the fresh, raw wood tone.
Step 2: Protecting & Priming
-
Masking time:
Apply painter’s tape meticulously along the edges where the exterior frame meets the interior wood. This crisp line is crucial for the high-end, two-tone effect seen in the photo. -
Protect the top:
If your cabinet has a top overhang you wish to keep natural, tape off the underside edge carefully to prevent paint bleed. -
Prime the exterior:
Apply a coat of shellac-based primer to all exterior surfaces. I find this prevents knots in the wood from bleeding through the light blue paint later. -
Check for imperfections:
Once the primer is dry, lightly sand with fine-grit paper to smooth out any raised wood grain or brush marks, then wipe away the dust with a tack cloth.
Clean Lines Secret
Before painting the blue, brush a thin layer of clear matte varnish over the tape edge. This seals the gap so any seepage is clear, leaving a razor-sharp paint line.
Step 3: Painting the Blue
-
Paint the frame edges:
Use an angled synthetic brush to cut in along the taped edges and corners of the cabinet carcass. Keep a wet edge to avoid visible stop-start marks. -
Roll the flat surfaces:
Immediately follow the brush work with a foam roller on the larger flat sides of the cabinet for a smooth, texture-free finish. -
Paint the doors:
Work on the doors separately. Brush into the recessed panels and grooves first, then roll the flat outer frames. Let the first coat dry for the time recommended on your paint tin. -
Apply the second coat:
Repeat the painting process for a second coat to achieve full, opaque coverage. Coastal blues often need two or three thin coats rather than one thick one. -
Peel the tape:
Remove the painter’s tape carefully while the final coat is still slightly tacky. This helps prevent the dried paint from pulling up with the tape.
Add Hidden Texture
For extra beach-house vibes, line the back interior panel with beadboard wallpaper or actual V-groove paneling before sealing the natural wood section.
Step 4: Finishing Touches
-
Seal the natural wood:
Apply a clear matte varnish or furniture wax to the exposed natural wood interior and the top shelf. This brings out the grain’s warmth without changing the color too drastically. -
Reattach doors:
Once the paint has cured (ideally leave it overnight or longer), screw the hinges back onto the frame and hang the doors. -
Install hardware:
Attach your brass knobs. The gold tone against the blue paint offers a classic nautical contrast that really defines the style.
Enjoy styling your open shelf with simple ceramics or woven baskets to complete the relaxed coastal look
Moody Charcoal Cupboards With Matching Walls
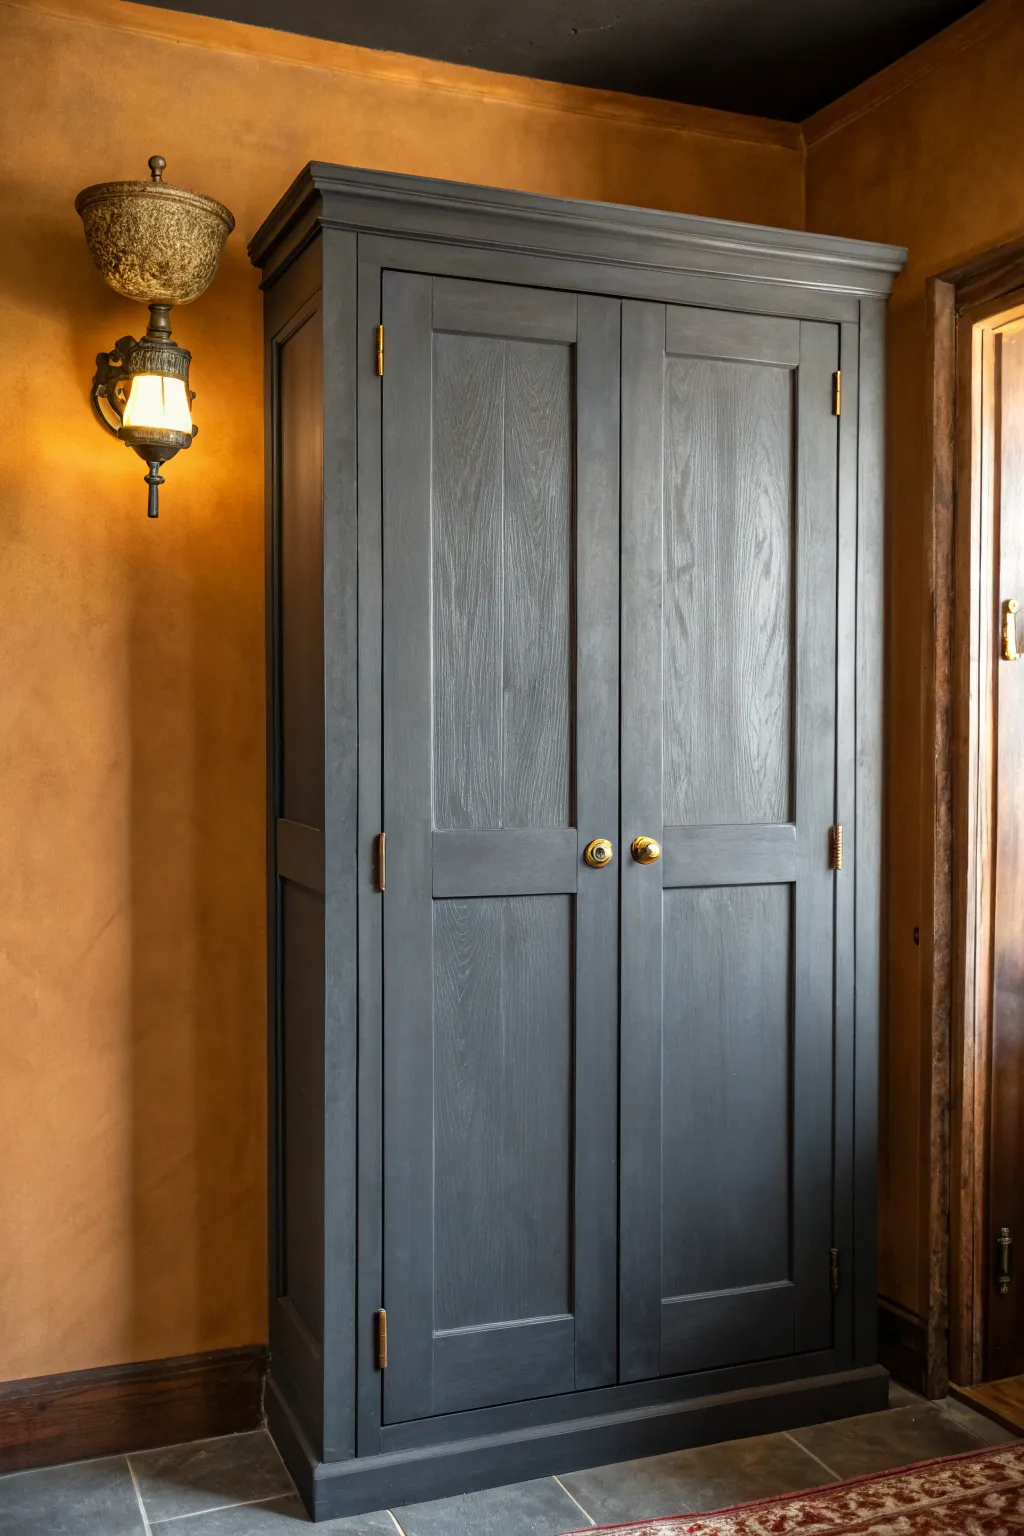
Transform a dated or plain wooden wardrobe into a statement piece with a rich, moody charcoal finish. This project balances modern sophistication with classic structure, letting the wood grain subtlely peek through for added texture.
Step-by-Step Tutorial
Materials
- Tall wooden cupboard or wardrobe
- Screwdriver (for hardware removal)
- Mild degreasing cleaner (like TSP) and sponge
- Medium-grit sandpaper (120-grit)
- Fine-grit sandpaper (220-grit)
- Tack cloth
- Wood filler (optional)
- Painter’s tape
- Stain-blocking primer (grey tinted preferred)
- High-quality charcoal gray latex or mineral paint
- Angled sash brush (2-inch)
- Small foam roller or velour roller
- Brass or gold polish (for existing hardware) or new hardware
- Matte or satin polyurethane topcoat
Step 1: Preparation & Cleaning
-
Remove Hardware:
Begin by unscrewing all knobs, handles, and hinges. Place these small pieces in a labeled bag so they don’t get lost. Removing the doors completely makes painting much easier, so I highly recommend taking them off the hinges. -
Clean Thoroughly:
Wipe down the entire piece with a mild degreasing cleaner to remove years of dust, oils, or furniture wax. Let the wood dry completely before moving on. -
Fill Imperfections:
Inspect the surface for deep scratches or dents. If you find any, fill them with wood filler, smoothing it out with a putty knife. Allow the filler to dry according to package instructions. -
Scuff Sanding:
Sand the entire cupboard, including the doors, with 120-grit sandpaper. The goal isn’t to strip it bare, but to scuff the glossy finish so the new paint adheres properly. -
Remove Dust:
Vacuum up the sanding dust, then wipe the surface with a tack cloth to ensure it is perfectly clean.
Sticky Doors?
If doors stick after painting, sand the edges slightly where they touch the frame. Paint adds thickness, so creating a tiny gap prevents rubbing.
Step 2: Priming the Wood
-
Tape Off Areas:
If there are parts you don’t want painted, such as internal shelves or glass panes, apply painter’s tape carefully to protect them. -
Apply Primer:
Using a brush for corners and a roller for flat areas, apply a coat of stain-blocking primer. Since our top coat is dark, I prefer using a grey-tinted primer to help with coverage. -
Sand the Primer:
Once the primer is fully dry, lightly sand it with 220-grit sandpaper to smooth out any brush strokes or bumps. Wipe away the dust again.
Step 3: Painting & Finishing
-
Cut In Edges:
Start painting with your charcoal gray color. Use the angled sash brush to ‘cut in’ the recessed panels, corners, and detailed moldings first. -
Roll Flat Surfaces:
While the cut-in paint is still wet, use your roller to paint the flat panels and sides. This technique, called ‘keeping a wet edge’, prevents visible lines. -
Apply Second Coat:
Allow the first coat to dry for the time recommended by the manufacturer. Apply a second coat using the same method to ensure rich, opaque coverage. -
Inspect Coverage:
Check your work in good lighting. If the charcoal color looks patchy or uneven, a light third coat might be necessary for that deep, moody finish. -
Seal the Finish:
Once the paint has cured for at least 24 hours, apply a clear matte or satin polyurethane topcoat. This protects the dark paint from scuffs and fingerprints. -
Refresh Hardware:
While the cupboard dries, polish your brass hinges and knobs to bring back their shine. If the old hardware is damaged, this is the perfect time to source new gold or brass replacements. -
Reassembly:
Carefully reattach the hinges and hang the doors back onto the cupboard frame. Screw on the knobs and verify that the doors close smoothly.
Add Interior Contrast
Paint the interior shelves a bright ochre or warm timber tone to create a stunning surprise whenever you open the doors to get something.
Enjoy the dramatic presence your newly refinished charcoal cupboard brings to the room
Pastel Cupboards for a Playful Refresh
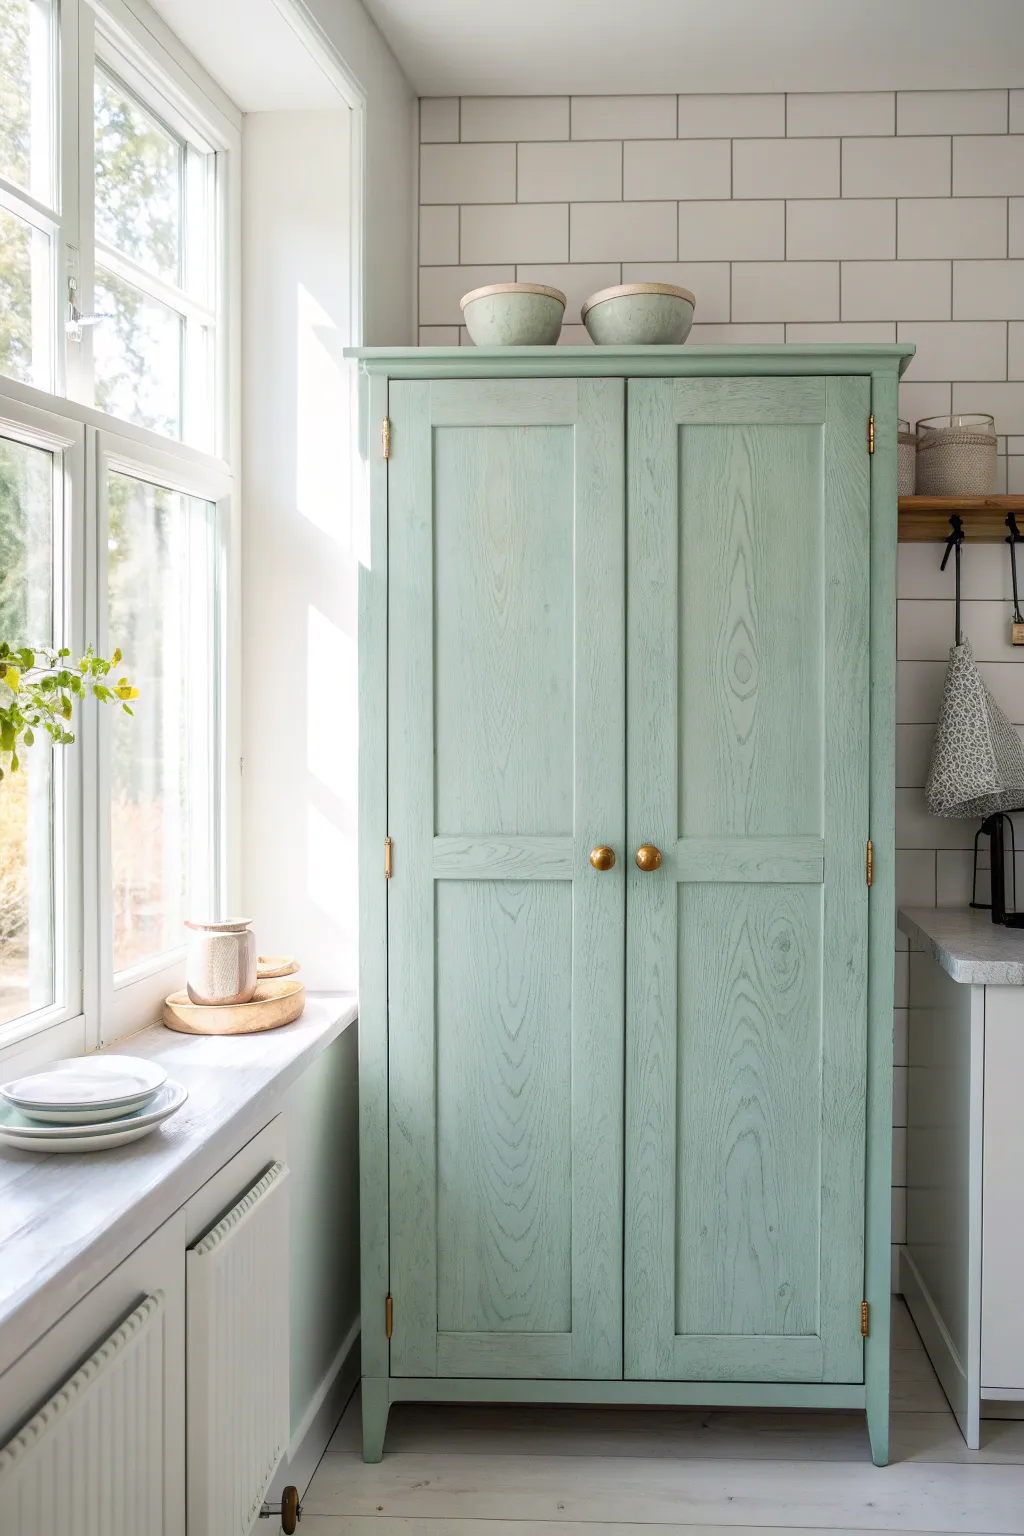
Transform a plain wooden wardrobe into a breezy focal point with this pastel refresh inspired by Scandinavian simplicity. The soft mint green finish allows just a hint of natural wood grain to peek through, adding texture and warmth to a bright corner.
Step-by-Step Guide
Materials
- Unfinished or previously painted wooden cupboard
- Medium-grit sandpaper (120-grit)
- Fine-grit sandpaper (220-grit)
- Clean tack cloths
- Screwdriver (for hardware removal)
- Wood filler (if repairs are needed)
- Adhesion primer
- Mint green chalk paint or matte furniture paint
- Clear matte protective wax or poly-topcoat
- Round synthetic paint brush (medium size)
- Detail brush
- New brass knobs (optional)
- Washing sugar soap or degreaser
Step 1: Preparation & Cleaning
-
Clear and unscrew:
Begin by emptying the cupboard completely. Use a screwdriver to remove existing knobs, hinges, and latches. -
Label the hardware:
Place all screws and fittings into ziplock bags and label them so you know exactly where they go later. -
Deep clean surfaces:
Wash the entire unit with sugar soap or a strong degreaser to remove years of kitchen residue, dust, or oils. -
Fill imperfections:
Inspect the wood for deep scratches or dents. Apply wood filler with a putty knife, let dry, and sand flush. -
Scuff sanding:
Sand the entire surface with 120-grit paper to break the old finish or open the grain of raw wood. -
Dust removal:
Wipe away every speck of dust using a damp cloth followed by a sticky tack cloth.
Visible Grain Trick
To keep that lovely wood grain texture visible like in the photo, dilute your paint by about 10% with water. It acts more like a solid stain than a thick lacquer.
Step 2: Priming & Painting
-
Apply primer:
Brush on a coat of high-quality adhesion primer. This is crucial for durability, even if your paint claims to be all-in-one. -
Sand the primer:
Once dry, give the primer a quick, light sanding with 220-grit paper to ensure a super smooth base. -
First coat of mint:
Stir your mint green paint thoroughly. Apply the first coat using long, even strokes following the direction of the wood grain. -
Don’t overwork it:
Keep a wet edge and resist going back over semi-dry areas to avoid drag marks. -
Drying time:
Allow the first coat to dry fully according to the manufacturer’s instructions, usually 2-4 hours. -
Second coat application:
Apply a second coat for richer color coverage. If you want the grain to show through slightly, thin this coat with a tiny amount of water. -
Check for drips:
Inspect corners and recessed panel edges immediately for paint pooling and smooth it out with your brush.
Sticking Doors?
If doors stick after painting, sand the inner edges where they meet. Paint adds thickness, so you often need slightly more clearance than before.
Step 3: Finishing & Reassembly
-
Apply protective topcoat:
Once the paint has cured (often 24 hours), apply a clear matte wax or poly-topcoat to seal the surface against fingerprints. -
Buffing (if waxing):
If using wax, let it dry for a few minutes then buff gently with a lint-free cloth to achieve a subtle sheen. -
Reattach hardware:
I prefer to polish old brass hinges before reinstalling them. Screw the doors back onto the frame carefully. -
Install knobs:
Attach your brass knobs. The gold tone complements the mint green beautifully. -
Final wipe down:
Give the entire piece a final check and gentle wipe to remove any lingering installation dust.
Now you have a refreshing statement piece that brings a calm, airy atmosphere to your room
Matte Black Cupboards With Warm Accents
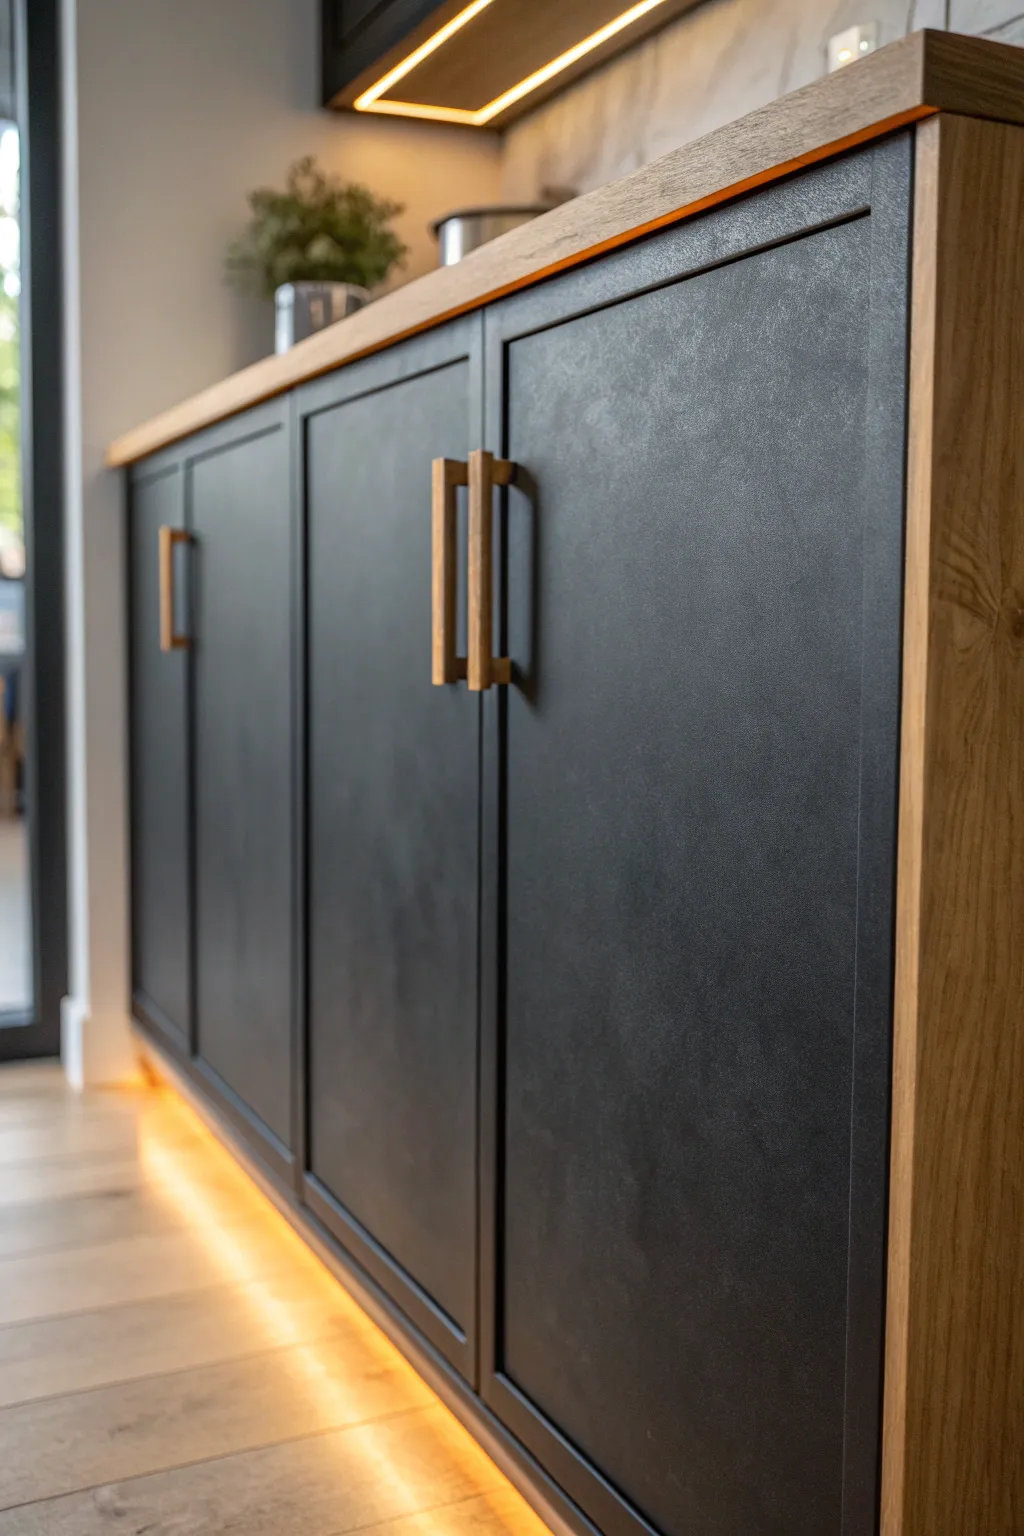
Transform dated cabinets into a modern masterpiece using deep matte black paint contrasted against warm oak tones. This finish mimics the texture of slate or stone, adding a tactile element that feels sophisticated and expensive.
Detailed Instructions
Materials
- Cabinet grade primer (high adhesion)
- Matte black cabinet paint (or chalk paint)
- Polyurethane topcoat (matte finish, non-yellowing)
- Sandpaper (120, 220, and 400 grit)
- Tack cloth
- High-density foam rollers
- Angled sash brush
- Painter’s tape
- Wooden block handles (oak)
- Wood veneer sheets (oak finish)
- Contact cement or wood glue
- LED strip lighting kit (warm white)
Step 1: Preparation & Surface Work
-
Remove Hardware:
Begin by removing all doors from the cabinet frames. Take off the old hinges and handles, storing the screws in labeled bags so you don’t lose them. -
Clean Thoroughly:
Scrub every surface with a heavy-duty degreaser or TSP alternative. Kitchen cabinets often have invisible grease films that will ruin your paint job if left behind. -
Scuff Sanding:
Using 120-grit sandpaper, thoroughly scuff the existing finish on the doors and cabinet frames. You aren’t trying to strip it bare, just creating ‘teeth’ for the primer to grip. -
Dust Removal:
Vacuum up the sanding dust, then wipe everything down with a tack cloth to ensure a perfectly debris-free surface.
Step 2: Creating the Wood Accents
-
Measure the Trim:
Measure the top edge of your cabinet frames and the visible side panels where you want the wood accent to appear. -
Apply Veneer:
Cut your oak veneer strips to size. Apply contact cement to both the cabinet surface and the back of the veneer, let it become tacky, and press firmly into place. -
Trim and Sand:
Use a utility knife to trim any excess veneer overhang carefully. lightly sand the edges with 220-grit paper to blend the transition. -
Seal the Wood:
Apply a clear matte sealant to the veneer and your new wooden handles now, so they are protected before you start painting near them. -
Protect the Accents:
Once the sealer creates a dry shell, tape off the wood veneer edges precisely with high-quality painter’s tape to protect them from the black paint.
Streak Fighter
Matte paint shows overlapping strokes easily. Always maintain a ‘wet edge’ while painting and never go back over a drying section.
Step 3: Priming & Painting
-
Apply Primer:
Roll on a coat of high-adhesion primer. Use a brush for the recessed corners of shaker-style doors first, then roll the flat panels. -
Sand the Primer:
Once the primer is fully dry, give it a quick pass with 220-grit sandpaper to knock down any bumps, then wipe clean. -
First Coat of Black:
Apply the first coat of matte black paint. I find that dabbing the brush into the corners creates a better fill than dragging it. Finish with long, smooth roller strokes. -
Build the Texture:
Let the first coat dry overnight. For the second coat, apply the paint slightly thicker to achieve that deep, light-absorbing matte finish shown in the photo. -
Final Sand:
For a pro finish, very lightly sand between the final paint coats with 400-grit paper, just enough to remove dust nibs without polishing the matte surface.
Texture Twist
For a true stone-like feel, use a mineral or chalk-based paint rather than standard latex, then seal with matte wax.
Step 4: Assembly & tech
-
Install Lighting:
Before reattaching doors, run your warm white LED strip lights along the bottom edge of the cabinet kickplate or underneath the lower frame. -
Rehang Doors:
Carefully reattach the hinges and hang the doors. Double-check your alignment to ensure the gaps between doors are even. -
Attach Handles:
Drill new holes for your oak block handles if the spacing differs from your old hardware. Screw them tightly into place, ensuring the wood grain runs vertically. -
Final Polish:
Remove the painter’s tape from the veneer trim and give the black surfaces a final wipe with a microfiber cloth to remove fingerprints.
Enjoy the dramatic, cozy atmosphere your new kitchen cabinets bring to the space
Warm Ochre or Mustard Cupboards
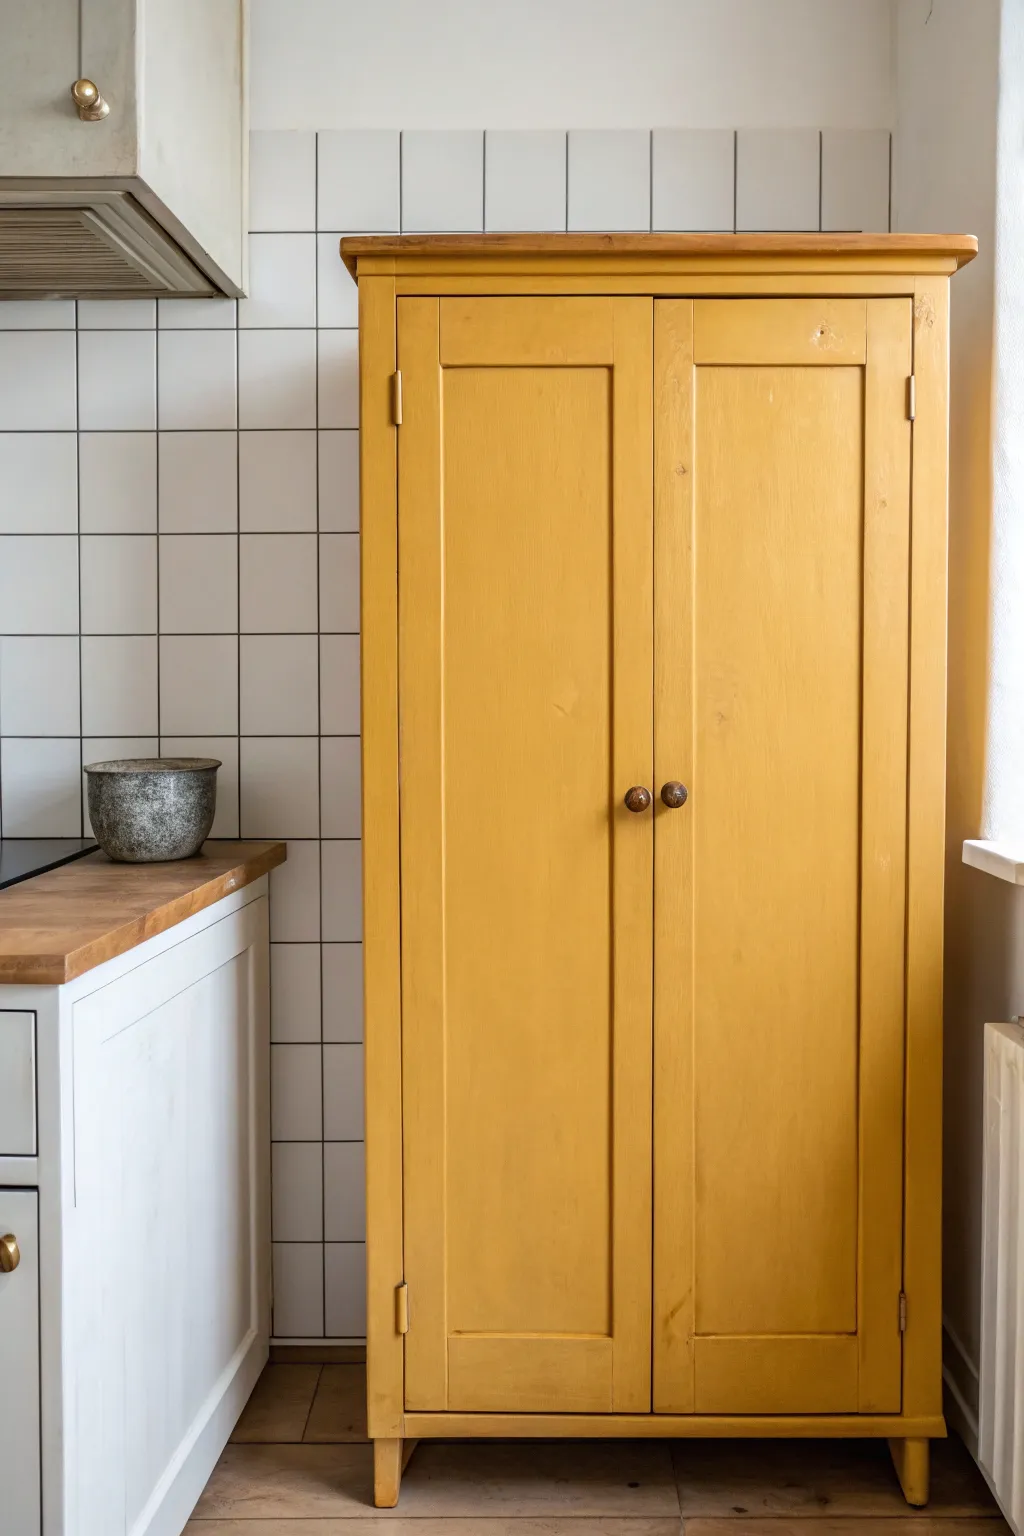
Transform a plain or tired wooden cupboard into a glowing kitchen focal point with this warm ochre finish. The result is a cheerful, vintage-inspired piece that brings instant character and light to any corner of your home.
Step-by-Step
Materials
- Wooden cupboard (vintage or raw wood)
- Medium-grit sandpaper (120-grit)
- Fine-grit sandpaper (220-grit)
- Tack cloth or microfiber rags
- Wood filler (if repairing old holes)
- High-adhesion primer (stain-blocking)
- Mustard or Ochre satin-finish furniture paint
- Synthetic angled sash brush (2-inch)
- Mini foam roller and tray
- Small artist’s brush
- Painter’s tape
- Screwdriver (for hardware removal)
- Drop cloth
Step 1: Preparation & Cleaning
-
Clear the area:
Begin by removing all contents from the cupboard and spreading a drop cloth underneath the unit to protect your floors. -
Remove hardware:
Use a screwdriver to carefully take off the knobs and hinges. Label the hinges with tape if they are specific to a certain door side so reassembly is easier later. -
Deep clean:
Scrub the entire surface with a degreasing cleaner to remove kitchen oils or old polish, which is crucial for paint adhesion. -
Fill imperfections:
Inspect the wood for deep scratches or dents. Apply a small amount of wood filler with a putty knife, smoothing it out, and let it dry completely.
Sticky Doors?
If doors stick after painting, run a candle along the meeting edges. The wax acts as a clear, invisible lubricant that stops fresh paint from grabbing.
Step 2: Sanding & Priming
-
Initial sanding:
Sand the entire piece with 120-grit sandpaper. You aren’t trying to remove all the old finish, just ‘scuffing’ it up to create a tooth for the primer. -
Remove dust:
Wipe away every speck of sanding dust using a tack cloth. Any leftover dust will create a bumpy texture in your final finish. -
Apply primer:
Brush a coat of high-adhesion primer onto the frame and doors. Use the angled brush to get into the recessed panels and corners first. -
Roll the flats:
While the corners are wet, use the mini foam roller on the flat panels and sides to smooth out brush marks and ensure even coverage. -
Light sand:
Once the primer is fully dry, give it a very gentle pass with 220-grit sandpaper to knock down any raised grain or brush ridges.
Distressed Charm
For a rustic look, gently sand the edges and corners with 220-grit paper after the final coat dries to reveal a sliver of the wood underneath.
Step 3: Painting the Ochre
-
Cut in edges:
Open your ochre paint and stir well. Using your angled brush, paint the interior edges of the door panels and the molding details. -
Roll the first coat:
Immediately follow up with your foam roller on the large flat surfaces. Work in long, vertical strokes to mimic the wood grain direction. -
Detail works:
Check for drips in the corners or near hinge mortises. Use a small artist’s brush to feather out any paint pooling in tight spots. -
Dry and assess:
Let the first coat dry according to the can’s instructions—usually 4 to 6 hours. Don’t rush this, or the second coat may drag the first one. -
Second coat:
Apply the second coat exactly like the first. The color should now look rich and opaque. I find a third thin coat is occasionally needed for lighter yellows to get true depth.
Step 4: Finishing Touches
-
Cure time:
Allow the paint to cure for at least 24 hours before handling heavily. This prevents fingerprints or dents in the fresh paint skin. -
Refinish hardware:
While drying, clean your old knobs. If you want a fresh look, you can polish dark wood knobs with beeswax or swap them for ceramic ones. -
Reassembly:
Screw the hinges back into place, hang the doors, and attach the knobs. Ensure the doors close smoothly without rubbing the frame.
Now you have a brilliantly restored piece that brings a touch of sunshine into your dailylife
Color-Blocked Cupboard Door Frames
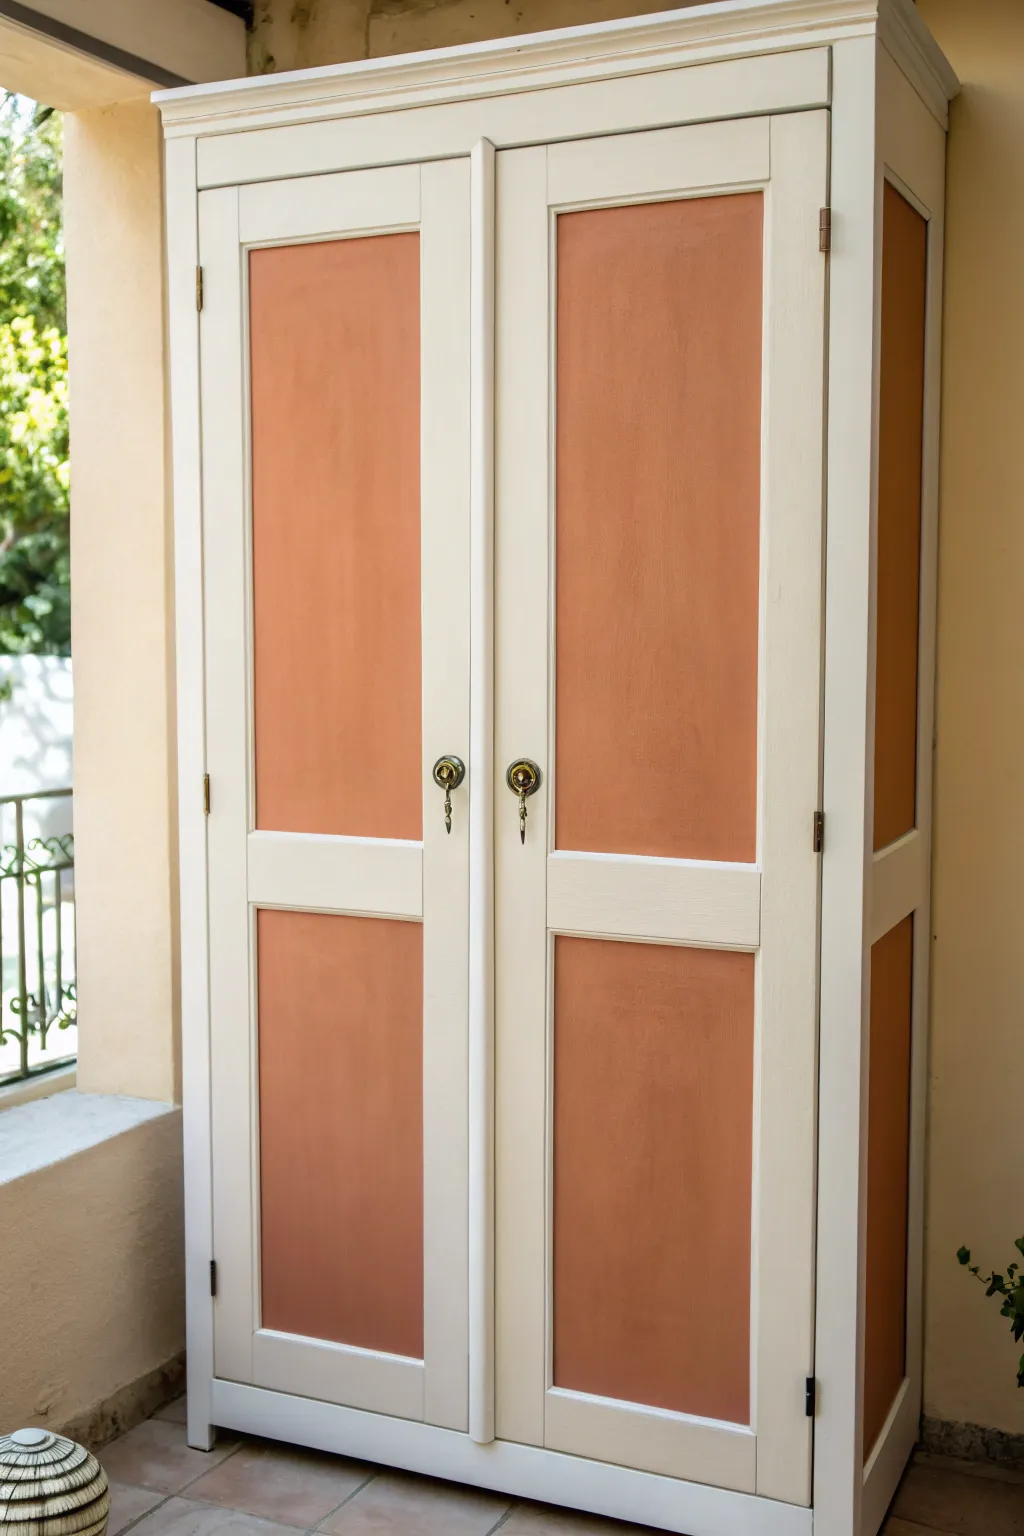
Refresh a tired wooden armoire with this warm, two-tone design that pairs creamy off-white frames with earthy terracotta panels. The result is a sophisticated, Mediterranean-inspired piece that adds a soft pop of color to any room without overwhelming the space.
Step-by-Step Tutorial
Materials
- Wooden cupboard or armoire
- Medium-grit sandpaper (120-grit)
- Fine-grit sandpaper (220-grit)
- Tack cloth or microfiber rags
- Painter’s tape (high quality)
- Wood primer (stain-blocking)
- Creamy off-white latex paint (satin or semi-gloss)
- Terracotta or warm peach latex paint (matte or eggshell)
- 2-inch angled sash brush
- 4-inch foam roller
- Small roller tray
- Screwdriver (for hardware removal)
- Drop cloth
Step 1: Preparation & Priming
-
Remove hardware:
Begin by carefully removing all handles, knobs, and keyhole covers with a screwdriver. Place these screws and pieces in a sealed bag so nothing gets lost during the painting process. -
Clean surfaces:
Wipe down the entire cupboard with a degreasing cleaner to remove dust, oils, and old furniture polish. A clean surface ensures the primer bonds properly. -
Sand the finish:
Scuff sand all exterior surfaces using 120-grit sandpaper. You don’t need to strip it to bare wood, but you do need to remove the glossy sheen to give the new paint ‘tooth’ to grab onto. -
Remove dust:
Vacuum up the sanding dust, then wipe the piece down thoroughly with a tack cloth to capture remaining fine particles. -
Apply primer:
Coat the entire piece with a stain-blocking primer. I prefer using a roller for the flat panels and a brush for the corners and molding details. Let this dry completely according to the can instructions. -
Light sand:
Once the primer is dry, lightly run 220-grit sandpaper over the surface to smooth out any brush strokes or bumps, then wipe away the dust.
Tape Sealing Secret
Painting over the tape edge with your base color (cream) before applying the accent color blocks paint bleed and guarantees a laser-sharp line.
Step 2: Painting the Frames
-
Paint the frames:
Stir your creamy off-white paint thoroughly. Using the angled sash brush, paint the structural frames, the legs, and the dividing strip between the doors first. -
Paint the door edges:
Open the doors and paint the edges and the interior lip of the door frames. This ensures no old wood color peeks through when the cupboard is closed. -
Apply second coat:
Allow the first coat of cream paint to dry fully. Apply a second coat to ensure opaque, solid coverage, watching for drips in the corners.
Texture Play
For a rustic look, mix a texture additive or baking soda into the terracotta paint to give the inset panels a plaster-like, old-world feel.
Step 3: Color-Blocking the Panels
-
Tape the boundaries:
Once the cream frame paint has cured (give it at least 24 hours to be safe), apply painter’s tape exactly along the inner edge where the panel meets the molding. Press the tape edges down firmly with your fingernail. -
Seal the tape:
Brush a very thin layer of the *cream* paint over the edge of the tape. This clever trick seals the tape line so any bleed-through matches the frame, keeping your terracotta line crisp. -
Paint the panels:
Dip your foam roller into the terracotta paint. Apply the color to the large inset panels on the doors and the side indents of the cupboard. -
Detailing corners:
Use a small artist’s brush or the tip of your sash brush to get the terracotta paint right up to the taped edge where the roller couldn’t reach, ensuring even coverage. -
Second coat:
Let the first coat dry to the touch, then apply a second coat of terracotta for a rich, deep color payoff. -
Remove tape:
While the second coat is still slightly tacky (not fully dry), carefully peel away the painter’s tape at a 45-degree angle to reveal clean, sharp lines.
Step 4: Finishing Touches
-
Reattach hardware:
Once the paint has cured for a few days to harden, reattach your keyhole covers and handles using the screws you saved earlier. -
Final inspection:
Check for any small touch-ups needed along the edges or feet and dap them lightly with a small brush if necessary.
Enjoy the fresh, structured look your updated cupboard brings to your living space
Stenciled Patterns on Cupboard Panels
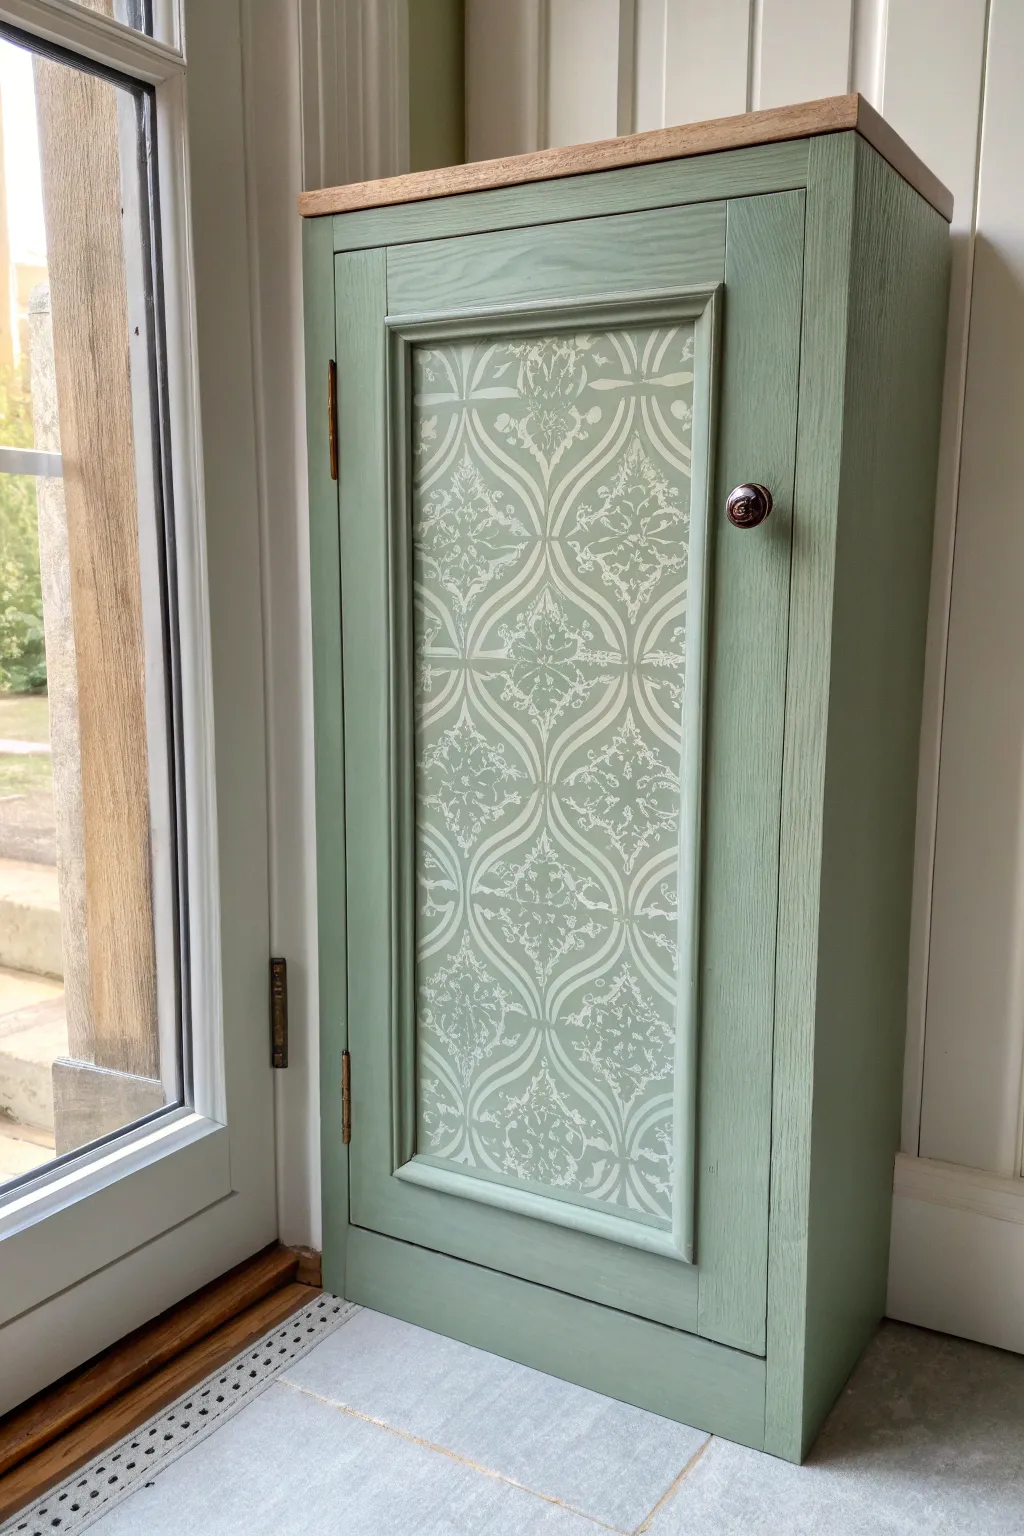
Transform a plain wooden cabinet into a charming statement piece with this gentle green finish and intricate panel detailing. The combination of a soft sage hue with a crisp white stencil creates a sophisticated, vintage-inspired look that brightens any corner.
How-To Guide
Materials
- Wooden cupboard or cabinet
- Sage green chalk finish paint
- White chalk finish paint
- Large damask or tile stencil (appx. 12×12 inch)
- Painter’s tape (low tack)
- Stencil brush or high-density foam roller
- Synthetic angled brush (2 inch)
- Medium grit sandpaper (120 grit)
- Fine grit sandpaper (220 grit)
- Clear matte wax or polycrylic sealer
- Tack cloth or lint-free rags
- Screwdriver (for hardware removal)
- Paper towels
Step 1: Preparation & Base Coat
-
Remove Hardware:
Begin by unscrewing the door knob and removing the hinges if possible. Taking the door off completely usually makes the stenciling phase much easier on your back. -
Sand the Top:
If your cupboard has a solid wood top like this one, sand it down to bare wood using 120-grit sandpaper to remove old varnish, then smooth it with 220-grit. Wipe away all dust. -
Clean the Surface:
Thoroughly clean the rest of the cabinet with a degreaser or mild soapy water to remove oils and dirt. Let it dry completely. -
Scuff Sanding:
Lightly sand the body and door using 220-grit sandpaper to give the existing finish some ‘tooth’ for the new paint to adhere to. -
Protect the Top:
Apply painter’s tape carefully along the edge where the wooden top meets the painted base to keep your natural wood finish pristine. -
First Coat of Sage:
Using your angled synthetic brush, apply the first coat of sage green chalk paint. Brush in the direction of the wood grain, covering the frame and the door. -
Drying Time:
Allow the first coat to dry for the manufacturer’s recommended time, usually about 1-2 hours for chalk paint. -
Second Coat:
Apply a second coat of sage green to ensure full, opaque coverage. Watch for drips in the corners of the panel molding.
Bleeding Lines?
If paint bleeds under the stencil, don’t panic. Wait for it to dry, then use a small artist’s brush and your base green color to ‘erase’ the white smudges and sharpen the lines.
Step 2: Stenciling the Panel
-
Position the Stencil:
Once the green base is completely cured (I like to wait overnight for this step), center your damask stencil on the recessed door panel. Secure it firmly with painter’s tape. -
Load the Brush:
Dip just the very tip of your stencil brush into the white paint. The brush should be almost dry—offload most of the paint onto a paper towel until barely any color comes off. -
Apply the Pattern:
Using a light dabbing or swirling motion, apply the white paint through the stencil design. Build the color up slowly in layers rather than applying one thick coat. -
Check Progress:
Carefully lift one corner of the stencil to check your coverage. If lines look crisp, you are doing it right. If paint is bleeding, your brush is too wet. -
Reposition and Repeat:
If the panel is larger than your stencil, carefully lift the plastic, realign it using the registration marks or the pattern itself, tape it down, and continue stenciling until the panel is filled. -
Clean Edges:
If any white paint got onto the raised molding around the panel, use a small damp brush or a tiny bit of green paint to touch it up.
Pro Tip: Anchor the Design
Start stenciling from the vertical center of the panel working outwards. This ensures the pattern looks symmetrical and balanced within the frame, rather than cutting off awkwardly at one side.
Step 3: Finishing Touches
-
Seal the Body:
For protection, apply a clear matte wax over the painted green areas and the stenciled panel. Buff it gently with a lint-free cloth once dry. -
Seal the Wood Top:
Apply a clear satin varnish or wax to the raw wood top to seal it while keeping the natural grain visible. -
Reassemble:
Once all sealers are cured, reattach the hinges and hang the door. Screw the knob back into place.
Now you have a beautifully customized storage piece that feels both traditional and fresh
Ombre Cupboards That Fade Top to Bottom
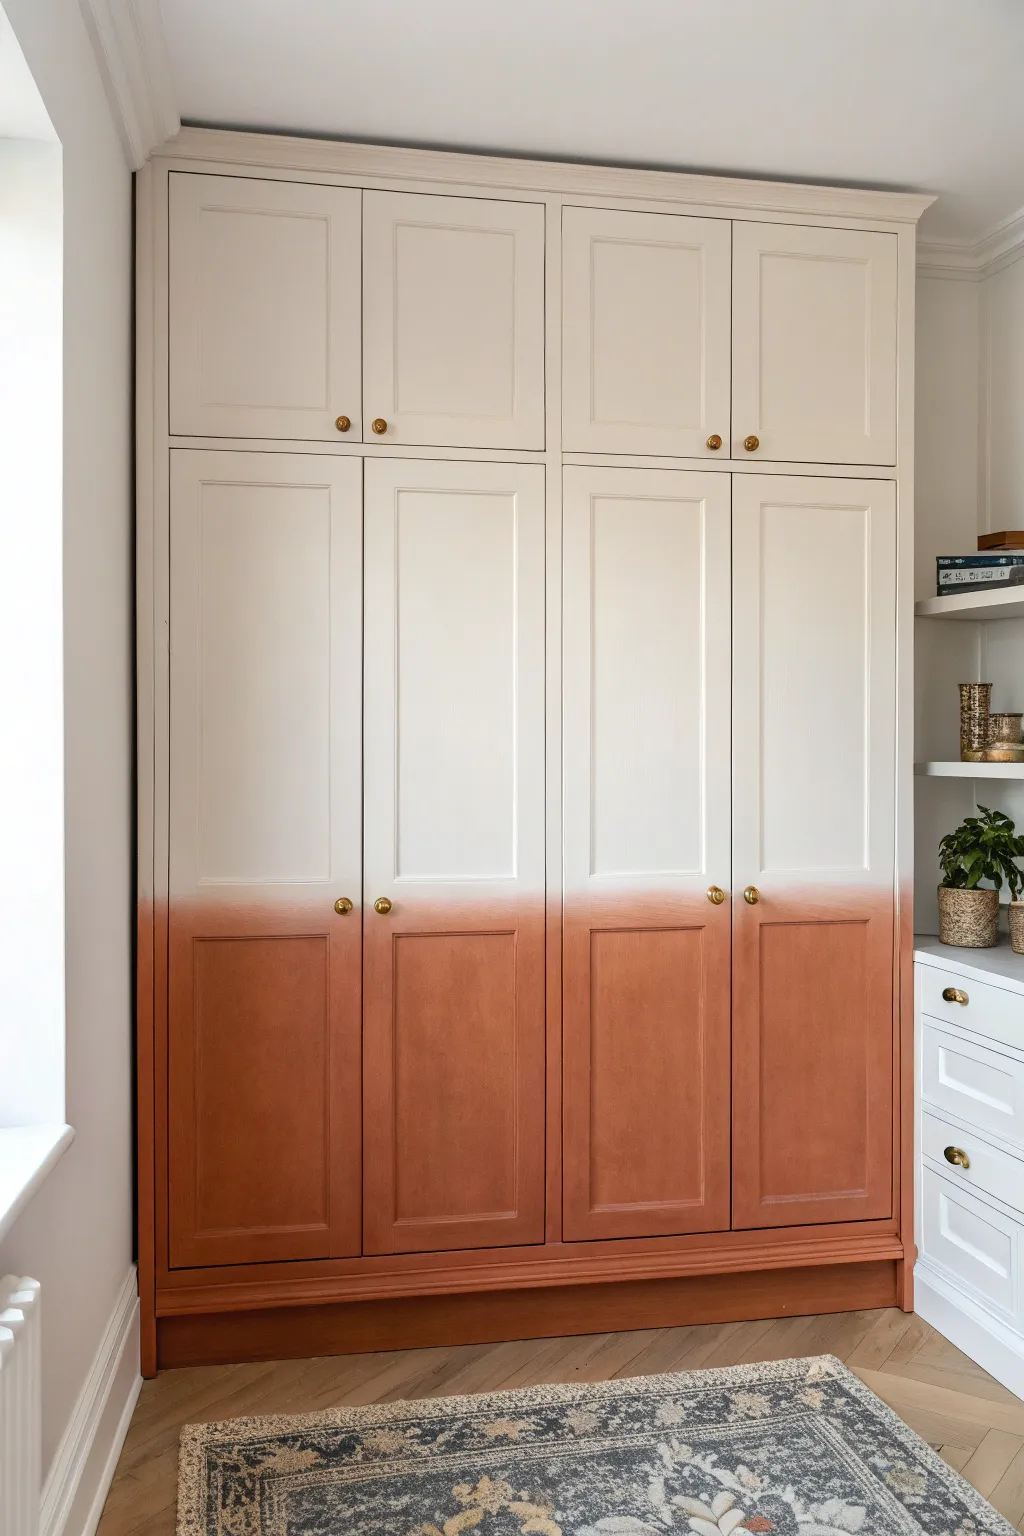
Transform a standard wardrobe into a statement piece with this warm, sun-drenched dip-dye effect. By blending a creamy white upper with a rich terracotta base, you create a soft gradient that mimics the hazy glow of a sunset right in your bedroom.
Detailed Instructions
Materials
- Large wooden wardrobe or built-in cupboard
- Sanding block or electric sander (120 and 240 grit)
- Sugar soap or degreaser
- Wood primer suitable for furniture
- Cream or off-white furniture paint (eggshell or satin finish)
- Terracotta or rust-orange furniture paint (eggshell or satin finish)
- High-quality synthetic paint brushes (2 inch and angled sash)
- Mini foam rollers and tray
- Misting water spray bottle
- Dry blending brush (soft bristle)
- Masking tape
- Drop cloths
- Gold drawer knobs (optional replacement)
Step 1: Preparation and Base Coat
-
Clear the area:
Begin by removing all contents from the wardrobe and taking off the doors if possible. Remove all hardware, including handles and hinges, keeping screws safely stored in a labelled bag. -
Clean surfaces:
Wipe down every surface you intend to paint with sugar soap or a strong degreaser to remove years of oils and dust. A clean surface is critical for paint adhesion. -
Sand for grip:
Scuff sand the entire unit lightly with 120-grit sandpaper. You don’t need to strip it back to bare wood, just create a ‘key’ for the primer to stick to. -
Prime the wood:
Apply a coat of wood primer using a roller for the flat panels and a brush for the corners and moulding. Let this dry completely according to the manufacturer’s instructions. -
Apply the top color:
Paint the upper two-thirds of the wardrobe in your chosen cream or off-white shade using a foam roller for a smooth finish. Bring this color down slightly lower than where you want the fade to start. -
Second coat:
Once dry, apply a second coat of the cream paint for a solid, opaque finish. Let this cure fully before moving on to the ombre technique.
Step 2: Creating the Ombre Fade
-
Mark your fade line:
Lightly mark a pencil line on the side of the cabinet where you want the transition to occur—usually just below the door handles looks balanced. -
Apply the base color:
Using a fresh roller, apply the terracotta paint to the bottom section, including the plinth or baseboard. Work your way upward, stopping about 4-6 inches below your transition zone. -
Apply the transition paint:
While the terracotta paint is still wet, brush it upwards into the transition zone. Immediately brush some fresh cream paint downwards from the top section to meet it. -
Blend the wet paints:
This is the crucial moment: use your mister bottle to lightly spritz the area where the two wet colors meet. The water keeps the paint workable for longer. -
Create the gradient:
Take a clean, dry blending brush. Use quick, light, cross-hatch (X-shaped) motions to mix the two wet colors directly on the wood. I find working quickly here prevents harsh lines from forming. -
Soften the edges:
Feather the paint upwards and downwards to create a smoky mist effect. The goal is to eliminate any hard stop between the orange and cream. -
Repeat for depth:
Allow the first ombre layer to dry. It will likely look patchy. Repeat the blending process with a second coat to build richness and depth in the color transition. -
Paint the plinth:
Ensure the very bottom kickboard or plinth is painted a solid terracotta to ground the piece visually.
Keep it Wet
Work in small sections. Acrylic paint dries fast! Keep a spray bottle of water handy to mist the paint if it starts to drag or get sticky while blending.
Step 3: Finishing Touches
-
Protective coat:
Apply a clear matte or satin varnish over the blended area and heavy-use sections (like around handles) to protect the finish from finger oils. -
Reattach hardware:
Once the paint is fully cured (give it at least 24 hours), screw the hinges back on and rehang the doors. -
Add warmth with brass:
Install knurled gold or brass knobs. The metallic gold contrasts beautifully against the terracotta and echoes the warmth of the design.
Fixing Patches
If the blend looks muddy, let it dry completely. Then, dry-brush a tiny amount of the pure original colors over the muddy area to brighten the gradient.
Step back and enjoy the warm, bespoke character your new ombre wardrobe brings to the room
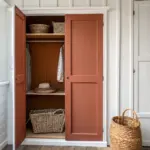
Surprise Painted Cupboard Interiors

Transform a standard cabinet into a statement piece by playing with contrasting interior and exterior hues. This project combines a classic white frame with a warm terracotta door and a unexpected, sophisticated taupe interior for a delightful visual surprise every time you open it.
Step-by-Step
Materials
- Tall wooden cupboard (unfinished or previously painted)
- Sandpaper (120 and 220 grit)
- Wood primer (high adhesion)
- Painter’s tape
- Terracotta/Rust red furniture paint (eggshell or satin finish)
- Crisp white furniture paint
- Warm taupe/grey-beige furniture paint
- Clear matte varnish or wax (optional)
- Small foam roller
- Assorted synthetic brushes (angled and flat)
- Screwdriver
- Drop cloth
- Tack cloth
Step 1: Prep & Prime
-
Remove hardware:
Begin by unscrewing all hinges, handles, and magnetic catches. Place all the screws and hardware into labeled bags so you don’t lose anything important. -
Detach the doors:
Carefully take the doors off the frame. It is much easier to achieve a professional finish when painting these flat on a workbench rather than vertically. -
Protect the top:
If your cupboard has a natural wood top like the one shown, use painter’s tape to meticulously mask off the edge where the wood meets the frame. Cover the rest of the top with paper or plastic. -
Sand surfaces down:
Scuff sand all surfaces—interior, exterior, and doors—using 120-grit sandpaper to remove old gloss and create a ‘key’ for the paint. Follow up with a tack cloth to remove every speck of dust. -
Apply primer:
Roll or brush a coat of high-adhesion primer over the entire piece. Do not skip this step, especially if painting over a dark color or slick varnish. Let it dry completely according to the can’s instructions.
Step 2: Painting the Interior
-
Cut in the corners:
Using your taupe paint and an angled brush, carefully paint the corners, shelf supports, and the vertical grooves of the back panel tongue-and-groove boards first. -
Roll the flats:
Switch to a small foam roller for the shelves and flat back sections. This ensures a smooth, stroke-free finish. Apply two to three thin coats for the best coverage, letting each dry fully. -
Paint the hidden door:
While you have the taupe paint out, decide if you want the inside of the doors to match the interior or the exterior. In the example, the right door interior matches the exterior white, but painting it taupe is a valid design choice too.
Don’t Rush the Cure
Even dry paint can be soft. Wait 2-3 weeks before placing heavy crockery on the shelves to prevent the paint from sticking or peeling.
Step 3: Exterior Transformation
-
Paint the frame:
Apply your crisp white paint to the main carcass frame and the legs. Use a brush for detailed molding and a roller for the flat sides. Apply 2-3 coats until opaque. -
Paint the right door:
Paint the right-hand door (front and back) in the same crisp white. I find laying it horizontally prevents drips from forming in the panel corners. -
Apply the accent color:
Take your terracotta/rust red paint and apply it to the left door exterior. Use an angled brush to get into the recess of the panels first, then smooth over flat areas. -
Second coat depth:
Apply a second or third coat of the rust color. Reds and oranges can sometimes be translucent, so building up thin layers captures that rich, earthy tone best. -
Refine the edges:
Check the edges of the doors. Ensure the distinct colors don’t bleed onto the wrong side; use a steady hand or tape to keep the transition sharp.
Add Subtle Texture
For the interior taupe, dry-brush a slightly lighter beige over the vertical tongue-and-groove lines to highlight the wood texture.
Step 4: Finishing Touches
-
Seal the work:
If using a chalk-style paint, apply a clear wax or matte varnish now to protect the finish from scuffs. On the shelves, a varnish is harder wearing than wax. -
Reattach hardware:
Once everything has cured for at least 24 hours, screw the hinges back onto the frame and hang the doors. Reattach any knobs or handles. -
Clean the hardware:
If your black hinges got any paint specs on them during the process, gently scratch them off with a fingernail or use a tiny bit of metallic sharpie to touch them up. -
Style the interior:
Fill your newly finished cupboard. The muted taupe interior makes white ceramics and clear glassware pop beautifully, just like in the photo.
Step back and enjoy the striking contrast of your bold, custom-painted storage piece


Have a question or want to share your own experience? I'd love to hear from you in the comments below!