Whenever I’m stuck on what to draw, Shakespeare is my favorite “instant vibe” subject because a few iconic details make him recognizable right away. Here are some Shakespeare drawing ideas that range from super simple to delightfully extra, so you can pick what matches your mood today.
Classic Shakespeare Portrait With Ruff Collar
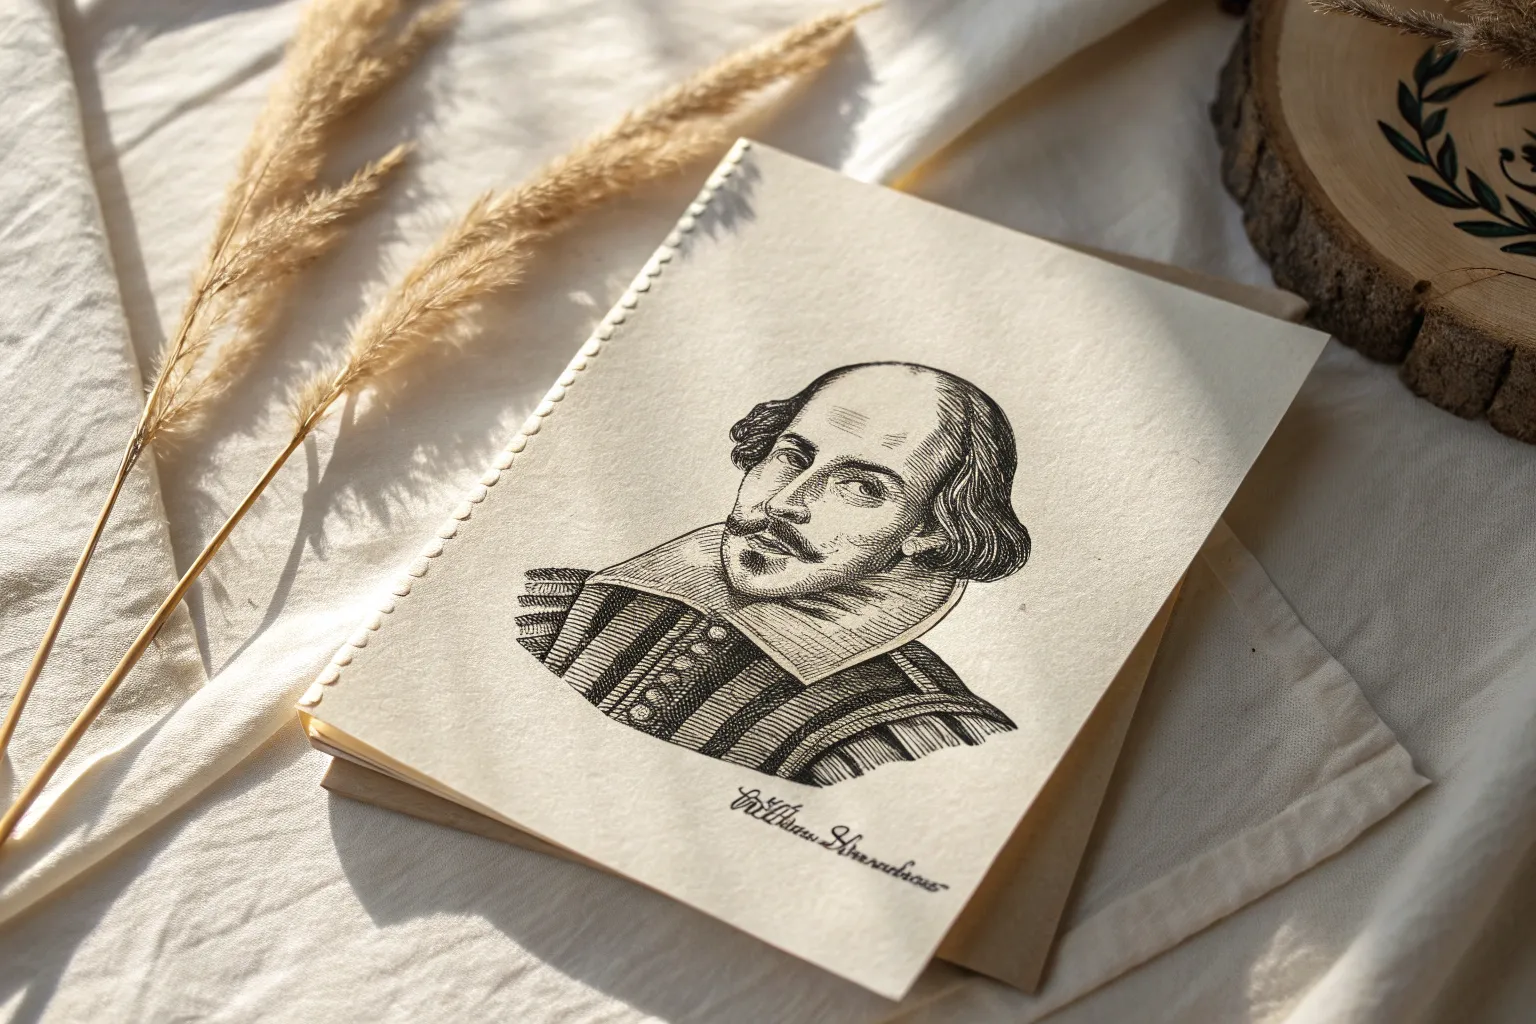
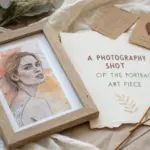
Capture the timeless gaze of William Shakespeare with this detailed charcoal and graphite study. By working on textured, deckle-edged paper, you’ll give this drawing the authentic, aged feel of a Renaissance manuscript page.
Step-by-Step Tutorial
Materials
- Heavyweight textured drawing paper (deckle edge optional)
- HB and 2B graphite pencils
- Charcoal pencils (medium and soft)
- Kneaded eraser
- Paper blending stump (tortillon)
- Fixative spray
- Ruler
Step 1: Laying the Framework
-
Establish facial proportions:
Begin with a very light HB pencil sketch to map out the head shape. Since Shakespeare’s hairline is high, mark the eyes slightly below the vertical center of the head, and ensure the cranium is large and rounded. -
Sketch the features:
Place the distinctive heavy eyelids, the long nose, and the small mustache. Don’t press hard yet; you just want faint guidelines for the charcoal to follow later. -
Outline the costume:
Draw the stiff, angular shape of the ruff collar extending from the jawline. Sketch the basic trapezoid shape of the doublet (jacket) and the puffed shoulders.
Step 2: Building Tone and Texture
-
Start the shading:
Switch to your 2B pencil or a hard charcoal pencil. Begin shading under the prominent brow bone and along the side of the nose to create depth. Use light hatching strokes. -
Define the eyes:
Darken the pupils with a soft charcoal pencil, leaving a tiny speck of white paper for the catchlight to bring life to his gaze. Carefully outline the heavy, hooded upper lids. -
Render the hair:
For the hair on the sides, use wavy, flowing strokes. Start at the roots near the ears and flick outward. Keep the top of the head mostly bare, using very faint shading to suggest the curvature of the skull. -
Detail the facial hair:
Use sharp, short strokes for the mustache and goatee. The beard should look slightly scraggly, so vary the direction of your pencil strokes to mimic individual hairs. -
Model the face:
Using your blending stump, soften the graphite shading on the cheeks and forehead. This smooths out the skin tone while keeping the facial hair crisp.
Old Master Tip
To mimic the engraving style, avoid over-blending. Leave visible hatching lines, especially on the clothing, to give it that printed texture.
Step 3: The Collar and Costume
-
Structure the ruff:
The collar is a critical element. Draw distinct lines radiating from the neck outward. Shade the ‘valleys’ of the fabric folds deeply to make the ‘peaks’ pop forward. -
Create the doublet texture:
The jacket has a specific linear texture. Use consistent, horizontal hatching lines across the chest area. This mimics the heavy fabric of the Elizabethan era. -
Decorative elements:
Draw the vertical row of buttons down the center. Shade the right side of each button to make them look spherical. -
Shoulder details:
On the shoulder wings (epaulets), draw the geometric patterns or braiding. Use darker charcoal here to differentiate the heavy trim from the main body of the jacket. -
Deepen contrast:
I find that going back in with the softest charcoal pencil at this stage really helps. Darken the deepest shadows under the collar and the folds of the sleeve to anchor the figure.
Smudge Alert
Charcoal gets messy fast. Place a clean sheet of scrap paper under your drawing hand to protect finished areas from smearing while you work.
Step 4: Refining and Finishing
-
Review light source:
Ensure the light consistently hits from the left. This means the right side of the face (viewer’s right) and the right side of the nose should have stronger shadows. -
Clean up highlights:
Take your kneaded eraser and create a ‘point.’ Dab it gently on the forehead, the bridge of the nose, and the top of the collar to lift pigment and create bright highlights. -
Add the signature:
For a truly authentic look, lightly pencil in a script signature or title at the bottom right, similar to an old print edition. -
Preserve the work:
Once you are satisfied, spray the drawing with a workable fixative in a well-ventilated area to prevent the charcoal from smudging.
Hang your finished portrait proudly to add a touch of literary history to your studio space


Easy Cartoon Bard With Big Features
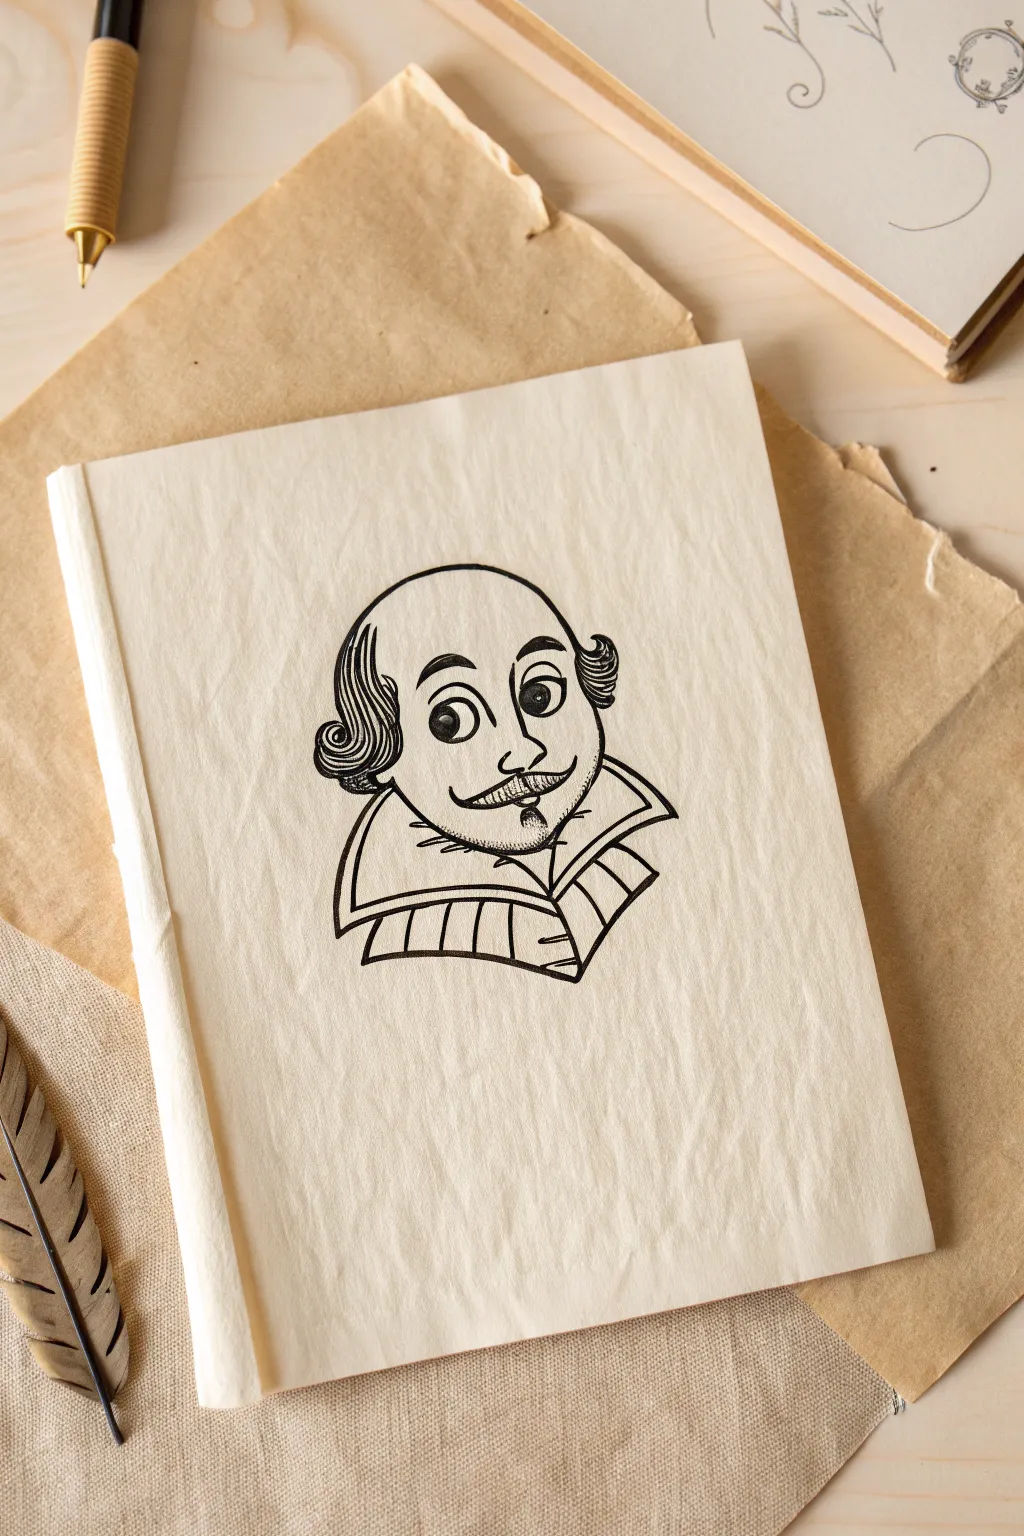
Capture the spirit of the world’s most famous playwright with this charmingly simplified cartoon sketch. Using clean ink lines and bold features, you’ll create a friendly caricature of Shakespeare that pops right off the textured page.
Detailed Instructions
Materials
- Cream or off-white sketchbook paper
- HB graphite pencil
- Kneaded eraser
- Fine liner pen (01 or 03 size, black)
- Medium liner pen (05 or 08 size, black)
- Ruler (optional)
Step 1: Penciling the Foundation
-
Outline the head shape:
Begin by sketching a wide U-shape for the chin and jawline. Top this with a large, smooth dome to create his signature high forehead. -
Place facial guidelines:
Lightly draw a vertical center line and a horizontal eye line just below the halfway point of the face. This helps keep his features centered. -
Draft the eyes and brows:
Sketch two large oval eyes sitting on the horizontal guideline. Above them, add thick, arched eyebrows that curve slightly downward at the ends for a gentle expression. -
Add nose and mustache:
Draw a small curve for the nose tip right between the eyes. Below it, sketch a handlebar mustache that curls up on both sides, with a small vertical line beneath it for the soul patch. -
Define the hair:
On the sides of the head, roughly level with the eyes and ears, sketch the fluffy tufts of hair. Think of them as cloud shapes or clustered curls hugging the temples.
Fixing Wobbly Lines
If a long line, like the head curve, gets shaky, don’t restart. Thicken the line slightly in that area to hide the wobble, or make the whole style ‘sketchy’ by restating the line loosely
Step 2: Drafting the Costume
-
Sketch the collar outline:
Draw a wide, stiff collar shape extending from the jawline. It should look like two large triangles pointing outward, framing the bottom of his face. -
Detail the collar structure:
Add a second, inner line parallel to the outer edge of the collar to give it a thick, bordered look. This represents the stiff fabric of an Elizabethan ruff. -
Draw the doublet:
Below the collar, sketch the top of his shoulders and chest. Add vertical stripes to suggest the fabric folds or pattern typical of period clothing.
Add an Aged Look
To make the drawing feel like an ancient manuscript, lightly brush some diluted coffee or tea over the paper before drawing to create a parchment effect
Step 3: Inking the Bard
-
Trace the main contours:
Switch to your medium liner pen (05 or 08). Boldly trace over the outer shape of the head, the jawline, and the main outline of the collar. -
Ink the eyes:
Using the same pen, carefully outline the eye ovals. Fill in large pupils, leaving small white highlights near the top right of each pupil to bring him to life. -
Define the facial hair:
Ink the mustache and the small beard patch. I like to use short, quick strokes here to simulate hair texture rather than a solid block. -
Texture the side hair:
Switch to a finer pen (01 or 03). Draw curvy, wavy lines inside the hair outlines on the sides of his head to create volume and curls. -
Refine facial details:
Ink the eyebrows, making sure they look full. Add a small curve for the nose and a simple line for the smiling mouth beneath the mustache. -
Complete the collar:
Go back to the medium pen for the collar’s heavily bordered edge. Use the fine pen to add faint hatching or small lines near the neck for shadow. -
Ink the clothing strips:
Carefully draw the vertical lines on his doublet. These don’t need to be ruler-straight; a slight wave makes the fabric look more natural.
Step 4: Finishing Touches
-
Wait for ink to dry:
Let the drawing sit for at least five minutes. Testing it with a light touch ensures you won’t smear the fresh ink. -
Erase pencil guides:
Gently rub the kneaded eraser over the entire drawing to lift away all the graphite guidelines, leaving only crisp black ink. -
Add final weight:
Look for areas where lines intersect, like under the chin or where the collar meets the neck. Thicken these crevices slightly with your medium pen to add depth.
You now have a delightful, iconic portrait of the Bard ready to inspire your next sonnet or play


Step-by-Step Face Construction Sketch

This sketchbook spread captures the timeless essence of Shakespeare through a series of structural studies and a fully realized color portrait. By breaking down the face into geometric foundations before adding ink and color, you’ll learn how to build historic character drawings with confidence and precision.
How-To Guide
Materials
- Dotted grid sketchbook or mixed media paper
- HB and 2B graphite pencils
- Fine liner pens (0.1mm and 0.3mm, black and sepia)
- Colored pencils (terracotta, cream, dark brown, peach)
- Ruler
- Eraser (kneaded preferred)
Step 1: Layout and Structure
-
Define the frames:
Begin by drawing four rectangular frames on your sketchbook spread using a ruler. Make them uniform in size, leaving ample white space between them. For a classical look, add a secondary inner border line about 2mm inside the main frame. -
Establish the crossed guide:
In one of the frames (like the top center one shown), lightly draw an ‘X’ from corner to corner. This isn’t just a placeholder; it helps you find the visual center for composing the head within the rectangle. -
Draft the head shapes:
In the other frames, sketch a basic oval for the head. Position it centrally, using your previous ‘X’ logic as a mental guide. Add a vertical center line to determine the direction the face is looking (three-quarter view or profile).
Step 2: Pencil Sketching the Features
-
Map facial proportions:
Lightly mark the horizontal eye line halfway down the oval. Place the nose line halfway between the eyes and chin, and the mouth line one-third down from the nose. -
Sketch the Shakespearean features:
For the main portraits, focus on the high forehead and deep-set eyes. Sketch the distinctive collar (ruff or flat collar) distinct to the Elizabethan era. -
Develop the beard and hair:
Using short, directional strokes, map out the shape of the beard and mustache. Don’t draw individual hairs yet; focus on the mass and volume of the hair around the jawline. -
Refine the profile view:
For the profile sketch (bottom right), pay close attention to the slope of the nose and the intricate headwear. I often use lighter strokes here to capture the delicate folds of the fabric cap.
Fixing Flat Features
If facial features look flat, deepen the shadows under the nose, chin, and brow ridge. Contrast is key to creating a 3D effect on paper.
Step 3: Inking and Detailing
-
Outline the strong contours:
Switch to a 0.3mm fine liner. Go over the main outlines of the face, collar, and shoulders. Keep the line weight consistent but lift your pen slightly at the ends of lines for a softer look. -
Texture the hair:
Use a 0.1mm pen to add texture to the beard and hair. Instead of coloring it in solid, use hatching lines that follow the curl of the hair to create volume and shadow. -
Add facial details:
Carefully ink the eyes, ensuring the pupils are crisp. Add subtle hatching under the eyebrows, nose, and chin to suggest depth without making the face look heavy. -
Decorate the clothing:
On the profile sketch, use cross-hatching to create the darker pattern on the shoulder garment. Keep the lines precise to mimic the texture of woven fabric.
Period Authentic Text
Use calligraphy ink or a chisel-tip marker to write the character names in a Gothic or Italic script above each frame for a true manuscript feel.
Step 4: Coloring the Main Portrait
-
Base skin tones:
Select one portrait to fully color (top right). Apply a light wash of cream or peach colored pencil over the face. Keep the pressure very light to preserve the texture of the paper. -
Build facial shadows:
Layer a slightly darker beige or light brown into the eye sockets, under the nose, and beneath the lip. This brings the 3D form to life. -
Color the garments:
Use a terracotta or warm red-brown pencil for the doublet (jacket). Apply more pressure in the folds of the fabric to create deep, rich shadows. -
Highlight the collar:
Leave the collar white or use a very faint grey to shade the folds. This contrast makes the warm colors of the coat pop. -
Finalize the frame:
Use a dark sepia or black pen to re-trace the frame border around your finished color piece, giving it a polished, gallery-ready appearance.
Now you have a structured study page that celebrates the Bard’s visage with historical flair


Ruff Collar Folds and Shadows Drill
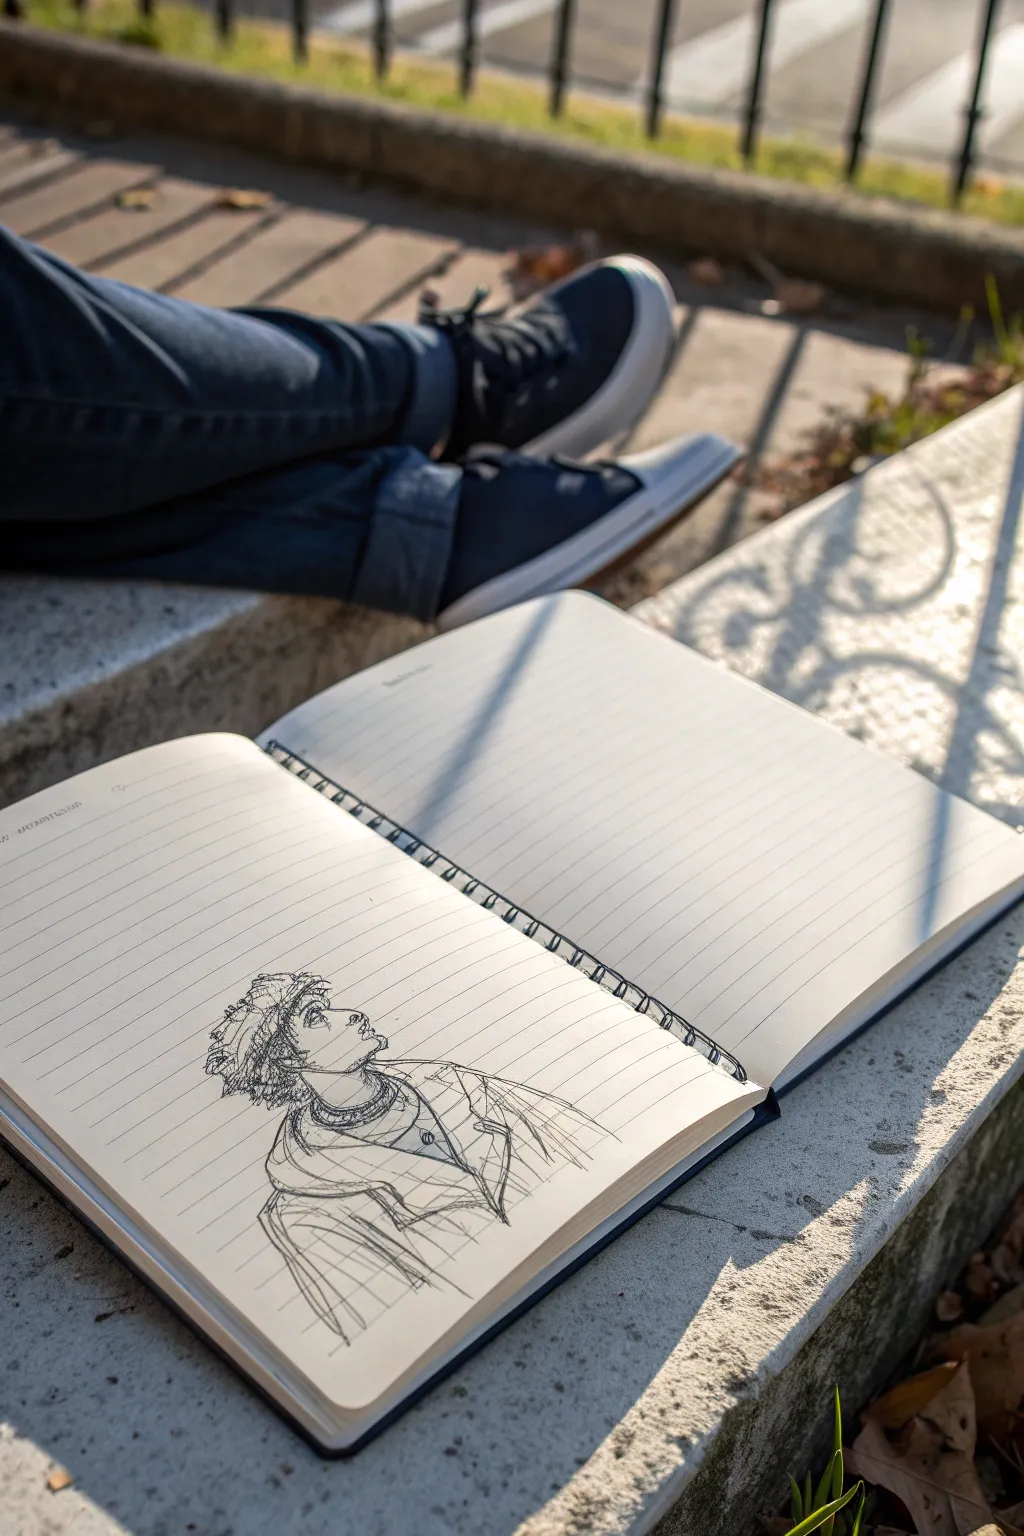
This project captures a contemplative figure with loose, expressive line work, blending contemporary fashion with a hint of classical drama. The focus is on capturing the upward gaze and the intricate folds of the clothing using a simple pen-and-ink technique.
How-To Guide
Materials
- Spiral-bound lined notebook
- Fine liner pen (black, 0.5mm)
- Ballpoint pen (black, optional for darker shading)
- Graphite pencil (HB for initial sketch)
- Eraser
Step 1: Laying the Groundwork
-
Establish the Head Angle:
Begin with a light pencil oval for the head. Tilt it significantly upward to capture the gazing posture. Draw a curved guideline down the center of the face to mark the profile angle. -
Map the Neck and Shoulders:
Extend a cylinder shape down for the neck, connecting it to a sloping line for the shoulders. The shoulders should be slightly hunched or relaxed, suggesting a casual pose. -
Outline the Hair Mass:
Sketch the general shape of the hair. Instead of individual strands, think of it as a cloud-like mass sitting on top of the head, with messy edges framing the face. -
Draft the Clothing Layers:
Sketch the collar of the hoodie or jacket. Draw a rough V-shape for the opening and add the hood draping around the neck, creating layers that mimic the complexity of a ruff without the rigidity.
Loose Grip Tip
Hold your pen further back from the tip. This forces you to draw with your shoulder rather than your wrist, resulting in fluid lines.
Step 2: Defining the Features
-
Refine the Profile:
Switch to your fine liner pen. Carefully ink the profile of the face, emphasizing the nose and the chin lifting upward. Keep the lines somewhat broken to maintain a sketch aesthetic. -
Sketch the Eye and Brow:
Draw the eye focusing upward. A simple almond shape with a dot for the pupil works well. Add a dark, slightly furrowed brow to suggest intense thought or emotion. -
Detail the Hair Texture:
Use quick, scribbly loops and zig-zags to define the curls. Vary the pressure to create depth within the hair mass, making the edges look tousled and windswept. -
Ink the Neck Details:
Define the Adam’s apple and the tendons of the neck. Add a necklace or choker detail with a simple curved line and a small pendant circle.
Try Sepia Ink
Swap the black fine liner for a brown or sepia pen. This instantly gives the sketch an ‘old master’ Da Vinci notebook vibe.
Step 3: Clothing Folds and Shadows
-
Structure the Jacket Collar:
Outline the lapels of the jacket. Use long, sweeping strokes. Don’t worry if the lines overlap; it adds to the energy of the drawing. -
Create Fold Depth:
Look for where the fabric bunches around the neck and shoulders. Add short, hatched lines in the corners of these folds to represent shadow. -
Add Texture to the Garment:
Use vertical hatching on the body of the jacket to suggest a heavier fabric texture. Keep these lines loose and reasonably spaced apart. -
Deepen the Shadows:
Go back into the deepest crevices—under the chin, inside the hood, and beneath the collar—and double your hatch lines (cross-hatching) to create darker values.
Step 4: Final Touches
-
Review Line Variance:
Strengthen the outer contour lines of the figure to separate it from the background. A slightly thicker outline helps the drawing pop. -
Erase Pencil Guidelines:
Once the ink is completely dry, gently erase the underlying pencil sketch. Be careful not to smudge the ink if it’s still fresh. -
Add Expressive Doodles:
If viewing the hair or clothes as too static, add a few flyaway lines or loose scribbles to enhance the movement.
Your finished sketch now carries a timeless, poetic quality suitable for any modern sketchbook

PENCIL GUIDE
Understanding Pencil Grades from H to B
From first sketch to finished drawing — learn pencil grades, line control, and shading techniques.
Explore the Full Guide
Ink-Pen Shakespeare With Bold Lines
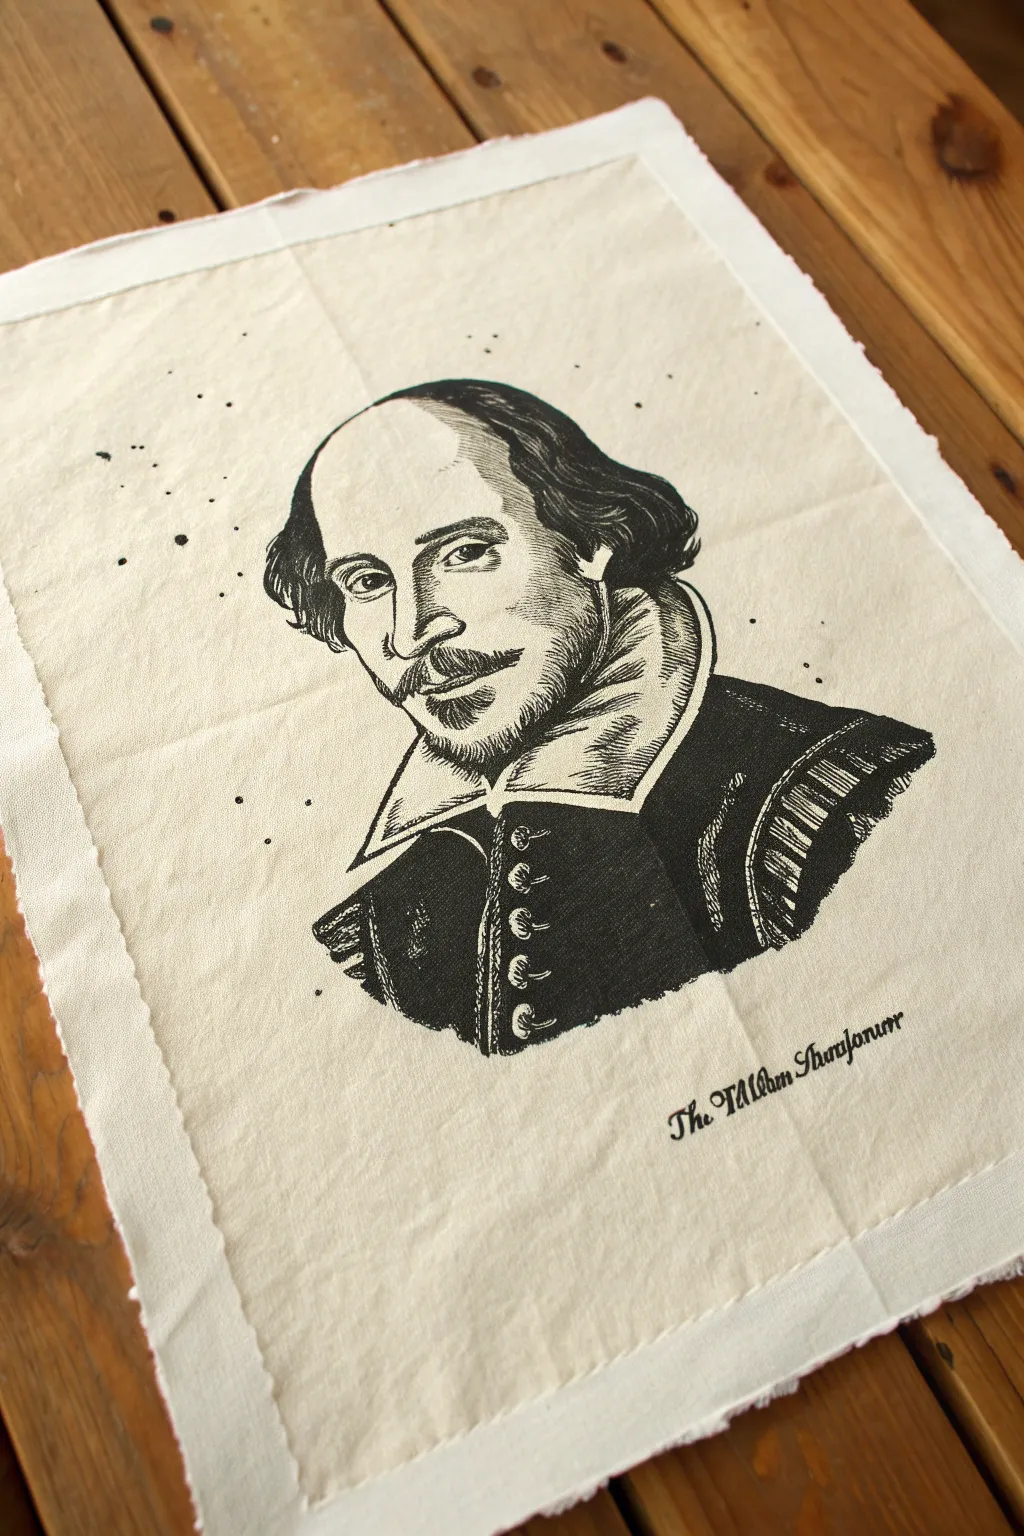
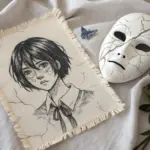
Capture the Bard’s likeness with this striking project that blends engraving-style illustration with fabric art. Using bold ink lines on unbleached cotton creates a timeless, vintage aesthetic perfect for a literary wall hanging.
Step-by-Step
Materials
- Unbleached cotton muslin or canvas fabric (approx. 11×14 inches)
- Black fabric ink or permanent fabric markers (fine and broad tips)
- Pencil (HB or lighter)
- Eraser
- Ruler
- Reference image of the Droeshout portrait
- Masking tape
- Iron and ironing board
- Flat, hard surface for drawing
Step 1: Preparation & Sketching
-
Fabric Prep:
Begin by cutting your fabric to size, leaving roughly an inch of extra border for the raw edge effect. Iron the fabric completely flat to ensure a smooth drawing surface. -
Secure the Surface:
Tape the corners of your fabric down to a hard, flat surface. This prevents the cloth from shifting or bunching up while you sketch and ink. -
Basic Shapes:
Using a light pencil, lightly map out the oval of the head and the triangular shape of the collar. Keep lines faint so they can be easily erased later. -
Facial Features:
Sketch the placement of the eyes, nose, and the distinctive hairline. Focus on proportions rather than detail at this stage. -
Refining the Lines:
Harden your pencil lines to define the curls of hair, the mustache, and the folds of the ruff collar. Ensure the likeness is accurate before uncapping your pens.
Ink Bleeding?
If ink spreads into the fibers, your fabric might be too absorbent. Try ironing freezer paper to the back of the fabric first to stabilize it, or switch to a tighter weave canvas.
Step 2: Inking the Portrait
-
Outlining:
Using a medium-tip fabric pen, trace the main structural lines of the face and clothing. Use a steady hand, as fabric can grab the pen tip slightly. -
The Eyes and Nose:
Switch to a finer tip for the eyes and nose. Use small, careful strokes to capture the heavy-lidded expression without making the lines too thick. -
Hair Texture:
Create the wavy hair texture using varied line weights. Long, flowing strokes work best here to imply volume and the classic hairstyle. -
Engraving Style Shading:
To mimic the engraving look, use hatching (closely spaced parallel lines) to shade the face. Focus on the shadow under the brow, the cheek, and the neck. -
Cross-Hatching Shadows:
For darker areas like the beard and the area under the chin, use cross-hatching to build density and depth without filling it in solid black.
Age It Up
Before drawing, soak your fabric in strong black tea or coffee and let it dry. This creates a parchment-colored background that makes the black ink look truly antique.
Step 3: Clothing & Details
-
The Ruff Collar:
Ink the collar with delicate, curved lines to suggest lace and folded fabric. Leave plenty of negative space here to keep it looking white and crisp. -
darkening the Doublet:
The clothing requires the most ink. Use a broad-tip marker or brush pen to fill in the dark sections of the doublet coat, carefully working around the lighter decorative slashes. -
Line Work on Shoulders:
Add directional shading lines on the shoulder pads (wings) of the doublet to show the curvature of the body. -
Button Details:
Define the row of buttons down the center. Keep the highlights on the buttons strictly white to make them pop against the dark fabric. -
Ink Splatters:
For a stylized, artistic finish, add a few controlled dots of ink around the head to mimic stray ink splatter or an aged paper texture.
Step 4: Finishing Touches
-
Adding Text:
Lightly pencil the text ‘The William Shakespeare’ in a gothic or serif font at the bottom right. Ink over it carefully with a fine tip. -
Erase Pencil:
Once you are absolutely certain the ink is dry (I usually wait at least an hour), gently erase visible pencil lines. Hold the fabric taut to avoid wrinkling. -
Fraying the Edges:
Pull horizontal and vertical threads from the raw edges of the canvas to create a deliberate, consistent fringe border about half an inch deep. -
Heat Setting:
If using heat-set fabric ink, iron the reverse side of the fabric for a few minutes to make the design permanent and wash-safe.
Hang your finished piece in a simple frame or use magnetic poster hangers to display your literary masterpiece
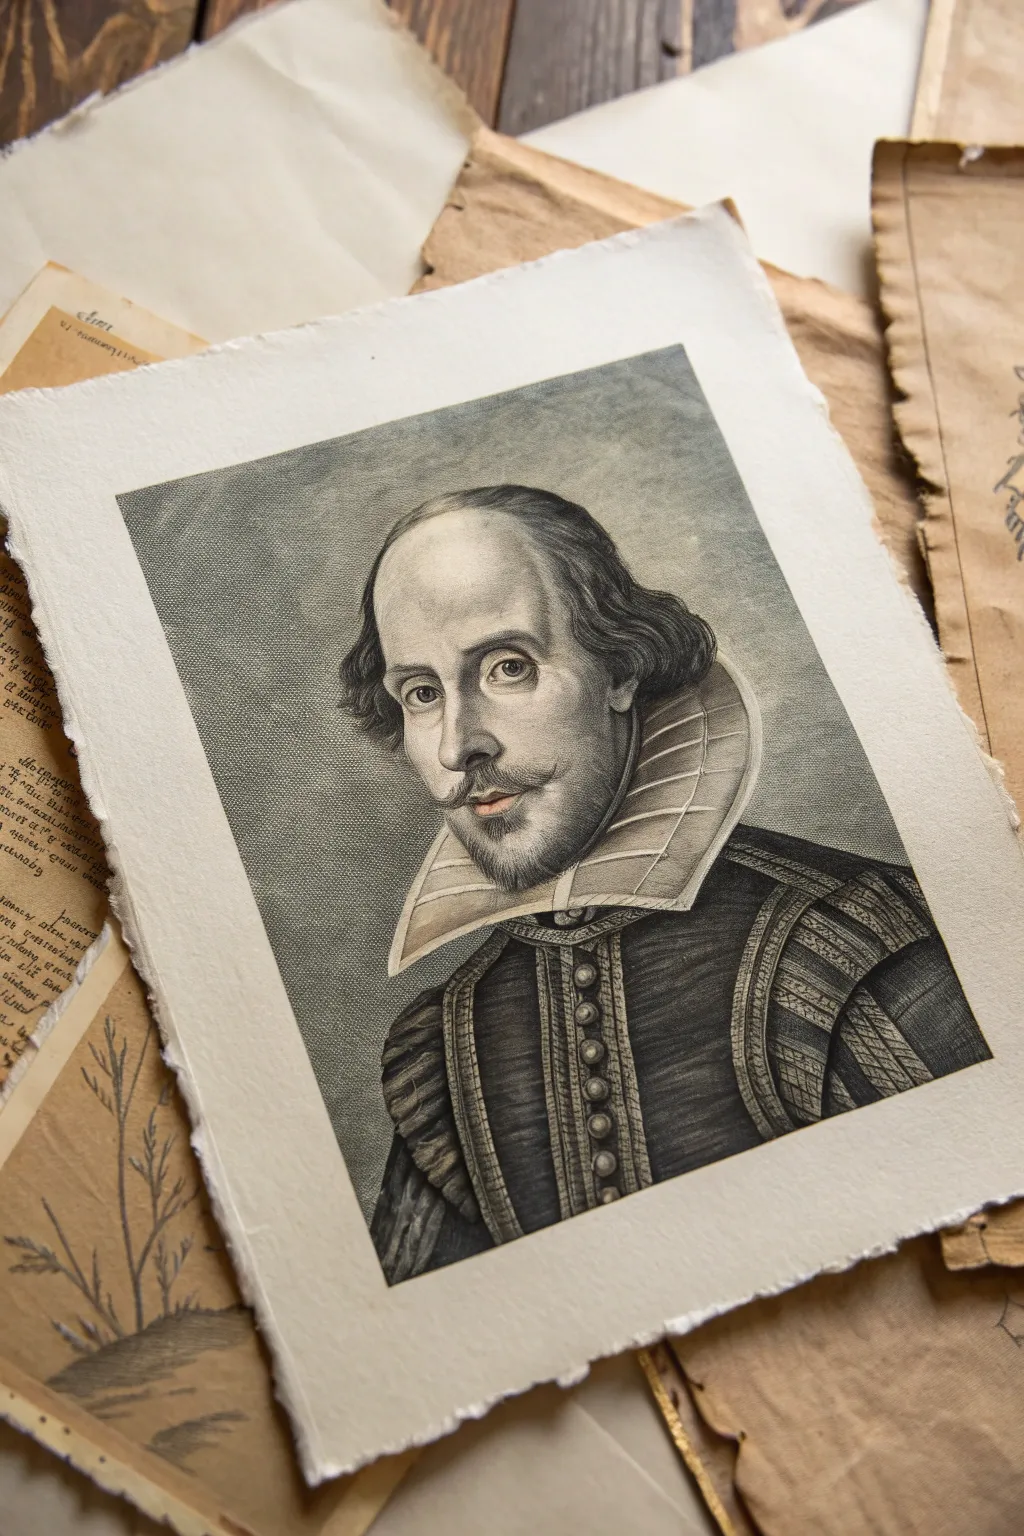
Realistic Pencil Portrait With Soft Blending
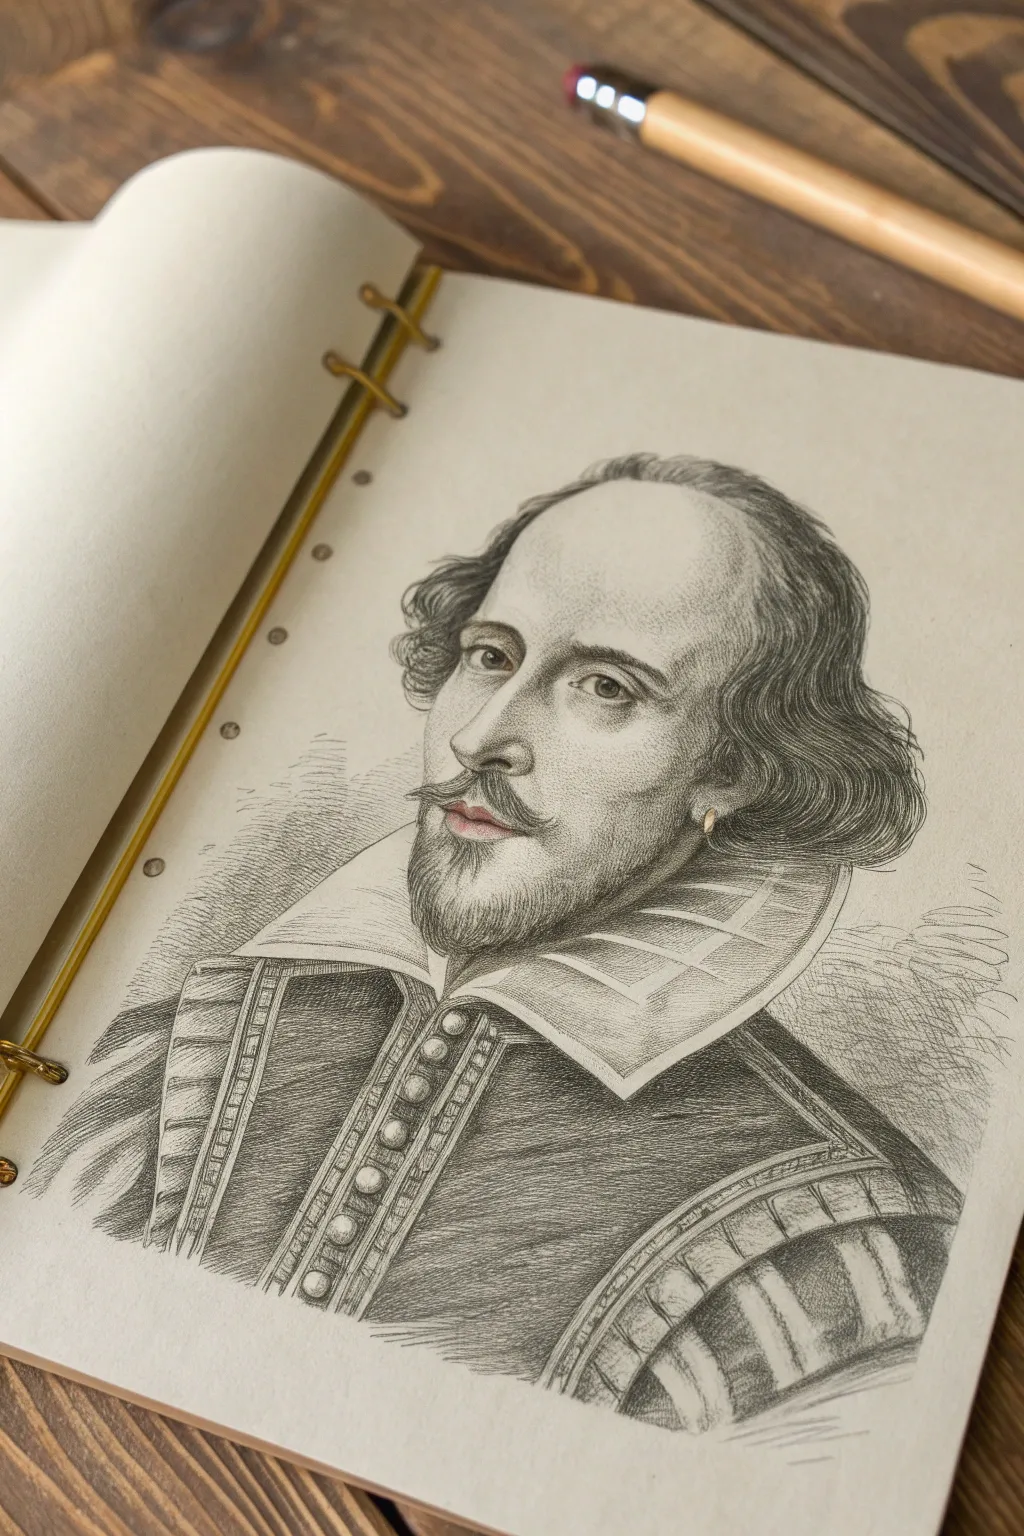
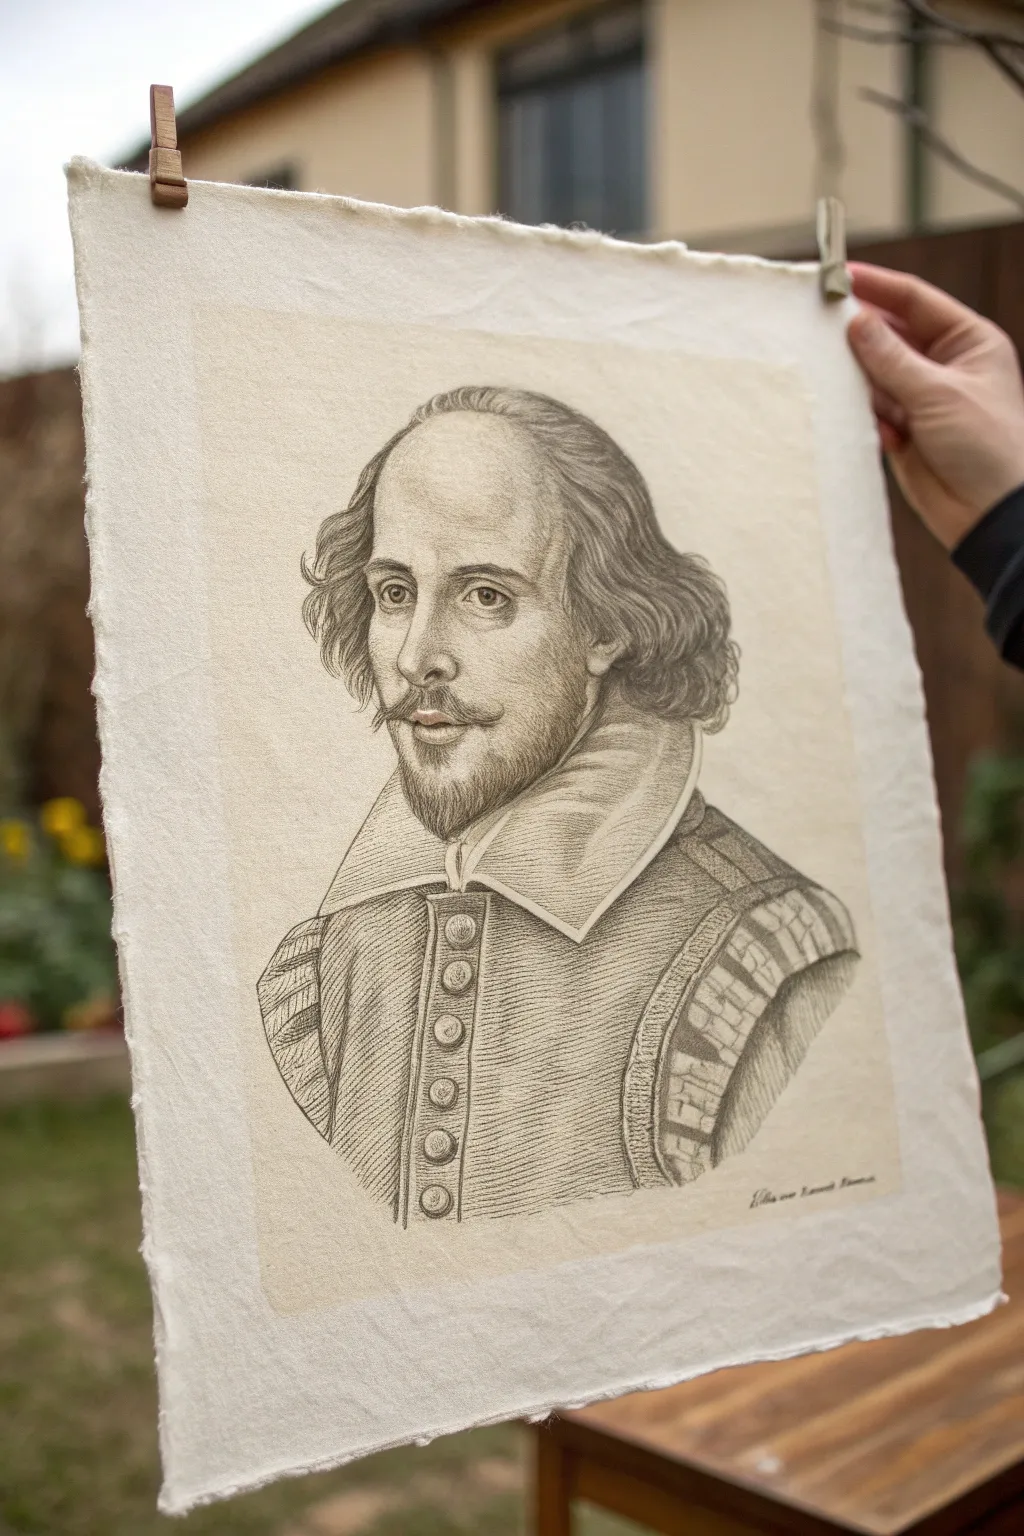
Capture the timeless visage of William Shakespeare with this realistic pencil study, focusing on delicate shading and intricate period clothing. The result is a sophisticated, sketchbook-style portrait that balances soft skin tones with the crisp details of Elizabethan fashion.
Detailed Instructions
Materials
- High-quality sketchbook (smooth or vellum finish)
- Graphite pencils (HB, 2B, 4B, 6B)
- Mechanical pencil (0.5mm, HB) for fine details
- Kneaded eraser
- Blending stump or tortillon
- Reference image of the Droeshout portrait
Step 1: Laying the Foundation
-
Establish the head shape:
Begin with a light HB pencil to sketch a large oval for the head. Shakespeare has a very distinct, high forehead, so ensure the upper portion of the oval is spacious and rounded. -
Map facial features:
Lightly draw a vertical center line and horizontal guidelines for the eyes, nose, and mouth. Position the eyes slightly lower than the halfway point of the oval to account for the receding hairline. -
Outline the hair and collar:
Sketch the flowing shapes of the hair on the sides, curving outward near the ears. Below the chin, draft the large, flat shape of the stiff ‘rebatos’ collar, followed by the shoulders and doublet.
Fixing “Muddy” Shading
If blending makes the face look dirty or gray, you’ve over-smudged. Lift graphite with a kneaded eraser to regain the paper’s white, then re-shade lightly without blending tools.
Step 2: Developing the Face
-
Detail the eyes:
Switch to a sharp 2B pencil. carefully draw the almond shape of the eyes. Add creases above the lids to show age and wisdom. Shade the iris darkly, leaving a tiny fleck of white for the catchlight. -
Refine the nose and mouth:
Define the long, straight nose using shading rather than harsh lines. Sketch the mustache with short, directional strokes, and define the lips, keeping the upper lip slightly darker. -
Create the facial hair:
Using a mechanical pencil or sharp HB, build the goatee and mustache. Use quick, short flicks of the wrist to mimic individual hairs, layering them to create density. -
Hair texture:
Move to the hair on the sides of the head. Use wavy, flowing lines to create the soft curls. I find it helps to draw the ‘ribbons’ of hair first, then fill them with texture. -
Skin shading:
Using a 2B pencil held at a low angle, lightly shade the forehead, cheeks, and neck. Use a blending stump to smooth this graphite out, creating a soft, realistic skin texture.
A Touch of Antiquity
For a true Renaissance feel, sketch on toned tan or grey paper. Use a white charcoal pencil to add bright highlights to the collar and forehead.
Step 3: Clothing & Final Details
-
Detail the collar:
The collar is a key feature. Outline the stiff edges firmly. Add faint, radiating lines to suggest the stiffening wires or starch, and shade underneath the jawline to cast a shadow on the fabric. -
Texture the doublet:
For the jacket (doublet), switch to a 4B or 6B pencil. Use cross-hatching to create a heavy, fabric texture. The strokes should be denser here to contrast with the light collar. -
Add decorative trim:
Draw the decorative strips running down the chest and shoulders. Draw small circles for the buttons or metallic studs, adding a tiny shadow to one side of each to make them look spherical. -
Deepen the blacks:
Go back in with your 6B pencil and darken the deepest shadows: the pupils, the nostrils, the shadow under the collar, and the folds of the doublet. This high contrast brings the drawing to life. -
Add the earring:
Don’t forget the small gold hoop earring in his left ear (viewer’s right). Keep the center white or very light to simulate the reflective gold surface. -
Refine the hairline:
Soften the transition between the forehead and the hairline. Add tiny, faint wisps of hair along the scalp line so it doesn’t look like a solid helmet. -
Final highlights:
Use your kneaded eraser to tap and lift pigment from the high points of the face: the bridge of the nose, the forehead, and the tops of the cheekbones.
Sign your work with a flourish and enjoy your personalized piece of literary history
BRUSH GUIDE
The Right Brush for Every Stroke
From clean lines to bold texture — master brush choice, stroke control, and essential techniques.
Explore the Full Guide
Minimal One-Line Shakespeare Profile
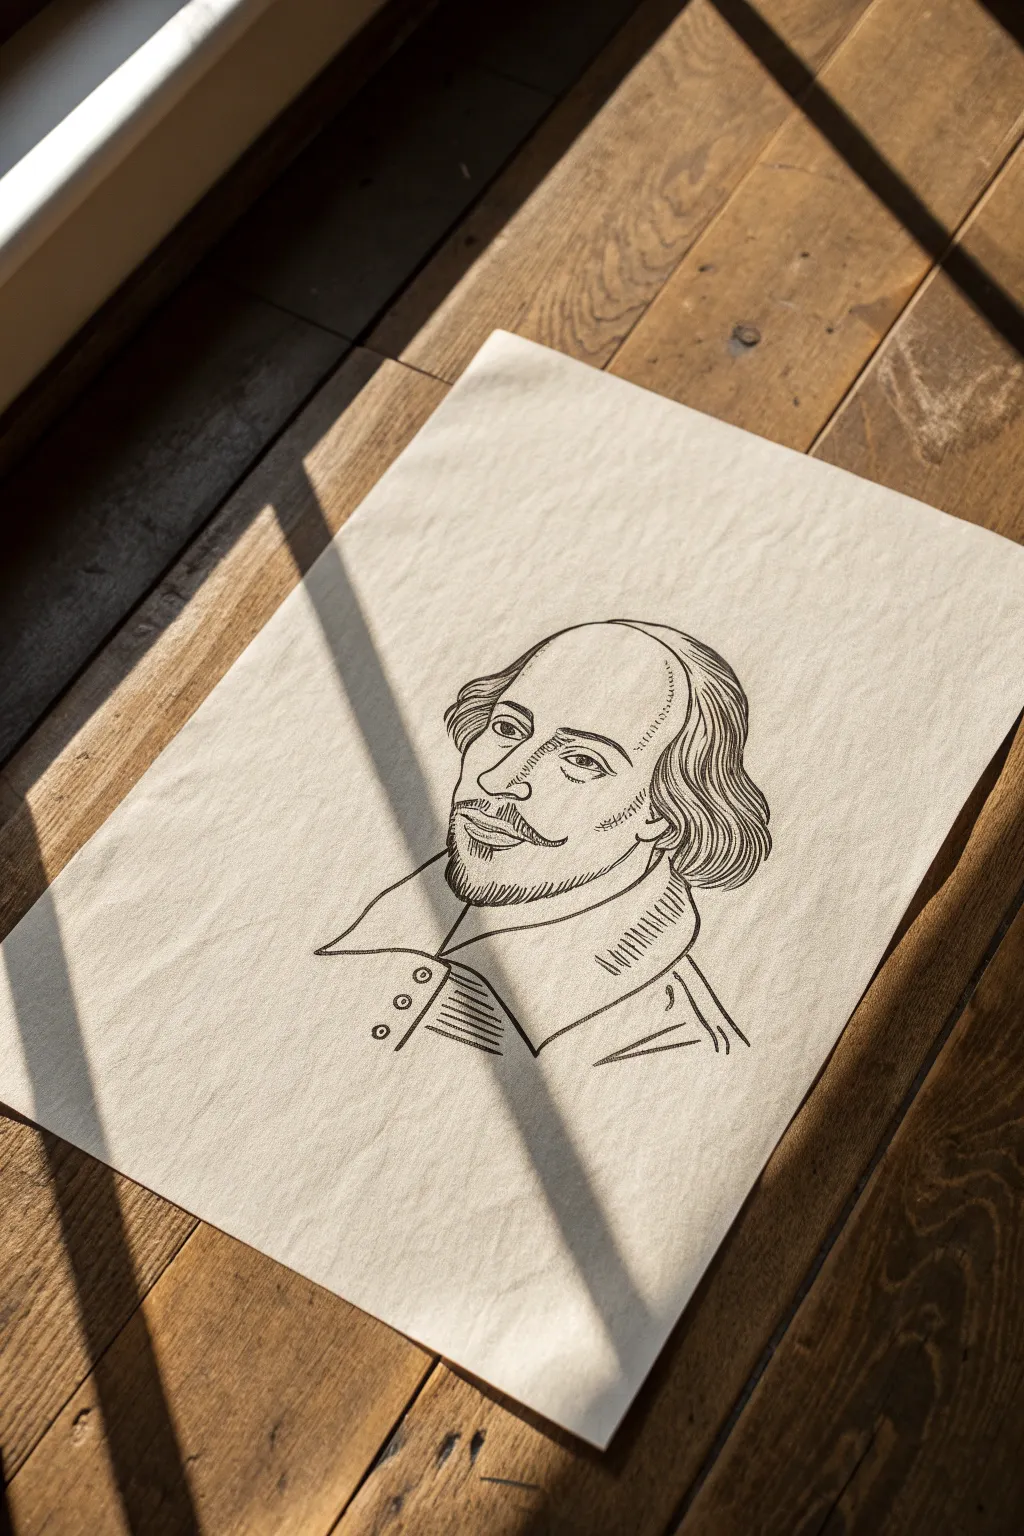
Capture the essence of the famous Droeshout engraving with clean, confident linework on textured paper. This project distills Shakespeare’s iconic features into a striking black-and-white illustration that feels both classic and refreshingly modern.
Step-by-Step
Materials
- High-quality, heavy-weight drawing paper (cream or off-white, slightly textured)
- Pencil (HB or 2B for sketching)
- Kneaded eraser
- Fine-point black fineliner pen (0.3mm or 0.5mm)
- Medium-point black drawing pen (0.8mm or 1.0mm)
- Reference image of the Droeshout portrait
Step 1: Drafting the Foundations
-
Establish the Head Shape:
Begin with your pencil by lightly sketching a large oval shape for the head. Keep this outline incredibly faint, as you only need it for placement. -
Map Facial Features:
Draw a vertical centerline to help with symmetry, slight curving it to the left to match the 3/4 turn pose. Mark horizontal lines for the eyes, nose base, and mouth. -
Sketch the Eyes and Brow:
Lightly pencil in the almond shapes of the eyes. The left eye (viewer’s left) should be slightly smaller due to the angle. Add the arched brow lines above them. -
Define the Nose and Mustache:
Draw the bridge of the nose connecting to the brow. Sketch the distinct curved shape of his mustache, ensuring it curls slightly upward at the ends. -
Outline the Hair and Ruff:
Sketch the perimeter of the hair, focusing on the poufy shape around the ears. Below the chin, draw the wide, angular triangles that will form his stiff collar (ruff).
Wobbly Lines?
If your hand shakes, don’t try to hide it. Embrace the ‘trembling’ line style often seen in old etchings. Just keep the general direction consistent.
Step 2: Refining the Portrait
-
Detail the Forehead:
Shakespeare is famous for his high forehead. Ensure your sketch line for the hairline recedes appropriately, leaving plenty of open space at the top. -
Refine the Collar:
Add the inner lines of the collar. It should look like two triangular wings framing his jawline. I find it helpful to check the angles against the jaw to ensure it sits correctly. -
Add Clothing Details:
Sketch the visible shoulders and the button placket down the front of the doublet. Include small circles for the buttons.
Old Paper Effect
Want that vintage folio look? Before drawing, lightly stain your heavy paper with cold tea or coffee and let it dry flat under a heavy book.
Step 3: Inking the Lines
-
Start the Flowing Lines:
Switch to your medium-point pen (0.8mm). Begin inking the main contours of the face first—the jawline, forehead, and nose—using smooth, continuous strokes where possible. -
Ink the Eyes:
Carefully trace the eyelids and pupils. Leave a tiny speck of white in the pupils to create a catchlight, bringing life to the expression. -
Texture the Hair:
Using the finer pen (0.3mm), draw wavy lines to create the hair texture over the ears. Keep these lines generally parallel to simulate combed locks. -
Define the Facial Hair:
Use short, directional strokes for the mustache and the small soul patch below the lip. Don’t outline the hair as a solid block; let the individual strokes define the edge. -
Cross-Hatch the Beard:
For the scruff along the jawline, use short, quick hatching marks. This suggests stubble without needing to draw every hair. -
Detail the Collar:
Ink the outline of the collar with the thicker pen. Then, switch to the fine pen to add the hatching lines inside the collar, suggesting the shadow and fabric texture. -
Finish the Clothing:
Ink the shoulder lines and the button placket. Add horizontal hatching or parallel lines on the doublet chest area to give the garment some weight and tone.
Step 4: Final Touches
-
Erase Pencil Marks:
Wait at least 10 minutes to ensure the ink is completely dry. Then, gently use the kneaded eraser to lift all visible graphite lines. -
Strengthen Line Weight:
Look at the drawing as a whole. Go back over key structural lines (like the bottom of the chin or the outer shoulder) with the thicker pen to add contrast and grounding.
Now you have a timeless piece of literary art ready to frame or display on your desk
Geometric Shakespeare With Faceted Planes
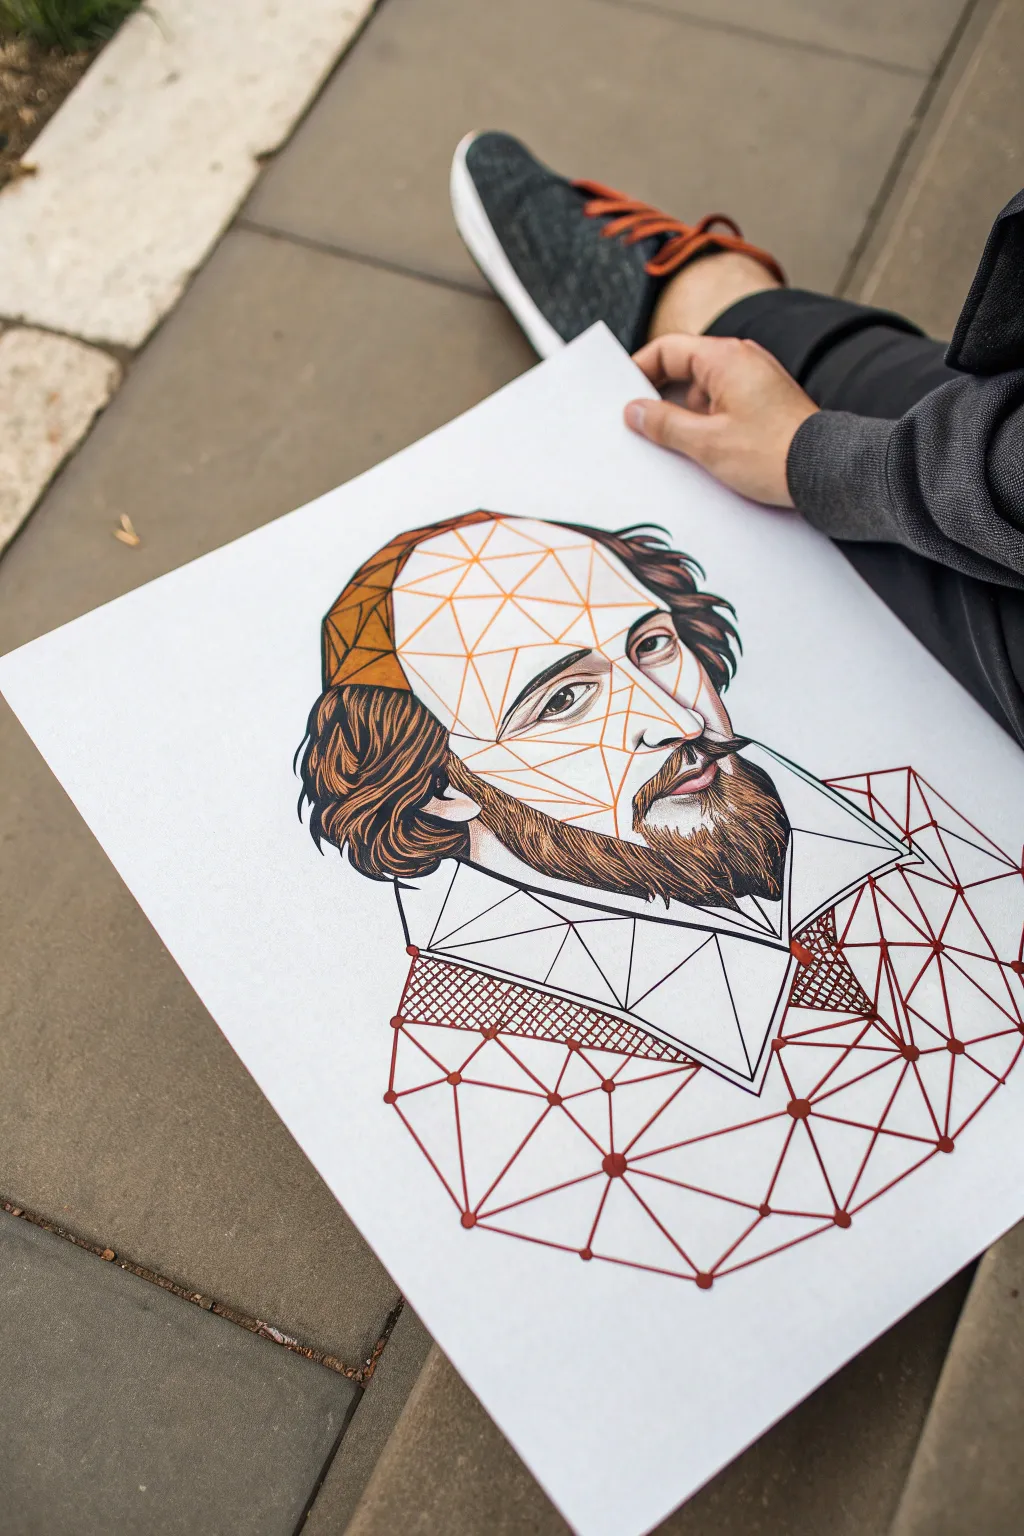
Blend classical portraiture with modern geometric design in this unique take on the Bard. By combining realistic ink rendering for the features with structural wireframe elements, you’ll create a striking visual metaphor for Shakespeare’s multifaceted genius.
How-To Guide
Materials
- Large heavy-weight drawing paper (A3 or larger)
- HB and 2B graphite pencils
- Fine liner pens (0.1mm, 0.3mm, 0.5mm) in black
- Colored fine liners or markers (red/maroon)
- Alcohol-based markers (skin tones, browns, yellows)
- Ruler or straight edge
- Kneadable eraser
- Reference image of the Chandos portrait
Step 1: Planning and Sketching
-
Establish the Foundation:
Begin by lightly sketching the outline of Shakespeare’s head and shoulders using an HB pencil. Focus on getting the proportions of the Chandos portrait correct, paying special attention to the position of the eyes and the hairline. -
Map the Facial Features:
Sketch the eyes, nose, and mouth with more detail. These areas will remain realistic, so ensure the likeness is accurate before moving on to the abstract elements. -
Design the Wireframe:
Lightly draw the geometric triangulation pattern. Start with the forehead, breaking the skin surface into triangles. Extend this logic to the collar and the chest area, using your ruler to keep the lines perfectly straight. -
Integrate Hair and Beard:
Sketch the flowing shapes of the hair and beard. These organic shapes will contrast beautifully with the rigid geometry, so keep your pencil strokes loose and eurhythmic.
Step 2: Inking the Features
-
Define the Eyes:
Using a 0.1mm fine liner, carefully ink the eyes and eyelids. Add tiny hatching lines to suggest depth in the iris and shadow under the brow. -
Render the Hair:
Switch to a 0.3mm pen for the hair and beard. Instead of outlining every hair, draw clumps and waves, using the direction of your stroke to indicate flow and volume. -
Geometric Lines on the Face:
Use a light hand and a ruler to ink the triangular mesh on the face. I find using a brown or sepia fine liner here works better than black to keep it subtle against the skin tone. -
Constructing the Collar:
Ink the stiff, white collar using bold, straight lines with a 0.5mm pen. The collar should look structural, acting as a bridge between the organic head and the abstract body.
Uneven Triangles?
If your triangles look messy, mark the connection points (vertices) first with dots before connecting them. This ensures your ruler lands exactly where it needs to.
Step 3: Color Application
-
Skin Tones:
Apply a base layer of pale skin tone marker to the face. Leave the highlights (the centers of the geometric triangles) uncolored or extremely pale to emphasize the faceted look. -
Darkening the Hair:
Layer brown alcohol markers over the hair and beard sections. Build up opacity slowly, keeping the highlights lighter to maintain the illusion of volume. -
Coloring the Facets:
Add shading to the facial geometry. Color one or two sides of each triangle slightly darker to create a 3D relief effect, making the face look carved. -
The Golden Detail:
Fill in the geometric hair cap or side details with a muted yellow-ochre or gold tone, staying strictly within the triangular lines.
Pro Tip: Line Weight
Vary your line weights intentionally. Use thick lines for the outer silhouette and the red body structure, and hairline thin strokes for facial details to create depth.
Step 4: The Molecular Body
-
Drafting the Network:
For the chest area, you are creating a ‘constellation’ or molecular network. Draw bold red nodes (circles) at the intersections of your grid. -
Connecting the Nodes:
Connect these red nodes with thick, confident red lines. This section should feel distinctly digital or scientific compared to the classical face. -
Adding Texture:
In the transitional area between the collar and the red network, add a small section of cross-hatching or mesh texture to blend the two styles visually.
Step 5: Final Touches
-
Erase Sketches:
Once the ink is completely dry—give it at least 20 minutes to be safe—gently erase all underlying pencil marks with a kneadable eraser to clean up the drawing. -
Enhance Contrasts:
Go back in with your thickest black pen to deepen the darkest shadows in the beard and the pupil of the eye, ensuring the focal point pops. -
Review Edges:
Check the outer geometric lines of the collar and body mesh; re-line them if necessary to ensure they are crisp and stand out against the white paper.
Step back and admire how the fusion of Old World charm and modern geometry creates a timeless portrait


Color-Block Shakespeare Poster Style
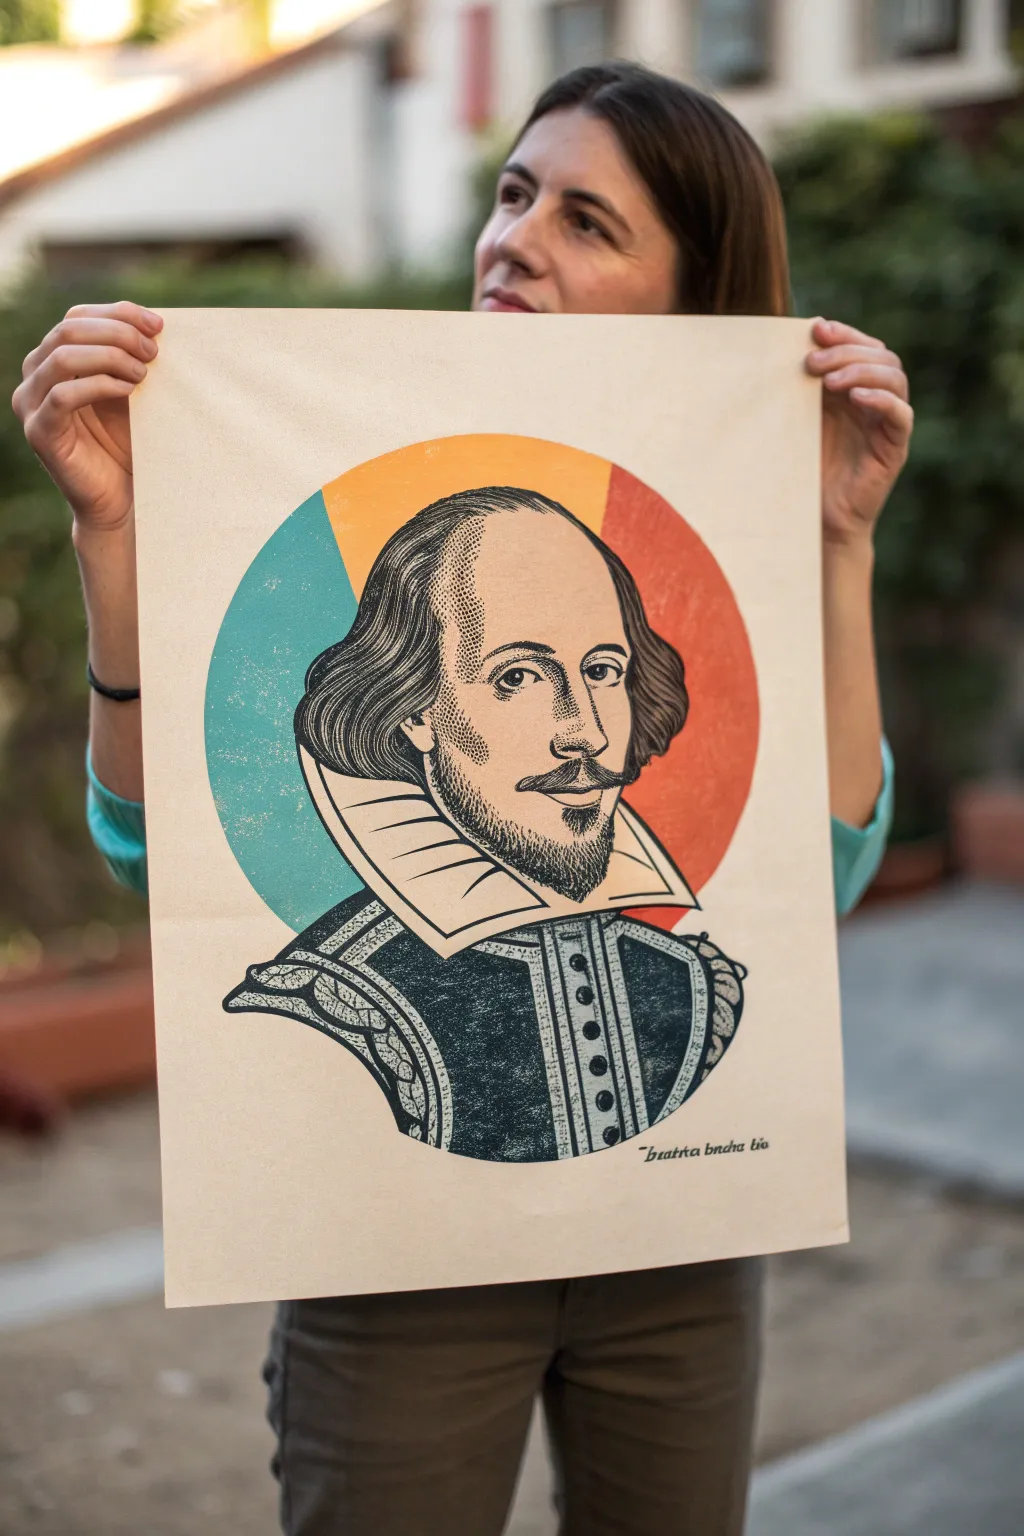
This project blends a classic woodcut aesthetic with a modern, geometric color palette to create a striking poster of the Bard. The iconic portrait sits boldly against a split-tone circle, making it a perfect piece for literature lovers who appreciate contemporary design.
Detailed Instructions
Materials
- Heavyweight cream or off-white paper (A3 size)
- Black block printing ink or heavy body acrylic paint
- Soft rubber brayer (roller)
- Linoleum block or soft-cut carving block (A4 size)
- Linocut carving tools (V-gouge and U-gouge)
- Acrylic paints (teal, mustard yellow, warm red)
- Painter’s tape or masking tape
- Medium flat paintbrush
- Carbon transfer paper
- Pencil
- Compass or round object for tracing
Step 1: Preparing the Design
-
Source the image:
Find a high-contrast public domain image of the Chandos portrait of Shakespeare. Verify it has clear lines for the eyes, collar, and beard, as these details are crucial for the woodcut look. -
Transfer the sketch:
Place your carbon paper face down on the lino block, then tape your reference image on top. Trace the main lines of the face, hair, and elaborate collar firmly with a pencil. -
Define the shadows:
Before carving, use a permanent marker to color in the areas of the block that will remain raised (the black parts of the print). This visual guide prevents accidental carving of incorrect areas.
Clean Lines Tip
Warm up your lino block with a hair dryer for 30 seconds before carving. The heat softens the material significantly, allowing for smoother curves and less hand strain.
Step 2: Carving the Block
-
Carve the outlines:
Use a fine V-gouge tool to carve along the outer edges of your marker lines. Keep the tool at a shallow angle to ensure smooth, clean cuts without digging too deep. -
Add texture to the hair:
Switch to a slightly wider tool for the hair. Carve wavy, parallel lines to mimic the flow of locks, leaving enough raised surface to catch the ink. -
Detail the face:
Use stippling (small dots) or very short dashes on the cheeks and forehead to create shading. This ‘dot work’ technique mimics the engraving style seen in the reference photo. -
Clear the negative space:
Use a wide U-gouge to clear away the large background areas around the head and shoulders. You want the background of the block to be completely recessed so it doesn’t pick up ink.
Step 3: Creating the Background
-
Draw the circle:
On your final poster paper, lightly draw a large circle in the center where the head will go. Divide this circle into three vertical segments or pie-slice shapes. -
Mask the first section:
Apply painter’s tape along the lines of your first segment (the left third). Ensure the tape is pressed down firmly to prevent paint bleed. -
Paint the teal section:
Paint the left segment with a flat teal acrylic paint. Apply it thinly to keep the paper texture visible. Let it dry completely before removing the tape. -
Paint the remaining sections:
Repeat the masking and painting process for the middle (mustard yellow) and right (warm red) sections. I find waiting about 20 minutes between colors prevents any smudging.
Make It Literary
Instead of solid colors in the background circle, use torn pages from old, damaged Shakespeare plays. Glue them down in a collage before printing the black portrait on top.
Step 4: Printing the Portrait
-
Ink the block:
Squeeze a line of black block printing ink onto a palette or glass pane. Roll your brayer back and forth until it has a velvety, even coating of ink. -
Apply ink to lino:
Roll the inked brayer over your carved block. Apply multiple thin layers rather than one thick one to avoid clogging the fine details in the beard and collar. -
Position the paper:
Carefully align your paper (with the dry painted background) over the inked block. You can also place the block face down onto the paper if you feel more confident with that alignment method. -
Transfer the image:
Apply pressure to the back of the paper using a barren or a clean wooden spoon. Rub in small circular motions, focusing on the edges and the detailed face area. -
Peel and reveal:
Slowly peel one corner of the paper back to check ink coverage. If it looks spotty, lay it back down and rub more. Once satisfied, pull the paper entirely off the block. -
Dry the print:
Hang the print or lay it flat in a safe, dust-free area. Oil-based inks may take a few days to cure fully, while water-based inks will dry within an hour.
Once the ink is fully cured, frame your masterpiece to add a touch of dramatic flair to your wall
Mixed-Media Shakespeare With Handwritten Script
Recreate the timeless gaze of William Shakespeare with this sophisticated mixed-media project that combines classical drawing techniques with textural collage. By layering a finely detailed portrait over aged, handwritten manuscripts, you’ll achieve a piece that feels like a discovered historical artifact.
Step-by-Step
Materials
- Heavyweight textured art paper (cream or off-white, deckle edge preferred)
- Graphite pencils (HB, 2B, 4B)
- Fine liner pens (black, 0.1mm and 0.3mm)
- Colored pencils (flesh tones, warm gray, muted gold)
- Aged/stained paper scraps or parchment
- Calligraphy pen or fountain pen
- Sepia or brown ink
- Matte gel medium or craft glue
- Reference image of the Droeshout portrait
Step 1: Preparing the Foundation
-
Age your papers:
Before starting the portrait, gather your background papers. If they look too new, lightly stain them with diluted tea or coffee and let them dry completely to create that mottled, antique look seen in the corners. -
Create the script layer:
On the darker, aged paper scraps, write out lines from a sonnet using a calligraphy pen and brown ink. The text doesn’t need to be perfectly legible; it serves as a texture element peeking out from behind the main portrait. -
Shape the main paper:
Take your main heavyweight art paper. If it doesn’t have a deckle edge, carefully tear the edges by hand to create a rough, fibrous border rather than a clean cut.
Step 2: Drawing the Portrait
-
Sketch the basic outline:
Using an HB pencil, lightly map out the head shape, the iconic high forehead, and the large stiff collar. Keep your lines very faint at this stage so they can be easily corrected. -
Refine facial features:
pay close attention to the proportions of the eyes and the distinctive nose. The eyes should sit roughly halfway down the head oval. Mark the placement of the mustache and the small tuft of beard. -
Ink the linework:
Switch to your 0.1mm fine liner to trace your pencil lines. The goal is to mimic an engraving, so use short, deliberate strokes. Create the hair using wavy, parallel lines rather than random scribbles. -
Cross-hatching technique:
Build up the shadows on the cheek, neck, and clothing using cross-hatching. This involves drawing intersecting sets of parallel lines—closer lines create darker shadows. -
Detailing the doublet:
Use the 0.3mm pen for the heavier fabrics of the doublet. Create the decorative braiding down the center with small, repeating circles and thick outlines to suggest raised embroidery. -
Develop the collar:
The ruff is a key focal point. Draw lines radiating outward from the neck to show the stiff structure, and add faint curved lines between them to suggest the transparency and weave of the fabric.
Ink Bleeding?
If your fine liner pen starts bleeding into the art paper, the paper might be too absorbent. Switch to a smoother hot-press paper or seal the paper with a thin layer of clear gesso before inking.
Step 3: Shading and Color
-
Apply graphite shading:
Go back in with 2B and 4B pencils to deepen the contrast. Focus heavily on the hair behind the ears and the deep folds of the black doublet to make the white collar pop. -
Soft skin tones:
Very lightly layer flesh-colored pencil over the face. Keep it transparent; you want the ‘etched’ ink lines to show through clearly. Add a tiny touch of pink to the lips for life. -
Tinting the eyes:
Use a warm gray or pale hazel pencil for the irises. Leave a tiny speck of white paper uncolored to represent the catchlight, which gives the eyes focus. -
Highlighting the hair:
I find that adding just a hint of cool brown or grey pencil to the hair creates depth without overpowering the ink work.
Pro Tip: The Engraved Look
When shading with ink, don’t smudge. Instead, practice ‘stippling’ (tiny dots) or directional hatching. This mimics the rigid mechanical lines of 17th-century printing plates.
Step 4: Assembly and Finishing
-
Adding texture to the drawing:
To make the new drawing mimic the background, lightly rub a dirty eraser or a dry brush with a tiny bit of charcoal dust over the clean white areas of the paper to knock back the brightness. -
Arranging the composition:
Lay down your scripted, aged papers first. Position your finished portrait on top, slightly offset so the script is visible at the edges. -
Adhering the layers:
Apply a thin layer of matte gel medium to the back of the portrait and press it firmly onto the scripted background papers. Smooth it from the center outward to prevent air bubbles.
Display your finished Bard on a wooden desk or frame it in dark wood to complete the scholarly aesthetic
Shakespeare Doodle Page for Study Notes
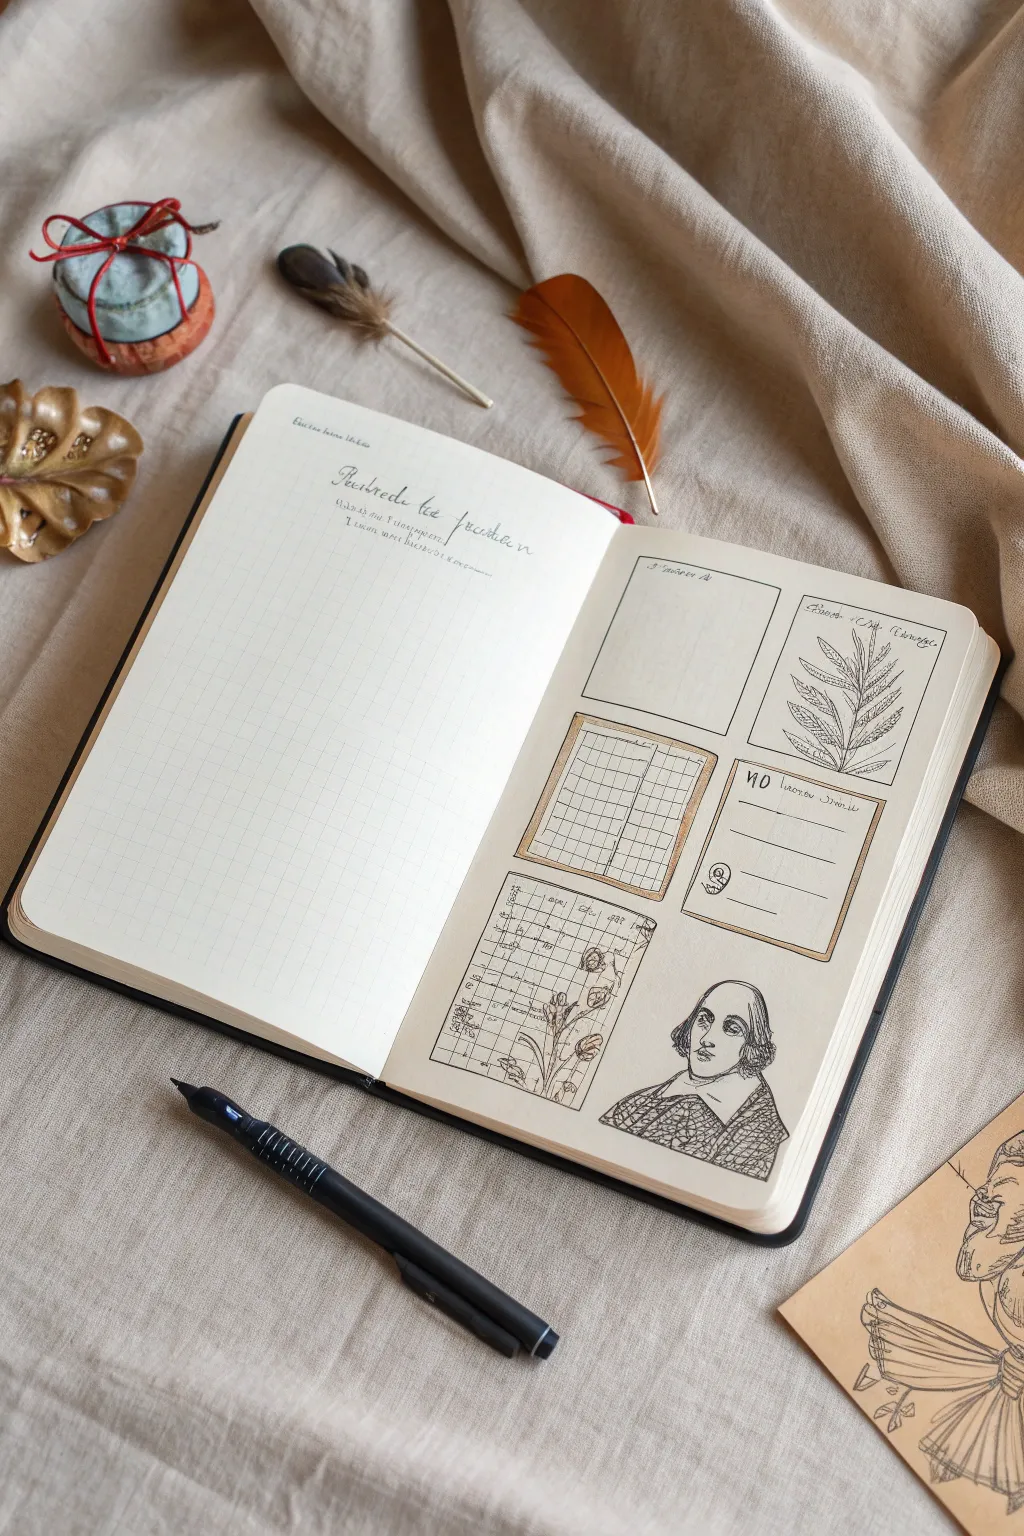
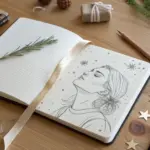
Transform your blank notebook into a sophisticated, academic layout perfect for organizing literature notes. This project combines precise grid work, vintage-style botanical sketches, and a classic portrait for a page that looks like it belongs in a Renaissance scholar’s library.
Step-by-Step Tutorial
Materials
- A5 Dot grid or graph notebook (cream paper preferred)
- Black fine liner pens (sizes 0.1, 0.3, and 0.5)
- Ruler or straight edge
- Pencil (HB or 2B)
- Eraser
- Light brown marker or brush pen (for vintage accents)
- Reference image of William Shakespeare
Step 1: Setting the Structure
-
Prepare the Left Page:
Begin on the left-hand page of your spread. Use your ruler and a 0.1 fine liner to draw a very faint, large rectangle that fills most of the page, leaving a generous margin. If your notebook already has a grid, you can skip drawing the lines and simply define the writing area. -
Add the Header Script:
At the top of the left page, write a title in a flowing, cursive script. Something like ‘Richard the Third’ or ‘Hamlet notes’ works well. Use a 0.3 pen to give the title slightly more weight than the grid lines. -
Draft the Right Page Layout:
Switch to your pencil. On the right-hand page, lightly sketch out five distinct zones. You’ll need two square boxes near the top, a rectangular chart in the middle left, a smaller note box in the middle right, and space at the bottom for a larger chart and a portrait.
Ink Smudges?
If you smudge fresh ink, turn it into a ‘vintage stain.’ Dab a little diluted brown watercolor or coffee over the smudge to make it look like intentional aging.
Step 2: Drawing the Study Modules
-
Ink the Top Boxes:
Using a 0.3 pen and ruler, ink the two top squares. Keep lines crisp. Inside the right-hand box, draw a simple frame border. -
Create the Calendar Grid:
In the middle-left position, draw a square box. Inside, create a grid pattern—perhaps 5×5 or 6×6 small squares. This mimics a calendar or a tracking chart. -
Add the Notes Section:
To the right of the grid, draw a horizontal rectangle. Use a ruler to add three horizontal lines inside for writing, and create a small circle icon in the bottom left corner for variety. -
Detail the Bottom Chart:
In the bottom left area, draw a larger, more complex grid. This one should look messy and used. Draw irregular vertical and horizontal lines, and sketch a faint botanical flower overlaying the grid lines to make it look like an old field journal. -
Add Vintage Accents:
Take your light brown marker. Carefully trace just the outer edge of the middle-left grid and the middle-right note box. This adds an ‘aged paper’ or ‘shadow’ effect.
Step 3: Illustrating Details
-
Sketch the Botanical Sprig:
In the top right box you created earlier, pencil in a simple branch with leaves. Start with a central stem curve, then add paired leaves extending outward. -
Ink the Botanical:
Trace your botanical sketch with a 0.1 pen. Use short, quick strokes for the veins of the leaves to emulate an engraving style. -
Outline the Portrait:
In the bottom right corner, lightly pencil the outline of Shakespeare’s head and shoulders. Focus on the signature high forehead, the ruff collar, and the flowing hair. -
Face Details:
Using the 0.1 pen, ink the facial features. Keep the eyes small and the nose defined. Don’t worry about photorealism; a stylized line drawing captures the essence perfectly. -
Texture the Clothing:
I particularly enjoy this part—use cross-hatching (crisscrossed diagonal lines) to shadow his doublet and collar. This adds depth and visual weight to the bottom of the page. -
Hair and Beard:
Fill in the hair and beard with wavy lines. Leave some white space to suggest shine or highlights.
Level Up
Use actual coffee or tea to stain the edges of the pages before drawing. Crinkle the paper slightly after drying for an authentic 16th-century manuscript texture.
Step 4: Final Touches
-
Label the Sections:
Using very small, neat handwriting (all caps or cursive), label your boxes. ‘Notes,’ ‘Act III,’ or ‘Themes’ are good placeholders. -
Review and Correct:
Check for any uneven lines. You can thicken the outer borders of your main boxes with a 0.5 pen to make them pop against the lighter grid lines. -
Erase Guidelines:
Wait at least 5-10 minutes for all ink to be completely dry. Gently erase all your pencil sketches to reveal the clean layout.
Now you have a structured canvas ready for your literary analysis


Have a question or want to share your own experience? I'd love to hear from you in the comments below!