Whenever I need a little creative reset, I paint a scenic landscape—it’s like taking a mini trip without leaving my easel. Below are my go-to scenic painting ideas, starting with the classics and drifting into some playful, unexpected twists.
Sunset Silhouette Over Rolling Hills
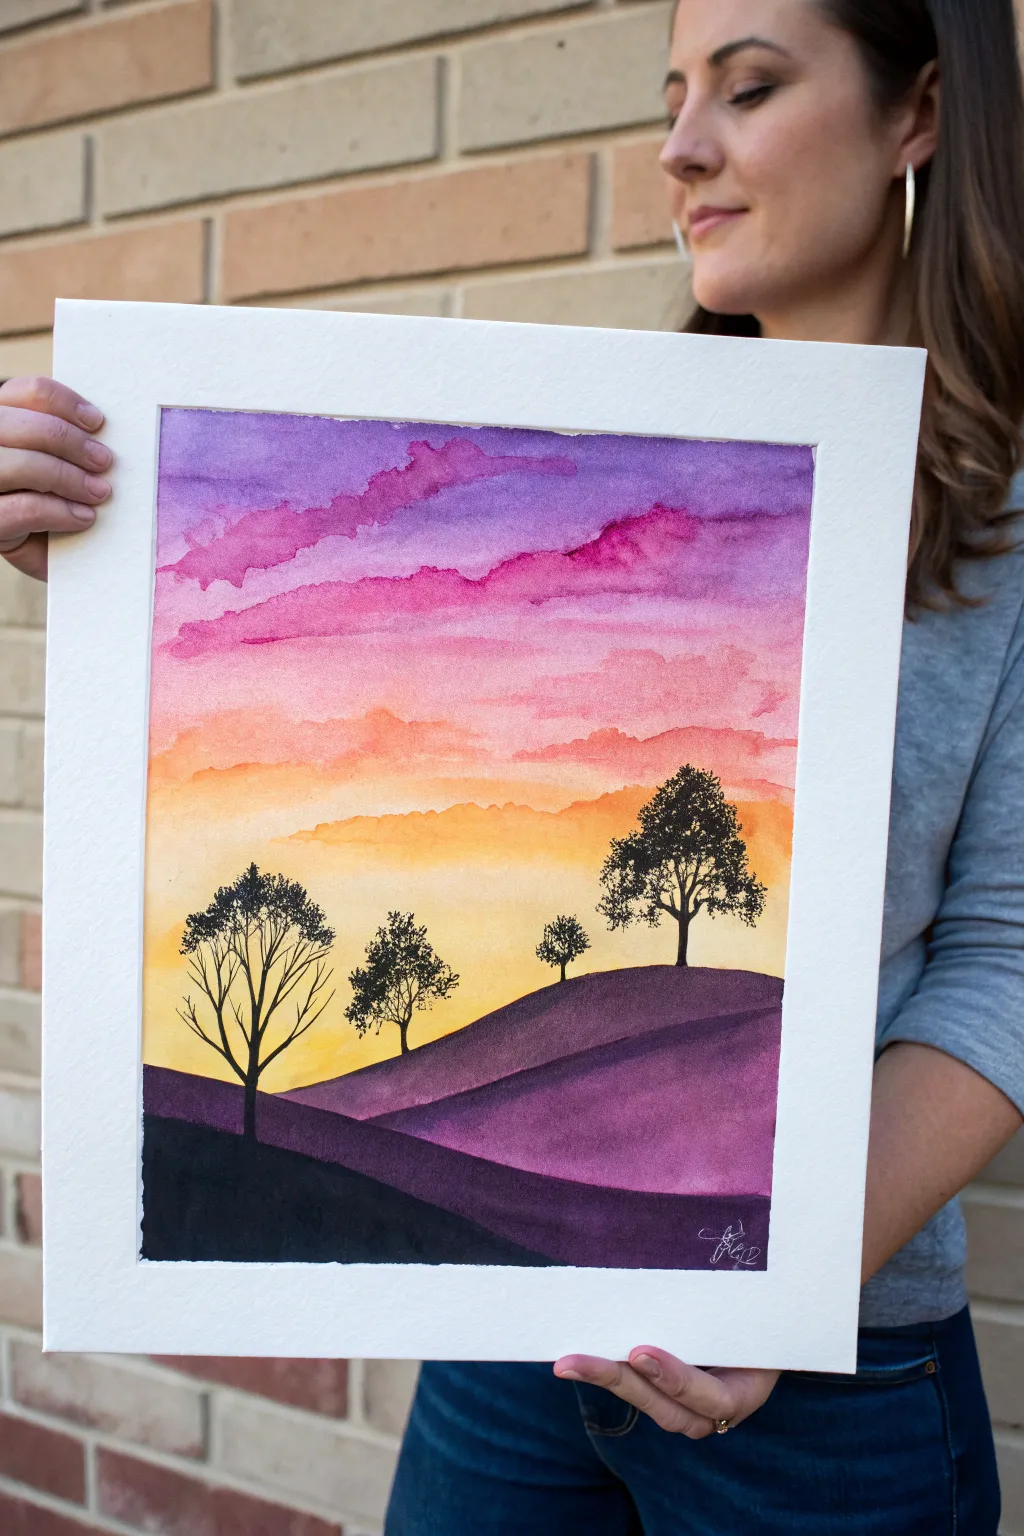
Capture the serene beauty of twilight with this vibrant watercolor landscape. Using a wet-on-wet technique for the sky creates a dreamy transition of colors, while crisp silhouettes add depth and drama to the foreground.
How-To Guide
Materials
- Cold press watercolor paper (140lb/300gsm)
- Watercolor paints (Purple, Magenta/Rose, Orange, Yellow, Black)
- Masking tape
- Drawing board or hard surface
- Large flat wash brush
- Round brushes (Sizes 4, 8, and a detail liner/size 0)
- Jar of clean water
- Paper towels
- Palette for mixing
Step 1: Setting the Sky
-
Secure the paper:
Begin by taping down all four edges of your watercolor paper to your board. This prevents warping when the paper gets wet and creates that crisp white border seen in the final piece. -
Pre-wet the sky area:
Using your large flat brush and clean water, apply an even coat of water to the upper two-thirds of the paper where the sky will be. You want a sheen on the surface, but no puddles. -
Start with purple:
Load a round brush with a rich purple mix. Apply horizontal strokes at the very top of the sky, letting the pigment bleed slightly downward into the wet paper. -
Transition to pink:
Rinse your brush and pick up a vibrant magenta or rose color. Paint specifically shaped cloud-like strokes just below the purple, encouraging the colors to touch and blend naturally without overworking them. -
Add the warm glow:
As you move lower towards the horizon line, switch to bright orange. Paint across the width of the paper, softening the transition from the pinks above. -
Finish with yellow:
At the lowest part of the sky section, blend a warm yellow into the bottom of the orange area, fading it out gently where the first hill will begin. Let this entire sky layer dry completely before moving on.
Fixing “Blooms”
If water drops back into semi-dry paint, creating irregular cauliflower edges (blooms), wait until it’s fully dry and gently scrub the edge with a damp stiff brush to soften it.
Step 2: Layering the Landscape
-
Sketch the hills:
Once the sky is bone dry, use a pencil to lightly sketch three distinct rolling hill shapes. The furthest one should be highest on the page, sloping down, with the closest one at the bottom left. -
Paint the furthest hill:
Mix a medium-tone purple. Fill in the shape of the most distant hill (the one highest on the paper). Keep the top edge crisp against the yellow sky, but you can be looser near the bottom as it will be covered. -
Create the middle ground:
Mix a slightly darker, more intense purple for the middle hill. Wait for the first hill to dry, then paint this section, overlapping the previous layer to establish depth. -
Paint the foreground:
For the closest hill in the immediate foreground, mix a very dark purple or mix purple with a touch of black. Paint this large, sweeping shape at the bottom, creating a solid base for the composition. -
Deepen the shadows:
While the foreground hill is drying, I sometimes add a second coat of dark paint to the very bottom left corner to create a vignette effect, guiding the eye into the scene.
Add Texture
Before the silhouetted trees dry, sprinkle a tiny pinch of salt onto the foliage areas. It will absorb pigment unevenly, creating a fantastic natural texture for the leaves.
Step 3: Adding Silhouettes
-
Mix the silhouette color:
For the trees, you need an opaque, dark color. Use black watercolor derived from the tube with very little water, or mix a dense chromatic black using burnt umber and ultramarine blue. -
Outline the main tree:
Using a size 4 round brush or a liner brush, paint the trunk of the largest tree on the right side of the middle hill. Keep the lines organic and slightly uneven. -
Stipple the foliage:
Use the tip of a round brush to tap or ‘stipple’ tiny dots and clusters around the branches to form the leaves. Leave small gaps of sky showing through the canopy to keep it airy. -
Paint the smaller trees:
Add the smaller, distant tree on the middle hill using the same technique but with less detail. Then, paint the bare, skeletal tree on the left side of the composition, focusing on thin, reaching branches. -
Final touches:
Check for any gaps in the hills or light spots in the silhouettes and fill them in carefully. Once completely dry, slowly peel off the masking tape at a 45-degree angle.
Step back and admire the glowing atmosphere and sharp contrasts you have created.

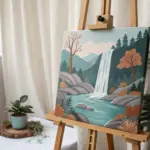
Evergreen Forest With Misty Depth
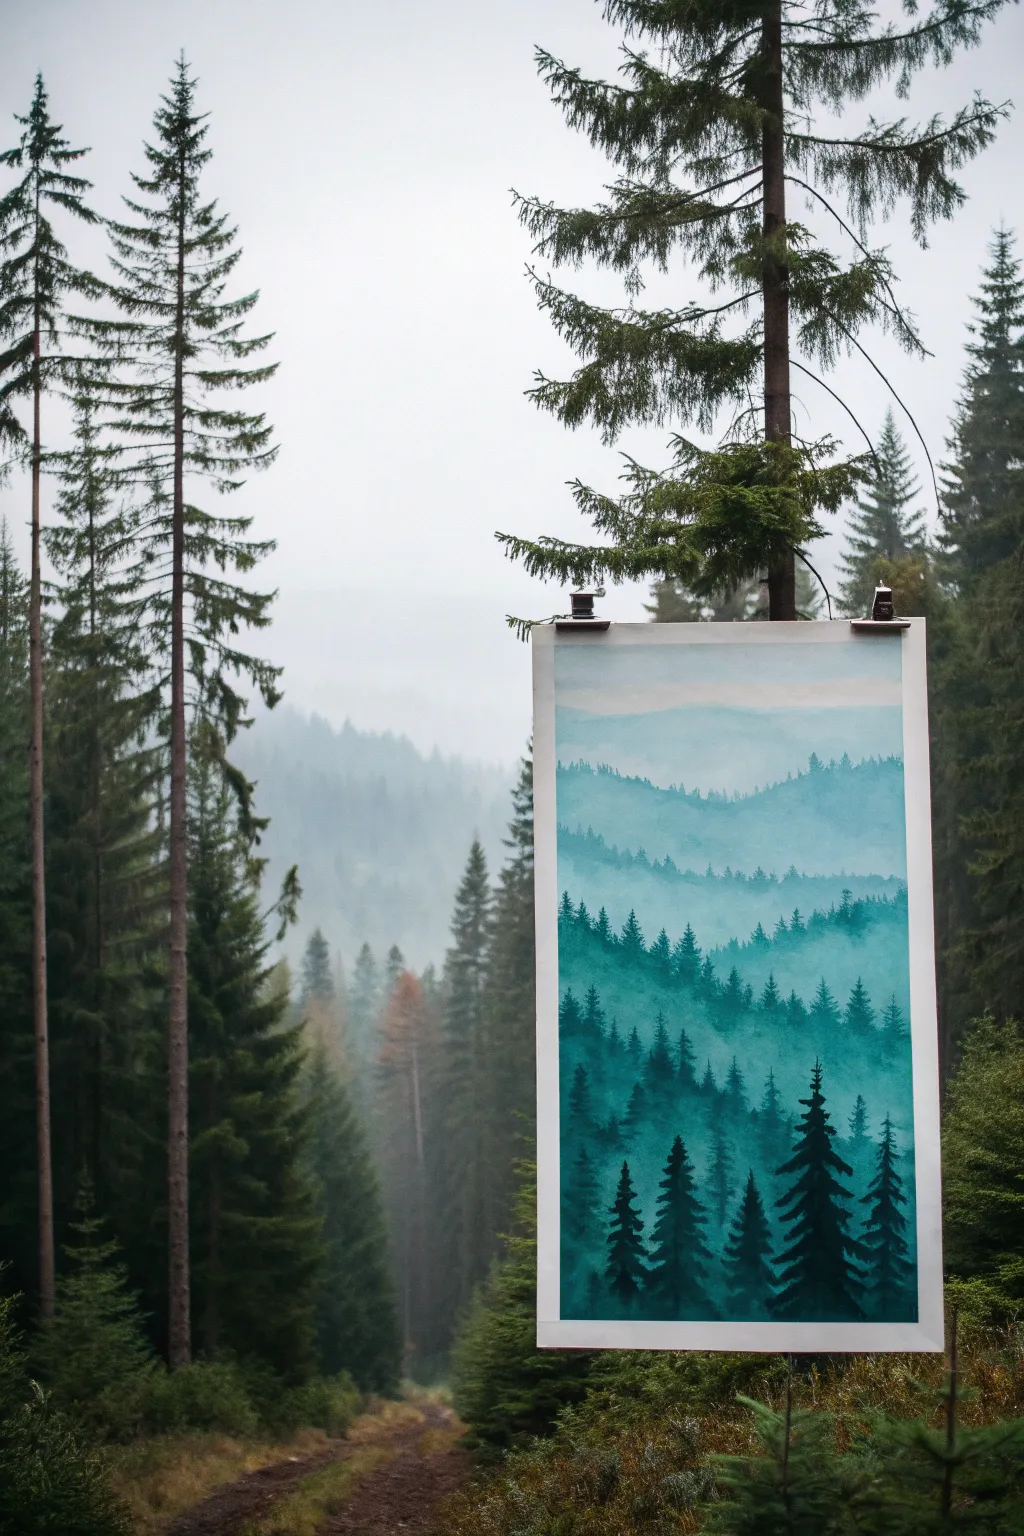
Capture the serene depth of a mountain forest with this atmospheric painting that uses value changes to create distance. By layering washes of teal and evergreen from light to dark, you’ll build an illusion of endless misty hills right on your paper.
How-To Guide
Materials
- Heavyweight watercolor paper (300gsm cold press recommended)
- Watercolor paints (Phthalo Green, Indigo, Payne’s Gray, Prussian Blue)
- White gouache (optional, for mist)
- Flat wash brush (1 inch)
- Round brushes (sizes 4 and 8)
- Masking tape
- Two jars of water
- Paper towels
- Palette for mixing
Step 1: Preparation and Sky
-
Secure the paper:
Tape your paper down firmly to a board or table on all four sides. This prevents buckling when we add water and creates that crisp white border seen in the final piece. -
Pre-mix your gradient:
Prepare a large puddle of a very pale, watery teal mix. I usually combine a touch of Phthalo Green with a plenty of water to start. You will be darkening this same pile of paint gradually for each layer. -
Wet the sky area:
Using your flat brush, apply clean water to the top third of the paper. You want it damp and glistening, but not swimming in a pool of water. -
Paint the distant sky:
While the paper is wet, drop in your palest teal mix at the very top, letting it fade downward into the white of the paper. This soft gradient creates the atmospheric backdrop.
Step 2: Building the Distant Hills
-
First ridge line:
Once the sky is bone dry, mix a slightly stronger version of your base teal color. Paint a rolling, organic line across the paper, about a third of the way down. Fill in the area below this line with a wash of this color. -
Soften the bottom edge:
Before that wash dries completely, take a damp, clean brush and run it along the bottom edge of the paint. This feathers the color out, creating the misty effect where the next layer will begin. -
Dry completely:
Wait for this layer to dry fully. If the paper is cool to the touch, it’s still damp. Painting too soon will cause ‘cauliflowers’ or bleeding. -
Second ridge layer:
Add a bit more pigment (perhaps a touch of Prussian Blue) to your mix. Paint a second mountain ridge slightly lower than the first, varying the peak heights so they don’t look uniform.
Muddy Waters?
If your layers are bleeding together and losing definition, create patience. Each layer must be 100% dry before the next is applied, or the distinct ‘ridge’ lines will disappear into a single blob.
Step 3: Mid-Ground Forests
-
Introduce texture:
As you move lower down the paper, darken your mix again. This time, when painting the ridge line, use the tip of a size 8 round brush to dab tiny vertical uneven textural marks along the top edge, suggesting distant treetops. -
Extend the wash:
Pull this color downward, again fading it out at the bottom with a clean, damp brush to maintain that foggy feeling between layers. -
Deepen the color:
For the next layer, mix in some Indigo or Payne’s Gray. This layer should be noticeably darker. Create a more distinct tree line now, using jagged, small strokes to mimic the shape of fir trees. -
Suggesting volume:
While the paint is wet, you can drop slightly darker pigment into the base of these tree shapes to give them weight and volume.
Golden Hour
For a sunrise variation, add a weak wash of Yellow Ochre or warm pink to the very first sky layer before starting your greens. It adds a beautiful morning warmth to the mist.
Step 4: Foreground Detail
-
Detailed tree shapes:
Switch to your size 4 round brush. Mix your darkest value yet—almost pure Indigo and Green. Paint the closest tree line near the bottom, focusing on sharp, distinct evergreen silhouettes. -
Painting the branches:
Start with a thin vertical line for the trunk, then use a zig-zag motion that gets wider at the bottom to create the boughs. Leave tiny gaps of light to keep the trees looking natural. -
Varying heights:
Ensure some foreground trees tower higher than others, overlapping the lighter layers behind them. This overlap is crucial for measuring depth. -
Anchor the bottom:
Fill the very bottom of the page with your darkest mix to ground the composition. -
Final mist touches:
If you lost some mist effect, you can dilute a tiny amount of white gouache and glaze it horizontally between the tree layers to bring back the fog. -
The reveal:
Once absolutely dry, peel off the masking tape slowly at a 45-degree angle to reveal your crisp borders.
Step back and admire how simple distinct layers can create a whole world of depth on a flat page


Country Road Leading to Distant Mountains
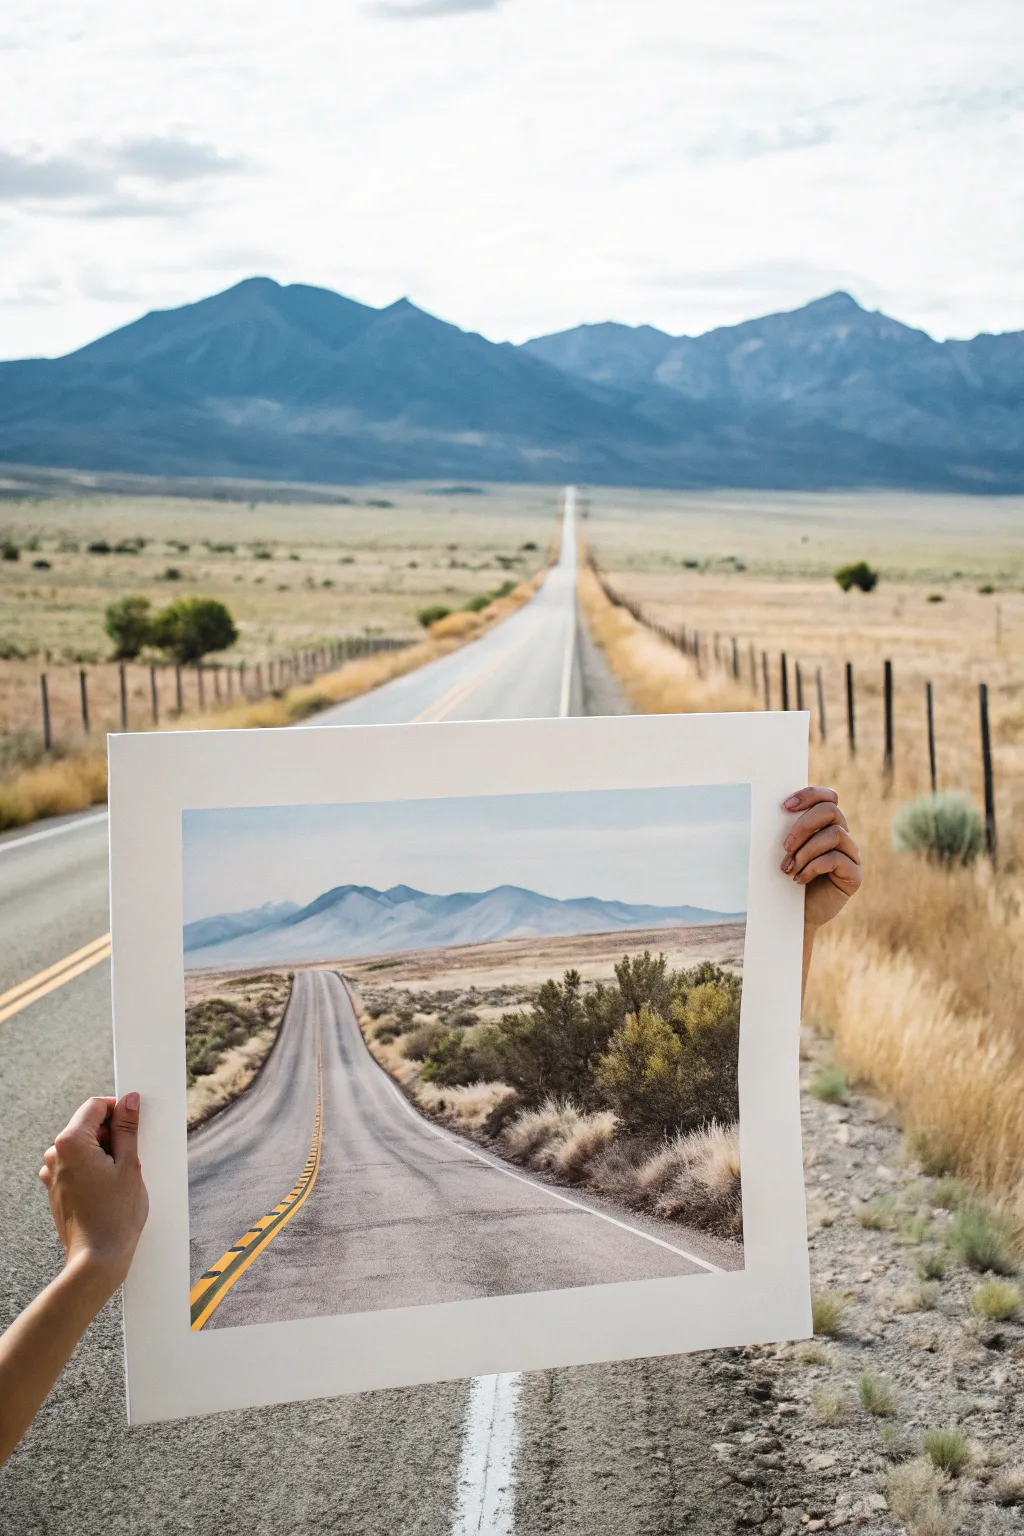
Capture the infinite feeling of a long desert highway with this acrylic landscape painting. By focusing on atmospheric perspective and the dramatic convergence of the road, you’ll create depth that draws the viewer’s eye straight toward the mountains.
Step-by-Step
Materials
- Canvas board or stretched canvas (16×20 inch recommended)
- Acrylic paints: Titanium White, Ultramarine Blue, Burnt Umber, Yellow Ochre, Cadmium Yellow, Mars Black, Sap Green
- Large flat brush (1 inch)
- Medium filbert brush
- Small round detail brush
- Palette knife (optional for texture)
- Ruler
- Pencil
- Jar of water and paper towels
Step 1: Planning and Sky
-
Establish the Horizon:
Use your ruler to draw a light horizontal line roughly one-third of the way up from the bottom of the canvas. This lowers the horizon to give prominence to the sky and distant mountains. -
Sketch the Perspective:
Mark a vanishing point right in the center of your horizon line. Draw two diagonal lines extending from the bottom corners of the canvas to this single point to create the road’s edges. -
Outline the Landforms:
Lightly sketch the mountain range sitting on the horizon. Keep the shapes organic and undulating, rather than sharp, perfect triangles. -
Mix the Sky Gradient:
Prepare a large amount of Titanium White with a tiny touch of Ultramarine Blue for the lower sky. Separately, mix a slightly darker, purer blue for the upper corners. -
Paint the Sky:
Using the large flat brush, apply the darker blue at the top and the pale mix near the horizon. Blend them while wet using horizontal strokes to create a seamless fade.
Atmospheric Depth Tip
As objects get further away, they become bluer and paler. Add more white and blue to your mixtures for the distant mountain range to push it back.
Step 2: Mountains and Mid-ground
-
Base Mountain Color:
Mix Ultramarine Blue with a little Titanium White and a dash of Burnt Umber to desaturate it. Distant mountains should look hazy and cool-toned, not vibrant. -
Block in Mountains:
Paint the mountain shapes with your filbert brush. The color should be solid but slightly lighter towards the base where the atmosphere is thickest. -
Create the Scrubland Base:
Mix Yellow Ochre, Titanium White, and a tiny bit of Burnt Umber for the dry grassy areas. Apply this color loosely on both sides of the road, using horizontal strokes that get smaller as they approach the horizon. -
Add Subtle Variations:
While the ochre layer is damp, blend in hints of Burnt Sienna or darker browns in the foreground areas to suggest uneven terrain and shadows.
Fixing Wobbly Lines
If your road lines look shaky, wait for the paint to fully dry. Then, use low-tack painter’s tape to mask off the area and repaint a crisp edge.
Step 3: The Road
-
Mix the Asphalt Grey:
Combine Titanium White, Mars Black, and a tiny touch of Ultramarine Blue. You want a cool, neutral grey. Make a lighter version for the distance and a slightly darker version for the foreground. -
Fill the Road Surface:
Paint vertically between your road lines. Start with the darker mix at the bottom and blend into the lighter grey as you move toward the vanishing point to enhance the illusion of distance. -
Add Asphalt Texture:
Once the base grey is dry, take a nearly dry brush with a darker charcoal color and scumble it lightly over the foreground road area to mimic rough pavement texture. -
Paint the Double Yellow Line:
Mix Cadmium Yellow with a speck of Yellow Ochre. Using your ruler as a guide or a steady hand, paint the double lines down the center, making them extremely thin as they reach the vanishing point and wider at the bottom. -
Dash the Lines:
Break up the yellow lines according to road marking patterns if desired, or keep them solid for a ‘no passing’ zone look. Remember perspective: dashes get shorter and closer together further away.
Step 4: Foreground Details
-
Mix Sage Green Shades:
Combine Sap Green with White and a touch of Burnt Umber to get a dusty, dry sage color. Desaturated greens look more realistic in desert scenes. -
Stipple the Bushes:
Use an old, frayed brush or a stippling motion with the round brush to create the texture of sagebrush and scrub along the roadside. Focus specifically on the right foreground for balance. -
Add Shadows to Vegetation:
Mix a dark green-black and dab it at the base of your larger bushes to ground them. I find this instant contrast makes the plants pop off the canvas. -
Highlight the Grass:
With your smallest brush and a mix of White and Yellow Ochre, paint thin, upward flicking strokes in the immediate foreground to represent dry stalks of grass catching the light. -
Final Adjustments:
Step back and check your perspective lines. If the road edges look too sharp, gently feather some of the dirt color over the edge of the asphalt to soften the transition.
Enjoy the peaceful solitude of your desert highway painting


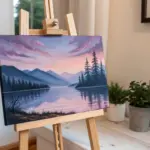
River Bend With Soft Reflections
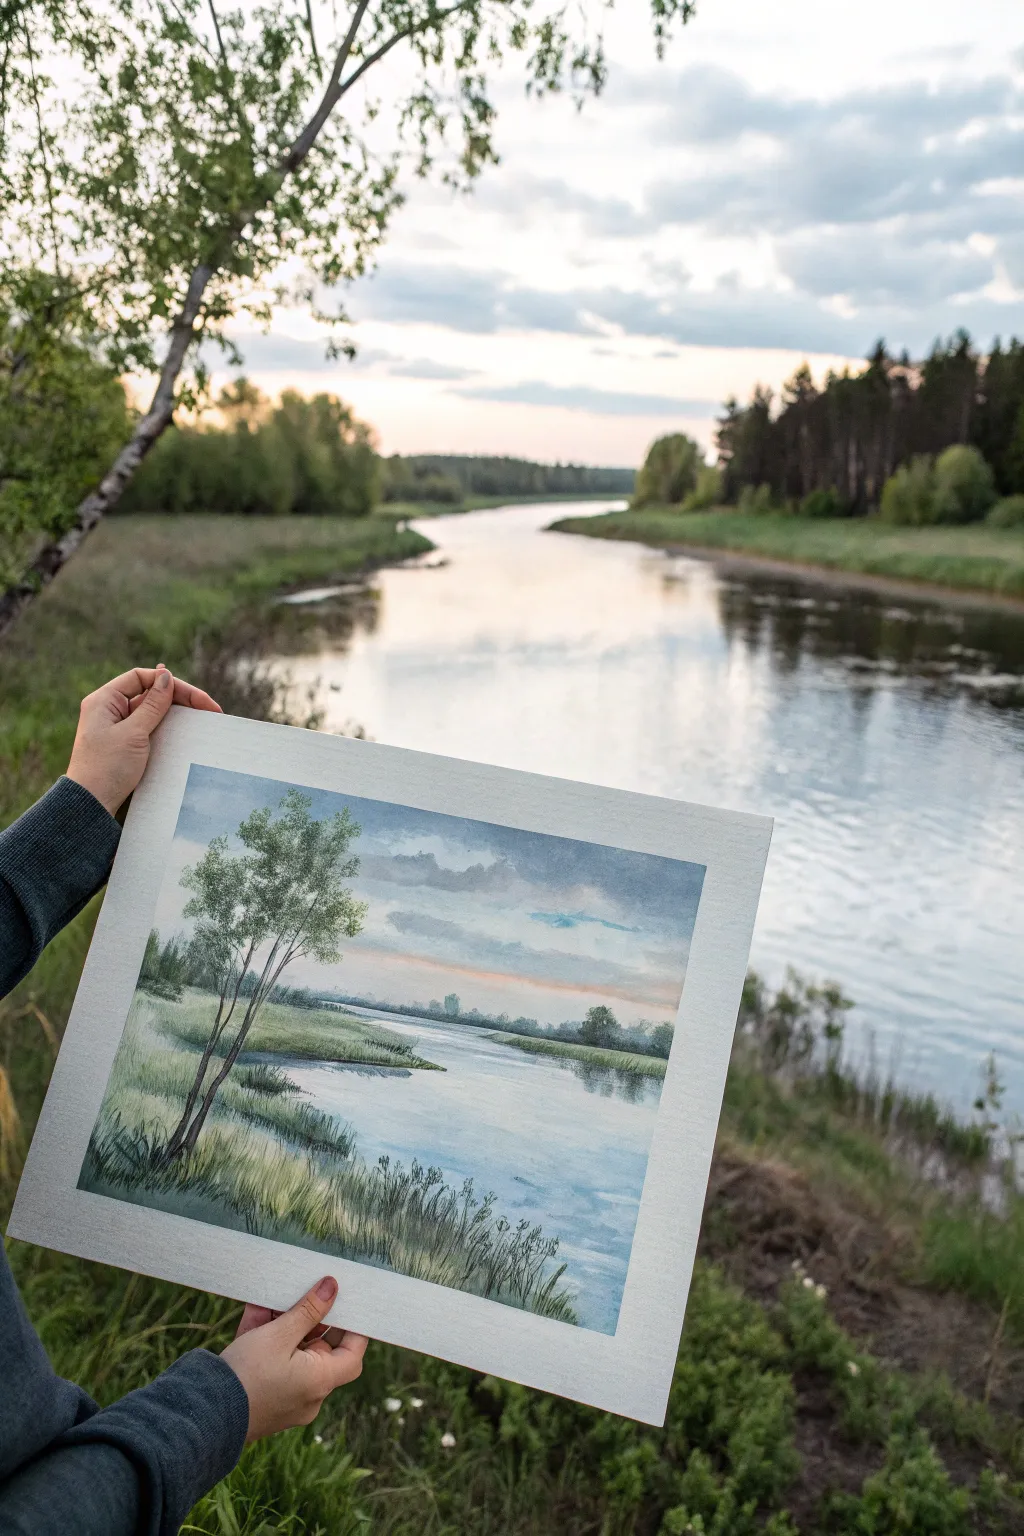
Capture the serene beauty of a river at twilight with this soft watercolor landscape. By using wet-on-wet techniques and muted tones, you’ll create a hazy, atmospheric scene that mirrors nature’s quiet moments.
Detailed Instructions
Materials
- Cold-press watercolor paper (300 gsm)
- Watercolor paints (Payne’s Gray, Sap Green, Burnt Sienna, Hooker’s Green, Cobalt Blue, Alizarin Crimson, Yellow Ochre)
- Masking tape
- Large flat brush (3/4 inch)
- Round brushes (sizes 4, 8, and 12)
- Pencil (HB or H)
- Two jars of water
- Paper towels
Step 1: Sketching and Sky
-
Tape it down:
Secure your paper to a board with masking tape on all four sides. This creates a clean white border and prevents the paper from buckling when wet. -
Light sketch:
Using an H or HB pencil, lightly sketch the horizon line about one-third of the way up the paper. Sketch the winding riverbanks, making the river narrower as it recedes. Mark the placement of the large foreground tree on the left, but keep the lines faint. -
Wet the sky:
With your large flat brush, apply clean water to the entire sky area, stopping just at the horizon line. The paper should be glistening but not forming puddles. -
The first wash:
Mix a diluted wash of Cobalt Blue with a touch of Payne’s Gray. Drop this into the upper sky, letting it diffuse downwards. Leave some white paper showing for clouds. -
Sunset hint:
While the sky is still damp, mix a very pale, watery wash of Alizarin Crimson and Yellow Ochre. Gently paint this near the horizon line to suggest a soft, fading sunset glow. -
Cloud shadows:
Add a slightly stronger mix of Payne’s Gray and Blue to the undersides of the cloud shapes while the paper is still wet to create soft, fluffy volume.
Softer Edges
For fluffier foliage, blot your brush on a paper towel before dabbing paint onto the paper. This dry-brush effect creates natural, airy texture for leaves.
Step 2: River and Horizon
-
Distant trees:
Once the sky is dry, mix a cool, pale grey-green using Hooker’s Green and a little Payne’s Gray. Paint the distant tree line along the horizon. Keep the shapes simple and edges slightly soft to push them into the background. -
Water base:
Wet the river area with clean water. Apply a very faint wash of Cobalt Blue, mirroring the sky. Leave horizontal streaks of white paper to represent surface reflections. -
Water reflections:
While the river wash is damp, drop in slightly darker blue-grey horizontal strokes near the banks and under the distant trees to suggest shadows on the water. -
Bank foundation:
Mix Sap Green with a touch of Yellow Ochre. Paint the grassy banks on either side of the river. Use horizontal brushstrokes that follow the lay of the land.
Step 3: Foreground Details
-
Deepen the banks:
Once the base green is dry, mix a darker green using Hooker’s Green and Burnt Sienna. Add texture to the grassy areas, especially closer to the foreground, using short, upward flicks. -
Tree trunk structure:
For the main tree on the left, mix Burnt Sienna with Payne’s Gray to get a dark, cool brown. Use a size 4 round brush to paint the trunk and main branches. Ensure the lines are organic and broken in places. -
Adding foliage:
Load a size 8 brush with a mix of Sap Green and some blue for a cooler leaf tone. Stipple or dab the brush loosely over the branches to create clumps of leaves. Leave gaps so the sky shows through. -
Foreground grasses:
I like to switch to my smallest brush here. Use a dark green mix to paint distinct, tall blades of grass in the immediate bottom left foreground. Vary the height and direction for a natural look. -
Bank shadows:
Add dark accents right at the waterline where the land meets the river to define the edge clearly. This grounds the painting. -
Final touches:
Review your painting for contrast. If the foreground needs more punch, glaze a thin layer of dark green over the bottom corners. Let everything dry completely before carefully peeling off the tape.
Depth Trick
Make distant colors cooler (more blue) and paler. Make foreground colors warmer (more yellow/brown) and saturated. This naturally pushes the horizon back.
Step back and admire how the simple washes of color have come together to form a peaceful landscape
BRUSH GUIDE
The Right Brush for Every Stroke
From clean lines to bold texture — master brush choice, stroke control, and essential techniques.
Explore the Full Guide
Snowy Peaks With Cool Shadow Planes
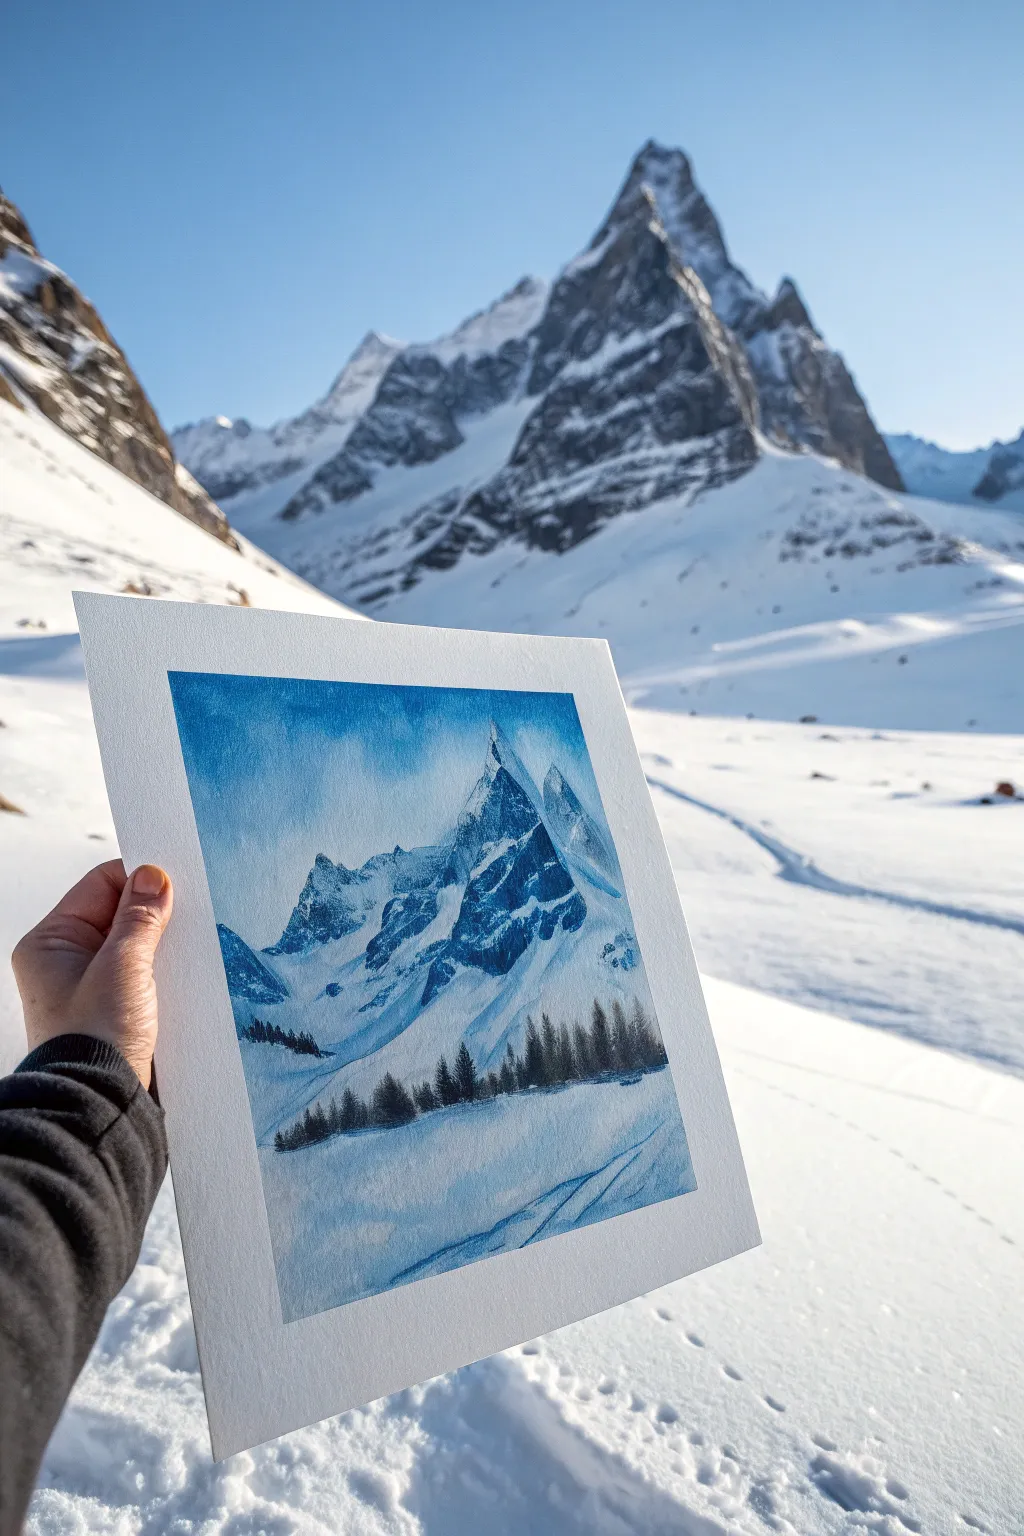
Capture the crisp, cold atmosphere of a high-altitude winter landscape with this monochromatic watercolor study. Using a limited palette of cool blues, you will practice negative painting techniques to sculpt sharp mountain peaks out of pure white paper.
Step-by-Step
Materials
- Cold Press watercolor paper (140lb/300gsm)
- Watercolor paints: Prussian Blue, Ultramarine Blue, Indigo, Burnt Umber
- Flat wash brush (3/4 inch)
- Round brushes (sizes 4, 8, and 12)
- Masking fluid (optional)
- Painter’s tape or masking tape
- Paper towels
- Two water containers
- Pencil (HB or 2H)
Step 1: Preparation and Sketching
-
Paper Setup:
Begin by taping down all four edges of your watercolor paper to a board. This prevents buckling when we apply heavy washes later and creates that crisp white border seen in the reference photo. -
Mapping the Composition:
Lightly sketch the main triangular shape of the central peak. Keep your pencil lines extremely faint, as they are hard to erase once painted over. Outline the jagged ridge line and the secondary peak to the right. -
Defining Shadow Planes:
Inside the mountain outline, draw the division lines between the sunlit faces (left) and the shadowed faces (right). Also, lightly mark the horizon line where the trees will eventually stand, keeping it in the lower third of the paper.
Unwanted Blooms?
If you see ‘cauliflowers’ or back-runs forming in your blue sky wash, don’t panic. These water marks actually look like distant clouds or drifting snow and add character to mountainous scenes.
Step 2: The Sky and First Wash
-
Pre-wetting the Sky:
Tilt your board slightly. using your large flat brush, apply clean water to the sky area only, carefully painting *around* the mountain peaks. The paper should be glisten, but not hold puddles. -
Dropping in Blue:
While the paper is wet, load a size 12 round brush with a watered-down mix of Prussian Blue. Touch it to the wet sky area, letting the color bloom and flow naturally. -
Creating Atmosphere:
Add a slightly stronger concentration of blue near the top edge of the paper and fade it out as you approach the horizon line. If paint creeps onto your white mountain, quickly lift it with a clean, damp brush. -
Complete Drying:
Allow this layer to dry completely. If the paper feels cool to the touch, it is still wet holding moisture.
Step 3: Sculpting the Peaks
-
Mixing Shadow Tones:
Prepare a medium-value mix of Ultramarine Blue and a touch of Indigo. We want a cool, crisp shadow color that defines the mountain’s form. -
Painting the Shadow Side:
Using a size 8 brush, paint the shadowed facets of the mountain structure. The key here is hard edges; paint right up to your pencil line where the shadow meets the light, creating a jagged, rocky texture. -
Softening Edges:
On the bottom edge of these shadow shapes, rinse your brush and soften the paint slightly downward to suggest snow covering the rocky base. This prevents the mountain from looking like a cutout sticking on top of the snow. -
Adding Rock Details:
While the shadow areas are damp (not soaking), drop in concentrated Indigo or a mix of Blue/Burnt Umber into the deepest crevices. This ‘wet-in-wet’ technique adds volume and drama to the rock faces. -
Texture on the Light Side:
I like to dry brush a very faint, watery blue on a few spots of the sunlit side. Use a damp brush with barely any pigment and drag it sideways to suggest wind-blown snow texture without covering the white paper.
Level Up: Salt Texture
b While the sky is still wet, sprinkle a tiny pinch of table salt into the blue paint. As it dries, the salt pushes the pigment away, creating crystalline textures that look like falling snow.
Step 4: Foreground and Trees
-
Foreground Snow Field:
Mix a very watery wash of Ultramarine. Paint the foreground area, leaving large white spaces for bright snow highlights. Use sweeping, diagonal strokes to mimic the slope of the terrain. -
Adding Slope Shadows:
While the foreground is still damp, paint a slightly darker blue streak in the bottom right corner, suggesting a drifted snow bank or a ski track leading into the scene. -
Mixing Darkest Value:
Create a dark, almost black mixture using Indigo and Burnt Umber. It should have the consistency of heavy cream. -
Painting the Tree Line:
Switch to your size 4 round brush. Along the horizon line you marked earlier, paint vertical strokes to create the pine trees. Vary the heights, making some taller and some shorter to look natural. -
Refining Tree Shapes:
Use the very tip of the brush to tap in tiny branches on the sides of your vertical strokes. Keep the tops pointed and the bottoms slightly wider. -
Grounding the Trees:
Run a thin line of watered-down shadow color underneath the trees to ground them, connecting the dark forest to the white snow field.
Step 5: Final Touches
-
Assessment:
Step back and look at your contrast. If the mountain shadows dried too light, glaze a second layer of transparent blue over them to deepen the values. -
The Reveal:
Once the paper is bone dry, carefully peel away the masking tape at a 45-degree angle to reveal the clean, gallery-style border.
Now you have a serene winter landscape that captures the chill of the high peaks
Autumn Path Through Colorful Trees
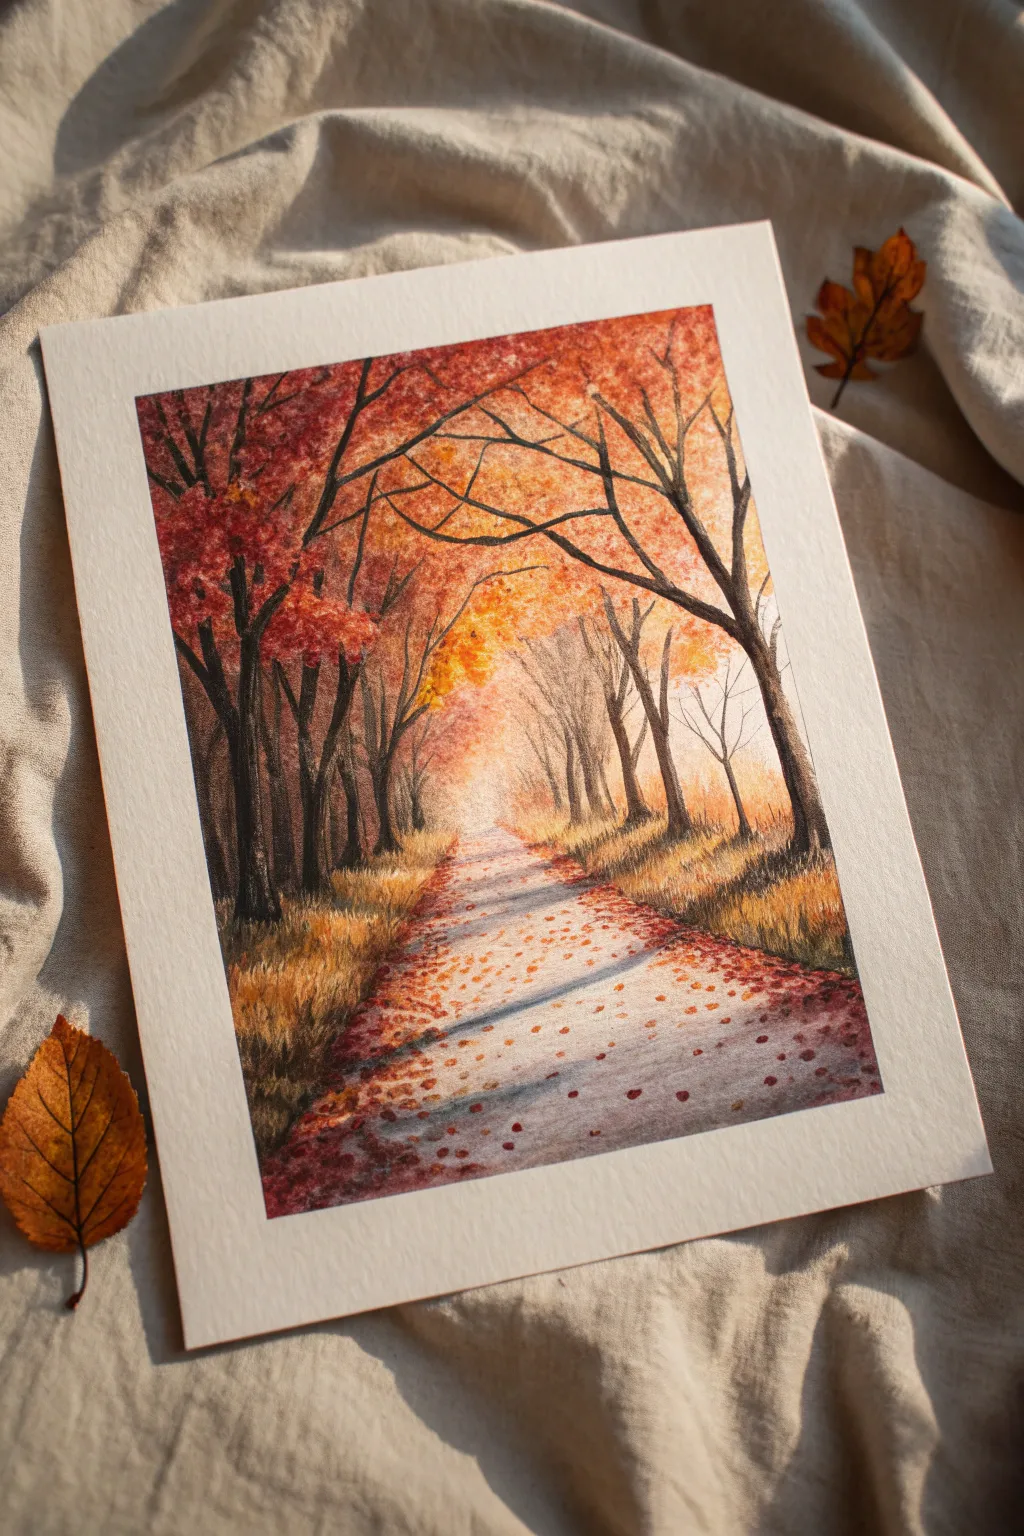
Capture the warmth of fall with this vibrant watercolor painting featuring a sun-drenched path winding through a canopy of fiery maple trees. The piece balances soft, misty backgrounds with crisp foreground details to create an inviting sense of depth.
Step-by-Step Guide
Materials
- Cold press watercolor paper (heavier weight, e.g., 300gsm)
- Watercolor paints (Cadmium Red, Alizarin Crimson, Burnt Sienna, Yellow Ochre, Ultramarine Blue, Burnt Umber)
- Masking tape
- Pencil (HB or H)
- Round brushes (sizes 2, 6, and 10)
- Small rigger or liner brush for branches
- Paper towels
- Two jars of water
Step 1: Preparation and Base Wash
-
Secure the paper:
Tape all four edges of your watercolor paper down to a board or table to create a crisp white border and prevent buckling when wet. -
Sketch the composition:
Lightly sketch the converging lines of the path and the vertical placement of the main tree trunks. Keep the lines faint, focusing on the perspective point in the center distance. -
Wet the sky area:
Using your largest round brush and clean water, dampen the upper portion of the paper where the light will filter through the trees. -
Create the distant glow:
Drop in a very diluted wash of Yellow Ochre into the center wet area to establish the bright, foggy light source at the end of the journey.
Use Salt for Texture
While the canopy wash is still wet, sprinkle a pinch of table salt onto the pigment. As it dries, it pushes the paint away, creating stunning, star-like leaf textures.
Step 2: Painting the Canopy
-
Build the foliage colors:
While the paper is still slightly damp, start dabbing in mixtures of Cadmium Red and Burnt Sienna for the leaves, keeping the color lighter near the center and darker at the edges. -
Add depth to the leaves:
Mix a darker rust color using Alizarin Crimson and a touch of Burnt Umber. Stipple this into the outer corners to frame the scene, suggesting dense layers of branches. -
Soften the edges:
Use a damp, clean brush to soften hard edges where the foliage meets the central light, maintaining that hazy, atmospheric look.
Muddy Colors?
Avoid over-mixing directly on the paper. If your reds and greens mix too much, they turn brown. Let layers dry completely before glazing a complementary color on top.
Step 3: Trees and Ground
-
Paint distant trees:
Mix a pale grey-brown wash. Paint the silhouettes of the furthest trees with a size 6 brush; they should look faint and almost transparent to push them into the background. -
Define the foreground trunks:
Using a thicker mixture of Burnt Umber and Ultramarine Blue (to make a dark, almost black tone), paint the prominent tree trunks on the left and right sides. Let the paint break slightly on the paper’s tooth for texture. -
Add delicate branches:
Switch to your rigger or small liner brush. Pull fine lines from the main trunks upward and outward, crisscrossing them naturally to form the skeletal structure of the trees. -
Establish the grassy verges:
Using short, vertical flickering strokes with Yellow Ochre and Burnt Sienna, paint the tall grasses lining the path. I find it helps to start the stroke at the bottom and flick upward quickly. -
Paint the path surface:
Wash a very diluted cool grey (Ultramarine Blue + Burnt Sienna, water heavy) over the path area, leaving some white paper shows through for highlights.
Step 4: Shadows and Details
-
Cast tree shadows:
Once the path wash is dry, mix a cool, purplish-grey shadow tone. Paint the clear, elongated shadows stretching across the path from the right-hand trees. -
Deepen the contrast:
Glaze a darker brown over the bases of the foreground trees and the deepest parts of the grassy areas to ground the image. -
Stipple fallen leaves:
Load a small brush with concentrated red and orange paint. Dot scattered leaves onto the path and in the shadow areas, varying the size and grouping. -
Refine the canopy:
Add a few sharp, dark accents in the upper corners to represent individual leaves catching less light, enhancing the frame effect. -
Final touches:
Check your values. If the central light feels too dim, you can carefully lift a little pigment with a damp sponge or add small touches of white gouache if necessary. -
Reveal the border:
Wait until the painting is bone dry, then slowly peel away the masking tape at a 45-degree angle to reveal the clean, professional edges.
Frame your masterpiece in a simple wood frame to let the autumn colors truly shine

PENCIL GUIDE
Understanding Pencil Grades from H to B
From first sketch to finished drawing — learn pencil grades, line control, and shading techniques.
Explore the Full Guide
Lavender Rows With Strong Perspective
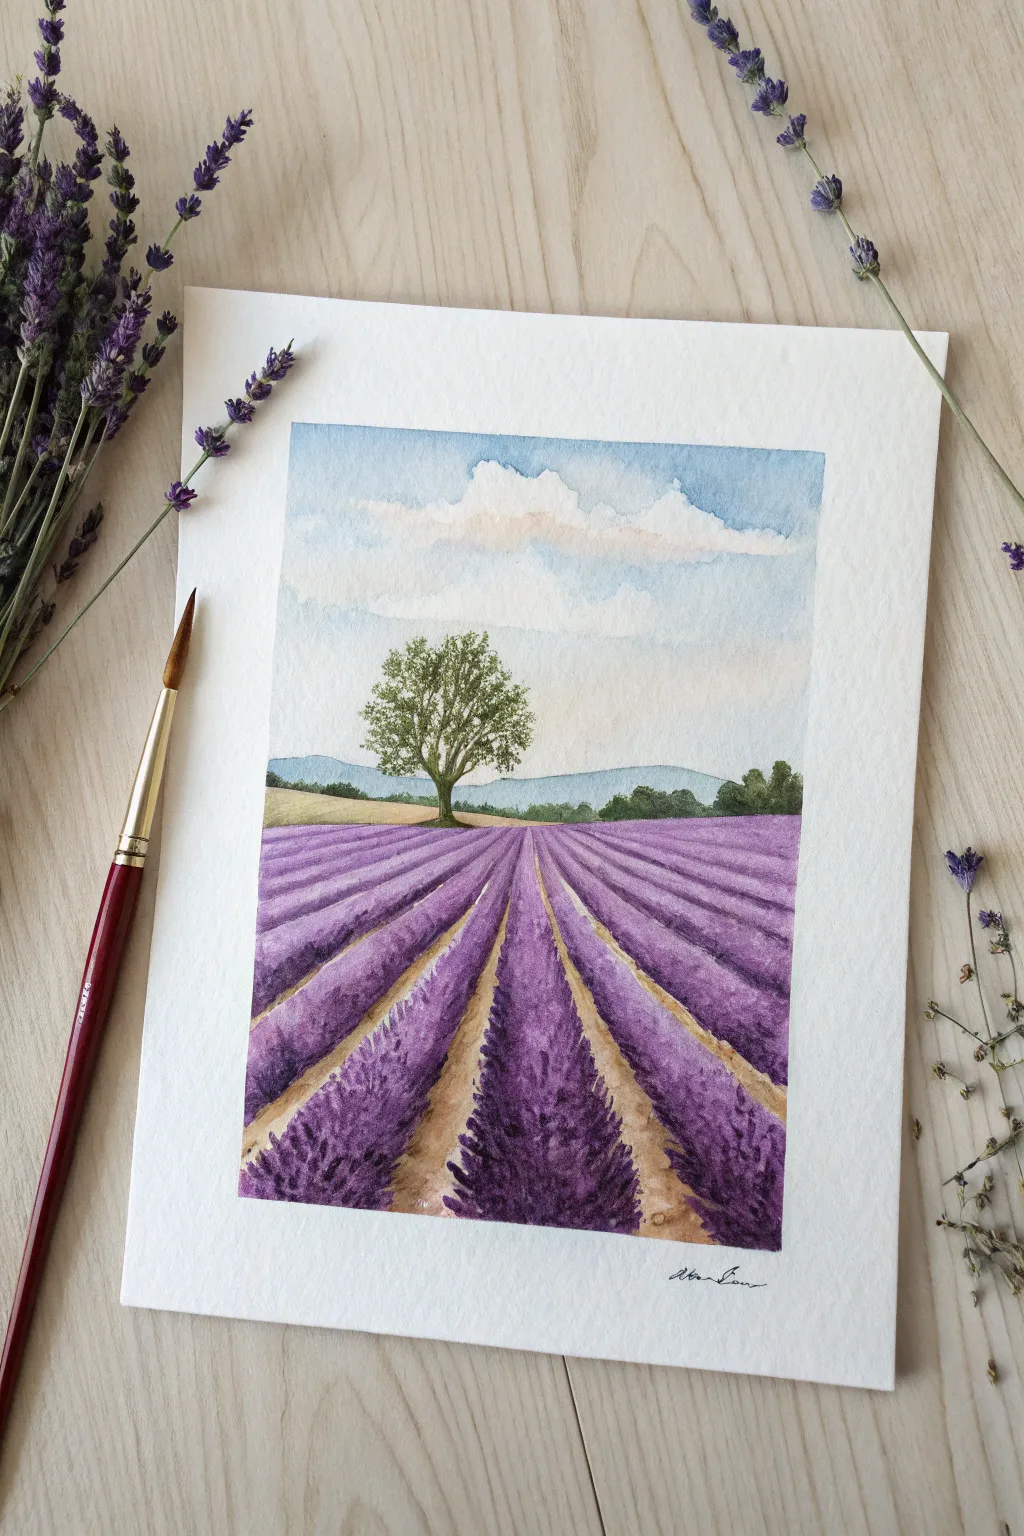
Capture the essence of Provence with this serene watercolor landscape featuring converging rows of lavender. This project focuses on mastering one-point perspective to create depth, guiding the viewer’s eye straight toward a solitary tree on the horizon.
Step-by-Step Tutorial
Materials
- Cold press watercolor paper (300 gsm)
- Watercolor paints (Ultramarine Blue, Alizarin Crimson, Sap Green, Burnt Sienna, Yellow Ochre, Cerulean Blue)
- Round brushes (flats for washes, medium round for foliage, rigger for details)
- Masking fluid (optional, for clouds)
- Pencil and eraser
- Ruler
- Two jars of water
- Paper towels
Step 1: Sketching the Composition
-
Establish the horizon line:
Lightly draw a horizontal line across your paper, positioning it slightly below the vertical center. This will separate your sky from the land. -
Mark the vanishing point:
Place a small dot on the horizon line where you want your tree to stand. This will be the focal point where all your lavender rows converge. -
Draw the lavender rows:
Using a ruler, draw light diagonal lines radiating from your vanishing point toward the bottom edge of the paper. Keep the rows wider at the bottom and extremely narrow as they reach the horizon to create strong perspective. -
Outline the tree and distant hills:
Sketch a simple, softly rolling shape for the distant background hills. Then, draw the basic trunk and canopy shape of your central tree, ensuring it overlaps the horizon line.
Texturing Tip
Don’t over-blend the lavender rows! Let the rough texture of the paper work for you by using slightly ‘dry’ brushstrokes in the foreground to mimic individual flower spikes.
Step 2: Painting the Sky and Background
-
Prepare the sky wash:
Mix a watery wash of Cerulean Blue. Wet the sky area with clean water first, avoiding the stark white shapes of the clouds. -
Define the clouds:
Drop the blue pigment into the wet paper around your cloud shapes. Soften the edges of the clouds with a damp, clean brush so they don’t look like cutouts, adding faint touches of diluted Alizarin Crimson to the cloud undersides for volume. -
Paint the distant hills:
Once the sky is dry, mix a cool, pale green-blue for the mountains. Paint them with a flat wash, keeping the color light to push them into the distance. -
Add the middle ground:
Paint the sloping field directly beneath the tree using Yellow Ochre mixed with a touch of green. This sunlit patch creates a warm contrast against the cool lavender.
Make It Yours
Instead of a single tree, try painting a small stone cottage or a windmill at the vanishing point to change the narrative from nature to rural life.
Step 3: Purple Rows and Texture
-
Mix your lavender hues:
Create a generous pool of purple by mixing Ultramarine Blue and Alizarin Crimson. Prepare a second, slightly darker/bluer mix for the shadowed sides of the rows. -
Base layer for rows:
Paint the lavender strips using the lighter purple mix. Follow the perspective lines carefully. Use horizontal brush strokes within the vertical strips to suggest the texture of the plants. -
Paint the soil paths:
While the purple dries, mix Burnt Sienna with a little Yellow Ochre. Paint the dirt paths between the lavender rows, narrowing your strokes significantly as they approach the tree. -
Add depth to the lavender:
Using the darker purple mix, dab concentrated color onto the right side of each lavender row (assuming light comes from the left). Use essential stippling or tapping motions to mimic the bushy flower heads nearby. -
Soften distant details:
As the rows recede toward the tree, let the purple become a solid, less detailed shape. Detail is only necessary in the immediate foreground.
Step 4: The Tree and Final Details
-
Paint the tree trunk:
Use a mix of Burnt Sienna and Ultramarine Blue to create a dark brown. With a small round brush, paint the trunk and main branches. -
Stipple the leaves:
Load a medium round brush with Sap Green and a touch of the dark brown. Use a stippling motion to create the tree’s canopy, leaving small gaps of sky showing through the leaves for airiness. -
Highlight the foliage:
Add a lighter, yellower green to the top-left edges of the tree canopy to indicate sunlight hitting the leaves. -
Background vegetation:
Paint the small line of bushes and trees on the right horizon line using a dark green. Keep silhouettes simple to avoid distracting from the central tree. -
Final contrast check:
Assess the foreground lavender. If it needs more punch, add a very dark, saturated purple-blue to the bottom-most corners of the rows to anchor the painting.
Sign your name in the corner and enjoy the calming depth of your French countryside view
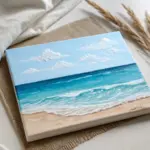
Simple Desert Scene With Big Shadows
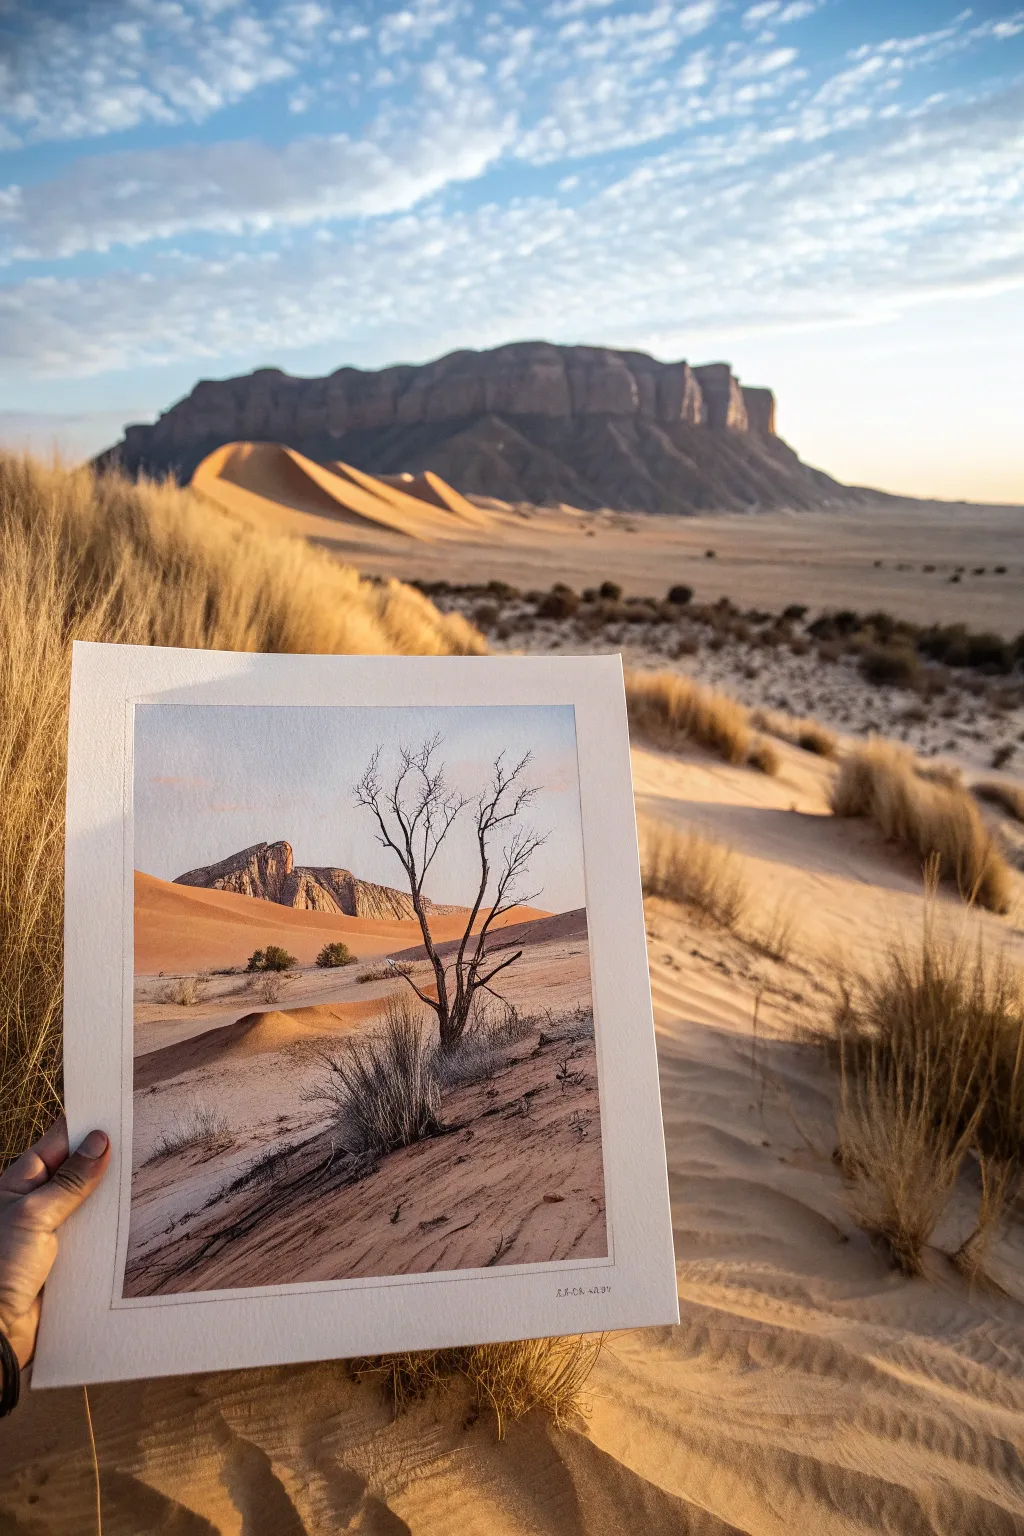
Capture the stark beauty of an arid landscape with this watercolor project, featuring sweeping sand dunes and a solitary, withered tree. The composition emphasizes the contrast between warm, sunlit sands and the cool, delicate details of desert flora.
Detailed Instructions
Materials
- Cold press watercolor paper (140lb/300gsm)
- Watercolor paints (Burnt Sienna, Yellow Ochre, Ultramarine Blue, Burnt Umber, Alizarin Crimson, Paynes Gray)
- Masking fluid and an old synthetic brush
- Round brushes (flats for washes, small rounds for details)
- Rigger brush or liner brush
- Pencil (HB) and kneaded eraser
- Two jars of water
- Paper towels
Step 1: Sketching and Preparation
-
Establish the horizon:
Begin by lightly sketching a low horizon line about one-third up from the bottom of your paper. This will give plenty of space for the dramatic sky and the distant mountain range. -
Outline the dunes:
Draw the swooping curves of the sand dunes. Create a large, sweeping curve in the foreground for the main dune and a smaller, layered shape for the mid-ground dune. -
Position the focal point:
Lightly sketch the skeleton of the dead tree in the foreground. Don’t worry about every twig yet, just mark the main trunk and primary branches where they intersect the sky and dunes. -
Preserve the highlights:
Apply masking fluid carefully over the thinnest branches of the tree and any bright highlights on the sand ridges. Let this dry completely before touching a brush to paper.
Muddy colors?
If your sand shadows look dirty, you likely over-mixed the orange and blue on the paper. Let layers dry completely between warm lights and cool shadows.
Step 2: Sky and Background Mountain
-
Paint the sky gradient:
Wet the sky area with clean water. Mix a very pale wash of Ultramarine Blue with a tiny touch of Alizarin Crimson for a soft, hazy sky. Apply it from the top down, fading to almost clear water near the horizon. -
Block in the mountain base:
Once the sky is dry, mix Burnt Umber with a little Ultramarine Blue to create a rocky grey-brown. Paint the distant mountain shape with a flat wash, keeping the edges crisp against the sky. -
Add mountain texture:
While the mountain shape is still slightly damp, drop in stronger pigment (more Burnt Umber) on the shadowed side of the ridges to create dimension and form.
Level Up: Texture
Before the sand washes dry, sprinkle a tiny pinch of table salt on the foreground. Brush it off when dry for a hyper-realistic grainy sand effect.
Step 3: The Rolling Dunes
-
Mix your sand color:
Combine Yellow Ochre with a touch of Burnt Sienna. You want a warm, golden base tone that represents the sunlit side of the dunes. -
Apply the sunlit wash:
Wash this warm mixture over the main dune shapes. Keep the application fairly loose, but be careful not to paint over the shadowed areas you plan to add later. -
Create the dune shadows:
Mix a ‘shadow’ version of your sand color by adding a bit of Purple or mixing Alizarin Crimson and Blue into your Burnt Sienna. Paint the backside of the dunes while the sunlit edge is dry to create a sharp ridge line. -
Soft transitions:
On the flatter foreground sand, soften the edges of your washes with a damp brush to suggest wind-blown textures rather than sharp ridges.
Step 4: Foreground Details
-
Dry brush texture:
Using a nearly dry brush with a mix of Burnt Umber and Paynes Gray, drag it lightly across the foreground sand. This creates the grainy, textured look of the desert floor. -
Remove masking fluid:
Gently rub away the masking fluid from the tree branches once the paper is bone dry. You should see crisp white lines remaining. -
Paint the tree structure:
Using a rigger or fine liner brush, paint the tree trunk and branches with a dark mix of Burnt Umber and Paynes Gray. Leave some of the white paper showing on the sunlit side of the trunk for highlights. -
Add the fine twigs:
I like to steady my hand on a separate piece of paper for this part. Extend the branches out into delicate, spidery twigs that reach into the sky area. -
Paint the scrub bushes:
Use a small round brush to dab in the scrubby bushes at the tree’s base and in the mid-ground. Use a desaturated green (mix Sap Green with Burnt Sienna) and keep the strokes erratic and upward-flicking. -
Final shadows:
Cast a long, cool shadow from the tree base onto the sand using a diluted purple-grey mix. Ensure the angle matches the lighting on the dunes.
Frame your piece with a wide white mat to really make those warm desert tones pop against the wall.


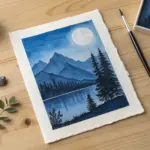
Night Sky Stars Over Quiet Hills
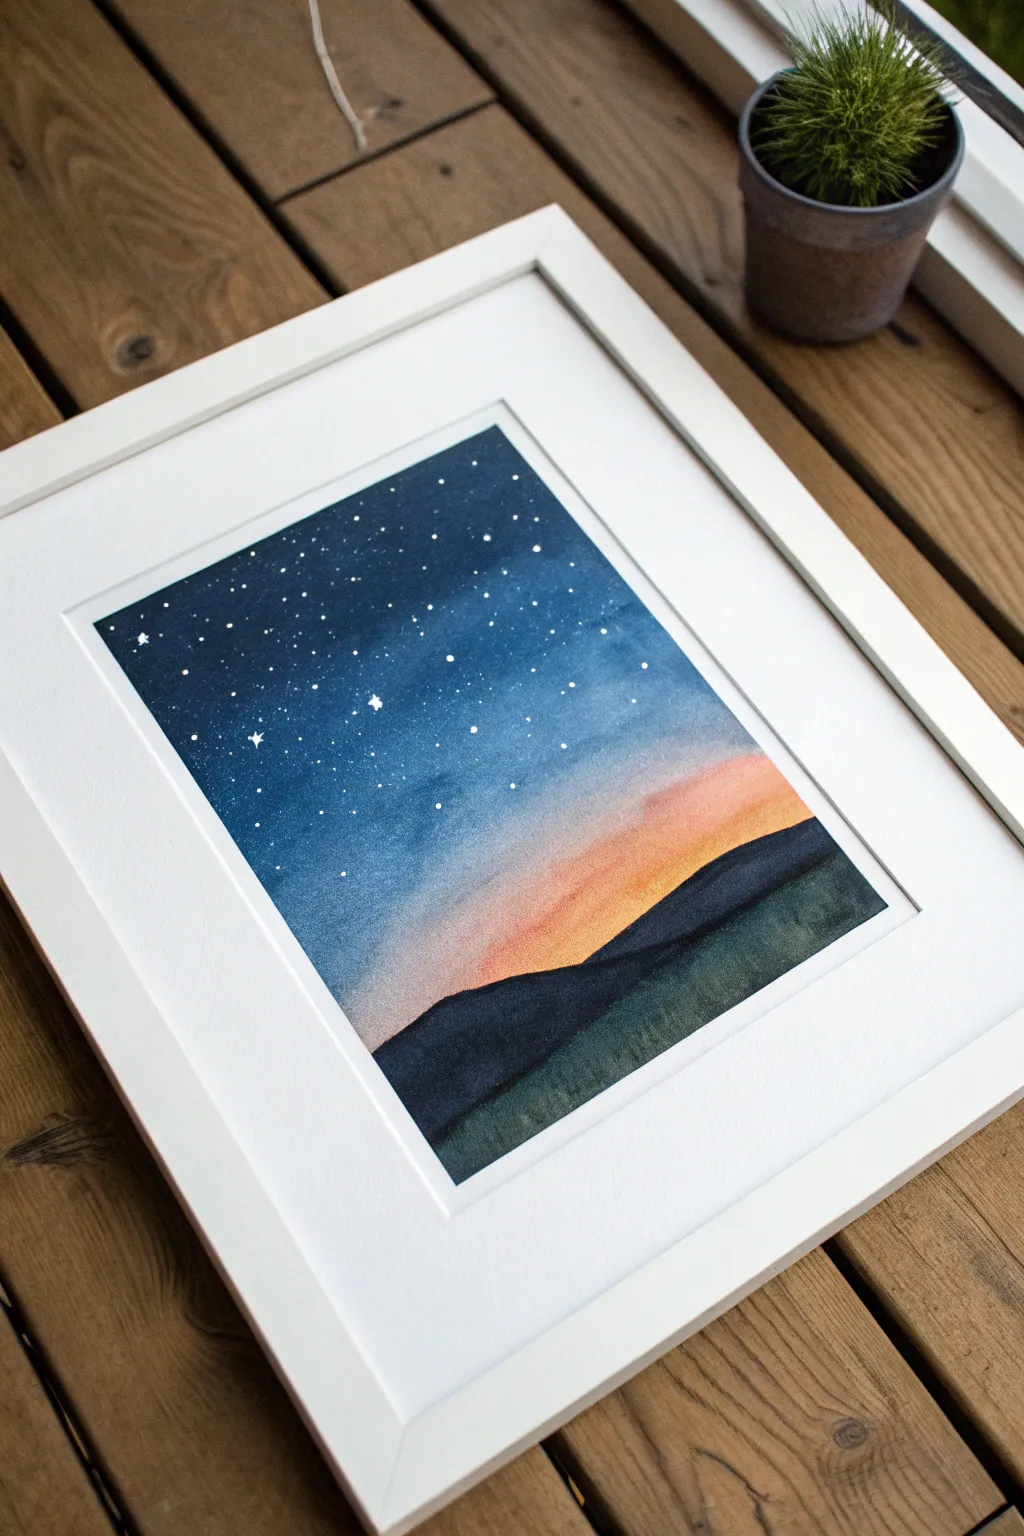
Capture the magic of twilight fading into night with this serene watercolor landscape. The vibrant transition from deep indigo to warm sunset orange creates a stunning backdrop for simple, majestic hills.
Step-by-Step Tutorial
Materials
- Cold press watercolor paper (300 gsm)
- Painter’s tape or masking tape
- Watercolor paints (Indigo, Prussian Blue, Alizarin Crimson, Cadmium Yellow, Lamp Black)
- Flat wash brush (1 inch)
- Round brush (size 6 or 8)
- Small detail brush (size 0 or 1)
- White gouache or white gel pen
- Two jars of water
- Paper towels
- Pencil and eraser
Step 1: Setting the Scene
-
Secure the paper:
Tape down all four edges of your watercolor paper to a rigid board or your work surface. This prevents buckling when the paper gets wet and creates a crisp white border for framing later. -
Sketch the horizon:
Lightly sketch the outlines of the hills. You want two distinct layers: a higher, distant range and a lower, foreground hill. Keep the pencil lines very faint so they don’t show through the final wash. -
Pre-wet the sky:
Use your clean flat wash brush to wet the entire sky area above your pencil line with clean water. The paper should be glisten with a sheen but not have puddles.
Fixing “Cauliflowers”
If water blossoms (backruns) appear in your drying sky, don’t panic. Wait for it to dry completely, then gently scrub the edge with a damp stiff brush to soften the unintended texture.
Step 2: Painting the Gradient Sky
-
Start with the darkest blues:
Load your flat brush with intense Indigo mixed with a touch of Prussian Blue. Start at the very top edge and paint horizontally, letting the color bleed downward into the wet paper. -
Softening the blue:
As you move down the page, gradually add more water to your brush to dilute the blue. By the mid-point of the sky, the blue should be significantly lighter and more transparent. -
Introduce the warmth:
Clean your brush thoroughly. Mix a diluted Alizarin Crimson (a cool red) and begin painting just below where the blue ends, allowing the two to touch slightly. If they mix too much, you’ll get mud, so be gentle. -
The sunset glow:
Rinse again and pick up Cadmium Yellow. Paint the area just above the hill line, blending it upward into the crimson to create a soft orange transition. -
Let it dry completely:
This is crucial. The sky must be 100% bone dry before you paint the hills, or the black paint will bleed into your beautiful sunset. Use a hairdryer on a low setting if you’re impatient.
Level Up: Tree Line
Make the horizon more interesting by using a tiny brush to pull very small vertical lines up from the top of the hills, simulating the silhouette of a distant pine forest.
Step 3: Adding the Hills
-
Mix the hill color:
Create a deep, dark color for the distant hills. I prefer mixing Lamp Black with a tiny bit of the Indigo from the sky to harmonize the colors, rather than using straight black. -
Paint the distant range:
Using the round brush (size 6), carefully fill in the shape of the upper, more distant hill silhouette. Ensure the top edge is crisp against the sunset. -
Allow the first hill to dry:
Wait until the distant hill is dry to the touch. This prevents the foreground hill from bleeding into it, keeping the shapes distinct. -
Paint the foreground:
Mix a slightly darker, denser black for the closest hill. Fill in the bottom section, covering the bottom of the first hill layer. This creates atmospheric perspective. -
Add subtle texture:
While the foreground hill is still slightly damp, you can drop in tiny hints of green or brown if you want an earthier look, though a solid silhouette works perfectly too.
Step 4: The Starry Finish
-
Prepare the stars:
Once the entire painting is completely dry, squeeze a small dot of white gouache onto your palette and mix it with a tiny drop of water until it has a heavy cream consistency. -
Splatter the galaxy:
Load a small brush or an old toothbrush with the white mix. Tap the handle against another brush over the dark blue section of the sky to create random, tiny speckles. -
Hand-paint larger stars:
Use your smallest detail brush (size 0) or a white gel pen to manually place a few larger, brighter stars. Focus these in the darkest part of the sky. -
Add a twinkle:
Choose one or two dominant stars and paint a tiny cross or ‘plus sign’ shape to make them twinkle. -
The reveal:
Carefully peel away the painter’s tape at a 45-degree angle to reveal your crisp, clean borders.
Frame your masterpiece in simple white wood to enhance the contrast of the night sky
Stormy Sky With Sunbreak Beams
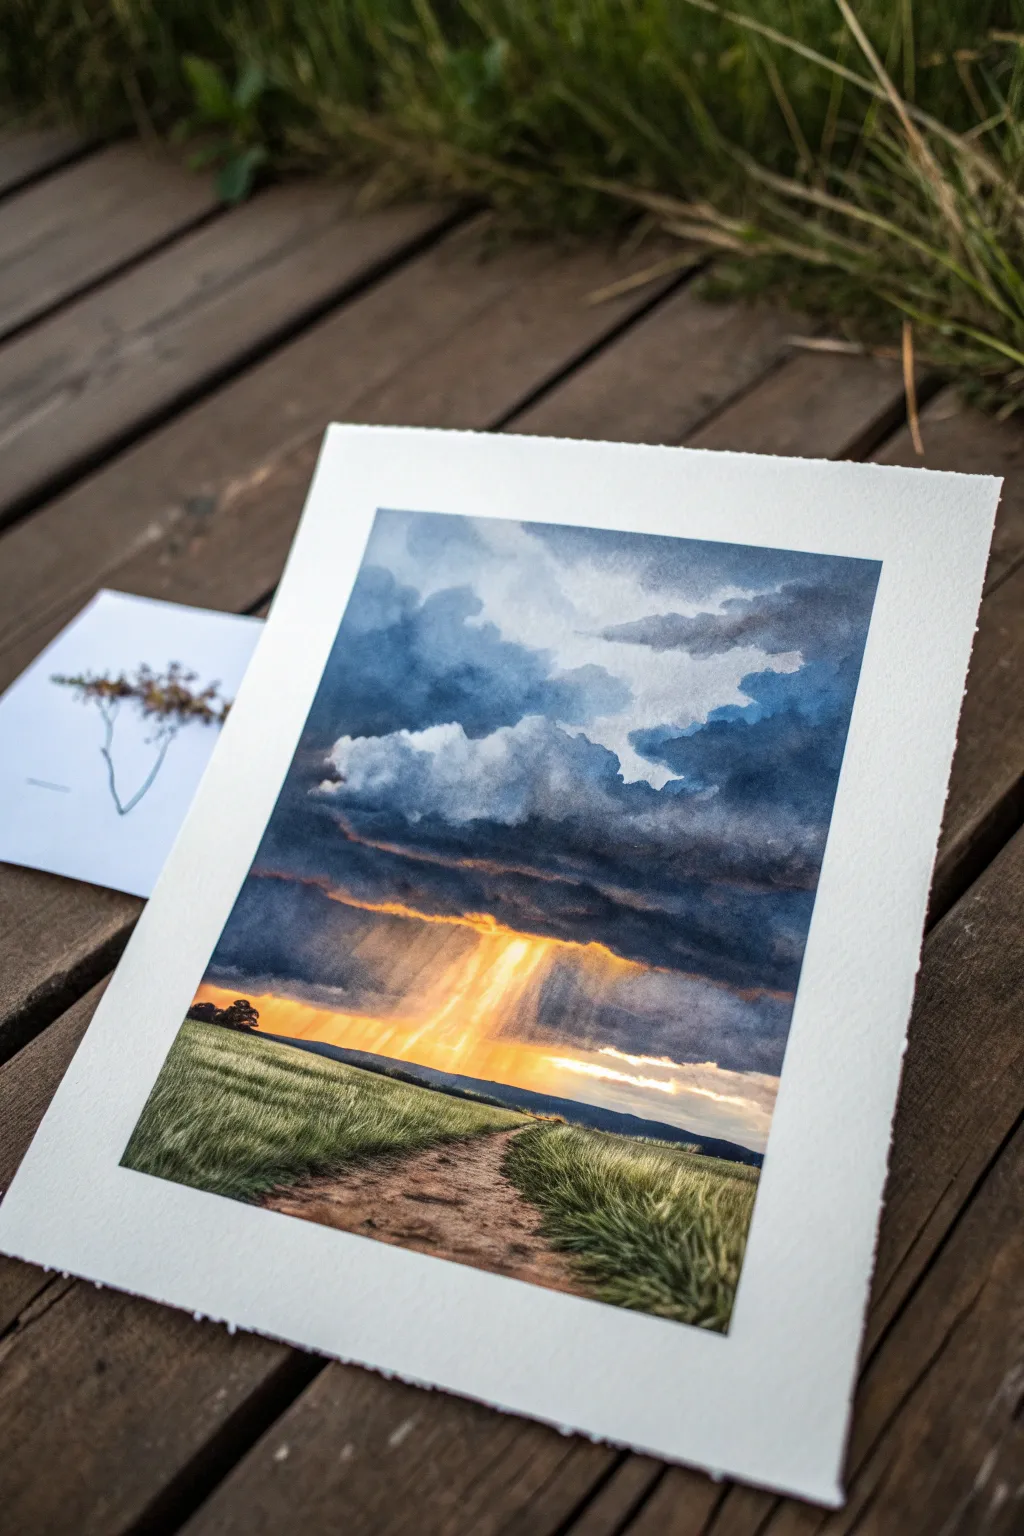
Capture the dramatic interplay of light and shadow with this moody watercolor landscape. This project teaches you how to render heavy storm clouds that break open to reveal brilliant, golden sunbeams illuminating a windswept field.
How-To Guide
Materials
- Cold-pressed watercolor paper (300 gsm or higher)
- Painter’s tape or masking fluid
- Watercolor paints (Indigo, Payne’s Grey, Burnt Sienna, Yellow Ochre, Sap Green, Cadmium Yellow, Ultramarine)
- Flat wash brush (1 inch)
- Round brushes (sizes 4, 8, and 12)
- Clean water jars
- Paper towels
- Pencil for sketching
- Hairdryer (optional)
Step 1: Preparation and Sketching
-
Secure the paper:
Tape down all four edges of your watercolor paper to a board using painter’s tape. This prevents buckling when the paper gets wet and creates that crisp white collection border. -
Lightly sketch the scene:
Using a faint pencil line, draw the horizon line about one-third up from the bottom. Mark out the winding path leading from the foreground toward the horizon, getting narrower as it recedes. -
Mask the sunbeams (optional):
If you want extremely crisp rays, you can apply masking fluid in diagonal streaks coming from the light source area. However, for a softer look like the reference, we will lift the paint later.
Step 2: Painting the Sky
-
Wet-on-wet base:
Generously wet the entire sky area with clean water using your large flat brush. The paper should be glisten but not have puddles. -
Apply the glow:
While wet, drop in a mix of Cadmium Yellow and Yellow Ochre near the center horizon line where the light will break through. Keep this area bright and clean. -
Building the storm clouds:
Mix a dark, stormy grey using Indigo, Payne’s Grey, and a touch of Burnt Sienna to warm it slightly. Start painting the top of the sky, letting the dark pigment bleed naturally downwards. -
Creating cloud volume:
Use a round brush to dab in more concentrated Indigo into the wet clouds to create fluffy, heavy shapes. Leave some lighter gaps between the dark masses to suggest depth. -
Lower clouds and rain:
As you move closer to the yellow horizon, dilute your grey mix. Paint vertical streaks connecting the dark clouds to the horizon to simulate distant rain curtains. -
Lifting the sunbeams:
While the cloud layer is damp (not soaking), take a clean, slightly damp flat brush. Gently drag it diagonally from the yellow light source downwards through the rain and clouds to ‘lift’ the pigment, creating soft shafts of light. -
Let it dry completely:
Allow the sky to dry fully before touching the landscape. If the paper is cool to the touch, it’s still wet.
Muddy Clouds?
If your clouds turn grey and flat, you’re over-mixing on the paper. Let the blue, grey, and purple pigments mix naturally on the wet paper. Don’t brush over the same spot repeatedly.
Step 3: Painting the Landscape
-
Distant hills:
With a size 8 brush, paint the distant horizon line using a mix of Indigo and Sap Green. Keep this thin and fairly flat to push it into the background. -
Field base layer:
Wet the grassy area. Drop in a wash of Sap Green mixed with a little Yellow Ochre for the sunlit parts of the field near the horizon. -
Foreground shadows:
While the grass is wet, add deeper greens (Sap Green mixed with Indigo) to the bottom corners and edges of the path to create a vignette effect. -
Painting the path:
For the dirt path, use a watery Burnt Sienna mixed with a tiny bit of Grey. Paint horizontally across the path initially to suggest texture. -
Adding texture to the path:
While the path is damp, drop slightly thicker brown pigment into the foreground area to suggest rocks and uneven ground.
Add Dimension
Sprinkle a tiny pinch of salt onto the wet dirt path before it dries. The salt absorbs pigment, creating a speckled, rocky texture perfect for gravel or dirt roads.
Step 4: Refining Details
-
Grassy textures:
Once the field base is dry, use a small liner brush or the tip of your size 4 round brush. Flick upward with dry, thick green paint to create individual blades of grass in the foreground. -
Highlighting the grass:
I like to mix a bit of opaque white or pale yellow gouache with green to add sun-struck highlights to the tips of the grass near the path. -
Enhancing the light:
If your sunbeams faded too much upon drying, you can gently scrub them with a damp brush again or glaze a transparent yellow over the light area to bring back the warmth. -
Final reveal:
Ensure the painting is 100% bone dry. Carefully peel away the painter’s tape at a 45-degree angle to reveal the clean, professional border.
Frame this piece behind glass to protect those delicate watercolor washes and enjoy your personal slice of dramatic weather
Palette Knife Texture for Clouds and Fields
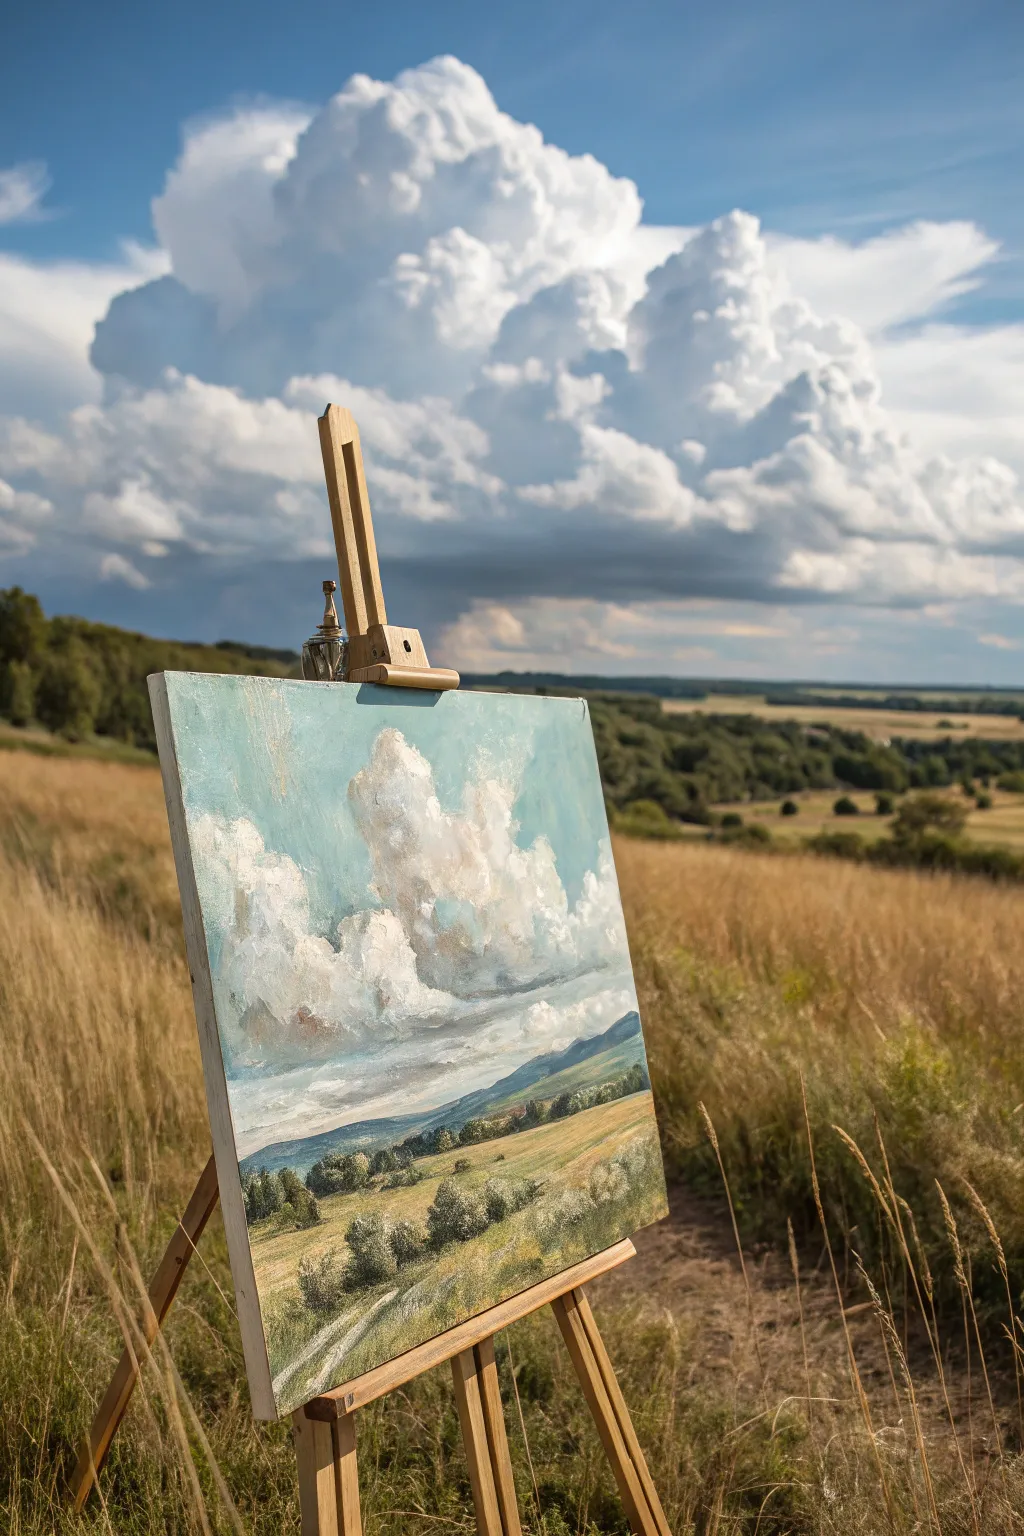
Capture the drama of a summer sky with this textured landscape painting tutorial that emphasizes bold strokes and atmospheric depth. Using a palette knife alongside your brushes allows you to build thick, fluffy clouds and wind-swept grasses that feel almost three-dimensional on the canvas.
Step-by-Step Tutorial
Materials
- Stretched canvas (approx 16×20 inches for room to work)
- Oil paints (Titanium White, Ultramarine Blue, Cerulean Blue, Sap Green, Yellow Ochre, Burnt Sienna, Burnt Umber, Alizarin Crimson)
- Set of palette knives (trowel shape and elongated diamond shape)
- Large flat bristle brush (size 8 or 10)
- Medium filbert brush (size 6)
- Small round brush for details
- Odorless mineral spirits or turpentine
- Palette (wood or tear-off paper)
- Lint-free rags or paper towels
Step 1: Sky and Cloud Foundation
-
Prime the sky:
Begin by blocking in the upper sky with a mix of Cerulean Blue, a touch of Ultramarine, and plenty of Titanium White. Use your large brush to scrub this color in loosely, keeping the blue deeper at the top corners and fading it lighter as you move toward the horizon line. -
Draft the cloud shapes:
Switch to a medium filbert brush with a greyish-purple mix (Ultramarine, Alizarin Crimson, and White). Lightly sketch out the irregular, billowing shapes of the cumulus clouds. Don’t worry about being neat; you just want to establish the main masses. -
Apply base shadows:
Load the underside of your cloud shapes with that same purple-grey mixture. Keep the edges soft here. This shadow layer provides the volume that makes the clouds look heavy and three-dimensional. -
Initial knife work:
Load a trowel-shaped palette knife with thick Titanium White mixed with a tiny speck of Yellow Ochre to warm it up. Apply this to the sun-hit tops of the clouds using a confident, spreading motion, like buttering toast. -
Build cloud structure:
Continue adding thick white paint with the knife, dragging it slightly over the shadow areas to create a transitional mid-tone where the paint mixes. Leave the texture rough; the ridges in the paint will catch the light later. -
Soften the edges:
Use a clean, dry filbert brush to very gently feather the edges of the clouds into the blue sky. I like to do this while the paint is still tacky to create that wispy, vaporous look.
Step 2: Landscape and Terrain
-
Block in the distance:
Mix a hazy blue-green using Sap Green, Ultramarine Blue, and White. Paint the distant hills along the horizon line. Keep this layer thin and flat to push it into the background visually. -
Establish the middle ground:
Mix Sap Green with Yellow Ochre and a touch of Burnt Sienna. Use the large flat brush to lay down the sweeping fields of the middle ground. Follow the contours of the land with your brushstrokes. -
Create the foreground base:
For the closest grass area, mix a darker, richer green using Sap Green and Burnt Umber. Apply this roughly to the bottom third of the canvas. -
Knife texture for fields:
Switch back to your palette knife. Mix Yellow Ochre with White and drag the knife sideways across the dried foreground paint. This ‘scumble’ effect mimics the texture of dry, sun-bleached grass sitting on top of the darker undergrowth. -
Add tree clusters:
Using the edge of your palette knife or a firm brush, dab in dark green clusters to form the bushes and trees in the mid-ground. Keep the bottoms of these shapes dark to ground them. -
Highlight the foliage:
Touch the tops of those tree clusters with a lighter yellow-green mix. Do not overblend; let the dabs of light paint sit on top of the dark shadows to suggest individual leaves catching the sun. -
Define the path:
If you want to suggest a subtle path or clearing, use a horizontal stroke of pale grey-green (White + Sap Green + touch of Black) cutting through the foreground grass.
Muddy Clouds?
If your cloud whites are turning grey, stop immediately. Wipe your palette knife completely clean between every single stroke to keep the highlights crisp and bright.
Step 3: Atmosphere and Final Unity
-
Refine the horizon:
Check the line where the sky creates a ‘floor’ for the clouds. Add a very pale, almost white blue line just above the distant hills to simulate atmospheric haze. -
Enhance cloud highlights:
Take a clean palette knife with pure Titanium White and add final, high-impasto highlights to the very peaks of the clouds. This should be the thickest paint on the canvas. -
Add grassy details:
Use the sharp edge of the palette knife to scratch through the wet paint in the foreground, revealing the canvas or underlayer. These thin lines look like individual stalks of tall grass. -
Final assessment:
Step back from the easel. If the foreground looks too uniform, break it up with a few accents of Burnt Sienna to suggest patches of earth or dried flora.
Knife Angle Matters
Hold the palette knife at a low angle (almost flat) to spread paint smoothly. Hold it at a high angle (90 degrees) to scrape paint away or create sharp, thin lines.
Allow the thick impasto layers several days to dry completely before framing your expansive landscape
Limited Palette Monochrome Landscape Study
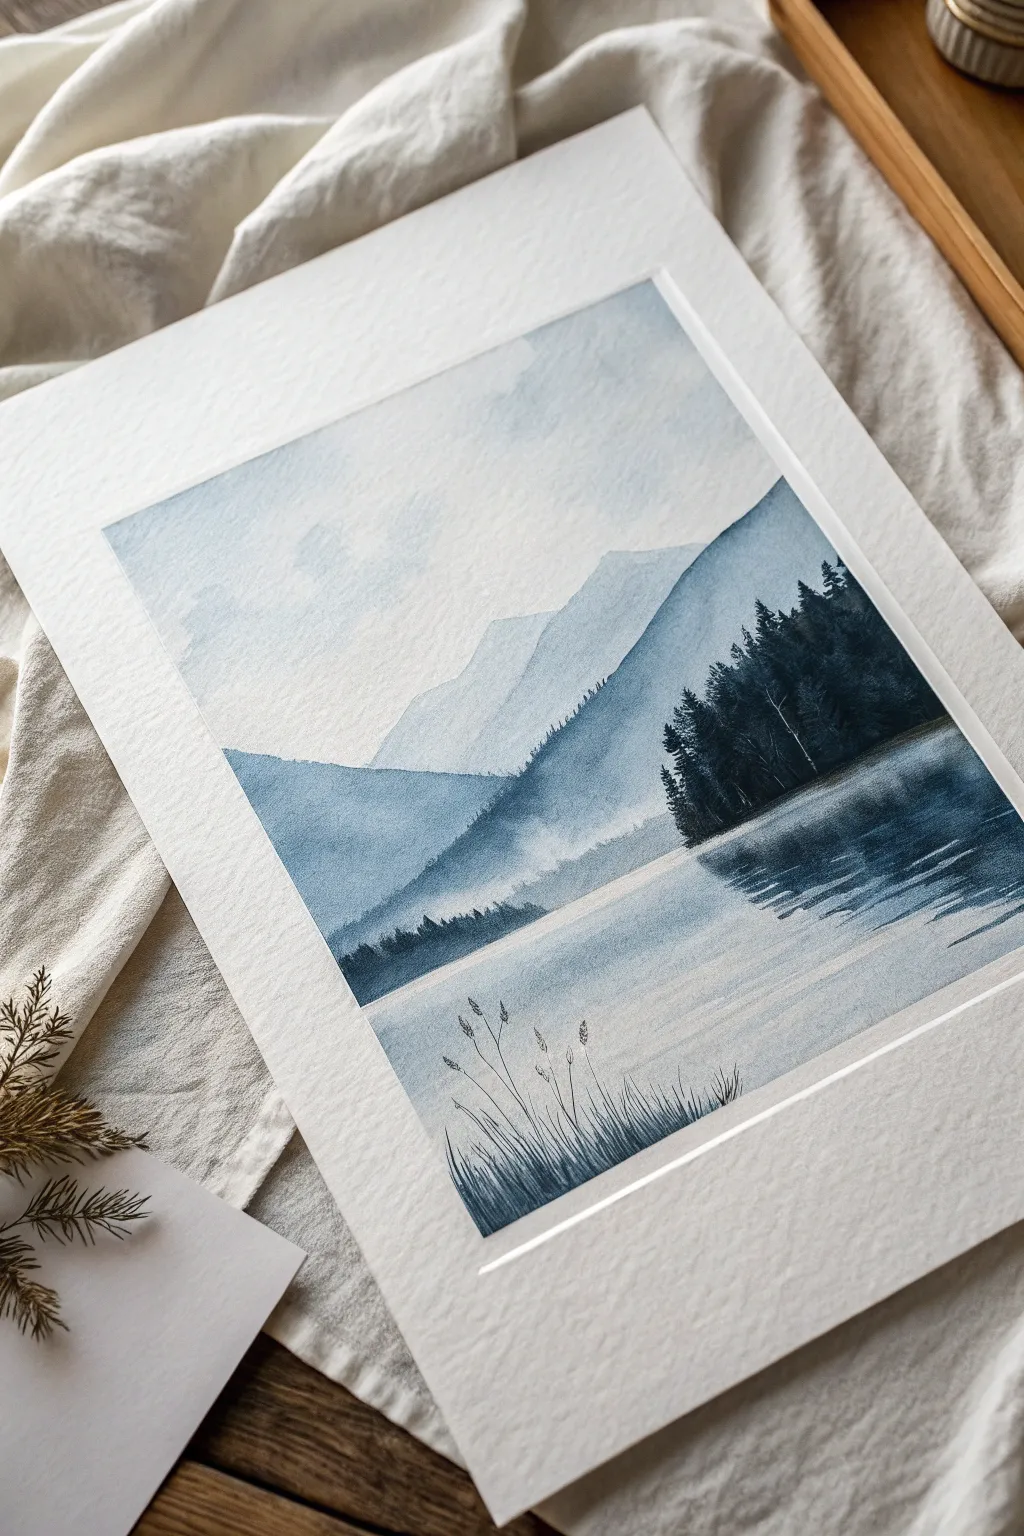
Capture the serene stillness of a mountain lake using only a single color family to create depth and atmosphere. This monochromatic study relies on varying water-to-pigment ratios to build soft, receding mountains and sharp, detailed foregrounds.
Step-by-Step
Materials
- Cold Press Watercolor Paper (140lb/300gsm), approx. 9×12 inches
- Watercolor Paint in Indigo or Payne’s Gray
- Flat Wash Brush (1 inch)
- Round Brush (Size 6 or 8)
- Detail/Rigger Brush (Size 0 or 1)
- Bowl of Clean Water
- Paper Towels
- Masking Tape
Step 1: Setting the Atmosphere and Background
-
Paper Preparation:
Begin by taping down all four edges of your watercolor paper to a board or table. This ensures clean, crisp borders and prevents the paper from buckling during the heavy washes. -
Mixing Gradients:
Prepare three puddles of your chosen indigo paint: a very diluted, watery mix (tea consistency) for the sky, a medium mix (milk consistency) for distant mountains, and a saturated mix (cream consistency) for the foreground. -
Applying the Sky:
Using your flat brush, wet the upper third of the paper with clean water. While still damp, drop in your lightest indigo mix, letting it bloom softly to create subtle cloud shapes. Leave some areas white for light. -
First Mountain Layer:
Once the sky is dry to the touch, mix a slightly stronger wash. Paint the silhouette of the furthest mountain range. Keep the edge crisp at the top but soften the bottom edge with clean water to create a misty look. -
Second Mountain Layer:
Allow the first layer to dry completely. Now, use a medium indigo mix to paint the next range of mountains, slightly lower on the page. Let these shapes overlap the previous ones to establish recession and depth. -
Creating Atmospheric Perspective:
While painting the mid-ground mountains, notice how I like to lift a little pigment out with a damp brush near the base of the mountains. This enhances the foggy transition into the lake area.
Fixing “Cauliflowers”
If water blooms or back-runs appear in your smooth sky, wait for it to dry completely. Then, gently scrub the area with a damp stiff brush and glaze over it again to smooth it out.
Step 2: The Mid-Ground and Reflections
-
Painting the Tree Line:
Switch to your Size 6 or 8 round brush and load it with a fairly saturated, dark mix. On the right side, paint a dense cluster of pine trees. Use erratic, vertical strokes to suggest pine branches. -
Adding the Water’s Edge:
Continue that dark tree line down to where the water begins. Paint a horizontal shoreline, leaving a thin sliver of white paper between the land and the reflection to suggest a highlight on the water. -
Wet-on-Dry Reflections:
Using the same dark value, paint the reflection of the trees into the water. Mirror the shapes vertically, but use horizontal, slightly broken strokes to mimic ripples on the surface. -
Establishing the Water Gradation:
With a diluted wash, glaze over the lake area. Ensure the reflections you just painted are dry first if you want sharp lines, or work wet-in-wet for a blurrier look. The water should be darker near the bottom and lighter towards the horizon. -
Distant Water Line:
On the left side of the composition, define the lower mountain range meeting the water with a clean, hard edge. Paint a very soft, faint reflection below it using a watery mix.
Step 3: Foreground Details
-
Base for Foreground Grasses:
At the very bottom center of your paper, paint a small, indistinct shape of land or marsh using a medium-dark wash. This anchors your foreground elements. -
Painting Grass Stalks:
Pick up your rigger or detail brush and use the most concentrated, creamy paint mixture. Paint fine, sweeping lines flicking upward from the bottom patch to create tall grasses. -
Adding Seed Heads:
At the top of these tall stalks, add small dots and textured dabs to represent seeds or wheat-like tops. Vary the height and angle of the stalks so they don’t look like a picket fence. -
Final Touches:
Review your painting for balance. If the water looks too flat, dry brush a few very faint horizontal lines to suggest movement. Darken the core of the pine trees if they dried too light. -
The Reveal:
Ensure the paper is 100% bone dry. Carefully peel away the masking tape at a 45-degree angle to reveal the crisp white border that frames your monochrome landscape.
Add Winter Detail
Turn this into a snowy scene by sprinkling salt onto the wet mountain washes. The salt pushes pigment away, creating crystalline textures that look like ice or rocky snow.
Enjoy the calm simplicity of your finished indigo landscape and consider trying this same technique with a warm sepia tone next time
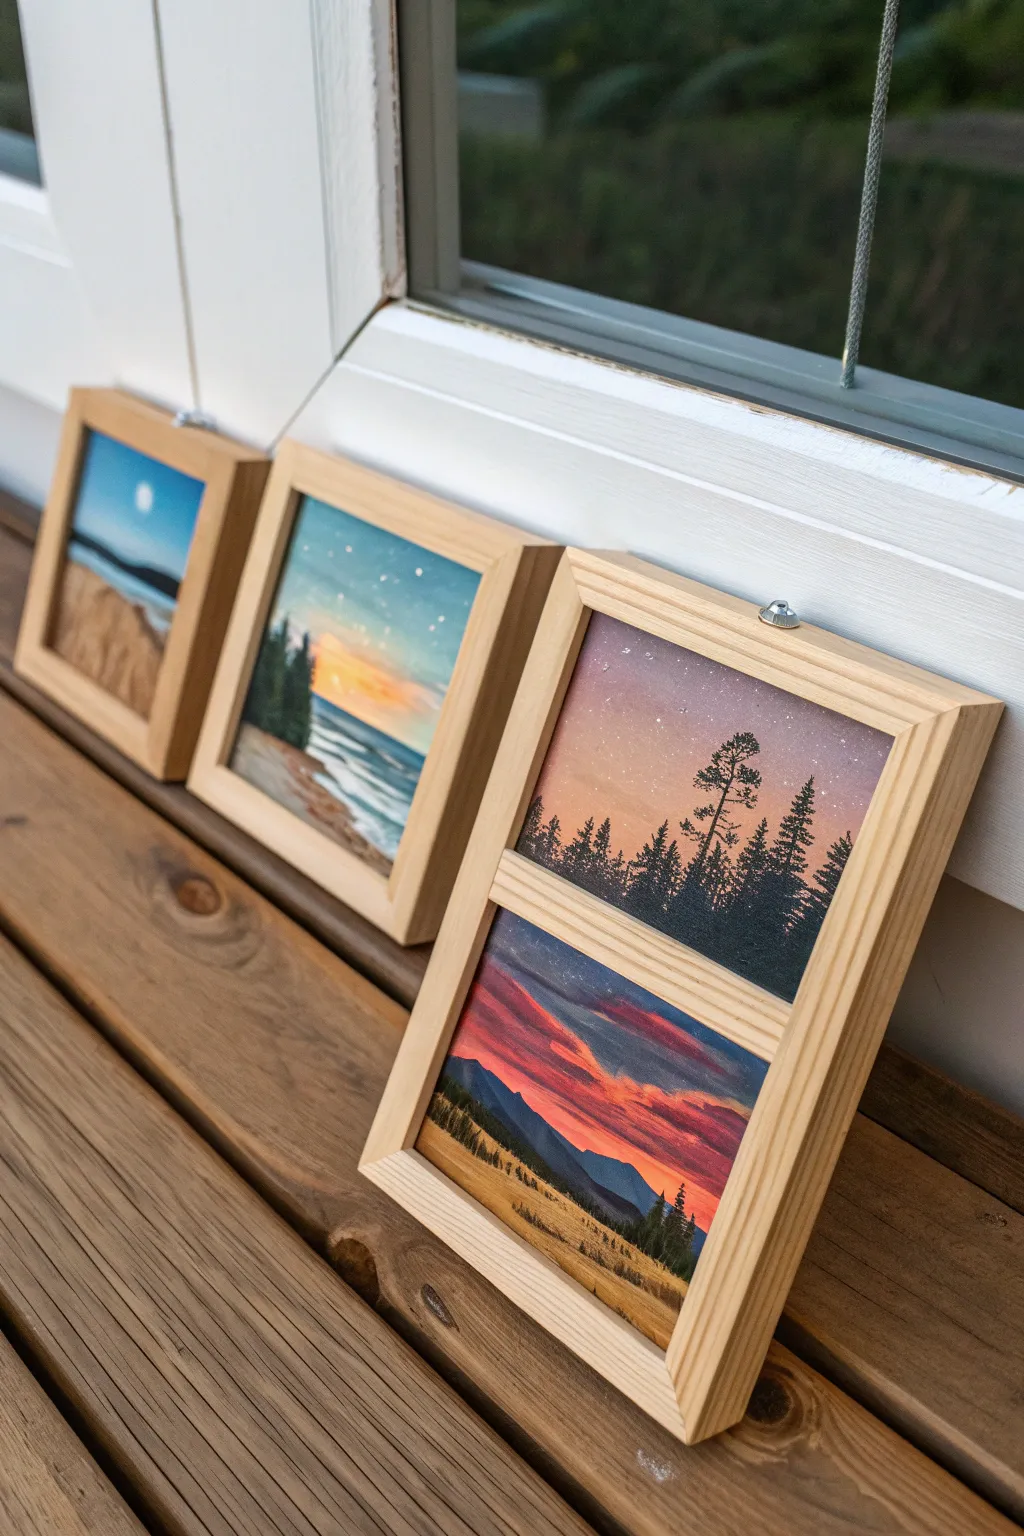
Mini Scenery Series in Four Tiny Panels

Capture the serene transition from sunset to starry night with this charming set of four miniature paintings. Using small, custom-built wooden frames, this project breaks down grand landscapes into bite-sized, approachable art pieces perfect for a windowsill display.
Step-by-Step Tutorial
Materials
- 4 small canvas panels or primed wood squares (approx. 3×3 inches)
- Acrylic paints (Titanium White, Phthalo Blue, Mars Black, Burnt Sienna, Yellow Ochre, Cadmium Red, Alizarin Crimson)
- Small synthetic brushes (flat shader size 4, round size 0 or 00 for details)
- Balsa wood or pine strips (approx. 1/2 inch wide) for framing
- Wood glue
- Sandpaper (220 grit)
- X-acto knife or small saw
- Palette and water cup
- Small eye screws (optional for hanging)
Step 1: Preparing the Mini Canvases
-
Size and Cut:
Cut your canvas pad or primed wood into four equal squares. For the double-decker piece seen on the right, you can either mount two squares together later or cut a single rectangular piece that is twice the height. -
Prime the Surface:
Apply a thin coat of gesso to your surfaces if they aren’t pre-primed. Let this dry completely and give it a quick sanding for a smooth painting surface, which is crucial for tiny details. -
Plan composition:
Lightly sketch a horizon line on each panel. Vary the height: low horizons for big skies, and a mid-point horizon for water scenes. Reserve the vertical rectangular panel for two stacked scenes.
Uneven Gradients?
If your sky blending looks streaky, use a slightly damp mop brush to smooth the transition while the paint is wet. Acrylic retarder can also slow drying time.
Step 2: Painting the Skies
-
Base Gradients:
On the ‘Night Dunes’ panel (far left), blend Phthalo Blue into a lighter blue-grey at the horizon. For the ‘Sunset Coast’ (center), blend deep teal at the top into a warm yellow-orange horizon. -
The Twilight Stack:
For the tall panel on the right, treat the top section as a starry dusk—blend dusty purple into pale pink. For the bottom section, paint a vibrant sunset with deep reds and purples streaking across the sky. -
Adding Clouds:
While the sky paint is still slightly tacky, use a small dry brush to scumble in soft clouds. Use touches of Alizarin Crimson on the bottom sunset panel to create dramatic, under-lit cloud forms. -
Stars and Moon:
Once the sky layers are bone dry, use your smallest detail brush or a toothpick to doc tiny white stars in the darker upper corners. Add a small white circle for the moon on the first panel.
Step 3: Painting the Landscapes
-
Distant Mountains:
Mix Phthalo Blue with a touch of Black and White to create a hazy mountain color. Paint simple triangular shapes on the horizon of the bottom-right panel to create depth. -
Water Reflections:
For the center panel, mirror your sky colors into the water area below the horizon. Add horizontal white dashes on top once dry to simulate waves catching the last light. -
Foreground Silhouettes:
Mix a dark chromatic black using Phthalo Blue and Burnt Sienna. Use this for the pine trees. I like to use a fan brush turned sideways or a tapping motion with a round brush to create the prickly texture of pine needles. -
Golden Fields:
For the bottom-right panel, mix Yellow Ochre and Burnt Sienna. Paint vertical, grassy strokes in the foreground, layering lighter ochre over darker brown to suggest illuminated grass blades. -
Dune Details:
On the far left panel, use varied shades of beige and light brown to paint the rolling sand dunes. Keep the brushstrokes curving downward to mimic the slope of the sand.
Add Dimension
Mix a tiny amount of iridescent medium into your moon or water reflection paint. It gives a subtle glow that shifts as viewing angles change.
Step 4: Framing the Series
-
Measure and Cut Wood:
Measure the outer dimensions of your painted panels. Cut your wood strips with 45-degree mitered corners for a professional look, or simple butt joints for a rustic feel. -
Assemble the Frames:
Glue the wood strips around the edges of your paintings. For the tall rectangular piece, glue a small horizontal strip between the two scenes to act as a divider. -
Sand and Finish:
Once the glue is dry, gently sand the corners of the wood to soften them. You can leave the wood raw for a scandi-minimalist look as seen in the photo, or seal it with a matte varnish. -
Attach Hardware:
If you plan to hang them, carefully screw a tiny eye hook into the center top of each wooden frame.
Now you have a tranquil miniature gallery ready to brighten up any small corner of your home


Have a question or want to share your own experience? I'd love to hear from you in the comments below!