If you’ve ever sketched a rose, you already know it can look totally different depending on the linework, shading, and mood you lean into—and that’s exactly why rose tattoo designs never get old. Here are my favorite rose tattoo ideas to help you land on a look that feels classic, personal, and a little bit you.
Black-and-Gray Realism Rose
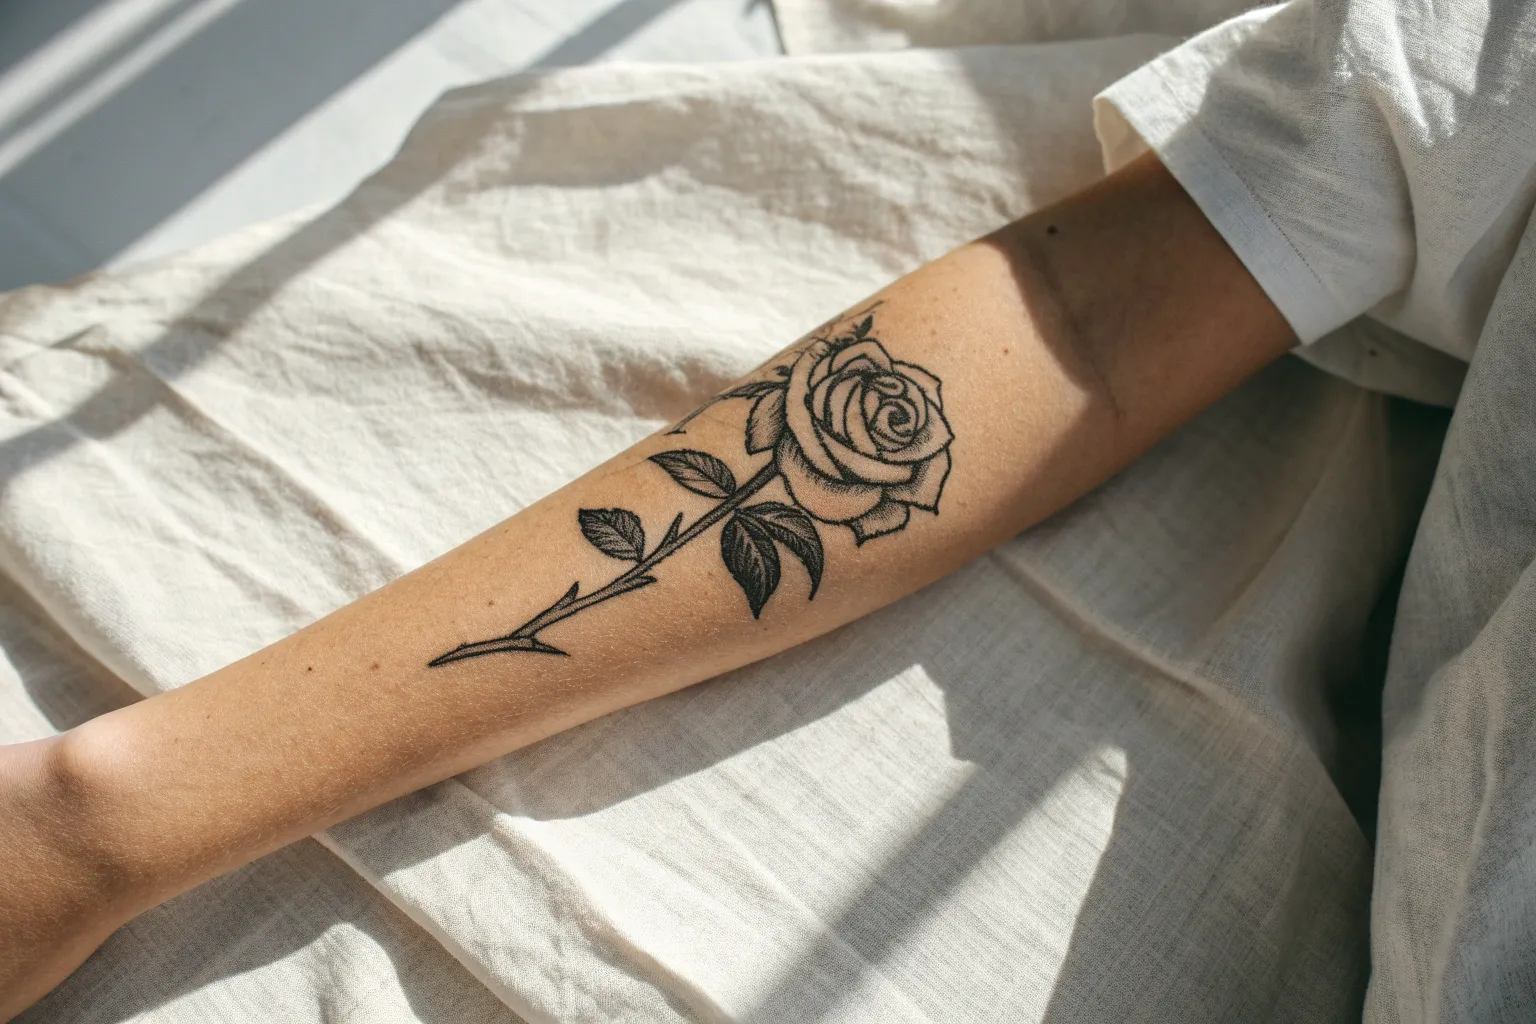
This project focuses on executing a stunning black-and-grey rose tattoo that blends realism with an illustrative, etched style. The design utilizes fine dotwork textures to create soft gradients and depth without harsh shading blocks.
Step-by-Step
Materials
- Professional tattoo machine (rotary preferred for smooth stippling)
- Needle Cartridges: 3RL (Round Liner) for fine details
- Needle Cartridges: 5RL or 7RL for bolder outlines
- Stencil paper and transfer gel
- Dynamic Black ink (or high-quality equivalent)
- Grey wash set (Light, Medium, Dark)
- Green soap and squeeze bottle
- Vaseline or tattoo glide
- Clip cord sleeves and machine bags
- Disposable gloves and paper towels
Step 1: Preparation and Stencil
-
Design the reference:
Begin by sketching the rose shape. Focus on how the petals unfurl from the center. The outer petals should be wide and slightly curled at the edges, while the center is tightly packed. Ensure the leaves are jagged and natural-looking. -
Create the stencil:
Trace your design onto stencil paper. Be very precise with your line weights here; mark where your darkest shadows will be with small ‘x’ marks or dashed lines so you don’t lose your way once the ink starts flowing. -
Prepare the skin:
Clean the forearm area thoroughly with green soap and shave the area if necessary. Apply a thin layer of transfer gel and place your stencil carefully, ensuring it wraps naturally around the arm’s curvature. -
Allow to dry:
Let the stencil dry for at least 10-15 minutes. This is crucial—if you start too soon, you risk wiping away your guide.
Step 2: Linework Foundation
-
Outline the main petals:
Load your machine with a 5RL or 7RL and solid black ink. Start tracing the major outlines of the rose petals. Keep your hand steady and your voltage moderate to ensure crisp, clean lines. -
Detail the leaf edges:
Move to the leaves. Use the same liner to create the serrated edges. I find it helps to use quick, short pulls for the jagged teeth of the leaves to keep them sharp. -
Add delicate interior lines:
Switch to a smaller 3RL needle. Map out the delicate fold lines inside the petals and the central veins of the leaves. These lines should be thinner than your main outline to create hierarchy in the design. -
Thicken shadow areas:
Go back over the darkest crevices where petals overlap. Slightly thicken the line weight in these ‘nooks’ to establish the deepest contrast points early on.
Dotwork Dynamics
Lower your machine voltage slightly for stippling. If the machine runs too fast, you’ll get lines instead of distinct dots when moving your hand quickly.
Step 3: Shading and Texture
-
Start the stippling:
Using the 3RL and a medium grey wash, begin the dotwork (stippling) process. Start at the base of a petal where it tucks under another, tapping the needle to create a cluster of dots. -
Build the gradient:
Work your way out from the shadow toward the light source (usually the tips of the petals). Space your dots further apart as you move away from the shadow to create a smooth fade. -
Shade the leaves:
Apply the same stippling technique to the leaves. Concentrate the density of dots along the central vein and the base of the leaf, fading out toward the serrated edges. -
Deepen the contrast:
Switch to dark grey wash or solid black. Revisit the deepest shadows—specifically the very center of the rose spiral and directly under the larger petals. Layer more dots here until it looks almost solid. -
Texture the foldovers:
For the petals that curl over, use extremely light stippling on the underside of the curl. This emphasizes the 3D effect, making the petal look like it is physically bending toward the viewer.
White Ink Accents
For extra pop, use a tiny amount of opaque white ink on the very edges of the curled petals and leaf tips to maximize the 3D contrast.
Step 4: Refining and Finalizing
-
Add superficial cracks:
Using your finest 3RL, add tiny, sparse scratches or dots on the surface of the petals to mimic the velvety texture of a real rose. Don’t overdo this; less is more. -
Connect the stem:
Ensure the stem connects logically to the bloom. Use directional shading (whip shading) along the length of the stem to give it a cylindrical roundness. -
Highlight check:
Review the tattoo for ‘skin breaks’—areas of negative space where no straight ink was applied. Ensure these highlights are clean, as they provide the necessary breathing room for the dark ink. -
Clean and protect:
Gently wipe down the entire piece with green soap and water to remove excess ink and plasma. Apply a thin layer of soothing balm or a second-skin bandage to protect the fresh work.
Once healed, the dotwork will settle into a soft, velvety texture that mimics natural organic shadows beautifully


Fine-Line Minimal Rose Outline
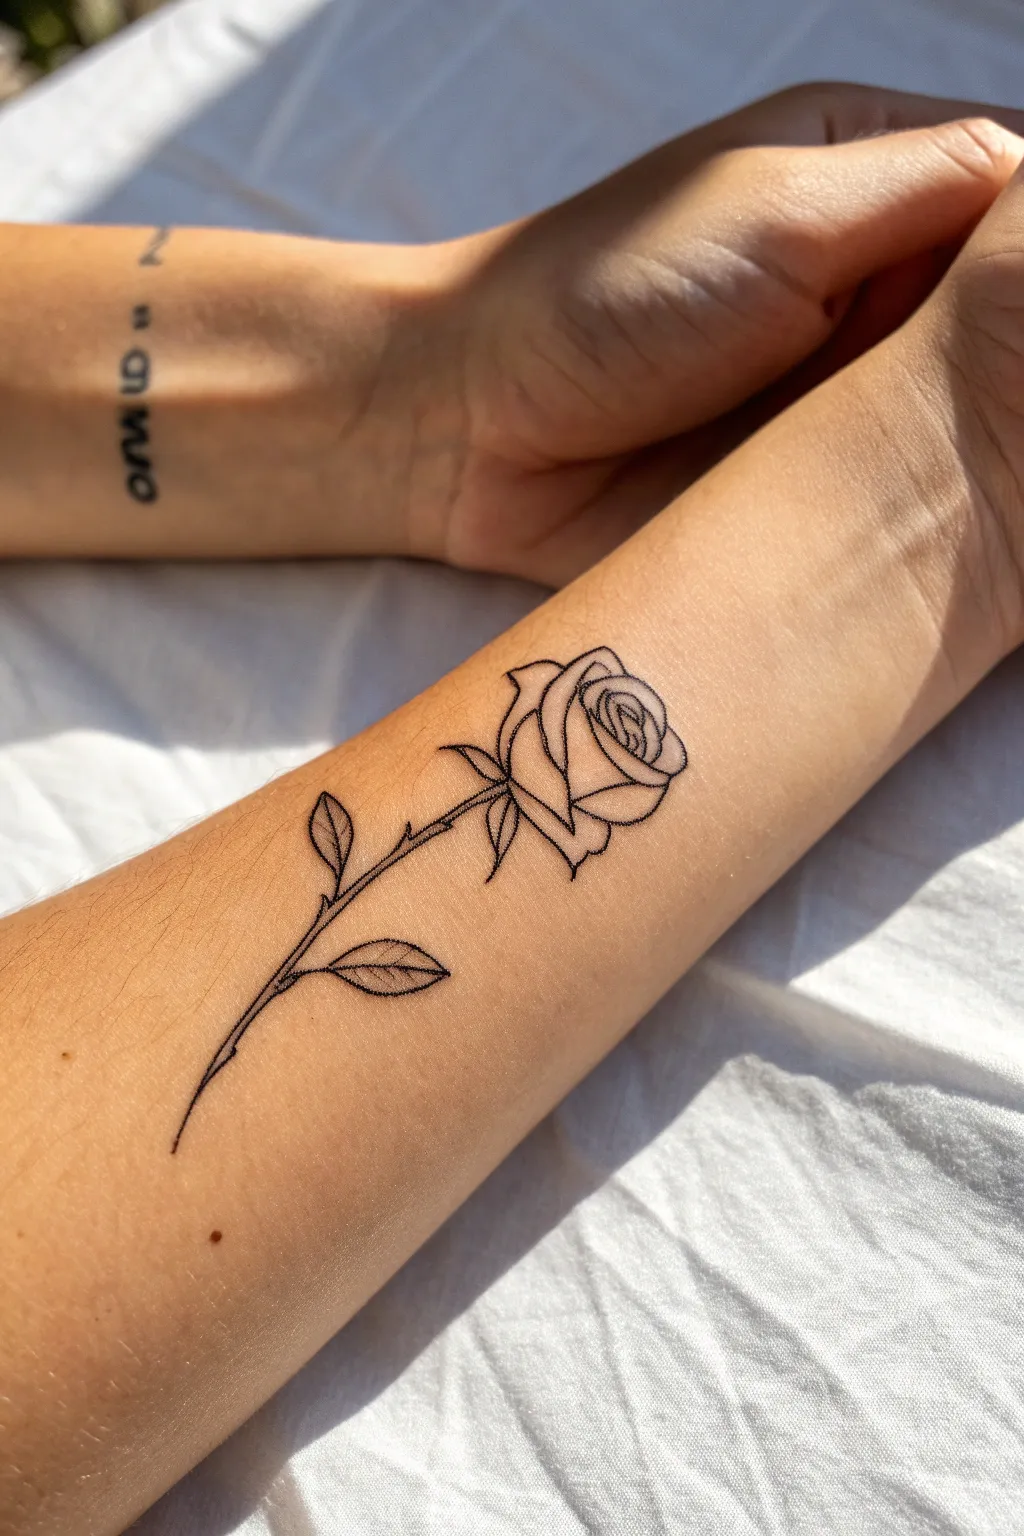
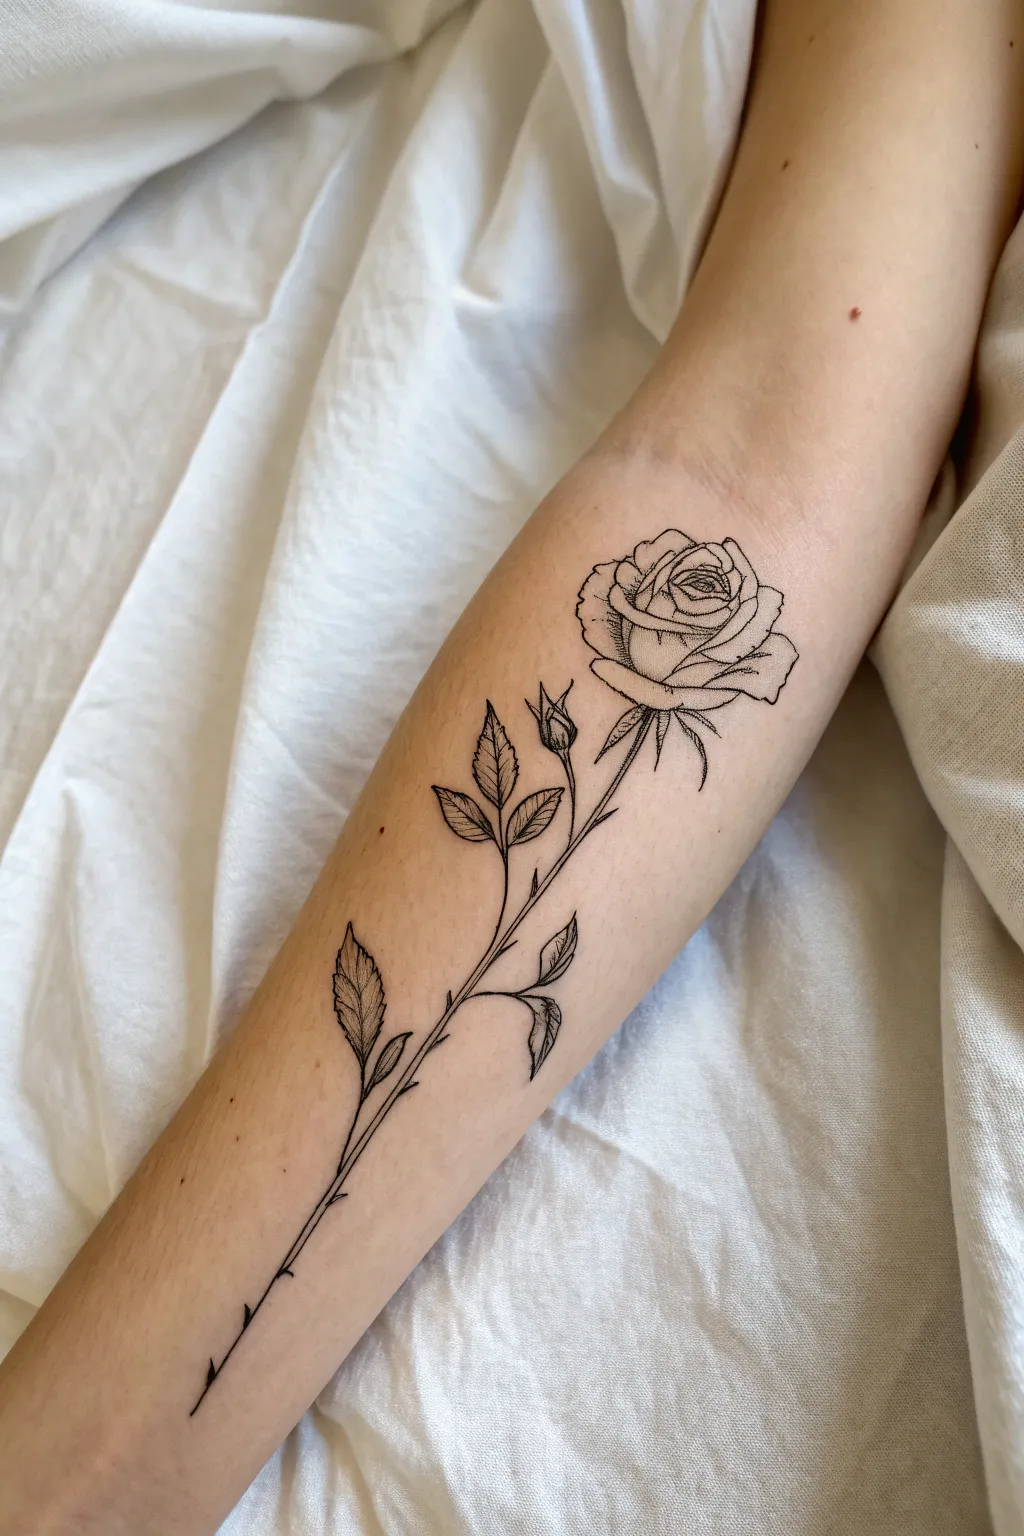
This project captures the elegance of a classic rose through modern, minimalist line work. The design features a single stem rose with unfolding petals and subtle thorns, executed in crisp, fine black ink for a timeless look.
Step-by-Step Guide
Materials
- Tattoo machine (pen style or coil)
- 3RL or 5RL tattoo needle cartridge (for fine lines)
- Black tattoo ink (high quality, lining ink)
- Stencil paper
- Stencil transfer gel
- Green soap & squeeze bottle
- Paper towels
- Disposable ink caps
- Vaseline or tattoo glide
- Disposable gloves
- Razor (for skin prep)
- Alcohol wipes
Step 1: Preparation and Stencil
-
Create the Design:
Sketch or digitally draw your rose design first. Focus on a clear contour drawing with no shading. Draw the rose head slightly tilted, with petals spiraling outward from a tight center. Add a long, slightly curved stem with two distinct leaves and small thorns. -
Make the Stencil:
Once your design is finalized, transfer it onto thermal stencil paper. Ensure the lines are crisp and dark purple, as this guide is crucial for fine-line work where there is no shading to hide mistakes. -
Prepare the Skin Area:
Clean the inner forearm area thoroughly with green soap. Shave the area carefully to remove hair, then sanitize with an alcohol wipe to remove oils that might repel the stencil. -
Apply the Stencil:
Apply a thin, even layer of stencil transfer gel. Place the stencil firmly onto the skin, ensuring it follows the natural flow of the arm. Press down gently and peel it back carefully. Let it dry for at least 10-15 minutes so it doesn’t smudge during tattooing.
Blowout Patrol
Fine lines blowout easily. Keep your needle depth shallow (1.5mm-2mm) and hand speed consistent. Don’t press too hard; let the needle do the work.
Step 2: Tattooing the Outline
-
Setup Machine:
Load your machine with a fine liner needle, like a 3RL or 5RL. Use a lining black ink. I prefer to dip the needle and run the machine briefly to ensure the ink flows smoothly before touching skin. -
Start with the Stem:
Begin at the bottom of the stem to avoid wiping away your stencil as you work upward. Pull a single, steady line for the main stem, moving slowly to ensure consistent saturation. -
Outline the Lower Leaf:
Move to the bottom leaf attached to the left side of the stem. Create the leaf outline with two curved strokes that meet at a sharp point. -
Detail the Lower Leaf:
Add the central vein inside the leaf. Keep this line slightly thinner or lighter if possible, but distinct. Add tiny cross-hatched veins if you want extra detail, though the reference keeps it simple. -
Continue the Stem Upward:
Continue the stem line upward, adding small triangular thorns along the way. Stop right below where the flower head begins. -
Outline the Upper Leaf:
Execute the second, smaller leaf higher up on the stem. Like the first, draw the perimeter first, then add the central vein line with a steady hand. -
Begin the Rose Base:
Outline the sepals (the small green leaves directly under the flower). These should be jagged and point downwards, framing the bottom of the rose bloom.
Step 3: The Flower Head
-
Outer Petals:
Start defining the lowest, largest petals of the rose head. Use smooth, curving lines that overlap slightly to create depth without shading. -
Build the Layers:
Work your way inward, drawing the mid-layer petals. Ensure these lines connect cleanly to the outer petals, suggesting they are wrapping around the center. -
The Center Spiral:
For the very center of the rose, execute a tight spiral shape. This is the focal point, so keep your hand very steady and your needle depth consistent. -
Final Petal Details:
Check for any gaps in the petal outlines. If a line looks too thin or “holiday” (skipped spot), carefully reinforce it, but be cautious not to double the line width. -
Clean and Inspect:
Gently wipe the tattoo with green soap and a paper towel to remove excess ink and blood. Inspect your lines one last time to ensure they are solid black and connected where intended.
Dotwork Detail
Add subtle stippling (dot shading) at the base of the petals or leaves to give the rose dimension while maintaining the minimalist vibe.
Once healed, you will have a sophisticated and permanent piece of botanical art right on your skin.

Single-Stem Rose on Inner Forearm
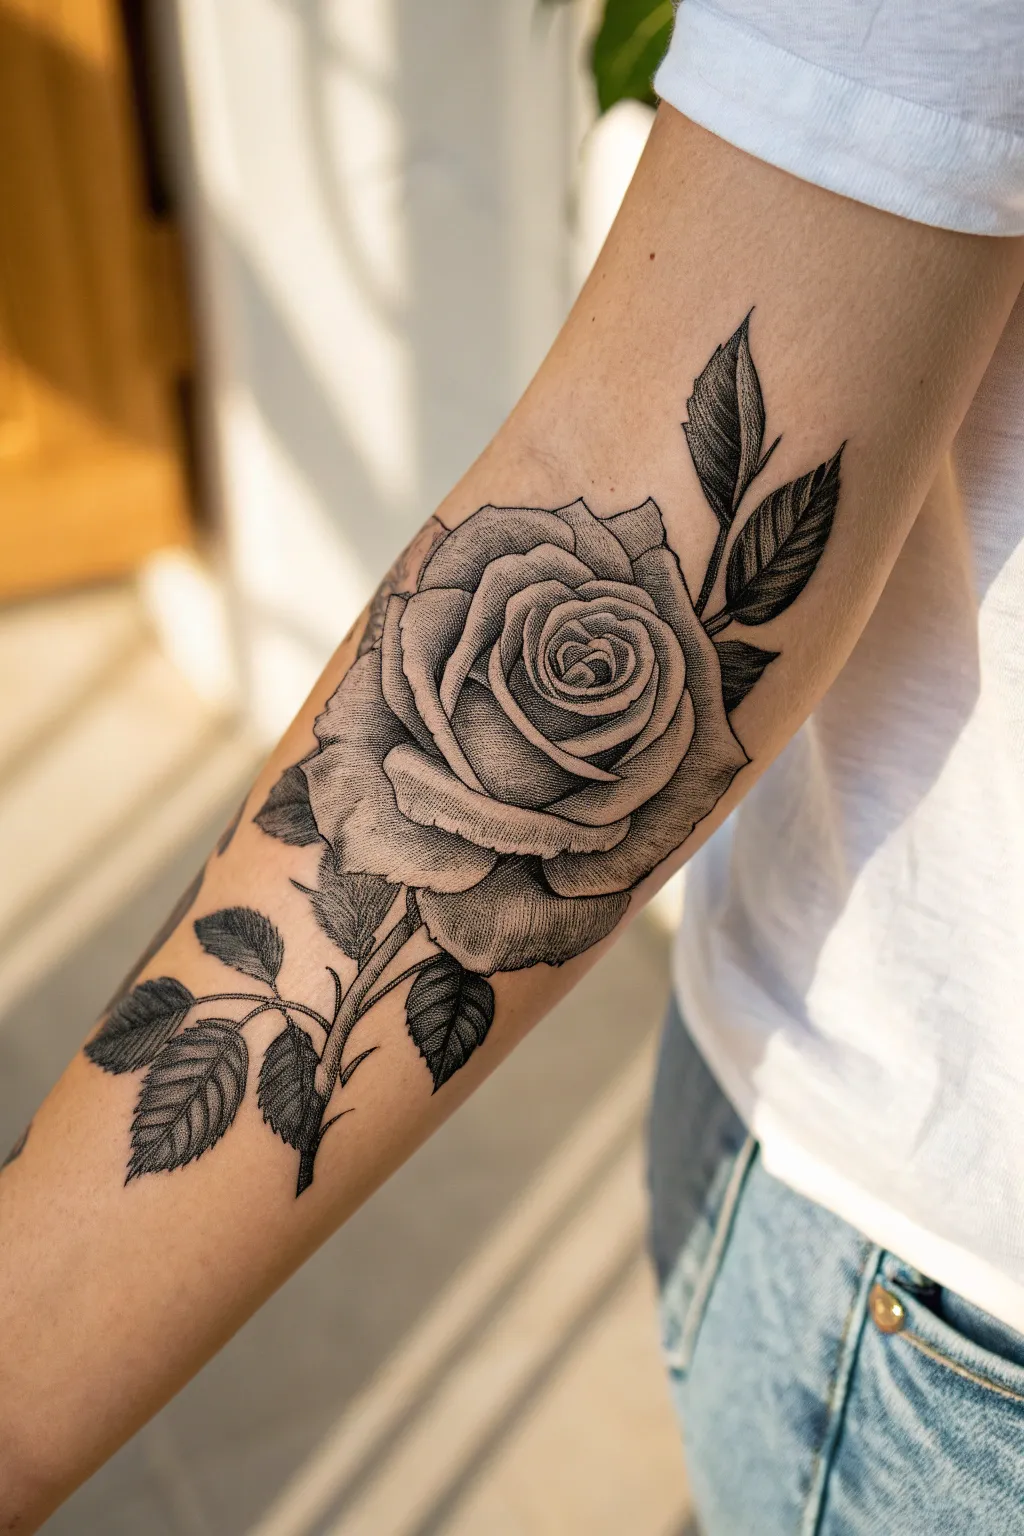
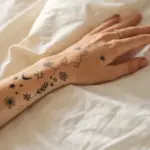
This project focuses on creating a delicate, single-stem rose design ideal for placement along the inner forearm. The style combines botanical accuracy with illustrative flair, using fine lines and subtle stippling to bring the flower to life.
Step-by-Step
Materials
- Tracing paper or digital drawing tablet
- Pencil (HB or 2B) and eraser
- Fine-liner pens (0.1mm, 0.3mm, and 0.5mm)
- Smooth heavyweight drawing paper or cardstock
- Ruler (optional)
Step 1: Planning and Sketching
-
Map out the placement:
Since this design is meant for the inner forearm, start by drawing a very faint central guide line. This line should be roughly 6-8 inches long to replicate the elongated elegance of the stem in the reference image. I usually add a slight curve near the top to make the flower head look natural. -
Sketch the flower head shape:
At the top of your guide line, lightly sketch a rounded cup shape for the base of the bloom and an oval above it to indicate the opening. Keep this loose; you are just establishing volume. -
Draft the petals:
Begin refining the rose head by sketching the central spiral of petals. Work outward, adding larger, unfolding petals that wrap around the center. Notice how the outer petals in the reference curl slightly at the edges. -
Outline the sepals and bud:
Draw the sepals (the small leafy structures) underneath the rose head, letting them drape downwards. Immediately below the main flower, about an inch down the stem, sketch a small, tight rose bud branching off to the right. -
Add leaves and thorns:
Along the stem, sketch two groupings of leaves. Place one pair higher up near the bud and another solitary leaf lower down on the left. Finally, mark small triangular spikes along the lower section of the stem to represent thorns. -
Refine the leaf details:
Inside your leaf outlines, lightly draw a central vein for each. The edges of rose leaves are serrated, so sketch jagged, saw-tooth edges instead of smooth lines.
Step 2: Inking and Detailing
-
Outline the main stem:
Switch to a 0.5mm fine-liner for the main structural lines. trace the long stem, carefully incorporating the thorns so they look like part of the growth rather than stuck-on triangles. -
Ink the flower petals:
Using a slightly finer 0.3mm pen, ink the rose petals. Pay attention to line weight; use slightly thicker lines for the outer contour of the petals and thinner, broken lines for the inner folds to suggest softness. -
Define the leaves:
Ink the serrated edges of the leaves with the 0.3mm pen. Ensure the points of the serrations face away from the stem, mimicking real botany. -
Add texture with stippling:
Switch to your finest 0.1mm pen. To create depth without heavy shading, use stippling (tiny dots). Concentrate these dots at the base of the petals where they meet the stem and in the deep folds of the rose center. -
Detail the leaves:
Use the 0.1mm pen to draw the veins inside the leaves. Instead of solid lines, use quick, light flicking motions to feather the veins, leaving some white space for a lighter look. -
Shade the sepals:
Add fine hatching lines to the sepals under the main flower and the small bud. This distinguishes them as greener, textured plant matter compared to the smooth petals. -
Enhance the stem:
Add very subtle linear texture to the main stem using the 0.1mm pen. A few broken, vertical lines can make the stem look woody rather than like a simple wire. -
Clean up the sketch:
Once the ink is completely dry—give it a good five minutes to be safe—erase all the underlying pencil marks. This reveals the crisp, high-contrast look typical of fine-line tattoo flashes. -
Final Contrast Check:
Step back and assess the drawing. If the flower head feels too light, add a few more stippling dots to the shadowy areas between petals to increase the contrast and make the bloom pop.
Wobbly Lines?
If your long stem lines aren’t smooth, try locking your wrist and moving your entire arm while drawing. Pull the pen toward you rather than pushing it away.
Make it Unique
Personalize the design by turning the small bud into a different flower entirely, or by hiding a tiny initial within the shading of a leaf.
You have now created a timeless floral design that flows perfectly with natural anatomy

Rose Vine Wraparound
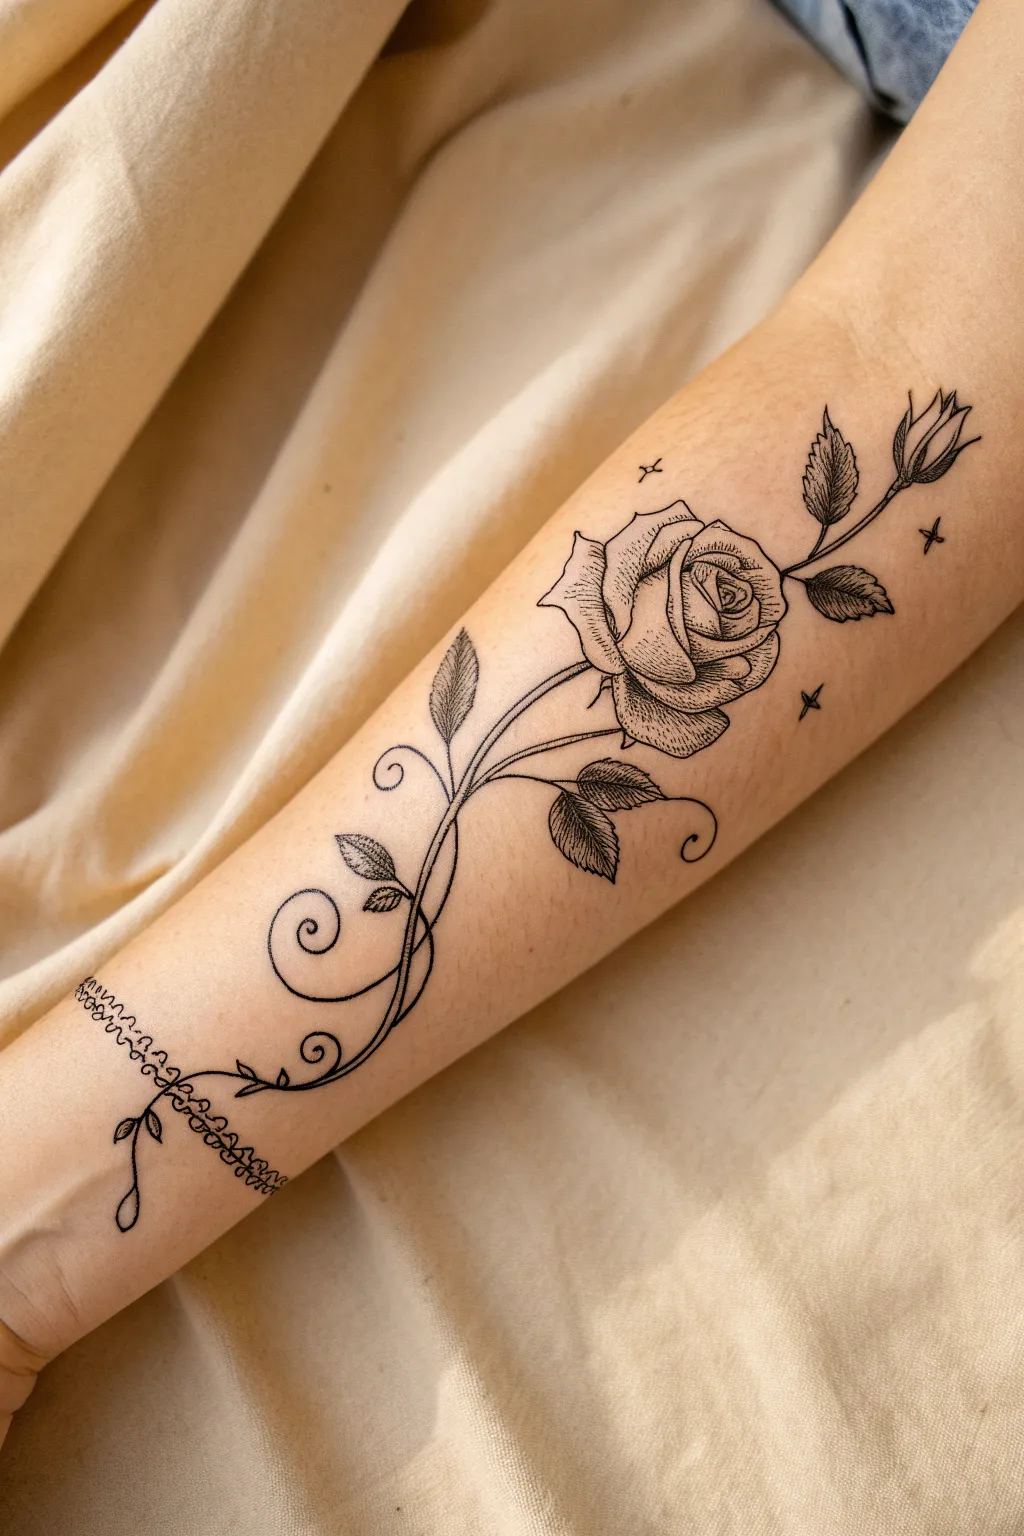
This elegant tattoo design features a beautifully detailed rose bloom and twisting vine that flows naturally along the forearm. Using fine-line techniques and subtle dotwork shading, you will create a timeless floral piece that combines botanical realism with decorative flourishes.
Step-by-Step Tutorial
Materials
- Tattoo machine (pen style or coil)
- Round Liner cartridges (3RL for fine details, 5RL or 7RL for main outlines)
- Black tattoo ink (high quality)
- Grey wash ink set (light, medium, dark)
- Stencil paper and transfer gel
- Green soap and wash bottle
- Paper towels and ink caps
- Vaseline or tattoo glide
- Disposable gloves
Step 1: Preparation & Stenciling
-
Design the composition:
Begin by sketching the main S-curve of the vine. Position the main rose head near the upper third of the forearm and the bracelet-like vine wrapping near the wrist. Ensure the flow follows the natural muscle structure of the arm. -
Create the stencil:
Refine your line drawing, focusing on the serrated edges of the leaves and the layered petals of the rose. Transfer this final design onto stencil paper, ensuring clear, crisp lines. -
Prepare the skin:
Shave and thoroughly clean the forearm area with green soap and alcohol. Apply a thin layer of transfer gel and carefully place your stencil. Allow it to dry completely—usually 10-15 minutes—so the purple lines won’t wipe away during the process.
Fixing Shaky Lines
If a long stem line gets shaky, thicken the line slightly on the wobble’s outer edge to smooth the curve, effectively ‘sculpting’ the line straight.
Step 2: Linework Foundation
-
Outline the main bloom:
Using a 5RL or 7RL, start outlining the central rose. Use a steady hand to create the petal edges, varying your line weight slightly—thicker on the outer edges and thinner for the inner folds to create depth. -
Trace the vine and stem:
Follow the winding stem down the arm. Keep these lines smooth and flowing. For the ornamental swirls near the wrist, switch to a finer 3RL if you want them to look more delicate and airy. -
Add the leaves and bud:
Outline the leaves, ensuring you capture the serrated, saw-tooth edges. Outline the small rosebud at the top right. Don’t fill in any veins yet; just establish the outer shapes. -
Detail the wrist ornament:
Carefully line the bracelet-like element near the wrist. This section mimics a jewelry chain or lace, so precise, clean loops are essential here.
Level Up: White Highlights
Add tiny touches of opaque white ink to the very tips of the rose petals and dew drops on leaves to make the drawing pop against the skin.
Step 3: Detailed Shading & Texture
-
Stipple the petals:
Switch to a 3RL for shading. Use a stippling (dotwork) technique or whip shading to add dimension to the rose petals. Concentrate the dots at the base of the petals where they overlap to create a shadow gradients. -
Build petal volume:
Layer your dots carefully. I find it helpful to start with a light pass and build up density slowly. The tips of the petals should remain mostly skin-negative space to act as highlights. -
Shade the leaves:
For the leaves, draw fine central veins and smaller branching veins. Use whip shading starting from the center vein outwards, lifting the needle as you move to the edge to fade the black into grey. -
Texture the stem:
Add very subtle linear shading along one side of the vine stems. This simple step gives the stems a cylindrical, rounded appearance rather than looking like flat lines. -
Enhance the bud:
Apply darker shading at the base of the unopened rosebud and the small sepals wrapping around it, leaving the tip lighter to show its tightness.
Step 4: Final Flourishes
-
Add decorative elements:
Ink the small sparkle or star shapes surrounding the main floral elements. These should be crisp and sharp to contrast with the organic shapes of the flower. -
Refine the darkest areas:
Review the tattoo for contrast. If the center of the rose or the undersides of leaves need more depth, go back in with small amounts of solid black or dense stippling. Contrast is what makes fine-line tattoos last. -
Clean and soothe:
Gently wipe down the entire area with green soap and water to remove excess ink and plasma. Apply a thin layer of soothing aftercare balm or a second-skin bandage to protect the fresh artwork.
With proper aftercare, this delicate vine will heal into a stunning, permanent piece of botanical art
BRUSH GUIDE
The Right Brush for Every Stroke
From clean lines to bold texture — master brush choice, stroke control, and essential techniques.
Explore the Full Guide
Traditional Bold-Outline Rose
This project captures the timeless strength of traditional American tattooing, featuring bold, clean outlines and heavy black saturation. The classic red rose with its gradient shading creates a striking contrast against skin tones, embodying a vintage aesthetic that never goes out of style.
Step-by-Step
Materials
- Tracing paper
- Pencil (HB or 2B)
- Black drawing ink or heavy body black acrylic paint
- Watercolor paper or skin-tone practice pad (synthetic skin)
- Red and orange watercolor or liquid acrylics (for the gradient)
- Micron pens or varying felt tip markers (0.8mm and 1.2mm)
- Fine detail brush and medium round brush
- Paper towels for blotting
Step 1: Conceptualization and Sketching
-
Establish the rose center:
Begin by lightly sketching a tight spiral in the center of your paper. This spiral represents the tightly packed petals at the heart of the rose and serves as the anchor for the entire composition. -
Build outward petals:
Draw three to four C-shaped curves hugging the central spiral. Ensure these overlap slightly to create the illusion of depth, keeping the shapes simple and rounded rather than jagged. -
Create the outer bloom:
Sketch larger, wider petals that fan out from the core. Aim for a balanced, somewhat symmetrical shape overall, giving the flower a flattened, illustrative look typical of traditional flash art. -
Add the stem and leaves:
Extend a sturdy stem downwards from the base of the flower. Attach three to five serrated leaves along the stem and tuck a few leaves behind the rose head itself to frame the color. -
Refine the linework:
Go over your sketch with a firmer pencil stroke to finalize the shapes. Simplify any overly complex areas; traditional style relies on readability, so clean up messy intersections now.
Uneven Gradients?
If your fade from black to red looks muddy, let the black ink dry 100% before adding color. Wet black ink will bleed into the red and ruin the crisp contrast.
Step 2: Inking the Bold Lines
-
Select your boldest tool:
Using a thick marker or a brush loaded with black ink, begin tracing your final pencil lines. The definitive trait of this style is a heavy, consistent line weight, often called a ‘bold 9’ or similar in tattoo terms. -
Outline the central petals:
Trace the inner spiral and the immediate surrounding petals. Keep your hand steady to maintain a uniform thickness; wobbles destroy the clean, graphical effect we need. -
Outline the leaves and stem:
Continue inking the exterior elements. For the leaves, outline the main shape first, then add a single strong center vein line. Don’t add fine veins yet; we handle those with shading. -
Erase pencil guides:
Allow the ink to dry completely to avoid smudging. I usually give it an extra five minutes just to be safe before gently erasing all underlying graphite marks.
Spit Shading Look
To mimic the smooth tattoo fade on paper, use a second brush with just clean water. Lay down color, then quickly drag the edge out with the wet brush.
Step 3: Heavy Black Shading (Whip Shading)
-
Identify shadow areas:
Locate the areas where petals overlap. The shadows in traditional roses are not subtle; they are solid black fading quickly into color. Mark these ‘deep’ spots mentally. -
Apply solid black fills:
Fill the deepest corners of the spiral and the base of the leaves with solid black ink. This high contrast is the backbone of the design. -
Execute the ‘whip’ technique:
From the solid black areas, flick your brush or pen outward quickly. You want the black to break up into tiny dots or a rough texture as it extends, rather than a smooth gray gradient. -
Shade the leaves:
Fill one half of each leaf with heavy black shading, usually aiming from the center vein outward. This half-and-half contrast makes the leaves pop visually.
Step 4: Color Packing
-
Prepare the red gradient:
Mix a deep, vibrant red. The goal is a transition from deep red to a lighter orange or skin tone at the petal edges (a ‘skin break’). -
Paint the petal bases:
Apply the saturated red directly next to your black shading on the petals. Don’t cover the whole petal; work from the shadow outward. -
Blend into orange:
While the red is still slightly damp (if using paint), introduce a touch of orange or yellow-orange to the outer third of the petals, blending where they meet the red. -
Leave the highlights:
Leave the very tips of the petals unpainted or extremely pale. In tattooing, this is the negative space of the skin, which provides breathing room for the dense colors. -
Final leaf details:
If you want color in the leaves, add a hunter green to the non-black sections, but sticking to black and grey for foliage is also very traditional and lets the red rose stand out more.
Step 5: Final Touches
-
Re-affirm the blacks:
Once the color is dry, check your black shading. If the color has washed it out, go back in with your black ink to ensure those darks are truly opaque. -
Clean up edges:
Use your thick liner pen to crisp up any exterior lines that might have gotten fuzzy during the coloring process.
Now you have a bold, traditional rose design that honors the roots of tattoo history
Small Wrist Rose Accent
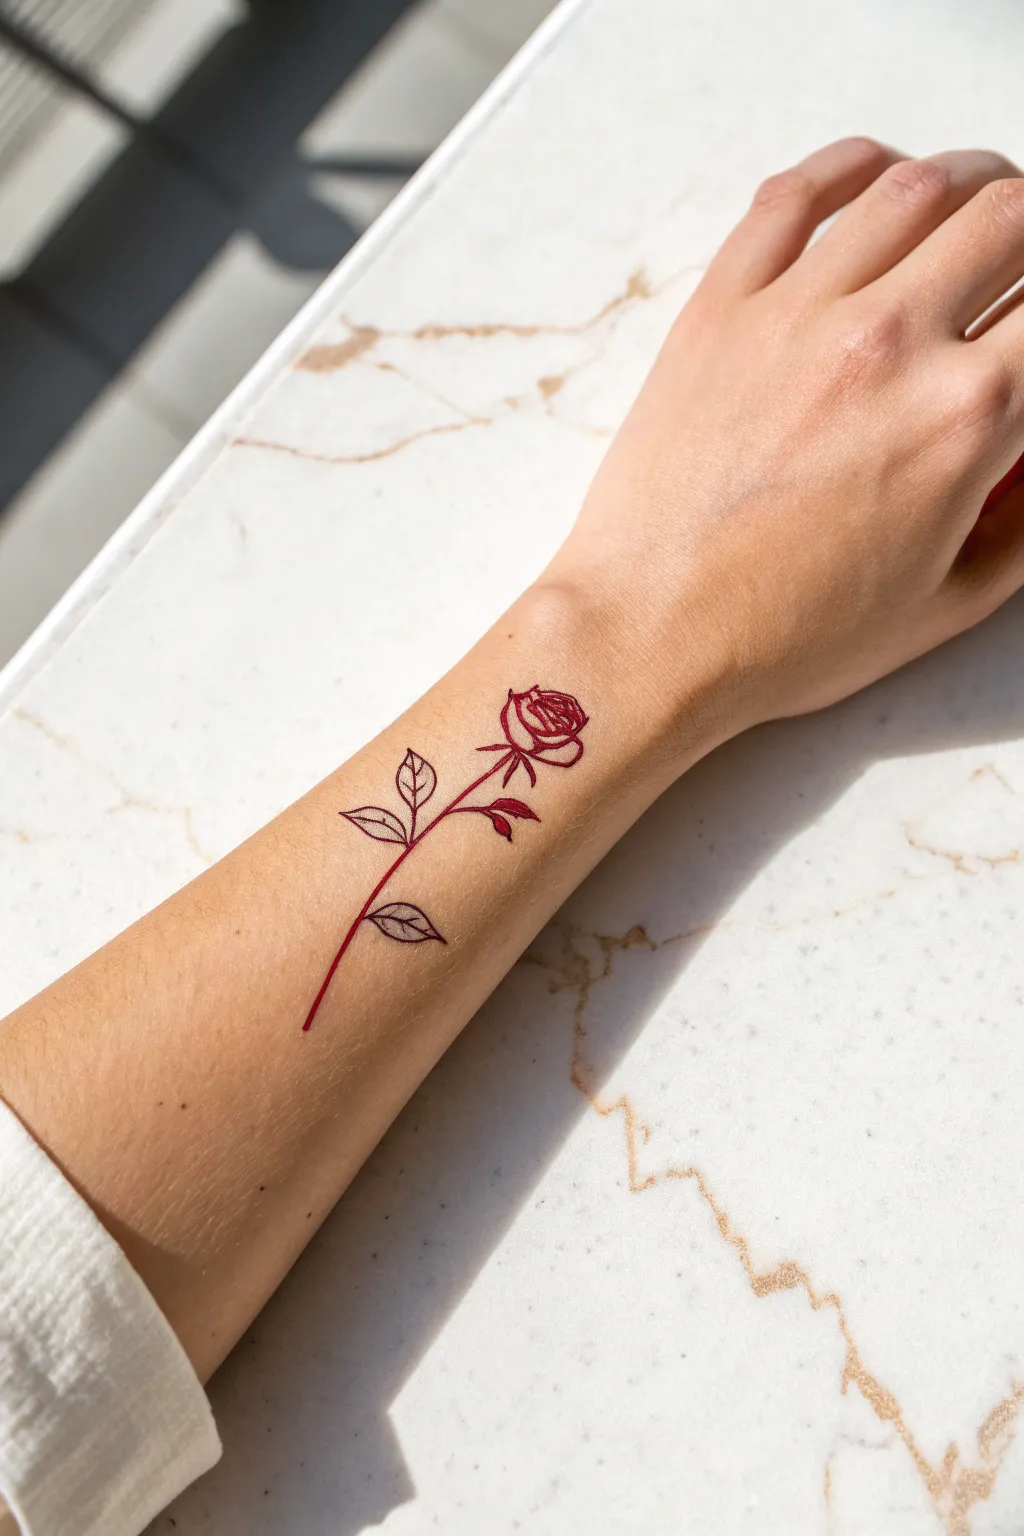
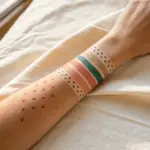
This project captures the essence of modern fine-line body art using temporary tattoo markers or skin-safe body paint. The result is a striking, monochromatic red rose that looks elegant and minimalist on the wrist.
Step-by-Step Guide
Materials
- Skin-safe fine tip body art marker (Red)
- Rubbing alcohol or skin cleanser
- Cotton pads
- Tracing paper (optional)
- Soft cosmetic pencil (light brown or nude)
- Translucent setting powder
- Makeup setting spray or liquid bandage spray
Step 1: Preparation and Sketch
-
Cleanse the canvas:
Begin by thoroughly cleaning the inner wrist area with a cotton pad soaked in rubbing alcohol. This removes natural oils and ensures your design stays crisp and lasts longer. -
Map the stem:
Using a soft nude or light brown cosmetic pencil, draw a faint guide line for the stem. Start about three inches from the wrist crease and draw a slightly curved line moving upward toward the hand. -
Position the bloom:
At the top of your stem line, sketch a small oval shape to represent the base of the rosebud. This helps you center the flower head before committing to ink. -
Mark leaf placement:
Lightly mark the positions for three leaves: two branching off the left side of the stem spacing them out, and one lower down on the right side.
Step 2: Inking the Outline
-
Start the stem:
Switch to your red fine-tip body art marker. Starting from the bottom, draw a confident, singular line up the stem, following your guide but stopping where the leaves will intersect. -
Draw the lower leaf:
On the right side of the stem, draw the lowest leaf. Create a teardrop shape with a pointed tip, and add a single center vein line. Keep the outline thin and consistent. -
Add middle leaves:
Move up the stem and draw the two leaves on the left side. Notice how the upper left leaf is slightly smaller and perky, while the lower one extends outward more. -
Outline the flower base:
Draw the sepals (the small green parts under a rose, though here they are red) at the top of the stem. Create three small, downward-curving spikes that cradle the flower head. -
Form the outer petals:
Draw a ‘U’ shape sitting in the sepals to form the cup of the rose. Add a slightly wavy line across the top to simulate the petals starting to curl.
Smudge Control
If you make a mistake with the red ink, use a Q-tip dipped in alcohol immediately. Don’t rub; dab precisely to lift the error without spreading the pigment.
Step 3: Detailing and Setting
-
Create the inner spiral:
Inside the flower cup, draw a tight, heavy spiral or concentric loops. This mimics tightly packed petals in the center of the bud. -
Refine the line weight:
Go back over just the very center of the rosebud to slightly thicken the lines. I find this adds depth and draws the eye to the bloom without needing shading. -
Clean up guide lines:
Allow the red ink to dry completely for at least five minutes. Once dry, gently brush away any visible nude pencil marks with a clean, dry cotton swab. -
Apply powder:
Dust a tiny amount of translucent setting powder over the design. This matte finish makes the ink look more like a real tattoo and less like a drawing. -
Seal the design:
Spray a light mist of makeup setting spray or liquid bandage over the area from about 6 inches away to waterproof your new temporary ink.
Level Up
For a dimensional look, use a darker red or burgundy marker to re-trace just the bottom underside of the leaves and the base of the petals to create ‘shadows’.
Enjoy wearing your elegant, custom-drawn floral accent

PENCIL GUIDE
Understanding Pencil Grades from H to B
From first sketch to finished drawing — learn pencil grades, line control, and shading techniques.
Explore the Full Guide
Ankle Rose With Delicate Leaves
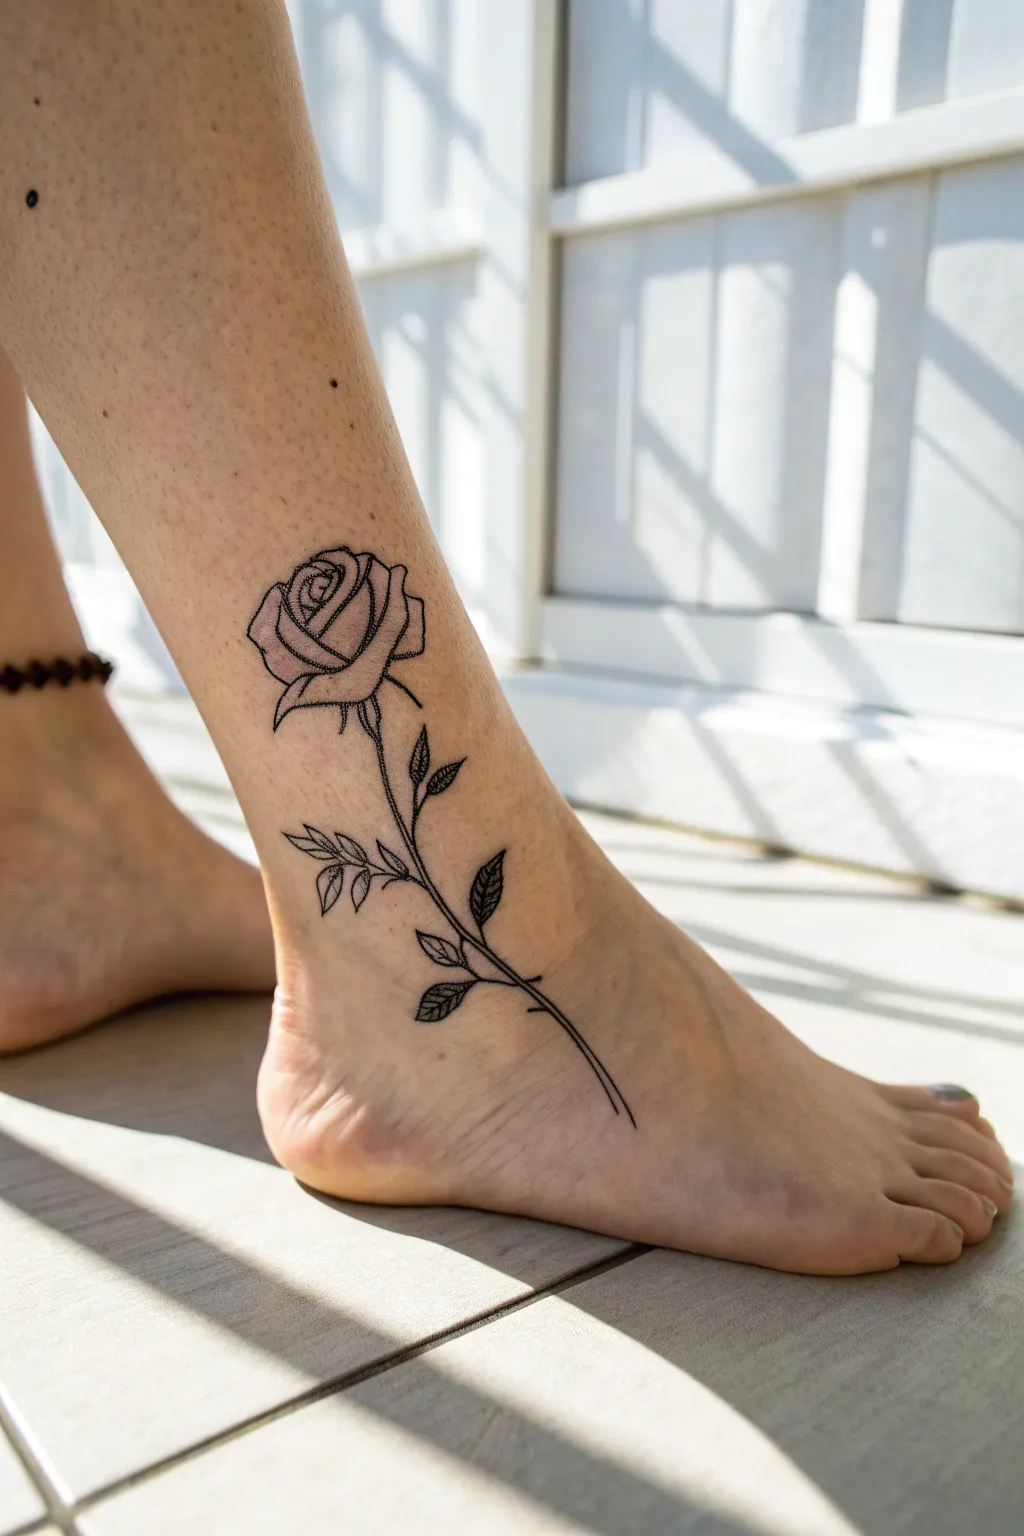
This elegant ankle tattoo features a single stem rose designed with fine lines and delicate shading, creating a graceful flow from the lower calf down to the foot. The piece combines clean outlining with subtle stippling for a timeless, botanical aesthetic.
How-To Guide
Materials
- Professional tattoo machine (rotary or coil)
- Round Liner (RL) cartridges: 3RL (for fine details) and 5RL (for main outlines)
- Magnum shader (optional, small size like 5M) or use liners for stippling
- Dynamic Black ink (or high-quality lining black)
- Stencil paper and thermal printer (or hand-tracing tools)
- Stencil transfer gel
- Green soap and wash bottle
- Paper towels
- Vaseline or tattoo glide
- Disposable gloves
- Skin marker (surgical marker)
Step 1: Preparation and Stencil
-
Design Preparation:
Create your line drawing based on the reference: a semi-open rose bud at the top, a long curving stem, and scattered leaves. Ensure the stem has a gentle ‘S’ curve to flow naturally with the body’s anatomy. Print or draw your final stencil. -
Skin Prep:
Clean the ankle and foot area thoroughly with green soap and shave the area if necessary. Disinfect with alcohol to ensure a clean surface. -
Placement:
Apply a thin layer of stencil gel. Position the stencil so the rose head sits on the lower calf/upper ankle bone area, and the stem trails down towards the toes. Have the client stand up to check how the design warps with movement before letting it dry for 10-15 minutes.
Uneven Foot Lines?
Foot skin is tough and uneven. Stretch the skin very firmly with ‘three-point traction’ to stop the needle from snagging or blowing out.
Step 2: Linework Foundation
-
Rose Head Outline:
Load your 5RL with black ink. Begin at the bottom of the design to avoid rubbing off the stencil, but for the flower specifically, start with the innermost petals. Use confident, steady pulls to create the spiral shape of the center. -
Outer Petals:
Continue outlining the larger outer petals. Keep the line weight consistent, but taper your pressure slightly at the tips of the petals to keep them looking delicate. -
Stem Structure:
Trace the long stem lines. I like to break the line slightly where leaves attach to give it an organic feel, rather than drawing one continuous rigid pipe. Run these lines all the way down onto the top of the foot. -
Leaf Outlines:
Outline the leaves attached to the stem. Notice that the reference has some leaves that are just outlines and others that will be filled. Keep the tips sharp and pointy.
Step 3: Shading and Details
-
Switching Needles:
Switch to a smaller needle grouping, like a 3RL, to handle the intricate shading and fine details inside the leaves and petals. -
Petal Shading:
Using a stippling or whip-shading technique, add texture to the base of the rose petals. Flick the needle outward from the deepest creases to create a gradient from dark to skin tone. -
Darkening the Leaves:
Select specific leaves to fill in darkly (as seen in the reference) to create contrast. For the ‘filled’ leaves, use tight circular motions or tight packing to ensure solid black saturation. -
Leaf Venation:
For the open, unfilled leaves, draw a very fine center line. Add tiny diagonal veins branching off the center using the very tip of your 3RL. -
Stem Texture:
Add extremely subtle, short scratchy lines or dots along one side of the stem to give it roundness and dimension, preventing it from looking smooth and flat. -
Final Stippling:
Go back to the rose head and add a few extra dots of stippling on the upper curves of the petals. This creates a ‘dewy’ or textured look that softens the solid lines.
Pro Tip: Pain Management
The ankle bone and top of the foot are sensitive. Use a numbing spray (with lidocaine) once the skin is broken to help the client sit still for final details.
Step 4: Cleanup and Aftercare
-
Final Wipe:
Gently wipe the entire tattoo with green soap and water to remove excess ink and plasma. Check for any ‘holidays’ (missed spots) in the solid black leaves. -
White Highlights (Optional):
If desired, you can add tiny touches of white ink on the wettest/highest points of the petals for extra contrast, though the reference relies mostly on negative space. -
Photography:
Let the skin calm down for a few minutes. Apply a very thin layer of ointment to reduce redness before taking photos. -
Bandaging:
Apply a second skin bandage or traditional cling wrap to protect the fresh work.
With proper care during the healing process, these fine lines will settle into a beautiful, lasting piece of botanical art
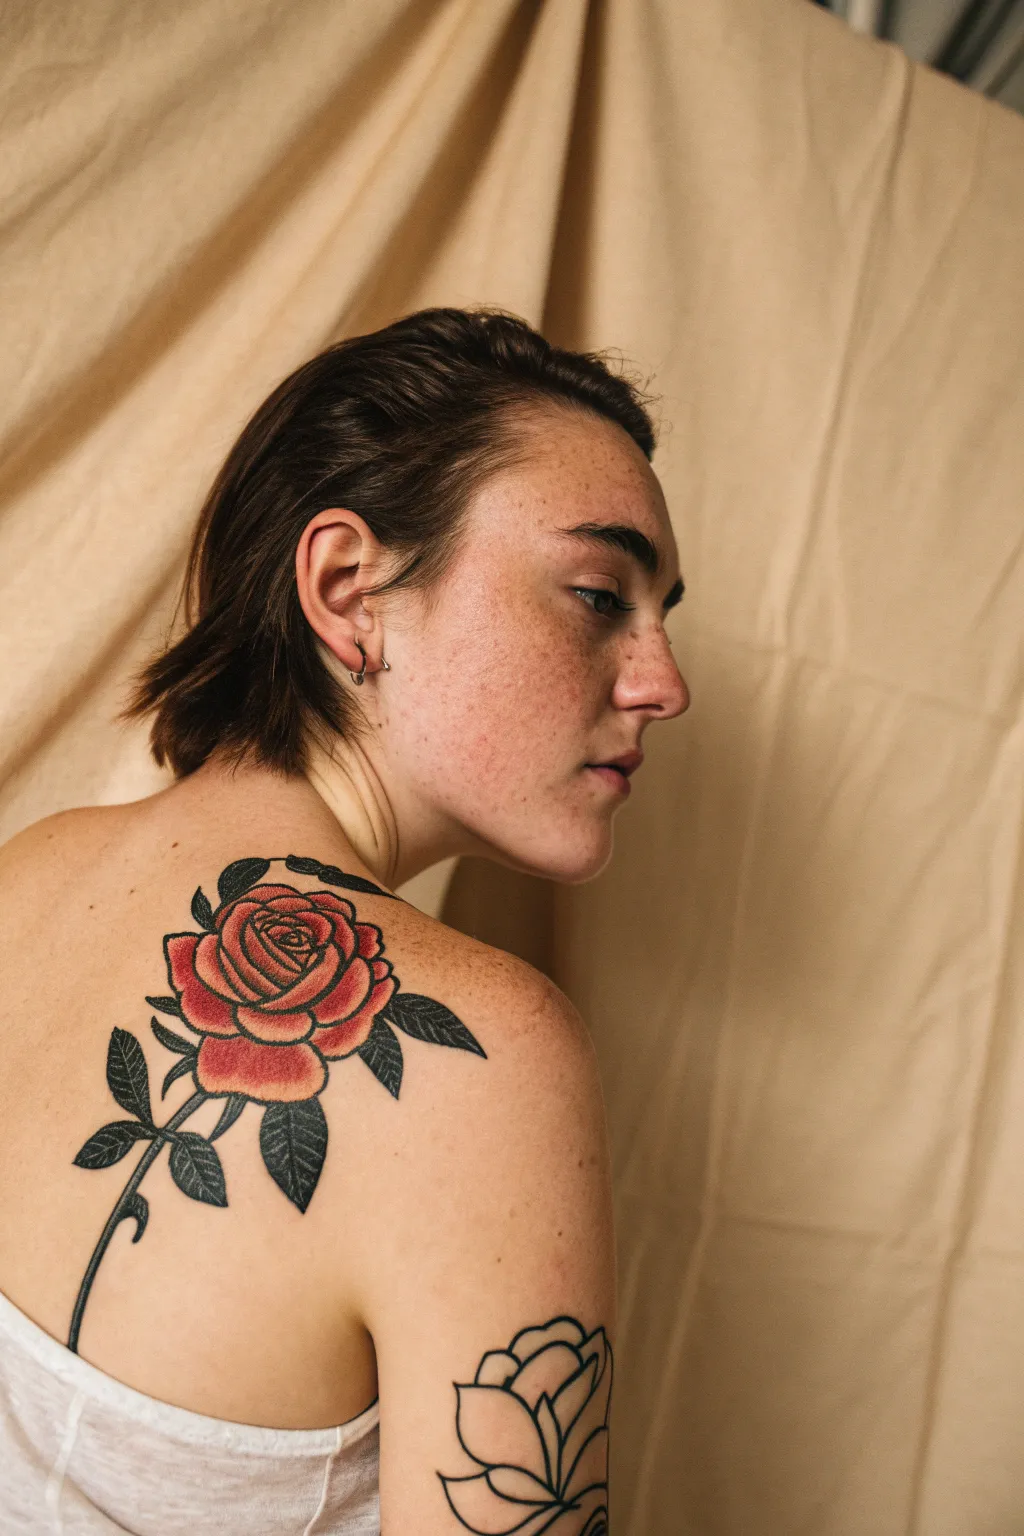
Shoulder-Cap Rose Cluster
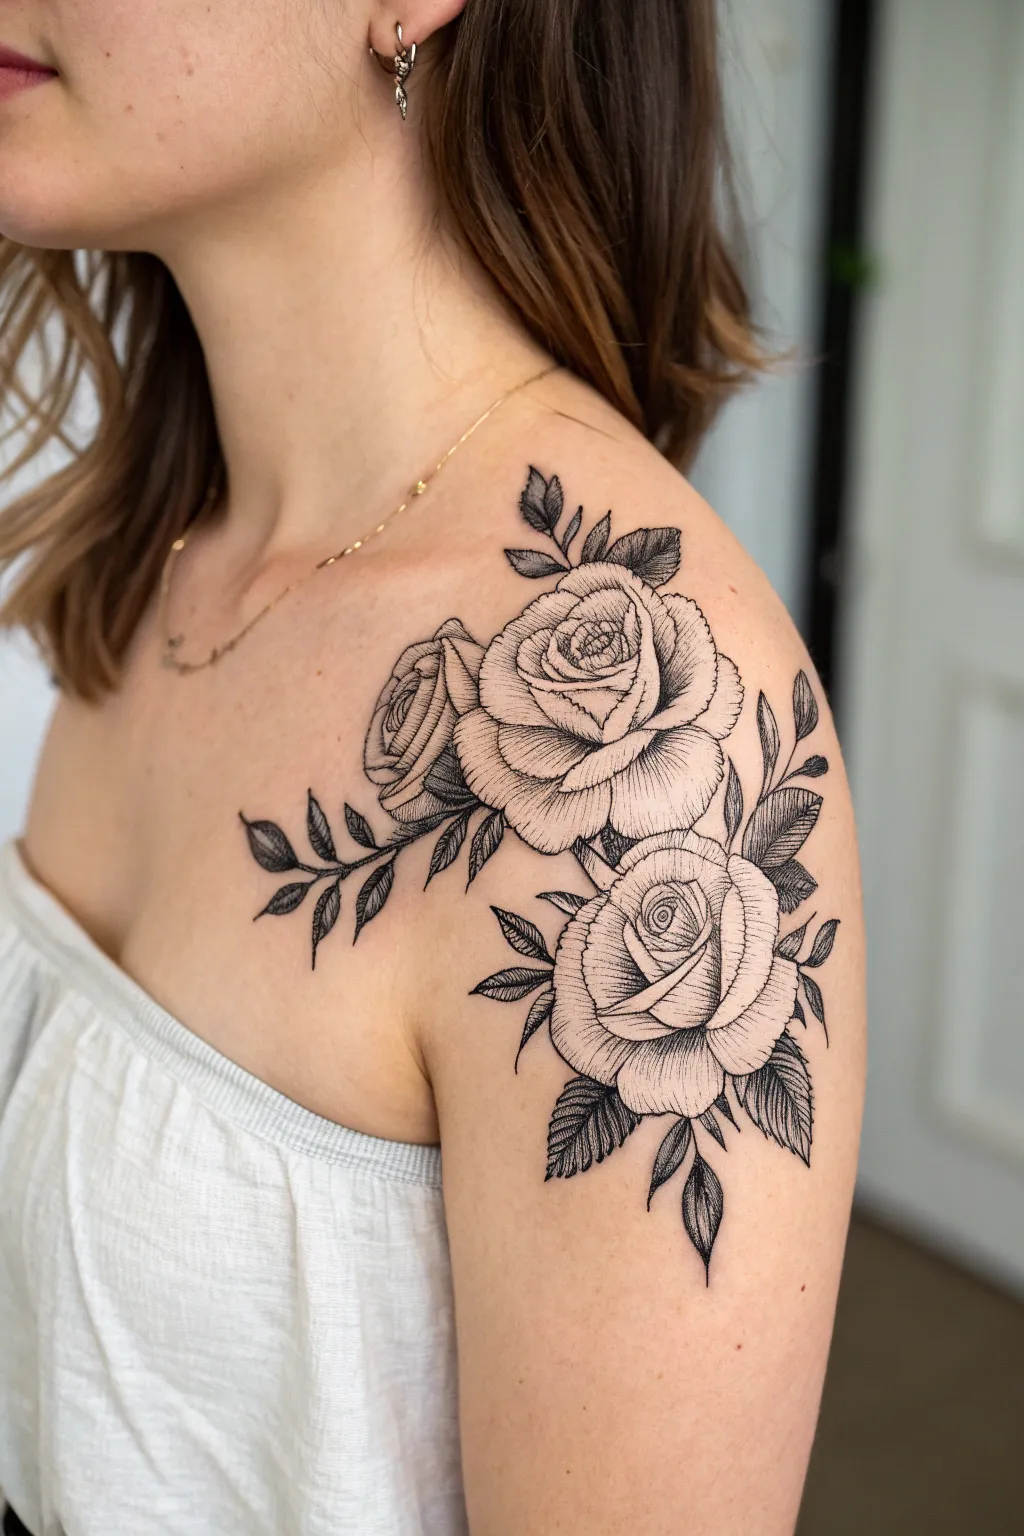
This elegant black-and-grey tattoo design features three highly detailed roses blooming across the shoulder cap. The style relies on crisp fine lines and delicate whip shading to create depth and texture without needing any color packing.
Step-by-Step Guide
Materials
- Rotary or coil tattoo machine
- 3RL (Round Liner) needle cartridge for fine lines
- 5RL or 7RL needle cartridge for bolder structural lines
- 3RS (Round Shader) or fine Magnum needle for shading
- Dynamic Black ink (or preferred black lining ink)
- Grey wash set (Light, Medium, Dark)
- Stencil paper and transfer gel
- Green soap and wash bottle
- Vaseline or tattoo glide
- Clip cord sleeves and barrier film
- Paper towels
- Disposable razors
- Alcohol wipes
Step 1: Preparation and Stencil Application
-
Prepare the shoulder area:
Clean the entire shoulder and collarbone area thoroughly with green soap. Shave the area carefully to remove any fine hairs that might interfere with the needle or stencil. -
Disinfect the skin:
Wipe the shaved area with an alcohol pad to remove oils and ensure a pristine surface. Let it air dry completely for the best stencil adhesion. -
Apply the stencil:
Apply a thin, even layer of stencil transfer gel. Place your printed stencil so the largest rose sits right on the curve of the shoulder ball, with the smaller bud flowing inward toward the collarbone. -
Check the flow:
Before peeling the paper off, ensure the leaves wrap naturally around the arm’s curve. Peel off the backing and let the stencil dry for at least 15 minutes so it doesn’t wipe away during tattooing.
Step 2: Linework and Foundations
-
Outline the central rose:
Load your machine with a 5RL needle and black ink. Start with the central, largest rose. Trace the outermost petal edges first to establish the main shape, keeping your hand speed consistent for clean lines. -
Detail the inner petals:
Switch to a 3RL for the tighter, inner petals of the center rose. These lines can be slightly thinner to create a sense of delicacy in the flower’s center. -
Outline secondary blooms:
Move to the bottom rose and the smaller bud near the collarbone. Use the 5RL for the main shapes. Be careful with the overlapping areas; don’t line through petals that are meant to be in the foreground. -
Add the foliage:
Outline the leaves extending outward. For the leaves, use a slightly jagged or serrated motion to mimic the natural edge of a rose leaf, rather than a perfectly smooth line. -
Define the leaf veins:
Using the 3RL, draw the central vein in each leaf. Add the smaller branching veins with a very light touch, or even lift the needle slightly at the end of the stroke for a tapered effect.
Troubleshooting Stencil Loss
If your stencil wipes away mid-tattoo, stop immediately. Do not guess the lines. Use a surgical marker to redraw lost key guides before continuing the shading.
Step 3: Shading and Texture
-
Start whip shading the petals:
Switch to a 3RL or a loose 3RS. Dip into your dark grey wash or solid black if you have a light hand. Start at the base of each petal (where it meets the center) and whip the needle outward quickly. -
Build the gradient:
The whip shading should result in a stippled, dot-like gradient that fades from dark to skin tone. I find it helpful to start with the deepest shadows under the petal overlaps to separate the layers visually. -
Texture the petal edges:
Add very short, fine hatch marks or stippling near the curled edges of the petals. This mimics the velvety texture of a rose and adds dimension without looking like solid shading. -
Shade the leaves:
Treat the leaves with the same whip-shading technique. darker at the central vein and fading out toward the edges. Leave the very tips of the serrated edges open (skin breaks) for highlight. -
Add contrast to the center:
Go back into the very center of the roses with solid black. Deepen the tightest crevices to make the flower look like it has depth and isn’t flat on the skin. -
Refine the bud:
The smaller bud on the left needs careful shading to look round. Focus the shadow on the bottom curve and where the sepals (the green parts) hug the petals. -
Final leaf details:
If any leaves look too flat, add a second layer of whip shading to the half of the leaf that would naturally be in shadow, creating a folded appearance.
Level Up: Dotwork Drifts
Instead of standard grey wash, execute all shading using pure dotwork (stippling). This takes longer but gives a modernized, airy texture perfect for botanical pieces.
Step 4: Cleaning and Aftercare
-
Clear away excess ink:
Using your wash bottle and a paper towel, gently clean the entire tattoo. Do not rub hard; just dab and rinse to reveal the final contrast. -
White highlights (Optional):
If you want extra pop, you can use a clean needle and white ink to add tiny highlights on the wettest looking parts of the petal curls, though this design looks great without it. -
Sanitize and wrap:
Apply a thin layer of aftercare ointment or soothing glide. Cover the fresh tattoo with a protective film (like Saniderm) or plastic wrap and medical tape.
Once healed, the fine lines will settle into the skin for a soft, permanent bouquet on the shoulder.


Thigh Rose Statement Piece
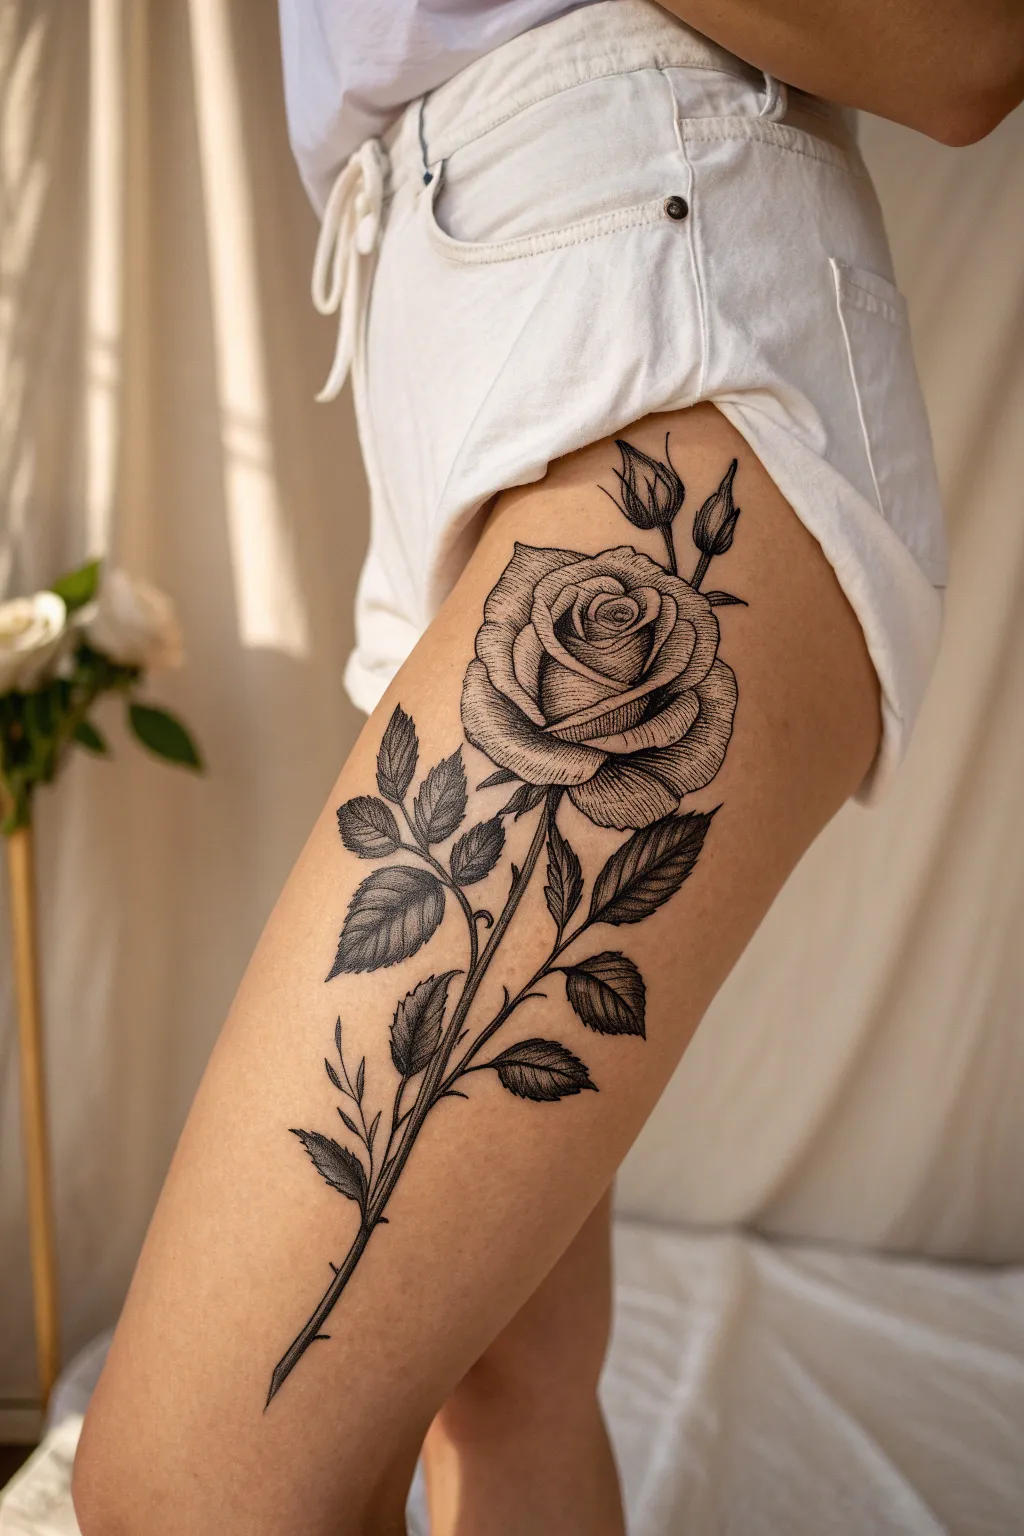
This striking thigh piece combines bold outlines with delicate, illustrative shading to create a timeless floral statement. The design features a fully bloomed rose head with budding companions, resting on a sturdy stem adorned with detailed leaves.
Step-by-Step
Materials
- Tattoo machine (pen style or rotary preferred)
- 3RL (Round Liner) needle cartridge for fine details
- 7RL or 9RL needle cartridge for bold outlines
- Magnum shader (7M or 9M) or 3RL for whip shading
- Dynamic Black ink (or preferred high-quality black lining ink)
- Stencil paper and transfer gel
- Green soap and wash bottle
- Vaseline or tattoo glide
- Paper towels
- Disposable gloves and sterile setup
Step 1: Preparation and Stencil Application
-
Prepare the design:
Begin by drawing the rose design to scale. Ensure specific attention is paid to the angle of the stem so it flows naturally down the thigh muscle. The main bloom should sit high on the thigh, with the stem trailing downward. -
Create the stencil:
Trace your design onto hectograph paper. Be meticulous with the leaf veins and the swirl of the petals, as these guides are crucial for the shading phase. -
Prep the skin:
Clean the thigh area thoroughly with green soap and shave the area if necessary. Apply a thin, even layer of stencil transfer gel. -
Place the stencil:
Have the client stand naturally to ensure the placement doesn’t warp when they move. Apply the stencil firmly, hold for a few seconds, and peel back. Let it dry completely for 10-15 minutes.
Blowout Patrol
Thigh skin can be sensitive. If your lines look blurry, decrease needle depth immediately. Stretch the skin tightly with your non-working hand to ensure crisp, clean ink insertion.
Step 2: Linework Foundation
-
Outline the main bloom:
Load your 9RL with solid black ink. Start with the central petals of the main rose, using steady, confident pulls to create crisp outer lines. -
Line the leaves and stem:
Continue down the stem and outline the leaves. Use slightly varied line weight—thicker on the undersides of leaves for weight, thinner on the tips. -
Detail the buds:
Outline the two upper rosebuds and their small stems. Keep these lines sharp to distinguish them from the main bloom. -
Add secondary lines:
Switch to a 7RL or stay with the 9RL but use a lighter hand to add the major fold lines inside the petals. Do not add the fine texture lines yet.
Step 3: Shading and Texture
-
Establish dark values:
Switch to your 3RL or a fine Magnum. Identify the deepest shadow areas, particularly where the petals overlap and at the base of the leaves near the stem. -
Whip shade the petals:
Using a whip-shading technique (moving the needle fast out of the skin), create gradients on the petals. Start from the base of each petal and flick outward to create a smooth transition from black to skin tone. -
Texture the petal edges:
I like to use the 3RL to add very fine hatching or stippling near the curled edges of the petals. This gives the rose that illustrative, engraved look. -
Detail the leaves:
For the leaves, shade heavily along the central vein and the base. Use directional strokes that follow the shape of the leaf to suggest surface texture. -
Shade the stem:
Add cylindrical shading to the stem. Keep one side darker (the shadow side) and leave a sliver of negative space on the opposite side to suggest a highlight. -
Refine the buds:
Add dark contrast to the sepals (the green parts) enclosing the buds, making them pop against the lighter petals peeking through. -
Final leaf veins:
Go back in with your fine liner (3RL) and add the delicate vein lines inside the leaves, cutting through the shading you just applied for dimension. -
Review contrast:
Wipe the area clean and let the skin calm for a moment. Look for areas that need more black to increase the contrast and longevity of the piece. -
Create separation:
Ensure there is a clear distinction between the foreground leaves and the background elements by darkening the shadows behind the top leaves. -
Clean and wrap:
Give the tattoo a final cleanse with green soap and distilled water. Apply a thin layer of aftercare glide and wrap the tattoo with a protective film.
White Highlights
For extra dimension, use a white ink cartridge at the very end. Add tiny highlights to the dew drops or the crispest edges of the petals to make the black ink appear even deeper.
With proper care, this elegant floral piece will settle into the skin beautifully and remain sharp for years
Rose Bouquet for a Half-Sleeve
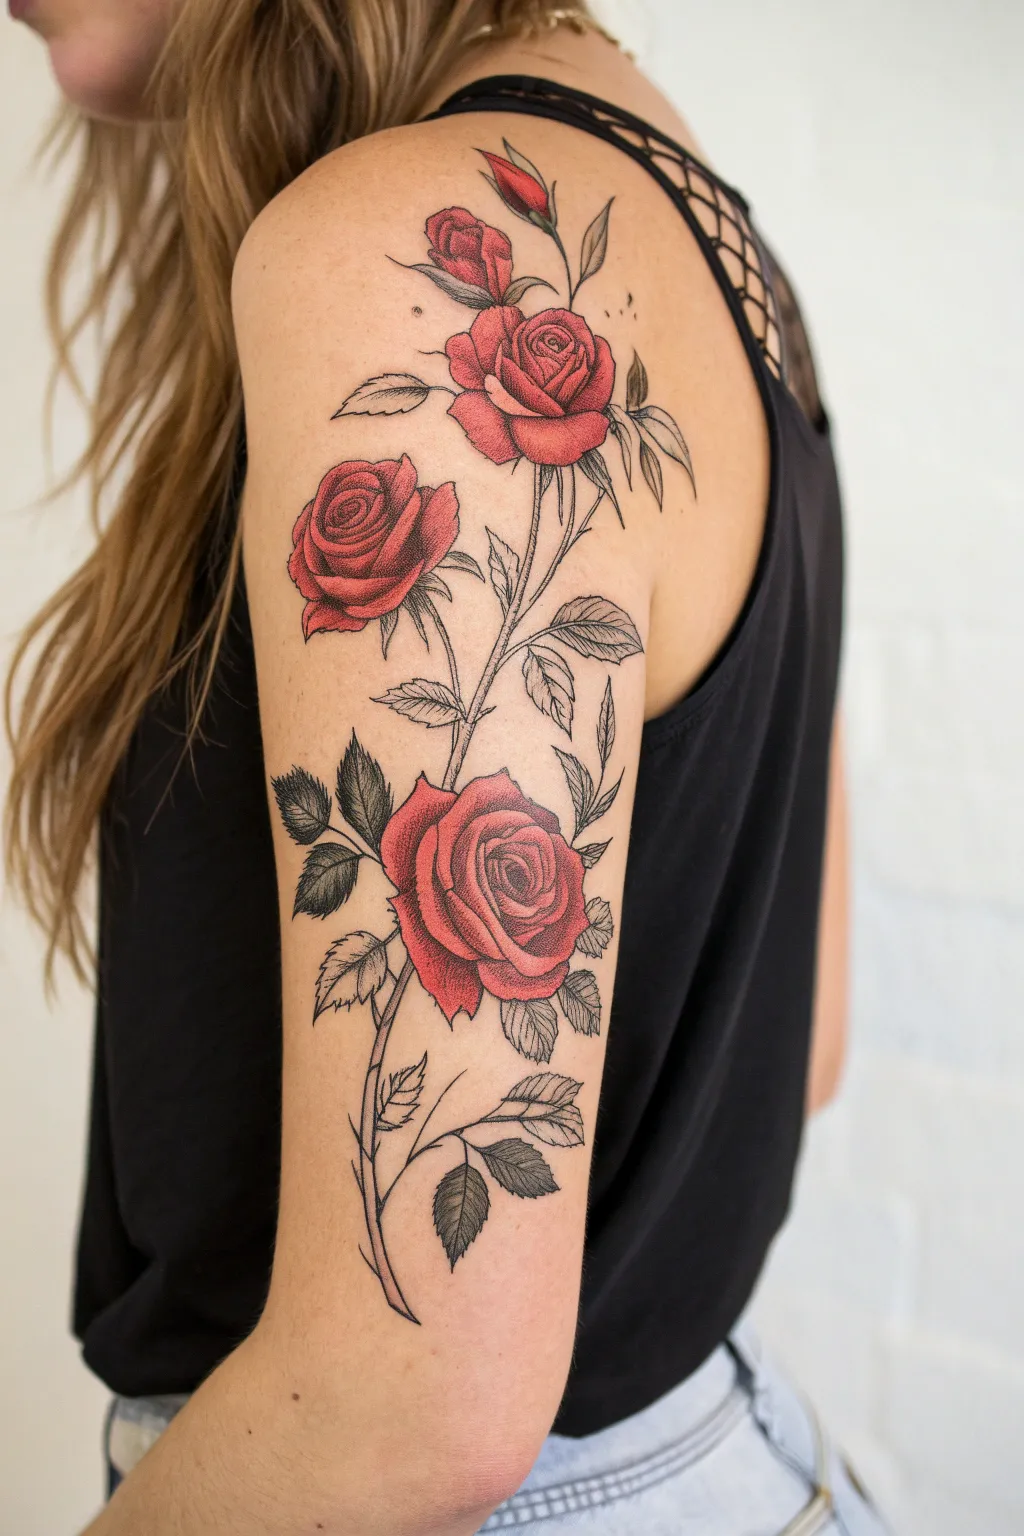
This striking half-sleeve design features three vibrant red roses and a budding bloom, connected by a delicately shaded stem. The style blends bold, saturated color packing in the petals with fine-line illustrative work for the leaves and stems, creating a timeless botanical look.
How-To Guide
Materials
- Rotary or coil tattoo machine
- 3RL (Round Liner) needle cartridge for fine details
- 7RL needle cartridge for bolder outlines
- 7M (Magnum) or 9M needle cartridge for shading and color packing
- Black tattoo ink (lining and shading)
- Dark red tattoo ink
- Bright crimson tattoo ink
- Green soap and wash bottle
- Stencil paper and transfer gel
- Vaseline or tattoo glide
- Clip cord sleeves and machine bags
- Comfortable armrest
Step 1: Preparation and Stencil
-
Clean the skin:
Begin by thoroughly cleaning the client’s upper arm with green soap and water. Shave the area carefully to ensure a smooth canvas, then clean it once more with alcohol to remove oils. -
Design placement:
Apply the transfer gel evenly. Place your stencil so that the topmost bud sits near the shoulder cap and the lowest leaves extend toward the elbow ditch. The main stem should flow naturally with the triceps muscle. -
Let it set:
Remove the paper and allow the stencil to dry completely for at least 10–15 minutes. This prevents the purple lines from wiping away during the initial outline work.
Stipple Success
Use a low voltage and fast hand speed when stippling the petals. This creates distinct, individual dots rather than accidental lines.
Step 2: Line Work
-
Outline the roses:
Load your 7RL with black ink. Start tracing the outer petals of the three main roses. Keep your hand steady but light; you want crisp, clean lines that aren’t too thick, maintaining that delicate illustrative feel. -
Define the leaves:
Switch to a 3RL for the leaves and internal details. Outline the serrated edges of the leaves with quick, sharp strokes to mimic their natural texture. -
Draw the stems:
Using the same 3RL, trace the long, winding main stem and the smaller offshoots. Add the thorns carefully, ensuring they look sharp and distinct. -
Add petal details:
Go back into the rose heads with the 3RL to add the very fine inner fold lines. These crucial lines will guide your shading later and give the flowers depth.
Red Ink Trouble?
If the red looks patchy, slow your hand speed down. Red pigment often requires slower, more deliberate saturation to really stick.
Step 3: Black and Grey Shading
-
Whip shade the leaves:
Using a 3RL or tight liner, perform whip shading techniques inside the leaves. Start from the center vein and flick outward towards the edges. This creates a textured, semi-realistic look typical of illustrative styles. -
Darken the stem:
Add subtle stipple or hatch shading along one side of the main stem to give it cylindrical volume. Don’t overdo it; keep the stem largely open to contrast with the dark leaves. -
Deepen the shadows:
Identify where leaves overlap or sit behind the roses. Add solid black or dark grey wash in these crevices to make the red roses pop forward visually.
Step 4: Color Packing
-
Pack the dark red:
Switch to your Magnum needle (7M or 9M). Load the darker red ink first. Pack this color into the deepest folds of the rose petals and the areas where the petals overlap. I prefer to work from the bottom rose upward to avoid smearing the stencil. -
Blend to bright crimson:
Clean your needle or switch to a dedicated color pot. Load the bright crimson ink. Blend this into the dark red areas, pulling the color out toward the edges of the petals. -
Leave skin breaks:
Crucially, do not color the very tips of the petals completely. Leave small gaps or ‘skin breaks’ at the curled edges. This negative space acts as a natural highlight and adds dimension without using white ink. -
Color the bud:
For the topmost bud, use mostly the darker red at the base and a touch of the bright red at the tip, keeping it tighter and more saturated than the open blooms. -
Final stippling:
Returning to a liner with black ink (or a very dark grey wash), add tiny stipple dots over the red ink in the deepest shadow pockets of the roses. This ‘pepper shading’ adds a gritty, textured finish that defines the illustrative style.
Step 5: Final Touches
-
Review and refine:
Wipe the tattoo down with green soap to remove excess ink and blood. Check for any holidays (missed spots) in the red packing and touch them up immediately. -
Clean and wrap:
Apply a thin layer of soothing ointment or glide. Cover the finished piece with a protective film or bandage to begin the healing process.
With proper aftercare, this floral piece will settle into a beautiful, lasting work of art on the skin


Have a question or want to share your own experience? I'd love to hear from you in the comments below!