A plain backpack is basically a moving canvas, and painting it is one of my favorite ways to turn everyday gear into wearable art. Here are my go-to backpack painting ideas—starting with the classics and ending with a few studio-style surprises.
Simple Wildflower Sprays
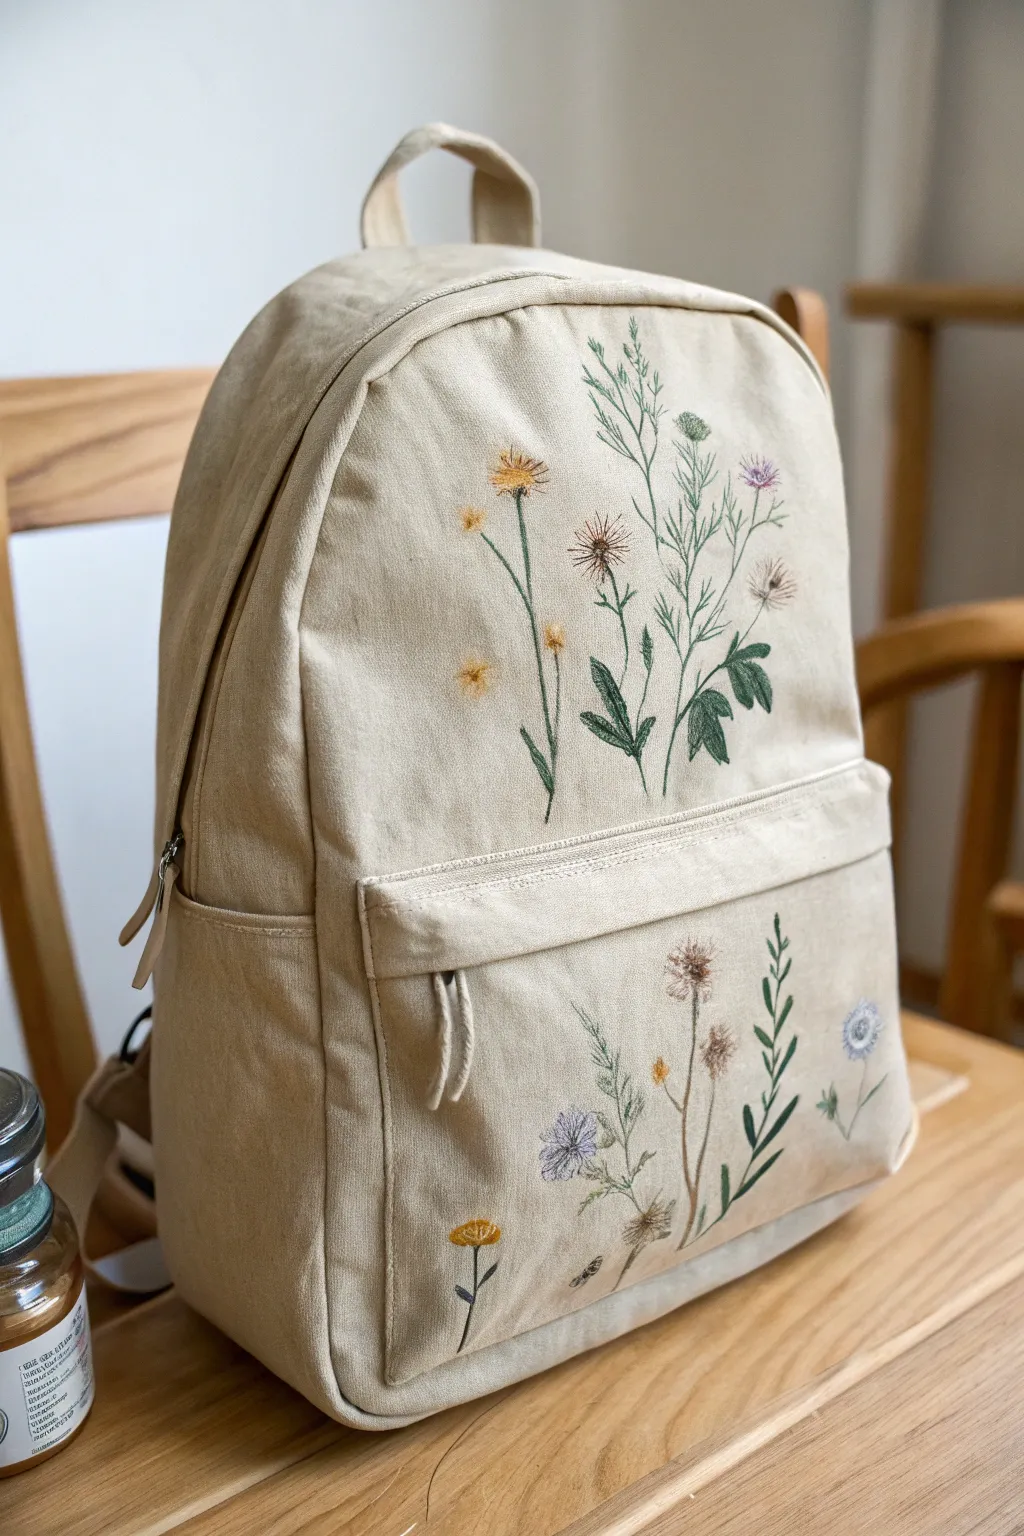
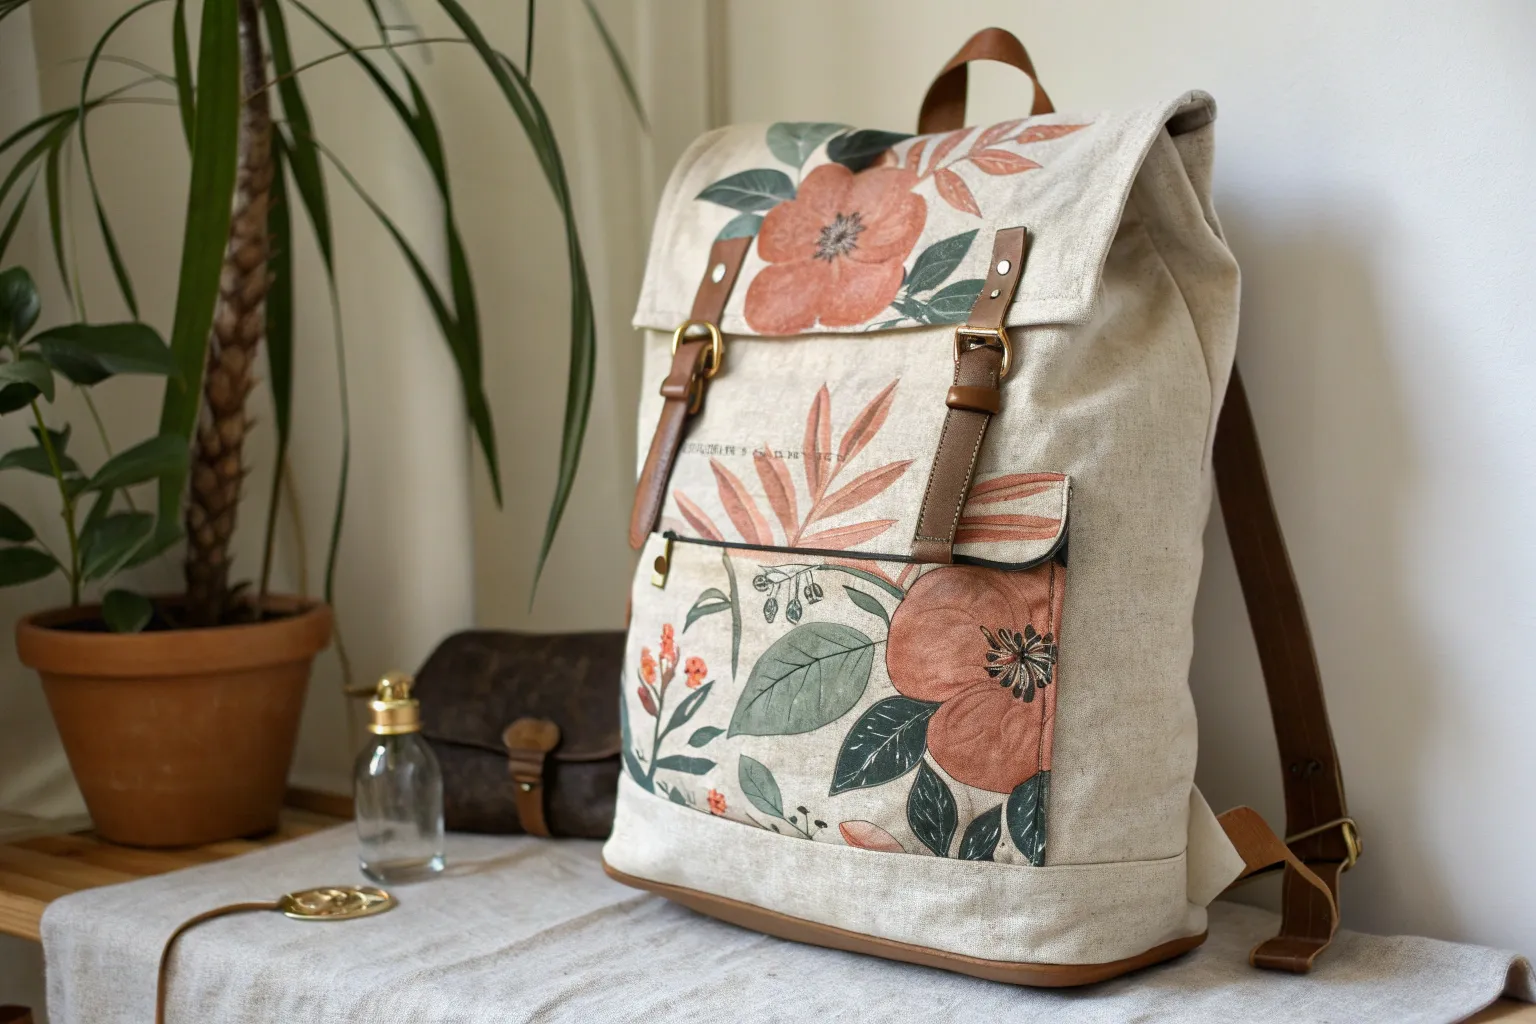
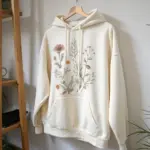
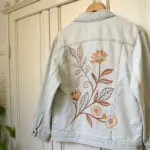
Transform a plain canvas backpack into a roving garden with this subtle and airy design. By using fine liners and fabric paints to mimic the look of vintage botanical illustrations, you can achieve an elegant, organic aesthetic that is perfect for nature lovers.
Step-by-Step Tutorial
Materials
- Light beige or cream canvas backpack
- Fabric markers (fine tip: greens, browns, muted yellows, purples)
- Fabric paint (white, sage green, mustard yellow, lavender)
- Fine detail paintbrushes (sizes 0 and 00)
- Disappearing ink fabric pen or pencil
- Cardboard insert
- Iron (for heat setting)
Step 1: Preparation & Sketching
-
Prepare the surface:
Begin by cleaning any dust off the backpack. Unzip the main compartment and the front pocket, then slide a piece of stiff cardboard inside each section. This provides a stable surface for drawing and prevents ink from bleeding through to the lining. -
Plan the composition:
Visualize your layout. The image uses two main clusters: a taller, vertical arrangement on the upper main panel and a horizontal, spreading arrangement across the lower pocket. Keep the stems long and slender to create negative space. -
Draft the stems:
Using your disappearing ink pen, lightly sketch the main skeleton of the plants. Draw tall, sweeping lines for the stems on the top panel, varying their heights. On the pocket, draw shorter stems that fan out slightly.
Step 2: Painting the Foliage
-
Mix your greens:
On a palette, mix a sage green fabric paint. I like to add a tiny touch of brown to my green to dull it down, making it look more like a dried wildflower than a fresh spring shoot. -
Paint the main stems:
Using a size 0 brush, carefully trace over your sketched stem lines. Keep the pressure light to maintain a very thin, delicate line. If the paint drags, thin it slightly with a drop of water. -
Add leafy details:
Switch to a fine-tip green fabric marker for precision. Draw small fern-like fronds and thin grasses branching off the main stems. Use quick, flicking motions to taper the ends of the leaves. -
Paint broad leaves:
For the darker, broader leaves (like the ones on the right side of the top panel), use your mixed sage green paint. Fill in the leaf shapes completely, ensuring the edges are crisp. -
Add veining:
Once the broad leaves are touch-dry, use a darker green fabric marker or a very fine brush with dark green paint to add a central vein line down the middle of each leaf.
Natural Texture
Use a dry-brush technique for the larger leaves. Wipe most paint off your brush before applying to create a scratchy, textured look that mimics embroidery thread.
Step 3: Adding the Blooms
-
Create dandelion puffs:
For the spikey, dandelion-style flowers, use a fine-tip brown or dark yellow marker. Draw lines radiating outward from a center point, creating a starburst shape. -
Paint yellow accents:
Dip your smallest brush (size 00) into mustard yellow paint. Add tiny dots or small petals to the tops of the simpler stems. These don’t need to be perfect; irregular blobs often look more natural. -
Detail the purple flowers:
Using lavender paint, create small clusters of dots or short dashes to form the thistle-like flowers. Keep the color concentration denser at the bottom of the flower head and lighter at the top. -
Add the white wildflowers:
On the pocket section, paint delicate white cone shapes or small daisies. Because the canvas is light, you may need two coats of white paint to make them stand out against the beige background. -
Draw seed heads:
Use a fine-line brown marker to draw tiny, textured seed heads. Stipple dots closely together to create a fuzzy texture for plants that look clearer and drier.
Bee Friendly
Add a tiny painted bumblebee or butterfly hovering near one of the flowers. A touch of metallic gold paint on the bee’s wings adds a lovely subtle shimmer.
Step 4: Finishing Touches
-
Review and refine:
Step back and look at the whole piece. If an area looks too empty, add a small floating seed, a falling petal, or a tiny stem to balance the composition. -
Erase guidelines:
Once the paint is completely dry (wait at least an hour), use a damp cloth or heat (depending on your pen type) to remove any visible sketch lines. -
Heat set the design:
To make your artwork permanent and waterproof, cover the painted areas with a pressing cloth or piece of scrap cotton. Iron over the design on a medium setting (no steam) for about 3-5 minutes to seal the paint into the fibers.
Allow your beautiful botanical creation to cure for 24 hours before taking it out on your next adventure


Bold Geometric Tape Shapes
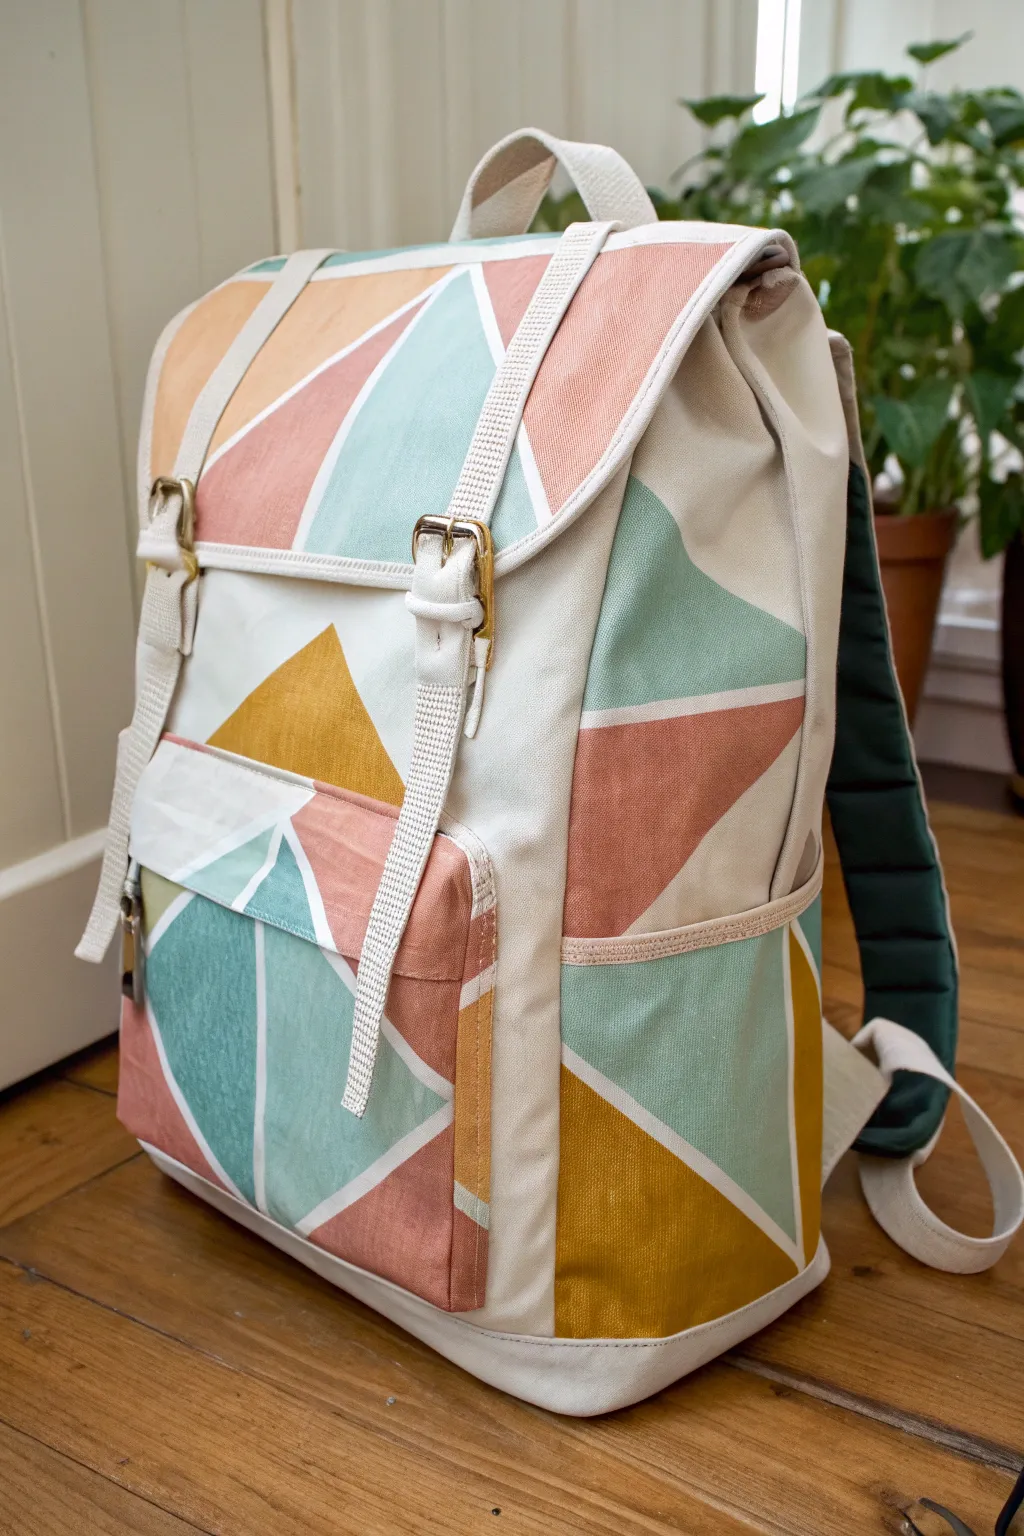
Give an ordinary canvas backpack a modern, Scandinavian-inspired makeover with crisp geometric lines and a soft, muted color palette. This masking tape technique makes it incredibly distinct, turning functional gear into a wearable piece of art.
Step-by-Step
Materials
- Light-colored canvas backpack (cream or beige works best)
- Painter’s tape or masking tape (various widths)
- Fabric medium
- Acrylic craft paints (salmon pink, mustard yellow, mint green, sage green)
- Flat paintbrushes (large and small)
- Pencil
- Ruler
- Paper plate or palette
- Hair dryer (optional for faster drying)
Step 1: Preparation and Design
-
Clean surface:
Ensure your backpack is clean and free of lint. If it’s new, give it a quick wipe down with a damp cloth and let it dry completely to remove any manufacturing residue. -
Stuff the bag:
Pack the main compartment and the front pocket with old towels or bubble wrap. This provides a firm surface to paint on and prevents paint from seeping through to the lining. -
Plan the geometry:
Using a ruler and a pencil, lightly sketch your primary triangle shapes. You don’t need a full grid, just mark the main vertices where your distinct color blocks will meet to ensure balanced spacing.
Step 2: Taping the Pattern
-
Apply main border tape:
Start by taping off the areas you want to remain raw canvas white. The key feature of this design is the white space between shapes, so lay down strips of painter’s tape to form the boundaries of your triangles. -
Seal edges:
Press down firmly on all tape edges with your fingernail or a credit card tool. This is crucial for achieving those crisp, professional lines without paint bleeding underneath. -
Protect hardware:
Wrap small pieces of tape around buckles, zippers, straps, or leather accents to protect them from accidental brushstrokes.
Bleeding Lines?
Before applying color, paint a thin layer of the background color (or clear matte medium) over the tape edges. This seals the gap so any seepage is invisible.
Step 3: Mixing and Painting
-
Prepare the paint:
Mix your acrylic paints with fabric medium according to the bottle instructions (usually a 2:1 or 1:1 ratio). The medium ensures the paint remains flexible and doesn’t crack when the fabric moves. -
Start with the lightest color:
Dip a flat brush into your mint green or lightest pastel shade. Apply a thin, even coat inside the designated taped triangles, brushing away from the tape edge to further prevent bleeding. -
Apply darker shades:
Move on to the salmon pink and mustard yellow sections. I like to keep a wet rag nearby to quickly wipe my brush between bold color changes. -
Layer up:
Canvas is absorbent, so the first coat might look patchy. Let the first layer dry to the touch (about 20 minutes) and apply a second coat for solid, opaque coverage. -
Detail the side pockets:
Don’t forget the side panels. Extend your geometric pattern around the curve of the side pockets to ensure the design looks cohesive from all angles. -
Paint the flap:
For the top flap, ensure your pattern flows logically from the back panel so the lines visually connect when the bag is closed.
Add Texture
Mix a small amount of metallic gold paint into the mustard yellow sections for a subtle shimmer that catches the sunlight.
Step 4: Finishing Touches
-
The reveal:
Wait until the paint is tacky but not fully cured—usually about an hour after the final coat. carefully peel back the tape at a 45-degree angle to reveal your crisp white lines. -
Touch ups:
If any paint bled through, dip a tiny detail brush in white acrylic paint (mixed with fabric medium) and carefully correct the lines. -
Dry completely:
Let the bag sit undisturbed for at least 24 hours to cure. -
Heat set:
Once dry, place a thin cloth over the painted areas and iron on a medium setting (no steam) for 3-5 minutes to permanently seal the paint into the fibers.
Your stylish new geometric backpack is now ready for your next adventure

Soft Ombre Sunset Blend
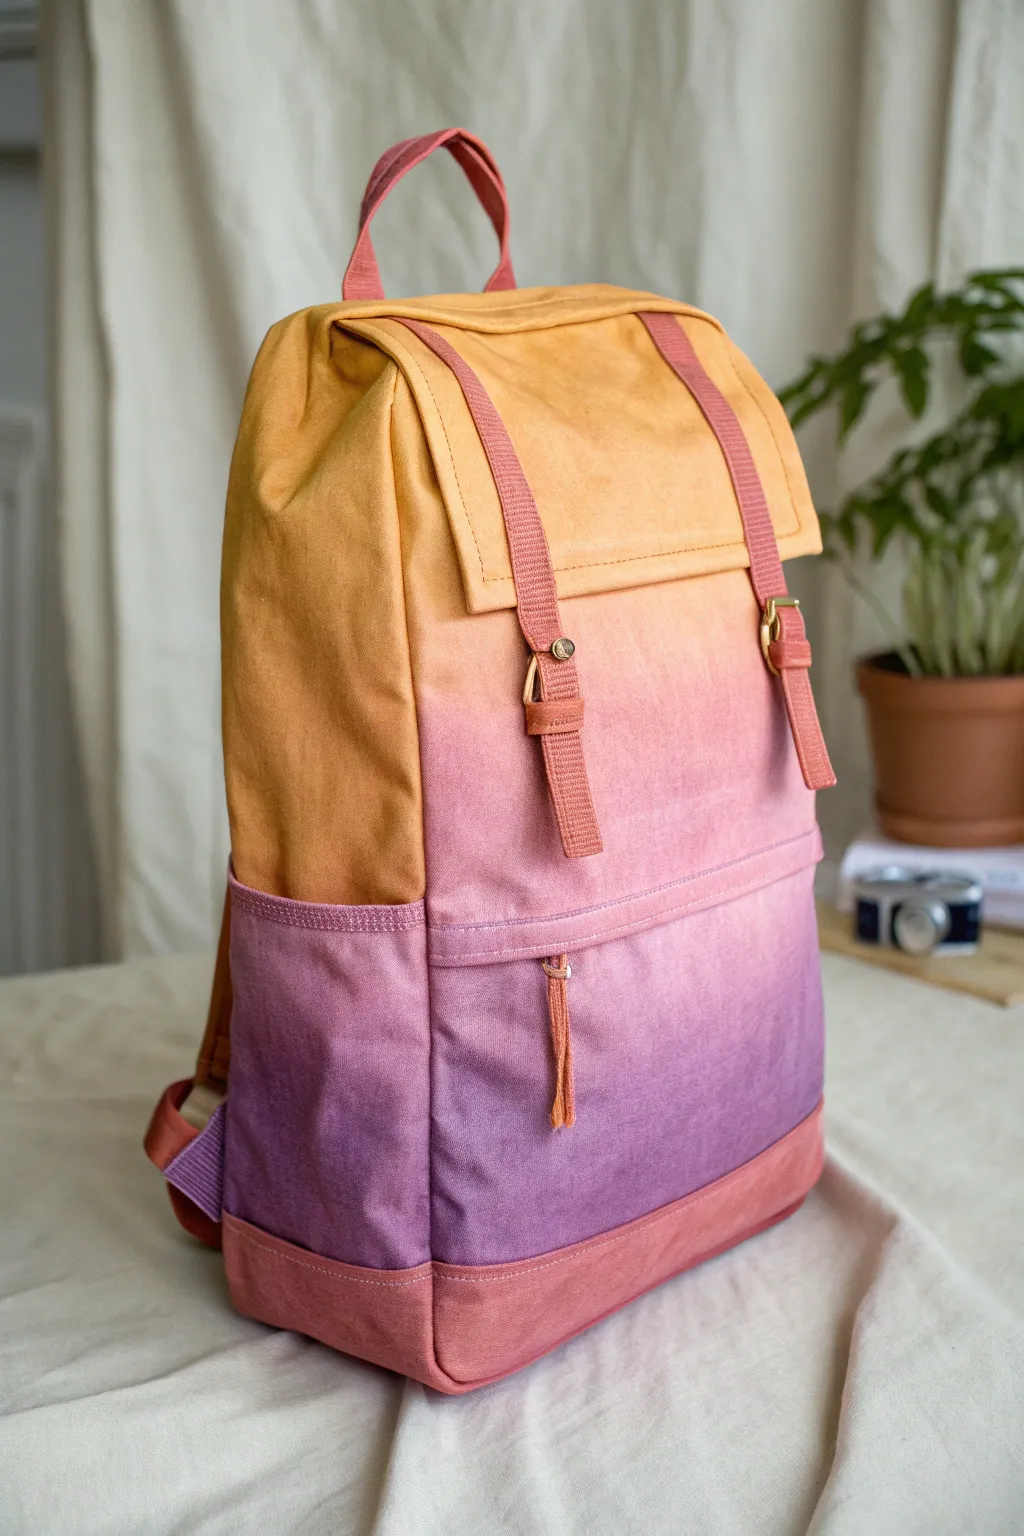
Transform a plain canvas backpack into a wearable sunset with this stunning ombre dye project. This technique creates seamless transitions between golden yellow, soft coral, and deep violet for a dreamy, high-end look.
Step-by-Step Tutorial
Materials
- White or natural cotton canvas backpack (pre-washed)
- Fabric dyes (Golden Yellow, Coral, Violet/Purple)
- Large plastic tubs or buckets (one for each color)
- Rubber gloves
- Foam brushes or wide paintbrushes
- Plastic drop cloth
- Water spray bottle
- Fabric medium (optional, for blending)
- Masking tape or painter’s tape
Step 1: Preparation
-
Clean surface:
Start by protecting your work area with a plastic drop cloth. This project involves liquid dye and can get messy, so ensure you have plenty of space. -
Prep the bag:
Remove any detachable straps or hardware if possible. If you can’t remove them, cover zipper pulls and metal buckles tightly with masking tape to protect them from staining. -
Dampen fabric:
Lightly mist the entire backpack with water using your spray bottle. The canvas should be damp but not dripping wet; this helps the dye spread and blend more naturally.
Wet-on-Wet Magic
Keep a spray bottle handy constantly. Keeping the transition zones wet is the only way to get a smooth, cloud-like gradient instead of hard stripes.
Step 2: Painting the Gradient
-
Mix colors:
In separate containers, dilute your fabric dyes with a small amount of water. You want a consistency that flows easily but maintains strong pigment intensity. -
Apply yellow:
Starting at the very top flap and upper section of the bag, apply the Golden Yellow dye using a wide foam brush. Saturate the fabric well. -
Fade down:
Bring the yellow down to just below the flap line, gradually using less dye on your brush as you move lower to prepare for the transition. -
Apply coral:
Begin applying the Coral dye in the middle section of the bag. Start painting a few inches below where the yellow ends solid, leaving a gap. -
Blend the transition:
Working quickly while both dyes are wet, brush the Coral upward into the fading Yellow section. Use a clean, slightly damp brush to blur the line where they meet. -
Enhance the middle:
Continue painting the Coral dye downwards, covering the central body of the backpack. Ensure the color is rich and even. -
Start the purple:
Apply the Violet dye to the bottom third of the bag, including side pockets if applicable. Be generous here as canvas tends to soak up dark colors voraciously. -
Create the second fade:
Blend the Violet upward into the Coral section. I like to use spritzes of water here to help the purple migrate slightly upward for a softer look.
Step 3: Details and Setting
-
Paint the base:
For the reinforced bottom panel (if your bag has one), apply a solid coat of Coral or a darker reddish tone to ground the design. -
Check straps:
Don’t forget the straps and handle. Paint the top handle yellow/coral and fade the shoulder straps to match the section of the bag they attach to. -
Detail work:
Use a smaller brush to nudge dye right up to seams and zippers without bleeding over. Precise edges make the bag look professional. -
Dry completely:
Allow the backpack to air dry for at least 24 hours. Keep it away from direct sunlight while drying to prevent uneven fading. -
Heat set:
Once dry, heat set the dye according to the manufacturer’s instructions. Usually, this involves tumbling it in a dryer on high heat or ironing it with a pressing cloth.
Add Texture
Before drying, sprinkle coarse salt over the wet transition areas. As it dries, the salt pulls pigment, creating a cool speckled, starry-sky effect.
Now you have a custom accessory that captures the beauty of twilight wherever you go


Ocean Wave Front Panel
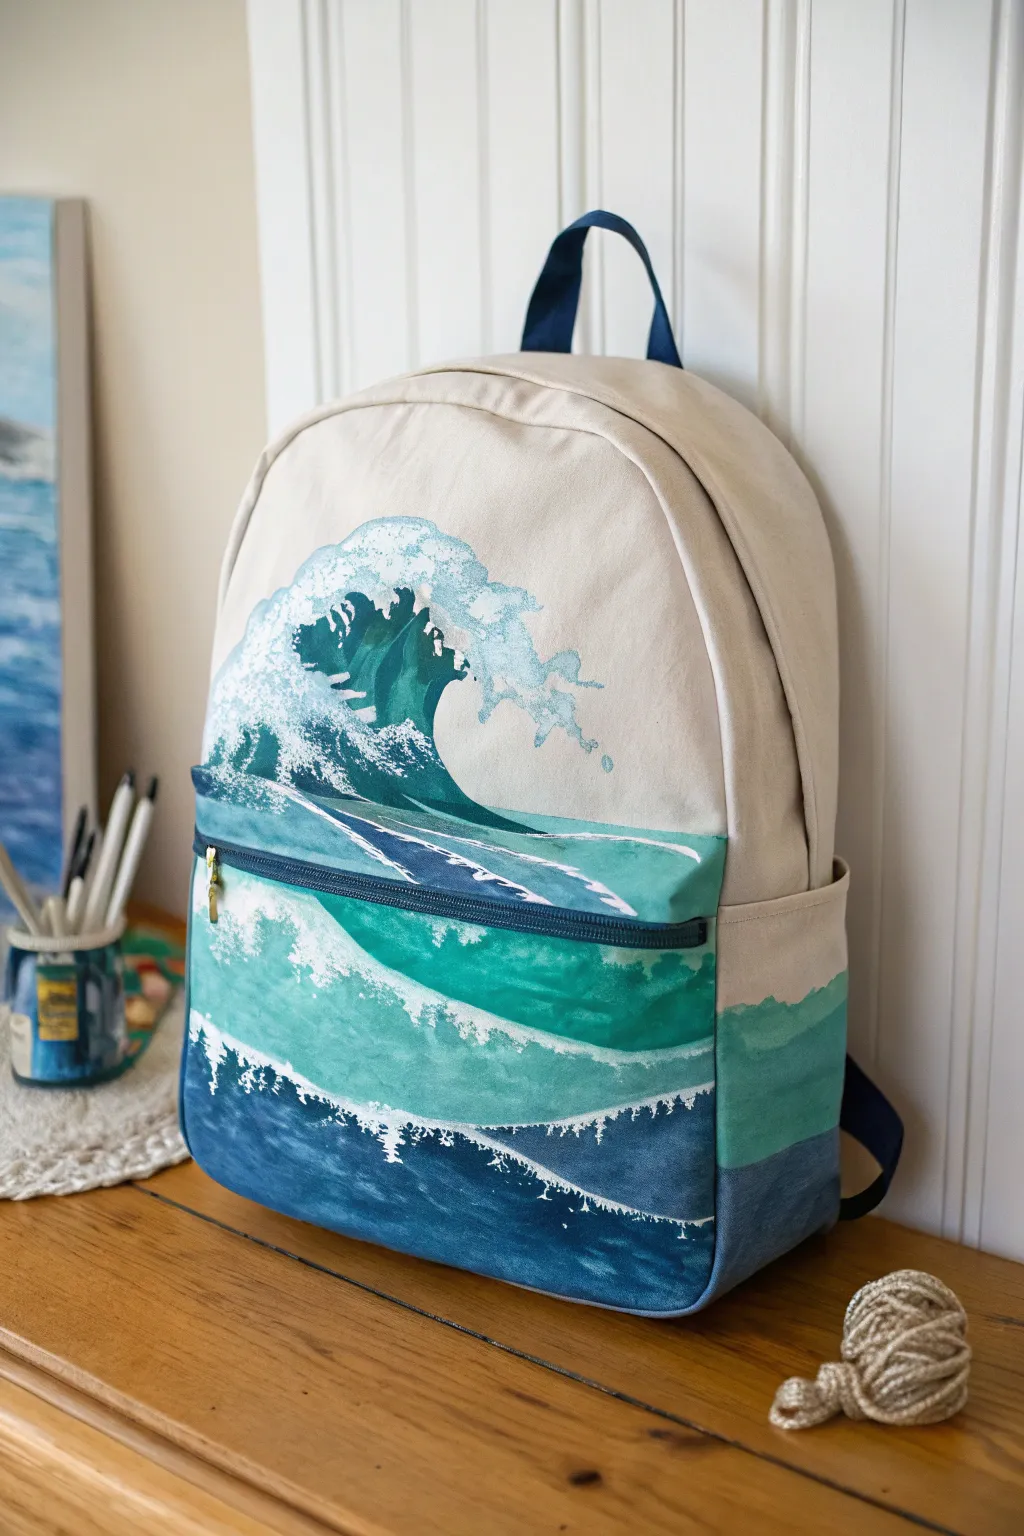
Transform a plain canvas backpack into a wearable seascape with this dynamic ocean wave design. The artwork features crashing teal and navy waves highlighted by crisp white foam, flowing seamlessly across the main panel and front pocket.
Step-by-Step Guide
Materials
- Light beige or cream canvas backpack
- Fabric medium
- Acrylic craft paints (Titanium White, Phthalo Blue, Teal/Turquoise, Navy Blue)
- Set of synthetic brushes (1-inch flat, medium filbert, fine liner)
- White chalk or fabric pencil
- Cardboard insert
- painter’s tape (optional)
- Palette for mixing
- Cup of water and paper towels
Step 1: Preparation & Sketching
-
Prepare the surface:
Before laying down any color, stuff the main compartment and the front pocket of the backpack with cardboard or stiff paper. This creates a solid painting surface and prevents paint from soaking through to the lining. -
Protect the hardware:
If you’re worried about getting paint on the zipper pulls or the strap hardware, wrap them in a small piece of painter’s tape. -
Map out the horizon:
Using your white chalk or fabric pencil, lightly sketch a horizon line just above the top of the front pocket. It doesn’t need to be perfectly straight; an organic line works better for water. -
Sketch the wave shapes:
Draw the main crashing wave on the upper panel. Let the crest hook over to the left. Then, sketch rolling wave lines across the front pocket and side panels to create continuity.
Pro Tip: Seamless Blending
Keep a spray bottle of water handy. A quick, light mist over your acrylics straight on the canvas keeps them wet longer, allowing for smoother, softer gradients between the deep blues and teals.
Step 2: Painting the Ocean Base
-
Mix your medium:
Mix your acrylic paints with fabric medium according to the bottle’s instructions (usually 1:1 or 2:1). This ensures the paint remains flexible and won’t crack on the backpack. -
Block in the darkest depths:
Start at the very bottom of the front pocket. Use the flat brush to apply the Navy Blue mixed with a touch of Phthalo Blue. Paint horizontally, fading the color slightly as you move upward toward the zipper. -
Create the mid-tone waves:
On the upper section of the pocket and the base of the main wave on the top panel, apply your Teal or Turquoise. Blend the bottom edge of this teal into the navy blue while the paint is still wet for a gradient effect. -
Establish the background water:
Fill in the area behind the main wave on the upper panel with a very light wash of teal mixed with plenty of white. This pushes the horizon into the distance. -
Paint the main wave body:
Return to the large wave on the top panel. Use a mix of Phthalo Blue and Teal to fill in the body of the wave, following the curve of your sketch to suggest movement. -
Wrap that pattern:
Don’t forget the side pockets. Continue your horizontal bands of navy and teal around the sides so the design looks finished from all angles.
Level Up: Textile Texture
Mix a small amount of puff paint additive or embroidery texture paste into your white foam layer. This will create a raised, 3D bubbly effect for the crashing wave crest.
Step 3: Adding Details & Foam
-
Start the seafoam texture:
Using a dry filbert brush and pure Titanium White (mixed with medium), dab along the top edges of your blue wave layers. Keep the brush relatively dry to create a broken, frothy texture. -
Define the crashing crest:
Focus on the big wave on the top panel. Use the white paint to create the large, hooked crest. Use a stippling motion (tapping the brush straight down) to mimic splashing water. -
Add spindrift details:
Switch to your fine liner brush. Pull tiny, thin lines of white extending off the back of the wave crest and into the air, looking like spray blowing in the wind. -
Highlight the water surface:
Paint thin, watery streaks of white and light teal across the dark blue section on the pocket. These lines should follow the curve of the water to give it volume. -
Refine the zipper area:
I find it helpful to carefully paint right up to the fabric tape of the zipper with a small angled brush to ensure no canvas shows through between the sections. -
Add final bright spots:
Go back over the whitest parts of the foam with a second layer of thick white paint to make them pop against the dark blue water. -
Heat set the design:
Allow the backpack to dry for at least 24 hours. Once fully dry, heat set the paint by blowing a hair dryer on high heat over the surface for a few minutes or ironing over a pressing cloth.
Now you have a durable, artistic accessory perfect for beach trips or daily commutes
BRUSH GUIDE
The Right Brush for Every Stroke
From clean lines to bold texture — master brush choice, stroke control, and essential techniques.
Explore the Full Guide
Classic Polka Dot Pop
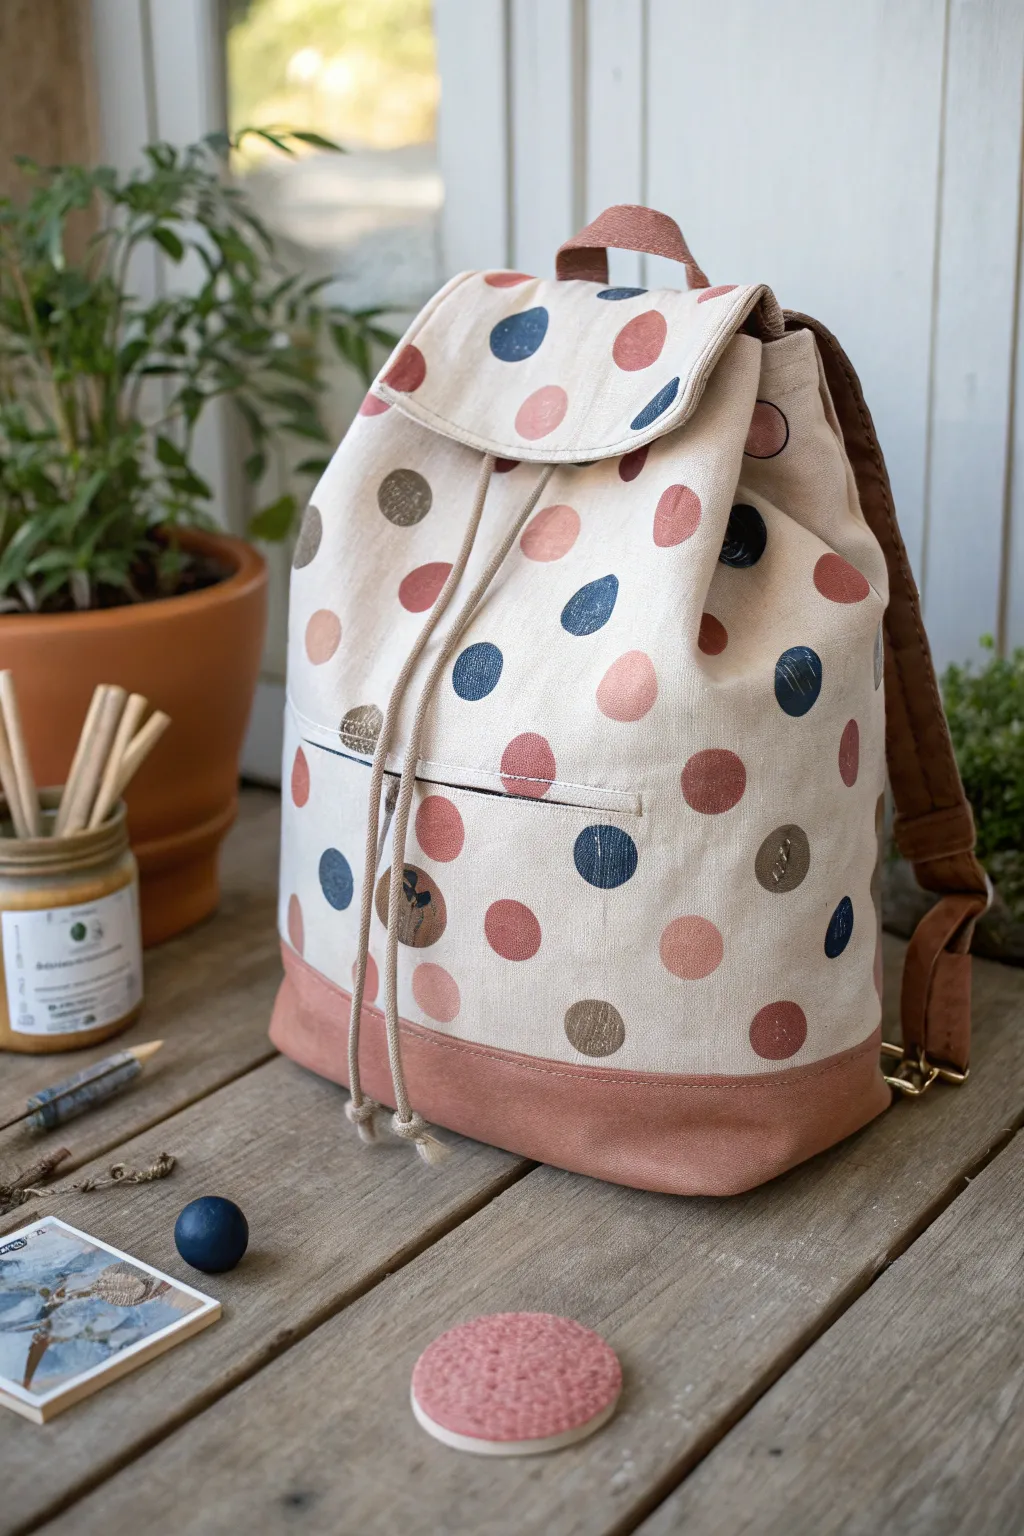
Transform a plain canvas backpack into a playful accessory with this classic polka dot design featuring earthy tones and soft shapes. The imperfect, hand-stamped look gives the bag a relaxed, artisanal vibe that pairs perfectly with the textured fabric.
Step-by-Step
Materials
- Canvas bucket backpack (cream or beige)
- Fabric paints (terra cotta, navy blue, dusty rose, gold/bronze metallic)
- Round foam pouncers (assorted sizes: 1 inch to 2 inches)
- Small flat paintbrush
- Paper plate or palette
- Cardboard insert
- Iron (for heat setting)
- Press cloth or parchment paper
Step 1: Preparation & Planning
-
Prep the surface:
Before starting, make sure your backpack is clean and free of lint. If it’s brand new, consider a quick wash (without fabric softener) and dry to remove sizing, which helps paint adhere better. -
Protect the inside:
Insert a piece of stiff cardboard inside the main compartment of the bag. This creates a stable surface for stamping and prevents paint from bleeding through to the back layer of canvas. -
Plan your palette:
Pour small puddles of your chosen fabric paint colors onto a paper plate. For this look, focus on warm, earthy tones like terra cotta and dusty rose, accented by deep navy and a shimmering bronze.
Uneven Is Okay
Don’t stress about perfect circles. Slightly distressed or faded edges on the dots add to the vintage, hand-printed aesthetic of this project.
Step 2: Stamping the Pattern
-
Start with the dominant color:
Load a medium-sized foam pouncer with the terra cotta paint. Dab off excess paint onto a clean part of the plate to ensure an even coat rather than a gloppy one. -
Create the first dots:
Press the foam pouncer firmly onto the canvas. I like to twist the handle slightly back and forth without lifting it to ensure the edges are crisp and filled in. -
Space them out:
Continue stamping terra cotta dots randomly across the front of the bag, leaving plenty of open space for the other colors. Keep the spacing irregular for a more organic feel. -
Add the secondary tone:
Switch to a clean pouncer (or wash and dry the first one thoroughly) and dip into the dusty rose paint. Fill in some of the gaps, allowing these lighter dots to sit near the darker ones without touching. -
Introduce contrast:
Using a slightly smaller pouncer or brush, add the navy blue dots. Use these sparingly; they act as strong anchor points for the eye amidst the warmer tones. -
Apply metallic accents:
For a bit of shine, stamp a few dots using the metallic gold or bronze paint. These catch the light beautifully and add a touch of texture to the matte finish of the other colors. -
Address the flap and pockets:
Don’t forget the top flap and front pocket area. Lay the flap flat against a scrap piece of cardboard to stamp it easily, ensuring the pattern flows logically from the main body.
Texture Play
Mix a fabric medium or a tiny bit of puff paint additive into your metallic gold color to give those specific dots a subtle 3D raised texture.
Step 3: Finishing Touches
-
Check for consistency:
Step back and look at the overall pattern. If some areas look too empty, add a small dot. If a dot looks too faint, carefully re-stamp over it or fill it in with a small brush. -
Touch up edges:
Sometimes stamp edges can be a bit rugged. Use a small flat paintbrush with the corresponding color to smooth out the circumference of any dots that didn’t stamp perfectly round. -
Clean up stray marks:
If you accidentally got a smudge where you didn’t want it, use a damp Q-tip immediately to lift the paint before it sets. -
Let it dry completely:
Allow the backpack to sit undisturbed for at least 24 hours. Fabric paint needs to cure fully before it can withstand wear or heat setting. -
Heat set the design:
once dry, cover the painted areas with a press cloth or parchment paper. run a hot, dry iron over the design for several minutes to lock the paint into the fibers.
Now you have a custom, artistic backpack ready for your next adventure
Hand-Lettered Mantra
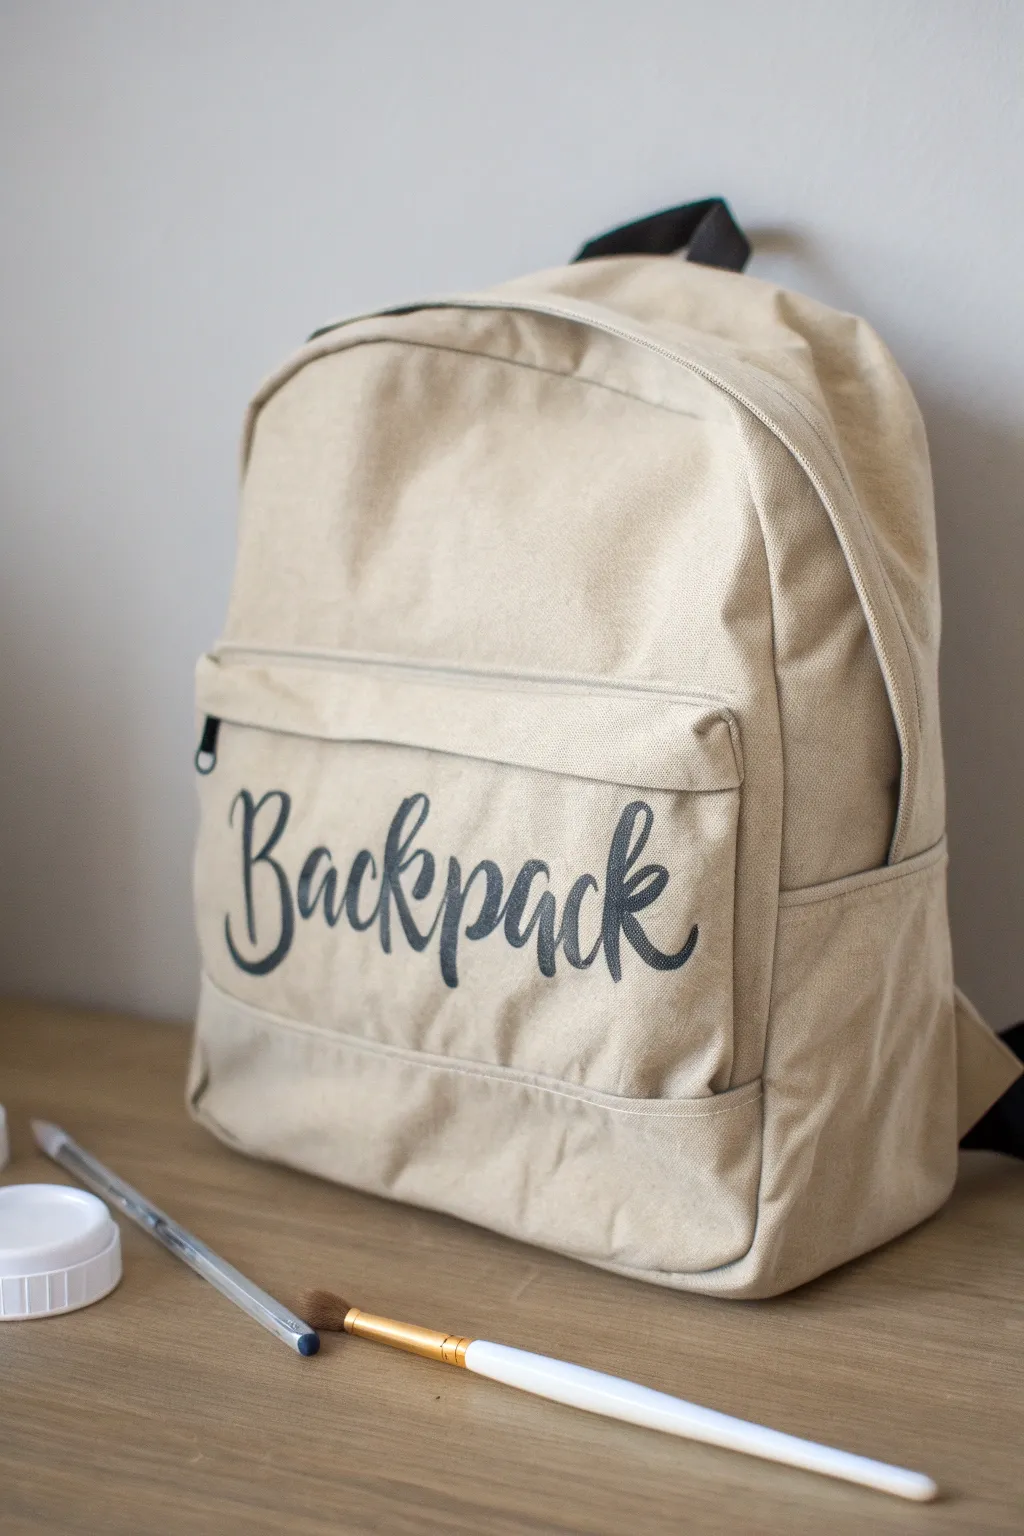
Transform a plain canvas backpack into a personalized statement piece with simple, elegant hand lettering. This project focuses on clean lines and classic script to give your bag a custom, boutique look using just a few basic tools.
Step-by-Step Guide
Materials
- Light-colored canvas backpack (beige or natural)
- Black fabric paint (or charcoal grey)
- Round detail paintbrush (size 2 or 4)
- Pencil specifically for sketching (HB or B)
- Word processing software (optional)
- Ruler
- Cardboard insert
- Painters tape (optional)
Step 1: Preparation & Layout
-
Prepare the bag structure:
Begin by emptying the backpack completely. Open the front zipper pocket and slide a piece of stiff cardboard inside. This provides a hard surface for drawing and prevents paint from bleeding through to the inner lining. -
Choose your font style:
Decide on the script style you want for your text. For the look in the photo, aim for a playful, modern calligraphy style with loops and varying line thickness. -
Mock up the text:
If you are unsure about freehanding, type your chosen word (like ‘Backpack’) into a word processor using a font like ‘Great Vibes’ or ‘Allura.’ Adjust the size to fit the front pocket dimensions. -
Center the design:
Use a ruler to find the center point of the front pocket. You can make a tiny, faint mark with your pencil to help guide you. -
Sketch the letters:
Lightly sketch the word onto the canvas using your pencil. Don’t press too hard; you just want a faint guide. Start with the middle letters near your center mark and work outward to ensure the word is balanced. -
Refine the lines:
Go back over your sketch to thicken the downstrokes (the parts of the letters where your pen would naturally move downward). This faux-calligraphy technique creates that beautiful brush-script look before you even pick up paint.
Uneven texture?
If the canvas is too rough and paint skips, mix a tiny drop of water into your fabric paint. This helps it flow into the fabric weave better for sharper lines.
Step 2: Painting & Detailing
-
Load the brush:
Dip your round paintbrush into the black fabric paint. You want the brush fully loaded but not dripping. I find it helps to dab the excess slightly on a paper towel or palette. -
Outline the first letter:
Starting with the first capital letter, carefully trace the outer edges of your pencil sketch. Use the very tip of the brush for thin lines. -
Fill the downstrokes:
Fill in the thickened downstroke areas of the letter. Apply slightly more pressure to the brush to fan the bristles out just a bit, which helps cover the canvas texture. -
Paint the connectors:
Move to the next letter, ensuring the connecting tail flows smoothly. Keep your hand steady and lift the brush pressure as the line curves upward. -
Continue painting:
Work your way through the rest of the word, letter by letter. To avoid smudging, be mindful of where you rest your palm—you might want to place a piece of scrap paper under your hand. -
Check consistency:
Once the main word is painted, step back and look at the line weights. Ensure all the thick parts are roughly the same width and the thin loops look delicate. -
Touch up edges:
If the canvas texture made any edges look ragged, use the very tip of your brush with a small amount of paint to smooth them out. -
Clean up sketch lines:
Allow the paint to dry completely (check your fabric paint instructions, usually 4-24 hours). Once fully dry, gently erase any visible pencil marks that weren’t covered by paint. -
Set the paint:
Most fabric paints require heat setting. Place a thin cloth over the design and iron it on a medium setting (no steam) for a few minutes to make the design permanent.
Add some gloss
For a subtle upgrade, trace over your dried black letters with a clear fabric gloss medium. It captures the light and makes the text look professionally printed.
Now you have a stylish, custom bag ready for your next adventure

PENCIL GUIDE
Understanding Pencil Grades from H to B
From first sketch to finished drawing — learn pencil grades, line control, and shading techniques.
Explore the Full Guide
Clean Stenciled Monogram
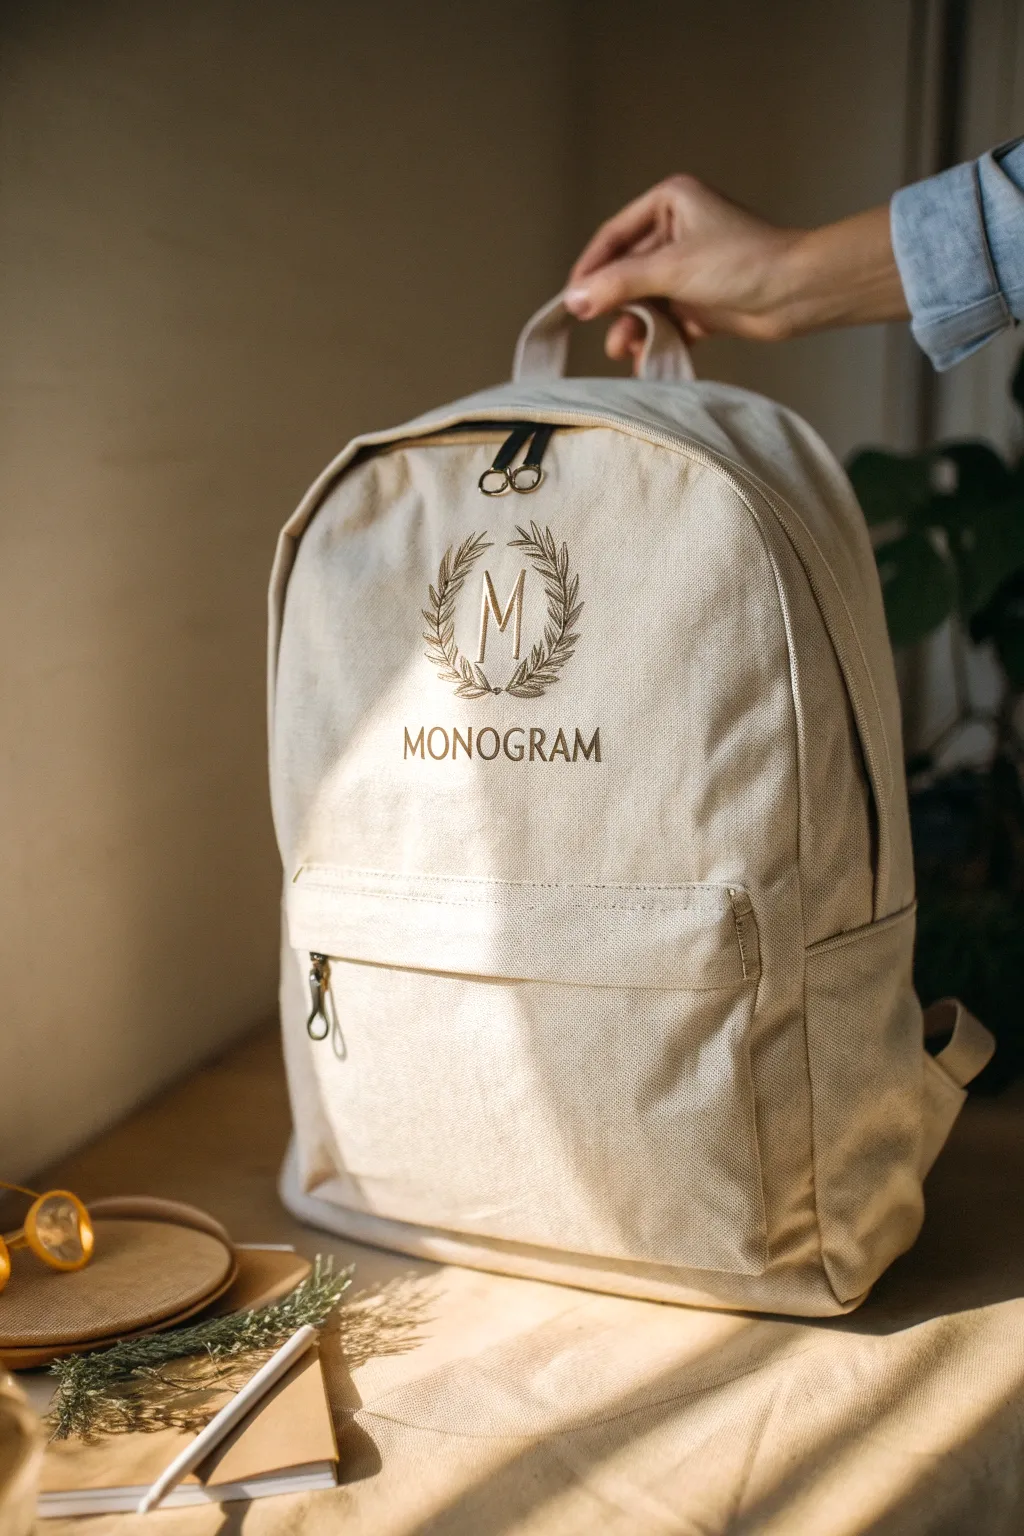
Transform a plain canvas backpack into a personalized accessory with this elegant, minimal monogram design. Using fabric paint and a simple stencil technique, you can achieve a crisp, metallic finish that looks professionally embroidered at first glance.
Detailed Instructions
Materials
- Light colored canvas backpack (beige or off-white)
- Fabric medium
- Metallic bronze or antique gold acrylic paint
- Self-adhesive stencil vinyl or freezer paper
- Craft knife or electronic cutting machine
- Dense foam pouncer or stencil brush
- Transfer tape (if using vinyl)
- Masking tape
- Iron and pressing cloth
- Cardboard insert
Step 1: Preparing the Design
-
Choose your typography:
Begin by selecting a serif font for the central initial and a clean sans-serif for the name below. Incorporate a laurel wreath illustration to encircle the main letter. -
Size the artwork:
Measure the upper front panel of your backpack to determine the maximum width for your design. Scale your artwork so it fits comfortably with at least an inch of margin on all sides. -
Cut the stencil:
Cut your design out of adhesive vinyl or freezer paper. If you don’t have a cutting machine, print the design on paper, tape it over the vinyl, and carefully trace-cut with a sharp craft knife. -
Weeding:
Remove the parts of the stencil where you want the paint to go—the letters and the laurel leaves. Keep the centers of letters (like the middle of the ‘O’s) safe.
Step 2: Applying the Stencil
-
Prepare the surface:
Stuff the front pocket of the backpack with a piece of cardboard. This provides a hard surface to work on and prevents paint from bleeding through to the inside lining. -
Position the stencil:
Use transfer tape to lift your vinyl design and position it centrally on the upper panel of the backpack. Check alignment twice before committing. -
Adhere firmly:
Press the stencil down firmly. I like to use a credit card or scraper tool to really burnish the edges of the vinyl into the fabric weave to prevent leaks. -
Mask off surroundings:
Use extra masking tape around the edges of your stencil sheet to ensure no stray paint accidentally gets on the rest of the canvas.
Seal the Edges
Before applying color, dab a thin layer of the background paint color over the stencil edges. This seals gaps so your main color lines are razor-sharp.
Step 3: Painting the Monogram
-
Mix the paint:
Mix your metallic bronze acrylic paint with fabric medium according to the bottle instructions (usually 2:1 or 1:1). This creates a flexible finish that won’t crack. -
Load the brush:
Dip your foam pouncer lightly into the paint, then dab most of it off onto a paper towel. You want a ‘dry brush’ consistency. -
First coat application:
Apply the paint using a straight up-and-down dabbing motion. Do not drag the brush, or paint will slide under the stencil edges. -
Let it set:
Allow the first layer to dry for about 10-15 minutes until it’s tacky but not wet. -
Second coat:
Apply a second layer to build opacity, focusing on getting a rich, consistent gold tone across the letters and leaves. -
Remove the stencil:
While the second coat is still slightly damp (not wet, but not fully cured), carefully peel away the vinyl at a sharp angle. -
Pick out details:
Use a weeding tool or pin to carefully lift off the small inner pieces of the stencil, like the centers of the leaves or letters.
Add Dimension
Mix a tiny drop of dark brown into your gold paint for the very bottom of the laurel leaves to create a subtle gradient shadow effect.
Step 4: Finishing Touches
-
Air dry:
Let the backpack sit undisturbed for at least 24 hours to allow the paint to fully cure. -
Heat set:
Once dry, place a thin pressing cloth over the design and iron on a medium heat setting (no steam) for 3-5 minutes to permanently set the fabric paint.
Now you have a custom, high-end looking bag ready for your daily commute or next adventure
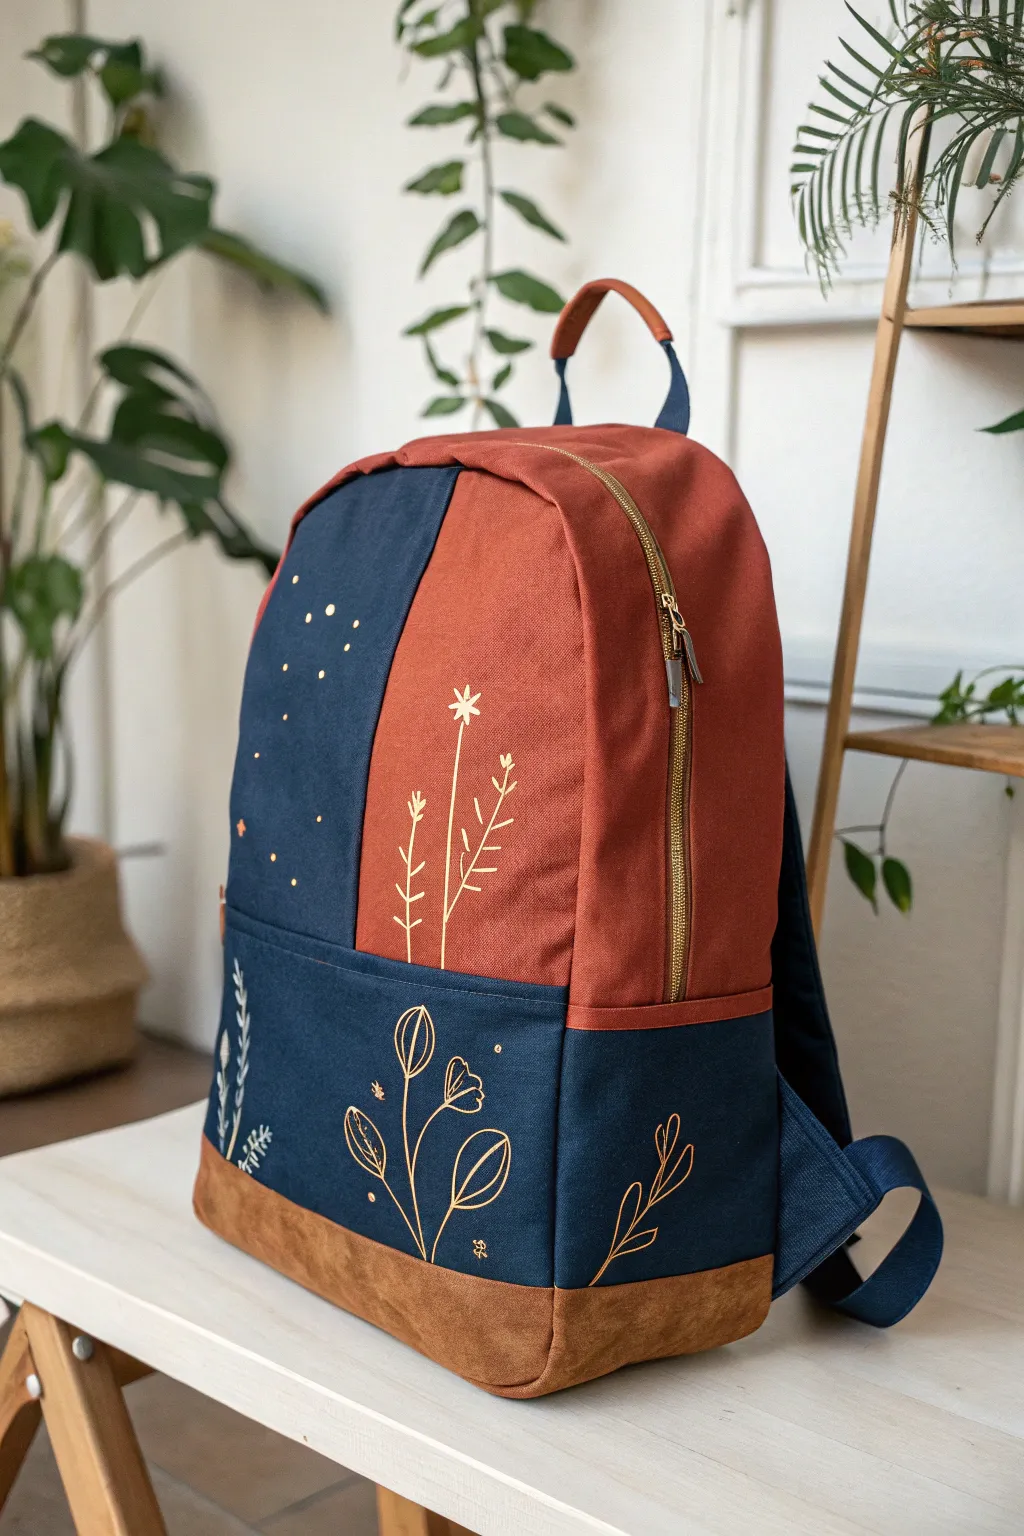
Starry Galaxy Gradient
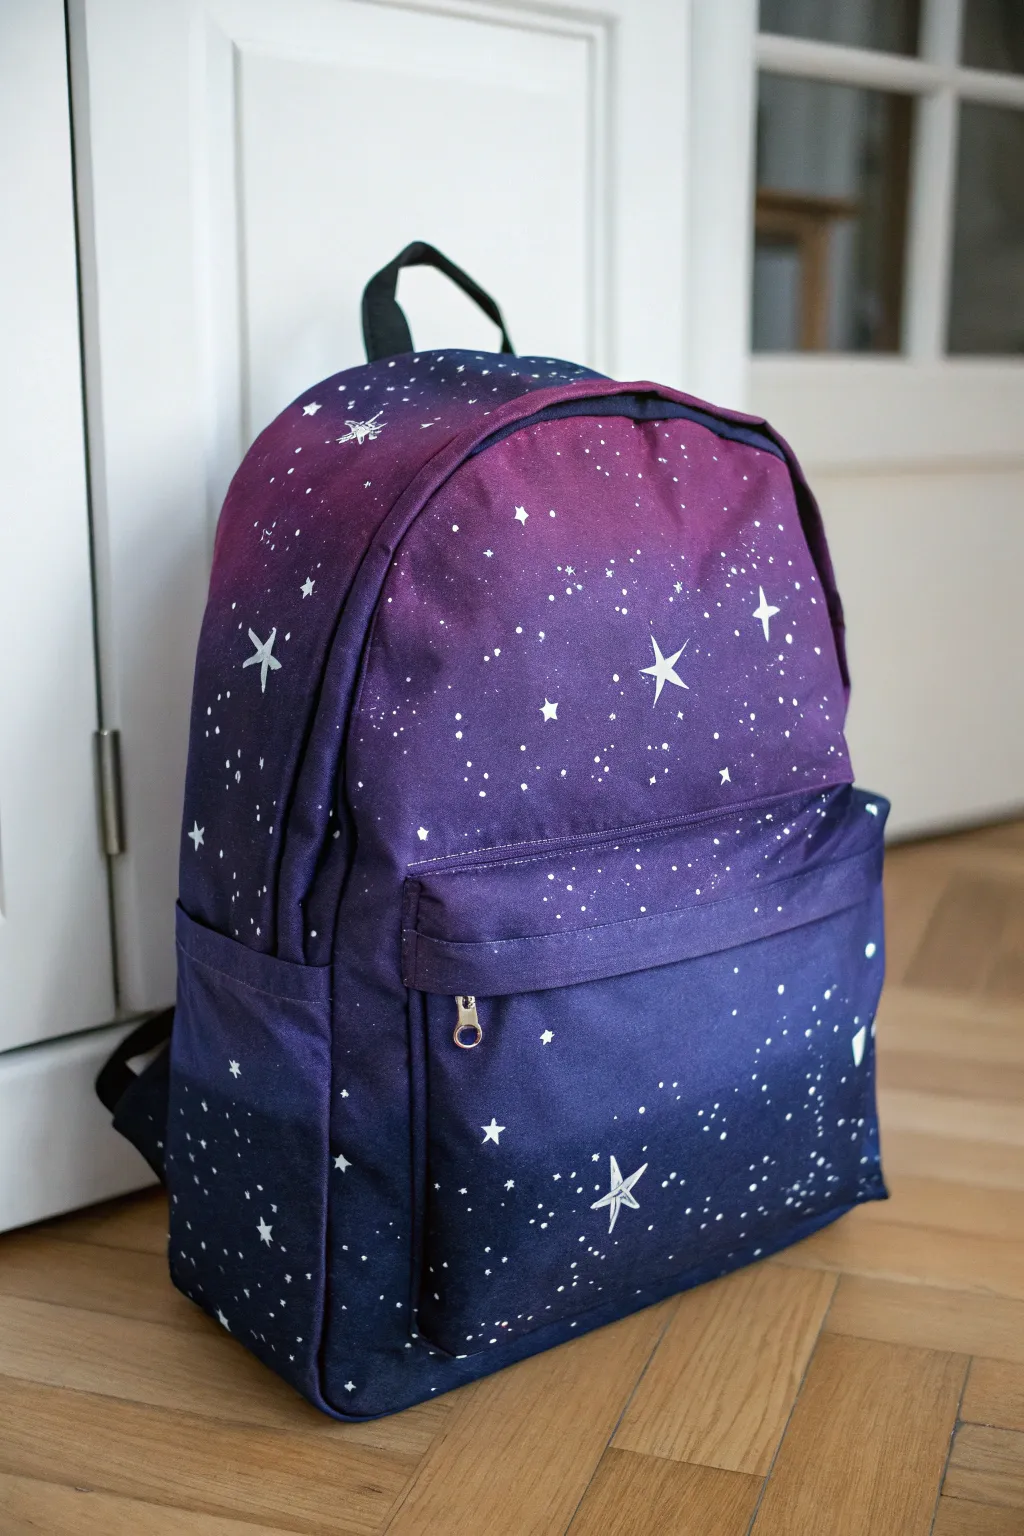
Transform a plain canvas backpack into a portal through space with this stunning gradient effect. The deep violet fades seamlessly into midnight blue, scattered with hand-painted constellations and stardust for an out-of-this-world accessory.
Step-by-Step
Materials
- Plain canvas backpack (black, navy, or dark purple base works best)
- Fabric medium
- Acrylic fabric paints: violet, magenta, navy blue, black, titanium white
- Sponge applicators or kitchen sponge pieces
- Fine detail paintbrush (size 0 or 00)
- Old toothbrush
- Painter tape or masking tape
- Cardboard or plastic bags (for stuffing)
- Palette or paper plate
- Water cup
Step 1: Preparation & Base Gradient
-
Prepare the surface:
Before you start, stuff the main compartment and the front pocket of the backpack with cardboard or crumpled plastic bags. This stretches the fabric taut for easier painting and prevents paint from bleeding through to the inside lining. -
Mask the hardware:
Use painter’s tape to carefully cover any zippers, metal buckles, or logo tags you want to keep paint-free. Press the edges down firmly to stop seepage. -
Mix your medium:
Mix your acrylic paints with fabric medium according to the bottle instructions (usually a 1:1 or 2:1 ratio). This crucial step ensures the paint remains flexible and won’t crack when the fabric moves. -
Apply the darkest tone:
Start at the bottom of the backpack and the bottom of the front pocket. Use a sponge to dab on a mixture of navy blue and a touch of black. Work your way upward about one-third of the height. -
Introduce the mid-tone:
Clean your sponge or grab a fresh piece. Load it with the violet paint. Begin dabbing just above the dark blue section, working upwards towards the top third of the bag. -
Create the gradient blend:
While the paints are still wet, go back to the border where the navy and violet meet. Lightly dabbing over this line mixes the colors directly on the fabric, creating that seamless transition. -
Add the highlight color:
For the very top of the curved area and the upper section of the bag, sponge on a blend of magenta and violet. This lighter purple creates a glowing effect at the top of the galaxy. -
Smooth the upper transition:
Just like before, gently blend the magenta section down into the violet mid-section using a clean, damp sponge to soften any harsh lines. -
Let it cure:
Allow the gradient layer to dry completely. This might take 1-2 hours depending on humidity; the fabric needs to be dry to the touch before adding crisp star details.
Step 2: Stars & Constellations
-
Mix the stardust:
Water down a small amount of white fabric paint until it has a milky, ink-like consistency. It needs to be fluid enough to flicker off bristles but opaque enough to show up. -
Flick the background stars:
Dip an old toothbrush into the watered-down white paint. Hold it over the bag and run your thumb across the bristles to spray a fine mist of tiny stars. Focus on the darker areas for better contrast. -
Paint larger distinct stars:
Switch to your fine detail brush and straight white paint (not watered down). Dot random small circles throughout the bag to represent distant, brighter planets. -
Draft the hero stars:
Choose 3-5 spots for your largest stars. I usually pick the center of the upper curve and the lower pocket corner. Paint a simple cross shape first using thin, confident strokes. -
Detail the hero stars:
Turn the cross into a four-pointed star by curving the lines inward slightly to meet at the points. Fill in the center to make it solid white. -
Add varied star shapes:
creating variety makes the galaxy look organic. Add a few five-pointed stars or diamond shapes scattered loosely between the dense clusters of sprayed dots. -
Clean up:
Once all paint is fully dry (wait at least 24 hours), carefully peel off the painter’s tape from the zippers and hardware. -
Heat set:
To make the design permanent and washable, heat set the paint. Place a pressing cloth over the design and iron on medium heat (no steam) for 3-5 minutes, moving constantly.
Patchy Paint?
If the canvas texture is showing through too much, let the first layer dry and sponge on a second coat. Don’t press too hard, or paint might soak through the lining.
Glow Up
Mix a tiny drop of glow-in-the-dark pigment into your white paint for the final stars. The bag will look normal in the day but reveal a hidden galaxy at night.
Now you have a piece of the universe to carry with you wherever you travel


Cute Animal Face Pocket
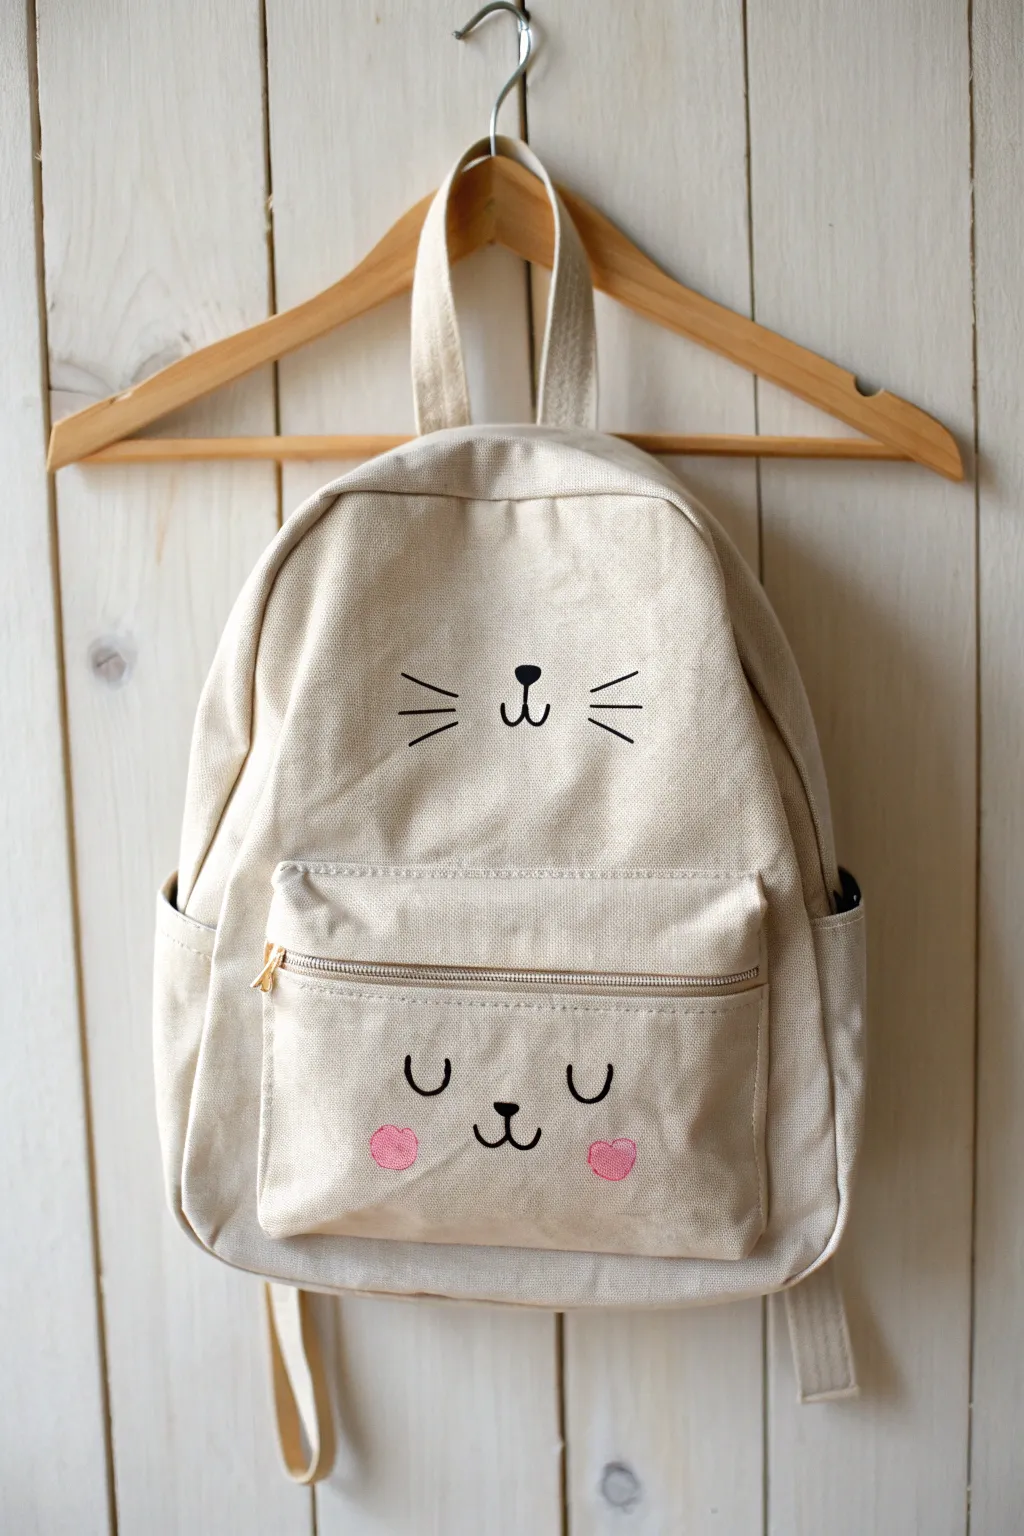
Transform a plain canvas backpack into an adorable companion with this minimalist cat face design. Using just a few simple strokes and soft pink accents, you’ll create a charming, two-part illustration that plays with the bag’s natural structure.
Step-by-Step Tutorial
Materials
- Plain beige or cream canvas backpack (with a front zipper pocket)
- Black fabric paint (or a black fabric marker)
- Soft pink fabric paint
- Small round paintbrush (size 2 or 4)
- Fine liner brush (size 0 or 00) for whiskers
- Fabric pencil or disappearing ink pen
- Piece of cardboard (sized to fit inside the pocket)
- Second piece of cardboard (sized to fit inside the main bag)
- Iron and ironing board (optional, for heat setting)
Step 1: Preparation & Sketching
-
Prepare the canvas:
Before you begin, ensure your backpack is clean and dry. If it’s brand new, give it a quick wash and dry to remove any sizing chemicals, which helps the paint adhere better. -
Insert protective layers:
Slip a piece of sturdy cardboard inside the main compartment of the backpack. Place a smaller piece inside the front pocket as well. This prevents paint from bleeding through to the back layers of fabric. -
Plan the upper face:
Using a disappearing ink pen or light fabric pencil, locate the center of the upper bag area. Sketch a small, rounded triangular nose about two inches above the pocket zipper. -
Add the mouth anchor:
Draw a short vertical line extending down from the bottom of the nose sketch. -
Sketch the upper mouth curves:
From the bottom of that vertical line, draw two small curves—one curving up to the left, one to the right—to form the classic cat mouth shape. -
Draft the whiskers:
Lightly mark three straight lines on each cheek area of the upper face. Keep them horizontal but slightly fanned out, ensuring they don’t cross into the zipper area. -
Plan the sleeping pocket face:
Move down to the front pocket. Find the horizontal center and sketch a new nose and mouth set, identical in style to the top one but slightly smaller. -
Sketch the sleeping eyes:
Instead of open eyes, draw two ‘U’ shapes on either side of the pocket nose to look like sleeping eyelids. Space them evenly so the face looks relaxed. -
Mark the cheeks:
Lightly trace two small circles just below and to the outside of the sleeping eyes for the blush spots.
Step 2: Painting & Finishing
-
Paint the black details:
Load a small round brush with black fabric paint. Carefully fill in the nose on the upper face first, making it solid black. -
Outline the mouth:
Using the very tip of your brush or switching to a fine liner brush, trace over the mouth lines you sketched. Keep the pressure even for a consistent line width. -
Paint the whiskers:
With the fine liner brush, paint the six whisker lines on the upper bag. Use a quick, confident stroke for each one to keep them straight and sharp. -
Detail the pocket face:
Move to the pocket. Paint the second nose solid black and trace the mouth lines just as you did before. -
Create the sleeping eyes:
Carefully trace the ‘U’ shapes for the eyes. I find it helpful to rotate the bag slightly if needed to get the curve angle just right for my hand. -
Apply the blush:
Clean your brush thoroughly or switch to a fresh one. Dip into the soft pink fabric paint and fill in the two cheek circles on the pocket. Dab the paint on gently to work it into the canvas texture. -
Clean up edges:
Inspect your lines. If any pencil marks are still visible, let the paint dry completely before wiping them away with a damp cloth or letting them fade (depending on your marking tool). -
Dry completely:
Let the backpack sit flat in a safe, dust-free area for at least 24 hours to ensure the paint cures fully. -
Heat set the design:
once dry, cover the painted areas with a thin cloth and press with a hot iron (no steam) for a few minutes to permanently set the fabric paint.
Use Fabric Markers
If you don’t trust a brush for thin lines, use a fabric marker for the whiskers and mouth. It offers more control and less mess.
Rough Texture Help
If the canvas is very bumpy, mix a tiny drop of water into your paint. It helps the pigment flow into the weave rather than sitting on top.
Now you have a custom, sweet-faced backpack ready for your daily adventures
Tropical Leaf Border
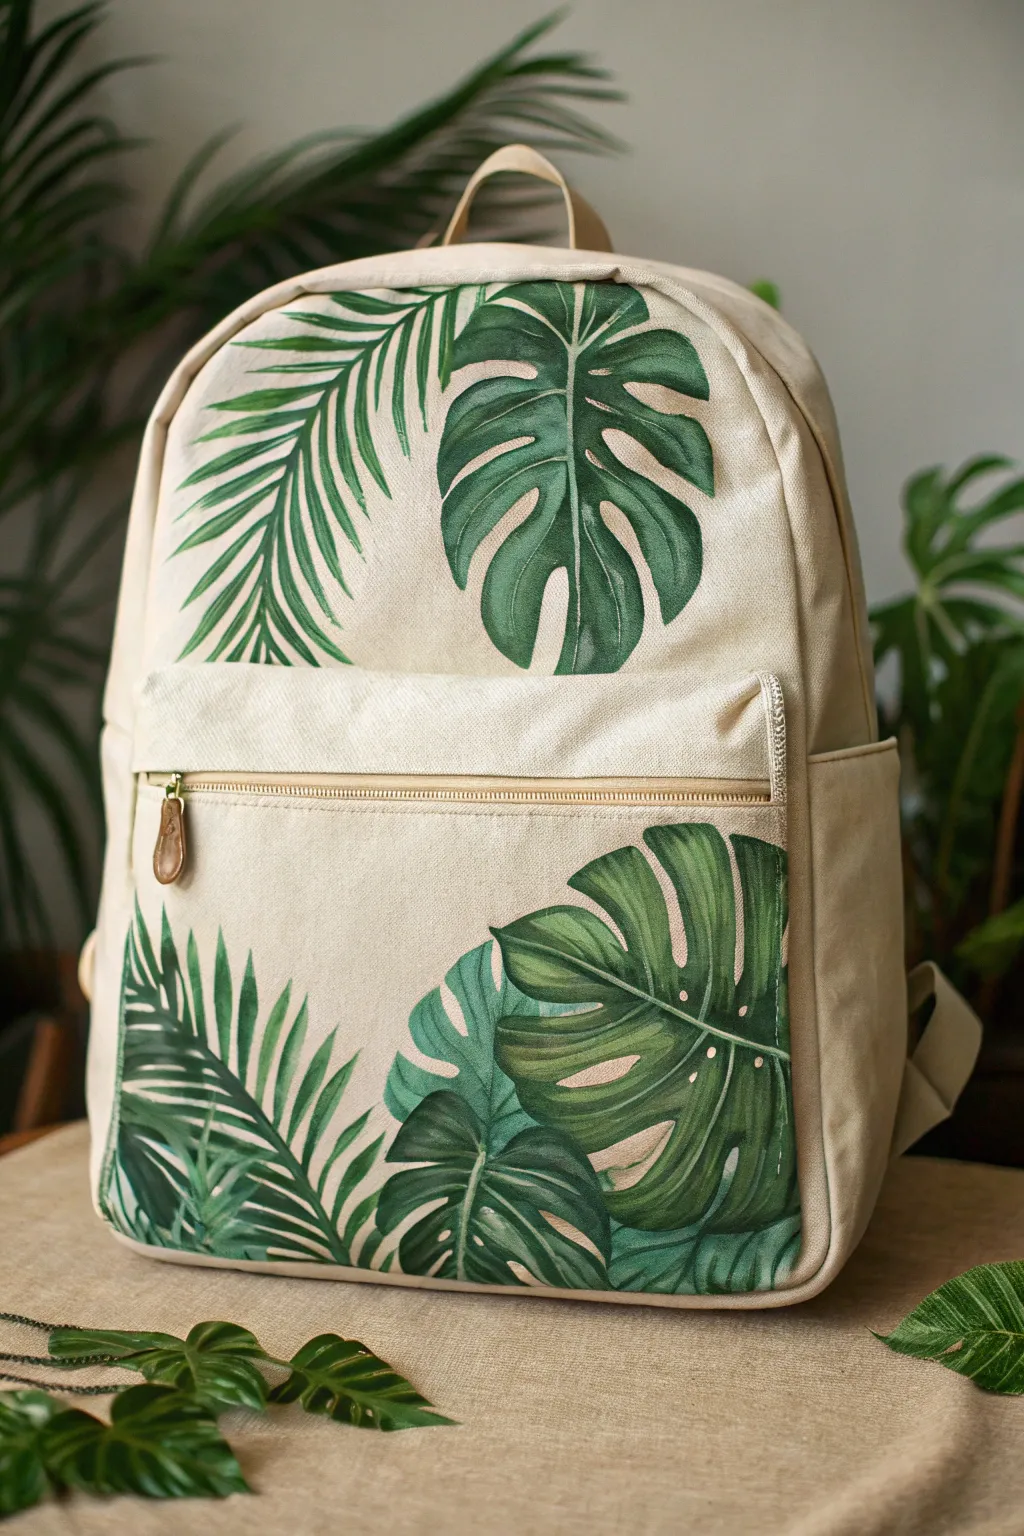
Transform a plain canvas backpack into a botanical masterpiece with this cascading leaf design. Featuring rich Monstera and Areca palms, this project uses layered greens to create depth and a fresh, summery vibe that’s perfect for everyday adventures.
How-To Guide
Materials
- Plain cream or beige canvas backpack
- Fabric medium
- Acrylic paints (Dark hunter green, emerald green, sap green, leaf green, white)
- Small flat shader brush (#6 or #8)
- Fine liner brush (#0 or #1)
- Pencil or disappearing fabric marker
- Cardboard insert
- Painter’s tape or masking tape
- Palette for mixing
Step 1: Preparation and Planning
-
Prepare the fabric canvas:
Before you begin, clean your backpack surface to remove any lint or dust using a lint roller and verify the fabric is taut and wrinkle-free. -
Insert protective backing:
Place a thick piece of cardboard or stiff cardstock inside the main compartment of the backpack and inside the front pocket. This is crucial to prevent paint from bleeding through to the lining or the back of the bag. -
Mix your paint medium:
Mix your acrylic paints with the fabric medium according to the bottle instructions (usually a 2:1 ratio). This ensures the paint stays flexible on the canvas and won’t crack when the bag moves.
Stiff Canvas?
If the paint feels too stiff, you likely used too little fabric medium. Lightly sand the dry paint with fine-grit sandpaper for a vintage, worn look that softens the feel.
Step 2: Sketching the Layout
-
Outline the top leaves:
Using a pencil or disappearing ink pen, lightly sketch a large Monstera leaf draping down from the top right seam. Next to it, draw the long, feathery spine of a palm leaf extending from the top left. -
Sketch the pocket design:
Move to the front pocket area. Sketch a large Monstera leaf entering from the bottom right corner, angling upward. Fill the bottom left corner with a cluster of smaller palm fronds and a partial Monstera leaf peeking out. -
Refine the leaf shapes:
Go back over your Monstera outlines and add the characteristic ‘fenestrations’ (the splits and holes) in the leaves. Keep the lines light so they won’t show through lighter paint layers.
Step 3: Base Painting
-
Block in base greens:
Start with a mid-tone sap green or leaf green. Using your flat shader brush, fill in the main bodies of the Monstera leaves. Leave the veins and stems unpainted for now to help guide you later. -
Paint the palm fronds:
For the palm leaves on the top left and bottom pocket, use a slightly darker emerald green. Paint each individual leaflet with a sweeping motion, starting at the stem and flicking outward to get a sharp, tapered tip. -
Add variance to the greens:
While the base coat is still slightly tacky, mix a little white into your green for some leaves and a little dark hunter green for others. Paint different sections with these slight variations to create a natural, non-uniform look. -
Let the base dry:
Allow these base layers to dry completely to the touch. This usually takes about 15-20 minutes depending on how thick your application was.
Use a Leaf Stencil
Not confident in your drawing skills? Print a leaf shape from your computer, cut it out, and trace around it directly onto the bag for perfect proportions every time.
Step 4: Adding Depth and Detail
-
Shadowing the Monstera:
Mix your darkest hunter green. Using the edge of your flat brush, paint along one side of the central vein and near the bottom edges of the Monstera leaves to create depth and curvature. -
Defining the veins:
Switch to your fine liner brush. Mix a very light green (white + sap green). Carefully paint the central veins and the side veins on the Monstera leaves. Keep the lines thin and steady. -
Highlighting the palms:
Clean your liner brush and pick up the light green mix again. Add thin highlight lines down the center of each palm frond leaflet. This gives them a dimensional, sun-kissed appearance. -
Layering the pocket leaves:
On the front pocket where leaves overlap, ensure the leaf ‘behind’ is darker where it meets the leaf in ‘front.’ Paint a dark shadow line just under the top leaf to visually separate them.
Step 5: Finishing Touches
-
Sharpen edges:
Check the edges of your leaves. If any look fuzzy, use your liner brush with the appropriate green color to sharpen the outline for a crisp, graphic look. -
Final cure:
Once you are happy with the painting, let the backpack dry for at least 24 hours. I usually prefer to wait 48 hours to be safe. -
Heat set the design:
To make the design permanent and washable, place a thin cloth over the painted areas and iron on a medium heat (no steam) for 3-5 minutes, moving the iron constantly.
Now your custom botanical gear is ready to accompany you on your next journey
Minimal Mountain Line Art
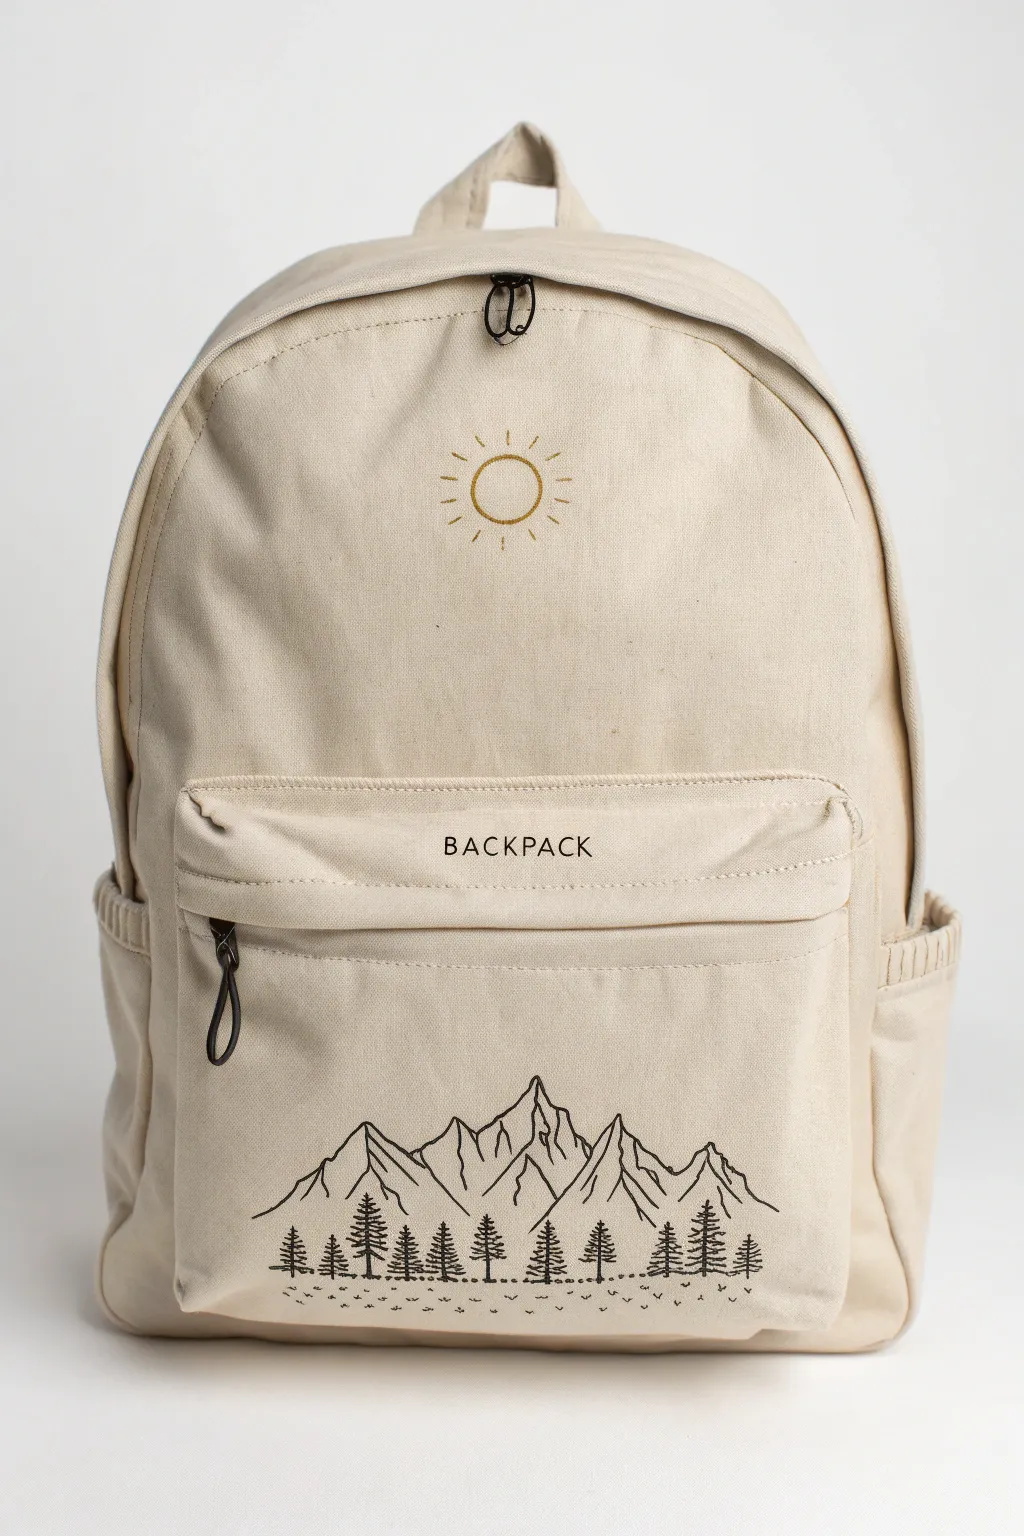
Transform a plain canvas backpack into an adventure-ready accessory with this elegant, minimalist line art design. Using simple fabric markers or paint, you will capture the serene beauty of mountain peaks and pine forests alongside a delicate golden sun.
Detailed Instructions
Materials
- Light beige or cream canvas backpack depending on preference
- Fine-tip black fabric marker (or 00 round brush and black fabric paint)
- Gold fabric paint or metallic fabric marker
- Pencil and eraser
- Ruler
- Cardboard insert or stiff backing board
- Painter’s tape or masking tape
- Iron or hairdryer (for heat setting)
Step 1: Preparation & Layout
-
Prepare the Surface:
Before you begin, ensure the backpack is clean and free of dust. Unzip the front pocket and the main compartment. -
Insert Support:
Slip a piece of cardboard or a stiff backing board inside the front pocket. This is crucial as it creates a flat surface to draw on and prevents ink from bleeding through to the inside lining. -
Establish the Horizon:
Using a ruler and a light pencil, verify exactly where you want the bottom of your tree line to sit on the front pocket. I like to keep it about an inch above the bottom seam to allow the design to breathe.
Fixing Wobbly Lines
If your line fluctuates, thicken it slightly to even it out. Alternatively, embrace the imperfection—organic lines often make nature sketches look more authentic.
Step 2: Designing the Mountains
-
Sketch Peak Outlines:
Lightly sketch the outline of your mountain range with a pencil. Aim for jagged, uneven peaks—one large central peak flanked by two or three smaller ones on each side creates a nice balance. -
Add Ridges:
Draw interior lines coming down from the peak tips to define the ridges. These zig-zag lines give the mountains their 3D form. -
Trace with Ink:
Once satisfied with the sketch, carefully go over your pencil lines with the fine-tip black fabric marker. Keep your hand steady and maintain a consistent pressure for a clean, uniform line weight. -
Let the Ink Dry:
Allow the black mountain outlines to dry completely for about 15 minutes before moving on, ensuring you don’t smudge the lines with your hand.
Step 3: Adding the Forest Details
-
Map Tree Positions:
Mark small vertical dashes along your horizon line where each pine tree will stand. Vary the heights slightly so the forest looks natural rather than uniform. -
Draw Tree Trunks:
Draw thin vertical lines for the trunks using your black marker. -
Create Branches:
Starting from the top of a trunk, make small horizontal scribbles that get slightly wider as you move down. The motion is almost like drawing a stretched-out triangle. -
Ground the Scene:
Add tiny stippling dots or subtle dashes beneath the trees to suggest uneven ground and connect the individual trees into a cohesive forest floor.
Level Up: Texture
Use a sponge to lightly dab diluted white fabric paint onto the mountain peaks for a subtle ‘snow-capped’ effect that adds dimension without clutter.
Step 4: Text & Sun Detailing
-
Position the Text:
On the pocket flap, use your ruler to measure the center point. Lightly sketch your chosen word (like ‘BACKPACK’ or ‘ADVENTURE’) in a small, capitalized serif font. -
Ink the Letters:
Trace the letters with the black marker. For a serif look, add tiny horizontal ticks at the ends of the strokes. -
Draft the Sun:
Move to the upper main section of the backpack. Place more cardboard inside this main compartment. Use a circular object (like a spice jar lid) to trace a light pencil circle centered above the pocket. -
Paint the Gold Ring:
Using gold fabric paint or a metallic marker, trace the circle. If using paint, a thin round brush helps keep the line delicate. -
Add Sun Rays:
Draw short, straight lines radiating outward from the circle. Keep the spacing relatively loose and airy, rather than densely packed.
Step 5: Finishing Touches
-
Erase Guidelines:
Once you are absolutely certain all ink and paint is 100% dry (this may take an hour or more), gently erase any visible pencil marks. -
Heat Set the Design:
To make your design permanent and weather-resistant, follow the instructions on your fabric marker or paint. Usually, this involves ironing the design (covered with a scrap cloth) for a few minutes.
Pack your gear and head out knowing your custom creation is ready for the trail
Boho Mandala Medallion
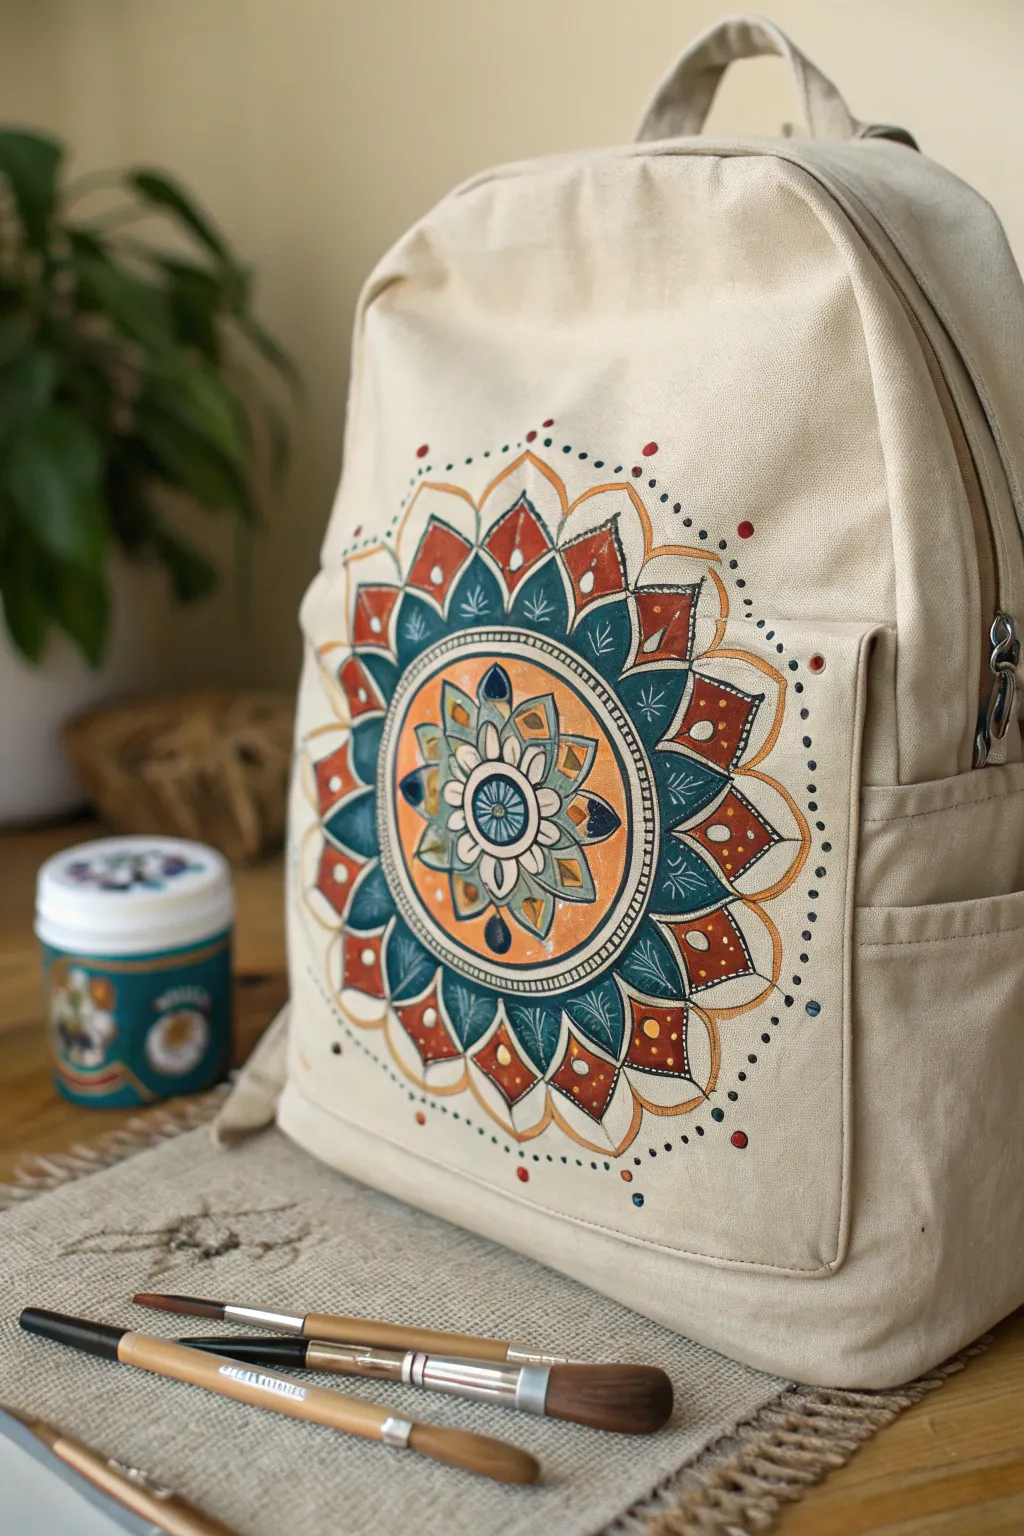
Transform a plain canvas bag into a wandering work of art with this intricate mandala design. Featuring a warm palette of burnt orange, teal, and deep red, this project uses radial symmetry to create a striking focal point.
Step-by-Step Tutorial
Materials
- Light beige canvas backpack
- Fabric medium (mix with acrylics) or fabric paints
- Acrylic paints: Burnt Orange, Teal/Deep Cyan, Brick Red, Cream, and Gold
- Compass and pencil
- Fine liner brush (size 0 or 00)
- Small round brush (size 2)
- Small flat brush (size 4)
- Palette or small mixing cups
- Piece of cardboard (to insert inside the bag)
- Ruler
Step 1: Preparation & Sketching
-
Prepare the surface:
Before anything else, stuff the front pocket of the backpack with a piece of rigid cardboard. This provides a hard surface for drawing and prevents paint from bleeding through to the inner lining. -
Find the center:
Measure the width of the front pocket to find the exact center point. Mark this tiny dot lightly with a pencil; everything will radiate from here. -
Draft the guide circles:
Using a compass, draw a series of concentric circles radiating from your center point. You’ll need about five main rings: a small inner hub, a medallion spacer, a wide band for the petals, and an outer rim. -
Sketch the petal structure:
Lightly sketch the primary flower petals within the central ring. Then, divide the larger outer ring into equal sections—usually 8 or 12 points—and draw the large, pointed ‘cathedral’ style arches that define the outer edge. -
Detail the filler patterns:
Within the large outer arches, sketch a smaller, inverted petal shape. Add small circles between the tips of the outer petals to act as guides for the dotted border later.
Uneven Circles?
If your hand-painted circles look wobbly, don’t repaint. Instead, thicken the black outline or add a row of small dots along the edge to visually mask the irregularity.
Step 2: Painting the Core
-
Mix your medium:
If you aren’t using pre-made fabric paint, mix your acrylics with fabric medium according to the bottle instructions. This ensures the paint flexes with the fabric rather than cracking. -
Base coat the central ring:
Using the small flat brush, paint the background of the middle ring in a solid burnt orange. Allow the edges to be slightly rough as you will outline them later. Let this dry completely. -
Paint the center flower:
Fill in the innermost petals with cream and light teal. I prefer to do two thin coats here to ensure the canvas texture doesn’t swallow the lighter colors. -
Add the teal accents:
Move to the outer ring. Paint the negative space inside your large arches with the deep teal color, leaving the inverted petal shape unpainted or filling it with a contrasting color like brick red.
Pro Tip: Symmetry Hack
Cut a paper template for one ‘slice’ of your mandala (like a pizza slice). Trace this repeatedly around your center point to ensure every petal is identical.
Step 3: Defining & Detailing
-
Fill the outer petals:
Paint the inverted tear-drop shapes inside the teal arches with brick red or deep orange. Using a variety of warm tones here adds that rich, boho depth. -
Outline the structure:
Once all your color blocks are dry, take your fine liner brush and black or very dark grey paint. Carefully outline every major shape, petal, and ring. Keep a steady hand and pull the brush towards you for smoother lines. -
Add internal petal details:
Inside the orange ring, paint small teal triangles or leaves. Use the fine liner to add veins or small dots to these leaves. -
Create the striped borders:
Between the main sections, paint thin concentric rings of black and white (or cream) to separate the tiers of the mandala. This high contrast makes the colors pop.
Step 4: Final Flourishes
-
Apply the dot border:
Dip the back end of a brush (or a dotting tool) into dark paint. Press firmly around the outermost perimeter of the design to create a uniform dotted halo. -
Add accent dots:
Using a smaller dotting tool and red or gold paint, place tiny accent dots at the tips of the main petals and scattered within the dotted halo for extra texture. -
Highlight with white:
Use the liner brush to add tiny white highlights or dashes on the red and teal petals. This mimics the look of light hitting the design and adds dimension. -
Heat set the design:
Once the paint is fully cured (usually 24 hours), place a thin cloth over the design and iron it on a medium setting without steam. This seals the paint into the fibers.
Pack your new custom bag for your next adventure and enjoy showing off your wearable art
Checkerboard With Color Shifts

Transform a plain canvas backpack into a trendy statement piece with this soft, color-shifted checkerboard design. The muted palette of sage, terracotta, and cream gives the structured geometric pattern an organic, relaxed feel.
Step-by-Step Guide
Materials
- Canvas backpack (light color like white or beige works best)
- Fabric medium
- Acrylic paints (Sage Green, Terracotta/Rust, Beige, Warm White)
- Painter’s tape (1-inch width for standard checks)
- Flat shader brushes (medium and small sizes)
- Ruler or measuring tape
- Pencil or chalk fabric marker
- Palette or paper plate
- Cardboard insert for the bag
Step 1: Preparation & Grid Layout
-
Prep the surface:
Start by cleaning your backpack if it isn’t brand new to remove any oils or dirt. Stuff the main compartment and front pocket with stiff cardboard or heavy paper to create a firm, flat painting surface and prevent paint from bleeding through to the lining. -
Mix your medium:
Mix each of your acrylic paint colors with fabric medium according to the bottle’s instructions (usually a 1:1 or 2:1 ratio). This step is crucial because it ensures the paint remains flexible and won’t crack when the fabric moves. -
Establish the vertical lines:
Using your ruler and pencil, lightly mark vertical lines down the front of the bag. Space them evenly—about 1.5 to 2 inches apart depending on how large you want your checks. Make sure these lines run straight from the top curve down to the bottom seam. -
Mark horizontal lines:
Draw perpendicular horizontal lines across the bag with the same spacing as your vertical lines to create a perfect square grid. Be careful around zippers and seams; you want the grid to look continuous even if a pocket interrupts it. -
Map your colors:
Before you start painting, lightly mark inside each square with a letter (like ‘G’ for Green, ‘R’ for Rust) to plan your pattern. I find this really helps prevent mistakes later since check patterns can get confusing once you’re in the zone.
Tape Bleed Trouble?
If paint bleeds under tape, wait for it to dry fully. Then, take a tiny brush with the correct color and carefully touch up the line. A white gel pen can also act as an ‘eraser’ for light squares.
Step 2: Painting the Pattern
-
Tape the first set:
Apply painter’s tape along the outside edges of your first set of squares. You won’t be able to paint adjacent squares at the same time, so focus on every other square in a row first. -
Paint the Sage Green checks:
Load your flat brush with the fabric medium-mixed sage paint. Apply an even layer to your designated green squares, brushing from the tape inward to prevent seepage underneath the edges. -
Add the Rust tones:
Switch to a clean brush and fill in the terracotta/rust squares that aren’t touching the wet green paint yet. Use smooth, consistent strokes to work the paint into the canvas weave. -
Fill in the neutrals:
Paint the beige and warm white squares in the available spots of your initial taping. These lighter colors might need a slightly thicker application to look opaque. -
Remove tape and dry:
Carefully peel off the tape while the paint is still slightly tacky to get the crispest lines. Let these squares dry completely—usually about 30 to 60 minutes.
Level Up: Texture
For a worn, vintage look like the photo, lightly sand the dried painted squares with fine-grit sandpaper. This softens the colors and exposes a tiny bit of canvas weave.
Step 3: Completing the Grid & Details
-
Tape the second set:
Once the first batch is dry to the touch, tape off the remaining empty squares. Ensure the tape covers the edges of the already-painted squares precisely to avoid gaps. -
Paint remaining squares:
Fill in the rest of the grid with your color pattern, repeating the process of painting from the tape edge inward. Pay extra attention to corners where four colors meet. -
Detail work around zippers:
Use a small detail brush to carefully paint the partial squares right up against the zipper tape and seams where the painter’s tape couldn’t reach. A steady hand is key here. -
Address the side pockets:
Extend the pattern around to the side pockets. Try to align the horizontal lines from the front of the bag with the side pockets for a cohesive look. -
Paint the bottom panel:
The image shows a solid color on the very bottom rim. Paint this section (likely sage or rust) solidly without checks to ground the design. -
Final cure:
Allow the entire bag to dry for at least 24 hours. After it is fully dry, heat set the paint by ironing it with a pressing cloth over the design, or tumbling it in the dryer if the bag’s care instructions allow.
Pack your new custom bag for your next adventure and enjoy the handmade flair.
Faux Patchwork Quilt Blocks
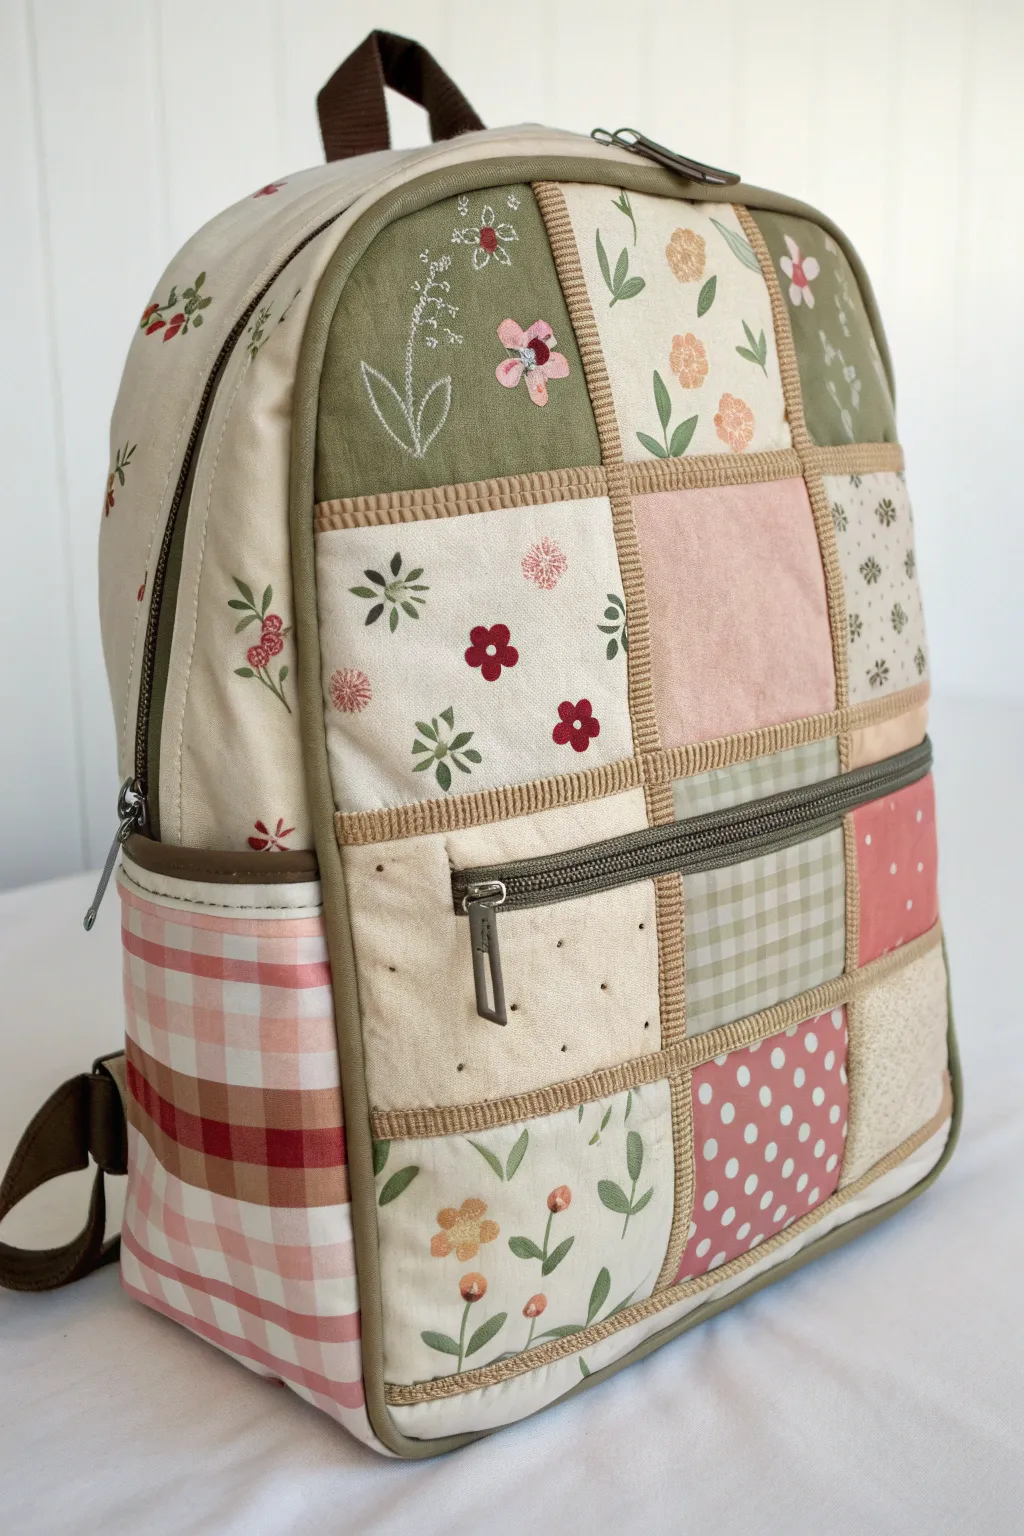
Transform a plain canvas backpack into a charming, cottagecore-inspired accessory with this faux patchwork painting technique. Using fabric paints and clever masking, you will create the illusion of soft, stitched fabric scraps without sewing a single thread.
Step-by-Step Tutorial
Materials
- Light beige or cream canvas backpack
- Fabric medium
- Acrylic paints (olive green, muted pink, dusty rose, cream, white, deep red)
- Painter’s tape or masking tape (various widths)
- Fine liner brush (size 0 or 00)
- Flat shader brushes (medium and small)
- Ruler
- Fabric marker or pencil
- Hair dryer (optional for speeding up drying)
Step 1: Planning the Grid
-
Clean and prep:
Begin by ensuring your canvas backpack is clean and free of lint. If it’s new, give it a quick wipe down or lint roll to ensure the paint adheres properly. -
Map the squares:
Using a ruler and a light pencil or fabric marker, draw a grid on the main panel of the backpack. Aim for squares approximately 3-4 inches wide, but feel free to vary the sizes slightly for a more organic, scrappy look. -
Protect the hardware:
Wrap small pieces of painter’s tape around zippers, zipper pulls, and strap buckles to keep them paint-free during the process.
Textured Thread Trick
To make the ‘binding’ lines between squares look 3D, mix a little baking soda into your tan paint. It creates a gritty texture that looks just like heavy woven fabric.
Step 2: Blocking in Color
-
Mix fabric paint:
Mix your acrylic paints with fabric medium according to the bottle instructions (usually a 1:1 or 2:1 ratio). This ensures the paint remains flexible and doesn’t crack on the canvas. -
Tape the first set:
Apply painter’s tape over the grid lines to mask off a checkerboard pattern. You want to paint every other square first to achieve crisp edges. -
Base coat the squares:
Fill in the exposed squares with your base colors. Alternate between olive green, cream, soft pink, and beige to create a balanced palette. Apply two thin coats rather than one thick one for better coverage. -
Dry and switch:
Allow the first set of squares to dry completely. Carefully remove the tape, then re-tape over the dried painted squares to expose the blank ones. Fill these remaining squares with your alternating colors. -
Paint the side pockets:
While the main panel dries, paint the side pocket area. For the gingham look shown in the image, paint the entire pocket a light pink base, then grid it out with tape and paint vertical and horizontal stripes in a deeper rose tone.
Step 3: Adding Patterns & Details
-
Stipple the texture:
To mimic the look of fabric texture, take a nearly dry brush with a slightly darker shade of the base color and gently stipple or dab the center of the solid colored squares. This adds depth so it doesn’t look like flat plastic. -
Paint floral motifs:
Using your fine liner brush, paint tiny floral designs on the cream and green squares. Simple five-petal flowers in red or pink with small green leaves work best. Keep them loose and illustrative rather than realistic. -
Add geometric patterns:
On other squares, paint small repeating patterns like polka dots, tiny grids, or small asterisk-style stars to simulate different printed fabrics. -
Create the gingham effect:
If painting a gingham square on the front, use a flat brush to create intersecting horizontal and vertical lines. Where the lines cross, add a slightly darker square of paint to replicate the transparency of woven fabric. -
Let detail dry:
Ensure all detail work is bone dry before moving on to the final faux-stitching phase, as you don’t want to smudge your delicate flowers.
Patchwork Patches
Glue actual small buttons or tiny fabric bows onto the centers of a few flowers for a mixed-media element that adds tactile authenticity to the quilt look.
Step 4: Faux Stitching & Finishing
-
Mix a ‘thread’ color:
Create a mixture of tan and white paint to resemble natural thread or yarn. It should be light enough to show up against the darker squares but dark enough to be visible on the cream ones. -
Paint the binding:
Using a steady hand and a liner brush, paint thick, textured lines over the original grid lines between the squares. This represents the fabric binding or sash that would hold a quilt together. -
Add thread texture:
On top of those binding lines, paint tiny diagonal ticks or ‘V’ shapes to simulate the woven texture of a grosgrain ribbon or thick fabric edge. -
Simulate embroidery:
For an extra detailed touch, paint white dashed lines resembling running stitches around the stems of your flowers or along the edges of specific blocks. I like to keep these slightly imperfect to look handmade. -
Heat set:
Once the backpack is fully dry (wait at least 24 hours), heat set the paint by blowing it with a hairdryer on high heat for a few minutes or ironing it through a pressing cloth to make it permanent.
Now you have a comfortable everyday bag that carries the charm of a handmade heirloom wherever you go
Zipper-Framed Tiny Scene
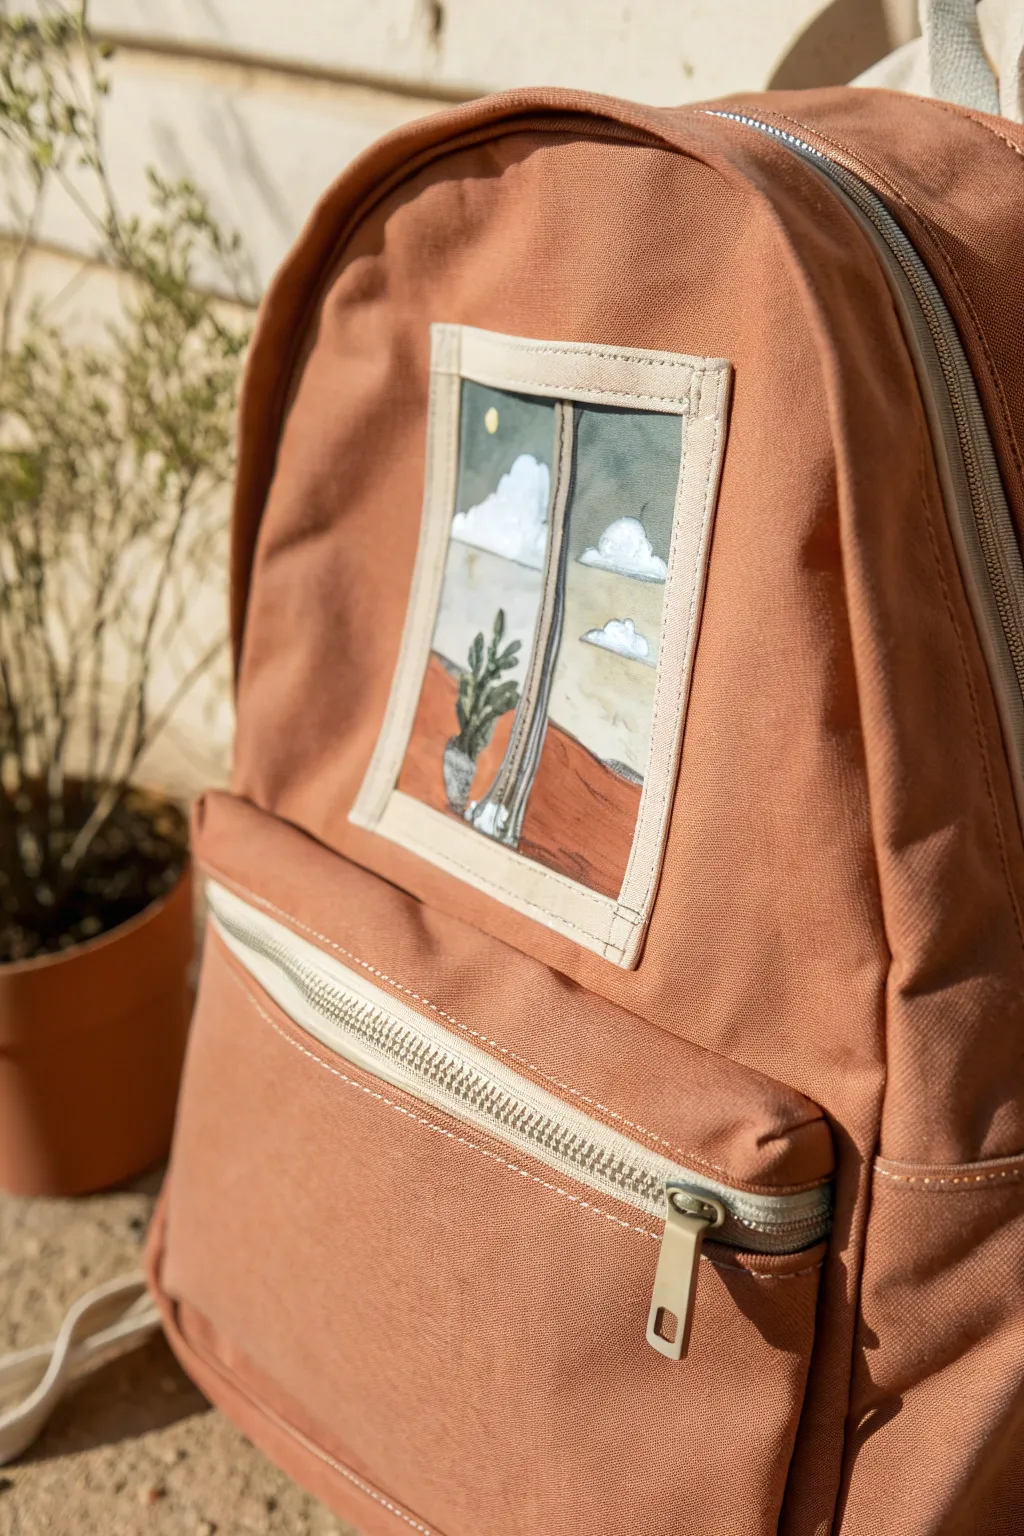
Transform a plain backpack into a wearable gallery with this charming sewn-on painted patch. This project frames a dreamy desert landscape within a fabric window, bringing a touch of whimsy and wanderlust to your everyday carry.
Detailed Instructions
Materials
- Heavyweight canvas or cotton duck fabric (white or off-white)
- Fabric medium
- Acrylic paints (terracotta, slate blue, white, sage green, gray, black)
- Beige or cream cotton twill tape (1-inch width)
- Sewing machine (or needle and thread)
- Fine detail paintbrushes
- Flat shader brush
- Pencil and eraser
- Masking tape
- Iron and ironing board
Step 1: Preparing the Canvas
-
Cut the base:
Cut a rectangle of your white canvas fabric slightly larger than your desired final window size, approximately 4×5 inches. -
Create the viewing area:
Using masking tape, tape off the borders of your rectangle to create a crisp edge for your painting area. This ensures your ‘window’ stays perfectly rectangular. -
Sketch the scene:
Lightly sketch your design with a pencil inside the taped area. Draw a horizon line about one-third up from the bottom for the dunes, a vertical line slightly off-center for the window frame, and the outline of a potted cactus on the left.
Bleeding Lines?
If paint bleeds under the tape, wait for it to dry completely. Then, use a small flat brush with titanium white or gesso to tidy up the edges before adding the fabric frame.
Step 2: Painting the Landscape
-
Mix your medium:
Before dipping into your colors, mix your acrylics with fabric medium according to the bottle instructions (usually 1:1 or 2:1). This prevents cracking later. -
Paint the sky:
Start with the background. Paint the upper section in a slate blue-grey tone. I find it helpful to wet the brush slightly to get a smoother wash effect on the canvas weave. -
Add the dunes:
Fill in the bottom section with a deep terracotta or rusty orange color to create the rolling sand dunes. Let the paint meet the sky at the horizon line cleanly. -
Create clouds:
Once the sky is dry to the touch, use pure white paint to dab in fluffy cumulus clouds. Place a large one dominated the left side and two smaller ones floating on the right. -
Detail the clouds:
While the white is still slightly wet, add tiny touches of light grey to the bottom of the clouds to give them volume and shadow. -
Paint the cactus:
Using a small round brush and sage green, carefully fill in the cactus shape. Add darker green shadows on one side of the pads to suggest dimension. -
Add the pot:
Paint the small pot holding the cactus in a light grey or stone color. Add a tiny rim detail at the top. -
The moon detail:
Add a tiny dot of pale yellow or white in the upper left corner of the sky to represent a distant moon.
Heat Set for Longevity
Before sewing the patch onto the bag, cover your dry painting with a scrap cloth and iron it on medium heat for 2-3 minutes. This heat-sets the fabric medium.
Step 3: The Window Frame & Assembly
-
Paint the center bar:
Using a fine liner brush and grey paint, go over your vertical pencil line to create the window pane divider. Add a small ‘latch’ detail halfway up. -
Remove tape:
Once the paint is fully dry, carefully peel away the masking tape to reveal your crisp rectangular edges. -
Prepare the border:
Cut four strips of beige twill tape. Two should match the height of your painting plus seam allowance, and two should match the width. -
Attach vertical borders:
Pin the vertical strips to the left and right sides of your painted canvas, overlapping the raw edge slightly. Sew them down with a straight stitch. -
Attach horizontal borders:
Pin the top and bottom strips, folding the raw ends under at the corners for a clean finish. Sew these in place, creating a complete frame. -
Position on backpack:
Place the finished patch onto the upper center of your backpack. Use pins to secure it, checking that it is perfectly centered and level. -
Sew the patch:
Using a matching thread (beige or cream), topstitch around the entire perimeter of the twill tape frame to secure the artwork permanently to the bag.
Now you have a custom piece of art that travels with you wherever you go
Metallic Line Art Over Matte Base
Transform a plain canvas backpack into a boutique-style accessory using color blocking and elegant metallic touches. This project combines bold matte colors with delicate gold line work to create a stunning contrast that looks professionally designed.
Step-by-Step Tutorial
Materials
- Canvas backpack (light color preferred for base)
- Fabric medium
- Acrylic paints (Navy Blue, Burnt Orange/Terracotta)
- Metallic gold fabric paint or paint pen
- Painter’s tape (various widths)
- Chalk or disappearing fabric pen
- Flat shader brushes (medium and large)
- Fine liner brush (size 0 or 00)
- Ruler
- Iron and press cloth (for heat setting)
Step 1: Preparation and Color Blocking
-
Clean surface:
Begin by ensuring your canvas backpack is clean and free of lint. If it’s new, give it a quick wipe down to remove any factory sizing. -
Tape vertical division:
Identify the center vertical seam or visually mark the center of the main backpack panel. Run a strip of painter’s tape vertically to split the bag into left and right sections. -
Tape horizontal section:
Place a horizontal strip of tape about one-third of the way up from the bottom suede base. This creates the separation for the bottom navy panel. -
Mix fabric medium:
Mix your acrylic paints with fabric medium according to the bottle instructions (usually 2:1 ratio). This ensures the paint remains flexible and doesn’t crack on the fabric. -
Paint the navy sections:
Apply the Navy Blue mix to the entire left vertical panel and the bottom horizontal panel. Use a flat brush and work the paint into the weave, being careful around the taped edges. -
Paint the terracotta section:
Apply the Burnt Orange mix to the upper right panel. You may need two coats for full opacity, especially if the original backpack canvas is dark. -
Remove tape:
Carefully peel off the painter’s tape while the paint is still slightly tacky to get crisp, clean lines. Let the bag dry completely for at least 24 hours.
Clean Lines Secret
Before painting your first solid color, paint a thin layer of the base fabric color (or clear medium) over the tape edge to seal it preventing bleed-through.
Step 2: Designing the Metallic Art
-
Sketch the layout:
Using a piece of chalk or a disappearing fabric pen, lightly sketch your floral and celestial designs directly over the dry painted sections. -
Plan floral placement:
Draw three distinct floral stems: tall, thin stems on the orange side, and wider, leafier stems on the bottom navy panel. Vary the heights to keep the composition dynamic. -
Add celestial details:
On the upper navy section, mark tiny dots for stars and perhaps a small crescent moon shape if desired, creating a ‘night sky’ effect. -
Prepare gold paint:
Shake your metallic gold fabric paint well. If you are using a pot of paint rather than a pen, thin it slightly with a drop of water to help it flow off a fine liner brush. -
Outline the stems:
Starting with the orange panel, trace your chalk lines with the gold paint. Use confident, smooth strokes for the long vertical stems. -
Add floral details:
Paint the small geometric star-flowers at the tips of the orange-side stems and the leaf veins on the navy-side plants. -
Paint the stars:
Dip the very tip of a brush handle or a dotting tool into the gold paint and gently press it onto the navy upper panel to create uniform star dots. -
Refine lines:
Go back over any lines that look faint. I find a second pass on the thickest parts of the leaves makes the gold pop significantly more against the dark blue. -
Final dry:
Allow the metallic paint to dry completely. This usually takes significantly longer than standard acrylics, so be patient. -
Heat set:
Once fully dry (wait 72 hours for best results), place a press cloth over the design and iron on medium heat (no steam) to permanently set the paint.
Shaky Hands?
If you struggle with fine brushes, use a metallic gold oil-based paint marker instead. It offers better control for thin stems and won’t wash out.
Now you have a custom, celestial-inspired bag ready for your next adventure
Glow Accent Constellations
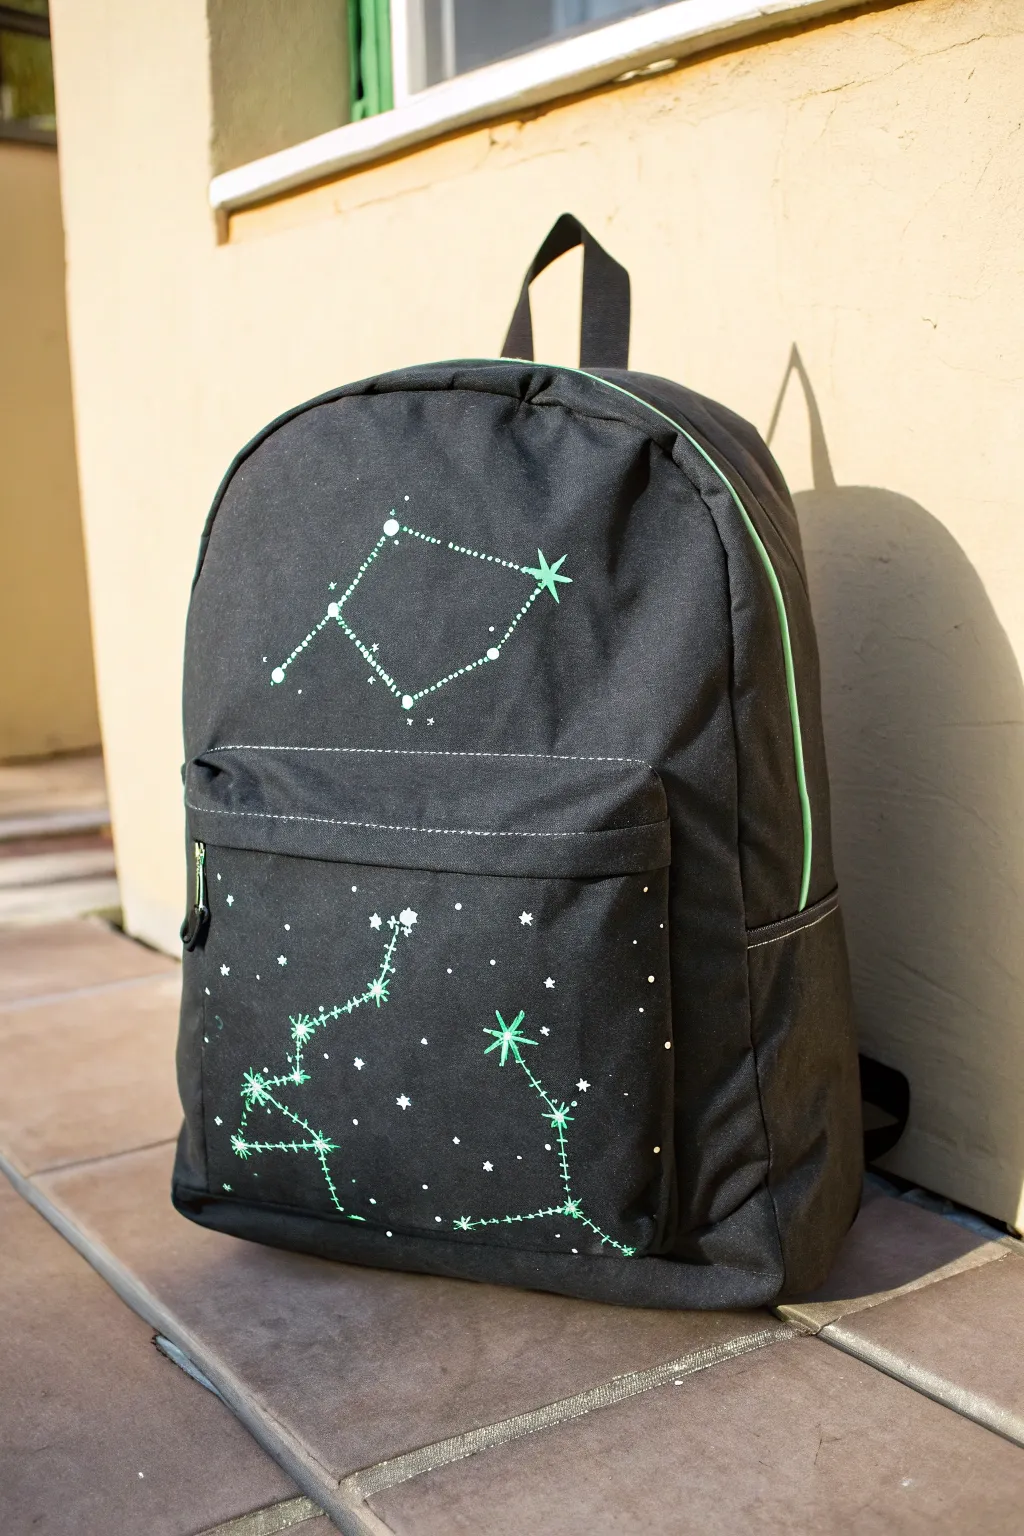
Transform a plain black backpack into a piece of wearable stargazing art with this simple yet striking project. Using fabric paint, you’ll map out glowing geometric constellations that stand out by day and shine even brighter by night.
How-To Guide
Materials
- Black canvas backpack
- Tailor’s chalk or white colored pencil
- Glow-in-the-dark fabric dimensional paint (mint green or pale blue)
- Small round paintbrush (optional, for smoothing)
- Ruler
- Printed star charts (optional reference)
- Paper towels
- Scrap cardboard (to insert into the pockets)
Step 1: Preparation & Planning
-
Stuff the bag:
Before laying down any paint, ensure your workspace is flat. Insert pieces of stiff cardboard inside the main compartment and the front pocket. This prevents paint from bleeding through the fabric layers and gives you a firm surface to draw on. -
Clean the surface:
Use a lint roller over the front of the backpack to remove any dust, hair, or fuzz. A clean canvas ensures the fabric paint adheres properly and creates crisp lines. -
Choosing your stars:
Decide which constellations you want to feature. The geometric shape on the top flap (resembling a kite shape) works well for broader areas, while more complex zodiac signs like Leo or Ursa Major fit perfectly on the square front pocket.
Step 2: Mapping the Stars
-
Mark the major stars:
Using tailor’s chalk or a white pencil, lightly mark small dots where the main ‘stars’ of your constellation will be. I usually start with the top flap design first to get a feel for the spacing. -
Connect the dots:
Use a ruler to lightly draw straight lines connecting your star points. Do not press too hard; these are just guidelines for your painting process later. -
Detailing the pocket:
Move to the front pocket and repeat the mapping process for your second, more complex constellation. Add a few random dots around the main figure to represent background stars.
Oops! Paint clog?
If the nozzle sputters, don’t force it. Unclog it with a sewing needle. If a blob lands on the fabric, let it dry slightly and lift it off with tweezers rather than wiping.
Step 3: Painting the Constellations
-
Test paint flow:
Squeeze a small amount of your dimensional fabric paint onto a paper towel. You want to ensure the nozzle is clear and the paint is flowing smoothly to avoid unexpected splatters. -
Create star anchors:
On the top flap, squeeze a generous dot of paint onto each of your chalk ‘star’ markings. For the brightest stars, make these dots slightly larger. -
Draw the connection lines:
Carefully trace over your chalk lines with a steady stream of paint. Instead of a solid line, try using a series of tiny, closely spaced dots or dashes to give it an authentic ‘star chart’ aesthetic. -
Add a feature star:
Choose one prominent point in the constellation and turn it into a crossed starburst. Draw a small vertical line and a horizontal line intersecting through the center dot for emphasis.
Make it Your Own
Mix glow powder into clear fabric glaze for invisible stars that only appear in the dark, or use metallic silver paint for the connecting lines to add daytime sparkle.
Step 4: Adding the Milky Way Details
-
Pocket constellation:
Repeat the painting process on the front pocket. Connect your main stars with dashed lines, ensuring the paint stands up slightly from the fabric for that 3D look. -
Create variation:
On the pocket, add variety to your stars. Use simple dots for faint stars, small crosses for medium ones, and larger eight-point bursts for the brightest celestial bodies. -
Scatter background stars:
Fill the empty negative space around the main constellation with tiny, random pin-prick dots. This creates depth and makes the main design feel like part of a larger galaxy. -
Clean up edges:
If you smudge any paint, quickly wipe it away with a damp Q-tip before it sets. If the lines look too uneven, you can use a fine brush to gently smooth them out, though the textured look is desirable.
Step 5: Finishing Up
-
Dry completely:
Dimensional fabric paint takes longer to dry than standard acrylics. Leave the backpack flat in a safe, dust-free area for at least 24 hours to ensure the paint cures all the way through. -
Remove chalk marks:
Once the paint is rock-hard and fully dry, gently brush away any remaining visible white chalk lines with a damp cloth or a soft bristle brush. -
Charge the glow:
Place the finished backpack in bright sunlight or under a strong lamp for a few minutes to charge the phosphorescent pigment and test out your glowing creation.
Now you are ready to head out with a galaxy on your back that looks cool during the day and magical at night


Have a question or want to share your own experience? I'd love to hear from you in the comments below!