Whenever I’m stuck, a starry night sketch instantly gets my hand moving—those swirling sky lines are basically magic for loosening up. Here are my favorite drawing ideas that riff on the classic glow, motion, and moody silhouettes in a way you can totally make your own.
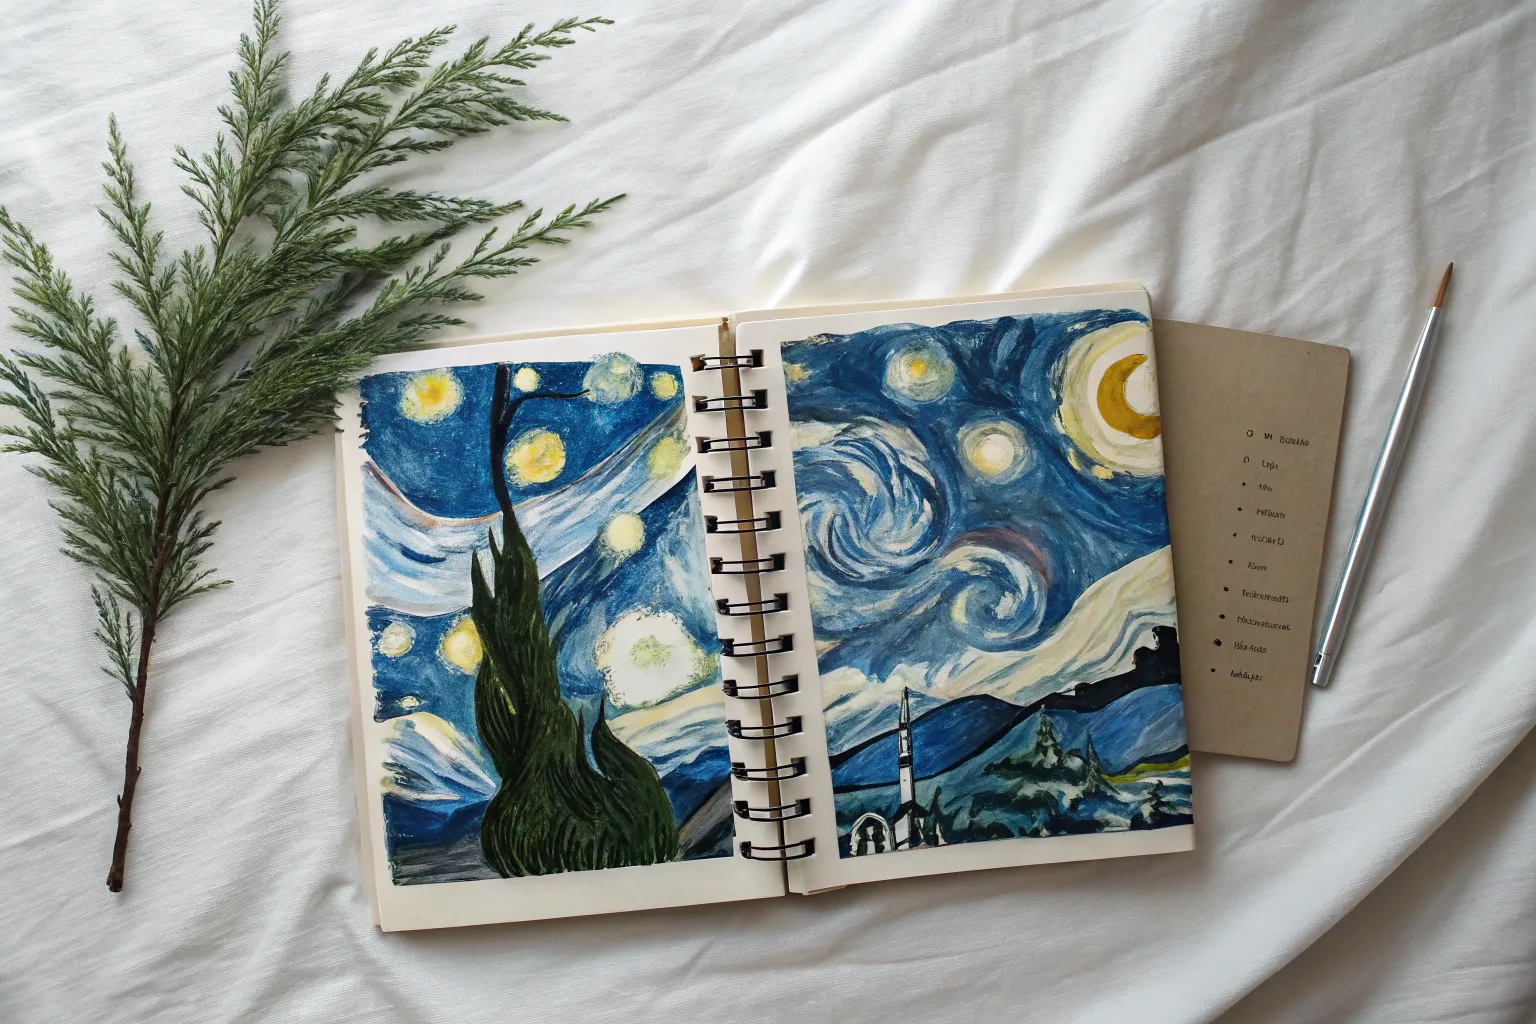
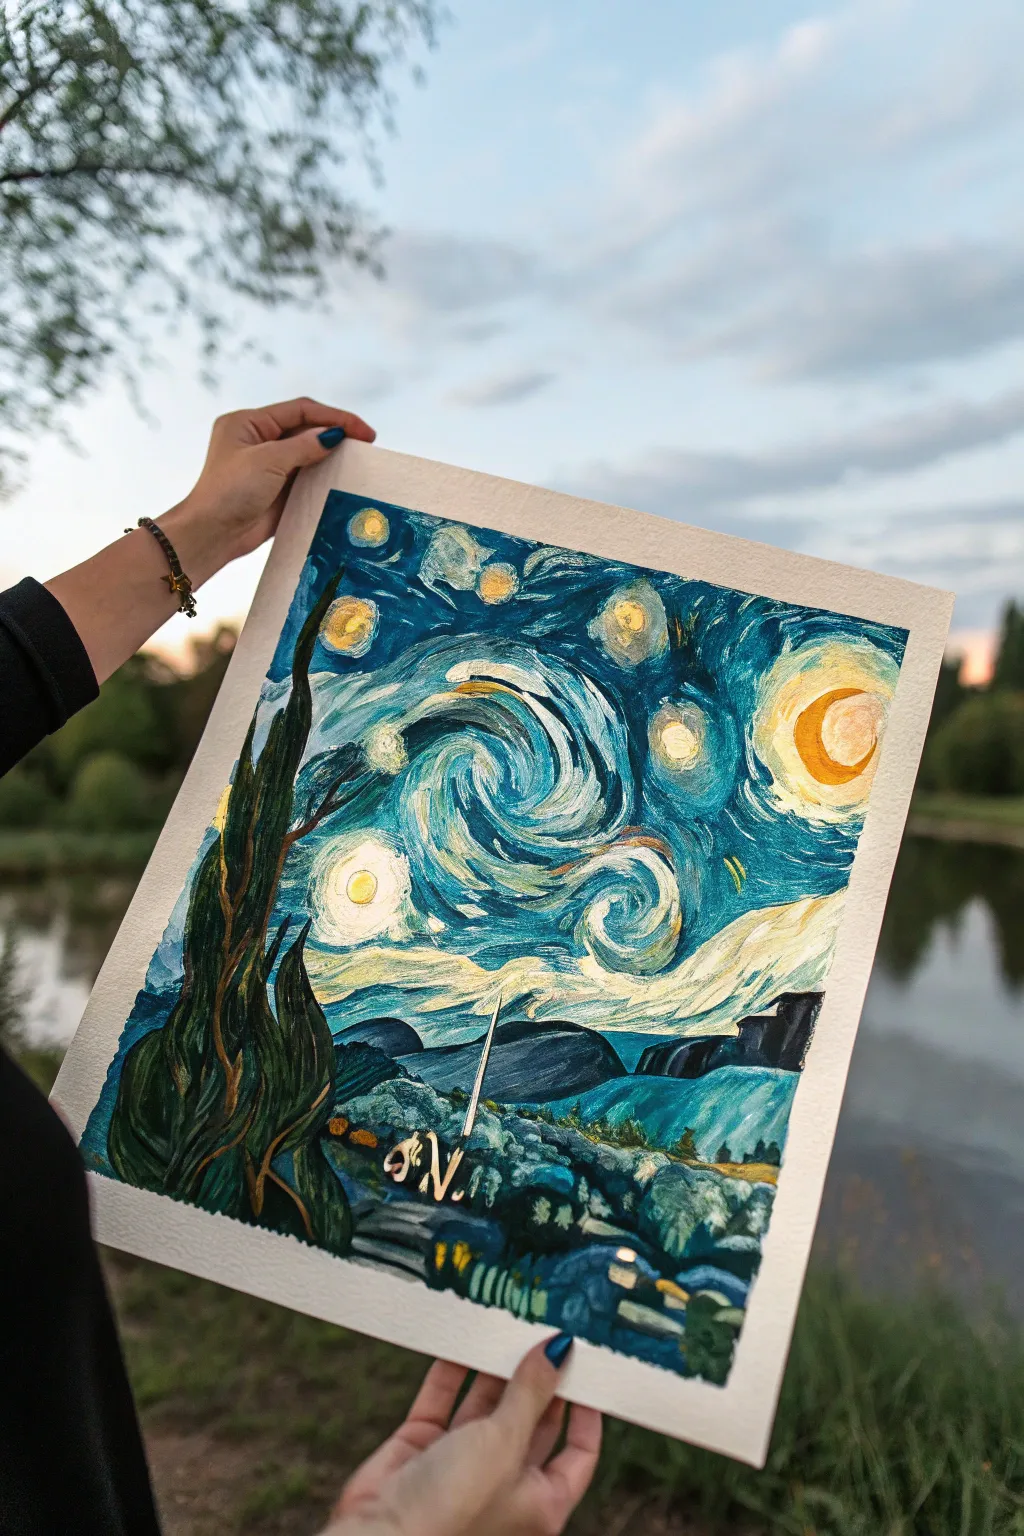
Classic Swirling Sky With Village
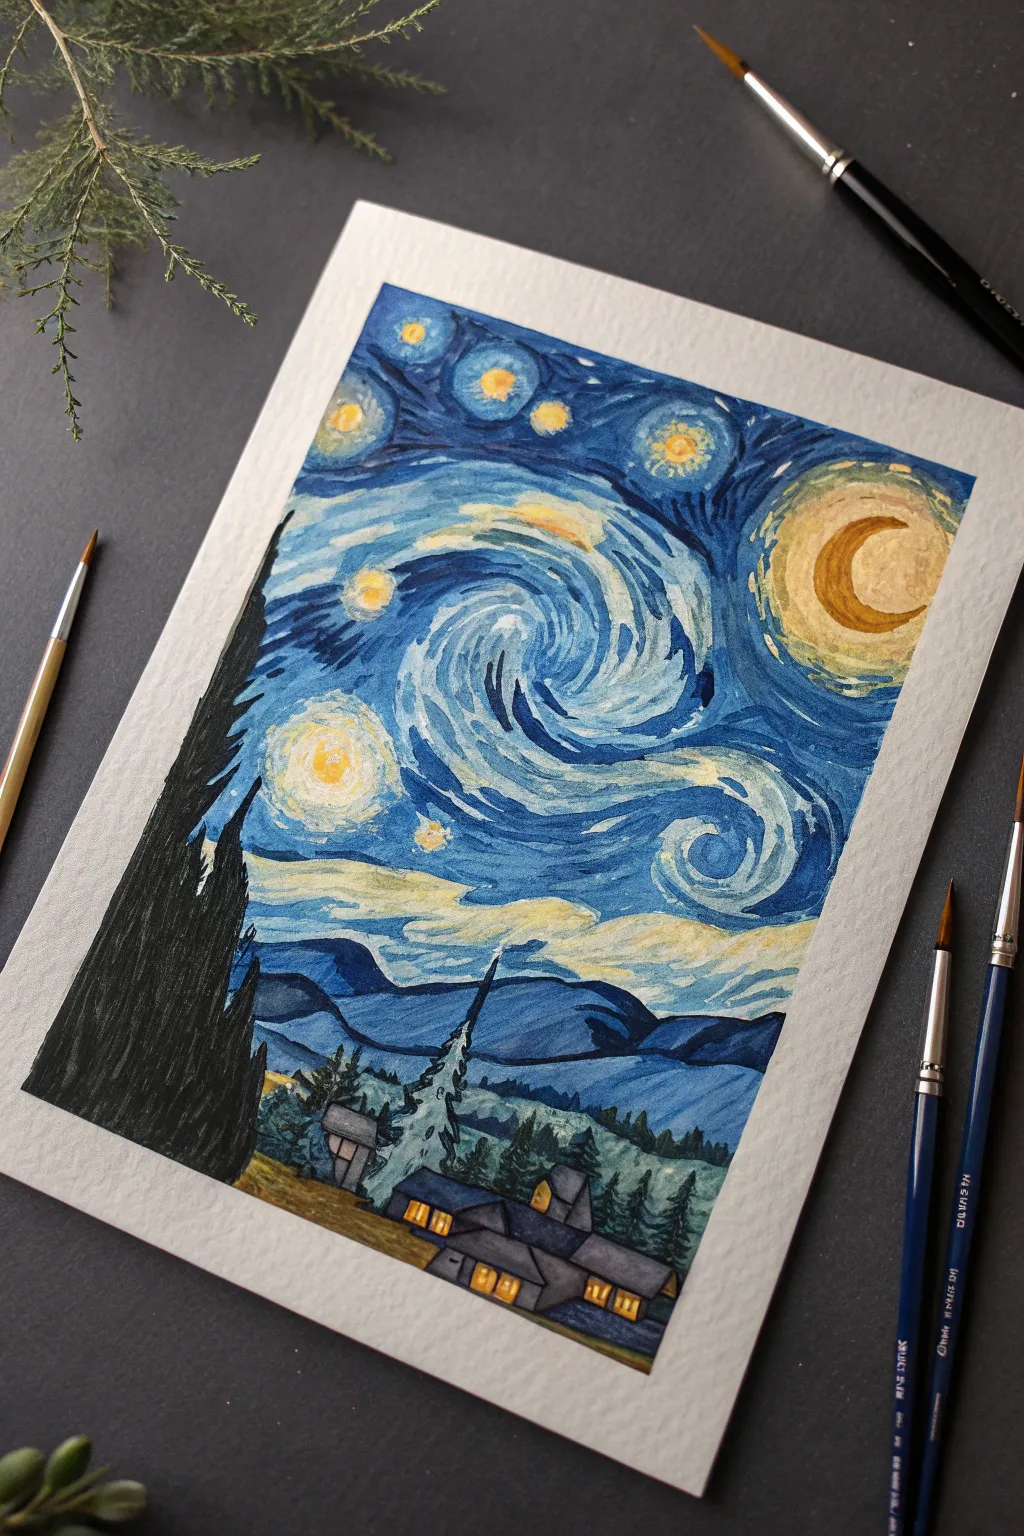
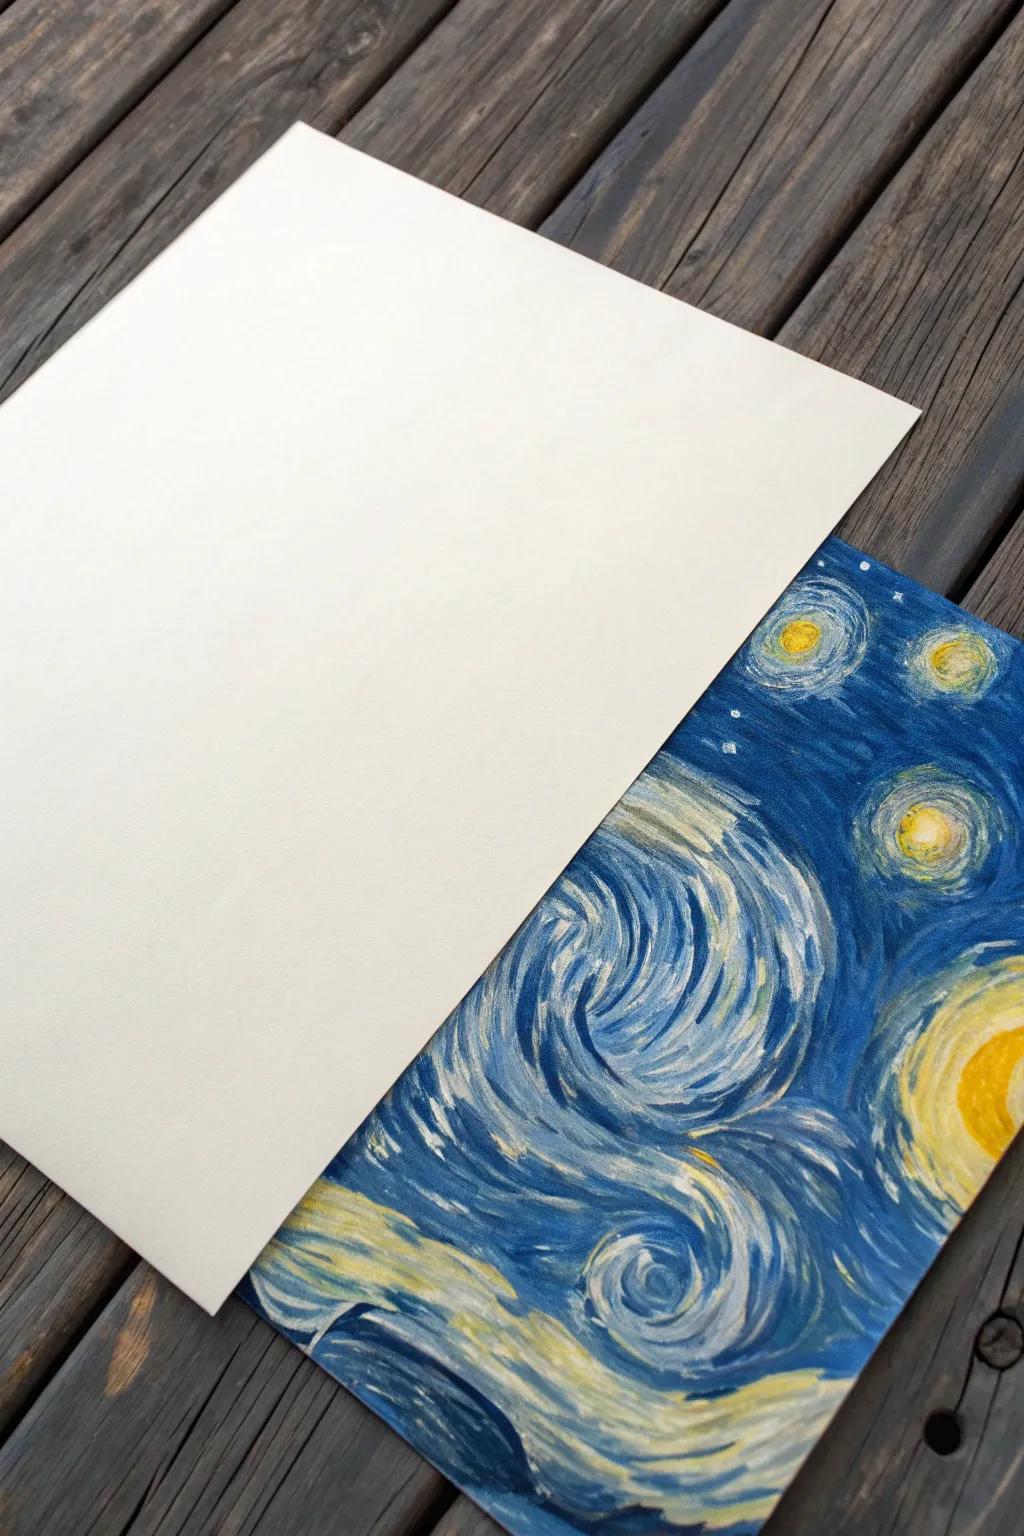
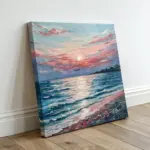
Capture the magic of Van Gogh’s masterpiece with this vibrant watercolor recreation. You will learn to build up the iconic swirling sky and sleepy village using fluid strokes and layered colors.
Detailed Instructions
Materials
- Cold press watercolor paper (300 gsm)
- Watercolor paint set (focus on Ultramarine Blue, Prussian Blue, Lemon Yellow, Cadmium Yellow, Burnt Sienna, Black)
- Round watercolor brushes (sizes 2, 4, and 6)
- Masking tape
- Pencil (HB)
- Jar of clean water
- Paper towels
- Palette for mixing
Step 1: Sketching and Preparation
-
Prepare the paper:
Tape down all four edges of your watercolor paper to a drawing board or table using masking tape. This creates a crisp white border and prevents the paper from buckling when wet. -
Outline the composition:
Lightly sketch the main elements with an HB pencil. Place the large cypress tree on the left, the rolling hills in the background, the village houses at the bottom, and approximate circles for the moon and stars in the sky. -
Mask the lights:
If you have masking fluid, apply small dots where the bright stars and village windows will be. If not, just be mindful to paint around these areas to keep the paper white for maximum brightness later.
Muddy Colors?
If your blue and yellow swirls turn an ugly brown, ensure the first layer is 100% dry before adding the next. Patience prevents unwanted mixing.
Step 2: Painting the Sky
-
Base wash for the sky:
Mix a watery wash of light blue. Apply this freely across the sky area, avoiding the moon and star circles. Let the colors bleed slightly but leave some white spaces for the swirling motion. -
Adding the yellow glow:
While the blue is drying but still damp, drop in diluted Lemon Yellow around the moon and star shapes. Let the yellow bleed slightly into the blue to create a glowing green halo effect. -
Defining the swirls:
Once the base is dry, use a size 4 brush with a darker Ultramarine Blue. Paint the distinct ‘S’ shape swirl in the center using short, dashed strokes rather than one long line. -
Deepening the night:
Mix Prussian Blue with a touch of black for a deep indigo. Fill in the darker areas of the sky between the swirls and stars, using directional brushstrokes that follow the flow of the wind. -
Highlighting the moon:
Paint the crescent moon with Cadmium Yellow. Use short dashes of orange and darker yellow around it to create the radiating light effect indicative of Van Gogh’s style.
Texture Boost
For a more impasto look like the oil original, mix your watercolor with a little white gouache. It adds opacity and lets you layer light over dark.
Step 3: Landscapes and Village
-
The rolling hills:
Paint the distant mountains in a wash of blue-grey. I like to let this layer dry completely before adding a second, darker layer on the ridges to define the shapes. -
The village structure:
Block in the shapes of the houses using a mix of grey and blue. Keep the values lighter than the cypress tree but darker than the sky. -
Roof details:
Use a fine brush (size 2) and a dark grey or brown mix to outline the roofs and distinct angles of the village buildings. -
Lighting the windows:
Fill the small window squares with bright yellow and orange. This warm light contrasts beautifully with the cool tones of the landscape.
Step 4: The Cypress Tree
-
Base layer for the cypress:
Mix a very dark green using green and black. Paint the large, flame-like cypress tree on the left side, ensuring the edges feel organic and wavy. -
Adding texture:
While the dark paint is wet, lift out a few highlights or add concentrated black strokes to mimic the vertical, flickering texture of the tree.
Step 5: Final Touches
-
Enhancing the flow:
Return to the sky with your smallest brush. Add thin, unmixed strokes of white gouache or pale blue to emphasize the movement of the wind swirls if you lost some definition. -
Sharpening outlines:
Add final dark outlines to the mountains and village houses to separate them clearly from the background. -
The reveal:
Wait until the painting is completely bone-dry. Carefully peel away the masking tape at a 45-degree angle to reveal your clean edges.
Frame your masterpiece or gift it to a fellow art lover to brighten their wall


Simple Starry Night for Beginners
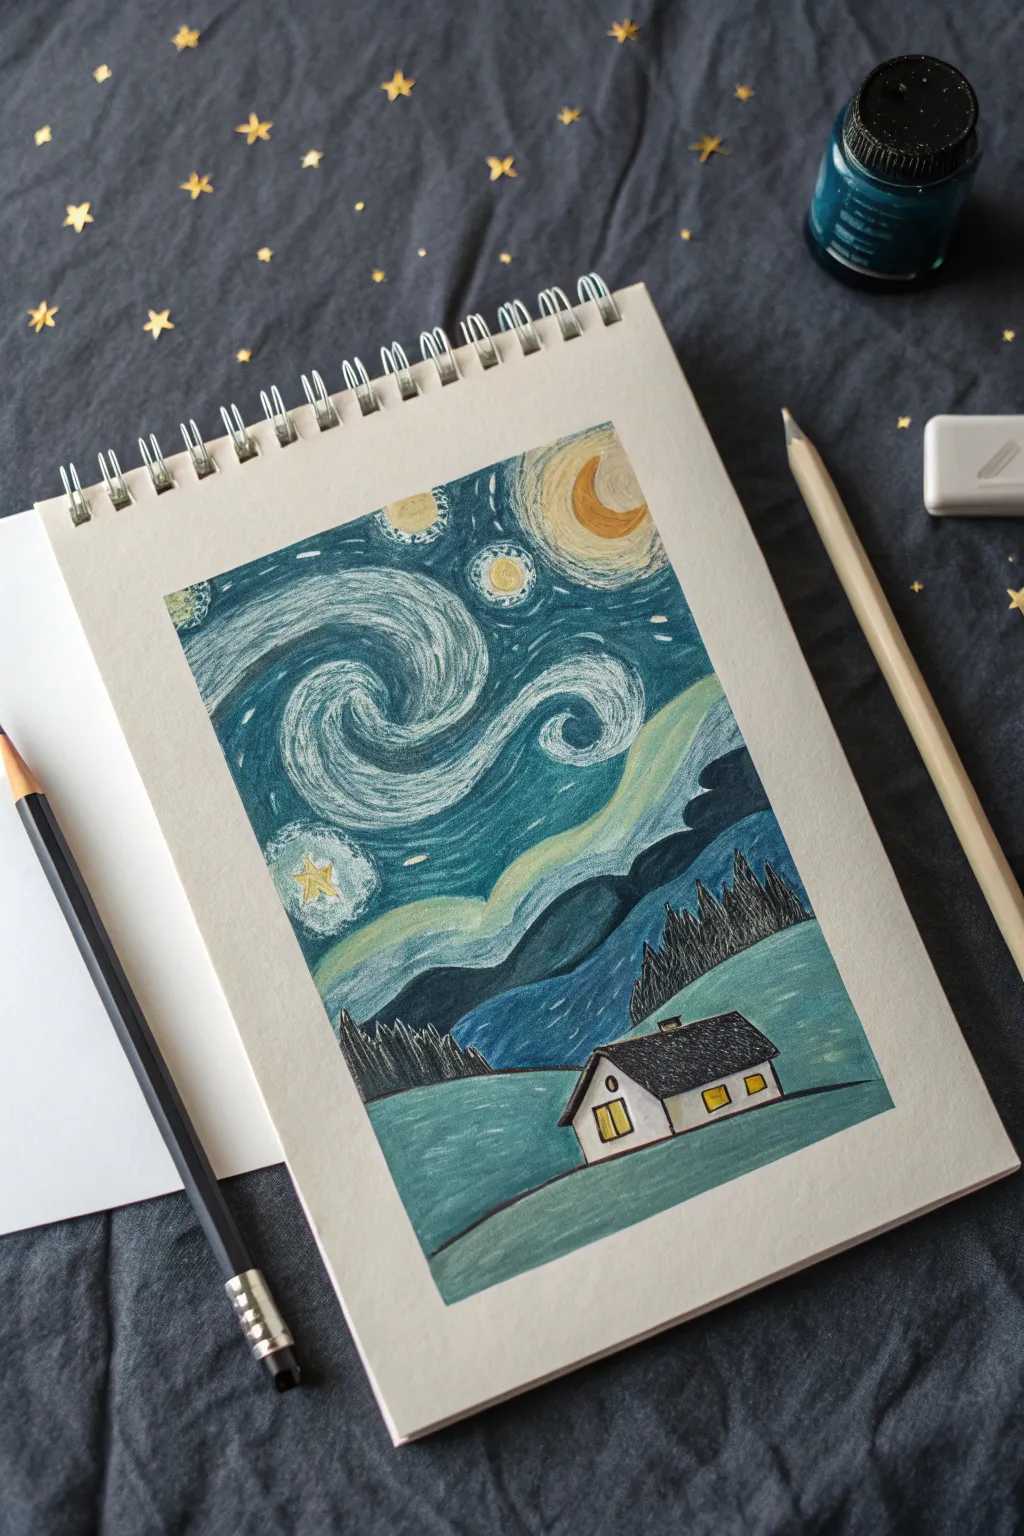
Capture the magic of Van Gogh’s masterpiece in a simplified, charming style perfect for a personal sketchbook. This tutorial guides you through creating swirling night skies and a cozy landscape using layered colored pencils.
Step-by-Step
Materials
- Heavyweight sketch paper or mixed media paper
- Soft core colored pencils (Prismacolor or similar)
- Pencil sharpener
- Graphite pencil (HB or 2B) for sketching
- Eraser
- White gel pen (optional for highlights)
Step 1: Laying the Groundwork
-
Define the Horizon:
Start by drawing a soft, sloping line across the bottom third of your page to separate the land from the sky. Don’t make it perfectly straight; a gentle curve adds organic movement. -
Sketch the House:
In the lower right center, outline a simple house shape. Draw a rectangle for the base and a triangle on top for the roof. If you want a 3D effect, extend the side and rooflines slightly backward. -
Outline the Mountains:
Behind the house, draw rolling mountain shapes. Create two distinct layers: a lower range closer to the foreground and a higher, darker range behind it. -
Draft the Sky Swirls:
Lightly sketch the main composition of the sky. Draw two large, S-shaped spirals in the center for the wind, a crescent moon in the top right, and several circles for the stars.
Keep it Sharp
For the tiny details in the pine trees and the window panes, sharpen your pencil to a fine point. A dull tip will make the architectural lines look muddy.
Step 2: Coloring the Sky
-
Yellow Base Layer:
Using a bright yellow pencil, fill in the crescent moon and the centers of your star circles. Apply the color firmly to make it pop against the blue later. -
Create Glowing Halos:
Around your yellow stars and moon, switch to a pale cream or very light yellow. Make small, dashed circular strokes radiating outward to simulate a glowing halo effect. -
Define the Swirls:
With a white or very pale blue pencil, color the main S-curve wind swirls. Use long, flowing strokes that follow the direction of the wind to build texture. -
First Blue Layer:
Take a medium blue pencil (like cerulean or sky blue) and begin filling the spaces around the swirls and stars. Keep your strokes directional, mimicking the flow of the wind. -
Deepen the Night:
Layer a dark indigo or navy blue over the medium blue areas, pressing harder near the edges of the page and around the swirls to create depth and contrast. -
Blend the Sky:
Go back in with your lighter blue or white pencil to blend the edges where the dark blue meets the wind swirls. I often use a colorless blender pencil here to smooth the tooth of the paper.
Step 3: Landscape and Details
-
Color the Hills:
Fill the distant mountains with a mix of dark slate blue and charcoal gray. Use horizontal strokes for the lower hills and diagonal strokes for the steeper peaks. -
Add the Pine Forest:
On the left side and peeking over the hill behind the house, draw vertical, jagged shapes for pine trees. Use a very sharp black or dark green pencil to create the texture of needles. -
Grass and Foreground:
Color the foreground hill with a muted teal or seafoam green. Keep the shading smooth, but allow some paper texture to show through to mimic grass. -
House Details:
Outline the house firmly in black. Fill the roof with charcoal gray or black. For the windows, use a bright yellow to suggest warm light inside, framing them with thin black lines. -
Final Touches:
Review your sky and add small white or yellow dashes throughout the blue areas to represent distant stars. Strengthen the black outlines of the mountains to separate them from the sky.
Metallic Magic
Use a gold gel pen or metallic gold paint marker for the stars and moon to make your drawing literally shimmer when the light hits the page.
Now you have a charming, miniature masterpiece in your sketchbook.


Bold Cypress Silhouette Foreground
Capture the magic of Van Gogh’s masterpiece with this vibrant acrylic recreation on textured paper. This project features a slightly brighter, more whimsical color palette while maintaining the iconic impasto swirls and that distinctive, looming cypress silhouette.
How-To Guide
Materials
- Heavyweight watercolor paper (300gsm) or acrylic paper block
- Masking tape
- Acrylic paints (Phthalo Blue, Ultramarine Blue, Prussian Blue, Titanium White, Lemon Yellow, Cadmium Yellow Deep, Burnt Umber, Hooker’s Green, Black)
- Flat brushes (various sizes)
- Round brushes (small and medium)
- Small filbert brush (for swirls)
- Palette knife (optional, for mixing)
- Palette
- Water cup and paper towels
Step 1: Preparation and background base
-
Secure the paper:
Begin by taping down all four edges of your paper to a flat work surface. This creates a crisp white border later and prevents the paper from buckling under the moisture of the acrylics. -
Sketch the major shapes:
Using a very light touch and a pencil, map out the horizon line, the large rolling hills, and the swooping curve of the central wind gust. Don’t worry about the stars yet, but do outline the large cypress tree on the left side. -
Block in the sky gradient:
Mix a light blue using Titanium White and a touch of Phthalo Blue. Apply this to the lower portion of the sky, just above the hills. -
Deepen the sky:
As you move upward, gradually mix in Ultramarine and Prussian Blue to darken the sky. By the time you reach the top corners, the color should be a deep, rich midnight blue. Blend the transitions while the paint is still wet for a smooth gradient base.
Pro Tip: Stroke length
Keep your dashes consistent in length (about half an inch) but vary the colors often. Don’t rinse your brush fully between similar blues to create natural, painterly blends.
Step 2: Creating the Swirls and Stars
-
Start the central swirl:
Mix Titanium White with a tiny bit of Lemon Yellow. Using a small filbert or round brush, paint the two main interlocking spiral shapes in the center of the sky. Keep your brushstrokes loose and following the curve. -
Add directional strokes:
Around your white spirals, begin adding short, dashed strokes of light blue and turquoise. These strokes should hug the form of the spiral, creating that sense of movement. -
Map out the stars and moon:
Place circles of bright Lemon Yellow where the stars will be. Paint a crescent shape in the top right corner for the moon. -
Create the glowing halos:
Around each yellow star and the moon, paint concentric rings of short dashes. Start with pale yellow, move to white-yellow, and fade into light blue. This creates the shimmering halo effect characteristic of the original. -
Fill the night sky:
Fill the rest of the dark blue sky with short, rhythmic dashes of varying blues—Ultramarine, Phthalo, and Prussian. I find it helpful to constantly vary the direction of the strokes to mimic the turbulence of the wind.
Step 3: Landscape and Village
-
Paint the distant hills:
Mix a blue-grey tone and fill in the rolling hills in the background. Outline the tops of the hills with a dark blue or black line to separate them from the sky. -
Lay the foreground base:
For the village and lower landscape, layer patches of dark greens, blues, and greys. Use horizontal strokes here to contrast with the swirling sky. -
Add village details:
Once the base represents the rolling land, use a small round brush to dab in suggestions of houses. Use small squares of yellow for lighted windows and black vertical lines for church spires or building edges. -
Highlight the ground:
Add texture to the foreground hills with dabs of lighter green and blue-grey, suggesting vegetation and moonlight reflecting on the grass.
Level Up: Impasto Texture
Mix a transparent modeling paste gel into your acrylics for the swirling sky. This adds physical thickness to the paint, mimicking Van Gogh’s heavy brushwork.
Step 4: The Cypress Tree
-
Base coat the cypress:
Mix Hooker’s Green with a little Black and Burnt Umber to get a very dark, near-black green. Fill in the large, flame-like shape of the cypress tree in the foreground. -
Add flamelike texture:
Once the dark base is tacky, use a small brush to add wavy, upward-moving strokes of pure Hooker’s Green and subtle touches of brown. This gives the tree its twisting, fire-like appearance. -
Final outlines:
Go back in with a fine liner brush and black paint to crispen up any edges on the hills or the cypress tree that got lost. -
Remove tape:
Wait until the painting is completely dry—acrylics can trick you—then carefully peel away the masking tape at a 45-degree angle to reveal your clean white border.
Step back and admire the movement in your sky before framing your masterpiece


Textured Strokes With Oil Pastels
Capture the movement and magic of Van Gogh’s masterpiece on a smaller scale using the rich, creamy texture of oil pastels. This project focuses on building layers of dynamic strokes to recreate that iconic, wind-swept sky.
Step-by-Step
Materials
- Heavyweight mixed-media paper or cardstock
- Oil pastels (student or artist grade)
- Blending stump or cotton swabs
- Paper towel for cleaning pastels
- Masking tape (optional for borders)
- Pencil for light sketching
Step 1: Setting the Scene
-
Prepare your surface:
Cut your paper to your desired size (a square format works well for this composition) and tape down the edges if you want a clean border. -
Lightly sketch the flow:
Using a pencil, very faintly draw the main directional lines of the sky. Map out where the large central swirl will go and the positions of the moon and stars. -
Block in the darks:
Start with a dark blue or indigo pastel. Lay down a base layer in the corners and the areas between the swirls, pressing lightly to cover the white of the paper without saturating it yet.
Keep it Clean
Oil pastels pick up other colors easily. Keep a scrap piece of paper nearby to scribble off dirty layers from your light-colored sticks.
Step 2: Layering the Sky
-
Add the mid-tones:
Select a medium cobalt or ultramarine blue. Apply this color next to your dark areas, following the curves of your initial sketch. -
Introduce light blues:
With a light blue or sky blue pastel, fill in the remaining gaps in the sky, particularly around where the stars and the main wind swirl will be. -
Create the first blend:
Use your finger or a paper towel to gently smudge these blue layers together. This creates a soft underpainting that will peek through your textured strokes later. -
Begin the texture strokes:
Take your dark blue again. Instead of coloring solid blocks, start making short, dashed lines that curve and flow. These dash marks are essential for that Van Gogh style. -
Build the swirl:
Using a combination of sky blue and white, draw curved, dashed lines in the center to form the famous S-shaped wind current. Layer white over blue to make it pop.
Make It Impasto
For a truly painterly look, warm the tip of the pastel with your fingers before drawing to deposit thick, chunky blobs of color.
Step 3: Illuminating the Stars
-
Mark the star centers:
Use a bright yellow pastel to draw small circles where your stars and moon are located. -
Create the glow:
Circle the yellow centers with dashed strokes of a lighter yellow or cream color. Work outwardly in concentric circles. -
Add the radiance:
Switch to white or very pale yellow. Add short dashes radiating outward from the stars, blending slightly with the surrounding blue sky to create a glowing halo effect. -
Define the moon:
For the large crescent moon shape (if included in your crop), use a deep yellow ochre or orange for the inside, blending out to bright yellow on the edges.
Step 4: Refining Details
-
Deepen the contrast:
Go back in with your darkest blue or even a touch of black. Add definition between the swirls and stars to make the bright colors stand out more. -
Add white highlights:
I like to take a clean white pastel and add fresh, unblended dashes on top of the lightest parts of the swirl to simulate movement and light reflection. -
Clean up edges:
If you struggle with colors muddying, wipe the tip of your pastel on a paper towel before applying it to the canvas. -
Final texture check:
Look for any large flat areas. If you find them, add more short, directional strokes in varying shades of blue to ensure the entire surface feels active and textured.
Now you have a vibrant, swirling piece of art that captures the restless energy of the night sky
BRUSH GUIDE
The Right Brush for Every Stroke
From clean lines to bold texture — master brush choice, stroke control, and essential techniques.
Explore the Full Guide
Vertical Starry Night Composition
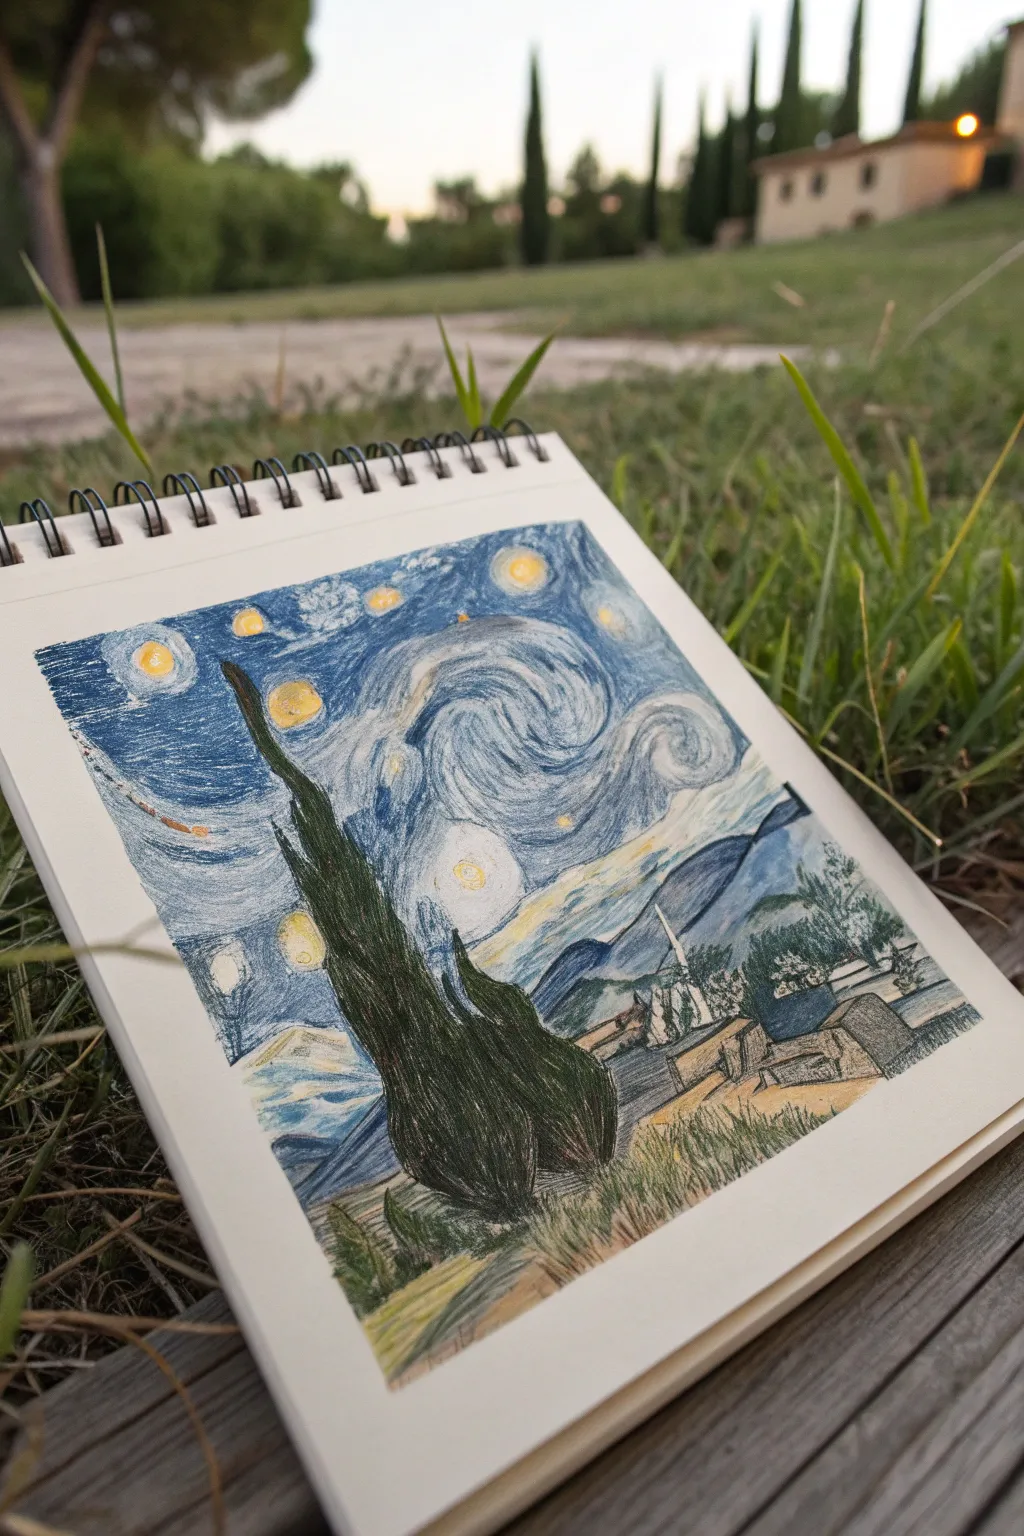
Capture the magic of Van Gogh’s masterpiece in a fresh vertical format perfect for sketchbooks. This colored pencil rendition focuses on the dramatic interplay between the swirling night sky and the imposing cypress tree.
How-To Guide
Materials
- Sketchbook with medium-tooth paper
- HB graphite pencil
- Kneaded eraser
- Colored pencils (wax or oil-based)
- White gel pen (optional for highlights)
- Pencil sharpener
- Tissue or blending stump
Step 1: Initial Sketch & Layout
-
Establish the horizon:
Begin by lightly drawing a sloping horizon line about one-third of the way up from the bottom of your page. This line doesn’t need to be straight; give it the rolling feel of hills. -
Outline the cypress tree:
Sketch the large, flame-like shape of the cypress tree on the left side. Let it dominate the foreground, stretching from the bottom edge almost to the top of the paper. -
Map the celestial swirls:
Lightly trace the path of the main S-curve swirl in the center of the sky. Mark the positions for the moon in the upper right and the various stars scattered across the blue expanse. -
Sketch the village:
Block in the small houses and the church steeple at the base of the hills. Keep these shapes simple and geometric for now, focusing on their placement relative to the hills.
Stroke Direction Matters
To truly mimic Van Gogh, ensure your pencil strokes follow the form of the object—curved around stars, wavy for the tree, and rolling for hills.
Step 2: Layering the Sky
-
Base blue layer:
Take a medium blue pencil and shade the entire sky area lightly, avoiding the circles you marked for the stars and moon. Use horizontal strokes for the background. -
Deepen the darks:
Switch to a dark indigo or navy blue. Begin adding the dashes and directional strokes that define the ‘flow’ of the sky, pressing harder near the edges and around the swirls. -
Create the swirl:
Use a mix of light blue and white pencils to define the central S-curve. Apply the pencil in short, curved strokes to mimic Van Gogh’s impasto brushwork style. -
Add the glowing orbs:
Fill the star circles and moon with a bright yellow. I like to layer a bit of orange or ochre in the centers to give them warmth and depth. -
Blend the halos:
Surround the yellow stars with concentric dashed lines of pale yellow and white, blending them slightly into the surrounding blue to create a glowing halo effect.
Step 3: Developing the Landscape
-
Color the hills:
Use sweeping diagonal strokes of light blue and slate grey to color the rolling hills. Add a touch of black outline to separate the ridges. -
Detail the village:
Fill in the village structure with earthy tones—browns and greys adjacent to the blue hills. Use distinct vertical lines for walls and angled strokes for roofs. -
Foreground grasses:
Add texture to the very bottom right foreground using short, upward strokes of olive green and yellow ochre to suggest field grasses.
Mixed Media Pop
Once your pencil work is done, use a white gel pen or a fine dab of white acrylic paint in the center of stars to make them brightly shine.
Step 4: The Cypress & Final Touches
-
Base layer for the tree:
Color the cypress tree with a dark olive green. Ensure the coverage is solid, serving as a dark anchor for the composition. -
Add definition:
Layer black and deep brown over the green in wavy, flame-like vertical motion. leave some slivers of the green showing through to suggest illuminated texture. -
Intensify sky contrast:
Go back into the sky with your darkest blue or black pencil to increase the contrast against the bright stars and the light swirl. -
Texture refinement:
Look over the entire piece and add more short, dashed marks (hatching) where the texture looks too flat, reinforcing that signature post-impressionist movement.
Close your sketchbook knowing you have captured a pocket-sized piece of art history
Have a question or want to share your own experience? I'd love to hear from you in the comments below!