
Stickmen are my favorite little drawing shortcut because a few lines can still tell a whole story. Here are stickman ideas you can steal, remix, and turn into your own quick sketches, comics, or warm-up drills.
Classic Walking Poses
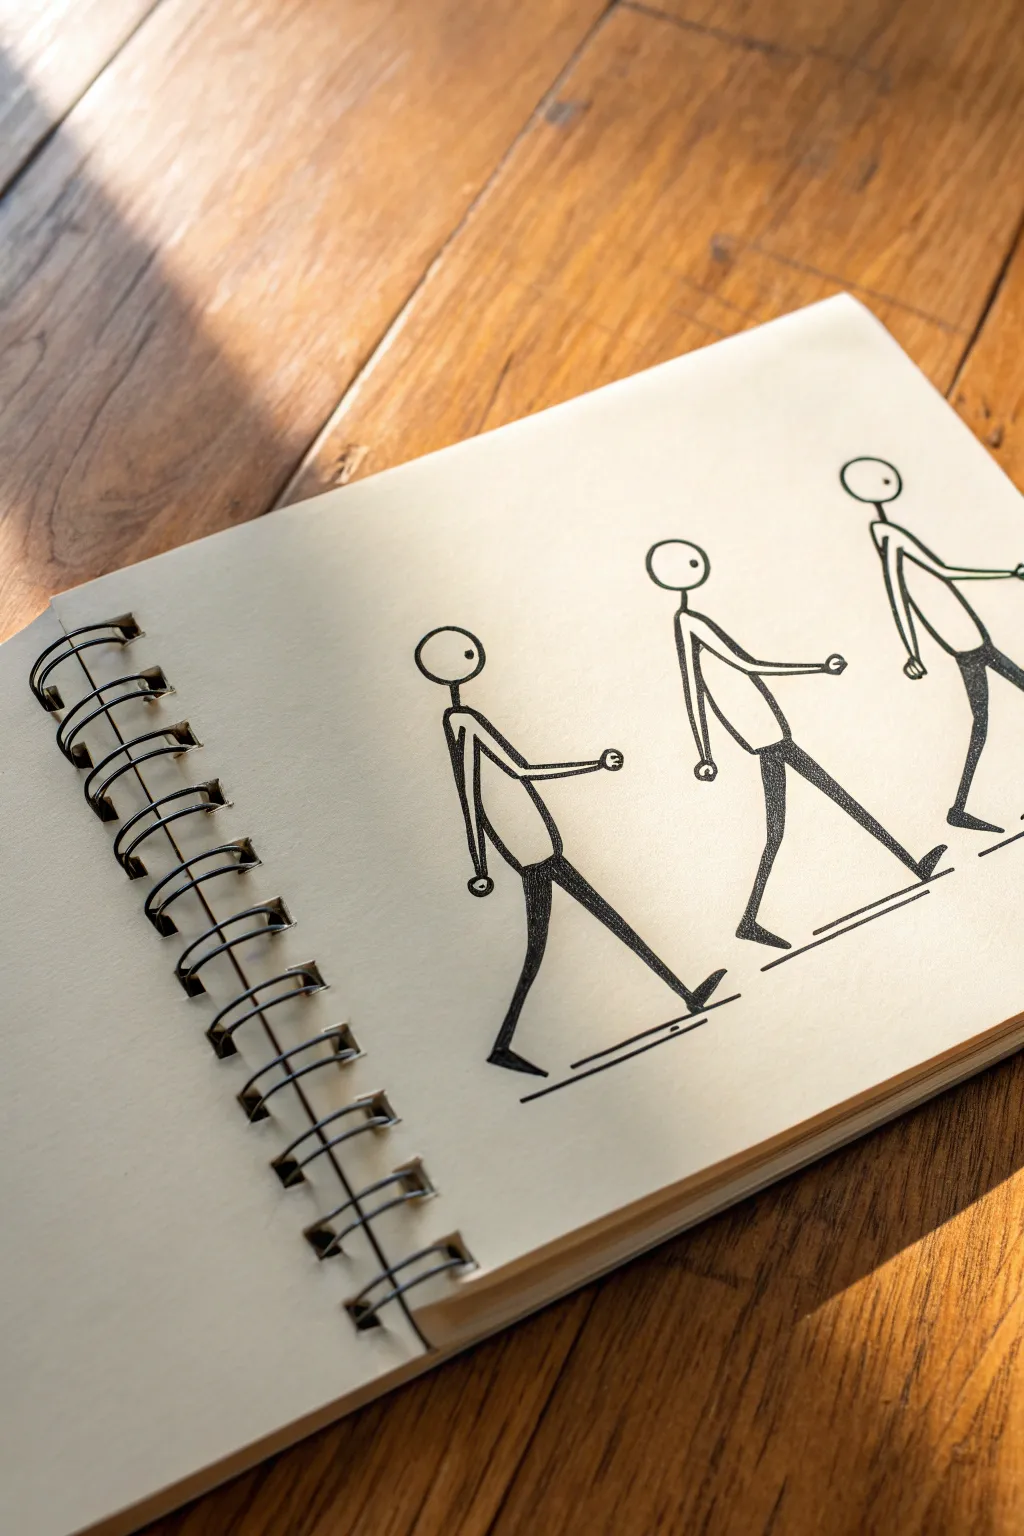
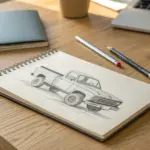
Master the art of motion with this clean, sequential drawing of a walking stickman figure. Using simple geometric forms and bold ink lines, you’ll capture the rhythm of a mid-stride walk cycle on textured sketchbook paper.
Step-by-Step
Materials
- Spiral-bound sketchbook (cream or off-white paper)
- HB pencil
- Fine-point black drawing pen (0.5mm)
- Medium-point black marker or brush pen
- Eraser
- Ruler (optional)
Step 1: Planning the Composition
-
Define the ground line:
Begin by lightly sketching a horizontal guideline across your page with an HB pencil to ensure your figures walk on a level plane. This doesn’t need to be perfectly straight, as a slight hand-drawn quality adds charm. -
Establish head placement:
Visualize three figures spaced evenly across the page. Lightly sketch three circles for the heads, keeping them at the same height relative to your ground line to maintain consistent character size. -
Draft the torsos:
Draw a slightly curved line extending down from each head circle. This spine line should lean forward just a tiny bit to suggest forward momentum. -
Sketch the body mass:
Instead of a single stick line for the body, lightly sketch an elongated oval or bean shape around the spine line. This adds volume to the torso and gives the figure more presence.
Wobbly Lines?
If your straight lines are shaky, rotate the sketchbook so you can pull the pen toward your body. Drawing lines toward you is naturally more stable than pushing away.
Step 2: Constructing the Pose
-
Position the leading leg:
For the front leg, draw a line extending forward and down from the hip area. Ensure the knee has a very subtle bend, but keep the overall limb relatively straight as it reaches for the next step. -
Position the trailing leg:
Sketch the back leg extending behind the torso. This leg is pushing off the ground, so current posture is crucial—make sure the angle complements the front leg to create a wide, confident stride. -
Draft the arms:
Draw the arms swinging in opposition to the legs. If the right leg is forward, the right arm should be back. Keep the elbows slightly bent to avoid a stiff robot look. -
Add hand and foot details:
Sketch small circles at the ends of the arms for hands. For the feet, add simple triangular wedges at the ankles; the front foot should be heel-down, while the back foot is on its toes. -
Refine the repetition:
Repeat this limb construction for the second and third figures. I find it helpful to vary the arm angle ever so slightly on the last figure to simulate the progression of movement.
Step 3: Inking and Definition
-
Outline the head:
Switch to your fine-point black pen. Trace over your pencil circle for the head, leaving a small gap if you want a stylistic open look, or closing it completely for a classic feel. -
Ink the torso:
Carefully outline the bean-shaped body. Keep your lines smooth and continuous. Add a small dot inside the head circle near the front to indicate the eye direction. -
Thicken the legs:
Using the medium-point marker, ink the legs. Instead of a single line, draw the legs with thickness—tapering slightly at the ankles. Fill these shapes in solid black for a bold silhouette. -
Ink the arms:
Return to the fine-point pen for the arms. Draw them as hollow tubes rather than solid lines to differentiate them from the black legs. This visual distinction helps readability. -
Detail the hands:
Ink the small circle hands. You can add a tiny curve inside the circle to suggest a clenched fist or fingers.
Animate It
Trace your finished drawing onto three separate index cards. Flip through them quickly to see your stickman actually take a step.
Step 4: Final Touches
-
Ground the figures:
Draw a thin, straight line directly underneath the feet of each figure. Don’t connect them all; individual ground lines underscore the specific placement of each step. -
Erase guidelines:
Wait until the ink is completely dry to prevent smudging. Gently erase all the underlying pencil sketch lines, leaving only the crisp ink work. -
Review contrast:
Check the solid black legs. If the coverage looks patchy, go over them one more time with the marker to ensure a deep, opaque black.
Now you have a dynamic sequence that brings a simple character to life on the page


Pointing, Waving, and Gesturing
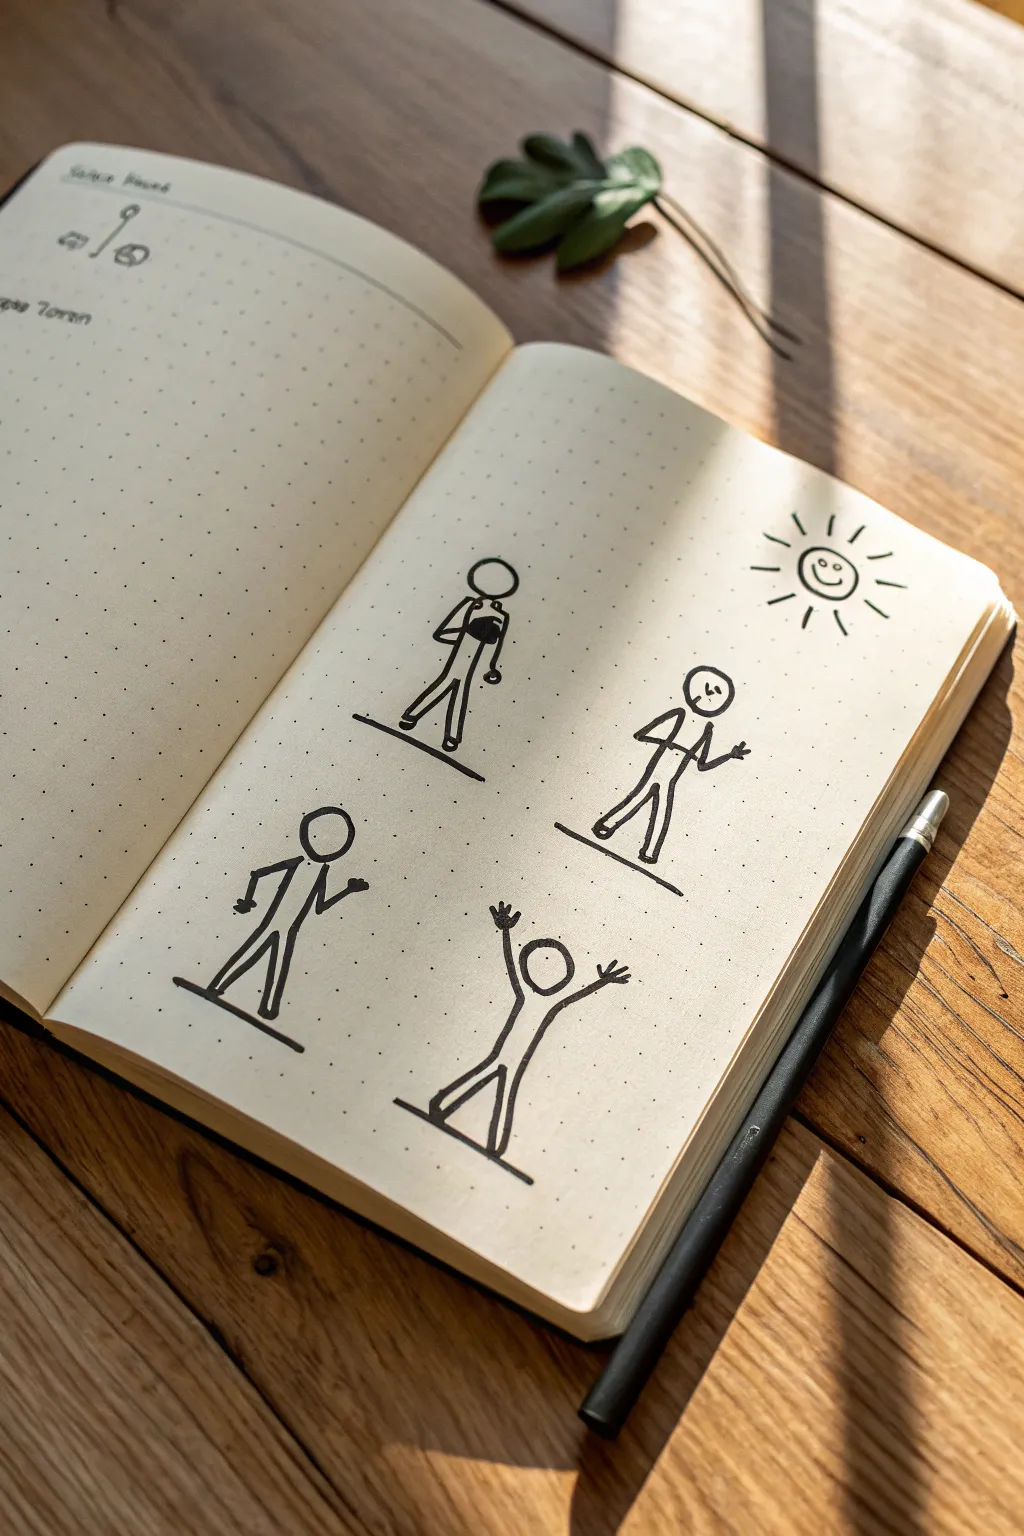
Learn to draw character-filled stick figures on dot grid paper, focusing on clear gestures like pointing and waving. This simple black ink project captures movement and emotion with just a few well-placed lines.
How-To Guide
Materials
- A5 Dot Grid Notebook or Journal
- Fine Liner Pen (0.3mm or 0.5mm, Black)
- Pencil (HB)
- Eraser
- Ruler (optional)
Step 1: Planning and Layout
-
Prepare the page:
Open your dot grid notebook to a clean spread. Ensure the paper is flat to avoid distortion while drawing. -
Draft figure positions:
Using a pencil and light pressure, lightly mark four distinct areas on the right-hand page where your figures will stand. Create a grid-like arrangement with two figures on top and two below. -
Establish the ground lines:
Draw a short horizontal line at the base of each designated area. These lines anchor your figures so they aren’t floating in space.
Wobbly Lines?
Don’t stress about perfect straightness. If a line goes astray, just thicken it slightly to correct the visual weight. A sketchy look adds character!
Step 2: Drawing the Base Structures
-
Draft the heads:
Pencil in a small circle for the head of each figure. Keep them roughly the same size for consistency across the page. -
Add torsos:
Draw a vertical line down from each head circle. For the top-right figure, curve the torso slightly backward to show a leaning posture. -
Sketch the legs (Top Left):
Draw the legs for the first figure in a simple A-frame stance, feet touching the ground line. -
Sketch the legs (Top Right):
For the second figure, bend the knees slightly to suggest a relaxed, leaning stance. -
Sketch the legs (Bottom Left):
Give the third figure a wide, confident stance with straight legs planted firmly. -
Sketch the legs (Bottom Right):
Draw the legs wide apart for the final figure, reminiscent of a jumping jack or victory pose.
Add Personality
Give your stick figures tiny accessories like hats, ties, or holding distinct objects like a balloon or a coffee cup to tell a mini-story.
Step 3: Adding Gestures and Inking
-
Add arms (Top Left – Neutral):
Sketch arms bent at the elbow, hands resting near the chest or waist. Keep it simple. -
Add arms (Top Right – Talking):
Draw one arm pointing downward and the other raised as if making a point during a conversation. -
Add arms (Bottom Left – Walking):
Draw the arms in a swinging motion—one forward, one back—to simulate a strut or confident walk. -
Add arms (Bottom Right – Cheering):
Extend both arms straight up in a ‘V’ shape for a high-energy, celebrating gesture. -
Detail the sun:
In the upper right corner, pencil a circle with radiating dashes. Add a simple smiley face inside for charm. -
Ink the outlines:
Switch to your fine liner pen. Trace over your pencil lines confidently. I find it helps to pull the pen toward you for smoother straight lines. -
Thicken the lines:
Go over the torso and limb lines a second time to give them a slightly bolder, sketched look, distinguishing them from the thin grid dots. -
Erase pencil marks:
Wait until the ink is completely dry to prevent smudging. Gently erase all underlying pencil sketches.
Now you have a lively reference page for adding action to your journal entries


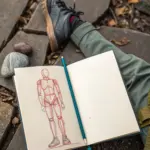
Emotion Through Body Language
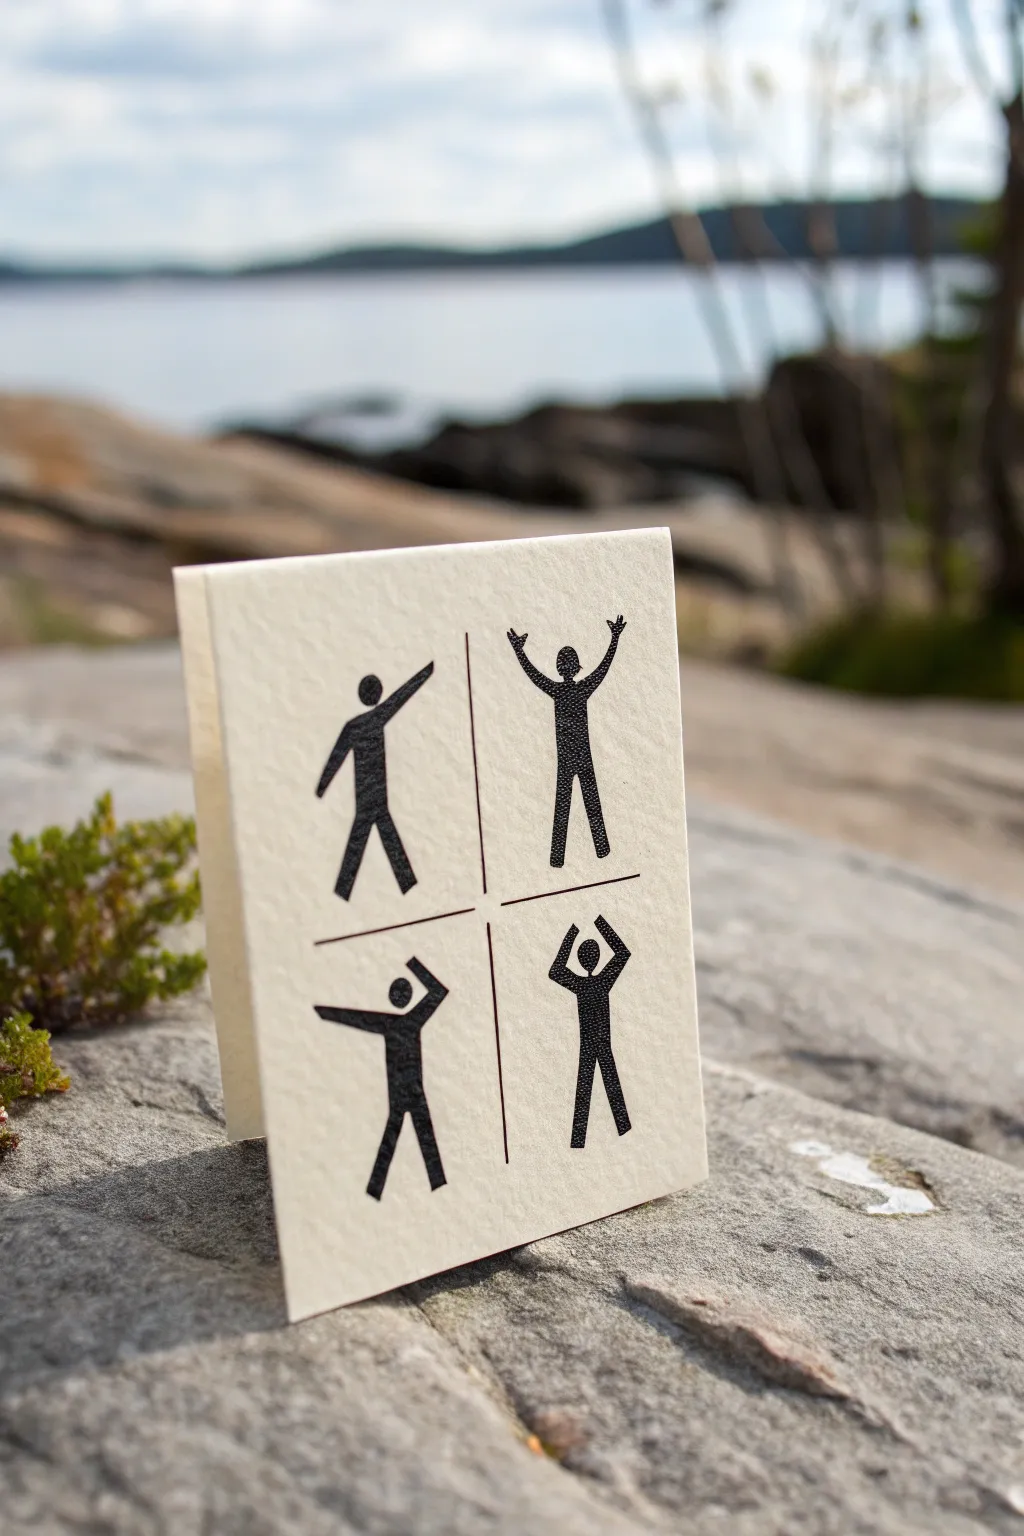
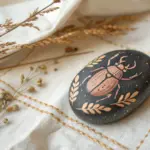
Capture a range of emotions with this graphic, minimalist greeting card featuring expressive stick figures. The design uses block printing techniques to create a bold, textured look on heavy cardstock.
Step-by-Step Guide
Materials
- Heavyweight textured cardstock (cream or off-white)
- Linoleum carving block or soft rubber carving block
- Linocut carving tools (V-gouge and U-gouge)
- Black block printing ink (water-based or oil-based)
- Brayer (rubber roller)
- Glass or acrylic plate for rolling ink
- Pencil and eraser
- Ruler
- Fine-point black permanent marker or pigment liner
- Craft knife or scissors
- Bone folder (optional)
Step 1: Planning and Carving
-
Sketch your figures:
Begin by sketching four simple stick figures on a piece of scrap paper. Focus on distinct angles for the arms and legs to convey specific emotions or actions, like triumph, confusion, or excitement. -
Transfer to block:
Draw your four chosen designs directly onto the carving block using a pencil. Keep them roughly equal in size, about 1 to 1.5 inches tall each. -
Outline the shapes:
Use a fine V-gouge tool to carefully crave around the outline of your first stick figure. Go slowly around the round head to keep it circular. -
Clear the negative space:
Switch to a wider U-gouge to remove the material surrounding your figure. You don’t need to cut too deep, just enough so the background won’t touch the paper. -
Separate the stamps:
I find it easiest to work with individual stamps, so cut the carving block into four separate squares, one for each stickman, using a craft knife. -
Clean the edges:
Trim away any excess rubber close to the figure’s edges to prevent stray ink marks during the stamping process.
Clean Lines
If you struggle carving perfect circles for heads, try using a small metal hole punch or a piece of brass tubing to stamp-cut the rubber circle first.
Step 2: Preparing the Card
-
Cut the paper:
Cut your textured cardstock to your desired size (e.g., 8×6 inches, to fold into a 4×6 card). -
Score and fold:
Measure the midpoint and score a line for the fold. Use a bone folder to create a crisp clean crease. -
Mark the grid:
Lightly mark a faint pencil crosshair on the front of the card to divide the space into four equal quadrants. This will guide your stamping placement.
Step 3: Printing and Finishing
-
Prepare the ink:
Squeeze a small amount of block printing ink onto your glass plate. Roll the brayer back and forth until the ink sounds ‘sticky’ and has a velvety texture. -
Ink the first stamp:
Roll a thin, even layer of ink onto your first stickman stamp. -
Stamp the first quadrant:
Press the stamp firmly into the top-left section. Apply even pressure with your fingers to ensure the texture of the paper picks up the ink. -
Complete the grid:
Repeat the inking and stamping process for the remaining three figures, placing one in each quadrant. Allow the ink to dry completely. -
Draw the grid lines:
Once the ink is fully dry, take your fine-point black marker and ruler. Draw straight lines over your pencil guides to separate the four figures. -
Add detail logic:
Stop the marker lines just short of the figures if they overlap the center, or draw right through for a strict grid look. The example shows the lines framing the figures perfectly. -
Erase guidelines:
Wait for the marker ink to set, then gently erase any visible pencil marks to leave a clean, professional finish.
Make it Pop
Try using a different ink color for just one of the four quadrants (like a bright red) to make that specific emotion stand out as the ‘punchline’ of the card.
Now you have a charming, hand-printed card ready to share a specific sentiment

Stickman Friends and Interactions
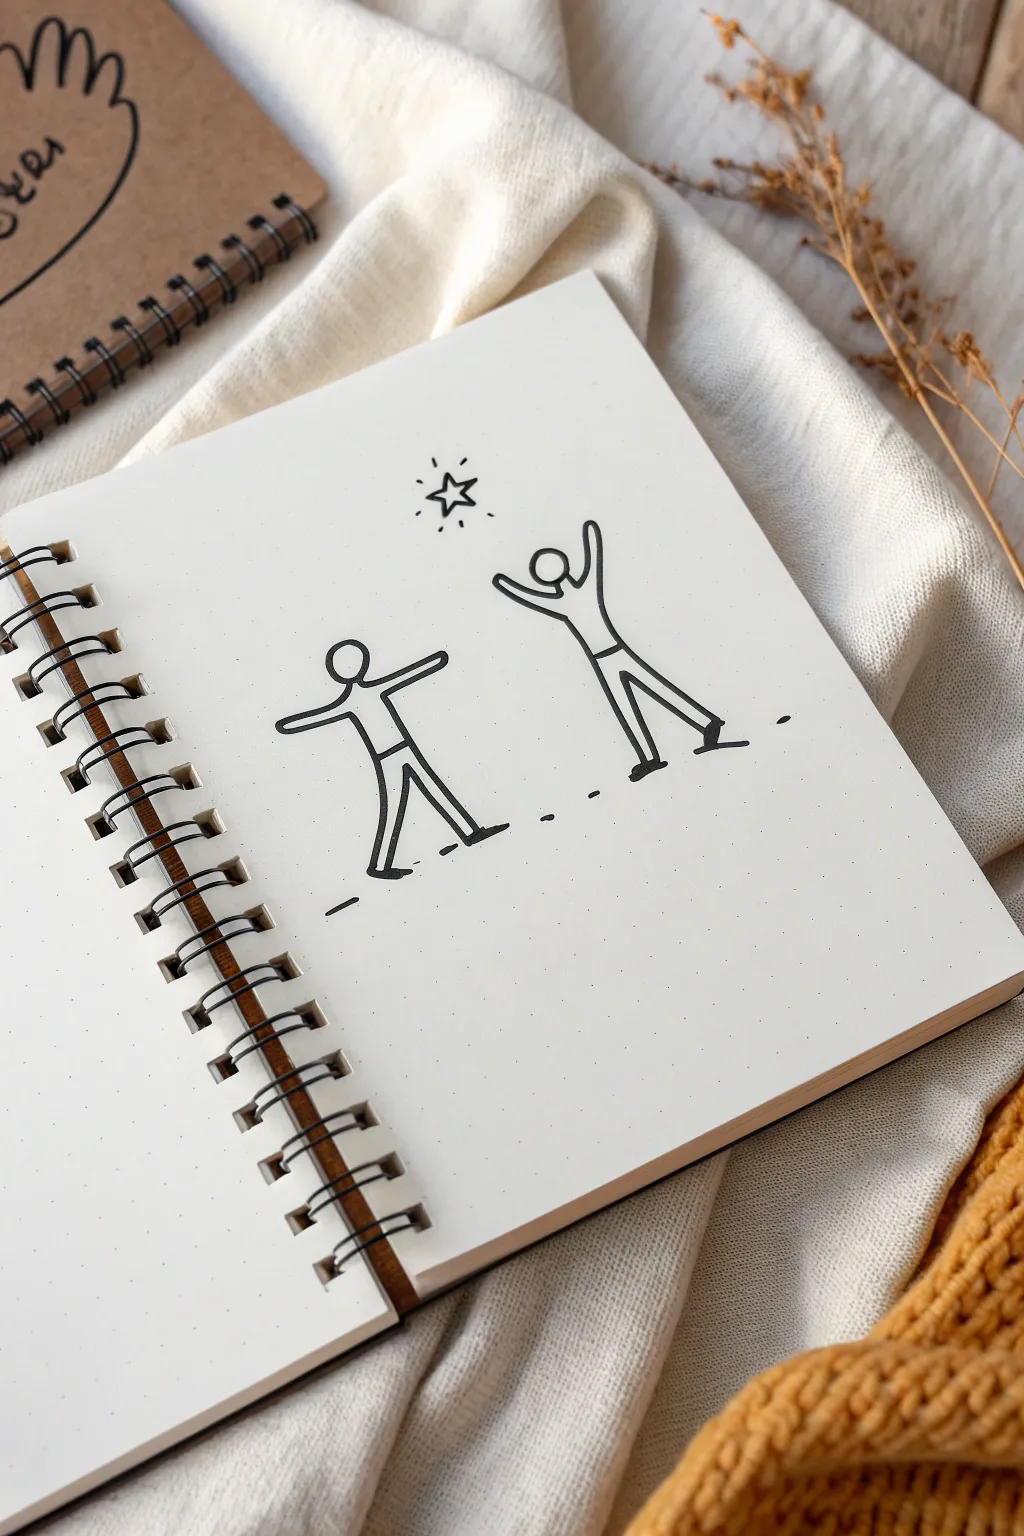
This minimalist stickman drawing captures a moment of shared ambition and playful movement using just a few confident ink lines. The dot-grid background adds a structured yet casual feel, perfect for a bullet journal spread or a quick doodle break.
Step-by-Step Tutorial
Materials
- A5 Dot-grid notebook or paper
- Fine liner pen (0.5mm, black)
- Pencil (HB or H)
- Eraser
- Ruler (optional)
Step 1: Planning composition
-
Establish the ground line:
Locate the lower third of your page. Using the dot grid as a guide, lightly mark a horizontal path where your figures will stand. This invisible line ensures they don’t look like they are floating. -
Position the figures:
Visualize where the two figures will go. Place the left figure slightly lower and the right figure slightly higher and to the right, creating a diagonal flow. Mark their center points with tiny pencil dots.
Wobbly Lines?
If your straight lines look shaky, try drawing them faster. Moving your hand quickly creates smoother strokes than drawing slowly and over-thinking the movement.
Step 2: Drafting the left figure
-
Draw the head:
Start with the left figure. Sketch a simple, clean circle for the head. It should be roughly one grid square high if you are using standard dot paper. -
Add the torso:
Draw a straight vertical line down from the head to represent the torso. Keep it proportional—about twice the height of the head works well. -
Sketch the arms:
Extend the arms horizontally outward. The left arm goes straight out, while the right arm tilts slightly upward, suggesting balance or a welcoming gesture. -
Form the legs:
Draw the legs in a wide stance, like an inverted ‘V’. The left leg angles back, and the right leg angles forward. Add short horizontal dashes at the bottom for feet to ground the character.
Make it Pop
Use a yellow highlighter or a metallic gold gel pen to fill in the star. This tiny splash of color draws the eye immediately to the focal point of the interaction.
Step 3: Drafting the right figure
-
Position the second head:
Move up and to the right for the second figure. Draw the circle for the head, ensuring it’s the same size as the first one for consistency. -
Curve the torso:
Sketch the torso line, but give it a very slight curve or tilt to the right to imply upward movement and stretching. -
Reach for the sky:
Draw both arms reaching upwards in a ‘V’ shape. Try to make the curves smooth, as if the figure is really stretching their shoulders toward something above. -
Plant the feet:
Draw the legs. The left leg should be straight and angled back, while the right leg steps forward with a bent knee implied by the angle. Add firm horizontal feet lines.
Step 4: Adding details
-
Draw the star:
Directly above the gap between the two figures, sketch a small, five-pointed star. It doesn’t need to be geometrically perfect; a hand-drawn look adds charm. -
Add radiance lines:
Surround the star with three little dash marks to indicate it is shining or glowing. -
Indicate the ground:
Instead of a continuous horizon line, draw small, broken dashes under the feet of each figure and a few in betwen them. This suggests the ground without cluttering the scene.
Step 5: Inking and finishing
-
Trace with pen:
Take your black fine liner. With confident, steady strokes, go over your pencil lines. I prefer to pull the pen toward me for straighter lines rather than pushing it away. -
Define the silhouettes:
Go over the torso and limb lines a second time if needed to make them slightly bolder than the detail lines like the ground dashes. -
Let ink dry:
Wait at least two full minutes to ensure the ink is completely set. Smudging at this stage is heartbreaking. -
Erase guidelines:
Gently erase all underlying pencil marks. Hold the paper taut with one hand while erasing with the other to prevent the paper from crinkling.
Enjoy the clean simplicity of your new stickman artwork

PENCIL GUIDE
Understanding Pencil Grades from H to B
From first sketch to finished drawing — learn pencil grades, line control, and shading techniques.
Explore the Full Guide
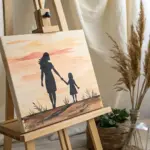
Dance and Groove Stickmen
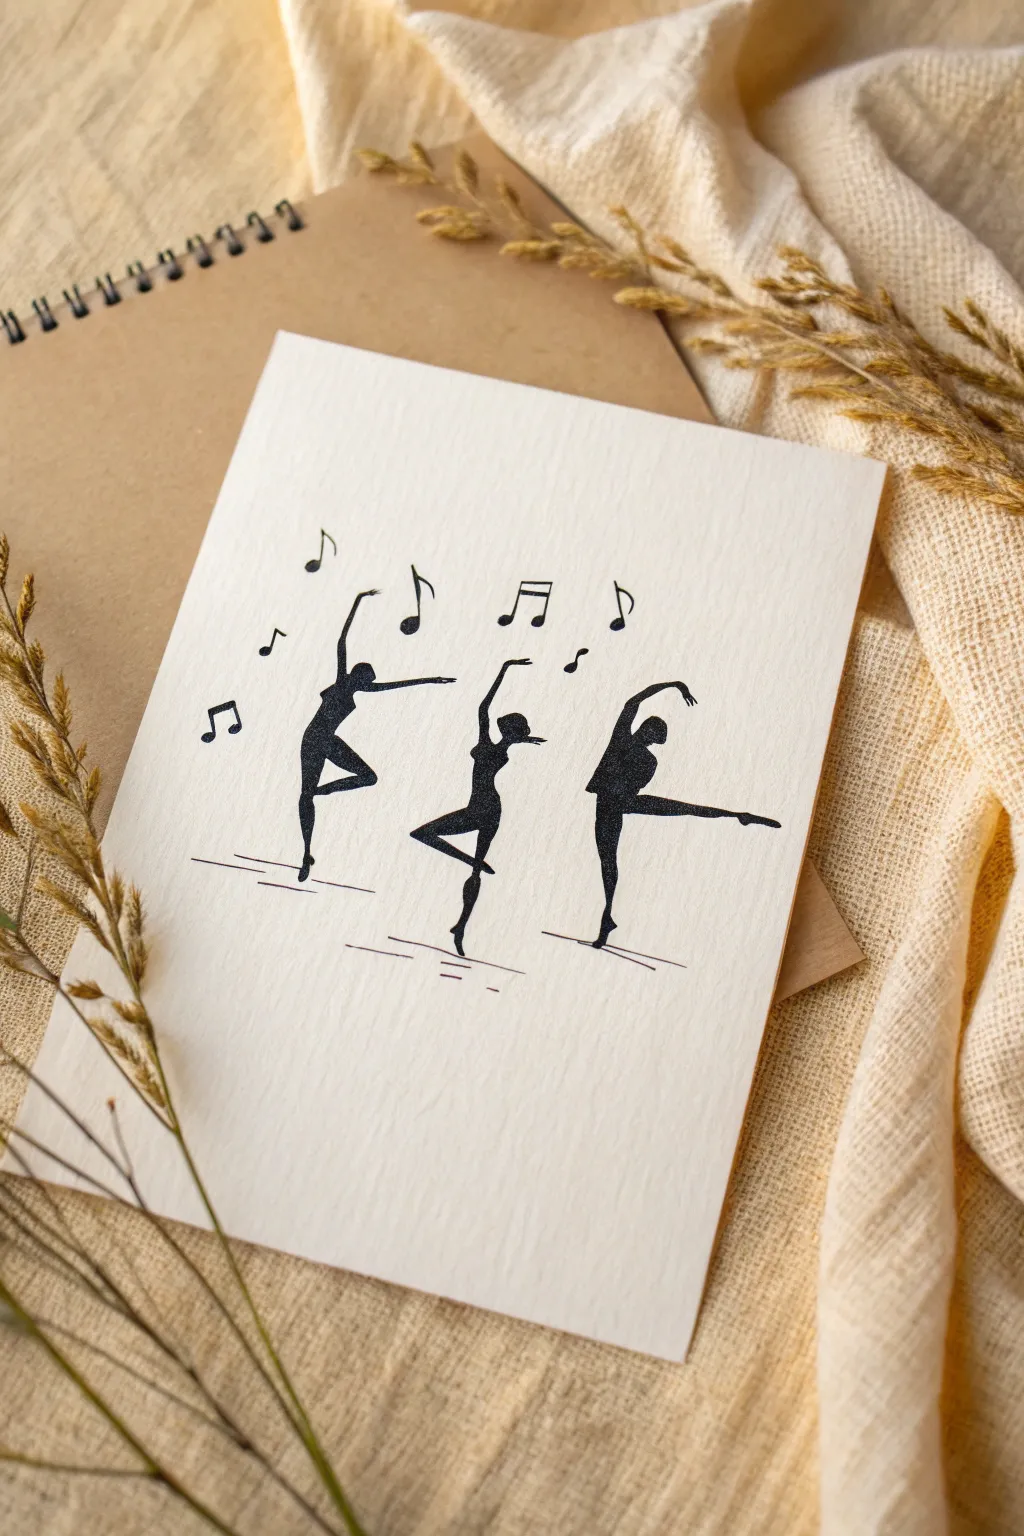
Capture the fluid motion of dance with this elegant ink illustration featuring three stylized figures in mid-performance. The high contrast of black ink against textured paper creates a striking, minimalist look perfect for greeting cards or wall art.
How-To Guide
Materials
- Heavyweight textured paper (cold press watercolor paper or cardstock)
- Black fine liner pen (0.3mm or 0.5mm)
- Black brush pen or India ink with a small round brush
- Pencil (HB or H)
- High-quality eraser
- Ruler or straight edge
Step 1: Planning the Composition
-
Prepare your surface:
Cut your textured paper to your desired size. If making a card, score and fold it now so you can visualize the front panel’s center. -
Mark the ground lines:
Using a pencil and a ruler, lightly sketch three short, horizontal lines where the dancers’ feet will land. Stagger them slightly to create depth, rather than placing them on a single flat horizon. -
Sketch the first stick figure:
Start with the left dancer. Sketch a basic stick figure framework: a vertical spine, a leg planted on the ground line, and the other leg bent at the knee. Add arms reaching upward and outward. -
Form the second figure:
Move to the center. Draw the framework for a dancer in a pirouette. One leg should be straight down, the other bent into a ‘flag’ shape at the knee. Angle the torso slightly back. -
Outline the third figure:
For the right-hand dancer, sketch a stick figure doing an extension. One leg anchors to the ground, while the other extends straight out to the side. Arch the back and curve one arm overhead. -
Add volume to the forms:
Go back over your stick skeletons and flesh out the shapes. Since these are silhouettes, focus on the contour. Give them defined waists, shapely calves, and elegant arches in the feet. -
Position the music notes:
Lightly pencil in various musical symbols—eighth notes, quarter notes, and beamed notes—floating in the negative space above the dancers’ heads.
Step 2: Inking the Silhouettes
-
Outline the first dancer:
Switch to your fine liner pen. Carefully trace the outer edge of your first pencil sketch. I prefer starting with the head and working downward to avoid smudging. -
Fill the shape:
Using a brush pen or a small brush dipped in India ink, fill in the outline completely. Work slowly near the edges to keep the lines crisp. -
Refine the limbs:
Use the fine liner again to sharpen the very tips of the toes and fingers. These delicate points are hard to get with a brush tip. -
Ink the center dancer:
Repeat the process for the middle figure. Pay special attention to the curve of the back and the chest profile to ensure the anatomy looks natural in silhouette. -
Complete the third dancer:
Outline and fill the final dancer on the right. Ensure the extended leg is straight and strong. -
Anchor the feet:
Beneath each planted foot, draw a few quick, horizontal strokes with the fine liner to represent the floor or shadow, replacing your pencil guide lines.
Silhouette Success Tips
If you make a mistake on an outline, simply thicken the limb slightly to correct the curve. Silhouettes are forgiving because there are no internal details to align.
Step 3: Adding Musical Details
-
Trace the notes:
Ink the outlines of your musical notes using the fine liner pen. -
Fill the note heads:
Color in the oval heads of the notes. Keep the stems thin and elegant to match the dancers’ limbs. -
Let it dry completely:
Wait at least 15 to 20 minutes for the ink to fully set. Textured paper can hold wet ink in its grooves longer than smooth paper. -
Erase pencil marks:
Gently gently erase the underlying graphite sketches. Hold the paper taut with one hand and rub lightly to avoid crinkling the page.
Make It Sparkle
Once the black ink is totally dry, add tiny dots of gold or silver gel pen on the dancers’ bodices to mimic costume sequins catching the stage light.
Now you have a dynamic, rhythmical piece of art that looks ready to leap off the page
Stickman Climbing and Hanging Scenes
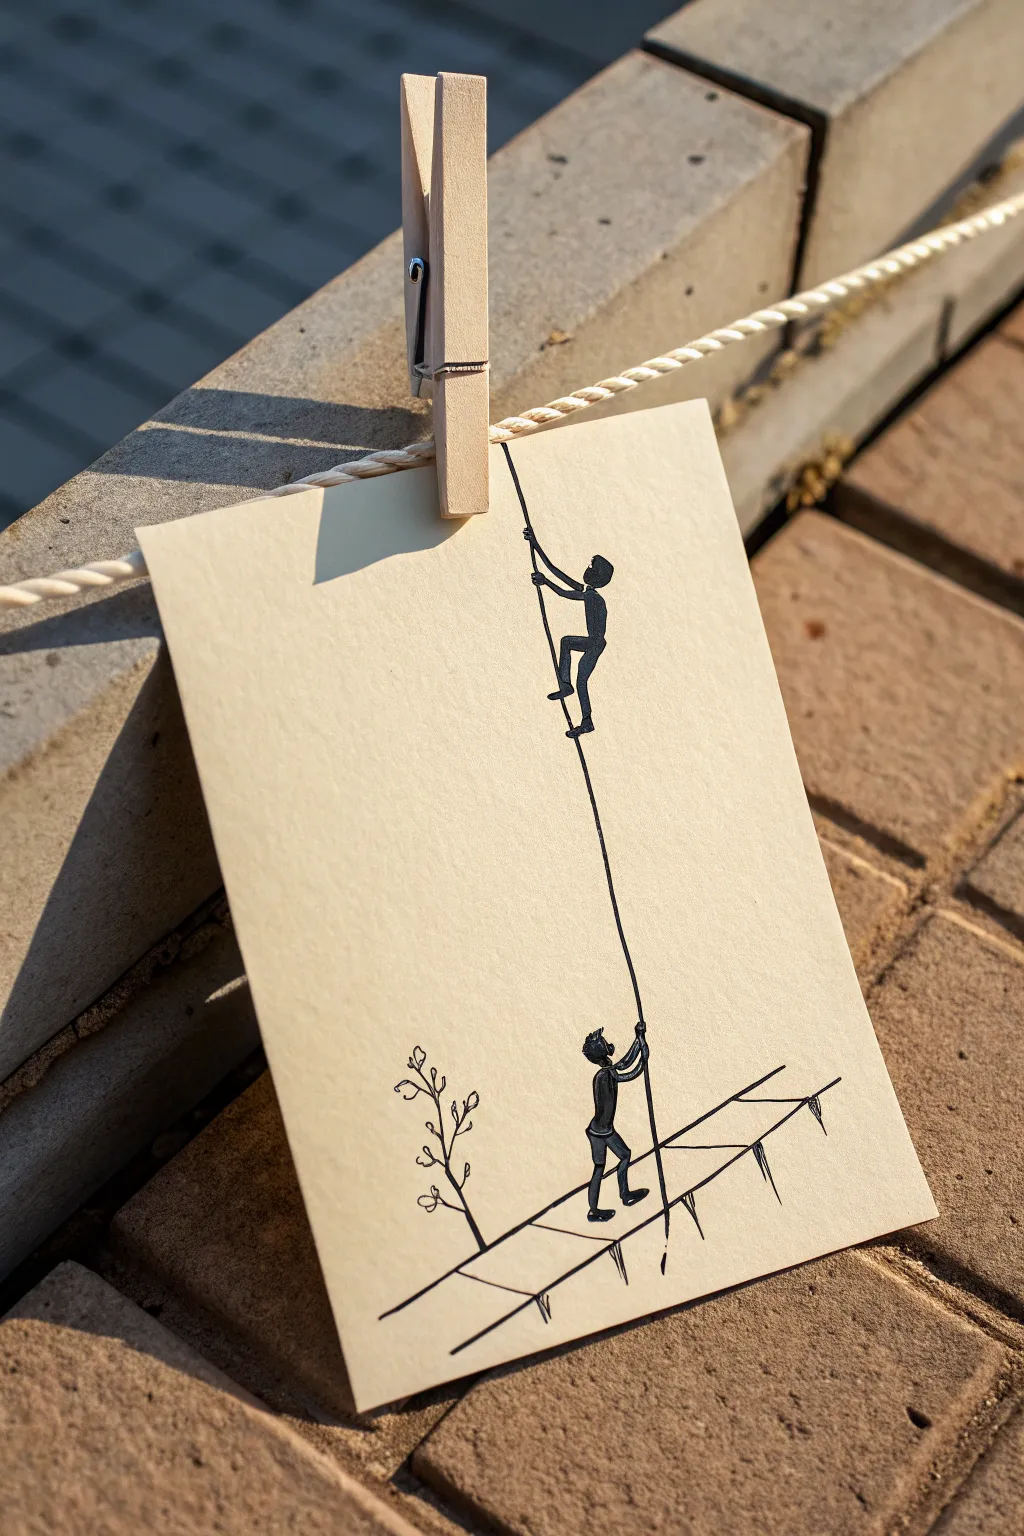
This clever optical illusion art piece features two stick figures interacting with the very medium they are drawn on. Using simple perspective and a physical prop like a clothespin, the drawing creates a playful narrative of one character helping another climb out of the frame.
Step-by-Step Tutorial
Materials
- Cream or off-white cardstock paper (A5 or 5×7 size)
- Fine-tip black drawing pen (0.3mm or 0.5mm)
- Thicker black marker or brush pen
- Pencil (HB)
- Eraser
- Ruler
- Wooden clothespin
- String or twine for display
Step 1: Planning the Composition
-
Initial sketch:
Begin by lightly sketching the entire scene with an HB pencil. Place the ground level near the bottom third of the paper. -
Drawing the pole:
Use a ruler to pencil in the central vertical line representing the pole. It should extend from the ground line all the way to the top edge of the paper, slightly off-center to the right. -
Positioning the climber:
Sketch the climbing figure near the top of the pole. Their body should be angled slightly away from the pole to show effort, with limbs bent at the knees and elbows. -
Positioning the helper:
Sketch the standing figure at the bottom. Position them so their hands are gripping the base of the pole, looking upward at their friend.
Alignment Secret
When hanging the art, align the drawn pole directly with the metal spring of the clothespin. This makes the drawn line flow seamlessly into the real object.
Step 2: Inking the Characters
-
Inking the climber’s body:
Using the thicker black marker, fill in the climber’s head and torso first. This establishes the visual weight of the figure. -
Detailing the climber’s limbs:
Switch to the fine-tip pen to draw the climber’s arms and legs. Adding slight curves to the limbs rather than stick-straight lines makes the action look more dynamic. -
Inking the helper:
Use the same two-pen method for the figure on the ground: thick marker for the head and torso, fine pen for the limbs. -
Grounding the helper:
Ensure the helper’s feet are firmly planted on your pencil guide line. I find drawing small ovals for feet helps define their stance better than simple lines.
Step 3: Environment and Perspective
-
Inking the main pole:
Carefully trace the long vertical pole line with your fine-tip pen. You can go over this line twice to make it slightly bolder than the background elements. -
Drawing the path:
Ink the ground line. Instead of a single horizon line, draw two parallel diagonal lines that converge slightly to create a sense of a sidewalk or path. -
Adding texture to the ground:
Draw small, vertical hash marks extending downward from the path’s edge to give the illusion of a raised platform or cliff edge. -
Creating the tree:
To the left of the figures, draw a simple, spindly tree using the fine-tip pen. Keep the branches thin and sparse to maintain the minimalist aesthetic. -
Adding leaves:
Draw tiny, uncolored loop shapes at the ends of the tree branches to suggest leaves without adding visual clutter.
Go 3D
Glue a real piece of thin black thread over the drawn pole line for actual texture. Leave the end dangling at the bottom for the lower figure to hold.
Step 4: Finishing Touches
-
Erasing guides:
Wait at least five minutes for the ink to dry completely, then gently erase all pencil marks. Be careful near the heavy black torsos to avoid smudging. -
Checking the illusion:
Examine the line where the pole meets the top of the paper. Ensure the line goes right to the very edge so it looks like it continues off the page. -
Hanging the artwork:
String up your twine line. Attach the artwork to the line using a wooden clothespin. Clip it exactly where the inked pole meets the paper’s edge. -
Final adjustment:
Adjust the angle of the paper so the pole line aligns vertically with the clothespin itself, completing the visual trick that the figure is climbing the hanging apparatus.
Now step back and enjoy how a simple doodle transforms into an interactive scene just by hanging it up correctly
BRUSH GUIDE
The Right Brush for Every Stroke
From clean lines to bold texture — master brush choice, stroke control, and essential techniques.
Explore the Full Guide
One-Line Stickman Drawings

Capture the essence of motion and minimalism with this oversized, fluid stickman drawing. Created on a large scale, this project transforms a simple doodle into a striking piece of wall art using confident, sweeping lines.
Detailed Instructions
Materials
- Large sheet of white butcher paper or easel paper (at least 24×36 inches)
- Thick black marker or charcoal stick (chisel tip ideal for line variation)
- Painter’s tape or masking tape
- Flat, hard surface (floor or large table)
Step 1: Preparation and Setup
-
Surface selection:
Find a large, flat area to work on. A wooden floor provides a great firm backing, but ensure it is clean of debris that might create bumps under your paper. -
Paper placement:
Unroll your large white paper. You want plenty of negative space around your figure, so cut a piece that feels generous—roughly 3 feet long is a good starting point. -
Secure the corners:
Use small pieces of painter’s tape or masking tape on the corners of the paper to hold it taut against the floor. This prevents the paper from shifting while you make long strokes. -
Test your tool:
On a scrap piece of paper, test your marker or charcoal. You want a tool that flows smoothly without skipping, capable of making a bold, opaque line.
Wobbly Lines?
Don’t stress over shakes. Drawing from your shoulder rather than your wrist creates smoother, longer strokes. Speed helps too; faster lines are straighter.
Step 2: Drawing the Figure
-
Visualize the flow:
Before touching the paper, visualize the stickman’s posture. This figure relies on fluid connections rather than rigid geometry, so imagine the limbs flowing into the torso. -
Start with the head:
Begin near the upper third of the paper. Draw a loose, slightly imperfect circle for the head. Don’t worry about closing the loop perfectly; a bit of overlap adds character. -
Draw the neck and shoulder:
Starting from the bottom center of the head loop, draw a short line down for the neck, then seamlessly curve it outward to the left to form the first shoulder. -
Create the left arm:
Continue that shoulder line, extending it outward and slightly down to create the left arm. Keep the line consistent. -
Form the torso:
Return to the base of the neck junction. Draw a long, slightly curved line straight down to represent the spine and torso. -
Extend the right shoulder:
From the neck/spine intersection, draw a line extending to the right for the second shoulder. I find it helps to rotate my body slightly here to keep the drawing angle comfortable. -
Draw the right arm:
Extend the right shoulder line outward to match the length of the left arm. Let the end of the line remain loose. -
Draft the left leg:
From the bottom of the torso line, extend a long stroke diagonally down and to the left for the leg. -
Draft the right leg:
From that same hip junction, draw the second leg diagonally down to the right. Aim for symmetry in length, but allow the angles to be relaxed. -
Add the feet:
At the end of each leg line, add a small, sharp perpendicular dash or ‘L’ shape to suggest feet. This grounds the figure.
Pro Tip: Shadow Play
Work near a window on a sunny day. Seeing the shadow of your hand and tool on the paper can actually help you visualize the flow of the line before you mark it.
Step 3: Refining the One-Line Look
-
Thicken the outline:
Go back over your primary lines. Instead of just tracing, create a second parallel line very close to the first, essentially turning the stick figure into a very thin outline shape. -
Connect the joints:
Where the limbs meet the torso, curve your new outer lines to create smooth ‘armpits’ and a crotch area, avoiding sharp stick-figure angles. -
Close the ends:
At the hands and feet, draw small curved caps to connect your double lines, sealing the shape. -
Fill gaps (Optional):
If your marker was dry in spots, do a quick touch-up, but leave some texture if you used charcoal for an artistic effect. -
Erase guidelines:
If you sketched lightly with pencil first, wait for the ink to fully dry before gently erasing any stray marks.
Now you have a bold, expressive figure ready to add a modern touch to your wall
Have a question or want to share your own experience? I'd love to hear from you in the comments below!