If you’re in the mood to paint something bold, soulful, and wildly fun, a lion is basically the perfect subject. Here are my favorite lion painting ideas—starting with classic compositions and sliding into more playful, unexpected twists.
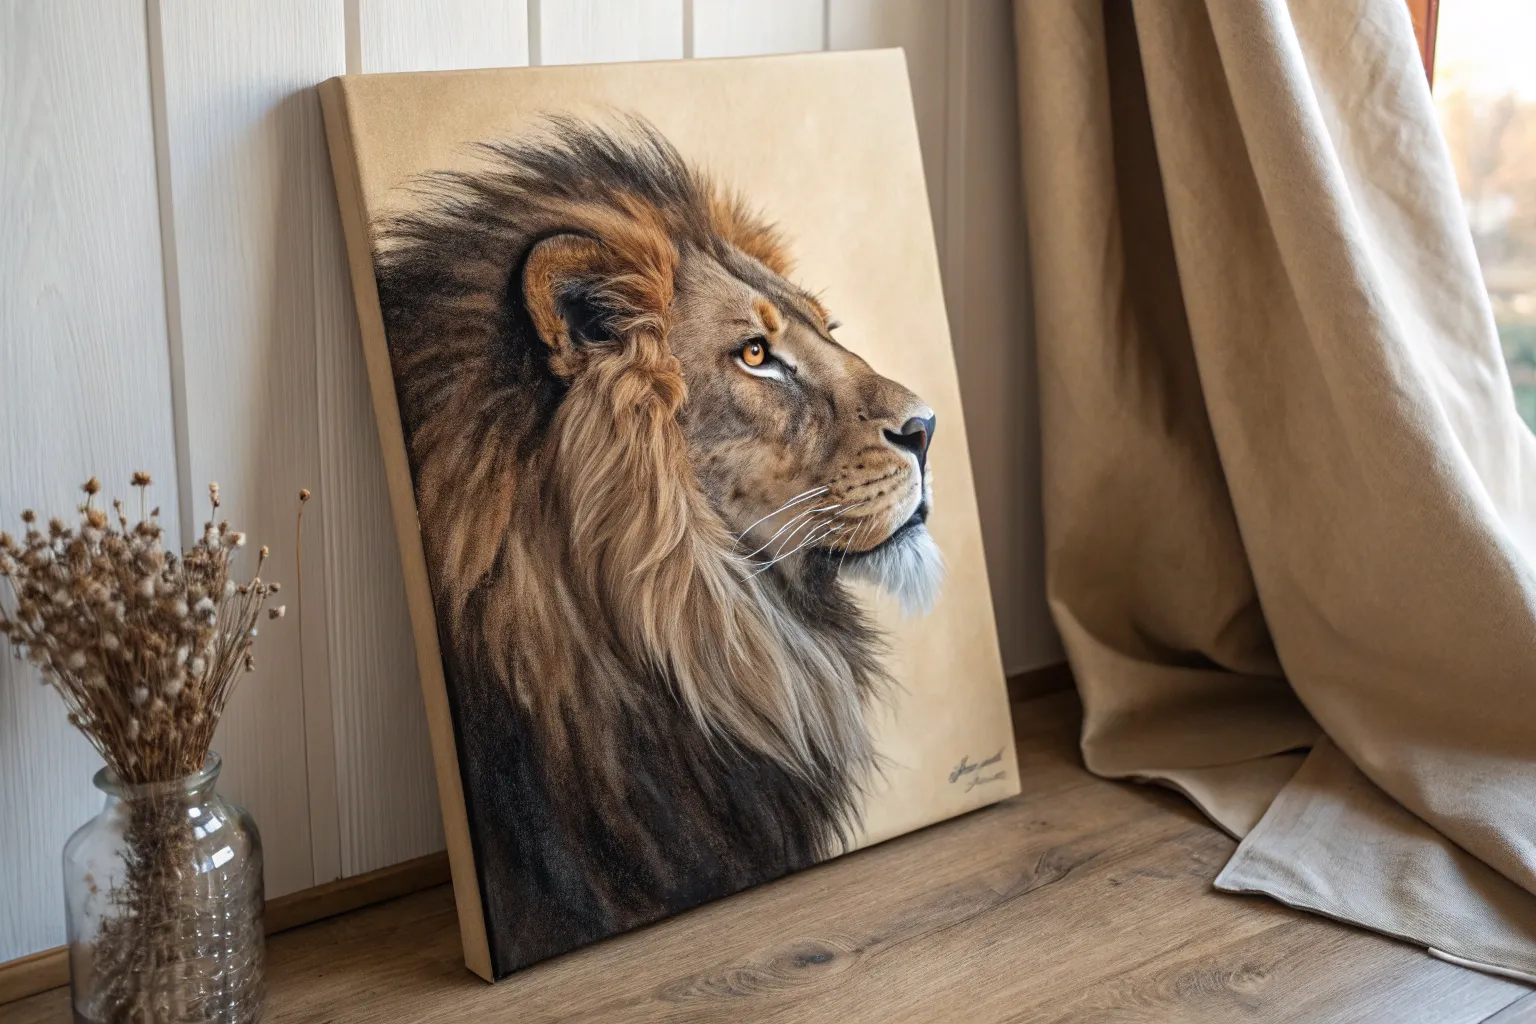
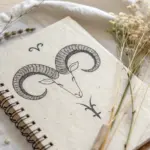
Stoic Lion Profile in Warm Light
Capture the regal silence of a male lion with this mixed-media drawing that emphasizes warm, glowing light and intricate fur textures. Using a combination of pastels and colored pencils allows you to build depth from soft underlayers to sharp, realistic details.
How-To Guide
Materials
- Textured toned paper (tan/beige, preferably with deckled edges)
- Soft pastels (pan pastels or sticks) in ochre, sienna, burnt umber, and dark brown
- Colored pencils (wax or oil-based) in golden yellow, orange, russet, dark brown, black, and white
- Pencil sharpener with a long point
- Kneaded eraser
- Soft blending sponge or chamois
- Workable fixative spray
Step 1: Blocking the Form
-
Establish the outline:
Begin with a very light sketch using a neutral brown colored pencil. Focus on the profile shape: a sloping forehead, the strong bridge of the nose, and the curve of the chin. Don’t press hard; these lines are just guides. -
Map shadow areas:
Identify the darkest zones of the mane and face. Lightly shade the area behind the ear and the lower neck with a dark brown pastel stick to establish your deepest values early on. -
Apply base tone:
Using a soft sponge and yellow ochre pan pastel, wash a light layer of color over the entire face and mane area. This kills the paper white and provides a glowing undertone for the fur.
Muddiness Fix
If fur colors look muddy, you’ve layered too quickly. Spray a fixative layer to ‘reset’ the surface tooth, let dry, then apply fresh, sharp pencil strokes on top.
Step 2: Building the Mane
-
Layer mid-tone pastels:
With a burnt sienna pastel, start indicating the flow of the mane. Use broad, sweeping strokes that follow the hair growth direction—downward from the neck and backward from the face. -
Deepen the shadows:
Introduce burnt umber pastel into the darker recesses of the mane, particularly under the jawline and behind the ears. Blend these gently with your finger or a sponge to keep the focus soft. -
Switch to pencils:
Now, take a dark brown colored pencil to begin refining the mane. Draw distinct clumps of hair over your pastel base, varying your pressure to create depth within the fur masses. -
Add warm highlights:
Use a golden yellow or light orange pencil to pick out the sunlit portions of the mane. Stroke firmly in the direction of growth to simulate the texture of coarse hair catching the light.
Gwyther’s Glow
To make the lion truly glow, lightly glaze a bright orange pastel over the transition zone between the lit face and shadow mane before adding final pencil details.
Step 3: Refining the Face
-
Detail the eye:
The eye is the focal point. Outline it carefully with black pencil, then fill the iris with layers of yellow and light brown. Leave a tiny speck of white paper or add white pencil for the reflection. -
Sculpt the snout:
Using a sharp russet pencil, define the bridge of the nose. Shade lightly around the muzzle, keeping the transitions smooth to show the short, velvety fur on the face. -
Darken the nose and mouth:
Fill in the nose leather and the line of the mouth with black and dark grey pencils. Pay attention to the nostril shape, ensuring it looks three-dimensional rather than flat. -
Create muzzle texture:
On the upper lip area where the whiskers will go, use a technique called stippling—tiny dots—with a dark brown pencil to suggest pore texture.
Step 4: Final Details
-
Refine the ear:
The ear needs depth to look hollow. Darken the inner ear with black or deep brown, then stroke light, fluffy hairs coming out of it with a cream or white pencil. -
Brighten the chin:
The chin often catches light and has white fur. Use a sharp white pencil to draw short, downward strokes here, layering them over a greyish base to create volume. -
Add the whiskers:
This step requires confidence. Sharpen your white pencil to a needle point. Draw the long whiskers in single, swift motions. I find it helpful to rotate the paper to get the perfect angle for your hand. -
Intensify contrast:
Look at the mane one last time. Where the dark fur meets the light background, use a black pencil to deepen the contrast, making the head pop forward. -
Clean up edges:
Use your kneaded eraser to lift any stray pastel dust from the background. You want the negative space to be clean to emphasize the silhouette. -
Seal the work:
Given the mix of dusty pastel and wax pencil, apply a light coat of workable fixative to prevent smudging and lock in your vibrant colors.
Now you have a striking, dignified portrait ready to be framed and displayed


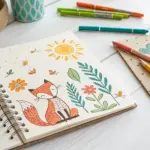
Direct Gaze Close-Up
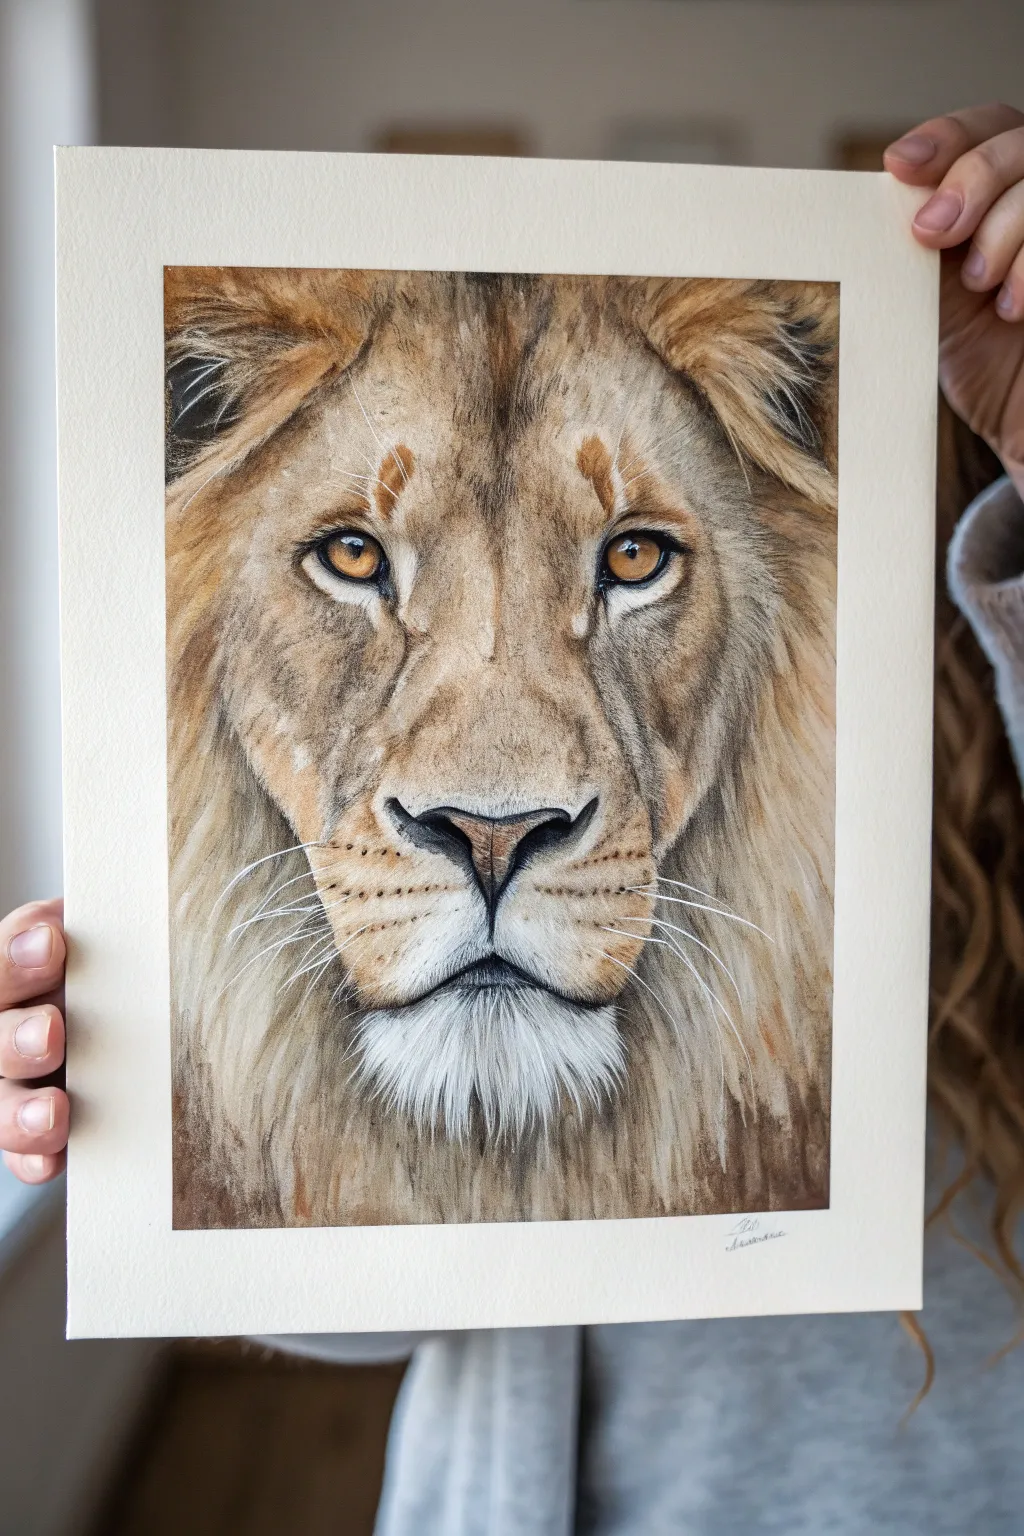
Capture the intense, regal presence of a lion with this detailed close-up that focuses on the animal’s piercing gaze. Using layered colored pencils, you will build up realistic fur textures and deep, golden eyes that seem to follow you across the room.
Step-by-Step
Materials
- High-quality colored pencils (earth tones, black, white, greys)
- Heavyweight drawing paper or Bristol board (vellum surface preferred)
- Graphite pencil (HB or 2H for sketching)
- Kneaded eraser
- Electric eraser or fine tip eraser pen
- White gel pen or gouache (for highlights)
- Blending stump or tissue
- Pencil sharpener
Step 1: The Foundation
-
Establish the proportions:
Begin with a very light graphite sketch. Draw a vertical line for symmetry and a horizontal line for the eyes. Sketch the basic shapes: circles for the eyes, a rounded triangle for the nose, and the muzzle’s width. -
Refine the features:
Firm up your outline, paying close attention to the spacing between the eyes and the distinctive ‘V’ shape of the brow. Lightly mark the direction of the fur growth around the mane, as this will guide your coloring later. -
Lift the graphite:
Roll your kneaded eraser gently over the entire sketch. You want the lines to be barely visible—just ghost images—so the graphite doesn’t muddy your pencil colors.
Muddy Fur?
If fur colors are getting muddy, your pencil point is likely too dull or you are blending too soon. Keep pencils extremely sharp for texture and don’t blend until at least 3 layers are down.
Step 2: The Gaze
-
Base the eyes:
Start with a layer of yellow ochre or light gold in the irises. Leave the pupil area blank for now. Keep your pressure light. -
Deepen the iris color:
Layer burnt sienna and light brown around the outer edges of the iris and near the pupil, blending inward to create depth. The eye should look darker at the top where the eyelid casts a shadow. -
Define the pupil and liner:
Use a sharp black pencil to fill in the pupil and outline the eye. I like to add a tiny touch of dark blue to the black for richness. Carefully draw the tear duct and the dark rim surrounding the eye. -
Add the spark:
Use your white pencil or a tiny dot of white gouache to add the reflection highlight in the pupil or upper iris. This instantly brings the lion to life.
Golden Glow
To make the lion look like it’s in the savannah sun, glaze a very light layer of bright yellow or orange over the highlighted side of the face as a final step.
Step 3: Fur and Texture
-
Layer the base fur tone:
Using the side of a cream or light beige pencil, lay down a base color over the face, avoiding the white muzzle area and the chin. Keep strokes consistent with fur direction. -
Detail the nose:
Fill the nose pad with dark browns and distinct blacks. Texture it with small stippling dots rather than smooth shading to mimic the leathery surface. -
Build the short fur:
Sharpen a medium brown pencil to a fine point. Start drawing short, flicking strokes on the nose bridge and forehead. Let the underlying cream color show through. -
Darken the facial markings:
Add the darker patches above the eyes (the eyebrows) and the contours down the sides of the muzzle using dark umber and charcoal grey. Use short strokes to blend these dark areas into the lighter fur. -
Develop the white muzzle:
On the muzzle and chin, use a cool grey to create shadows between the white tufts. Keeps the strokes longer here. You can use white pencil to glaze over the top to blend it. -
Work on the mane:
The mane requires longer, looser strokes. Use a mix of burnt sienna, gold, and dark brown. Do not color it solid; leave gaps for individual hair definition and layer darks over lights.
Step 4: Refining and Finishing
-
Deepen the shadows:
Return to the face and increase the contrast. Darken the areas under the chin, the corners of the eyes, and the nostrils to make the form look three-dimensional. -
Add the chin beard:
Create the scruffy chin texture. Use negative drawing: shade the dark background areas *around* the white hairs, or use an indenting tool before coloring to keep thin white lines pristine. -
Make the whiskers pop:
This is the final touch. Use an electric eraser to lift thin lines for whiskers, or use a fine white gel pen. Ensure the whiskers cross over the dark muzzle spots (whisker pads) clearly. -
Final assessment:
Step back and look for balance. If the fur looks too scratchy, burnish gently with a lighter pencil or a colorless blender to unify the layers.
Frame this majestic portrait behind glass to protect the delicate pencil layers and enjoy the intense connection it creates


Roaring Lion With Dramatic Shadows
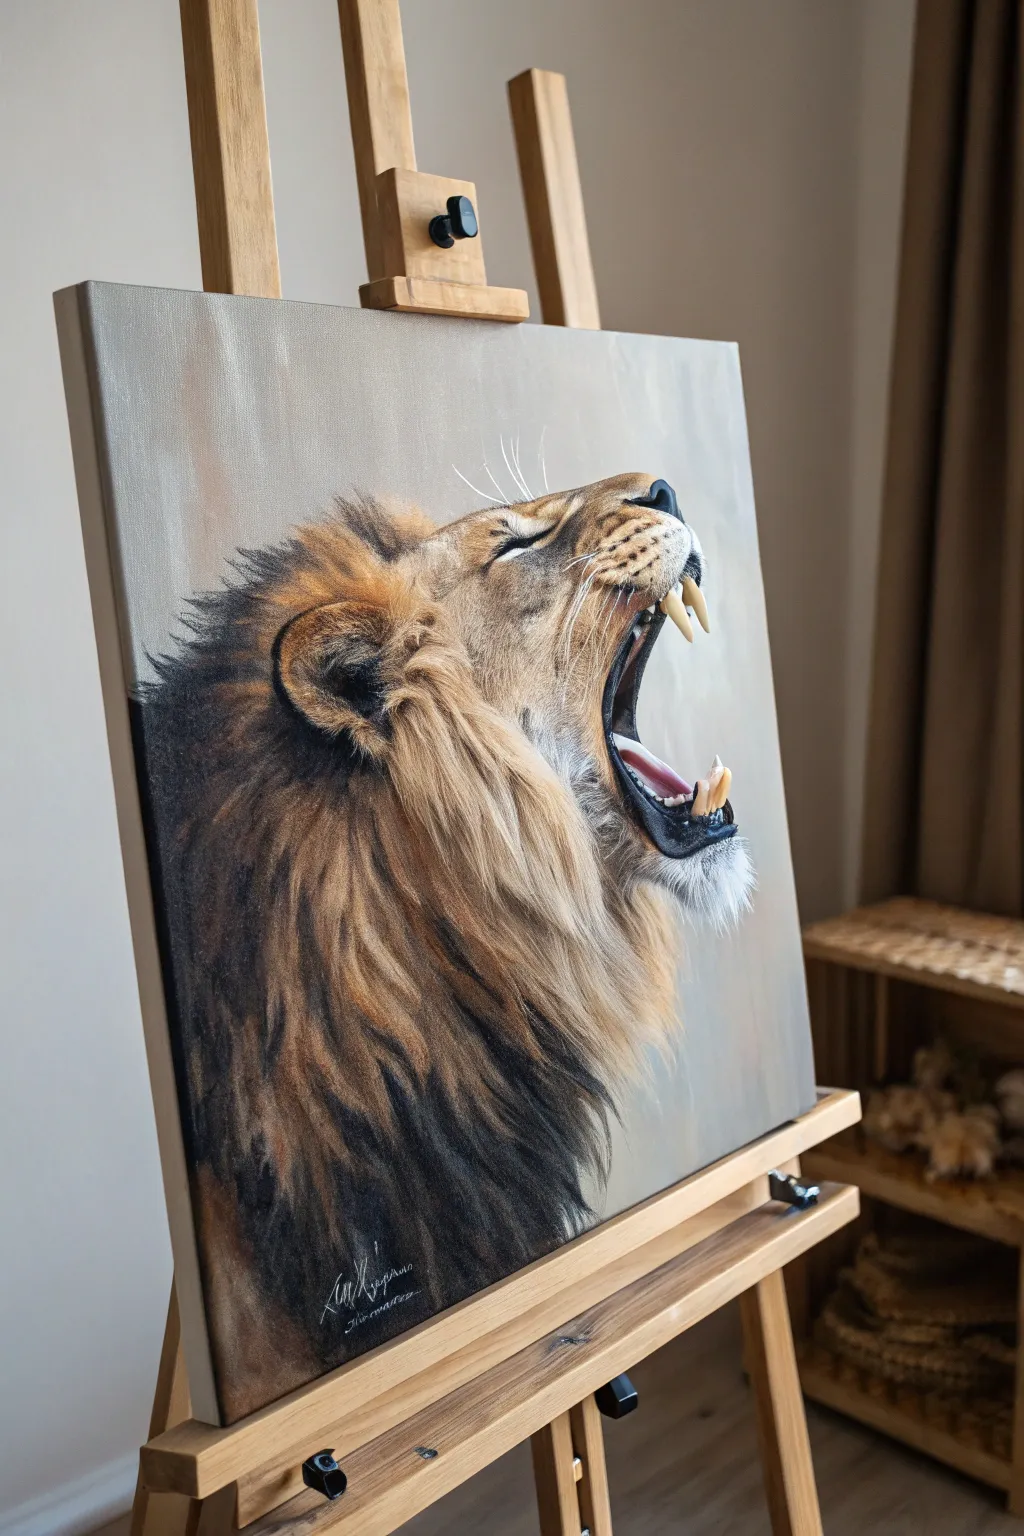
Capture the raw energy of the savannah with this striking profile painting of a roaring lion. By layering acrylics or oils, you will build up a rich, warm mane and achieve lifelike details in the teeth and whiskers against a soft, neutral background.
How-To Guide
Materials
- Canvas (square or slightly rectangular format, e.g., 18×20 inches)
- Acrylic or Oil paints (Titanium White, Mars Black, Burnt Umber, Yellow Ochre, Burnt Sienna, Raw Sienna, Alizarin Crimson)
- Set of bristle brushes (for mane texture)
- Fine detail brushes (synthetic rounds, size 0 and 00)
- Medium filbert brush
- Palette knife and palette
- Easel
- Pencil for sketching
- Slow-drying medium (if using acrylics)
Step 1: Sketch and Underpainting
-
Establish the Layout:
Begin by sketching the lion’s profile lightly with a pencil. Focus on the triangular shape of the open mouth and the long slope of the nose. Ensure the head is positioned centrally but with enough space at the bottom for the heavy mane. -
Block in Background:
Mix a soft, neutral grey-beige using Titanium White, a touch of Burnt Umber, and a tiny dot of Black. Paint the entire background around your sketch with a large brush, keeping the strokes loose to create a blurred, out-of-focus effect. -
Map the Shadows:
Using thin Burnt Umber, paint the darkest areas of the mane and the inside of the mouth. This establishes your values early, showing you where the deep shadows under the heavy fur will eventually sit.
Fur Texture Tip
For realistic fur, always paint in the direction of hair growth. Start with the darkest value at the root and flick the brush outward quickly to taper the stroke.
Step 2: Developing the Face
-
Base Skin Tones:
Mix Yellow Ochre, White, and a little Burnt Sienna for the short fur on the face. Apply this to the snout, nose bridge, and around the eye, using smoother strokes than you will for the mane. -
Define the Mouth Interior:
For the inside of the mouth (the gum line and tongue), use Alizarin Crimson mixed with Black and a touch of Burnt Umber. It needs to look dark and recessed. Paint the tongue slightly lighter pink near the front to show wetness. -
Sculpt the Nose and Lips:
Use Mars Black to paint the nose leather and the dark lips lining the teeth. Add a tiny highlight of pure white or light grey on the top of the nose to make it look wet and dimensional. -
Paint the Teeth:
Block in the teeth with a warm off-white (White mixed with a tiny bit of Yellow Ochre). Do not use pure white yet, as teeth need to look organic and slightly aged.
Make it Pop
Mix a tiny amount of blue into your black paint for the deepest shadows in the mane. This cold undertone makes the warm orange and gold highlights vibrate intensely by contrast.
Step 3: Building the Mane
-
Darkest Mane Layers:
Switch to a worn bristle brush. Mix Mars Black and Burnt Umber. Paint the deepest sections of the mane, particularly at the bottom near the neck/shoulder, using downward, flicking strokes to mimic hair direction. -
Mid-Tone Fur:
Mix Burnt Sienna with Raw Sienna. Apply this over the transition areas where the mane meets the face and the top of the head. Keep your strokes loose and overlapping the darker layer beneath. -
Golden Highlights:
Mix Yellow Ochre and White. Identify where the light hits the ‘crown’ of the mane and the sideburns. Apply this lighter color in clusters of strands, letting the dark underpainting show through in gaps. -
Refining Texture:
I find it helpful to use a fan brush or a dry flat brush here to drag colors into one another, softening the transition between the short face fur and the long, flowing mane.
Step 4: Detailing and Refinement
-
Beard and Chin:
Paint the small ‘beard’ under the chin. This fur often bunches together, so use strokes that clump slightly. Use a lighter, cooler grey-brown here, as it catches the light differently than the golden mane. -
Ear Detail:
Define the ear with a dark rim of Burnt Umber and fill the center with short, dark strokes to show depth. Highlight the very edge with a lighter tan to separate it from the mane behind it. -
Sharpen the Teeth:
Return to the teeth with a fine liner brush. Add pure White highlights to the tips and ridges to make them look sharp and glossy. Add a very thin line of darkness where the tooth enters the gum. -
Eye Expression:
Refine the closed/squinting eye. Since the lion is roaring, the eye is often squeezed shut. Paint the dark crease line and add faint wrinkles around it to show the tension in the face.
Step 5: Final Touches
-
Adding Whiskers:
Load a liner brush with thinned White paint (ink consistency). With a confident, quick motion, paint the long whiskers extending from the muzzle. These should arc gently. -
Mane Fly-aways:
Using the same thin brush, add delicate individual hairs breaking the silhouette of the mane against the background. This eliminates the ‘cut-out’ look. -
Final Glaze (Optional):
If using acrylics, you can add a very thin glaze of Burnt Sienna over the mane once dry to unify the warm tones.
Step back and admire the ferocity you have captured on canvas
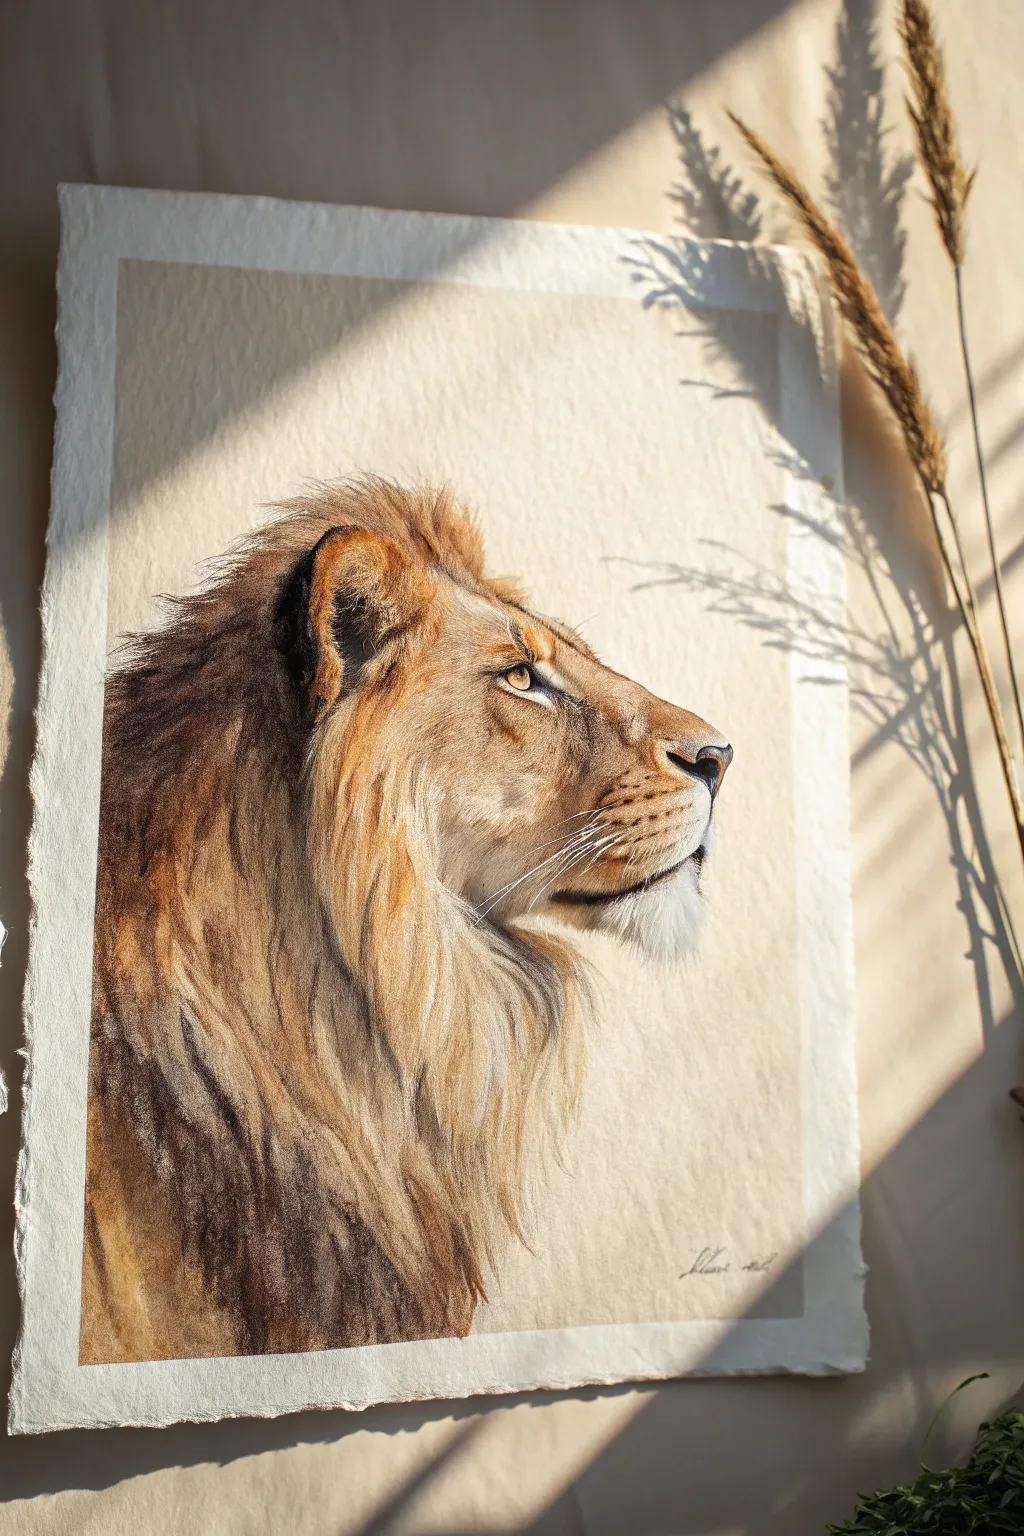
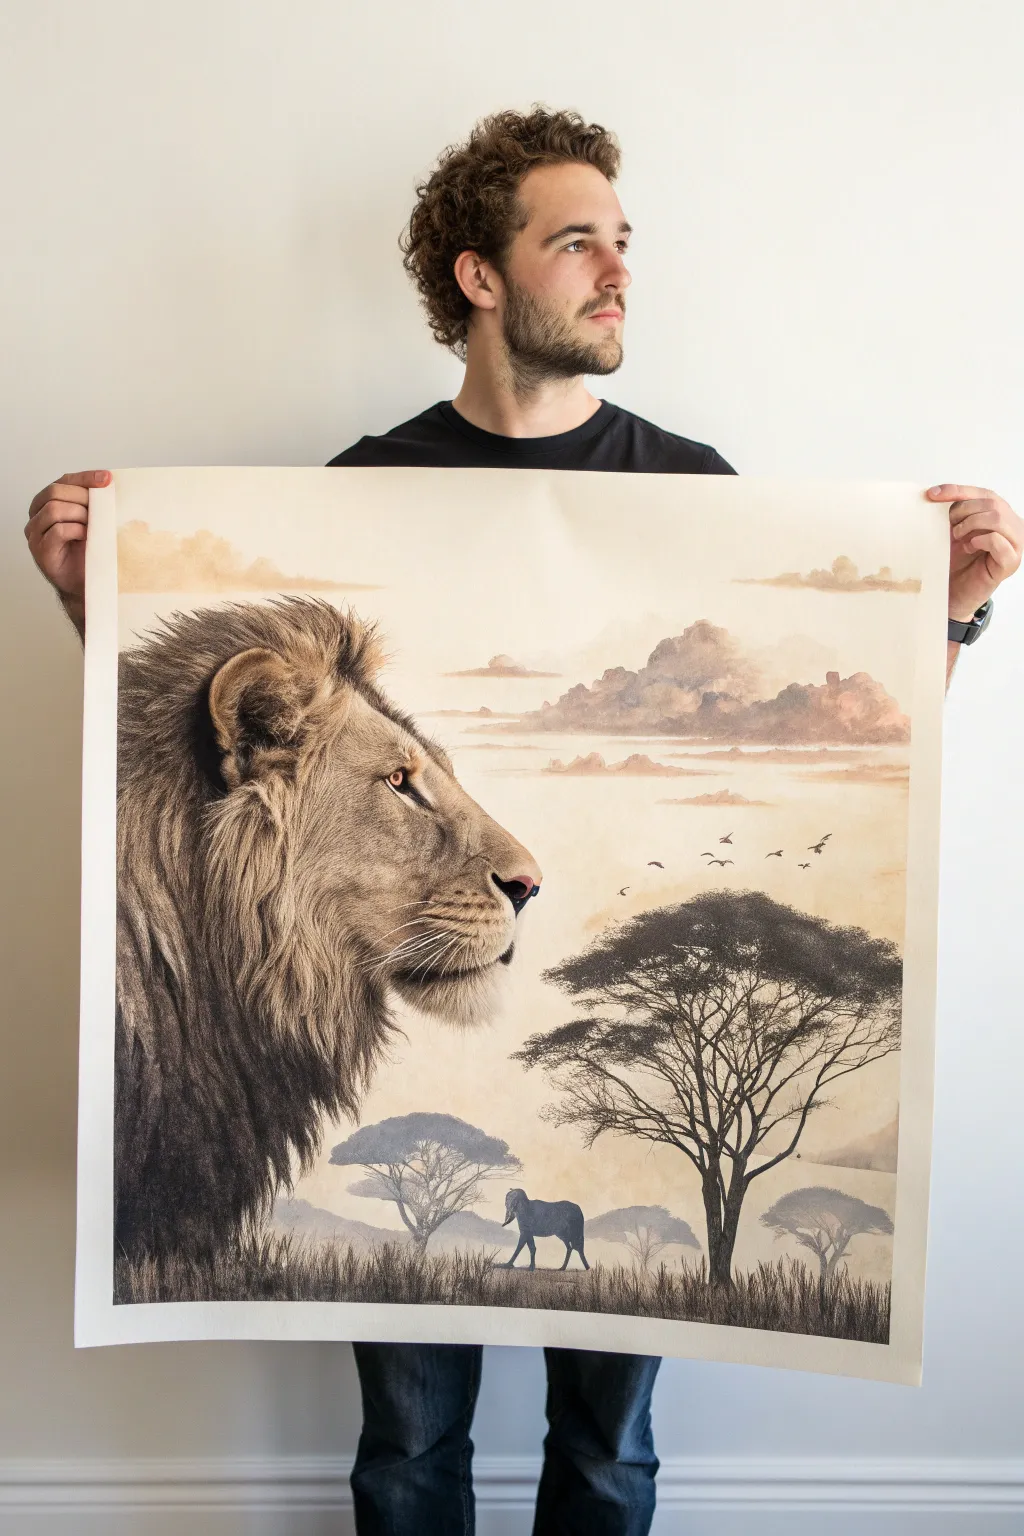
Full-Body Lion Walking Toward You
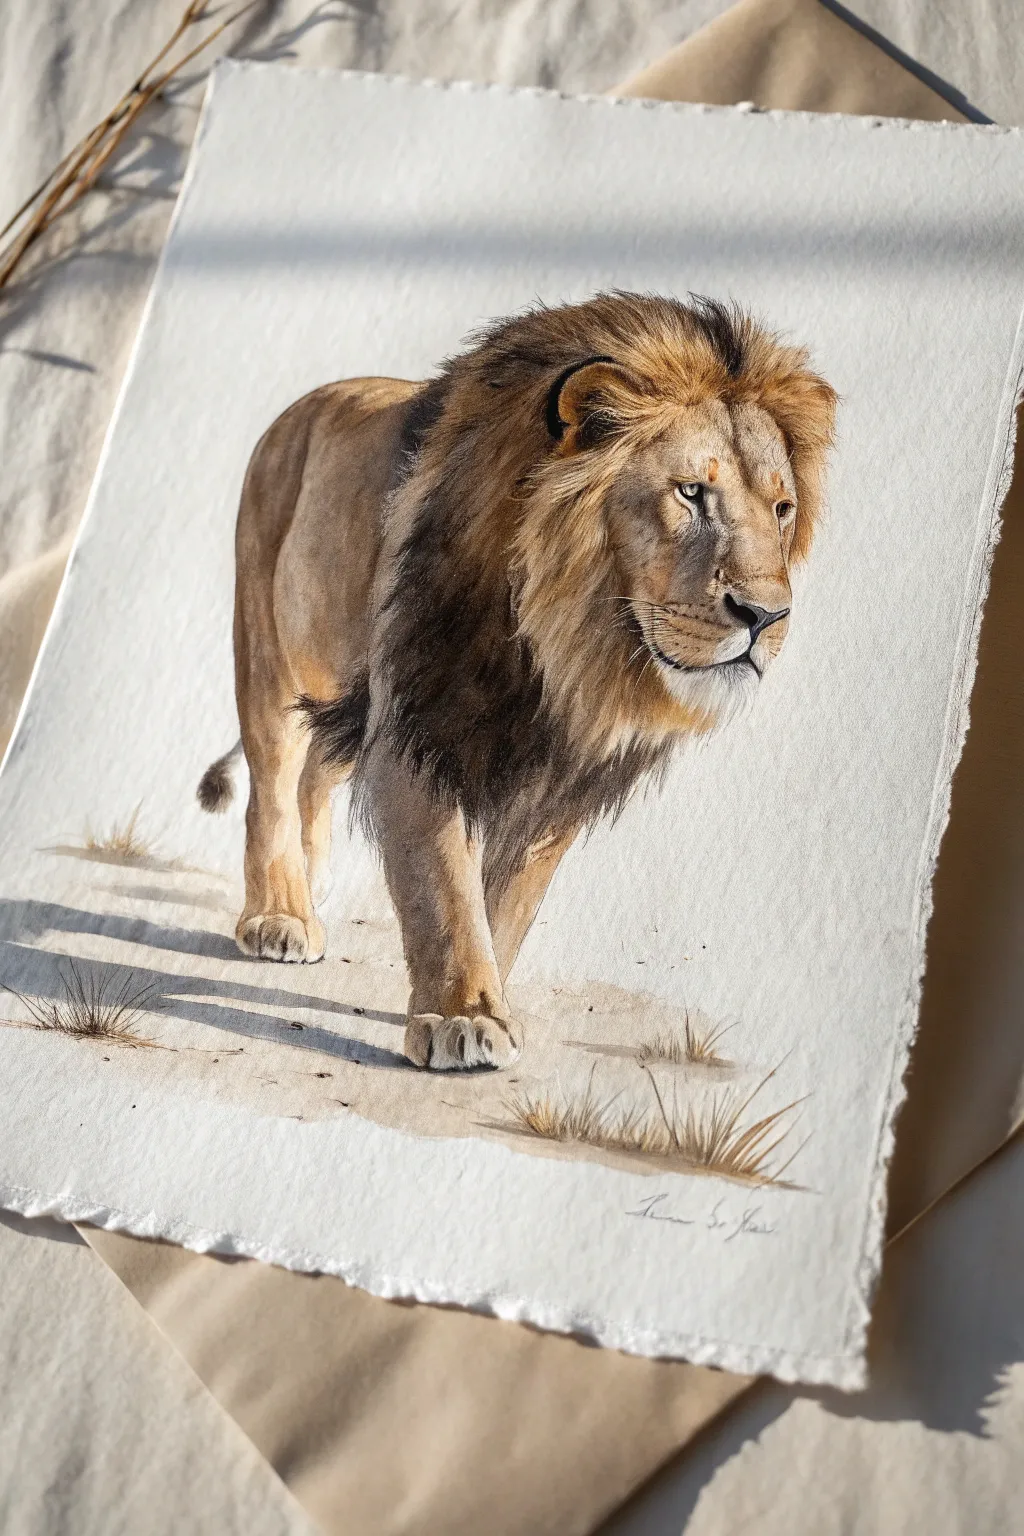
Capture the raw power and calm dignity of a male lion with this realistic watercolor tutorial. By combining warm, earthy washes with precise dry-brush detailing, you will create a piece that feels both soft and incredibly lifelike on textured paper.
Detailed Instructions
Materials
- Heavyweight cold-press watercolor paper (300gsm or higher) with deckled edges
- Watercolor paints (Yellow Ochre, Burnt Sienna, Burnt Umber, Lamp Black, Raw Sepia)
- White gouache or white gel pen
- Round watercolor brushes (Size 8 for washes, Size 2 and 0 for details)
- Hard-lead pencil (2H or H) for sketching
- Kneaded eraser
- Two jars of water
- Paper towel or cotton rag
Step 1: Initial Sketch and Base Washes
-
Plan the composition:
Visualize the lion walking diagonally across the paper from the upper right toward the lower left. Leave plenty of negative space around the animal to emphasize the stark, sunny setting. -
Lightly sketch the outline:
Using a 2H pencil, draw the basic shapes of the lion. Focus on the large mass of the mane, the muscular shoulder, and the forward-stepping leg. Keep your lines extremely faint so they won’t show through the transparent watercolor layers later. -
Observe the light source:
Notice that the light is coming from the upper right, casting shadows to the left. Mark these shadow areas lightly on your sketch to guide your painting. -
Apply the first wash:
Mix a very watery tea-consistency wash of Yellow Ochre and a touch of Burnt Sienna. Using your size 8 brush, paint the main body of the lion, avoiding the mane and the white areas around the muzzle and eyes. Keep this layer wet and loose. -
Add warmth to the mane:
While the body dries, mix a slightly stronger concentration of Yellow Ochre and Burnt Sienna. Apply this to the lighter, outer areas of the mane, letting the pigment bleed slightly into damp edges for a soft, furry look. -
Establish the ground shadow:
Mix a cool gray using Burnt Umber and a tiny touch of Lamp Black heavily diluted with water. Paint horizontal streaks under the paws to ground the lion immediately, suggesting a dusty savanna floor.
Pro Tip: Fur Flow
Always pull your brush strokes in the direction the hair grows. For the mane, use longer, sweeping strokes; for the face, use tiny, stippled dots.
Step 2: Building Depth and Texture
-
Darken the mane:
Now, mix a rich concentration of Burnt Umber and Raw Sepia. Switch to a size 4 or small round brush. Start painting the darker, inner sections of the mane, particularly around the neck and shoulder area. -
Create the fur texture:
Instead of painting solid blocks, use short, directional strokes that mimic the flow of hair. Allow some of the golden underpainting to show through these darker strokes to create volume. -
Deepen body shadows:
I like to mix a mauve-gray shadow color using Burnt Sienna and a touch of purple or blue. Glaze this over the belly, the back leg, and under the neck where the mane casts a shadow on the body. -
Define the face:
Switch to your size 2 brush. Carefully paint the nose using a mix of pink and brown, darkening toward the nostrils. Paint the eye with a clear, golden yellow, leaving a tiny spot of white paper for the catchlight. -
Add the darkest mane details:
Mix Lamp Black with Raw Sepia for a near-black hue. Apply this to the deepest recesses of the mane and the dark tuft at the elbow. Use ‘dry brush’ technique here—wipe most moisture off your brush—to create the scratchy, coarse texture of the hair.
Level Up: Deckled Edge
Tear your watercolor paper against a ruler instead of cutting it. Floating frame mount the finished piece to show off this ragged edge for a premium gallery look.
Step 3: Refining Details and Final Touches
-
Detail the paws:
Use a light brown wash to define the toes on the paws. Add small, dark accents for the claws and the shadow gaps between the toes, ensuring the front paw looks weight-bearing. -
Enhance facial features:
With your smallest brush (size 0), outline the eye, the nostrils, and the separation of the mouth with the dark sepia mix. Add tiny dots on the muzzle where the whiskers will go. -
Paint the whiskers:
Using a rigger brush or the very tip of your round brush, flick quick, confident lines for the whiskers. Use white gouache or a gel pen for whiskers that cross over dark fur, and dark paint for those over light fur. -
Add grass tufts:
Mix a dry, olive-brown color. Use quick upward flicks at the base of the painting to create dry grass tufts near the paws. This adds context without overcrowding the scene. -
Final shadow check:
Look at the cast shadow on the ground again. Deepen the areas directly under the paws with a stronger gray-brown mix to ensure the lion feels heavy and planted. -
Soften edges:
If any edges on the body look too hard or ‘cut out,’ use a clean, slightly damp brush to gently soften them, especially along the back and belly.
Step back and admire the fierce elegance of your finished lion, ready to rule the savanna.
BRUSH GUIDE
The Right Brush for Every Stroke
From clean lines to bold texture — master brush choice, stroke control, and essential techniques.
Explore the Full Guide
Lion Cub With Soft Fur Textures
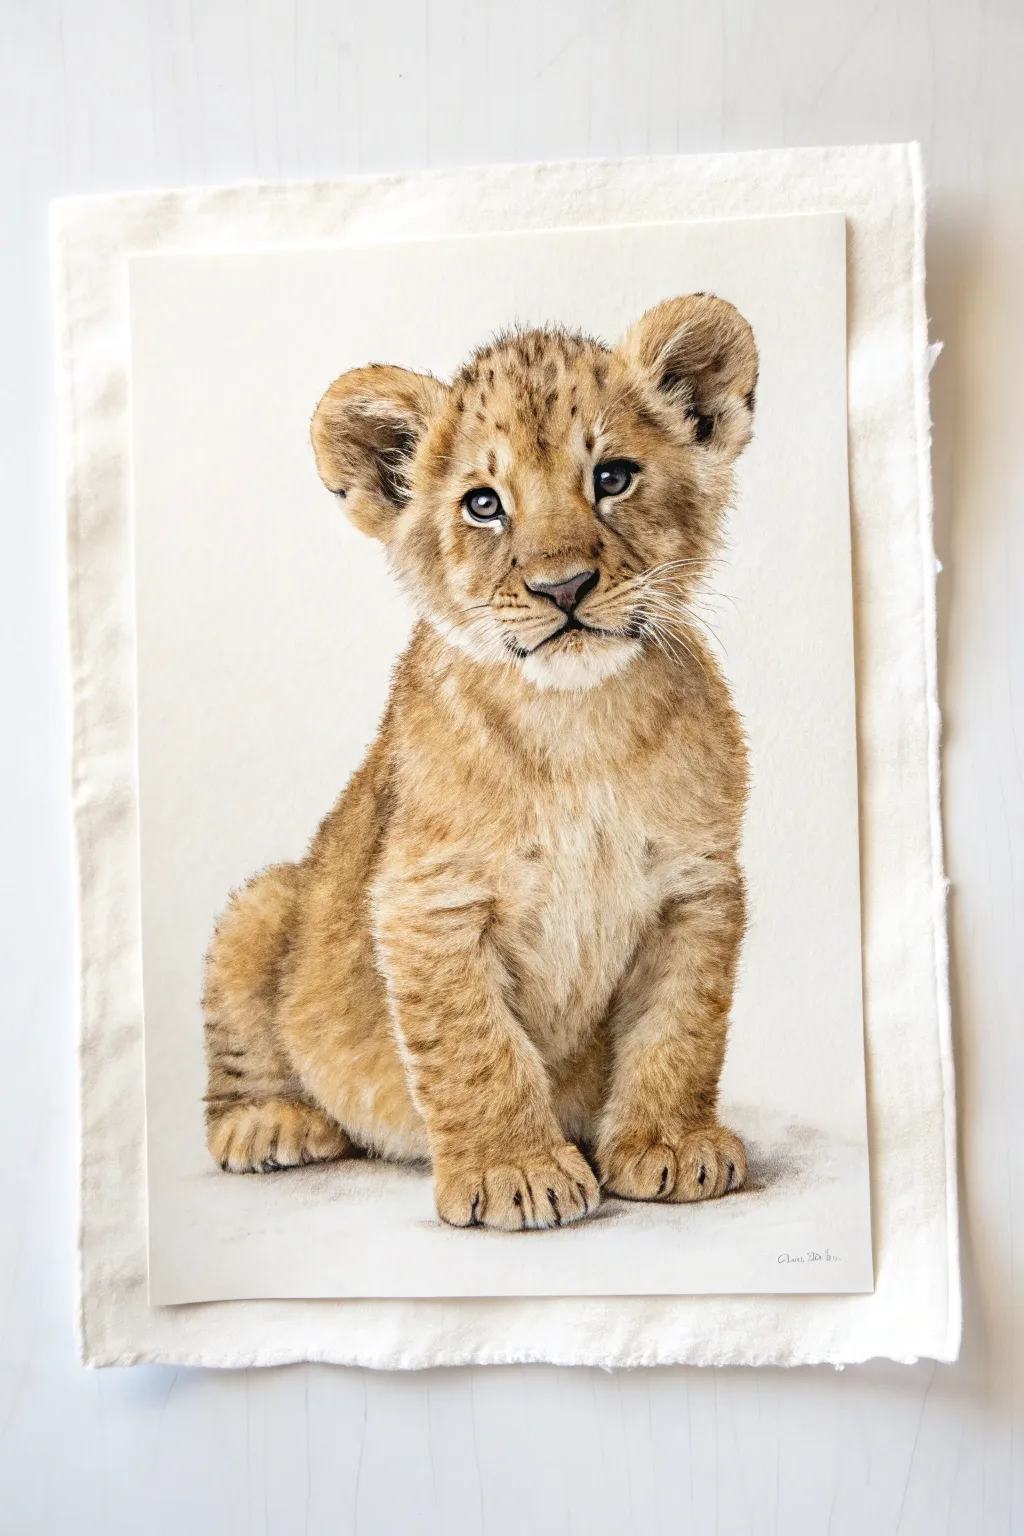
Capture the innocent charm of a lion cub with this detailed colored pencil study, focusing heavily on building realistic, soft fur textures. The warm, golden tones and soulful eyes make this piece a heartwarming addition to any wildlife art collection.
Step-by-Step Tutorial
Materials
- High-quality colored pencils (wax or oil-based)
- Pastel mat or smooth Bristol board paper
- HB or 2B graphite pencil
- Kneaded eraser
- White gel pen or gouache
- pencil sharpener (very sharp)
- Blending stump or solvent (optional)
- Fixative spray
Step 1: Initial Sketch & Base Layers
-
Rough Outline:
Begin with a light graphite sketch of the cub’s posture. Focus on the large oval for the head and the triangular shape of the body sitting down. Keep your lines incredibly faint so they don’t show through the light fur later. -
Refine the Features:
Mark the position of the eyes, nose, and mouth carefully. The eyes should be slightly wide-set to give that youthful look. Ensure the ears are rounded and large relative to the head. -
Lift the Graphite:
Before adding color, gently roll your kneaded eraser over the entire sketch. You want the graphite to be barely visible—just enough to guide you without dirtying the yellow pigments. -
Eye Foundation:
Start with the eyes to bring the cub to life early. fill the iris with a mix of burnt ochre and dark brown, leaving the pupil pure black. Reserve a tiny crisp circle of white paper for the highlight. -
Nose & Mouth:
Use a dark mauve or dusty pink for the nose pad, outlining the nostrils with dark sepia rather than black for a softer look. Sketch the mouth line gently.
Fixing Muddy Fur
If fur colours look muddy, you may be layering too many opposing colours. Let the paper rest, then apply a layer of workable fixative to regain ‘tooth’ before adding fresh, clean strokes.
Step 2: Building the Fur Texture
-
Base Tone Application:
Using a creamy, pale ochre or wheat color, lay down a very light base layer over the face and body. Use circular motions to avoid directional streaks at this stage. -
Mapping the Hair Direction:
Observe how the fur flows: it radiates outward from the nose bridge, sweeps back over the forehead, and falls downward on the chest. Mark these directions lightly with a medium golden brown. -
Deepening the Gold:
Layer a richer golden yellow or raw sienna over the back, paws, and forehead spots. I find it helpful to use short, flicking strokes here to start suggesting individual hairs. -
Adding Shadow Depth:
Under the chin, between the front legs, and where the back leg tucks in, add cool greys or muted browns. This contrast is crucial for making the cub look three-dimensional rather than flat. -
Ear Details:
Inside the ears, use a mix of dark brown and charcoal to create the deep hollows, but keep the edges fluffy with short, outward strokes of light cream or white pencil.
Step 3: Developing Texture & Details
-
Detailed Fur Strokes:
Sharpen your pencils to a needle point. Using burnt umber and dark ochre, draw thousands of tiny, overlapping hair strokes. Follow your directional map religiously. -
Creating the Spots:
Lion cubs have faint spots. Use a warm dark brown to stipple these onto the forehead and legs. Keep the edges of these spots soft and broken, not solid circles. -
Chest Fluff:
The fur on the chest is longer and fluffier. Use longer, sweeping strokes with a cream or white pencil, pressing firmly to blend into the darker underlayers. -
Paw Definition:
Define the toes on the large paws using dark brown between them. Add little tufts of hair overlapping the claws to keep them looking soft. -
Eye Depth:
Return to the eyes and darken the rim with black. Add a touch of blue-grey to the whites of the eyes to make them look wet and reflective.
Pro Tip: The Indentation Trick
For ultra-fine white whiskers, use a sterile needle or empty pen to press lines into the paper BEFORE drawing. When you color over them, the indented lines stay bright white.
Step 4: Final Touches
-
Whiskers:
This step requires confidence. Using either a very sharp white pencil (on dark fur) or a fine dark grey (on light fur), add the long whiskers. You can also drag a purely white colorless blender or an indentation tool across the paper before shading to create white whiskers. -
Highlights:
Use a white gel pen or a tiny brush with white gouache to add the brightest highlights to the eyes and the wet line of the nose. -
Grounding Shadow:
Lightly shade a cool grey shadow underneath the cub so it doesn’t look like it’s floating in space. Fade this shadow out softly. -
Final Cleanup:
Check for any stray graphite marks or smudges and lift them with the eraser. Add a final layer of fixative to protect the wax bloom.
Enjoy the process of watching your soft, golden cub emerge from the page.
Lion in a Savannah Sunset
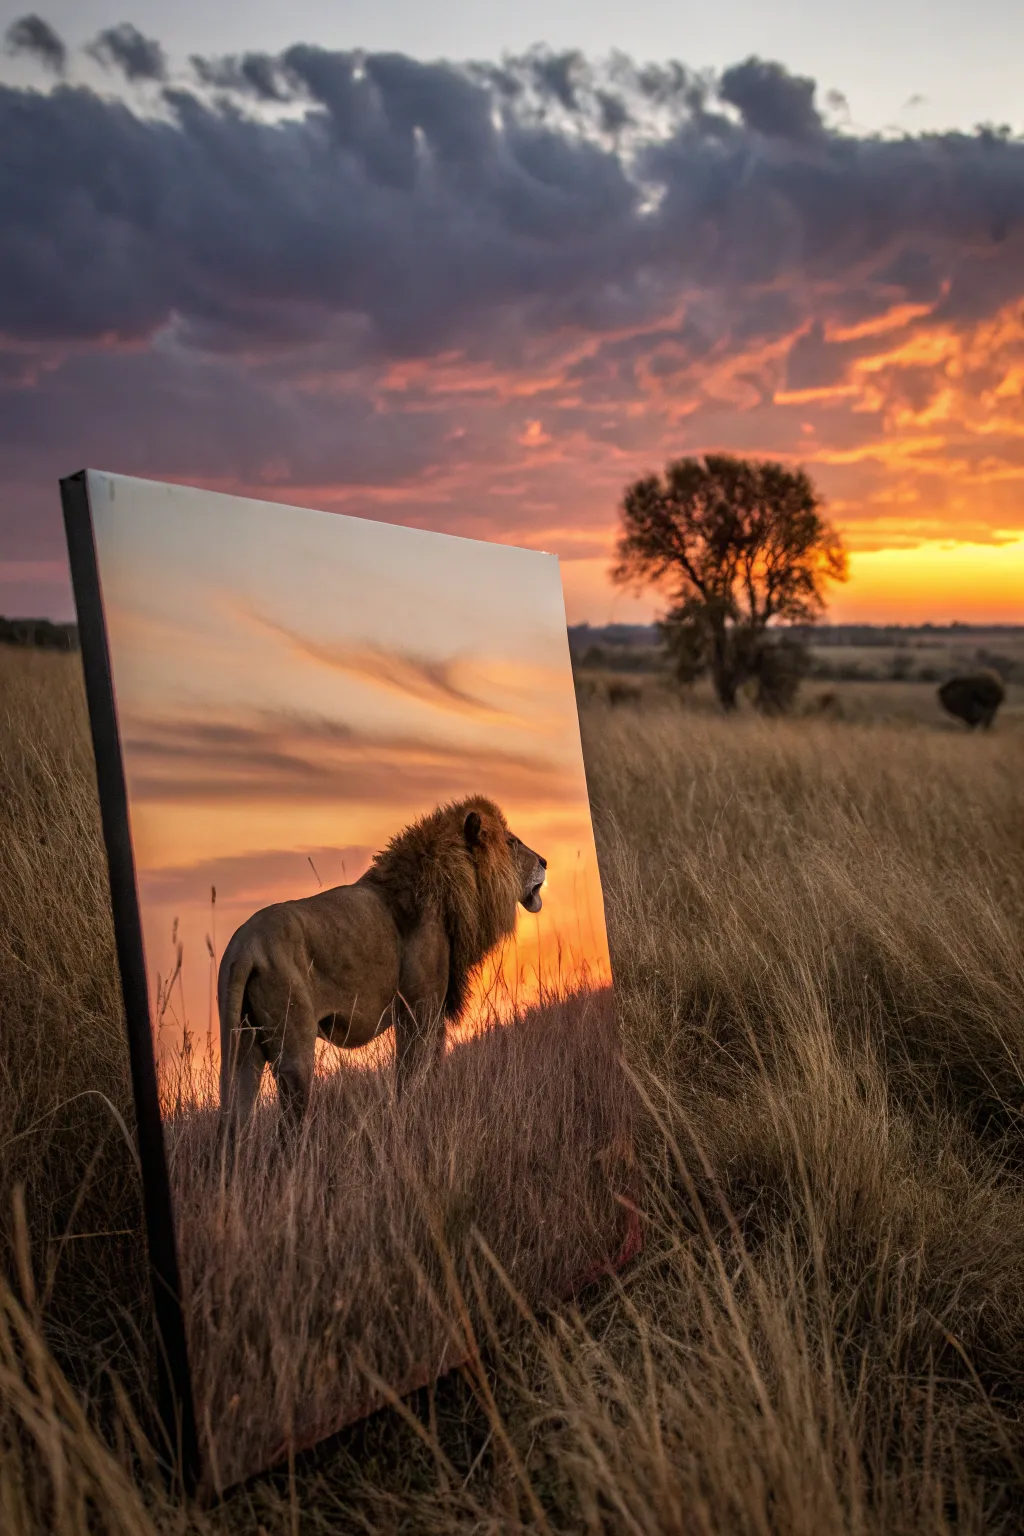
Capture the majestic silhouette of a male lion surveying his domain against a fiery African sunset. This acrylic painting project balances vibrant sky blending techniques with textural dry-brushing to create realistic savannah grasses and fur.
Step-by-Step Tutorial
Materials
- Stretched canvas (12×16 inch or similar vertical format)
- Acrylic paints: Titanium White, Cadmium Yellow, Orange, Burnt Sienna, Burnt Umber, Mars Black, Purple
- Large flat wash brush (1 inch)
- Medium filbert brush
- Small round detail brush (size 0 or 1)
- Fan brush (optional, for grass)
- Palette and palette knife
- Cup of water and paper towels
- Chalk or soft pencil for sketching
Step 1: Setting the Sky and Horizon
-
Prepare the Colors:
Squeeze out generous amounts of Titanium White, Cadmium Yellow, Orange, and a touch of Purple onto your palette. You want the colors ready for wet-on-wet blending. -
Paint the Upper Sky:
Using the large flat wash brush, mix a soft violet-grey using Purple, a tiny bit of Black, and plenty of White. Apply this to the top third of the canvas, brushing horizontally. -
Create the Sunset Transition:
While the top layer is still wet, introduce Titanium White mixed with a hint of Orange just below the violet section. Blend the seam gently so the greyish clouds fade into a brighter horizon. -
Add the Glaring Horizon:
Clean your brush thoroughly. Mix Cadmium Yellow with a lot of White to create a blindingly bright sunlight color. Paint this across the middle of the canvas where the horizon will be, blending it upward into the orange-white mix. -
Paint the Cloud Shadows:
Using a smaller filbert brush and a mix of Purple and Burnt Sienna, dab in soft, horizontal cloud formations against the bright sky. Keep the edges soft and feathery to suggest movement.
Muddy Sky Fix
If your sunset colors turn brown while blending purple and yellow, let the first layer dry completely. Apply the second color as a transparent glaze over the dry paint instead.
Step 2: Sketching and Blocking the Lion
-
Outline the Subject:
Once the background is completely dry, use a piece of chalk or a light pencil to sketch the outline of the lion standing in profile. Focus on the slope of the back and the heavy mane. -
Block in the Silhouette:
Mix a dark base color using Burnt Umber and Mars Black. Using a medium brush, fill in the lion’s entire shape. Don’t worry about fur details yet; just establish the solid form against the light. -
Paint the Distant Ground:
Use Burnt Sienna mixed with a little Purple to paint a low, hazy horizon line behind the lion’s legs. This anchors the animal in space.
Pro Tip: Backlighting
For the most realistic sunset effect, make the lion’s silhouette darker than you think it needs to be. The high contrast against the bright sky is what makes the light look real.
Step 3: Detailing the Mane and Body
-
Highlight the Anatomy:
Mix Burnt Sienna with a little Yellow Ochre or Orange. Using a dry-brush technique, lightly graze the lion’s flank, shoulder, and rear leg to suggest muscles catching the sunset light. -
Build Mane Texture:
Switch to a small round brush. Mix Burnt Umber with a touch of lighter brown. Paint short, quick strokes along the edge of the mane where the light hits, layering them to look thick and heavy. -
Add the ‘Golden Rim’:
This is crucial for the backlit effect. Mix pure Yellow and White. Carefully paint a very thin, bright line along the top of the lion’s nose, the tips of the mane, and the curve of the back. -
Deepen the Shadows:
Glaze pure Mars Black into the deepest parts of the lion—under the belly and the shadowed side of the mane—to increase the contrast against the bright sky.
Step 4: Foreground Grasses
-
Establish the Field Base:
Mix a dark brown wash using Burnt Umber and water. Apply this loosely at the very bottom of the canvas to create a shadowy base for the grass. -
Paint Individual Blades:
Using a liner brush or the edge of a fan brush, flick upward strokes using Burnt Sienna. I like to vary the pressure to make some blades look thick and others wispy. -
Add Sunlit Grass Tips:
Mix Yellow, Orange, and White. Paint fine, vertical highlights on the tips of the grasses that overlap the lion’s legs and the lower sky. This integrates the subject into the environment. -
Layer the Foreground:
Continue adding layers of grass in different shades of brown and tan, ensuring the grass in the immediate foreground is taller and more detailed than the grass further back.
Step back and admire how the warm light wraps around your savannah king

PENCIL GUIDE
Understanding Pencil Grades from H to B
From first sketch to finished drawing — learn pencil grades, line control, and shading techniques.
Explore the Full Guide
Chiaroscuro Lion on a Dark Background
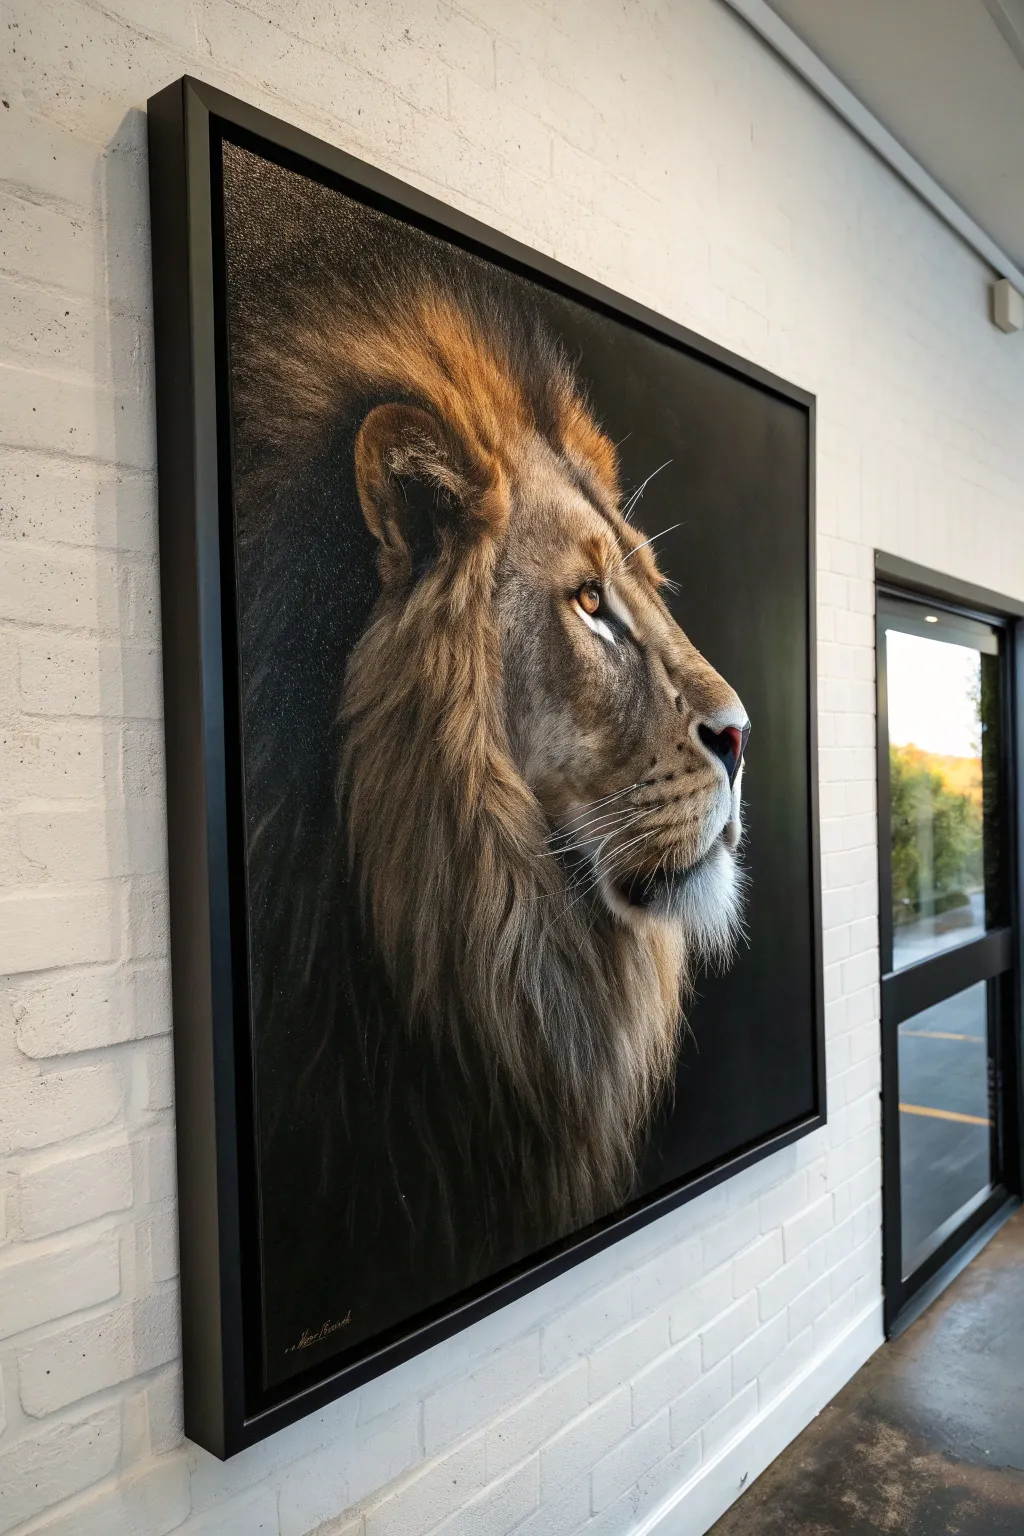
Capture the raw power and regality of the king of beasts with this dramatic chiaroscuro portrait. By utilizing a stark black background, you’ll emphasize the glorious golden hues of the fur and the piercing intensity of the lion’s gaze.
Step-by-Step
Materials
- Large stretched canvas (at least 24×30 inches)
- Acrylic paints (Mars Black, Titanium White, Burnt Umber, Raw Sienna, Yellow Ochre, Burnt Sienna)
- Gesso (black is ideal, or white painted black)
- Assorted synthetic brushes (large flat, medium filbert, fine liner)
- Stay-wet palette
- Water cups and rags
- Chalk or white charcoal pencil
- Reference photo of a lion profile
- Floating black frame (optional)
Step 1: Preparation & Blocking
-
Prime the Surface:
Start by establishing that deep, velvety darkness. Apply two coats of black gesso to your canvas. If you only have white gesso, apply that first, let it dry, and then coat the entire surface with Mars Black acrylic. Ensure the coverage is solid and opaque. -
Draft the Silhouette:
Using a piece of white chalk or a white charcoal pencil, lightly sketch the outline of the lion’s profile. Focus on the major shapes: the slope of the nose, the curve of the ear, and the sweeping flow of the mane. Don’t worry about fur details yet; just get the proportions right. -
Map the Light:
Identify exactly where the light source is hitting your reference. In this style, the light catches the front of the face, the ear rim, and the top of the mane. Lightly hatch these areas with your chalk to guide your painting.
Muddy Fur?
If your fur looks flat or muddy, let the paint dry completely. Then, re-apply your darkest shadows and brightest highlights on top. Contrast is key to texture.
Step 2: Underpainting & Form
-
Mix Mid-Tones:
Create a base brown shade using Burnt Umber and a touch of Burnt Sienna. With a medium filbert brush, paint the shadowed areas of the face—the cheek hollows and the side of the neck—where the fur transitions into the darkness. -
Establish the Highlights:
Mix Raw Sienna with a little Titanium White. Paint the areas that the light hits most directly: the bridge of the nose, the brow bone, and the chin. I like to scrub the paint in loosely here to mimic the underlying volume of the lion’s skull. -
Deepen the Shadows:
Use pure Burnt Umber or mix it with a tiny bit of black to deepen the crevices around the eye, the inner ear, and the mouth line. Soften the edges where these darks meet the black background so the lion appears to emerge from the void.
Step 3: Fur Texture & Details
-
Layering the Mane:
Switch to a smaller flat brush. Mix Yellow Ochre, Burnt Sienna, and a little medium. Start flicking paint in the direction of hair growth on the mane. Keep these strokes long and sweeping, layering lighter browns over the dark underpainting. -
Facial Fur Direction:
The fur on the face is much shorter. Using a small round brush and a mix of Raw Sienna and White, dab short, directional strokes on the nose and cheeks. Pay close attention to how the hair radiates from the nose bridge. -
Ear Details:
Paint the fluffy texture inside the ear using softer, feathery strokes with a light beige mix. For the ear rim, use a brighter highlight to separate it from the dark mane behind it. -
The Eye:
This is the focal point. Paint the iris with a vibrant amber mix (Yellow Ochre + Burnt Sienna). Add a dark pupil and a sharp, tiny reflective glint of pure Titanium White near the top. Outline the eye with black to give it weight. -
Refining the Mouth:
Paint the nose leather with a mix of black and purple or blue for a cool dark tone, contrasting the warm fur. Add a soft pinkish-grey highlight on the bottom lip.
Golden Glow Level Up
Mix a tiny amount of iridescent gold medium or gold mica powder into your final glaze layer on the mane. It will catch the light subtly as viewers move past.
Step 4: Final Highlights & Glazing
-
High Contrast Highlights:
Mix Titanium White with a very small amount of Yellow Ochre. Using a rigger or fine liner brush, add individual strands of fur on the brightest points: the top of the mane, the whiskers, and the chin hairs. -
Painting Whiskers:
Dilute off-white paint to an inky consistency. With a confident, quick motion, sweep your liner brush to create long, tapered whiskers emerging from the muzzle. These should overlap the dark background for maximum pop. -
Warm Glaze:
Once dry, mix a transparent glaze using water or glazing medium and a tiny bit of Burnt Sienna. Lightly brush this over the mid-tone areas of the fur to unify the colors and add a golden warmth. -
Background Cleanup:
Inspect the black background. If any stray brushstrokes ruined the abyss effect, use Mars Black to carefully cut back in and clean up the edges, re-establishing the sharp silhouette. -
Varnishing:
Allow the painting to cure completely (usually a few days for acrylics). Apply a satin or gloss varnish to deepen the black tones and protect the delicate fur details. -
Framing:
Install the canvas into a black floating frame. This gap between canvas and frame enhances the feeling of the subject floating in darkness.
Hang your finished piece where dramatic lighting can hit those golden details
Mane Texture Study in Layers

This study captures the quiet majesty of a lion using delicate layering techniques to build convincing fur textures. By combining wet-on-wet washes for the soft undercoat with precise dry-brushing for individual strands, you will create a piece that feels both soft to the touch and strikingly lifelike.
Step-by-Step Tutorial
Materials
- High-quality watercolor paper (cold press, at least 300gsm)
- Watercolor paints (Yellow Ochre, Burnt Sienna, Burnt Umber, Lamp Black, Ivory Black, Titanium White gouache)
- Round brushes (sizes 8, 4, and a fine liner size 0)
- Masking fluid
- Pencil (HB or 2H)
- Kneaded eraser
- Clean water and palette
Step 1: Sketch and Base Layer
-
Light Outline:
Begin with a very faint pencil sketch of the lion’s profile. Focus on the triangular shape of the nose, the slant of the forehead, and the curve of the jaw. Mark the boundaries where the face meets the heavy mane. -
Protect Whiskers:
Apply thin lines of masking fluid where the white whiskers will eventually be. This is crucial because painting around them later is nearly impossible with this level of detail. -
Initial Wash:
Once the masking fluid is dry, wet the entire face area (excluding the mane for now) with clean water. Drop in a very dilute wash of Yellow Ochre mixed with a tiny touch of Burnt Sienna to establish the golden skin tone. -
Shadow Mapping:
While the paper is still damp but not soaking, introduce a slightly darker mix of Burnt Umber around the eye socket, the side of the nose, and under the jawline to create soft, diffused shadows.
Step 2: Developing Facial Features
-
The Eye:
Using a size 4 brush, paint the iris with a rich amber tone (Yellow Ochre and Burnt Sienna). Leave a tiny spot of white paper for the catchlight, or add it later with white gouache. Outline the eye with Lamp Black, ensuring a sharp, crisp edge. -
Nose and Mouth:
Paint the nose leather using a mix of Ivory Black and a touch of Burnt Umber to keep it from looking flat. Start with a medium gray wash and build up the darkest blacks in the nostrils and the line of the mouth. -
Short Fur Texture:
Switch to a smaller brush. On dry paper, use short, directional strokes with a mix of Yellow Ochre and Burnt Umber to mimic the short, velvet-like fur on the snout and cheeks. Follow the contours of the bone structure. -
Muzzle Details:
Add tiny dots on the muzzle pad where the whiskers emerge. Keep these subtle; they shouldn’t look like distinct polka dots but rather like pores in the skin.
Pro Tip: Fur Flow
Always rotate your paper so you can pull the brush strokes toward you. This gives you more control over the tapering ‘flick’ at the end of each hair strand, keeping the fur looking soft.
Step 3: Building the Mane
-
Mane Underpainting:
Wet the mane area significantly. Apply broad, loose washes of Yellow Ochre, transitioning into Burnt Sienna and Burnt Umber towards the bottom neck area. Let the colors bleed together naturally. -
Darkening the Depths:
While the underpainting is still slightly damp, drop concentrated Ivory Black and Burnt Umber into the lower section of the mane to establish the deep, shadowed fur. -
Mid-Layer Fur:
After the previous layer is bone dry, mix a medium brown. Using a size 8 brush, paint clumps of hair rather than individual strands. Think of these as ribbons of fur flowing backward from the face. -
Adding Definition:
Use a rigger brush or fine liner with a darker brown mix to separate the clumps. Paint long, sweeping lines that follow the direction of growth, focusing on the areas behind the ear and along the neck. -
White Chin Fur:
For the white beard area, use very diluted gray-blue shadows to define the clumps, leaving the paper white for the highlights. Soften any hard edges with a damp brush.
Troubleshooting: Muddy Fur
If fur texture looks muddy, you likely didn’t let the under-layer dry enough. Wait for complete dryness between the base wash and the detail strokes to keep lines crisp and separate.
Step 4: Final Details
-
High Contrast Shadows:
Go back in with your darkest black. Deepen the shadows in the deepest crevices of the mane and immediately under the chin to push the lighter fur forward visually. -
Ear Detail:
Paint the dark tuft inside the ear, ensuring the edges are soft and feathery against the lighter inner ear skin. -
Remove Masking:
Gently rub away the masking fluid to reveal the crisp white paper underneath. -
Refining Whiskers:
If the revealed white lines look too stark, glaze over them lightly with a very watery yellow ochre near the root. I sometimes use white gouache to extend the tips if they broke off during masking removal. -
Opaque Highlights:
Use a tiny amount of Titanium White gouache to add stray, illuminated hairs on the top of the head and bridge of the nose to catch the light.
Step back and appreciate the depth you’ve created in those soulful eyes and heavy mane.


Impressionistic Lion With Chunky Strokes

Capture the quiet dignity of the king of the jungle with this soft, impressionistic study. Using layered brushwork and a warm, earthy palette, you will build a majestic lion portrait that balances realistic gazing eyes with loose, expressive fur textures.
Detailed Instructions
Materials
- Square canvas (approx. 20×20 or 24×24 inches)
- Acrylic paints (Titanium White, Burnt Umber, Burnt Sienna, Yellow Ochre, Raw Sienna, Lamp Black)
- Large flat brush or wash brush for background
- Medium filbert brush for blocking features
- Small angled brush or dagger stripper for fur details
- Fine liner brush for eyes and whiskers
- Palette for mixing
- Water cup and paper towels
- Pencil for sketching
Step 1: Preparation & Sketching
-
Prepare the canvas:
Start by applying a very thin, misty wash of white mixed with a drop of Raw Sienna across the entire canvas. This breaks the stark whiteness and creates a warm, vintage-like undertone. -
Map the composition:
Lightly sketch the lion’s basic geometry. Place the head slightly off-center to the right, ensuring the profile view allows room for the mane to expand to the left. -
Refine the features:
Focus on the snout’s slope and the distinctive triangular shape of the nose. Carefully outline the eye, paying attention to the heavy brow ridge above it.
Fixing “Plastic” Fur
If the mane looks too solid or smooth, don’t over-blend. Let layers dry completely, then dry-brush lighter colors over the texture to catch the high points.
Step 2: Underpainting & Blocking
-
Block the shadow areas:
Mix Burnt Umber with a touch of Black. Apply this dark mixture to the inner ear, the nostril, the line of the mouth, and the deepest shadows of the mane behind the neck. -
Establish the mid-tones:
Using a loose filbert brush, lay down patches of Burnt Sienna and Yellow Ochre where the mane is thickest. Don’t worry about individual hairs yet; focus on the mass and shape of the fur. -
Create the face structure:
Mix a blend of White, Raw Sienna, and a tiny dot of Burnt Umber. Paint the flattened planes of the face—the cheekbone, the bridge of the nose, and the forehead—smoothing the paint to suggest shorter fur.
Level Up: Pallet Knife
Swap the brush for a palette knife on the outer mane. Scrape thick, unmixed globes of Yellow Ochre and Burnt Sienna to create massive physical texture.
Step 3: Building the Mane
-
Layer the dark mane:
Switch to your angled brush. Load it with a mix of Burnt Sienna and Burnt Umber. Using confident, sweeping strokes, pull the paint from the neck outward to create the darker ‘red’ sections of the mane. -
Add golden highlights:
Mix Yellow Ochre with Titanium White. Apply this lighter tone over the darker mane layers while they are still slightly tacky or fully dry, depending on how much blending you want. Use jagged strokes to simulate the rugged texture. -
Feather the edges:
At the outer edges of the mane, use a drier brush with very little paint to create a soft, feathery transition into the background. This keeps the painting feeling airy rather than cut-out. -
Define the neck fur:
I like to use long, vertical strokes under the chin and down the chest with a creamy White and Raw Sienna mix to show the longer, heavier chest hair.
Step 4: Facial Details & Eyes
-
Paint the iris:
Fill the iris with a bright Yellow Ochre mixed with a touch of orange. Let it dry, then add a smaller circle of Black for the pupil. -
Add the eye spark:
Place a tiny, crisp dot of pure Titanium White on the upper curve of the pupil. This ‘catchlight’ is crucial for bringing the animal to life. -
Detail the nose and muzzle:
Use a dusty pink-brown mix for the top of the nose leather. Then, strengthen the dark line where the lips meet. Add small dots on the muzzle pad where the whiskers will emerge. -
Brighten the muzzle:
Paint the chin and the area just above the mouth with pure White. Use short, flicking strokes to make this fur look bristly and stiff.
Step 5: Final Touches
-
Enhance contrast:
Step back and look for areas that feel flat. Deepen the shadow right under the ear and behind the jawline to pop the face forward. -
Add the whiskers:
Dilute some white paint with water until it’s inky. Using your finest liner brush, swiftly pull long, thin whiskers from the muzzle dots. Add a few erratic eyebrow hairs as well. -
Soften the periphery:
Take a clean, dry brush and gently scumble (rub lightly) over the very bottom edge of the painting to make the lion fade artistically into the white canvas.
Step back and admire the noble expression you’ve captured in your lion’s gaze
Watercolor Lion With Soft Bleeds
Capture the regal spirit of the king of beasts with this vibrant watercolor project that balances realistic facial details with an expressive, flowing mane. The painting features stunning warm-to-cool transitions, creating a dreamy, ethereal effect that bleeds beautifully into the paper’s edges.
Step-by-Step
Materials
- Cold press watercolor paper (300 gsm or heavier)
- Watercolor paints (Burnt Sienna, Yellow Ochre, Alizarin Crimson, Ultramarine Blue, Turquoise, Violet)
- Round brushes (flats for washes, medium round sizes 6-8, and a small liner size 0-2 for details)
- Pencil (HB or H) and kneaded eraser
- Masking fluid (optional)
- Two jars of water
- Paper towels
Step 1: Sketching and Initial Washes
-
Light structural sketch:
Begin with a very faint pencil sketch. Outline the main shapes of the lion’s head, focusing on the eyes, nose bridge, and muzzle. Sketch the mane loosely, just indicating the general direction of the fur clumps without drawing individual hairs. -
Masking highlights:
If you want to preserve the brightest whites, apply a tiny amount of masking fluid to the whiskers and chin area. Alternatively, you can carefully paint around these areas or use white gouache later. -
Start with the eyes:
Paint the eyes first using a mix of Yellow Ochre and a touch of Burnt Sienna. While still damp, drop deeper brown into the upper iris for shadow, leaving a tiny spot of white paper for the catchlight. -
Base skin tones:
Mix a watery wash of Yellow Ochre and a hint of Burnt Sienna. Apply this to the face area—nose bridge, cheeks, and forehead—using the wet-on-dry technique to establish the base color. -
Building facial depth:
While the base layer is still slightly damp, drop in stronger Burnt Sienna and a touch of purple near the nose sides and under the eyes to begin sculpting the face’s dimension.
Wet-on-Wet Magic
For the softest blends in the background splash, wet the paper with clean water first, then touch the loaded brush to the surface and watch the pigment explode.
Step 2: Developing the Mane and Colors
-
Warm mane underpainting:
Wet the paper around the lion’s face where the mane sits. Drop in vibrant oranges and reds (Alizarin Crimson mixed with Yellow Ochre) on the left side, letting them bleed naturally outward. -
Cool transition:
Moving to the right side and lower mane, introduce violet and blue tones. I find that letting the purple mix slightly with the still-wet orange areas creates interesting, muted transitions. -
Deepening the shadows:
Mix a strong dark brown or deep violet. Paint wet-on-dry into the deepest crevices of the mane near the ears and neck to create contrast and push the face forward. -
Adding texture strokes:
Once the initial wash is damp but not soaking, use a medium round brush to add directional strokes in the mane. This suggests fur texture without becoming overly rigid or detailed. -
Create the drip effect:
Load a brush with watery turquoise or blue paint. Apply it to the bottom of the mane section and tilt your board upright, encouraging gravity to pull drips down the paper. -
Splatter texture:
Cover the lion’s face with a scrap piece of paper. Load a brush with red and purple paint, then tap the handle against your finger to splatter droplets around the upper mane for an energetic look.
Add Metallic Flair
Once the painting is completely dry, use gold watercolor paint or gold leaf flakes on the edges of the mane to give the lion a truly royal appearance.
Step 3: Refining Details
-
Facial features definition:
Using your smallest brush and a dense mix of black or dark sepia, carefully paint the nostrils, the line of the mouth, and the eyeliner. -
Chin fur shading:
Add very light gray-blue shadows to the white tuft of fur on the chin to give it volume, ensuring the strokes follow the direction of hair growth. -
Defining the whiskers:
If you used masking fluid, rub it off now. If not, use white gouache or a white gel pen to draw crisp, long whiskers radiating from the muzzle. -
Mane separation:
With a semi-dry brush, add a few sharp, dark lines in the mane to separate large clumps of hair, particularly near the ears and forehead. -
Final eye glint:
Reassess the eyes. If the catchlight got painted over, add a tiny dot of opaque white paint to bring the lion to life.
Step back and admire the fierce yet gentle expression you have captured in your watercolor creation
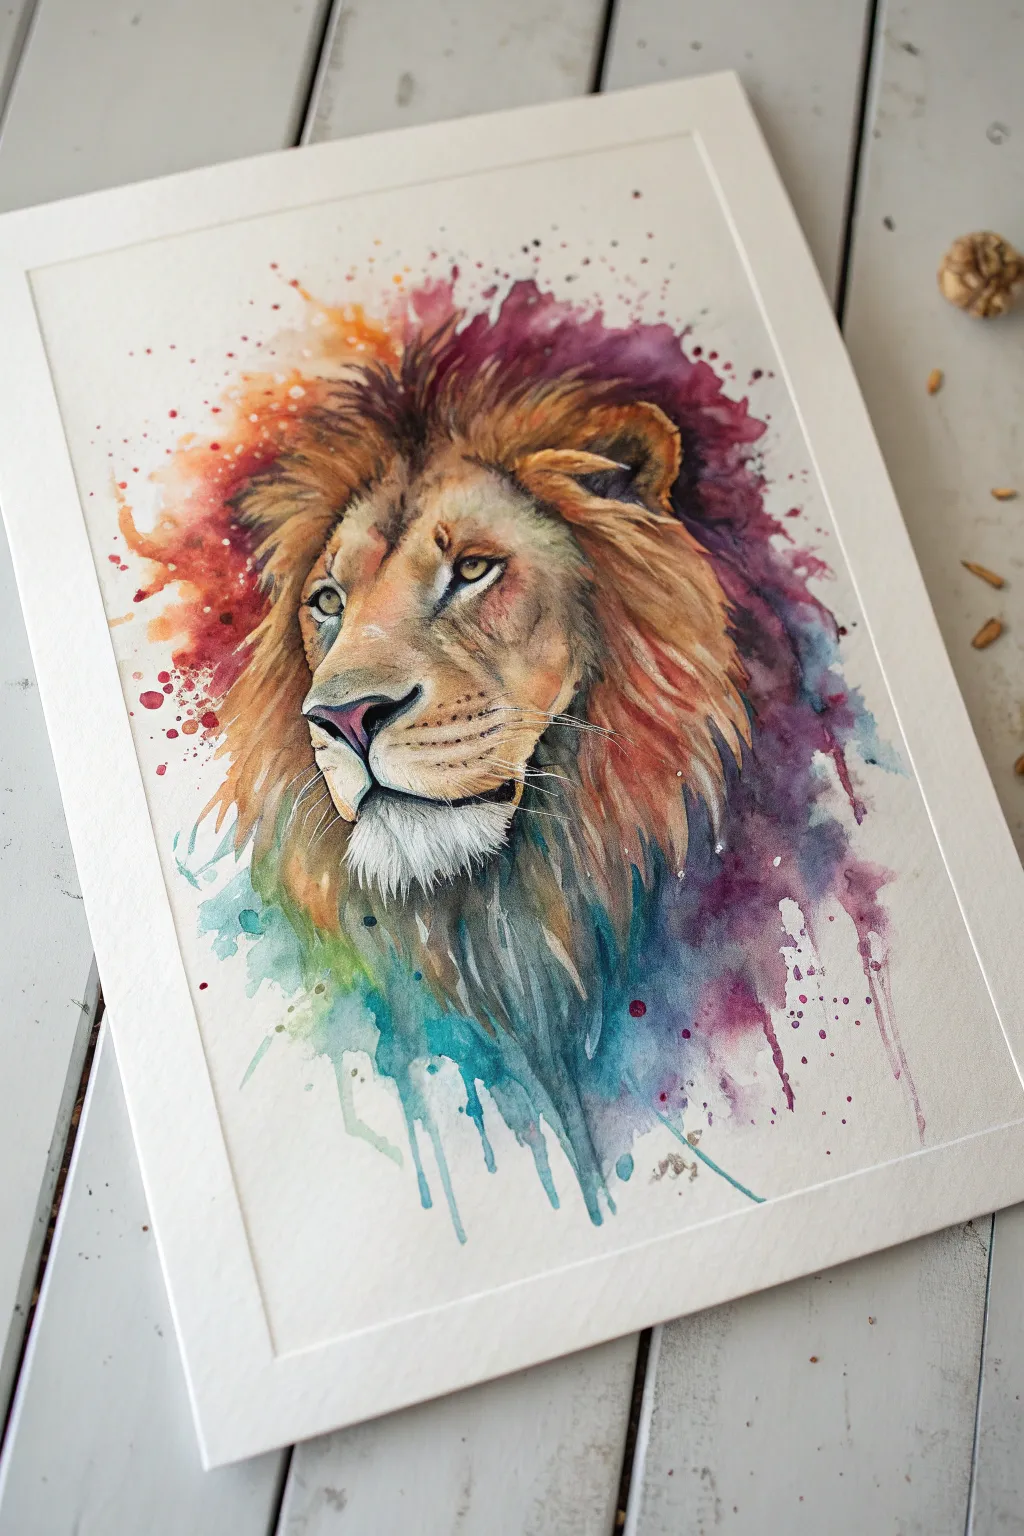
Explosive Color Mane, Realistic Face
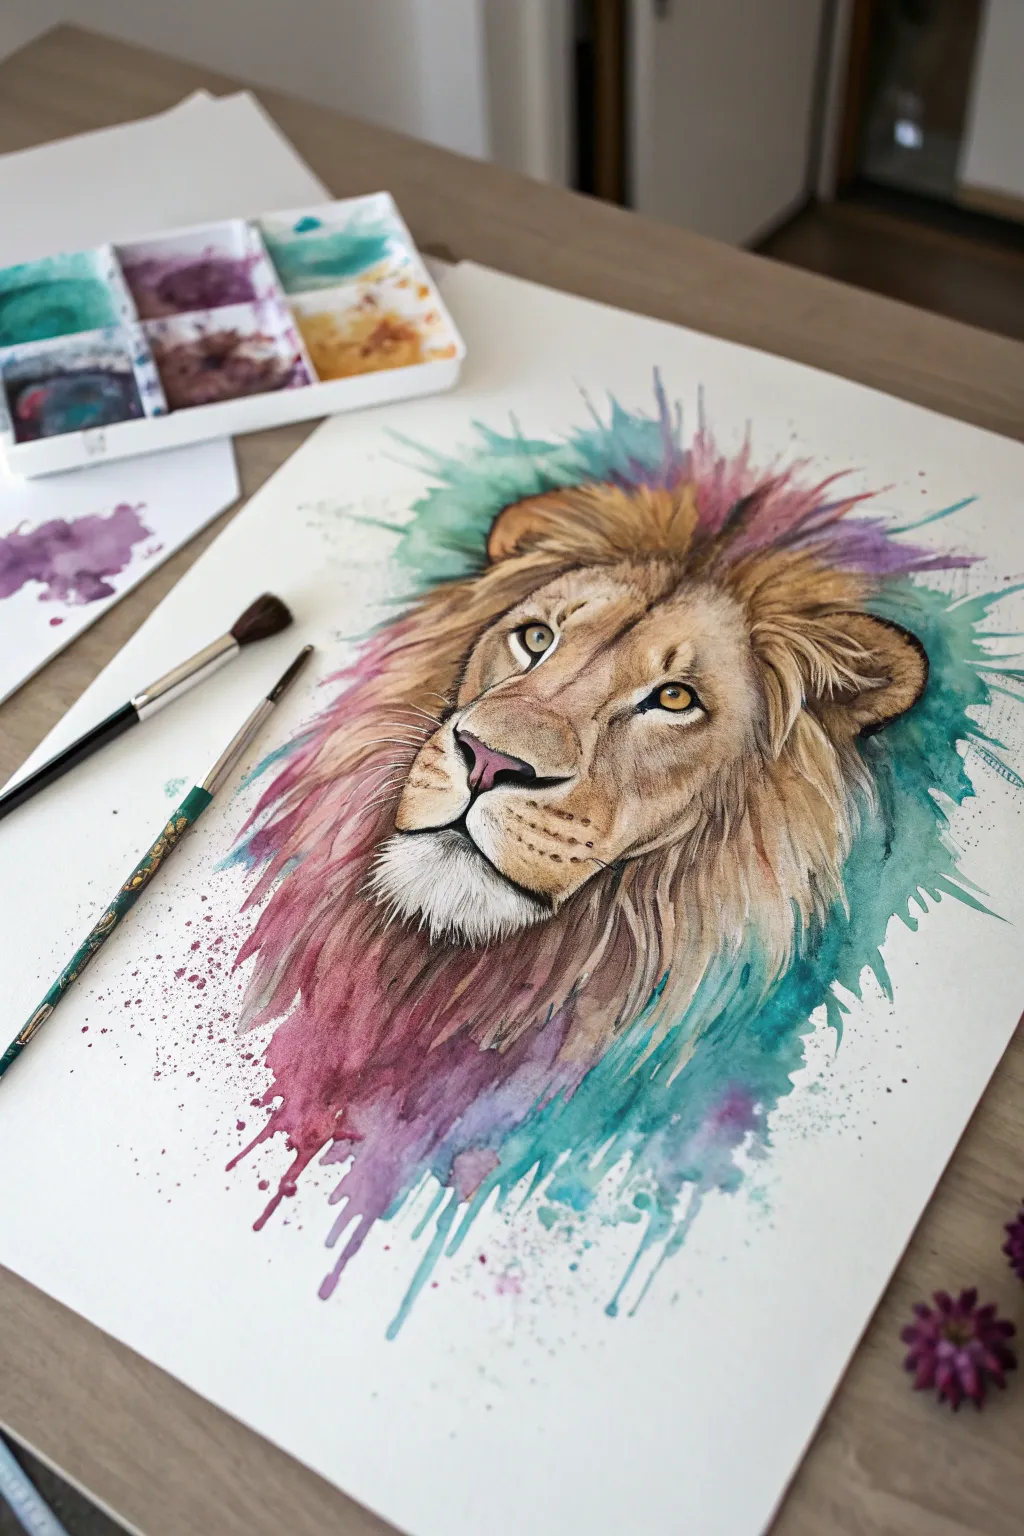
Merge the precision of realistic portraiture with the loose, vibrant freedom of watercolor in this striking lion project. You’ll create a detailed, soulful face that seems to emerge from an expressive explosion of teal and violet splashes.
How-To Guide
Materials
- High-quality hot press watercolor paper (smooth texture)
- Watercolor paints (pans or tubes): Burnt Umber, Yellow Ochre, Lamp Black, Teal/Turquoise, Violet/Purple, Cadmium Red
- Pencil (HB or 2H) and kneaded eraser
- Round watercolor brushes (sizes 2, 6, and 10)
- Fine detail brush (size 0 or 00)
- White opacity marker or white gouache
- Masking tape
- Two jars of water
- Paper towels
Step 1: Sketching the Foundation
-
Prepare your surface:
Tape your watercolor paper down to a flat surface or drawing board using masking tape on all four sides. This prevents warping when we add heavy washes later. -
Map out proportions:
Using an HB pencil, lightly sketch the basic oval shape for the lion’s head. Draw a vertical centerline and horizontal eye line to ensure symmetry, keeping your pressure very light so the graphite won’t show through the paint. -
Refine the features:
Draw the almond shapes of the eyes, the broad triangle of the nose, and the muzzle structure. Pay close attention to the direction of the fur around the brow and cheeks; marking these directional lines now will help your brushstrokes later. -
Clean up the sketch:
Use a kneaded eraser to lift up any heavy graphite, leaving only a faint guide. The less pencil visible now, the cleaner your colors will look.
Control the Bloom
To keep the face sharp but the mane loose, ensure the face paint is 100% bone dry before wetting the paper for the mane background. This acts as a barrier.
Step 2: The Realistic Face
-
Base skin tones:
Mix a watery wash of Yellow Ochre and a touch of Burnt Umber. Apply this pale tan color to the bridge of the nose, forehead, and cheeks, leaving pure white paper for the muzzle and under-eye highlights. -
Deepening the shadows:
While the first layer is still slightly damp, drop in a slightly stronger mix of Burnt Umber around the eye sockets and the sides of the nose to build form. -
Painting the eyes:
Switch to your size 2 brush. Paint the irises with a glowing mix of Yellow Ochre and a tiny dot of green or brown. Leave a tiny white speck of paper for the catchlight, or mask it off if you prefer. -
Pupils and liner:
Once dry, use Lamp Black (or a very dark brown mix) to paint the pupils and the thick ‘eyeliner’ around the eyes. This high contrast brings the soul of the lion to life immediately. -
Nose details:
Paint the nose leather using a mix of pink and brown. Darken the nostrils significantly for depth, blending the edges softly into the pink area. -
Texture building:
Using a relatively dry small brush, lay down short directional strokes of Burnt Umber and Ochre to mimic short fur on the face, following your initial sketch lines.
Step 3: The Explosive Mane
-
Wet-on-wet preparation:
Clean your water. Brush clear water around the outer edges of the lion’s face where the mane begins, extending somewhat randomly outward into the negative space. -
Dropping in the cool tones:
Load a size 10 brush with saturated Teal or Turquoise. Touch the wet paper around the right and bottom edges, letting the pigment bloom and spread naturally. -
Adding warmth and drama:
On the left side and top, introduce Violet and deep purples. Let these colors bleed into the teal in some areas, but try not to overmix them or they may turn muddy. -
Connecting face to mane:
While the colorful background is wet, pull strokes of brown and ochre from the dry face area *out* into the wet color. This creates soft, furry edges where the realistic head transitions into the abstract background. -
Creating the splatter effect:
Load your brush with watery paint (Teal or Purple). Hold it over the paper and tap the handle against another brush to send fine sprays of droplets onto the white paper, enhancing the explosive energy. -
The drip technique:
I like to tilt the board slightly upright at this stage. Load a wet brush with purple or teal and touch the bottom edge of your painted mane, encouraging gravity to pull drips down the page.
Muddy Purple/Green Mix?
If your violet and teal are mixing into a dull grey, let one color dry completely before glazing the other over it, or keep them separated on the paper.
Step 4: Final Details
-
Refining fur texture:
Return to the face with your smallest brush and dark brown paint. Add specific individual hairs around the ears and forehead to sharpen the focus. -
Whiskers and highlights:
Using white gouache or an opacity marker, draw crisp, thin whiskers over the dark muzzle area. Add tiny white accents to the wetness of the eyes and nose. -
Enhancing the separation:
If the jawline feels lost, use a slightly darker wash of purple or teal right underneath the chin to push the background back and make the chin pop forward.
Peel off your tape carefully to reveal those crisp white borders against your wild, colorful creation.
Splatter and Drip Lion Energy

Capture the regal spirit of a lion combining realistic facial details with raw, untamed energy through loose watercolor techniques. This project balances fine ink work with free-flowing drips to create a dynamic portrait that feels both grounded and wild.
Step-by-Step
Materials
- Cold press watercolor paper (300 gsm)
- Watercolor paints (Yellow Ochre, Burnt Sienna, Burnt Umber, Payne’s Grey, Black)
- Black fineliner pens (sizes 0.1 and 0.5)
- White gouache or white gel pen
- Round watercolor brushes (sizes 4 and 8)
- Pencil (HB) and kneaded eraser
- Masking tape
- Paper towels
- Water jar
Step 1: Sketching the Foundation
-
Tape down your paper:
Secure your cold press paper to a flat board using masking tape on all four sides. This prevents warping when we add heavy washes later. -
Outline the basics:
Using an HB pencil, lightly sketch the oval shape of the lion’s head. Mark lines for eye placement and the center line for the nose to ensure symmetry. -
Detail the features:
Refine the eyes, nose, and muzzle shape. Keep your lines faint for the mane area, as this will be largely defined by paint strokes rather than rigid outlines.
Gravity is Your Friend
For natural-looking drips, don’t force the paint. Let gravity do the work by tilting your board at a 45-degree angle immediately after applying wet paint.
Step 2: Layering the Base Colors
-
First golden wash:
Mix a watery Yellow Ochre and apply it loosely over the face area, avoiding the white muzzle and the area immediately around the eyes. -
Deepening the shadows:
While the first layer is still slightly damp, drop in Burnt Sienna around the nose bridge, under the eyes, and in the inner ears to build dimension. -
Painting the mane’s base:
Load your size 8 brush with a mix of Yellow Ochre and Burnt Umber. Use distinct, outward strokes starting from the face and flicking the brush outward to mimic fur texture. -
Adding the grey tones:
Introduce diluted Payne’s Grey to the lower mane and the chin tuft. This cool tone contrasts beautifully with the warm gold and adds depth to the shadier parts of the fur. -
Let it dry completely:
Before moving to details, ensure the paper is bone dry to prevent the ink or subsequent sharp lines from bleeding.
Muddiness Control
If your brown and grey areas look muddy, let the first layer dry completely before adding the second. Wet-on-wet is great for blends, but wet-on-dry is best for crisp fur texture.
Step 3: Detailed Ink & Texture
-
Defining the eyes:
Use the 0.1 fineliner to outline the eyes. Fill the pupil with black watercolor or ink, leaving a tiny spot of white paper for the catchlight. -
Creating facial fur:
With the 0.1 pen, add short, directional hatching strokes along the nose bridge and cheeks to simulate short fur. Follow the curvature of the bone structure. -
Darkening the nose:
Paint the nose pad with specialized black watercolor or ink, keeping the edges crisp. Use a damp brush to lift a tiny highlight on the top ridge for a wet-nose look. -
Refining the mane:
Switch to a smaller brush (size 4) and a darker mix of Burnt Umber. Paint individual strands of hair in the mane, layering them over the initial loose wash.
Step 4: The Splatter and Drip Effect
-
Prepare the drip mix:
Mix a generous puddle of Burnt Sienna with plenty of water. It needs to be fluid enough to run down the page easily. -
Initiate the drips:
Load your brush heavily and touch it to the bottom edge of the painted mane. Tilt your board upright so gravity pulls the paint down into organic streaks. -
Add secondary drips:
Repeat the process with a watery Payne’s Grey on the darker, lower sections of the mane. Allow the colors to mingle slightly as they trail off the bottom. -
Create the splatter:
Load a brush with Burnt Umber, hold it horizontally over the paper, and tap the handle firmly. This will send small speckles of paint across the piece, adding movement.
Step 5: Final Touches
-
Check the contrast:
Step back and assess the values. If the face looks flat, glaze a transparent layer of Burnt Umber over the deepest shadow areas. -
Whiskers and highlights:
Using white gouache or a gel pen, draw the long, sweeping whiskers extending from the muzzle. Add sharp white highlights to the eyes to bring the lion to life. -
Clean up:
Once everything is perfectly dry, carefully peel away the masking tape to reveal the clean, crisp edges of your masterpiece.
Step back and admire the fierce elegance of your new watercolor creation
Geometric Lion in Faceted Shapes
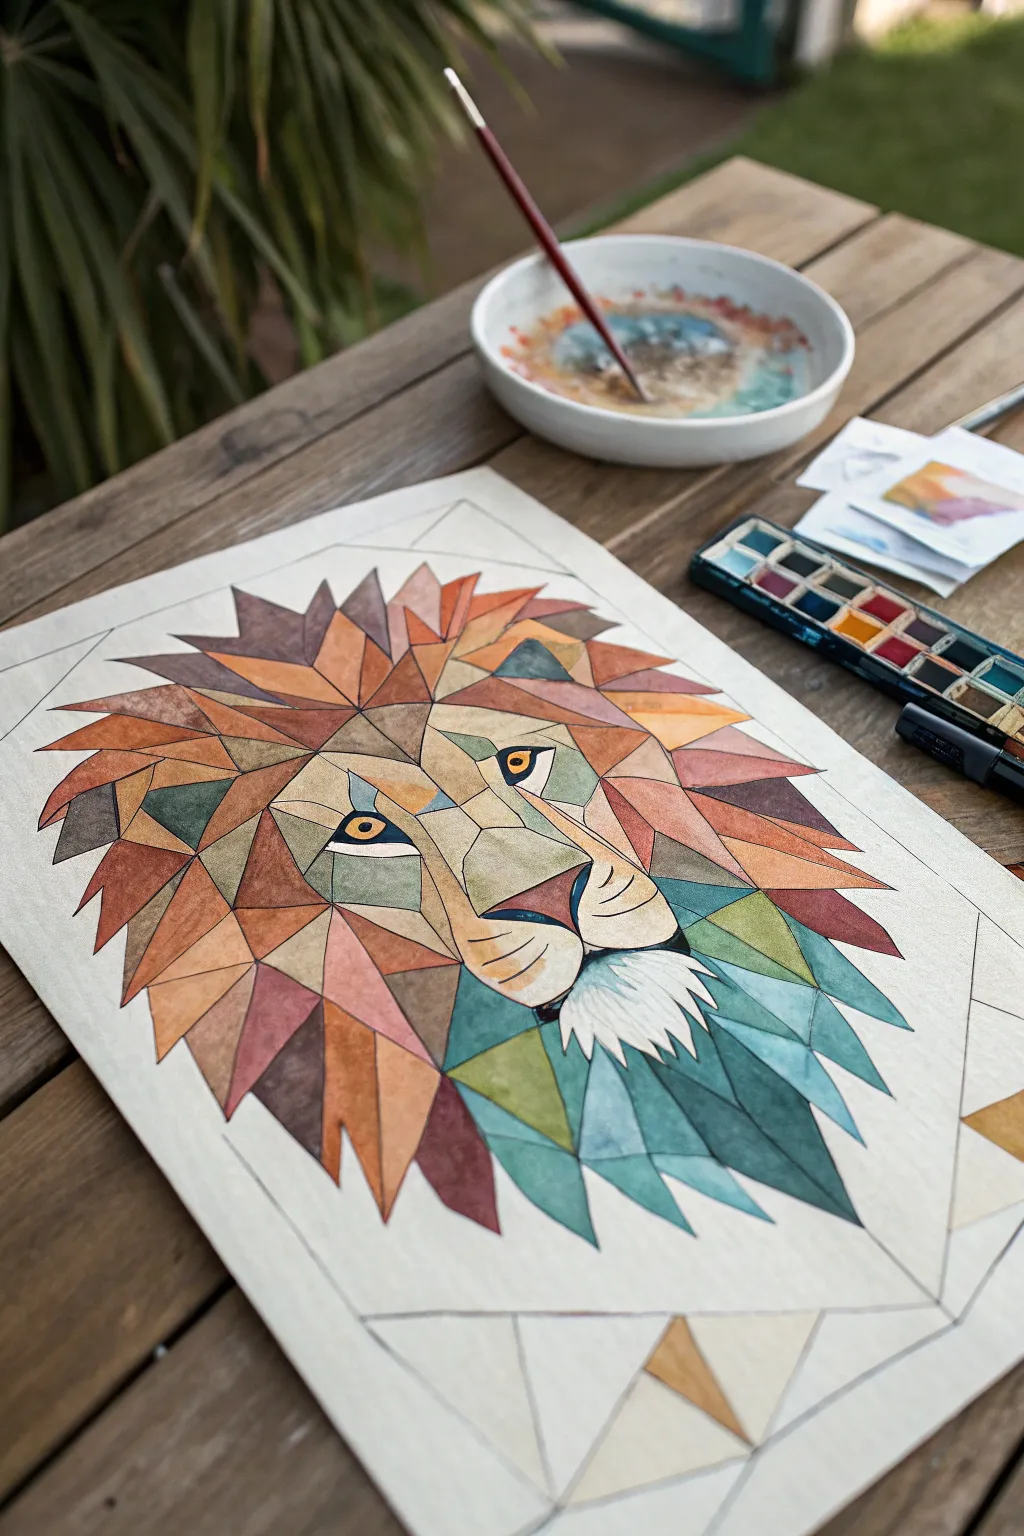
Master the art of geometric abstraction with this striking lion portrait that breaks the regal subject down into vibrant, faceted shapes. Using watercolor allows for beautiful, subtle gradients within each polygon, giving the flat shapes unexpected depth and dimension.
Step-by-Step Tutorial
Materials
- High-quality watercolor paper (cold press, 300gsm)
- Watercolor paint set (pans or tubes)
- Round brushes (sizes 2, 4, and 8)
- Pencil (HB or 2H)
- Ruler
- Eraser
- Fine liner pen (optional, for final definition)
- Masking tape
- Palette for mixing
- Jars of clean water
Step 1: Preparation & Sketching
-
Prepare your workspace:
Begin by taping your watercolor paper down to a sturdy board or table using masking tape. This prevents the paper from buckling when it gets wet and creates a clean border around your artwork. -
Map out the face shape:
Lightly sketch the general outline of the lion’s head using an HB pencil. Don’t worry about details yet; just focus on getting the proportions of the mane, snout, and eyes correct. -
Create the geometric grid:
Using a ruler, start breaking down the organic shapes into straight-edged polygons. Draw lines that dissect the mane into large triangles and shards. Keep the shapes around the eyes and nose smaller to retain detail. -
Refine the facets:
Go over your grid to ensure symmetry where needed. The nose bridge should feel solid, while the mane can be more chaotic and jagged. Press lightly so the graphite doesn’t show through the paint later.
Bleeding edges?
If paint bleeds into a neighbor shape, stop! Let it dry fully. Then, re-wet the area with clean water and lift the unwanted pigment with a thirsty brush or paper towel.
Step 2: Base Colors & Gradients
-
Select your palette:
Prepare your colors. You will need warm earth tones like burnt sienna, ochre, and warm orange for the upper mane, and cooler tones like teal, turquoise, and dusty blue for the lower mane. -
Paint the first facet:
Choose a triangle in the mane that isn’t touching any other wet areas. Load your size 4 brush with a diluted burnt sienna and fill the shape. -
Add a wet-on-wet gradient:
While that first shape is still wet, drop a tiny amount of a darker brown or saturated orange into one corner of the triangle. Let it bloom naturally to create a gradient effect within the single shape. -
Work non-adjacently:
Move to a different section of the painting to fill another shape. It is crucial to let each polygon dry completely before painting its neighbor to prevent colors from bleeding across the pencil lines. -
Introduce cool tones:
As you move toward the bottom of the mane, switch to your cool palette. Mix a watery teal and apply it to the lower geometric shards, letting the colors transition from warm browns to cool blues.
Metallic Accent
For a truly regal look, paint specific facets—like the eyes or select mane shards—using metallic gold watercolor paint. It catches the light beautifully.
Step 3: Details & Contrast
-
Define the eyes:
The eyes are the focal point. Use a small size 2 brush to paint the iris a striking yellow-ochre. Carefully outline the eye shape with a dark Payne’s gray or black, leaving a tiny white spot for the catchlight. -
Paint the nose and snout:
Fill the geometric planes of the nose with a dusty rose or light brown. Use darker values on the underside of the nose planes to suggest shadow and form. -
Deepen the shadows:
Once your base layers are dry, look for areas that need more depth. Glaze a second, transparent layer of darker paint over specific facets—usually those closer to the neck or under the overlapping mane shards. -
Leave negative space:
Notice the white chin area in the project image. Leave the paper white here, painting only small, sharp shadow shapes to suggest tufts of fur or the bottom lip.
Step 4: Final Touches
-
Clean up edges:
I sometimes find that my edges get a bit messy. If needed, take a slightly damp, clean brush to gently lift any paint that has strayed over your pencil guidelines. -
Optional outlining:
If you want a crisper, more illustrative look, you can outline the shapes with a very fine waterproof pen. However, leaving the slight white gap between shapes (created by the pencil line) often looks more elegant. -
Erase guidelines:
Ensure the painting is 100% bone dry. Gently run a soft eraser over the image to remove visible pencil lines, leaving just the sharp edges of the paint.
Step back and admire how simple shapes have come together to form a powerful, modern portrait.
Lion Silhouette With Gradient Sky
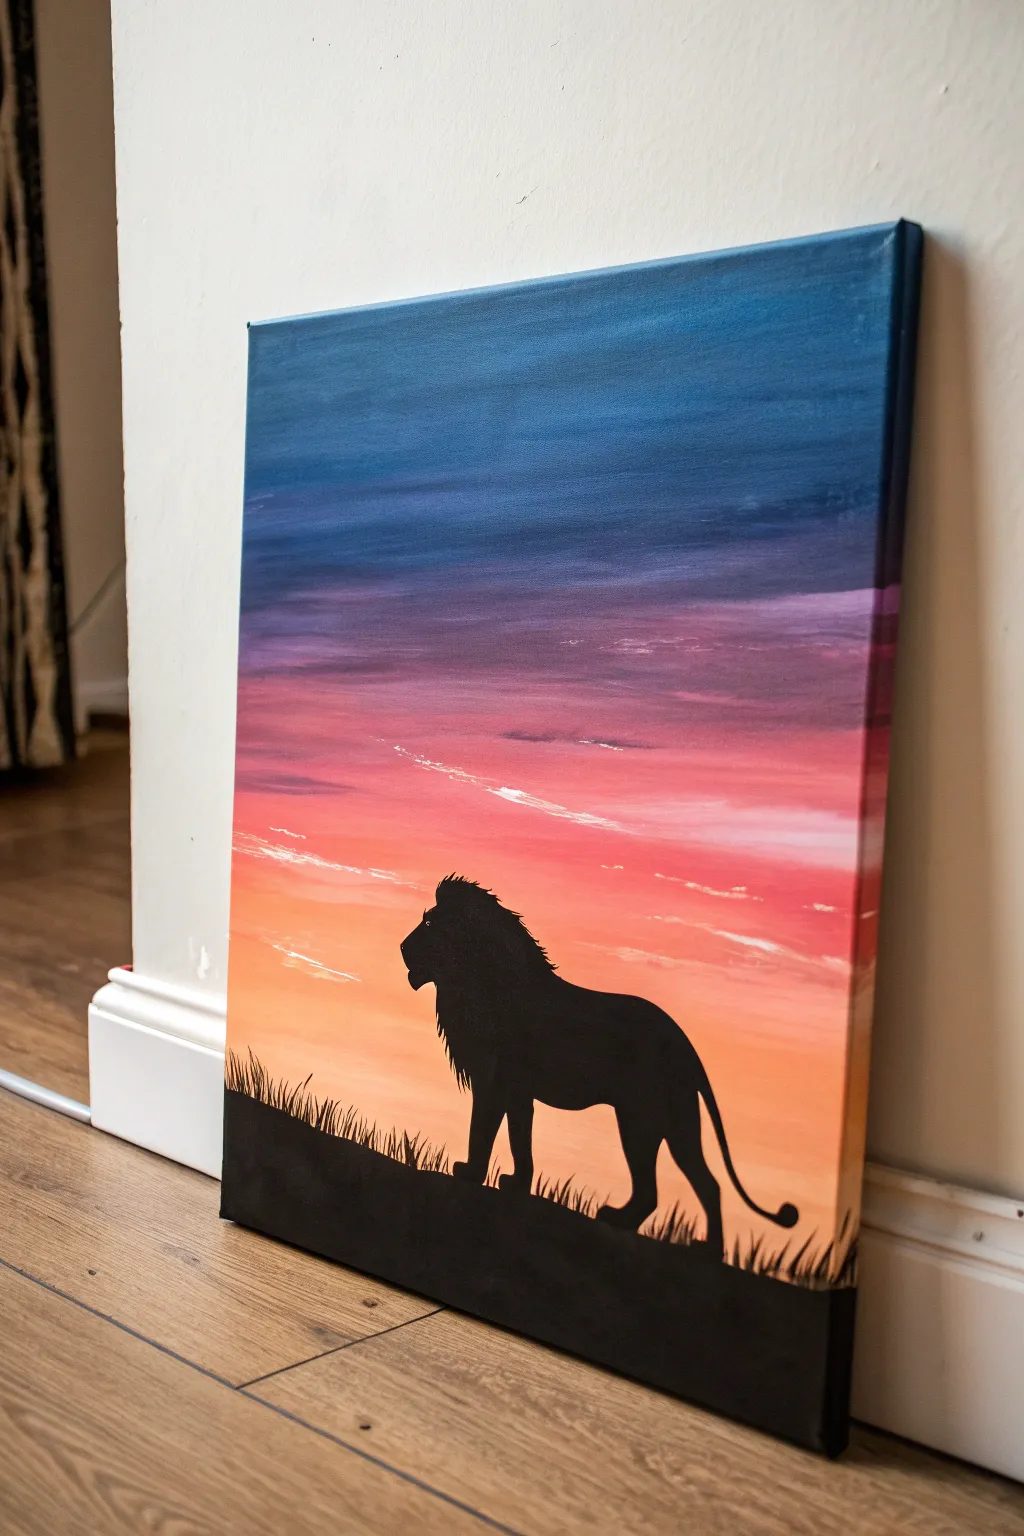
Create a striking piece of art that pairs the bold silhouette of the king of the jungle against a serene, fading sunset. This project demonstrates how smooth gradient blending can set a dramatic stage for simple, high-contrast subjects.
How-To Guide
Materials
- Rectangular stretched canvas (16×20 inches is a good start)
- Acrylic paints: Carbon Black, Titanium White, Deep Blue, Purple, Magenta, Cadmium Orange, Lemon Yellow
- Large flat brush or foam brush (for blending)
- Medium round brush
- Small liner or detail brush
- Pencil and eraser
- Cup of water and paper towels
- Mixing palette or paper plate
Step 1: Painting the Gradient Sky
-
Prepare your palette:
Squeeze out generous amounts of your sky colors: Deep Blue, Purple, Magenta, Cadmium Orange, and a touch of Lemon Yellow mixed with Titanium White. Having these ready is crucial because acrylics dry fast. -
Start at the top:
Using your large flat brush, apply a broad band of Deep Blue across the very top of the canvas. Paint quickly with horizontal strokes, covering about the top 20% of the surface. -
Transition to purple:
Without cleaning your brush fully (just wipe off excess blue), dip into the Purple paint. Apply this directly below the blue band, overlapping the wet edge of the blue slightly to encourage blending. -
Blend the upper sky:
Work your brush back and forth horizontally where the blue and purple meet. The colors should mix on the canvas to create a seamless transition without a hard line. -
Add the pink hues:
Wipe your brush clean. Pick up the Magenta paint and apply it below the purple section. Again, overlap with the wet purple edge above it and blend carefully using long, smooth strokes. -
Introduce the warmth:
Clean your brush thoroughly. Now, pick up the Cadmium Orange. Paint the next band below the pink, blending the transition zone gently. The sky should now be warming up significantly. -
Paint the horizon glow:
For the bottommost section of the sky (before the ground), mix a little Orange with Lemon Yellow and White. Apply this pale, glowing peach color right at the horizon line, blending it up into the orange. -
Add wispy clouds:
While the sky is still slightly tacky or just dry, take a smaller brush with a tiny amount of Titanium White mixed with a drop of water. Lightly drag a few very thin, horizontal streaks across the pink and orange sections to mimic distant clouds. -
Let it dry completely:
Allow the background to dry fully before moving on. This usually takes about 20-30 minutes for acrylics, but ensure there are no cold or wet spots.
Step 2: Creating the Lion Silhouette
-
Draft the horizon:
Use a pencil to lightly sketch a sloping hill at the bottom of the canvas. This doesn’t need to be straight; a slight angle adds interest. -
Sketch the lion outline:
Lightly draw the outline of the lion standing on the hill. Focus on the big shapes: the large mane, the sloping back, and the tail position. Don’t worry about tiny fur details yet. -
Paint the ground:
Load your medium round brush with Carbon Black. Fill in the entire hill area below your pencil line, ensuring it is a solid, opaque black. -
Fill the lion’s body:
Switching between the medium brush for the body and a smaller brush for the legs, fill in the lion shape with solid black paint. You may need two coats to ensure no sunset color shows through. -
Detail the mane:
Using your smallest liner brush or the very tip of a round brush, flick tiny strokes outward from the silhouette of the head and neck. This creates the texture of the wind-blown mane. -
Refine the face:
Use the liner brush to carefully sharpen the profile of the nose and chin. I find that getting this profile sharp is what makes the lion recognizable instantly. -
Add the tail tuft:
Paint the thin line of the tail extending down, finishing with a small, teardrop-shaped tuft at the end. -
Create grass blades:
Along the top edge of the black hill, use quick, upward flicking motions with your liner brush to create silhouette grass. Vary the height and angle of the blades for realism. -
Blend the feet:
Add a few grass blades overlapping the lion’s paws. This grounds the animal in the scene so it looks like he is standing *in* the grass, rather than floating on top of it. -
Final inspection:
Step back and check for any spots where the black paint looks thin or streaky. Touch up with a second coat of black where needed for maximum contrast.
Keep the Brush Wet
When blending acrylics for the sky, keep a misting spray bottle handy. A light mist keeps the paint on the canvas workable longer, making smooth gradients easier.
Make It a Family
Expand the narrative by adding a smaller lion cub silhouette sitting or walking next to the main figure, perhaps looking up at the larger lion.
Hang your new masterpiece in a spot where it can catch the light and show off those vibrant colors
Negative Space Lion Mane
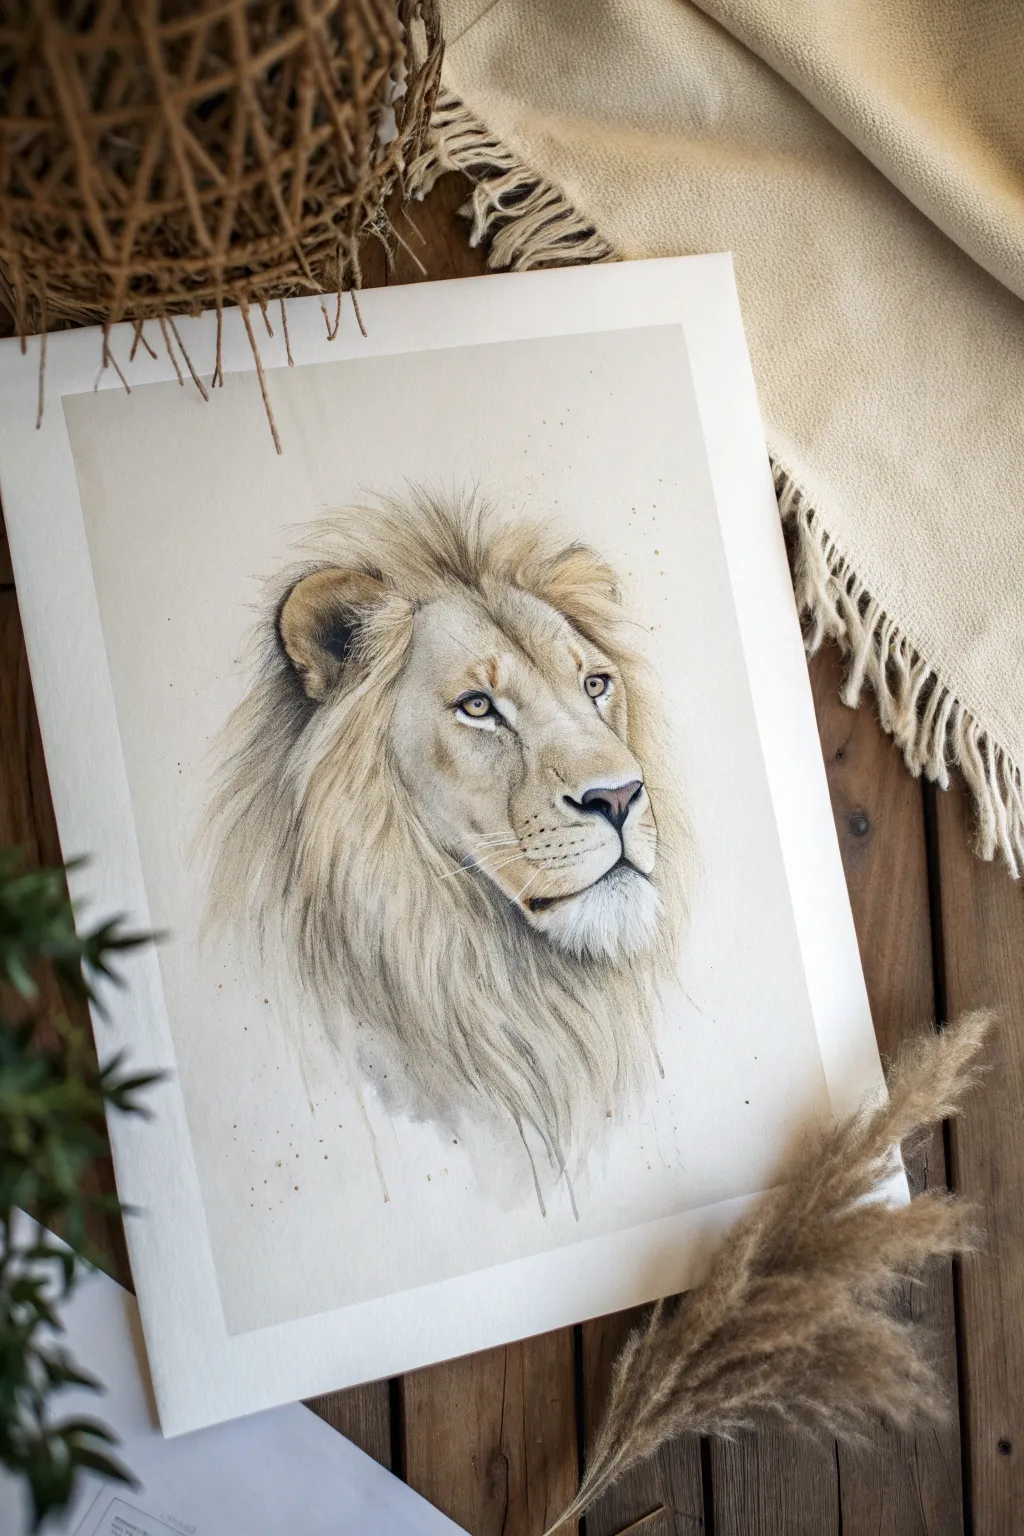
Capture the regal calm of a lion with this soft, detailed portrait that blends realistic features with an ethereal, fading mane effect. The technique uses a mix of watercolor washes and fine pencil work to create depth without overwhelming the composition.
Detailed Instructions
Materials
- Hot press watercolor paper (smooth texture)
- Watercolor paints (Yellow Ochre, Burnt Sienna, Raw Umber, Paynes Grey, Sepia)
- Watercolor brushes (Round #8 for washes, Round #2 and #0 for details)
- Colored pencils, water-soluble or wax-based (Cream, White, Dark Brown, Black)
- Graphite pencil (HB or 2H for sketching)
- Kneaded eraser
- Paper towels and two jars of water
- Masking fluid (optional, for whiskers)
Step 1: Sketching the Monarch
-
Outline the basics:
Begin with a very light graphite sketch. Focus on the triangular shape of the nose and the almond shape of the eyes. Keep your lines incredibly faint, as watercolor is transparent and won’t cover dark graphite marks. -
Map the mane:
Lightly indicate the direction of the fur flow. Instead of drawing every hair, simply mark the major clumps and the outer boundary where the mane will fade into the white space. -
Refine the gaze:
Double-check the proportions of the eyes and snout. The distance between the eyes is crucial for a realistic look; ensure the pupils are aligned and staring intently.
Step 2: Laying the Watercolor Foundation
-
First wash:
Mix a very watery wash of Yellow Ochre and a touch of Burnt Sienna. Apply this loosely over the face area, avoiding the white chin and the area immediately around the eyes. -
Define the shadows:
While the first layer is still slightly damp but not soaking, drop in a slightly darker mix of Raw Umber around the nose bridge and the inner corners of the eyes to build soft volume. -
The fading mane:
Load your larger brush with a diluted mix of Sepia and Yellow Ochre. Start near the ears and pull the color outwards. As you reach the outer edges, dip your brush in clean water to dilute the pigment, letting the mane fade seamlessly into the paper. -
Let it dry completey:
Wait until the paper is bone dry. This is critical before adding texture, or the lines will bleed and look muddy.
Pro Tip: Fur texture
Don’t draw individual hairs everywhere. Focus detail around the eyes and nose, then let the texture become looser and vague towards the edges to guide the viewer’s focus.
Step 3: Detailing with Pencil and Paint
-
Deepen the eyes:
Use a small brush with concentrated Sepia or Paynes Grey to paint the pupils and the dark lining around the eyes. Leave a tiny speck of white paper for the highlight, or add it later with white gouache. -
Nose texture:
Paint the nose using a mix of Paynes Grey and Burnt Sienna. Use a stippling motion (tiny dots) near the top of the nose leather to suggest a porous texture. -
Refining facial fur:
With a sharpened colored pencil (Cream or Light Brown), draw short, directional strokes over the dry watercolor wash on the face. Follow the contour of the muscles. -
Building the mane:
Switch to a darker brown pencil. Draw longer, flowing strokes for the mane, starting from the roots near the face. Press harder at the root and flick outward quickly to taper the line. -
Adding the negative space drips:
Mix a watery grey-brown. Using a medium brush, paint a few vertical, dripping lines at the very bottom of the mane to enhance the artistic, unfinished look. I like to let gravity do the work by tilting the paper slightly. -
Highlighting:
Use a sharp White colored pencil to add subtle highlights on the bridge of the nose and the lighter tufts of fur around the ears.
Troubleshooting: Muddy colors
If your fur looks muddy, you likely didn’t let the watercolor layers dry fully before using colored pencils. Pause, let it dry completely, and sharpen your pencils for crisp lines.
Step 4: Final Touches
-
Whisker work:
With a very fine liner brush or a sharp dark pencil, draw the whisker spots on the muzzle. Then, with a confident, quick motion, sweep out the long whiskers. If you’re nervous, practice the motion on scrap paper first. -
Splatter effect:
Load a toothbrush or stiff brush with diluted gold or brown paint. Retract the bristles with your thumb to flick tiny speckles onto the paper, focusing on the outer edges of the mane for a dynamic feel. -
Final contrast check:
Step back and assess your values. If the eyes or mouth line need more definition, darken them carefully with your darkest colored pencil.
Now step back and admire the gentle strength in the expression you created
Double-Exposure Lion and Landscape
This stunning mixed-media project blends the noble profile of a lion with the serene expanse of the African savanna. By combining graphite detailing with soft watercolor washes, you will create a dreamy, atmospheric piece that celebrates the spirit of the wild.
Step-by-Step
Materials
- Large format watercolor paper (A2 or similar size, hot press for smooth detail)
- Graphite pencils (HB, 2B, 4B, 6B)
- Mechanical pencil (0.5mm) for fine fur details
- Watercolor paints (burnt sienna, yellow ochre, raw umber, ivory, Payne’s gray)
- Round watercolor brushes (sizes 4, 8, and a large wash brush)
- Fine liner pigment pen (0.1mm, black)
- Masking fluid
- Kneaded eraser
- Painter’s tape and drawing board
Step 1: Setting the Composition
-
Prepare your surface:
Tape your large watercolor paper securely to a board. This prevents buckling when we add the watercolor washes later and gives you a nice crisp border. -
Sketch the lion’s profile:
Using an HB pencil, lightly map out the lion’s head on the left third of the paper. Focus on the triangular shape of the nose, the curve of the mane, and the placement of the ear. Keep lines faint so they disappear later. -
Draft the landscape elements:
Lightly sketch the horizon line across the center. Add the silhouettes of the acacia trees on the right and the small elephant walking near the bottom center. Sketch faint mountain shapes in the background. -
Mask key highlights:
Apply masking fluid to the lion’s whiskers and the very brightest highlights in the eye. This preserves the pure white of the paper against the dark fur we will draw later.
Soft Transitions
To blend the graphite lion into the watercolor sky seamlessly, lightly drag a clean, barely-damp brush over the outer pencil strokes of the mane. It turns the graphite into a subtle grey wash.
Step 2: Graphite Fur Techniques
-
Start the eye:
Begin detailing the eye with a 4B pencil. Establish the pupil’s darkness and lightly shade the iris, leaving the masked highlight clear. The eye anchors the soul of the piece. -
Layer the face fur:
Switch to your mechanical pencil. Use short, directional strokes to mimic the short fur on the muzzle and nose bridge. Follow the contours of the bone structure underneath. -
Build the mane’s volume:
Use a 2B pencil to lay down the base flow of the mane. Use longer, sweeping strokes here. Don’t worry about individual strands yet; focus on the clumps and waves of hair. -
Deepen the shadows:
Take your 6B pencil and push the darkest values in the mane, particularly under the chin and behind the ear. This high contrast creates the 3D effect. -
Fade the neck:
As you move down the lion’s neck, let your pencil strokes become lighter and more sparse. This creates the ‘fading’ effect where the animal blends into the landscape.
Step 3: Atmospheric Watercolor Wash
-
Mix the sky colors:
Prepare a very watery mix of ivory and a touch of yellow ochre. You want a warm, dusty light, not a bright sunny yellow. -
Apply the background wash:
Wet the sky area of the paper with clean water first. Drop in your ivory/ochre mix, letting it spread naturally. Avoid painting over the detailed graphite lion face, but carefully wash around the mane edges. -
Paint the distant mountains:
While the sky is still slightly damp, mix a pale wash of burnt sienna and grey. Paint the distant mountain shapes. The damp paper will soften the edges, making them look far away. -
Add cloud texture:
Dab a slightly stronger mix of burnt sienna and grey into the cloud areas. Use a thirsty brush or paper towel to lift out some pigment to create fluffy, sun-lit cloud tops.
Sunset Glow
Enhance the mood by adding a transparent glaze of diluted rose madder or pink watercolor over the clouds and horizon line once the first layers are dry for a ‘golden hour’ feel.
Step 4: Silhouettes and Final Details
-
Paint the acacia tree:
Using Payne’s gray mixed with raw umber (for a very dark, warm black), paint the prominent acacia tree on the right. Use the tip of your size 4 brush for the delicate, flat-topped branches. -
Add the elephant:
Paint the elephant silhouette with a slightly lighter grey-blue mix than the tree. This helps push it slightly further back in space than the tree but closer than the mountains. -
Create the foreground grass:
At the bottom of the page, use short, upward flicks of your brush with the dark tree color to create tall grasses. Overlap these slightly with the bottom of the lion’s mane to unify the two halves. -
Draw the birds:
Use your fine liner pen to add tiny V-shapes for the flock of birds in the distance. Vary their sizes to suggest movement and depth. -
Reveal the whiskers:
Once everything is completely dry, gently rub off the masking fluid. I like to lightly define the bottom edge of a few whiskers with a hard H pencil to make them pop.
Step back and admire how the fierce details of the lion soften beautifully into the tranquil landscape you have created
Galaxy Mane Cosmic Lion
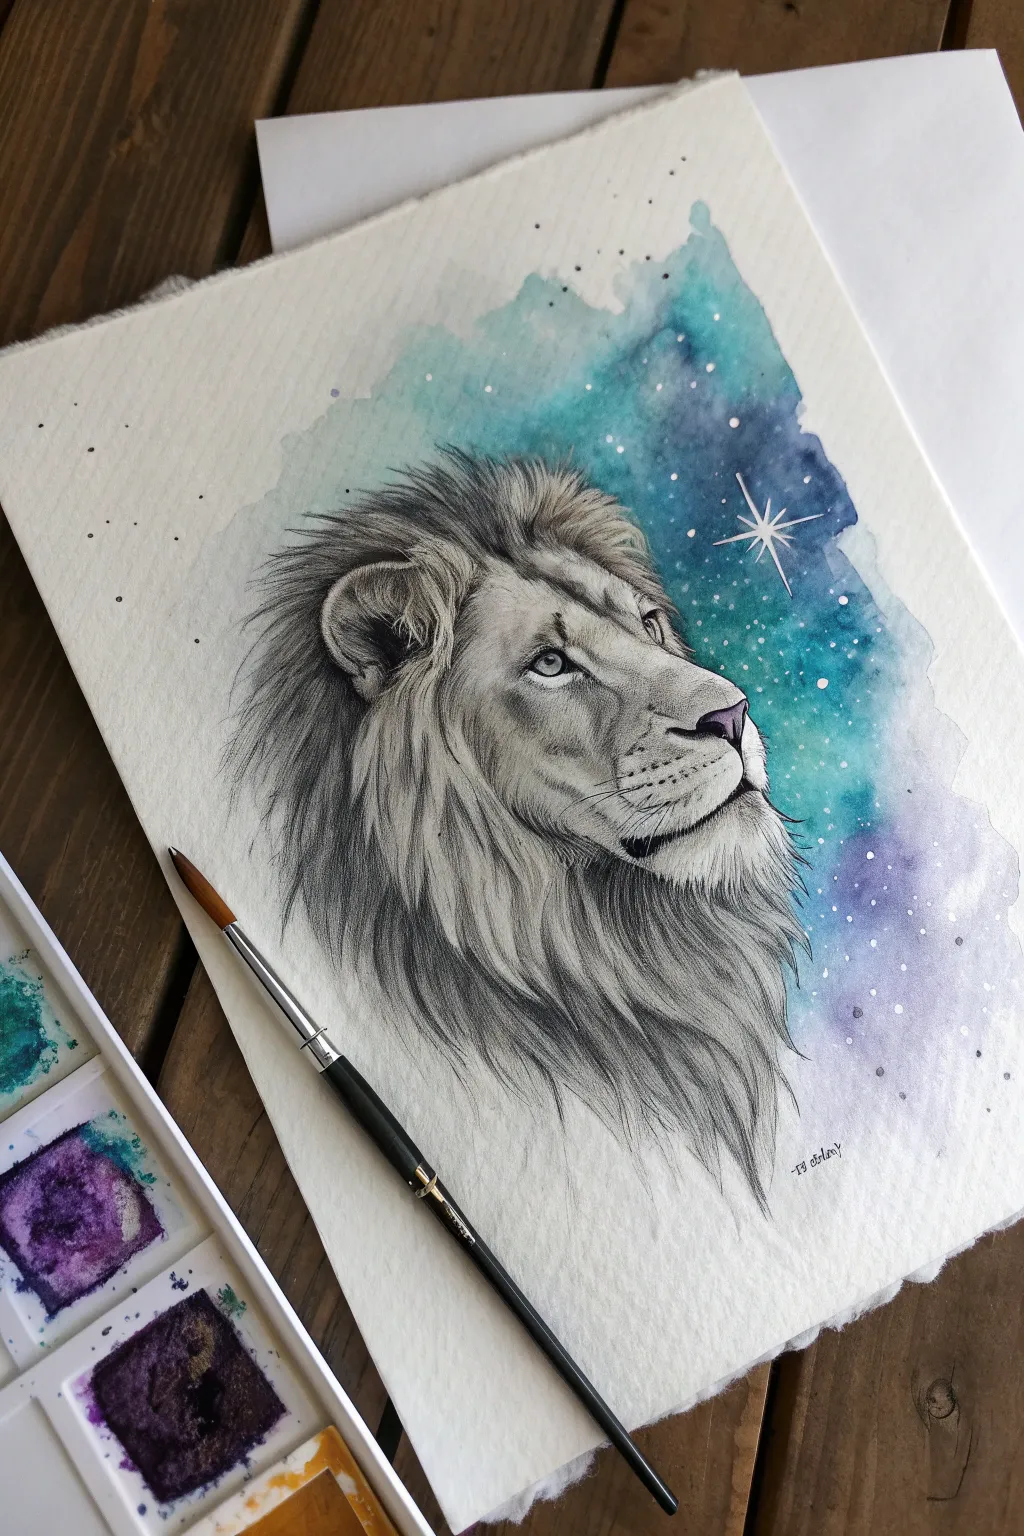
This majestic project combines precise graphite realism with the dreamy fluidity of watercolor to create a lion gazing into a cosmic abyss. The contrast between the monochromatic, detailed fur and the vibrant teal and violet galaxy wash makes for a truly striking piece composed on textured paper.
Detailed Instructions
Materials
- Cold press watercolor paper (300 gsm)
- Graphite pencils (HB, 2B, 4B, 6B)
- Watercolor paints (Turquoise, Prussian Blue, Violet/Purple, Indigo)
- White gel pen or gouache
- Synthetic round brushes (specifically a size 4 or 6)
- Fine liner pen (0.1mm, black pigment)
- Masking tape
- Palette
Step 1: Sketching the Monarch
-
Outline the profile:
Begin with an HB pencil to lightly map out the lion’s profile. Focus on the triangular shape of the nose, the prominent brow bone, and the upward tilt of the chin to establish that gazing posture. -
Map the mane:
Loosely sketch the flow of the mane. Instead of drawing individual hairs immediately, outline varying clumps and distinct directions of growth, ensuring the mane frames the face without overlapping the background area too much yet. -
Refine the features:
Tighten up your sketch around the eye, nostril, and mouth line. The eye is the focal point, so ensure the pupil is placed to look upward and the iris is clear.
Unwanted Graphite Smudge
If your graphite smudges when painting near the mane, dab—don’t rub—with a clean paper towel. Once dry, you can erase the smudge or cover it with a darker watercolor layer.
Step 2: Graphite Detailing
-
Shade the face:
Switch to a 2B pencil to begin shading the face. Use short, directional strokes to mimic short fur on the muzzle and around the eyes, leaving the bridge of the nose lighter for a highlight. -
Deepen contrast:
Use a 4B or 6B pencil to darken the pupils, the nostril interior, and the line of the mouth. This high contrast anchors the drawing. -
Develop the mane texture:
Start rendering the mane with long, sweeping strokes. I find it helpful to start from the root and flick the pencil outward to create tapered ends. -
Layering fur values:
Build volume in the mane by layering 2B strokes over HB ones. Focus on the shadowed areas under the ear and chin to make the head pop forward. -
Final pencil details:
Add the whiskers using quick, confident strokes. Make sure they curve naturally rather than looking stiff. Ensure the graphite work is complete before touching water.
Step 3: The Cosmic Wash
-
Prepare the wash area:
Using a clean brush and clear water, wet the area of the paper where the galaxy sky will be—behind the head and fading out to the right. Be careful not to let the water touch your pencil drawing to avoid smudging. -
Drop in turquoise:
While the paper is wet, load your brush with turquoise watercolor and touch it to the paper near the lion’s forehead area. Let it bloom naturally. -
Add depth with blues:
Introduce Prussian Blue or Indigo into the wet wash, particularly closer to the lion’s mane to create a sense of deep space. Allow the colors to bleed into the turquoise. -
Integrate purple hues:
Add touches of violet at the edges of the blue wash. This creates that classic nebula look. Keep the edges ragged and natural; don’t paint a straight box. -
Dry completely:
Let the watercolor layer dry fully. The paper must be bone dry before the next step to prevent ink bleeding.
Sharp Star Bursts
For the large highlight star, use a ruler with your white gel pen. Drawing the cross-lines quickly prevents ink pooling and keeps the celestial beams sharp and tapered.
Step 4: Celestial Highlights
-
Create stars:
Dip a small brush or toothbrush into white gouache (or diluted white acrylic) and gently flick varying sizes of distinct specks over the dry watercolor wash to create a star field. -
Specific constellations:
Use a white gel pen to draw a few specific, larger stars. Add a prominent four-point star near the lion’s gaze to suggest a guiding light. -
Connect the worlds:
Finally, inspect the boundary between the mane and the paint. You can use your pencil to extend a few hair strands slightly over the dry watercolor to integrate the subject with the background.
Step back and admire how the stillness of the graphite lion balances perfectly with the movement of your watercolor galaxy.
Floral Mane Lion Portrait
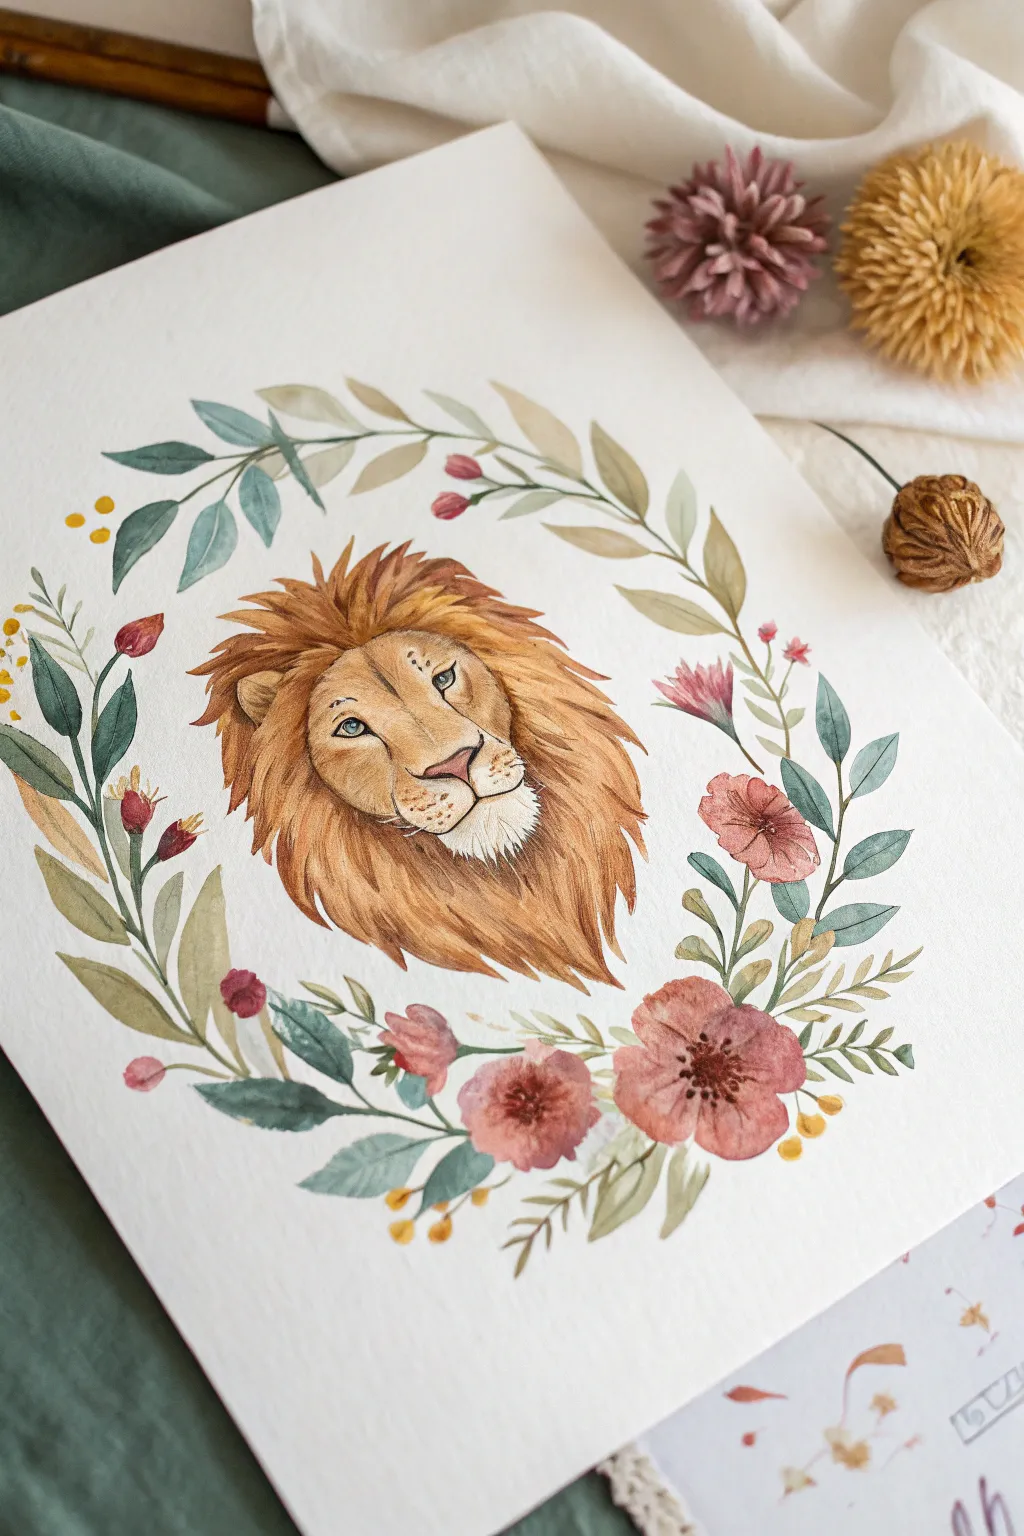
Bring a touch of majesty and softness to your art collection with this charming watercolor portrait. This project guides you through painting a serene lion’s gaze framed by a delicate wreath of dusty pinks and sage greens.
Step-by-Step
Materials
- Cold press watercolor paper (300 gsm)
- Watercolor paints (Yellow Ochre, Burnt Sienna, Burnt Umber, Sap Green, Payne’s Grey, Alizarin Crimson, Dusty Pink)
- Round watercolor brushes (Size 2, 6, and 10)
- Pencil (HB) and kneaded eraser
- Clean water and paper towels
- Palette for mixing
- White gouache or white gel pen (optional for highlights)
Step 1: Sketching the Composition
-
Outline the wreath:
Begin by lightly drawing a large circle in the center of your paper to serve as a guide for the wreath. Mark the center point where the lion’s face will gaze out. -
Draft the lion’s features:
Sketch the lion’s face in the center. Start with a T-shape for the eyes and nose bridge. Draw almond-shaped eyes, a broad nose, and a gentle muzzle. Keep your pencil strokes very faint so they don’t show through the paint later. -
Frame the mane:
loosely sketch the flow of the mane around the face. Instead of individual hairs, draw clumps and shapes that radiate outward, giving the lion a regal but relaxed appearance. -
Detail the flora:
Along your circle guide, sketch the stems, leaves, and flowers. Vary the size of the leaves—some long and willow-like, others shorter and rounded. Add the main blooms at the bottom right and smaller buds trailing up the sides.
Mane Texture Tip
Don’t overwork the mane! Leave some gaps where the underlayer shows through. The contrast between loose washes and fine, dark hair strokes creates realistic volume.
Step 2: Painting the Lion
-
Base layer for the face:
Mix a watery wash of Yellow Ochre with a tiny touch of Burnt Sienna. Apply this to the face, leaving white space around the eyes and the chin area for a natural highlight. -
Adding shadow and depth:
While the base is still slightly damp, drop in a slightly darker mix of Burnt Sienna around the nose bridge and eye sockets. This wet-in-wet technique creates soft, seamless shadows. -
Developing the mane:
Use your size 6 brush to paint the mane. Start with Yellow Ochre, then strip in Burnt Sienna and Burnt Umber while the paint is wet to create variation. Follow the direction of hair growth, flicking the brush at the ends for a feathery texture. -
Defining the features:
Once the face is dry, use a small size 2 brush with a dark mix of Burnt Umber and Payne’s Grey to carefully paint the nose, the eyeliner, and the pupils. Keep the touch delicate. -
Eye details:
Paint the iris with a light blue or hazel tone, leaving a tiny speck of white paper for the catchlight to give him life. -
Mane texture:
Layer darker, thin strokes of Burnt Umber over the dried mane areas to suggest individual strands of hair, especially where the mane meets the face.
Muddy Fur?
If your lion’s face looks muddy, you likely layered colors while the paper was too wet. Let the layer dry completely, then apply a fresh glaze of warm yellow to brightness.
Step 3: Creating the Floral Wreath
-
Painting green foliage:
Mix Sap Green with a little Payne’s Grey for a sage tone. Paint the longer leaves on the left side, varying the pressure on your brush to get tapered tips. -
Adding variety to leaves:
For the leaves on the right, add a bit more Yellow Ochre to your green mix for warmth. Paint these leaves slightly smaller and rounder to create visual interest and asymmetry. -
Base floral blooms:
Using a dilute Dusty Pink or Alizarin Crimson, paint the large flowers at the bottom right. Keep the wash loose and watery, allowing the pigment to pool slightly at the edges of the petals. -
Buds and berries:
Add small pops of pink for the buds and yellow for the little berries scattered throughout the wreath. These small accents help tie the color palette together. -
Floral centers:
When the flowers are dry, use a concentrated dark brown or crimson mix to stipple small dots in the center of the blooms for pollen and depth. -
Connecting stems:
Use your finest brush and a brownish-green mix to draw thin, elegant stems connecting all your floating leaves and flowers to the main circular flow.
Step 4: Final Touches
-
Whiskers and highlights:
Use a white gel pen or opaque white gouache to add the whiskers on the muzzle. I find quick, confident strokes work best here to keep them looking sharp. -
Review and refine:
Step back and assess your painting. Darken any shadows in the mane or under the chin if they look too washed out, and erase any lingering pencil marks once the paper is bone dry.
Frame your gentle lion in a simple wood frame to complement the earthy tones of your beautiful new artwork
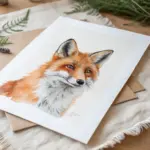


Have a question or want to share your own experience? I'd love to hear from you in the comments below!