When kids want to draw, they usually want something cute, recognizable, and doable right now. Here are my go-to drawing ideas for kids that start simple and get extra imaginative as you go.
Easy Bird on a Branch

This charming little bird sketch combines simple black ink lines with a soft touch of color on the breast. It’s a perfect beginner project that teaches how to capture a bird’s shape without needing complex shading.
How-To Guide
Materials
- Sketchbook or quality drawing paper
- Pencil (HB or similar light graphite)
- Black fine-liner pen (0.3mm or 0.5mm)
- Eraser
- Watercolor paints or watercolor pencils (red/orange and light brown)
- Small paintbrush
Step 1: Sketching the Outline
-
Start with the body shape:
Begin by drawing a gentle, tilted oval shape for the bird’s body. Imagine it sitting at a slight angle on a branch. -
Add the wing:
On the back curve of the oval, sketch a long, teardrop shape that points downward for the wing. Let the tip of the wing extend slightly past the body. -
Draw the head:
Create the head by drawing a smaller semi-circle curve on top of the main oval. It should blend smoothly into the back. -
Beak and eye:
Place a small, sharp triangle on the left side of the head for the beak. Just behind it, draw a small circle for the eye with a tiny highlights dot inside. -
Tail feathers:
Sketch a rectangular shape extending from under the wing to form the tail feathers.
Natural Texture
When painting the red breast, try dabbing with a somewhat dry brush. This leaves tiny white gaps that look like ruffled feathers.
Step 2: Creating the Perch
-
Draw the main branch:
Draw a curved line passing right underneath the bird’s belly. Make it slightly wavy to look natural, not perfectly straight. -
Thicken the branch:
Add a second line parallel to the first one to give the branch thickness. It’s okay if it gets a little thinner towards the end. -
Add the legs:
Draw two thin little legs coming down from the belly to the branch. Add tiny toes gripping the wood. -
Sketch leaves:
Draw simple leaf shapes coming off the branch. Make them pointed ovals with a single line down the middle for the vein. Keep them outline-only for a minimalist look.
Step 3: Inking and Coloring
-
Outline with pen:
Take your black fine-liner and trace over your pencil lines. Use confident, smooth strokes. -
Refine the beak:
Fill in the beak with black ink, leaving a tiny sliver of white at the top for shine. -
Detail the wing:
Add small, scalloped lines or little ‘u’ shapes inside the wing to suggest distinct feathers. -
Add texture:
Draw dots near the top of the chest and small dashes on the head to suggest fluffy texture. -
Erase pencil marks:
Wait for the ink to be completely dry—I usually give it a full minute—then gently erase all the underlying pencil sketches. -
Paint the breast:
Using watercolor, dab a mix of red and orange onto the bird’s chest. Use a ‘stippling’ motion (little dots) rather than a solid wash to create a feathery texture. -
Color the branch and wing:
Use a very watery light brown to tint the branch, the tail, and the top of the wing. Keep this color very pale so the ink lines stand out.
Ink Smudges?
If your black pen smears when you paint over it, check if it’s waterproof. If not, paint the color first, let it dry, then draw.
Step back and enjoy the sweet simplicity of your finished bird drawing


Smiling Fish With Pattern Scales
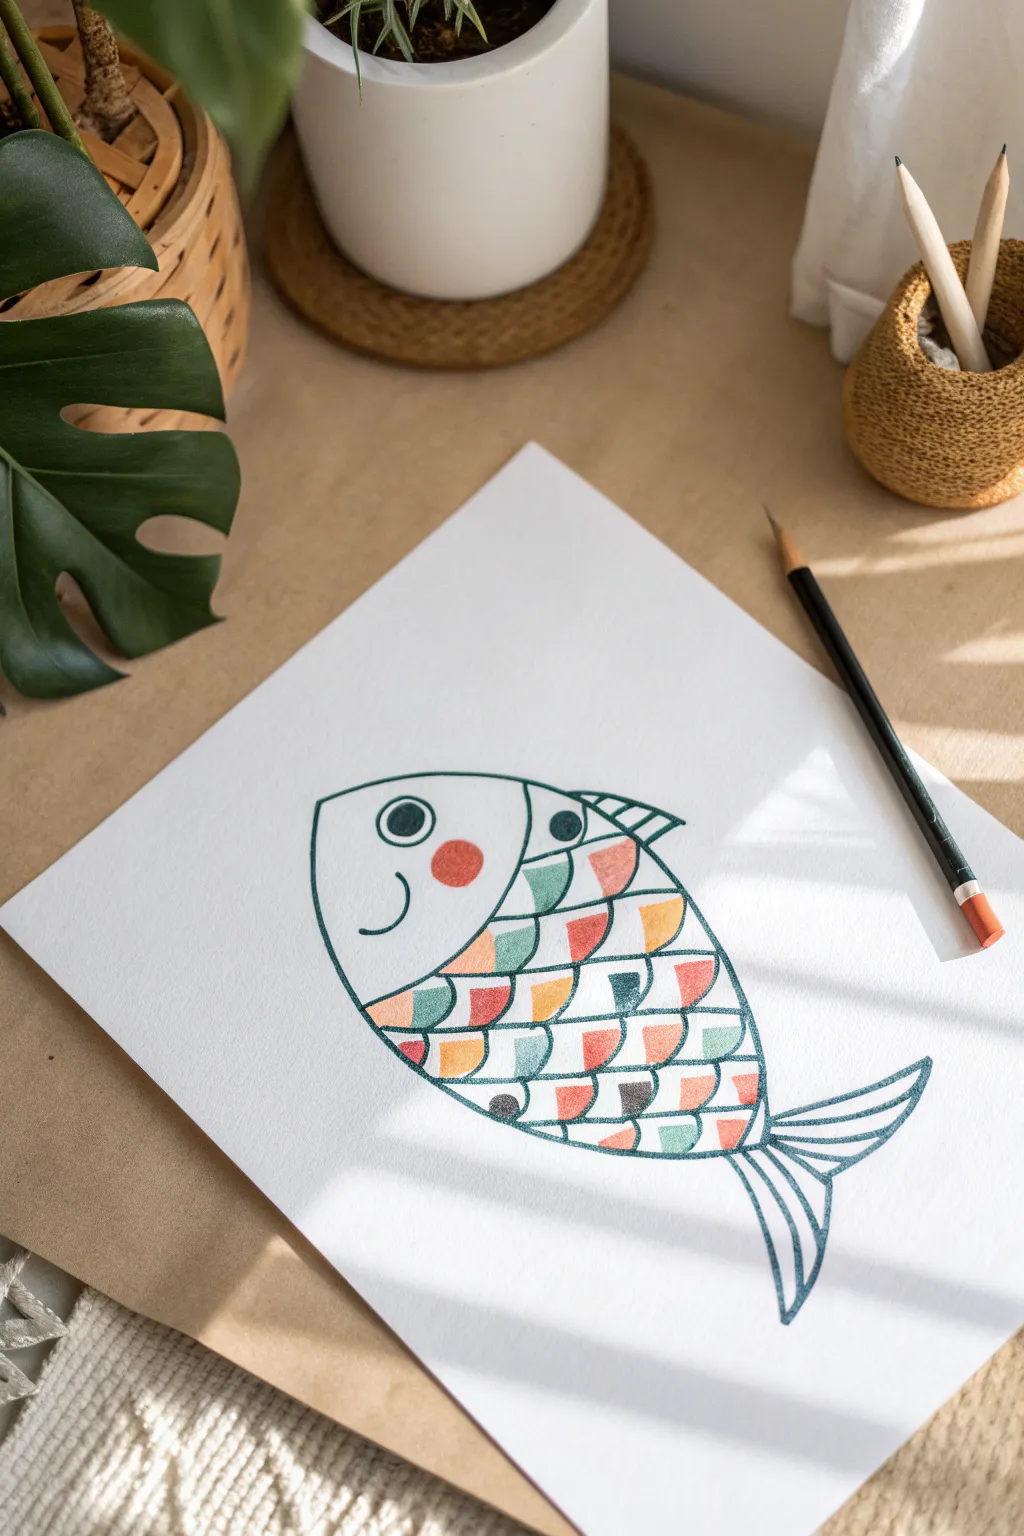
Dive into creativity with this charming fish illustration that combines simple linework with vibrant, geometric patterns. The playful mix of colors and shapes makes the scales pop off the page, creating a cheerful character perfect for decorating a bedroom wall.
Step-by-Step
Materials
- High-quality white drawing paper suitable for pencils and ink
- Pencil (HB or 2B) for sketching
- Eraser
- Fine-point black marker or drawing pen
- Colored pencils (teal, coral red, orange, golden yellow, slate blue)
- Ruler (optional)
Step 1: Sketching the Outline
-
Draw the main body:
Start by drawing a large, elongated teardrop shape horizontally in the center of your paper. The pointy end will be the tail, and the rounded end will be the face. -
Define the face:
About a third of the way back from the rounded nose, draw a vertical curved line that connects the top edge to the bottom edge. This separates the head from the body. -
Add facial features:
On the face section, draw a dark circle for the eye, leaving a tiny white dot in the center for a sparkle. Below and to the left of the eye, draw a simple ‘U’ curve for a smile. -
Give it a cheek:
Lightly sketch a circle behind the smile for a rosy cheek. We will color this in later. -
Add fins:
Draw a small, triangular dorsal fin on the top of the body, just behind the head line. Add a flowing tail shape at the pointed end of the body, giving it two distinct flourishes.
Pro Tip: Texture Trick
Place a piece of rough watercolor paper underneath your drawing sheet while coloring. As you rub the pencil, it will pick up that bumpy texture for a cool, grainy effect.
Step 2: Creating the Scale Grid
-
Draw horizontal guides:
Across the main body section, lightly sketch 4 or 5 horizontal lines that curve slightly to follow the shape of the fish. These don’t need to be perfect straight lines. -
Add vertical dividers:
Draw short vertical lines between your horizontal guides. Stagger them like bricks in a wall—so a line in one row sits in the middle of the segment above it. -
Form the scales:
In every resulting rectangular space, draw a curved line connecting the bottom left corner to the top right corner. This creates the ‘quarter-circle’ variety of scales. -
Vary the curves:
For visual interest, you can flip the curve direction on random scales or keep them uniform depending on the look you want.
Step 3: Inking the Design
-
Outline the main shape:
Take your black marker or drawing pen and carefully trace over your main fish outline, the head divider, and the fins. -
Trace the scales:
Go over your scale grid. Outline the individual geometric shapes you created inside the body. -
Detail the eye and fins:
Fill in the pupil of the eye with black ink. Add stripe details to the top fin and the tail fin to show texture. -
Erase pencil marks:
Wait a moment for the ink to dry completely to avoid smudging, then gently erase all the underlying pencil sketches.
Level Up: Metallic Pop
Use a metallic gold or silver gel pen to outline just a few specific scales or add tiny dots between the scales to make your fish shimmer like it’s underwater.
Step 4: Adding Color
-
Color the cheek:
Use a coral red or pink pencil to fill in the round cheek circle on the face. -
Start the pattern coloring:
Choose 3-4 distinct colors for your palette. I like to start with the teal pencil and color random scale segments throughout the body. -
Fill in remaining scales:
Switch to your orange, yellow, and slate blue pencils. Fill in the remaining scale shapes, trying not to put two of the same color right next to each other. -
Add texture:
When coloring, press a little harder on one side of each scale shape to create a slight gradient or textured look, mimicking the roughness of paper. -
Color the fins:
Use the slate blue or teal pencil to add light shading inside the stripes of the tail and dorsal fin.
Now you have a cheerful aquatic friend swimming across your page, ready to brighten up your day


Elephant With Big Ears and Trunk
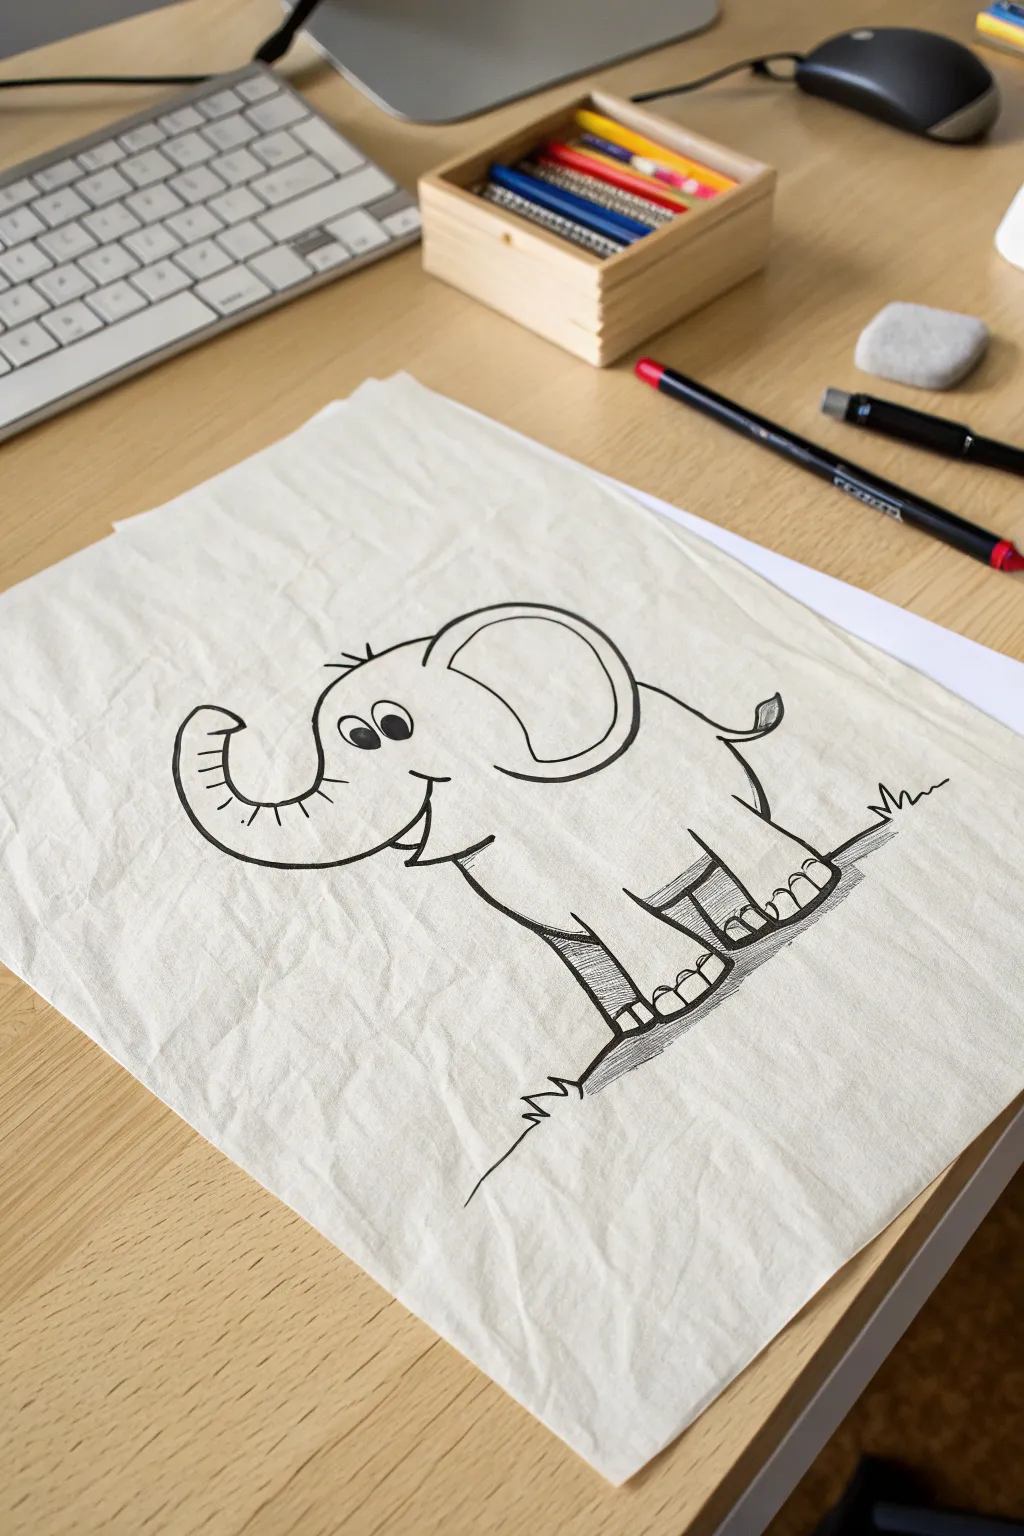
Learn to draw this delightful cartoon elephant with its trunk raised high for good luck. This uncomplicated sketch uses bold outlines and simple shading techniques to bring the character to life on textured paper.
Step-by-Step
Materials
- Textured drawing paper or sketch pad
- Pencil (HB or 2B)
- Eraser
- Black fine-liner pen (0.4mm or 0.5mm)
- Black marker or felt-tip pen (medium tip)
Step 1: Drafting the Basic Shapes
-
Head and Ear:
Start near the upper left-center of your page. Lightly sketch a large ‘C’ shape for the ear. From the front of the ear, draw a curved line forward for the forehead that dips down to start the trunk. -
Trunk Time:
Extend that forehead line into a long, upward-curving ‘S’ shape to form the top of the trunk. Draw a parallel line underneath it, curling up at the end, and connect them with a slightly flattened oval for the trunk tip. -
Body Outline:
From the back of the ear, draw a smooth, rounded line curving down and to the right for the elephant’s back. Curve it down towards where the back legs will be. -
Front Legs:
Draw the front leg closest to you by extending a line down from the chin area. Make it sturdy and rectangular, slightly wider at the bottom. Add the second front leg slightly behind it. -
Back Legs and Tail:
Sketch the rear leg, making sure it lines up with the back curve. Add the other rear leg peeking out from behind. Don’t forget a cute, small tail sticking out from the rear with a little tuft at the end.
Step 2: Inking the Details
-
Face Features:
Draw two ovals for eyes; fill them in black but leave a small white highlight in each. Add a small curve for a smile just below the trunk, and a little tuft of hair on top of the head. -
Refining the Ear:
Draw an inner curve inside the big ear shape to give it depth and a rim. This makes the ear look more three-dimensional. -
Trunk Texture:
Add small curved lines across the underside of the trunk to show the wrinkly skin texture. -
Toes and Ground:
Draw small semi-circles at the bottom of each foot for toenails. Sketch a jagged horizontal line underneath the elephant to represent grass and ground. -
Solid Outline:
Using your medium-tip black marker, go over your main pencil lines. I prefer to use confident, continuous strokes here rather than sketchy ones to get a clean cartoon look. -
Clean Up:
Once the ink is completely dry—give it a minute or two—erase all the underlying pencil sketch lines gently.
Line Weight Magic
Make the bottom lines of the feet and belly slightly thicker than the top lines (like the head or back). This simulates weight and shadow instantly.
Step 3: Shading and Finishing
-
Shadows on Legs:
Switch to your fine-liner pen. Add diagonal hatching lines on the back leg that is furthest away to push it into the background. -
Belly Shadow:
Add a small patch of cross-hatching (crisscrossed lines) on the belly just behind the front leg to create a cast shadow. -
Grounding the Figure:
Use horizontal sketching lines underneath the feet to create a shadow on the ground. This prevents your elephant from looking like it’s floating. -
Enhancing the Trunk:
Add a few very light, thin lines on the underside curve of the trunk for extra volume. -
Final Touches:
Thicken the outer perimeter line of the elephant slightly with your marker to make the character pop against the background.
Smudged Ink?
If you smudge the ink while erasing, turn it into a shadow or texture! Use a white gel pen to clean up edges or add highlights back over the smudge.
Now you have a charming elephant friend ready to hang on the wall


Lion With a Sunburst Mane
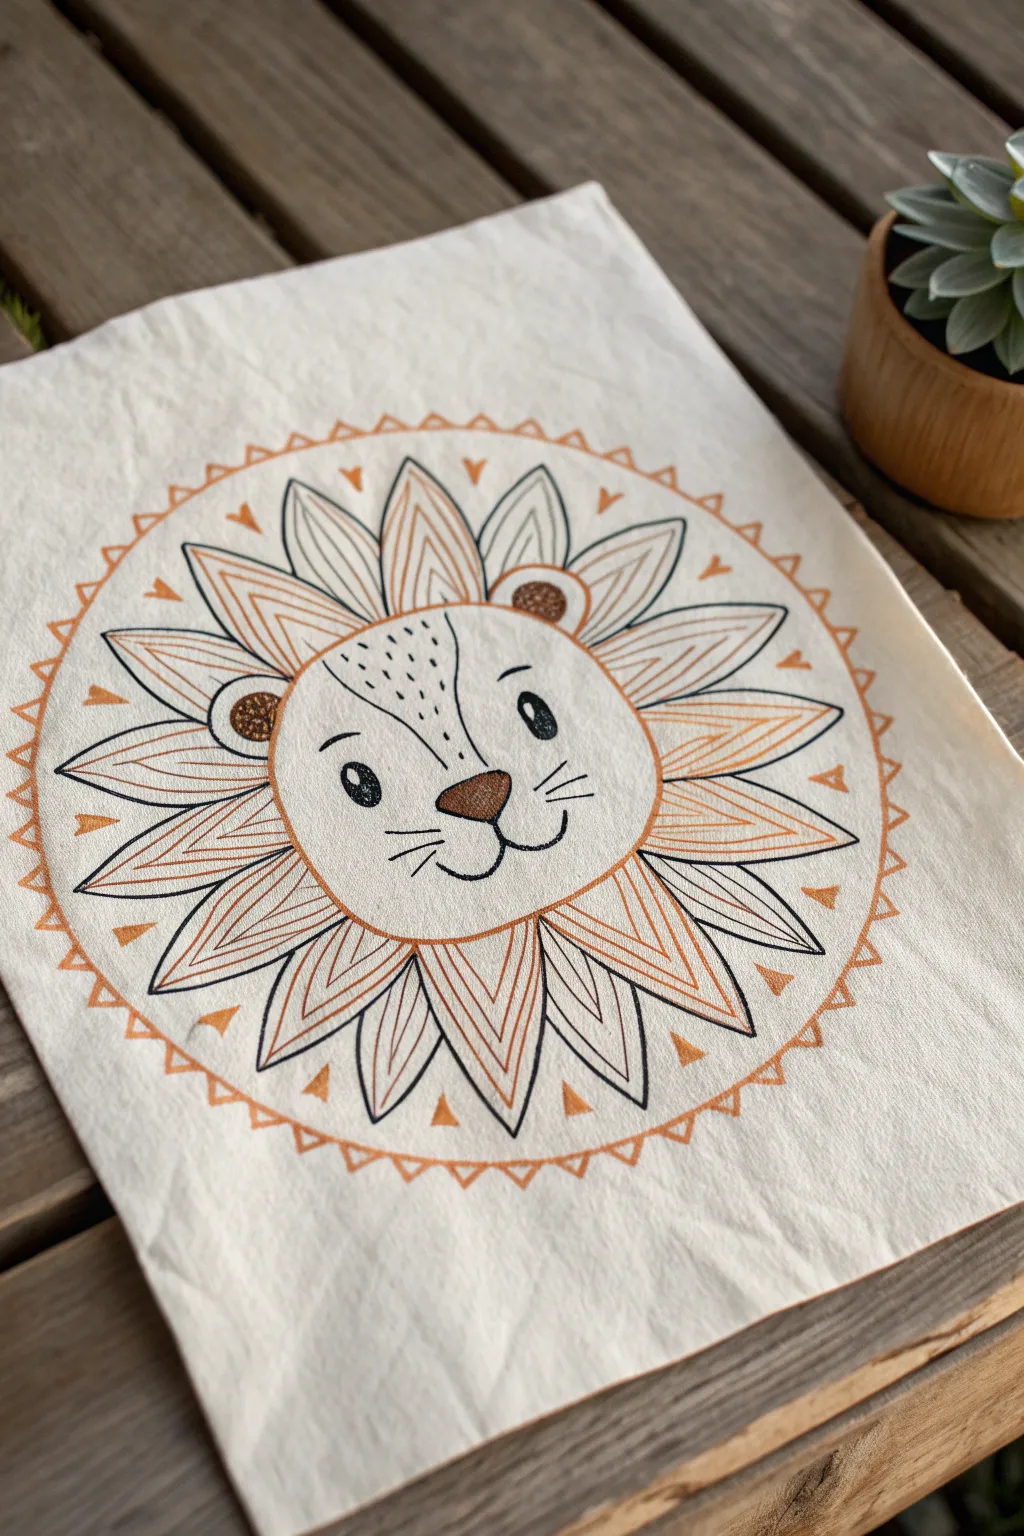
This cheerful project turns a plain piece of fabric or a tote bag into a roaring masterpiece featuring a lion with a geometric sunburst mane. The design combines bold black outlines with warm, earthy accents for a modern, boho-inspired look perfect for kids.
Detailed Instructions
Materials
- Cotton tote bag or light-colored cotton fabric piece
- Fabric markers (black and terracotta/burnt orange)
- Pencil and eraser
- Round object for tracing (like a small bowl or large lid)
- Ruler
- Cardboard (to place inside the bag/under fabric)
- Iron (for heat setting, if required by your markers)
Step 1: Planning the Face
-
Prepare your surface:
Start by ironing your fabric to remove any wrinkles, which ensures a smooth drawing surface. Then, slide a piece of cardboard inside the tote bag or underneath your fabric layer. This is crucial as it prevents the ink from bleeding through to the other side. -
Trace the central circle:
Place your round object in the center of the fabric. Using a pencil and a very light touch, trace a perfect circle. This will become the lion’s face. -
Sketch clarity features:
Inside the circle, lightly sketch two small semi-circles for ears at the 10 o’clock and 2 o’clock positions. Add a large, soft ‘W’ shape near the bottom for the muzzle and an inverted triangle for the nose.
Fabric Tension Trick
Tape the edges of your fabric or bag to the table or cardboard insert. This keeps the material taut, preventing it from bunching up while you draw.
Step 2: Drafting the Mane
-
Create the outer boundary:
Use your ruler to measure about 2-3 inches out from the edge of the face circle. Make small tick marks at regular intervals to guide you, then lightly sketch a larger, concentric circle connecting these marks. This defines the outer edge of the mane. -
Draw the petal shapes:
Sketch the ‘petals’ of the mane. Connect the inner face circle to the outer guidelines with pointed leaf shapes. They should touch side-by-side. Don’t worry if they aren’t perfectly identical; I think slight variations add character. -
Divide the petals:
Inside each leaf shape, draw a straight line down the center, from the face to the tip. This creates the vein of the leaf. -
Add the decorative border:
Draw one final, larger circle lightly around the entire mane. On this line, sketch small triangles pointing inward, spacing them evenly around the circumference.
Bleeding Lines?
If ink spreads into the fabric fibers (bleeding), you are pressing too hard or moving too slowly. Try faster, lighter strokes for crisp lines.
Step 3: Inking the Outlines
-
Trace the main lines:
Switch to your black fabric marker. Carefully trace over the main circle of the face, the ears, and the outline of every leaf shape in the mane. -
Define the facial features:
Ink the nose, the ‘W’ mouth, and the eyes. For the eyes, draw two ovals, leaving a small white highlight circle inside each before filling the rest in black. -
Add whiskers and details:
Draw three straight whiskers on each cheek. Add the small vertical dash lines on the forehead to suggest fur texture. -
Detail the mane:
Ink the central vein line inside each mane leaf. Then, ink the large outer circle and the small triangles on the border.
Step 4: Adding Color Accents
-
Color the nose and ears:
Using your terracotta or burnt orange marker, fill in the nose completely. Then, draw and fill small circles inside the ears. -
Stripe the mane:
This step brings the texture to life. Inside each mane leaf, use the orange marker to draw diagonal lines (chevrons) pointing outward. Only do this on one side of the central vein for every leaf to create an alternating pattern, or fill the whole leaf with lines as shown. -
Fill the border triangles:
Use the orange marker to color in every other triangle on the outer border. Between the mane leaves, add small floating orange triangles for extra decoration. -
Erase pencil marks:
Wait at least 15-20 minutes to ensure the ink is completely dry. Once safe, gently erase any visible pencil guidelines. -
Heat set the design:
Check your fabric marker instructions. Many require ironing the reverse side of the fabric for a few minutes to make the design permanent and washable.
Now you have a custom-designed piece that is ready to be worn or gifted
BRUSH GUIDE
The Right Brush for Every Stroke
From clean lines to bold texture — master brush choice, stroke control, and essential techniques.
Explore the Full Guide
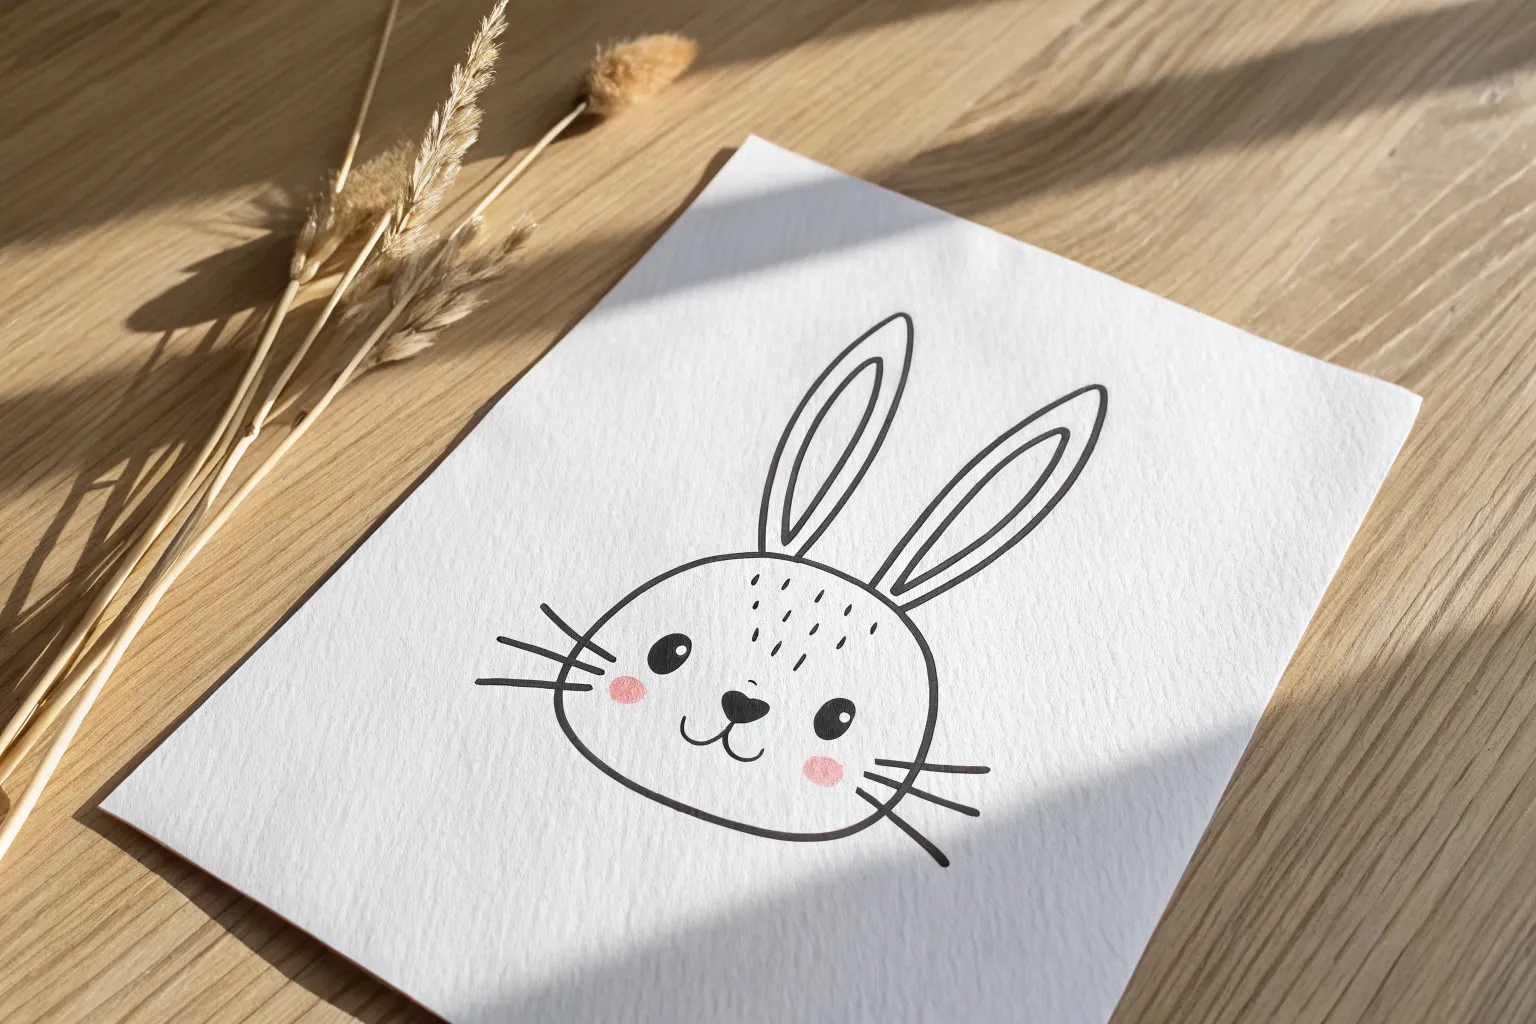
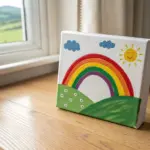
Frog on a Lily Pad
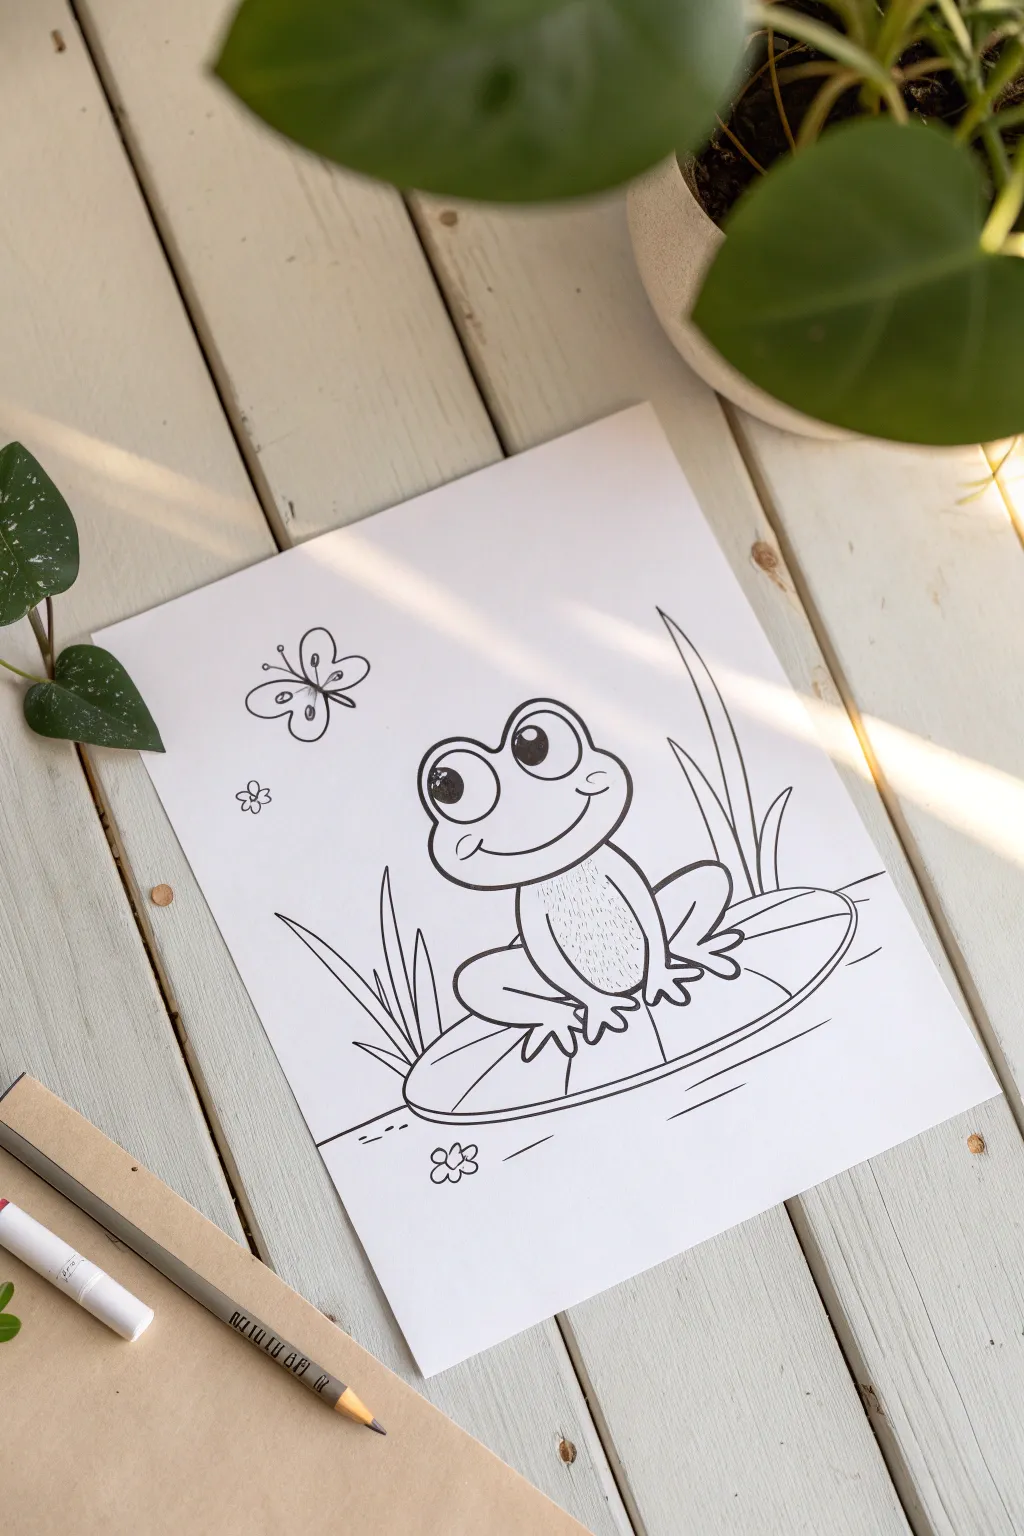
Create a cheerful pond scene featuring a wide-eyed frog resting on a giant lily pad. This simple line drawing is perfect for beginners and serves as a wonderful custom coloring page once complete.
Detailed Instructions
Materials
- White drawing paper (A4 or letter size)
- Pencil (HB for sketching)
- Eraser
- Fine-point black marker or pen (for outlining)
- Ruler (optional, but helpful for spacing)
Step 1: Sketching the Frog’s Head
-
Start with the eyes:
Begin by drawing two large, connected circles near the center of your paper for the frog’s eyes. The left circle should be slightly lower than the right one to give the head a tilted, curious look. -
Shape the face:
Draw a curved line starting from the outer edge of the left eye, swooping down and around to meet the outer edge of the right eye. This forms the cheeky, rounded shape of the frog’s face. -
Add the smile:
Inside the face shape, draw a wide, upward-curving line for the mouth. Add small ‘cheek’ curves at the ends of the smile to make the expression extra friendly. -
Draw the pupils:
Inside each eye circle, draw a smaller black circle for the pupil, leaving a tiny white dot in each for a sparkle of light. Position them looking slightly upward and to the left.
Step 2: Drawing the Body and Limbs
-
Create the body shape:
Draw a rounded shape extending down from the head. Imagine a soft, squishy pear shape that sits below the chin. -
Detail the belly:
Add a slightly smaller oval inside the body shape to define the frog’s tummy. I like to add short, light texture lines inside this area to suggest a fuzzy or soft texture. -
Sketch the front legs:
Draw two stick-like arms coming down from the shoulders, ending in splayed hands with three pointed fingers on each. -
Add the hind legs:
On either side of the body, draw large, curved humps for the knees. Connect these to larger, flat feet that rest on the ground, mirroring the three-toed shape of the hands.
Clean Lines
Rotate your paper as you draw curved lines, like the big lily pad. Pulling the pen toward you usually creates a smoother curve than pushing it away.
Step 3: Creating the Pond Setting
-
Outline the lily pad:
Draw a large, flat oval underneath the frog. Make sure the frog’s feet are sitting firmly inside the lines. -
Refine the lily pad shape:
Add a ‘V’ notch on the left side of the oval to give it that classic lily pad look. Draw a few curved veins radiating from the center of the pad outward. -
Add water ripples:
Sketch a horizontal line behind the frog to represent the water level. Add short, dashed horizontal lines around the lily pad to show movement in the water. -
Draw tall grass:
On the right side, draw two or three long, slender blades of grass reaching upwards. On the left side, add shorter tufts of grass poking up from the water.
Make it Yours
Turn this into a mixed-media piece by coloring the frog with watercolor paints and using crayons for the water to create a wax-resist effect.
Step 4: Adding Details and Inking
-
Create a butterfly friend:
In the upper left corner, draw a small butterfly. Start with a thin body, then add two wings on each side. Decorate the wings with simple dots or circles. -
Sprinkle in flowers:
Draw tiny, simple five-petal flowers floating in the water or filling empty space in the background for extra charm. -
Trace with marker:
Once you are happy with your pencil sketch, carefully go over all your lines with a fine-point black marker. -
Erase pencil lines:
Wait a moment for the ink to dry completely to avoid smudging, then gently erase all the underlying pencil sketches to reveal a crisp, clean drawing.
Now you have a delightful pond scene ready to be colored or displayed as is
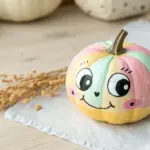
Ice Cream Cone With Toppings
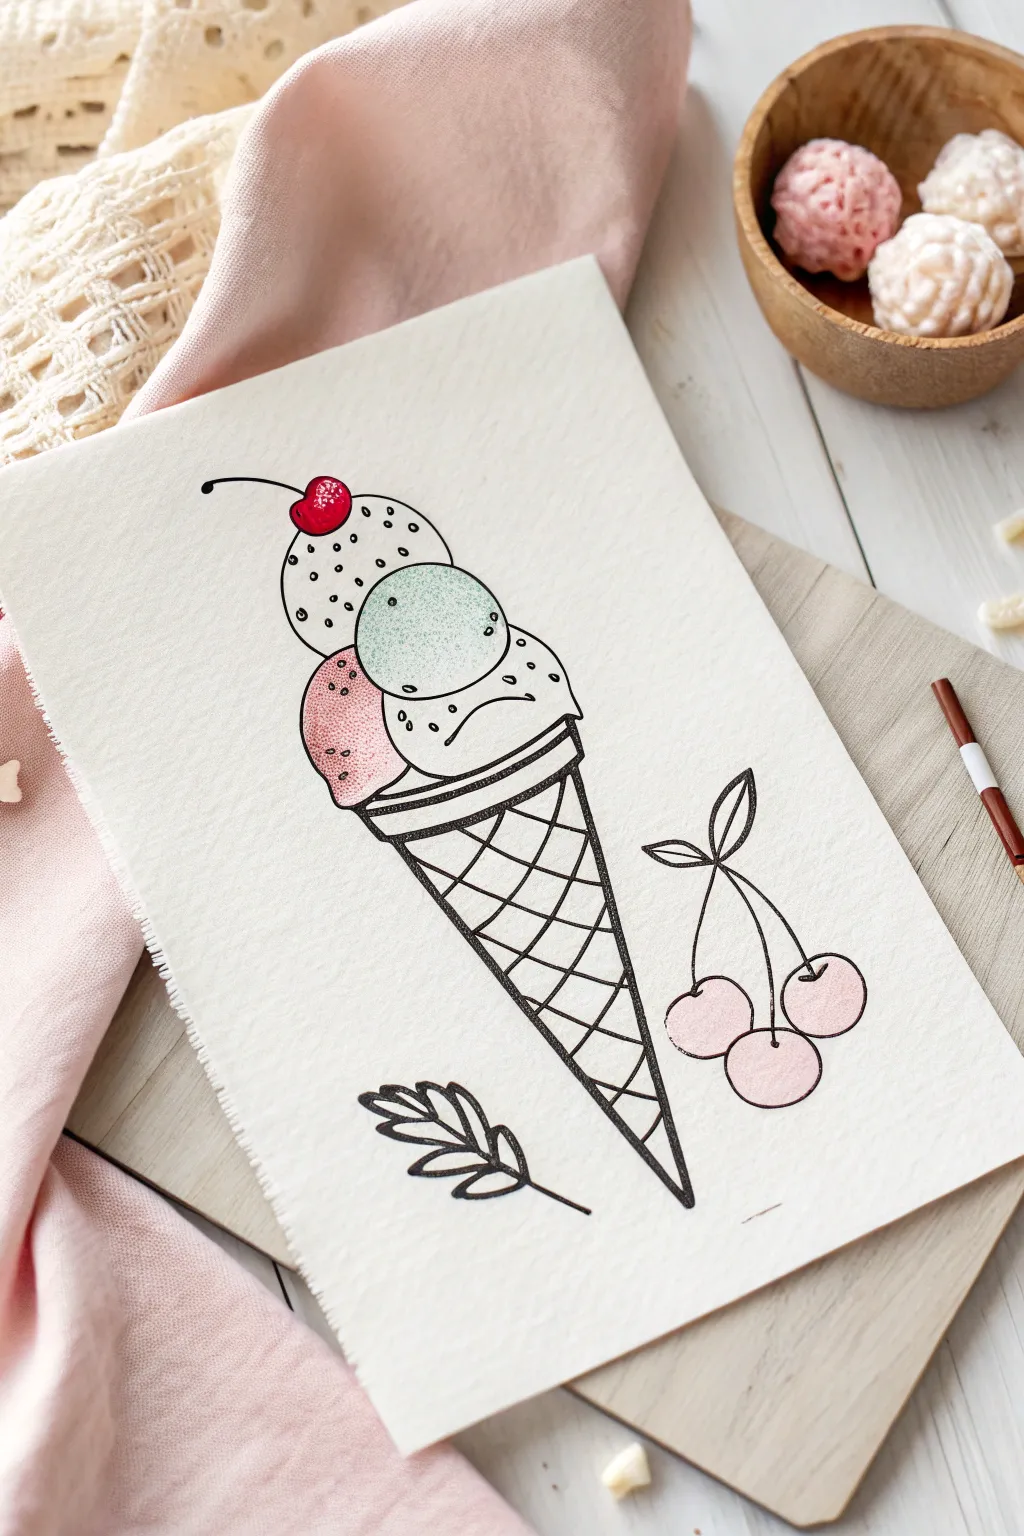
This sweet project combines simple line drawing with soft washes of color to create a delicious-looking ice cream cone. The combination of bold black outlines and gentle pastel hues gives it a charming, illustrative style that looks professional yet is easy to achieve.
Step-by-Step
Materials
- Thick watercolor paper or mixed media paper
- Fine liner pen (waterproof, black, size 0.5 or 0.8)
- Pencil and eraser
- Watercolor paints (pink, mint green, red)
- Small round paintbrush (size 2 or 4)
- Water cup and paper towel
Step 1: Sketching the Sweets
-
Start with the top scoop:
Begin near the top center of your paper. Draw a slightly flattened circle for the top scoop of ice cream. Don’t close the very top; leave a small dip where the cherry will sit. -
Add the cherry:
Draw a small, round cherry nestling into the dip on top of that first scoop. Add a long, curved stem stemming out to the left. -
Stack the second scoop:
Draw the second scoop overlapping slightly underneath and to the right of the first one. It should look like it’s tucked behind just a bit. -
Draw the bottom scoop:
Add the final, third scoop at the bottom. This one should look a bit squashed as it rests on the cone. Add a wavy, uneven line at the bottom of this scoop to represent the ‘skirt’ of ice cream melting slightly.
Waterproof Test
Before painting, scribble with your pen on a scrap paper and brush water over it. If it blurs, it’s not waterproof and will ruin your drawing.
Step 2: Drawing the Cone & Details
-
Create the cone rim:
Right under the bottom scoop, draw two thin, horizontal rectangles stacked on top of each other. These form the sturdy rim of the sugar cone. -
Form the cone shape:
From the edges of that rim, draw a long, sharp ‘V’ shape extending downward to a point. This is the main body of your cone. -
Add the waffle pattern:
Use a series of diagonal lines crossing each other to create a crisscross diamond pattern inside the cone triangle. -
Sketch the side elements:
To the right of the cone, draw three small circles connected by stems to a single point for a bunch of cherries. Below the cone, add a simple leaf shape with a central vein.
Make It Sparkle
Once the paint is totally dry, add tiny dots of white gel pen on the cherries and the curve of the scoops to make them look shiny and wet.
Step 3: Inking the Outline
-
Trace with ink:
Take your waterproof black fine liner and carefully trace over your pencil lines. I like to keep a steady hand here, but don’t worry if the lines aren’t perfectly straight—it adds character. -
Thicken the cone lines:
Go over the outer edges of the cone and the waffle grid one more time to make them slightly bolder than the delicate ice cream lines. -
Add texture dots:
On the top and bottom scoops of ice cream, add tiny stippling dots with your pen to suggest texture or sprinkles. Keep the middle scoop plain for contrast. -
Erase pencil marks:
Wait about five minutes to ensure the ink is completely dry, then gently erase all the underlying pencil sketches.
Step 4: Adding Soft Color
-
Paint the top scoop:
Using a very watery wash of pale gray or cream, lightly color the top scoop. We want this to look like vanilla or perhaps cookie dough. -
Color the middle scoop:
Mix a gentle mint green watercolor. Paint the middle scoop, keeping the color somewhat transparent so the paper texture shows through. -
Paint the bottom scoop:
Use a soft pink wash for the bottom scoop. Dab a little extra pigment on the left side to create a subtle shadow effect. -
Brighten the cherries:
Use a stronger, more saturated red for the single cherry on top. For the bunch of three cherries on the side, use a very pale pink wash, keeping them lighter than the ice cream. -
Final touches:
Let the first layers dry. If you want more depth, add a tiny bit of darker paint (wet-on-dry) to the left side of the cone or under the scoops for shadow.
Now you have a delicious piece of art that looks good enough to eat

PENCIL GUIDE
Understanding Pencil Grades from H to B
From first sketch to finished drawing — learn pencil grades, line control, and shading techniques.
Explore the Full Guide
Fruit Friends With Funny Faces
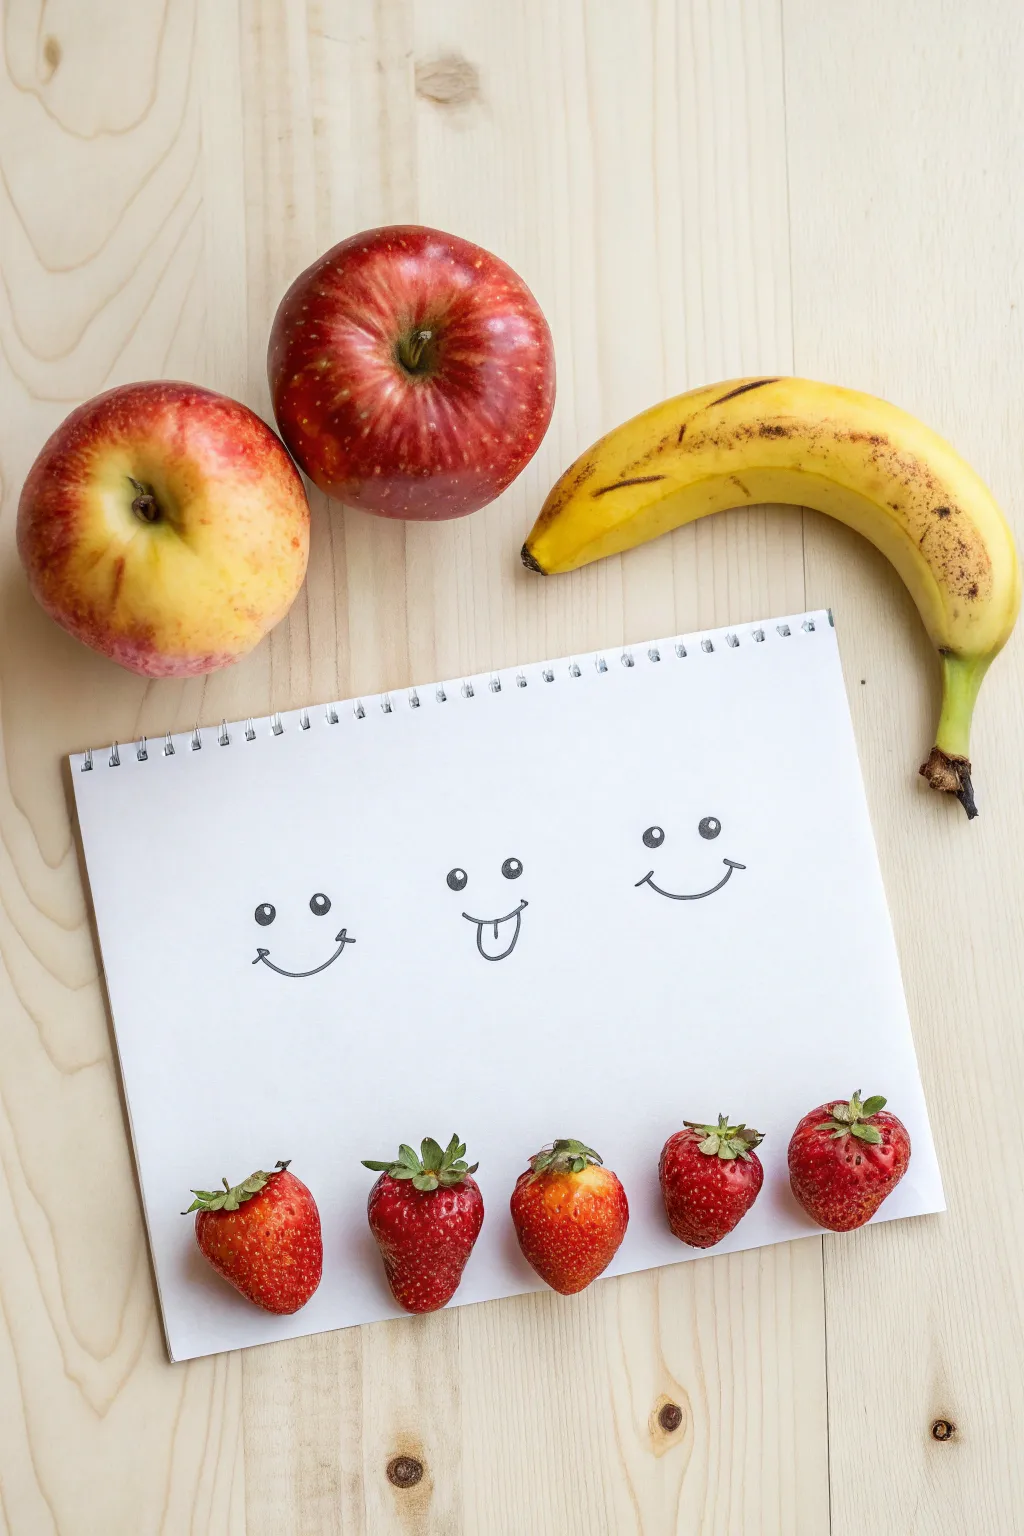
This playful project combines real fruit with simple doodle art to create a happy, healthy scene perfect for young artists. It uses fresh produce as a frame for three silly, hand-drawn expressions on a crisp white sketchbook page.
How-To Guide
Materials
- Spiral-bound sketchbook or white drawing paper
- Fine-tip black marker or drawing pen
- 2 fresh red apples
- 1 ripe yellow banana
- 5 fresh strawberries
- Flat wooden surface or table
Step 1: Setting the Stage
-
Prepare your workspace:
Find a clean, flat surface with good lighting, preferably a light-colored wooden table to match the aesthetic. Clear away any clutter so your fruit can take center stage. -
Select your paper:
Place a spiral-bound sketchbook in the center of your workspace. If you don’t have a spiral book, a single sheet of white cardstock or drawing paper works just as well. -
Position the top fruit:
Take your two apples. Place the first one near the top left corner of the paper, angled slightly so the stem is visible. -
Add the second apple:
Set the second apple next to the first one, closer to the center top edge. I usually like to pick apples with different color variations, like one gala and one delicious, for visual interest. -
Curve the banana:
Place the banana to the right of the apples. Arrange it so it curves down the right side of the paper, creating a natural frame that hugs the corner.
Uneven Fruit?
If your strawberries keep rolling over, slice a tiny sliver off the back of each berry to create a flat side that will sit perfectly still on the paper.
Step 2: Drawing the Faces
-
Plan the spacing:
Visualize three invisible vertical lines dividing your paper into three equal sections. You want your faces to be centered in the middle of these sections. -
Draw the left face’s eyes:
Using your black marker, draw two small circles for eyes on the left side. Leave a tiny white dot inside each pupil to make them look shiny and alive. -
Add the left smile:
Draw a simple, wide U-shape curve beneath the eyes. Add small tick marks at the ends of the smile line for cheeks. -
Draw the center face’s eyes:
Move to the middle of the page. Draw two slightly wider-set eyes, again leaving those little white highlights for character. -
Create the silly mouth:
Draw a U-shape for the smile, but attach a U-shaped ‘tongue’ hanging down from the center of the lip line. Draw a line down the middle of the tongue for detail. -
Draw the right face’s eyes:
On the right side, draw two more eyes. Try placing these slightly higher or lower than the others to give each face a unique personality. -
Finish the right smile:
Draw a classic clear smile line here, making sure it curves up nicely towards the eyes.
Make It a Story
Give each fruit personality by adding tiny paper hats or speech bubbles to the real fruit, making them interact with the drawn faces.
Step 3: The Berry Bottom
-
Select your berries:
Pick out five strawberries that are roughly the same size. Make sure the green leaves (calyx) are still attached and looking fresh. -
Place the first berry:
Set the first strawberry directly on the paper’s bottom edge, aligned under the left face. -
Line them up:
Continue placing the remaining four strawberries in a straight horizontal line across the bottom of the paper. -
Adjust the spacing:
Nudge the berries gently so they are evenly spaced. They should act like a decorative border at the bottom of your artwork. -
Final check:
Step back and look at your composition. Ensure the fruit frames the drawings without covering them, and that your marker lines are bold and clear.
Now you have a cheerful, mixed-media composition that looks good enough to eat
Sailing Boat on Wavy Lines
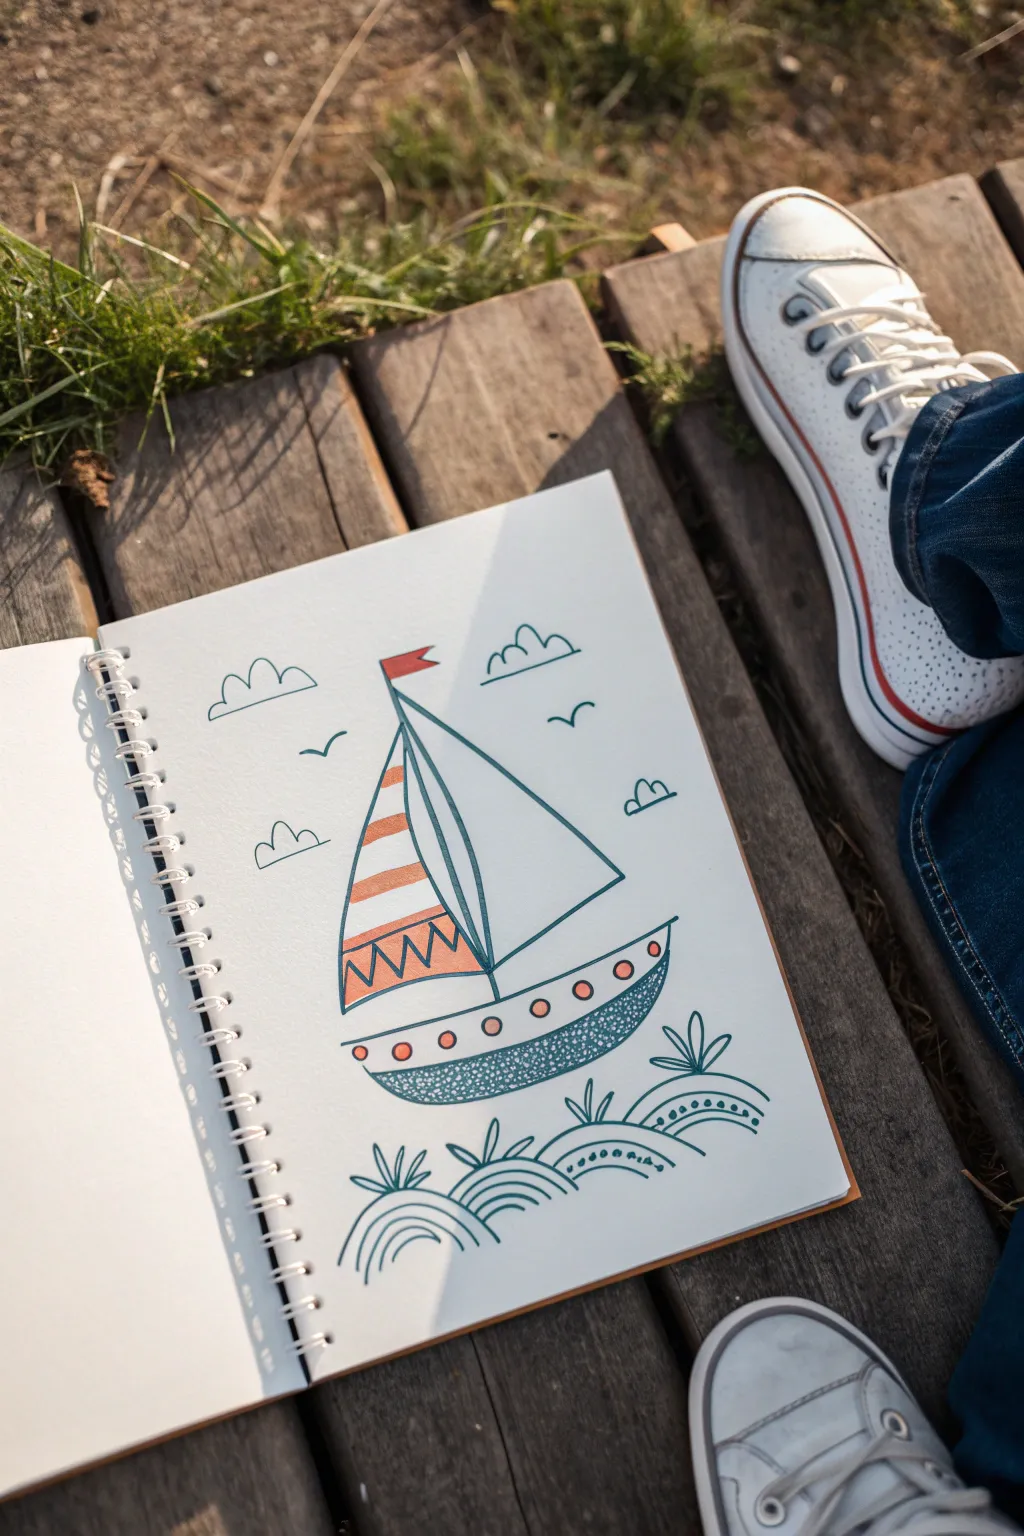
Set sail on a creative journey with this charming, stylized sailboat drawing that captures the breezy feeling of a day at sea. Using clean lines and playful patterns, you will create a whimsical nautical scene perfect for doodlers of all ages.
Step-by-Step
Materials
- White sketchbook paper or heavy drawing paper
- Fine-point black drawing pen (or felt-tip marker)
- Orange marker or colored pencil
- Teal or light blue marker (fine tip)
- Ruler (optional, for straighter lines)
Step 1: Drafting the Hull
-
Draw the main curve:
Start by drawing a long, gentle U-shape curve in the lower third of your page. This will be the bottom of your boat’s hull. -
Close the shape:
Connect the two ends of your curve with a straight horizontal line across the top to finish the basic boat shape. -
Add the porthole strip:
Draw another curved line inside the hull, running parallel to the bottom edge. This creates a separate strip at the bottom for the textured pattern later. -
Sketch the deck detail:
Draw a straight horizontal line just below the top edge of the boat, creating a thin band where the portholes will go.
Step 2: Raising the Sails
-
Plant the mast:
Draw a vertical line rising from the center of the boat’s deck. It doesn’t need to be perfectly straight; a hand-drawn look adds character. -
Outline the main sail:
From the top of the mast, draw a large triangle extending to the right, connecting back down to the boat’s deck. -
create the front sail:
Draw a slightly curved triangle on the left side of the mast. Make the outer edge curve inward slightly to look like it’s catching the wind. -
Add sail details:
Inside the right sail (the mainsail), draw a vertical line parallel to the mast to give it some dimension. On the left sail, draw two curved lines down the length to suggest fabric folds. -
Top with a flag:
At the very top of the mast, draw a small triangular flag fluttering to the right.
Wobbly Lines?
Don’t stress about perfect straight lines. A slightly wiggly line actually makes the boat look more like it’s bobbing on the water and adds to the charm.
Step 3: Adding Patterns and Color
-
Stripe the front sail:
Divide the left sail into horizontal sections with four or five curved lines. Fill alternating sections with your orange marker. -
Decorate with zig-zags:
In the bottom section of that same left sail, use your teal or blue pen to draw a sharp zig-zag pattern over the orange background. -
Color the flag:
Fill in the small flag at the top of the mast with solid orange. -
Draw the portholes:
In the thin band along the upper hull, draw a row of small circles. Alternate filling them with solid orange and leaving them open as simple rings. -
Texture the hull:
In the bottom strip of the hull, create a dense texture by drawing many tiny, tight scribbles or loops with your teal pen. I find this creates a nice ‘watery’ visual weight to the bottom of the boat.
Pattern Play
Try swapping the teal scribbles on the hull for polka dots or vertical stripes to make the boat design uniquely yours.
Step 4: Setting the Scene
-
Create the waves:
Beneath the boat, draw three distinct mounds using semi-circles. Instead of just one line, layer multiple arching lines over each other to create rainbow-like wave shapes. -
Detail the water:
Decorate the waves with patterns. Try adding a row of dots between the arches on the rightmost wave, and simple radiating lines on the others. -
Add sea spray:
Draw small, leaf-like splashes or droplets shooting up from the tops of your waves to show movement. -
Draw fluffy clouds:
In the sky above, sketch a few simple clouds using a series of connected bumps. Keep the bottoms of the clouds flat for a stylized look. -
Finish with birds:
Complete your scene by drawing a few simple ‘V’ shapes in the sky to represent seagulls flying in the distance.
Now you have a breezy nautical scene ready to be displayed on the fridge or in a frame


Bumblebee With Stripes and Wings
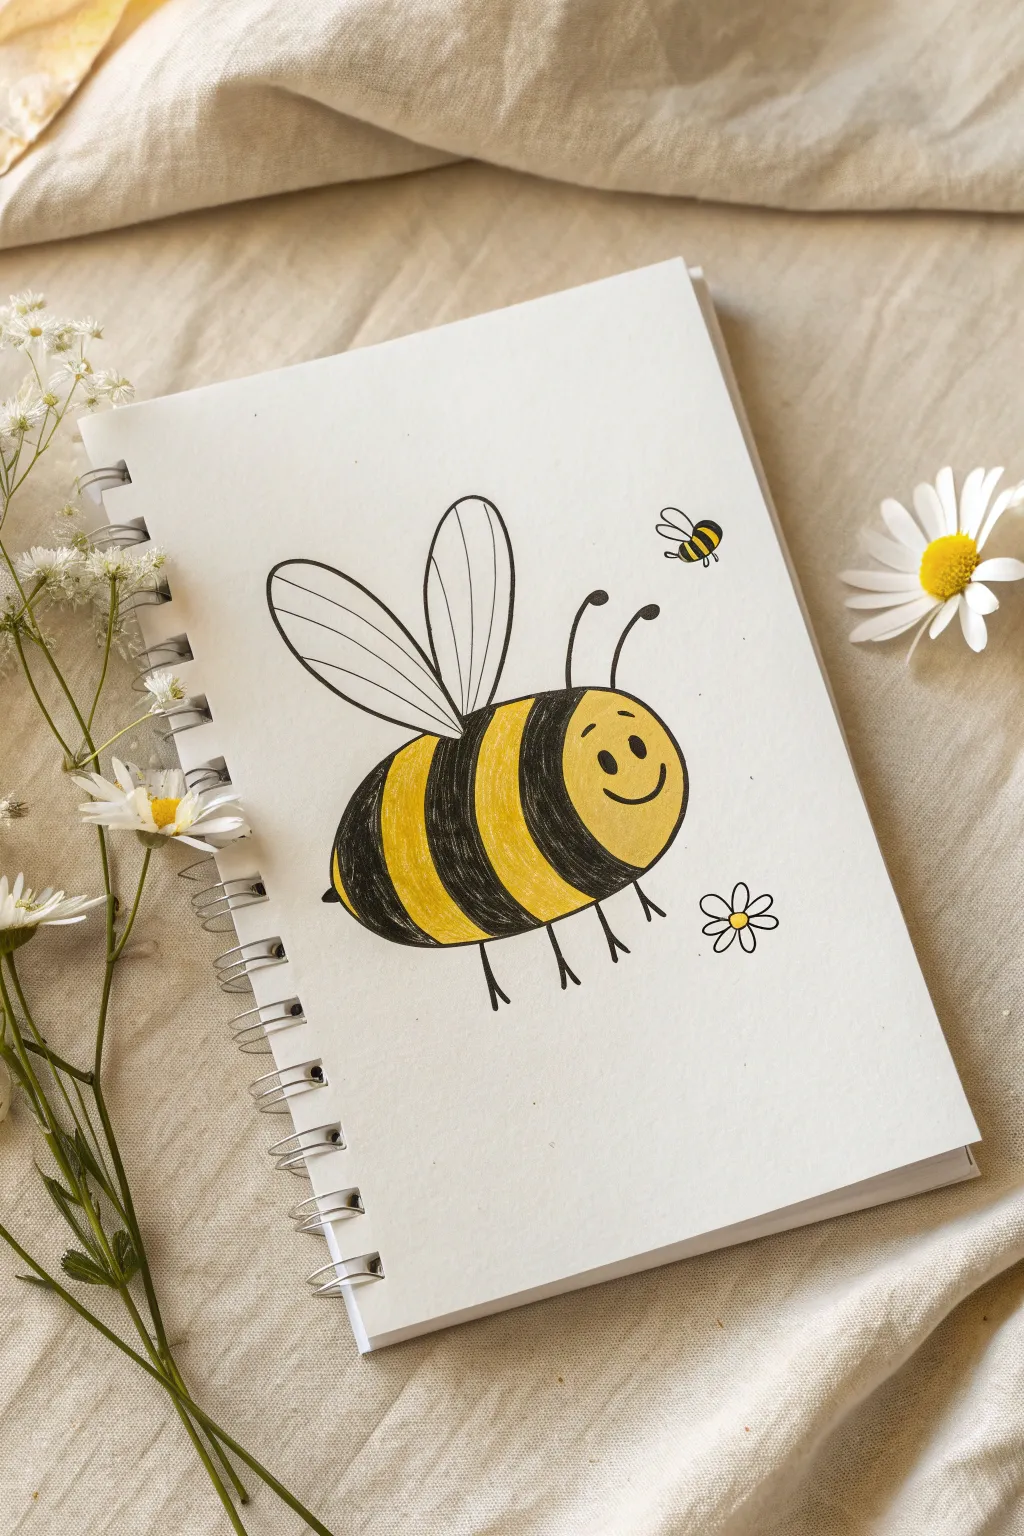
Create a cheerful garden friend with this simple cartoon bumblebee drawing. This project uses bold black lines and bright yellow stripes to bring a character full of personality to your sketchbook page.
Step-by-Step Guide
Materials
- Sketchbook or drawing paper
- Pencil for sketching
- Eraser
- Fine-tip black marker or pen
- Yellow colored pencil or marker
Step 1: Drawing the Body
-
Outline the main shape:
Start by drawing a large oval shape for the bee’s body. Tilt it slightly upwards to the right so it looks like the bee is flying. -
Define the head:
Draw a curved line inside the oval, near the front (right side), to separate the face from the rest of the body. -
Add stripe guidelines:
Along the main body, sketch two or three curved lines to mark where the black and yellow stripes will go. Keep these lines parallel to the head curve. -
Sketch the stinger:
At the very back of the oval (the left side), add a tiny, sharp triangle for the stinger.
Wing Texture
Keep your wing lines very thin and light. If using a marker, try lifting the pen up quickly at the end of the stroke to make the line taper off naturally.
Step 2: Adding Wings and Limbs
-
Draw the front wing:
Draw a large, tall loop starting from the top of the body’s back. It should look a bit like a tall teardrop shape. -
Draw the back wing:
Behind the first wing, draw a second, slightly smaller loop visible peeking out from behind. -
Add wing details:
Draw straight lines inside both wings, radiating from the base to the tip, to give them a transparent texture. -
Sketch the antennae:
On top of the head area, draw two curved lines sticking up. Add a small dot at the end of each line. -
Add the legs:
Draw four or five simple stick legs coming down from the bottom of the body. Angle them slightly differently to simple movement.
Step 3: Inking and Coloring
-
Outline in ink:
Go over your pencil lines with a black marker. Trace the outline of the body, wings, and legs carefully. -
Draw the face:
Using the black marker, draw two small oval eyes and a wide U-shape for a happy smile on the face section. -
Fill the black stripes:
Color in alternating stripes on the body with your black marker. Make sure to leave the face and every other stripe blank for the yellow. -
Color the yellow stripes:
Use your yellow marker or colored pencil to fill in the remaining white stripes on the body. I like to press firmly here to make the yellow really pop against the white paper. -
Color the face:
Fill in the face area with yellow as well, being careful to color around the eyes and mouth. -
Erase pencil marks:
Once the ink is completely dry, gently erase any visible pencil sketches underneath your drawing.
Smudged Ink?
If your black marker smears into the yellow, wait longer for the black outline to dry completely before coloring, or color the yellow parts first.
Step 4: Fun Extras
-
Draw a tiny friend:
In the upper right corner, draw a tiny version of your bee using simple shapes—just a small oval, tiny wings, and stripes. -
Add a flower:
Draw a simple daisy near the bottom right. Start with a yellow circle center, then add loop petals around it. -
Final touches:
Add small dots or dashed lines around the bees to show movement or buzzing paths.
Now you have a busy little bee ready to fly off the page
Unicorn With a Rainbow Mane
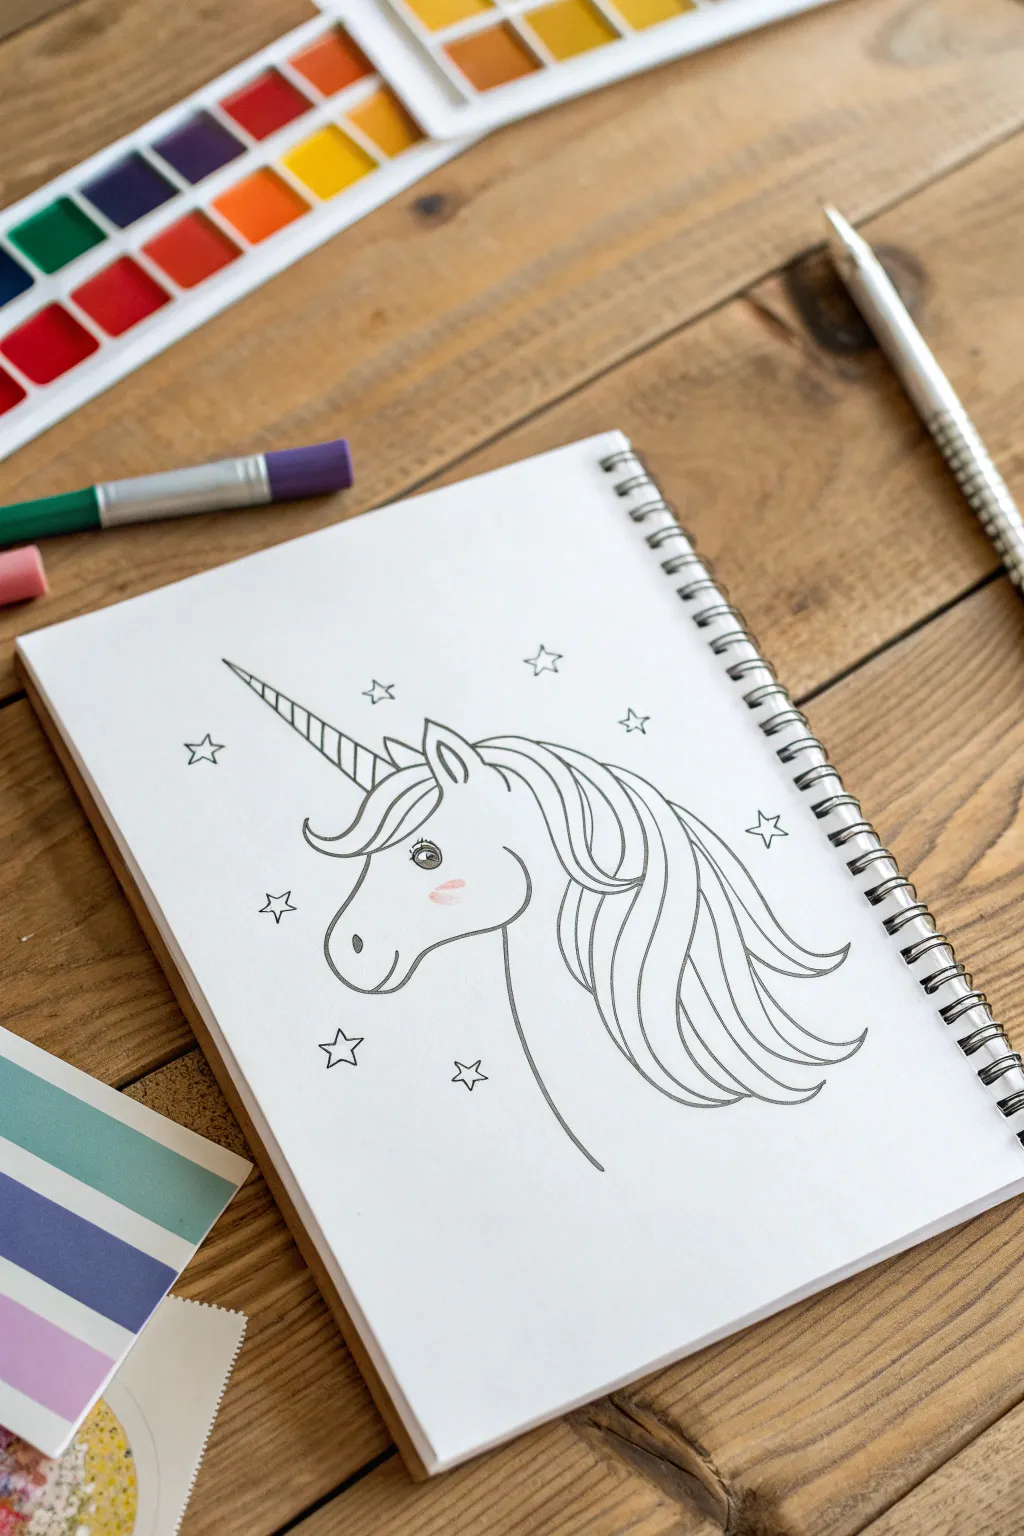
Capture the magic of mythical creatures with this clean and elegant unicorn sketch. This simple yet enchanting drawing features sweeping mane lines and scattered stars, perfect for coloring in later.
Step-by-Step
Materials
- Spiral-bound sketchbook (white paper)
- Fine-tip black drawing pen (0.5mm or 0.8mm)
- Pencil (HB or 2B)
- Eraser
- Pink colored pencil or pastel
Step 1: Basic Shapes & Head
-
Light sketch:
Start by lightly sketching a tilted oval shape for the head and a smaller circle for the muzzle area using your pencil. This guides your proportions. -
Define the snout:
Using your pen, trace the lower curve of the snout, creating a gentle ‘U’ shape that dips slightly for the mouth. -
Add the nostril:
Draw a small, comma-shaped mark near the front tip of the snout for the nostril. -
The jawline:
Continue the line from the chin upward to form the jaw, stopping where the neck will begin. -
Draw the eye:
Place a large oval midway up the head. Fill in a pupil, leaving a tiny white circle for a highlight sparkle to make it look alive. -
Eyelashes:
Add three small, curved flicks extending from the top outer corner of the eye for lovely lashes.
Smooth Lines
Draw long mane lines using your whole arm, not just your wrist. This creates fluid, confident curves rather than shaky, short strokes.
Step 2: Horn & Mane Details
-
The horn outline:
Draw a long, slender triangle extending from the forehead. I find it helps to angle it slightly forward. -
Horn ridges:
Add diagonal stripes across the horn. Curve these lines slightly downward to give the horn a 3D, spiral effect. -
The ear:
Sketch a pointed ear shape behind the horn, adding a smaller triangle inside for the inner ear detail. -
Forelock bangs:
Draw a sweeping curve of hair falling over the unicorn’s forehead, right between the ear and horn. -
Top mane volume:
Create the top of the mane by drawing a large, flowing curve that starts behind the ear and arches over the neck. -
Flowing strands:
Fill in the mane with long, wavy lines that cascade downward. Vary the width of the strands to make the hair look thick and luxurious. -
Neck line:
Draw a simple, single curve extending down from the jawline to suggest the front of the neck.
Ink Smudging?
Wait at least 5-10 minutes before erasing pencil marks. If your ink smears, try a waterproof fineliner or place a clean tissue under your hand while drawing.
Step 3: Finishing Touches
-
Add floating stars:
Draw simple five-pointed stars scattered around the unicorn’s head. Vary their sizes for a magical atmosphere. -
Erase pencil guides:
Once the ink is completely dry, gently erase all the underlying pencil sketches to leave a crisp, clean image. -
Rosy cheek:
Take a pink colored pencil or pastel and gently shade a small oval just below the eye to give the unicorn a sweet blush.
Now you have a charming unicorn illustration ready for a splash of rainbow colors
Silly Monster Mash-Up Character

Unleash your imagination by sketching this adorable, wide-eyed monster with jagged stripes and silly horns. It’s a perfect beginner project that uses simple shapes to create a charming, slightly goofy creature.
Step-by-Step Guide
Materials
- Spiral-bound sketchbook or drawing paper
- Pencil (HB or #2)
- Fine-point black marker or rollerball pen
- Eraser
- Colored pencils (optional, for later)
Step 1: Sketching the Base Shape
-
Draw the body outline:
Start by drawing a tall, rounded gumdrop shape in the center of your page. Keep the bottom edge open for now rather than closing it off with a straight line. -
Add the jagged hem:
Connect the two bottom endpoints of your gumdrop shape with a zig-zag line to create a furry texture at the base of the monster’s body. -
Position the eyes:
Near the top third of the body, draw two large circles side-by-side. Make the left circle slightly smaller than the right one to give it a quirky look. -
Detail the pupils:
Inside each large circle, draw a smaller circle for the pupil. Add two tiny reflection bubbles inside each pupil—one medium and one small—before shading the rest of the pupil dark with your pencil.
Make it Alive!
Vary line thickness: use a slightly thicker pen for the outside body outline and a thinner one for the inside details like spots.
Step 2: Adding Character Features
-
Draw the mouth:
Sketch a deeply curved smile underneath the eyes. Connect the ends with a straight line across the top to make a semi-circle mouth shape. -
Add sharp teeth:
Along that top straight line of the mouth, draw a row of triangular teeth pointing explicitly downward. -
Create the horns:
Draw two curved horns coming out of the sides of the head. Make the right horn curve upward and the left horn curve slightly outward. -
Stripe the horns:
Add small curved lines across the width of each horn to give them a segmented, striped texture. -
Give it a hairstyle:
Between the horns on the very top of the head, draw a cluster of three or four leaf-shaped spikes for a fun tuft of hair.
Ink Smearing?
Wait at least 60 seconds before erasing pencil marks. If ink smears, turn it into a shadow or a dark spot on the monster’s fur.
Step 3: Limbs and Textures
-
Draw the arms:
Sketch two long, thin arms hanging down from the sides of the body. Keep them simple and noodle-like. -
Add clawed hands:
At the end of each arm, draw three sharp, triangular fingers to form the claws. -
Sketch the legs:
Draw two thin lines extending down from the furry bottom edge for the legs. I like to keep these fairly stick-like to contrast with the big body. -
Finish the feet:
Add long, flat feet with three toes each, pointing outward in opposite directions. -
Draw the belly pattern:
Across the main body, draw two horizontal zig-zag lines. These divide the monster’s fur into sections. -
Add spots:
Fill the space above the top zig-zag line (around the eyes) with small, empty circles or polka dots. -
Fill the bottom textures:
Between the two zig-zag lines, add tiny vertical dashes. Below the bottom zig-zag line, add small circles again to match the top section.
Step 4: Inking and Refining
-
Trace with pen:
Take your black fine-point pen and carefully trace over all your pencil lines. Try to keep your hand steady for smooth curves. -
Fill the blacks:
Use the pen to color in the pupils (avoiding the white reflection spots) and darken the tips of the claws or hair if desired. -
Erase pencil marks:
Once the ink is completely dry—give it a minute!—gently erase the underlying pencil sketch to reveal a clean, crisp drawing.
Now you have a unique monster friend ready to be colored or displayed on your wall
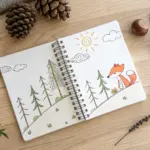
Story Scene in a Snow Globe Circle
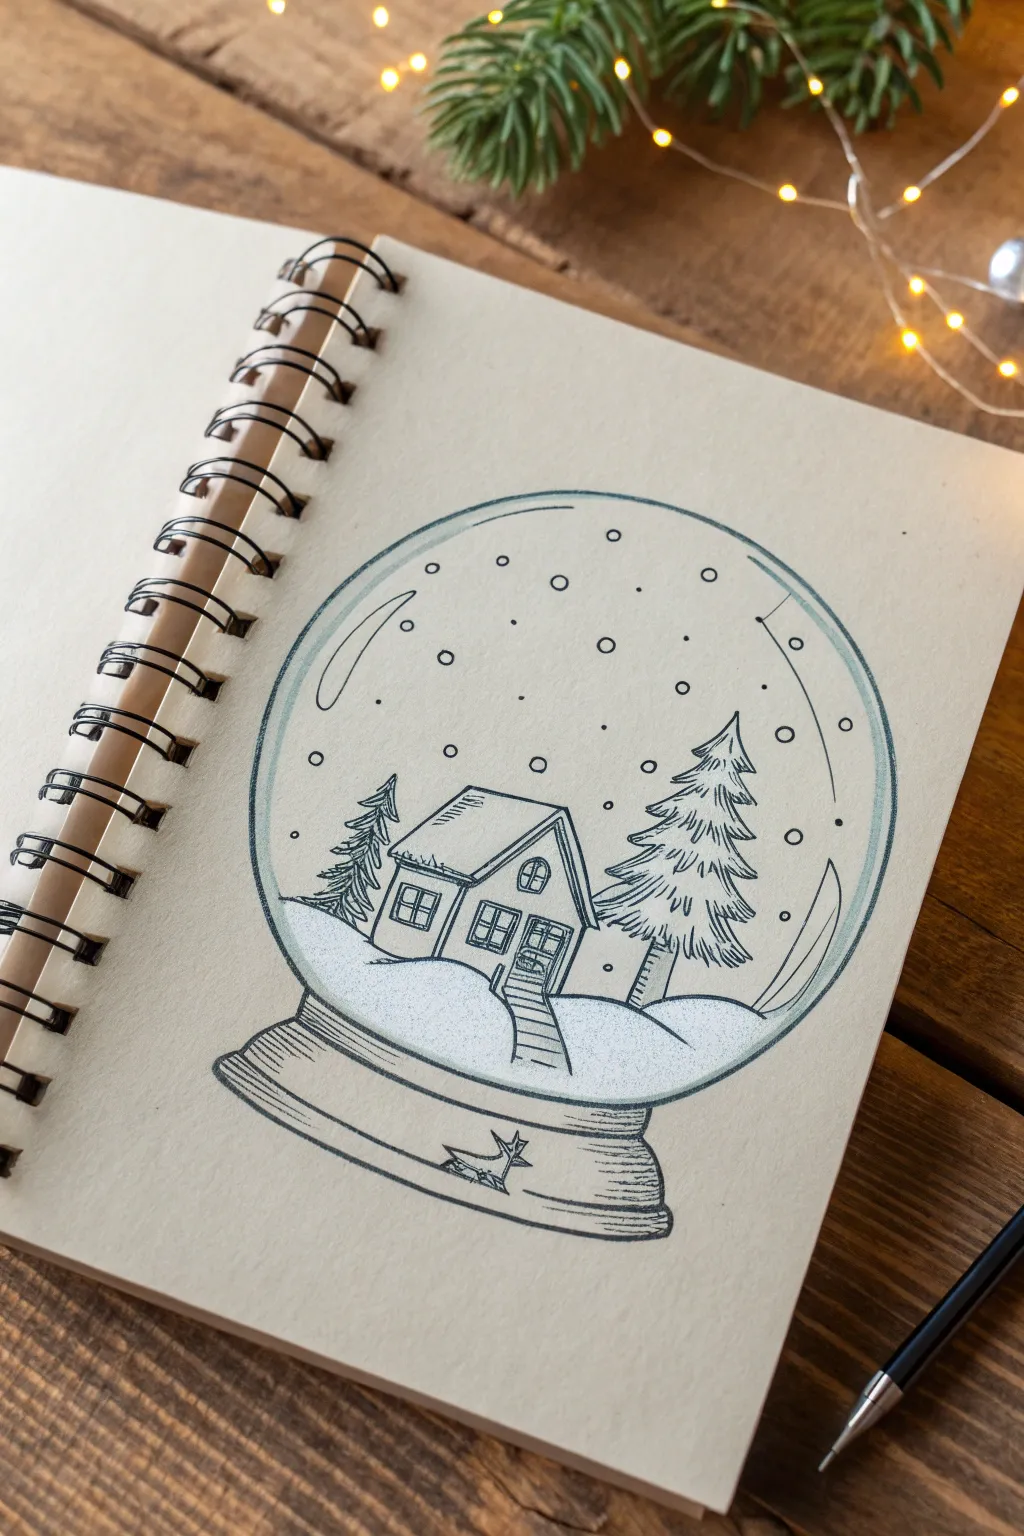
Capture the magic of winter by sketching a charming little scene inside a classic snow globe. Using simple lines and soft shading, you’ll create a nostalgic illustration of a cabin tucked away in a snowy forest.
Detailed Instructions
Materials
- Sketchbook with cream or tan toned paper
- Fine liner pen (black, 0.3mm or 0.5mm)
- Pencil (HB for sketching)
- White gel pen or white charcoal pencil
- Compass or round object to trace
- Eraser
Step 1: Setting the Stage
-
Draw the main circle:
Start by drawing a large, perfect circle in the center of your page. You can use a compass for precision or trace around a bowl or large mug if you prefer a more organic feel. -
Add the base foundation:
Directly below the circle, sketch a wide, flattened oval shape that slightly overlaps the bottom edge of the globe. This will serve as the top surface of the snow globe’s base. -
Form the base body:
Draw two short, diagonal lines angling outwards from the sides of that oval, then connect them with a curved line at the bottom to complete the stand’s shape. -
Define the snow line:
Inside the globe, roughly a third of the way up, draw a soft, wavy line across the circle to represent the ground where the snow has piled up.
Glass Effect Pro Tip
Keep your reflection lines broken and varying in thickness. Continuous solid lines can make the globe look like a flat tire rather than a sphere.
Step 2: Building the Scene
-
Outline the cabin structure:
Place a small boxy shape slightly left of center on your snow line. Add a peaked roof to create a classic cabin silhouette. -
Add cabin details:
Sketch a small rectangular door and a couple of square windows. Don’t forget a little chimney peeking out from the roof. -
Sketch the pathway:
Draw two winding lines leading from the cabin door down towards the bottom front of the glass, creating a little cleared path in the snow. -
Plant the large tree:
To the right of the cabin, sketch a tall pine tree. Start with a vertical trunk line and use jagged, downward-pointing zigzag strokes to create bushy evergreen branches. -
Add a background tree:
Tuck a smaller, simpler pine tree behind the cabin on the left side to add depth to your tiny forest.
Fixing Wobbly Circles
If your main circle looks uneven after inking, thicken the outline intentionally in a few spots to disguise the wobbly parts as artistic style.
Step 3: Inking and Definition
-
Ink the globe:
Take your fine liner pen and carefully trace over the main circle. I like to double up this line slightly on one side to mimic the thickness of the glass. -
Ink the scene:
Go over your pencil sketches of the house and trees with the pen. Use quick, confident strokes for the pine needles to keep them looking sharp. -
Detail the base:
Ink the base of the globe. Add horizontal hatching lines—closely spaced parallel lines—curving around the sides of the base to give it a rounded, 3D form. -
Decoration on the stand:
Draw a small star or snowflake emblem on the front center of the wooden base for a decorative touch. -
Erase pencil guides:
Once the ink is completely dry, gently erase all your underlying pencil lines to clean up the drawing.
Step 4: Atmosphere and Shading
-
Add glass reflections:
Draw two long, curved lines following the inner contour of the globe on the upper left and lower right sides. This suggests the reflection of light on the curved glass surface. -
Create falling snow:
Scatter small open circles throughout the empty space in the sky area. Their varying sizes make the snowfall look more natural. -
Shade the ground:
Use very light stippling (dots) or soft pencil shading on the snow ground to give it texture, keeping it lighter than the trees and house. -
Final highlights:
If you have a white gel pen or white charcoal, add tiny touches of white to the roof of the cabin and the tips of the pine trees to make the snow pop against the tan paper.
Now you have a captured winter moment that will stay perfectly frozen in time no matter the season


Have a question or want to share your own experience? I'd love to hear from you in the comments below!