
Brown is one of my favorite colors to paint with because it instantly feels grounded, cozy, and kind of timeless. If you’ve ever felt stuck with “boring neutrals,” these brown painting ideas will show you how many moods you can pull out of a single earthy palette.
Wood Grain and Knot Studies
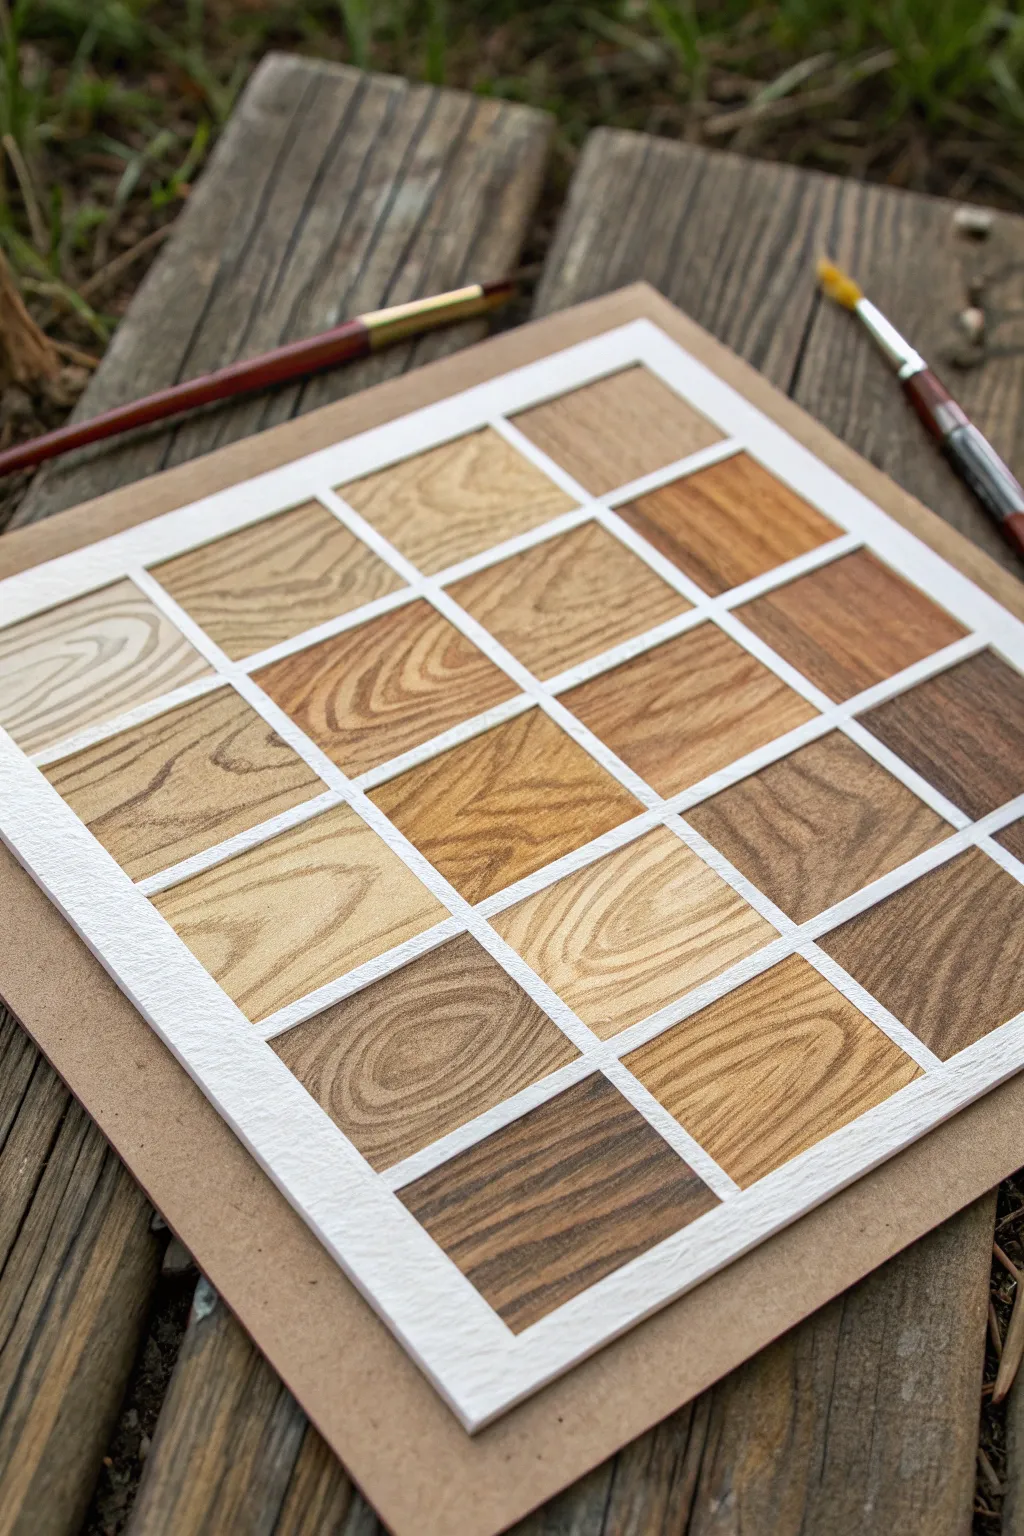
This methodical study transforms a simple sheet of watercolor paper into a rich library of wood textures, ranging from pale pine to deep walnut. By isolating each grain pattern within a crisp white grid, you create a satisfying sampler that serves as both a warm decorative piece and a masterclass in brown color theory.
Step-by-Step Tutorial
Materials
- Heavyweight cold-press watercolor paper (300 gsm or heavier)
- Artist masking tape (1/4 inch width is ideal)
- Watercolor or gouache paints (Burnt Umber, Yellow Ochre, Raw Sienna, Burnt Sienna, Sepia)
- Round brushes (sizes 2 and 4)
- Fine liner brush (size 0 or 00)
- Pencil and ruler
- Mixing palette
- Cardboard backing board
- Painter’s tape (for mounting)
Step 1: Grid Preparation
-
Mount the paper:
Begin by taping your square sheet of watercolor paper securely to a rigid backing board or table using painter’s tape on all four edges. This prevents buckling when the paint is applied later. -
Measure the layout:
Using a pencil and ruler, lightly mark out a 4×4 grid. The exact dimensions depend on your paper size, but aim for roughly 2-inch squares to give yourself enough room for detail. -
Apply the geometric mask:
Lay down strips of 1/4 inch artist masking tape over your pencil lines to create the white borders. Run long strips horizontally first, then vertically, pressing down firmly to seal the edges against paint bleed. -
Seal the tape edges:
For razor-sharp lines, I like to apply a very thin layer of clear matte medium or white gouache along the edges of the tape and let it dry. This blocks colored paint from seeping underneath.
Bleeding Lines?
If paint sneaks under the tape, don’t panic. Wait for it to dry completely, then gently scrape the excess away with an X-Acto knife or cover it with dense white gouache.
Step 2: Base Colors
-
Mix your palette:
Prepare a range of brown washes on your palette. Mix Yellow Ochre with water for light wood, Raw Sienna for medium tones, and Burnt Umber mixed with a touch of blue or black for the devastatingly dark squares. -
Apply the first wash:
Working one square at a time, fill each area with a flat wash of color. Vary the hues randomly across the grid—place a pale beige next to a dark chocolate tone to create visual interest. -
Create variation:
While the squares are still wet, you can drop in slightly darker pigment in the corners of a few squares to suggest uneven staining or lighting. -
Let it dry completely:
Allow the base layers to dry fully. The paper must be bone dry before you attempt to paint the grain lines, or they will blur into fuzzy blobs.
Organic Flow Pro-Tip
Hold your brush near the end of the handle, not the ferrule. This reduces control slightly, creating naturally shaky, organic lines that look more like real wood grain.
Step 3: Painting the Grain
-
Start with straight grain:
Choose a light-colored square. Using your size 2 brush and a mix slightly darker than the base color, paint gentle, parallel lines. Wiggle the brush slightly as you pull it to create a natural, organic tremor. -
Develop cathedral arches:
On a medium-tone square, create the classic ‘cathedral’ grain pattern. Start with a V-shape or arch in the center bottom, and paint concentric arches radiating outward, getting wider as they reach the top. -
Add knots:
Pick a square for a knot detail. Paint a dark, tight oval, then paint flowing lines that wrap around it like a stream flowing around a rock. Paint these lines close together near the knot and wider apart further away. -
Layering transparency:
If using watercolor, you can glaze a second layer of grain over the first once it dries to add depth and complexity to the wood texture. -
Vary line weight:
Switch to the fine liner brush for the darker wood squares. Darker woods often have tighter, subtler grain, so use very thin, faint lines here. -
Enhance contrast:
Go back to your lightest squares (like the faux pine) and add a few very dark, thin split lines or cracks to emphasize the dryness of the wood.
Step 4: Finishing Touches
-
The reveal:
Once the paint is thoroughly dry—give it extra time to be safe—slowly peel away the masking tape. Pull the tape away from the paper at a 45-degree angle to avoid tearing surface fibers. -
Mount the artwork:
Center your finished grid on a piece of neutral-toned cardboard or mat board. Use double-sided tape or glue dots on the back to secure it, leaving a pleasing border around the white grid. -
Final inspection:
Check for any paint that might have bled onto the white grid lines. You can carefully touch these up with a dab of opaque white gouache or a white gel pen.
Now you have a stunning texture study that celebrates the natural beauty of timber.

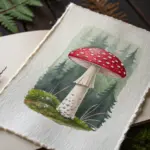
Bark Texture Close-Up
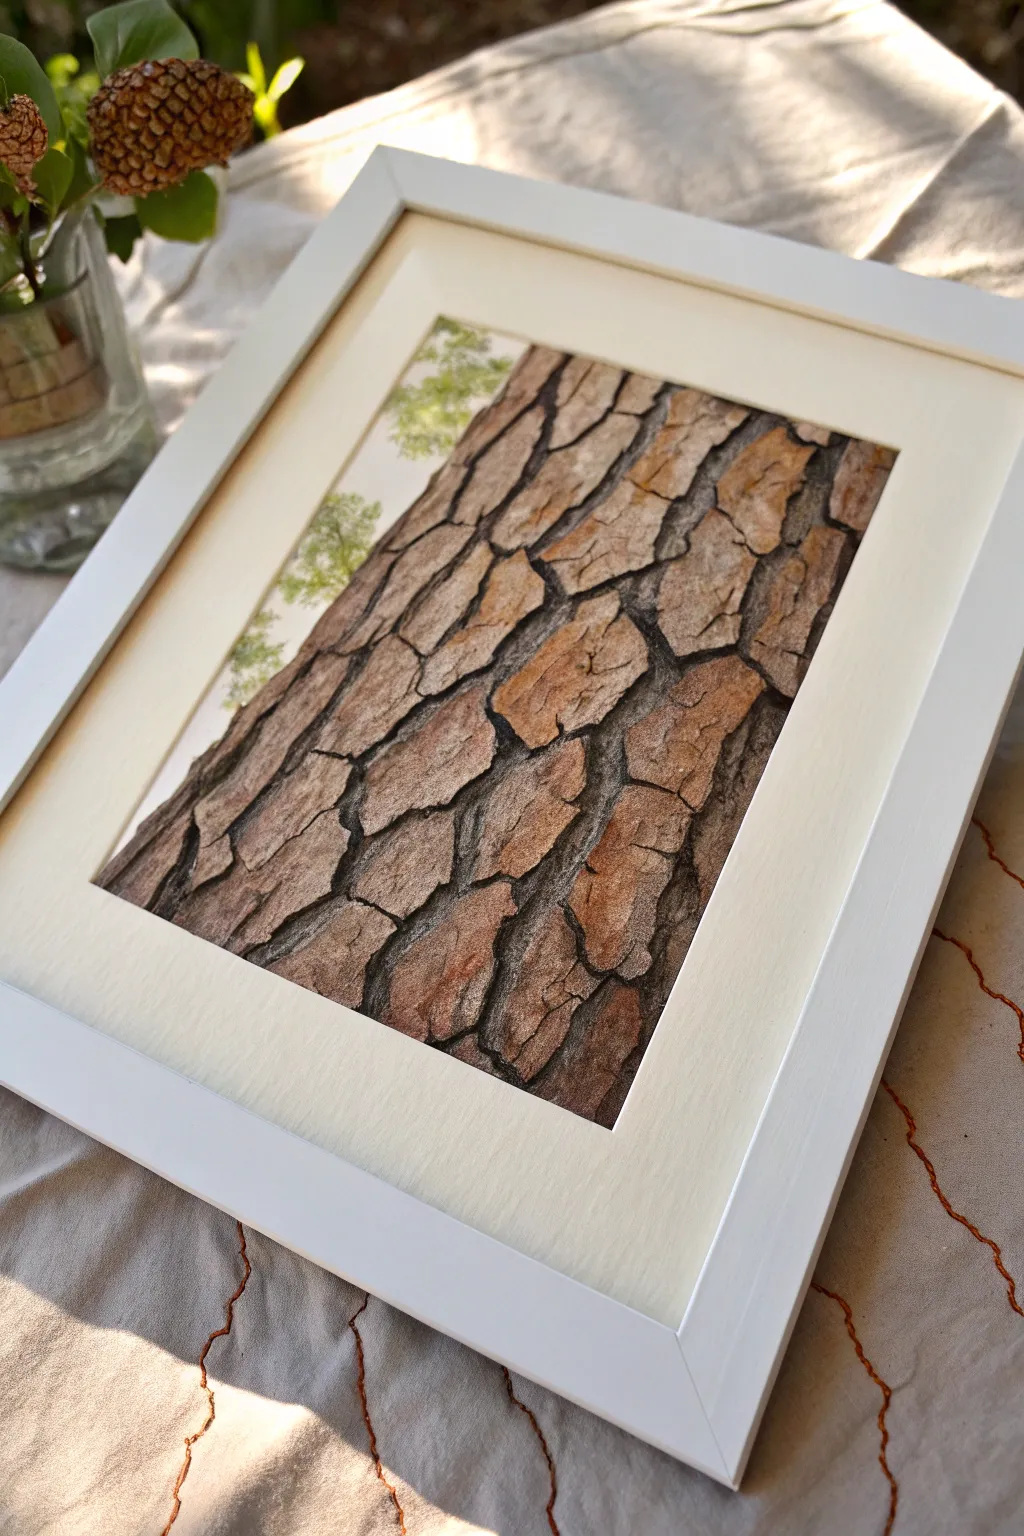
Capture the rugged beauty of nature with this detailed close-up painting of pine bark texture. By layering warm browns and deep charcoals, you’ll create a dimensional piece that feels like you could reach out and touch the rough surface.
Step-by-Step
Materials
- Heavyweight watercolor paper (hot press for detail)
- Watercolor paints (Burnt Sienna, Raw Umber, Yellow Ochre, Paynes Gray, Sap Green)
- Small round brushes (Size 0, 2, and 4)
- Pencil (HB or 2H)
- Kneadable eraser
- Masking tape
- Mixing palette
- Two jars of water
- White or light wood frame with cream mat
Step 1: Sketching the Structure
-
Outline the plates:
Begin by lightly sketching the large, irregular jigsaw shapes of the bark plates. Focus on how they interlock and radiate slightly diagonally across the page. -
Map the fissures:
Draw the deep cracks (fissures) between the plates. Make these lines thicker and jagged to indicate depth, rather than single pencil strokes. -
Add surface detail:
Lightly sketch the internal texture within each bark plate, marking where the surface is flaky or peeling. -
Hint at foliage:
In the upper left corner, sketch a few faint, blurry shapes to represent distant green leaves, keeping them minimal to maintain focus on the bark.
Pro Tip: Scratch it Up
For realistic wood grain, use an exacto knife to gently scratch the paper surface while the paint is damp. Pigment will settle into these scratches, creating instant fine texture.
Step 2: Base Layers
-
First wash of color:
Mix a very watery wash of Yellow Ochre and lightly paint over all the bark areas. This provides a warm, sunlit undertone for the wood. -
Leaf background:
While the bark dries, add a very pale, wet wash of Sap Green to the foliage corner. Keep edges soft and undefined. -
Defining the plates:
Once the base is dry, mix Burnt Sienna with a touch of Raw Umber. Paint the bark plates again, but leave incomplete, scratchy edges to let the yellow undertone show through. -
Building variety:
Drop small amounts of slightly darker brown into the wet paint on the lower/shadowed sides of each bark plate involved to create accidental textures.
Troubleshooting: Flat Bark?
If your bark looks 2D, your shadows aren’t dark enough. Be brave with your darkest mixture in the cracks—high contrast is the secret to making the texture look 3D.
Step 3: Adding Depth and Texture
-
Darkening the cracks:
Mix Paynes Gray with Burnt Umber to create a near-black. Using your smallest brush, carefully paint the deep fissures between the plates. -
Softening edges:
Before the dark crack paint fully dries, use a clean, damp brush to drag a tiny bit of that dark color up onto the edge of the bark plate, creating a cast shadow. -
Texture details:
Switch to a dry-brush technique. Load a size 2 brush with thick Burnt Sienna paint, wipe most of it off, and drag it lightly over the bark plates to simulate roughness. -
Highlighting separation:
Use a finer brush to add thin, dark lines inside the bark plates where the layers of wood are splitting or peeling.
Step 4: Final Touches and Framing
-
Deepening shadows:
Go back into the deepest crevices with your darkest gray-brown mix. I find adding a second layer here really makes the bark pop forward. -
Foliage details:
Add a few distinct dabs of brighter Sap Green to the top left corner to suggest leaves, but keep them looser than the bark. -
Clean up:
Once the painting is completely bone dry, gently erase any visible pencil lines that weren’t covered by paint. -
Matting the work:
Center your painting behind a cream-colored mat. The cream tone complements the warm browns of the wood better than stark white. -
Framing:
Place the matted artwork into a simple white frame to keep the presentation modern and clean.
Now you have a serene piece of nature study ready to hang on your wall
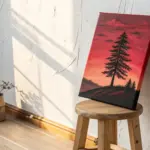


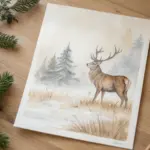
Chocolate and Cream Sky
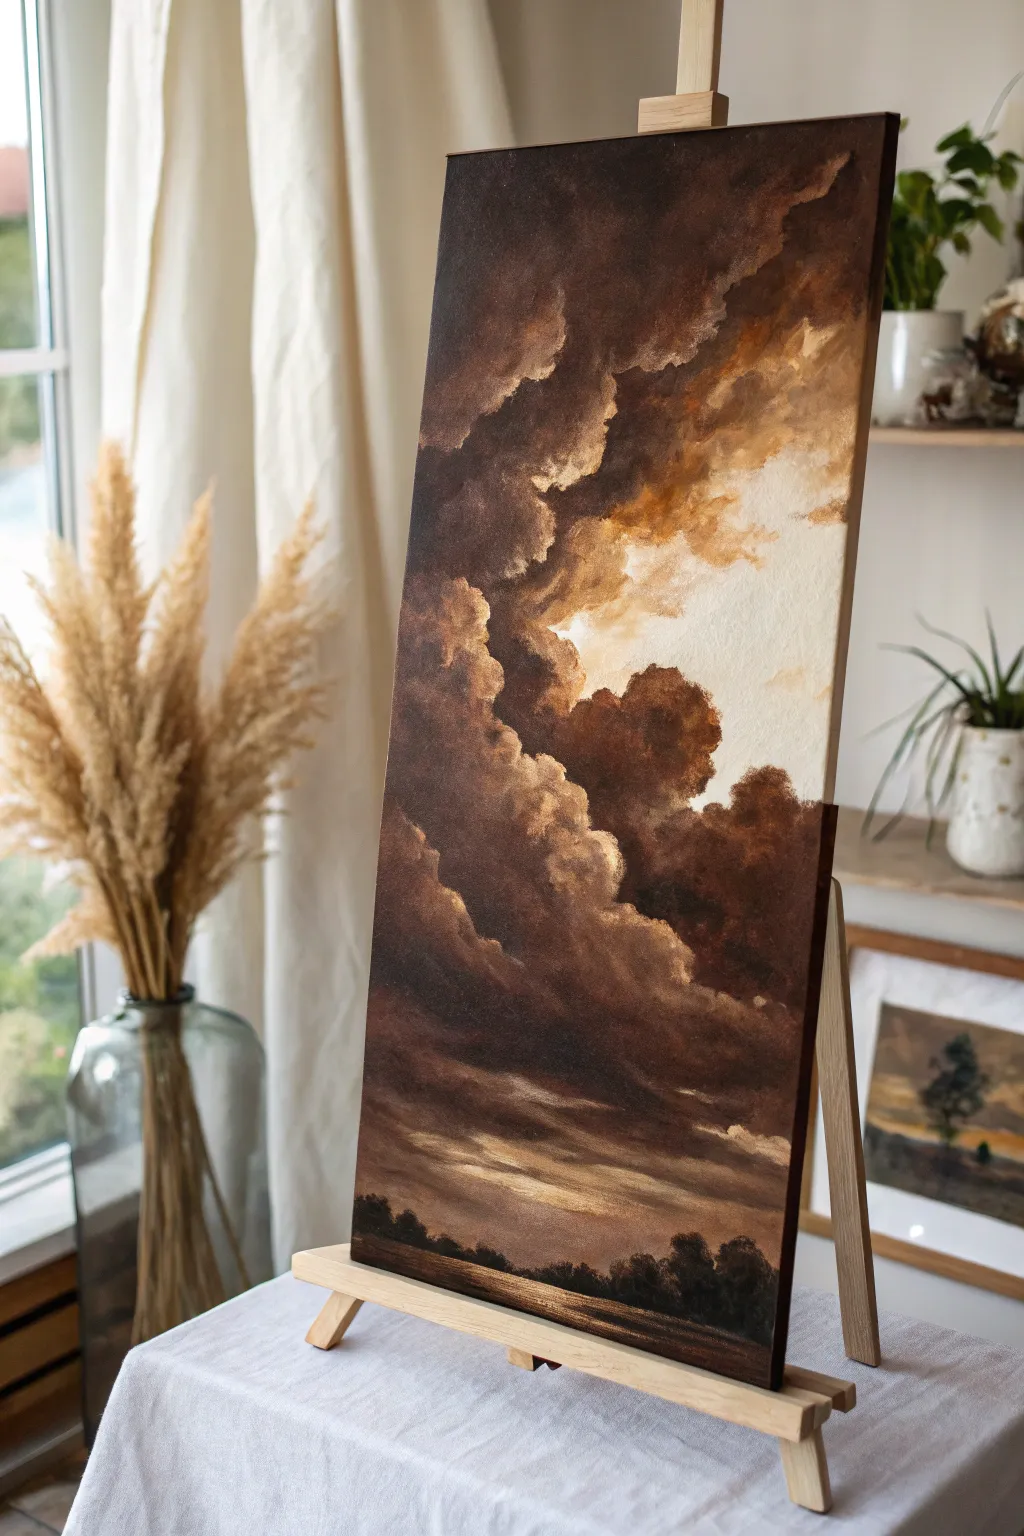
Master the art of dramatic skies with this moody, monochromatic study of towering storm clouds. Using a limited palette of deep browns and soft creams, you’ll create a painting that feels both turbulent and classically elegant.
Step-by-Step Guide
Materials
- Tall rectangular stretched canvas (e.g., 12×24 inches)
- Acrylic paints: Burnt Umber, Raw Umber, Titanium White, and Yellow Ochre
- Soft synthetic brushes: 1-inch flat, medium filbert, and a small round detail brush
- Slow-drying medium or retarder (optional but helpful for blending)
- Palette knife for mixing
- Water container and rag
- Easel
Step 1: Setting the Atmosphere
-
Prepare the palette:
Squeeze out generous amounts of Burnt Umber and Titanium White. Add smaller amounts of Raw Umber and a touch of Yellow Ochre. Mix a mid-tone ‘milk chocolate’ shade using Burnt Umber and White to serve as your base transition color. -
Map the composition:
Using a watered-down Raw Umber and your round brush, fastly sketch the main cloud shapes. Create a large, diagonal cloud mass sweeping from top left to bottom right, leaving the upper right area open for the lighter sky. -
Block in darks:
With the large flat brush, apply pure Burnt Umber to the darkest areas of the composition: the bottom left corner, the deep pockets between cloud formations, and the very top edge of the canvas. -
Establish the light source:
Mix Titanium White with a tiny speck of Yellow Ochre and Burnt Umber to create a warm cream color. Apply this to the upper right section of the canvas, brushing loosely to create a hazy, bright sky backdrop.
Muddy Clouds?
If your clouds turn gray or muddy, stop blending! Let the layer dry completely, then apply fresh, clean highlights on top. Overworking wet paint destroys contrast.
Step 2: Sculpting the Clouds
-
Create the mid-tones:
Switch to your filbert brush. Load it with your ‘milk chocolate’ mix and begin painting the edges of the dark cloud masses where they meet the light sky. Use a circular, scrubbing motion to create soft, billowy edges. -
Build volume:
Mix a slightly lighter brown (add more white to your milk chocolate mix). Apply this to the rounded tops of the cloud clusters. I find it helps to think of these as irregular spheres—paint the side facing the light source (upper right) with this lighter tone. -
Blend the transitions:
While the paint is still wet, use a clean, dry filbert brush to gently feather the boundary between the dark umber shadows and the mid-tone browns. This creates the soft, gaseous look characteristic of storm clouds. -
Add deep contrast:
Go back into the deepest crevices of the clouds with pure Burnt Umber or a mix of Burnt Umber and a tiny touch of black if you have it. This intensifies the drama and makes the lighter areas pop forward.
Step 3: Refining and Detailing
-
Highlight the edges:
Mix a bright highlight color using mostly Titanium White with just a hint of the underlying brown to keep it cohesive. Using the tip of a smaller brush, dab this onto the very edges of the cloud formations that catch the most light. -
Scumble for texture:
Take a fairly dry brush with a small amount of lighter paint and lightly drag it over the darker areas. This ‘scumbling’ technique creates wispy, vaporous textures that break up solid blocks of color. -
Soften the background sky:
Return to your cream sky area. If it looks too flat, add very faint wisps of white/ochre clouds in the distance to give it depth, ensuring they are much softer and less detailed than the foreground storm clouds. -
Check values:
Step back from your easel. Ensure you have a full range of values from the deepest dark brown to the brightest cream. If the painting looks muddy, re-apply your darkest darks and brightest lights.
Pro Tip: Edge Control
Make the edges of the clouds near the light source sharper and crisper, while keeping the shadow edges soft and blurry. This mimics how light naturally behaves.
Step 4: Grounding the Scene
-
Paint the horizon:
At the very bottom of the canvas, use your flat brush to paint horizontal strokes of dark brown mixed with a little Yellow Ochre. This suggests a distant flat landscape or water reflecting the sky. -
Add the tree silhouette:
Mix your darkest possible color (Burnt Umber + Raw Umber). Using the small round brush or the edge of a flat brush, dab in a jagged, uneven line of trees along the horizon. -
Soften the tree line:
While the trees are wet, gently pull slightly upward in a few spots to suggest taller trees, and blend the bottom of the tree line into the horizontal ground strokes so they feel rooted in the landscape. -
Final glazes:
Once the painting is dry to the touch, you can apply a very thin, watery wash of Yellow Ochre over the transition area between dark clouds and light sky to add a warm, golden glow to the whole piece.
Step back and admire the powerful atmosphere you have captured in just a few varied tones of brown

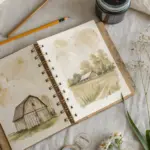
Brown Ink Line-and-Wash Sketch
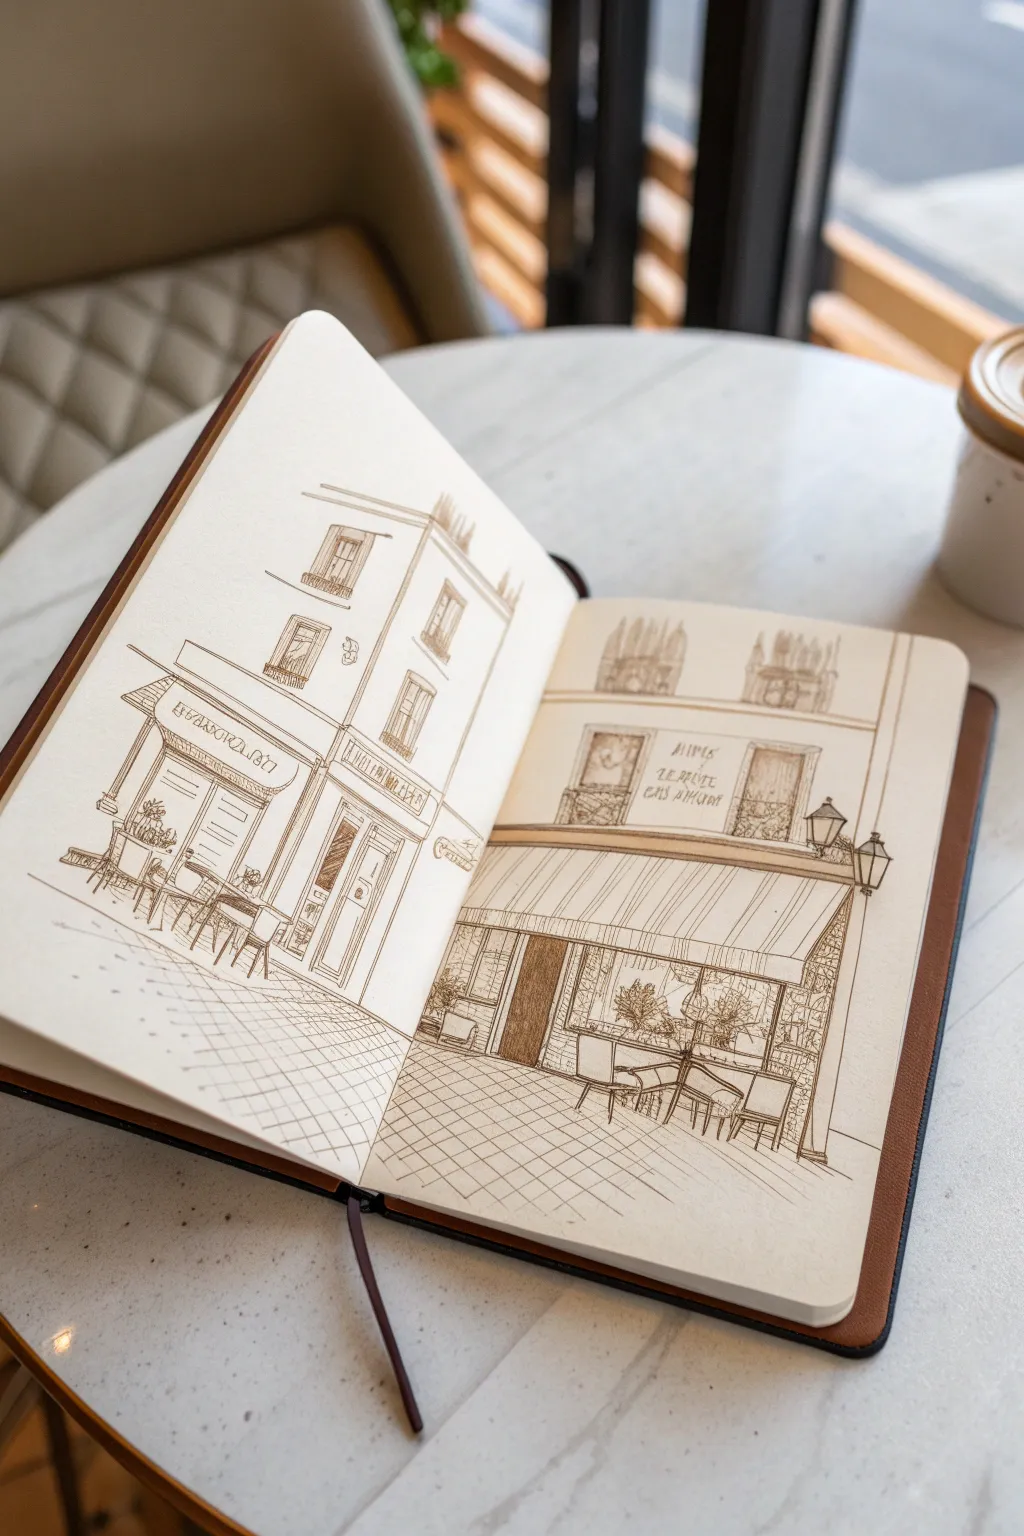
Capture the charm of a sun-drenched European street corner with this continuous architectural sketch spread across two pages. Using sepia-toned ink creates a warm, timeless feel that gives the illustration a classic travel-journal aesthetic without needing a full palette of colors.
Detailed Instructions
Materials
- Hardbound sketchbook (A5 landscape or similar)
- Brown/Sepia fineliners (0.1mm, 0.3mm, 0.5mm)
- HB Pencil
- Kneaded eraser
- Ruler (optional)
- White gel pen (optional for highlights)
Step 1: Drafting the Layout
-
Establish the horizon line:
Begin with your pencil, lightly drawing a horizon line about one-third up from the bottom of the page. This line should stretch across both pages to connect the scene seamlessly. -
Block in major shapes:
Sketch the large rectangles that will become the buildings. Place a tall, narrow building on the left page and a slightly wider, shorter façade on the right page. -
Define the perspective:
Draw the diagonal lines for the awnings and sidewalks, ensuring they angles roughly converge toward a vanishing point on the far left. This creates that inviting depth into the corner. -
Mark window placements:
Lightly indicate where the upper windows and the storefront entrances will go. Keep these loose; precise details aren’t necessary yet.
Loose Lines
Don’t connect every line perfectly. Leaving small gaps in the outlines of buildings or furniture creates a breezier, more artistic sketch style.
Step 2: Inking the Structure
-
Outline the main walls:
Review your pencil lines. Once you are happy with the proportions, use a 0.3mm sepia pen to ink the vertical lines of the building corners and walls. -
Detail the upper windows:
Switch to a 0.1mm pen for the intricate window frames on the upper floors. Add small, quick scribbles inside the windows to suggest reflections or curtains. -
Draw the awnings:
Use the 0.3mm pen to draw the outline of the large awnings. For the striped texture on the right page’s awning, use quick, parallel strokes with the 0.1mm pen. -
Create the storefront signage:
Carefully letter the shop names on the fascia boards. Don’t worry about perfect typography; a slightly handwritten look adds character to a travel sketch.
Coffee Wash
For an authentic vintage look, use a waterbrush and a tiny bit of leftover espresso to paint light shadows over your waterproof ink lines.
Step 3: Adding Atmosphere and Texture
-
Flesh out the ground floor:
Draw the large glass windows of the shops. Use vertical hatching lines to suggest glass reflections and depth inside the store. -
Sketch the furniture:
Add the tables and chairs on the sidewalk. Outline the shapes first, focusing on the simple geometry of the seat backs and tabletops. -
Detail the seating:
Refine the chair legs and table bases. Since they are delicate, a 0.1mm pen works best here to avoid making the furniture look clunky. -
Add foliage:
Scribble loose, organic shapes in the window boxes and planters near the doors. This organic texture contrasts nicely with the straight architectural lines. -
Draw sidewalk pavers:
Create the pavement texture by drawing a grid of diagonal lines. Fade the lines out as they move toward the bottom of the page to create a vignette effect.
Step 4: Final Polish
-
Strengthen shadows:
Switch to your 0.5mm pen to darken the deepest shadows, such as under the awnings and inside the open doorways. This contrast makes the sketch pop. -
Add street lamps:
Draw the classic lantern-style street lamps attached to the building façade on the right page. -
Erase pencil guides:
Wait for the ink to dry completely to avoid smudging. Then, gently use the kneaded eraser to lift all visible pencil marks. -
Final assessment:
Look for any gaps in your line work. Add tiny dots or broken lines on the pavement or walls to suggest grit and age without overworking the drawing.
Now you have a charming architectural spread that captures the essence of a quiet café morning
BRUSH GUIDE
The Right Brush for Every Stroke
From clean lines to bold texture — master brush choice, stroke control, and essential techniques.
Explore the Full Guide
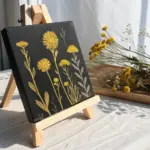
Minimal Botanicals in Taupe
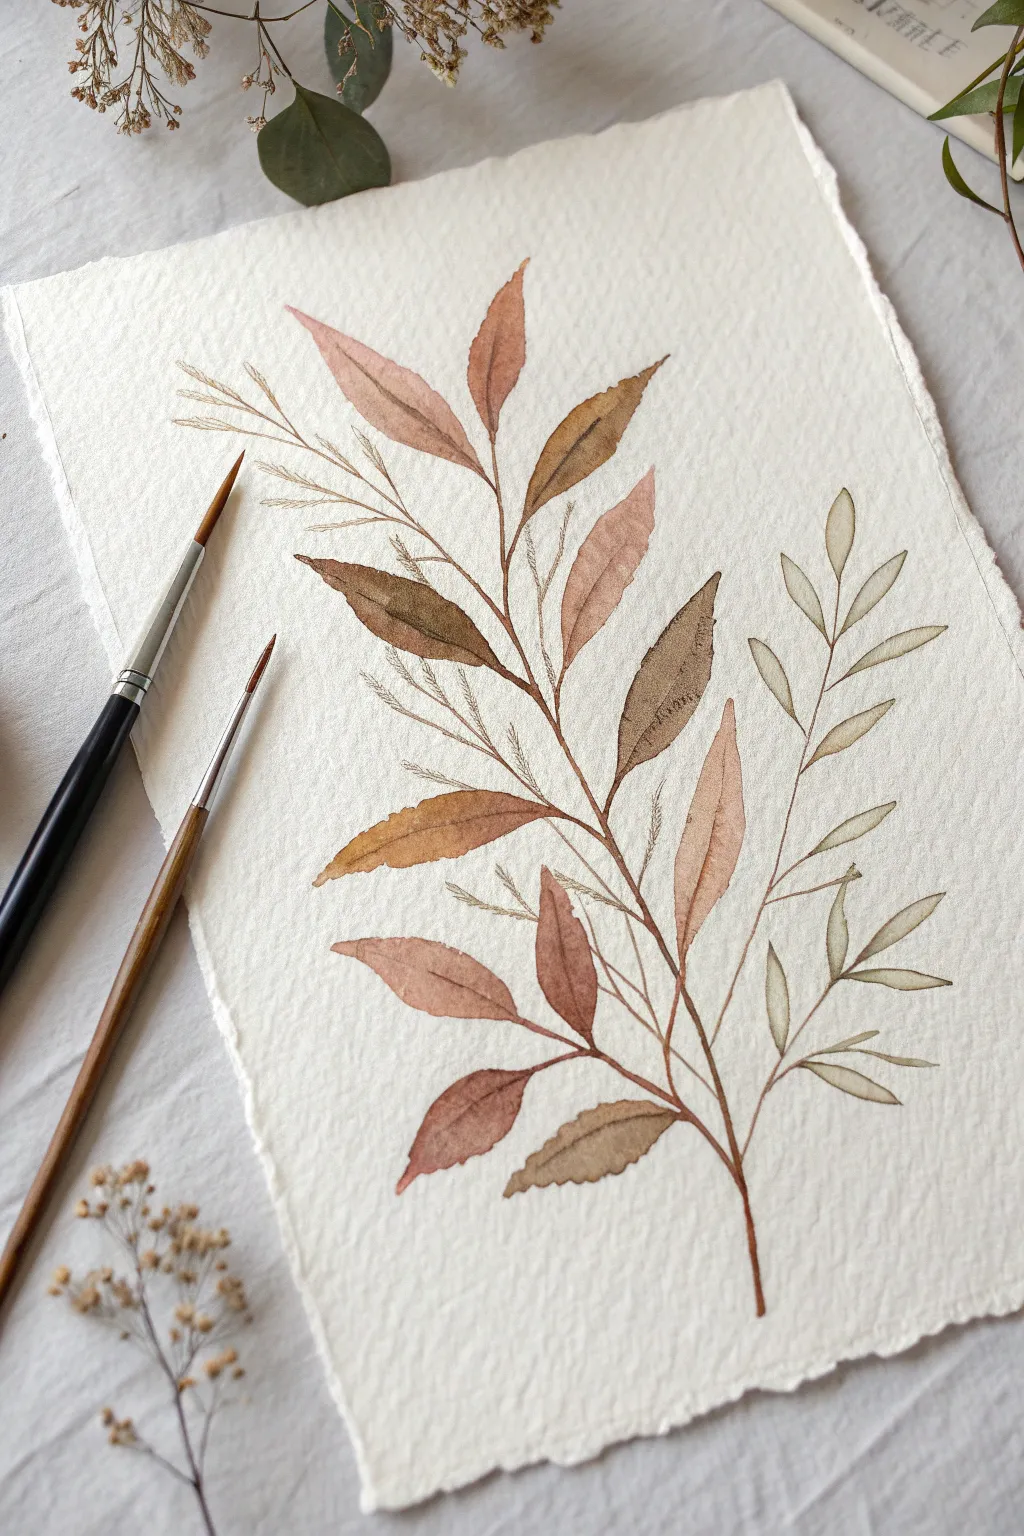
Capture the delicate beauty of autumn with this minimalist watercolor study featuring soft taupe, muted umber, and whisper-light sage tones. The composition relies on the interplay between a main, prominent branch and delicate, ghostly underlying foliage to create depth and movement.
Detailed Instructions
Materials
- Cold press watercolor paper (deckle edge preferred, 300gsm)
- Round watercolor brushes (size 4 and size 0 or 1 for details)
- Watercolor paints: Burnt Umber, Yellow Ochre, Sepia, and Olive Green
- Two jars of water (one simple, one soapy if needed, or just clean)
- Paper towel
- Pencil (HB or lighter) and kneaded eraser
Step 1: Planning the Composition
-
Light Sketching:
Begin by lightly sketching the main stem with an HB pencil. Curve it diagonally across the page, starting from the bottom right and reaching toward the top left. Add simple lines indicating where the main leaves will branch off. -
Mapping Secondary Foliage:
To the right of the main stem, lightly sketch a smaller, straighter vertical stem. This will become the paler, greenish sprig later. Mark out thin lines for the feathery background grasses on the left side, keeping your pencil pressure extremely light so it doesn’t show through the paint.
Muddy colors?
If your taupes look muddy, you’re over-mixing. Use just 2 colors (like brown + green) and stop mixing while streaks are still visible. Let them blend naturally on the paper.
Step 2: Painting the Main Branch
-
Mixing Your Palette:
Create a puddle of ‘Taupe’ by mixing Burnt Umber with a touch of Sepia and plenty of water. Create a second puddle of ‘Warm Rust’ using Burnt Umber and a tiny bit of Yellow Ochre. You want these mixes to be fluid but not watery. -
The Central Stem:
Load your size 4 brush with the darker Sepia mix. Paint the main central stem first, using the tip of the brush for a fine line that thickens slightly at the joints where leaves attach. Let this dry for a minute. -
First Leaf Layer:
Start with the leaves at the bottom left. Load your brush with the Warm Rust mix. Press the belly of the brush down to create the wide part of the leaf, then lift as you pull outward to create a pointed tip. This pressure-and-lift technique gives the leaves their natural shape. -
Color Variation:
As you move up the stem to the middle leaves, dip your dirty brush into the Taupe puddle. This creates a natural, subtle variation in color. Paint the large leaves on the right side of the stem with this cooler, earthier tone. -
Top Foliage:
For the uppermost leaves, dilute your paint slightly with more water. Paint these leaves with a lighter touch, making them slightly smaller/narrower than the ones at the base to suggest distance and growth. -
Contrast Details:
While the larger taupe leaves are still slightly damp (but not soaking), drop a tiny amount of darker Sepia into the base of one or two leaves. This wet-on-wet technique adds instant volume and shadow. -
Adding Texture:
Once the main branch leaves are fully dry, use your size 0 or 1 brush with a concentrated brown mix to paint the central veins. Keep lines broken and delicate rather than drawing a solid line from base to tip.
Pro Tip: Edges Matter
To get that crisp leaf edge, ensure your brush tip is perfectly pointed before touching the paper. Roll the wet brush on your palette to reshape the bristles into a sharp point.
Step 3: The Ghost Elements
-
Mixing Sage Green:
Clean your palette area. Mix a very watery wash of Olive Green with a tiny touch of Burnt Umber. Test it on scrap paper; it should look very pale and desaturated, almost transparent. -
The Right-Hand Sprig:
Using the size 4 brush, paint the vertical sprig on the right side. Paint the stem and small, almond-shaped leaves all in one go. Because the paint is so watery, these leaves will look soft and receding compared to the bold main branch. -
Adding Veins to Pale Leaves:
Wait for the sage sprig to dry completely. Then, using the same green mix but with slightly less water, paint a single, very thin central vein line on each of these small leaves. -
Feathery Grasses:
Switch to your finest detail brush (size 0). Mix a very pale, watery brown—almost the color of tea. On the left side of the main branch, paint the feathery grass stalks using quick, flicking motions. -
Refining the Grass:
Add tiny, hair-like offshoots to the grass stems. Keep your hand loose and don’t worry about perfection; these should look like dried, brittle textures in the background.
Step 4: Final Touches
-
Connecting Stems:
Check where your leaves meet the main stem. Use the detail brush to refine the connections, ensuring every leaf feels securely attached to the branch. -
Deepening Shadows:
I like to take a final look at the darkest brown leaves. If they look too flat, apply a second glaze of translucent dark brown over just the shadowed half of a leaf to increase the contrast. -
Serrated Edges:
For a little extra realism on the larger brown leaves, use a slightly dry detail brush to roughen the edges slightly, mimicking the serrated texture seen in nature.
Allow your painting to dry completely before erasing any visible pencil marks to maximize the crisp, ethereal effect
Vintage Sepia Collage Painting
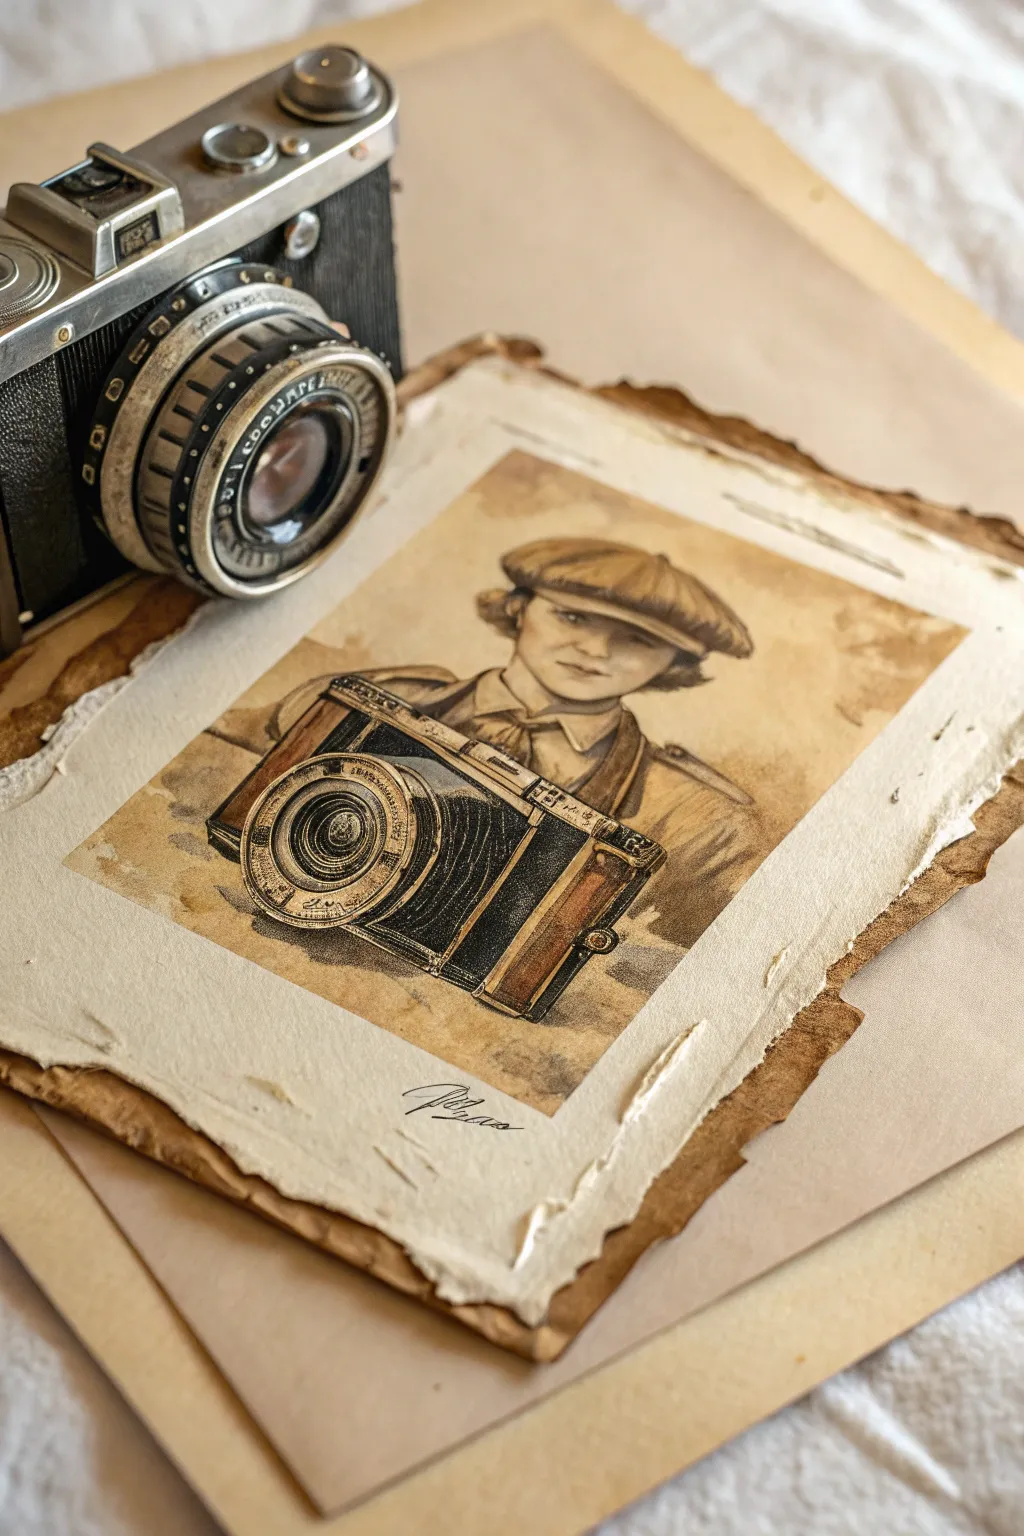
Capture the nostalgia of early photography with this layered mixed-media piece that combines sepia watercolor washes with fine ink detailing. You will create a faux-vintage artifact featuring ragged, hand-torn edges and authentic-looking coffee staining effects.
Step-by-Step Guide
Materials
- Heavyweight watercolor paper (300gsm, cold press)
- Kraft paper or brown cardstock (for backing)
- Sepia and Burnt Umber watercolor paints
- Instant coffee granules
- Fine liner pens (Black and Sepia, sizes 0.1, 0.3, 0.5)
- Pencil (HB) and kneaded eraser
- Soft round brushes (sizes 4 and 8)
- Flat brush (1 inch)
- White gel pen or gouache
- Ruler
- Craft glue or mounting tape
Step 1: Preparing the Aged Surface
-
Tear the edges:
Begin by taking your main sheet of watercolor paper. Instead of cutting it, carefully tear the edges by hand to create a rough, deckled look. Pull the paper away from you to expose the inner fibers. -
Create a coffee stain:
Mix a strong solution of instant coffee in warm water. Using the flat brush, apply a messy, uneven wash across the entire paper surface. Don’t worry about puddles; they add character. -
Add localized aging:
While the paper is still damp, drop concentrated coffee or Burnt Umber watercolor into the corners and along the torn edges to simulate handling marks. -
Dry and flatten:
Let the paper dry completely. If it buckles significantly, place it under a heavy book for an hour, but leave some texture as it enhances the antique feel.
Fixing Muddy Watercolors
If your sepia tones look muddy or flat, let the paper dry fully, then glaze over the shadows with a transparent burnt sienna to bring back warmth and glow.
Step 2: Sketching the Composition
-
Outline the figure:
Lightly sketch the subject using an HB pencil. Focus on the large shapes first: the tilt of the newsboy cap, the collar, and the placement of the hands. -
Draft the camera:
Draw the large box camera in the foreground. Use a ruler to get the perspective of the bellows and the lens housing correct, keeping lines faint so they can be adjusted. -
Refine the details:
Tighten up your sketch, adding details like the creases in the clothing, the texture of the camera grip, and the facial features.
Step 3: Sepia Watercolor Painting
-
First wash:
Dilute your Sepia watercolor to a tea-like consistency. Apply a wash over the figure’s skin and coat, preserving the white of the paper for the brightest highlights on the face and the camera lens. -
Deepen shadows:
Mix a thicker, creamier consistency of Sepia or Burnt Umber. Paint the shadows under the cap brim, the folds of the jacket, and the dark sides of the camera body. -
Camera details:
For the camera bellows and leather sections, use your darkest brown mix. Paint carefully around the metallic trims to keep them lighter. -
Background texture:
Add faint cloud-like splotches of dilute brown around the figure’s head to separate the subject from the empty background without creating a hard line.
Burned Edges Effect
Carefully run a lit match along the very edge of the torn paper (outdoors/safe area) to create authentic charred borders that crumble slightly.
Step 4: Inking and Definition
-
Outline contours:
Once the paint is bone dry, use a 0.3 black or sepia fineliner to outline the main forms. Use broken lines for fabric to keep it looking soft. -
Cross-hatching shadows:
I particularly enjoy using a 0.1 pen here to add cross-hatching in the deepest shadow areas, such as the neck and underneath the camera, to mimic old print styles. -
Technical details:
Switch to a 0.5 pen for the camera’s mechanical parts. Draw the concentric circles of the lens and the hard edges of the metal frame with precision. -
Sign the work:
Add a signature at the bottom using a quick, fluid motion with the black pen.
Step 5: Final Assembly
-
Prepare the backing layer:
Take a separate piece of kraft paper or brown cardstock that is slightly larger than your painting. Tear its edges roughly as well, making it more jagged than the top layer. -
Distress the backing:
Brush the edges of this backing paper with dark brown paint or ink to frame the composition. -
Mounting:
Apply glue or mounting tape to the center of the backing paper. Press your finished painting onto it, leaving the torn brown edges visible underneath. -
Final highlights:
Use a white gel pen or a tiny touch of white gouache to add a specular highlight to the camera lens glass and the figure’s eyes to bring them to life.
Display your finished piece on a wooden desk or frame it in a shadow box to emphasize the beautiful texture of the torn paper edges

PENCIL GUIDE
Understanding Pencil Grades from H to B
From first sketch to finished drawing — learn pencil grades, line control, and shading techniques.
Explore the Full Guide
Bronze Patina Effects
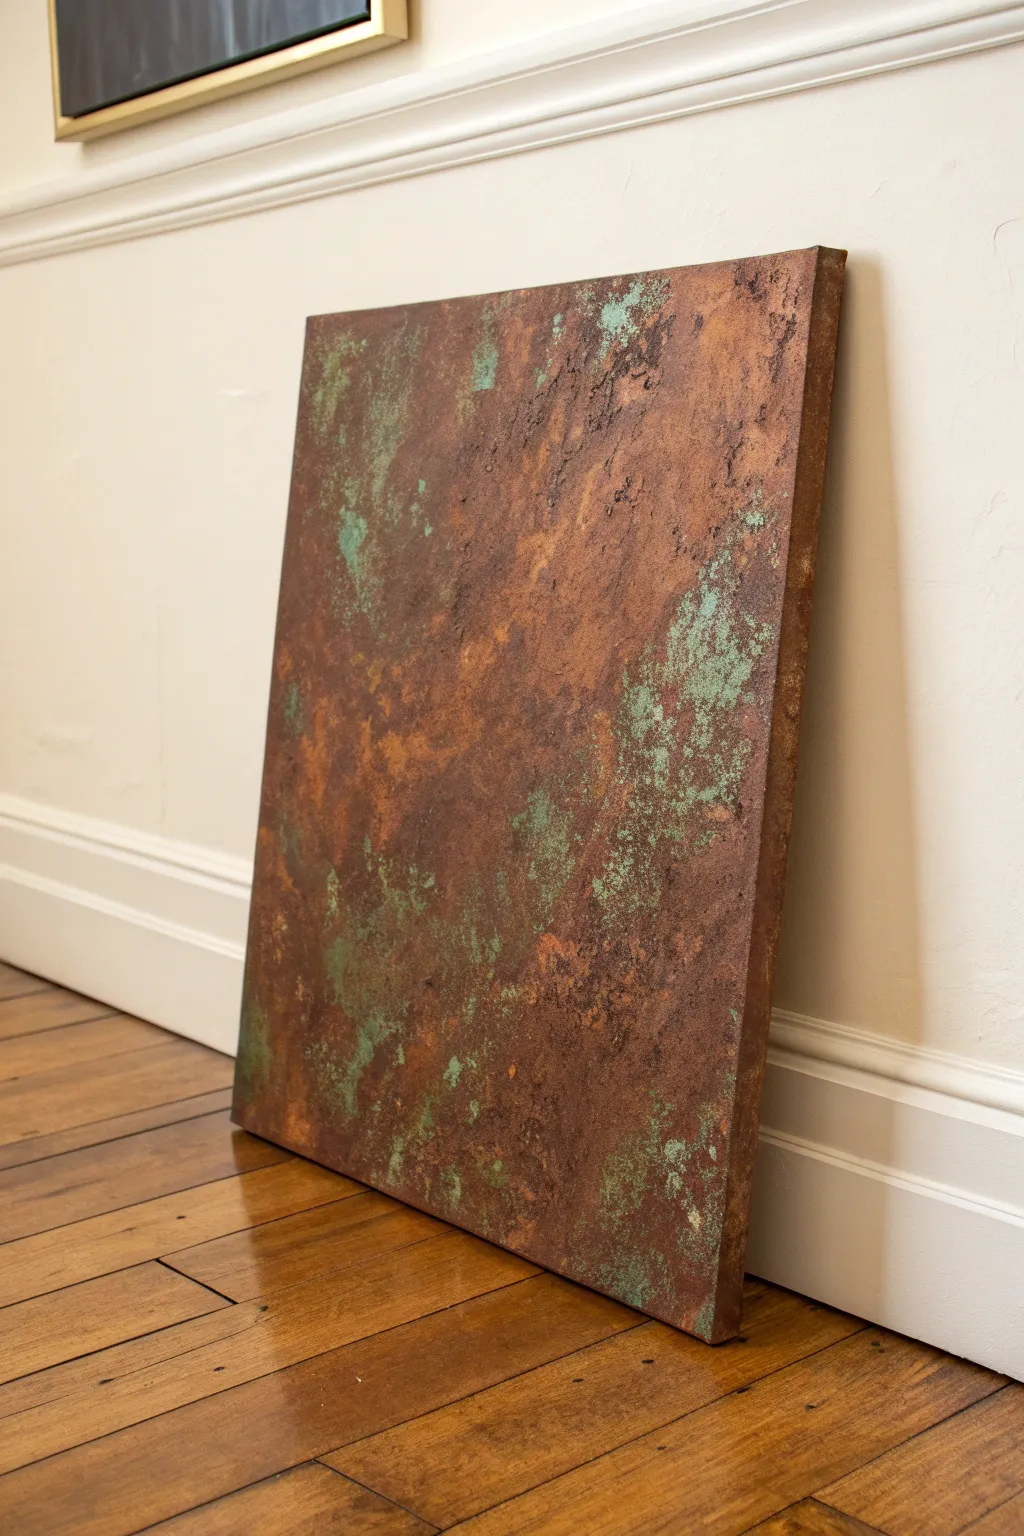
Transform a plain canvas into a stunning faux-metal sheet that looks like it has weathered the elements for decades. This technique combines rich metallic browns with oxidized turquoise hues to create a textured, industrial masterpiece perfect for modern or rustic decor.
Step-by-Step
Materials
- Large stretched canvas (deep edge preferred)
- Black gesso or black acrylic paint
- Modeling paste or coarse pumice gel
- Palette knives (assorted sizes)
- Metallic bronze acrylic paint
- Metallic copper acrylic paint
- Dark umber acrylic paint
- Patina green or turquoise acrylic paint
- Sea sponge or natural sponge
- Spray bottle with water
- Matte spray varnish
Step 1: Building the Foundation
-
Prime the Surface:
Start by coating your entire canvas with black gesso. Make sure to cover the sides thoroughly, as this artwork is intended to look like a solid metal slab from all angles. Allow this base layer to dry completely. -
Add Texture:
Using a palette knife, apply modeling paste or pumice gel randomly across the canvas. Avoid a smooth finish; instead, create ridges, rough patches, and uneven areas to mimic corroded metal. Focus some heavier texture near the corners. -
Create Pockmarks:
While the paste is still wet, press a dry sea sponge or even crumpled foil into the texture paste in various spots to create organic, pitted surfaces. Let the texture layer cure for at least 2-4 hours or until hard. -
Base Color Application:
Paint a layer of dark umber over the dried texture paste. You don’t need perfect coverage; letting some black peek through the deepest crevices adds instant depth to the final piece.
Step 2: Creating the Metal Effect
-
Bronze Layer:
Squeeze out your metallic bronze paint. Using a dry brush or a sponge, stipple the paint over the dark brown layer. Use a light hand so the paint catches on the raised texture but leaves the lower areas dark. -
Copper Highlights:
While the bronze is still slightly tacky or just after drying, repeat the process with the metallic copper paint, focusing on the highest ridges of your texture. This creates the variation seen in real aging metal. -
Blend the Metals:
Take a clean, dry chip brush and lightly sweep over the surface to blend the transition between the copper and bronze areas slightly, ensuring there are no harsh brush strokes visible. -
Dry Time:
Allow the metallic layers to dry fully. This is crucial because we will be using water in the next phase, and we don’t want the metal paint to muddy up.
Natural Texture
Mix clean sand or even dried used coffee grounds into your base acrylic paint for a gritty, gritty rust texture that looks incredibly realistic.
Step 3: Developing the Patina
-
Prepare the Patina Mix:
Thicken your turquoise or patina green paint slightly if it’s too runny, or keep it fluid if you want drips. For the look in the image, a standard creamy acrylic consistency works best. -
Initial Patina Application:
Dab the green paint onto the canvas using a sea sponge. Concentrate on areas where water would naturally collect on metal—often in the textured pits or drifting down from the top edge. -
The Spritz Method:
Immediately mist the wet green paint with water from your spray bottle. This causes the pigment to separate and flow naturally into the cracks of your texture paste. -
Blotting Back:
I like to take a crumpled paper towel and blot up excess water and paint almost immediately. This leaves the green pigment stuck in the ‘pores’ of the texture while revealing the shiny metal on the high points. -
Enhancing Contrast:
If the green looks too flat, mix a tiny drop of white into your turquoise and dab it sparingly on top of the existing green patches to mimic calcified oxidation. -
Detail Work:
Use a small detail brush to add flecks of pure bronze back on top of any large green areas that feel too heavy, creating a layered look where the rust appears to be eating through the metal. -
Final Inspection:
Step back and assess the balance. You want a mix of deep darks, shining metals, and crusty greens. Add more copper to the edges if the frame needs definition. -
Seal the Work:
Once absolutely dry (give it 24 hours due to the texture thickness), apply a matte spray varnish. A gloss varnish would make it look like plastic; matte preserves the dry, crusty look of real rust.
Active Reactants
For a true chemical reaction, use Iron Paint and an oxidizing activator spray instead of acrylics. The rust will be real and continue to develop over time.
Hang your new industrial art piece in a well-lit spot to let the metallic flecks catch the light
Natural Pigment Mud Painting
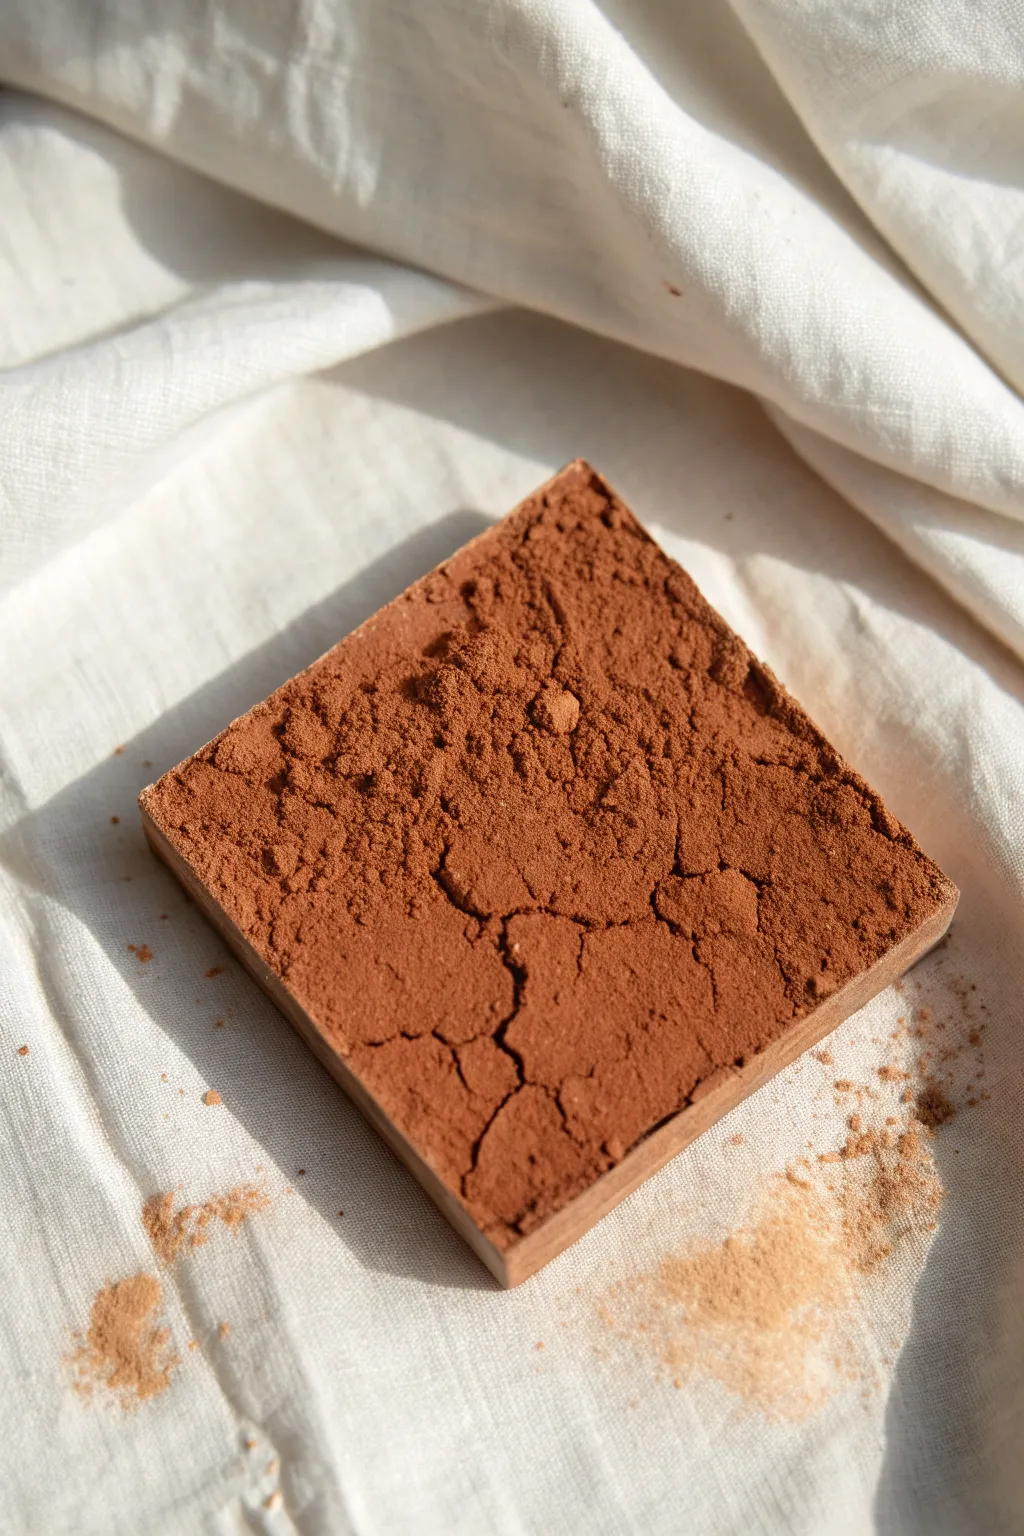
Embrace the raw beauty of natural materials by creating your own compressed earth pigment block. This project results in a stunningly textured, cracked-surface square that serves as both a sculptural object and a functional source of natural paint.
Detailed Instructions
Materials
- Red clay soil or store-bought dry red clay powder
- Square wooden casting frame or small box mold (approx. 4×4 inches)
- Pestle and mortar (or a rolling pin and heavy bag)
- Fine mesh sieve
- Gum arabic (powdered or liquid)
- Water spray bottle
- Palette knife
- Clean cotton cloth
- Flat board for pressing
Step 1: Preparation & Processing
-
Source your earth:
Collect dry, red-toned soil from your garden or use a store-bought natural dry clay powder. If collecting wild soil, ensure it is completely dry before beginning. -
Crush the material:
Place your dry earth into a mortar and grind it down with the pestle. You are aiming for a consistent, somewhat fine texture, though keeping some grit adds character. -
Sift for purity:
Pass the ground earth through a fine mesh sieve to remove large organic matter like rocks, roots, or leaves. -
Assess quantity:
Ensure you have enough sifted powder to fill your chosen square mold to the brim, as the material will compress significantly. -
Prepare the binder:
In a separate small dish, mix a teaspoon of gum arabic powder with a small amount of warm water until dissolved. This acts as the glue that holds the block together.
Crack Control
For deeper fissures, use slightly less binder and dry the block near a gentle heat source. The stress of quick evaporation creates those dramatic lines.
Step 2: Mixing & Molding
-
Incorporate the binder:
Gradually sprinkle the gum water or liquid gum arabic into your sifted earth pile. I like to use my hands here to ensure it’s evenly distributed. -
Check consistency:
The mixture should feel like slightly damp sand—it should hold together when squeezed tightly but crumble apart easily. Do not make it wet or muddy. -
Prepare the mold:
Place your square frame on a flat board covered with a clean cotton cloth. This cloth adds a nice texture to the bottom. -
Fill the frame:
Pour the damp earth mixture into the mold, overfilling it slightly to account for compression. -
Initial distribution:
Use a palette knife to spread the earth into the corners, ensuring there are no air pockets hidden at the bottom.
Paint With It
This isn’t just decor! Rub a wet wet brush directly onto the block’s surface to activate the gum arabic and lift the pigment for watercolor-style painting.
Step 3: Compression & Finishing
-
The press:
Place a rigid, flat board that fits just inside your mold on top of the powder. Press down firmly with your body weight to compact the earth. -
Create the texture:
Remove the pressing board. Use your palette knife or fingers to roughen the surface slightly if it looks too uniform. -
Induce cracking:
To achieve the specific cracked look in the photo, lightly mist the surface with water, then let it dry rapidly in a warm spot or sunlight. The rapid drying pulls the surface apart. -
Unmold:
Once the block feels solid but not fully cured (usually after a few hours), carefully slide the frame upward to release the square. -
Dusting details:
Take a pinch of dry, unmixed pigment powder and sprinkle it over the cracks and edges to enhance the velvety, matte appearance. -
Final cure:
Let the block dry completely for 24-48 hours in a dry, ventilated area before handling or using it as paint.
Now you have a piece of earth preserved in a perfect geometric form, ready to display or use


Have a question or want to share your own experience? I'd love to hear from you in the comments below!