When I’m craving that cozy, illustrated look, I grab my gouache—it’s hard to beat that velvety matte finish and satisfying opacity. Here are my go-to aesthetic gouache painting ideas that feel calming, whimsical, and totally doable, even on a busy day.
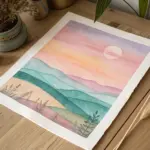
Dreamy Sunset Cloudscape
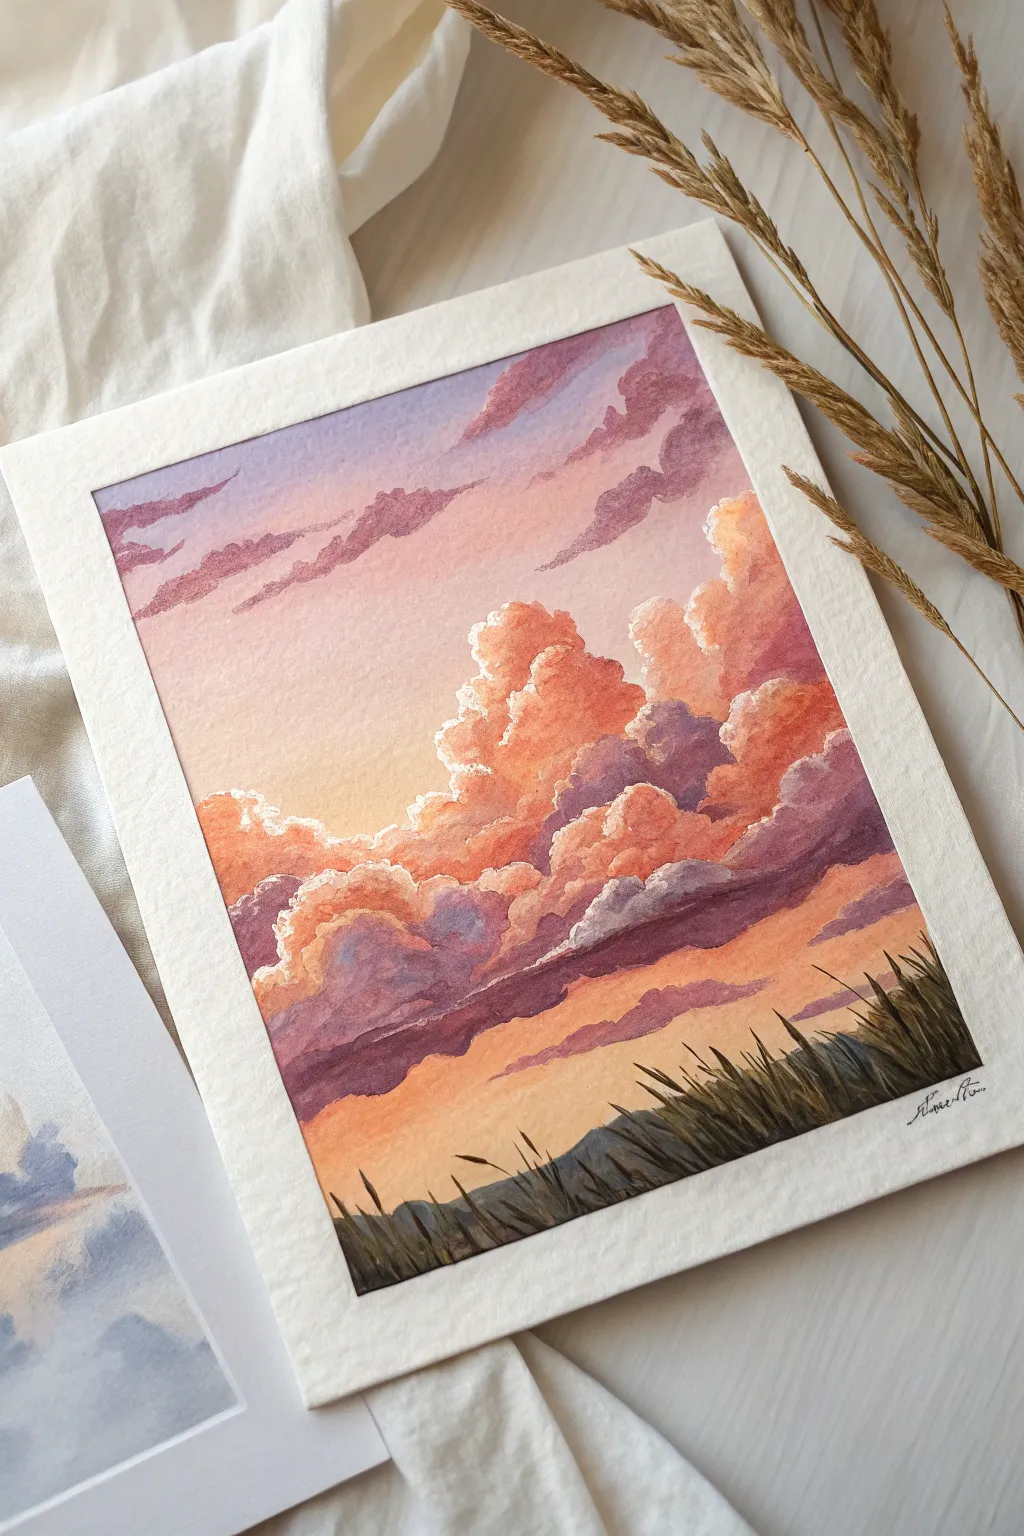
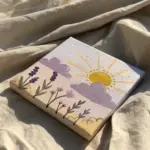
Capture the magic of golden hour with this dreamy gouache cloudscape, featuring billowing cumulus formations awash in peach, lavender, and violet hues. The soft gradients and layered textures create a glowing atmosphere that feels both vibrant and serene.
Step-by-Step Guide
Materials
- Gouache paint set (primary colors plus white, peach, violet, burnt sienna)
- Cold press watercolor paper (300gsm suggested)
- Washi tape or masking tape
- Flat shader brush (size 6 or 8)
- Round synthetic brushes (sizes 2, 4, and 0 for details)
- Mixing palette
- Two jars of water
- Paper towels
Step 1: Setting the Sky Gradient
-
Prep the Surface:
Tape down all four edges of your watercolor paper to a rigid board. This creates the crisp white border seen in the reference and prevents the paper from buckling when wet. -
Mix the Base Colors:
Prepare three main puddles on your palette: a pale lavender (white + violet), a soft peach (white + orange + tiny dot of red), and a warm yellow-cream (white + yellow ochre). -
Paint the Upper Sky:
Using a wet flat brush, apply the pale lavender mix to the top third of the paper. Keep the paint creamy, not too watery, to ensure opacity. -
Blend the Transition:
While the lavender is still damp, rinse your brush and pick up the peach mixture. Apply this to the middle section, gently brushing upward into the lavender to create a smooth, seamless gradient. -
Finish the Horizon Glow:
Paint the bottom third with the warm yellow-cream mixture, blending it upwards into the peach. The goal is a soft ombré effect from purple to warm yellow.
Cloud Fluff Pro-Tip
Use a ‘scumbling’ technique for the clouds: load your brush with thick paint and scrub it in small circles. This creates a rough, fluffy texture perfect for cumulus edges.
Step 2: Building the Cloud Formations
-
Outline the Main Cloud Shape:
Once the background is completely dry, mix a vibrant coral-orange (orange + white + red). Using a size 4 round brush, lightly block out the silhouette of the large cumulus cloud in the center. -
Establish the Light Source:
Determine that the light is coming from the left/center. Paint the fluffy top edges of the clouds with a lighter version of your peach mix to define their shape against the sky. -
Add Mid-tone Shadows:
Mix a muted mauve color (violet + burntsienna + white). Apply this to the lower sections of the main cloud clusters, dabbing the brush to create a fluffy texture rather than smooth strokes. -
Deepen the Cloud Bases:
Create a darker purple-grey mix. Paint the undersides of the heavy clouds, extending them horizontally to suggest wind-blown layers. This adds weighted volume to the fluffier tops. -
Paint the Upper Wisps:
Use a diluted lavender-pink to add the thin, streak-like stratus clouds in the upper purple sky area. Keep these strokes loose and horizontal.
Level Up: Metallic Touch
Mix a tiny amount of gold gouache or watercolor into your cloud highlights. When the light hits the painting, the cloud linings will literally shimmer.
Step 3: Refining Details and Foreground
-
Highlight the Cloud Tips:
With a clean, damp brush and pure white (or very pale yellow) gouache, paint the absolute brightest edges of the cumulus clouds. This ‘rim lighting’ makes them pop. -
Soften the Edges:
I like to take a slightly damp, clean brush and gently run it along the bottom edges of the purple cloud shadows to soften them into the sky, keeping the top edges crisp. -
Add Middle-Ground Clouds:
Paint smaller, fragmented cloud shapes near the horizon using the mauve and coral mixes. These should look more compressed and less detailed than the main formation. -
Block in the Silhouette:
Mix a dark, muddy green or brownish-black. Using the tip of your round brush, paint a low, uneven hill shape at the very bottom of the composition. -
Paint the Grass Base:
Add short, vertical strokes along the hill shape to suggest a dense field of tall grass. Vary the height to keep it looking natural. -
Add Individual Blades:
Switch to your smallest detail brush (size 0). Paint distinct, long stalks of grass extending upward, crossing over the bottom of the glowing sky. -
Detail the Dried Grass:
Mix a slightly lighter olive tone and add highlights to the tips of the grass blades. Add small, seed-like shapes to the tops of a few prominent stalks. -
Final Assessment:
Step back and check your contrast. If the clouds look flat, add a deeper violet to the darkest crevices. Let everything dry completely. -
The Reveal:
Slowly peel away the masking tape at a 45-degree angle to reveal your crisp white border.
Enjoy the peaceful warmth radiating from your newly created sunset scene


Starry Night over Water
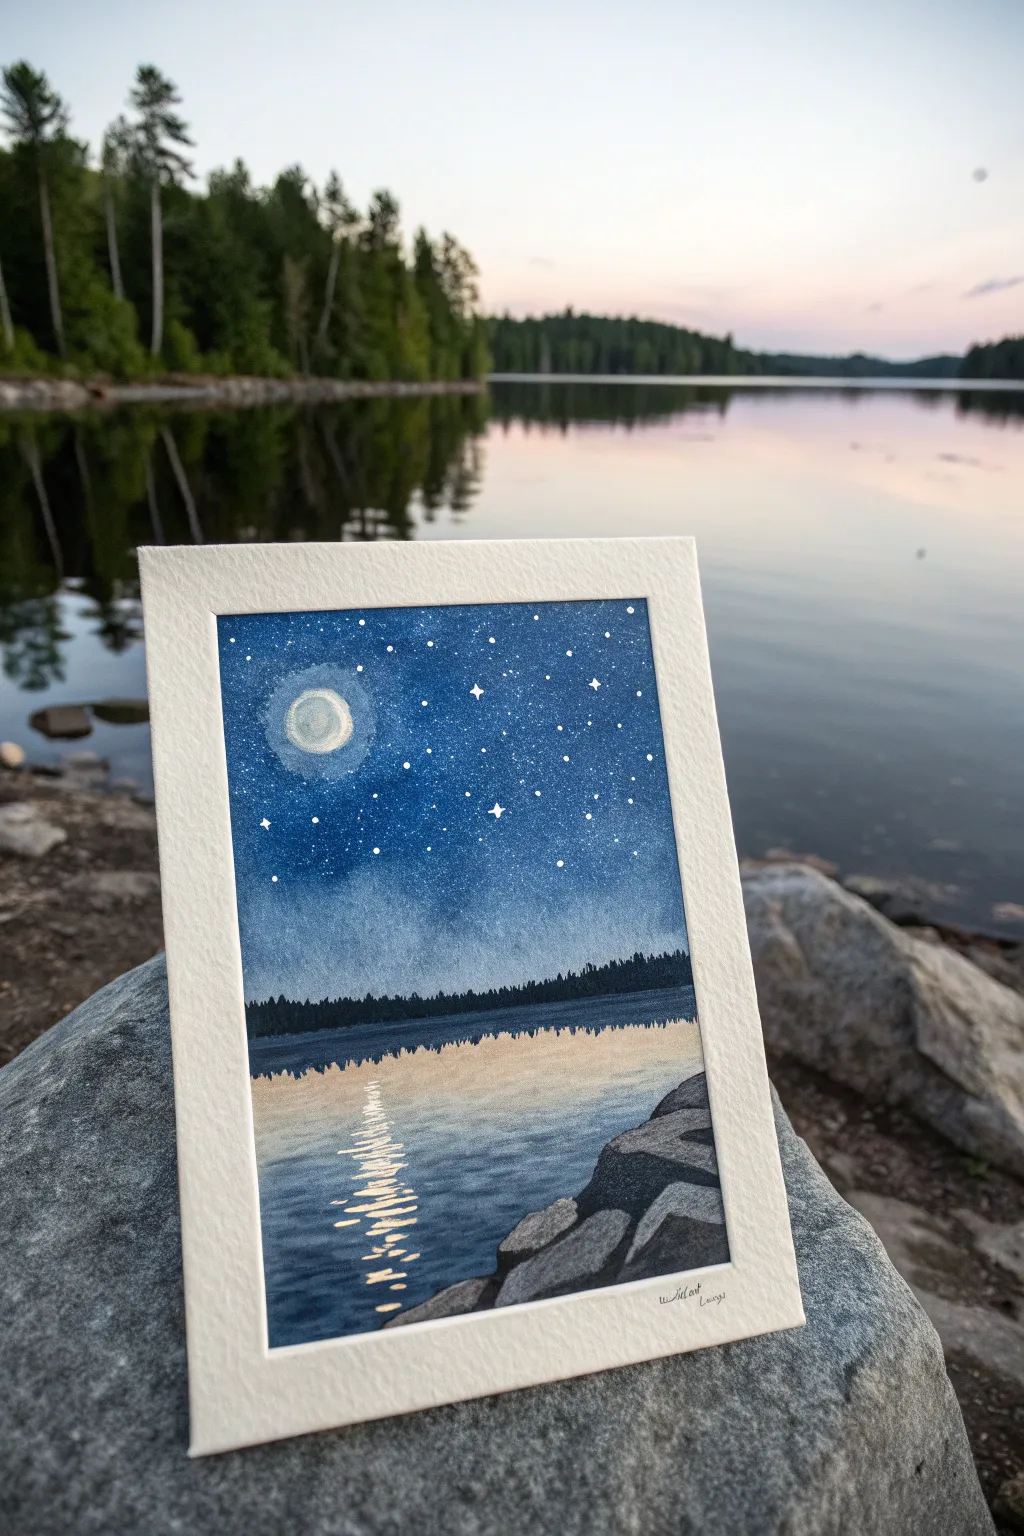
Capture the serene beauty of a peaceful lake under starlight with this gouache painting project. You will learn to blend a deep night sky, create shimmering water reflections, and layer rocky textures for a calming, aesthetic result.
Step-by-Step
Materials
- Gouache paint set (primary colors, black, and plenty of white)
- Watercolor paper (cold press, at least 300lb or taped down securely)
- Flat shader brush (approx. 1/2 inch)
- Small round detail brush (size 0 or 1)
- Masking tape
- Mixing palette
- Two water cups
- Paper towels
- Pencil and eraser
Step 1: Setting the Scene
-
Prepare your canvas:
Tape down all four edges of your watercolor paper to a board or table to create a crisp white border and prevent buckling. This is crucial for that polished, framed look. -
Sketch the horizon:
Lightly draw a horizontal line about one-third of the way up from the bottom of the paper. This separates the sky from the water. -
Outline the foreground:
Sketch a cluster of large, jagged rocks in the bottom right corner, overlapping the water line slightly.
Tape Trouble?
Does your paper tear when removing tape? Try heating the tape briefly with a hair dryer on a low setting before peeling. This softens the adhesive.
Step 2: Painting the Sky
-
Mix your sky colors:
Create a gradient palette: a deep midnight blue (ultramarine mixed with black or burnt umber) for the top, transitioning into a lighter cerulean blue, and finally a very pale, almost white-blue at the horizon line. -
Apply the dark sky:
Using your flat brush, paint the top third of the sky with your darkest midnight blue. Ensure the paint is creamy and opaque. -
Blend the transition:
While the top is still slightly wet, paint the middle section with the cerulean mix. Use back-and-forth horizontal strokes to blend it seamlessly into the dark blue above. -
Brighten the horizon:
Finish the sky by blending the pale blue down to the horizon line. The sky should look like it’s glowing from below. -
Create the moon:
Once the sky is dry, mix a tiny bit of yellow ochre with white. Paint a small circle in the upper left area. Don’t make it perfectly solid white; leave some texture for craters. -
Add the stars:
Load a wet toothbrush or stiff brush with watered-down white gouache and flick it over the sky area to create a spray of stars. Use a detail brush to manually paint larger, twinkling stars with cross shapes.
Level Up: Color Play
Swap the blue palette for purples and pinks for a ‘golden hour’ or fantasy effect. The same layering technique applies regardless of hue.
Step 3: The Water and Treeline
-
Paint the distant trees:
Mix a very dark, near-black blue-green. Using the tip of a small brush, dab a silhouette of pine trees all along the horizon line. Keep them small to show distance. -
Base layer for water:
Paint the water area with a medium blue, slightly darker than the horizon sky but lighter than the top sky. Use horizontal strokes. -
Add the sunset reflection:
While the blue base is wet, blend in a soft peach or pale warm yellow right below the tree line. This mimics the afterglow reflecting on the water. -
Paint the moon reflection:
Using pure white or pale cream, paint horizontal zigzag lines directly underneath the moon. Make the lines wider near the bottom and narrower near the horizon. -
Refine the water texture:
Add thin, dark blue horizontal lines across the water surface to suggest ripples and movement.
Step 4: Foreground Details
-
Base coat the rocks:
Mix a mid-tone grey using blue, orange, and white. Paint the entire rock shapes in the bottom right corner with this solid color. -
Add shadows to rocks:
Mix a dark charcoal grey. Paint the left and bottom sides of each individual rock to create dimension and separation. -
Highlight the rocks:
Using a light grey (almost white), paint the top edges of the rocks where the moonlight would hit them. -
Final dry touch:
Let everything dry completely. I like to double-check the stars here—if the splatter was too faint, dot a few brighter ones with pure white paint. -
Reveal the border:
Carefully peel off the masking tape at a 45-degree angle to reveal your clean, crisp edges.
Enjoy the calm feeling of your finished nightscape

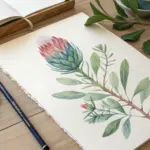
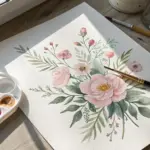
Wildflower Bouquet in a Vase
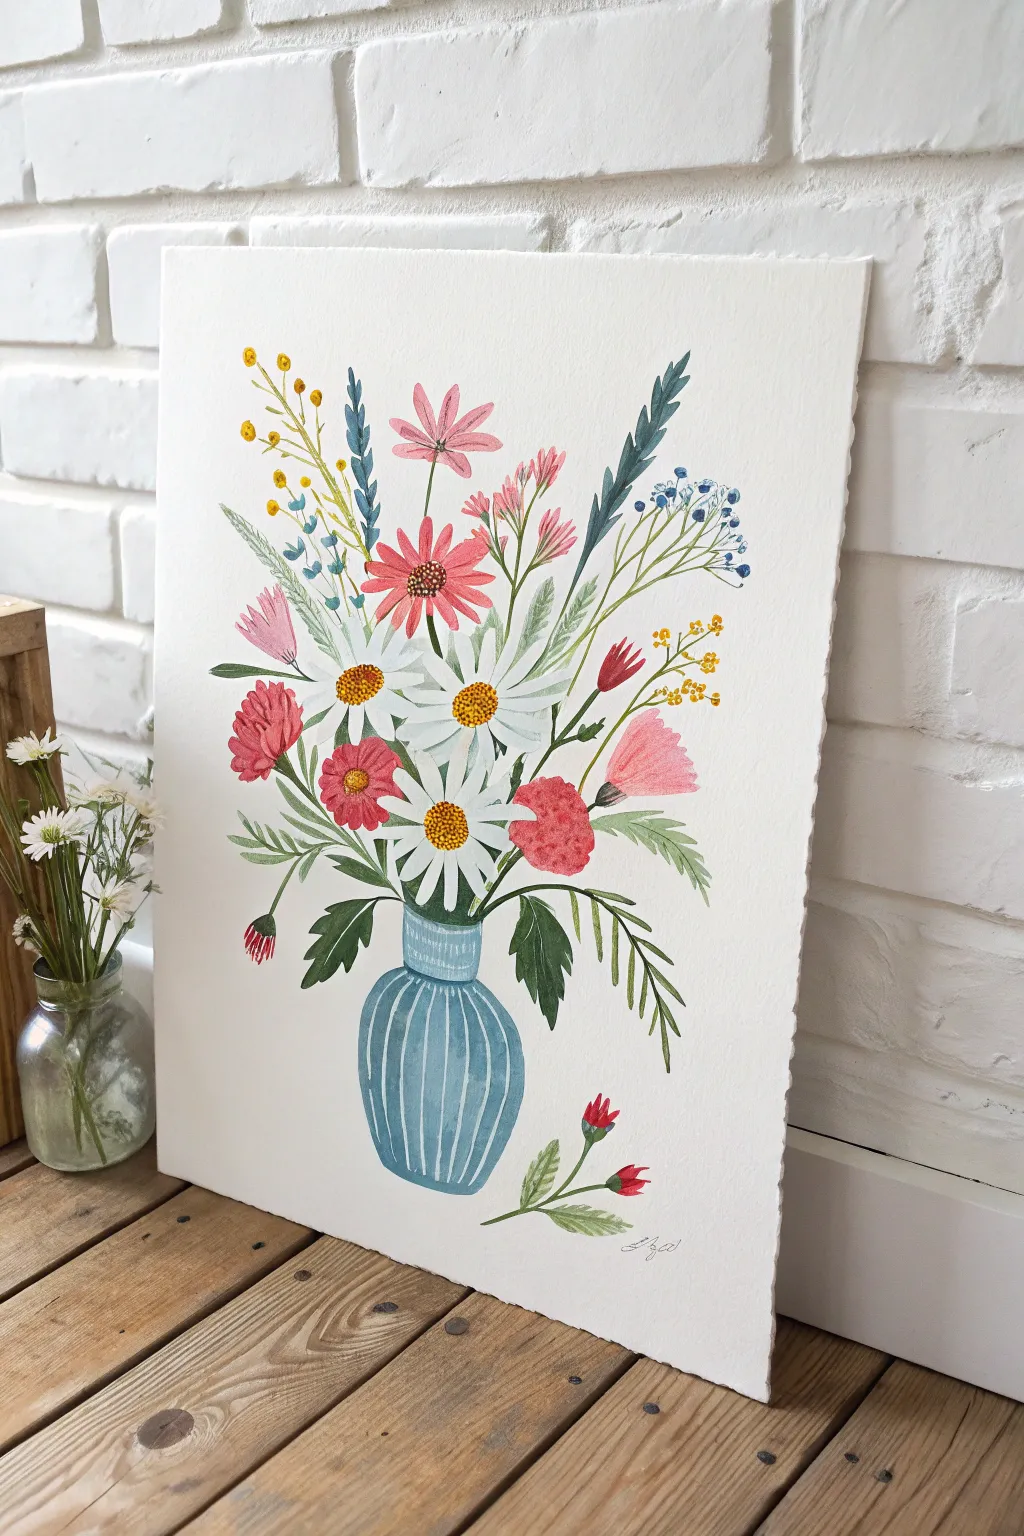
Capture the fresh, breezy nature of a garden-picked arrangement in this vibrant gouache illustration. The piece features a stylized blue vase overflowing with daisies, cosmos, and delicate filler flowers, all painted with the signature matte finish of gouache.
Step-by-Step Tutorial
Materials
- Heavyweight cold-press watercolor paper (300 gsm)
- Gouache paints (Primary set plus White, or colors: Deep Blue, Teal, White, Yellow Ochre, Primary Red, Deep Green, Sap Green)
- Round synthetic brushes (sizes 2, 6, and a detail liner)
- Mixing palette
- Pencil (HB) and kneaded eraser
- Two cups of water (one for clean, one for dirty)
- Paper towels
Step 1: Sketch and Vase Base
-
Light sketch:
Begin by lightly sketching the outline of the vase near the bottom center of your paper. Draw faint guidelines for the main flower stems radiating outward to establish the bouquet’s shape. -
Flower placement:
Mark the positions of the larger daisy heads and the pink cosmos with simple circles. This ensures your composition feels balanced before you commit to paint. -
Mix the vase color:
Create a muted teal blue by mixing Deep Blue, a touch of Teal, and White. You want a creamy, opaque consistency similar to heavy cream. -
Base coat the vase:
Fill in the vase shape with your mixed teal. Don’t worry about the stripes yet; just get a solid, smooth layer of color down and let it dry completely.
Creamy Consistency
For smooth, streak-free opaque layers, mix your gouache to the consistency of melted ice cream. If it drags, add a drop of water; if it’s transparent, add more paint.
Step 2: Foliage and Stems
-
Mix green variations:
Prepare three shades of green on your palette: a dark forest green (Deep Green + Blue), a bright grassy green (Sap Green + Yellow), and a muted sage (Green + White + dot of Red). -
Main stems:
Using your size 2 brush and the forest green, paint the primary stems rising from the vase neck toward your sketched flower circles. -
Large leaves:
Add the large, drooping leaves near the vase rim using the dark green. Press the belly of the brush down to create the wide part of the leaf and lift up for the tapered tip. -
Fern-like details:
Switch to the sage green mix. Paint the feathery, fern-like stems on the right and left sides using quick, light strokes for an airy feel. -
Tall grasses:
Use a bluish-green mix to paint the tall, wheat-like spikes near the top. Keep these strokes vertical and rigid to contrast with the softer leaves.
Step 3: Blooms and Blossoms
-
White daisies:
Clean your brush thoroughly. Use pure White gouache to paint the daisy petals. Start from the center and pull outward, leaving a small empty space in the middle for the yellow disk later. -
Pink cosmos:
Mix a soft coral pink (Red + White + tiny touch of Yellow). Paint the pink flowers, making the petals slightly jagged at the outer edges for realistic texture. -
Red accents:
Using a more concentrated red, paint the small buds on the left and the lower right stems. I like to keep these shapes simple and slightly rounded. -
Yellow filler:
Mix a mustard yellow. Dot small clusters of yellow flowers on the upper right side using the tip of your brush to mimic mimosa or goldenrod. -
Blue filler:
With a diluted blue, add the tiny berry-like clusters on the upper right and left, connecting them with very fine green lines.
Make It Yours
Change the vase pattern! Instead of vertical stripes, try painting small polka dots, a checkerboard pattern, or leave it solid matte for a modern minimalist look.
Step 4: Details and Definition
-
Daisy centers:
Once the white petals are dry, mix a textured yellow-orange. Dab this into the centers of the daisies, stippling the paint to create a fuzzy pollen look. -
Flower details:
Use a detail brush to add darker pink lines on the cosmos petals to show veining. Add tiny dark dots to the yellow centers of the daisies for depth. -
Vase stripes:
Mix a lighter tint of your original vase teal (add more White). Carefully paint vertical curved stripes following the contour of the vase to give it volume. -
Fallen stem:
Paint the small sprig lying on the ‘ground’ to the right of the vase, adding a sense of casual realism to the composition. -
Final touches:
Inspect your painting. Add crisp white highlights to the vase rim and subtle dark green veins to the largest leaves to finish the piece.
Step back and admire your everlasting bouquet as the matte colors dry to a velvety finish.


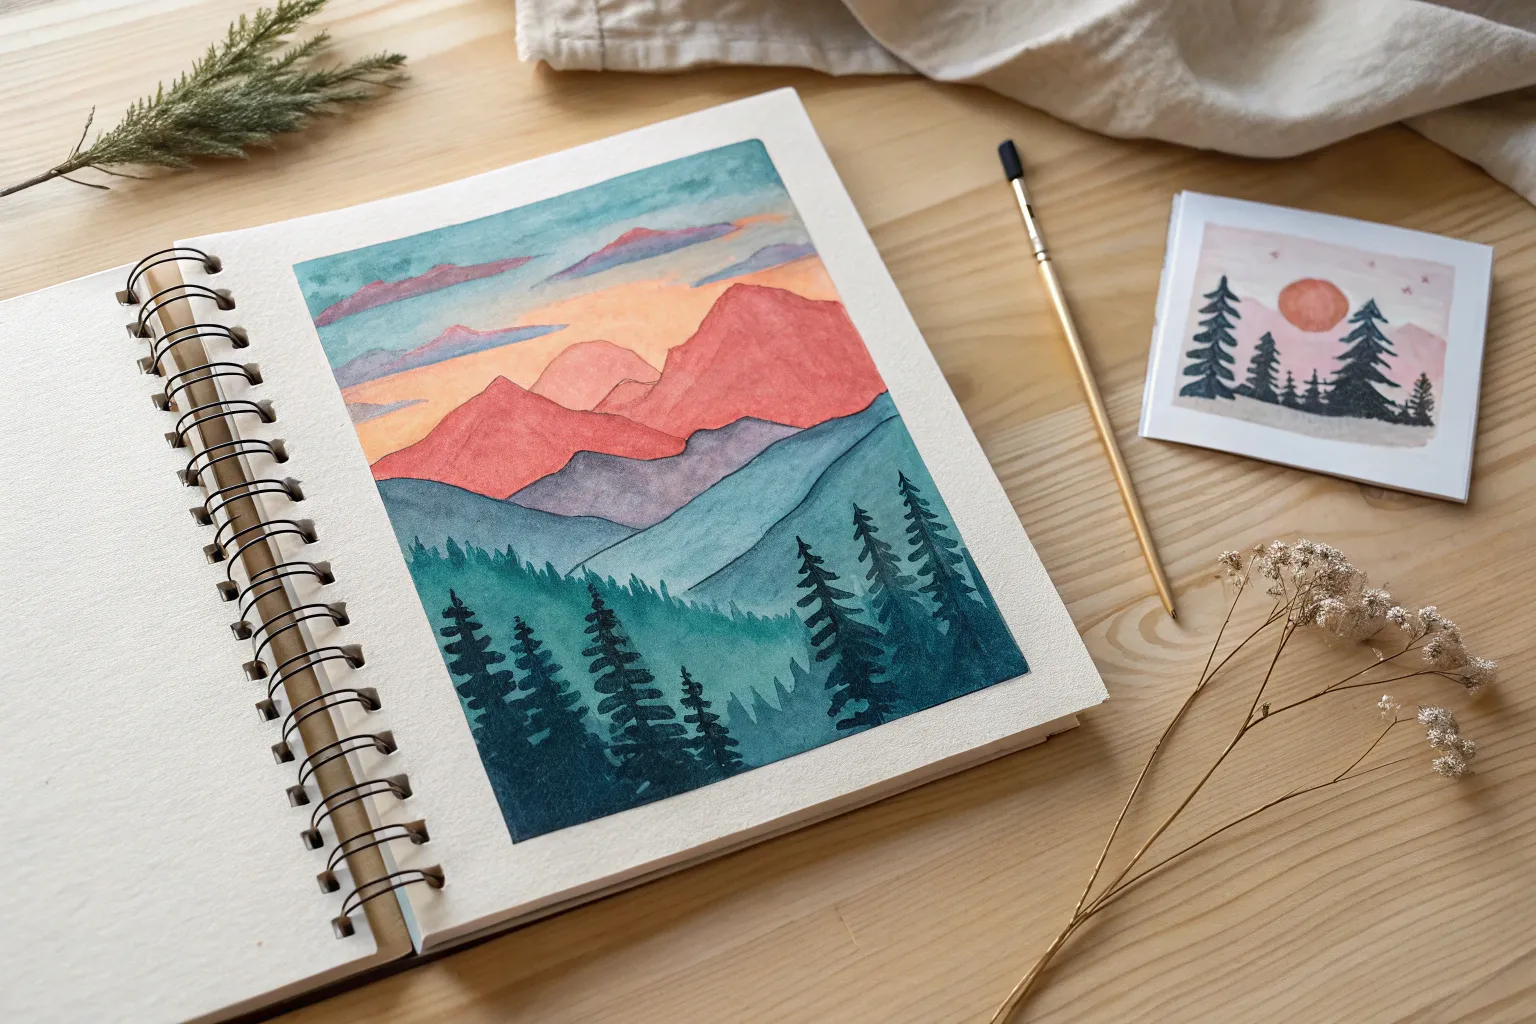
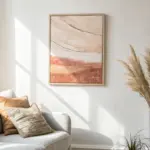
Layered Mountain Silhouettes
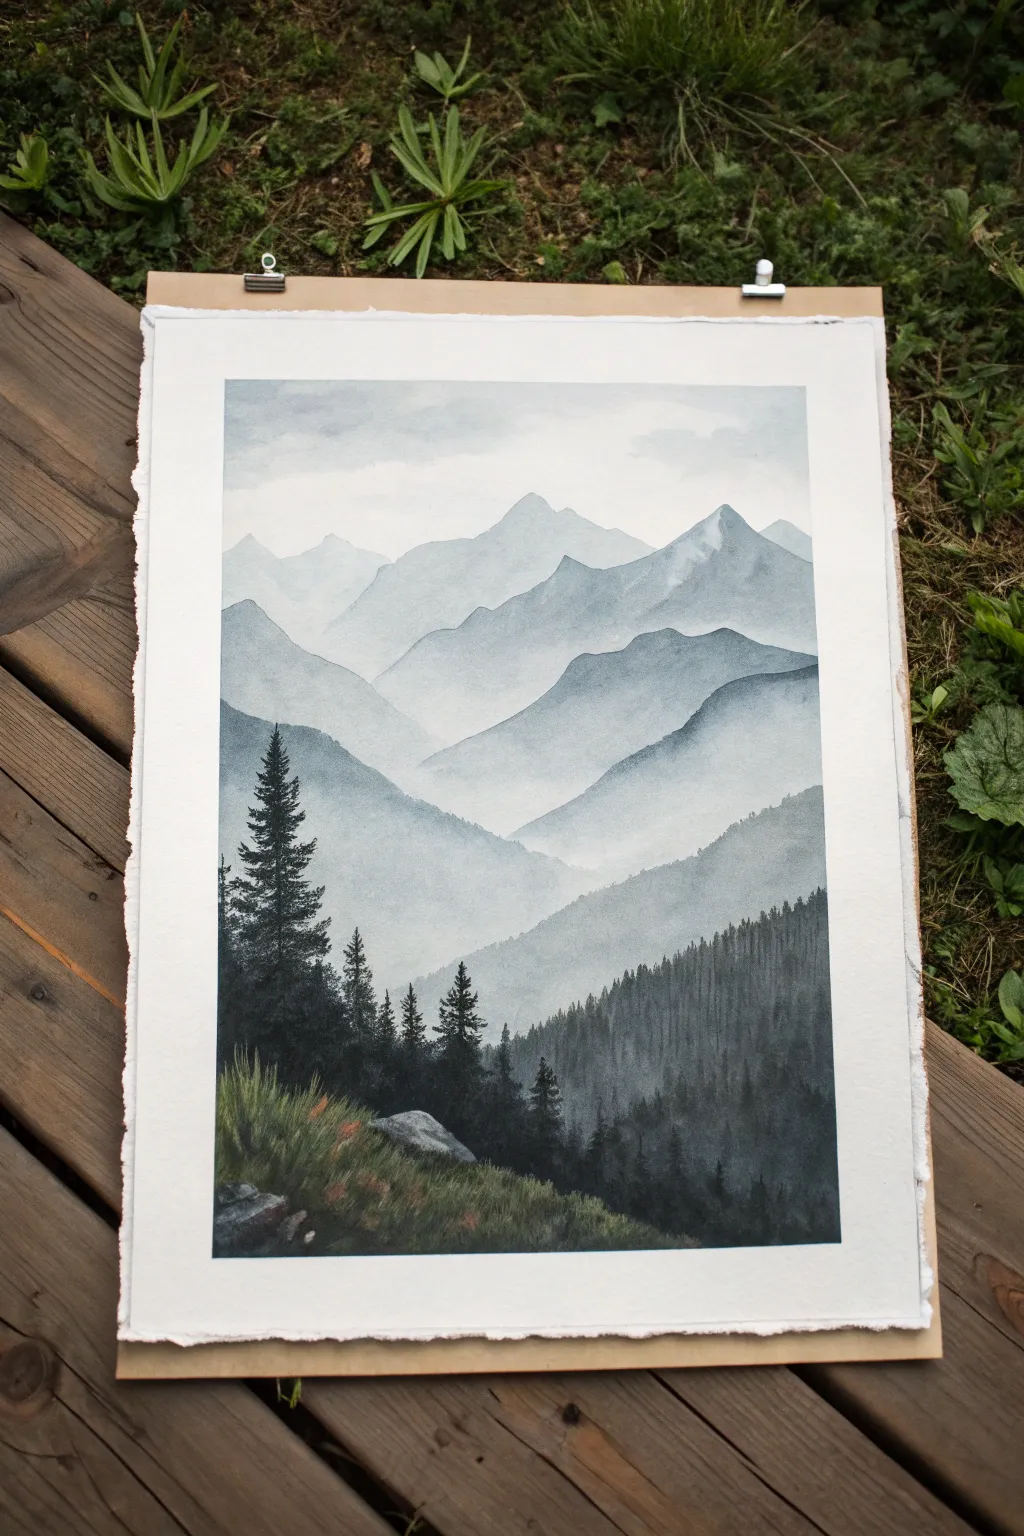
Capture the serene beauty of distant peaks with this atmospheric gouache landscape. By layering opaque and transparent washes in cool blue-gray tones, you will create a stunning sense of depth that draws the viewer deep into the misty valley.
Step-by-Step Tutorial
Materials
- Gouache paints (Indigo, White, Black, Burnt Umber, Sap Green)
- Cold press watercolor paper (300gsm/140lb)
- Flat wash brush (1 inch)
- Round brushes (sizes 2, 6, and 8)
- Detailed liner brush (size 0 or 00)
- Mixing palette
- Two jars of water
- Masking tape
- Paper towels
Step 1: Setting the Scene
-
Prepare the surface:
Tape your watercolor paper down to a sturdy board using masking tape on all four sides. This creates a clean white border and prevents the paper from buckling when wet. -
Light sky wash:
Mix a very watery, pale gray wash using a touch of black and plenty of white gouache. Using your large flat brush, apply this to the top third of the paper. Keep it uneven and cloudy to suggest an overcast sky. -
Sketch the layers:
Lightly sketch the outlines of four to five mountain ranges with a hard pencil (like an H or 2H). Start high in the background and work your way down, making each subsequent mountain range lower and closer to the foreground.
Step 2: Painting the Distant Ranges
-
First mountain layer:
Mix a very pale blue-gray color. You want this to be barely darker than the sky. Paint the silhouette of the furthest mountain peaks. The bottom edge should be soft and fade into white to mimic mist. -
Building depth:
Mix a slightly darker shade of blue-gray for the next range. Paint the silhouette just below the first one. Use the ‘wet-on-wet’ technique slightly at the bottom edge of this shape to blur it downward. -
Middle ground mountains:
Continue stepping down the paper. For the third layer, add a tiny bit more Indigo to your mix. The shapes should become more defined, but keep the paint relatively thin to maintain that atmospheric perspective. -
Creating mist pockets:
As you paint these middle layers, lift your brush pressure as you reach the bottom of the mountain shape, or blot the bottom edge with a clean, damp brush or paper towel to create the illusion of fog settling in the valleys.
Misty Edges
If your ‘mist’ looks too sharp or like a hard line, use a clean, damp brush (not wet) to gently scrub and soften the bottom edge of a mountain layer while the paint is still damp.
Step 3: The Foreground Valley
-
Darker hills:
For the closest hill before the immediate foreground, mix a much darker slate blue. Paint this layer more opaquely than the previous ones, giving it a solid presence. -
Suggesting distant trees:
While the previous layer is still slightly damp, take a smaller round brush and tap tiny, vertical strokes along the ridge line. These abstract marks suggest a dense forest far away without needing detailed branches. -
Deepest shadows:
Mix your darkest color yet: Indigo mixed with Black and a touch of Sap Green. Paint the large, steep hill on the left side and the deep valley bottom on the right. This layer should be completely opaque. -
Texture transition:
Allow the dark hill shapes to dry completely. A chalky, matte finish creates the perfect base for the sharp details coming next.
Color Consistency
Mix a large batch of your base blue-gray color first. Then, simply separate small puddles and add more white or black to each to ensure your mountain gradient stays in the same color family.
Step 4: Adding Life and Detail
-
Detailed pine trees:
Load your size 2 or liner brush with a thick, creamy mix of Black and Sap Green. Paint the prominent pine trees on the left hill. Start with a thin vertical line for the trunk, then dab horizontal branches that get wider towards the bottom. -
Mid-ground forest texture:
On the darker mountain layer to the right, use a size 6 brush to paint vertical lines closely packed together. Vary the heights slightly to mimic treeline tops. I like to use a slightly dry brush here to get a rough, organic texture. -
Foreground grasses:
Mix Sap Green with a little Burnt Umber and White for an olive tone. Using quick, upward flicking motions with your liner brush, paint the grassy slope in the immediate foreground bottom left. -
Adding rocks:
Paint a few rock shapes among the grass using a light gray. Keep the tops lighter and the bottoms shadowed to ground them in the scene. -
Wildflower accents:
Mix a muted reddish-brown or dull orange. Stipple tiny dots into the grassy area to suggest wildflowers catching the dim light. -
Final highlights:
Touch up the very tips of the foreground grass with a lighter green-yellow mix to simulate light hitting the blades. -
The reveal:
Wait until the painting is bone dry—gouache can smear if tape is removed too early. Peel the tape away slowly at a 45-degree angle to reveal your crisp white border.
Step back and admire the tranquil depth you have built, layer by layer.
BRUSH GUIDE
The Right Brush for Every Stroke
From clean lines to bold texture — master brush choice, stroke control, and essential techniques.
Explore the Full Guide
Misty Pine Forest at Dusk
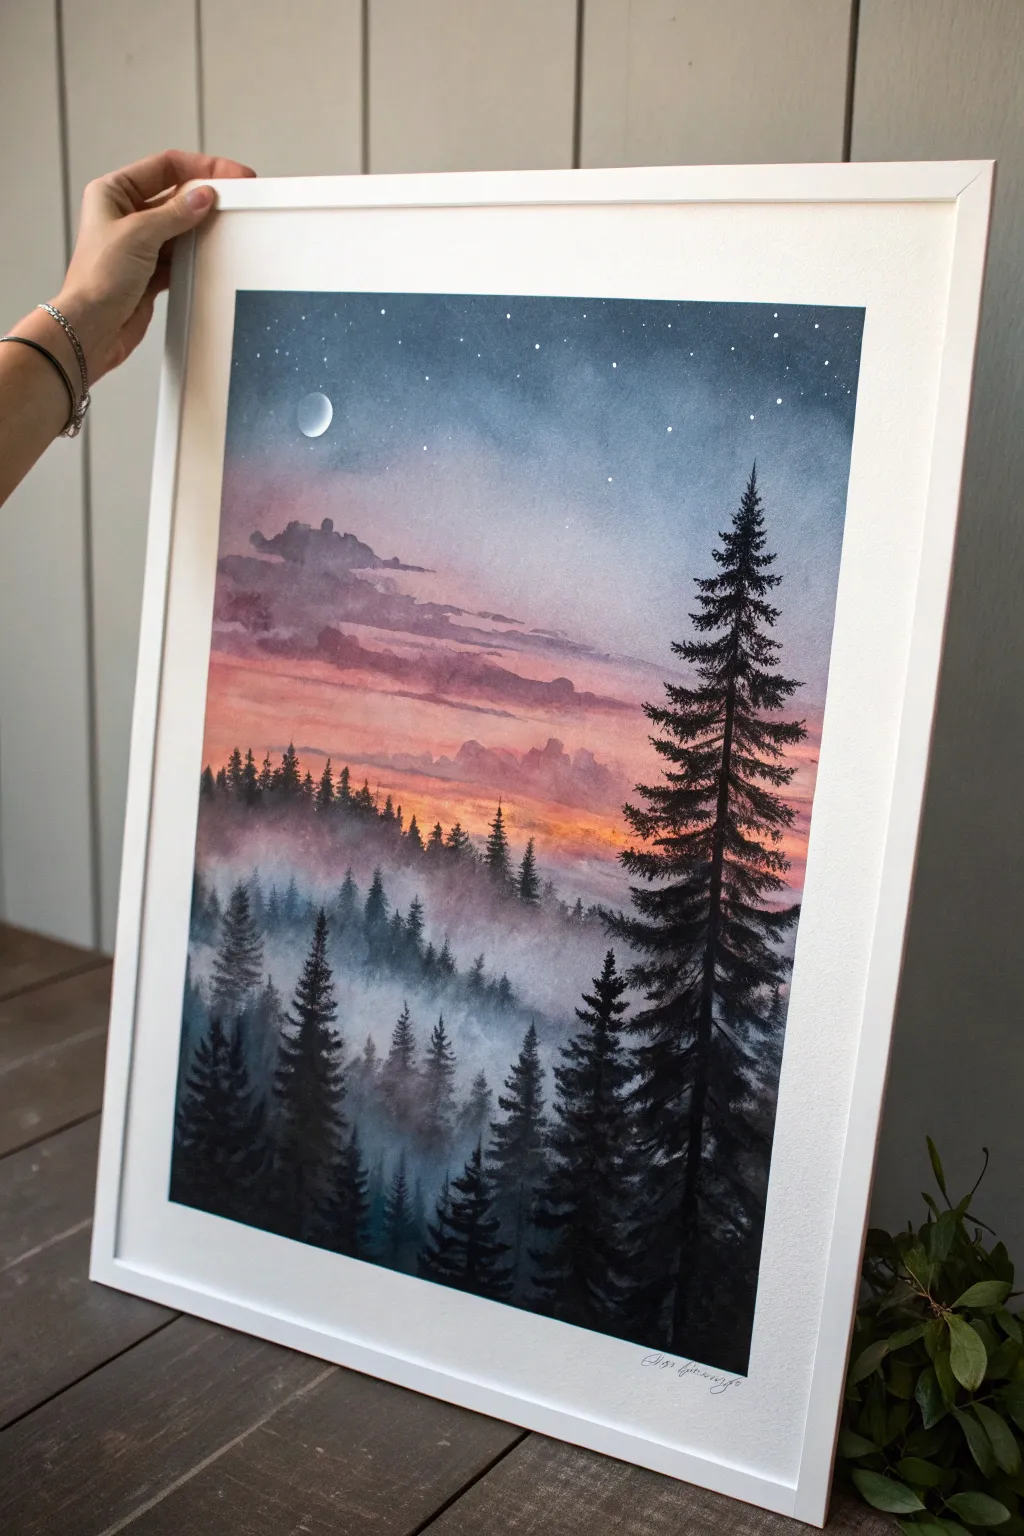
Capture the serene transition from sunset to starlight with this atmospheric gouache landscape. This project balances soft, blended gradients in the sky against the crisp, dark silhouettes of towering pines, creating a sense of depth and mystery.
How-To Guide
Materials
- Gouache paint set (Prussian Blue, Ultramarine, Magenta, Orange, White, Lamp Black)
- Watercolor paper or mixed media paper (heavyweight, at least 300gsm)
- Painter’s tape or masking tape
- Flat wash brush (1/2 inch or 3/4 inch)
- Round brush (size 6 or 8)
- Fine detail brush (size 0 or 1)
- Palette for mixing
- Two cups of water
- Paper towels or rag
- Old toothbrush (optional for stars)
Step 1: Setting the Sky Gradient
-
Prep the Surface:
Tape down all four edges of your paper to a flat board or table. This creates that crisp white border seen in the framed piece and prevents the paper from buckling when wet. -
Mix the Sky Colors:
Prepare three piles of paint on your palette: a deep midnight blue (Prussian Blue mixed with a touch of Black), a mid-tone purple-grey (Ultramarine mixed with Magenta and White), and a warm sunset peach (Orange mixed with plenty of White and a dot of Magenta). -
Apply the Sunset Glow:
Using a wet flat brush, paint horizontal strokes of the peach mixture starting about halfway down the paper. Work quickly to keep the paint moist. -
Transition to Purple:
Clean your brush slightly, pick up the purple-grey mixture, and paint right above the peach section. Blend the wet edges where the colors meet using gentle back-and-forth strokes to create a seamless gradient. -
Add the Midnight Blue:
Apply the dark midnight blue to the very top of the paper, blending it down into the purple section. I find adding a tiny bit of water to the brush helps the gouache flow better for gradients. -
Paint the Clouds:
While the sky is still slightly damp, mix a darker, muted purple. Use the round brush to tap in uneven cloud shapes across the middle section, softening their bottom edges with a clean, damp brush to make them look wispy.
Step 2: Creating the Misty Middle Ground
-
Mix the Mist Color:
Combine white with a very small amount of blue-grey. The consistency should be thin and milky. -
Block in Distant Hills:
Using a lighter grey-blue mix, paint the silhouette of a distant tree line just below the sunset area. Keep the top edges ragged to suggest trees, but let the bottom fade out into the white paper. -
Layering the Mist:
Once the distant layer is dry, mix a slightly darker blue-green-grey. Paint a second row of treetops below the first, staggering them so they don’t look too uniform. -
Softening Edges:
Immediately after painting a row of trees, take a clean, wet brush and drag the paint downwards at the bottom of the trees. This creates the ‘fog’ effect that obscures the forest floor.
Gouache Mist Technique
To get perfectly soft mist, keep two water cups: one for cleaning wash, one for clean blending water. Dirty water will make your mist look muddy instead of airy.
Step 3: Foreground Pines and Details
-
Mix the Darkest Value:
Prepare a rich, dark color for the foreground. Don’t use straight black; mix Prussian Blue with Black or Burnt Umber to get a deep, natural shadow color. -
Paint the Main Tree Trunk:
Identify where the largest pine tree will stand on the right side. Using your fine brush, paint a very thin vertical line for the trunk, tapering it as it reaches the sky. -
Add Pine Branches:
Starting from the top of the tree, use a small round brush or detail brush to dab on branches. Use a zig-zag motion, making the branches wider and heavier as you move down the trunk. -
Fill the Lower Forest:
Using the same dark mixture, paint smaller pine trees on the left side and fill in the bottom of the paper with dense foliage. These trees should look sharper and darker than the misty layers behind them. -
Add the Moon:
With a clean detail brush and pure white paint, carefully paint a small crescent moon in the dark blue upper sky. You can create a faint glow by watering down a tiny bit of white and painting a translucent halo around it. -
Sprinkle the Stars:
Dilute some white paint until it’s inky. Load an old toothbrush or a stiff brush and flick the bristles with your thumb to spray tiny stars across the top of the sky. -
Final White Highlights:
Use your finest brush to add a few deliberate, larger stars (just tiny dots) in specific spots to balance the composition. -
The Reveal:
Wait until the painting is completely bone-dry. Slowly peel away the tape at a 45-degree angle to reveal the clean edges.
Starry Night Effect
Cover the bottom half of your painting with a scrap piece of paper before splattering stars. This prevents white specks from landing on your dark foreground trees.
Frame your new misty landscape and enjoy the tranquil atmosphere you’ve built layer by layer
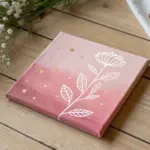
Split-Page Two-Mood Spread
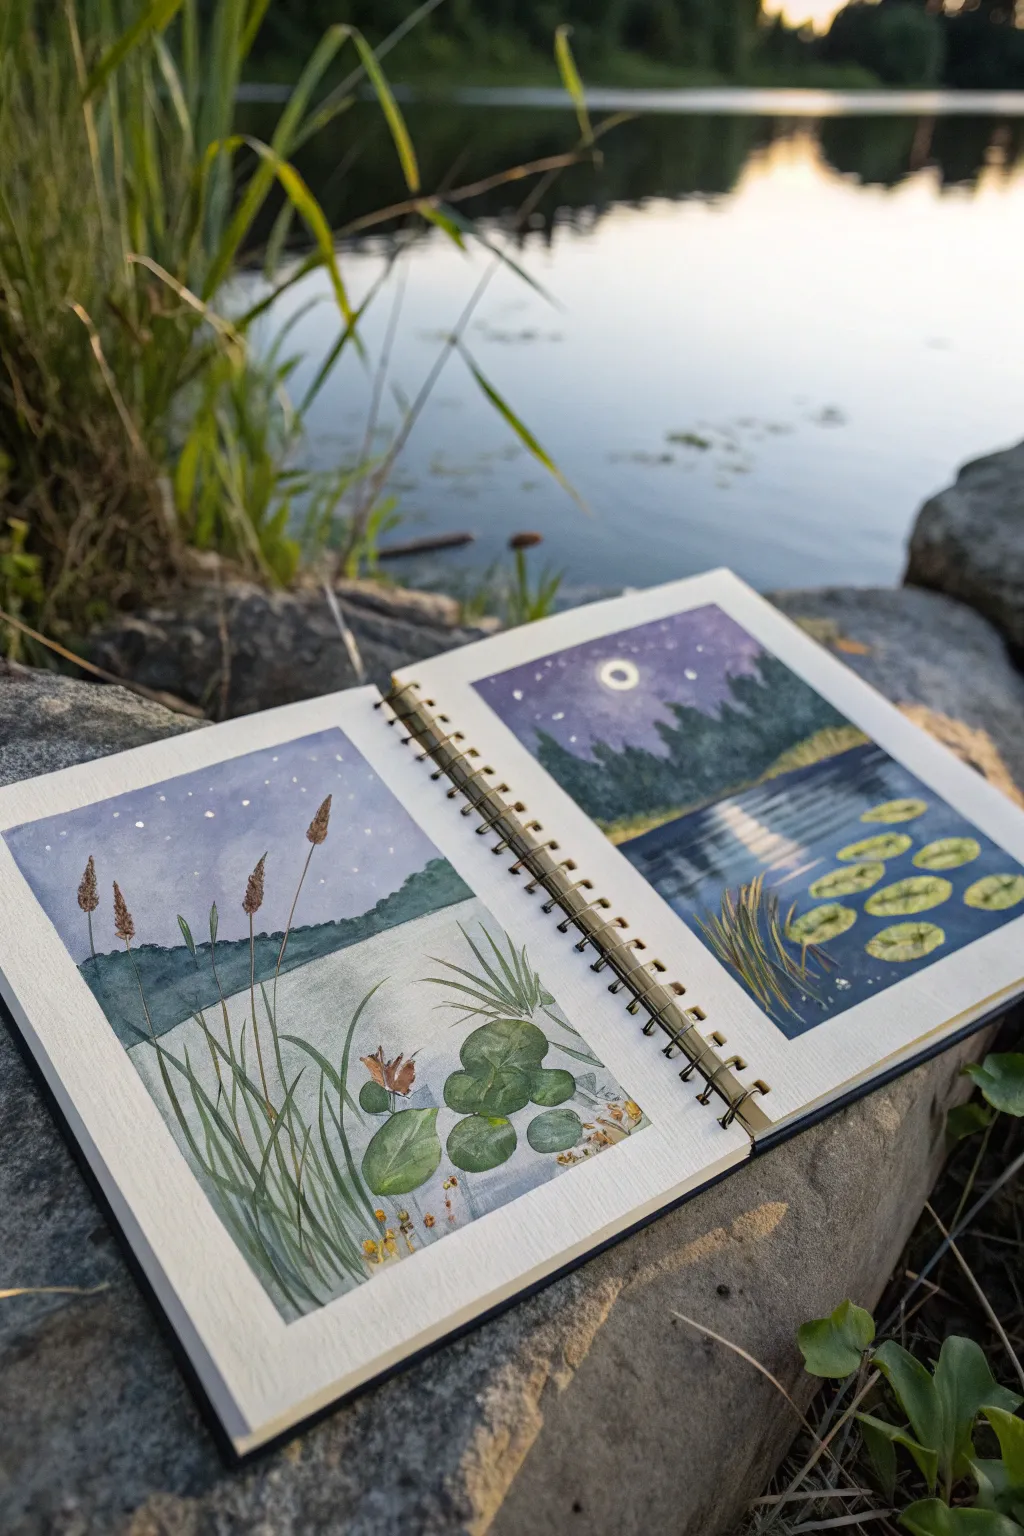
Capture the shifting moods of nature with this split-page gouache spread, depicting the same serene lakeside scene in two distinct moments of time. This project explores contrasting color palettes—soft, hazy pastels for twilight and deep, rich indigoes for midnight—united by a common composition.
Step-by-Step
Materials
- Spiral-bound sketchbook (heavyweight mixed media or watercolor paper)
- Gouache paint set (essential colors: Indigo, Ultramarine Blue, Titanium White, Leaf Green, Burnt Umber, Yellow Ochre, Primary Red or Pink)
- Flat shader brush (size 6 or 8)
- Round detail brush (size 0 or 1)
- Masking tape (optional for edges)
- Two cups of water
- Mixing palette
- Paper towels
Step 1: Setting the Sky Gradients
-
Mix the twilight base:
For the left page (twilight), mix a large amount of Titanium White with a tiny touch of Ultramarine Blue and a speck of Primary Red. You want a very pale, dusty lavender-blue. -
Paint the twilight sky:
Using your flat brush, cover the top two-thirds of the left page with this pale mixture. Add a little more white as you move downwards to create a subtle gradient. -
Create the midnight sky:
For the right page (night), mix Indigo with a touch of Primary Red to deepen it towards violet. Paint the top half of the page, starting very dark at the top. -
Blend the night horizon:
While the midnight blue is still wet, mix a lighter violet-blue and blend it downwards toward where the horizon line will be, creating a transition from deep space to a glowing night sky.
Step 2: Building the Lake & Horizon
-
Paint the distant tree line:
Mix a muted dark green using Leaf Green, Indigo, and a touch of Burnt Umber. On the left page, paint a soft, rolling hill silhouette across the middle. On the right page, use a darker version of this mix (more Indigo) to paint jagged evergreen shapes. -
Establish the water base (Day):
For the left page water, mix a pale, milky green-grey using White, a hint of Green, and a touch of the sky color. Paint this from the tree line down to the bottom, swirling slightly to suggest stillness. -
Establish the water base (Night):
On the right page, reverse the gradient. Paint the water area with your dark blue mix, but drag horizontal strokes of lighter blue through the center to prepare for the moon’s reflection. -
Add the stars:
Once the sky is bone dry, use your smallest brush to dot tiny white stars on both pages. On the left page, keep them faint and few; on the right page, make them bright and plentiful.
Patchy Sky?
Gouache dries aggressively fast. If your sky gradients look streaky, re-wet your brush slightly and work in horizontal layers, or add extended drying medium to keep the paint workable longer.
Step 3: Detailed Foreground Elements
-
Add the moon:
On the right page, paint a small white circle in the sky. If the blue paint lifts, let it dry and apply a second coat of white for opacity. -
Paint moonlight reflections:
Using a slightly watered-down white, paint horizontal ‘zig-zag’ lines on the dark water directly beneath the moon. The lines should be wider near the bottom and narrower near the horizon. -
Create the lily pads:
Mix a vibrant mid-tone green. Paint oval clusters near the bottom right of each page. On the left page, these can be more detailed; on the right, keep them flatter to mimic low light. -
Detail the lily pads:
Once the green ovals dry, use a darker green to paint a small ‘V’ notch and shadow on one side of each pad. On the right page, add a tiny highlight of pale yellow to the top edge where moonlight hits. -
Paint the reeds:
Switch to your fine liner brush. Mix a brownish-green. Starting from the bottom left of the left page, paint long, sweeping lines upward for the tall grasses. -
Add seed heads:
For the left page, mix Burnt Umber with a little White. Dab small, textured ovals at the tips of the tallest grasses to create seed heads. -
Paint grassy reflections:
On the right page, paint a few dark reed silhouettes on the bottom left, and add faint, dark squiggly lines in the water beneath them to show their reflection. -
Final highlights:
I like to add very subtle white highlights to the left side of the tall grass stems on the left page to show the ambient light direction.
Make It Sparkle
For the night side, mix a tiny amount of metallic watercolor or iridescent medium into your moon reflection paint. It creates a magical shimmer when you turn the page in the light.
Now you have a mirrored masterpiece that celebrates the quiet beauty of the lake at any hour

PENCIL GUIDE
Understanding Pencil Grades from H to B
From first sketch to finished drawing — learn pencil grades, line control, and shading techniques.
Explore the Full Guide
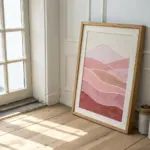
Power Lines against a Cotton-Candy Sky
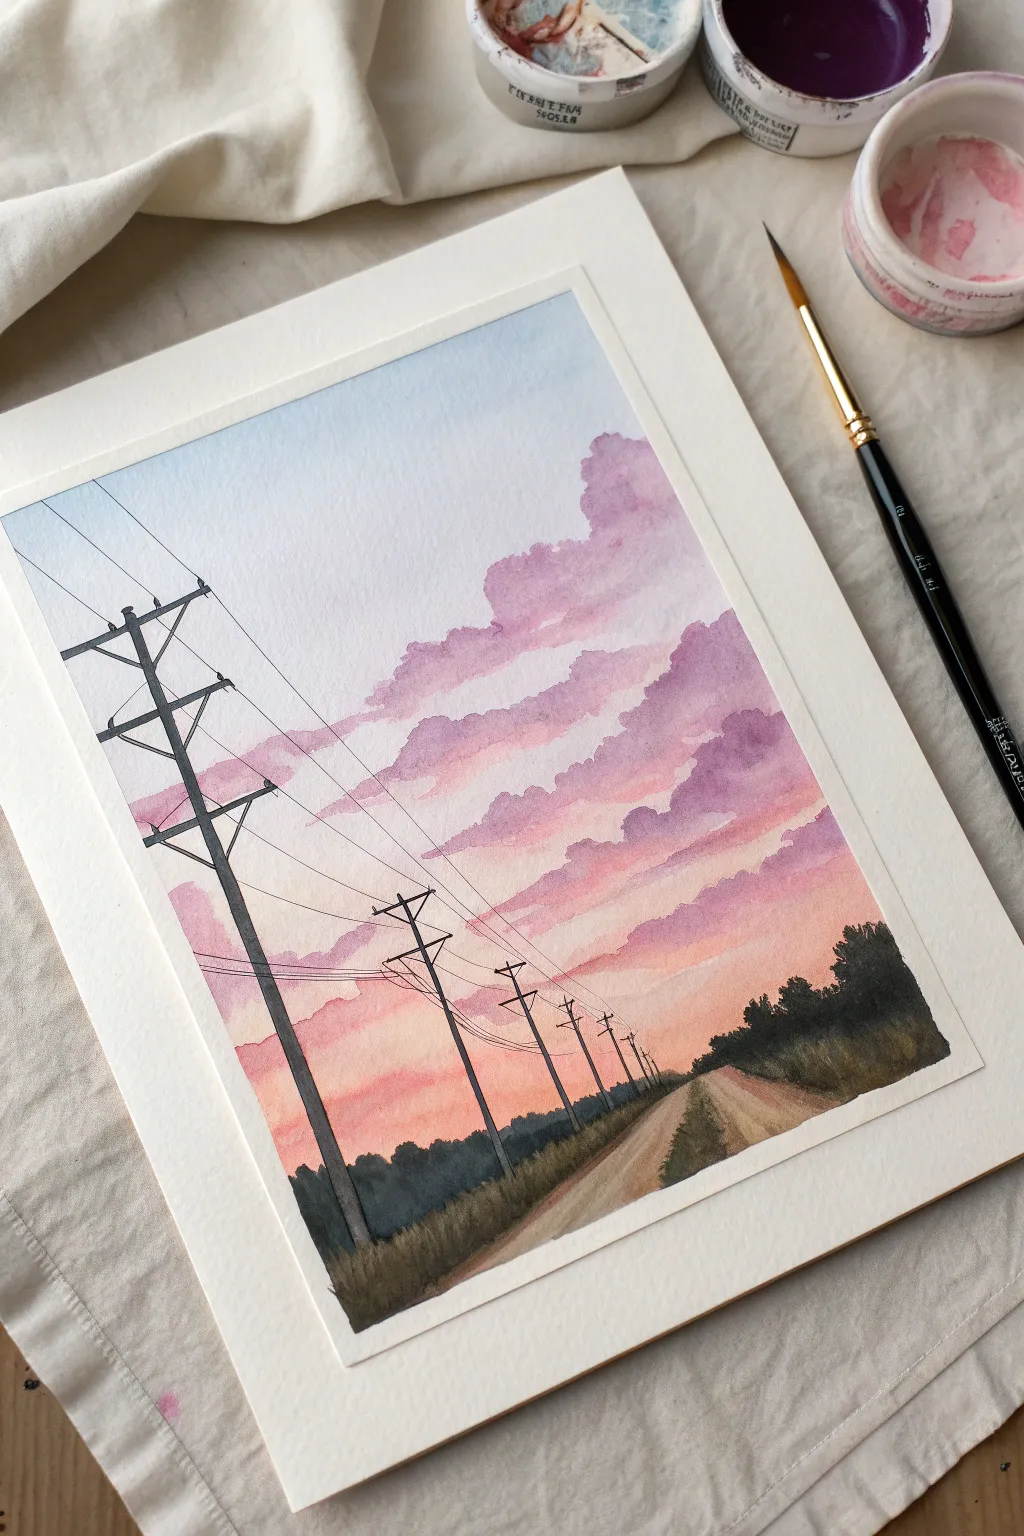
Capture the surprisingly peaceful geometry of utility lines stretching into a dreamy, cotton-candy sunset. This gouache piece balances soft, blended atmospheric skies with the crisp, dark silhouettes of poles and wires for a beautiful study in perspective.
Step-by-Step Guide
Materials
- Gouache paint (Titanium White, Ultramarine Blue, Magenta/Primary Red, Violet, Lemon Yellow, Burnt Umber, Lamp Black)
- Cold press watercolor paper (taped down)
- Painter’s tape or masking tape
- Flat brush (1-inch or 3/4-inch)
- Round brush (size 6 or 8)
- Fine liner or rigger brush (size 0 or 00)
- Palette for mixing
- Two cups of water
- Pencil and ruler
Step 1: Planning and Sky Gradient
-
Sketch the Perspective:
Begin by lightly sketching your horizon line about one-third of the way up the page. Draw a converging road narrowing to a single vanishing point on that horizon. Mark vertical lines for your utility poles, making them smaller and closer together as they recede into the distance. -
Mix Sky Colors:
Prepare three piles of gouache: a pale sky blue (a tiny dot of blue in plenty of white), a soft lavender (magenta, white, and a touch of violet), and a warm peach (yellow, magenta, and white). -
Paint the Upper Sky:
Use your flat brush to apply the pale blue across the top third of the paper. Keep the consistency creamy, like melted ice cream, to ensure it’s opaque but smooth. -
Blend the Transition:
While the blue is still slightly damp, wash your brush and pick up the lavender mix. Paint the middle section, gently overlapping the blue edge to create a soft, seamless gradient. -
Warm Horizon:
Finish the sky by painting the peach mixture near the horizon line. Blend it upward into the lavender. Gouache dries quickly, so work confidently; a slightly damp brush can help reactivate the edges for smoother blending.
Smooth Wire Secret
If your hand shakes painting wires, turn the paper sideways or upside down. Pull the stroke toward your body rather than across it for a straighter line.
Step 2: Clouds and Landscape Base
-
Create Cloud Forms:
Using a round brush and a slightly darker mix of purple and magenta, dab in the cloud shapes. Focus on creating fluffy, organic tops while keeping the bottoms flatter to suggest distance. -
Layering Shadows:
While the clouds are wet, drop a deeper violet into the lower right sections of each cloud puff to create volume and shadow. -
Highlighting Clouds:
Rinse your brush and mix a pale pinkish-white. Gently dry-brush the top edges of the clouds where the setting sun would catch them. -
Base of the Road:
Mix Burnt Umber with plenty of white and a touch of yellow for a sandy beige color. Paint the road surface, keeping your brushstrokes horizontal or following the perspective lines. -
Grassy Verges:
Mix a dark, muted green using Burnt Umber, Blue, and a little Yellow. Paint the areas on either side of the road. Don’t worry about grass blades yet; just get a solid base color down.
Level Up: Birds on a Wire
Use your finest brush to add tiny dots or ‘v’ shapes sitting on the wires. Group them unevenly for a natural flocking effect that adds life to the scene.
Step 3: Details and Power Lines
-
Distant Trees:
Using a dark grey-green mix, stipple in a silhouette of trees along the horizon line. Tapping the tip of the brush creates a natural leafy texture. -
Texturing the Grass:
Switch to a smaller round brush. Using strokes that flicks upward, add texture to the grassy areas. Vary the color by adding more yellow or black to your green mix to create depth near the road’s edge. -
Painting the Poles:
Mix a solid black or very dark grey. Using a small round brush or the edge of a flat brush, paint the vertical utility poles. Ensure the closest pole is thickest and they become hairline thin in the distance. -
Crossbars:
Add the horizontal crossbars near the top of the poles. Remember, perspective applies here too—angling them slightly can enhance the feeling of height. -
The Wires:
This is the trickiest part. Use a rigger brush or fine liner with watered-down black paint (ink consistency). Paint the wires with long, confident swoops connecting the poles. Allowing the lines to sag slightly adds realism. -
Final Touches:
Add tiny ceramic insulators (little dots) on the crossbars. Look at the road again—if it needs texture, dry-brush a little darker brown to suggest tire tracks or dirt.
Peel off your tape carefully to reveal those crisp white borders that make the colors pop
Flat-Lay Sketchbook Palette Shot
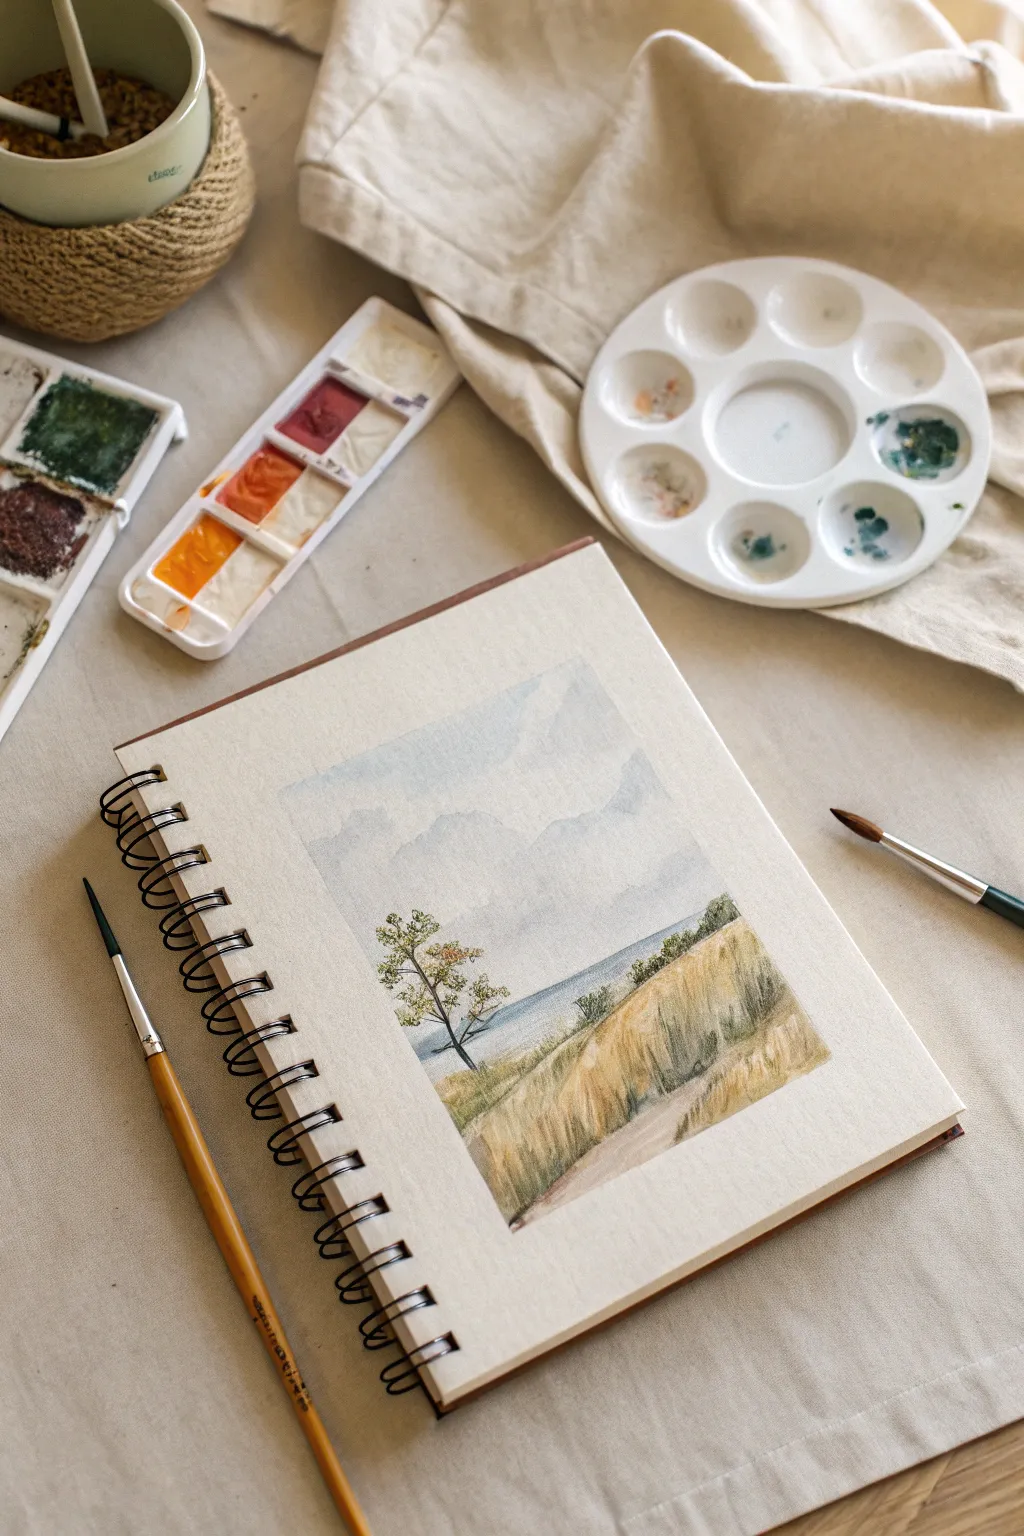
Capture the quiet beauty of a windswept coastline with this atmospheric gouache landscape. This tutorial guides you through layering misty mountains, calming waters, and textured dune grasses in your sketchbook.
Step-by-Step
Materials
- Spiral-bound sketchbook with heavyweight mixed-media paper
- Gouache paints (Ultramarine Blue, Burnt Umber, Yellow Ochre, Titanium White, Olive Green)
- Round brushes (Size 2 and Size 6)
- Small flat brush or filbert brush
- Ceramic palette for mixing
- Jar of clean water
- Paper towel or cloth rag
- Washi tape or masking tape
Step 1: Preparation and Sky
-
Frame the composition:
Begin by taping off a rectangular area in the center of your sketchbook page. This creates that crisp, clean border essential to the flat-lay aesthetic seen in the photo. Press the tape edges down firmly to prevent bleeding. -
Mix the sky color:
On your ceramic palette, mix a very pale, cool grey. Combine a large amount of Titanium White with a tiny dot of Ultramarine Blue and a whisper of Burnt Umber to desaturate it. The mixture should be milky and thin. -
Applying the sky wash:
Using your larger brush, apply this pale wash to the upper two-thirds of your taped area. Keep the paint wet and fluid, allowing for some subtle streaks that suggest atmospheric clouds.
Step 2: Atmospheric Mountains
-
Creating distance:
While the sky is drying, mix a slightly darker version of your sky color. Add just a touch more blue and a hint of purple if you have it. You want this to be barely darker than the sky to create depth. -
Paint the mountain silhouette:
Paint jagged, soft shapes overlapping the lower sky area. Keep the edges soft; you can even lift a little pigment with a damp clean brush to make the peaks look like they are disappearing into the mist. -
Layering the ranges:
Once the first mountain layer is dry, mix a third, slightly more saturated blue-grey. Paint a second range of hills below the first one. This ‘atmospheric perspective’ technique gives the illusion of vast distance.
Tape Peeling Pro Tip
To prevent ripping the paper when removing tape, heat it gently with a hairdryer for a few seconds first. This softens the adhesive for a perfect peel.
Step 3: Water and Mid-Ground
-
Establishing the water line:
Mix a muted teal-blue for the water. Combine Ultramarine Blue, a touch of Green, and White. Paint a horizontal band underneath the mountains. Ensure your horizon line is straight, perhaps using a ruler as a guide if your hand is shaky. -
Softening the shore:
Where the water meets the land, blend the paint slightly so there isn’t a harsh line. The water should look calm and still. -
Painting the distant bank:
On the right side, just above the foreground dune, dab in some small, indistinct shapes using a mix of Olive Green and the mountain grey. These represent distant vegetation along the shoreline.
Dealing with Muddy Colors
If your greens look muddy against the blue water, let the water layer dry completely before painting the tree. Wet-on-wet mixing often causes dull greys.
Step 4: Foreground Dunes
-
Base layer for the hill:
Mix a warm, sandy color using Yellow Ochre, White, and a tiny bit of Burnt Umber. With your larger brush, block in the shape of the large sloping dune in the foreground, covering the bottom right section. -
Adding texture and shadow:
While the base is still slightly damp, introduce a darker mix of Burnt Umber and Green into the lower crevices and the shadowed side of the dune. This gives the hill volume rather than looking flat. -
Detailing the grass:
Switch to your Size 2 round brush or a rigger brush. With a relatively dry mixture of Olive Green and Yellow Ochre, flick quick upward strokes to simulate tall dune grasses. Vary the direction slightly to mimic wind movement. -
Highlighting the foliage:
Clean your brush and pick up pure Yellow Ochre mixed with White. Add highlights to the tips of the grass clumps where the sun would catch them.
Step 5: The Focal Tree
-
Structured trunk:
Using your smallest brush and a dark mix of Burnt Umber and Ultramarine Blue (which makes a near-black), paint the trunk of the lone tree on the left. Keep the lines thin and slightly crooked for a natural look. -
Branch structure:
Extend delicate branches outward. Remember that trees in windy coastal areas often lean slightly or have branches swept in one direction. -
Adding foliage:
Stipple small clusters of leaves onto the branches using a mix of Olive Green and Yellow Ochre. Don’t overdo it—leave plenty of ‘air’ between the branches so you can see the water and mountains through the tree. -
Final touches:
Add a few tiny darker green dots to the distant bank on the right for texture, and deepen the shadow at the base of the main tree to ground it. -
The reveal:
Wait until the painting is bone dry—I usually give it an extra ten minutes just to be safe. Carefully peel away the tape at a 45-degree angle to reveal your crisp, clean edges.
Once you’ve cleaned your palette, take a step back and enjoy the tranquil coastal scene you’ve built from scratch.


Monochrome Night Study in Indigo
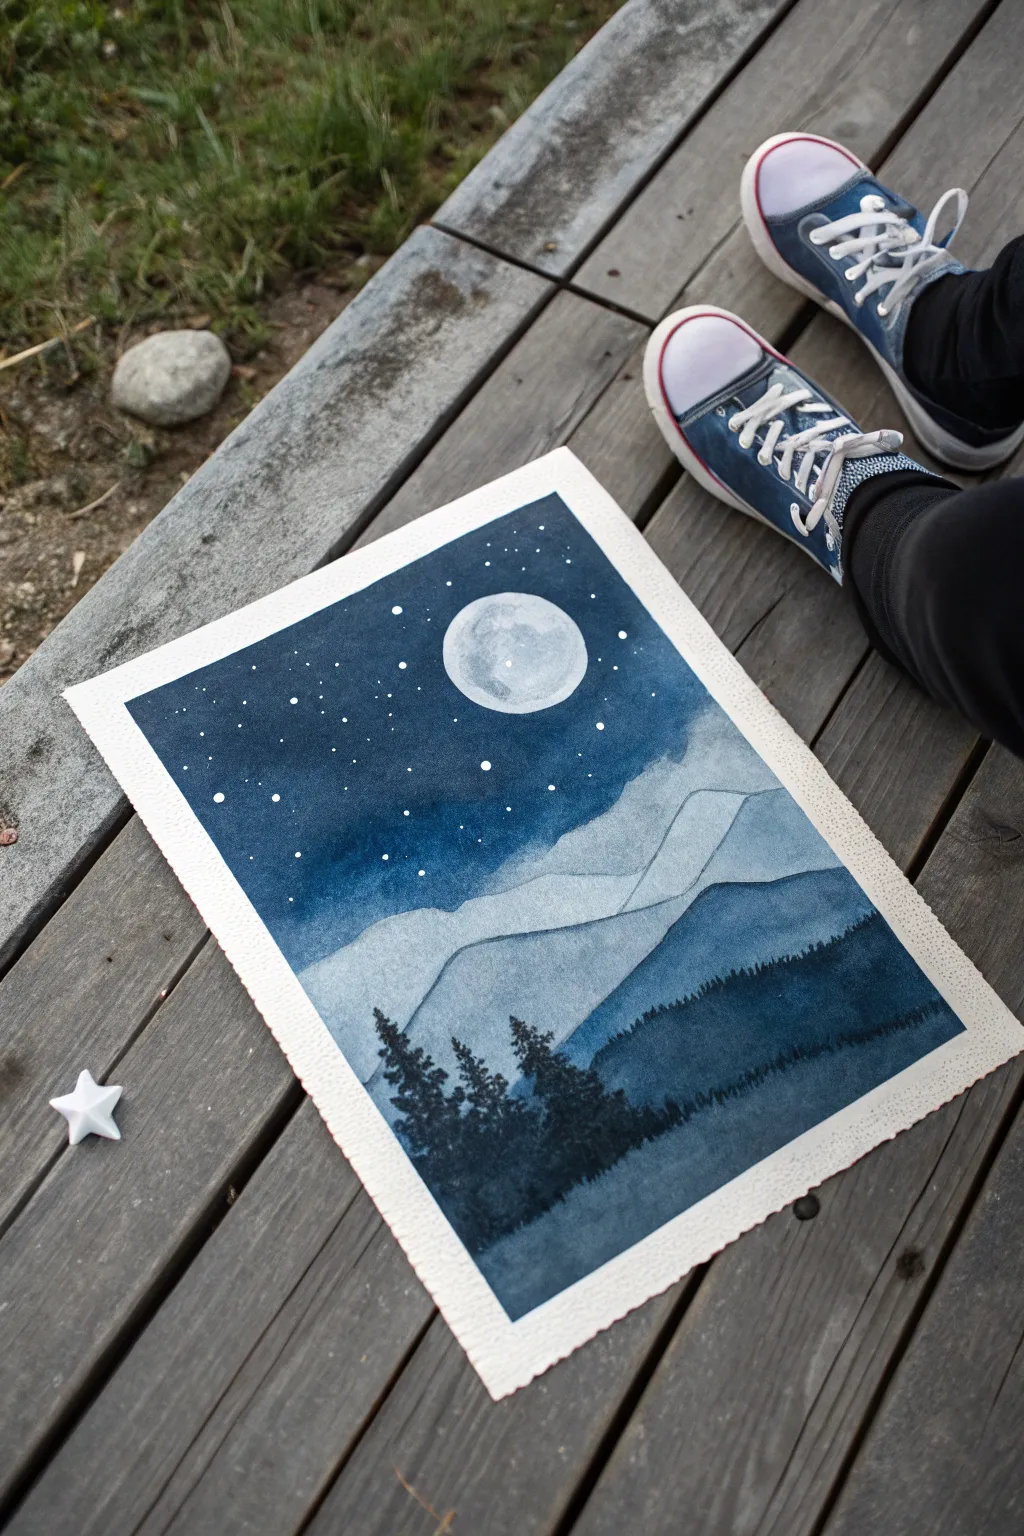
Capture the serene stillness of a mountain night with this monochromatic gouache study. Using only indigo and white, you’ll build atmospheric depth through layering and explore the beautiful opacity that gouache offers.
Step-by-Step Tutorial
Materials
- Cold press watercolor paper (approx. 300gsm)
- Indigo gouache paint
- Titanium white gouache paint
- Flat shader brush (3/4 inch)
- Small round brush (size 2 or 4)
- Fine liner or detail brush (size 0 or 00)
- Mixing palette
- Two jars of water
- Painters tape or masking tape
Step 1: Preparation and Sky Gradient
-
Secure the paper:
Tape down all four edges of your watercolor paper to a board or table. This prevents buckling and creates a clean border, though this specific piece features raw edges, you can choose to tape or not depending on your preferred finish. -
Mix your base indigo:
Squeeze out a generous amount of indigo gouache. In a separate well, mix a very dark, rich consistency—almost ink-like—with just a touch of water to make it flow. -
Begin the sky:
Using your large flat brush, paint the top third of the paper with your darkest indigo mix. Ensure solid coverage without streaks. -
Create the gradient:
While the paint is still wet, add a tiny dot of white to your indigo mix on the palette. Blend this lighter shade immediately below the dark section on the paper, letting them merge softly. -
Fade to the horizon:
Continue lightening your mix with more white as you move down the sky area. By the time you reach where the mountain peaks will sit, the color should be a hazy, medium-blue tone. Let this layer dry completely.
Chalky Finish?
If darks look chalky or pale when dry, you likely added too much white or water. Glaze over the area with a thin, pure indigo wash to restore the deep richness.
Step 2: Painting the Moon and Stars
-
Outline the moon:
With a clean small round brush and pure white gouache, carefully paint a circle in the upper center of the sky. The opacity of gouache makes this easy to do over the dark background. -
Texture the moon:
Mix a very pale grey-blue using a speck of the sky color. Blot this gently onto parts of the white moon while it’s slightly damp to create craters and shadows. -
Splatter stars:
Dilute some white paint until it’s milky. Load a brush, hold it over the sky area, and tap the handle against another brush to spray fine mist-like stars across the darkness. -
Add prominent stars:
Use your fine liner brush to manually dot in a few larger, brighter stars to break up the uniformity of the splatter.
Pro Tip: Edge Control
To get the crisp, rough edge shown in the photo, rip your paper to size using a ruler as a guide before painting, rather than cutting it with scissors.
Step 3: Mountain Layers
-
First mountain range:
Mix a light, milky blue-grey. Paint the furthest mountain range with soft, rolling peaks. This layer should be just slightly darker than the lowest part of your sky gradient. -
Second mountain range:
Once the first range is dry, darken your mix slightly by adding more indigo. Paint a second range of mountains that overlaps the first, bringing the peaks slightly lower on the page. -
Third mountain range:
Darken the mix again. Create a third, closer set of mountains. I like to make the angles of these peaks a bit sharper to suggest rugged terrain closer to the viewer. -
Foreground base:
For the bottom section of land, use a deep, nearly pure indigo. Fill in the bottom area completely, covering up to the base of your last mountain range.
Step 4: Silhouettes and Details
-
Start the treeline:
Using the pure indigo mix and your smallest round brush, begin painting tiny vertical lines along the top edge of the dark foreground to establish tree trunks. -
Foliage details:
Stipple or dab the brush along these trunks to create the shape of pine trees. Keep the trees on the right side smaller and denser relative to the perspective. -
Foreground trees:
On the left side, paint three or four larger, distinct pine trees. Use the fine liner to detail the jagged branches sticking out from the silhouettes. -
Final touches:
Check your moon and stars; if the background blue has dulled them, add a final tiny dot of pure white to the brightest stars to make them pop.
Allow your painting to dry fully before displaying your peaceful night scene
Lo-Fi Reading Nook Scene
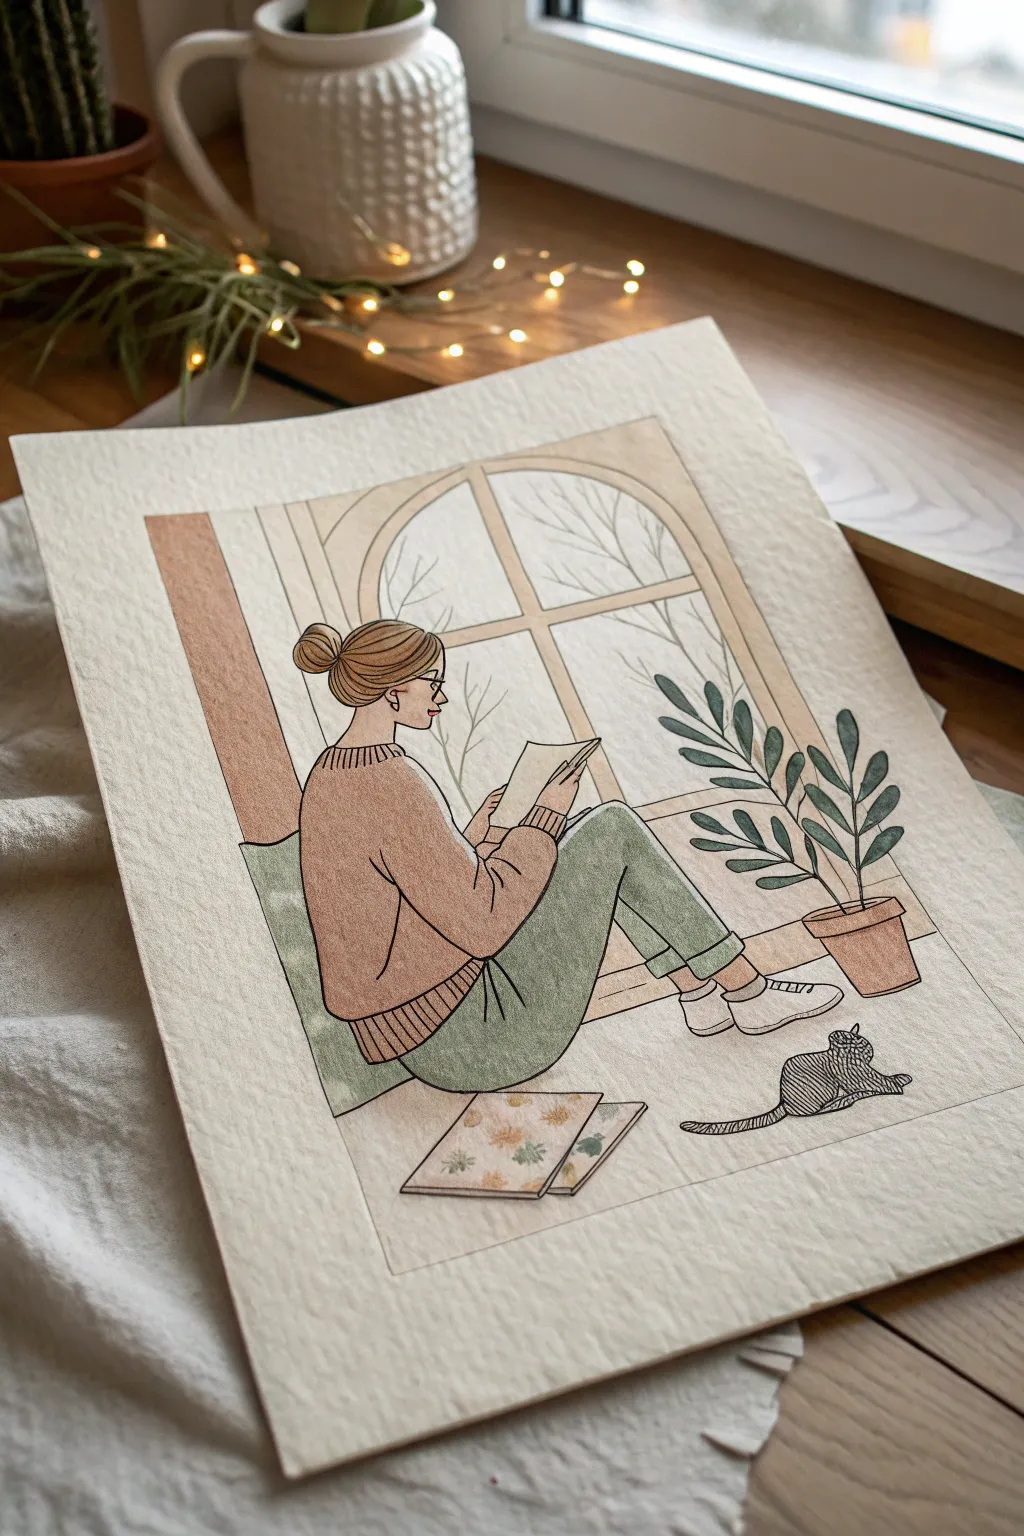
Capture the ultimate peaceful moment with this charming gouache illustration of a girl reading by a winter window. Featuring a soft, muted palette and clean linework, this piece combines the coziness of lo-fi aesthetics with the satisfaction of architectural and figure drawing.
Step-by-Step Guide
Materials
- Heavyweight watercolor or mixed media paper (at least 300gsm)
- Gouache paints: Burnt Sienna, Yellow Ochre, Sage Green, Titanium White, Black
- Pencil (HB) and eraser
- Fine liner pens (0.1mm and 0.3mm, black, waterproof)
- Round brushes (sizing 2, 4, and 6)
- Palette for mixing
- Masking tape
- Water cups and paper towels
Step 1: Sketching the Composition
-
Prepare your paper:
Tape down all four edges of your paper to a hard board. This creates that crisp white border you see in the final piece and prevents the paper from buckling under the washes. -
Establish the window frame:
Lightly sketch a large arch shape in the upper center of the page. Divide it with a vertical center line and a horizontal crossbar to create the window panes. -
Sketch the figure:
Draw the girl sitting on the floor in profile. Focus on the simple shapes: an oval for the head, a curved shape for the slouchy sweater, and angled legs bent at the knees. -
Add environmental details:
Sketch the floor cushion behind her back, the potted plant to the right with its tall leaves, and the two books lying flat on the floor in the foreground. -
Refine the sketch:
Add the smaller details: her bun, glasses, the socks, and the small cat stretching out near her feet. Keep your pencil lines light so they won’t show through lighter paint layers.
Step 2: Blocking in Base Colors
-
Paint the sweater:
Mix a soft, warm beige using Burnt Sienna, a touch of Yellow Ochre, and plenty of White. Paint the entire sweater shape and drying completely before moving on. -
Fill the trousers:
Create a muted sage green. Apply this to the legs, being careful to paint around the socks and the hands holding the book. -
Color the architectural elements:
Use a very watered-down wash of pale beige (mostly water and a dot of brown) for the window frame and the wall section to the left. It needs to be significantly lighter than the clothing. -
Paint the accessories:
Use a dusty terracotta or ochre shade for the plant pot and the spine of the book she is holding. Paint the leaves of the plant with a darker variation of the trouser green.
Consistent Coziness
To keep the color palette harmonious, try mixing a tiny dot of your background beige into every other color you use. It ties the scene together beautifully.
Step 3: Adding Depth and Texture
-
Skin tones and hair:
Mix a pale peach for the face and hands. For the hair, use a light brown wash. Don’t worry about individual strands yet; just get the solid color down. -
Window scenery:
For the view outside the window, use an extremely pale grey-white wash to suggest a snowy or overcast day. It should be barely visible, just enough to distinguish it from the white paper border. -
Floor details:
Paint the book covers on the floor with cream and soft green. Once dry, dab small spots of yellow and orange to suggest a floral pattern on the covers. -
Shadows and shading:
Mix a slightly darker version of your sweater color. Paint a shadow under the arm and where the sweater folds. Do the same for the trousers, adding shadows where the legs bend.
Make It Personal
Customize the view outside the window! Instead of bare winter branches, paint lush green leaves for spring or falling orange leaves for an autumn vibe.
Step 4: Inking and Final Details
-
Outline the figure:
Using your 0.1mm fine liner, carefully trace the outline of the girl. Use broken or lighter lines for fabric folds to keep the drawing looking soft. -
Detail the sweater:
Draw vertical lines on the cuffs, collar, and hem of the sweater to create a ribbed texture effect. -
Ink the plant and cat:
Outline the plant leaves and the pot. For the cat, use tiny hatching lines or a stippling motion with the pen to simulate fur texture rather than a solid outline. -
Hair details:
Add sweeping pen strokes to the hair bun to show the direction of the strands. I like to keep these lines loose to maintain that illustrative feel. -
Window branches:
Inside the window panes, use the pen to draw very delicate, bare tree branches. Keep the lines shaky and organic to mimic natural wood. -
Final touches:
Erase any remaining pencil marks once the ink is totally dry. Finally, peel off your masking tape slowly at a 45-degree angle to reveal the clean border.
Now you have a serene little reading nook artwork to hang on your wall or gift to a book-loving friend
Glowing Fantasy Mushrooms at Midnight
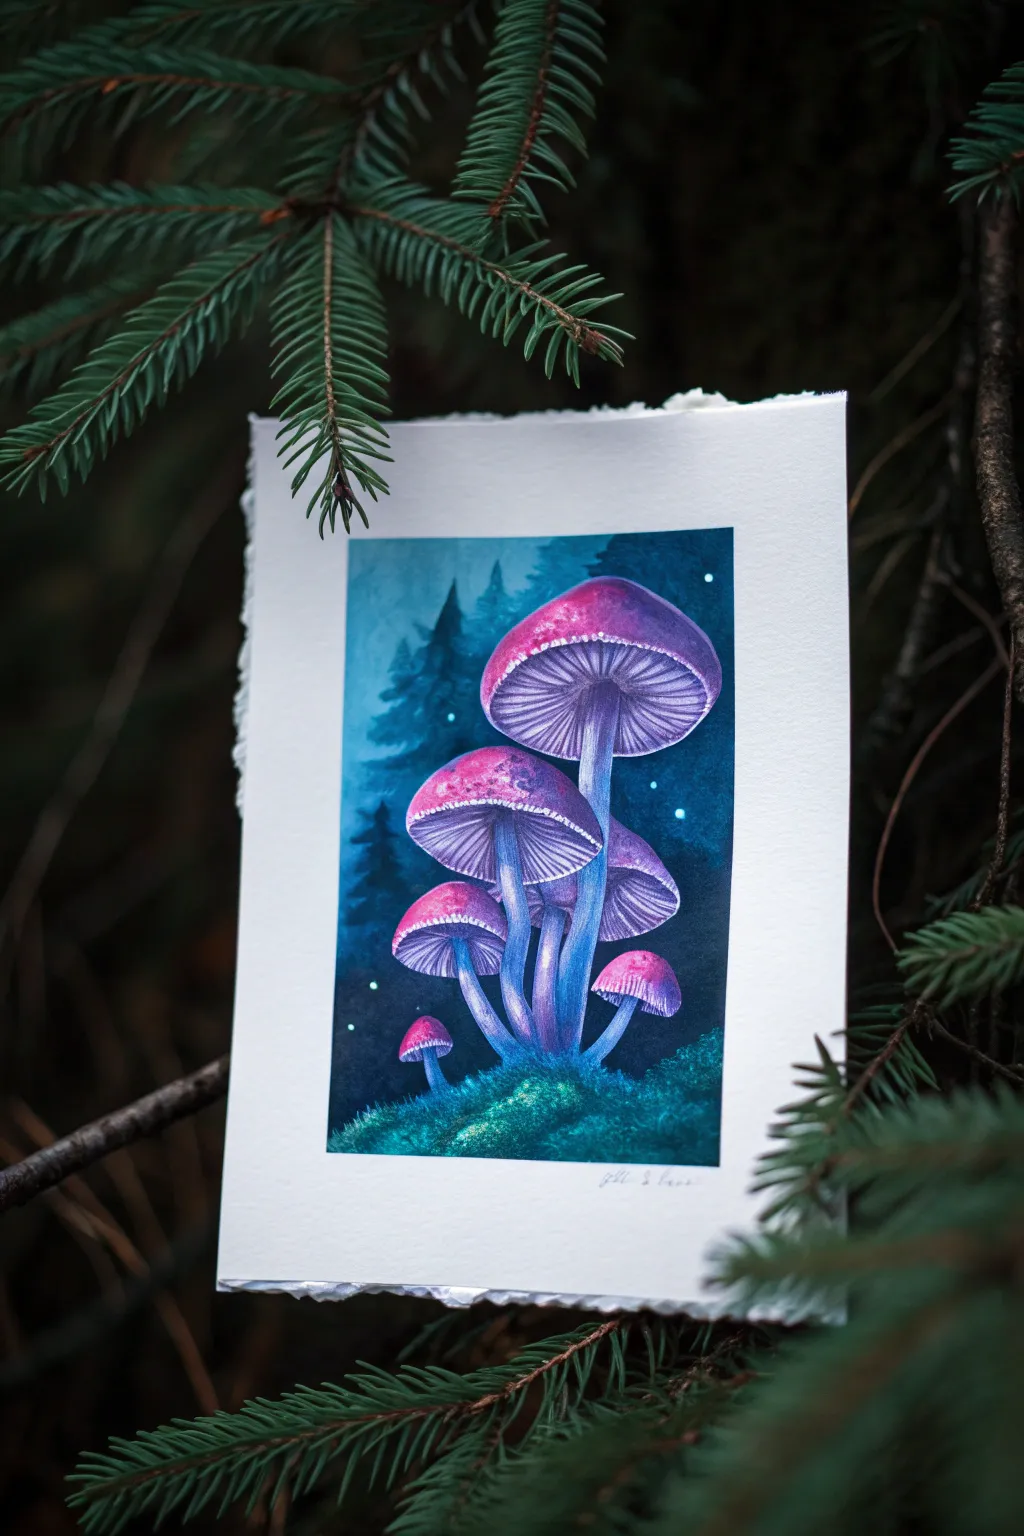
Gouache is the perfect medium for capturing the ethereal glow of this fantasy scene, as its opacity allows vibrant lights to pop against dark backgrounds. This project focuses on building luminous layers to create depth and magic.
Step-by-Step
Materials
- Heavyweight watercolor paper or mixed media paper (deckled edge optional)
- Gouache paints: Prussian Blue, Indigo, Magenta, White, Turquoise, Violet
- Flat shader brush (size 6 or 8)
- Round detail brushes (size 0 and 2)
- Palette for mixing
- Cup of water and paper towels
- Painter’s tape or drawing board
Step 1: Setting the Scene
-
Tape and sketch:
Secure your paper to a board if you aren’t holding it loose. Lightly sketch the cluster of mushrooms using a pencil. Place the largest mushroom near the top center, with smaller ones cascading down the stem, overlapping slightly. -
Base background wash:
Mix Prussian Blue with a touch of Turquoise and water to create a thin, milky wash. Apply this to the entire background area around your mushroom sketch. -
Deepen the shadows:
While the wash is still slightly damp, drop in concentrated Indigo around the edges of the paper and the bottom corners to create a vignette effect. Let this dry completely. -
Ghostly trees:
Using a diluted mix of Indigo and a flat brush, paint simple triangular silhouettes of pine trees in the background. Keep the edges soft so they look like they are receding into the mist.
Chalky Finish?
If dark colors dry looking dusty or chalky, you likely used too much water or not enough pigment. Apply a second, creamier layer of paint to restore the depth and richness of the color.
Step 2: Painting the Mushrooms
-
Mushroom base coats:
Mix a vibrant violet using Magenta and a tiny bit of Prussian Blue. Paint the caps of all the mushrooms with this solid color. Don’t worry about the glow yet; aim for flat, opaque coverage. -
Diffused stem light:
For the stems, mix White with a drop of Turquoise and a hint of Violet. Paint the stems, blending the color into the dark background at the bottom where they meet the moss. -
Creating the gradient:
On the mushroom caps, blend a lighter pink (Magenta + White) onto the very top edge of each cap while the base purple is still wet. This establishes the light source coming from above. -
Painting the gills:
Using your smallest round brush and a mix of White and Violet, paint fine lines radiating from the center stem out to the edge of the cap. These are the gills. -
Deepening gill shadows:
Go back in between the light gill lines with a darker purple mix. This contrast makes the ridges look three-dimensional. -
The glowing rim:
This is the crucial step for the ‘glow.’ Use pure Titanium White with a very small amount of water. Carefully outline the rim of the mushroom caps where the gills meet the skin. -
Adding textures:
Stipple tiny dots of white and light pink on top of the mushroom caps to mimic texture and reflected light.
Step 3: Atmosphere and Details
-
Mossy foundation:
Mix Turquoise and a little Yellow (or just use the blue-green mix) to paint the mossy mound at the base. Use a dabbing motion to create a fluffy, organic texture. -
Highlighting the moss:
Add more White to your green mix and dab it onto the top of the moss mound where the mushroom light would hit it. -
Enhancing the glow:
Mix a very watery glaze of bright Turquoise or electric blue. Gently glaze over the area where the stems meet the moss to create a bioluminescent ambiance. -
Floating spores:
Load your brush with watery white paint. Tap the handle against another brush to splatter tiny ‘stars’ or spores into the dark background areas. -
Defining the edges:
Use a detail brush with pure white to add a few final, sharp highlights on the very edges of the stems and the most prominent gills.
Pro Tip: Reactivation
Gouache reactivates with water. If you mess up a sharp edge, use a damp, clean brush to gently lift the paint away or soften the mistake before repainting perfectly.
Step back and admire the magical glow you have created.
Have a question or want to share your own experience? I'd love to hear from you in the comments below!