When you’re craving a cuter look in your art, it really comes down to a handful of style choices you can mix and match. Here are my favorite cute art styles ideas to play with—starting with the classics and drifting into the delightfully weird.
Kawaii Face Basics
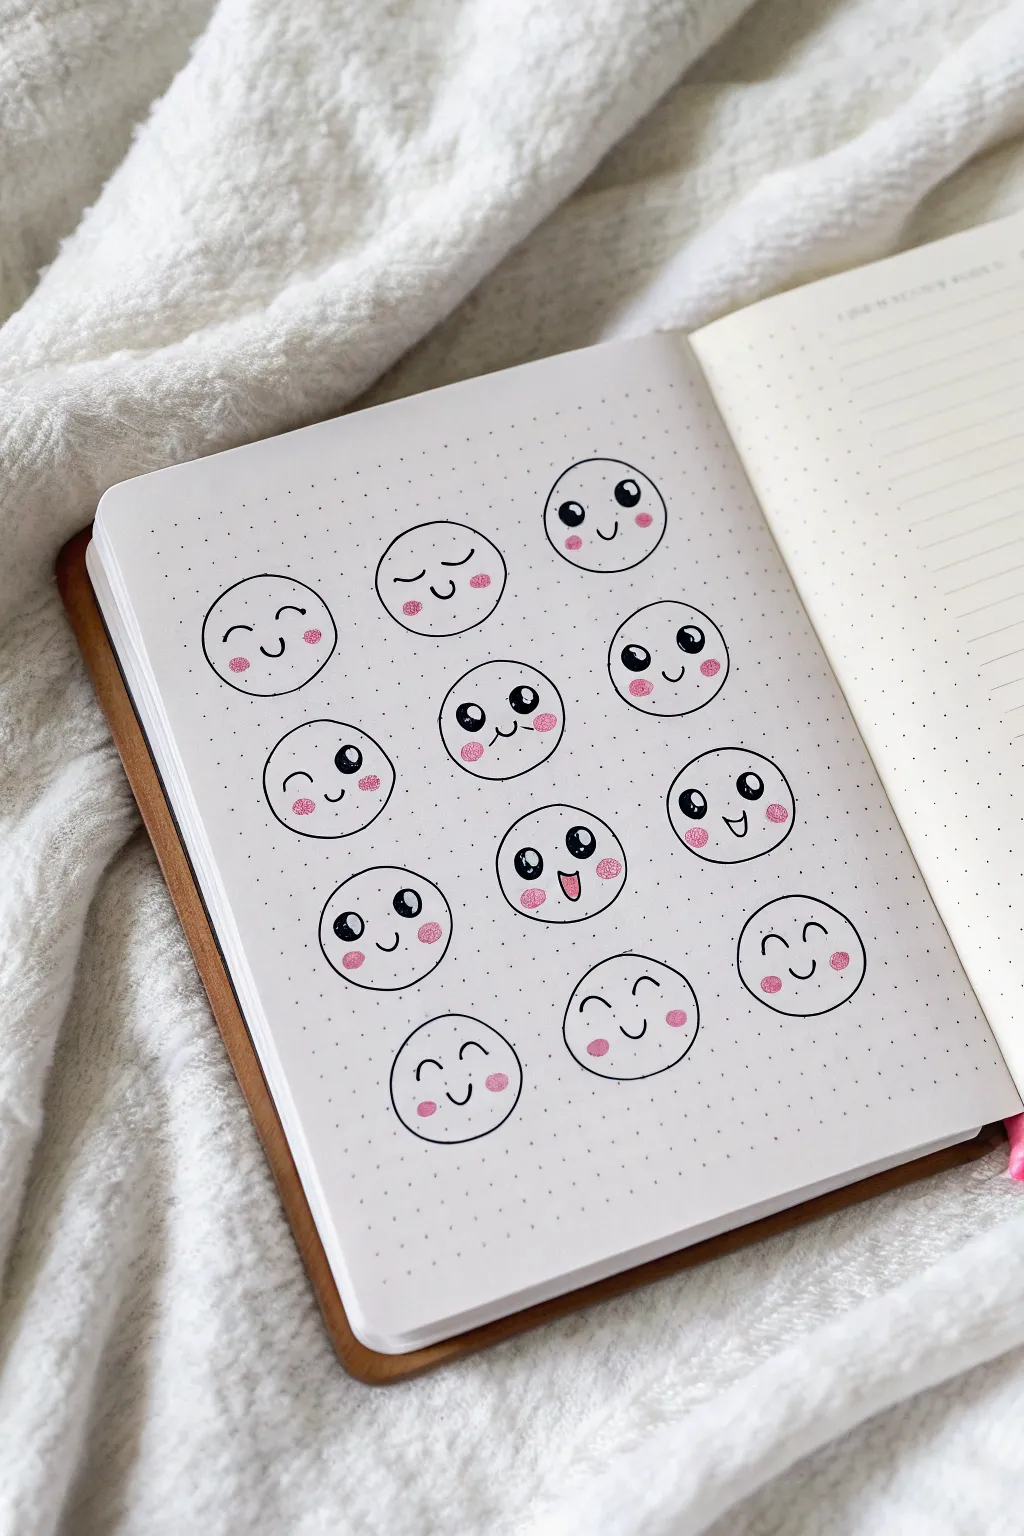
Capture a range of emotions with this adorable spread of minimalist kawaii faces, perfect for a bullet journal mood tracker or just doodle practice. The simplicity of the circular base makes it easy to experiment with different expressions while maintaining a cohesive, charming look.
Step-by-Step Tutorial
Materials
- Dot grid notebook or journal
- Circle stencil or compass (approx. 1-1.5 inch diameter)
- Pencil and eraser
- Black fine liner pen (0.3mm or 0.5mm)
- Black brush pen or thicker marker (for eyes)
- Soft pink highlighter or marker
- White gel pen (optional, for eye highlights)
Step 1: Planning the Layout
-
Grid setup:
Begin by counting the grid dots on your page to center your design. You will need space for a grid of roughly 3 columns and 4-5 rows, though you can adjust the spacing based on your notebook size. -
Drafting circles:
Using a pencil and your circle stencil (or a compass), lightly trace thirteen circles. Arrange them in a loose grid pattern, but leave enough breathing room between each one so the page doesn’t look cluttered. -
Sketching expressions:
Lightly sketch a different facial expression inside each circle with your pencil. Vary the eyes—from simple arcs for sleeping faces to large, shiny circles for excited ones—and change the mouths to match.
Step 2: Inking the Faces
-
Inking the outlines:
Take your black fine liner and carefully trace over the circular outlines. Try to keep your hand steady for a smooth, continuous curve, but don’t worry if it’s slightly imperfect; that adds to the hand-drawn charm. -
Drawing closed eyes:
For the sleeping or happy faces (like the top left), draw simple curved arcs. You can make them curve upwards for a happy squint or downwards for a peaceful sleep. -
Creating open eyes:
For the open eyes, draw larger circles. To get that classic ‘kawaii’ shine, draw two small circles inside the eye pupil first—one larger highlight at the top and a smaller one at the bottom—then fill in the rest of the pupil with solid black. -
Inking the mouths:
Go over your pencil sketches for the mouths. Keep the strokes small and centered. For open mouths, you can add a small curved line inside to suggest a tongue. -
Erasing sketches:
Wait at least a minute or two to ensure the black ink is completely dry, then gently erase all your pencil guides to leave a clean, crisp drawing.
Use a Circle Template
For perfectly uniform doodles, use a circle template ruler instead of a compass. It prevents pinholes in your paper and keeps sizes consistent.
Step 3: Adding Color & Detail
-
Applying blush:
Using a soft pink highlighter or marker, dab two small circles on the cheeks of every face. I find that placing these slightly wider than the eyes creates the cutest proportion. -
Adding texture:
If your pink marker is too solid, you can gently tap it to create a slightly textured, stippled look. Alternatively, use a glitter pen for sparkly cheeks. -
Coloring mouths:
For the open-mouthed expressions (like the winking face or the laughing one), use the same pink shade to color in the tongue area. -
Highlighting:
If you accidentally filled in the white highlights in the eyes, you can use a white gel pen to dot them back in on top of the black ink. -
Final touches:
Review the spread for any uneven lines. You can thicken the outer circle lines slightly if you want them to stand out more against the delicate facial features.
Uneven Eyes?
If one eye turns out larger than the other, simply thicken the outline of the smaller one slightly to balance them out visually.
Enjoy filling your new mood tracker or decoration page with these expressive little characters

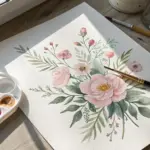
Soft Pastel Palette Style
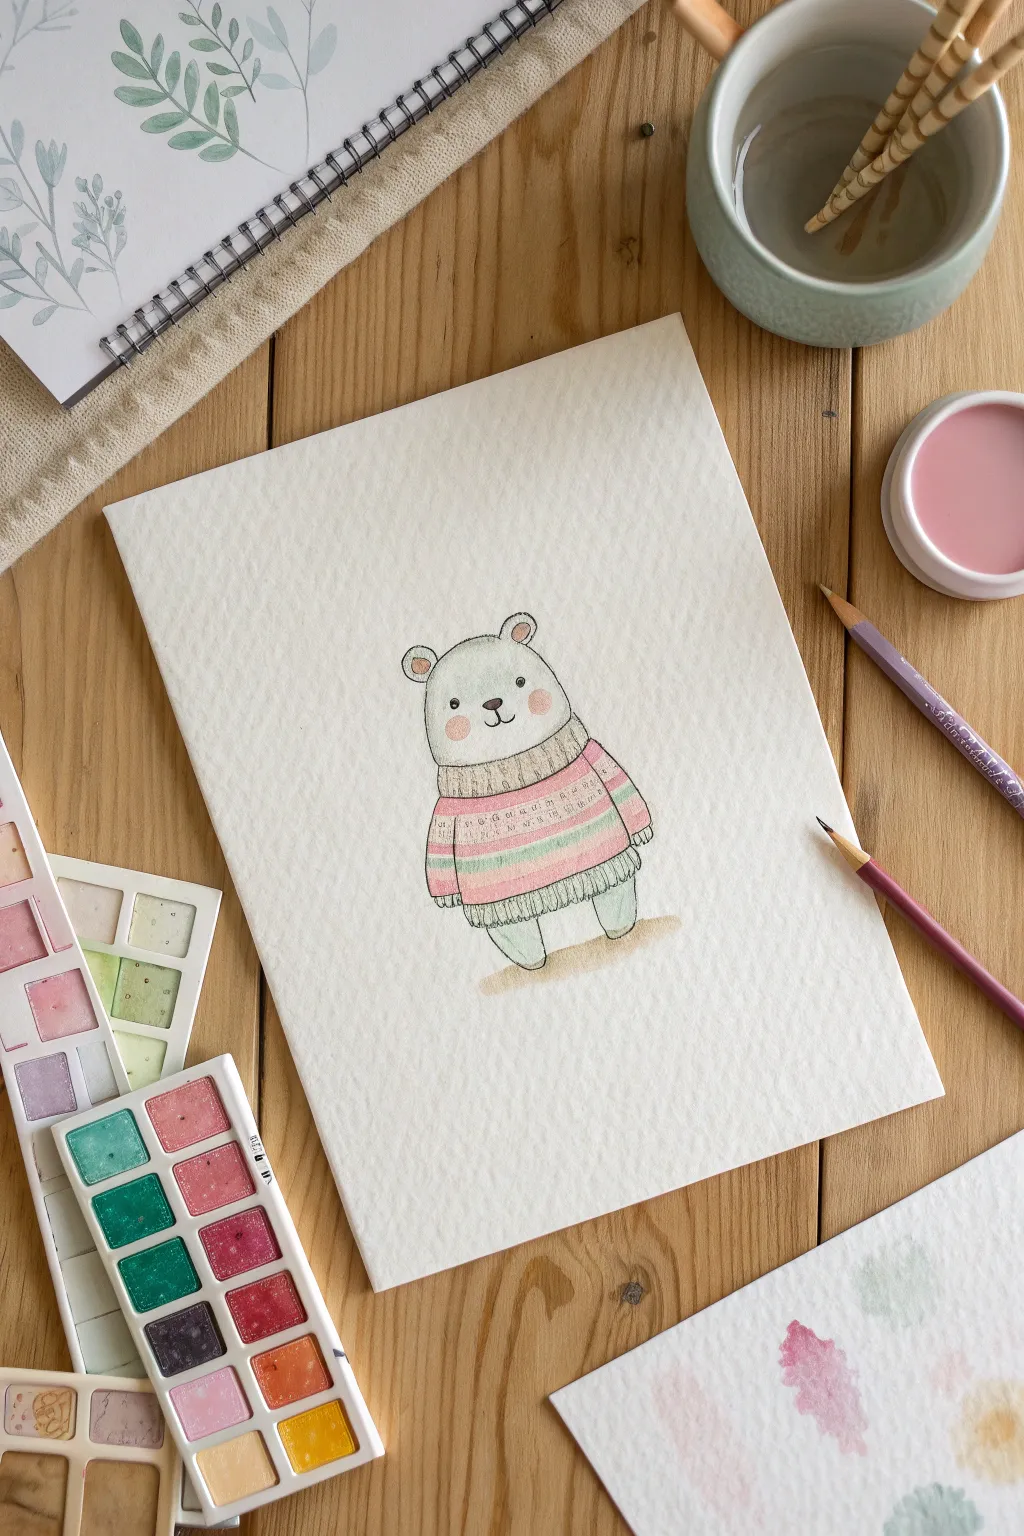
Capture the charm of soft pastel art with this adorable illustration of a bear bundled up in a knit sweater. Combining gentle watercolor washes with colored pencil details creates a textured, heartwarming character perfect for greeting cards or nursery decor.
Detailed Instructions
Materials
- Cold press watercolor paper (A5 size recommended)
- HB graphite pencil
- Kneaded eraser
- Watercolor pan set (pastels: mint green, soft pink, cream)
- Small round watercolor brush (size 2 or 4)
- Colored pencils (dark grey, rose pink, mint green)
- Cup of water and paper towels
- Fine liner pen (optional, dark grey or brown)
Step 1: Sketching the Character
-
Draft the head shape:
Start near the upper center of your paper. Lightly sketch a rounded shape for the head; it should be slightly wider at the bottom than the top, like a very soft gumdrop. -
Add the body:
Draw the body directly beneath the head. Make it roughly the same height as the head but slightly wider to give the bear a chubby, cuddly appearance. -
Sketch the sweater outline:
Define the sweater by drawing a curved line where the neck meets the body for the collar. Draw a slightly wavy line across the bottom of the body for the hem. -
Add limbs and ears:
Draw two small semi-circles on top of the head for ears. Add simple, short shapes for the arms resting against the sides, and two small feet peeking out from under the sweater hem. -
Refine the face:
Place two small dots for eyes wide apart. Add a small oval nose in the center and a simple ‘w’ shape for the mouth. Keep the pencil lines very faint so they do not show through the paint later.
Keep it Loose
Don’t worry if your watercolor goes slightly outside the lines. This ‘imperfect’ look enhances the hand-drawn, cozy aesthetic of the style.
Step 2: Painting Base Layers
-
Wash the fur:
Mix a very dilute, watery grey or cream color. Apply this wash gently to the head, paws, and feet. Leave the sweater area unpainted for now. Keep the paint very transparent. -
Paint the sweater base:
While the fur dries, mix a soft pastel pink. Paint horizontal stripes across the body of the sweater. I like to leave small gaps of white paper between stripes to keep colors from bleeding into each other. -
add contrasting stripes:
Once the pink stripes are slightly damp but not soaking, fill in the white gaps with a soft mint green watercolor. If the colors touch slightly, that’s okay—it adds to the charm. -
Color the cheeks:
Dip your tip into a slightly more concentrated pink. Dab two round spots on the bear’s cheeks while the face layer is dry, which creates a classic ‘blush’ effect. -
Paint the ribbing:
Use a light beige or cream color to paint the collar and the bottom hem of the sweater. Let the entire painting dry completely before moving to the next phase.
Step 3: Adding Details & Texture
-
Outline with pencil:
Take a sharp dark grey or black colored pencil. Carefully trace over your original pencil sketch lines to define the bear’s outline. Use short, disjointed strokes to mimic a fuzzy texture. -
Detail the face:
Darken the eyes and nose with the colored pencil. Add a tiny white highlight to the nose if you have a white gel pen, or simply press harder with the dark pencil to build contrast. -
Texture the sweater:
Using a pink colored pencil, draw tiny vertical ticks on the pink painted stripes to simulate knitting stitches. Do the same with a green pencil on the green stripes. -
Define the ribbing:
On the beige collar and hem, draw vertical lines spaced closely together. This instantly makes the area look like ribbed knit fabric. -
Add the shadow:
Mix a watery light brown or grey paint. Paint a simple oval shadow underneath the bear’s feet to ground the character so it doesn’t look like it’s floating. -
Final touches:
Check the ears—add a touch of pink inside roughly with the colored pencil. Review the outline and strengthen any lines that feel too faint.
Holiday Twist
Change the sweater colors to red and green for a holiday version, or add tiny painted snowflakes falling around the bear for a winter scene.
Step back and admire your cozy creation, noting how the mixed media textures make the character pop off the page


Round Shapes-Only Cartoon Look
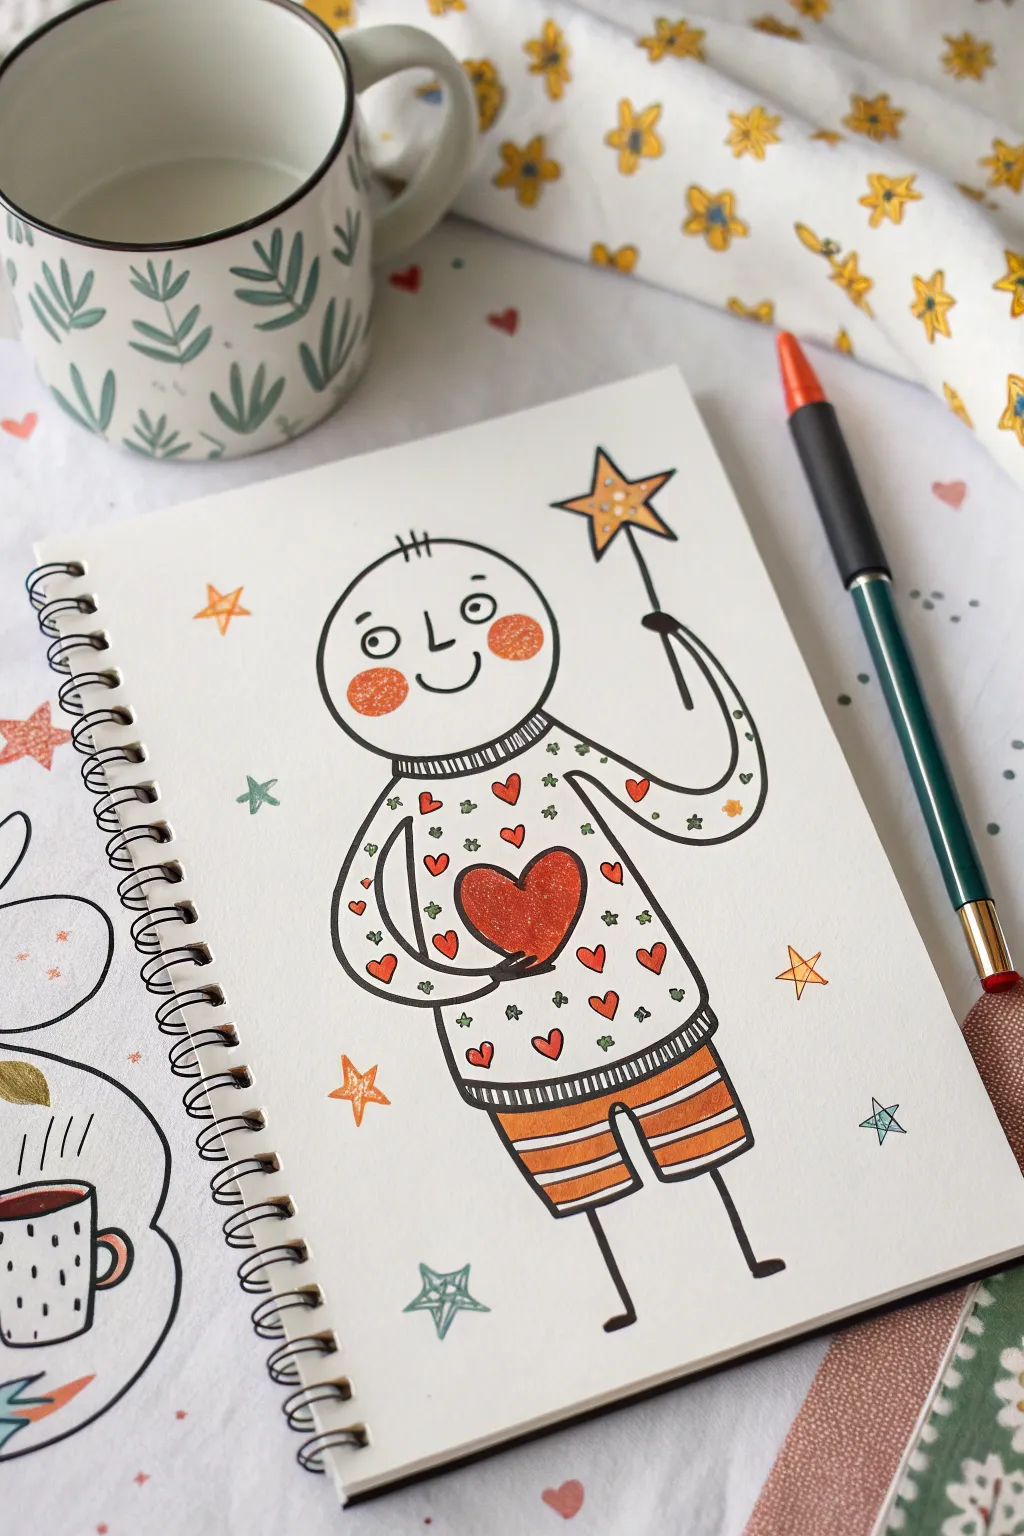
Capture the charm of simple shapes with this endearing illustration of a round-headed character holding a heart. Using bold ink lines and warm marker accents, you’ll create a whimsical figure perfect for greeting cards or sketchbook pages.
Step-by-Step Guide
Materials
- Spiral-bound sketchbook or mixed-media paper
- Fine liner pen (black, waterproof, 0.5mm or 0.8mm)
- Alcohol markers or colored fineliners (orange, red, dark green)
- Pencil (HB for sketching)
- Eraser
Step 1: Sketching the Base Shapes
-
Head and Body:
Start by drawing a perfect circle for the head near the upper middle of your page. Just below it, sketch a softly rounded trapezoid shape for the body, slightly wider at the bottom than at the neck. -
Adding Limbs:
Draw two long, curvy, tube-like arms coming from the shoulders. Position the left arm curving inward to hold something against the chest, and the right arm curving upward as if holding a wand. -
Legs and Wand:
Sketch two short, rectangular shapes for shorts at the bottom of the body. From the shorts, draw two simple stick legs ending in small rectangular feet. Finally, add a five-pointed star at the tip of the raised right hand.
Step 2: Inking the Outlines
-
Tracing the Main Lines:
Go over your pencil sketch with a black fine liner. Use a confident, steady hand to create smooth continuous curves. Don’t worry if the lines wobble slightly; it adds to the hand-drawn charm. -
Facial Features:
Inside the head circle, draw two small dots for eyes with eyebrows floating high above. Add a simple ‘L’ shape for the nose and a wide ‘U’ curve for a smiling mouth. -
Three Little Hairs:
Draw three small vertical dashes right at the very top of the head for a cute hair detail. -
Refining the Clothes:
Ink the sweater cuffs and neckline with ribbed details—groups of small vertical lines. Define the ‘shorts’ clearly, separating them from the sweater. -
The Heart and Wand:
Carefully draw a large heart shape being cradled by the left arm. Draw the stick handle of the wand connecting the right hand to the star.
Uneven Circles?
Don’t stress about perfect geometry. If your head circle is lopsided, thicken the outline in certain spots to visually balance the shape without redrawing it.
Step 3: Adding Patterns and Details
-
Sweater Design:
Fill the white space of the sweater with a repeating pattern. Alternate between small hearts and tiny four-point star shapes to create a festive texture. -
Shorts Stripes:
Draw horizontal stripes across the shorts. Make sure the lines are slightly curved to follow the form of the fabric. -
Background Elements:
Scatter a few stars around the character—some simple five-pointed outlines and some smaller solid stars—to fill the negative space.
Make it Sparkle
Once the marker ink is dry, use a white gel pen to add tiny highlight dots to the flushed cheeks and the big red heart for extra cuteness.
Step 4: Coloring
-
Rosy Cheeks:
Using an orange or coral marker, draw two distinct circles on the face for cheeks. Fill them in completely for a rosy look. -
The Big Heart:
Color the large heart held by the character with a deep red marker. If you want texture, use small circular strokes rather than long lines. -
Sweater Accents:
I prefer to use a finer colored pen for this part—fill in the small heart patterns on the sweater with red, and use a dark green fine liner for the tiny star patterns. -
Stripes and Wand:
Color the stripes on the shorts with the orange marker, leaving every other stripe white. Use the same orange to color in the star on the wand. -
Surrounding Stars:
Color the scattered background stars. Make the larger outlines orange and use green for minimal star accents. -
Cleanup:
Once the ink is fully dry, gently erase any visible pencil sketch lines to leave a crisp, clean illustration.
Now you have a delightfully quirky character ready to spread some illustrated joy

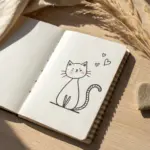
Tiny Doodle Icon Style
Capture the charm of everyday objects with these delightful, miniature drawings scattered across a bullet journal page. This project uses simple lines and soft pastel touches to create a cohesive, kawaii-inspired spread that is perfect for filling empty spaces or tracking moods.
Step-by-Step Guide
Materials
- A5 dotted notebook or bullet journal
- Fine liner pen (black, 0.1mm or 0.3mm nib)
- Pastel highlighters or art markers (pink, faint yellow)
- Pencil (HB)
- Eraser
- Ruler (optional for spacing)
Step 1: Planning the Layout
-
Visualize the grid:
Start by looking at your dotted page. Instead of a rigid grid, imagine an invisible, loose checkerboard pattern. You want the icons to feel randomly scattered but evenly spaced, avoiding big clumps or large gaps. -
Pencil draft:
Lightly sketch the small icons with an HB pencil. Keep your shapes very simple—circles for faces, teardrops for leaves, and ovals for food items. Don’t press too hard, as you’ll want to erase these lines cleanly later. -
Distribute elements:
Place your larger items first, like the crescent moon, the cupcake, and the coffee mug. Scatter them across the page so no two large items are right next to each other. -
Fill the gaps:
In the spaces between larger icons, sketch smaller filler elements like single hearts, tiny stars, or small flowers. This creates a balanced texture across the page.
Smudge Alert
If your fine liner smears when erasing or coloring, switch to a pigment-based or archival ink pen. These dry waterproof and are marker-safe.
Step 2: Inking the Icons
-
Outline main shapes:
Take your black fine liner (a 0.3mm works well for bold clarity) and carefully trace over your pencil sketches. Prioritize clean, continuous lines rather than sketchy, broken strokes. -
Draw the botanical elements:
For the leaves and flowers, draw the outlines first. Add a central vein to the single leaves. For the flowers, draw the center circle first, then attach the petals around it. -
Add food details:
Ink the coffee mug with a simple curve for the handle. For the cupcake, draw the scalloped bottom wrapper and a soft swirl for the frosting top. For the cookie, add small irregular dots for chips. -
Character features:
Ink the simple faces—like the round blob character or the cat-like shape. Keep the eyes as simple dots or small curves. I like to place the eyes wide apart to enhance the cute factor. -
celestial touches:
Ink the crescent moon and the larger multi-pointed stars. Make sure the points of the stars connect cleanly in the center. -
Erase pencil lines:
Wait at least 5 minutes for the ink to dry completely to prevent smudging. Then, gently erase all visible pencil marks with a clean eraser.
Pro Tip: visual rhythm
Vary the orientation of similar items. If you draw two leaves, have one point left and one point right to keep the eye moving across the page.
Step 3: Adding Decorative Details
-
Internal details:
Go back in with a finer pen (0.1mm) if you have one, or just use a lighter touch. Add small details like the veins on flower petals, the steam rising from the coffee, or the wrapper folds on the candy. -
Texture dots:
Add tiny stippling dots to the cookie for texture, or small seeds on the strawberry shape if you included one. These tiny marks add depth without clutter.
Step 4: Spot Coloring
-
Choose your palette:
Select a limited color palette—stick to soft pastel pinks and maybe a hint of cream or peach. This keeps the look minimalist and prevents the page from looking chaotic. -
Color blocking:
Use a pastel marker to fill in specific areas. Color the flower petals pink, the cupcake wrapper, and the candy wrapper. Don’t worry about shading; flat color works best for this style. -
Off-register coloring:
For a looser, artistic feel, you don’t have to stay perfectly inside the lines. A slightly imperfect fill can look charming and hand-drawn. -
Highlighting filler elements:
Take a colored pencil or a very light marker and color in the tiny hearts and small circles scattered in the background. This ties the whole composition together. -
Check balance:
Step back and look at the color distribution. If one side looks too white, find a small uncolored heart or star and add a pop of pink to balance the visual weight.
Now you have a charming spread of doodles ready to brighten up your daily planning

PENCIL GUIDE
Understanding Pencil Grades from H to B
From first sketch to finished drawing — learn pencil grades, line control, and shading techniques.
Explore the Full Guide
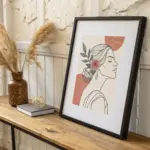
Minimal Line Art and Blush
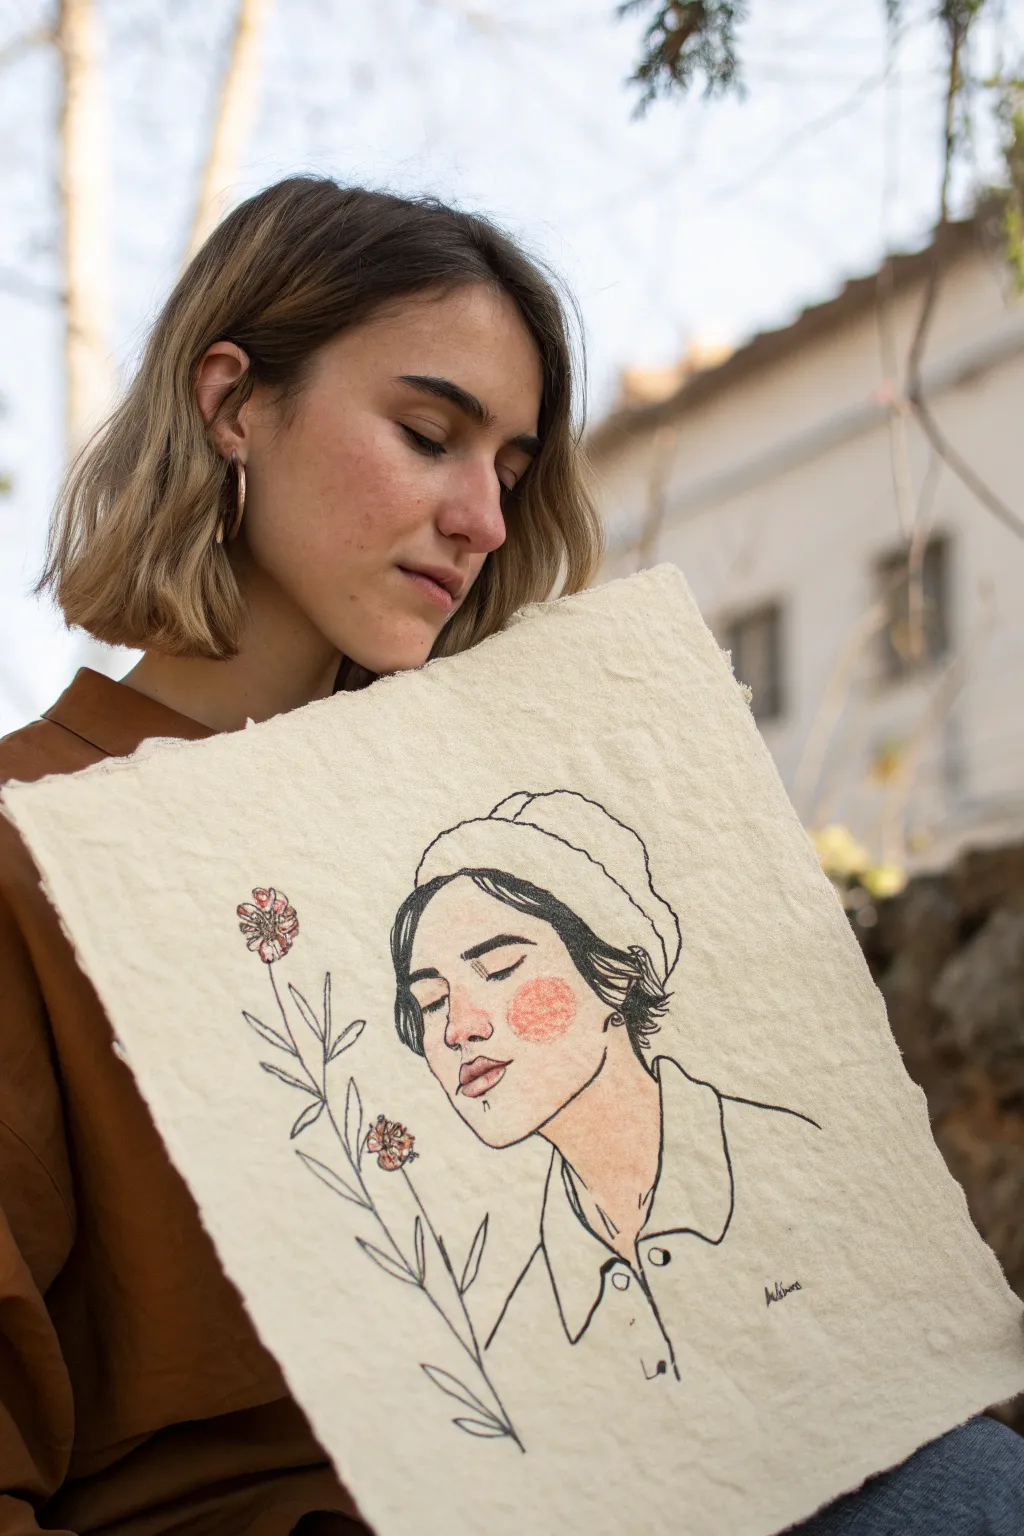
This serene project combines delicate ink line art with soft touches of color on textured, handmade paper. The result is a minimalist portrait that feels personal and dreamlike, capturing a moment of quiet reflection.
Step-by-Step Guide
Materials
- Sheet of heavy, handmade paper with deckled edges (cotton rag paper is ideal)
- Pencil (HB or 2B) for sketching
- Kneaded eraser
- Fine liner pens (black, sizes 01 and 03)
- Watercolor paints (Vermilion or Rose madder, and a touch of Yellow Ochre)
- Small round watercolor brush (size 2 or 4)
- Paper towel
- Water jar
Step 1: Preparation & Sketching
-
Secure the paper:
Place your handmade paper on a clean, flat surface. Because the texture is bumpy, you might want to tape the corners lightly to keep it from shifting, though the deckled edges usually lay flat enough on their own. -
Establish the pose:
Lightly sketch the basic structure of the figure using your pencil. Start with an oval for the heal, tilted slightly downward to the left to capture that contemplative angle. -
Draft facial features:
Mark the eye line about halfway down the face. Sketch closed eyes with a gentle downward curve. Place the nose just below, emphasizing the nostril and tip, and add the mouth slightly open or relaxed. -
Outline the beanie and hair:
Draw the shape of a beanie hat sitting loosely on the head. Sketch strands of hair peeking out from under the brim, framing the face and covering he ears partially. -
Add the collar:
Extend the neck down to draw a simple collared shirt. Keep the lines loose and not too stiff; the clothes should feel comfortable and draped. -
Compose the floral element:
To the left of the face, sketch a tall, slender flower stem with a few leaves and two blooms. Position the lower bloom so it appears close to the figure’s face, as if she is smelling it.
Ink Bleeding?
Handmade paper is absorbent. If lines feather, switch to a pigment liner rather than dye-based ink, and work faster so ink sits on top rather than soaking in.
Step 2: Inking the Lines
-
Test your pen workflow:
Before touching the final paper, test your pen on a scrap piece. Handmade paper can snag nibs, so hold the pen slightly more vertical than usual to glide over the nubs. -
Ink facial details:
Using the 01 fine liner, carefully trace the eyes, nose, and mouth. Use broken or thinner lines for the eyelashes to keep them wispy. -
Define the hair:
Switch to a slightly thicker stroke or press a bit harder for the hair. Ink the dark masses of hair, leaving small white gaps to suggest shine and texture. -
Outline the accessories:
Trace the beanie with a somewhat wobbly line to suggest soft fabric texture. Ink the collar and shoulders with confident, meaningful strokes. -
Ink the botanical elements:
Trace the flower stem and leaves. For the flower petals, use a stippling motion or very short dashes to give them an organic, textured feeling distinct from the smooth clothing lines. -
Erase pencil marks:
Wait at least 10-15 minutes for the ink to fully dry. Then, gently roll a kneaded eraser over the drawing to lift the graphite without damaging the paper’s delicate surface.
Step 3: Adding Color
-
Mix the blush tone:
Dilute a small amount of Vermilion or Rose watercolor with plenty of water. You want a very transparent, soft pink wash. -
Apply the cheek blush:
Paint a circular patch of pink on the cheek. I like to dab the brush gently to let the paper’s texture create a natural, uneven absorption that looks like skin pores. -
Tint the nose and neck:
Add a tiny touch of that same pink to the tip of the nose and a light wash on the neck for shadow warmth. -
Color the flowers:
Using a slightly more concentrated mix of the pink or a reddish-brown, dab color into the center of the flowers. Keep the color loose; it doesn’t need to stay perfectly inside the lines.
Use Texture to Your Advantage
Don’t fight the paper’s bumps. Lift your pen slightly at the end of hair or fabric strokes to let the texture create a natural fade-out effect.
Once the watercolor is dry, you can sign your name in the corner and frame your piece floating style to show off those beautiful deckled edges
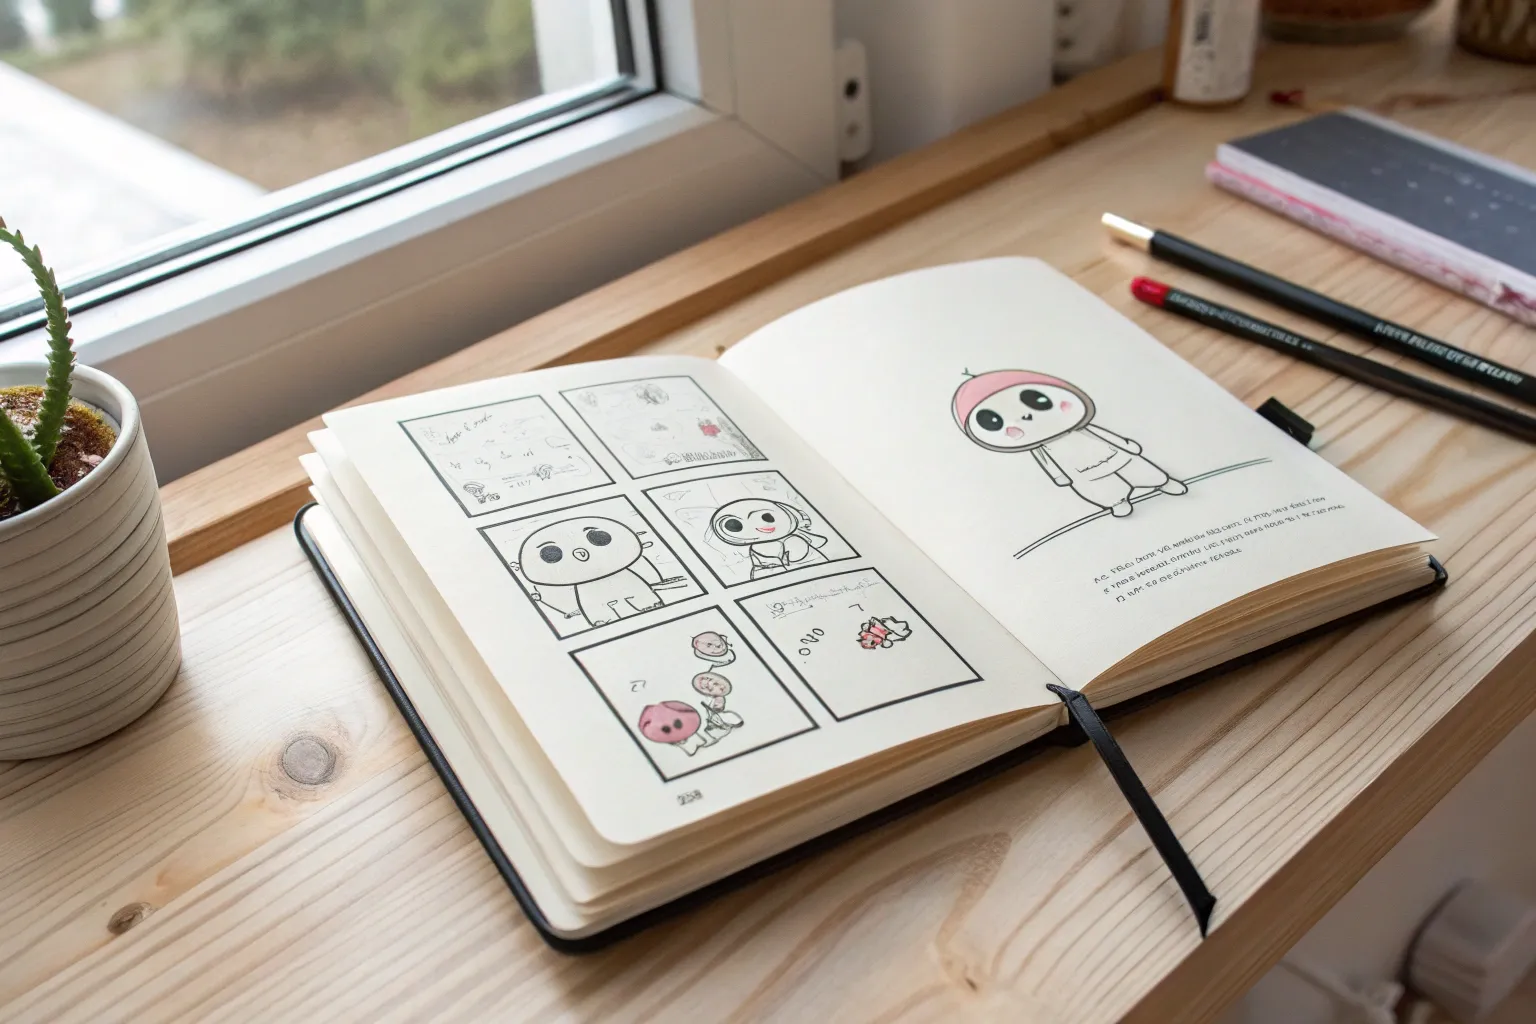
Mascot Buddy Companion Style
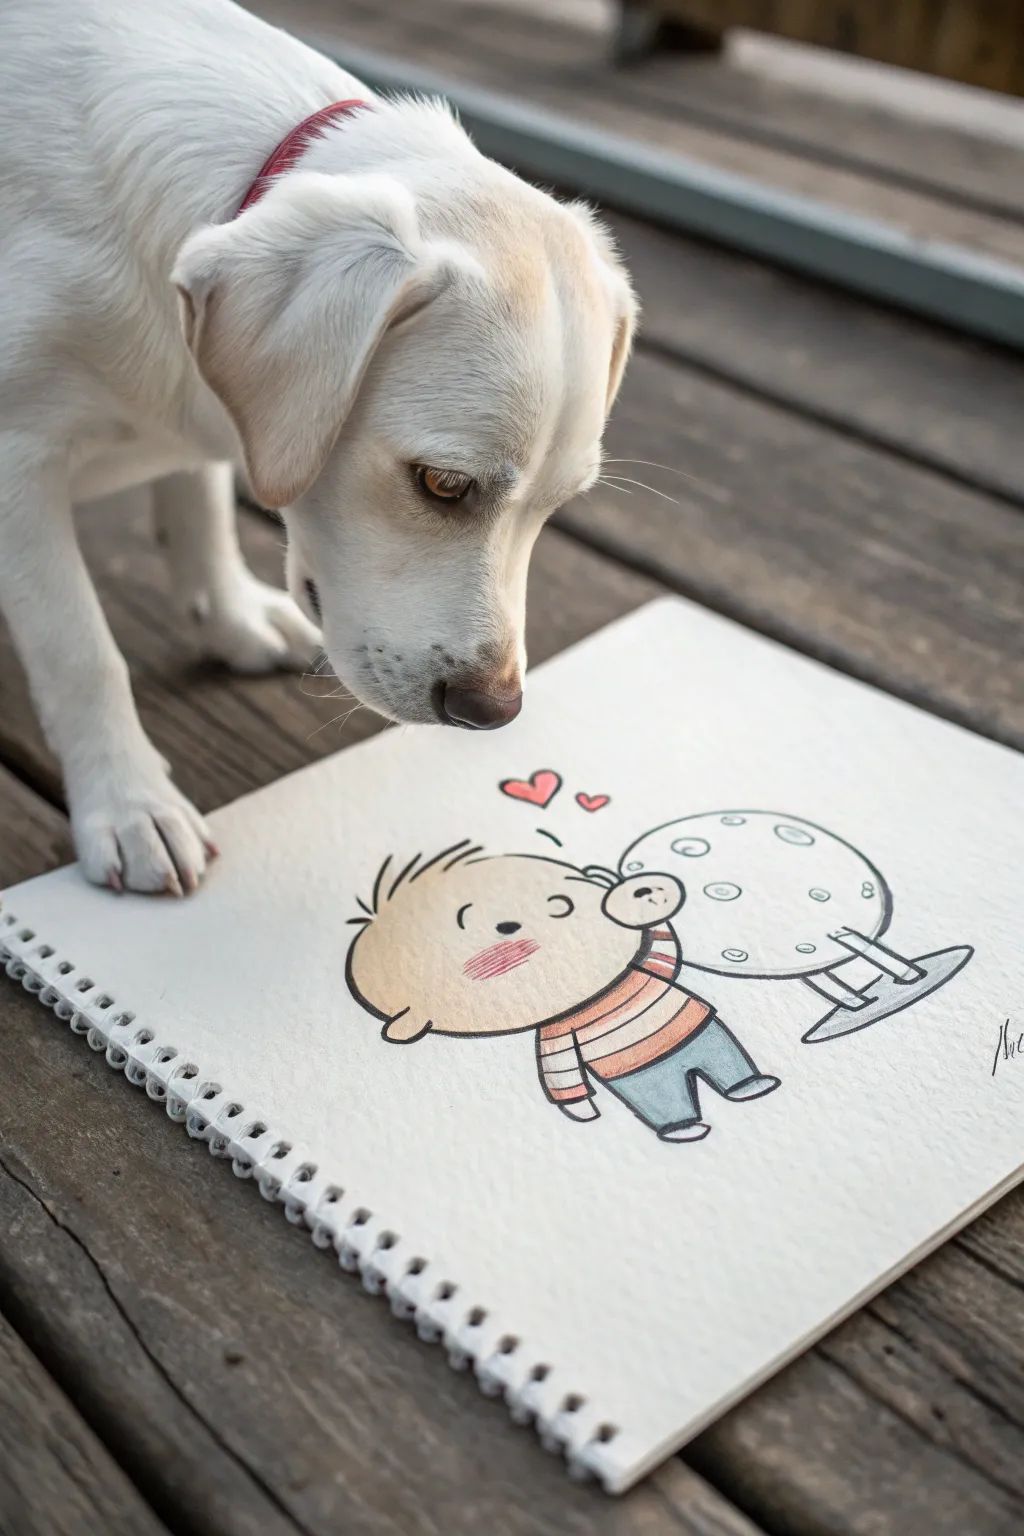
Capture the sweetness of childhood wonder with this charming mascot illustration, featuring a round-headed character interacting with a celestial friend. This project uses clean ink lines and soft shading to create a buddy companion style that feels both nostalgic and heartwarming.
Detailed Instructions
Materials
- Spiral-bound sketchbook or heavyweight drawing paper (smooth texture)
- H or HB pencil for initial sketching
- Kneadable eraser
- Fine liner pens (black, sizes 0.3mm and 0.5mm)
- Colored pencils, alcohol markers, or watercolor brush pens (skin tones, red, blue, grey)
- White gel pen (optional for highlights)
Step 1: Planning the Layout
-
Establish the Head Shape:
Begin lightly with your pencil. Draw a large, slightly flattened circle for the boy’s head. It should be the dominant shape on the left side of your page. -
Add the Body Frame:
Directly below the head, sketch a small, rectangular torso that leans slightly forward. Attach two short legs with simple, rounded feet pointing outward to ground the character. -
Position the Moon Object:
To the right of the boy, draw a large circle for the moon or globe. It should be roughly the same height as the boy’s head but resting on a simple stand or floating slightly above a base line.
Step 2: Refining the Characters
-
Detail the Face:
On the boy’s face, draw a ‘C’ shape for the ear on the left side. Add a small, snub nose and a simple curved mouth very close to the nose. Draw two small vertical dashes for eyes—keep them simple for that classic mascot look. -
Add Hair and Blush:
Sketch spiky tufts of hair on the top and back of the head. Lightly mark oval patches on the cheeks where the blush will go later. -
Draft the Clothing:
Add horizontal stripes to the boy’s shirt. Draw his arm reaching out toward the moon object, with a simplified hand looking like a mitten or paw resting near the moon’s surface. -
Texture the Moon:
Draw various small circles and ovals within the moon shape to represent craters. Add a stand at the bottom if you want it to look like a prop, or leave it floating for a magical feel. -
Insert Emotion:
Draw two small hearts floating above the space between the boy and the moon to emphasize their bond.
Smudged Ink?
If you accidentally smudge wet ink, don’t restart. Incorporate it as shadow texture or use a white gel pen to cover the mistake once it is fully dry.
Step 3: Inking
-
Outline Main Shapes:
Using a 0.5mm black fine liner, go over the main contours of the boy’s head, body, and the moon. Keep your lines smooth and continuous. -
Add Fine Details:
Switch to a 0.3mm pen for delicate areas like the hair spikes, the striped shirt pattern, and the moon’s craters. I find using a lighter touch here keeps the drawing from looking too heavy. -
Erase Sketches:
Wait for the ink to dry completely (give it at least 5 minutes), then gently erase all visible pencil lines with your kneadable eraser.
Create a Dialogue
Add a small, empty speech bubble above the ‘moon’ character to imply it’s listening, or turn the craters into a sleeping face for extra personality.
Step 4: Coloring and Shading
-
Base Skin Tone:
Use a light peach or beige colored pencil to fill in the face and hands. Apply the color lightly and evenly. -
Rosy Cheeks:
Take a light red or pink pencil and scribble a dense, textured patch on the cheek area to create a flushed, cute effect. Add a touch of pink to the floating hearts as well. -
Stripe the Shirt:
Color the stripes of the shirt, alternating between a warm terracotta or orange and white. Use firm pressure to make the colors pop against the white paper. -
Color the Pants:
Fill in the trousers with a soft slate blue or grey. Leave the feet or shoes white or a contrasting dark grey for simplicity. -
Shade the Moon:
Do not color the entire moon. Instead, use a light grey pencil to add soft shadows along the right edge and bottom of the sphere, giving it dimension without making it dark. -
Final Touches:
Add a tiny bit of red to the nose area if desired, and strengthen any thick black outlines that may have faded during coloring to make the character really stand out.
You now have a wonderfully expressive mascot character that captures a quiet moment of friendship
BRUSH GUIDE
The Right Brush for Every Stroke
From clean lines to bold texture — master brush choice, stroke control, and essential techniques.
Explore the Full Guide
Pose Base Practice for Cutie Characters
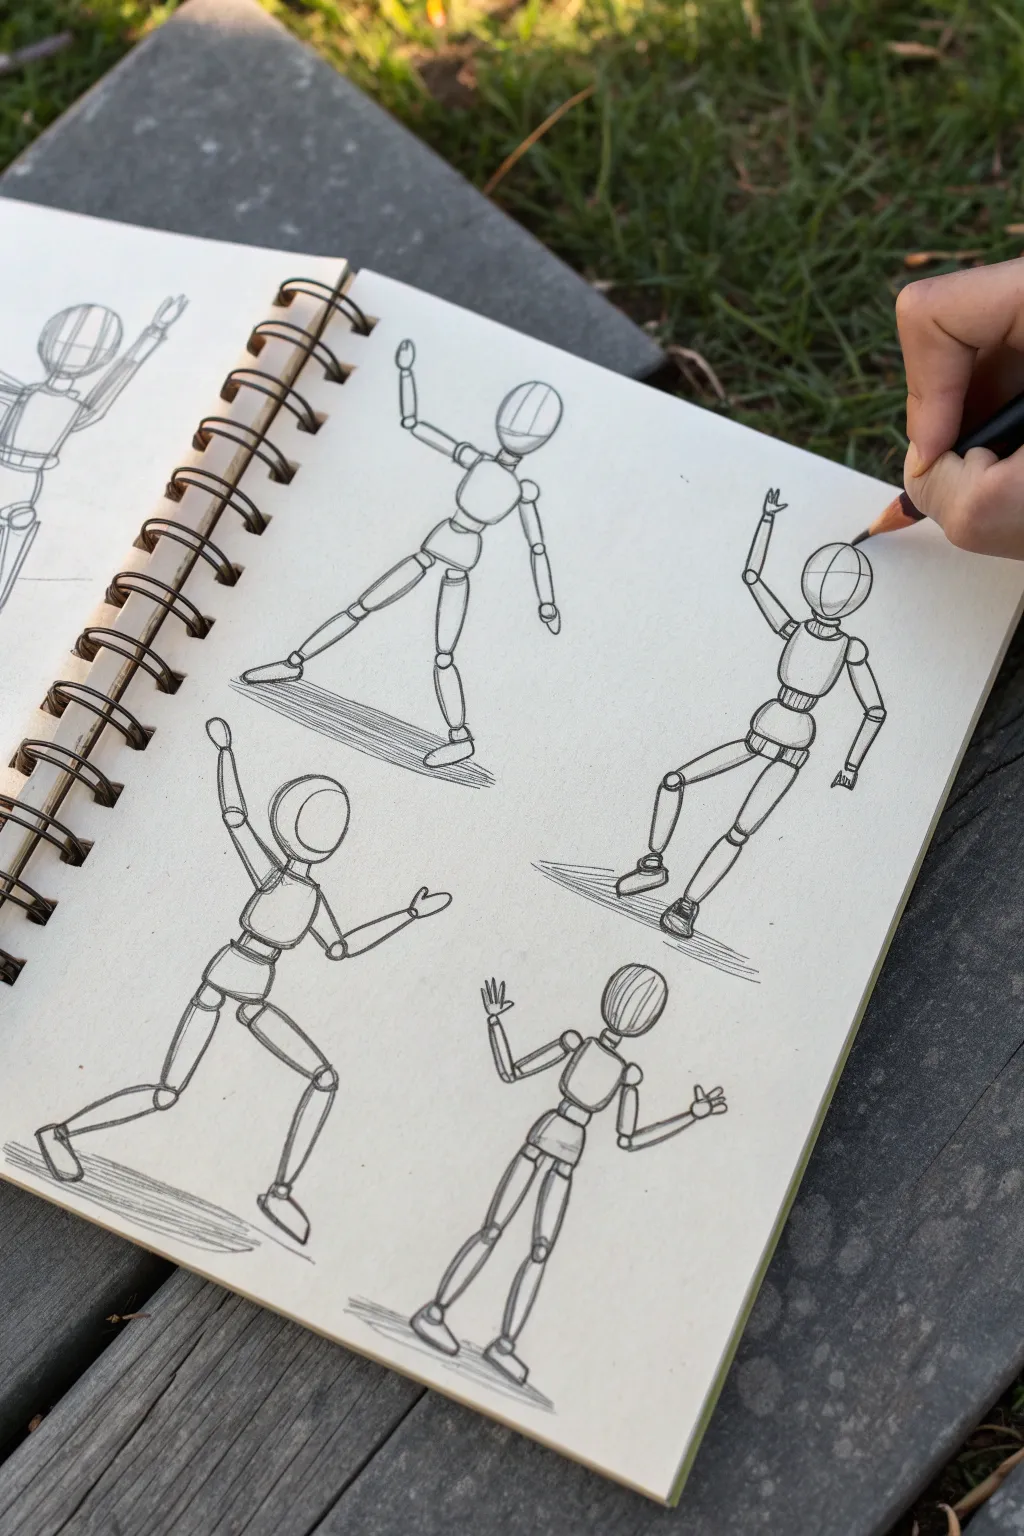
Learn the fundamental skill of breaking down the human form into simple geometric shapes to create dynamic poses for your cute characters. This study page exercise focuses on volume, proportion, and active gestures using a classic mannequin construction method.
Step-by-Step Guide
Materials
- Spiral-bound sketchbook (heavyweight paper preferred)
- Graphite pencil (HB or 2B recommended)
- Pencil sharpener
- Eraser
- Flat outdoor surface or drawing board
Step 1: Setting the Stage
-
Prepare your workspace:
Find a comfortable spot with good lighting—natural outdoor light works beautifully for observing subtle shadows on your paper. Place your sketchbook on a stable surface like a wooden deck or table. -
Sharpen your tool:
Ensure your pencil has a fine point. Drawing structural mannequins requires crisp lines to define distinct shapes, so a dull pencil will make the joints and connections look muddy. -
Visualizing the page layout:
Mentally divide your sketchbook page into quadrants. You want to fit about four distinct full-body poses on a single page, giving each one enough breathing room so they don’t overlap awkwardly.
Step 2: Constructing the First Figure
-
Start with the core line:
Begin with a very faint ‘line of action’—a single sweeping curve that dictates the flow of the pose from the head down to the feet. This prevents stiff positioning later on. -
Draw the head sphere:
Sketch a simple circle for the cranium. Add a curved cross-contour line across the ‘face’ area to indicate which direction the character is looking. Draw a small cylinder shape below for the neck. -
Establish the torso:
Beneath the neck, draw a rounded block or barrel shape for the ribcage. Leave a small gap for the waist, then draw a shorter, curved block for the pelvis, angling it differently than the ribcage to create a dynamic twist. -
Connecting the joints:
Draw small spheres at the shoulders and hip sockets. These ball-joints are crucial because they act as the pivot points for your limbs.
Pro Tip: Think in Tubes
Visualize the limbs as toilet paper rolls. Draw ellipses at the ends of the cylinders to show perspective—if you see the top opening, the limb is pointing toward you.
Step 3: Building Limbs and Gesture
-
Drafting arm cylinders:
Draw the upper arms as cylinders extending from the shoulder spheres. Add small sphere joints for the elbows, then add the forearm cylinders. Keep the lines clean and explicitly 3D. -
Drafting leg cylinders:
Repeat the process for the legs: upper thigh cylinder, knee sphere, and lower leg cylinder. Pay attention to how the cylinders overlap the joints to show foreshortening. -
Hands and feet basics:
Keep the extremities simple. Draw wedge shapes for the feet to show ground contact, and mitten-like shapes or simple curves for the hands. We aren’t worried about fingers and toes yet.
Level Up: Body Type Swaps
Change the proportions of your shapes to create character classes. Try a massive ribcage and tiny legs for a brute, or a giant head and small body for chibi style.
Step 4: Refining and Grounding
-
Reinforcing overlaps:
Go back over your lines and darken the areas where one shape sits in front of another. For example, if a forearm is coming toward you, darken the line where it overlaps the elbow joint. -
Adding center lines:
Lightly sketch center lines down the chest and face of your mannequins. This helps clarify the rotation of the body and ensures the limbs are attached symmetrically. -
Grounding the figure:
Under the feet, sketch quick horizontal hatching lines. This creates a ‘shadow pad’ that visually plants the character on the ground so they don’t look like they are floating in space. -
Repeat for variety:
Move to the next empty spot on your page. Try a totally different pose—maybe jumping, waving, or leaning back. I find it helpful to exaggerate the tilt of the shoulders and hips for more personality. -
Final clean-up:
Use your eraser to lift out any construction lines that became too messy or confusing, but leave the visible structure. The goal is a clean ‘wireframe’ look that you can draw over later.
Now you have a library of posable base figures ready to be dressed up into detailed characters
Two-Tone Shading Cute Style
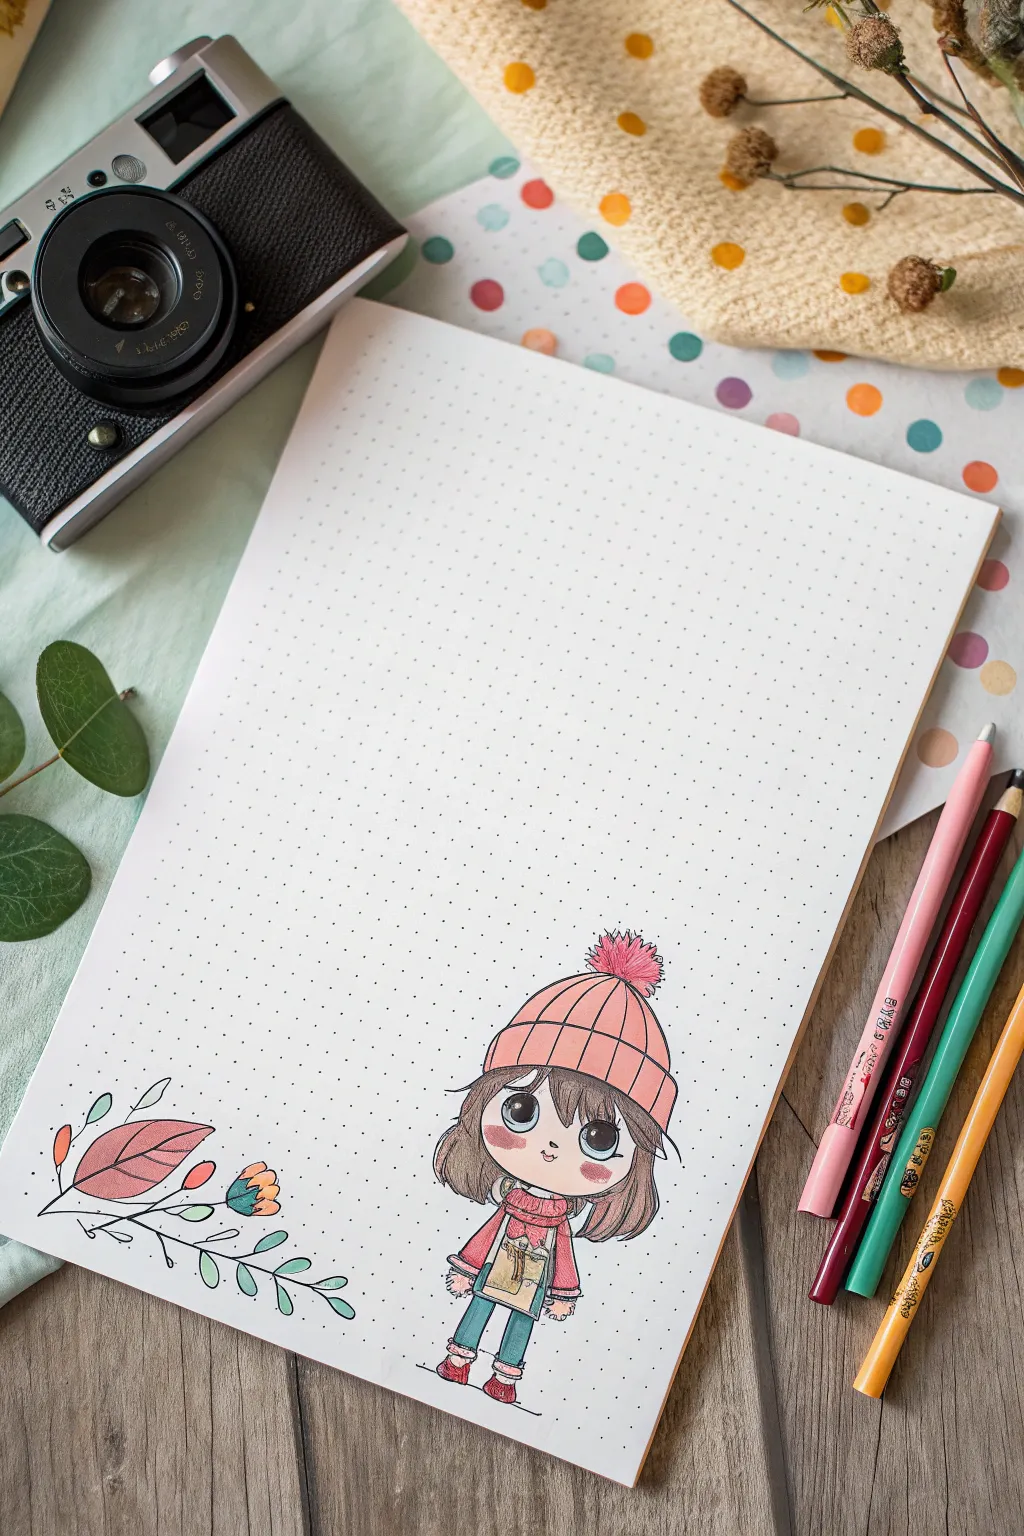
Create a cozy corner in your bullet journal with this adorable character illustration featuring distinct two-tone shading. The combination of clean ink lines and colored pencil gradients brings a charming, sticker-like quality to the dot-grid page.
Detailed Instructions
Materials
- A5 Dot grid notebook or loose paper
- Mechanical pencil (0.5mm) and eraser
- Fine liner pen (black, 0.1mm or 0.3mm)
- Colored pencils (Pink, brown, teal, orange, yellow)
- White gel pen (optional for highlights)
Step 1: Drafting the Character
-
Map out the head shape:
Start near the bottom right quarter of your page. Lightly sketch a large, rounded rectangle for the head base, keeping the chin soft and curved. -
Position the beanie:
Draw the rim of the beanie sitting fairly low on the forehead. Add the rounded top of the hat extending upwards, finishing with a fluffy pom-pom circle at the apex. -
Block in the body:
Below the head, sketch a small, simple A-line shape for the coat. Add two stick-like legs ending in chunky boots to ground the character. -
Draft the hair and features:
Draw the hair bob curving inward around the jawline. Place two large circles for eyes low on the face for that ‘chibi’ cute look, leaving plenty of forehead space. -
Sketch the floral accent:
Move to the bottom left corner of the page. Lightly draw a curving stem with a large leaf shape and a small flower bud facing towards the character.
Fixing Smudged Ink
If you accidentally smudge the fine liner while erasing, turn it into a stylistic choice! Use your white gel pen to draw over the smudge, or add a small sticker or washi tape to cover the error.
Step 2: Inking the Outline
-
Trace main lines:
Using your fine liner, carefully go over your pencil sketch. Use smooth, continuous strokes for the long lines of the hair and coat. -
Add beanie details:
Draw vertical lines on the beanie rim to simulate texturing. For the pom-pom, use short, spiky strokes radiating outward to make it look fluffy. -
Inking the face:
Outline the large eyes, but leave two white circles inside each for highlights. Ink the tiny nose and small smiling mouth. -
Detail the clothing:
Add the scarf wrapping around the neck and the pocket detail on the front of the coat. Don’t forget the cuffs on the boots. -
Erase guidelines:
Once the ink is completely dry—I usually wait at least five minutes to be safe—gently erase all underlying pencil marks.
Step 3: Two-Tone Coloring
-
Base shadow layer:
This style relies on distinct shadows. Take a pink pencil and color the top half of the beanie firmly. Press harder at the top to create a gradient fading downward. -
Lighter tone for the beanie:
Color the bottom half of the beanie and the rim with a very light touch of the same pink, blending slightly where it meets the darker top section. -
Hair gradation:
Using a brown pencil, color the tops of the hair darker, fading into a lighter brown or leaving it almost white near the bottom tips for a shiny effect. -
The blushing cheeks:
Apply two oval patches of pink specifically under the eyes. Press firmly in the center of the oval and fade out towards the edges. -
Outfit coloring:
Color the coat in pink to match the hat. Use teal for the legs (tights) or pants, applying a darker pressure at the top of the legs under the coat hem. -
Floral coloring:
For the leaf on the left, use a two-tone approach: color one half of the leaf pink and leave the other side very pale or white. Use teal accents for the stem leaves.
Softer Blends
To get that creamy gradient look without harsh lines, hold your pencil further back on the barrel. This forces you to use the side of the lead rather than the tip, creating smoother color transitions.
Step 4: Finishing Touches
-
Deepen the eyes:
Fill in the pupils with your darkest pencil or black pen, careful to preserve the white highlights you sketched earlier. -
Add decorative dots:
Scattered around the floral vine, add small teal or orange dots with your pen or pencil to fill negative space and balance the composition. -
White pen accents:
If you have a white gel pen, add tiny dots to the cheeks or extra shine lines on the hair to make the character pop.
Now you have a charming character to accompany your daily logs or notes


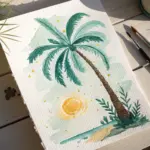
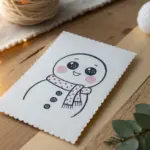
Marker-Like Sketchbook Cute Look
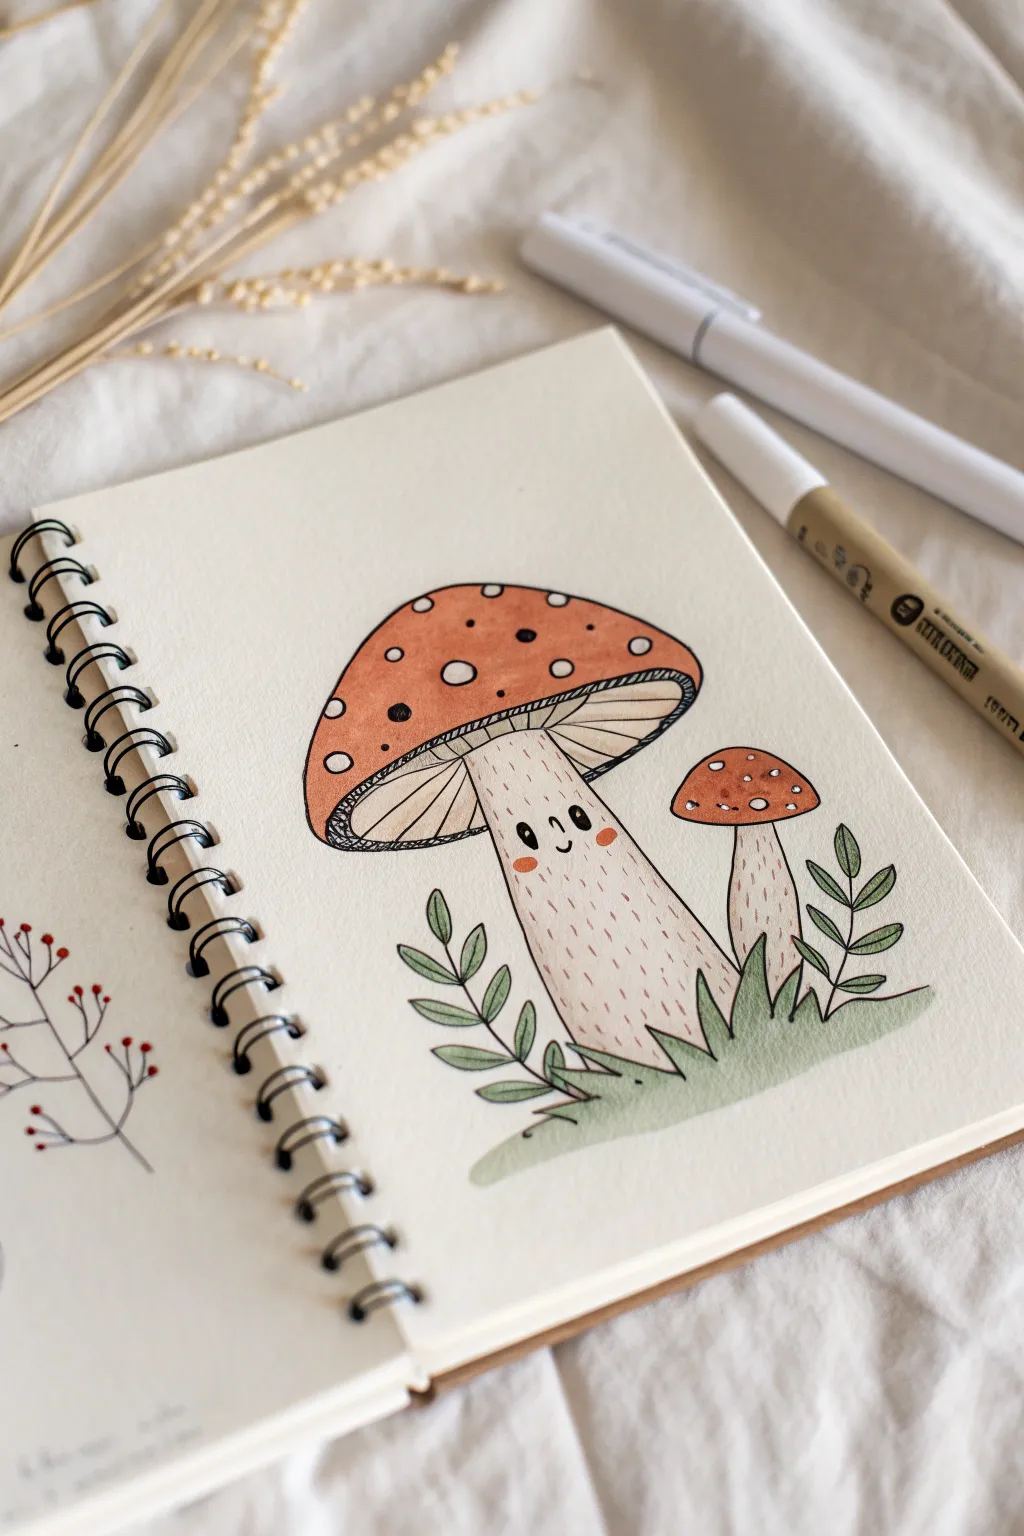
Capture the cozy charm of woodland sketching with this adorable mushroom duo illustration. Using simple shapes and warm, earthy tones, you’ll create a character-filled scene that pops right off the sketchbook page.
How-To Guide
Materials
- Spiral-bound sketchbook (mixed media or smooth bristol paper)
- Fine liner pens (sizes 0.1, 0.3, and 0.5, black ink)
- Alcohol markers (warm tan, rust orange, sage green)
- White gel pen (for highlights)
- Pencil (HB or 2H)
- Kneadable eraser
Step 1: Planning the Shapes
-
Draw the main cap:
Start lightly with your pencil. Near the center of the page, sketch a large, wide semi-circle that curves slightly downward at the edges. This will be the cap of your main mushroom character. -
Add the stem:
From underneath the center of the cap, draw a thick, sturdy stem that widens slightly at the base. It should look a bit like a tree trunk, grounding the character. -
Sketch the gills:
Connect the outer edges of the cap to the top of the stem with a curved line. This creates the underside where the mushroom gills will go. -
Add the little companion:
To the right of the main mushroom, sketch a smaller, simpler mushroom shape. Give it a rounder, darker cap and a thinner stem to creating a cute size contrast. -
Ground the scene:
Lightly sketch tufts of grass and a few simple leaf sprigs rising up around the base of both stems to settle them into a scene.
Bleeding Lines?
If your black ink smears when applying marker, your pen isn’t waterproof. Switch to pigment-based micron pens or let the ink cure for at least 30 minutes before coloring.
Step 2: Inking the Outlines
-
Outline the main shapes:
Switch to your 0.5 fine liner. Trace over the main pencil lines of the mushroom caps and stems. Use a confident, steady hand, but don’t worry if the lines aren’t mechanically perfect; a little wobble adds organic charm. -
Detail the gills:
Using a thinner 0.3 pen, draw lines radiating from the top of the stem to the edge of the cap underneath. These lines represent the gills and add great texture. -
Draw the face:
On the main stem, draw two small, oval eyes and a tiny ‘u’ mouth with the 0.5 pen. Fill in the eyes, leaving tiny white specks for sparkle, or save that for the white gel pen later. -
Ink the foliage:
Outline the grass and leaf sprigs with the 0.3 pen. For the leaves, line a central vein but keep the shapes simple and rounded. -
Erase pencil marks:
Wait for the ink to dry completely to avoid smudging. Then, gently use your kneadable eraser to lift away all the graphite guidelines.
Step 3: Adding Color
-
Color the caps:
Take a rust orange marker. Fill in the top of the large mushroom cap, carefully avoiding several small circular spots. Leaving these white paper circles creates the classic toadstool look without needing opaque white paint later. -
Color the companion cap:
Repeat the process for the smaller mushroom, using the same orange or a slightly darker red-orange tone if you have it. -
Shade the stems:
Use a very pale warm tan marker for the stems. I like to apply the color, then go back over just the edges while it’s still wet to create a subtle shadow effect on the sides. -
Add rosy cheeks:
Using a soft pink or coral marker, dab two small ovals right under the eyes of your character for an instant cute factor. -
Color the greenery:
Fill in the grass and leaves with a muted sage green marker. Keep the coloring relatively flat to maintain that graphic, illustrative style. -
Ground shadow:
Use the sage green or a light grey marker to add a horizontal wash of color underneath the grass clumps, visually anchoring the entire illustration.
Paper Choice Matters
Alcohol markers bleed through standard paper. Use specific marker paper or place a scrap sheet behind your drawing page to protect the rest of your sketchbook.
Step 4: Final Textures
-
Add stem texture:
Switch to your finest 0.1 pen. Draw tiny, short vertical dashes all over the stems to mimic surface texture. Draw more density near the bottom and sides for shading. -
Stipple the caps:
Add tiny ink dots (stippling) on the orange parts of the caps, concentrating them near the bottom rim to suggest curvature and shadow. -
Pop the highlights:
Finally, take your white gel pen. Add a small highlight to the eyes if you didn’t leave one earlier, and add tiny dots to the cheeks. You can also clean up the white spots on the caps if any marker bled over.
Enjoy the simple pleasure of seeing this happy little forest scene come to life on your page
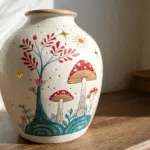
Patchwork Pattern Cute Style
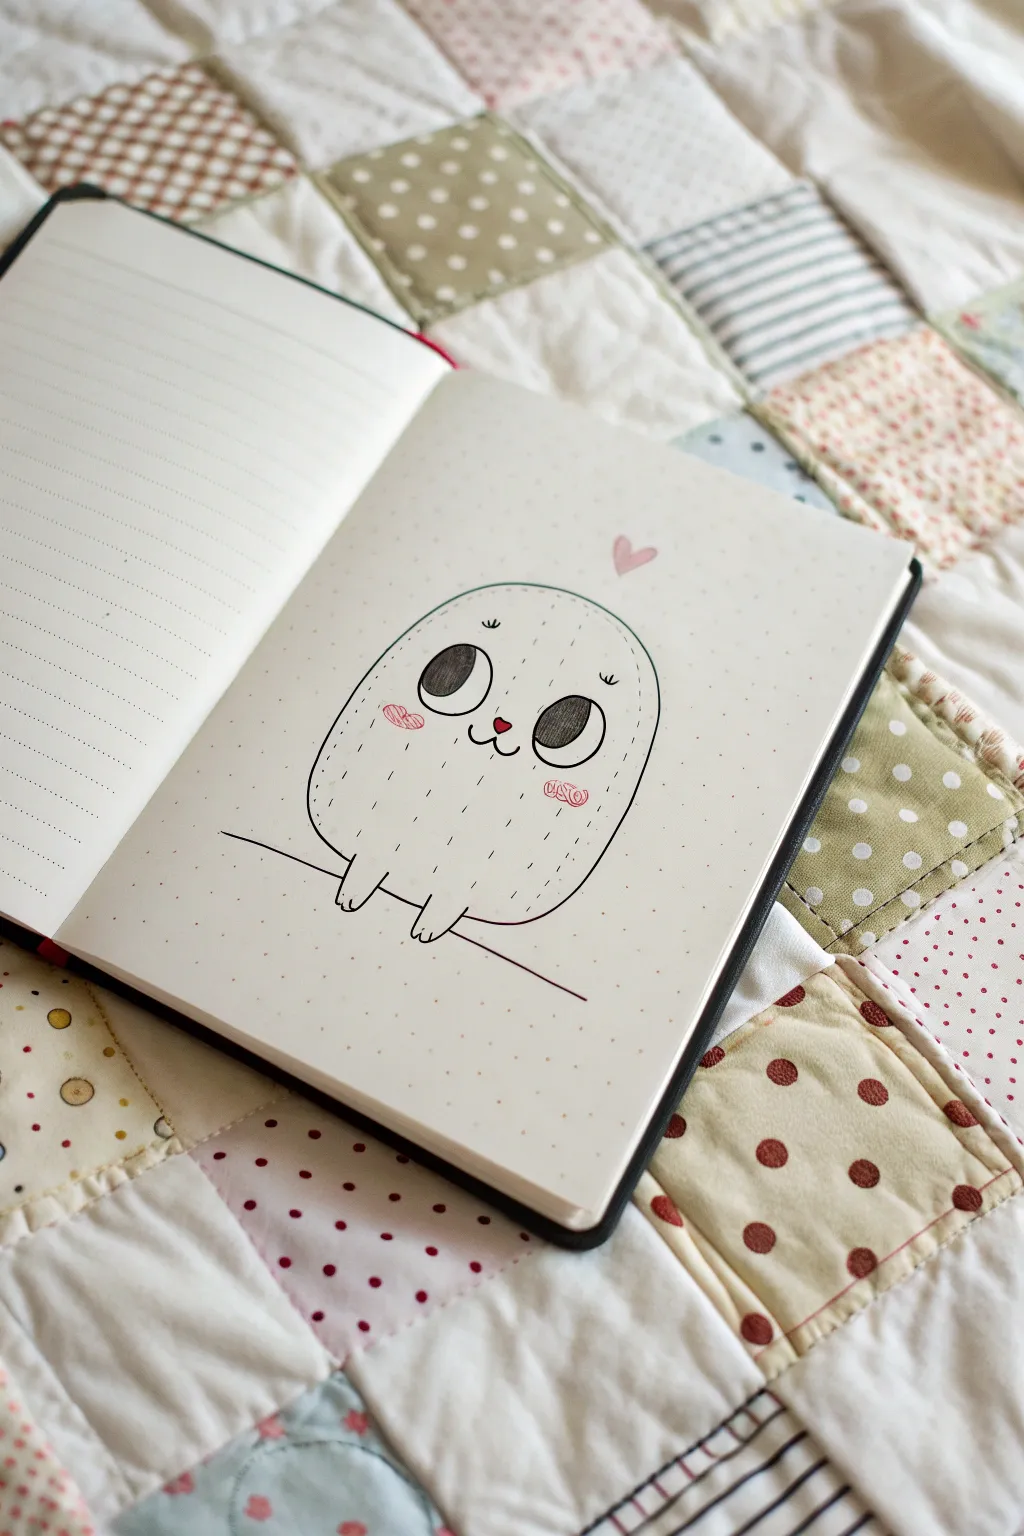
This adorable, egg-shaped creature is the perfect introduction to creating cute, minimalist character art in your sketchbook. With its expressive eyes and subtle stitch-like details, this project combines simple linework with soft pops of color for a heartwarming result.
Step-by-Step Tutorial
Materials
- Dotted or blank sketchbook
- Fine liner pen (black, size 0.3mm or 0.5mm)
- Pencil (HB or H for sketching)
- Eraser
- Colored pencils (pink and red)
- Ruler (optional)
Step 1: Basic Shape & Sketching
-
Map out the position:
Start by finding the center of your page. Lightly mark where the bottom line will go, leaving enough space above for the character’s body. -
Draw the main outline:
Using your pencil, sketch a large, vertical oval shape. It doesn’t need to be a perfect circle; aim for an inverted egg shape that is slightly wider at the bottom for a cute, weighted look. -
Add the ground line:
Sketch a horizontal line intersecting the bottom quarter of the oval. This will serve as the surface your character is sitting on. -
Position the paws:
Where the oval meets the ground line, sketch two small, U-shaped nubs protruding downwards. These will become the tiny feet or paws resting on the line.
Wobbly Lines?
If your main oval shape looks shaky, embrace it. Go over the outline a second time loosely. This creates a purposeful ‘sketchy’ style rather than looking like a mistake.
Step 2: Facial Features
-
Place the eyes:
Draw two large ovals in the upper middle section of the body. Space them slightly apart, angling the tops inward just a fraction to create a sweet expression. -
Refine the pupils:
Inside the large eye ovals, draw smaller circles near the top right edges to represent highlights. These white spots are crucial for that ‘alive’ look. -
Add the nose and mouth:
Centered between and slightly below the eyes, draw a tiny heart shape for the nose. Connect a small ‘w’ shape directly beneath it for the mouth. -
Sketch the cheeks:
Lightly mark oval areas on the cheeks where the blush will go later. You can also sketch a small floating heart above the head to the right.
Pattern Play
Instead of simple dashed fur, fill the body shape with a patchwork quilt pattern (squares and dots) to match the article’s theme.
Step 3: Inking the Outline
-
Trace the body:
Switch to your fine liner pen. Carefully trace the main body outline. I find it helpful to rotate the sketchbook as I draw curves to keep the line smooth. -
Ink the feet/paws:
Ink the small paws at the bottom. Notice how the body line breaks where the paws start—don’t draw a solid line through them. -
Define the ground:
Draw the horizontal ground line in ink, stopping just before it touches the paws on either side, so the character feels planted on top of it. -
Fill the eyes:
Carefully ink the outline of the eyes. Fill in the pupils with solid black ink, being extremely careful to leave those white highlight circles completely clean.
Step 4: Details & Color
-
Add texture marks:
Using very light, short strokes with your pen, add tiny vertical dashes all over the body. This mimics a plush or stitched texture. Keep them random and sparse. -
Erase pencil lines:
Wait a moment for the ink to dry completely to avoid smudging. Gently erase all your underlying pencil sketches. -
Color the nose and heart:
Take your red colored pencil or a red pen and fill in the tiny heart nose. Use a soft pink pencil to color the floating heart above the head. -
Apply blush:
Using the pink pencil, gently shade oval patches on the cheeks. Press incredibly lightly at first, building up color slowly. -
Scribble accents:
Over the pink cheek patches, use a red or darker pink fine liner to draw loose, scribbly loops. This adds that charming ‘sketchbook’ aesthetic. -
Final touches:
Add three small eyelashes to the outer corner of each eye and a few extra dashes near the bottom curve of the body for weight.
Now you have a sweet little companion living in your sketchbook pages
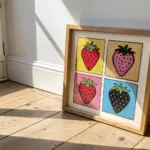
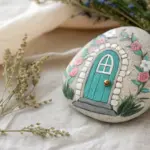
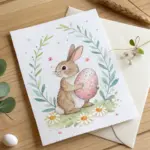
Paper Cut Layered Cute Style
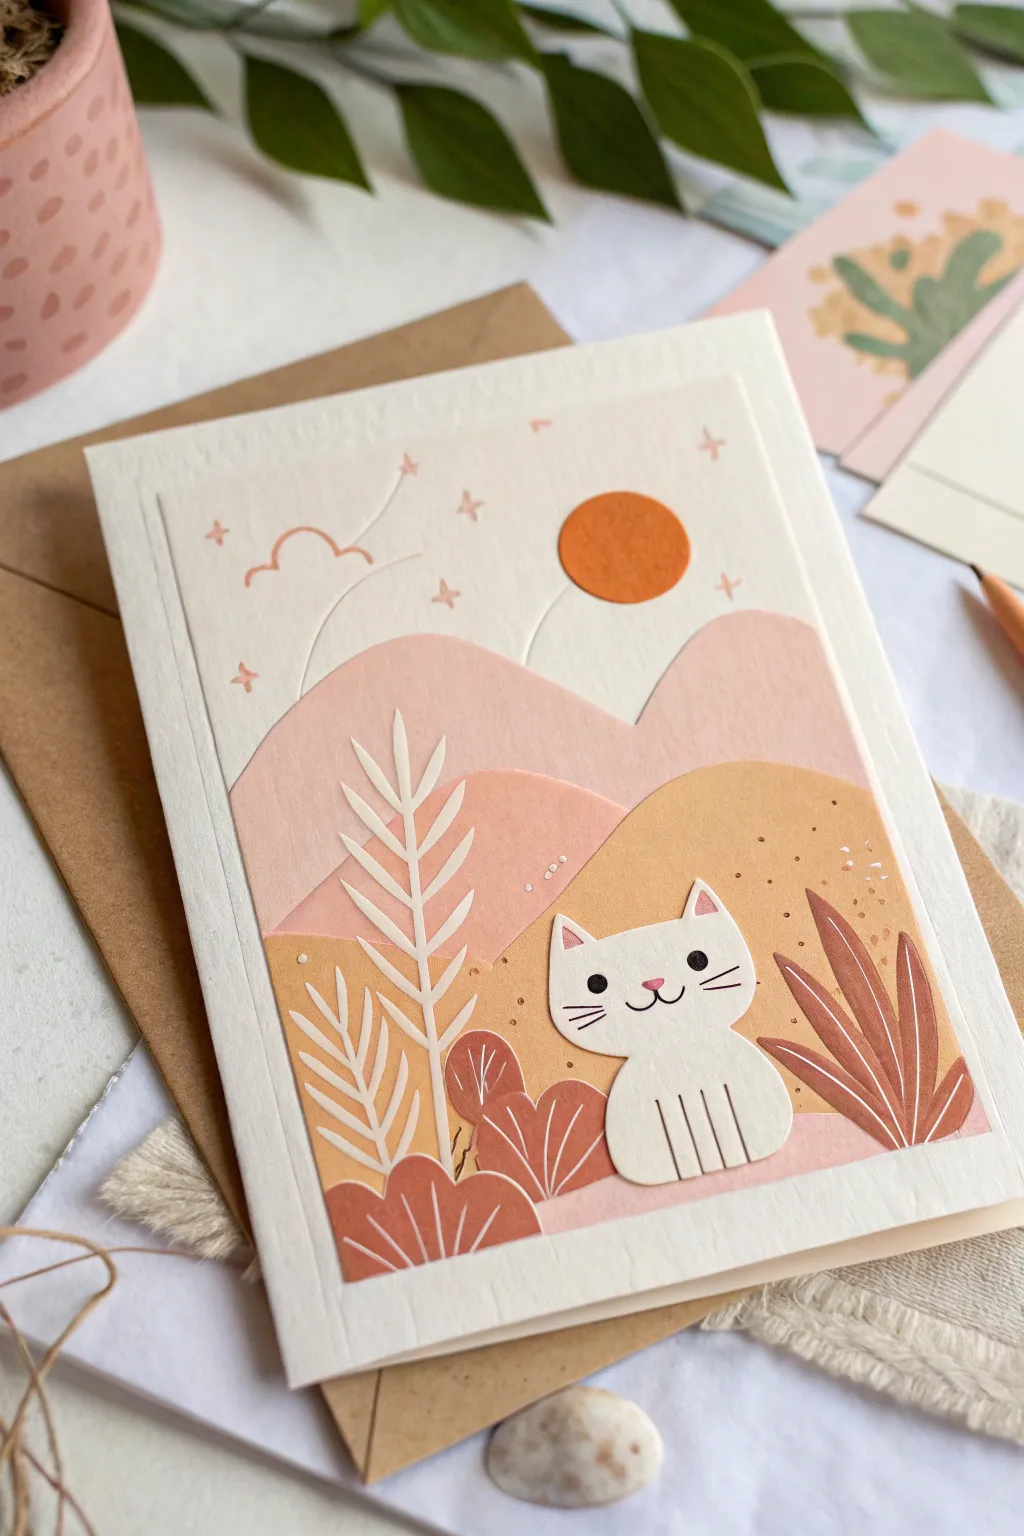
Capture the charm of rolling hills and a curious feline friend with this layered paper cut greeting card. Soft pastels combined with textured cardstock create a gentle, warm scene that feels both modern and handmade.
Step-by-Step
Materials
- Cardstock in shades of pink, peach, terracotta, ochre, white, and rust
- Heavyweight cream or off-white cardstock for the base
- Precision craft knife (like X-Acto) or cutting machine
- Self-healing cutting mat
- Fine-tip black pen or marker
- Pencil and eraser
- Adhesive foam squares or tape
- Glue stick or fine-tip glue pen
- Embossing stylus (optional)
Step 1: Preparing the Landscape Layers
-
Define the layers:
Begin by sketching your landscape design lightly on scrap paper to define the overlapping hills. You will need a background sky piece, a tall back mountain, a mid-ground hill, and a foreground hill. -
Cut the sky background:
Cut a rectangle of very light cream or pale peach cardstock to serve as your sky and background base. This should be slightly smaller than your folded card base. -
Cut the back mountain:
Select a dusty pink cardstock for the tallest mountain layer. Cut a gentle, rolling curve for the top edge and keep the bottom straight to align with the card’s base. -
Cut the mid-ground hill:
Using a slightly deeper peach or terracotta shade, cut a second hill shape that is shorter than the pink mountain but wider, creating depth in your scene. -
Cut the foreground hill:
Cut the final hill shape from an ochre or golden-yellow cardstock. This piece should anchor the bottom right corner and curve upwards. -
Create the sun:
Cut a small, perfect circle from bright orange or rust-colored paper for the sun.
Step 2: Crafting the Flora and Fauna
-
Cut the main foliage:
From white cardstock, carefully cut a tall, fern-like plant with a central stem and radiating leaves. This requires a sharp blade for clean edges. -
Add secondary plants:
Cut smaller fern shapes from the white cardstock. Then, use rust-colored paper to cut leafy bush shapes and pointed succulent-style plants. -
Assemble the cat body:
Cut the cat’s body shape from white cardstock—it resembles a rounded rounded triangle or gumdrop shape. Cut a separate oval shape with ears for the head. -
Detail the cat’s face:
Using a fine-tip black pen, draw two simple dots for eyes, a small nose, a curved mouth, and whiskers on the head piece. Add tiny pink triangles for the inner ears if desired. -
Define the legs:
On the body piece, draw four vertical lines near the bottom to suggest paws sitting together. I find using a ruler helps keep these lines crisp.
Clean Cuts Matter
For intricate shapes like the fern or cat whiskers, change your craft knife blade starting this project. A fresh, sharp tip prevents paper dragging or tearing.
Step 3: Assembly and Finishing Touches
-
Layer the hills:
Glue the pink mountain to the sky background first, ensuring the bottom edges align. Next, add the peach mid-ground hill. -
Insert the white fern:
Before attaching the ochre foreground hill, tuck the large white fern stem behind where the hill will sit, so it appears to be growing from behind it. -
Attach the foreground:
Adhere the ochre foreground hill. Glue the rust-colored plants and smaller white ferns on top of this layer. -
Position the cat:
Place the cat’s body on the foreground hill. Use a small foam square to attach the cat’s head to the body; this adds a lovely pop of dimension. -
Add distinct embossing:
If you have an embossing stylus, blind emboss (press without ink) some cloud outlines, stars, and radiating lines around the sun into the sky background for subtle texture. -
Draw final details:
Use a pen or very fine brush to add tiny speckles or stars in the sky and texture dots on the ochre hill. -
Mount to card base:
Center your finished landscape composition onto the folded heavyweight cream card base, leaving a neat border around the edges.
Add Subtle Depth
Use different thicknesses of foam tape between the hill layers. This physical separation creates natural shadows and makes the scene look like a shadowbox.
Now you have a charming, multi-dimensional piece of art ready to brighten someone’s day
Surreal Cute Mash-Up Style
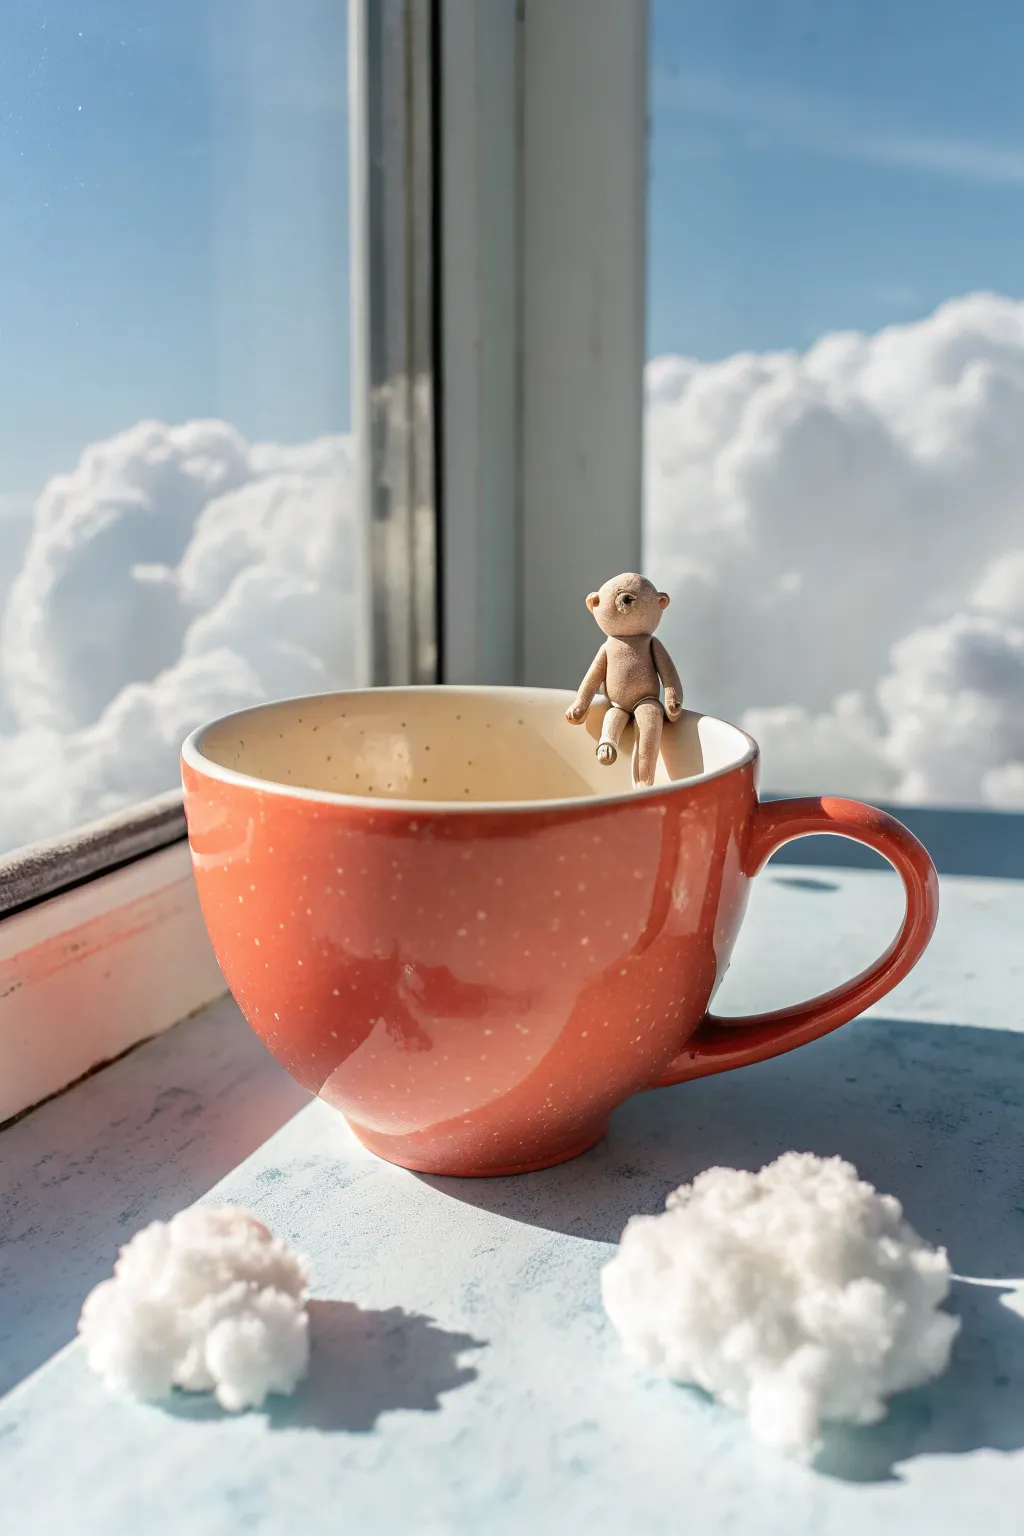
Create a whimsical, surreal scene featuring a tiny clay companion enjoying a view among the clouds. This project combines simple miniature sculpting with clever photography composition to bring a quiet, magical moment to life.
How-To Guide
Materials
- Polymer clay (beige or skin tone)
- Sculpting tools or toothpicks
- Orange speckled ceramic mug
- Cotton balls or polyester fiberfill
- Baking sheet and parchment paper
- Window with a view of the sky
- Smartphone or camera
- Window ledge or white surface
- Optional: Black acrylic paint and fine brush (for eyes)
Step 1: Sculpting the Sprite
-
Form the head:
Start with a small ball of beige polymer clay, roughly the size of a large pea. Roll it until it is perfectly smooth. -
Shape the body:
Create a slightly larger, oblong teardrop shape for the torso. Gently press the head onto the narrower top of the torso so they fuse together. -
Add the ears:
Roll two tiny dots of clay. Press them onto the sides of the head and use a rounded tool or toothpick to indent the centers, creating little cup-shaped ears. -
Create the limbs:
Roll four thin snakes or cylinders of clay for the arms and legs. Keep them long and slender to match the surreal, character style. -
Attach the legs:
Press the legs into the bottom of the torso. Bend them at the ‘knees’ so the figure looks like it is sitting on a ledge. -
Attach the arms:
Fix the arms to the shoulders. Pose them so they can rest relaxed at the figure’s sides or hold the rim of the cup later. -
Add facial details:
Use a needle tool to poke a single eye hole or shape a small nose. The charm is in the minimalism, so keep features sparse. -
Custom fit the pose:
Before baking, gently drape the raw clay figure over the rim of your actual mug to ensure the legs and bottom curve correctly to sit securely. I find this test-fitting step crucial for realism.
Don’t Flatten It
When pressing clay pieces together, use a gentle rolling motion with a silicone tool rather than just squashing with fingers to avoid unwanted fingerprints.
Step 2: Baking and Prep
-
Baking:
Carefully remove the figure from the mug and place it on a parchment-lined baking sheet. Bake according to your clay package instructions (usually 275°F for 15-30 minutes). -
Cooling and detailing:
Let the figure cool completely. If you want a darker eye, use a toothpick to dab a tiny speck of black paint into the eye socket. -
Prepare the clouds:
Tease apart several cotton balls or clumps of fiberfill to make them fluffy and less dense. These will be your foreground clouds.
Step 3: Staging the Scene
-
Position the mug:
Place your orange mug on a window sill or a table pushed right up against a window. Natural light is key here. -
Check the background:
Wait for a day with bright blue skies and fluffy cumulus clouds. Angle your setup so the real clouds differ in scale but match the color of your cotton clouds. -
Place the sprite:
Balance your baked clay sprite on the rim of the mug. It should sit comfortably thanks to your earlier custom fitting. -
Arrange foreground clouds:
Scatter the fluffed cotton balls on the surface around the base of the mug. Place a few out of focus in the very front to create depth. -
Find the angle:
Position your camera low, almost at the level of the table. You want the mug and the sprite to intersect with the sky background, blurring the line between the indoor sill and the outdoor sky. -
Capture the shot:
Focus on the texture of the clay figure and the mug. Snap the photo when the lighting hits the sprite’s face, highlighting the surreal mash-up of worlds.
Dreamy Atmosphere
Add a few drops of water to the surface where the cotton clouds sit. The reflection will make the ‘clouds’ look like they are floating on a wet, glassy surface.
This little scene offers a peaceful escape right on your windowsill, blurring the line between reality and imagination


Have a question or want to share your own experience? I'd love to hear from you in the comments below!