Whenever I’m sketching Diwali themes, I start by chasing that warm glow—tiny lights against a deep night, plus all those joyful details. Here are my favorite Diwali drawing ideas, starting with the classics and drifting into more creative, artsy twists.
Easy Rangoli Border Patterns
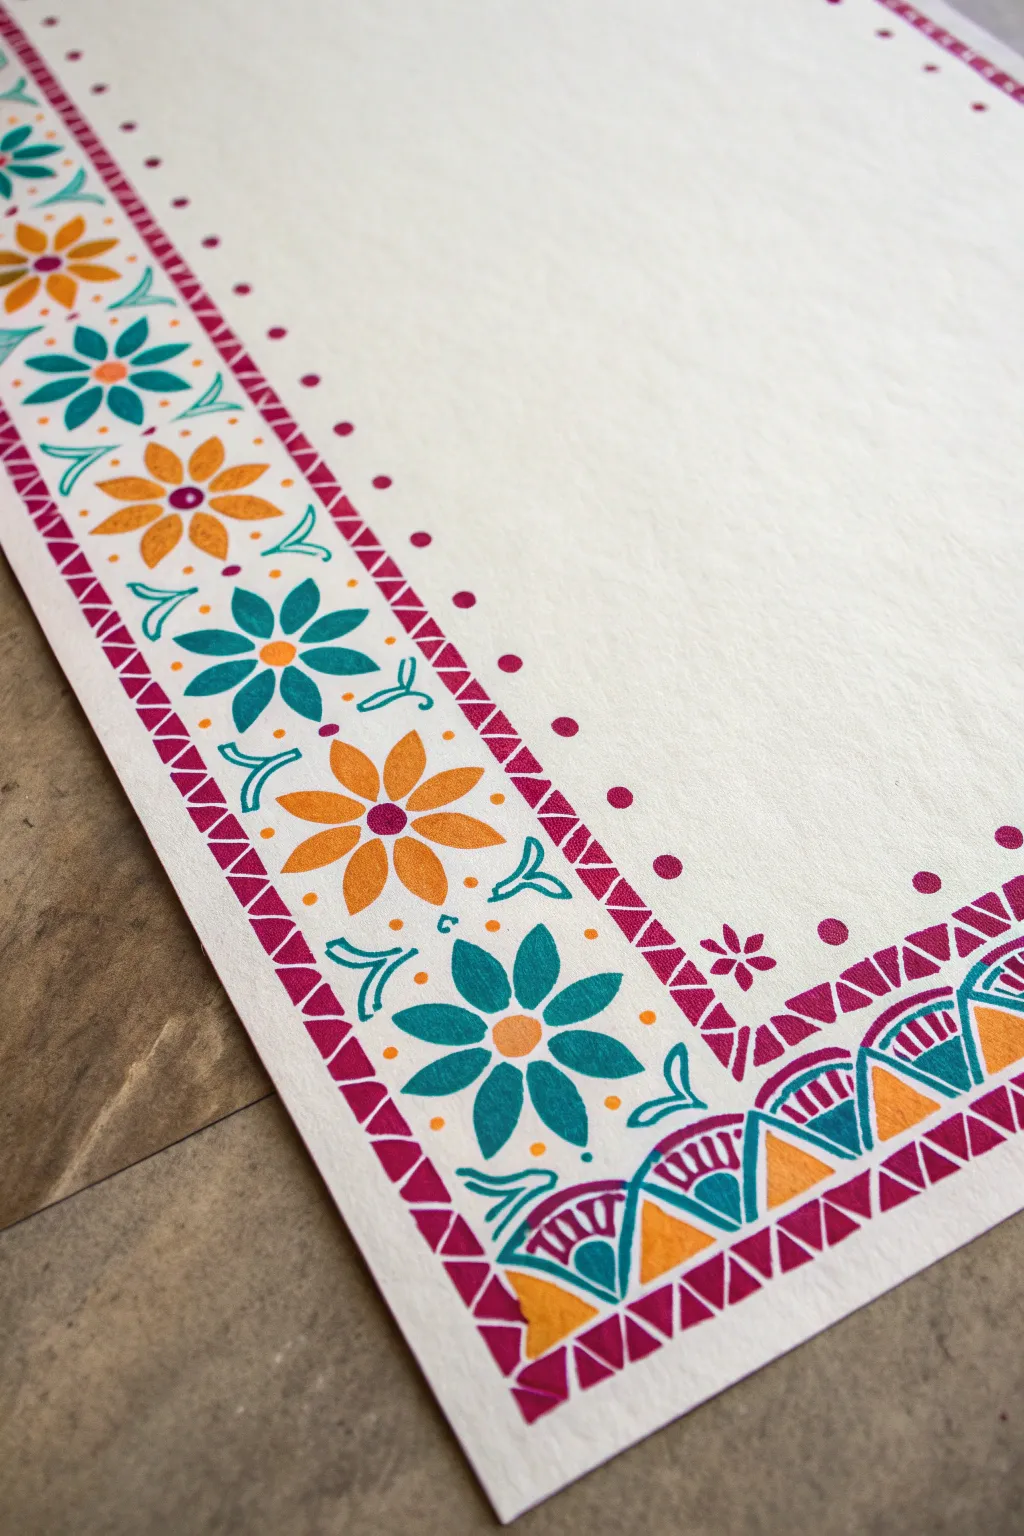
This vibrant border design combines bold geometric triangles with cheerful, alternating floral motifs to create a festive frame perfect for handmade greeting cards or invitations. The playful mix of magenta, teal, and amber markers pops beautifully against textured white paper.
Detailed Instructions
Materials
- High-quality white cardstock or textured paper
- Deep magenta felt-tip marker or brush pen
- Teal or turquoise felt-tip marker
- Amber or orange felt-tip marker
- Pencil (HB or lighter)
- Ruler
- Eraser
Step 1: Setting the Grid
-
Draw guide lines:
Start by using your ruler and pencil to lightly draw two parallel lines along the edge of your paper. These will define the width of your zig-zag border. Space them about 0.5 inches apart. -
Mark floral spacing:
In the wider white space next to your border area, lightly mark center points for your flowers. Aim for even spacing, roughly 1.5 to 2 inches apart, to ensure the floral pattern flows rhythmically. -
Sketch the corner:
Pay special attention to the corner. Lightly sketch a 90-degree turn for your triangular border so the pattern resolves neatly without an awkward gap.
Uneven Spacing?
If your flowers end up too close or far apart, add extra ‘leaf’ sprigs or simple dots to fill the awkward gaps without breaking the pattern flow.
Step 2: The Geometric Borders
-
Create the zig-zag:
Using your magenta marker, draw a continuous zig-zag line between your two pencil guide lines. Try to keep the peaks and valleys consistent. -
Fill the triangles:
Color in every other triangle created by the zig-zag pattern with the magenta marker. This creates a bold, negative-positive space effect. -
Add the inner line:
Draw another straight magenta line parallel to your zig-zag border, spaced slightly inward on the page. This frames the floral section. -
Add the dot border:
On the innermost side of the design (closest to the center of the page), plan a line of dots. Using the magenta marker, place small, evenly spaced dots in a straight line to bound the design.
Step 3: Blooming Flowers
-
Draw orange flower centers:
Switch to your orange marker. At every other marked flower spot, draw an eight-petaled flower shape. Start with a central dot or small circle. -
Complete orange petals:
Radiate eight simple, pointed oval petals outward from the center. Keep them distinct but close together. -
Draw teal flower centers:
Now, fill the remaining alternating spots with teal flowers. Just like before, start with the center dot using your teal marker. -
Complete teal petals:
Draw the eight teal petals around the centers. The alternating colors create a balanced visual rhythm. -
Add contrasting centers:
Once the ink is dry, use the magenta marker to add a small dot in the very center of every orange and teal flower for unity.
Use Grid Paper
Place a sheet of grid paper underneath your main paper. If your cardstock is thin enough, you can see the grid through it to guide your straight lines.
Step 4: Decorative Accents
-
Draw leaves:
Using the teal marker, draw stylized, curved ‘V’ shapes or simple sprigs in the spaces between the flowers. These act as abstract leaves connecting the blooms. -
Add small dots:
With the orange marker, place tiny dots in the negative spaces around flowers and leaves to add texture and fill gaps. -
Create the corner motif:
In the corner, you can switch the pattern slightly. Instead of a full flower, draw a scalloped or fan-like design using teal arches and orange fills. -
Detail the corner fan:
Add small magenta stripes or dashes inside the teal arches of your corner fan design to tie it back to the main border color. -
Erase pencil guides:
Wait until the ink is completely dry—I usually give it at least 15 minutes to be safe. Then, gently erase all your initial pencil guide lines for a clean finish.
Now you have a beautifully framed page ready for a heartfelt message or poem


Full Rangoli Mandala In The Center
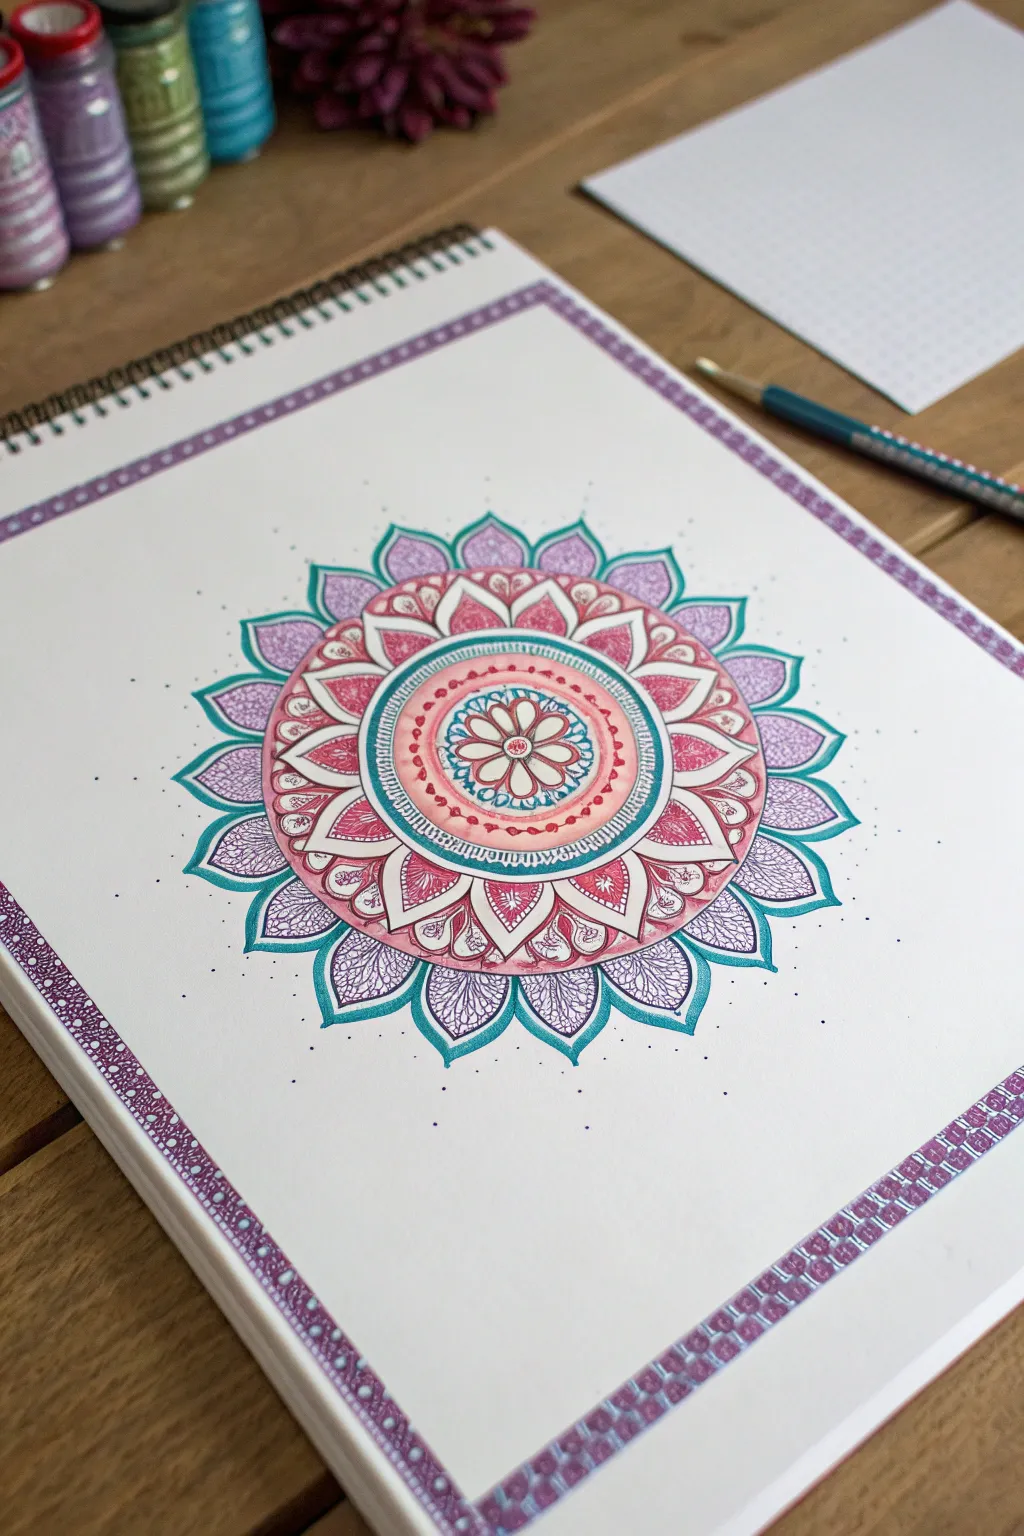
This intricate centerpiece mandala balances vibrant magenta and teal hues with delicate linework, perfect for a festive Diwali drawing. The symmetrical design radiates outward with petal-like layers, enclosed by a matching decorative border on a crisp white page.
Step-by-Step
Materials
- Spiral-bound sketchbook (heavyweight paper)
- Pencil and eraser
- Compass and ruler
- Fine-liner pens (black, 0.1mm and 0.3mm)
- Colored markers or brush pens (magenta, teal, light pink, purple)
- White gel pen (optional for highlights)
Step 1: Setting the Structure
-
Establish the center:
Begin by finding the exact center of your page. Mark it lightly with your pencil. Use your compass to draw a small central circle about 1 inch in diameter, followed by four concentric circles expanding outward, spacing them roughly 0.5 to 1 inch apart to guide your layers. -
Draft the segments:
With your ruler, lightly draw vertical and horizontal lines through the center, dividing the circle into quarters. Then, bisect these quarters twice more until you have 16 even wedge-shaped sections. This grid is essential for keeping your petals symmetrical. -
Define the border:
Measure a rectangle about an inch inward from the paper’s edge. Use your ruler to draw this frame lightly in pencil; this will dedicate space for the decorative purple border later.
Step 2: Drawing the Inner Layers
-
Create the central flower:
In the very center circle, sketch an eight-petaled flower. The petals should be rounded and touch the edge of the smallest guide circle. Add a small dot in the middle of each petal. -
Add the textured ring:
In the next concentric band, fill the space with tiny, repetitive circles or ‘seeds’ tightly packed together. This adds immediate texture around the central flower. -
Draw the pointed petals:
Moving to the next layer, sketch a row of sixteen pointed petals. These should look like lotus petals, with a wider base and a sharp tip reaching the next pencil guide line. -
Detail the inner petals:
Inside each of these pointed petals, draw a smaller, similar shape floating in the center. I find getting these inner shapes consistent really makes the final ink work pop.
Uneven Petals?
Don’t panic if symmetry slips. Thicken the outline of the uneven petal slightly to mask the wobble, or add extra internal detailing to distract the eye.
Step 3: Expanding the Design
-
Sketch the large outer scallops:
For the outermost main layer, draw large, wide scalloped curves connecting the points of the previous layer. These should feel expansive and open, creating the largest ‘leaves’ of the mandala. -
Draft the final pointed tips:
Between each large scallop, add a small, sharp triangular point peeking out from behind. This creates a layered depth, making the mandala look like distinct stacked flowers. -
Outline in ink:
Take your black fine-liner (0.1mm) and carefully trace over your pencil lines. Go slowly to ensure smooth curves. Outline the main petal shapes, but leave the shading lines for later. Erase the pencil guides once the ink is completely dry. -
Add floating dots:
Using a fine-tip pen, add the spray of tiny stippled dots radiating from the outer tips of the mandala into the white space. Keep them concentrated near the petals and sparse further out.
Glow Up
Use a white gel pen to add tiny highlights on the darkest teal and magenta sections to make the mandala look glossy and dimensional.
Step 4: Coloring and Refining
-
Base layer for the center:
Color the central flower with a light pink marker. Use a teal marker to fill the negative space behind the central petals to make them stand out. -
Color the textured ring:
Wash the ring of tiny circles with a light pink or coral tone. If you have a darker red or magenta pen, re-outline the tiny circles to define them against the wash. -
Fill the lotus layer:
For the row of sixteen petals, color the tips with a vibrant magenta, fading into white or light pink towards the base. This gradient effect adds dimension. -
Intricate filling:
In the large outer scallops, use a purple fine-liner to draw a delicate, vein-like web pattern inside each leaf. This stippled or webbed look mimics the texture of dry leaves or insect wings. -
Teal accents:
Outline the very outer edge of the large scallops with a thick teal line. Use the same teal to fill the small triangular points peeking out from behind. -
Finalize the border:
Go back to your rectangular border. Draw two parallel lines in purple ink. Fill the space between them with a repeating geometric pattern of small squares or diamonds, shading them alternately to create a woven look.
Step back and admire how the colors radiate from the center of your page.


Hanging Lantern (Kandil) Study
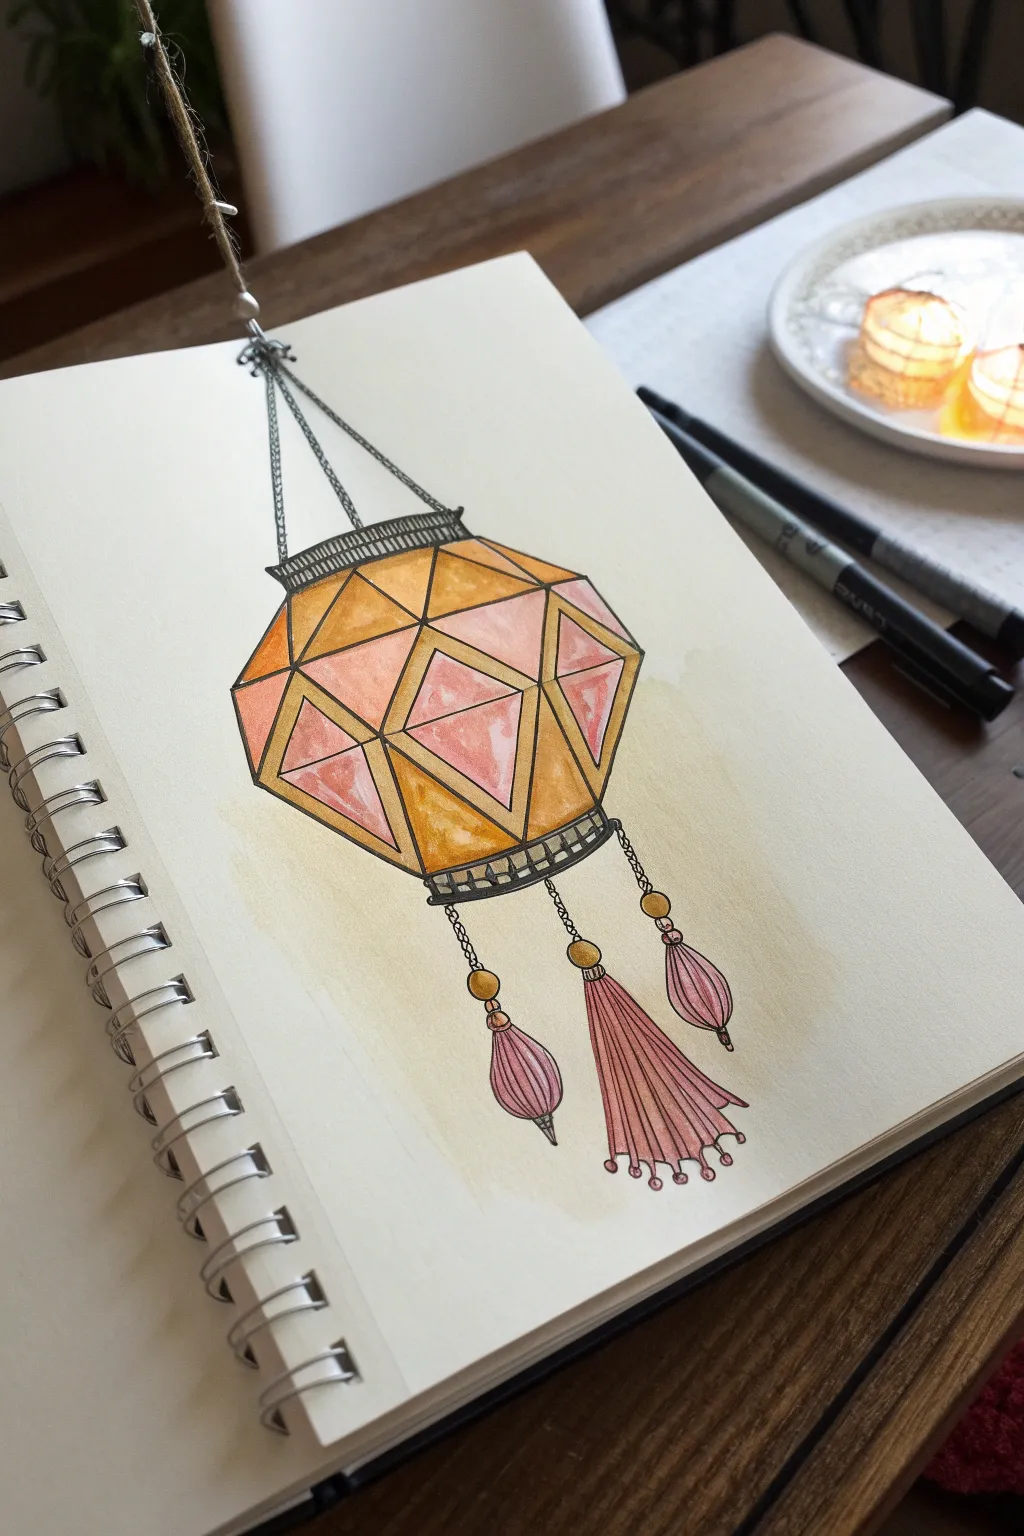
Capture the festive spirit of Diwali with this elegant watercolor and ink illustration of a traditional hanging lantern. The artwork features warm tones of amber and rose, defined by crisp ink lines that emphasize the lantern’s geometric structure.
Detailed Instructions
Materials
- Sketchbook with mixed media or watercolor paper
- Pencil (HB or H for light sketching)
- Fine liner pens (Black, size 0.1 and 0.3 or 0.5)
- Watercolor paints (Yellow Ochre, Burnt Sienna, Rose Madder or Pink)
- Small round watercolor brush (size 2 or 4)
- Ruler (optional, but helpful for geometric lines)
- Eraser
Step 1: Penciling the Structure
-
Establish the axis:
Start by lightly drawing a vertical centerline down the middle of your page. This will help keep your lantern symmetrical as you build its complex shape. -
Draft the main body:
Draw the central geometric form. Sketch a wide hexagon shape for the middle, tapering upwards to a smaller flat top and downwards to a slightly narrower base. -
Add internal geometry:
Connect the corners of your outer shape to the center line to create the faceted look. Draw diamond shapes within the larger panels to mimic the decorative paper cutouts often seen on Kandils. -
Sketch the fixtures:
Add a small rectangular band at the very top and bottom of the lantern body. From the bottom band, draw three vertical lines for the threads that will hold the tassels. -
Add hanging details:
Sketch the triangular chain formation at the top, meeting at a single hook point. At the bottom, sketch the distinct shapes of the tassels: two tear-drop gem shapes for the sides and a fuller, broom-style tassel for the center.
Wet-on-Dry Precision
For sharp geometric shapes, ensure the paper is completely dry before painting adjacent sections. This prevents the pink and yellow from bleeding into each other.
Step 2: Inking the Outline
-
Outline the main form:
Using a slightly thicker pen (0.3 or 0.5), trace over your pencil lines for the main lantern body. Be confident with your strokes to get clean, straight edges. -
Detail the rims:
On the top and bottom bands, draw tiny vertical hatches or small rectangles to simulate the metal or structured rim of the lantern. -
Draw the chains:
Switch to your finer 0.1 pen. Instead of a solid line, draw tiny, interlocking ovals to create the delicate texture of the hanging chains. -
Refine the tassels:
Ink the bottom decorative elements. For the central tassel, use quick, downward strokes to suggest the fibrous texture of the fringe. -
Erase guidelines:
Wait a few moments to ensure the ink is completely dry, then gently erase all your pencil sketches to leave a clean black-and-white framework.
Step 3: Adding Color
-
Base wash – Yellows:
Dilute some yellow ochre with water. Apply a light, watery wash to the ‘frame’ sections of the geometric lantern—the areas surrounding the inner diamond shapes. -
Base wash – Pinks:
While the yellow dries, mix a soft rose or pink shade. Carefully paint the inner diamond panels and the hanging tassel shapes. -
Layering shadows:
Once the first layer is dry, I like to come back in with a slightly more concentrated orange or burnt sienna. Paint the lower halves of the yellow sections to create a sense of dimension and shadow. -
Adding gradients:
Do the same for the pink areas. Add a darker pink touch to the bottom of the diamond facets and the tips of the tassels to make them look rounded. -
Final background glow:
To make the lantern pop, paint a very faint, watery wash of yellow around the outside of the lantern, fading out into the white paper to suggest a soft light.
Metallic Accent
Once painting is dry, use a gold gel pen or metallic watercolor paint on the chains and the connector beads for an extra festive sparkle.
Now you have a beautifully lit geometric lantern to brighten your sketchbook pages

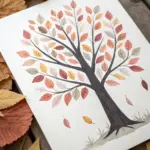
Fireworks Bursting In A Night Sky
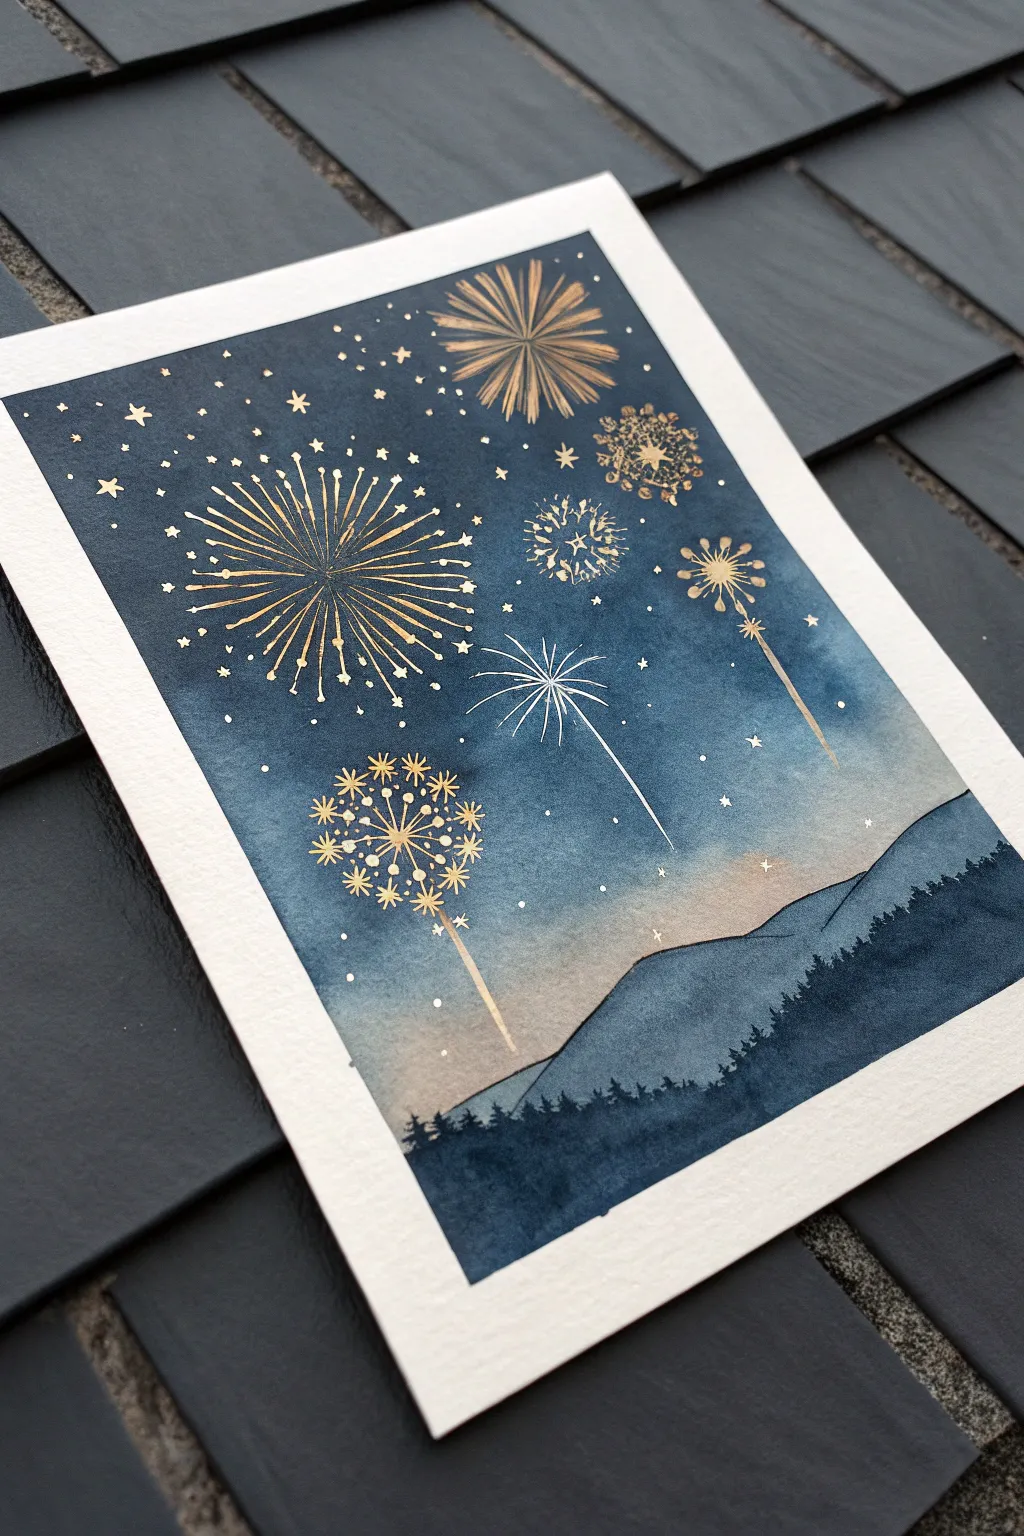
Capture the magic of Diwali with this elegant watercolor illustration featuring a deep indigo night sky illuminated by shimmering golden fireworks. The contrast between the dark, moody watercolor wash and the metallic accents creates a sophisticated and festive piece perfect for framing or greeting cards.
How-To Guide
Materials
- Cold press watercolor paper (300 gsm)
- Masking tape
- Watercolor paints (Indigo, Payne’s Grey, touches of Burnt Sienna or Orange)
- Metallic gold watercolor paint or gold gouache
- Clean water and two jars
- Large flat wash brush or mop brush
- Round brushes (size 6 and size 2/0 for details)
- Small palette for mixing
- Paper towels
Step 1: Setting the Scene
-
Prepare your surface:
Begin by taping the edges of your watercolor paper down firmly onto a hard board or table. This creates a clean white border and prevents the paper from buckling when wet. -
Outline the landscape:
Lightly sketch a gentle, rolling horizon line about one-third of the way up the paper. You want a layered look, so draw a faint line for the distant mountains and a slightly lower line for the foreground tree line.
Metallic Pop
If your gold paint looks dull on the dark paper, paint the firework lines in white gouache first. Let it dry, then layer the gold on top for maximum brightness.
Step 2: Painting the Sky Gradient
-
Pre-wet the sky:
Using your large wash brush, apply clean water to the entire sky area above your mountain line. The paper should be glisten with sheen but not hold puddles. -
Apply the dark top layer:
Load your brush with a rich, concentrated Indigo or Prussian Blue. Paint the very top of the sky, letting the color bleed downward naturally. -
Soften the transition:
As you move down the paper, dilute your blue slightly with water. Add a touch of Payne’s Grey to keep the night feeling moody and deep, blending it into the wet surface. -
Create the horizon glow:
Near the horizon line, mix a very faint amount of Burnt Sienna or a pale orange wash. Introduce this carefully just above the mountains to mimic light pollution or afterglow, blending it softly upward into the blue. -
Let it dry completely:
Allow the sky wash to dry fully. The paper must be bone-dry before moving to the next step, or the mountains will bleed into the sky.
Level Up: glitter
While the gold paint is still wet on the thickest firework bursts, sprinkle a tiny pinch of ultra-fine cosmetic glitter over it for real texture and sparkle.
Step 3: Layering the Landscape
-
Paint the distant mountains:
Mix a medium-strength wash of Indigo and Payne’s Grey. Paint the distant mountain shape, ensuring the top edge is crisp against the sky wash. -
Dry the mid-ground:
Wait for this mountain layer to dry completely. I usually use a hairdryer on a low setting here to speed things up if I’m impatient. -
Create the foreground silhouette:
Mix your darkest color—almost black—using concentrated Payne’s Grey and Indigo. Paint the bottom foreground layer. -
Add tree texture:
While painting the top edge of this dark foreground, use the tip of a smaller round brush to dab tiny vertical uneven strokes, simulating the tops of pine trees.
Step 4: Adding the Sparkle
-
Prepare the metallic paint:
Activate your gold watercolor or gouache with a few drops of water until it reaches a creamy, opaque consistency. It needs to be thick enough to stand out against the dark blue. -
Paint the main burst:
Using a fine liner brush (size 0 or similar), paint the largest firework. Start from a center point and flick lines outward in a radial pattern, varying their lengths. -
Add radial details:
Enhance the main burst by adding tiny dots or stars at the ends of some lines to create that exploding effect. -
Create variety:
Paint a few smaller, different styles of fireworks. Try a dandelion shape for one, and a simple starburst for another to keep the composition interesting. -
Draw the trails:
For the lower fireworks, paint thin, trailing lines specifically extending upward from the ground, mimicking the rocket’s path before explosion. -
Fill with stars:
Dip the very tip of your brush in gold and gently dot the empty spaces in the upper sky to create a field of distant stars.
Step 5: Final Touches
-
Add extra sparkle:
Paint tiny four-pointed stars scattered among the dots for extra twinkle. -
Review and refine:
Step back and check the balance. If the sky feels too empty, add a few more small gold dots or a faint gold trail. -
Remove the tape:
Once the gold paint is 100% dry, carefully peel away the masking tape at a 45-degree angle to reveal your crisp white borders.
Now you have a stunning, shimmering night scene ready to light up your Diwali celebration
BRUSH GUIDE
The Right Brush for Every Stroke
From clean lines to bold texture — master brush choice, stroke control, and essential techniques.
Explore the Full Guide
Minimal Line Art Diya With Bold Color Pops
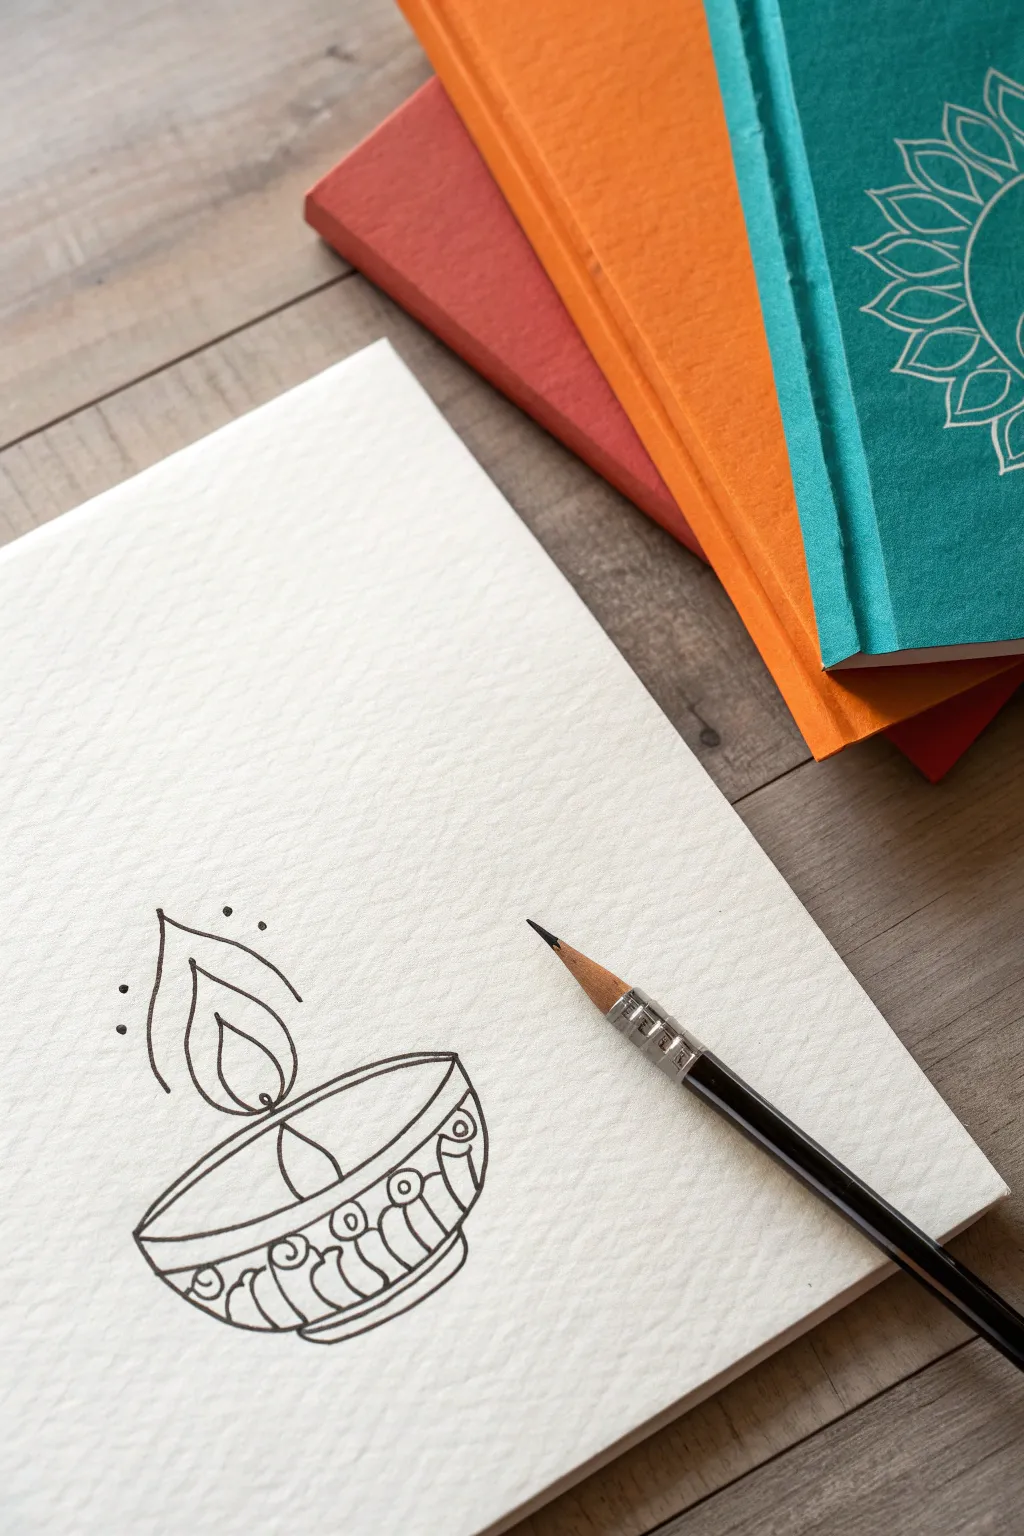
Capture the essence of light with this stunningly simple diya illustration. This project focuses on clean lines and negative space, proving that you don’t need complex shading to create a beautiful symbol of Diwali.
How-To Guide
Materials
- Heavyweight textured drawing paper (watercolor or mixed media paper works best)
- HB or 2B graphite pencil
- Fine-tip black drawing pen (archival ink)
- Soft block eraser
Step 1: Pencil Under-drawing
-
Map the Base:
Start by lightly sketching a wide, shallow semi-circle near the bottom center of your page. This will act as the bowl of the diya lamp. -
Define the Rim:
Draw an oval shape across the top of your semi-circle to create the open rim of the bowl. Keep your pencil pressure very light so these lines are easy to erase later. -
Sketch the Flame:
Floating slightly above the center of the rim, sketch a teardrop shape for the main flame. Add a smaller, inner teardrop inside it to suggest the hot core of the fire. -
Add Decorative Details:
Lightly pencil in the vertical segments on the bowl’s exterior. I usually add small circles near the top edge of the bowl to guide the ink placement later.
Step 2: Inking the Outline
-
Trace the Flame:
Using your black fineliner, carefully trace the outer flame shape first. Instead of closing the shape completely at the bottom, leave it slightly open where it meets the wick. -
Ink the Inner Flame:
Draw the smaller inner flame with a smooth, continuous curve. This double-layer effect gives the fire visual depth without needing color. -
Outline the Rim:
Ink the top oval of the bowl. When you reach the back side of the rim, you can make the line slightly thinner or broken to suggest perspective, though a solid line works perfectly for a graphic look. -
Draw the Bowl Shape:
Go over the bottom semi-circle with confidence. Try to execute this in one or two smooth strokes rather than many short, sketchy marks. -
Add the Wick:
Draw a small, curved line inside the rim that connects the bottom of the flame to the center of the oil, anchoring your fire to the lamp.
Smudge Prevention
Keep a spare scrap of paper under your drawing hand. This acts as a shield, preventing oils from your skin from transferring and stopping wet ink from smearing.
Step 3: Adding Details & Texture
-
Create the Bead Pattern:
Along the upper exterior of the bowl, draw a row of small circles. These represent decorative beads or indentations often found on clay diyas. -
Draw Vertical Sections:
Draw curved resizing vertical lines down the side of the bowl. Curve them slightly outward to follow the round form of the clay pot. -
Add Lower Accents:
At the bottom of each vertical section, you can add small scallops or half-circles to giving the bowl a carved appearance. -
Embellish the Aura:
To represent the glow of the light, draw two sweeping curved lines on either side of the flame. They shouldn’t touch the flame itself. -
Final Dots:
Place three simple black dots above the aura lines on the left side to balance the composition and add a touch of whimsy. -
Erase and Refine:
Wait at least 5 minutes for the ink to dry completely. Gently run your block eraser over the entire drawing to remove the graphite guidelines, revealing the crisp black lines.
Level Up: Gold Accents
Once the black ink is dry, use a metallic gold gel pen to fill in just the small circular beads or the inner flame for a subtle, festive sparkle.
This elegant line drawing is now ready to be framed or used as a lovely festive greeting card
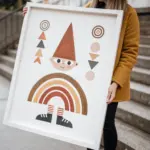
Pattern Page Of Diwali Icons
Fill a sketchbook page with this elegant spread of rhythmic Diwali motifs using fine lines and metallic accents. The combination of traditional lamps, geometric suns, and twinkling stars creates a festive yet modern aesthetic perfect for journaling.
Step-by-Step
Materials
- Spiral-bound sketchbook (dot grid or blank)
- Fine liner pen (black, size 01 or 03)
- Metallic gel pen or marker (gold, bronze, or copper)
- Pencil (HB or lighter)
- Eraser
- Ruler (optional for spacing)
Step 1: Planning the Layout
-
Visualize the grid:
Visualize an invisible grid on your blank page. You don’t need to draw strict lines, but aim for roughly four or five imaginary columns and five or six rows where your main icons will sit. -
Lightly sketch positions:
Using your pencil very lightly, mark small ‘X’s or circles where your major decorative elements will go. Stagger them so they aren’t perfectly aligned, creating a more organic, flowing pattern rather than a rigid chart.
Smudge Prevention
Place a piece of scrap paper under your drawing hand. This acts as a shield, preventing oils from your skin from smearing the fresh ink or metallic gel as you move across the page.
Step 2: Drawing the Key Icons
-
Sketch the Diya lamps:
Start with the traditional Diya lamps. Draw a few varying styles—some simple shallow bowls, others with striped details on the base. Scatter about three or four of these across the page. -
Add hanging lanterns:
In the empty spaces, sketch hanging lanterns (kandil). These often look like globes or domes with a small loop at the top and a tassel or geometric shape at the bottom. -
Draw candle motifs:
Fill in a few spots with candle designs. Try a cluster of two candles with melting wax drips, usually placed on a small plate, and single tall candles on distinct holders. -
Incorporate sunbursts:
Draw circular sun motifs. Create variety by making some with simple radiating lines and others with double outlines or jagged, star-like rays. -
Include geometric ornaments:
Add round, bauble-like ornaments decorated with horizontal stripes or zigzag patterns. Keep the lines simple and clean.
Step 3: Inking the Outlines
-
Trace with fine liner:
Once you are happy with the pencil placement, switch to your black fine liner. Carefully trace over your main icons. Use smooth, confident strokes to keep the lines crisp. -
Add internal details:
Add the smaller details inside the icons now, like the weave pattern on a lamp bowl or the stripes on a lantern. I find that keeping a light touch here prevents the drawing from looking too heavy. -
Draw the flames:
For every lamp and candle, draw the flame shape. Leave the inside of the flame blank for now; we will color it later. -
Erase pencil marks:
Wait a few minutes to ensure the ink is completely dry, then gently erase all the underlying pencil sketches to reveal the clean black and white forms.
Level Up: Watercolor Wash
Before doing any inking, paint loose, pale yellow or orange watercolor circles where the icons will go. Let it dry fully, then draw over the color for a glowing background effect.
Step 4: Adding Metallic Accents
-
Color the flames:
Take your metallic gold or bronze pen and color in the flames of the candles and Diyas. This adds a warm, glowing focal point to each drawing. -
Highlight the suns:
Use the metallic pen to color the center circles of your sunbursts. You can also trace over alternating rays to create a two-tone effect. -
Accentuate the lanterns:
Add small touches of gold to the hanging lanterns—perhaps color in a single stripe or the loop at the top.
Step 5: Filling the Gaps
-
Draw tiny stars:
Look for the white spaces between your main icons. Draw tiny, eight-pointed stars or simple asterisks using your fine liner. -
Add metallic dots:
Flick your eyes across the page to spot any remaining awkward gaps. Place small, solid dots using your metallic marker in these spaces to tie the whole color palette together. -
Final check:
Review the balance of the page. If a corner feels empty, add one last tiny starburst or a moon crescent to finish the composition.
Now you have a beautifully illustrated page celebrating the festival of lights

PENCIL GUIDE
Understanding Pencil Grades from H to B
From first sketch to finished drawing — learn pencil grades, line control, and shading techniques.
Explore the Full Guide
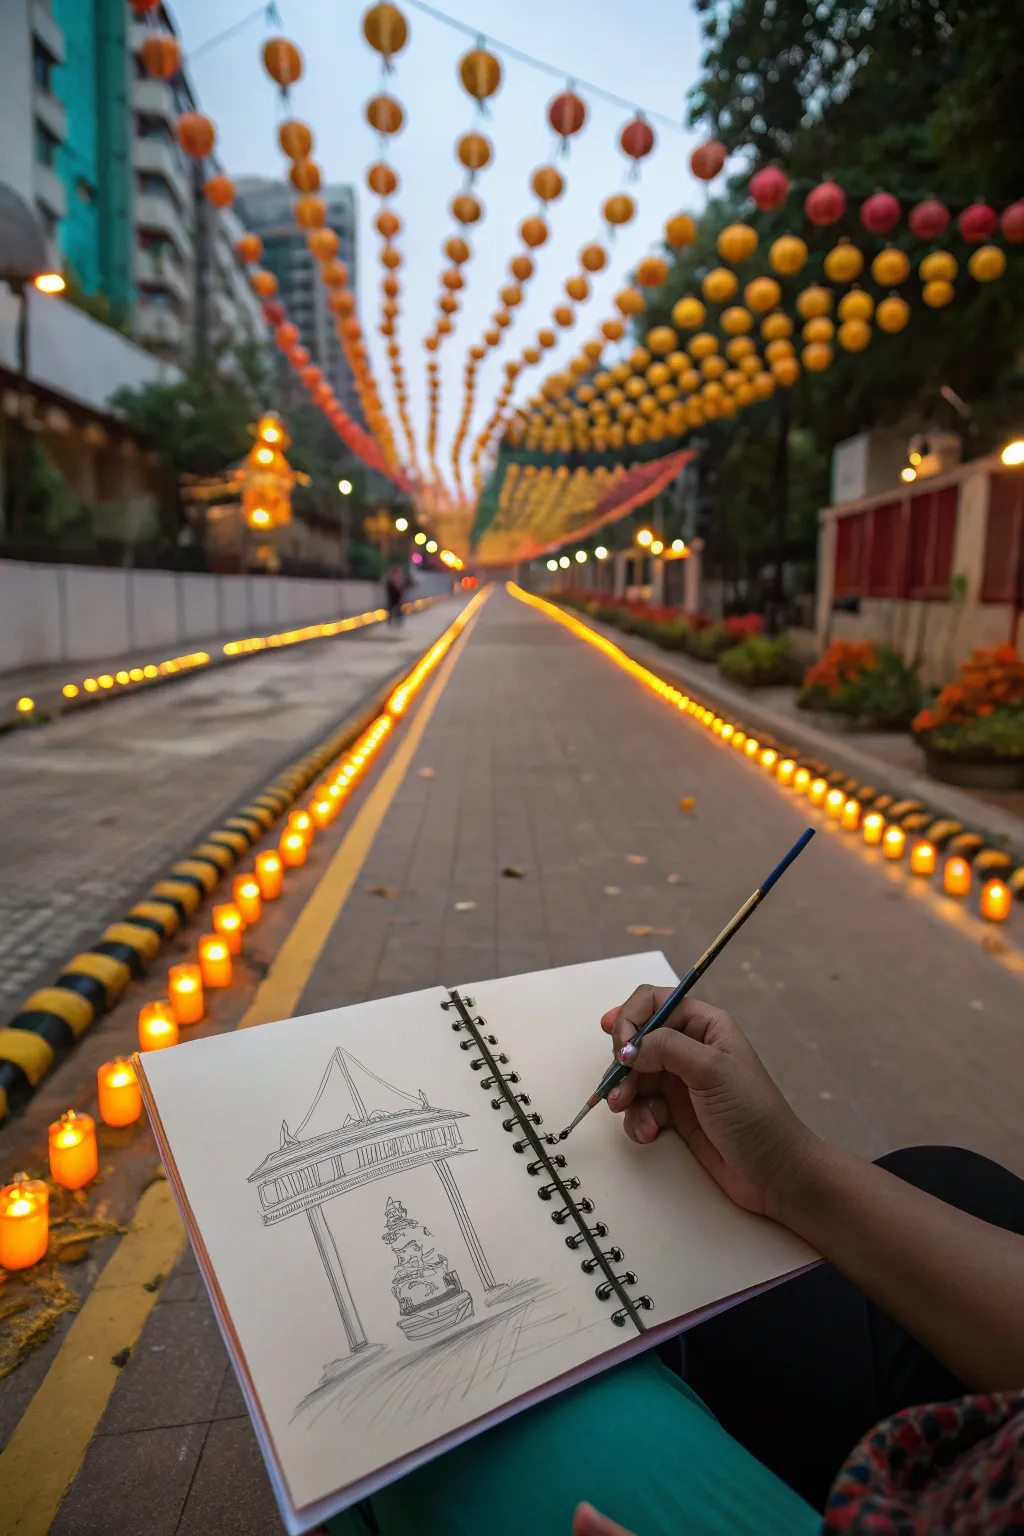
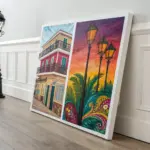
Street Perspective With Lamps Leading The Eye

Capture the magic of Diwali by sketching a serene street perspective that uses lines of lamps to draw the viewer deep into the scene. This project combines precise architectural sketching with loose, flowing perspective lines to create a sense of depth and celebration.
Detailed Instructions
Materials
- Spiral-bound sketchbook (heavyweight paper)
- H or HB pencil for initial layout
- Fine liner pens (0.1, 0.3, and 0.5 sizes)
- Graphite shading pencil (2B or 4B)
- Reference photo of a lit street (or live view)
- Ruler (optional for horizon line)
- Eraser
Step 1: Setting the Perspective
-
Establish the horizon:
Begin by lightly drawing a horizontal line across the upper third of your page. This will represent the eye level where the street disappears into the distance. -
Mark the vanishing point:
Place a small dot roughly in the center of your horizon line. This focal point is crucial, as all your parallel lines will converge here to create depth. -
Outline the street path:
From the bottom corners of your page, draw two diagonal lines meeting at the vanishing point. These lines define the road or walkway leading the viewer’s eye inward. -
Add the lamp guide lines:
Draw parallel diagonal lines just inside your road lines. These will serve as markers for where the rows of glowing diyas or lamps will sit along the curb. -
Block in the structure:
Sketch a simple box shape in the foreground or middle ground properly aligned with vertical lines. This creates the basic volume for the shrine or monument you see in the reference.
Wobbly Lines?
If your straight lines curve unintentionally, try locking your wrist and moving your whole arm from the shoulder. Drawing faster can also smooth out the wobble.
Step 2: Detailed Architectural Sketching
-
Refine the roofline:
Using your 0.3 pen, carefully draw the sloped roof of the structure. I like to add a slight overhang to give the architecture a traditional feel. -
Draw the pillars:
Extend vertical lines down from the roof corners to the ground. Keep these lines straight and parallel to the sides of your paper to ensure the structure looks stable. -
Detail the central figure:
Lightly sketch the deity or statue inside the structure. Focus on the silhouette first—head, torso, and base—before adding intricate details like jewelry or facial features with the 0.1 pen. -
Add structural textures:
Use short, vertical strokes on the roof and base to suggest texture. Keep the lines closer together in shadowed areas to create contrast without full shading.
Step 3: Creating Atmosphere and Depth
-
Ink the foreground lamps:
Draw small, cup-shaped ovals along your lamp guide lines. Make the ones at the bottom of the page larger and more detailed, slowly shrinking them as they recede toward the horizon. -
Suggest the background:
Sketch faint outlines of trees or walls on either side of the path. Keep these lines loose and less detailed than the central structure to ensure they don’t distract from the focal point. -
Apply shading to the ground:
Using a 2B pencil or hatching with a pen, add shadows beneath the central structure and the lamps. The shadows should stretch slightly away from the light sources. -
Define the path texture:
Draw faint, horizontal or slightly diagonal lines across the road surface. These should become closer together as they approach the horizon line to enhance the perspective effect. -
Enhance the linework:
Go over the main structural lines of the monument with the 0.5 pen to make it pop. This variations in line weight helps separate the foreground subject from the background. -
Add flame details:
inside each lamp oval, draw a tiny teardrop shape for the flame. You don’t need to color them; the outline alone suggests light in a black-and-white sketch.
Add a Warm Glow
Use a yellow or orange watercolor wash or colored pencil very lightly over these specific areas: the lamp flames and the center of the shrine.
Now you have a beautifully composed scene that leads the viewer right into the celebration


Have a question or want to share your own experience? I'd love to hear from you in the comments below!