If you want toddler Christmas canvas projects that actually look like Christmas (and not just “we had fun with paint”), I’ve got you. These ideas lean on handprints, footprints, and fingerprints to turn adorable chaos into festive keepsake gifts you’ll want to hang up every year.
Classic Handprint Christmas Tree

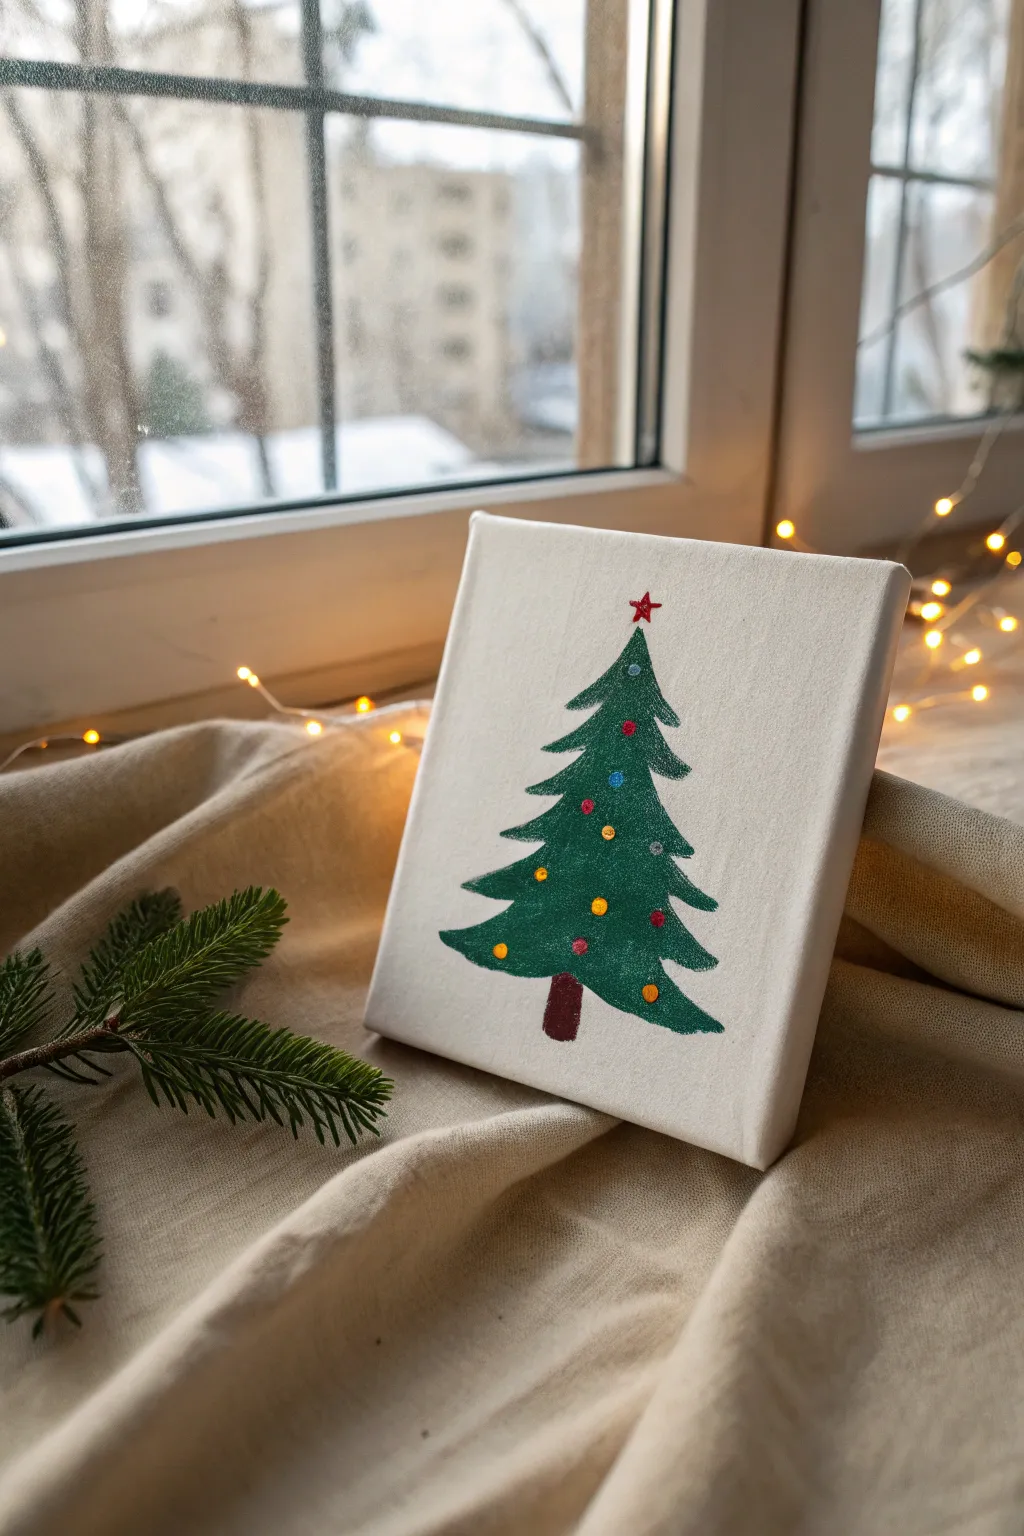
Capture the magic of tiny hands with this timeless Christmas tree canvas that grows layer by layer. The textured green prints create a remarkably organic pine needle effect, topped perfectly with a shining star.
Detailed Instructions
Materials
- White stretched canvas (8×10 or 11×14 inches)
- Non-toxic acrylic craft paint (Forest Green or Kelly Green)
- Non-toxic acrylic craft paint (Brown)
- Gold glitter cardstock or foam sheet
- Scissors
- Pencil
- Medium flat paintbrush
- Paper plate or palette
- Glue (craft glue or hot glue gun)
- Baby wipes or damp paper towels (essential for cleanup)
Step 1: Preparation & Practice
-
Set up your station:
Cover your work surface with newspaper or a plastic tablecloth. Place the canvas in the center and squeeze a generous amount of green paint onto your paper plate. -
Practice run:
Before touching the canvas, do a quick test print on a piece of scrap paper. This helps your toddler get used to the feeling of cold paint and lets you gauge how much pressure is needed for a clear print. -
Paint the hand:
Use the brush to coat your child’s entire palm and fingers with a layer of green paint. Ensure the coverage is thick enough to be opaque but not so globby that it smears the details.
Smudge Control
If a print smudges, don’t panic. Wait for it to dry, then stamp a fresh, opaque layer right over it. The layered look actually adds great volume.
Step 2: Building the Tree
-
The bottom row:
Start at the bottom of the canvas. Guide your child’s hand to press down firmly to create the lowest branch layer. You’ll likely need 4-5 handprints in a row here, depending on the canvas width. -
Angle the prints:
For a more natural tree shape, slightly angle the outer handprints outward—fingers pointing left on the left side, and right on the right side. -
Reload and repeat:
Refresh the paint on the hand between every single impression. This ensures the texture and color intensity remain consistent across the whole tree. -
The second layer:
Move up to the next row, overlapping the wrists of the previous prints slightly with the fingers of this new row. Reduce the number of prints by one (e.g., if the base was 5, this row is 4). -
Continuing upward:
Continue adding rows, decreasing the number of handprints each time to create a triangular pyramid shape. -
Creating the peak:
For the very top of the tree, place a single handprint pointing straight up. I find pressing the fingers down individually helps separate them for a nice pine-top look. -
Clean up hands:
Immediately wipe the green paint off the little hands using baby wipes before it dries, then wash thoroughly with soap and water.
Step 3: Trunk & Topper
-
Painting the trunk:
Using the brown paint and a flat brush, paint a simple trapezoid shape at the bottom center of the tree. Make the base of the trunk slightly wider than the top where it meets the green prints. -
Drying time:
Allow the green handprints and brown trunk to dry completely. This usually takes about 20-30 minutes depending on how thick the paint is. -
Cut the star:
While the paint dries, flip your gold glitter cardstock over and draw a simple five-pointed star on the back. Cut it out carefully with scissors. -
Attach the star:
Once the canvas is dry to the touch, apply a dab of glue to the back of the star. -
Final placement:
Press the star firmly onto the canvas just above the top handprint, overlapping slightly with the tip of the middle finger to connect it visually to the tree.
Level Up: Lights
Dip a fingertip in yellow, red, and blue paint to stamp ‘ornaments’ onto the dried branches, or glue on real mini pom-poms for 3D texture.
Hang your festive masterpiece on the wall and enjoy seeing those little hands every holiday season


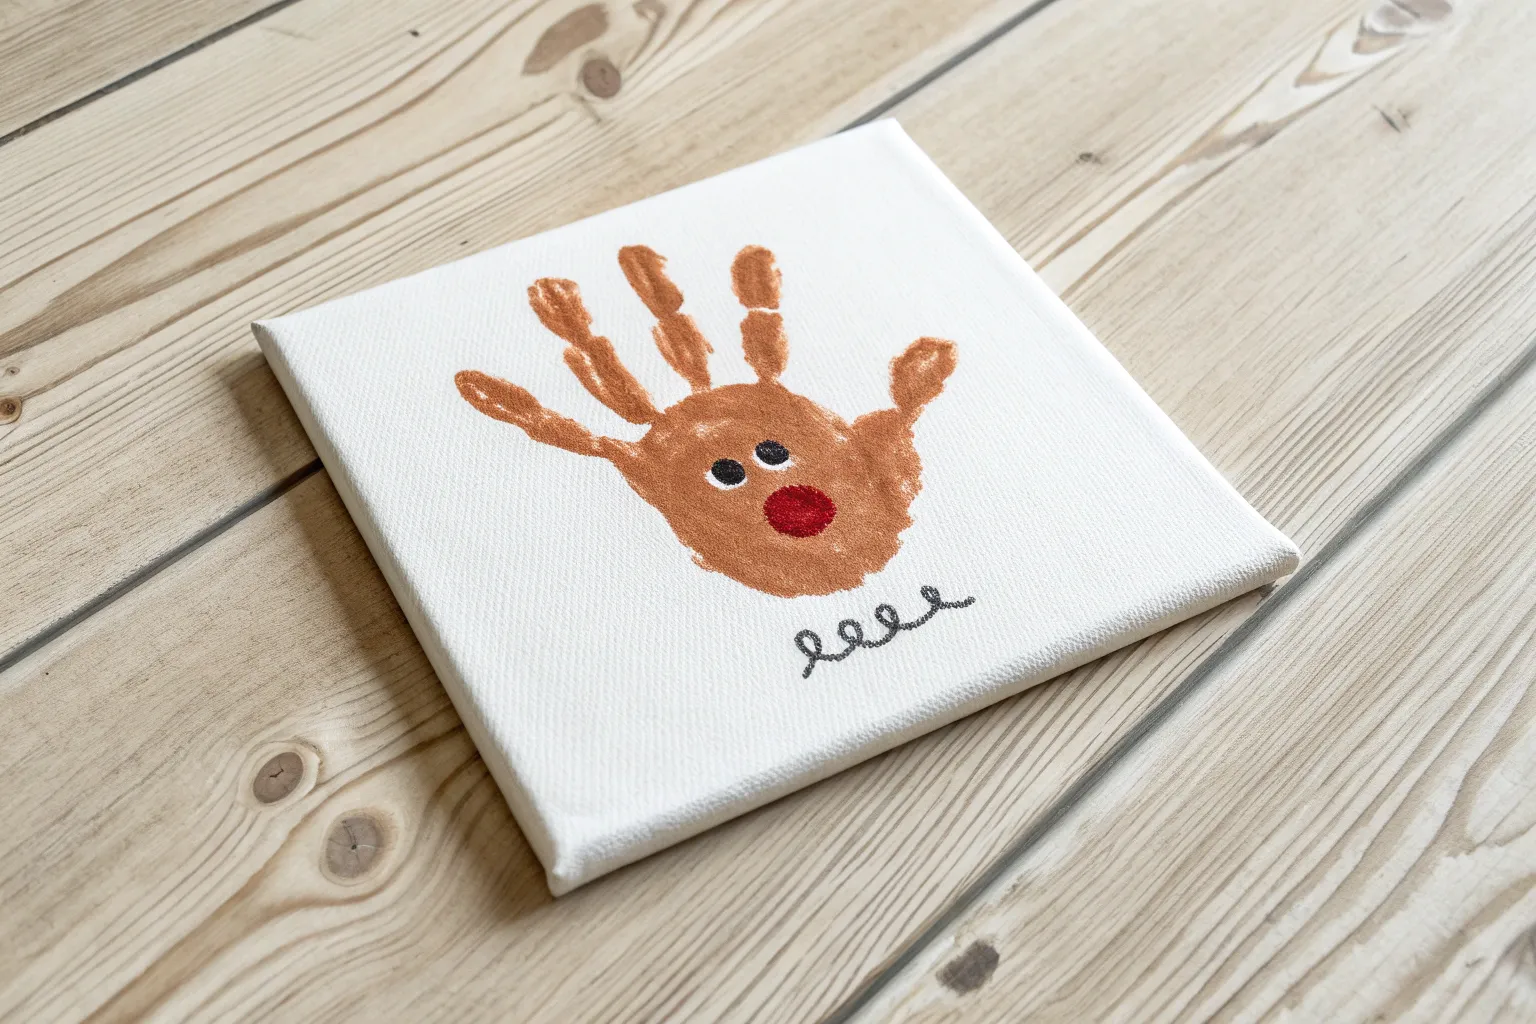
Footprint Reindeer With a Red Nose
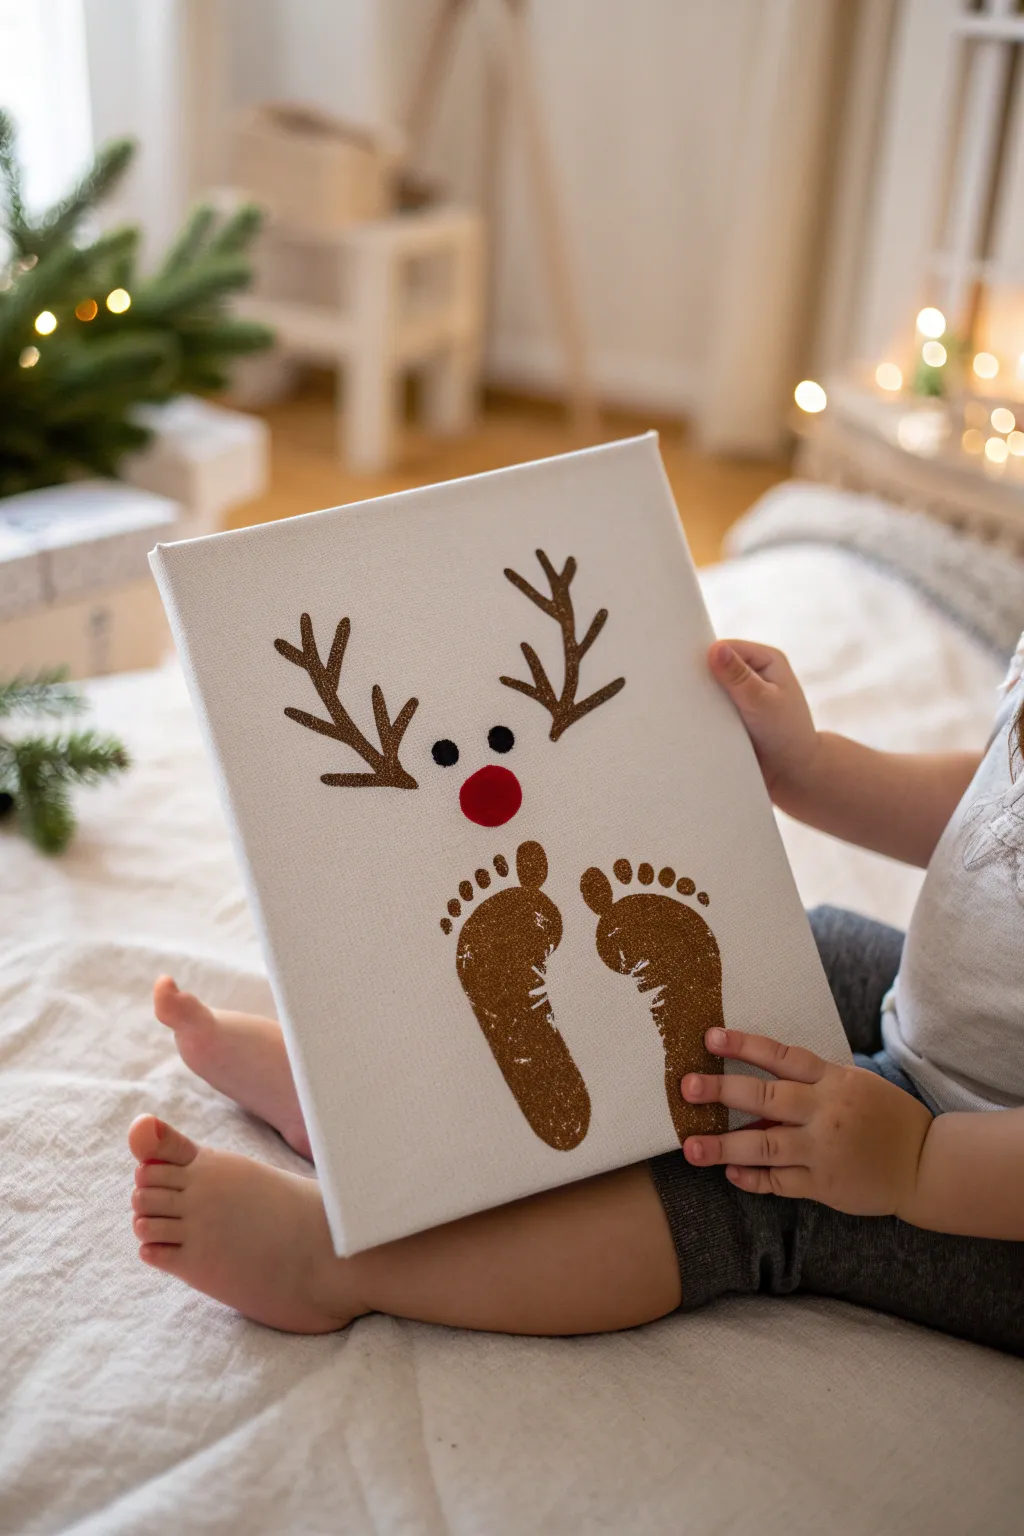
Transform tiny feet into a festive keepsake with this adorable reindeer canvas project. The natural shape of your toddler’s footprints creates the perfect reindeer face, complete with glittery brown details and a bold red nose.
Step-by-Step
Materials
- Small white stretched canvas (approx. 8×10 or 9×12 inches)
- Brown acrylic paint (warm, medium shade)
- Gold or bronze loose glitter (optional)
- Black acrylic paint
- Large red pom-pom (approx. 1 inch)
- Tacky glue or strong craft glue
- Medium flat paintbrush
- Small round detail brush
- Paper plate or palette
- Baby wipes or damp cloth (essential for quick cleanup)
Step 1: Creating the Footprints
-
Prepare the workspace:
Set up a comfortable area where your toddler can sit safely. Place the canvas on a flat surface protected by paper or a drop cloth, and have the baby wipes open and ready within arm’s reach. -
Paint the first foot:
Squeeze some brown acrylic paint onto your palette. Using the medium flat brush, apply a generous, even layer of paint to the bottom of your child’s right foot, ensuring the heel, arch, and all five toes are covered. -
Print the right side:
Position the foot on the right side of the canvas, roughly centered vertically. Press down firmly on the heel and toes to get a solid impression, keeping the foot straight so the toes point downward. Lift the foot cleanly straight up. -
Clean and repeat:
Immediately wipe the painted foot with baby wipes. Repeat the painting process on the left foot. -
Print the left side:
Place the left foot onto the canvas next to the first print, leaving a small gap of about an inch between the heels. Press firmly and lift to reveal the symmetrical shape of the reindeer’s head. -
Add a touch of sparkle:
While the brown paint is still wet, you can lightly sprinkle a pinch of gold or bronze glitter over the footprints to give them a magical, festive texture. I find this really helps catch the light near the Christmas tree. -
Allow to dry:
Set the canvas aside for at least 30 minutes until the footprint paint is completely dry to the touch.
Clean Print Secret
If the footprint looks patchy, use a small brush to fill in the missing spots with brown paint while it’s still wet to keep the shape solid but authentic.
Step 2: Painting the Details
-
Draft the antlers:
Using your small round brush and the same brown paint, visualize where the antlers should go. You’ll want them sprouting outward from the heel area of the footprints. -
Paint the main beams:
Paint a curved line extending diagonally up and out from the top outer corner of the left footprint (the heel). Repeat this on the right side to create the main structure of the antlers. -
Add the tines:
Paint smaller V-shapes or straight lines branching off the main beams. Three or four branches per antler usually look best. -
Thicken the lines:
Go back over your antler lines to thicken them slightly, ensuring they look sturdy enough to hold up those Christmas lights. Add a sprinkle of glitter to the wet antler paint to match the footprints. -
Let the antlers set:
Allow the antler paint to dry for about 10–15 minutes.
Step 3: Bringing the Face to Life
-
Position the eyes:
Dip the handle end of a paintbrush into black paint to create perfect circles, or use a very fine brush. Place two black dots just above where the heels come together, centered between the antlers. -
Glue the nose:
Apply a generous dab of tacky glue directly onto the canvas, right in the center gap between the two ‘heels’ of the footprints, slightly below the eyes. -
Attach the pom-pom:
Press the large red pom-pom firmly into the glue spot. Hold it there for a few seconds to ensure it grabs the canvas texture. -
Final drying time:
Let the entire project sit flat overnight to ensure the thick glue under the pom-pom cures completely before hanging.
Customize It
Write the child’s name and the year in small gold lettering along the bottom edge or corner of the canvas for a true time-capsule memory.
Hang your masterpiece low on the wall or place it under the tree to enjoy those tiny festive toes all season long


Fingerprint Christmas Light String
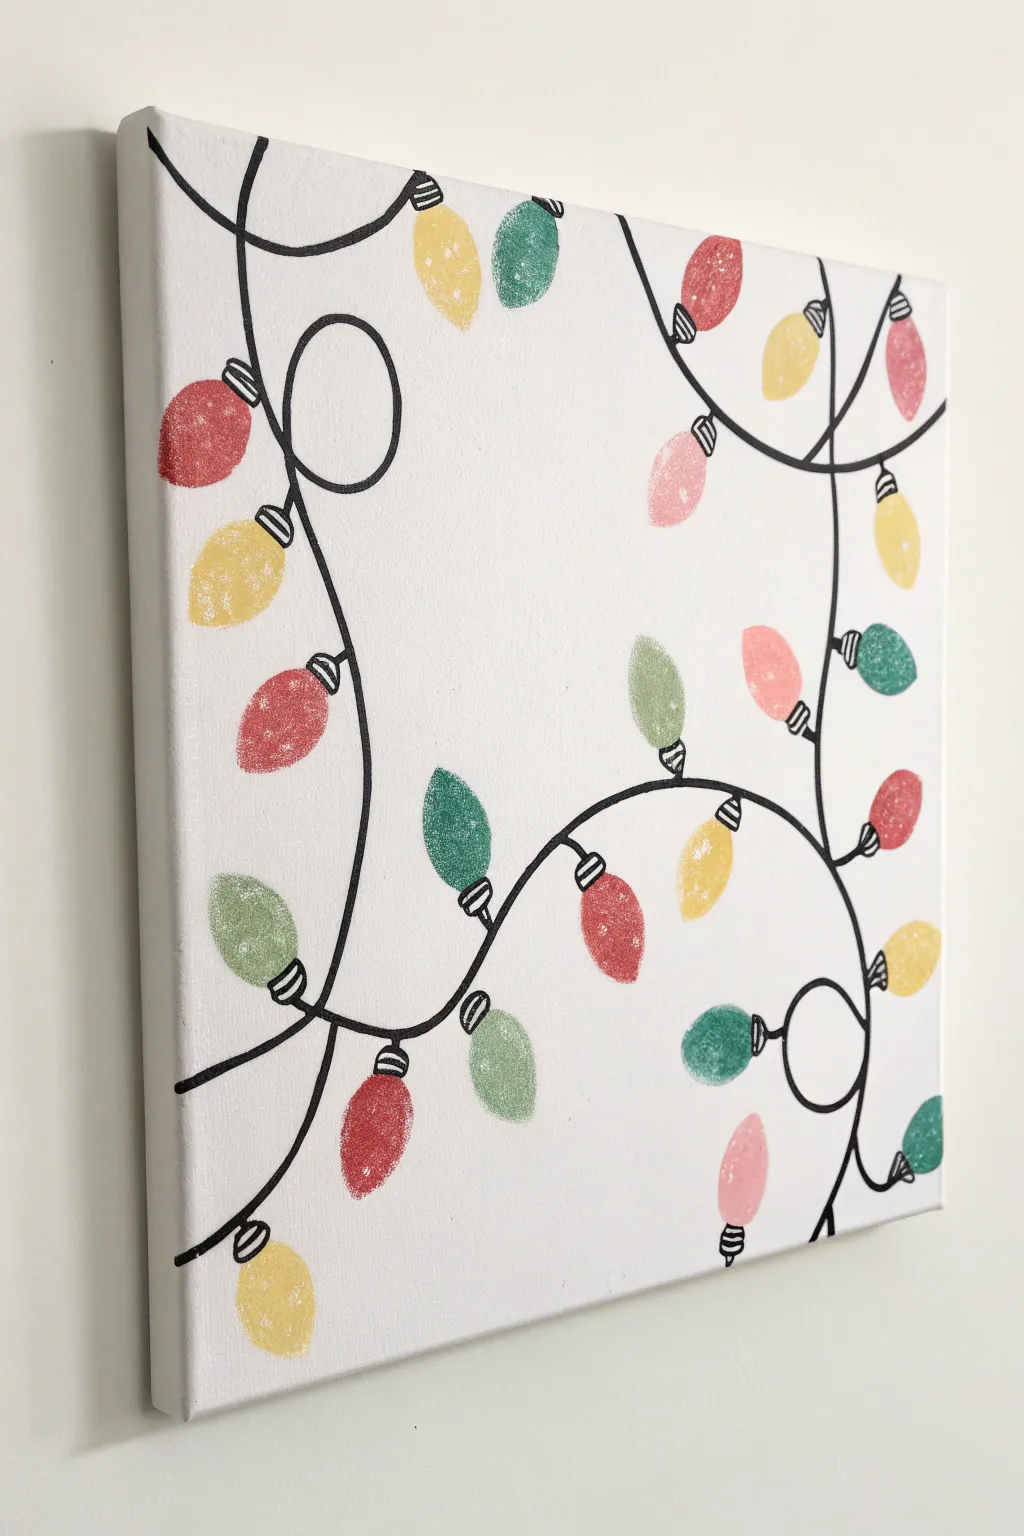
Transform tiny fingerprints into a festive string of glowing holiday lights with this charming keepsake canvas. The texture of the fingerprints adds a lovely, personal touch that captures a moment in time perfectly.
Detailed Instructions
Materials
- White stretched canvas (square or rectangular)
- Acrylic craft paints (red, green, yellow, pink)
- Black permanent marker (fine or medium tip) or black paint pen
- Paper plate or palette
- Pencil
- Baby wipes or damp paper towels
- Clear acrylic sealer spray (optional)
Step 1: Planning the String
-
Visualize the path:
Before making any marks, look at your canvas and imagine where the light string will flow. It usually looks best if it loops and curves naturally across the white space. -
Lightly sketch:
Using a pencil very lightly, draw a looping, swirling line that goes from one edge of the canvas to another. Don’t worry about being perfect; wavy lines look more like real tangled lights. -
Add loops:
Include one or two complete loops in your line to mimic how Christmas lights often get tangled or wound up. -
Trace the wire:
Once you are happy with your pencil sketch, trace over the line carefully with your black permanent marker or paint pen. Make the line bold and confident.
Step 2: Adding the Bulbs
-
Prepare palettes:
Squeeze a small amount of each paint color (red, green, yellow, pink) onto a paper plate. You won’t need much, just enough to dip a finger. -
Dip and blot:
Dip your index finger or thumb into the first color. Dab it once on a scrap piece of paper first to remove excess paint; this ensures the fingerprint texture shows clearly without globs. -
Place first color:
Press your painted finger onto the canvas near the black wire line. Space them out randomly, leaving plenty of room for other colors. -
Rotate orientation:
Aim the prints in different directions—some pointing up, some down, and some sideways—just like real bulbs hang on a wire. -
Clean up:
Wipe your finger clean thoroughly with a baby wipe before switching to the next color to avoid muddying the paints. -
Repeat with second color:
Choose your next color, dip, blot, and stamp new bulbs into the empty spaces along the wire. -
Fill the gaps:
Continue this process with all your chosen colors (pink, yellow, green) until the string looks happily crowded but not cluttered. -
Let it dry:
Allow the paint to dry completely. Since the layers are thin fingerprints, this shouldn’t take long—usually about 15 to 20 minutes.
Stamp Smart
Use your thumb for larger ‘vintage’ style bulbs and your pinky finger if you want the look of smaller ‘fairy’ lights on the string.
Step 3: Drawing the Details
-
Connect the bulbs:
Using your black marker or paint pen, draw a small square or rectangle at the base of each fingerprint where it should attach to the wire. -
Add texture lines:
Inside each little black square base, draw two or three tiny horizontal lines to mimic the screw threads on a lightbulb. -
Link to wire:
If there is a gap between your drawn bulb base and the main wire string, draw a tiny curved line to connect them so the bulb doesn’t look like it’s floating. -
Check for stragglers:
Scan the canvas for any bulbs that look disconnected and anchor them to the main string with your marker. -
Clean pencil marks:
If any original pencil sketch lines are still visible and distracting, gently erase them, being careful not to smudge the paint or marker. -
Seal (optional):
To protect the painting for years to come, take it outside and spray a light coat of clear acrylic sealer over the entire surface.
Sparkle Upgrade
While the paint is still wet, sprinkle a tiny pinch of extra-fine glitter onto the yellow bulbs to make them look like they are glowing.
Hang your festive masterpiece on the wall and enjoy the warm, handmade glow all season long


Upside-Down Footprint Snowman
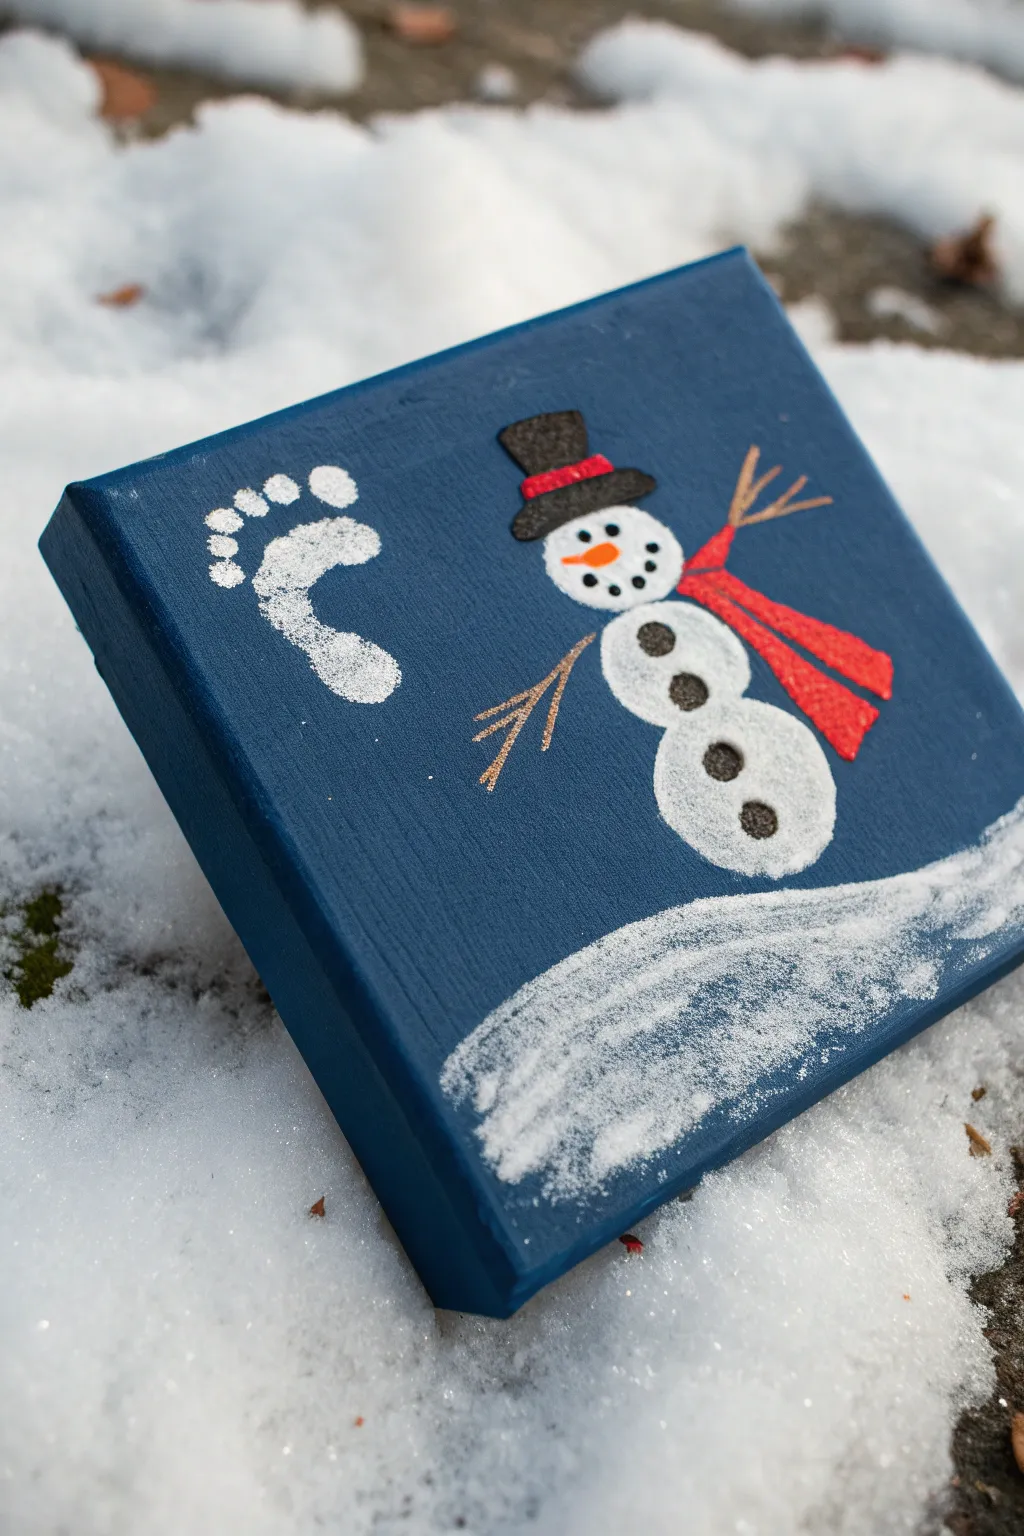
Immortalize those tiny toes with this charming winter keepsake that pairs a snowy footprint with a cheerful snowman friend. The deep blue background makes the white paint pop, creating a crisp, chilly scene perfect for holiday decor.
Step-by-Step Guide
Materials
- Small square canvas (approx. 6×6 or 8×8 inches)
- Acrylic paint: Dark blue (Navy or Midnight), White, Black, Red, Orange, Brown
- Foam brush or large flat brush
- Small detail paintbrushes
- Paper plate or palette
- Baby wipes (essential for cleanup)
- Table covering
Step 1: Setting the Scene
-
Base Coat:
Begin by painting the entire front and sides of your canvas with a solid coat of dark blue acrylic paint. Use broad, even strokes to ensure full coverage so no white canvas peeks through. -
Dry Time:
Allow the blue base to dry completely to the touch. If the first coat looks streaky, add a second coat for a deeper, richer night-sky effect and let it dry again.
Clean Print Secret
Place a hardback book under the canvas when stamping. The solid backing resists the pressure of the foot better than the giving canvas frame, ensuring a clearer print.
Step 2: Stamping the Footprint
-
Prepare the Foot:
Squeeze a generous amount of white acrylic paint onto a paper plate or palette. Using a foam brush, paint the bottom of your toddler’s foot. Ensure the toes and heel are well-coated but not dripping. -
The Stamp:
Position the foot on the left side of the canvas with the toes pointing upward. Press the foot down firmly, gently pressing on each toe to ensure a good impression. -
Clean Up:
Lift the foot straight up to avoid smearing the print. Immediately use baby wipes to clean the paint off the child’s foot before they run off. -
Touch Ups:
If parts of the print are too faint, you can carefully dab a little extra white paint over the existing impression to brighten it up, but try to keep the natural texture of the skin print visible.
Sparkle Finish
While the white paint on the snowman and ground is still wet, sprinkle a pinch of iridescent glitter over it. It mimics the way fresh snow glistens in the light.
Step 3: Building the Snowman
-
Snowman Body:
To the right of the footprint, paint three white circles stacked vertically. Make the bottom circle the largest, the middle slightly smaller, and the top one the smallest for the head. -
Snowy Ground:
While you have white paint on your brush, create a swooping, uneven line of white paint across the bottom of the canvas to represent a snowy hill. I like to dry-brush this part slightly to make it look powdery. -
Adding Texture:
Dab a stiff brush into the wet white paint of the snowman and the snowdrift to create a textured, fluffy snow appearance rather than a perfectly smooth finish.
Step 4: Adding Details
-
Top Hat Base:
Once the white paint is dry, use a small flat brush and black paint to add a top hat to the snowman’s head. Paint a small rectangle for the brim and a taller square shape on top. -
Hat Ribbon:
Carefully paint a thin red stripe across the base of the hat, just above the brim, to give it a festive band. -
The Face:
Using the handle end of a small paintbrush dipped in black paint, dot two eyes and a series of dots for a smiling mouth onto the head circle. -
Carrot Nose:
With a very fine brush and orange paint, draw a small sideways triangle for the carrot nose, pointing it towards the footprint. -
Coal Buttons:
Use the brush handle technique again to add three bold black buttons down the center of the snowman’s middle and bottom sections. -
Stick Arms:
Switch to brown paint and a thin liner brush. Paint stick arms extending from the middle snowball. Add little ‘V’ shapes at the ends to look like twigs. -
The Scarf:
Paint a red scarf around the snowman’s neck. extend two tails of the scarf blowing slightly to the right to imply a winter breeze. -
Final Flair:
If desired, you can add tiny white dots in the blue space around the figures to create falling snow, or leave it clear for a starker night look.
Display your frozen masterpiece on a mantel or shelf to enjoy all winter long
BRUSH GUIDE
The Right Brush for Every Stroke
From clean lines to bold texture — master brush choice, stroke control, and essential techniques.
Explore the Full Guide
Handprint Wreath Circle
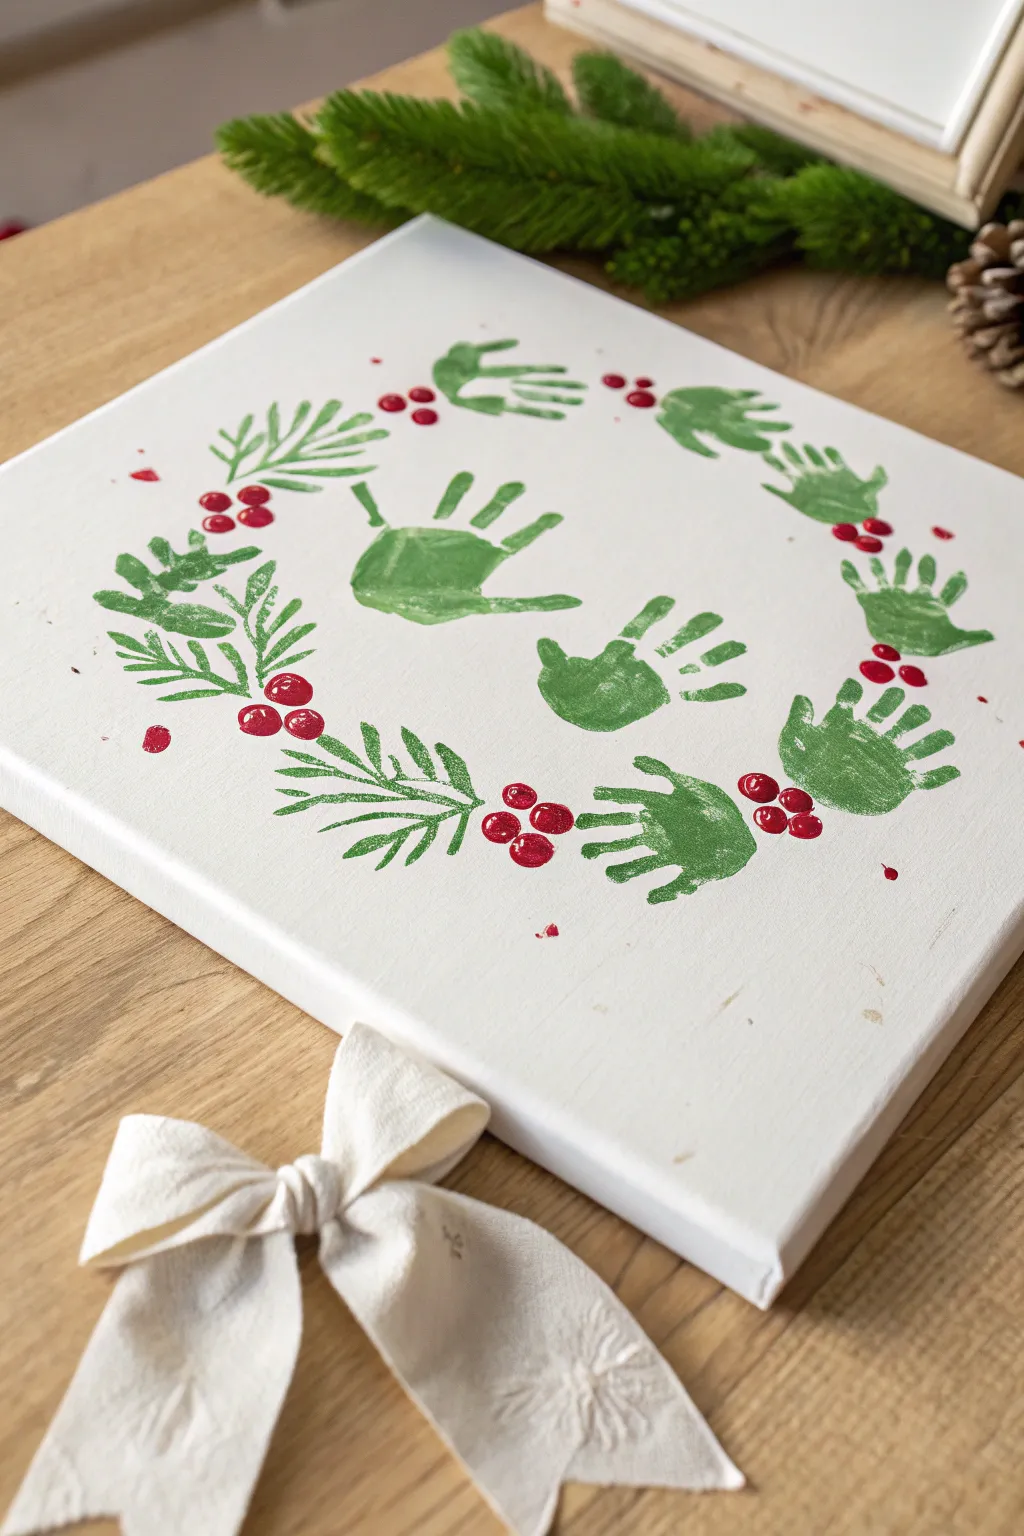
Immortalize those tiny hands with a festive wreath design that doubles as beautiful holiday decor. This project combines stamped handprints with painted greenery details for a balanced, artistic finish that looks lovely on the mantel.
Step-by-Step
Materials
- White stretched canvas (square or rectangular)
- Green acrylic craft paint (e.g., forest green or hunter green)
- Red acrylic craft paint
- Paintbrushes (medium flat brush for hands, fine liner brush for details)
- Paper plate or palette
- Pencil (optional for tracing)
- Wet wipes or paper towels (essential for cleanup)
Step 1: Planning and Stamping
-
Lightly trace a guide:
Before involving any paint, you might want to lightly trace a large circle onto the canvas with a pencil to guide where the wreath will go. A dinner plate works perfectly as a template for this. -
Prepare the green paint:
Squeeze a generous amount of green acrylic paint onto a paper plate. It needs to be wide enough to fit a toddler’s entire hand. -
Coat the hand:
Using a medium paintbrush, paint a layer of green paint onto the palm and fingers of your child’s hand. I prefer painting it on rather than dipping to ensure an even coat that isn’t too gloopy. -
Stamp the center hands:
Start with the two handprints in the very center of the canvas. Press the painted hand firmly down, gently pressing each finger to ensure good contact, then lift straight up. Repeat for the second handprint, overlapping them slightly or placing them side-by-side. -
Begin the wreath circle:
Refresh the paint on the child’s hand. Orient the canvas so you can easily stamp along the pencil guideline you drew earlier. Place the first handprint for the wreath border. -
Rotate and repeat:
Continue painting the hand and stamping around the circle. Rotate the canvas as you go so the fingers always point outward like leaves. -
Leave gaps for details:
Unlike a full handprint wreath, this design leaves empty spaces between the handprints. Aim for about 5-6 handprints total for the outer circle, leaving 2-3 inches of white space between each one. -
Clean up quickly:
Immediately wipe the child’s hands with wet wipes before the acrylic paint dries, then wash thoroughly with soap and water.
Smudge Savior
If a handprint smudges, turn it into a ‘mistake’ on purpose! simply paint a larger green leaf or extra pine needles over the smudge to hide the blur.
Step 2: Painting the Greenery Details
-
Initial drying time:
Let the handprints dry for about 10-15 minutes so you don’t accidentally smudge them while working on the filler details. -
Paint sprig stems:
Using a fine liner brush and the same green paint, draw thin, curved lines in the empty spaces between the handprints. These will be the stems for your pine or floral sprigs. -
Add pine needles:
Along some of the stems, paint short, quick dashes v-ing outward to resemble pine branches. Variation is key here, so make some needles longer than others. -
Add leafy shapes:
In other gaps, paint simple almond-shaped leaves attached to stems to add a different texture to the greenery. -
Connect the circle:
Visually inspect the wreath. If any gaps look too wide, gently extend your painted branches so they slightly touch or overlap the neighboring handprints, creating a cohesive circle.
Step 3: Adding the Berries
-
Switch to red:
Clean your brush thoroughly or grab a small, round brush and dip it into bright red acrylic paint. -
Dot the berries:
Paint clusters of 2 or 3 small red circles near the base of your painted sprigs and handprints. Think of these as holly berries. -
Scattered accents:
Add a few stray single red dots around the wreath for a whimsical, loose feel. -
Optional texture:
If you want the berries to have a slight 3D look, you can let the red paint blob slightly rather than flattening it out completely. -
Final dry:
Allow the entire canvas to dry completely undisturbed, ideally overnight, before displaying.
Festive Sparkle
While the red berry paint is still wet, sprinkle a tiny pinch of red or iridescent glitter onto them. It adds a magical holiday shimmer when dry.
Hang your new masterpiece with a simple ribbon or prop it up on a shelf to enjoy every Christmas
Mistletoe Footprint Keepsake
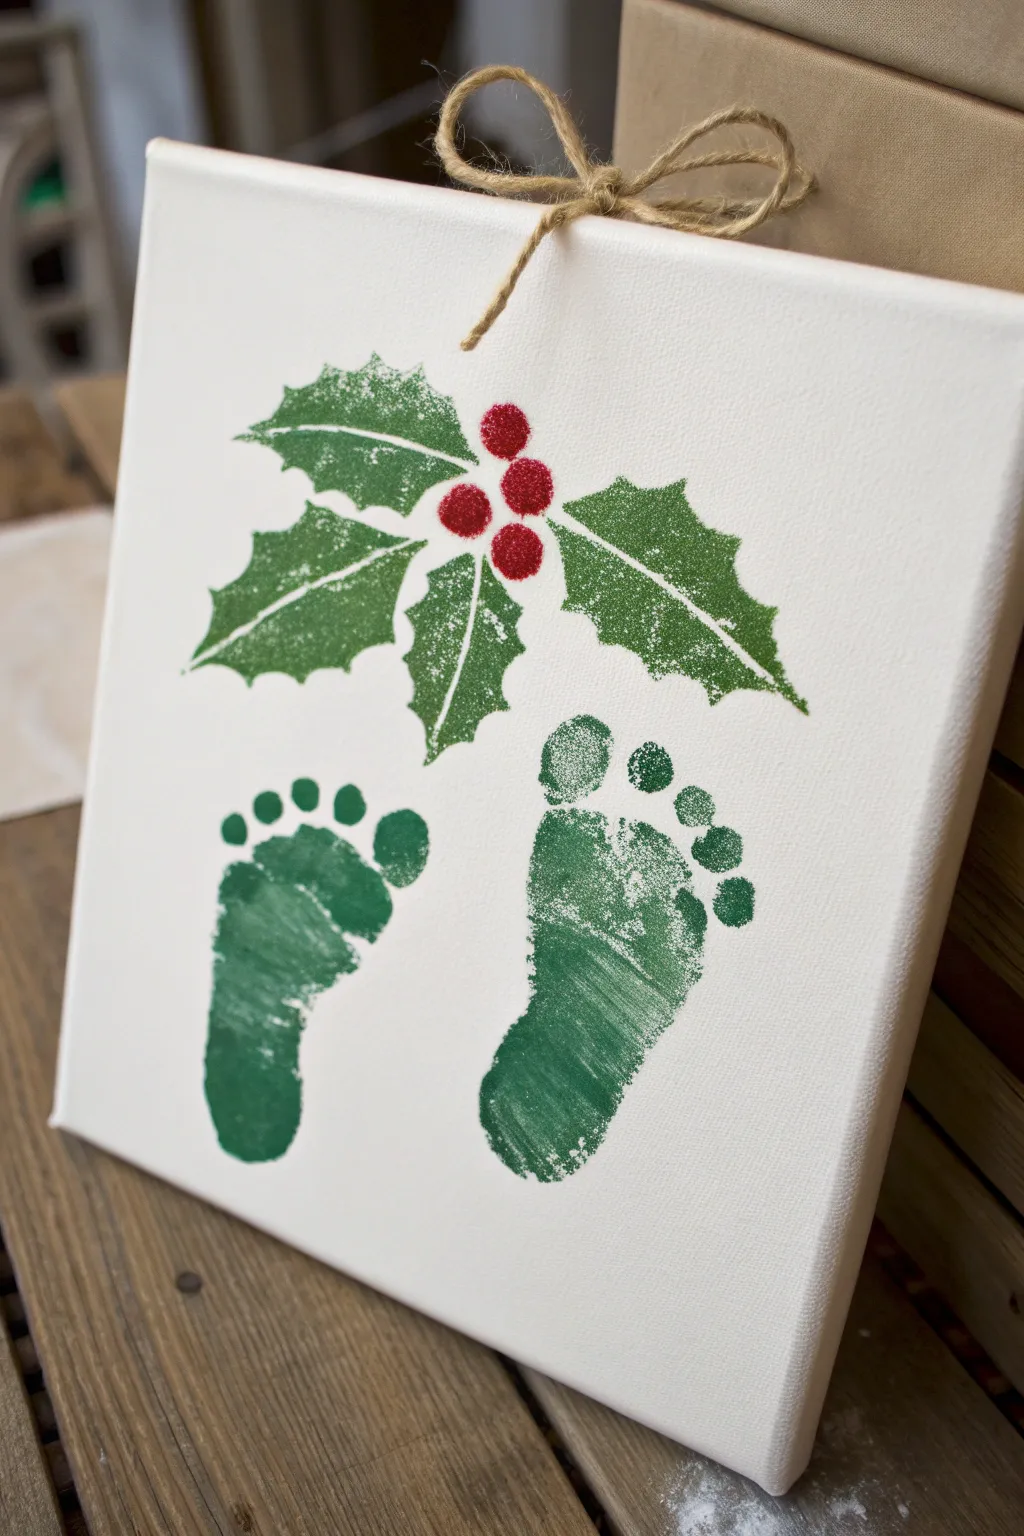
Capture those tiny toes forever with this festive canvas art that transforms little footprints into a holiday keepsake. This design combines the sweet simplicity of baby prints with stenciled holly leaves and bright red berries for a classic Christmas look.
Step-by-Step Tutorial
Materials
- Small square canvas (8×8 or 10×10 inches)
- Green acrylic craft paint (medium or dark green)
- Red acrylic craft paint
- Glitter paint or fine glitter (red and green)
- Holly leaf stencil
- Foam stencil brush or sponge dabber
- Small round paintbrush
- Jute twine
- Scissors
- Hot glue gun and glue sticks
- Paper towels or baby wipes (essential for clean-up)
Step 1: Preparation & Footprints
-
Set up your workspace:
Cover your table with newspaper or a craft mat. Have baby wipes ready and open immediately—toddler painting projects move fast. -
Prepare the paint:
Squeeze a generous amount of green acrylic paint onto a paper plate. Tap it out to create an even surface for dipping or brushing. -
Paint the first foot:
Apply the green paint to the bottom of the child’s left foot using a sponge brush. Ensure the toes and heel are well-coated but not dripping. -
Stamp the left print:
Gently press the painted foot onto the lower left side of the canvas. Press down on the toes individually to ensure a clear print, then lift straight up. -
Paint the second foot:
Repeat the process with the right foot. I prefer to wipe the first foot clean before starting the second to avoid stray green marks. -
Stamp the right print:
Press the right foot onto the lower right side of the canvas, mirroring the first print. Leave a small gap between them. -
Let it dry completely:
Set the canvas aside to dry fully before moving on to the stencil work. This prevents smudging the precious prints.
Clean Prints Secret
Perform a ‘dry run’ by pressing the child’s clean foot against a piece of paper first. This helps them get used to the sensation and helps you figure out the best grip before painting.
Step 2: Adding the Holly & Berries
-
Position the stencil:
Place your holly leaf stencil in the open space above the footprints. You want the leaves to look like they are sprouting from the space between the feet. -
Apply green stencil paint:
Load a foam dabber with green paint, offloading the excess on a paper towel until the sponge is almost dry. -
Stencil the leaves:
Lightly pounce the sponge over the stencil openings. Using a tapping motion rather than brushing helps keep the edges crisp. -
Add texture with glitter:
While the green paint is still wet, you can lightly dust fine green glitter over the leaves for a frosty effect, or use a glitter topcoat after it dries. -
Paint the berries:
Using a small round brush or a specialized round foam pouncer, dab three or four circles of red paint where the holly leaves meet in the center. -
Add berry sparkle:
To match the reference, apply a coat of red glitter paint or sprinkle red glitter directly onto the wet berry paint for a sugary texture.
Step 3: Finishing Touches
-
Create the bow:
Cut a length of jute twine and tie it into a simple shoelace bow. Trim the ends so they are even. -
Secure the bow:
Apply a small dot of hot glue to the very top edge of the canvas, right in the center. -
Attach the twine:
Press the knot of the twine bow into the hot glue. You can drape the tails of the bow slightly over the front of the canvas. -
Sign and date:
Once everything is dry, use a fine-tip permanent marker to write the child’s name and the year on the back or bottom corner of the canvas.
Make It 3D
Instead of painting the red berries, glue on real red craft pom-poms or large red buttons after the paint dries. This adds fun dimension and texture to the artwork.
Hang your new festive masterpiece near the tree and enjoy seeing how much those little feet grow by next year

PENCIL GUIDE
Understanding Pencil Grades from H to B
From first sketch to finished drawing — learn pencil grades, line control, and shading techniques.
Explore the Full Guide
Fingerprint Ornament Baubles
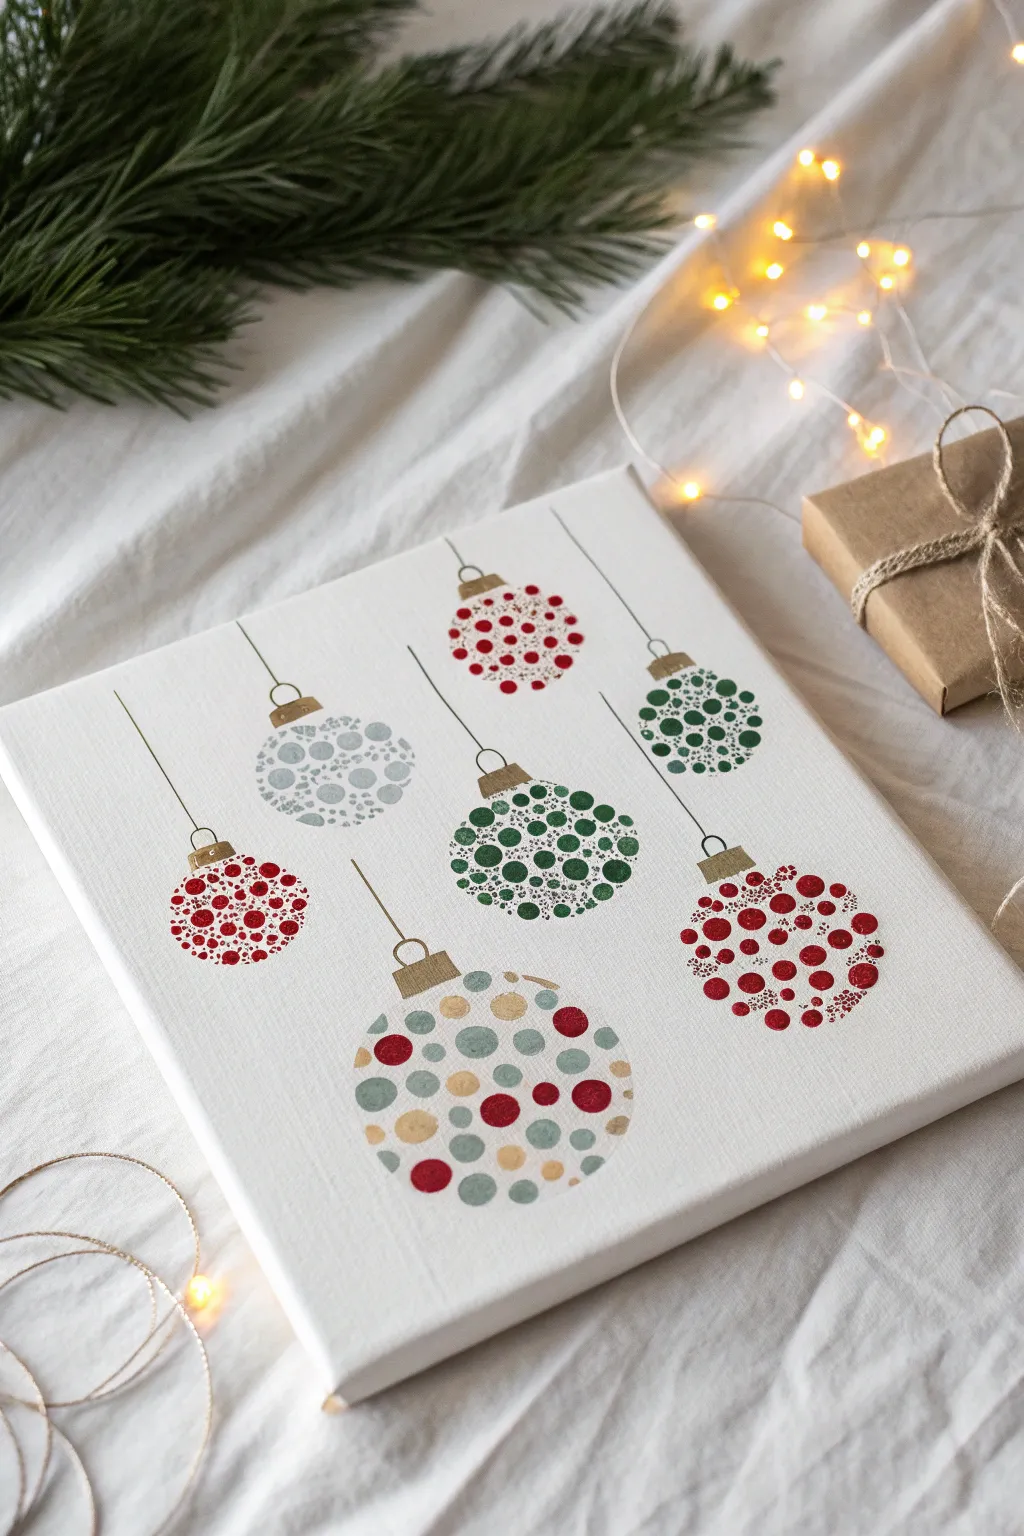
This charming project turns your little one’s fingertips into a sophisticated piece of holiday art. The result is a collection of bubbly, textured ornaments suspended on delicate lines, perfect for gifting or keeping as a seasonal keepsake.
Step-by-Step
Materials
- Square stretched canvas (approx. 10×10 or 12×12 inches)
- Acrylic craft paints (red, moss green, deep green, light blue, gold)
- Small flat paintbrush
- Fine liner paintbrush or black fine-point permanent marker
- Paper plate or palette
- Pencil
- Circular stencils or household lids (various sizes)
- Ruler
- Baby wipes or damp paper towels
Step 1: Planning and Layout
-
Map out the positions:
Begin by lightly sketching circles onto your canvas using a pencil. Use different sized lids or stencils to create variety, scattering about 5-7 ornaments across the space. -
Stagger the heights:
Ensure the circles are placed at different vertical levels to mimic ornaments hanging on a tree. Avoid clustering them all in the center; let some sit lower and some float higher up. -
Sketch the hardware:
At the very top of each circle, draw a small rectangle or square to represent the ornament cap. -
Connect the strings:
Using your ruler and pencil, draw a straight, vertical line from the top of each cap extending all the way to the top edge of the canvas.
Smudge Control
If a paint smudge happens outside the lines, wait for it to dry completely, then dab a tiny bit of white acrylic paint over it to act as “correction fluid.”
Step 2: Creating the Fingerprints
-
Prepare your palette:
Squeeze dime-sized amounts of your chosen acrylic colors onto a paper plate. You’ll want a red, a light blue-grey, a few shades of green, and a gold accent. -
Start the first ornament:
Choose one penciled circle to start with. Have your child dip their index finger into the first color, dabbing off excess paint on a scrap paper ensuring a textured, not gloppy, print. -
Fill the shape:
Press the painted fingertip firmly inside the pencil line. Continue filling the circle with random dots, reapplying paint as needed to keep the color consistent. -
Switch colors and sizes:
For the next ornament, use a different color. You can also create size variation by using a pinky finger for smaller dots or a thumb for larger statement ornaments. -
Create a multi-colored bauble:
For the large bottom ornament shown in the example, mix your colors. Alternate between blue, red, gold, and green fingerprints within the same circle outline. -
Overlapping technique:
It is okay if the dots slightly overlap or touch; this creates a dense, rich look. However, try to keep the edges relatively neat so the circular shape remains distinct. -
Clean up between colors:
Use baby wipes to thoroughly clean fingers between color changes to prevent muddy looking ornaments. -
Let the prints dry:
Allow the canvas to sit undisturbed for about 20-30 minutes until the fingerprint paint is completely dry to the touch.
Step 3: Adding Details
-
Paint the caps:
Using a small flat brush and gold acrylic paint, carefully fill in the rectangular cap shapes you sketched earlier. -
Add a metallic sheen:
If the gold paint looks too transparent after the first coat, let it dry briefly and apply a second layer for a solid, metallic finish. -
Draw the hanging loops:
With a fine liner brush and black paint (or a fine-point permanent marker), draw a tiny semi-circle loop on top of each gold cap. -
Trace the strings:
Carefully trace over your long pencil lines with the fine liner or marker. Keep your hand steady to maintain a crisp, straight line. -
Erase guide lines:
Once you are absolutely certain all paint and ink is strictly dry, gently erase any visible pencil marks remaining around the ornament edges.
Add Some Sparkle
While the paint is still wet, lightly sprinkle ultra-fine glitter over specific ornaments to make them shimmer like real glass baubles under the lights.
Hang your finished masterpiece on the wall to enjoy a touch of homemade festive cheer
Snowy Night Fingerprint Snowfall
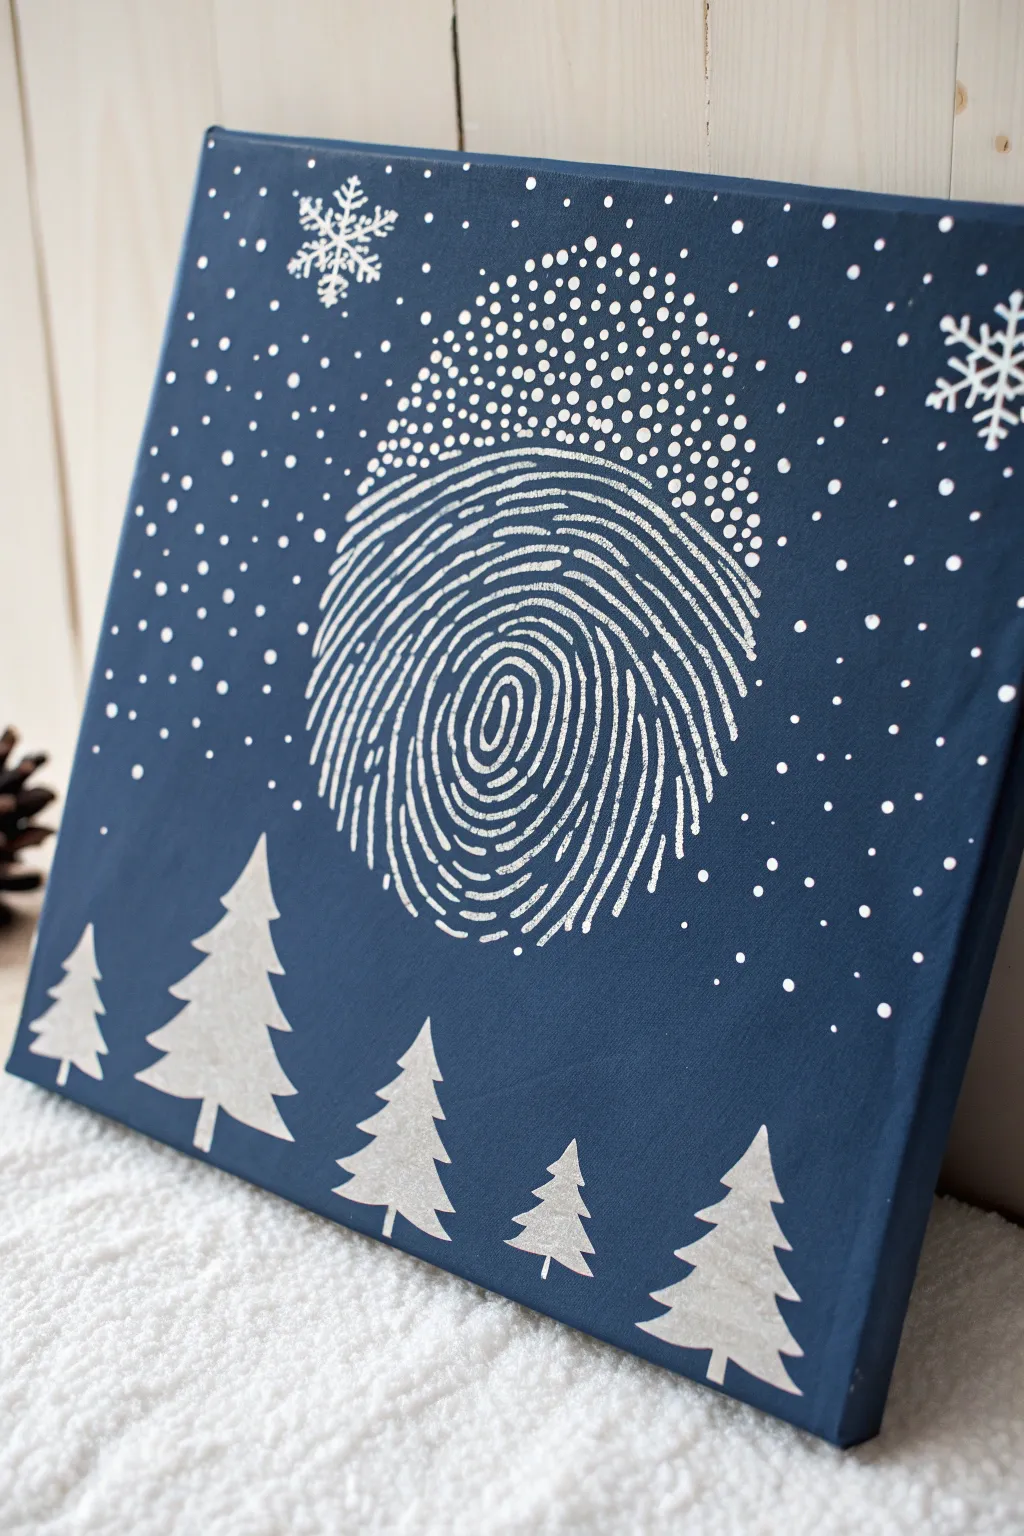
This striking winter scene transforms a simple fingerprint into a mesmerizing, oversized moon glowing against a deep navy sky. The high contrast between the dark blue background and the crisp silver-white details creates a modern, sophisticated piece of holiday decor.
Step-by-Step Guide
Materials
- Square stretched canvas (approx. 12×12 inches)
- Deep navy blue acrylic paint
- Silver or metallic white acrylic paint
- White acrylic paint (for mixing)
- Wide flat paintbrush (approx. 1-2 inches)
- Fine liner brush or detail brush
- Pencil (for light sketching)
- Ruler
- Paper plate or palette
- High-resolution photo of a thumbprint (enlarged and printed)
- White transfer paper or graphite paper
- Toothpick or dotting tool
Step 1: Setting the Scene
-
Prepare the canvas:
Begin by protecting your workspace with newspaper or drop cloths. Ensure your canvas is clean and free of dust. -
Paint the background:
Using the wide flat paintbrush, apply a generous coat of deep navy blue acrylic paint to the entire front surface of the canvas. I like to brush in long, horizontal strokes to ensure a smooth finish. -
Paint the edges:
Don’t forget to paint the sides of the canvas for a polished, gallery-wrapped took. This eliminates the need for a frame later. -
Second coat:
Allow the first layer to dry completely (about 20-30 minutes). If the white canvas is still peeking through, apply a second coat of navy blue for a rich, opaque background. Let this dry fully.
Smudged Lines?
If your fine lines get messy, wait for the silver paint to dry completely. Then, use a tiny brush with the background navy color to ‘erase’ and reshape the edges.
Step 2: Creating the Fingerprint Moon
-
Prepare the stencil:
Take a photo of a thumbprint, enlarge it on a computer to be about 4-5 inches wide, and print it out on standard paper. -
Transfer the design:
Place white transfer paper shiny-side down on the dried blue canvas, positioned slightly above the center. Place your fingerprint printout on top. Trace the main ridges of the fingerprint with a pencil to transfer the white lines onto the blue background. -
Mix the paint:
On your palette, mix your silver acrylic paint with a small amount of white. This helps the silver pop against the dark blue without losing its shimmer. -
Paint the ridges:
Using a very fine liner brush, carefully paint over the transferred lines. You don’t need to paint every single microscopic ridge—focus on the main swirls and loops to capture the essence of the print. -
Stipple the top edge:
To create the fading effect seen at the top of the moon, stop painting solid lines as you reach the upper curve. Instead, switch to small dots (stippling) that become sparser as they move upward and outward.
Step 3: Adding the Forest
-
Sketch the trees:
Lightly sketch five or six triangle shapes along the bottom edge of the canvas using a pencil. vary their heights and widths to create visual interest. -
Paint tree silhouettes:
Using the silver-white paint mixture and a small flat brush or angle brush, fill in the triangle shapes. Apply the paint solidly. -
Add branches:
While the paint is wet, or with a second layer, use the finer brush to pull small jagged points out from the sides of the triangles to mimic pine branches. -
Paint trunks:
Add small, simple rectangular trunks at the base of each tree using the fine liner brush.
Level Up: Glow Effect
Mix a tiny drop of neon blue or glow-in-the-dark medium into your silver paint for the moon. It creates a subtle luminescence that looks amazing in low light.
Step 4: Final Winter Details
-
Paint snowflakes:
In the upper left and right corners, use the fine liner brush to paint two or three detailed snowflakes. Start with a simple ‘X’ and add a vertical line through it, then add small ‘V’ shapes to the ends of the lines. -
Add falling snow:
Dip a toothpick or the handle end of a paintbrush into pure white paint. Dot the paint randomly across the sky area. -
Create depth:
Make some snow dots larger and some tiny to create a sense of depth and distance in the snowfall. -
Clean up:
Check for any stray pencil marks once the paint is 100% dry and gently erase them if visible.
Now step back and admire how a simple personal mark became a stunning piece of modern winter art


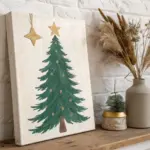
Paper-Tape Resist Christmas Tree

This striking Christmas canvas relies on a clever resist technique to create a crisp white tree silhouette against a backdrop of messy, toddler-friendly fun. The result is a modern, textured holiday decoration featuring energetic green brushstrokes and playful red and green paint spatters.
Detailed Instructions
Materials
- Small white canvas (square or rectangular)
- Painter’s tape or masking tape (wide width)
- Scissors
- Green acrylic paint
- Red acrylic paint
- Paintbrush (medium bristle)
- Small round paintbrush or cotton swabs (for dots)
- Old toothbrush (optional for splatter)
- Palette or paper plate
Step 1: Preparing the Resist
-
Cut tape strips:
Cut several strips of painter’s tape. You will need varying lengths to assemble the tree shape, so don’t worry about being too precise with sizing yet. -
Form the tree triangle:
Place strips of tape on the center of the canvas to form a large, basic triangle. Overlap the strips as needed to ensure the white canvas beneath is completely covered within the shape. -
Create the jagged branches:
To get that classic evergreen look, use scissors to cut small triangular notches out of the sides of the tape shape you just stuck down, or simply layer smaller diagonal pieces of tape sticking out from the sides to mimic branches. -
Add the trunk:
Cut a small, rectangular piece of tape and stick it at the very bottom center of your triangle to create the tree trunk. -
Seal the edges:
Press down firmly along every single edge of the tape. I like to run my fingernail over the edges to make sure no paint will bleed underneath later.
Bleeding Lines?
If paint seeps under the tape, try applying a thin layer of clear medium or white paint over the tape edges first to seal them before adding color.
Step 2: Adding the Greenery
-
Load the brush:
Squeeze a generous amount of green acrylic paint onto your palette. Dip a medium bristle brush into the paint, ensuring it’s not dripping wet but well-coated. -
Brush outward strokes:
Starting from the center of the tape (on top of the sticker), brush outward toward the blank canvas. This ‘inside-out’ motion is critical because it prevents paint from being forced under the tape edge. -
Create texture:
Encourage rough, expressive strokes. You don’t want a solid block of green; let the bristles trail off into the white space to look like pine needles. -
Outline the shape:
Continue this brushing method all around the perimeter of the tree shape until the entire silhouette is surrounded by a halo of green brushstrokes. -
Let it dry a bit:
Allow the green paint to dry for about 10 to 15 minutes. It doesn’t need to be fully cured, just tacky enough that other colors won’t turn it into mud immediately.
Sharper Edges
For ultra-crisp lines, use high-quality artist tape or Frog Tape instead of standard beige masking tape, which tends to be less secure.
Step 3: Decorating and Reveal
-
Prepare accent colors:
Put some red and a lighter shade of green (or the same green) onto your palette. -
Add festive dots:
Dip a cotton swab or the handle end of a small paintbrush into the red paint. Stamp random red berries around the outer edges of the canvas and near the tree branches. -
Incorporate green accents:
Repeat the dotting process with your green paint, filling in empty white spaces to balance the composition. -
Create the splatter effect:
For the fine speckled look seen in the example, thin down a little paint with water. Dip an old toothbrush or stiff brush into it, point it at the canvas, and run your thumb across the bristles to flick tiny specks of color. -
Wait for drying:
This is the hardest part! Let the canvas dry completely. The paint must be fully dry to the touch so the tape peels cleanly. -
Peel the resist:
Start at the bottom corner of the trunk or a tip of the tree. Slowly and carefully peel the tape back at a 45-degree angle to reveal the crisp white canvas underneath. -
Clean up edges:
If a tiny bit of paint bled through, you can gently scrape it away with a craft knife or touch it up with a tiny dab of white paint.
Display your modern silhouette tree on a mantel or package it up as a thoughtful handmade gift for grandparents
Squeegee-Swipe Evergreen Forest
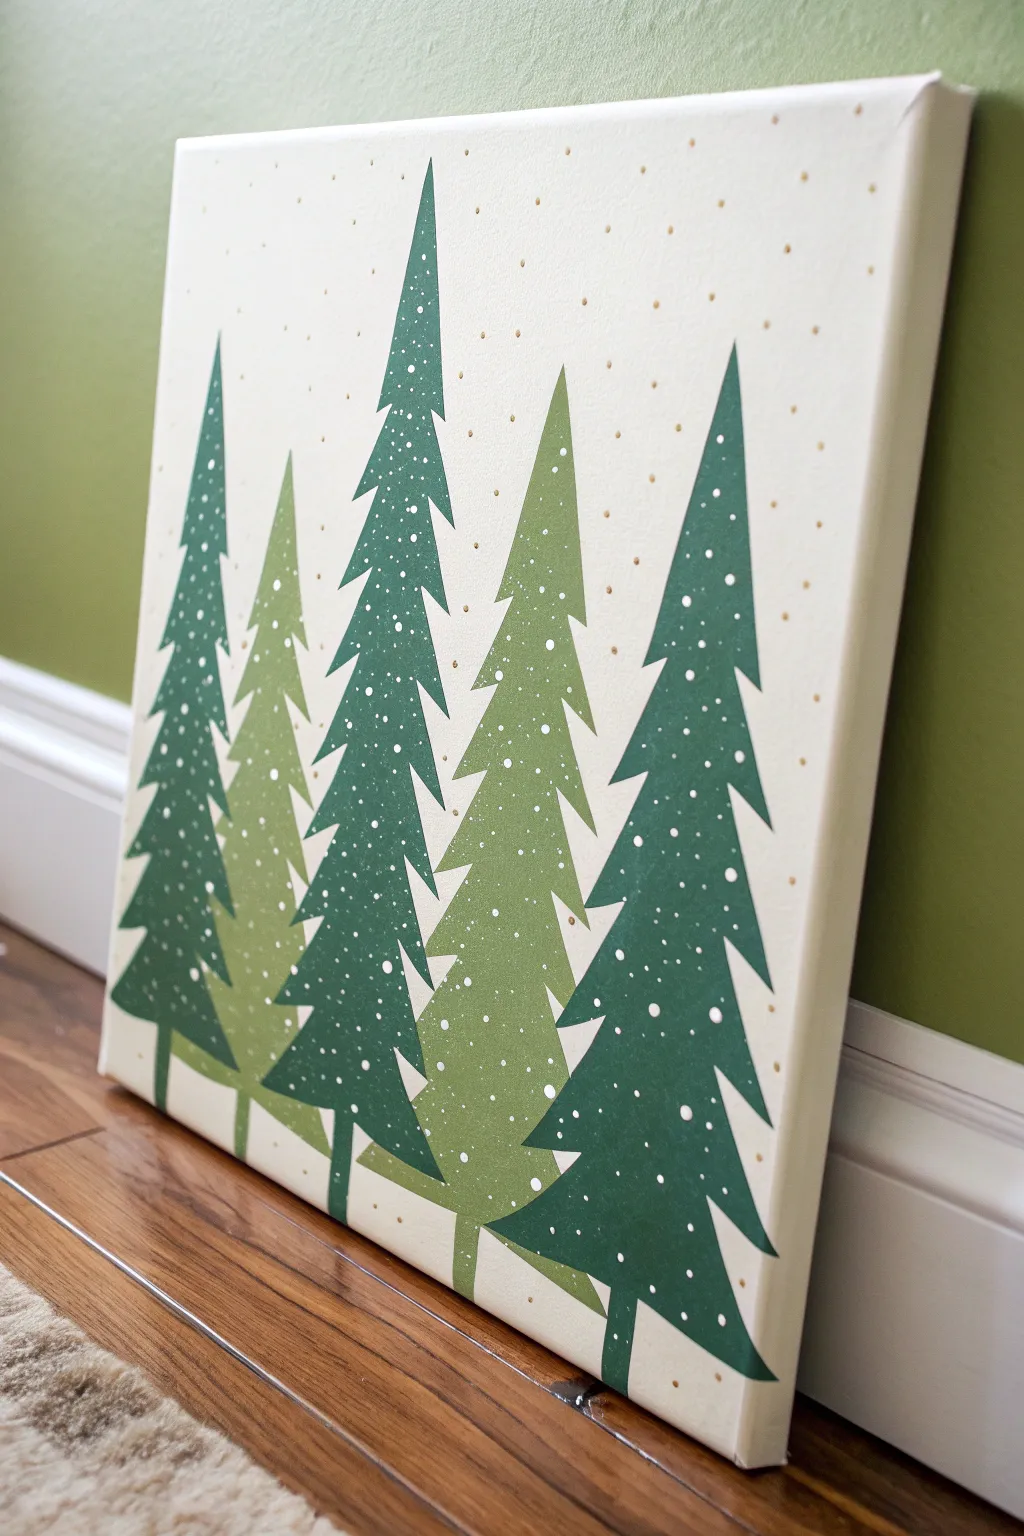
This charming modern forest scene uses a clever taping technique to create crisp, geometric evergreen trees without needing advanced brush skills. The contrasting greens and delicate splatter finish give it a professional look that’s surprisingly accessible for little hands with some adult guidance.
Step-by-Step
Materials
- Rectangular stretched canvas (12×12 or similar)
- Acrylic paint: dark forest green
- Acrylic paint: sage or olive green
- Acrylic paint: white
- Acrylic paint: metallic gold
- Painter’s tape or masking tape (1-inch width)
- Craft knife or scissors
- Foam brushes or flat synthetic brushes
- Small round paintbrush (for dots)
- Old toothbrush (optional for snow)
- Palette or paper plate
Step 1: Setting the Scene
-
Prep the canvas:
Start with a clean white canvas. If your canvas isn’t pre-primed or looks dull, give it a quick coat of white acrylic paint and let it dry completely to ensure a bright background. -
Plan the layout:
Visualize the placement of your five trees. You’ll want three tall trees in the foreground and two slightly shorter ones set back to create depth. -
Create the tape stencils:
Tear off five long strips of painter’s tape, slightly longer than the height of your trees. Lay them gently on a cutting mat or clean table—don’t stick them to the canvas yet. -
Cut jagged edges:
Using a craft knife (an adult job!) or scissors, cut a jagged, sawtooth pattern down both long sides of each tape strip. These irregular zig-zags will become the branches of your trees.
Bleeding Edges?
If paint bleeds under the tape, wait for it to dry fully. Then, use a small flat brush with white paint to ‘erase’ the messy edge and sharpen the line.
Step 2: Stenciling the Trees
-
Apply the first tape strip:
Place your first tape strip vertically on the canvas where you want a tree. Press it down firmly, smoothing it out to prevent paint from seeping underneath. -
Define the tree shape:
Now, here is the trick: You aren’t painting *inside* the tape. You are painting the shape defined by the tape itself. Add two more pieces of straight tape to form a tall triangle shape *around* your jagged strip, creating a stencil where the paint will go. -
Positioning the stencil:
Wait, let’s reverse that method for easier toddler application. Instead of negative space, lay down two strips of tape to form a tall, thin triangle (the tree shape). Then, use small torn pieces of tape along the *inside* edges of that triangle to create the jagged ‘branch’ shapes. This masks off the white background leaving a jagged tree hole. -
Secure the edges:
Run your fingernail or a credit card firmly along all the tape edges. This ‘burnishing’ step is crucial for getting those crisp lines you see in the photo.
Pro Tip: Seal It First
Paint a thin layer of white over your tape stencil first. This seals the edge so any bleeding is invisible white paint. Then paint your green on top!
Step 3: Painting the Forest
-
Paint the dark trees:
Squeeze out your dark forest green paint. Using a foam brush, dab the paint into three of your tree stencils. An up-and-down pouncing motion works better than swiping to keep paint from bleeding under the tape. -
Paint the light trees:
Use the sage or olive green for the remaining two tree contours. I like to alternate them—dark, light, dark—to create visual interest and separate the shapes. -
Add the trunks:
At the bottom of each tree shape, carefully paint a small rectangular vertical line for the trunk using the matching green color. -
Let it set slightly:
Allow the paint to dry for about 10-15 minutes. It shouldn’t be fully cured, but not soaking wet either. -
The reveal:
Carefully peel back the tape slowly at a 45-degree angle. This is the most satisfying part! You should now have five crisp, jagged tree shapes. -
Dry completely:
Let the green trees dry completely before moving on to the snowy details. If the paint is wet, the snow dots might smear.
Step 4: Making it Snow
-
Dotting the snow:
Dip the handle end of a small paintbrush (or a toothpick) into white paint. Gently dot ‘snow’ onto the dark green trees. Focus more dots near the tips of the branches. -
Adding texture:
Vary the size of your white dots slightly. Use a larger instrument like a Q-tip for big flakes and a toothpick for tiny ones. -
Gold background accents:
Switch to your metallic gold paint. Add tiny gold dots scattered throughout the white background sky. This adds a magical, festive shimmer to the empty space. -
Final touches:
Inspect your edges. If any green paint bled slightly, you can touch it up with a tiny bit of white paint once everything is dry.
Hang your snowy evergreen forest low on the wall where your little artist can admire their modern masterpiece
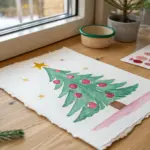
Fork-Stamped Tree Texture
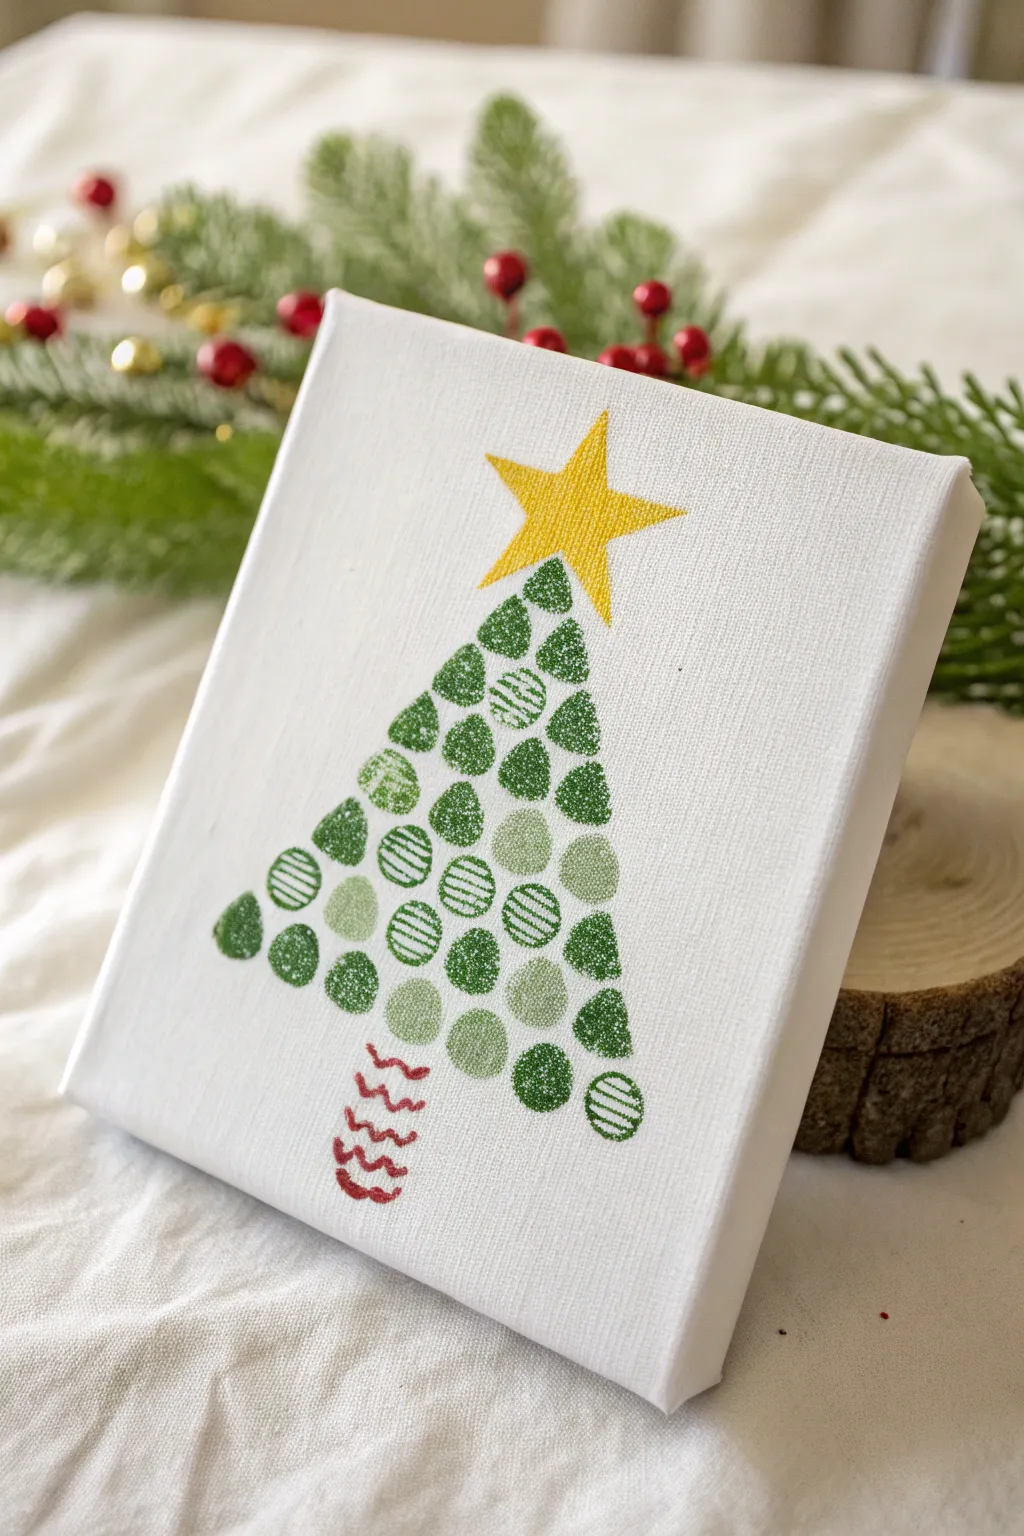
Create a charming, textured holiday keepsake that perfectly captures those little fingers. This project uses thumbprints and simple stamped patterns to build a unique Christmas tree on a small canvas.
Step-by-Step Tutorial
Materials
- Small white canvas (approx. 6×6 or 8×8 inches)
- Green acrylic paint (2-3 shades: dark, medium, light)
- Red acrylic paint
- Yellow acrylic paint or yellow fabric marker
- Small flat brush
- Fine detail brush
- Plastic palette or paper plate
- Paper towels
- A fork (for texture stamping)
- Pencil (optional)
Step 1: Planning and Preparation
-
Prepare your palette:
Squeeze out small amounts of your different green acrylic paints onto a paper plate. Having a mix of dark hunter green, lighter lime, and a medium grass green adds lovely depth to the finished tree. -
Mark the boundaries:
If you’re worried about the shape, very lightly mark a triangle on the canvas with a pencil to serve as a guide. Don’t draw the lines too dark, or they might show through the lighter paint colors. -
Test the prints:
Before touching the canvas, practice making a few prints on a scrap piece of paper. This helps you figure out how much paint is too much—you want a clear print, not a gloppy smear.
Clean Prints Only
Keep a pack of wet wipes or a damp rag right next to you. Wipe fingers completely clean between color changes to keep your greens bright and avoid muddying the shades.
Step 2: Building the Tree
-
Start at the base:
Dip a thumb or finger into the darkest green paint. Press it firmly onto the canvas at the bottom center of your imagined triangle. This creates the widest part of the tree. -
Create the bottom row:
Continue adding prints along the bottom row. Alternate between your dark and medium green shades. Leave tiny gaps between some prints; we will fill them in with lighter colors or textures later. -
Move up a level:
Start the second row just above the first, indenting slightly so the row is shorter. Press your thumbprints into the spaces between the prints below, like stacking bricks. -
Add texture stamps:
For the textured circles seen in the example, dip a round object (like a wine cork or the back of a large marker cap) into paint. Gently press it onto a spare piece of paper to remove excess paint, then press it onto the canvas to create a circle. -
Detail the textures:
While the stamped circles are still wet, you can use a tool like a fork tine or a toothpick to scratch lines through the paint, revealing the white canvas underneath. This mimics the striped ornaments shown in the image. -
Continue the pyramid:
Keep working your way up the tree, making each row narrower than the last. Mix up your thumbprints and your textured circle stamps to keep the pattern interesting. -
Form the peak:
Finish the tree shape with a single, clear print at the very top. This will be the point where your star sits. -
Fill in gaps:
Step back and look at your tree. If there are any large white spaces inside the triangle that look awkward, use your pinky finger to add small dab of lime green paint to fill them.
Make It Sparkle
Once the paint is dry, add tiny dots of gold glitter glue to the center of the textured circles to make them look like sparkling ornaments on the tree.
Step 3: Finishing Touches
-
Let the green dry:
Allow the green paint to dry completely. This is crucial so your red and yellow additions don’t turn muddy brown. -
Paint the trunk:
Using a fine detail brush and red paint, paint the trunk at the base. Instead of a solid block, paint wavy horizontal lines stacked on top of each other for a whimsical look. -
Add the star:
Dip your flat brush or a stencil brush into yellow paint. Carefully paint a five-pointed star at the very top of the tree. I find it easiest to paint an upside-down ‘V’ first, then cross the arms. -
Refine the star:
If painting a star is tricky, you can also use a yellow Posca pen or fabric marker once the canvas is bone dry to draw a sharp, clean star shape. -
Clean up edges:
Check around the edges of your canvas. If any green smudged where it shouldn’t be, use a damp Q-tip to wipe it away quickly before it sets.
Allow the canvas to dry flat overnight before displaying your festive masterpiece
Sponge-Print Holly Leaves and Berries
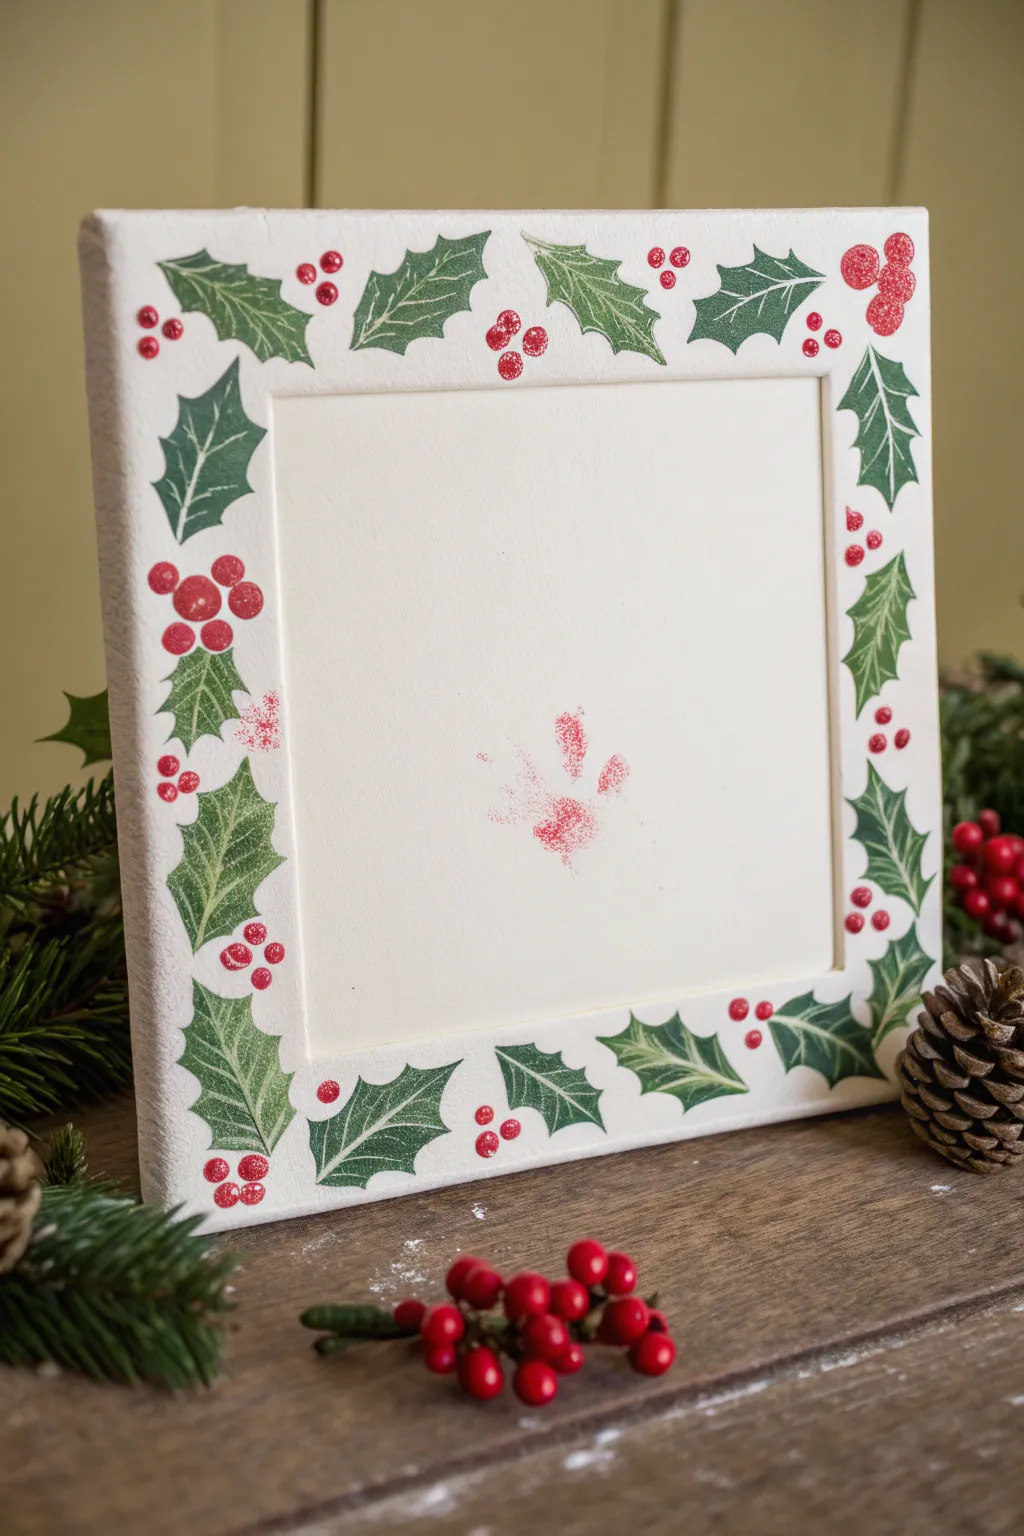
Create a festive keepsake frame using simple sponge stamping techniques perfect for little hands to help with. This charming canvas features a raised border decorated with classic holly leaves and bright red berries, leaving the center open for a precious holiday handprint.
Step-by-Step Guide
Materials
- Square stretched canvas with a reverse or ‘deep edge’ frame design (or a wide wooden picture frame)
- White acrylic paint or gesso (for priming)
- Dark green acrylic paint
- Bright red acrylic paint
- Fine glitter (red and clear/iridescent)
- Kitchen sponge or dense craft foam
- Scissors
- Pencil
- Small round paintbrush or cotton swabs (Q-tips)
- White gel pen or very fine liner brush
- Paper plate or palette
- Baby wipes (essential for toddler crafts)
Step 1: Preparation & Base
-
Prepare the surface:
If your canvas or wooden frame isn’t already a bright, clean white, give the entire surface a coat of white acrylic paint or gesso. Let this dry completely to ensure your stamped colors pop. -
Create the holly stamp:
Take a kitchen sponge or a piece of dense craft foam and draw a simple holly leaf shape with a pencil. It should be small enough to fit comfortably on the border of your frame. -
Cut the stamp:
Carefully cut out the holly leaf shape. If you dampen the sponge slightly and wring it out completely before cutting, you often get cleaner edges.
Step 2: Stamping the Foliage
-
Load the sponge:
Pour a small amount of dark green acrylic paint onto a paper plate. Dip your sponge holly leaf into the paint, then dab it off slightly on a clean part of the plate to prevent globs. -
Stamp the first leaf:
Press the sponge firmly onto the corner of the frame border. Lift it straight up to avoid smearing. -
Create the pattern:
Continue stamping leaves around the border. You can angle them in pairs or alternate directions to give the wreath a natural, flowing look. Leave small gaps between some leaves for the berries. -
Add texture:
While the green paint is still wet, you can lightly scratch vein lines into the leaves using the back of a paintbrush or a toothpick to reveal the white canvas underneath, giving it a textural look similar to a lino cut. -
Let it dry:
Allow the green leaf layer to dry completely before moving on to the red berries to avoid muddy colors.
Smudged Stamping?
If sponge prints look blurry, you likely have too much paint. Dab the sponge deeply on scrap paper first until the texture of the sponge becomes visible in the print.
Step 3: Adding Berries & Details
-
Prepare the berry tool:
For the berries, you can use the tip of a pinky finger (great for toddler involvement), a cotton swab, or the handle end of a paintbrush. -
Paint the berries:
Dip your chosen tool into bright red paint and dot clusters of three berries near the base of the holly leaves. Randomly place single berries in empty spaces to balance the design. -
Add sparkle:
While the red paint is still wet, sprinkle a tiny pinch of red glitter directly onto the berries. Shake off the excess once dry for a lovely shimmer. -
Highlight the leaves:
Once the green leaves are fully dry, use a white gel pen or a very fine brush with watered-down white paint to add delicate vein lines if you didn’t scratch them in earlier.
Personalize It
Use a gold paint pen to write the year or the child’s name along the bottom edge of the frame border for a personalized memory.
Step 4: The Centerpiece
-
Prepare the handprint:
Paint your toddler’s hand (or foot) with a thin, even layer of red paint. I usually keep a baby wipe nearby for immediate cleanup. -
Make the impression:
Guide their hand into the center of the recessed canvas area. Press firmly on the palm and each finger, then lift straight up. -
Seal the project:
Once all paint is completely cured (usually 24 hours), apply a clear spray sealer or a coat of Mod Podge to protect the artwork for years to come.
Hang this festive frame on the wall or prop it on a mantle to enjoy a handmade touch this holiday season
Cotton Swab Pointillism Tree Lights
This adorable mini canvas project turns painting Christmas lights into a fun motor skills activity for little hands. The result is a clean, festive fir tree decorated with perfectly round, colorful ornaments created entirely with cotton swabs.
Step-by-Step
Materials
- Small square canvas (around 6×6 inches)
- Green acrylic paint (deep forest tone)
- Brown acrylic paint
- Red acrylic paint (for star)
- Assorted bright acrylic paint colors (yellow, light blue, pink, orange)
- Medium flat paintbrush
- Cotton swabs (Q-tips)
- Small detail brush (optional, for star)
- Pencil (very light)
- Paper palette or paper plate
Step 1: Planning the Tree
-
Prep the Canvas:
Start with a clean, dry canvas. If you want a smoother surface, you can apply a quick coat of white gesso first, but the raw canvas works perfectly fine for this rustic look. -
Mark the Top:
Using a pencil very lightly, make a small dot near the top center of the canvas. This will be the tip of your tree and helps guide the shape so it doesn’t end up crooked. -
Sketch the Outline:
Lightly sketch a simple triangular tree shape. Don’t worry about individual branches yet; just draw a faint triangle to define how wide the bottom branches will be.
Uneven Dots?
If the cotton swab leaves a ‘donut’ print (paint only on the edges), you aren’t using enough paint. Reload the tip until it’s a generous dome of paint before stamping.
Step 2: Painting the Greenery
-
Load the Brush:
Squeeze out a generous amount of deep forest green acrylic paint. Load up your medium flat brush. -
Paint the Top Layer:
Starting at your top pencil mark, paint the highest tier of branches. Use short, downward strokes that flare out slightly at the ends to mimic pine needles. -
Work Downward:
Move to the next tier underneath. Paint it slightly wider than the top one. I find overlapping the tier above just a tiny bit helps the tree look full and cohesive. -
Add Texture:
As you paint the wider bottom branches, flick your wrist slightly at the end of the strokes to create jagged, needle-like edges rather than smooth lines. -
Fill in Gaps:
Go back and dab extra green paint into any white spots within the tree shape. You want a solid, opaque green base. -
Paint the Trunk:
Clean your flat brush and switch to brown paint. Paint a small, sturdy rectangle at the very bottom center of the tree for the trunk. -
Let it Dry:
This is the most important step before decorating. Let the green and brown paint dry completely to the touch so the ornament colors won’t mix with the background.
Pro Tip: Sharp Edges
For sharper tree branches, use the chisel edge of your flat brush (holding it vertically) to drag the paint outward at the tips of the branches.
Step 3: Decorating with Dots
-
Prepare the Ornaments:
Squeeze small dollops of your bright ornament colors (yellow, blue, pink, orange) onto your palette. They should be well-spaced so colors don’t muddy. -
Load the Cotton Swab:
Dip one end of a cotton swab directly into a color. Ensure the tip is fully saturated with paint but not dripping. -
Stamp the First Color:
Press the paint-covered swab straight down onto the dry green tree. Lift it straight up to leave a perfect circle. Repeat randomly with this first color. -
Switch Colors:
Using a fresh cotton swab (or the clean other end), dip into your next color. Stamp these dots into the empty spaces between the first set. -
Create Balance:
Continue swapping Q-tips and colors until the tree looks evenly decorated. Try not to clump too many of the same color in one spot. -
Add the Star:
Using a small detail brush or the very tip of a clean flat brush, paint a small, simple five-point star in red at the very peak of the tree. -
Final Touches:
Check your edges. If any ornament paint is too thin, you can gently re-stamp over the dry dot to make specific colors pop more.
Once dry, display your charming mini-masterpiece on a shelf or attach a ribbon to the back to hang it
Salt-and-Glue Sparkle Snowflakes
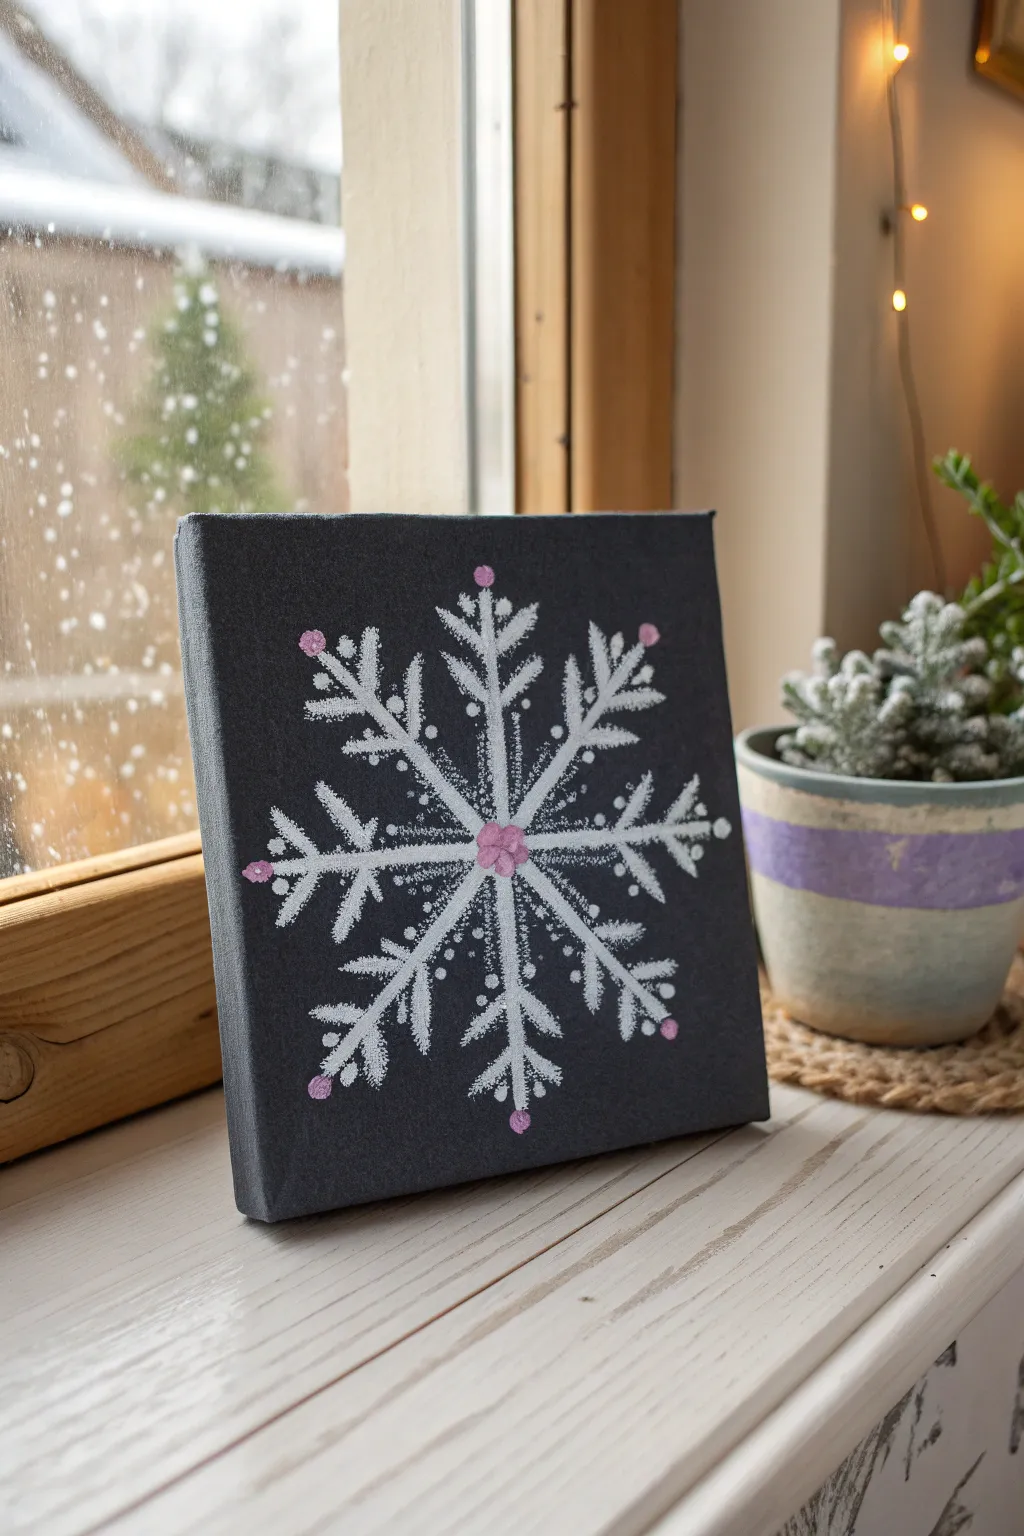
This elegant little project transforms a simple dark canvas into a winter wonderland using just glue and salt to create a beautiful, crystallized texture. The striking contrast of white on grey, accented by soft pink touches, makes for a sophisticated yet kid-friendly piece of holiday decor.
Detailed Instructions
Materials
- Small square canvas (approx. 6×6 or 8×8 inches)
- Dark grey or black acrylic paint
- Flat paintbrush
- White or clear school glue (PVA) in a bottle with a fine tip
- Table salt or fine kosher salt
- Small tray or baking sheet (to catch salt)
- Pink acrylic paint
- Small round paintbrush or cotton swab
Step 1: Setting the Scene
-
Prepare the Background:
Start by painting your entire canvas with a dark grey or charcoal acrylic paint. Ensure you cover the white surface completely, using smooth, even strokes. -
Side Coverage:
Don’t forget to paint the edges and sides of the canvas for a gallery-wrapped look that makes the finished piece look professional. -
Drying Time:
Set the canvas aside to dry completely. The background must be bone-dry before we add any glue, or the colors might muddy.
Keep it Clump-Free
If your salt pours out too fast, use a spoon to sprinkle it over the glue. This prevents heavy piles that can smear your delicate glue lines.
Step 2: Drafting the Design
-
Find the Center:
Once the paint is dry, visualize the center of your canvas. You can mark it lightly with a pencil if you need a guide, but freehand works perfectly for an organic feel. -
First Lines:
Using your glue bottle, gently squeeze a vertical line straight down the middle of the canvas, stopping about an inch from the edges. -
Cross it Over:
Squeeze a horizontal line across the vertical one to form a simple cross or plus sign. -
Diagonal Rays:
Add diagonal lines intersecting the center point, creating an eight-pointed star shape. Try to keep the glue flow steady for even lines.
Step 3: Adding the Details
-
Branching Out:
On each of the eight main arms, carefully squeeze small ‘V’ shapes or angled dashes pointing outward, resembling the feathery branches of a pine tree. -
Inner Details:
Add smaller dots or tiny lines closer to the center point to bulk up the snowflake’s core without letting the glue puddle too much. -
The Salt Shower:
Place your canvas inside a tray or baking sheet. Generously pour your salt over the entire canvas, ensuring every bit of wet glue is completely buried under a mountain of salt. -
Let it Absorb:
I like to wait about 30-60 seconds to let the glue really grab onto the salt crystals before moving. -
Shake it Off:
Tilt the canvas upright and gently tap it against the tray to shake off the excess loose salt. You should be left with a sparkling, raised snowflake design.
Watercolor Magic
Instead of pre-colored pink paint, touch a wet brush loaded with liquid watercolor to the dried salt. Watch the color wick through the snowflake!
Step 4: Finishing Touches
-
Initial Drying:
Let the glue and salt mixture dry undisturbed for at least an hour. It will harden and become quite sturdy. -
Painting White:
If your salt isn’t bright enough against the dark background, or if you used clear glue, you can very gently dab white acrylic paint over the raised salt lines once they are dry to make them pop. -
Pink Accents:
Dip a small round brush or the end of a cotton swab into pink paint. -
Jewel Points:
Gently dab a dot of pink paint onto the tips of the main snowflake arms. -
Center Bloom:
Create a small cluster of pink dots right in the center intersection of the snowflake to act as a focal point. -
Final Dry:
Allow the accent paint to dry completely before displaying your artwork upright.
Place this shimmering piece near a window or fairy lights to catch the sparkle on cold winter evenings
Shaving Cream Marble Ornament Background

Create a mesmerizing abstract masterpiece with your toddler using the classic and sensory-friendly shaving cream marbling technique. The finished canvas features swirls of rich red, forest green, and creamy white that look like a close-up of a peppermint candy or a glass ornament.
Detailed Instructions
Materials
- Small square canvas (8×8 or 10×10 inches)
- Foam shaving cream (not gel)
- Baking sheet or large tray
- Acrylic paints (Red, Green, White/Cream, Metallic Gold)
- Butter knife or craft stick
- Ruler or squeegee tool
- Painter’s tape
- Cardboard or drop cloth
- Optional: Fine glitter
Step 1: Preparation
-
Protect the edges:
Before involving any messy ingredients, take your canvas and apply painter’s tape along the sides and back edges. This ensures the messy shaving cream mixture doesn’t stain the neat wooden frame or sides if you want a clean look. -
Prepare the base:
Spray a generous layer of white foam shaving cream onto your baking sheet or tray. You want the layer to be roughly the same size as your canvas and about an inch thick. -
Smooth the surface:
Using a spatula or a ruler, gently smooth out the top of the shaving cream cloud so you have a relatively flat surface to work on.
Step 2: Adding the Color
-
Apply paint droplets:
Squeeze generous drops of red, green, and cream acrylic paint randomly across the surface of the shaving cream. Leave some white space between the drops initially. -
Add metallic accents:
For that holiday shimmer, add smaller drops of metallic gold paint or even a light dusting of fine glitter specifically focused where the colors might meet. -
Begin the swirl:
Hand your toddler the butter knife or a chopstick. Instruct them to drag the tool through the shaving cream in lines, moving up and down. -
Create the marble effect:
Next, have them drag the tool side-to-side through the lines they just made. I like to stop before the colors turn muddy—you want distinct ribbons of color, not a brown mess.
Muddy Colors?
If the design looks brown or gray, you likely over-mixed the shaving cream. Next time, use fewer strokes with the stick—swirl just enough to marble, then stop immediately.
Step 3: Printing & Revealing
-
Press the canvas:
With the pattern looking perfect, take your canvas face down and press it firmly into the shaving cream. Apply gentle pressure all over the back to ensure the entire surface makes contact with the paint. -
Lift straight up:
Carefully lift the canvas straight up off the shaving cream. It will look like a messy cloud of foam, but don’t panic—the magic is underneath. -
Let it sit briefly:
Place the foam-covered canvas face up on your drop cloth and let it sit for about two minutes. This allows the pigment to adhere to the canvas fabric. -
Scraping setup:
Position your ruler or squeegee at the very top edge of the canvas. You want to prepare for one clean, continuous swipe if possible. -
The scrape:
Firmly scrape the shaving cream off the canvas from top to bottom. The foam will be removed, leaving the swirled paint design permanently stained onto the canvas surface. -
Clean up edges:
Peel off the painter’s tape from the sides while the paint is still wet to ensure crisp, clean edges on your artwork. -
Final drying:
Allow the canvas to dry completely in a safe, dust-free area. Since the paint layer is very thin from the scraping technique, this usually takes less than an hour.
Pro Tip: Print Seconds
Don’t wash the tray yet! The leftover colored foam can usually make 2-3 printed canvases. Each subsequent print will be slightly softer and more pastel than the first.
Once dry, this festive canvas makes a stunning standalone decoration or a warm, homemade gift for grandparents


Have a question or want to share your own experience? I'd love to hear from you in the comments below!