
The 3 marker challenge is one of my go-to studio games: pick three random markers, then commit and make something cute (or gloriously chaotic) with just those colors. The secret sauce is starting with bold line art templates that have big, clear spaces—so the random palette really gets to shine.
Classic Emoji-Style Face Templates

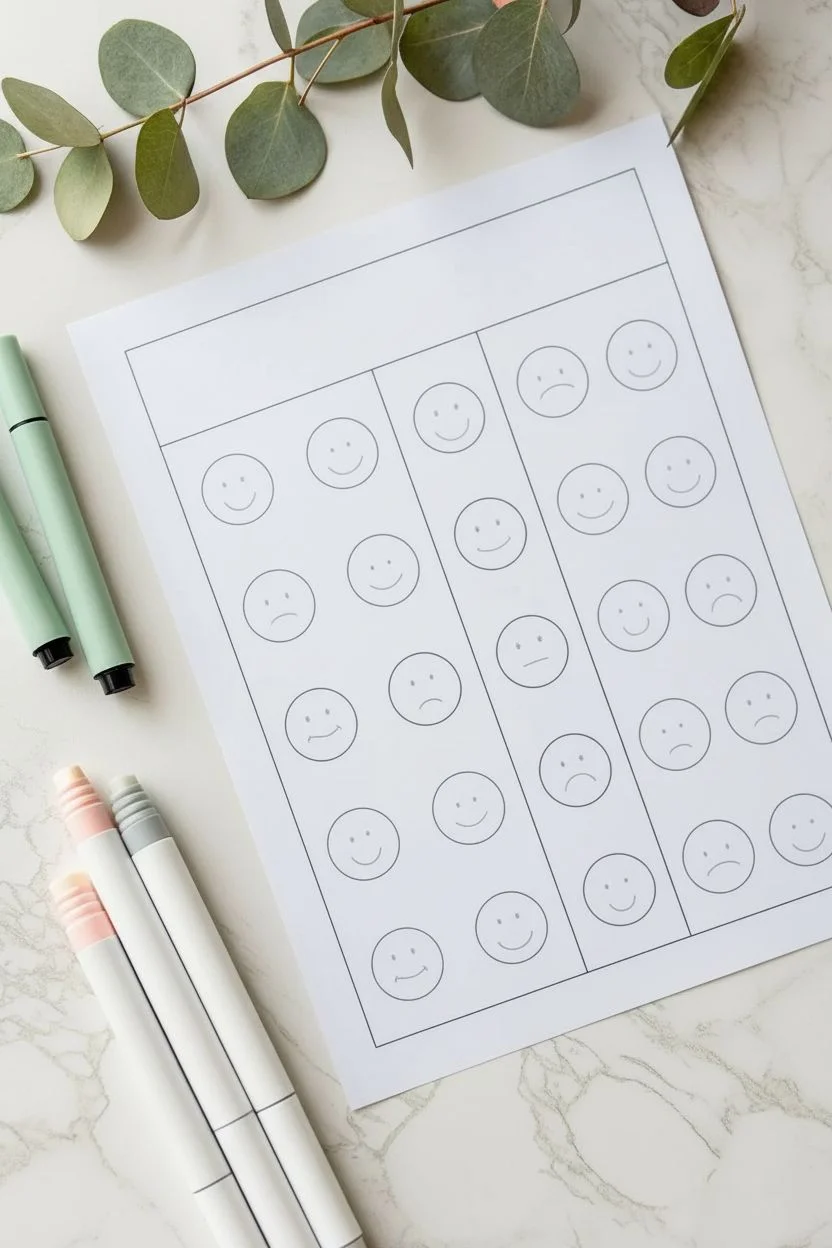
Create your own reusable emoji template perfect for drawing challenges or mood tracking. This clean, grid-based layout features a variety of face shapes and simple expressions ready for you to color and customize.
Step-by-Step Guide
Materials
- White printer paper or cardstock (8.5 x 11 inches)
- Black fineliner (0.5mm tip)
- Black marker (medium tip)
- Ruler
- Pencil
- Eraser
- Pastel markers (mint green, pale pink, light grey)
Step 1: Setting Up the Grid
-
Draw the main border:
Start by drawing a large rectangle on your paper using your ruler and pencil. Leave about a 1-inch margin on all sides to frame the chart nicely. -
Create the title section:
Measure about 1.5 inches down from the top line of your rectangle. Draw a horizontal line across the entire width to create a header area for your title. -
Divide vertical columns:
Divide the remaining large rectangle area into four equal vertical columns. Make light pencil marks first to ensure the spacing is even, then draw the vertical lines. -
Add horizontal rows:
Divide the columns horizontally to create your grid cells. Aim for about 5 or 6 equal rows to give yourself plenty of space for the faces.
Smudged Ink?
If your ruler drags ink across the page, stick a few stacked pieces of masking tape to the underside of the ruler. This lifts the edge slightly off the paper.
Step 2: Drawing the Base Faces
-
Draft the circles:
In the center of each grid box, lightly sketch a circle. It doesn’t need to be geometrically perfect; a slightly organic hand-drawn circle adds charm. -
Ink the layout:
Go over your main grid lines and the header box with a 0.5mm black fineliner. Use the ruler for these straight lines to keep it looking crisp. -
Ink the face outlines:
Trace over your penciled circles with the same fineliner. Try to keep your hand steady for a smooth, continuous line. -
Erase guidelines:
Once the ink is completely dry—give it a minute to avoid smudges—gently erase all the pencil marks underneath your grid and circles.
Step 3: Adding Expressions
-
Start with simple smiles:
In the first column, draw basic happy faces. Use two small dots for eyes and a wide U-shape for the mouth. -
Draft varied emotions:
Moving across the grid, sketch different moods. Try sad faces with downturned mouths, surprised faces with O-mouths, or confused expressions with wavy lines. -
Add detail to eyes:
For some faces, make the eyes larger circles instead of dots. You can add pupils by coloring in a smaller circle, leaving a tiny white speck for a highlight. -
Create ‘winking’ or ‘closed’ eyes:
Draw curved arches (like rainbows) for sleeping or happy closed eyes. Use inverted arches (U-shapes) for a content or laughing expression. -
Ink the features:
Commit to your expressions with the black fineliner. Keep the lines simple and consistent in thickness. -
Fill in dark areas:
For open mouths or larger pupils, switch to a medium-tip black marker to fill them in solidly black. -
Add the title text:
In the header space, write ‘Face Shapes’ or ‘My Emojis’ in a neat, small print font. Add a horizontal line next to it for a date or name.
Tracing Hack
Can’t draw a perfect circle? Trace the bottom of a small spice jar or a glue stick cap to get uniform face shapes for every single grid box.
Step 4: The 3 Marker Challenge Setup
-
Select your palette:
Pick three distinct markers, like the mint green, pale pink, and grey shown in the example. These should look nice together but offer contrast. -
Coloring strategy:
Now you are ready for the challenge. Blindly pick three markers and color in specific faces, or use your chosen limited palette to shade the backgrounds of alternating columns.
Now you have a perfect blank canvas to test your marker combinations or track your daily moods


Cute Animal Headshot Coloring Pages
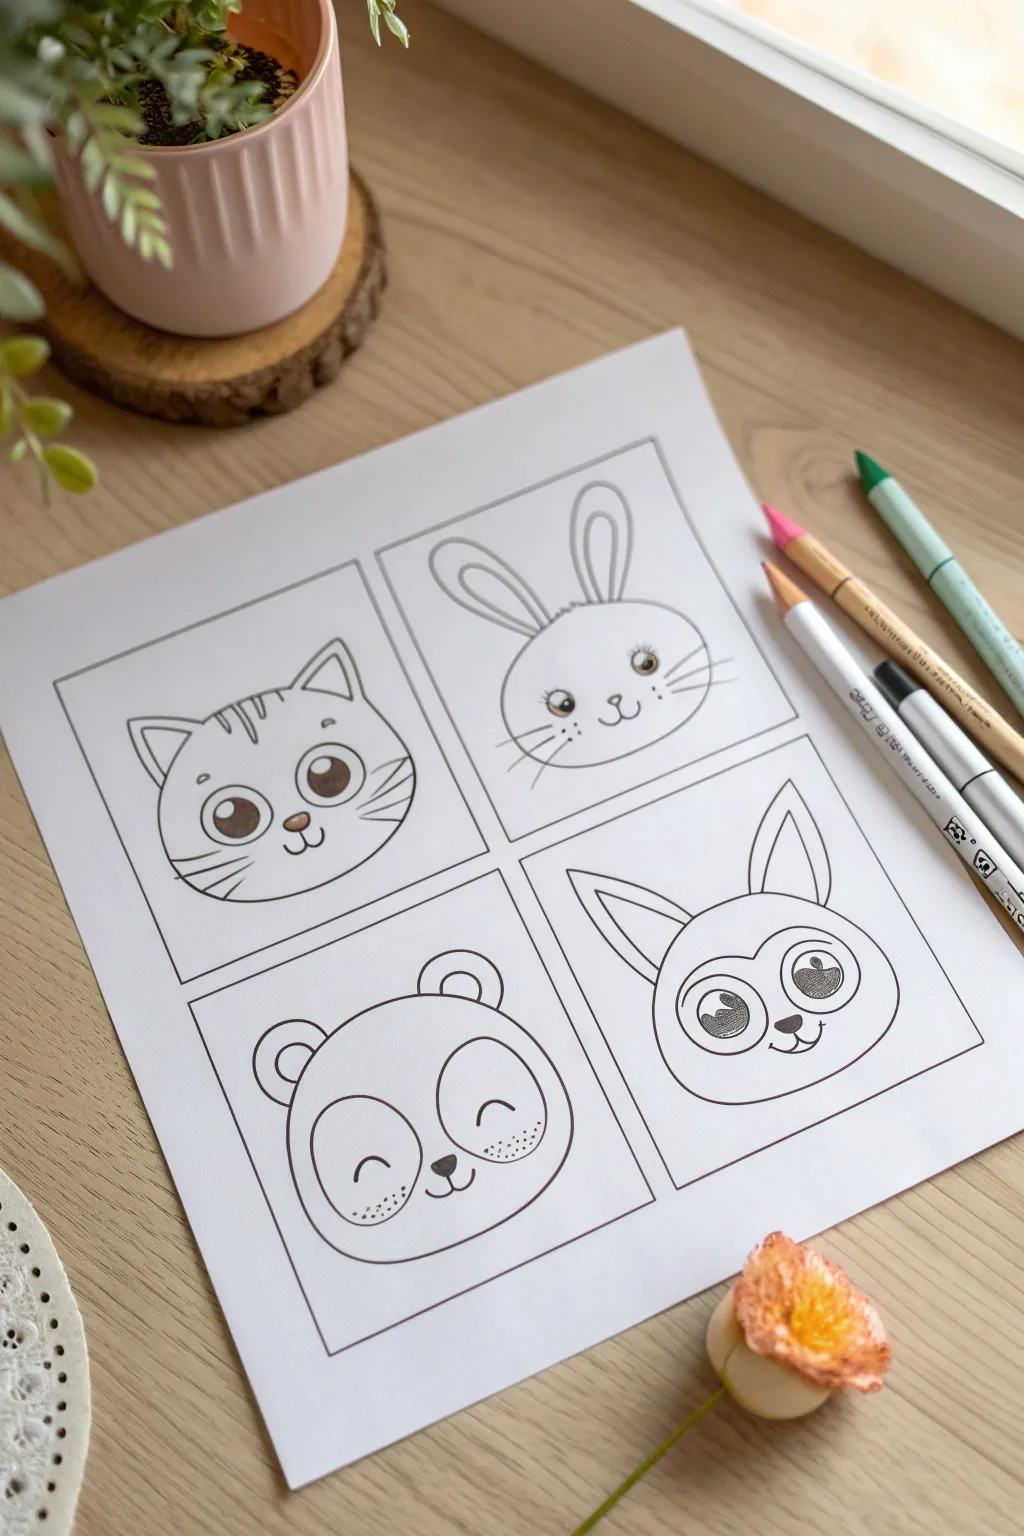
Create a charming set of four adorable animal portraits perfectly suited for a three-marker challenge or a relaxing coloring session. This clean line art style features expressive eyes and simple shapes that make coloring a delight.
How-To Guide
Materials
- White cardstock or heavy drawing paper (8.5 x 11 inches)
- Fine-point black drawing pen (0.5mm or 0.8mm)
- Pencil (HB or H)
- Eraser
- Ruler
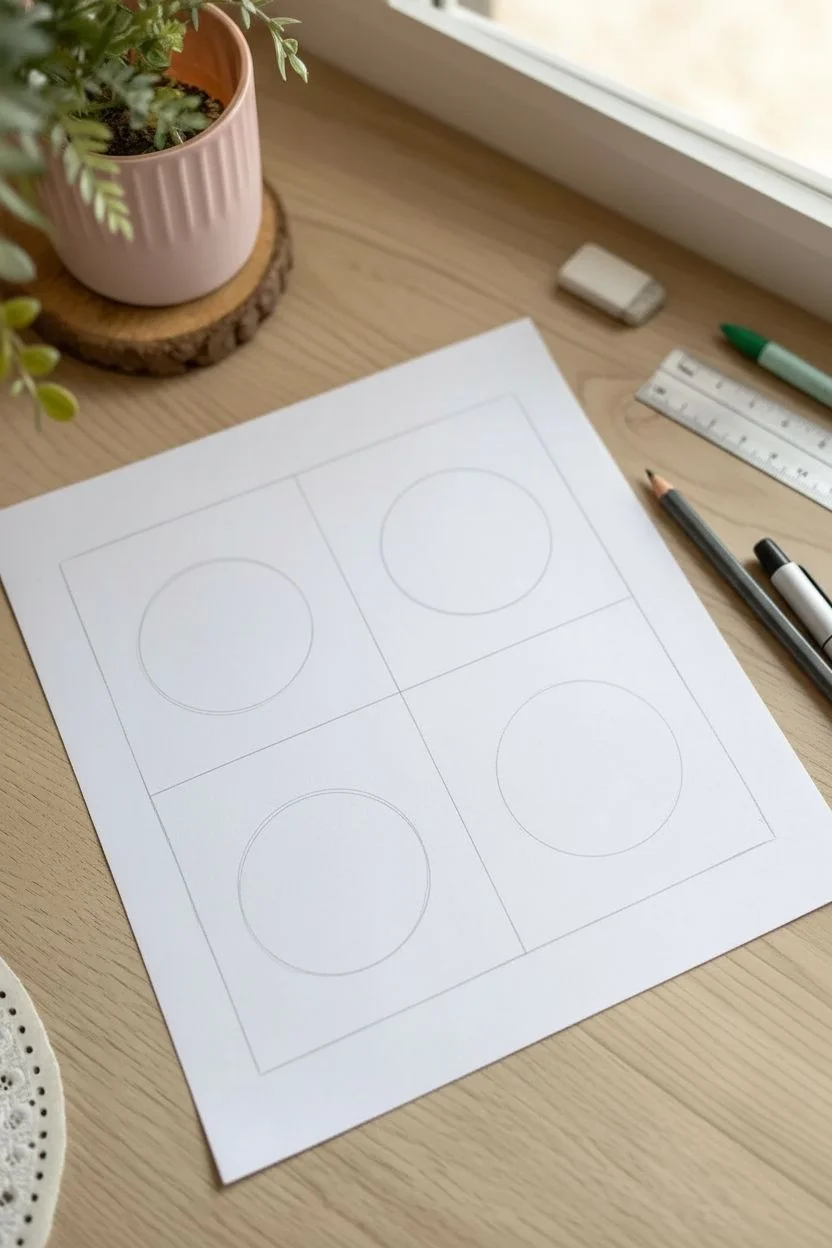
Step 1: Grid & Guidelines
-
Create the frame:
Start by drawing a large rectangle on your paper, leaving a comfortable 1-inch border around the edges to frame your artwork nicely. -
Divider lines:
Using your ruler, divide this large rectangle into four equal quadrants by drawing one vertical line down the center and one horizontal line across the middle. -
Initial shapes:
Sketch a light circle in the center of each of the four boxes. These will serve as the base head shapes for your animals.
Step 2: Top Left: The Kitten
-
Ears and contour:
In the top-left quadrant, refine the circle into a slightly wider oval. Add two triangular ears on top, drawing inner triangles for depth. -
Facial features:
Draw two large, round eyes, leaving small white circles inside for a shiny highlight. Add a tiny triangular nose and a ‘W’ shaped mouth. -
Signature stripes:
Add three small vertical stripes on the forehead and three whiskers extending from each cheek.
Ink Confidence
Don’t lift your pen mid-curve. Drawing the head shape in one or two continuous motions creates a much smoother line than short, sketchy strokes.
Step 3: Top Right: The Bunny
-
Distinctive ears:
For the top-right circle, draw two long, oval-shaped ears sticking straight up. Add a smaller oval inside each one. -
Expressive face:
Draw the eyes slightly farther apart than the kitten’s. Give the bunny long eyelashes and a small ‘Y’ shape for the nose and mouth connection. -
Final touches:
Add three long, straight whiskers on each side of the face.
Add Personality
Before inking, try swapping features! Give the panda glasses, or put a small bow on the bunny’s ear to customize your coloring page.
Step 4: Bottom Left: The Panda
-
Round ears:
In the bottom-left box, draw two small semi-circles on top of the head for ears, adding inner curves for detail. -
Eye patches:
Instead of open eyes, draw two large, kidney-bean-shaped patches slanted slightly inward. -
Happy expression:
Inside the patches, draw small curved lines for sleepy or happy closed eyes. Add a small nose and some freckle dots on the cheeks.
Step 5: Bottom Right: The Lemur
-
Pointed ears:
For the final quadrant, draw two large, pointed ears that angle outward more than the cat’s ears. -
Mask markings:
Draw a unified mask shape around the eyes that dips down in the center towards the nose. -
Eye detail:
Draw large, wide-open eyes with prominent pupils. I usually like to make these the darkest part of the drawing for contrast.
Step 6: Inking & Finalizing
-
Outline the grid:
Take your black fine-point pen and carefully trace the four rectangular frames first to establish your boundaries. -
Trace the animals:
Go over your pencil sketches with the pen. Use confident, smooth strokes for the curved head shapes. -
Fill in details:
Color in the pupils of the eyes solid black (except for the white highlights) to make the characters pop instantly. -
Erase guidelines:
Wait at least 5 minutes for the ink to dry completely, then gently erase all remaining pencil lines for a crisp, professional finish.
Now your sheet is ready for the three-marker challenge, so grab your colors and see what combinations you get


Cozy Still Life: Mug, Book, and Plant
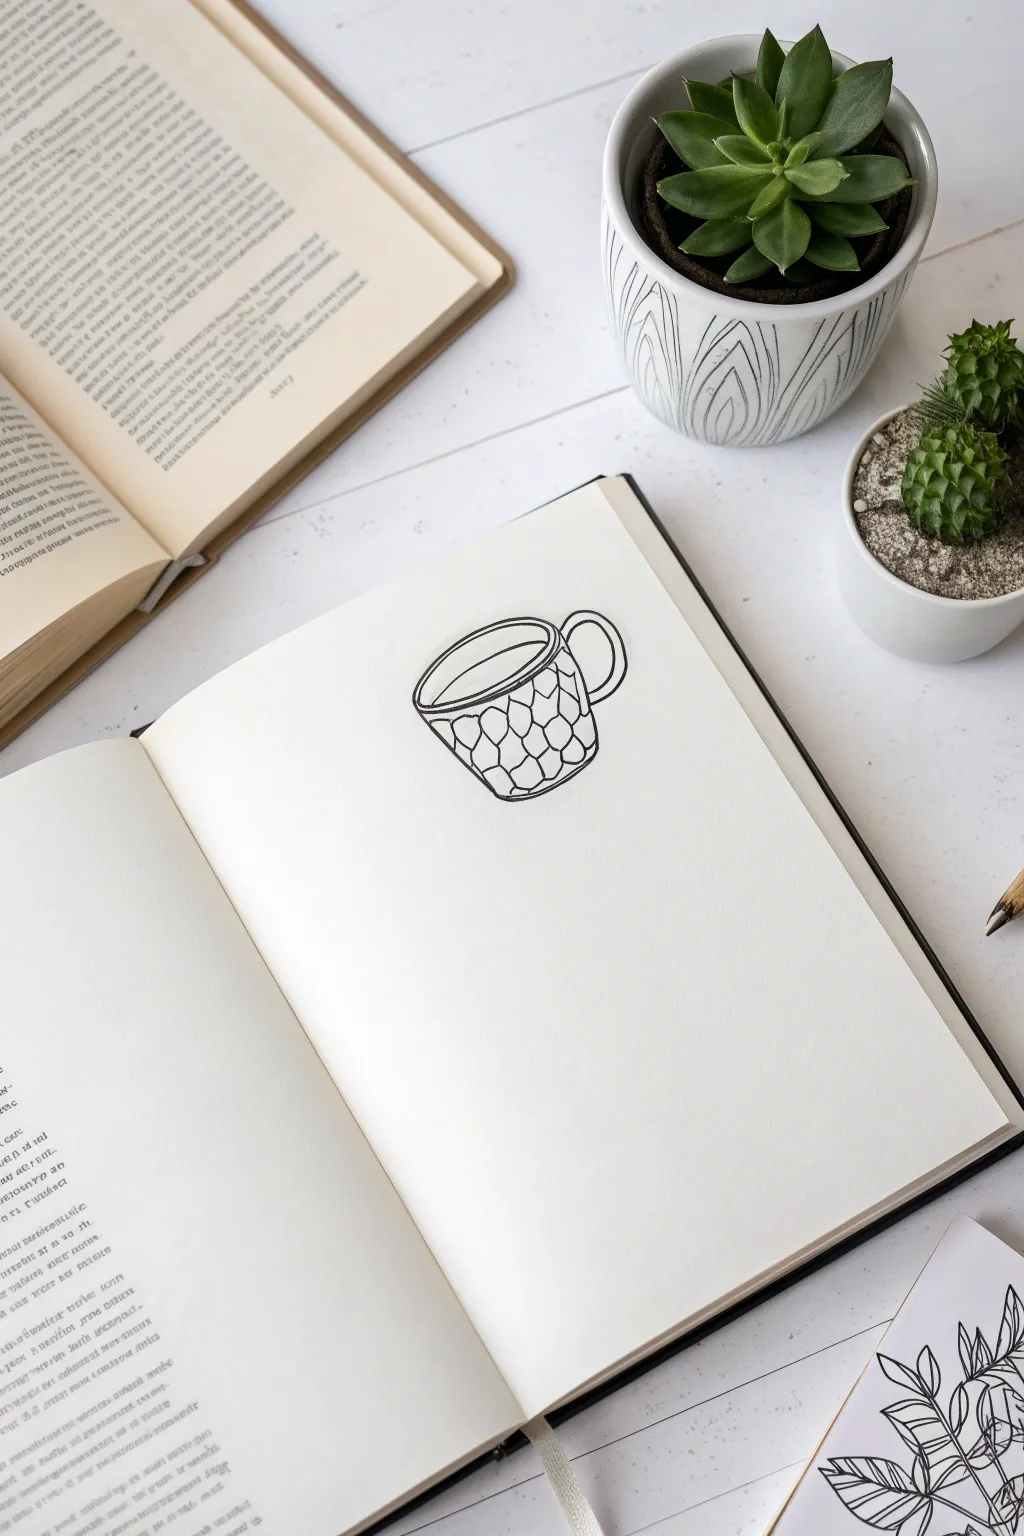

This project focuses on the beauty of simplicity with a clean, fine-line ink drawing of a coffee mug. Using just black ink, you’ll practice capturing form and adding interest through a fun geometric texture.
How-To Guide
Materials
- Fine liner pen (0.3mm or 0.5mm, black)
- Sketchbook or drawing paper
- Pencil (HB for light sketching)
- Eraser
Step 1: Sketching the Basic Shape
-
Define the rim:
Start near the center of your page. Draw a flattened oval (ellipse) to represent the top opening of the mug. Keep your lines light if using a pencil first, or confident and steady if going straight to ink. -
Add the liquid line:
Inside the oval you just drew, sketch a curved line mirroring the bottom curve of the rim. This creates the illusion of coffee or tea sitting inside the cup. -
Form the body:
Draw two vertical lines coming down from the widest points of the oval. Angle them slightly inward as they go down to give the mug a tapered look. -
Close the bottom:
Connect the two vertical lines at the bottom with a slightly curved line. This curve should match the curvature of the top rim to maintain perspective. -
Sketch the handle:
On the right side of the mug, draw a ‘C’ shape or ear shape. Start a bit below the rim and end about halfway down the mug’s body. -
Thicken the handle:
Draw a smaller, inner curve inside the handle shape to give it dimension and thickness.
Ink Confidence
Don’t worry if your lines wobble slightly. These small imperfections add character and a hand-drawn charm that makes the doodle feel cozy.
Step 2: Inking and Patterning
-
Outline the mug:
Using your fine liner, carefully trace over your pencil sketch. I prefer to use a confident, continuous stroke for the rim to keep it smooth. -
Divide the surface:
For the pattern, draw a horizontal line across the body of the mug, about a third of the way down from the rim. This separates the smooth top band from the textured bottom. -
Start the honeycomb:
Along the horizontal line you just drew, sketch a row of small ‘U’ shapes or semi-circles. They should touch each other side-by-side. -
Build the pattern:
For the next row down, draw new ‘U’ shapes positioned directly between the curves of the row above, creating a scale or honeycomb effect. -
Continue downward:
Repeat this alternating pattern until you reach the bottom of the mug. Let the shapes distort slightly near the edges to follow the mug’s rounded form. -
Add line weight:
Go back over the main outline of the mug (the silhouette) with a slightly heavier hand or a second pass to make the object pop off the page. -
Refine the details:
Check the connection points where the handle meets the body. Add tiny ink marks or ticks to suggest a shadow or seam. -
Erase guidelines:
Wait for the ink to be completely dry—give it a full minute or two—then gently erase any visible pencil sketch lines underneath.
Add Dimension
Use a light gray marker to add a simple shadow on one side of the mug and inside the handle to make your doodle look 3D.
You have now created a charming, minimalist illustration perfect for journaling or a relaxed afternoon sketch session


Mushroom Cluster With Pattern Caps
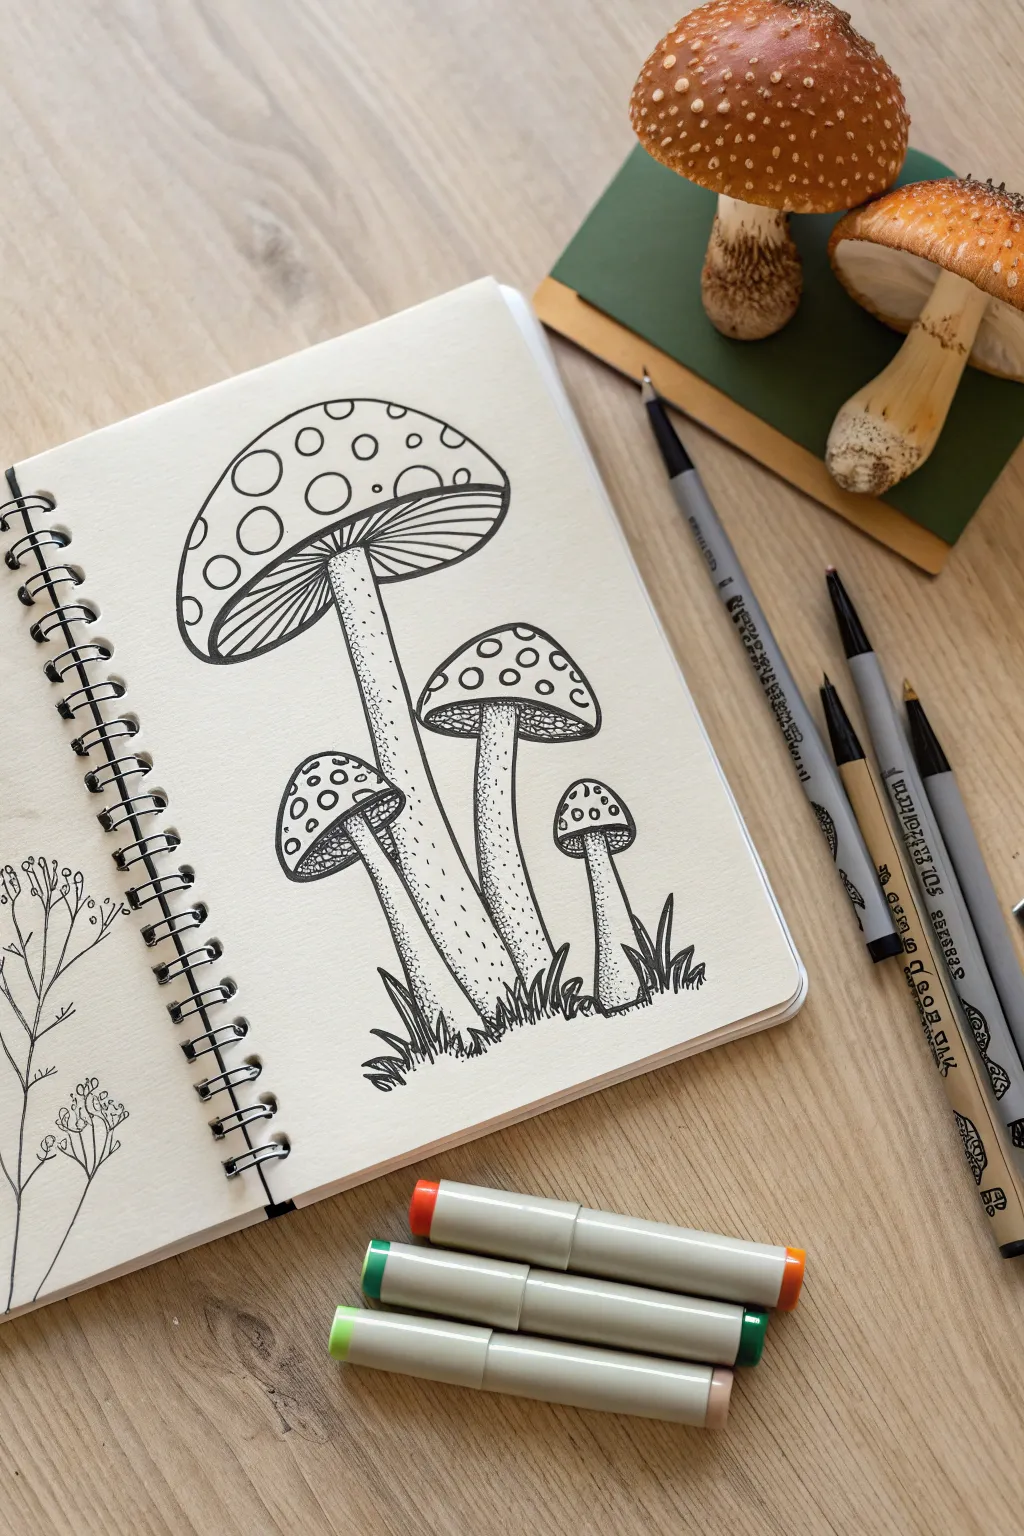
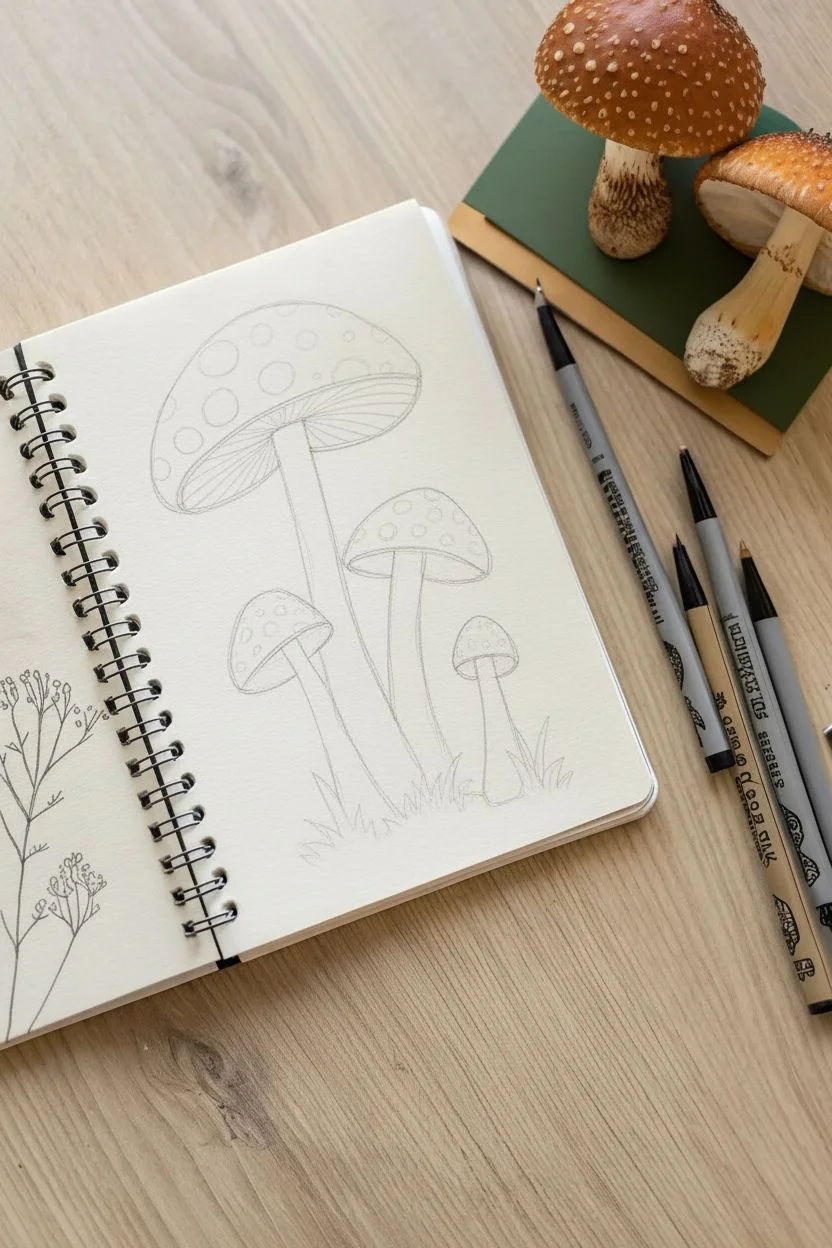
This charming sketch captures the organic beauty of a mushroom cluster using crisp ink lines and stippling techniques. The high-contrast black and white style makes it perfect for practicing line weights and texture without worrying about color just yet.
Step-by-Step Guide
Materials
- Spiral-bound sketchbook (medium weight paper)
- Fine liner pen (black, size 0.5mm)
- Fine liner pen (black, size 0.1mm or 0.05mm)
- Pencil (HB or 2H)
- Eraser
Step 1: Sketching the Composition
-
Map out the stems:
Start with your pencil to lightly map out the layout. Draw four vertical, slightly curving lines to represent the center of each mushroom stem. Place the tallest one on the left, a medium one slightly to its right, and two smaller ones flanking the sides. -
Add the cap shapes:
Sketch broad, dome-like semi-circles on top of your stem lines. Make the largest cap tilt slightly to the left. The others can sit relatively straight. Draw a curved line underneath each dome to connect the cap edges, creating that classic umbrella look. -
Thicken the stems:
Flesh out the stems by drawing lines on either side of your initial guides. Make the bases slightly wider than the tops where they meet the caps, giving them a sturdy, grounded appearance. -
Detail the bases:
At the bottom of the stems, sketch in jagged, grass-like tufts to hide where the mushrooms emerge from the ground. This anchors the drawing so the mushrooms aren’t floating in space.
Step 2: Inking the Outlines
-
Outline the caps:
Switch to your thicker 0.5mm fine liner. Trace your pencil lines for the outer shape of the mushroom caps. Keep your hand steady to get a smooth, continuous curve. -
Define the gills:
Underneath the main cap, draw a second, slightly smaller curve parallel to the bottom edge. This creates the rim of the cap where the gills will be. -
Inking the stems:
Outline the stems with the same pen. I find it helps to use slightly broken or wavering lines here to suggest an organic texture, rather than a perfect geometric cylinder. -
Add the spots:
Draw circles of varying sizes across the tops of the caps. Let some of them run off the edge of the outline (drawing only half a circle) to show the curvature of the 3D form.
Stippling Patience
Don’t rush the dots! Fast, hard tapping hurts your pen tip and creates messy ‘tails’ instead of circles. Hold the pen vertical and touch the paper gently.
Step 3: Adding Texture and Detail
-
Draw the gills:
Using your finer 0.1mm pen, draw tightly packed lines radiating from the top of the stem to the outer rim of the cap underside. These lines should curve slightly to follow the volume of the mushroom. -
Stipple the stems:
This is the meditative part. With the fine pen, start adding small dots (stippling) to the stems. Concentrate the dots heavily on the left side of each stem to create a shadow, and letting them fade out towards the right side. -
Texture the spots:
Return to the specific spots on the caps. You can leave them purely white for high contrast, or add a few tiny dots inside some of them for subtle texture. -
Detail the grass:
Ink the grass tufts at the base with quick, upward flicking strokes. Use the thicker pen for the main blades and the thinner pen for background texture. -
Deepen the shadows:
Go back to the stems and add a second layer of stippling just under the cap and at the very bottom. This extra darkness helps the cap look like it’s casting a shadow. -
Clean up:
Wait at least five minutes to ensure the ink is completely dry. Gently erase all your underlying pencil sketches to reveal the crisp black and white illustration.
Uneven Circles?
If your cap spots look too perfect or weirdly shaped, vary their sizes more drastically. Nature isn’t perfect; irregular shapes look more realistic.
Now you have a crisp botanical illustration ready for coloring or leaving as a striking monochrome piece

PENCIL GUIDE
Understanding Pencil Grades from H to B
From first sketch to finished drawing — learn pencil grades, line control, and shading techniques.
Explore the Full Guide
Butterfly Wings Split Into Easy Sections
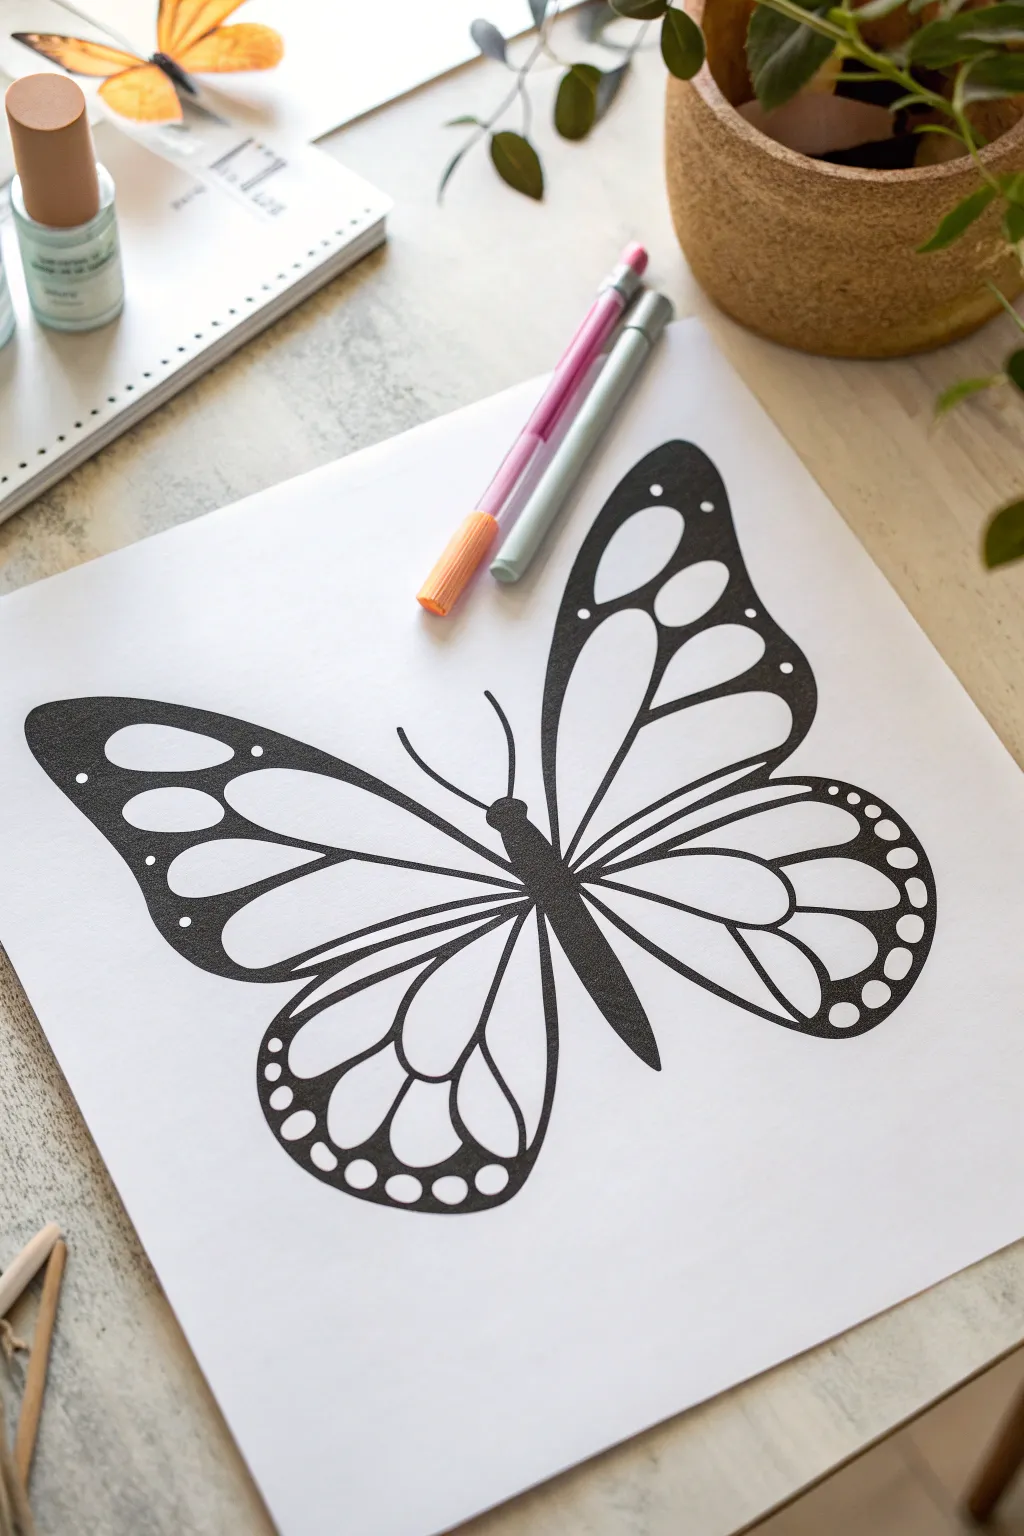
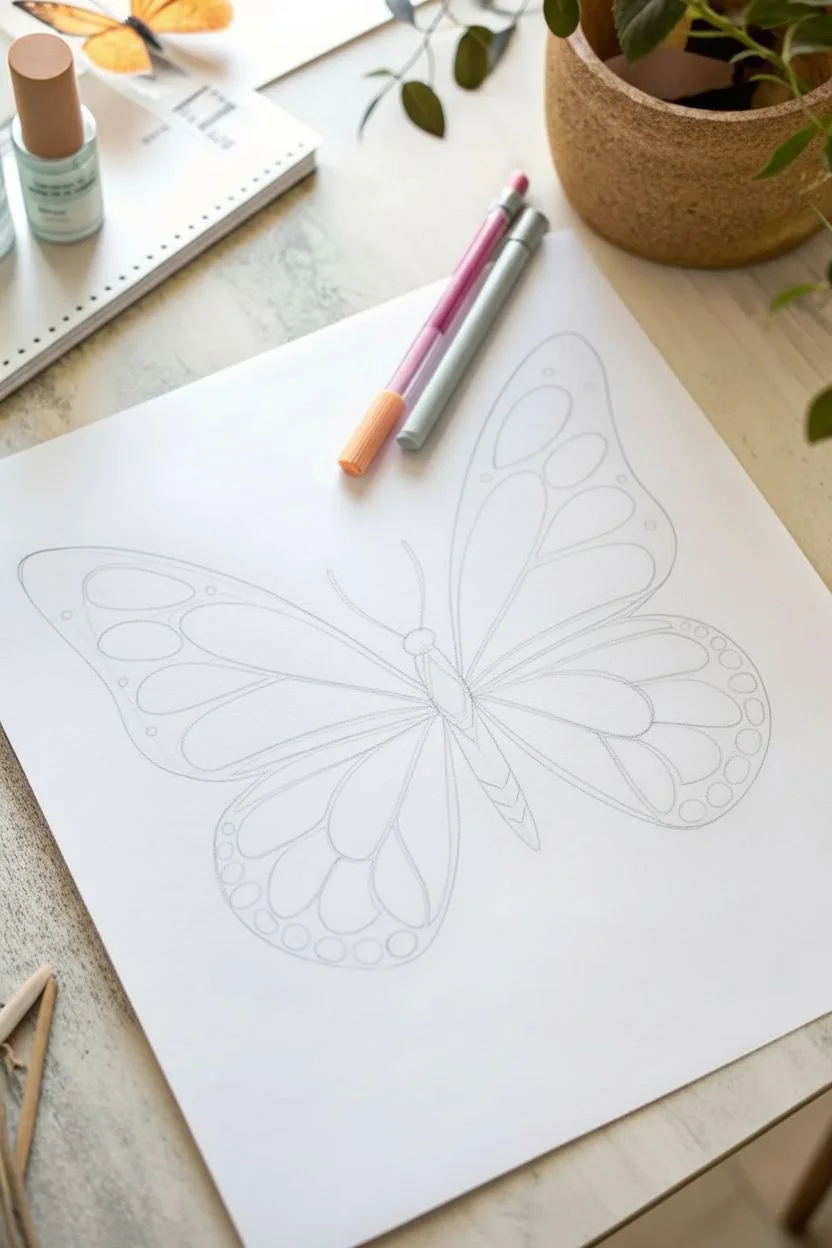
Before diving into a colorful marker challenge, you need a bold, crisp foundation. This tutorial guides you through sketching and inking a symmetrical monarch butterfly outline, creating defined sections perfect for testing your marker blending skills.
Step-by-Step Tutorial
Materials
- White cardstock or heavy drawing paper
- HB pencil for sketching
- Eraser
- Fine-point black permanent marker or drawing pen
- Medium-point black marker (optional, for filling areas)
- Ruler (optional)
Step 1: Sketching the Framework
-
Center Body:
Begin by lightly sketching the central body of the butterfly in the middle of your page. Draw a small, rounded shape for the head, a slightly longer, thicker oval for the thorax, and a long, tapered abdomen extending downwards. -
Upper Wing Arcs:
Starting from the thorax (the middle section of the body), sketch a large, sweeping curve upwards and outwards to define the top edge of the forewings. Try to keep both sides as symmetrical as possible. -
Lower Wing Curves:
From the same starting point on the thorax, draw the lower wings (hindwings). These should be more rounded, teardrop-like shapes that extend downwards, ending slightly below the abdomen’s tip. -
Refining the Shape:
Connect the outer edges of the upper wings back to the lower wings with a gentle, scalloped line. I find it helps to look at the negative space between the wings to gauge balance. -
Adding Antennae:
Draw two slender, curved lines extending from the head for antennae. Keep them simple and elegant.
Step 2: Designing the Patterns
-
Creating Cells:
Inside the upper wings, sketch large, elongated tear-drop shapes. These are the main ‘cells’ of the wing pattern. Leave a generous border around them to create the thick black veins later. -
Hindwing Details:
Repeat this process for the lower wings, creating smaller, more rounded segments radiating from the body outward. -
Distinct Borders:
Along the outer edges of all four wing sections, sketch a wide border strip. Inside this strip, draw small details like circles or dots, which act as the classic monarch white spots. -
Vein Structure:
Go back and thicken the lines between your cell shapes. The veins on a monarch are prominent, so don’t be afraid to make these sketching lines substantial.
Use a Light Table
Struggling with symmetry? Draw just the left wing on a separate paper, fold it, trace it to the other side using a window or light box, then transfer the full perfect shape.
Step 3: Inking and Definition
-
Review and Erase:
Take a moment to check your symmetry. While nature isn’t perfect, you want the wings to look balanced. Gently erase any confusing stray sketch lines. -
First Pass Outline:
Using your fine-point black marker, trace over your final pencil lines. Start with the central body and antennae to anchor the drawing. -
Tracing the Cells:
Carefully ink the interior shapes (the cells) of the wings. Keep your hand steady to ensure smooth, continuous curves. -
Filling the Body:
Color in the head, thorax, and abdomen with solid black. Leave no white spots here to give the butterfly visual weight. -
Thickening the Veins:
Now, fill in the space between your cell shapes. This is where the drawing comes to life. The black lines should differ in thickness—thicker near the body and tapering slightly as they move outward. -
Edge Detailing:
Fill in the thick outer borders of the wings with black ink, but be very careful to leave the small circles and dots uncolored. These white spots are crucial for the monarch look. -
Final Cleanup:
Once the ink is completely dry (give it a minute or two to avoid smudges), erase all remaining visible pencil marks to leave a stark, high-contrast image. -
Prep for Markers:
If you plan to use alcohol markers for your challenge, place a scrap sheet of paper underneath your drawing now to prevent bleed-through.
Make It Pop
Before coloring, thicken the outermost outline of the entire butterfly slightly more than the interior lines. This ‘sticker effect’ makes the artwork stand out boldly on the page.
Now you have a striking, high-contrast canvas ready for whatever colors your marker challenge dictates
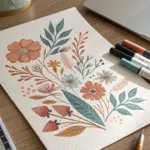
Tropical Leaf Set for Bold Color Blocking
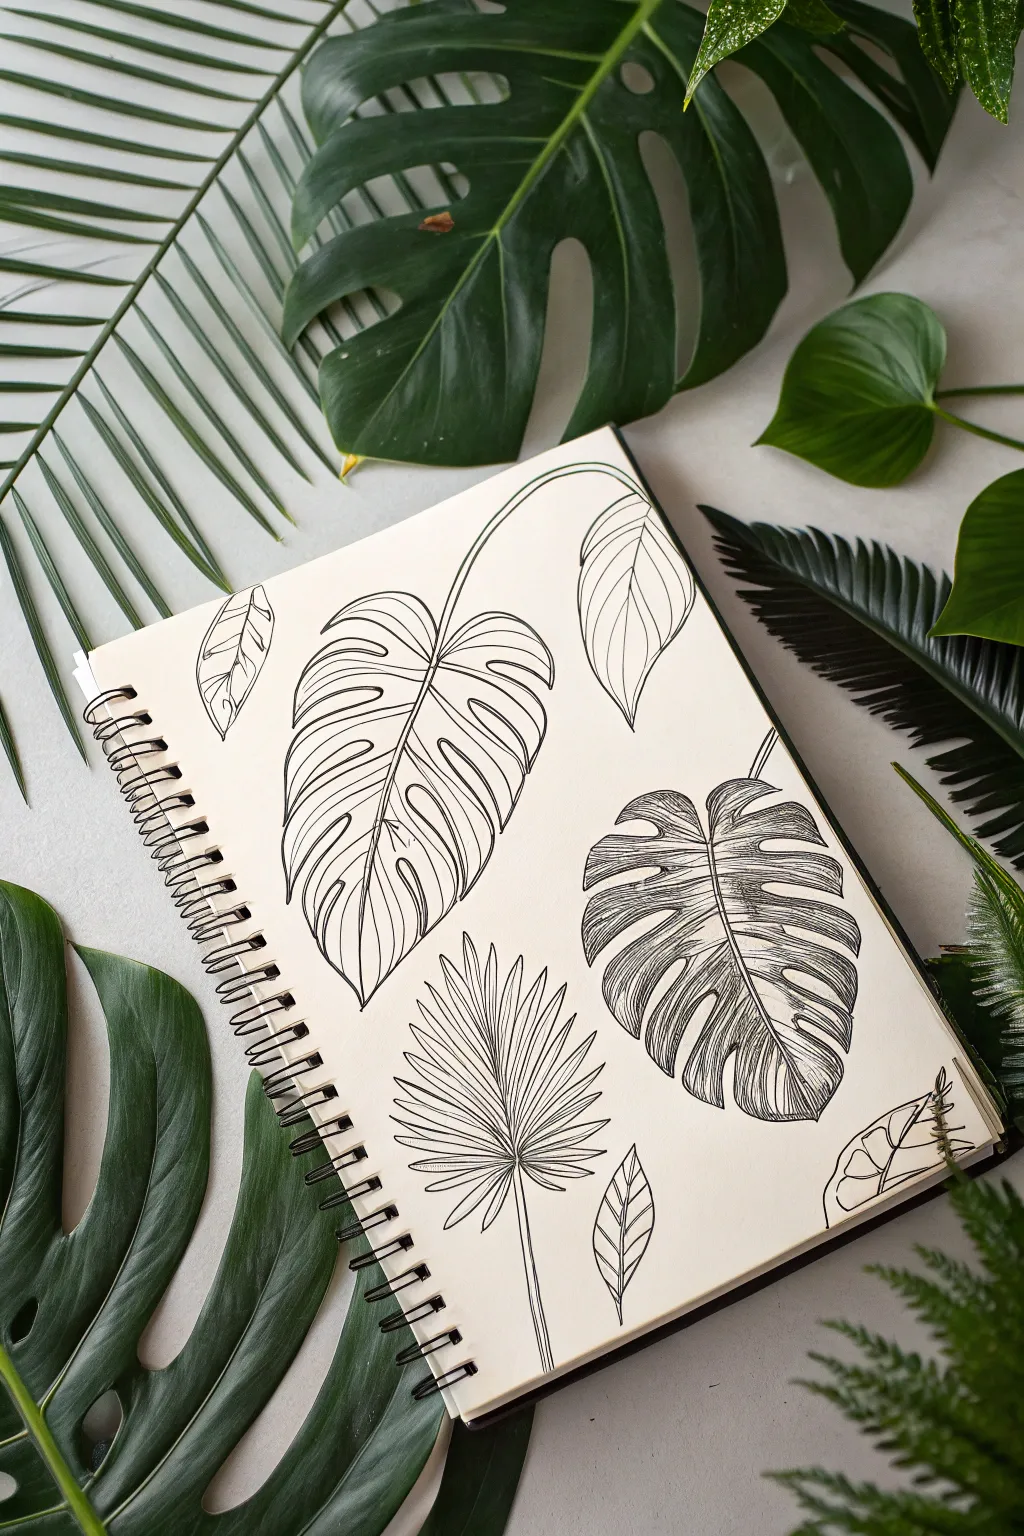
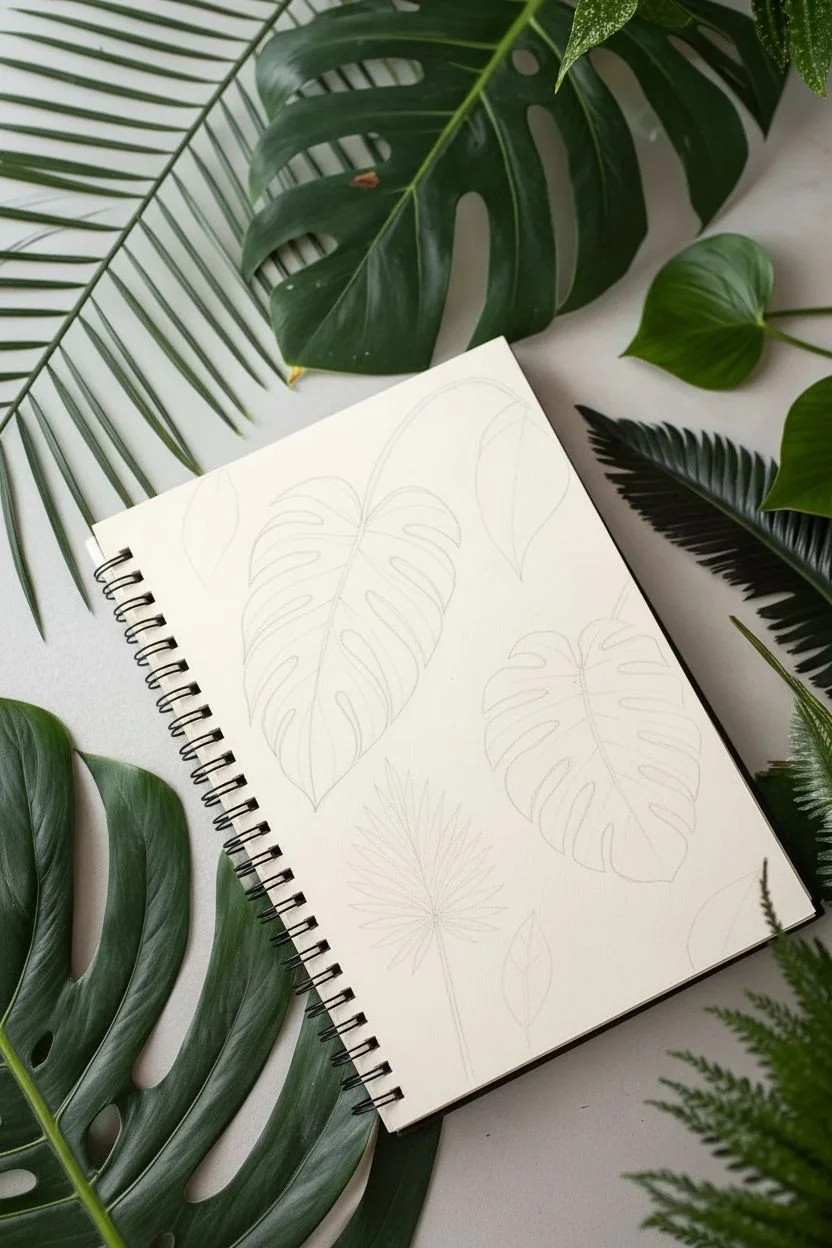
This project focuses on capturing the bold silhouettes and delicate veins of tropical foliage using simple black ink lines. It’s the perfect foundation for a marker challenge, creating defined spaces that are begging to be filled with vibrant, contrasting colors.
Step-by-Step Guide
Materials
- Spiral-bound sketchbook (heavyweight paper recommended)
- Fine liner pens (sizes 0.3mm and 0.5mm)
- Pencil (HB or 2B)
- Eraser
- Real or artificial tropical leaves for reference (optional)
Step 1: Planning and Sketching
-
Layout the Composition:
Start by visualizing where your leaves will sit on the page. We want a balanced composition with a large central Monstera, a fan palm at the bottom, and accents around the edges. -
Sketch the Central Leaf Shape:
Using your pencil lightly, draw a large heart shape slightly off-center to the left. This will be the main Monstera leaf. Don’t worry about the splits yet; just get the perimeter size right. -
Add Supporting Leaves:
To the right of the main leaf, sketch a narrower, heart-shaped leaf outline. At the bottom center, draw a triangular wedge shape that will become the fan palm. -
Place Smaller Accents:
Fill in the empty corners with smaller, simple leaf shapes—one near the top left spiral binding and another near the bottom right edge. -
Refine the Monstera Outline:
On your large central heart shape, sketch the characteristic deep splits (fenestrations). Draw inward curving lines from the edge toward the center rib, creating those iconic gaps.
Smudge Patrol
If your ink smears when erasing pencil lines, switching to a kneaded eraser can be gentler. Always test ink dryness by lightly touching it with a clean tissue first.
Step 2: Inking the Outlines
-
Select Your Pen:
Switch to your 0.5mm fine liner. This slightly thicker nib helps create a confident, bold silhouette that stands out. -
Ink the Monstera Stem and Rib:
Draw the central vein of the large Monstera first, extending it up into a long, curved stem that reaches the top of the page. This anchors the drawing. -
Trace the Leaf Edges:
Carefully go over your pencil lines for the leaf edges. Make these lines smooth and continuous rather than sketchy or broken. -
Ink the Fan Palm:
Move to the bottom center leaf. Draw the radiating segments of the fan palm, ensuring they all converge at a tiny central point at the base. -
Ink the Remaining Leaves:
Outline the secondary leaf on the right and the smaller accent leaves in the corners. I find it helpful to rotate the sketchbook to get the best angle for these curves.
Step 3: Adding Detail and Texture
-
Switch to a Thinner Pen:
Change to a 0.3mm or 0.1mm fine liner. We want the internal veins to look more delicate than the heavy outer outlines. -
Detail the Monstera Veins:
Inside the large split leaf, draw curved lines extending from the center rib toward the edges. Keep closer spacing near the bottom and wider spacing near the top. -
Add Texture to the Second Leaf:
For the leaf on the right, create a different texture. Instead of simple lines, use hatching or tight parallel lines on one half of the leaf to suggest shadow and depth. -
Define the Fan Palm:
Add a central line down the middle of each fan segment to give them dimension. -
Detail the Accent Leaves:
Add simple, minimal veining to the small corner leaves. Keep these less detailed so they don’t distract from the main subjects. -
Erase Guidelines:
Wait for the ink to be completely dry to the touch—patience is key here to avoid smudges. Gently erase all underlying pencil sketch marks. -
Final Cleanup:
Check your lines. If any outlines feel too thin, carefully go over them again with the 0.5mm pen to ensure the ‘coloring book’ style remains bold and ready for marker application.
Make it Pop
For the marker challenge, try ‘leaving’ the veins white. Color in the leaf sections but stop just short of your black vein lines to create brilliant highlights.
You now have a crisp, botanical spread ready for some bold marker experimentation
BRUSH GUIDE
The Right Brush for Every Stroke
From clean lines to bold texture — master brush choice, stroke control, and essential techniques.
Explore the Full Guide
Ocean Creature Templates With Large Shapes
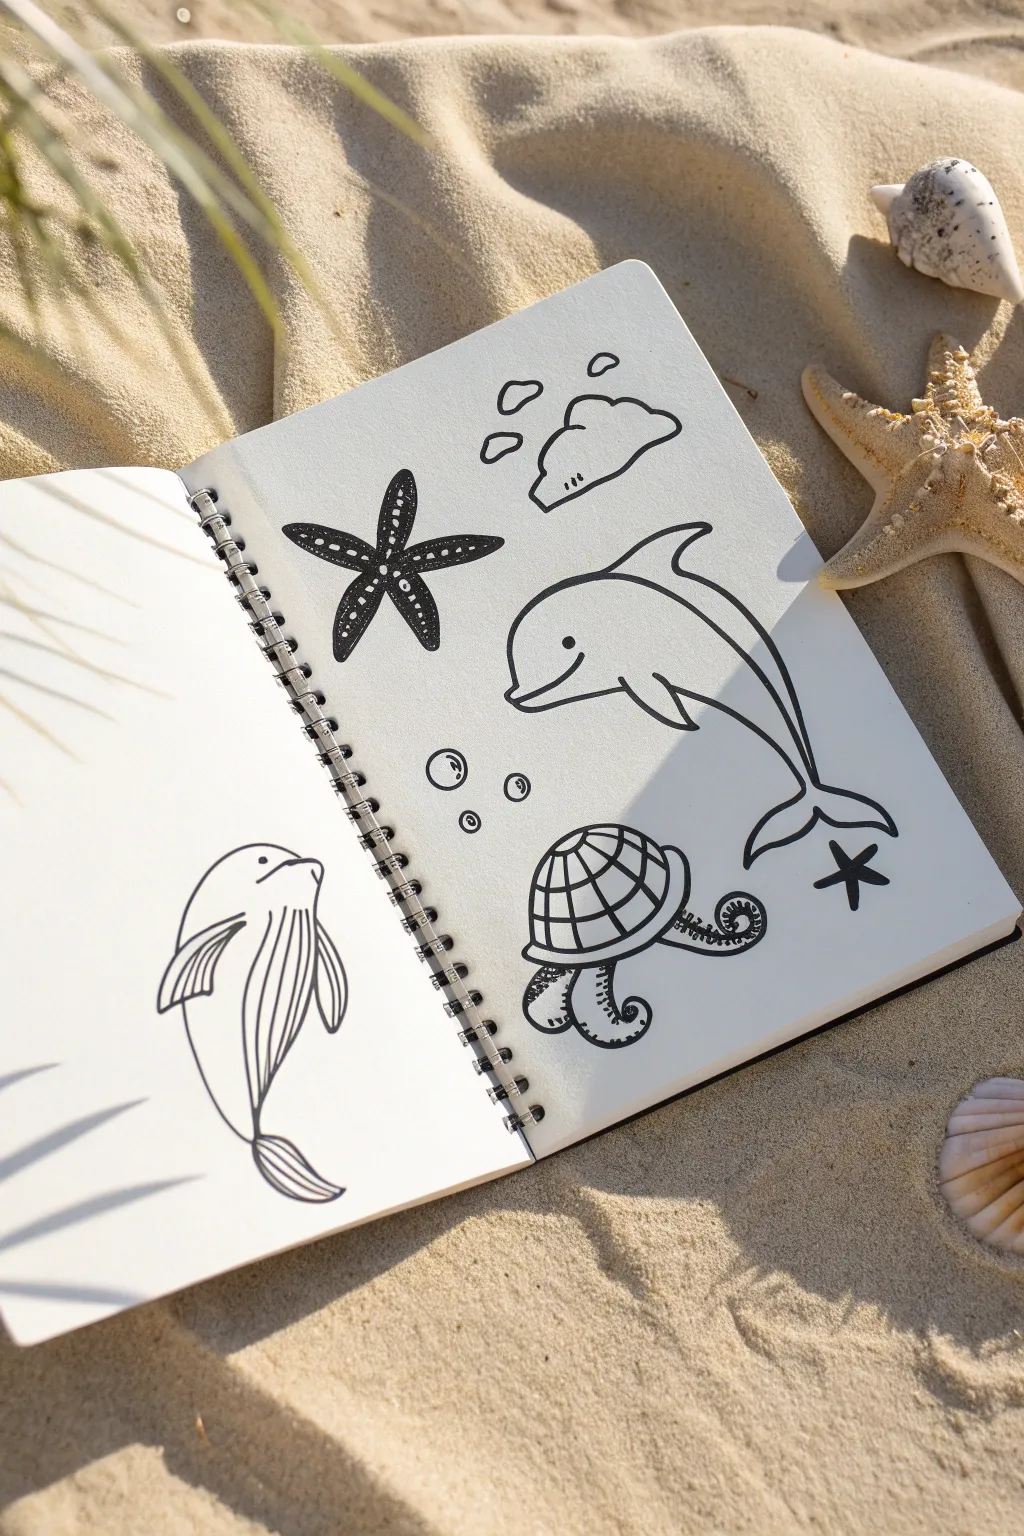
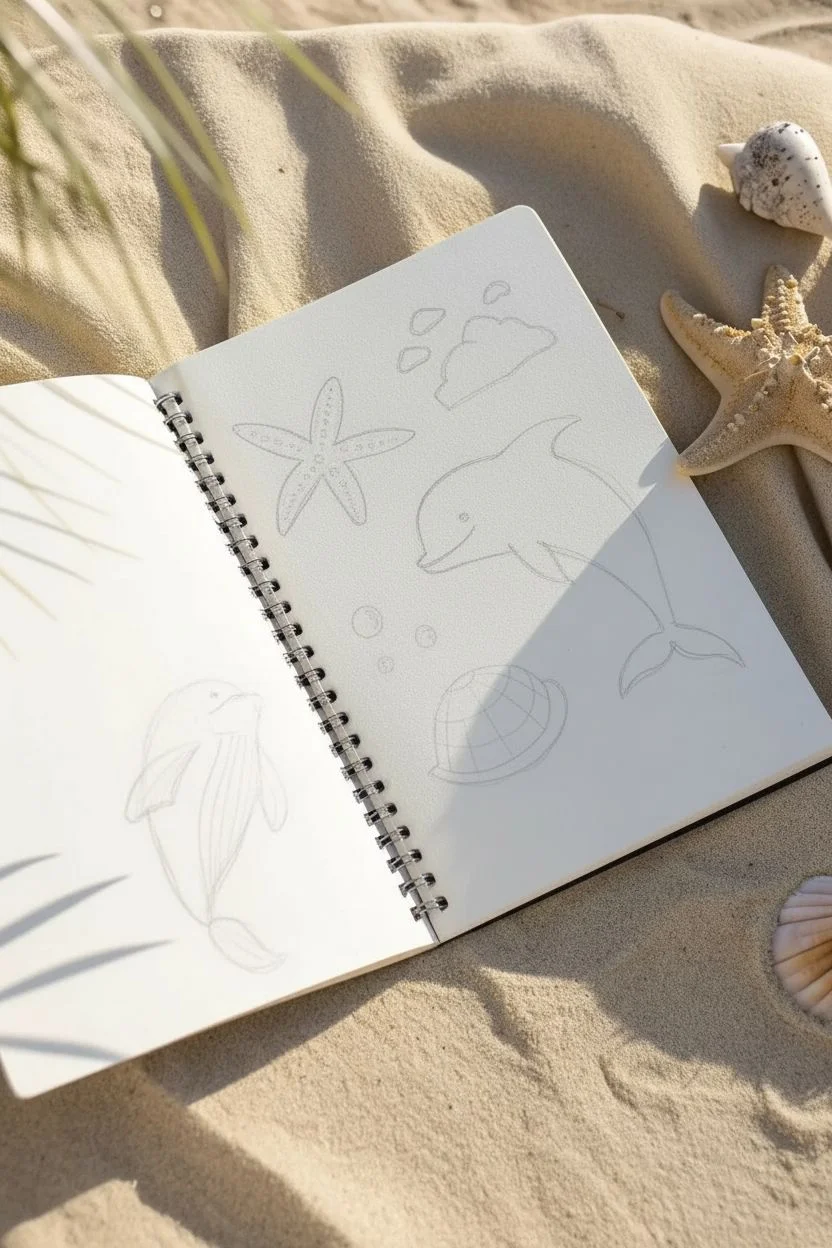
Capture the spirit of the shore with these bold, simple ocean doodles perfect for coloring. This project features chunky outlines and playful patterns that are ideal for a 3-marker challenge or just relaxing on the sand.
Step-by-Step Tutorial
Materials
- Spiral-bound sketchbook (medium weight paper)
- Black permanent marker (fine tip)
- Black permanent marker (medium or brush tip)
- Pencil
- Eraser
Step 1: Planning Your Layout
-
Set the scene:
Open your sketchbook to a fresh two-page spread. Visualize where you want your main creatures to go. You will have one large figure on the left page and a collection of smaller ones on the right. -
Draft the left page whale based shape:
Using a pencil and light pressure, sketch a large, curved teardrop shape on the left page for the whale’s body. The head should be rounded at the top and taper down to a tail. -
Add whale details:
Sketch a pectoral fin on the side and a fluked tail at the bottom. Draw faint vertical lines down the body to indicate the whale’s grooved belly texture. -
Draft the right page elements:
On the right page, lightly pencil in a five-pointed starfish near the top left and a leaping dolphin shape in the center. The dolphin should have an arched back and a distinct snout. -
Sketch the turtle and cloud:
Below the starfish, draw a semicircle for a turtle shell. Add a small cloud shape near the top right corner. Don’t worry about perfect lines yet; just get the placement right.
Step 2: Inking the Outlines
-
Outline the dolphin:
Switch to your medium-tip black marker. Carefully trace the outer contour of the dolphin. Use a single, smooth stroke for the arched back to keep it looking fluid. -
Define the starfish:
Trace the five arms of the starfish. I like to make the tips slightly rounded rather than sharp points for a friendlier cartoon look. -
Ink the cloud and bubbles:
Go over your cloud shape with bumpy, irregular lines. Add three small floating circles nearby to represent air bubbles rising from the water. -
Draw the turtle shell:
Ink the distinct dome of the turtle shell. Instead of realistic legs, draw curly, tentacle-like flippers emerging from the bottom to give it a whimsical, unique style. -
Complete the whale outline:
Move to the left page and ink the main outline of the whale. Make sure the fin connects smoothly to the body.
Smudge Alert
Wait at least 60 seconds before erasing pencil marks. Even permanent marker can smear if you rub it while it’s still damp or tacky.
Step 3: Adding Patterns & Details
-
Texture the starfish:
Inside the starfish outline, draw a smaller star shape. Fill the space between the inner and outer lines with small black dots to create a stippled texture. -
Detail the turtle shell:
Draw intersecting curved lines across the turtle shell to create a grid pattern. Color in alternating sections or thick border lines to make the plates pop. -
Add turtle flipper patterns:
Inside the curly flippers of the turtle, add small circles or loops to mimic suction cups or scales. -
Finalize the dolphin face:
Place a small black dot for the dolphin’s eye and draw a curved line for a smile. Add a line separating the belly to give the drawing dimension. -
Stripe the whale:
Using a finer tip marker, draw long, flowing lines down the length of the whale’s belly. These should contour with the body shape. -
Add finishing touches:
Draw small reflection glints on the bubbles and a tiny simple star shape near the bottom right for balance. Let the ink dry completely for a minute. -
Clean up:
Take your eraser and gently rub away any visible pencil lines, leaving just the crisp black ink drawings ready for color.
Color Challenge
Since these are large, open shapes, pick three random markers blindly from a bag and force yourself to color the entire page using only those hues.
Now you have a perfect set of nautical templates ready for your three-marker challenge
Simple House Front With Clear Color Zones
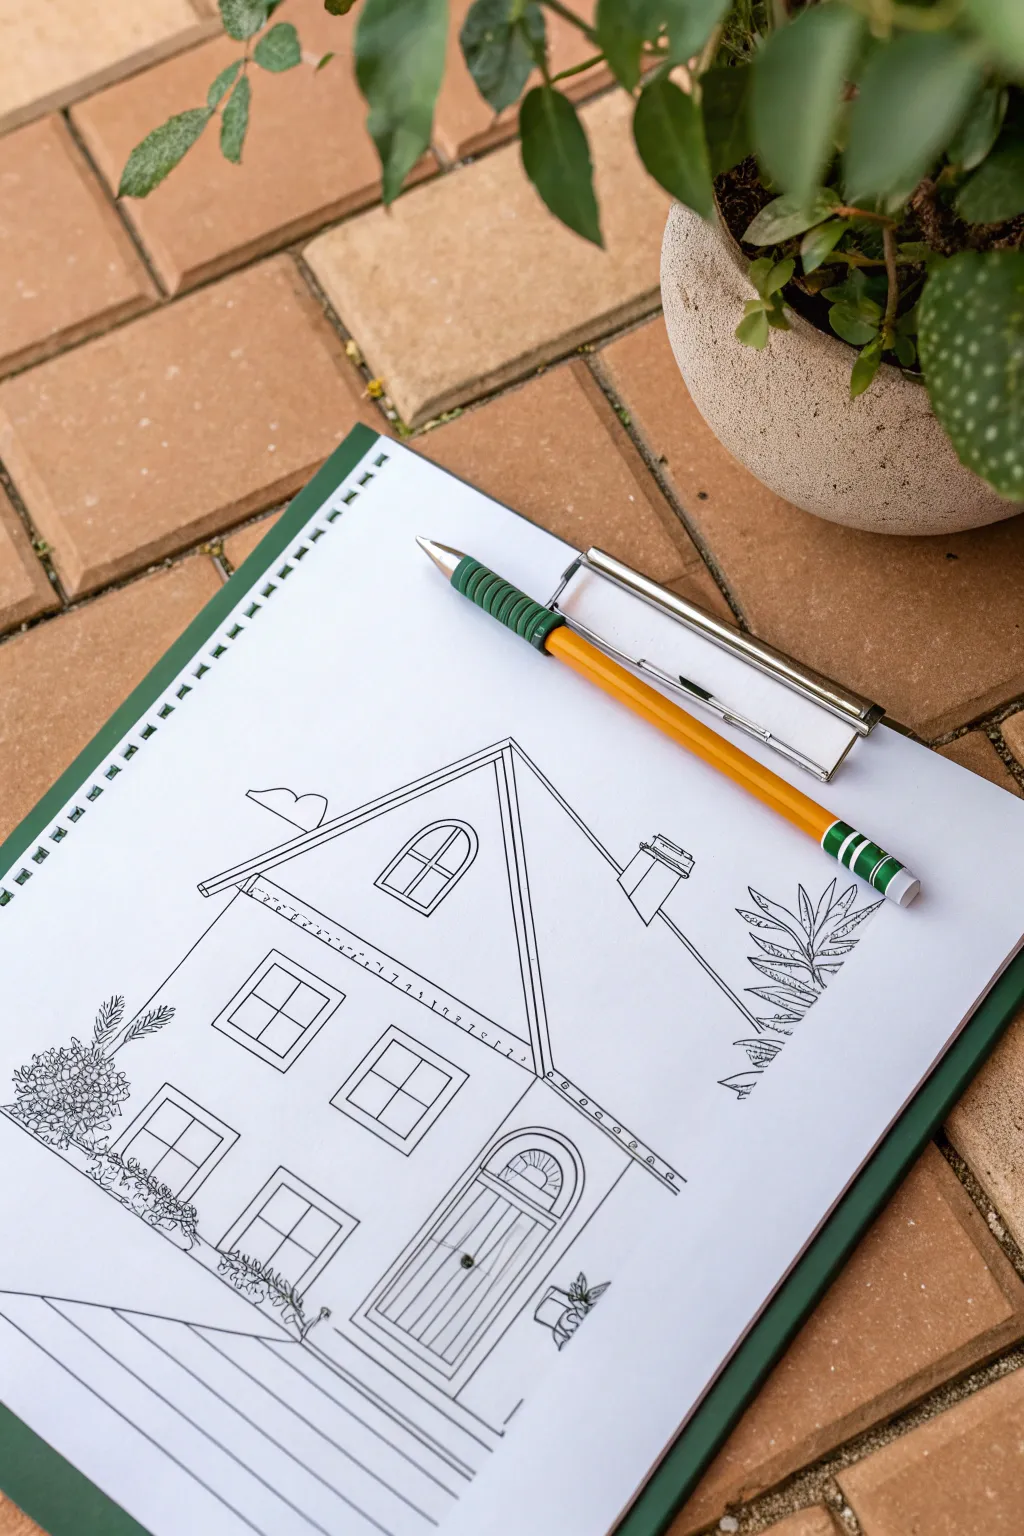
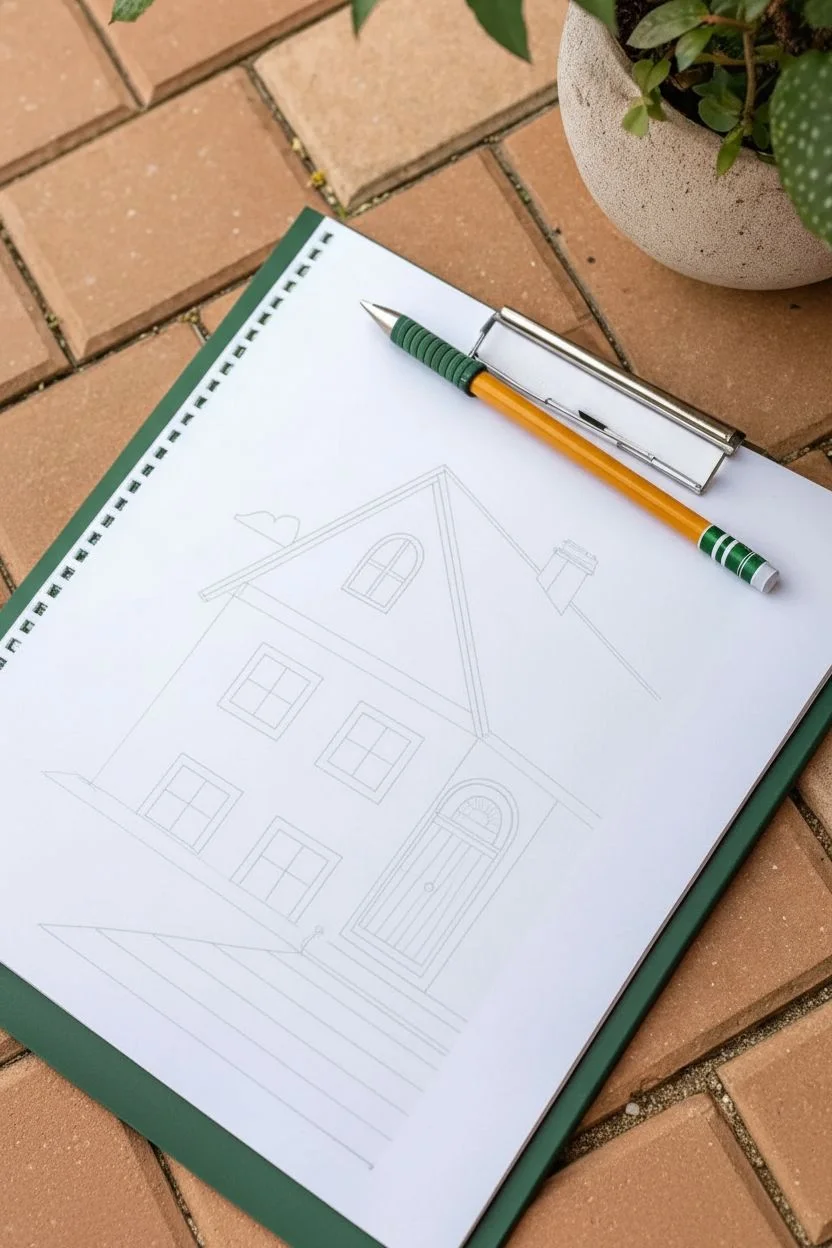
This charming architectural study features crisp, clean linework that is practically begging for color. The design creates distinct zones for roofing, siding, and landscaping, making it the perfect canvas for testing a limited three-marker palette.
Step-by-Step Guide
Materials
- Spiral-bound sketchbook (heavyweight paper)
- Black fineliner (0.5mm or 0.8mm)
- Pencil and eraser for sketching
- Ruler or straight edge
- Yellow mechanical pencil (as shown in photo) or standard HB pencil
Step 1: Laying the Foundations
-
Establish the main shape:
Begin by lightly sketching a large pentagon shape in the center of your page to form the main body and roof peak of the house. Keep your pencil lines faint so they can be easily erased later. -
Add the roofline:
Draw the steep, pitched roof by adding a parallel line about a centimeter outside your initial roof peak lines. Connect the bottom edges. -
Create the extension:
Sketch a smaller, secondary roof section extending to the right side of the house. This adds depth and breaks up the symmetry. -
Position the windows:
Block in two large square windows on the left side of the facade, stacking them vertically but leaving space between them. -
Draft the entryway:
On the lower right side of the main house body, sketch a tall rectangle with an arched top for the front door. Add steps leading up to it. -
Detail the attic window:
Place a smaller arched window directly in the center of the roof peak triangle.
Marker Tip
Since this is for a 3-marker challenge, choose distinct colors for the roof, walls, and plants. High contrast works best.
Step 2: Inking the Structure
-
Outline the main walls:
Switch to your black fineliner. Using a ruler for precision, ink over the vertical walls and horizontal base of your pencil sketch. -
Define the roof planks:
Ink the roof outlines. To suggest texture without clutter, I like to add just a few vertical lines inside the roof shape to imply standing seam metal or wood panels. -
Refine the windows:
Draw the window frames. Divide each square window into four panes with a simple cross. For the attic window, use a vertical line to split the arch. -
Detail the door:
Ink the arched door frame. Draw vertical panels on the door itself and add a small circle for the doorknob. Add a semi-circle window within the arch above the door. -
Add the chimney:
Draw a small rectangular chimney near the right roof extension, capping it with a slightly wider top. -
Create the scalloped trim:
Under the main roofline, draw a decorative trim. small, repeated semi-circles or dots work well here to give it a cottage feel.
Trouble with Smudges?
If your ruler smears the ink, tape a penny to the underside of the ruler. It lifts the edge off the paper just enough to prevent drag.
Step 3: Landscaping and Final Touches
-
Sketch the left foliage:
On the left side of the house, draw a loose, bushy shape near the ground. Fill it with small scribbles or leaf shapes to represent a flowering bush. -
Draw the right foliage:
On the right side, draw tall, spiky leaves reaching upward. This variation in plant types makes the scene more interesting. -
Add the walkway:
Using your ruler, draw diagonal lines extending from the bottom left corner toward the house to create a paved path or driveway. -
Erase pencil guides:
Once the ink is completely dry, gently erase all underlying pencil marks to leave a crisp, clean illustration.
Your clean line art is now ready for the ultimate three-color test


Scribble Starter Turned Into a Three-Color Creature
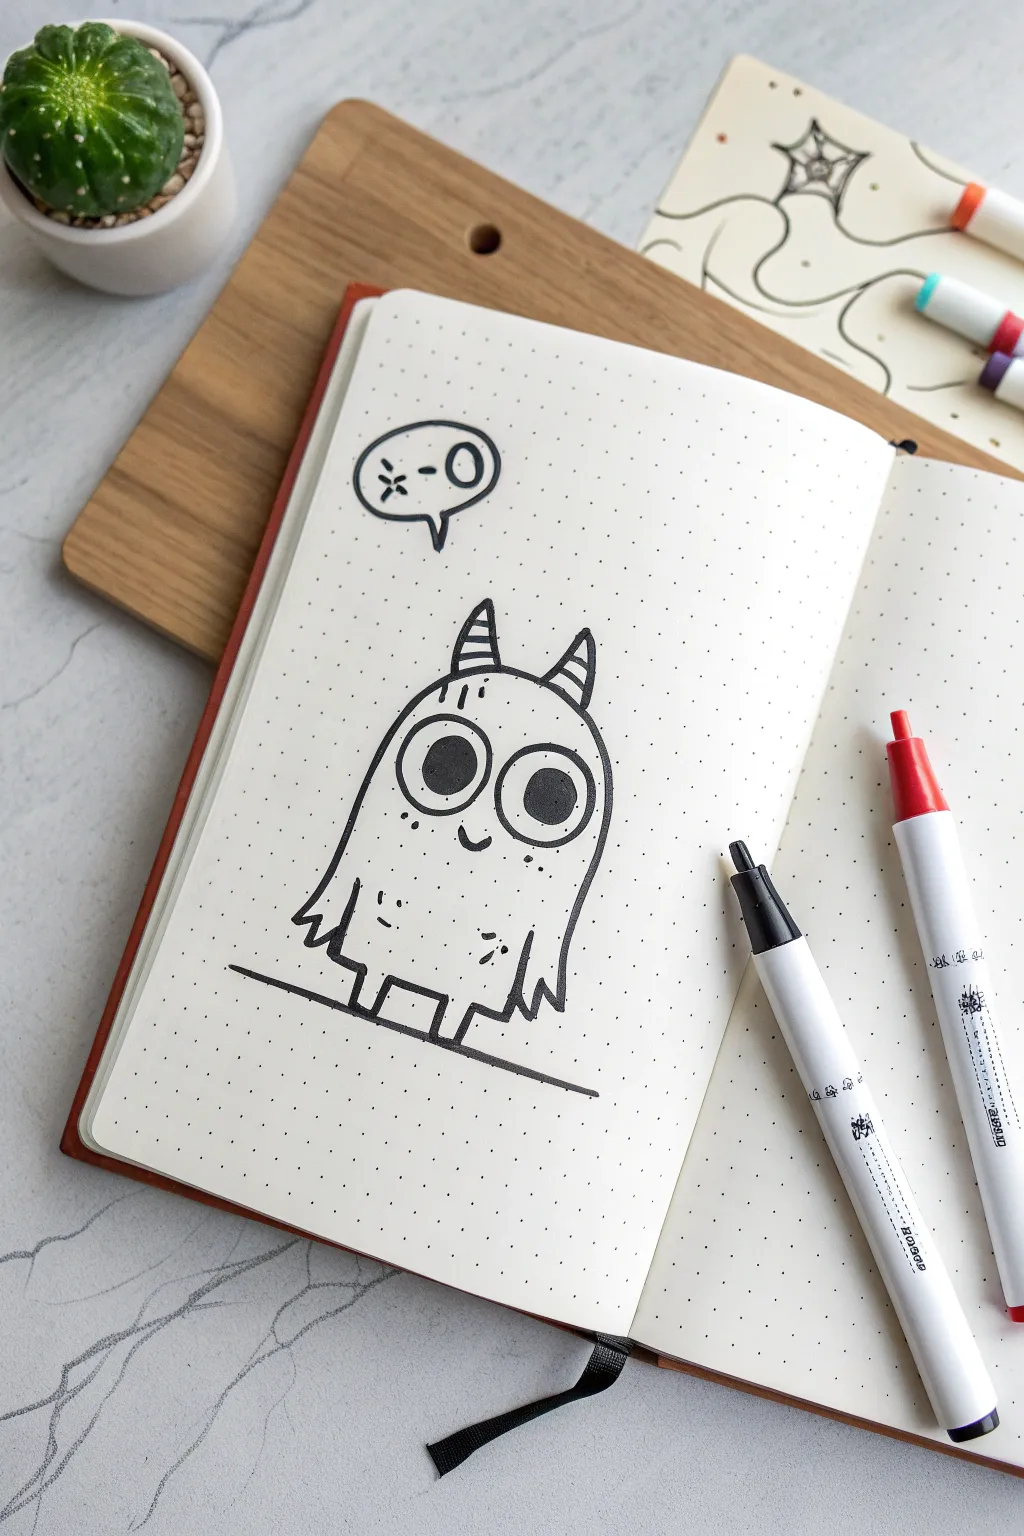
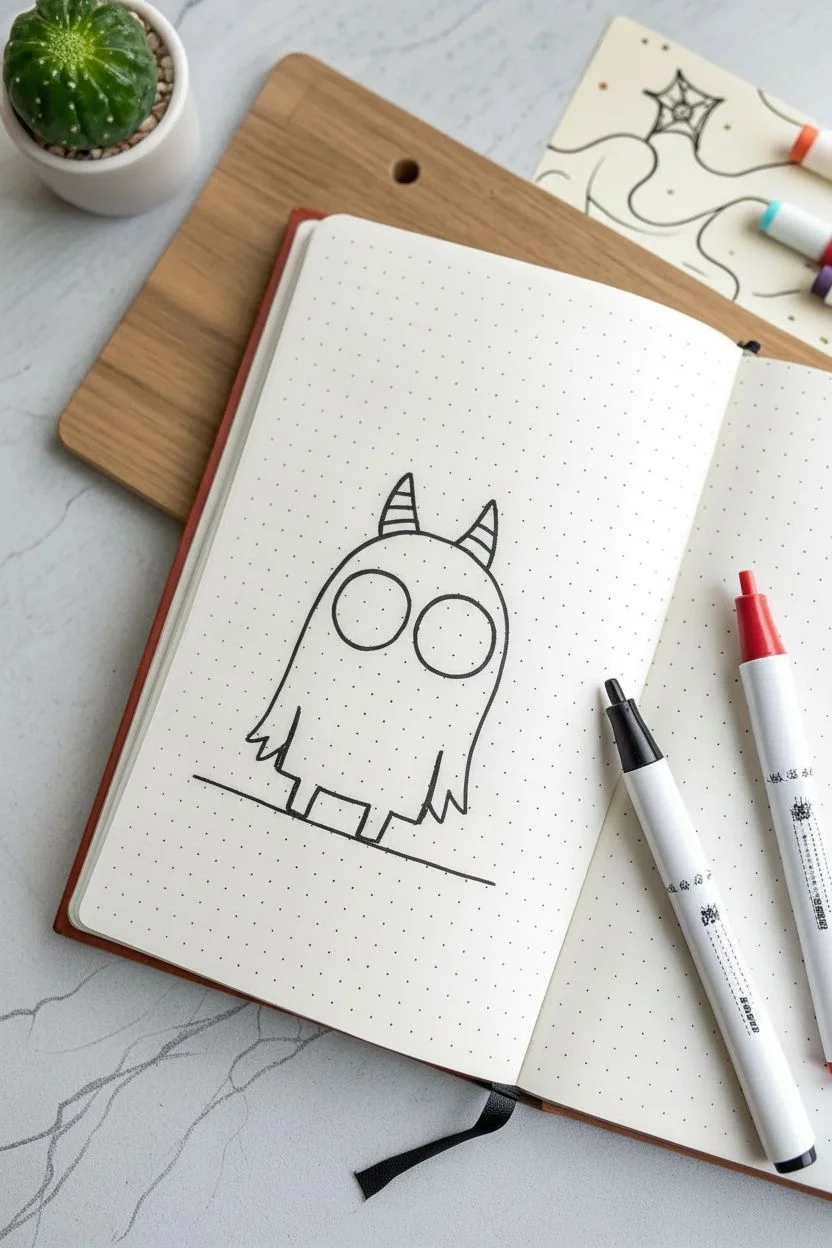
Transform a blank page into a charming little monster using simple lines and a dotted grid for guidance. This quick character sketch relies on bold outlining and expressive eyes to create a playful doodle perfect for margins or daily spreads.
Detailed Instructions
Materials
- Dot grid notebook or journal
- Black fineliner pen (0.5mm or 0.8mm)
- Black brush pen or marker (for filling)
- Optional: Pencil and eraser for sketching
Step 1: Shaping the Creature
-
Establish the base:
Start by drawing a horizontal line near the bottom of your page to serve as the ground. Keep it slightly rough rather than perfectly straight to add character. -
Outline the body:
Draw the main body shape, which looks like an inverted ‘U’ or a rounded tombstone. The bottom edge should hover just above your ground line. -
Add the feet:
At the bottom of the body, draw two small, rectangular protrusions extending down to touch the ground line. These are the stubby legs. -
Create the arms:
On the left side of the body, draw a jagged, downward-pointing zigzag shape for the first arm. Repeat this on the right side, mirroring the shape slightly. -
Draw the horns:
At the very top of the head, draw two small, curved triangles pointing slightly outward. Add two small horizontal stripes inside each horn for texture.
Grid Guide
Use the dots in your journal to align the eyes perfectly. Count three dots across for each eye to ensure symmetry without needing a ruler.
Step 2: Face and Details
-
Outline the eyes:
In the upper half of the body, draw two large circles side-by-side. Use the dot grid to help keep them relatively even in size. -
Fill the pupils:
Inside each eye circle, draw a smaller circle. Fill these inner circles in completely with black ink, leaving no white space. -
Add a smile:
Between and slightly below the eyes, draw a tiny, simple ‘u’ shape for a happy little mouth. -
Add texture marks:
Scatter small dots and tiny dashes across the monster’s body. Group a few near the eyes and the bottom hem to simulate fur or texture. -
Sketch the speech bubble:
Above and to the left of the monster’s head, draw an oval speech bubble. Add a small tail pointing down toward the creature. -
Fill the speech bubble:
Inside the bubble, draw a small symbol like a burst or asterisk, a dash, and a zero or circle shape (like ‘*-O’). This gives the impression of monster-speak. -
Refine the lines:
Go over the main outline of the body one more time to thicken the line weight, making the character pop off the page.
Colorful Twist
Since this is a 3-marker challenge, try coloring the monster’s body neon green or blue, leaving the eyes white for high contrast.
Now you have a quirky little friend to keep you company in your notebook


Have a question or want to share your own experience? I'd love to hear from you in the comments below!