Abstract painting is my favorite way to get something bold on the canvas fast, even when you don’t feel “good at drawing.” These easy abstract painting ideas lean on color, texture, and simple shapes so your finished piece still looks totally awesome.
Color Blocking with Big Shapes
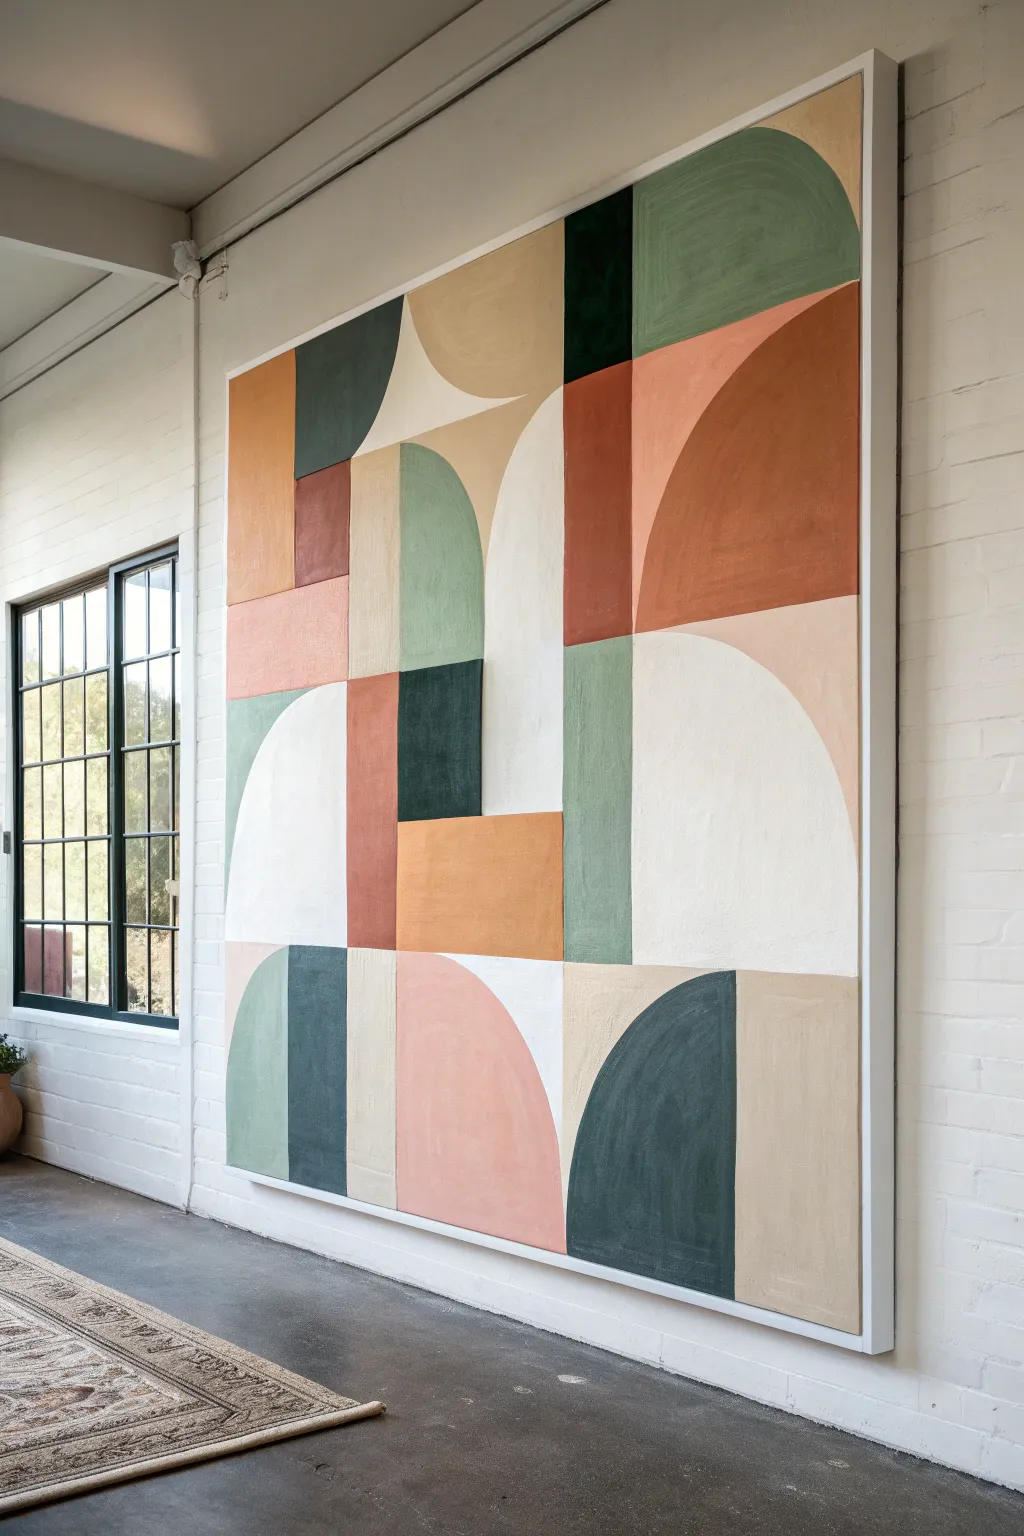
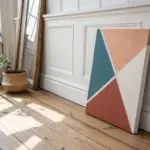
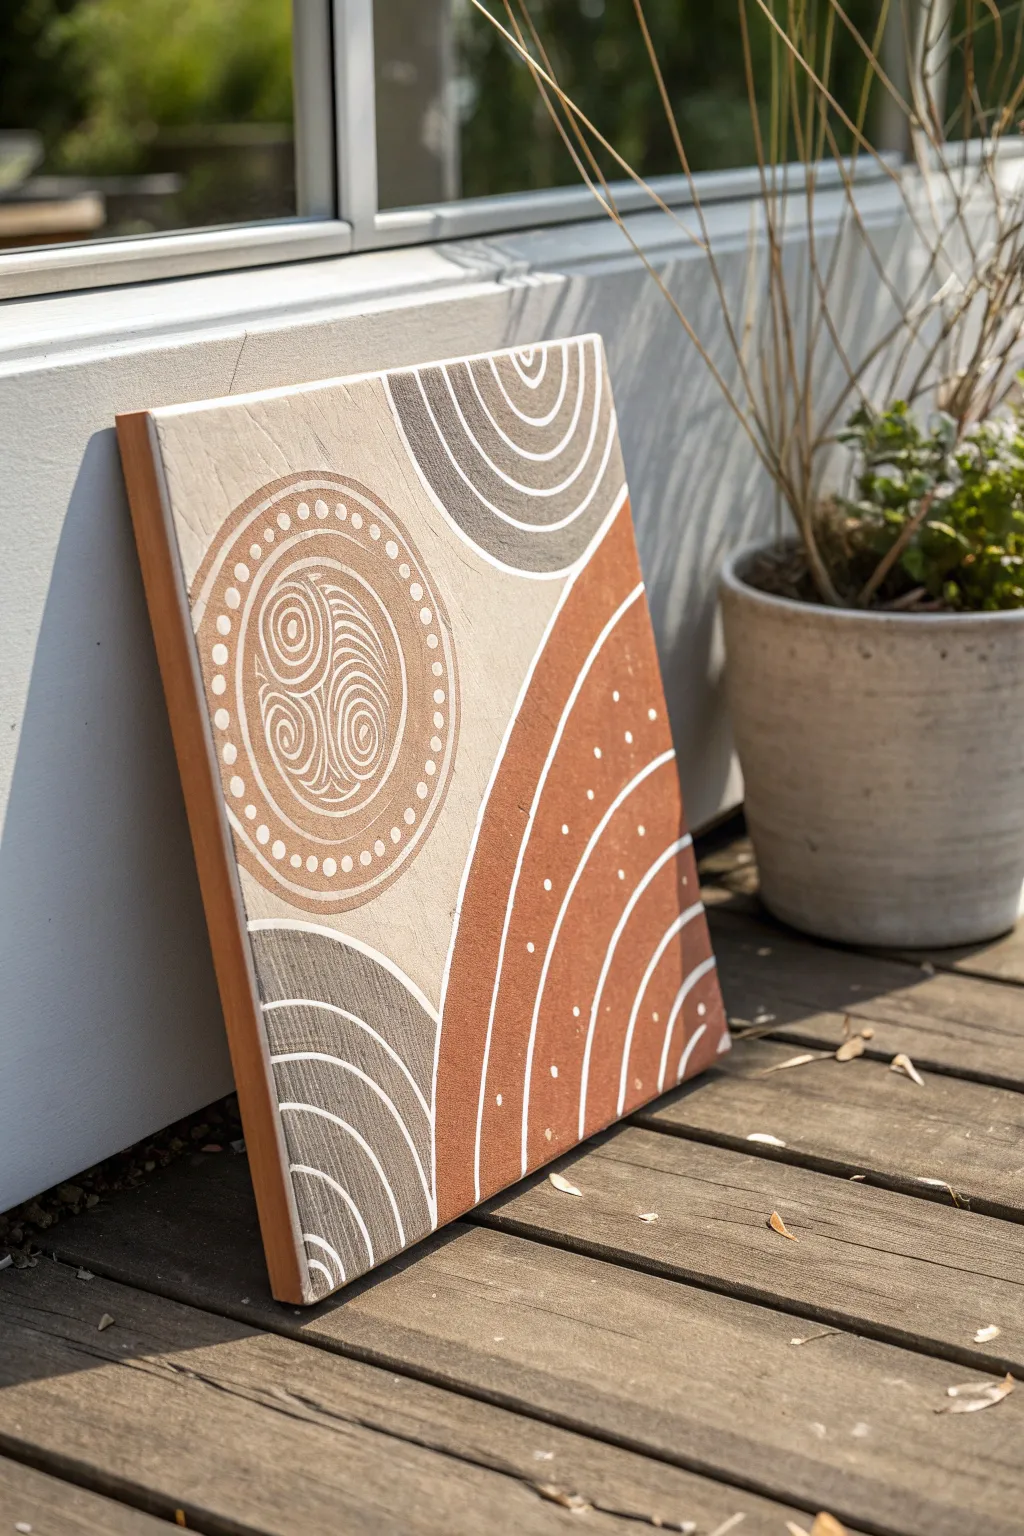
Transform a blank canvas or wall space into a stunning statement piece with this large-scale geometric abstraction. Featuring soothing earth tones and bold arches, this project mimics high-end modern art using accessible shapes and simple color blocking techniques.
Step-by-Step Tutorial
Materials
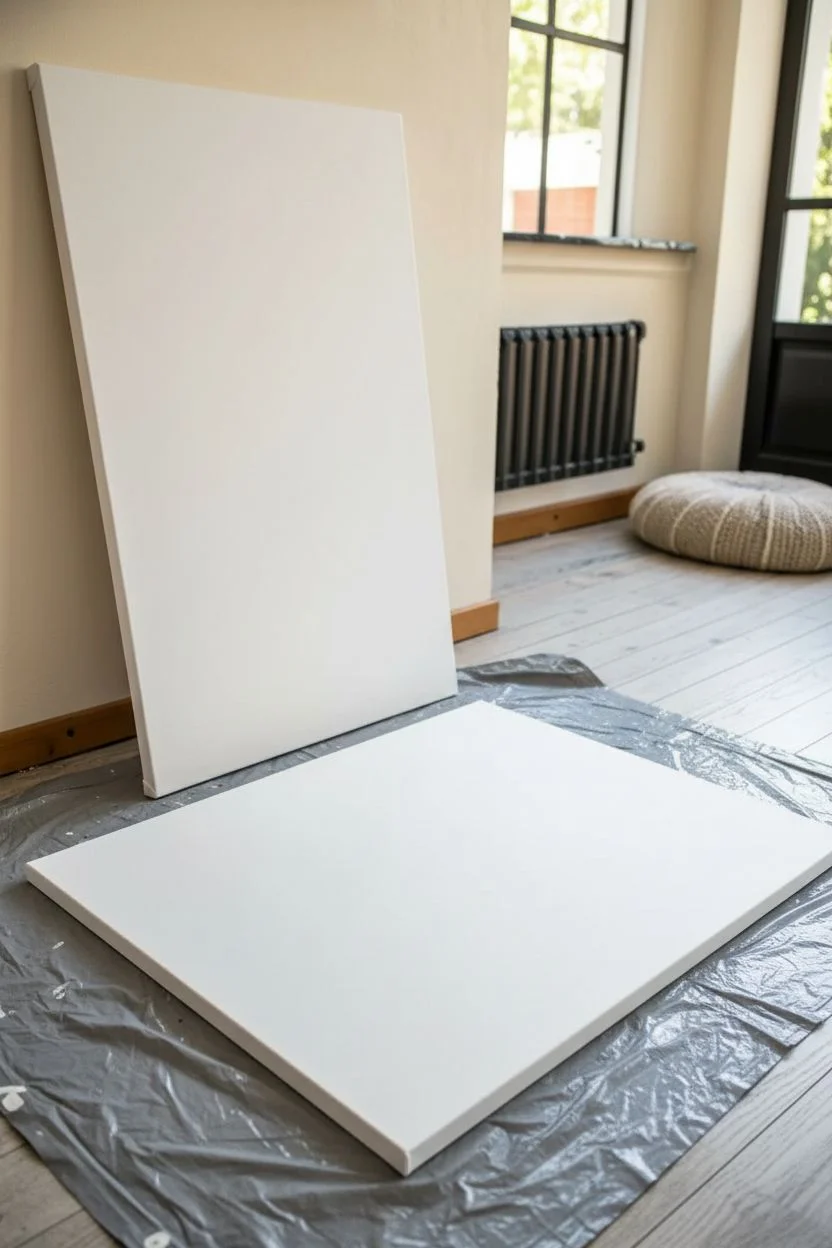
- Large canvas (store-bought or DIY stretchers with canvas drop cloth)
- Acrylic paints (terracotta, sage green, deep forest green, mustard yellow, beige, off-white, dark teal)
- Gesso (white primer)
- Pencil
- Long ruler or straight edge (yardstick)
- String and push pin (for drawing arcs)
- Painter’s tape (various widths)
- Assorted flat brushes (1-inch to 3-inch widths)
- Small angled brush for edges
- Paint tray and mixing cups
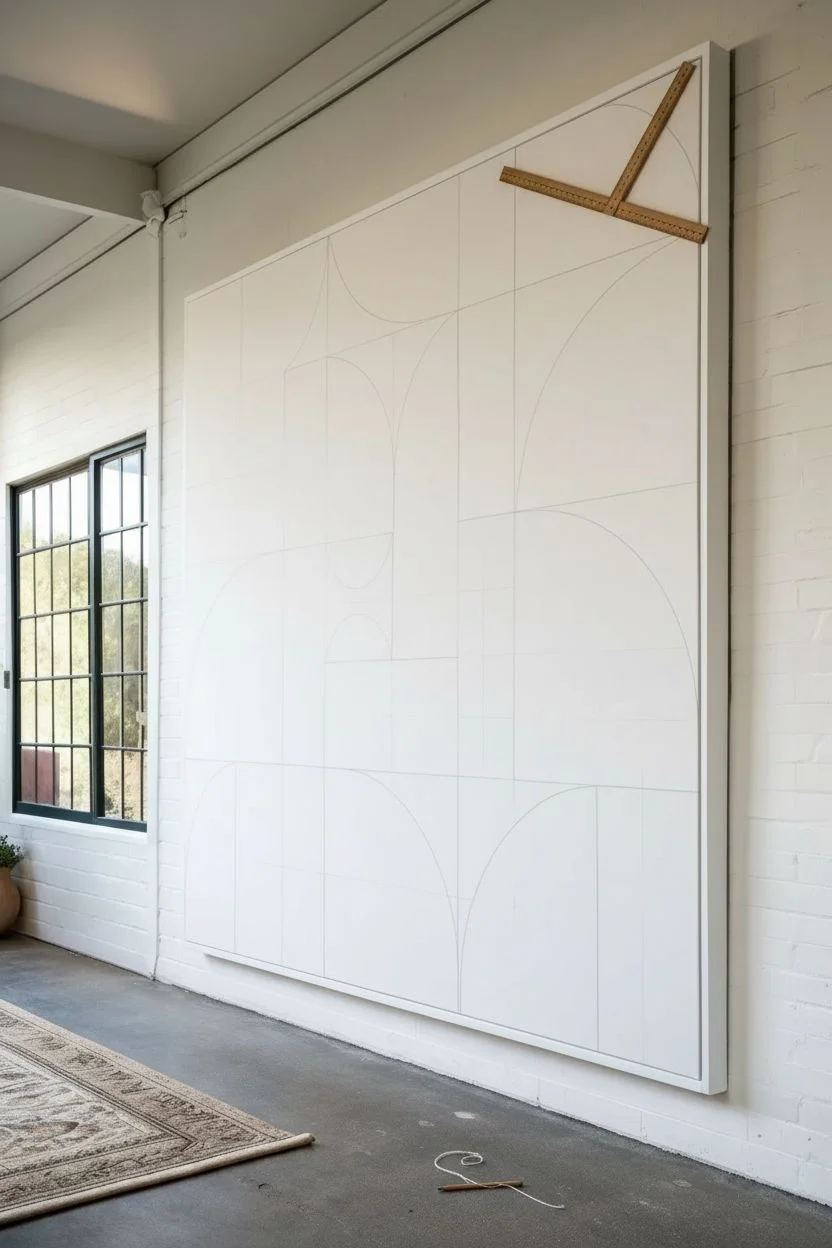
Step 1: Preparation & Mapping
-
Prime the surface:
Begin by applying two thorough coats of white gesso to your large canvas. This ensures your earth tones will appear opaque and rich. Allow the primer to dry completely before moving on. -
Establish the grid:
Visualize the canvas as a grid of rectangles. Lightly use your long ruler and a pencil to draw a faint grid system. This doesn’t need to be perfectly symmetrical, but having vertical and horizontal guides will keep your geometry structured. -
Draft the straight lines:
Sketch the rectangular components first. Look at the reference image and block out the vertical bars and square sections. Keep your pencil pressure light so mistakes are easy to erase. -
Create the curves:
To make the perfect arches and quarter-circles, use the string method. Tie a string to a pencil, pin the other end to the corner of where your curve begins, and swing the pencil like a compass. Draft out the large semi-circles and quarter-round shapes. -
Refine the composition:
Step back from the canvas to assess the balance. Retrace your final lines slightly darker to make them visible during painting, and erase any confusing guideline marks.
Bleeding Lines?
If paint bleeds under tape, let it dry fully. Then, re-tape over the mistake and paint the correct color over the bleed. Sealing tape edges with matte medium first prevents this.
Step 2: Painting the Base Layers
-
Tape the straight edges:
Starting with one color section (like the large terracotta arch area), apply painter’s tape along the straight boundaries. This guarantees crisp lines where shapes meet. -
Mix your palette:
Pre-mix your custom colors in cups. You’ll need a warm terracotta, a muted sage, a deep forest green, a soft mustard, and a creamy beige. I find that mixing a tiny bit of the beige into all colors helps unify the palette. -
Paint the lightest colors:
Begin with the cream and beige sections. Use a wide flat brush to apply the paint in smooth, even strokes. Don’t worry about perfect opacity on the first pass; thin layers are better. -
Fill in the mid-tones:
Move on to the sage greens and mustard yellows. When painting near a curved line where you can’t use tape, switch to a smaller angled brush to carefully ‘cut in’ the edge by hand. -
Apply the dark accents:
Paint the deep teal and forest green sections last. These strong colors anchor the composition, so take your time ensuring the edges are sharp against the lighter neighbors.
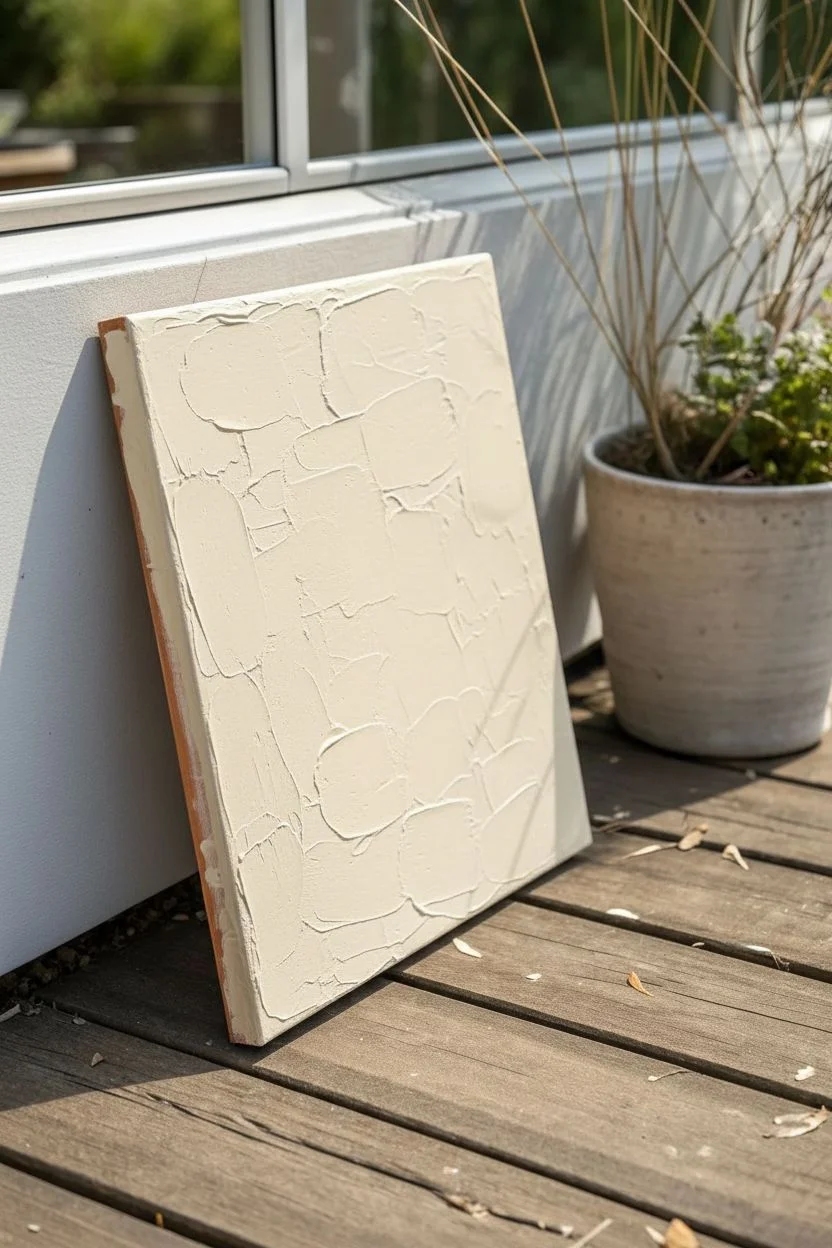
Add Texture
Mix a little modeling paste or baking soda into your acrylics before painting. This creates a gritty, plaster-like texture that makes the geometric shapes feel architectural.
Step 3: Refining & Texturing
-
Second coat application:
Once the first layer is touch-dry, apply a second coat to all colors. This eliminates streakiness and gives that solid, matte finish characteristic of modern abstract art. -
Clean up the edges:
Peel off the tape carefully. If any paint bled under, use a small detail brush and the background color (or adjacent color) to touch up the line for a razor-sharp finish. -
Soften the texture:
The reference image has a slightly hand-painted feel rather than a plastic look. You can achieve this by dry-brushing a tiny amount of a slightly lighter shade over the center of the larger shapes to create depth. -
Seal the work:
If you want to protect the finish, especially given the large surface area, apply a clear matte varnish over the entire piece once the paint has cured for at least 24 hours.
Hang your masterpiece in a spacious room and enjoy the calm, structured beauty of your new artwork


Tape Resist Geometric Grid
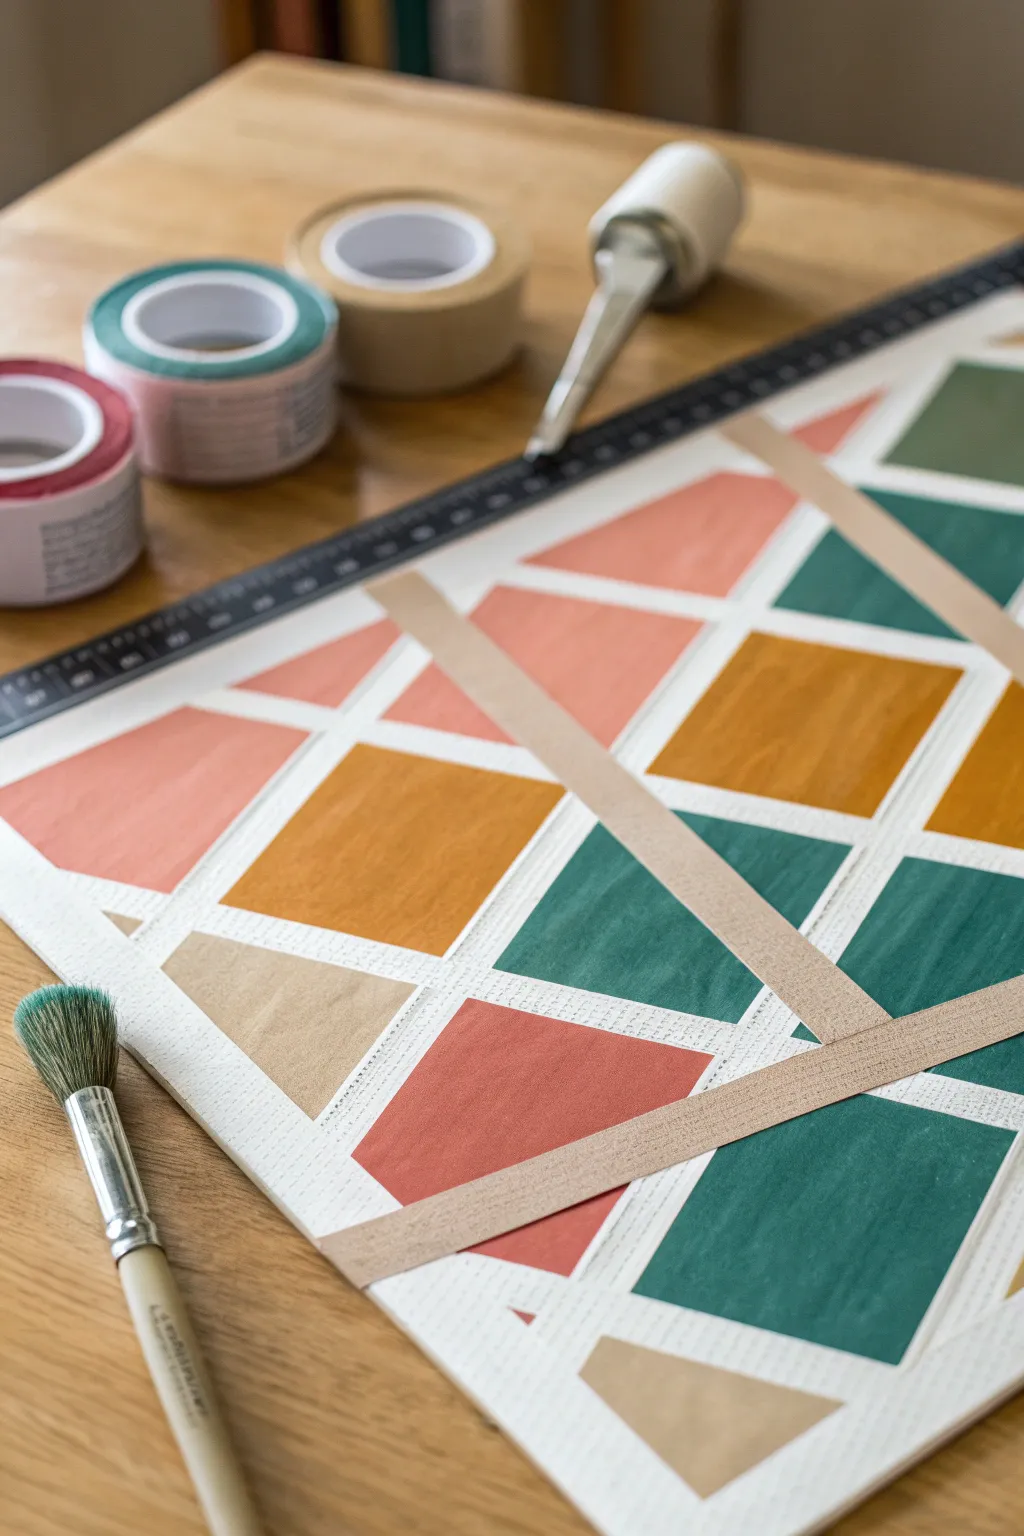
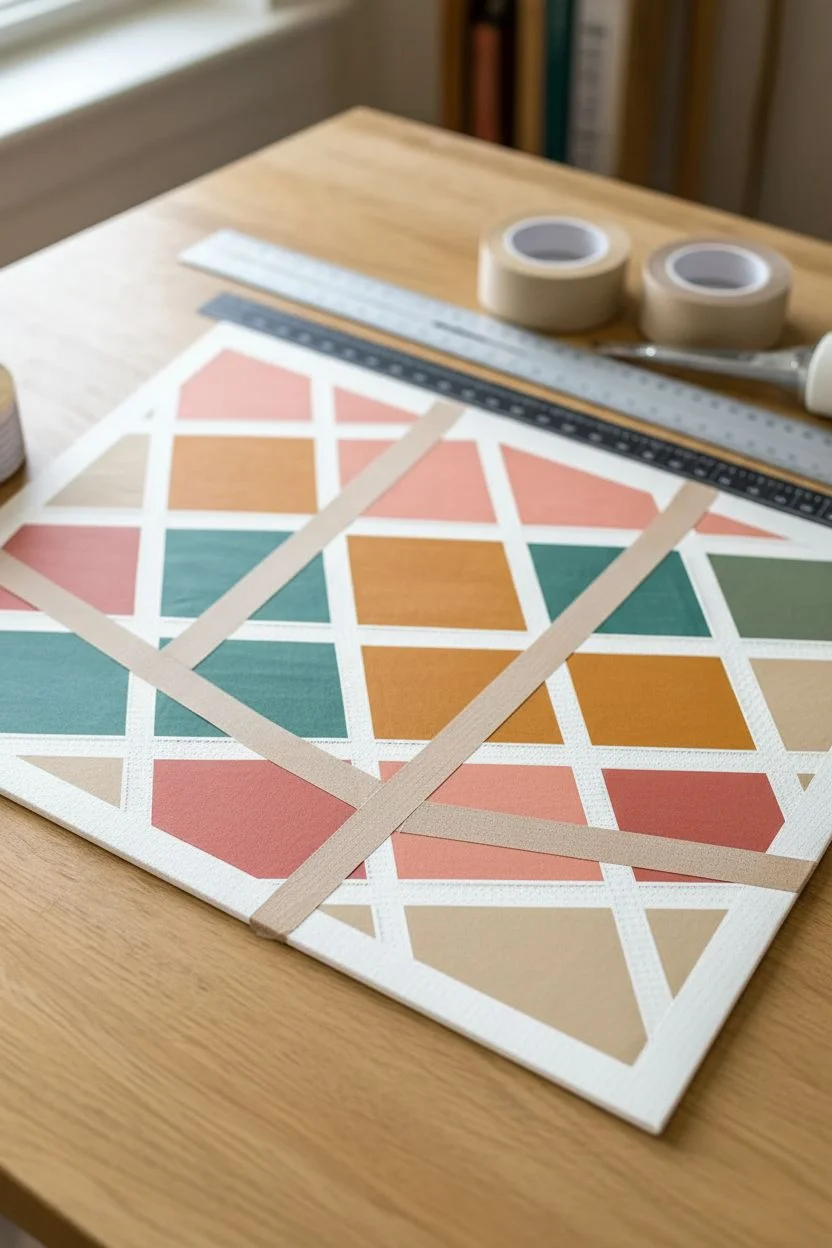
This project combines the satisfaction of peeling tape with the joy of color mixing to create a stunning modern geometric grid. It is the perfect beginner exercise to practice composition and achieving razor-sharp edges.
Step-by-Step Guide
Materials
- Heavyweight mixed-media paper or canvas board
- painter’s tape or dedicated drafting tape (various widths)
- Acrylic paints (Coral, Mustard Yellow, Deep Teal, Beige)
- Flat shader brushes (sizes 6 and 10)
- Ruler
- Pencil
- Palette or mixing plate
- Matte medium (optional)
Step 1: Planning and Taping
-
Surface Prep:
Start with a clean sheet of heavy mixed-media paper or a canvas panel. If you are using raw canvas, apply a coat of gesso first to ensure smooth paint application. -
Lay the Border:
Frame your workspace by applying strips of tape along all four edges of your paper to create a clean white margin later. -
Drafting the Diagonals:
Use a ruler to lightly visualize where your main lines will go, or feel free to work freestyle for a more organic look. -
Applying the Grid:
Stretch long pieces of painter’s tape diagonally across the surface. Create X-shapes and large triangles by crossing the tape strips at various angles. -
Subdividing Shapes:
Add smaller strips of tape between the main lines to break up larger spaces into interesting trapezoids and smaller triangles. -
Burnishing:
Run the back of your fingernail or a plastic card firmly along the edges of every piece of tape. This step is critical to prevent paint from bleeding underneath. -
The Sealing Trick:
For perfect lines, I often paint a very thin layer of white paint (or clear matte medium) over the tape edges and let it dry. This creates a barrier against color bleeding.
Step 2: Painting the Geometry
-
Mixing Coral:
Mix red, yellow, and a generous amount of white to create a soft salmon or coral pink shade. -
First Color Application:
Select several scattered shapes on your grid and fill them in with the coral mix. Try to keep shapes of the same color separated. -
Mixing Mustard:
Create a warm mustard tone by mixing yellow with a tiny touch of brown or orange. -
Adding Warmth:
Paint adjacent geometric sections with the mustard yellow, using a flat brush to get nice, even coverage near the tape edges. -
Deep Teal Contrast:
Mix a dark teal using phthalo green, a touch of blue, and a little black or grey to desaturate it slightly. -
Cool Tones:
Fill in the largest remaining shapes with the teal paint to provide a strong visual anchor for the brighter colors. -
Neutral Balance:
Use a neutral beige or taupe for the final few shapes to balance the composition and give the eye a place to rest.
Bleeding Paint?
If paint seeped under the tape, don’t panic! Wait for it to dry completely, then gently scrape the excess away with a craft knife or paint over it with opaque white.
Step 3: Finishing Up
-
Opacity Check:
Once the first layer is touch-dry, assess your coverage. Apply a second coat to any shapes that look streaky or transparent. -
Timing the Reveal:
Wait until the paint is dry to the touch but not fully cured—usually about 20 to 30 minutes depending on thickness. -
Peeling Technique:
Slowly peel the tape away at a 45-degree angle, pulling away from the painted area rather than straight up. -
Final Touches:
If there are any tiny rough spots, use a fine liner brush with white paint to touch up the grid lines.
Pro Tip: Tape Tackiness
If your masking tape feels too sticky and is ripping the paper, stick it to your jeans or a shirt once before applying it to the canvas to reduce the tack.
Step back and admire your crisp, modern geometric masterpiece.


Fluid Pour Marble Swirls
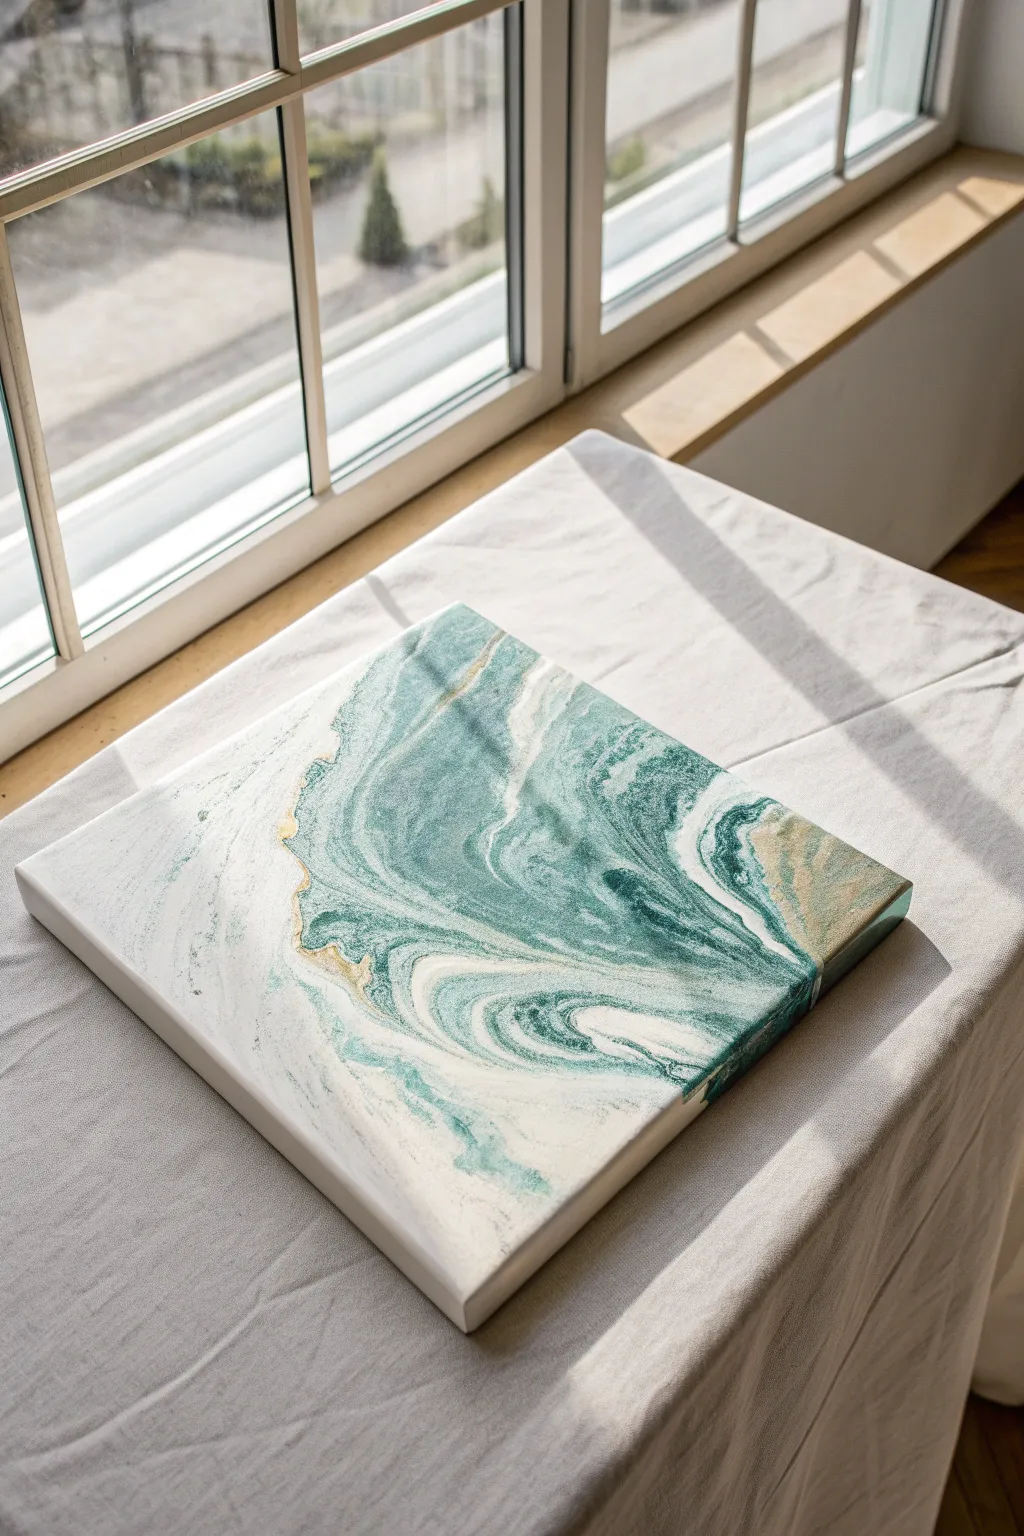
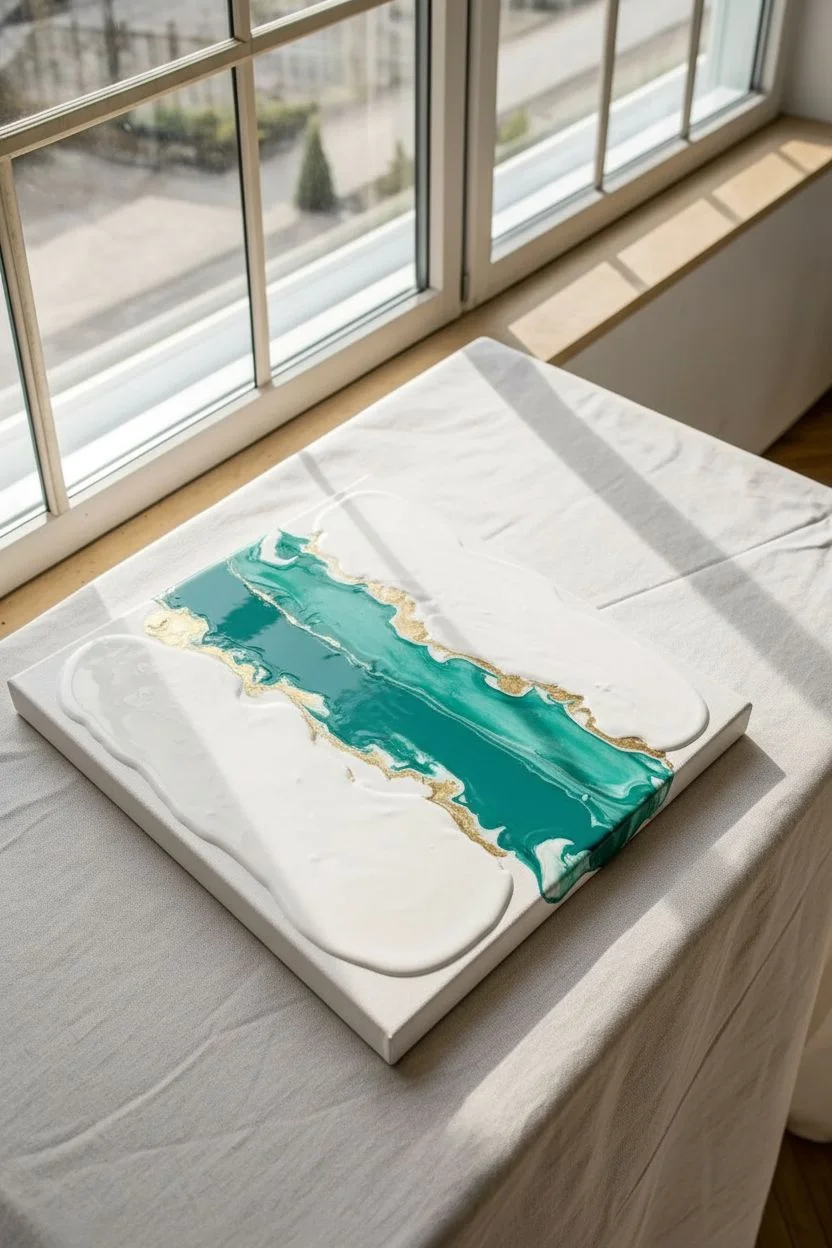
Capture the serene elegance of ocean waves meeting sandy shores with this sophisticated fluid art technique. By manipulating acrylic pouring paints, you’ll create organic swirls of teal, white, and gold that mimic the natural beauty of polished marble.
Detailed Instructions
Materials
- Square stretched canvas (12×12 or similar)
- Acrylic pouring paints (Titanium White, Teal/Turquoise, Deep Green, Metallic Gold)
- Pouring medium (like Liquitex or Floetrol)
- Clean plastic cups
- Stirring sticks
- Hairdryer (preferably with a cool setting) or straw
- Drop cloth or plastic sheeting
- Gloves
- Level working surface
Step 1: Paint Preparation
-
Mix your base:
Begin by preparing a generous amount of Titanium White mixed with your pouring medium. You want a consistency similar to warm honey—fluid enough to move but thick enough to hold its shape. -
Prepare accent colors:
In separate cups, mix your Teal, Deep Green, and Metallic Gold with pouring medium. If you’re mixing your own paints rather than using pre-mixed pouring acrylics, aim for a ratio of 1 part paint to 2 parts medium, adjusting until the flow is consistent across all colors. -
Check consistency:
Lift your stirring stick from the cup; the paint should drizzle off in a steady stream and leave a tiny mound on the surface for a second before disappearing. This ensures your marble lines stay crisp.
Step 2: Creating the Composition
-
Lay the negative space:
Pour a large puddle of your white mixture onto the canvas. Don’t cover the whole thing yet—focus mainly on the top left and bottom right corners to establish the negative space areas seen in the reference. -
Spread the base:
Use a palette knife or a clean stick to gently spread the white paint toward the edges. It doesn’t need to be perfectly smooth, just enough to wet the canvas so subsequent colors glide easily. -
Pour the color channel:
Create a diagonal channel of color through the middle of the canvas. Start by pouring a thick line of Teal, followed by a thinner stream of Deep Green right next to or on top of it. -
Add metallic elegance:
Drizzle the Metallic Gold sparingly along the edges where the teal meets the white base. This gold vein will act as the mineral deposit look found in real marble.
Silicone Secrets
Add 1-2 drops of silicone oil to your teal and green paints only. This helps create those intricate cells and lace-like patterns specifically within the colored ribbons.
Step 3: Manipulating the Flow
-
Tilt to combine:
Gently lift the canvas and tilt it slowly from side to side. Let the teal and green section migrate, allowing gravity to soften the hard edges where the colors meet the white background. -
The Dutch Pour technique:
Using a hairdryer on the ‘cool’ and ‘low’ setting, aim the air at the white paint first, pushing a thin layer of white *over* the edge of your colored section. This creates that foggy, veiled effect. -
Blow out the marble veins:
Now change the angle of the dryer to blow the colors outward across the canvas. Move swiftly to stretch the paint into long, organic ribbons rather than mixing them into a muddy color. -
Refine with breath:
Use a straw to blow specifically on the gold areas. Blowing manually gives you immense control to create those delicate, feathery tendrils that branch off from the main color swathe. -
Create distinct cells:
If you want those tiny bubble-like cells to appear within the green sections, lightly torch the surface with a crème brûlée torch or heat gun. Just a quick pass is enough to pop air bubbles and encourage cell formation.
Resin Finish
Instead of varnish, finish with a top coat of clear art resin. This provides a glass-like surface that mimics the depth and shine of a real polished marble slab.
Step 4: Finishing Touches
-
Check the sides:
Inspect the edges of your canvas. Use your finger to dab matching paint onto any bare spots on the corners or sides to ensure the pattern wraps around fully for a gallery-quality finish. -
Clean up the bottom edge:
I always run a popsicle stick along the underside of the canvas frame to catch drips. This prevents the paint from pulling the design off the canvas as it dries. -
Drying process:
Place the canvas on cups or a drying rack in a dust-free area. Let it dry undisturbed for at least 24 to 48 hours. -
Seal to protect:
Once fully cured (usually after 3-4 weeks), apply a high-gloss varnish. This will make the teal pop and the gold shimmer exactly like polished stone.
Enjoy the calming presence this piece brings as the sunlight catches the gold veins


Ombre Wash Soft Gradient Fade
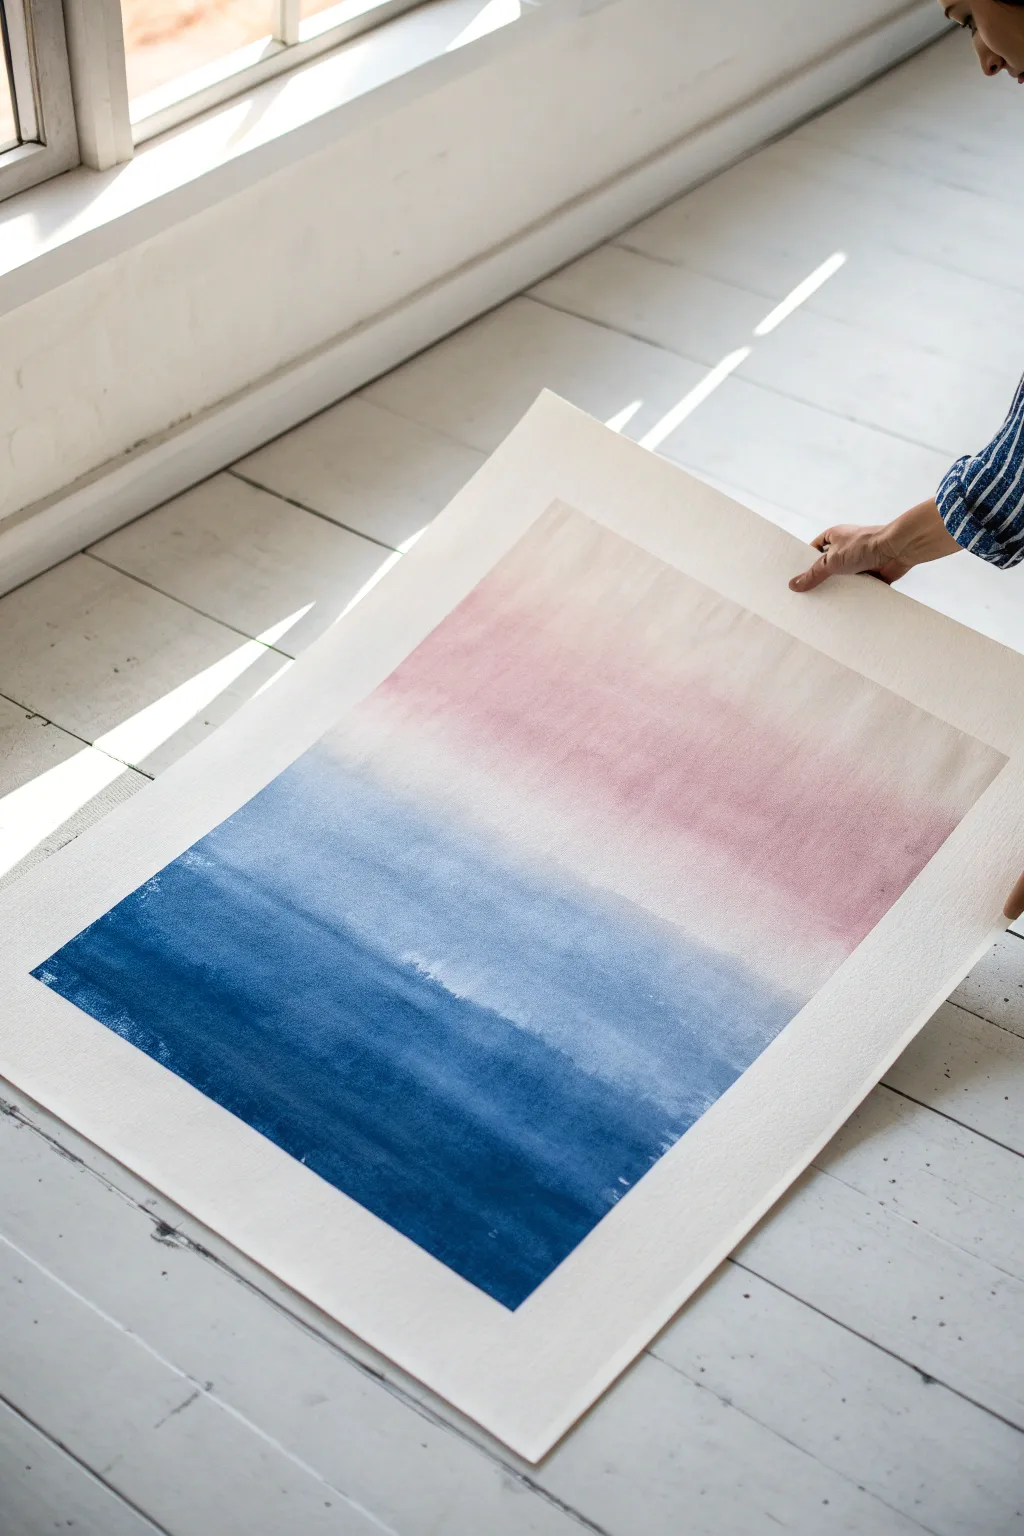
Capture the serene transition of twilight with this large-scale watercolor gradient. By blending deep indigos into soft blush pinks on heavyweight paper, you’ll create a minimal yet striking piece of art that feels both modern and timeless.
How-To Guide
Materials
- Large sheet of cold-press watercolor paper (300 gsm or heavier)
- Wide hake brush or flat wash brush
- Indigo watercolor paint (or gouache)
- Blush pink or dusty rose watercolor paint
- Masking tape
- Two containers of clean water
- Paper towels
- Rigid board or work surface
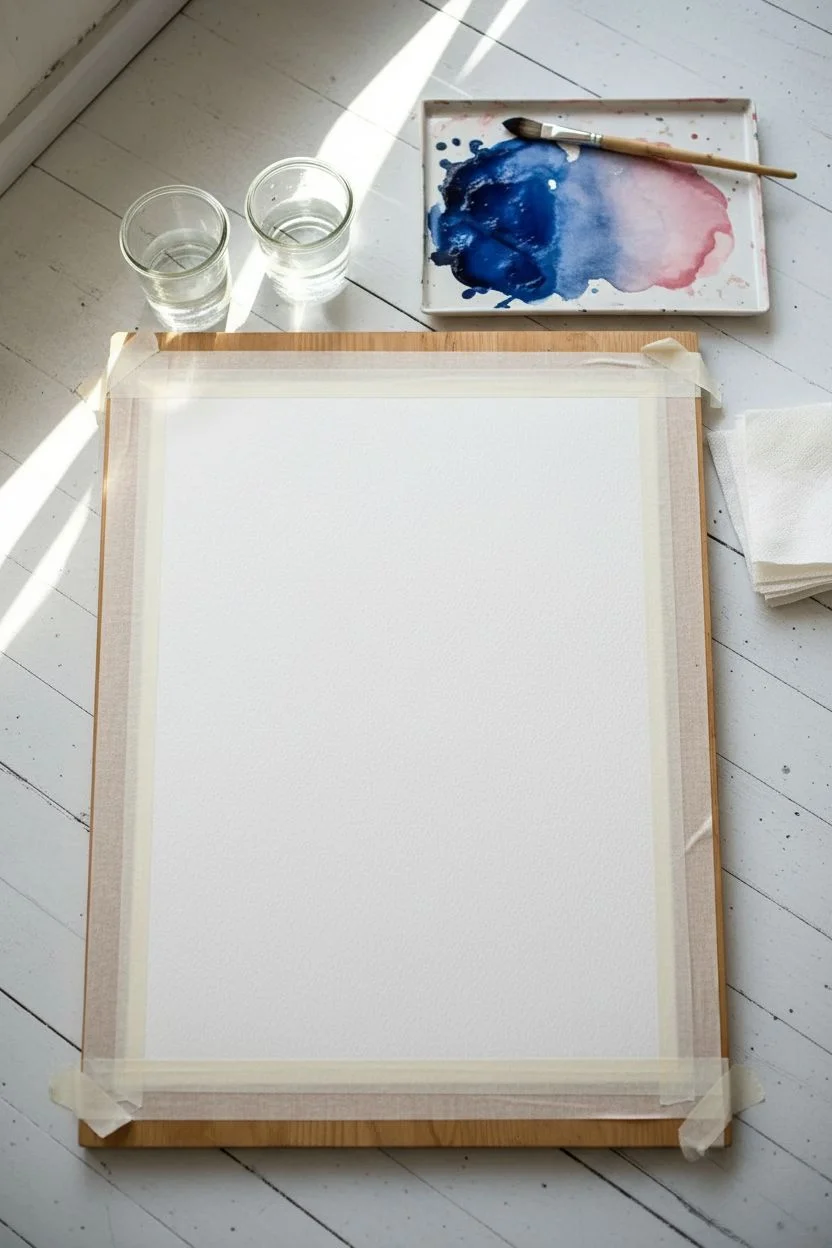
Step 1: Preparation
-
Secure the Paper:
Begin by taping your large sheet of watercolor paper to a rigid board or flat work surface. Use masking tape along all four edges, overlapping the paper by about half an inch to create a clean white border later. -
Pre-wet the Surface:
Using your large wash brush and clean water, apply a very even, light coat of water across the entire area inside the tape. The paper should sheen but not puddle. -
Mix Your Palette:
Prepare two generous pools of paint in your palette: a concentrated, dark indigo and a watery, pale blush pink. Ensure you have plenty of each mixed before you start painting.
Fixing Hard Lines
If a paint edge dries too fast creating a hard line, re-wet it gently with a clean damp brush and scrub softly to reactivate and smooth the transition.
Step 2: Creating the Ombré
-
Start with the Deepest Tone:
Load your wide brush heavily with the indigo paint. Apply a bold, saturated horizontal stroke across the very bottom of the paper. -
Begin the Fade:
Dip your brush into the water container just once, without washing it out completely, to dilute the pigment on the bristles slightly. -
Work Upwards:
Paint the next horizontal band just above the first, slightly overlapping the wet edge. The color should naturally start to lighten as the pigment spreads upward. -
Continue Diluting:
Repeat the process: dip the brush specifically to add more water, then apply the next stroke. I like to do this fairly quickly so the bottom edge doesn’t dry before I can blend it. -
Transition Zone:
Once you reach the middle of the paper, your blue should be quite faint. Wash your brush out thoroughly in your first water container until it’s clean. -
Introduce the Pink:
Load your clean brush with the blush pink mixture. Start painting from the very top of the paper, working downwards with a solid band of pink. -
Fade Downwards:
Similar to the blue process, dilute the pink paint on your brush slightly with water and paint the next band downwards, overlapping the wet edge. -
Blend the Meeting Point:
As the faint pink wash meets the faint blue wash in the center, use a clean, slightly damp brush to gently massage the connection point. The colors should bleed into each other softly, creating a dusky purple transition.
Step 3: Finishing Touches
-
Check for Pooling:
Look closely at the edges near the tape. If colored water is pooling there, use the corner of a paper towel to gently lift the excess liquid so it doesn’t bloom back into the painting. -
Let it Dry Completely:
Leave the painting taped down until it is 100% bone dry. This is crucial for keeping the paper flat, as wet paper will buckle if released too soon. -
The Reveal:
Once fully dry, slowly peel the tape away at a 45-degree angle, pulling away from the painted area to reveal your crisp white border.
Level Up: Salt Texture
While the indigo section is still very wet, sprinkle a pinch of coarse sea salt into the deep blue area. Let it dry completely before brushing off for starry textures.
This serene gradient wash brings a sense of calm to any room and looks particularly professional in a simple wood frame
BRUSH GUIDE
The Right Brush for Every Stroke
From clean lines to bold texture — master brush choice, stroke control, and essential techniques.
Explore the Full Guide
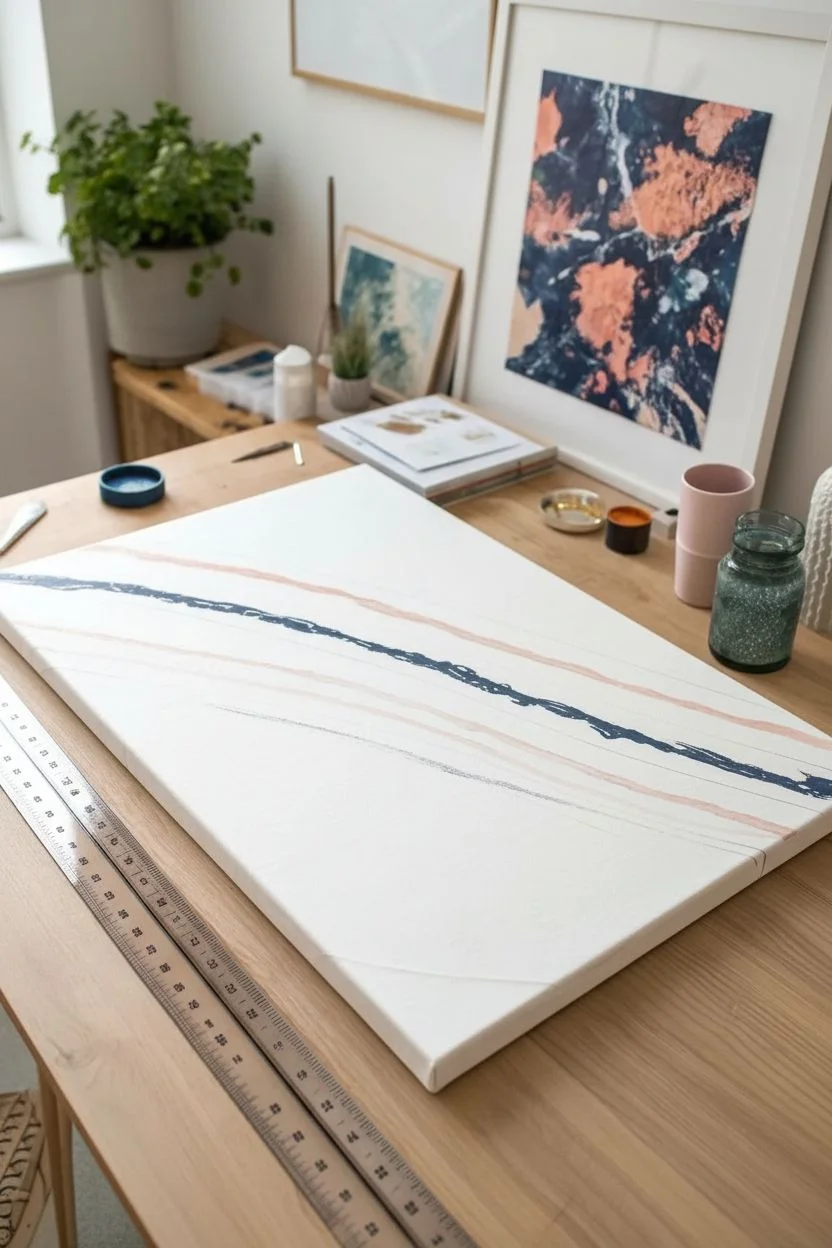
Abstract Stripes with a Dragged Brush
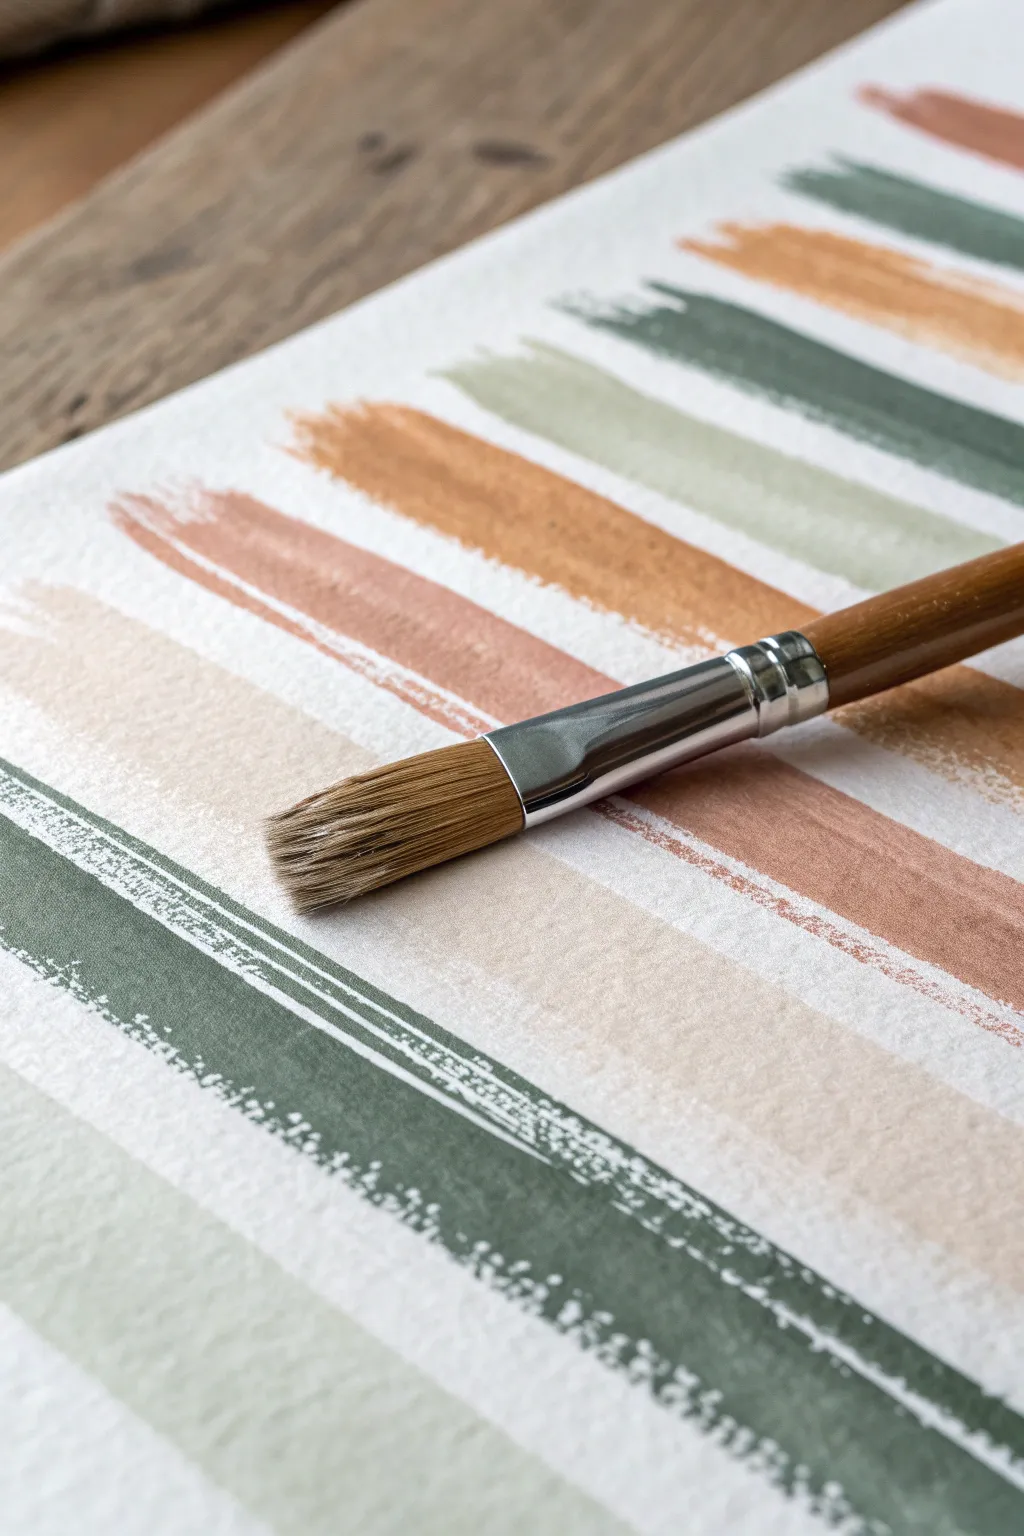
Embrace the beauty of imperfection with this minimalist abstract stripe project that focuses on texture and muted, earthy colors. The technique creates a lovely distressed look where the grain of the paper plays a major role in the final aesthetic.
Step-by-Step Guide
Materials
- Cold press watercolor paper (140lb or heavier for good texture)
- Flat shader brush (size 10 or 12)
- Acrylic paints (Sage Green, Terracotta, Pale Peach, Cream)
- Palette or mixing plate
- Paper towels
- Jar of water
- Masking tape (optional)
Step 1: Preparation
-
Prepare your workspace:
Lay down your watercolor paper on a flat, clean surface. If you want a clean border around the entire piece, tape down the edges with masking tape, but for this specific raw look, leaving it loose is perfectly fine. -
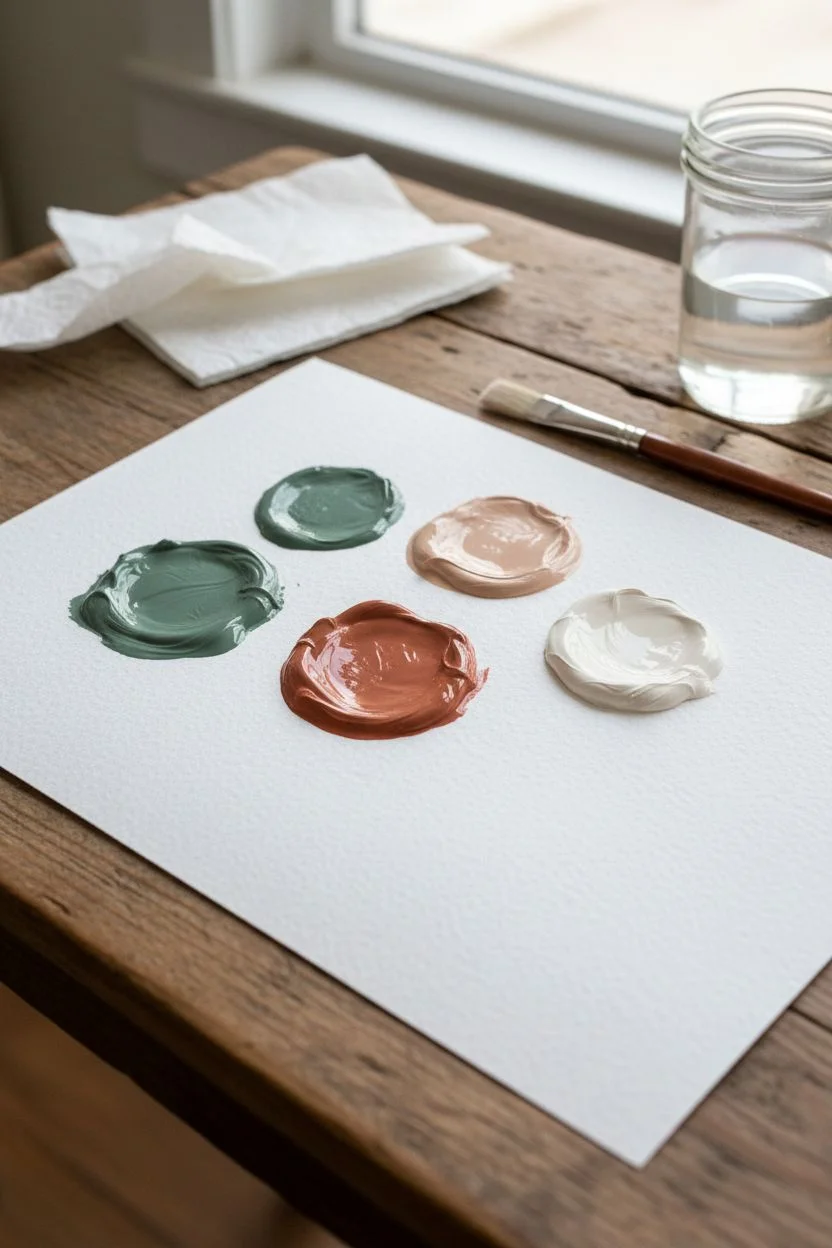
Mix your palette:
Squeeze out small amounts of your acrylic paints onto the palette. You want a color story of earthy neutrals: a deep sage green, a warm terracotta rust, a soft beige-peach, and a creamy off-white. -
Adjust paint consistency:
For the dry brush technique to work best, do not add water to your acrylics yet. The paint needs to be relatively thick and tacky, not fluid like watercolor.
Too solid?
If your stripes look too solid and lack texture, your brush is likely too wet. Dry it thoroughly on a towel or let the paint sit on your palette for 5 mins to thicken.
Step 2: Painting the Stripes
-
Load the brush:
Dip your dry flat brush into the Sage Green paint. You don’t want the brush overloaded; dab the excess off onto a paper towel until the bristles are coated but not dripping. -
The first drag:
Starting from the left side of the paper, place your brush flat against the surface. Pull the brush horizontally across the paper in one confident motion. -
Create texture:
As you drag, vary your pressure slightly. Press harder for solid coverage and lift slightly to let the paper’s texture break up the paint stroke. -
Dry time:
Let this first green stripe dry for about 2-3 minutes. Acrylics dry fast, which is perfect for this layering process. -
Clean your brush:
Rinse your brush thoroughly in the water jar and dry it completely with a paper towel. A bone-dry brush is crucial for maintaining the texture in the next stripe. -
Apply the second color:
Load your brush with the Pale Peach color. Position this stripe below the green one, leaving a small gap of white space between them. -
Vary stopping points:
Drag this second stripe across. I like to let the paint run out naturally before reaching the very end of the page sometimes, creating a faded tail effect. -
Add the Rust tone:
Clean and dry your brush again. Pick up the Terracotta paint. Apply this stripe either below the peach or perhaps above the green if you started lower on the page. -
Layering effects:
If you feel confident, you can slightly overlap the edges of two dry stripes with a very dry brush to create a third hue where they meet, though keeping them separate keeps the look clean. -
Introduce the lightest tone:
Use the Cream paint for another stripe. This light color might need a slightly heavier application to show up against the white paper, but keep the edges rough. -
Repeat the pattern:
Continue adding stripes down the page, alternating your colors randomly. Try not to create a perfect repeating pattern (A-B-C-A-B-C) to keep it organic. -
Check the spacing:
Step back and look at the negative space. The white gaps between stripes should vary slightly in thickness to avoid looking too rigid or manufactured. -
Add second coats (optional):
If a stripe looks too disjointed or faint, go back over just parts of it with the same color. Don’t cover the whole stripe perfectly; just enhance certain sections. -
Final touches:
Look for any large blobs of paint that detract from the texture. If paint is still wet, you can blot it with a dry paper towel to restore the rough look.
Pro Tip: Paper Grain
Use ‘Rough’ or ‘Cold Press’ watercolor paper instead of ‘Hot Press’. The rougher surface grabs the paint unevenly, doing 90% of the texturing work for you.
Step 3: Finishing
-
Full dry:
Allow the entire painting to dry for at least 30 minutes. The thicker parts of the acrylic will take the longest. -
Flattening (if needed):
If the paper has buckled slightly from the moisture, place the dry artwork under a heavy book overnight to flatten it out nicely.
Once dry, frame this piece in a simple wood frame to complement the warm, natural tones you’ve created
Monochrome Abstract in One Color Family
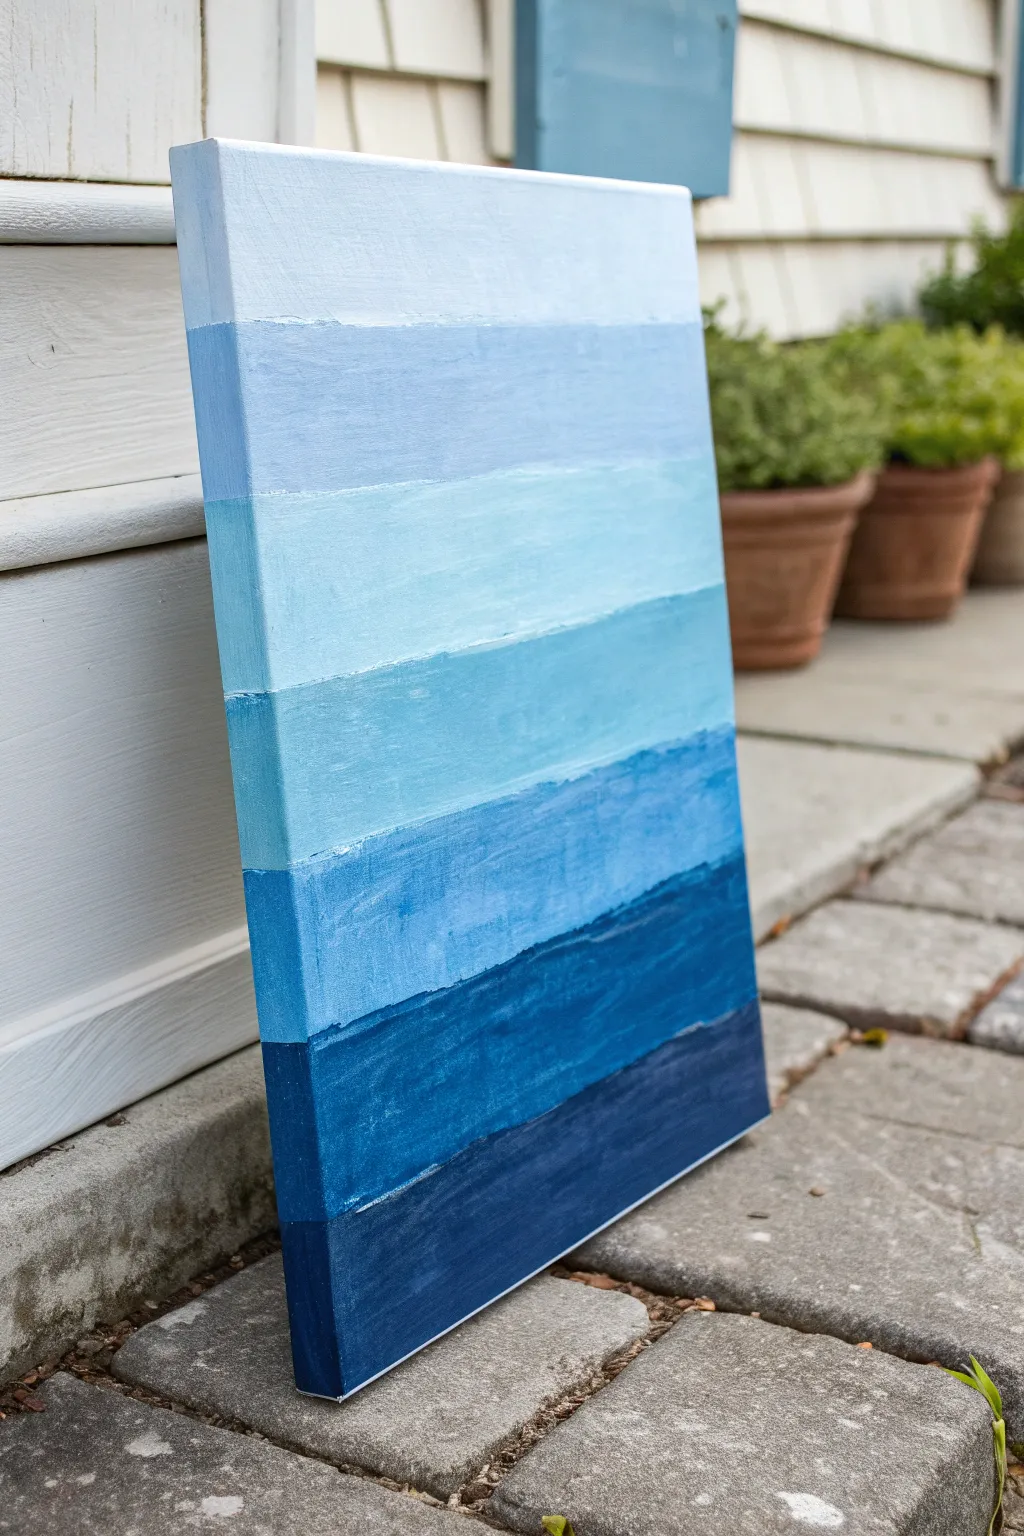
Capture the calm beauty of the ocean or sky with this monochromatic study in blue. By blending a single color family into graduated stripes, you create a soothing, modern piece that looks professionally done yet requires very simple techniques.
Detailed Instructions
Materials
- Stretched canvas (rectangular)
- Acrylic paints: Titanium White, Primary Blue (or Phthalo Blue), Navy Blue (or Payne’s Gray)
- Flat paintbrush (1 to 2 inches wide)
- Palette or paper plates for mixing
- Ruler
- Pencil
- Painter’s tape (optional)
- Cup of water
- Paper towels
Step 1: Preparation & Planning
-
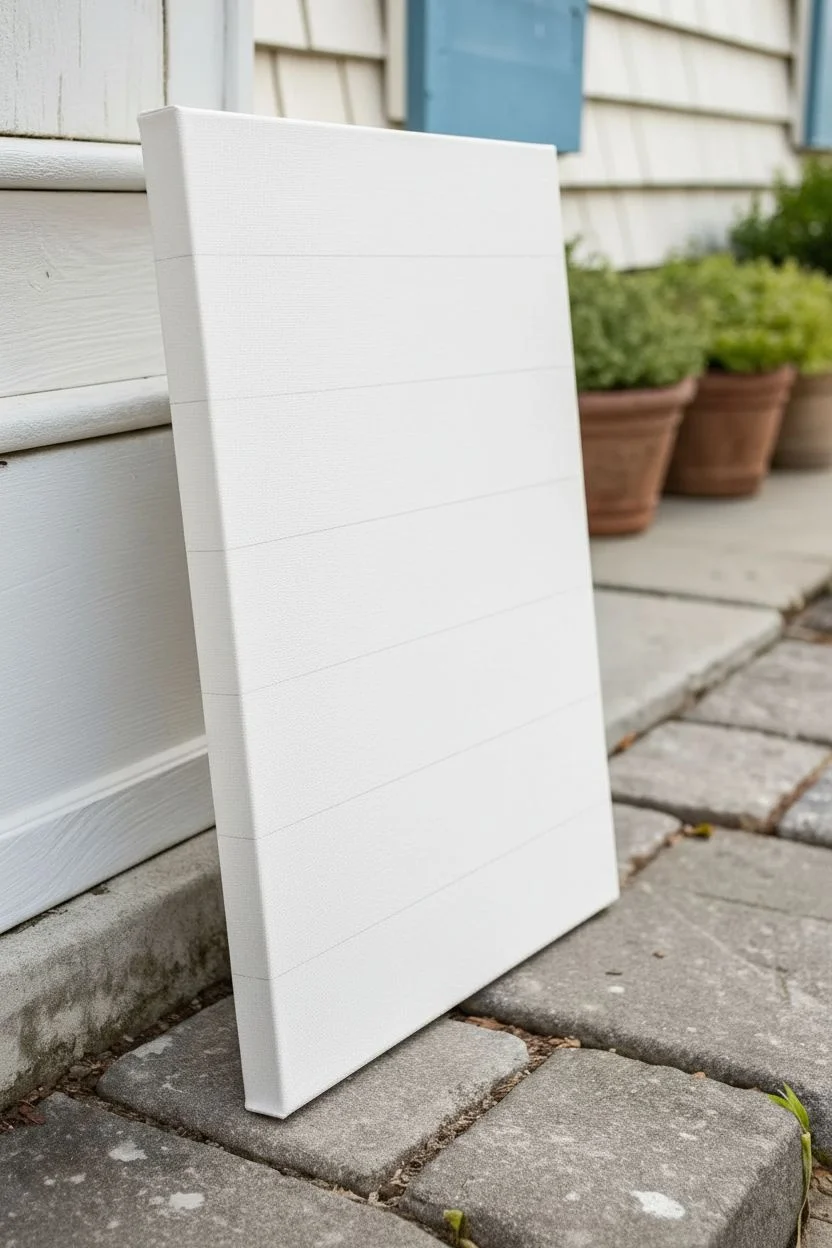
Clean your surface:
Ensure your canvas is free of dust or lint. If it’s a cheaper canvas, you might want to give it a quick base coat of white gesso, though it’s not strictly necessary for this project. -
Measure the stripes:
Decide how many color distinct bands you want. The example shows roughly six or seven bands. Measure the height of your canvas and divide by that number to get the height of each stripe. -
Mark the lines:
Using your ruler and pencil, lightly draw horizontal lines across the canvas to guide where each color transition will happen. Don’t press too hard; you want the paint to cover these marks easily. -
Prepare your palette:
Squeeze out a significant amount of white paint and a separate dollop of your medium blue and dark blue. You will be mixing fresh shades as you go, so keep the main piles separate.
Uneven Lines?
If you struggle with unsteady hands during the transitions, use painter’s tape to mask off each section. Just ensure the paint underneath is 100% dry before applying tape over it.
Step 2: Painting the Gradient
-
Mix the lightest shade:
Start at the top. Mix a large amount of white with just a tiny speck of blue to create a very pale, almost-white blue. -
Paint the top band:
Apply this lightest color to the top section. Use horizontal strokes that go all the way across the canvas. -
Wrap the edges:
Don’t forget the sides! extending the stripe color around the sides of the canvas creates a finished, gallery-worthy look without needing a frame. -
Mix the second shade:
Add a little more blue to your original pale mixture (or create a new pile). Aim for a shade distinct enough to see a difference, but still light. -
Apply the second band:
Paint the second section directly below the first. You can be precise with the line, or let the brush serve as a natural, slightly imperfect border for a painterly look. -
Create the mid-tones:
Continue down the canvas, adding progressively more blue to your mix for the next two bands. If you need it brighter, add a touch of Primary Blue; if you need it deeper, start introducing tiny bits of Navy. -
Blend or block?:
Decide on your style. For a hard edge (like color blocking), let the previous stripe dry slightly. For a softer look, paint the next stripe while the neighbor is wet and gently drag your brush across the seam. -
Mix the darker hues:
As you reach the bottom third, you should be using mostly pure blue, perhaps mixed with a little Navy to darken it. -
Paint the lower sections:
Apply these darker blues. Because dark acrylics can sometimes be transparent, you might need a second coat on these lower stripes once the first layer is dry to get solid coverage. -
The final dark band:
For the very bottom stripe, use your darkest Navy Blue (or mix blue with a tiny dot of black). This grounds the painting visually. -
Finish the bottom edge:
Ensure the dark blue wraps around the bottom edge of the canvas completely.
Step 3: Finishing Touches
-
Check for gaps:
Step back and look at the canvas. If you see any white canvas peeking through your brushstrokes (holidays), touch them up with the appropriate leftover paint. -
Optional texture:
If you want more texture, you can load your brush with thick paint and lightly drag it horizontally over dry sections to create raised ridges. -
Let it dry:
Allow the painting to dry completely in a dust-free area for at least 24 hours before hanging or sealing.
Adding Shimmer
Mix a clear acrylic gloss medium or a pearlescent mixing medium into your lighter blue shades. This mimics the glistening effect of sunlight hitting ocean waves.
This simple gradient technique creates a calming atmosphere in any room you choose to display it

PENCIL GUIDE
Understanding Pencil Grades from H to B
From first sketch to finished drawing — learn pencil grades, line control, and shading techniques.
Explore the Full Guide
Overlapping Circles and Soft Halos
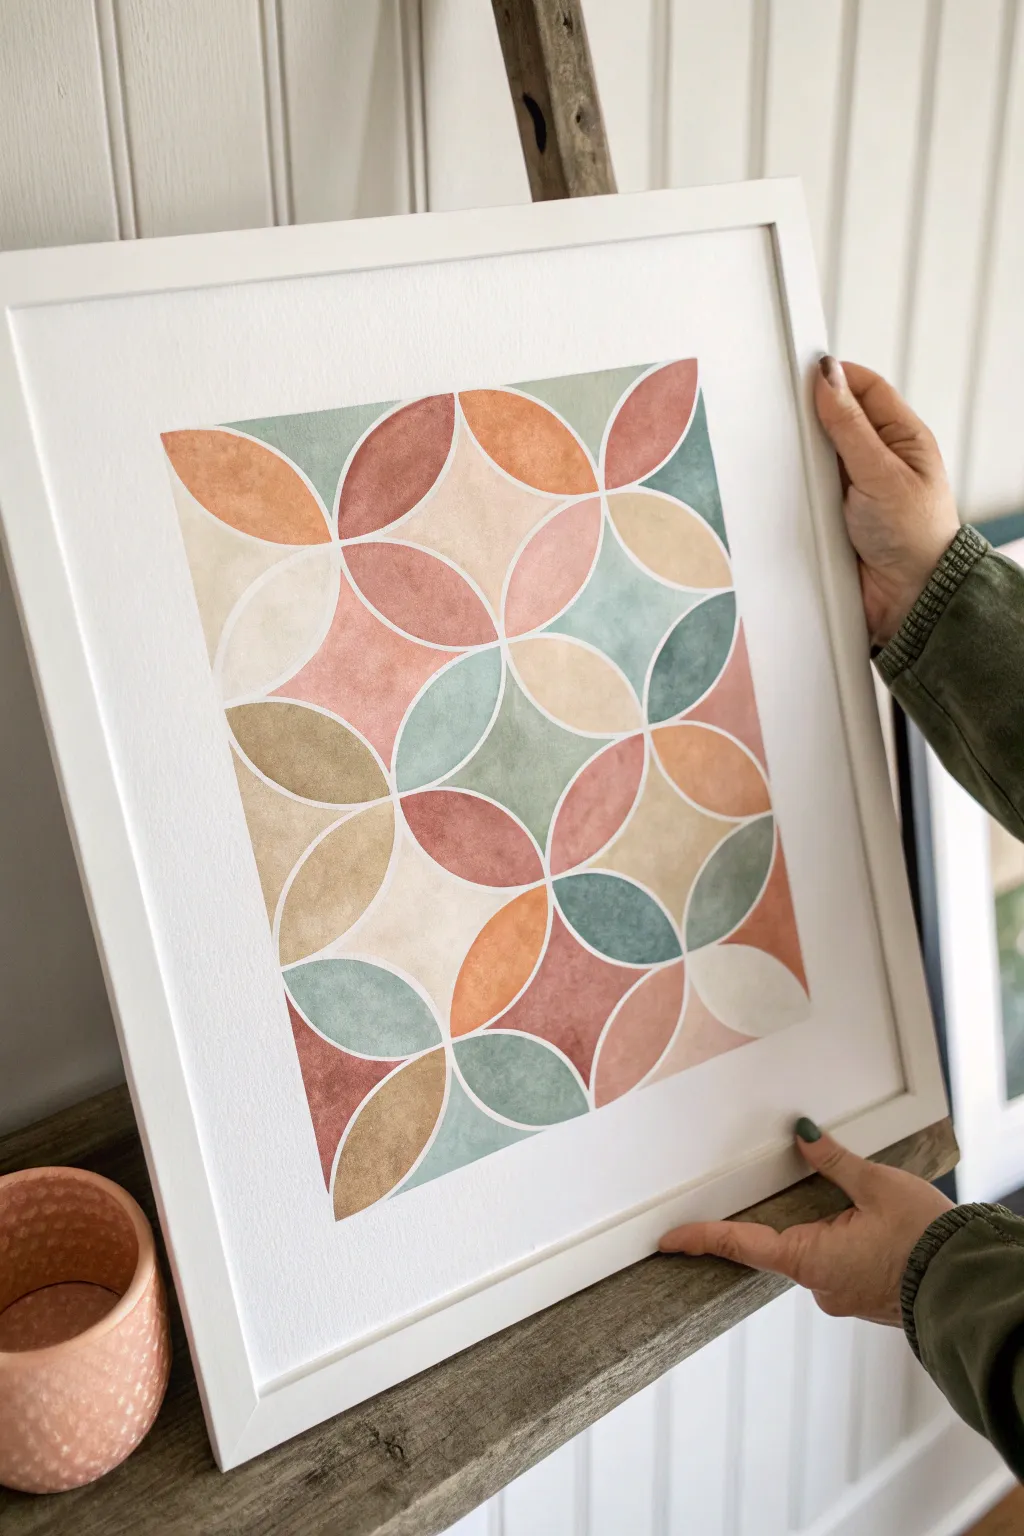
This project creates a stunning interplay of muted earth tones using a classic overlapping circle grid. By isolating shape segments and filling them with soft watercolor textures, you create a sophisticated piece that feels simultaneously retro and modern.
Detailed Instructions
Materials
- Hot press watercolor paper (smooth finish)
- Compass with extension bar (or large circular object for tracing)
- Pencil (HB or lighter)
- Artist eraser
- Ruler
- Watercolor or gouache paints
- Palette for mixing
- Medium round brush (size 6 or 8)
- Two jars of water
- Paper towels
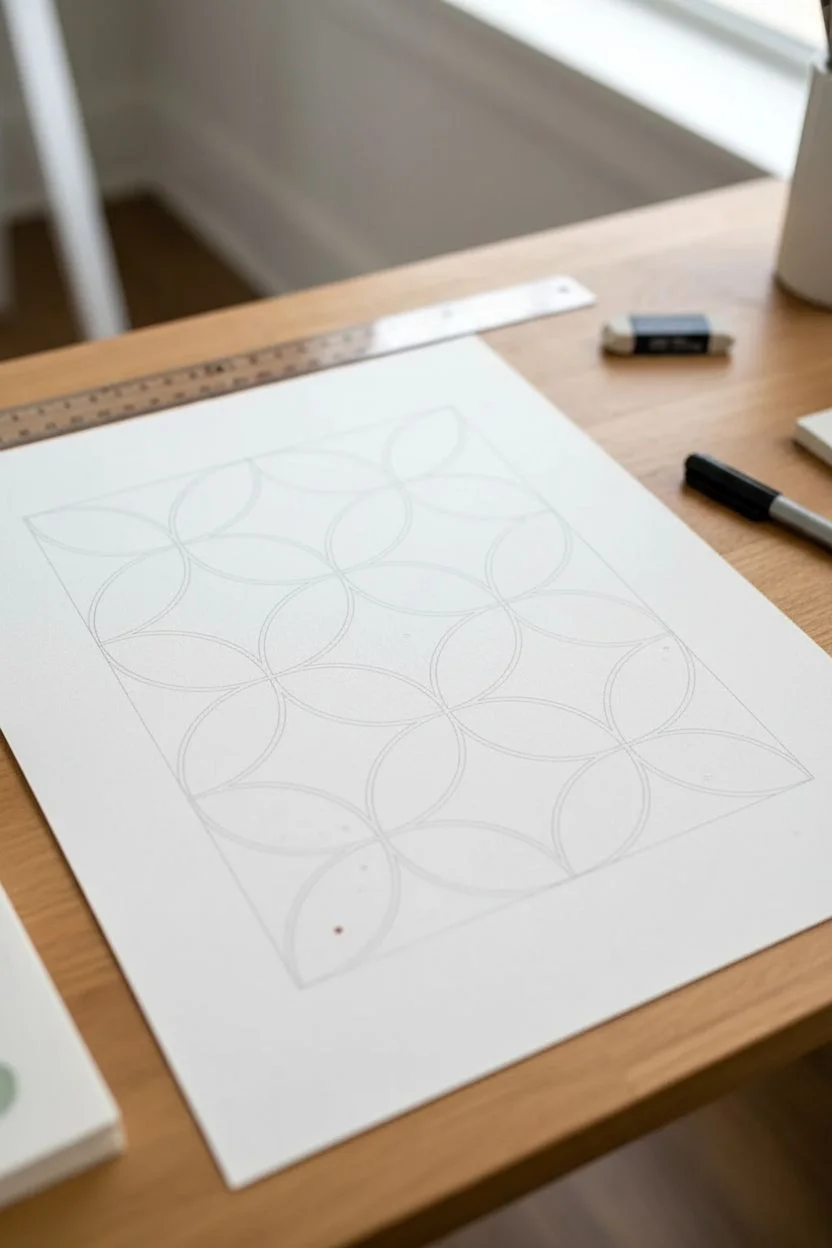
Step 1: Drafting the Grid
-
Find the center:
Measure your paper carefully to locate the absolute center point and mark it lightly with a pencil. -
Draw the central circle:
Set your compass radius to about 2.5 to 3 inches. Place the needle on your center point and draw the first circle. -
Start the grid:
Move the compass needle to any point on the edge of the first circle. Draw a second circle that passes through the center point of the first one. -
Continue the pattern:
Note where those two circles intersect. Place your needle on that intersection point and draw another circle. Repeat this process around the central circle until you have a ‘flower’ shape in the middle. -
Expand the design:
Continue this pattern outward, always placing your needle at the intersection points of previous circles. Fill the page until your grid covers your desired rectangular area. -
Frame the composition:
Using a ruler, lightly draw a rectangle around the pattern to define the edges of your print. You will stop painting at these lines.
Step 2: Planning the Palette
-
Mix your colors:
Prepare 5-6 muted shades. Aim for terracotta, sage green, mustard yellow, dusty pink, and a stormy blue-grey. Test them on a scrap piece of paper to ensure they look harmonious together. -
Map the colors:
Lightly mark inside each petal shape with a tiny dot of pencil indicating which color will go where. Try to avoid having the same color touch itself.
Bleeding Lines?
If colors bleed across the white gaps, your paint is too wet or the paper is damp. Let adjacent sections dry completely before painting neighbors, or use masking fluid for the white lines.
Step 3: Painting the Shapes
-
Start with lightest tones:
Begin painting the pale beige and pink sections first. Use the tip of your round brush to carefully outline the curved edge of a shape, then fill the center. -
Work in non-adjacent sections:
To prevent colors from bleeding into each other, I prefer to skip around the paper, painting sections that don’t touch while others dry. -
Create texture:
Let the watercolor pool slightly in some areas or lift paint with a dry brush in others to create that lovely mottled, organic texture seen in the reference. -
Add the darker tones:
Once the lighter sections are dry, move on to the terracotta and sage green shapes. Keep your hand steady along the pencil lines to maintain that crisp white gap between shapes. -
Refine the edges:
As you reach the rectangular border line you drew earlier, use a piece of masking tape or just very careful brushwork to create a straight, clean edge for the artwork. -
Erase guidelines:
Wait until the painting represents ‘bone dry’—meaning absolutely no coolness to the touch. Gently erase the visible pencil lines, leaving the white paper channels between the painted shapes.
Level Up: Gold Leaf
For a luxe touch, choose one specific color—like the mustard yellow—and replace it with gold leaf or metallic gold paint to make the geometry pop.
Frame your geometric masterpiece in white to really let those muted colors breathe
Splatter and Drip Controlled Chaos

Embrace the energy of action painting with this striking black and orange abstract piece that balances chaos with clean, negative space. The high-contrast palette creates a modern, sophisticated look that feels far more intentional than simple messy play.
How-To Guide
Materials
- Large stretched canvas (at least 24×36 inches recommended)
- White gesso or acrylic primer
- Heavy body acrylic paint (Mars Black)
- Heavy body acrylic paint (Cadmium Orange or similar bright orange)
- Fluid medium or water (for thinning paint)
- Assorted round brushes (sizes 6, 8, and 12)
- Plastic cups or small jars for mixing
- Drop cloth or tarp (essential for this method!)
- Palette knife or stir sticks
Step 1: Preparation & Base Coat
-
Workspace Setup:
Before anything else, lay down a large drop cloth or old sheet. This technique will get messy, and you need a wide perimeter of protection around your canvas. -
Canvas Position:
Place your canvas flat on the floor in the center of your drop cloth. Gravity is your main tool here, so a horizontal surface is non-negotiable. -
Prime the Surface:
Even if your canvas is pre-primed, apply a fresh, solid coat of white gesso or white acrylic paint. This ensures a crisp, bright background that makes the splatters pop. -
Let it Dry:
Allow this base layer to dry completely to the touch. You don’t want your splatter colors mixing with wet white paint and becoming muddy gray or pastel orange.
Control the flow
For thinner, sharper lines, hold your brush higher above the canvas (waist height). For thicker, blobbier lines, bring your hand much closer to the surface.
Step 2: Mixing the Paints
-
Prepare Black Paint:
Squeeze a generous amount of Mars Black into a cup. Add fluid medium or water gradually, stirring until it reaches the consistency of warm honey or heavy cream. -
Test Consistency:
Lift your stir stick; the paint should run off in a continuous, smooth stream without breaking, but shouldn’t be as thin as watercolor. -
Prepare Orange Paint:
Repeat the process with your orange paint in a separate cup. I like to keep the orange mixture just slightly thicker than the black to create subtle texture variations.
Step 3: The Black Layer
-
Load the Brush:
Dip a medium-sized round brush heavily into the black mixture. You want it dripping wet. -
create Long Drips:
Stand over the canvas and move your arm in long, sweeping motions across the surface. Let the paint fall naturally to create long, continuous lines. -
Vary the Speed:
Move your hand quickly for thin lines and slower for thicker, pooling lines. Try to create diagonal movements for dynamic energy. -
Add Accents:
Flick your wrist sharply near the corners or edges to create smaller, scattered dots rather than lines. -
Assess the Balance:
Step back and look at the composition. Ensure you have plenty of white space remaining; don’t overfill the canvas with black.
Metallic modern twist
Once the colors are dry, add a third layer using metallic gold or copper paint. The shine adds an incredible luxurious element against the matte black and white.
Step 4: The Orange Accents
-
Switch Colors:
Use a clean brush for the orange paint. This color is the ‘pop’ and should be used more sparingly than the black. -
Strategic Placement:
Look for areas that feel empty or unbalanced. Drip the orange paint in these spots, allowing it to cross over some black lines. -
Create Focal Pools:
Allow a few larger drips to land and pool in one or two spots to create visual weight, similar to the larger orange splotch seen in the example. -
Controlled Splatter:
Hold the brush perpendicular to the canvas and tap the handle with another brush to shake loose fine droplets for a misty effect in select areas. -
Review and Refine:
Walk around the canvas to view it from all angles. Add just a few final flicks of black if the orange feels too dominant, creating a layered depth. -
Extended Drying Time:
Because some of the drips are thick, leave the canvas flat to dry for at least 24-48 hours. Standing it up too soon will cause the design to run and ruin the composition.
Once fully cured, hang your energetic masterpiece to bring a bold, modern edge to any room


Sgraffito Scratch-Through Layers
This contemporary abstract piece combines warm, terracotta tones with the satisfying technique of sgraffito to carve designs directly into wet paint. The result is a tactile, bohemian-style artwork that uses negative space and texture to create movement on a simple wood panel.
Step-by-Step Guide
Materials
- Square wood panel (cradled birch or pine)
- White gesso
- Acrylic paints (terracotta/burnt sienna, warm grey, titanium white, unbleached titanium)
- Wide flat synthetic brush
- Sgraffito tools (palette knife, stylus, or an old ballpoint pen)
- Painter’s tape or masking tape
- Matte medium or varnish (optional)
- Sandpaper (fine grit)
Step 1: Preparation & Base Coat
-
Prepare the surface:
Begin by sanding your wooden panel lightly to remove any splinters or rough patches. Wipe away the dust with a damp cloth. -
Apply the base color:
Mix titanium white with a touch of unbleached titanium to create a warm, creamy off-white. Apply two coats of this mixture over the entire face of the panel, letting it dry completely between layers. -
Add texture (optional):
For a more rustic feel similar to the reference, you can mix a little modeling paste into your base coat or apply the paint thickly with visible brushstrokes. Allow this foundation to cure fully before moving on.
Wet-on-Wet Timing
Work one shape at a time! Acrylic dries fast. Only paint the specific area you are ready to scratch immediately, or the paint will become gummy and tear.
Step 2: Drafting the Design
-
Visual planning:
Lightly sketch your composition with a pencil. You’ll want a large circular motif on the left, a large quarter-circle arc swooping up from the bottom right corner, and smaller partial arcs filling the top center and bottom left. -
Masking off:
If you don’t trust your freehand painting skills, you can use faint pencil lines as guides, but this style embraces organic, imperfect shapes, so precise masking isn’t strictly necessary.
Step 3: Painting & Scratching: The Grey Sections
-
Mix the grey tone:
Create a warm, stone-like grey by mixing your warm grey paint with a tiny drop of the terracotta color to harmonize the palette. -
Paint the top arc:
Paint the semi-circle shape at the top center of the panel. Apply the paint generously—you need a thick, wet layer for the scratching technique to work. -
Perform sgraffito:
Immediately, while the paint is still wet, use your stylus or the handle of a paintbrush to scratch concentric semi-circles into the grey paint, revealing the cream base underneath. Clean your tool tip on a rag often to keep the lines crisp. -
Paint the bottom corner:
Repeat this process for the quarter-circle shape in the bottom left corner: apply the grey paint thickly, then scratch in your curved lines before it begins to dry.
Paint Not Scraping?
If the paint isn’t revealing the layer below, your top coat is too thin. Apply a thicker layer so the tool can actually ‘plow’ through the pigment.
Step 4: The Terracotta Elements
-
Create the sun shape:
Using your terracotta or burnt sienna paint, fill in the large circular shape on the left side. Again, ensure the coverage is opaque and relatively thick. -
Detail the sun interior:
While wet, scratch three smaller swirling spirals in the center of the circle, arranging them in a triangle formation. Surround these spirals with concentric scratched rings. -
Add the dot border:
Around the outer edge of this circle, instead of scratching lines, press the blunt end of a paintbrush handle into the wet paint to lift off small dots, creating a decorative border. -
Paint large arch:
Apply the terracotta paint to the large swooping arch on the right side of the panel. -
Detail the large arch:
Scratch long, sweeping lines that follow the curve of the arch. Between these lines, use a smaller tool to prick tiny dots into the paint for added texture variation. -
Refine edges:
If any paint bled or edges look too messy, you can tidy them up with a small brush and your cream base color once the colored sections are dry.
Step 5: Finishing Touches
-
Clean up:
Check the surface for any little crumbs of dried paint that might have resulted from the scratching process and brush them away gently. -
Seal (optional):
This style looks beautiful with a matte finish. If you want to protect it, apply a coat of matte varnish or spray fixative only after the thick paint has cured for several days.
Display your new textured masterpiece on a shelf or hang it as part of a modern gallery wall
String Pull Ribbon Veins
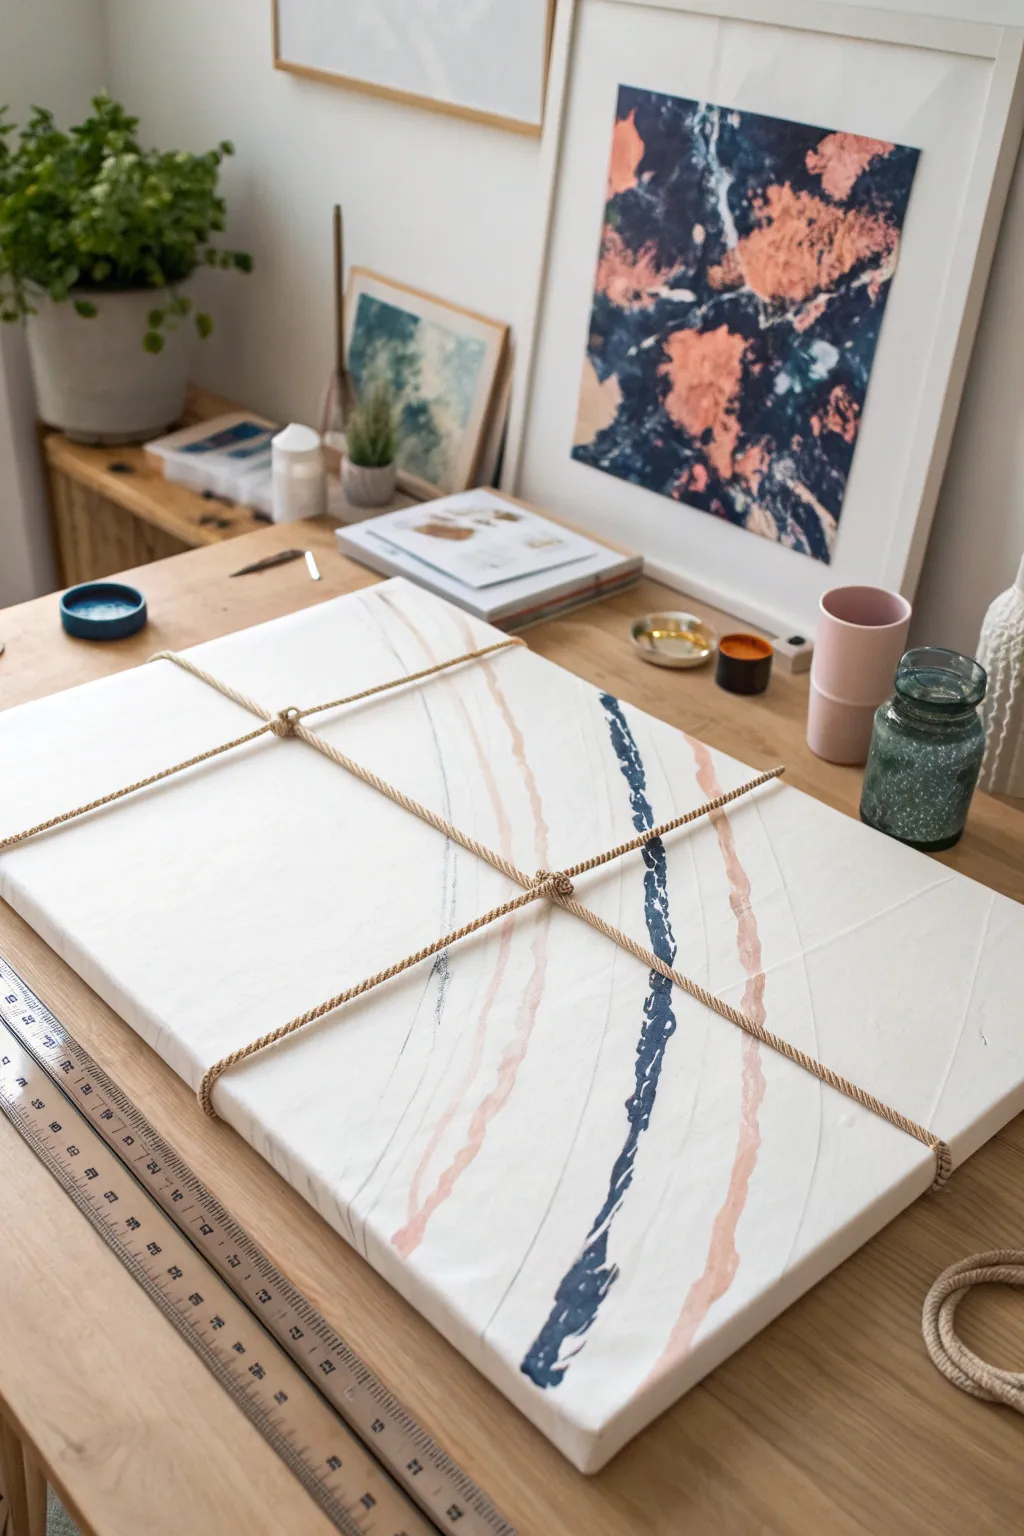
Create a striking, minimalist abstract piece that combines fluid painting techniques with tactile 3D elements. This project features soft, flowing veins of color intersected by a geometric wrapping of natural rope for a modern, textured finish.
How-To Guide
Materials
- Rectangular stretched canvas (approx. 18×24 inches)
- White acrylic paint (heavy body)
- Acrylic paints in dusty pink, salmon, and navy blue
- Pouring medium or water (to thin paints)
- Thick natural jute rope or twisted cotton cord (approx. 2-3 yards)
- Palette knife or large flat brush
- Cups for mixing paint
- Scissors
Step 1: Preparing the Base
-
Prime the Surface:
Start by ensuring your canvas is clean and taut. Even if it’s pre-primed, applying a fresh, thin coat of white acrylic paint helps the subsequent layers glide more distinctively. -
Mix Your Colors:
In separate cups, mix your pink, salmon, and navy blue paints with a small amount of pouring medium or water. You want a consistency that is fluid enough to flow but thick enough to hold a shape—think of melted ice cream or warm honey. -
Apply the Base Coat:
Cover the entire canvas with a generous layer of white paint. Use a large flat brush or palette knife to smooth it out, ensuring full coverage without making it too thick or gloopy.
Knot Security
Dab a tiny drop of clear craft glue or hot glue underneath the central knot. This keeps it perfectly centered and prevents it from sliding down the canvas over time.
Step 2: Creating the Veins
-
Pour the First Line:
Take your mixed salmon paint and slowly pour a thin, diagonal stream across the canvas. Try to let your hand waver slightly to create a natural, organic ‘vein’ rather than a perfect straight line. -
Add Variation:
Repeat this process with the dusty pink color, pouring a line parallel to the first but leaving some white space in between. Vary the thickness of the pour slightly for visual interest. -
Introduce Contrast:
Pour a final vein using the navy blue paint. This darker color acts as an anchor for the composition, so position it thoughtfully—perhaps a bit more centrally or crossing one of the lighter lines. -
Manipulate the Paint:
Gently tilt the canvas back and forth just a tiny bit to let the veins settle into the white base. You don’t want them to run off the edge, just to soften their edges slightly. -
Create Texture (Optional):
If the lines look too perfect, lightly drag the tip of a palette knife or a dry brush through parts of the colored veins to create a feathery, distressed look that mimics natural stone. -
Let it Dry Completely:
This step is crucial. Allow the painting to dry fully, preferably overnight. The paint must be hard to the touch before you proceed to the rope wrapping step to avoid smudging.
Step 3: The Rope Wrap
-
Position the Rope:
Once the canvas is bone dry, take your length of jute rope. Lay it diagonally across the painting, perpendicular to your painted veins. -
Create the First Wrap:
Wrap the rope around the back of the canvas and bring it back to the front. You are aiming for a crisscross pattern, so angle this second pass to intersect with your first line. -
Secure the Intersection:
Where the two rope lines meet in the center of the canvas, tie a simple overhand knot. This acts as a focal point and helps keep the tension tight. -
Tie the Edges:
If you want extra detail, create small knots where the rope wraps around the edge of the canvas frame. I find this helps secure the rope in place so it doesn’t slide around later. -
Fasten on the Back:
Flip the canvas over carefully. Pull the rope ends tight to ensure the front design is taut. Interpretation is up to you here, but generally, stapling the rope ends to the wooden frame is the most secure method. -
Trim Excess:
Cut off any long tails of rope on the back of the canvas using sharp scissors. Ensure the staples are holding firm before trimming close.
Paint Too Runny?
If your veins are spreading too much into the white base, your paint is too thin. Let the base coat dry for 10 minutes before pouring veins to reduce spreading.
Step 4: Finishing Touches
-
Check Tension:
Flip the artwork back to the front. Pluck the rope gently to ensure it’s tight against the canvas surface. If it’s loose, you may need to re-staple one end on the back. -
Seal (Optional):
For longevity, you can carefully brush a matte varnish over the painted areas, avoiding the rope. This protects the acrylics from dust and UV light.
Hang your new textured masterpiece in a spot with good lighting to highlight the shadows cast by the rope
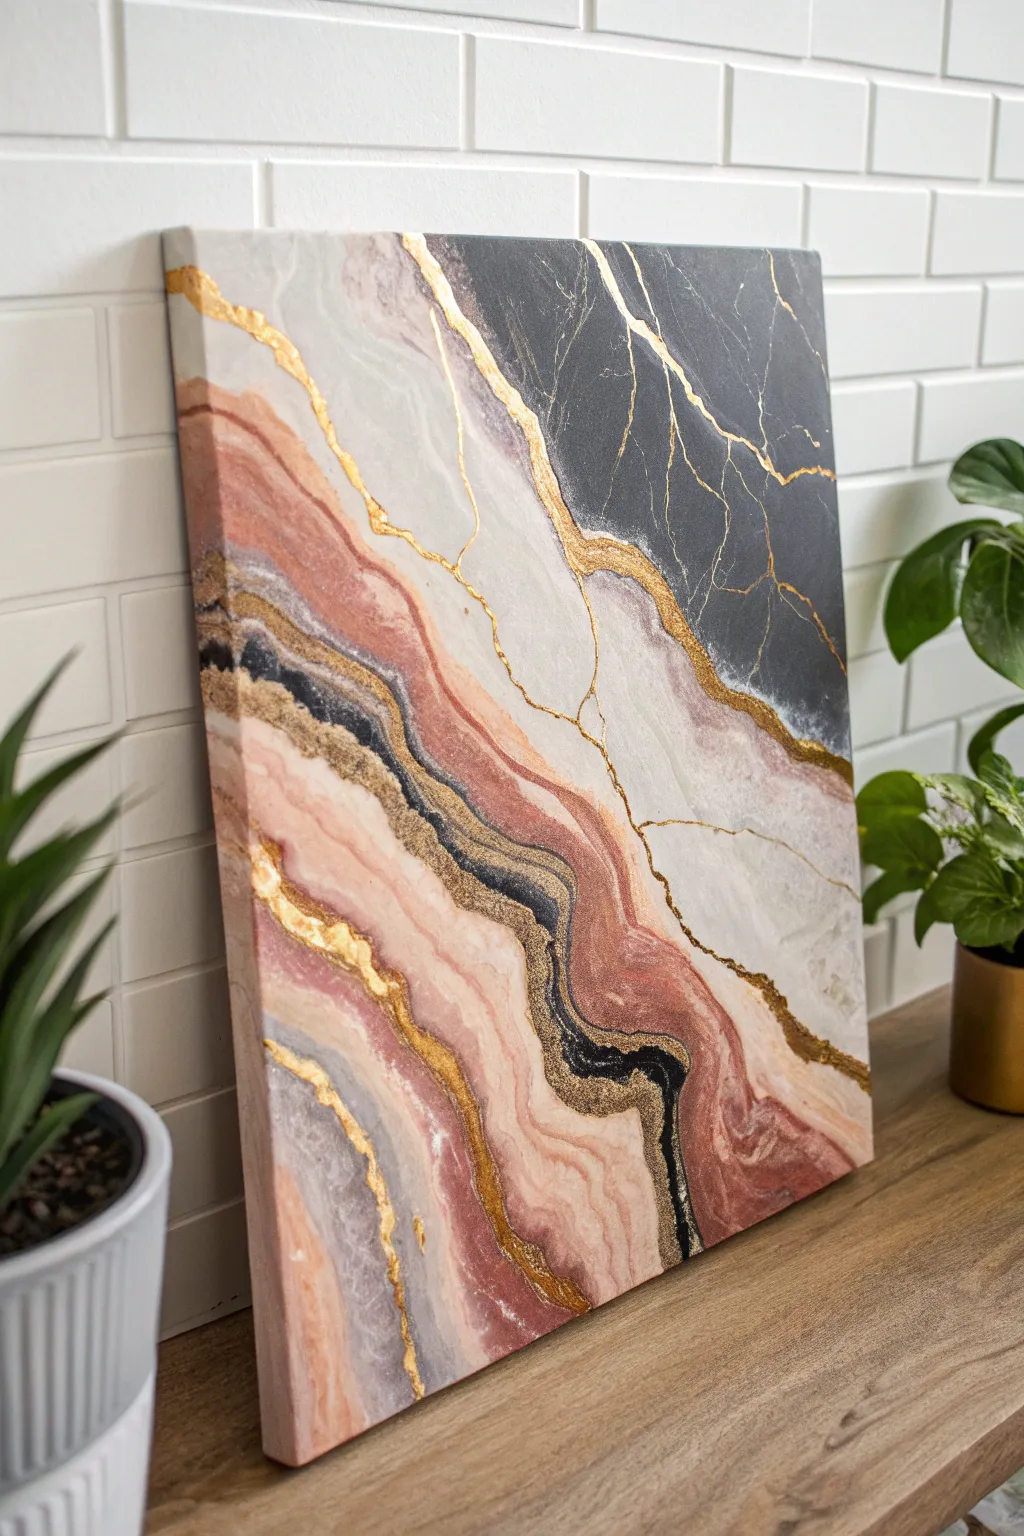
Metallic Accents for a Geode-Style Glow

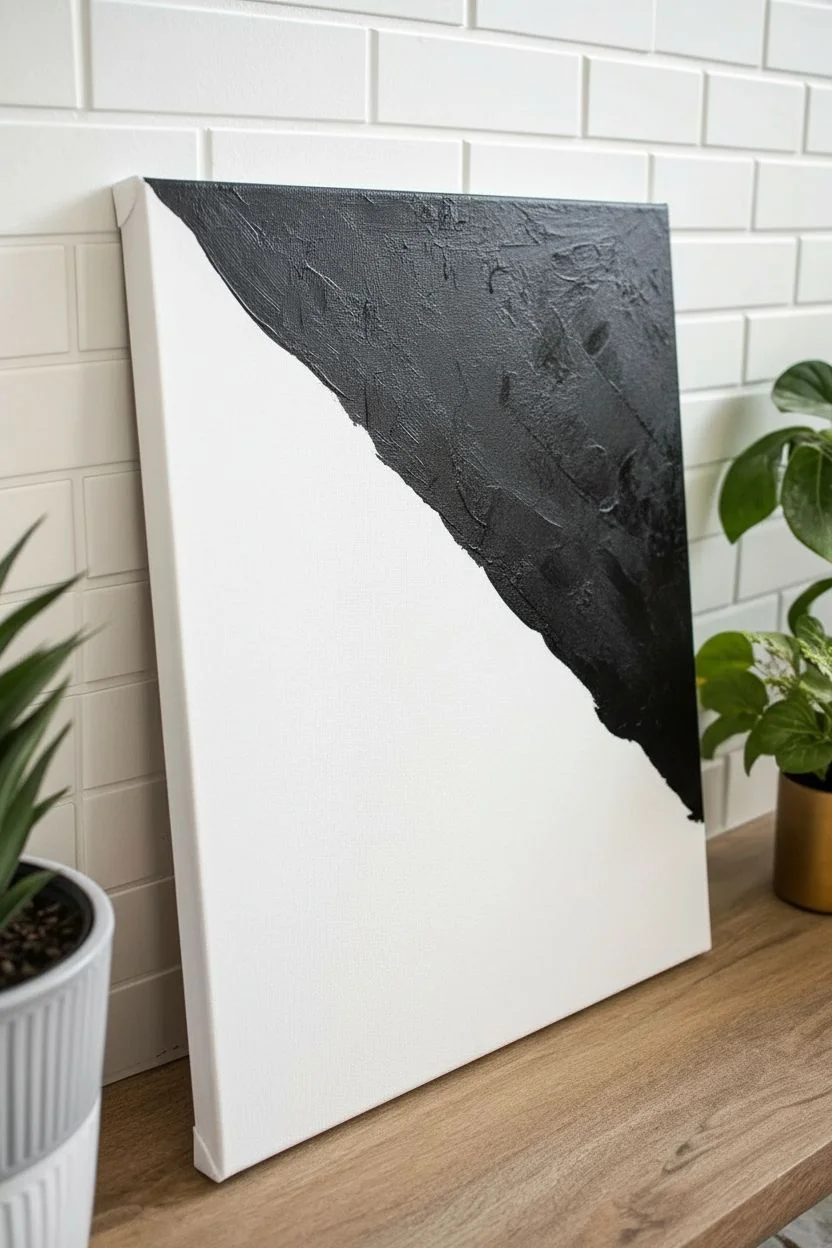
Capture the organic elegance of natural stone with this fluid art technique that mimics raw marble and rose quartz. By layering acrylic pouring medium with purposeful brushwork and bright metallic gold leafing, you’ll create a sophisticated, high-end piece of wall decor.
Step-by-Step Guide
Materials
- Rectangular stretched canvas (16×20 or similar)
- Fluid acrylic paints (blush pink, dusty rose, white, black, charcoal grey)
- Pouring medium
- Gold leaf sheets or metallic gold liquid leaf paint
- Fine detail liner brush
- Medium flat synthetic brush
- Small round brush
- Kintsugi or metallic gold paint pen (optional)
- Glazing liquid (optional)
- Varnish (gloss or satin)
Step 1: Planning and Foundation
-
Map out composition:
Visualize your canvas divided diagonally. You want the darker, charcoal section to occupy the top right corner, while the sweeping pinks and whites will dominate the bottom left. -
Mix your mediums:
Prepare your acrylics by mixing them with a small amount of pouring medium. Unlike a traditional dirty pour, you want these slightly thicker—like warm honey—so you have control over brushstrokes while still allowing for self-leveling. -
Apply the dark anchoring corner:
Start by painting the top right corner with a mix of black and charcoal grey. Use your flat brush to create varied tones, avoiding a flat, single-color block.
Muddy colors?
If your pinks and blacks are blending into grey mush, stop trying to wet-blend them. Let one layer dry, then dry-brush the next color over the edge for a layered look.
Step 2: Layering the Geode Strata
-
Paint the first white transition:
Ideally while the black section is still tacky, apply a band of white paint alongside it. Blend the edge slightly where they meet to create a soft, smoky transition rather than a hard line. -
Introduce the blush tones:
Below the white band, begin laying down your blush pinks. Vary the intensity by mixing in white for lighter streaks and a touch of dusty rose for depth. -
Create the central dark vein:
Paint a thin, wavy river of black and dark grey right through the middle of the pink section. This provides the contrast needed to make the ‘stone’ look realistic. -
Add texture with stippling:
Around this central dark vein, use an old, stiff brush to stipple (tap repeatedly) some gold or bronze paint mixed with a little sand or texture gel if you have it. This mimics the rough sediment often found in geodes. -
Fill the lower corner:
Continue the sweeping motion into the bottom left corner with deeper dusty rose and brownish-pink tones, ensuring the brushstrokes all flow in the same diagonal direction. -
Refine the color bands:
Go back while the paint is wet and drag clean, dry brushes through the bands to create finer striations, mimicking the layers of sedimentary rock. -
Let it dry completely:
This is crucial. Walk away and let the acrylics cure fully, preferably overnight, so your gold application doesn’t get muddy.
Pro Tip: Make it Shimmer
Mix a tiny pinch of mica powder or iridescent medium into your white paint. It adds a subtle pearlescent quality that mimics real quartz when the light hits it.
Step 3: The Gilded Details
-
Plan your gold veins:
Look at your dried painting. Identify the most interesting boundaries between colors, especially where dark meets light. These will become your gold fault lines. -
Apply adhesive size:
If using gold leaf, carefully paint a thin line of adhesive size along these boundaries using your finest liner brush. Let it sit until it turns tacky and clear. -
Lay the gold leaf:
Press the gold leaf sheets onto the tacky adhesive lines. Don’t worry about being messy; natural breaks look better. -
Brush away excellence:
Once the gold is set, use a soft, dry brush to whisk away the excess flake, revealing crisp, jagged metallic lines. -
Alternative: Liquid Gold:
If you aren’t using leaf, shake your liquid gold leaf paint thoroughly. Using a liner brush with a shaky hand (deliberately!), paint jagged ‘lightning bolt’ lines across the dark charcoal section. -
Connect the composition:
Extend a few fine gold cracks from the dark upper section down into the white and pink areas to visually tie the two halves together. -
Highlight the sediment:
Return to that central dark vein you textured earlier. Tap small amounts of bright gold along the edges to make that specific area pop. -
Seal the artwork:
Finish with a coat of gloss varnish. This deepens the blacks, saturates the pinks, and protects the gold leaf from tarnishing over time.
Hang your new stone-inspired masterpiece in a bright room where the gold can catch the light nicely


Have a question or want to share your own experience? I'd love to hear from you in the comments below!