If you’ve been craving a wall that feels more like you, acrylic paint is such a fun way to get there—fast-drying, forgiving, and seriously versatile. Here are my favorite acrylic wall painting ideas that range from classic, cozy looks to big “wow” statements when you’re ready to go bold.
Oversized Abstract Statement Wall
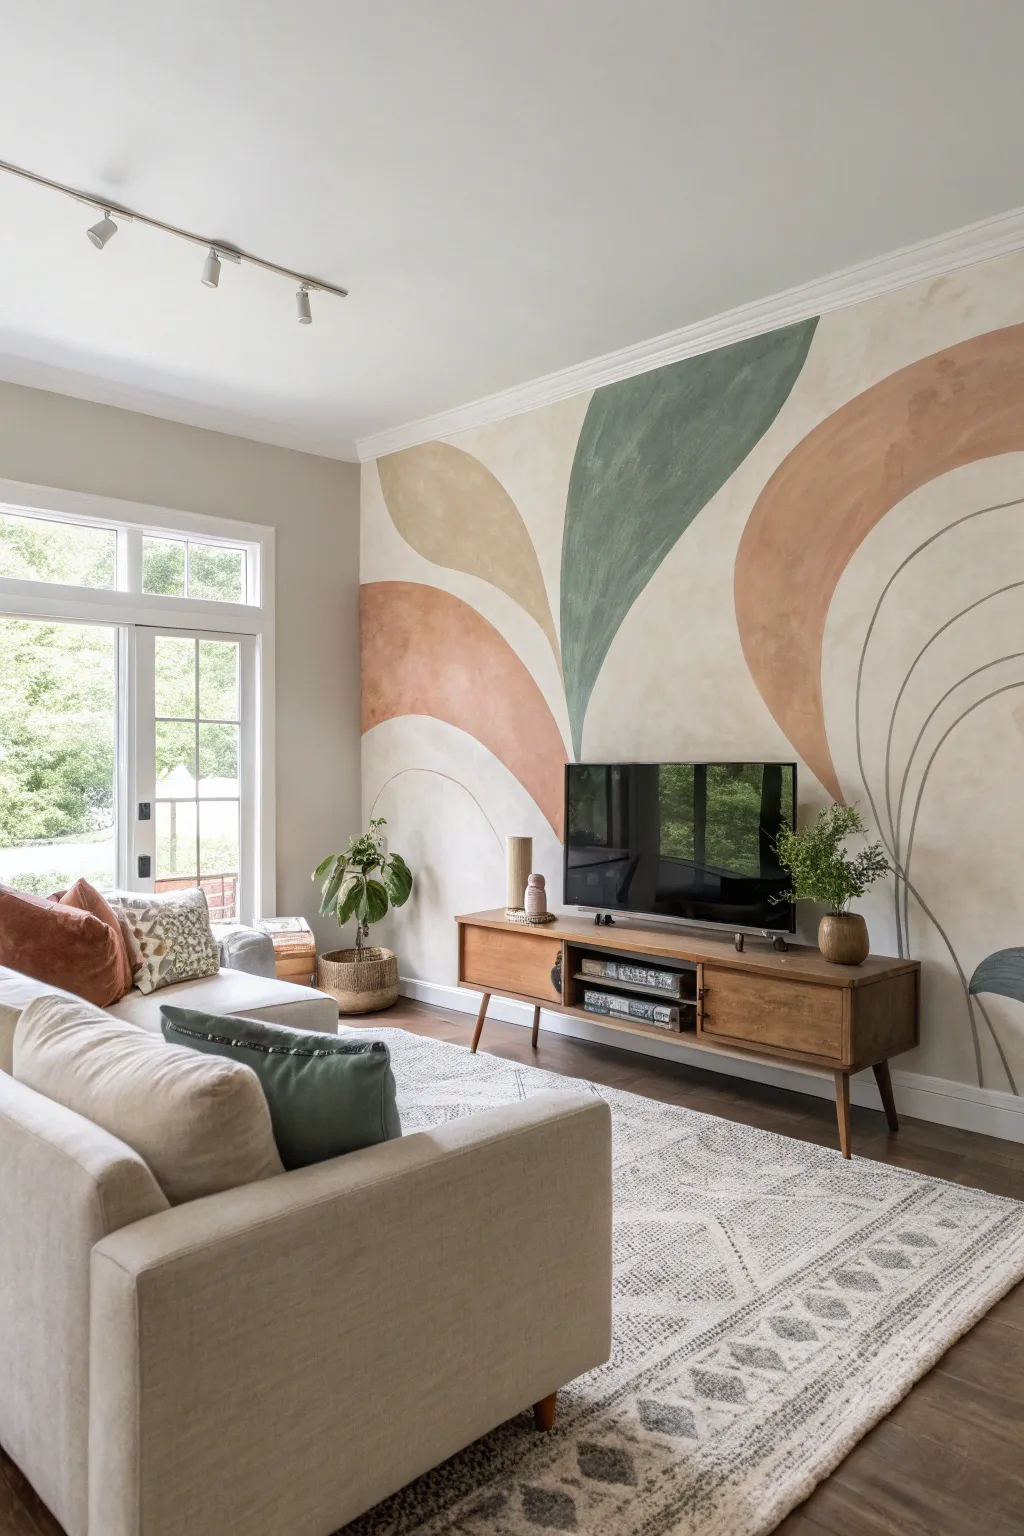
Transform a plain wall into a stunning mid-century modern statement piece with oversized, earthy arches and delicate line work. This mural uses a soft, limewash-inspired technique to create texture and warmth, making your living space feel organic and inviting.
Step-by-Step
Materials
- Interior latex or acrylic wall paint (cream base)
- Acrylic paints (terracotta orange, sage green, sandy beige, charcoal grey)
- Glazing medium
- Pencil and eraser
- Measuring tape
- String and thumb tack (for creating compass curves)
- Wide flat paintbrushes (2-3 inches)
- Round detail brush (size 4 or 6)
- Microfiber rags or sea sponge
- Painter’s tape
- Drop cloth
- Ladder or step stool
Step 1: Planning and Sketching
-
Prepare the surface:
Start by clearing the wall area and laying down your drop cloth. If your current wall color isn’t a neutral off-white or cream, apply a base coat of interior latex paint to create a fresh canvas for your mural. -
Find your focal point:
Decide where the arches will originate. In this design, the main shapes fan out from a central point near the bottom center of the wall, roughly where your media console sits. Mark this anchor point lightly with a pencil. -
Create a string compass:
Tie a piece of non-stretchy string to a pencil. Measure the length needed for your largest arch, then secure the other end of the string to your anchor point using a thumb tack or by having a friend hold it firmly against the wall. -
Sketch the large curves:
Keeping the string taut, lightly draw the large sweeping curves that form the boundaries of your colored shapes. Draw freely to create the leaf-like petal shapes, varying the heights and widths for visual interest. -
Outline the wireframe arches:
On the right side of the composition, sketch the thinner, wireframe-style arches. These should echo the curvature of the solid shapes but remain open and airy.
Textural Depth
For a true plaster look, mix a scant amount of baking soda or joint compound into your acrylics before glazing. It adds physical grit to the wall.
Step 2: Painting the Texture
-
Mix your glazes:
To achieve that soft, watercolor-like texture seen in the photo, don’t use the paint straight from the tube. Mix your terracotta, sage, and beige acrylics with a glazing medium in a 1:1 ratio. This increases transparency and working time. -
Apply the sage green:
Starting with the central, tallest shape, brush on your sage green mixture. Use a cross-hatch motion (painting X’s) rather than straight strokes to build that distinctive limewash texture. -
Soften the edges:
While the paint is still tacky, use a damp microfiber rag or a dry brush to feather out any harsh brushstrokes within the shape, keeping the color somewhat uneven for depth. I find this creates a lovely organic feel. -
Paint the terracotta arches:
Move on to the terracotta shapes on the left and right. Apply the glaze mixture using the same cross-hatch technique, being careful to stay within your pencil guidelines. -
Fill the beige sections:
Complete the solid shapes by painting the sandy beige sections. If you want more opacity in certain areas, wait for the first layer to dry and apply a second coat sparingly. -
Clean up the boundaries:
Once the main shapes are dry, use a smaller flat brush to neaten the edges where the shapes meet the background, ensuring crisp, curved lines.
Step 3: Detailing and Finishing
-
Prepare the line work paint:
Thin down your charcoal grey acrylic paint with a tiny bit of water until it has an inky, fluid consistency. This helps the paint flow smoothly for long lines without skipping. -
Paint the wireframe arches:
Using a size 4 or 6 round brush and a steady hand, paint over your pencil sketches for the thin, open arches on the right. Focus on maintaining a consistent line width. -
Add intersecting details:
Carefully paint the lines that overlap the solid colored shapes. This layering effect adds dimension and connects the solid and linear elements of the mural. -
Let it cure:
Allow the entire wall to dry for at least 24 hours. Erase any visible pencil marks gently with a high-quality white eraser to avoid smudging the paint.
Metallic Accent
Trace the outermost edge of one arch with a gold leaf pen or metallic acrylic paint to catch the light and add a glamorous twist.
Step back and enjoy the warm, artistic atmosphere your new feature wall brings to the room.


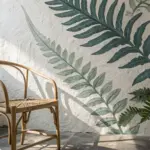
Modern Botanical Wall Mural
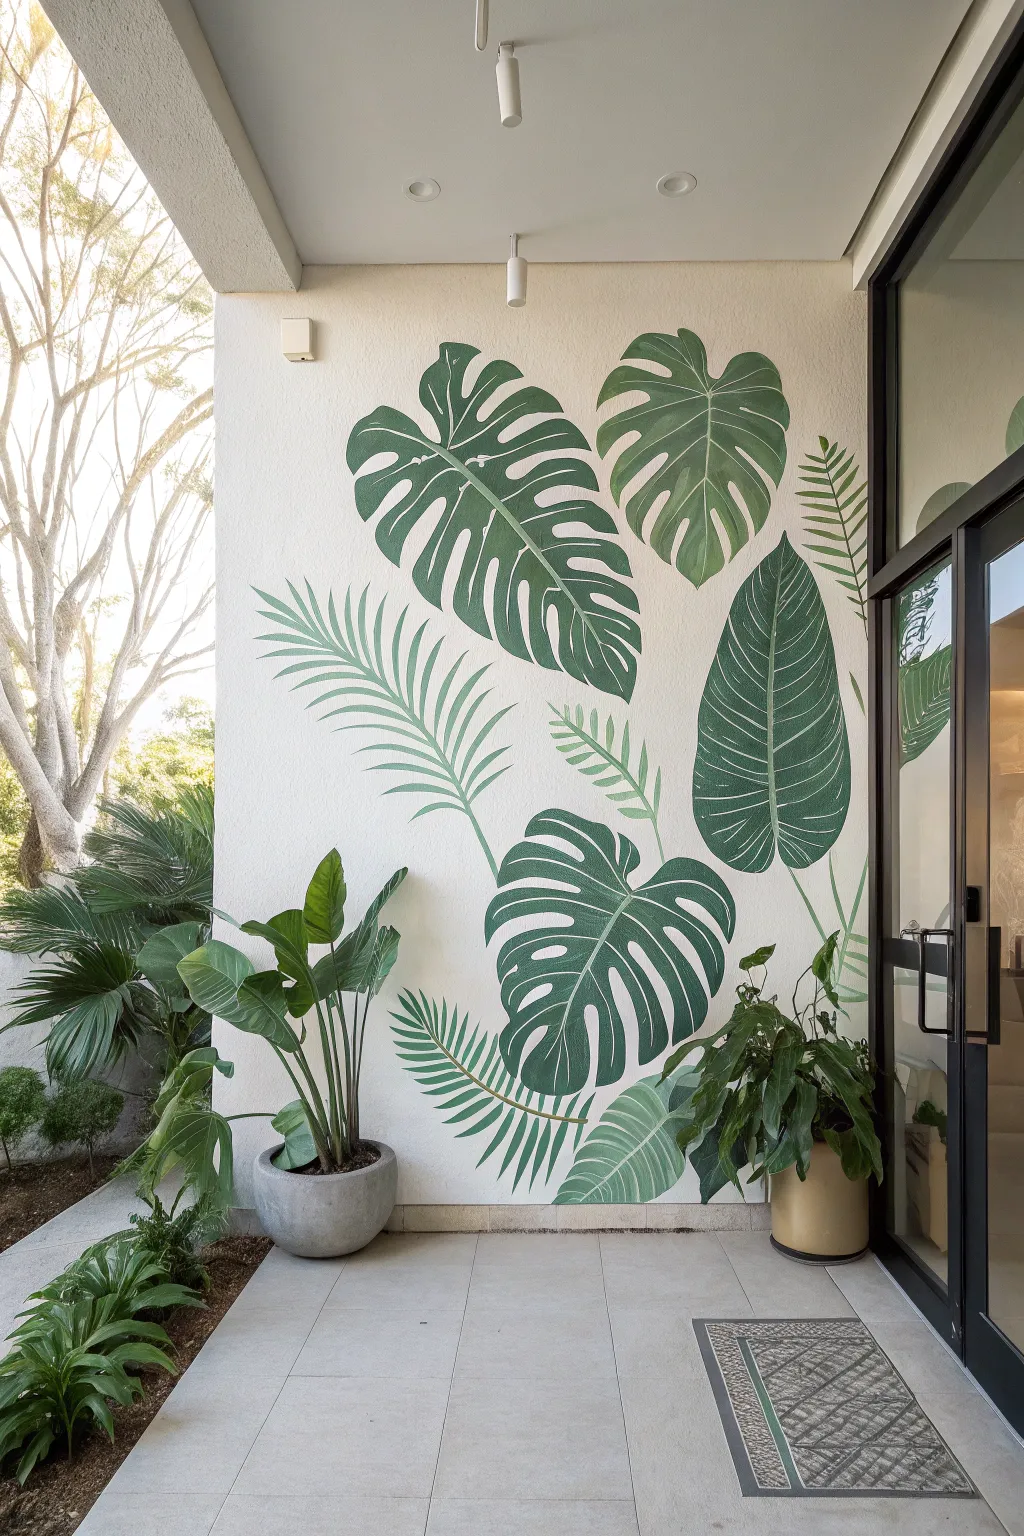
Transform a plain exterior or entryway wall into a lush sanctuary with this large-scale botanical mural. Featuring oversized monstera and palm leaves in soothing verdant tones, this project brings the calming influence of nature directly into your living space.
Detailed Instructions
Materials
- Exterior acrylic latex paint (white base)
- Acrylic paint samples (Deep hunter green, sage green, olive green, warm white)
- Pencil and large eraser
- Overhead projector (optional)
- Printed transparency of leaf composition (if using projector)
- Painter’s tape
- Drop cloth
- Medium angled sash brush (2-inch)
- Small round brushes (for details/veining)
- Artist’s liner brush
Step 1: Preparation and Sketching
-
Prepare the surface:
Begin by cleaning the wall thoroughly to remove any dust or cobwebs that might interfere with paint adhesion. If the wall is textured stucco, use a stiff brush to dislodge debris from the crevices. -
Protect the area:
Lay down a drop cloth to cover the floor tiles and tape off the trim or any adjacent glass doors to ensure crisp edges. -
Map out the composition:
If you are confident in freehand drawing, lightly sketch the large monstera shapes first, placing them centrally to anchor the design. For precision, I recommend using an overhead projector to cast your leaf design onto the wall and tracing the outlines lightly with a pencil. -
Refine the leaf shapes:
Go back over your pencil lines to define the characteristic splits and holes (fenestrations) in the monstera leaves. Add the long, sweeping curves of the palm fronds, ensuring they flow naturally behind and around the larger focal leaves. -
Erase guidelines:
Gently erase any stray sketching lines or heavy marks. You want the pencil guide to be barely visible so it doesn’t show through lighter paint later.
Rough Texture Help
Painting on stucco? Avoid destroying brushes by using a ‘stippling’ motion (poking the brush straight on) rather than dragging strokes to get paint into deep crevices.
Step 2: Painting the Base Layers
-
Mix your palette:
Create three distinct green blends: a deep shadow green for the largest monstera, a mid-tone olive for the upper leaves, and a lighter sage for the palm fronds. Keep a small cup of white paint nearby for tinting. -
Block in the darkest leaves:
Using the 2-inch angled brush, fill in the large, bottom monstera leaf with your deepest green shade. Work the paint into the stucco texture, dabbing if necessary to get full coverage. -
Paint the mid-tones:
Move to the upper monstera leaves and the large upright philodendron-style leaf on the right. Fill these in with your mid-tone olive green, keeping the edges crisp against the wall. -
Add the lighter foliage:
Paint the feathery palm fronds and fern-like sprigs using the sage green mixture. Use a smaller brush here to handle the thinner stems and individual leaflets. -
Check for opacity:
Let the first coat dry for about an hour. If the wall texture is showing through too much, apply a second coat to the solid green areas to ensure rich, opaque color.
Step 3: Detailing and Veining
-
Mix the vein color:
Create a very pale green—almost white—for the veins. It needs to contrast sharply with the leaf base colors. -
Draft the central veins:
With a small round brush, paint the primary central vein (midrib) down the center of each large leaf. Keep the line steady and taper it slightly as it reaches the leaf tip. -
Add lateral veins:
Using a thin liner brush, carefully paint the lateral veins branching out from the center line. Curve them gently toward the leaf edges to mimic the natural growth pattern. -
Refine the palm details:
Add a thin highlight line down the center of the palm frond stems to give them dimension. -
Clean up edges:
Inspect the mural for any spots where the green paint bled or looked uneven. use a small brush and the original wall color to touch up the negative space around the leaves for a sharp, professional finish. -
Final drying:
Remove the painter’s tape while the touch-ups are still slightly tacky to avoid peeling. Allow the entire mural to cure for at least 24 hours before placing planters or furniture nearby.
Add Dimension
Mix a darker version of your green and paint a thin shadow line along one side of the white veins. This makes the veins pop and look 3D.
Enjoy your new evergreen view that stays vibrant regardless of the season


Simple Mountain Range Horizon
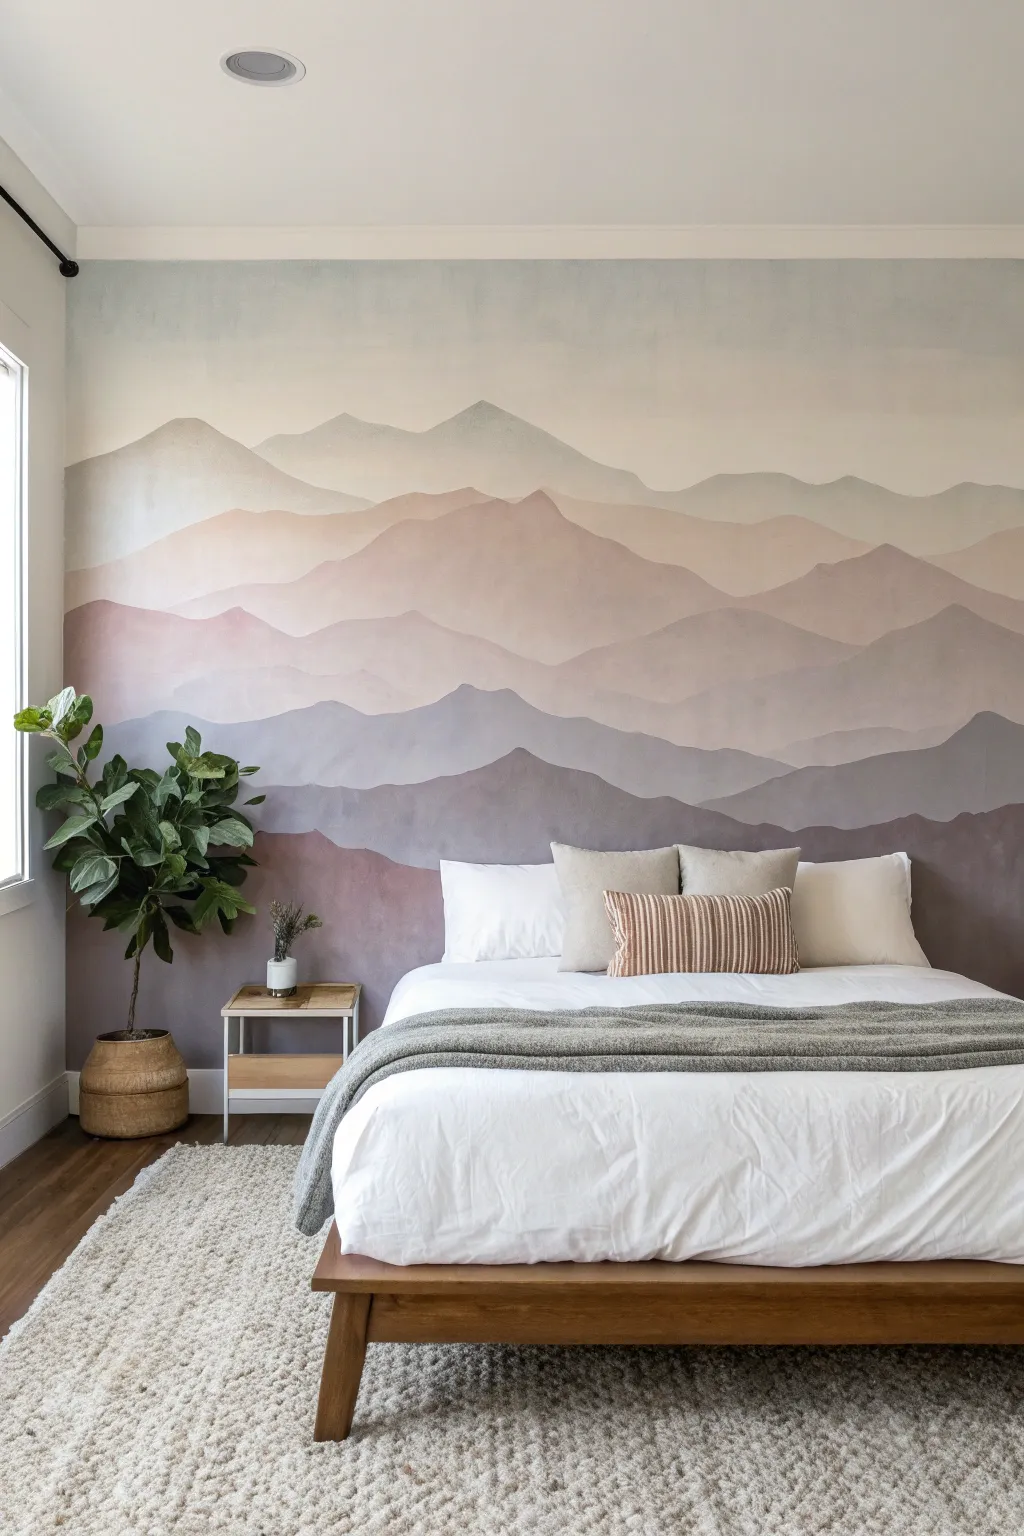
Transform a plain bedroom wall into a serene, atmospheric escape with this layered mountain landscape. The soft gradients from deep plum to airy cream create a calming depth that feels both modern and timeless.
Step-by-Step
Materials
- Interior acrylic latex paint (white base + 4-5 sample pots in gradient colors: deep plum, mauve, dusty rose, beige, pale blue-grey)
- Painter’s tape
- Drop cloths
- Pencil and eraser
- 2-inch angled sash brush (for cutting in)
- 4-inch foam roller or mini microfiber roller
- Roller tray with liners
- Large palette or paper plates for mixing
- Bucket of water and rags
- Ladder or step stool
Step 1: Preparation and Sketching
-
Clear and prep the space:
Move all furniture away from the wall to give yourself plenty of room to maneuver. Lay down drop cloths to protect your flooring and tape off the baseboards, ceiling line, and adjacent walls. -
Base coat the sky:
Paint the upper third of the wall in your lightest skyline color—a very pale blue-grey or off-white. This ensures the top horizon line will have a solid background without needing precise brushwork later. -
Sketch the ranges:
Using a pencil, lightly draw organic, wavy lines across the wall to map out your mountain layers. Aim for 5-6 distinct layers, keeping the peaks varied in height and shape for a natural look. The lowest layer should be the largest.
Fixing bumpy ridges
If your hand shakes and the ridge line looks messy, don’t worry. Simply wait for it to dry, then use the sky or upper-layer color to cut back into the line and reshape the peak.
Step 2: Painting the Layers
-
Mix the darkest shade:
Start with the bottom-most mountain range. Pour your darkest plum or charcoal-purple paint into a tray. If the color feels too flat, mix in a tiny drop of black or dark blue to deepen it. -
Cut in the first ridge:
Use the 2-inch angled brush to carefully paint along the top pencil line of the lowest mountain range. Focus on creating a crisp, smooth edge, as this silhouette is crucial for the effect. -
Fill the bottom section:
Once the edge is defined, use your mini roller to fill in the rest of the bottom section down to the baseboard. Apply two coats if necessary for full opacity. -
Mix the second layer color:
For the next layer up, take your dark base color and mix in about 20% of your next lighter shade (mauve or dusty rose) and a splash of white. You want a distinct but related step up in lightness. -
Paint the second ridge:
Paint the top edge of the second mountain layer using the angled brush. Overlap slightly with the layer below if needed to ensure no gaps, though the opaque paint should cover perfectly. -
Blend the bottom of the second layer:
As you fill in the body of the second mountain with the roller, I like to feather out the bottom edge where it meets the dark layer below. It doesn’t need to be blended perfectly since it’s a hard-edge style, but consistent coverage is key.
Step 3: Creating Atmospheric Depth
-
Mix the middle tones:
Continue moving upward, mixing progressively lighter batches of paint. For the middle layers, incorporate more beige and white into your mauve tones to desaturate the color, mimicking atmospheric perspective. -
Apply the middle ranges:
Paint the next two mountain layers using the same outline-then-fill method. Step back occasionally to ensure the color transition looks gradual and not too abrupt between ridges. -
Mix the distant peaks color:
For the highest mountain range, mix a color that is just slightly darker than your sky color. It should be a very pale, misty beige-grey. -
Paint the final peaks:
Carefully paint the top ridge line. Since this is the furthest mountain, keep the details smoother and less jagged than the foreground mountains to enhance the sense of distance. -
Feather the sky transition:
If you want a softer look near the top, while the paint is still wet on the highest peak, take a dry brush and lightly feather the top edge into the sky color. Otherwise, leave it crisp for a graphic look.
Add a misty texture
For a dreamy effect, mix a translucent glaze (water + paint) and sponge it lightly over the bottom of each mountain layer to simulate low-hanging valley fog.
Step 4: Finishing Touches
-
Inspect for holidays:
Once the wall is dry to the touch, check for ‘holidays’ (missed spots) or thin patches. Use a small brush to touch up these areas with the specific leftover paint mix for that layer. -
Clean up sketch lines:
If any pencil lines are still visible above the painted ridges, gently erase them. Be sure the paint is fully cured (give it 24 hours) before erasing to avoid scuffing. -
Remove tape:
Ideally, peel off the painter’s tape while the final coat is still slightly tacky to prevent peeling. Pull the tape away from the paint line at a 45-degree angle.
Step back and admire how your new horizon line adds a breath of fresh air to the room without leaving home.


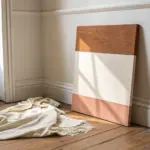
Soft Ombre Color Fade
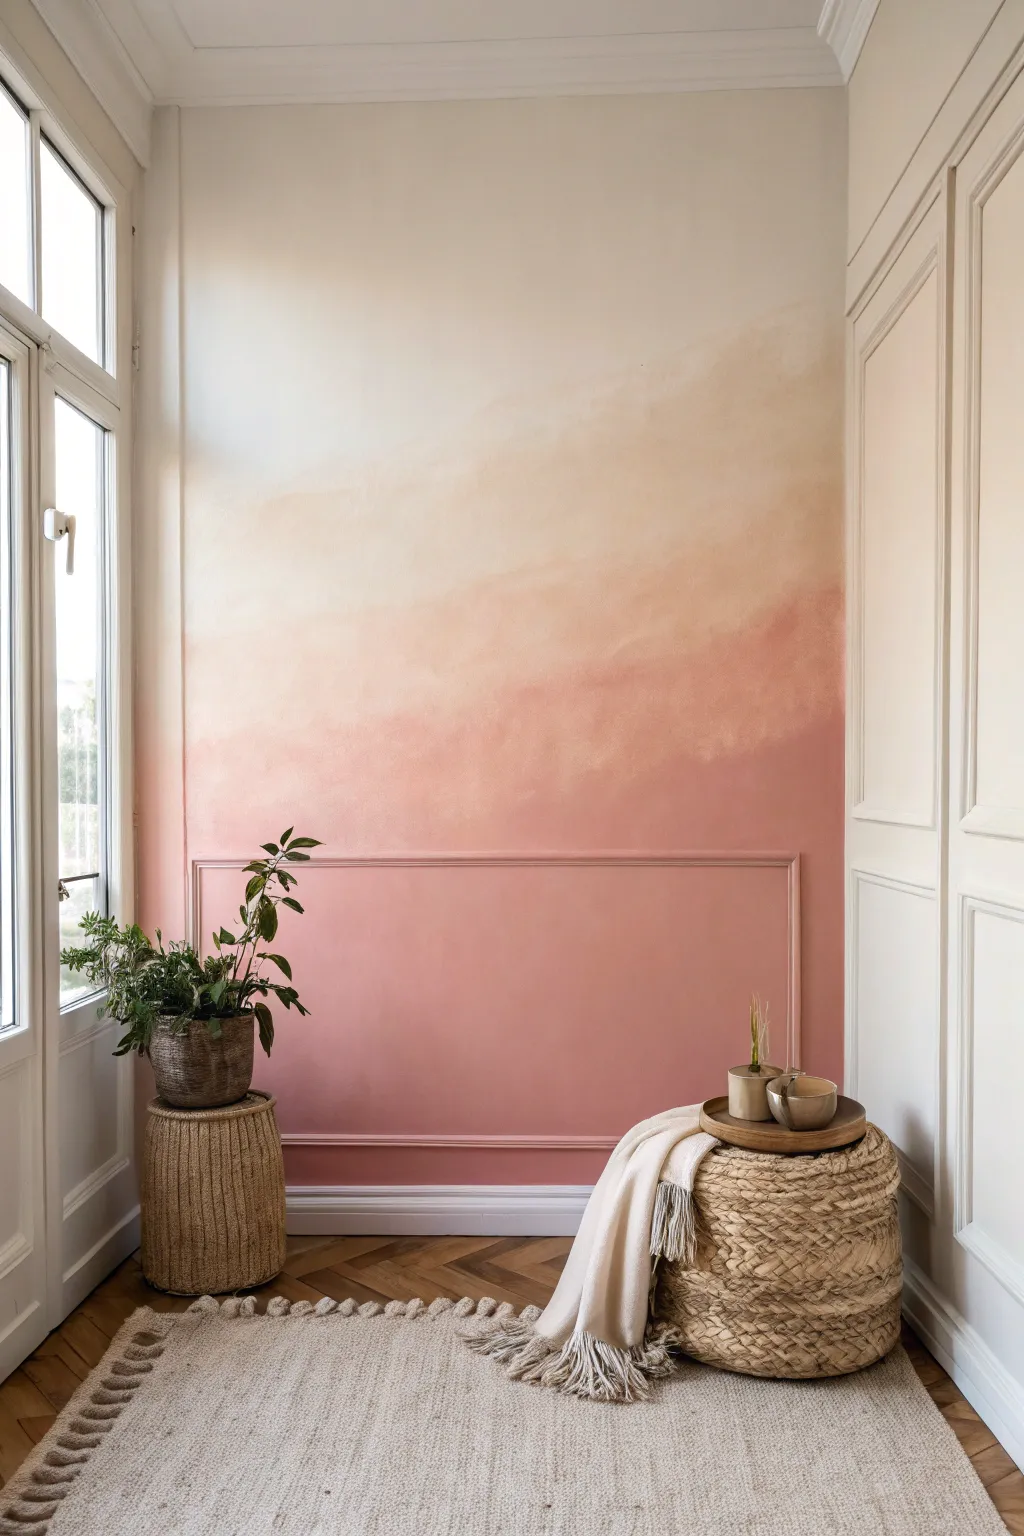
Transform a plain wall into a serene, warmth-filled focal point with this soft gradient technique. This project blends creamy whites into sandy beiges and deep terracotta pinks, creating a dreamy, cloud-like atmosphere that adds depth and height to any room.
Detailed Instructions
Materials
- Interior acrylic latex paint (white/cream base)
- Interior acrylic latex paint (sand/beige)
- Interior acrylic latex paint (terracotta/dusty pink)
- Paint tray and liners
- 2-3 Medium nap rollers (one for each main color)
- Large sponge or sea sponge
- Dry blending brush (large, soft-bristled)
- Painter’s tape
- Drop cloth
- Spray bottle with water (misting setting)
Step 1: Preparation and Base Layout
-
Prepare the workspace:
Clear the area of furniture and lay down a drop cloth to protect your flooring. Tape off the ceiling line, adjoining walls, and baseboards with high-quality painter’s tape to ensure crisp edges. -
Clean the surface:
Wipe down the wall with a damp cloth to remove dust or oils. If you are painting over a dark color, apply a coat of white primer first to ensure the ombre colors show up true and bright. -
Section the wall:
Mentally divide your wall into horizontal thirds. The top third will be your lightest cream, the middle a sandy beige, and the bottom the darkest terracotta pink. -
Paint the bottom section:
Using a roller, apply the darkest terracotta pink color to the bottom third of the wall. If you have wainscoting or molding like in the image, paint right over it for a monochrome look, ensuring you get into all the crevices. -
Paint the middle section:
Apply the sandy beige paint to the middle section of the wall. Leave a gap of about 4-6 inches between this wet paint and the pink section below to prevent premature blending. -
Paint the top section:
Roll the lightest cream or off-white paint onto the top section, cutting in carefully near the ceiling tape. Again, leave a small gap between this color and the beige section below.
Step 2: The Blending Process
-
Mix transition colors:
In your paint tray or on a palette, mix a small amount of the terracotta pink with the sandy beige to create an intermediate transition shade. -
Apply the lower transition:
Using a fresh roller or brush, apply this mixed transition color into the gap between the bottom pink and middle beige sections. Overlap slightly onto both wet edges. -
Wet-blend the lower seam:
While the paint is still wet, take a clean, dry blending brush. Use quick, cross-hatch X-motions to blur the line where the transition color meets the solid blocks. If the paint feels tacky, give it a very light mist of water. -
Mix the upper transition:
Clean your mixing area and now combine the sandy beige with the top cream color to create a lighter transitional hue. -
Apply the upper transition:
Paint this lighter mix into the gap between the beige middle and cream top sections, overlapping the wet edges of both. -
Create the cloud effect:
I like to use a damp sea sponge for this part to get that organic, non-linear look. Dab the sponge along the transition lines to break up any hard horizontal stripes. -
Soften with the dry brush:
Return to your dry blending brush. Gently sweep over the sponged areas in multiple directions to further soften the gradient. The goal is a hazy, ‘watercolor’ fade rather than a perfect stripe.
Paint drying too fast?
Add a latex paint conditioner or extender (like Floetrol) to your colored paints. This slows drying time, giving you longer to blend the gradient smoothly.
Step 3: Refining and Finishing
-
Assess the gradient:
Step back about 5-10 feet to view the whole wall. Look for areas where the color jump is too abrupt or where a brush mark is too visible. -
Touch up transitions:
If a transition looks too harsh, lightly dab a little of the lighter color over the darker edge (or vice versa) using your sponge, then dry-brush it out again. -
Detail the molding:
If you have molding, double-check that the bottom color is fully opaque in the grooves. Use a small angle brush to touch up any areas the roller missed. -
Remove tape:
Peel off the painter’s tape while the paint is still slightly damp. This prevents the dried latex paint from peeling off in chunks with the tape. -
Final cure:
Allow the wall to dry undisturbed for at least 24 hours before moving furniture back or styling the area.
Pro Tip: Keep brushes dry
Keep multiple clean, dry chip brushes on hand. Once a blending brush gets saturated with paint, it stops smoothing and starts dragging color. Switch to a fresh one immediately.
Now you have a tranquil, custom wall feature that brings the warmth of a sunset directly into your home
BRUSH GUIDE
The Right Brush for Every Stroke
From clean lines to bold texture — master brush choice, stroke control, and essential techniques.
Explore the Full Guide
Painted Arch Accent Behind Furniture
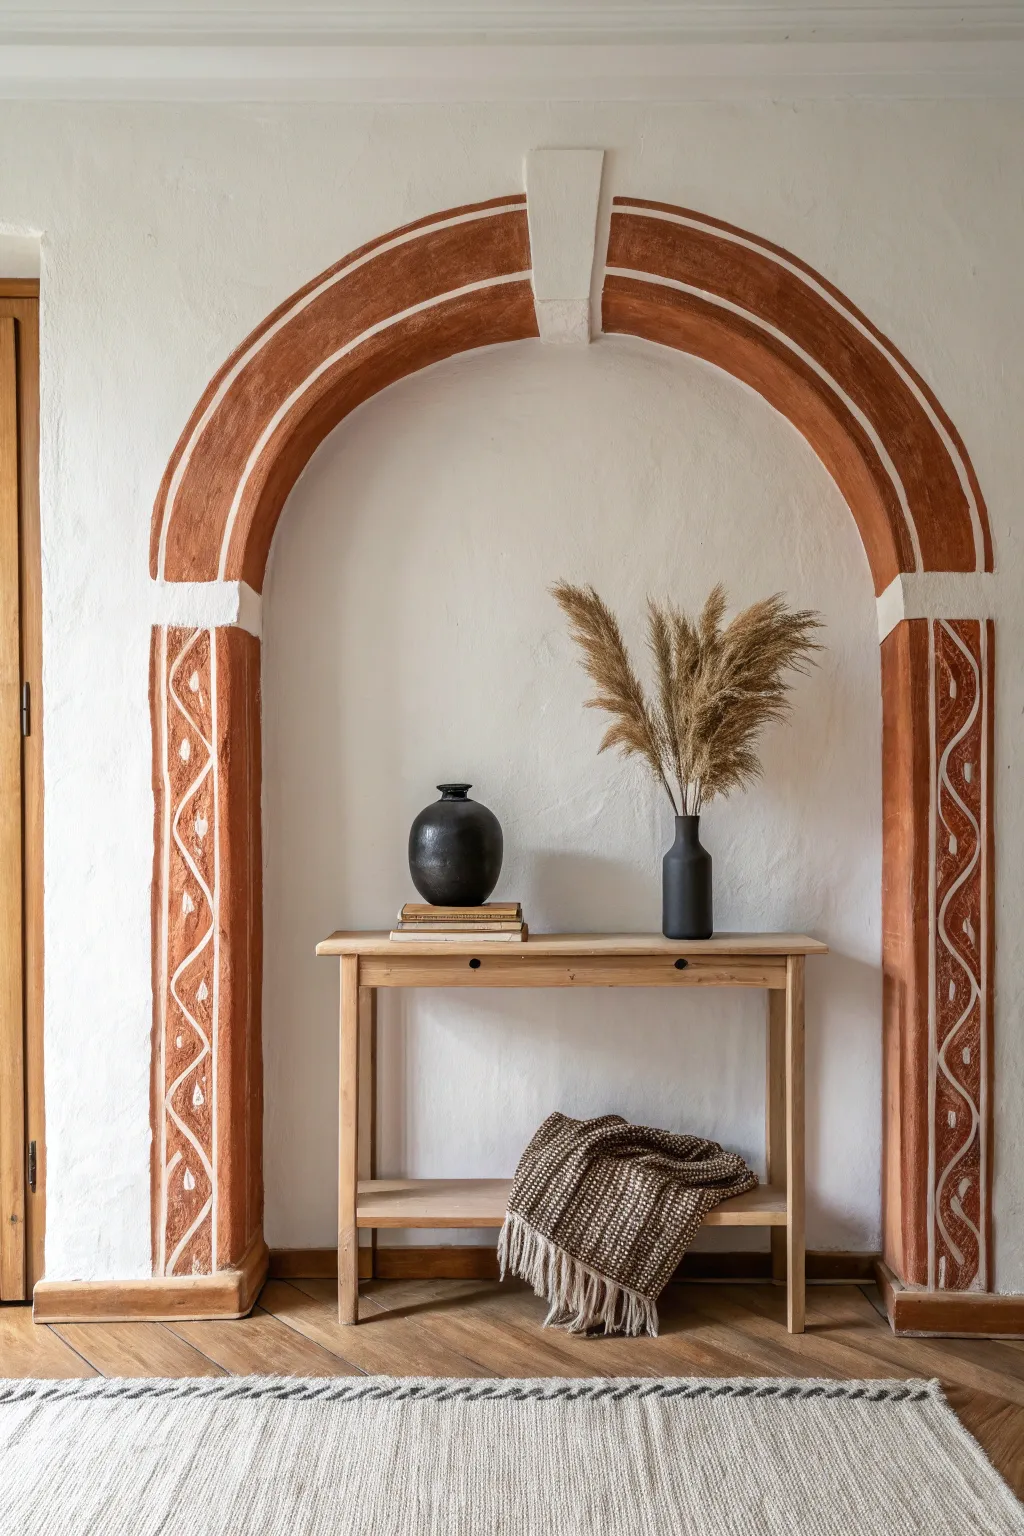
Transform a plain wall into a Mediterranean-inspired focal point with this hand-painted archway. Using warm terracotta tones and simple geometric patterns, this project creates architectural depth and a cozy, earthen vibe without any actual construction.
Detailed Instructions
Materials
- Wall paint (base white or cream)
- Terracotta or rust-colored acrylic paint (matte finish)
- Pencil
- String and thumb tack (or large compass)
- Long ruler or level
- Painter’s tape (optional)
- Medium flat brush (1-2 inch)
- Small fine-liner brush
- White acrylic paint (for details)
- Clean rag or sponge
- Sandpaper (fine grit, optional)
Step 1: Drafting the Structure
-
Determine placement:
Before marking anything, position your console table against the wall to center your design perfectly. Once you have the visual balance right, lightly mark the center point just above the furniture surface and move the table away. -
Draw the vertical guides:
Use a level and a ruler to draw two tall, vertical parallel lines on either side of your center point. These will form the outer edges of the columns. The width of each column should be about 6-8 inches. -
Create the arch curve:
Find the center point between your vertical columns at the height where the arch should begin. Secure a piece of string with a thumb tack here. Tie a pencil to the other end of the string so it reaches the outer edge of your column lines. -
Pencil the arches:
Draft the top semi-circle by keeping the string taut and swinging the pencil from left to right. Shorten the string by the width of your column (6-8 inches) and draw the inner arch line. You should now have a rainbow shape connecting your two columns. -
Define the keystone:
At the very peak of the arch, sketch a trapezoid shape to mimic a stone keystone. This element breaks the continuous curve and adds an authentic architectural feel.
Wobbly Lines?
Don’t stress over imperfection! If lines are too shaky, thicken the border slightly to mask it. The charm of this style is its hand-plastered look, so minor wobbles add character rather than ruin it.
Step 2: Applying the Base Color
-
Outline in paint:
Dip your medium flat brush into the terracotta paint. Carefully trace the pencil outlines first. I find that doing these edges freehand gives a more charming, organic look than using tape, which can feel too rigid. -
Fill the columns:
Fill in both vertical side columns with the terracotta paint. Don’t worry about perfect opacity; a slightly streaky or uneven application mimics the texture of aged plaster or clay. -
Paint the arch:
Continue painting the curved section, stopping abruptly at the lines you drew for the keystone. Leave the keystone area unpainted (showing the white wall color) or paint it a slightly lighter shade of cream for contrast. -
Add the trim detail:
Using a steady hand, paint a thinner strip of terracotta—about an inch wide—paralleling the top curve of the arch. Leave a small gap of white space between the main arch and this outer trim line for visual separation. -
Create column breaks:
Where the arch curve meets the straight columns, paint a horizontal band of white (or simply leave a gap if you planned ahead) to simulate a capital or molding that separate the arch from the pillars.
Texture Trick
Mix a teaspoon of baking soda into your acrylic paint before applying. This creates a grainy, stucco-like texture that makes the painted ‘stonework’ feel startlingly real even up close.
Step 3: Detailing and Weathering
-
Draft the geometric pattern:
Once the base terracotta paint is dry to the touch, lightly pencil a wavy, serpentine line running down the center of each vertical column. -
Paint the white wave:
Use your fine-liner brush and white paint to trace over the wavy pencil line. Keep the pressure consistent for a smooth flow. -
Add decorative dots:
Inside each curve of the wave, paint simple white dots or tear-drop shapes. Alternate the placement—dots on the left side of the wave, then the right—as you move down the column. -
Outline the columns:
Using the white paint again, paint thin vertical lines just inside the borders of your terracotta columns. This frames the pattern and makes the pillars pop. -
Distress the finish:
To achieve that old-world villa texture, take a very lightly damp rag and gently rub areas of the terracotta paint. This softens the crisp edges and reveals a hint of the wall texture underneath. -
Final clean-up:
Step back and check for any distracting smudges. Use a small brush with your original wall color to touch up any accidental splashes outside the main design.
Now step back and admire how this simple painted feature brings architectural warmth to your entire room.
Wildflower Field Border
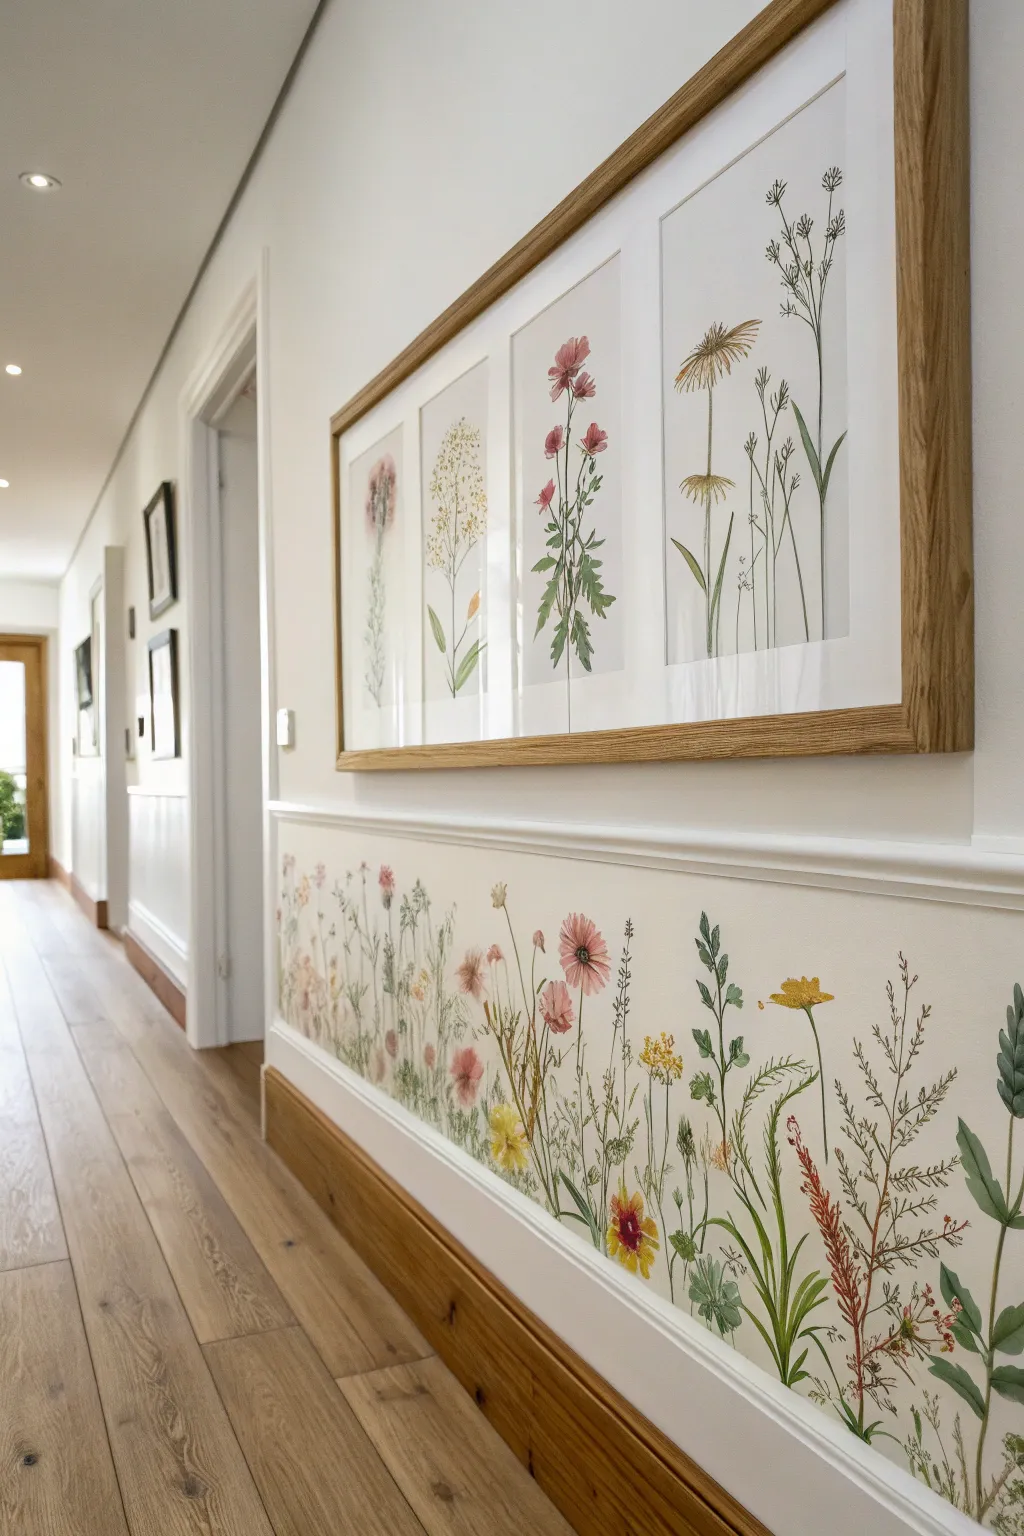
Transform a plain hallway corridor into a delicate meadow with this botanical border painting. By keeping the artwork below the chair rail, you create a grounding, garden-like atmosphere that feels both sophisticated and airy.
Step-by-Step Tutorial
Materials
- Interior latex paint (white for base)
- Acrylic paints (olive green, sap green, burnt sienna, yellow ochre, dusty rose, magenta, cream)
- Acrylic glazing medium
- Pencil
- Painter’s tape
- Chair rail molding (optional, if not existing)
- Round brushes (sizes 2, 4, and 6)
- Fine liner brush (size 0 or 00)
- Palette or paper plate
- Damp cloth
- Reference images of local flora
Step 1: Preparation & Layout
-
Prep the surface:
Ensure the lower section of your wall is clean, smooth, and painted with your desired base color. A warm, creamy white works best to make the flowers pop without being too stark. -
Define the boundaries:
If you don’t already have a chair rail, install simple molding or use painter’s tape to mark a crisp horizontal line about 30-36 inches from the floor. This frames your ‘garden’ space. -
Rough sketch:
Using a very light hand and a pencil, sketch vertical guide lines for your taller stems. Vary their heights so they don’t look like soldiers in a row; some should reach almost to the molding, others should stay low.
Variety is Key
Avoid repeating the same flower shape. Mix tall spikes, round blooms, and fern-like leaves to mimic the chaos of a real meadow.
Step 2: Painting the Foliage
-
Mix your greens:
Create a few variations of green on your palette. Mix sap green with a touch of burnt sienna for earthy stems, and olive green with white for softer, distant leaves. I like to keep the paint somewhat fluid for long strokes. -
Paint main stems:
Using a size 4 round brush, paint the primary vertical stems following your pencil guides. Apply slightly more pressure at the bottom and lift off as you go up to create a tapering effect. -
Add grassy textures:
Switch to a size 2 brush to add thinner blades of grass and secondary stems branching off the main ones. Keep your wrist loose to achieve natural, slight curves. -
Layer leaves:
Add leaves of various shapes—some fern-like fronds at the bottom, small oval leaves higher up, and long thin blades. Use the darker greens near the bottom (the connection to the baseboard) to anchor the composition visually.
Step 3: Adding the Blooms
-
Pink cosmos base:
Mix a dusty rose color. Identify where your largest flowers will sit and paint the petal shapes loosely. Don’t worry about perfect details yet; just block in the color. -
Yellow wildflowers:
Using yellow ochre and a size 4 brush, dab small clusters to represent goldenrod or buttercups. These should be scattered at mid-height. -
Detailed reddish spikes:
For the taller, reddish grass-like plants (sorrel), mix burnt sienna with a drop of red. Use a stippling motion with a small brush to create the textured, seed-head look along the upper stems. -
Define petals:
Go back to your pink flowers. Mix a slightly darker magenta and add defining lines towards the center of the petals to create depth and separation. -
Wait for layers:
Let these initial color blocks dry for about 15-20 minutes before adding finer details, or the colors might muddy together.
Fixing Heavy Stems
If a stem looks too thick, wait for it to dry, then use the wall’s base color to ‘cut in’ and slim the line down from the side.
Step 4: Fine Details & Highlights
-
Add centers:
Paint dark brown or deep yellow centers on your cosmos and daisy-like flowers using the tip of a small brush. -
Delicate linework:
Load your fine liner brush (size 0) with thinned dark green paint. Add very thin veins to larger leaves and tiny connecting stems that you might have missed. -
Seed heads and buds:
Dot tiny specks of white or cream near the top of the grasses to simulate pollen or seeds caught in the light. Add small, closed buds on the tips of some green stems. -
Glazing for depth:
Mix a tiny amount of grey-green with glazing medium. lightly wash over areas where stems overlap near the bottom to create a sense of shadow and density. -
Final review:
Step back about five feet. Look for any ‘bald’ spots in your meadow and fill them with a simple blade of grass or a floating seed head. -
Seal (Optional):
If this is a high-traffic hallway, consider applying a clear matte polycrylic varnish over the painted section once fully cured (after 24-48 hours) to protect your work.
This blooming border brings the outdoors in, creating a serene pathway through your home all year round

PENCIL GUIDE
Understanding Pencil Grades from H to B
From first sketch to finished drawing — learn pencil grades, line control, and shading techniques.
Explore the Full Guide
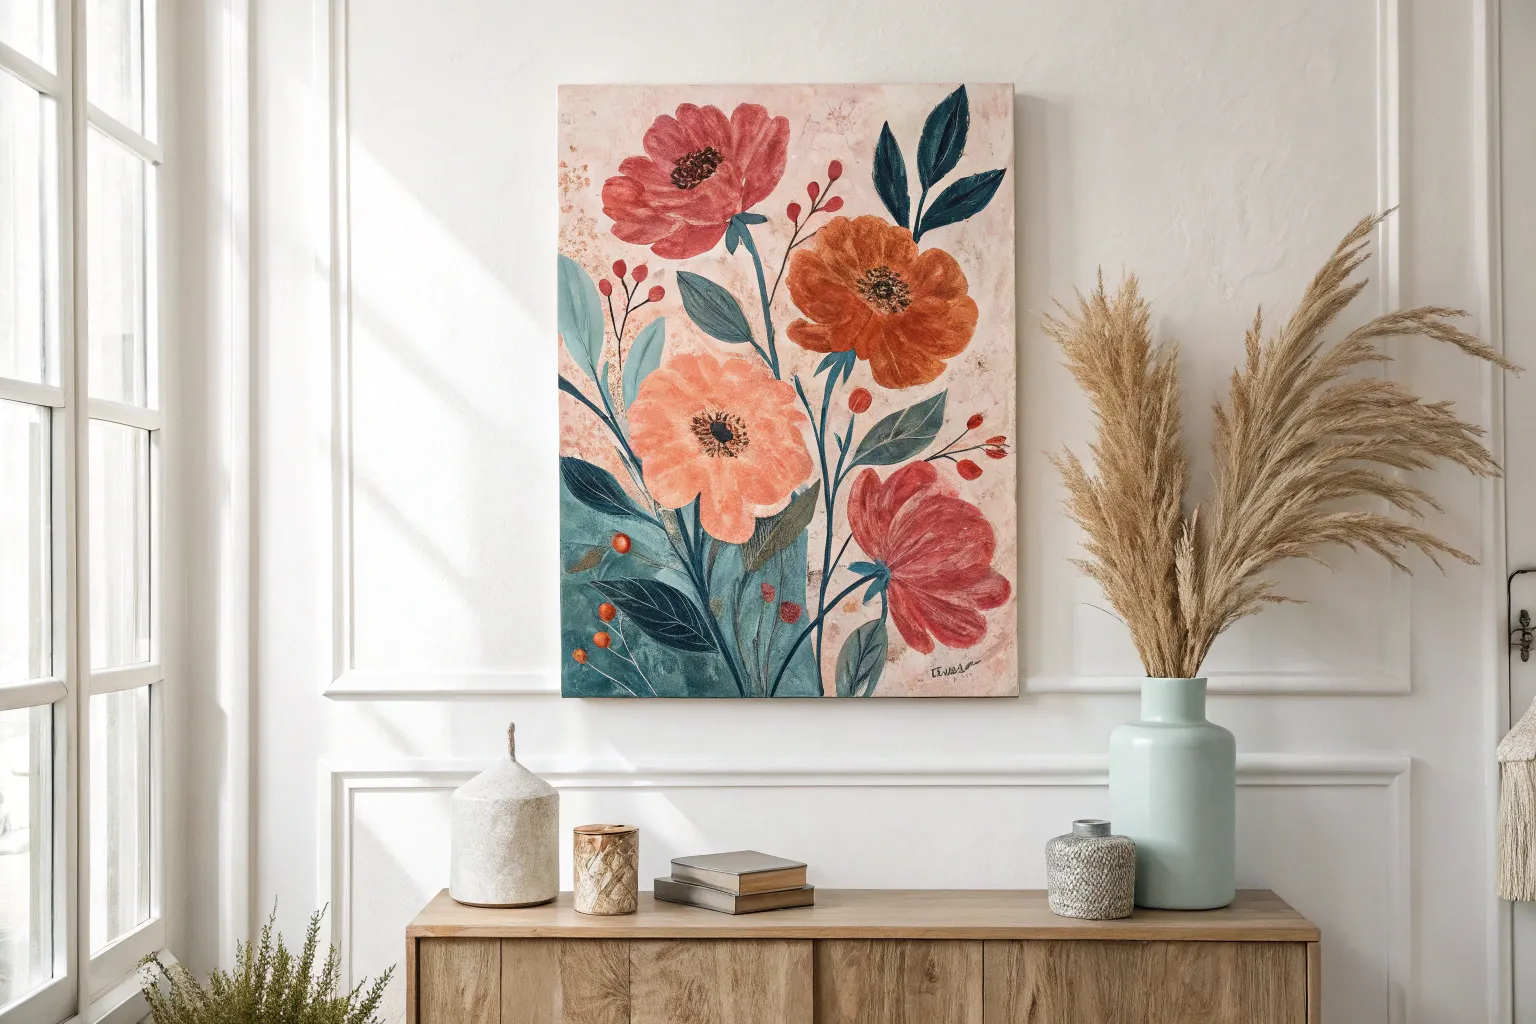
Minimal Line Art With Acrylic Shapes
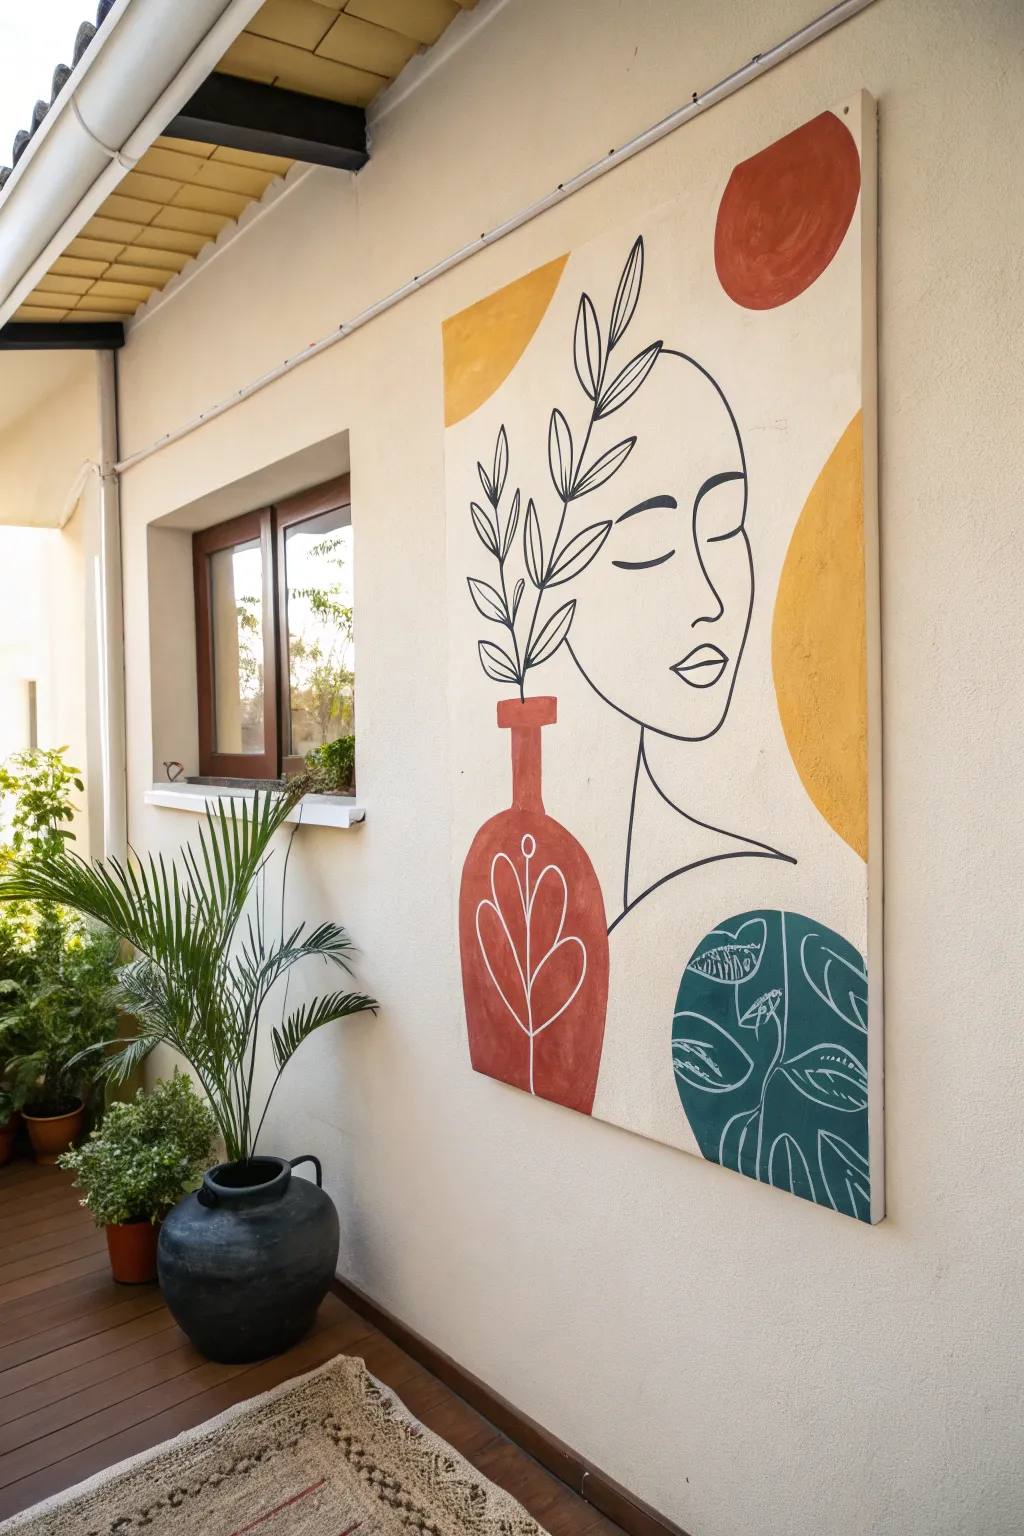
This striking large-scale piece combines fluid, continuous line drawing with bold, abstract blocks of acrylic color for a modern bohemian look. The juxtaposition of the structured geometric shapes against the organic flow of the botanical face creates a serene focal point perfect for a patio or bright living space.
Step-by-Step Guide
Materials
- Large canvas (approx. 36×48 inches) or prepared wooden board
- Gesso primer (if using wood)
- Acrylic paints: Terra Cotta, Mustard Yellow, Deep Teal, and Black
- Large flat brush (1-2 inch) for shapes
- Round brush (size 4 or 6) for line work
- Fine liner brush (size 0 or 1) for details
- Pencil and eraser
- Ruler or straight edge
- White paint pen (optional acrylic marker)
- Painter’s tape (optional)
- Palette or paper plate
- Water cup and paper towels
Step 1: Preparation and Base Shapes
-
Prepare your surface:
If you are working on a raw wooden board like the one in the example, apply two coats of white gesso to seal the wood and create a bright white background. If using a pre-primed canvas, you can skip this step, though an extra coat of white ensures opacity. -
Map out the composition:
Lightly sketch the approximate locations for your color blocks using a pencil. You’ll need a vase shape at the bottom left, a circle at the top right, a semi-circle at the top left, a large organic curve on the right edge, and a circular botanical shape at the bottom right. -
Paint the mustard yellow shapes:
Mix a warm mustard yellow acrylic. Using your large flat brush, fill in the semi-circle at the top left and the large curved shape hugging the right edge of the canvas. Apply two coats if necessary to reduce brush strokes. -
Create the terra cotta elements:
Switch to a terra cotta or burnt orange shade. Paint the rough circle in the top right corner. It doesn’t need to be mathematically perfect; a slightly organic edge adds character. -
Paint the vase base:
Using the same terra cotta color, paint the bottle-shaped vase silhouette in the lower left quadrant. Ensure the neck is narrow and straight, widening into a rounded base. -
Add the deep teal accent:
Mix a dark, moody teal green. Paint a large, rough circular shape in the bottom right corner, overlapping slightly with where the figure’s shoulder will eventually be. Let all color blocks dry completely before moving on.
Smooth Lines Tip
To get those fluid, continuous black lines without the brush dragging, mix a few drops of water or flow improver medium into your black acrylic paint until it has the consistency of unparalleled ink.
Step 2: The Line Art Figure
-
Sketch the face profile:
Very lightly sketch the woman’s profile with a pencil. Start with the forehead, curving down to the nose, lips, and chin. The style relies on simplicity, so focus on the contour. -
Draft the botanical headpiece:
Draw the stems rising from the vase and extending upward. I like to position the leaves so they appear to be part of the figure’s hair or headpiece, creating a surreal connection between the object and the person. -
Connect the neck and shoulder:
Draw a sweeping line for the neck and shoulder, ensuring it interacts visually with the teal circle at the bottom right without getting lost inside it. -
Outline the face in black:
Load your size 4 round brush with black acrylic paint thinned slightly with water for better flow. Carefully trace your pencil lines for the face profile, keeping your hand steady for a consistent line width. -
Paint the leaves:
Using the same black paint, outline the stems and leaves rising from the vase. The leaves should be simple almond shapes with a central vein line. -
Detail the eye and brow:
Switch to a smaller brush if needed. Paint the closed eyelid as a simple crescent curve and add a defined eyebrow above it. This expression gives the piece its peaceful, meditative quality. -
Connect the torso lines:
Paint the shoulder line. Notice how the line stops when it hits the teal circle and picks up again on the other side or merges into the shape’s design—this creates depth. -
Clean up edges:
Once the black paint is dry, gently erase any visible pencil marks that weren’t covered by paint.
Wobbly Hand?
If you struggle painting long, smooth lines with a brush, cheat a little! Use a broad-tip black acrylic paint marker for the main figure. It gives you drawing control with the permanence of paint.
Step 3: White Details and Finishing
-
Add vase details:
Using a fine liner brush and white acrylic (or a white paint pen), draw a simple botanical design inside the terra cotta vase. A central stem with three looped leaves on each side works perfectly. -
Detail the teal circle:
On the dark teal circle, paint stylized white leaves. Use loose, sketchy lines to create contrast against the solid color block. This mimics the ‘monstera’ look. -
Seal the artwork:
If this piece is going outside on a patio like the inspiration image, apply a clear, outdoor-rated polycrylic sealer. For indoor use, a standard matte varnish will protect the surface from dust.
Now you have a stunning, gallery-worthy piece that brings a modern, artistic touch to your favorite relaxation spot.
Triptych Acrylic Panels for Wide Walls

Bring the calming expanse of a seaside view into your home with this panoramic three-panel acrylic painting. By extending a single landscape across multiple canvases, you create a sense of vastness and continuity that beautifully fills a wide wall space.
Step-by-Step Tutorial
Materials
- Three equal-sized tall rectangular canvases (e.g., 18×24 or 24×36 inches)
- Acrylic paints: Phthalo Blue, Ultramarine Blue, Titanium White, Raw Umber, Burnt Sienna, Yellow Ochre, Sap Green, and Unbleached Titanium
- Large flat wash brush (2-inch)
- Medium filbert brush (size 8 or 10)
- Small round or rigger brush for details
- Palette knife
- Easel or large flat workspace
- Masking tape
- Water container and paper towels
Step 1: Preparation and Sketching
-
Align the Canvases:
Set up your three canvases side-by-side on your easel or floor. If possible, push them right up against each other so they touch. This is crucial for ensuring the horizon line and landscape features flow seamlessly from one panel to the next. -
Mark the Horizon:
Using a pencil or a piece of chalk, lightly sketch a straight horizon line across all three panels. Position it roughly one-third of the way up from the bottom to give dominance to the dramatic sky. -
Sketch the Land Masses:
Lightly outline the major shapes: the grassy dunes in the immediate foreground, the sandy inlet sweeping through the middle, and the distant tree line on the left panel. Ensure the paths of sand and water connect visually across the gaps.
Uneven Horizon Line?
If your horizon looks jumpy between panels, use a long strip of low-tack painter’s tape across all three canvases at once to establish a perfectly straight guideline before painting the sky.
Step 2: Painting the Sky and Water
-
Base Coat the Sky:
Mix Titanium White with a touch of Phthalo Blue for a pale, airy blue. Using your large flat brush, apply this gradient from the horizon upwards, adding slightly more blue as you reach the top edge of the canvases. -
Cloud Formation:
While the blue is still slightly tacky, use a filbert brush loaded with pure Titanium White to scrub in cloud shapes. Focus on large, fluffy cumulus clouds in the middle band of the sky, keeping the bottoms flat and gray-tinged for volume. -
Refining Cloud Shadows:
Mix a tiny amount of Burnt Sienna with Ultramarine and White to make a soft gray. Glaze this into the bottom nooks of the clouds to give them three-dimensional weight. -
Painting the Ocean:
For the distant water, mix Phthalo Blue with a little darker Phthalo Green and White. Paint sharp, horizontal strokes right at the horizon line. As you move closer toward the beach, lighten the mixture with white to suggest shallow water.
Step 3: The Middle Ground: Sand and Dunes
-
Blocking in the Sand:
Mix Unbleached Titanium with touches of Raw Umber and White. Paint the sandy areas with long, horizontal strokes. I like to let the brush run dry occasionally here to let the canvas texture mimic the graininess of sand. -
Wet Sand Reflections:
Where the water meets the sand, mix a slightly darker, cooler version of your sand color (add a dash of the sky blue). Glaze this over the shore area to make it look wet and reflective. -
Distant Vegetation:
On the far left panel, dab in the distant treeline using a mix of Sap Green and darkened with a little blue. Keep the edges soft; atmospheric perspective makes distant objects look slightly blurry.
Paint the Wrap-Around
Don’t stop at the front edge! Continue the painting onto the sides of the canvas (gallery wrap style). This makes the finished piece look professional and frameless-ready.
Step 4: Foreground Details
-
Underpainting the Grass:
For the grassy dunes in the immediate foreground, start with a dark base coat of Sap Green mixed with Burnt Sienna. Apply this loosely to establish the shadowed areas beneath the grass. -
Layering Grass Textures:
Switch to a fan brush or a worn-out flat brush. Mix Yellow Ochre and Sap Green and flick upward strokes to create tall grasses. Vary the direction slightly to simulate wind blowing through the dune. -
Adding Highlights:
Mix Yellow Ochre with White. With a rigger brush or the edge of a palette knife, add sharp, bright highlights to the tips of the grass where the sun hits them. -
Connecting the Earth:
Ensure the grassy banks on the left and center panels visual connect. Even though there is a gap between canvases, your eye should follow the slope of the dune from one frame to the next. -
The Fence Post Detail:
On the far right panel, use a small flat brush and a dark grey-brown mix to paint the solitary fence post. Add a swift vertical highlight on the sun-facing side to ground the foreground composition. -
Final Adjustments:
Separate the canvases to see how they look individually, then push them back together. Touch up any edges where the continuity feels broken, ensuring the horizon remains perfectly straight across the trio.
Once dry, hang your panels with equal spacing to reveal your seamless coastal window


Gallery Wall of Tiny Acrylic Minis
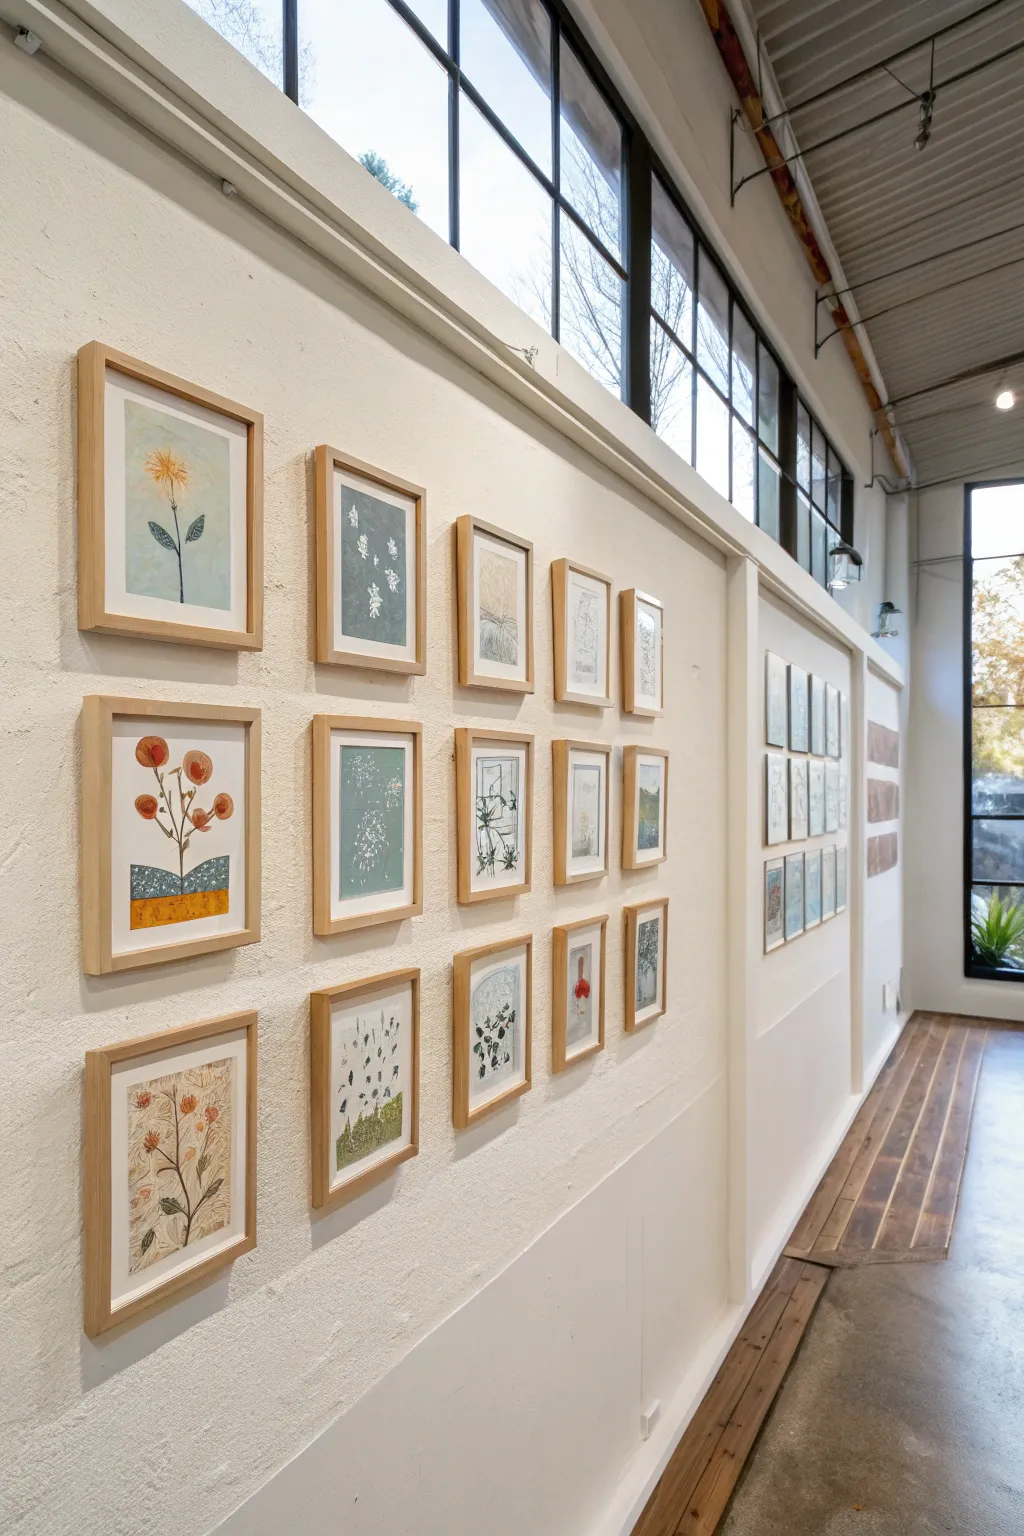
Bring the charm of a curated art exhibit into your home with this collection of tiny, nature-inspired acrylic paintings on paper. These miniature works feature delicate botanical motifs, abstract organic shapes, and a soft, earthy color palette framed in light natural wood.
Step-by-Step Guide
Materials
- Heavyweight mixed media paper or watercolor paper (cold press)
- Acrylic paints (Titanium White, Yellow Ochre, Burnt Sienna, Olive Green, various blues)
- Small synthetic brushes (sizes 0, 2, and 4)
- Fine liner brush for details
- Paint palette or mixing surface
- Pencil and eraser
- Ruler
- Masking tape
- Light wood frames (approx. 5×7 or 8×10 inches) with white mats
- Scissors or paper cutter
Step 1: Preparation & Planning
-
Size your paper:
Measure the opening of your frame mats to determine the exact size needed for each painting. Cut your heavyweight paper into rectangles slightly larger than the mat aperture to allow for easy mounting later. -
Plan your grid:
Since this is a gallery wall project, sketch out a rough plan for your grid. Decide on a cohesive color theme—the example uses muted blues, greens, terracottas, and creamy off-whites to create harmony across different subjects.
Step 2: Painting the Backgrounds
-
Mix base tones:
Create soft, muted background colors by mixing your acrylics with generous amounts of Titanium White. You want pale blues, creamy beiges, and soft sage greens. -
Apply washes:
Dilute your acrylic paint slightly with water to create a semi-opaque wash. Paint the entire background of each mini sheet. Don’t worry about perfect coverage; a little texture adds to the organic feel. -
Create distinct zones:
For some pieces, like the flower in the pot, block out distinct shapes for the ground or table using a solid, opaque color like Yellow Ochre or deep blue to ground the composition. -
Dry thoroughly:
Let all background layers dry completely before adding any details to prevent muddying your crisp lines.
Keep it Cohesive
Limit your palette to 4-5 core paint tubes. Mixing every shade from this limited set guarantees all paintings will look like they belong together.
Step 3: Botanical Details
-
Sketch the subjects:
Lightly sketch your botanical subjects using a pencil. Aim for variety: single long-stemmed flowers, patterned leaves, clusters of berries, or abstract ‘seed’ shapes. -
Block in main shapes:
Using a size 2 brush, paint the main botanical elements. For the sunflower-style piece, dab Yellow Ochre in a radial pattern. For leafy branches, use Olive Green mixed with a touch of blue for a cool tone. -
Layering color:
Once the base shapes are dry, add a second layer of slightly lighter or darker paint to give depth. For example, add a lighter terracotta highlight to the red berries to make them pop. -
Pattern work:
I particularly love adding tiny patterns to these minis. Use a fine liner brush to add white dots or dashes onto darker leaves, or dark veins onto light petals, mimicking the block-print style seen in the reference.
Go Mixed Media
Try incorporating bits of collage paper for the ‘ground’ or vase elements before painting over them for added texture and visual interest.
Step 4: Finishing Touches & Assembly
-
Add fine lines:
Use your smallest brush or even a fine-tip paint pen to draw stems, stamens, and delicate outlines. A very dark green or brown often looks softer and more natural than pure black. -
Review consistency:
Lay all your dried paintings out on a table together. Check that the colors flow well from one to another. If one looks too bright, glaze over it with a very watered-down white or beige to mute it. -
Mount artwork:
Use masking tape to secure the back of each painting to the frame’s mat board. Ensure the painted image is centered perfectly in the window. -
Frame and hang:
Place the mats into the light wood frames. Arrange them on your wall in a grid, keeping the spacing consistent—about 2-3 inches between frames creates a professional gallery look.
Step back and admire your personal art collection, creating a serene focal point for any room
Vertical Panel Art for Narrow Spaces
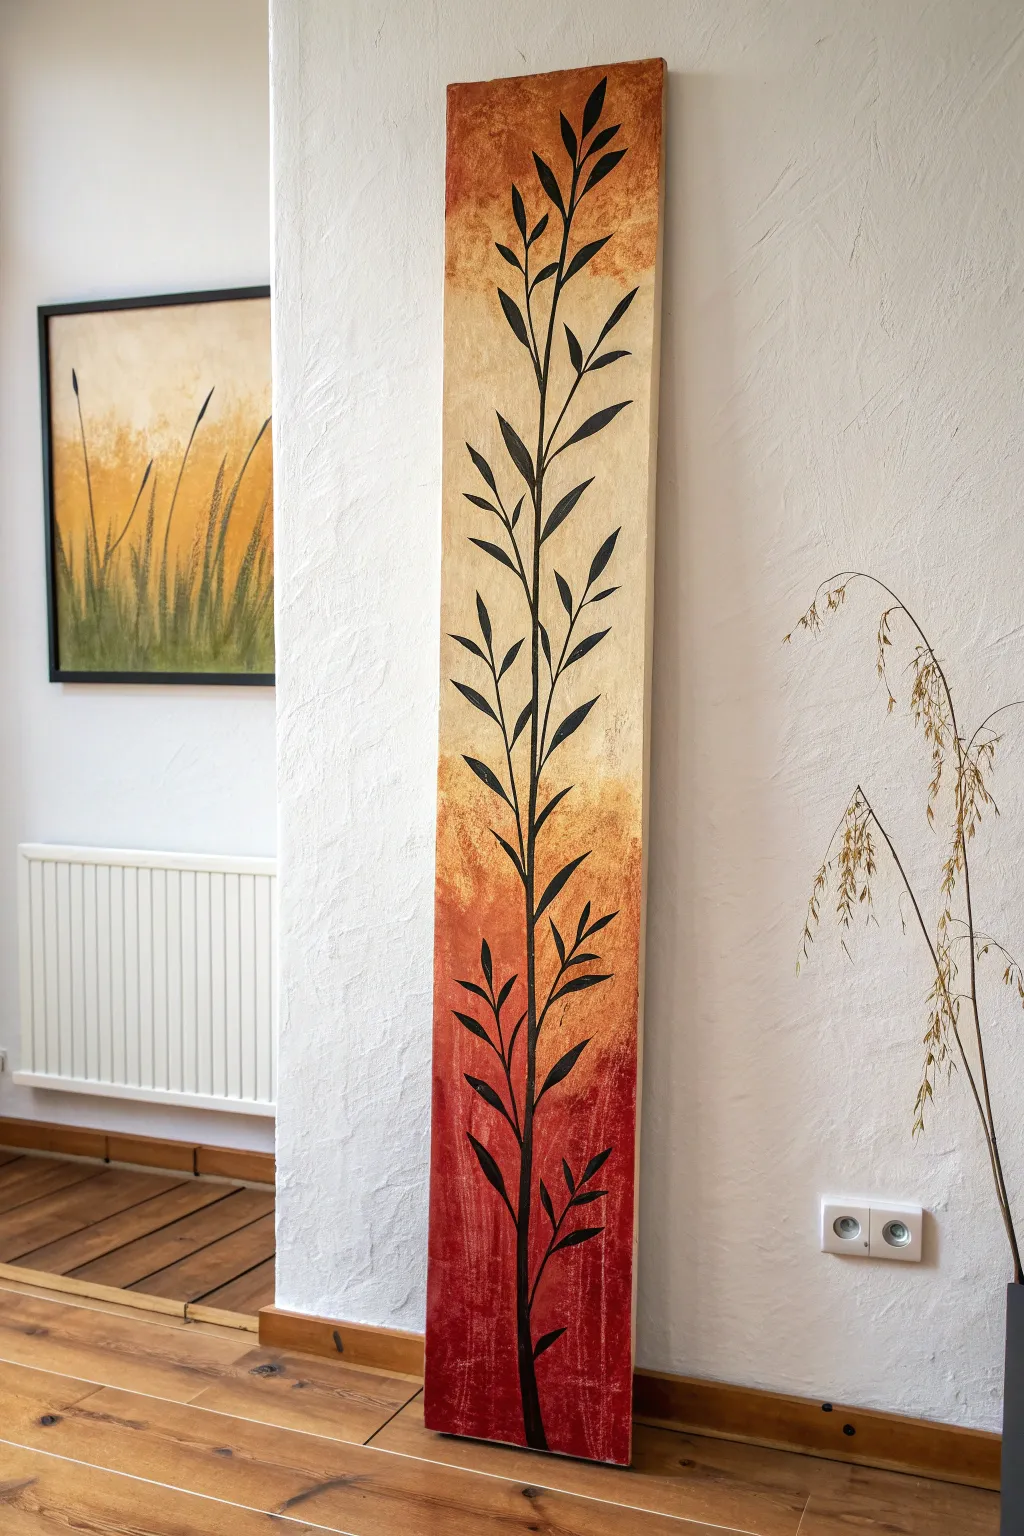
Transform a narrow, awkward wall space with this elegant vertical panel that blends warm, earthy tones with striking silhouette art. The gradient background mimics a sunset glow, providing a perfect backdrop for the simple yet sophisticated climbing vine design.
Step-by-Step Tutorial
Materials
- Tall, narrow canvas or MDF panel (approx. 10×60 inches)
- Gesso primer
- Acrylic paints: Deep Red/Burgundy, Burnt Orange, Ochre/Yellow deep, Titanium White, and Carbon Black
- Large flat brush or foam roller (for base)
- Medium sponge or stippling brush
- Fine liner brush and medium round brush (simulated size 2-4)
- Painter’s tape or stencil (optional)
- Pencil
- Matte or satin varnish
Step 1: Preparation & Base Gradient
-
Prime the surface:
Begin by applying a generous coat of Gesso to your narrow canvas or wood panel to ensure a smooth texture and prevent paint absorption. Allow it to dry completely before sanding lightly for an ultra-smooth finish. -
Map out color zones:
Mentally divide your canvas into three roughly equal horizontal sections with soft transitions. The bottom will be deep red, the middle burnt orange, and the top a creamy ochre. -
Apply the bottom layer:
Load your sponge or large brush with Deep Red or Burgundy paint. Stipple or brush the paint onto the bottom third of the panel, keeping the coverage somewhat textured rather than perfectly flat. -
Create the middle transition:
While the red edge is still slightly tacky, introduce the Burnt Orange. Stipple it into the middle section, blending it downwards into the red to create a gradient where the colors overlap. -
Paint the top section:
Mix Ochre with a touch of Titanium White to create a soft, sandy yellow. Apply this to the top third, blending it down into the orange section using a clean sponge to avoid muddying the colors. -
Intensify the top cap:
Notice how the very top edge of the example returns to a darker orange-brown tone. Gently sponge a small amount of Burnt Sienna or Orange at the very top edge to frame the piece. -
Refine the texture:
Once the blend looks right, use a slightly dry sponge to dab over the entire surface randomly. This ‘mottled’ effect gives the background a distressed, rustic stone or parchment appearance. Let this base layer dry fully—usually 1-2 hours.
Wet-on-Wet Blending
Work quickly while the acrylics are still wet when creating the background gradient. A slightly damp sponge helps the colors mix seamlessly on the canvas.
Step 2: Painting the Silhouette
-
Sketch the vine:
Using a pencil, lightly draw a single curving line starting from the bottom center and winding gently upward to the top. This will be the main stem. -
Mark leaf positions:
Make small tick marks along the stem where you want your leaves to grow. Alternate them left and right for a natural, organic flow. -
Paint the main stem:
Load a medium round brush or long liner brush with Carbon Black paint. Starting from the bottom, paint the main vine, pressing harder at the base for a thicker line and lifting pressure as you reach the top for a tapered end. -
Add lower branches:
Near the bottom, paint slightly thicker secondary branches extending out. Ensure the connection points to the main stem are fluid and curved, not sharp angles. -
Paint the first leaves:
Begin adding leaves at the bottom using Carbon Black. Press the belly of a round brush down to create the widest part of the leaf, then drag and lift to form a sharp point. -
Work upwards:
Continue painting leaves up the stem. I find it helpful to make the leaves slightly smaller as you move toward the top of the canvas to simulate distance and growth. -
Add fine details:
Go back with your finest liner brush to sharpen any leaf tips or add tiny, delicate stems connecting the leaves to the main vine. -
Check for opacity:
Acrylic black can sometimes dry semi-transparent. If the background shows through the leaves, apply a second coat of black to the silhouette once the first layer is dry. -
Clean up edges:
If you accidentally smudged black outside the lines, wait for it to dry, then carefully touch it up with your background colors using a small brush. -
Seal the artwork:
Once the painting has cured for at least 24 hours, apply a clear matte or satin varnish to protect the surface and unify the sheen of the background and the silhouette.
Fixing Shaky Lines
If your vine lines look wobbly, thin your black paint slightly with water or flow medium. Inky paint flows smoother than heavy body paint.
Hang your finished vertical panel in that tricky narrow spot to add instant warmth and nature-inspired charm to your room
Metallic Accents for a Luxe Pop
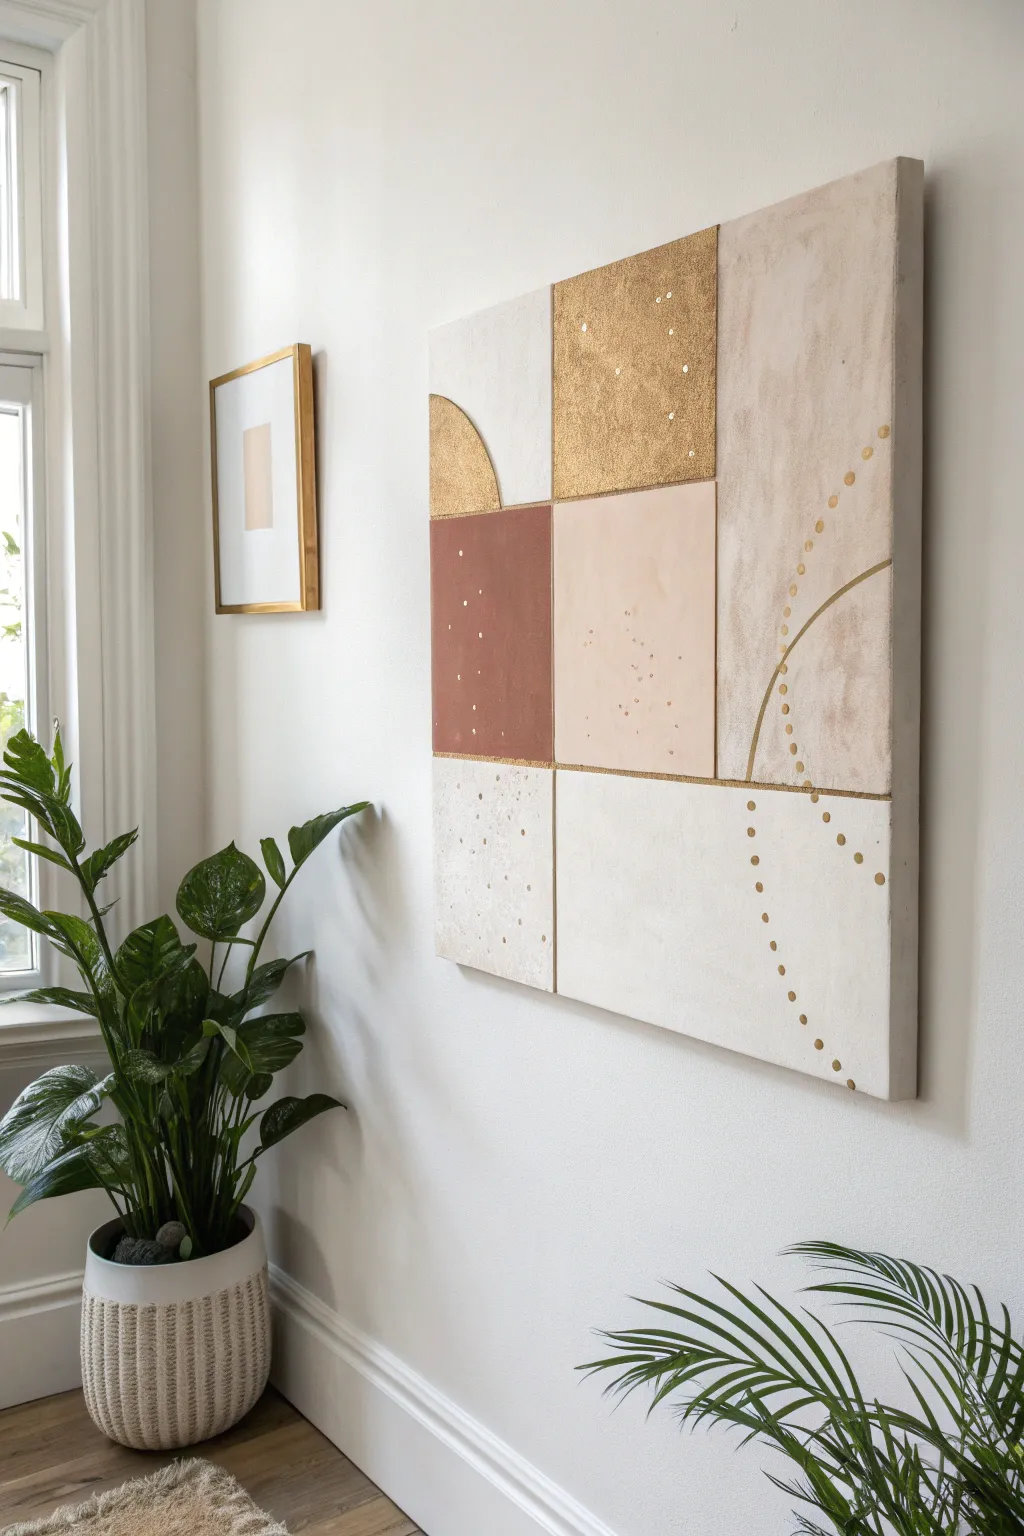
This large-scale, multitextured wall art combines warm earth tones with structural plaster effects and luxurious gold leaf detailing. The geometric patchwork design creates a modern focal point that feels both organic and high-end, perfect for bringing a subtle shimmer to a neutral room.
Detailed Instructions
Materials
- Large square canvas or wood panel (approx. 36×36 inches)
- Joint compound or modeling paste
- Acrylic paints (terracotta, beige, cream, white)
- Gold metallic paint
- Gold leaf sheets and adhesive (gilding size)
- Gold glitter (fine)
- Set of palette knives (various sizes)
- Painter’s tape (various widths)
- Large flat paintbrush
- Fine detail paintbrush or gold paint marker
- Small round sponge or dotting tool
- Ruler and pencil
- Fine-grit sandpaper
Step 1: Planning and Texturing
-
Map the grid:
Begin by laying your large canvas on a flat surface. Use a ruler and pencil to lightly draw a grid. The design in the image uses a varied grid, so don’t feel pressured to make every square identical; aim for a mix of large vertical rectangles and smaller squares. -
Tape the boundaries:
Apply painter’s tape along your pencil lines to separate the sections. This will keep your crisp geometric edges intact while we apply the messy texture. -
Apply base texture:
Working one section at a time, scoop up joint compound or modeling paste with a palette knife. Spread it across the designated areas, varying the thickness. For the larger right-hand panel, aim for a rougher, stonelike finish. -
Create smooth contrasts:
For the bottom-right and top-left squares, smooth the compound out more precisely with the flat edge of your knife to create calmer, flatter zones. -
Add granular details:
While the paste is still wet in the bottom-left section, gently dab it with a sponge or crumpled paper towel to create a pitted, concrete-like texture. -
Dry thoroughly:
Let the texture dry completely. Joint compound can take 24 hours to cure depending on thickness; ensure it is hard to the touch before proceeding.
Step 2: Color Blocking
-
Sand high spots:
Once dry, lightly run fine-grit sandpaper over the roughest peaks to prevent them from breaking off later. -
Mix your palette:
Prepare your acrylic colors. You’ll need a deep terracotta, a soft blush beige, a warm cream, and a pale off-white. I find mixing a little white into the terracotta softens it nicely for this look. -
Paint the terracotta section:
With a flat brush, paint the middle-left square in your deep terracotta. Work the paint into the texture nooks. -
Fill the neutrals:
Paint the central square in blush beige, the large right panel in a mottled mix of beige and cream, and the bottom squares in off-white. -
Add first metallics:
Paint the top-middle square with a base coat of gold metallic paint. This provides a solid background for the glitter or leaf we will add later.
Cracked Texture?
If your joint compound cracks while drying, don’t panic. Simply mix a little more paste with a tiny drop of water and smooth it into the cracks with your finger, then let dry again.
Step 3: Gilding and Detailing
-
Apply gold leaf:
For the metallic arch on the left, apply gilding adhesive in a semi-circle shape. Wait for it to become tacky, then gently press a sheet of gold leaf over it. Brush away the excess with a soft, dry brush. -
Create the glitter block:
Cover the top-middle gold square with a layer of clear craft glue or medium. Sprinkle fine gold glitter over it evenly for that intense textured shimmer shown in the photo. -
Paint the gold lines:
Using a fine liner brush and liquid gold paint (or a gold marker), draw curved lines sweeping across the large right-hand panel. These don’t need to be perfect arcs; organic movement looks better. -
Add gold dots:
Dip the end of a paintbrush handle or a dotting tool into thick gold paint. Stamp dots along the curved lines you just painted, and scatter a few random ‘constellations’ on the terracotta and blush sections. -
Peel and reveal:
Carefully peel off the painter’s tape to reveal the clean gaps between your textured sections. If paint bled under, touch it up with white paint. -
Fill the grout lines:
If you prefer the look of gold separation lines instead of white canvas, use a thin brush to paint the ‘grout’ lines between the squares with metallic gold paint.
Pro Tip: Layering Glazes
To get that aged, stone look on the large beige panel, wash a very watered-down brown paint over the dried texture and immediately wipe most of it off with a rag.
Now you have a stunning, multi-dimensional piece of art that looks like it came straight from a gallery.
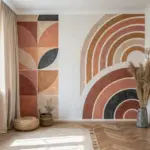
Stencil-Layer Pattern Mural
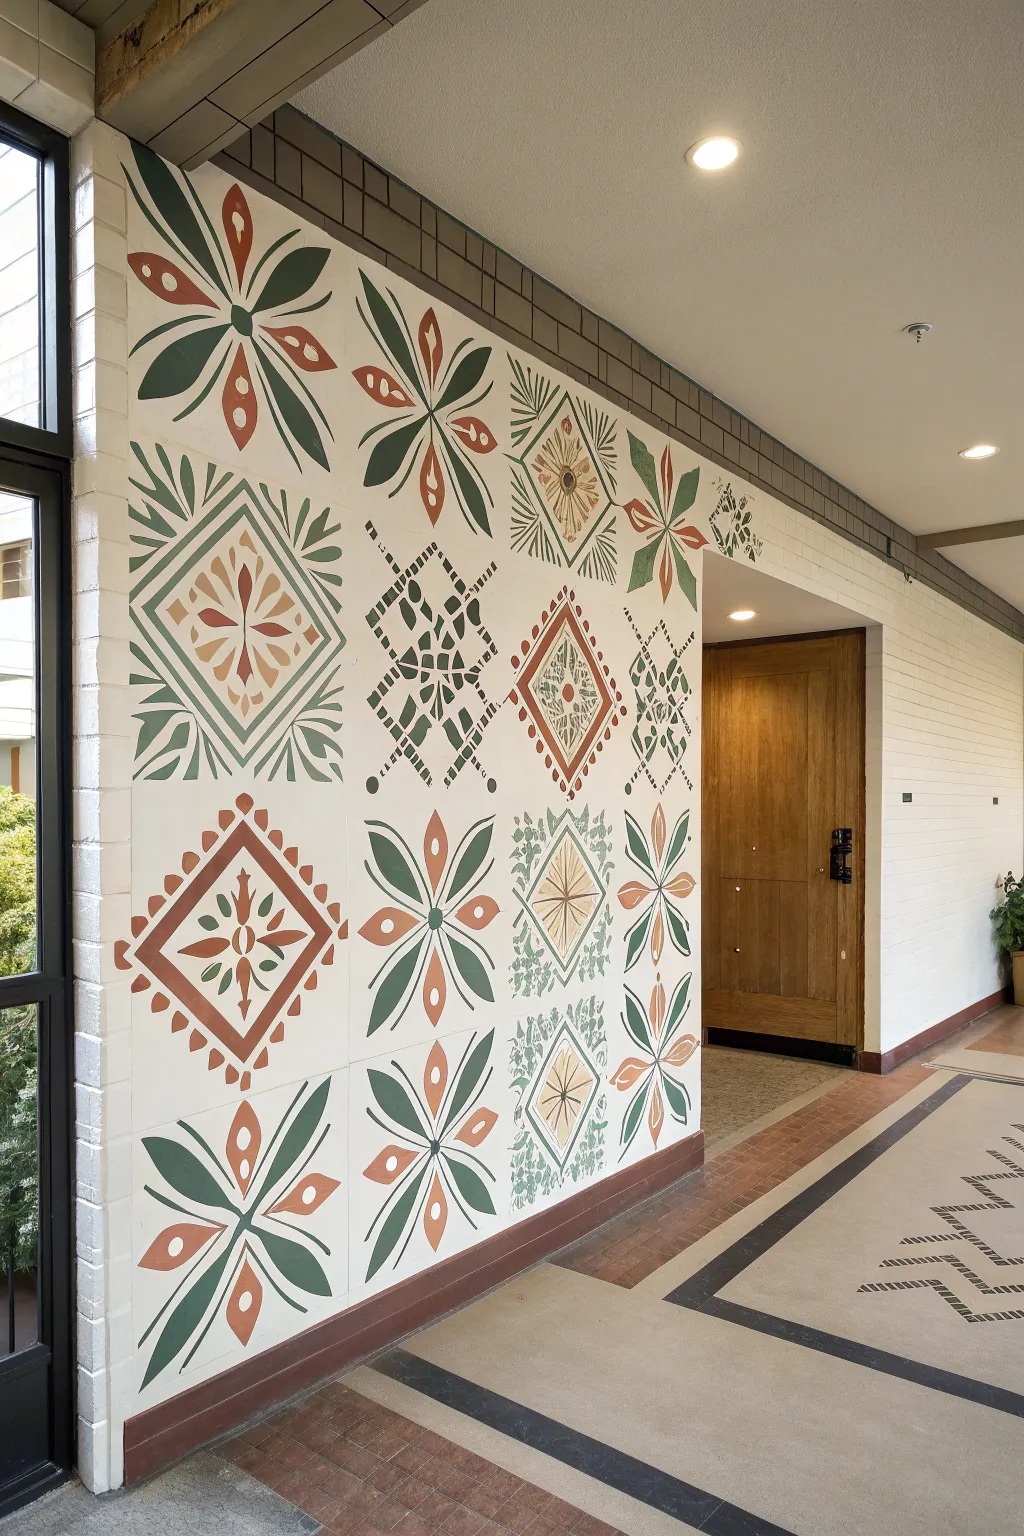
Transform a plain wall into a stunning display of faux-encaustic tiles using earthy tones and geometric precision. This large-scale stencil project combines the charm of folk art with clean modern lines, creating a warm, inviting feature wall.
Detailed Instructions
Materials
- White or off-white latex base paint (match existing wall if necessary)
- Acrylic paints: Sage Green, Deep Forest Green, Terracotta/Rust, Warm Beige
- Mylar stencil sheets (12×12 inches or larger)
- X-Acto knife or cutting machine (like Cricut)
- Repositionable spray adhesive
- Stencil brushes (various sizes)
- High-density foam roller (optional for large areas)
- Painter’s tape
- Measuring tape and pencil
- Laser level (highly recommended)
- Paper towels
- Small artist brush for touch-ups
Step 1: Preparation and Planning
-
Prepare the Surface:
Begin by cleaning the wall thoroughly to remove dust and grease. If the wall is textured brick like in the image, ensure you have a solid, clean coat of white or off-white base paint. Let it dry completely. -
Map Out the Grid:
Measure your wall and determine the size of your ’tiles.’ A 12×12 inch or 16×16 inch grid works well for this scale. Use a laser level and a light pencil to mark a grid on the wall, ensuring your patterns will be straight and evenly spaced. -
Design and Cut Stencils:
You will need about 4-5 distinct designs to replicate this look. Create your patterns: a large 8-petaled flower, a diamond-encased floral motif, a geometric lattice, and a starburst. Cut these designs out of Mylar sheets using an X-Acto knife or a cutting machine for precision.
Pro Tip: Sharp Edges
On textured surfaces like brick, seal the stencil edges by painting a thin layer of the *base wall color* over the stencil first. This blocks gaps so the colored paint can’t bleed under.
Step 2: Stenciling the Patterns
-
Apply Adhesive:
Lightly mist the back of your first stencil with repositionable spray adhesive. Let it get tacky for a minute before placing it on the wall. This prevents paint from bleeding under the edges, especially on uneven brick surfaces. -
Start with the Primary Motif:
I like to start with the largest, boldest pattern first—in this case, the large eight-pointed flower in the bottom left. align it within one of your pencil grid squares. -
Testing Colors:
Before committing to the wall, test your color combinations on a piece of cardboard. For the large flower, use Deep Forest Green for the outer leaves and Terracotta for the inner accents. -
Loading the Brush:
Dip your stencil brush into the paint, then offload almost all of it onto a paper towel until the brush feels ‘dry.’ This is crucial for crisp lines. -
Stippling Technique:
Apply the paint using a vertical dabbing or swirling motion. Don’t brush side-to-side, as this pushes paint under the stencil. Build up color in thin layers rather than one thick coat. -
Check and Rotate:
Carefully peel back a corner to check coverage. If satisfied, remove the stencil and move to the next grid square designated for this pattern. Rotate the stencil occasionally to avoid a repetitive ‘stamped’ look if the design allows.
Troubleshooting: Paint Bleed
If paint bleeds, let it dry completely! trying to wipe wet paint will smear it into the mortar. Once dry, touch it up with your white base color and a detail brush.
Step 3: Building the Montage
-
Add Secondary Patterns:
Move on to the diamond-shaped geometric motif. Align the stencil in the adjacent grid square. Use a lighter Sage Green for the framing lines to create depth and contrast against the darker floral elements. -
Layering Colors:
Some tiles, like the central diamond motif, require multi-color application. Use painter’s tape to mask off small sections of the stencil you don’t want to paint yet, applying the intricate Terracotta details first. -
Intricate Lattice Work:
For the delicate black/dark green lattice patterns, use a very small stencil brush. Be extra careful with paint volume here; too much paint will smudge the fine lines. -
Filling the Field:
Continue working across the wall, alternating your stencil designs based on your grid plan. Step back frequently to ensure the distribution of patterns feels balanced and not cluttered.
Step 4: Detailing and Finishing
-
Hand-Painted Accents:
Once the main stenciling is dry, go back in with a small artist brush. Add tiny details like the dots around the diamond patterns or refine the points of the leaves using freehand strokes. -
Touch-Ups:
Inspect the mural for any bleed-through. Use a small brush and your base wall color to clean up any fuzzy edges or mistakes. This step makes the difference between amateur and professional results. -
Erase Grid Lines:
Gently erase any visible pencil grid lines. If they are stubborn, a light touch of the base paint will cover them. -
Protective Coat (Optional):
If this wall is in a high-traffic area, apply a clear matte water-based sealer over the entire mural to protect your hard work from scuffs.
Enjoy the rhythmic beauty of your new, custom-stenciled feature wall


Have a question or want to share your own experience? I'd love to hear from you in the comments below!