If you love face paint but want something more elevated than kid-style designs, you’re in the right headspace—think cleaner lines, stronger shading, and seriously photogenic details. These adult face paint ideas are made for parties, festivals, and costume nights where you want the look to read as intentional art, not a quick doodle.
Classic Glam Skull With Soft Contour Shading
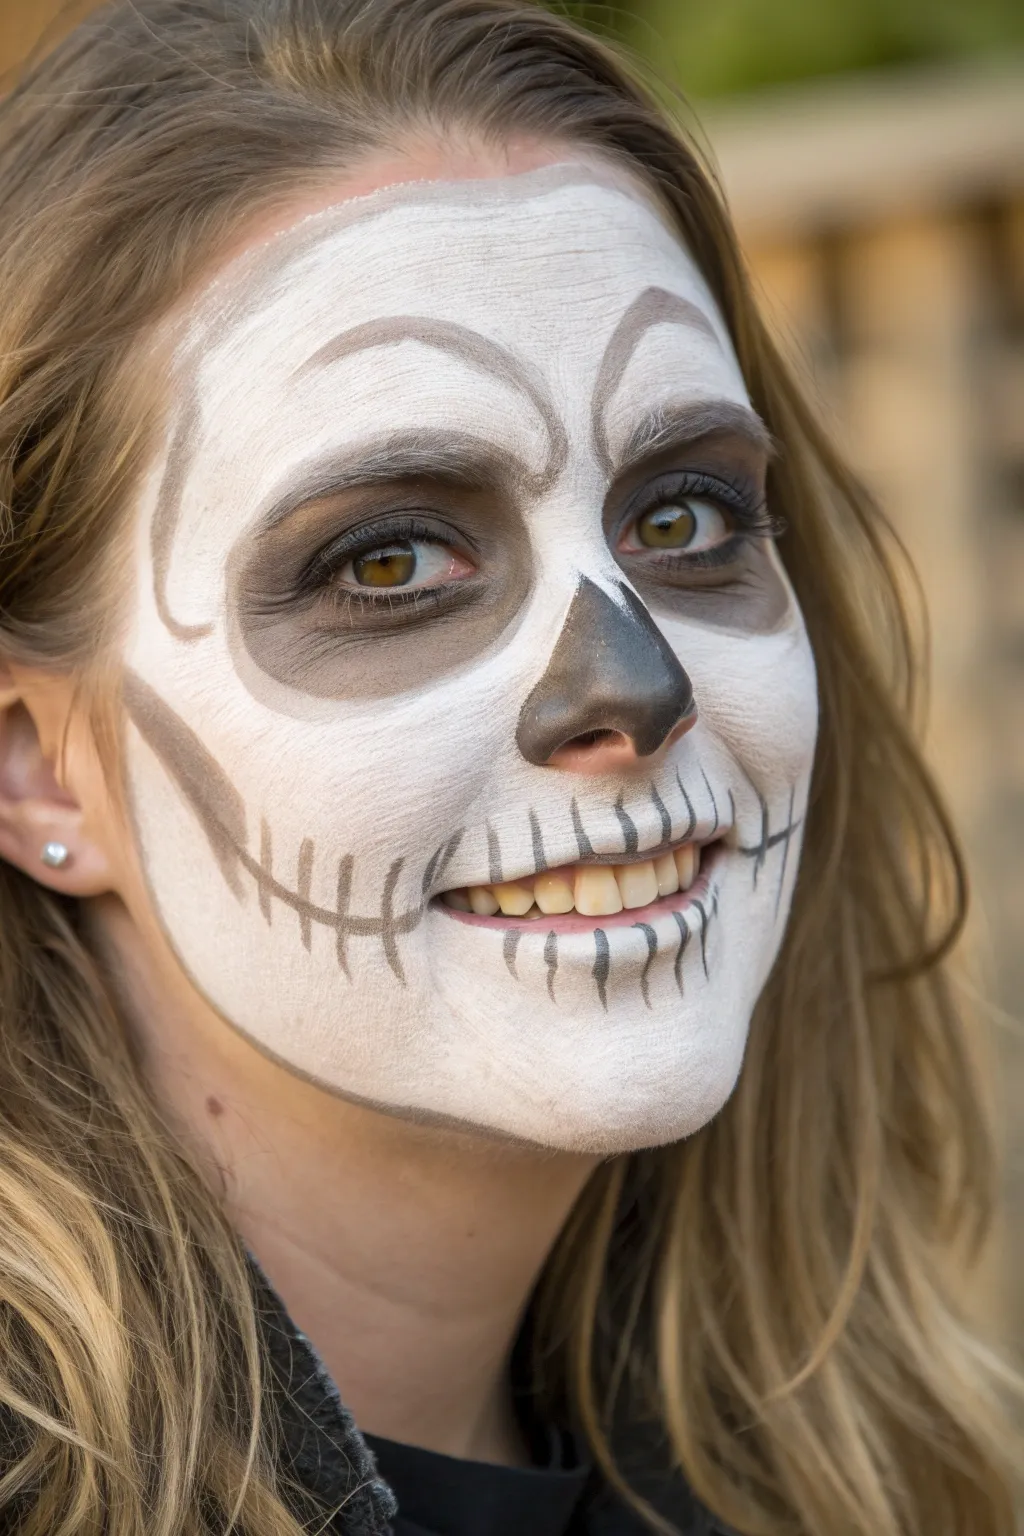
This approach to the classic skull face paint trades harsh graphic lines for gentle, smoky contours, creating a hauntingly realistic effect. By focusing on bone structure rather than cartoonish features, you’ll achieve a sophisticated look that is perfect for any grown-up costume party.
Detailed Instructions
Materials
- White cream face paint or water-activated cake makeup
- Black cream face paint or gel liner
- Grey eyeshadow or contour powder (matte)
- Black eyeshadow (matte)
- Flat foundation brush or synthetic sponge
- Small fluffy blending brush
- Fine detail brush or liner brush
- Setting powder (translucent)
- Setting spray
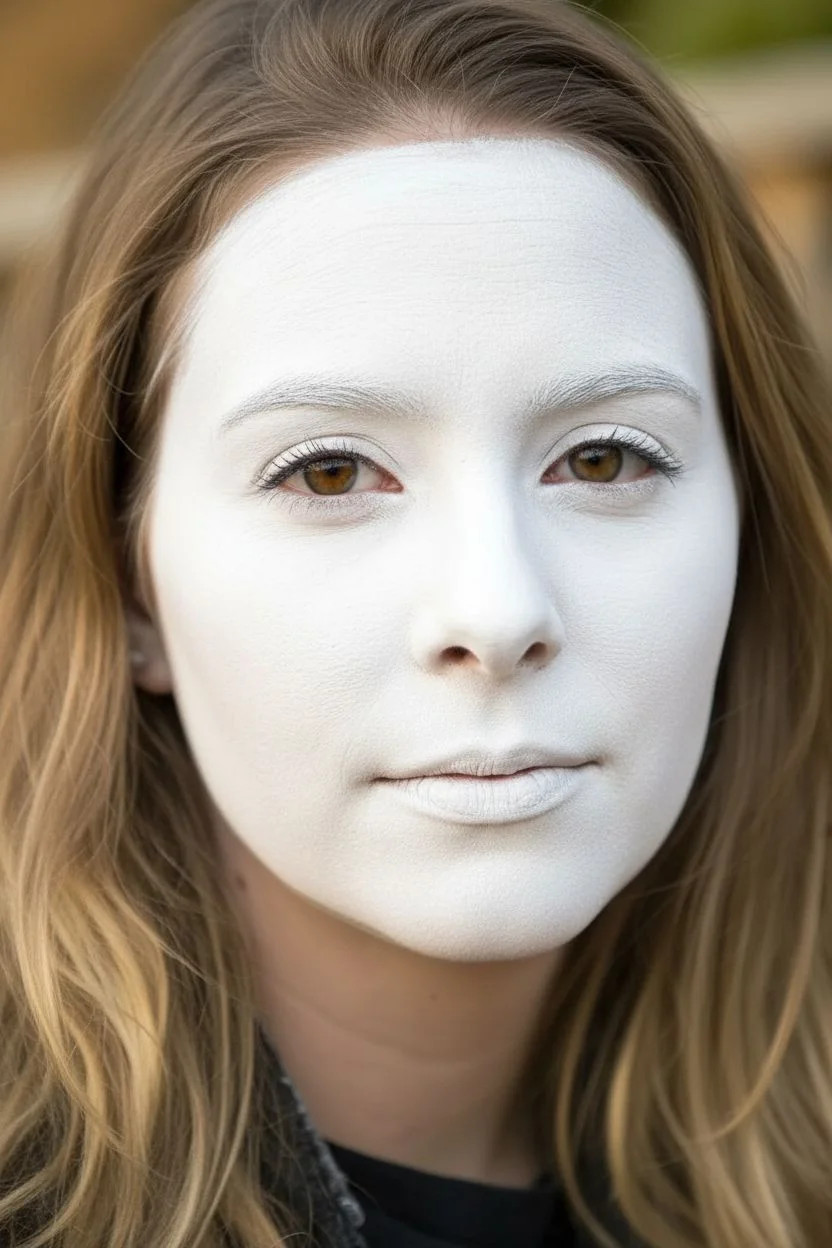
Step 1: Setting the Bone Structure
-
Base Application:
Begin with a clean, dry face. Load a flat foundation brush or damp sponge with white face paint. Pat the paint onto the skin rather than dragging it to ensure solid, opaque coverage. -
Full Coverage:
Cover the entire face, but stop just short of the hairline to avoid messy hair. You can leave the very center of the eyelids bare, as we will darken them later. -
Set the Base:
Once the white layer is opaque and even, lightly dust it with translucent setting powder. This is crucial for preventing the cream paint from creasing and creates a smooth surface for the shading steps.
Don’t Start Too Dark
Start shading with grey eyeshadow first, not black paint. It is much easier to darken a shadow than to fix a harsh black line.
Step 2: The Silent Scream: Eyes and Nose
-
Mapping the Sockets:
Using a grey matte eyeshadow and a fluffy blending brush, sketch two large circles around your eyes. These should extend up to the eyebrows and down onto the upper cheekbones. -
Deepening the Shadows:
Switch to black eyeshadow. Start packing the color onto the eyelid and blend it outward into the grey circle you just mapped. Keep the darkest point nearest the eye and fade it out. -
Defining the Brow Bone:
Use a small brush with grey shadow to create the ‘angry’ brow shape. Draw two curved lines originating from the bridge of the nose, arching up onto the forehead. -
Softening the Brow:
Blend the upper edge of these brow lines upward into the forehead using clean strokes so they look like indentations rather than drawn-on eyebrows. -
Nose Cavity Outline:
With a fine brush and black face paint, draw an inverted, softened ‘V’ or spade shape on the tip of the nose. -
Filling the Nose:
Fill in the nose shape with solid black paint. I like to tap a little black eyeshadow over the wet paint to set it and make it ultra-matte.
Step 3: Cheekhollows and Jaw
-
Finding the Hollows:
Suck in your cheeks to find your natural hollows. Use the grey eyeshadow on a fluffy brush to shade this area, starting from the ear and sweeping toward the corner of the mouth. -
Rounding the Cheekbone:
Intensify the depth near the ear with a touch of black shadow, blending it seamlessly into the grey. Curve the shading slightly upward to cup the cheekbone. -
Jawline Definition:
Add a separate, fainter line of grey shading along the jawline. This separates the ‘jawbone’ from the neck area. -
Temple Shading:
Lightly dust grey shadow at the temples, blending inwards toward the center of the forehead to give the skull a rounded dimension.
Glitz It Up
For a ‘glam’ twist, press silver or iridescent cosmetic glitter onto the center of the white forehead area before setting it.
Step 4: Teeth and Final Details
-
Mouth Extension:
Extend the corners of your mouth by drawing a thin black line outward about an inch on each side toward the jaw hinge. -
Vertical Tooth Lines:
Using a fine liner brush and thinned black paint (or grey shadow for a softer look), draw vertical lines across your lips. Make them shorter near the center and longer as you move outward. -
Bisecting the Lines:
Carefully draw a horizontal line that connects the ends of your extended smile, running right through the center of your lips. -
Root Shadowing:
At the top and bottom of each vertical tooth line, add a tiny flick or smudge of grey shadow. This simulates the roots of the teeth receding into the gum/bone. -
Final Mist:
Give your face a generous spritz of makeup setting spray to lock the haunting look in place for the night.
Enjoy your sophisticated transformation into this spectral figure


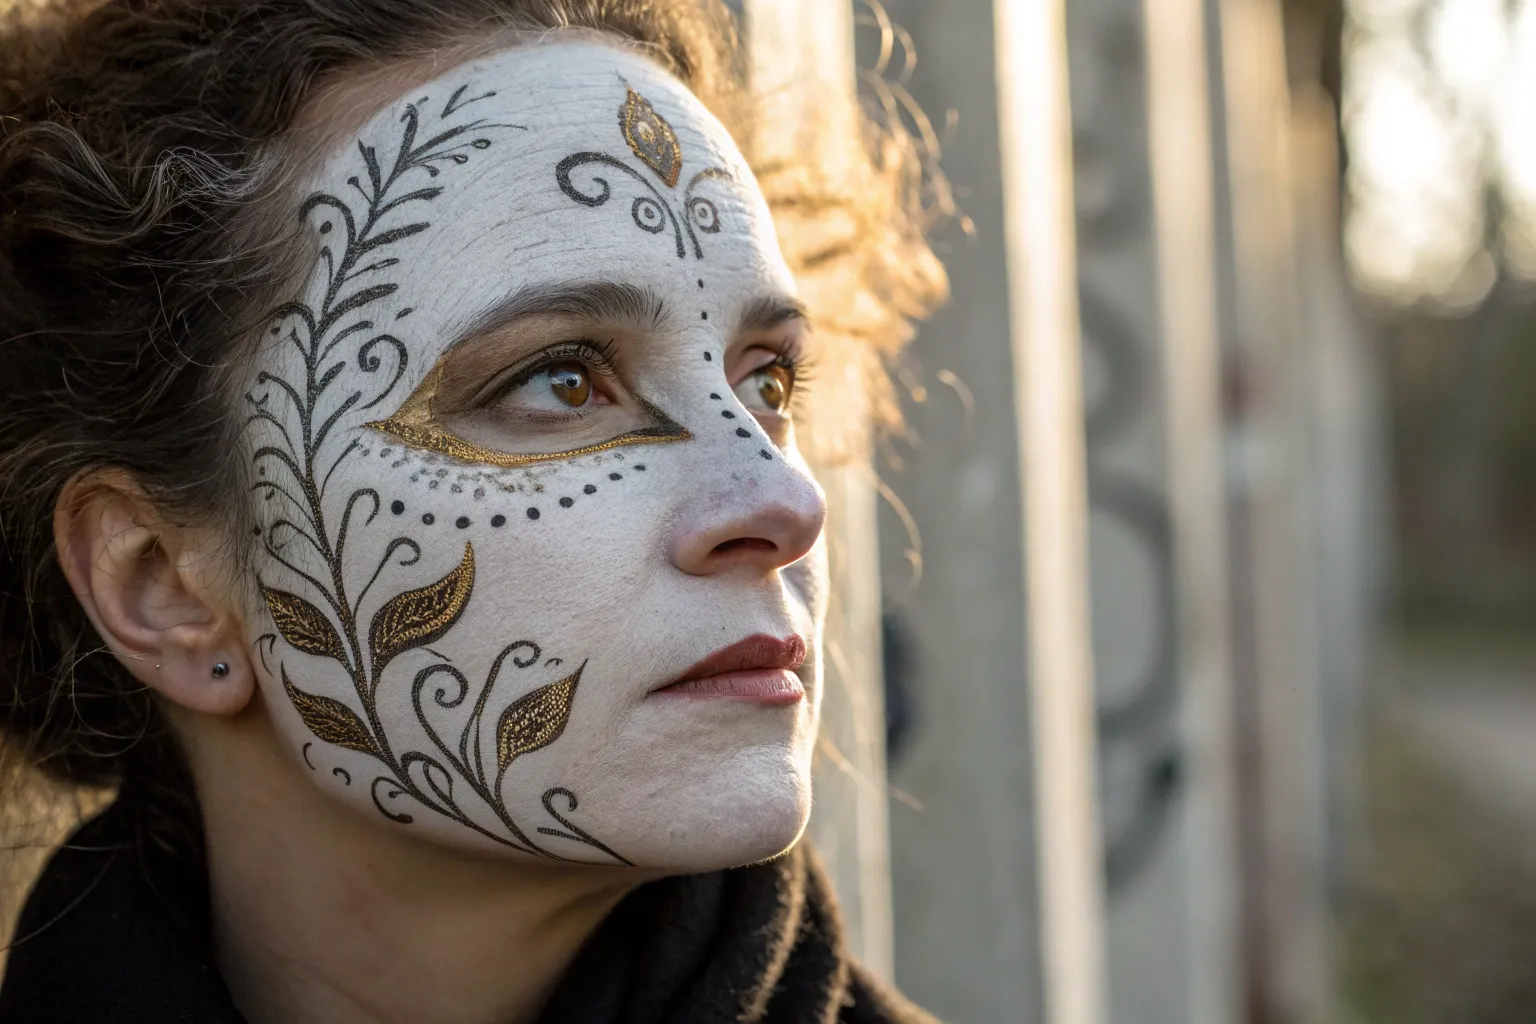
Elegant Sugar Skull With Floral Filigree

Transform into a stunning La Catrina with this detailed face paint design, featuring delicate filigree and soft floral accents. The look balances a stark white skull base with warm peach and rose tones for an elegant rather than scary finish.
How-To Guide
Materials
- White cream makeup
- Translucent setting powder
- Black face paint (water-activated preferred)
- Coral/Peach face paint
- Olive green face paint
- Makeup sponges
- Fine liner brush (size 0 or 00)
- Small round brush (size 2)
- Medium round brush
- Black eyeliner pencil
Step 1: Base and Eyes
-
Prepare the canvas:
Start with a clean, dry face. Tie back hair to keep it away from the forehead and temples. -
Apply the white base:
Using a slightly damp makeup sponge, dab white cream makeup all over the face, avoiding the immediate eye area. Keep the coverage even but not overly thick. -
Set the base:
Lightly dust translucent powder over the white paint to prevent smudging and create a smooth surface for detailed work. -
Map the eye sockets:
With a black eyeliner pencil, lightly trace large circles around the eyes, extending up to the eyebrows and down to the top of the cheekbones. -
Fill the eye sockets:
Use black face paint and a medium round brush to fill in the mapped circles completely. I find it easiest to close the eye I’m working on to get into the creases. -
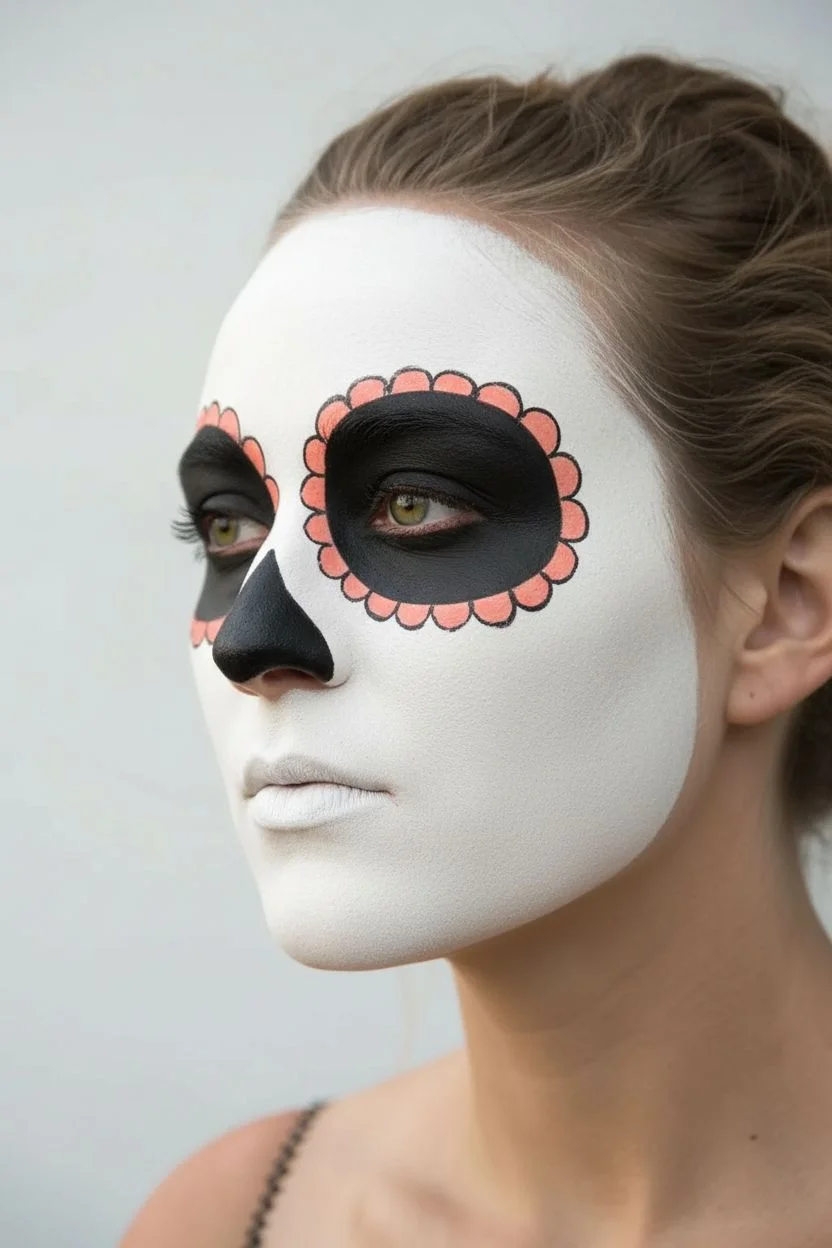
Create the scalloped edge:
Using a small round brush and coral/peach paint, create small U-shapes or flower petals all around the outer edge of the black eye sockets. -
Detail the nose:
Paint the tip of the nose black, creating an upside-down heart shape or spade shape that extends slightly up the bridge.
Patchy White Base?
If the white cream looks streaky, use a ‘stippling’ motion (dabbing repeatedly) rather than dragging the sponge. Let dry fully before adding the powder.
Step 2: Filigree and Features
-
Outline the mouth:
Draw black lines extending horizontally from the corners of the mouth towards the jawline using a fine liner brush. -
Stitch the lips:
Paint vertical stitch lines across the lips and the extended smile lines. Make them irregular lengths for a more organic look. -
Start the cheek filigree:
On the cheekbone, use a fine liner brush and black paint to draw a swirling vine that curves upward toward the ear. -
Add leaves:
Switch to olive green paint and a small brush to add small leaf shapes branching off the black vine swirl. -
Forehead centerpiece:
Paint a central coral heart or teardrop shape in the middle of the forehead, just above the brow line. -
Forehead swirls:
Flank the central shape with symmetrical black swirls and flourishes extending outward toward the temples. -
Add floral details:
Paint a small, simple four-petal flower on the temple using the coral paint with a tiny dot of yellow or black in the center. -
Chin accents:
Replicate the floral motif on the chin by painting three large petal shapes fanning upward in coral and outlining them thinly in black.
Glitter Glam
While the paint is still slightly tacky, press small cosmetic-grade gems or sequins around the eye scallops for a sparkling, three-dimensional effect.
Step 3: Final Touches
-
Refine lines:
Go back over your black linework with the fine liner brush to sharpen any edges or flourishes that look faint. -
Add highlights:
If the design feels flat, add tiny dots of white paint specifically on the black eye sockets or the center of the petals. -
Apply the crown:
Place your flower crown on your head, positioning it low on the forehead to frame the painting perfectly.
Wear your beautiful sugar skull design with pride and enjoy the celebration


Half-Face Sugar Skull for Easy Wear and Big Impact
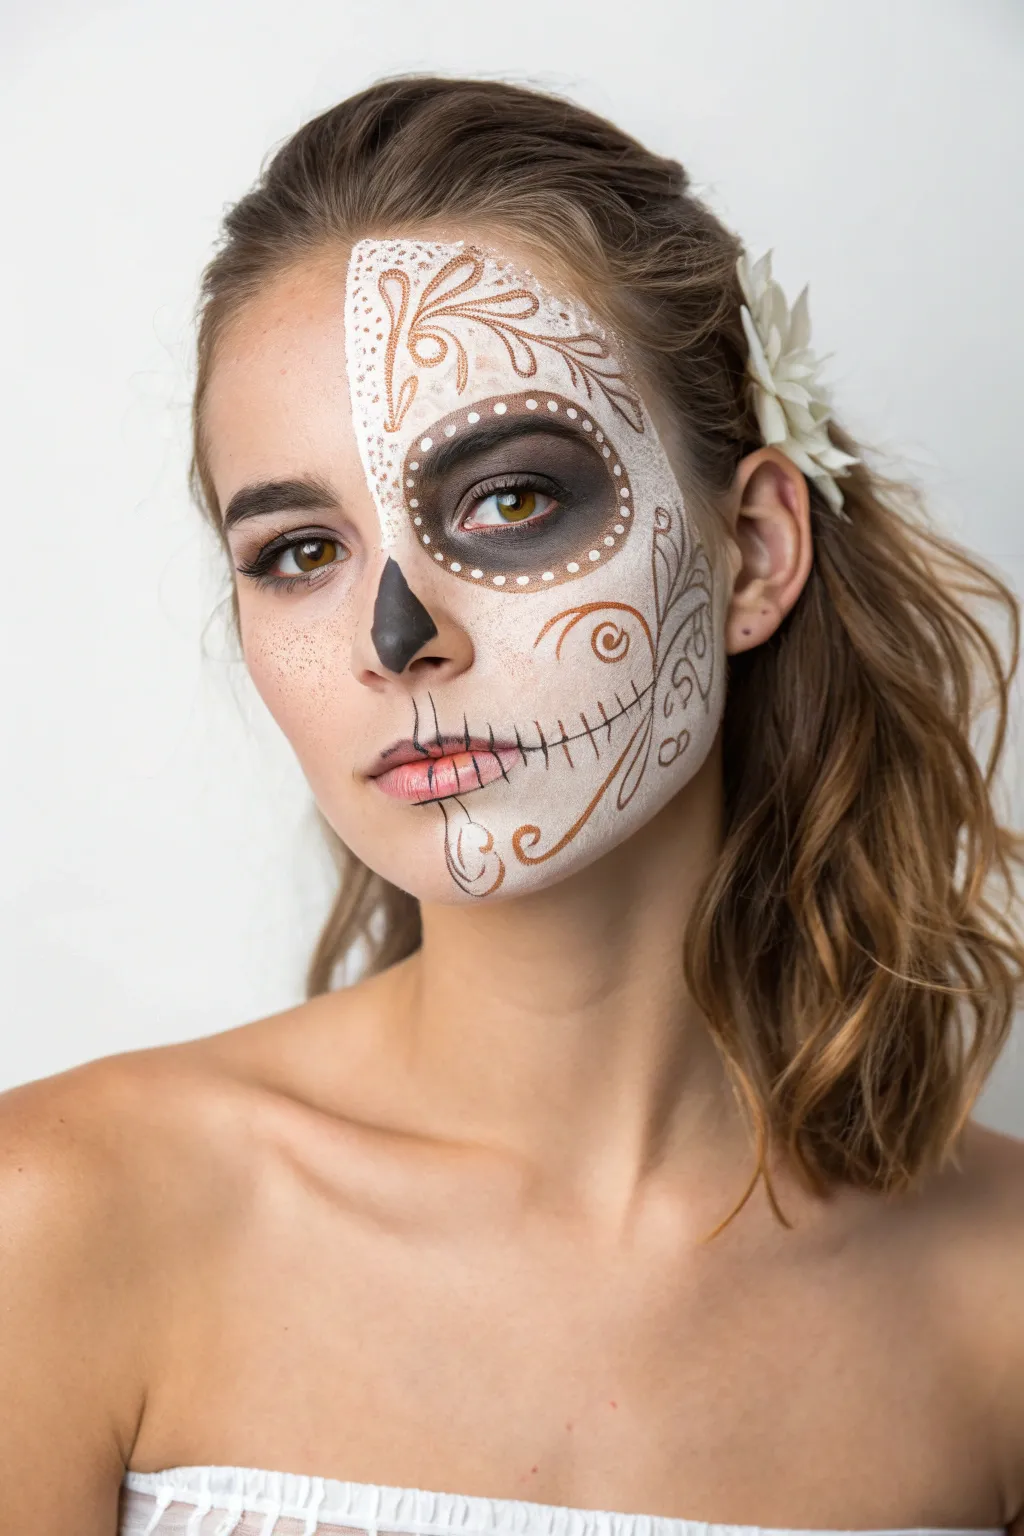
For a sophisticated take on Dia de los Muertos, this half-face design balances eerie skeletal features with delicate, gilded beauty. The asymmetry makes a striking impact while leaving one side of your face free for natural makeup.
Step-by-Step Tutorial
Materials
- White cream face paint or foundation (full coverage)
- Black cream face paint
- Metallic copper or bronze face paint (or eyeliner)
- Translucent setting powder
- Flat foundation brush
- Small tapered blending brush
- Fine detail brush (liner brush)
- White eyeliner pencil
- Spoolie brush or brow gel
- Makeup sponge
- White silk flower hair clip
Step 1: Prepping and Base Layer
-
Prepare the skin:
Start with a clean, moisturized face. Apply a primer to the left side of your face (the side getting the skull design) to ensure the white paint adheres smoothly and lasts all night. -
Block the eyebrow:
Using a glue stick or brow wax, drag the product heavily through the left eyebrow hair to flatten it against the skin. Let this dry completely so the texture doesn’t disrupt your paint. -
Apply the white base:
Load a flat foundation brush or damp sponge with white cream paint. Stipple the product onto the entire left half of your face, stopping precisely at the center line of the nose and chin. -
Set the base:
Pat translucent setting powder gently over the white paint using a puff or fluffy brush. This is crucial for preventing the black and metallic lines from smearing into the white later.
Keep It Sharp
Use a piece of cardstock or tape held against the center of your nose when sponging the white base. This acts as a shield to create that razor-sharp straight line down the middle.
Step 2: Creating the Skull Structure
-
Outline the eye socket:
With a white eyeliner pencil, faintly sketch a large circle around your left eye. It should go well above your eyebrow and dip down to the top of the cheekbone. -
Fill the socket:
Use a medium brush and black face paint to fill in this circle. I like to leave the very center of the eyelid slightly lighter or blended out for a softer, smokier appearance rather than a solid black block. -
Paint the nose cavity:
On the left side of your nose, paint a teardrop shape in black. The point should aim upward, and the rounded bottom should follow your nostril curve. Keep the edge sharp along the center of your nose bridge. -
Carve the cheek:
Using a contour shade or watered-down black paint, lightly shade a hollow under the cheekbone to give the skull some dimensionality without being too harsh.
Step 3: Detailed Line Work
-
Begin the mouth stitching:
Starting from the center of your lips, draw a black line extending outward horizontally toward your ear, curving slightly up like a smile. Paint small vertical lines across the lips and the extended line to create the ‘teeth’ effect. -
Add the chin swirl:
Use a fine liner brush dipped in copper or bronze metallic paint to draw a decorative swirl on the chin, connecting it to the black mouth stitching line. -
Decorate the forehead:
Paint organic, vine-like swirls using the metallic copper paint on the forehead area. Start from the center line and sweep outward, mimicking the shapes of marigold petals or filigree. -
Detail the eye socket:
Using the same copper metallic paint and a dotting tool or the back of a brush, apply small dots around the perimeter of the black eye socket circle to frame it. -
Add cheek embellishments:
Draw large, open floral swirls on the cheek using the copper paint. These should flow backward toward the ear, filling the white space with elegant line work. -
Enhance shading:
Go back in with a very small amount of black eyeshadow and a fluffy brush to deepen the inner corner of the eye socket and the edges of the nose cavity for a 3D effect.
Gilded Texture
While the copper paint is wet, gently press loose gold glitter or cosmetic foil onto the swirls. This catches the light and adds a stunning 3D texture to the filigree.
Step 4: Finishing Touches
-
Refine the edges:
Clean up the center line of your face with a little concealer where the white paint meets your natural skin to ensure a perfect split. -
Apply natural makeup:
On the right side of your face, apply your standard beauty makeup—foundation, blush, and mascara—to create a stark contrast with the painted skull side. -
Accessorize:
Clip a large white silk flower into your hair just above the ear on the painted side to complete the festive look.
Step back and admire the beautiful duality of your new festive look


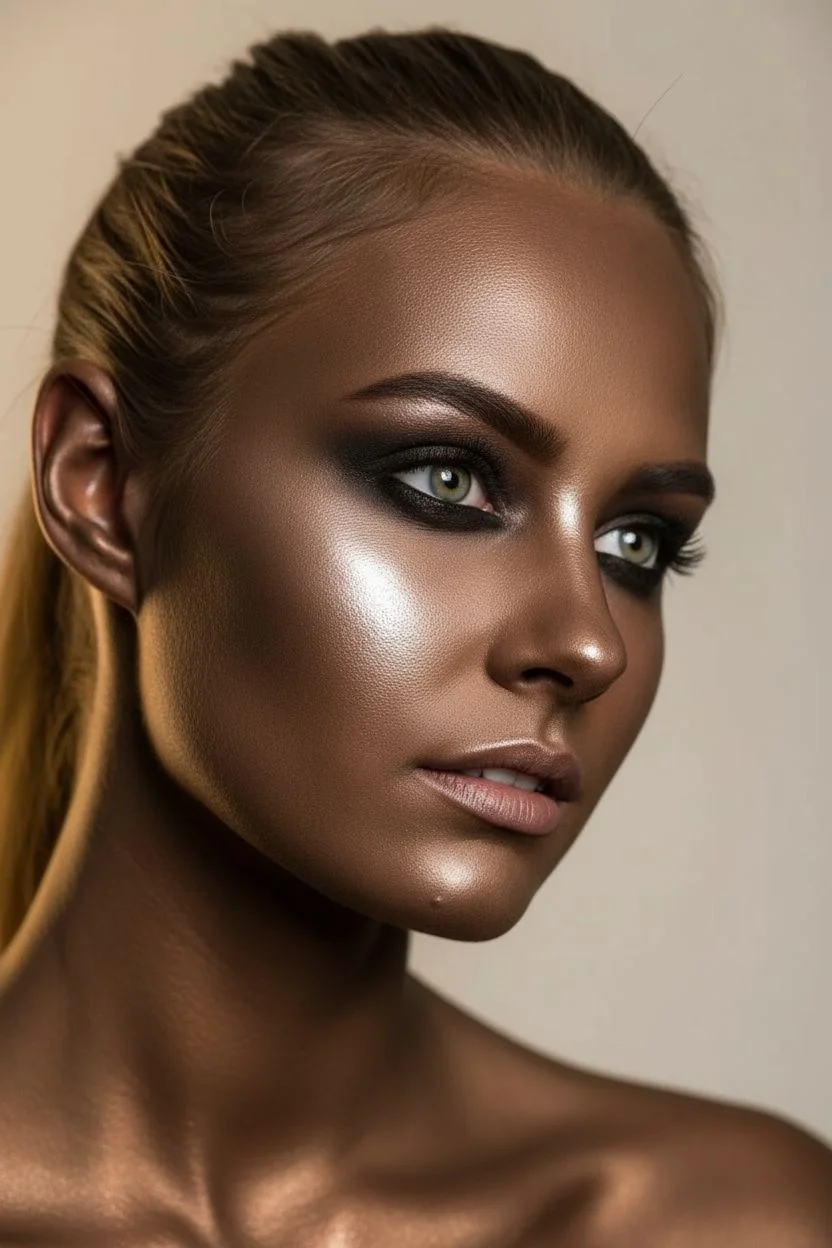
Sultry Vampire Fade With Dark Lips and Veins
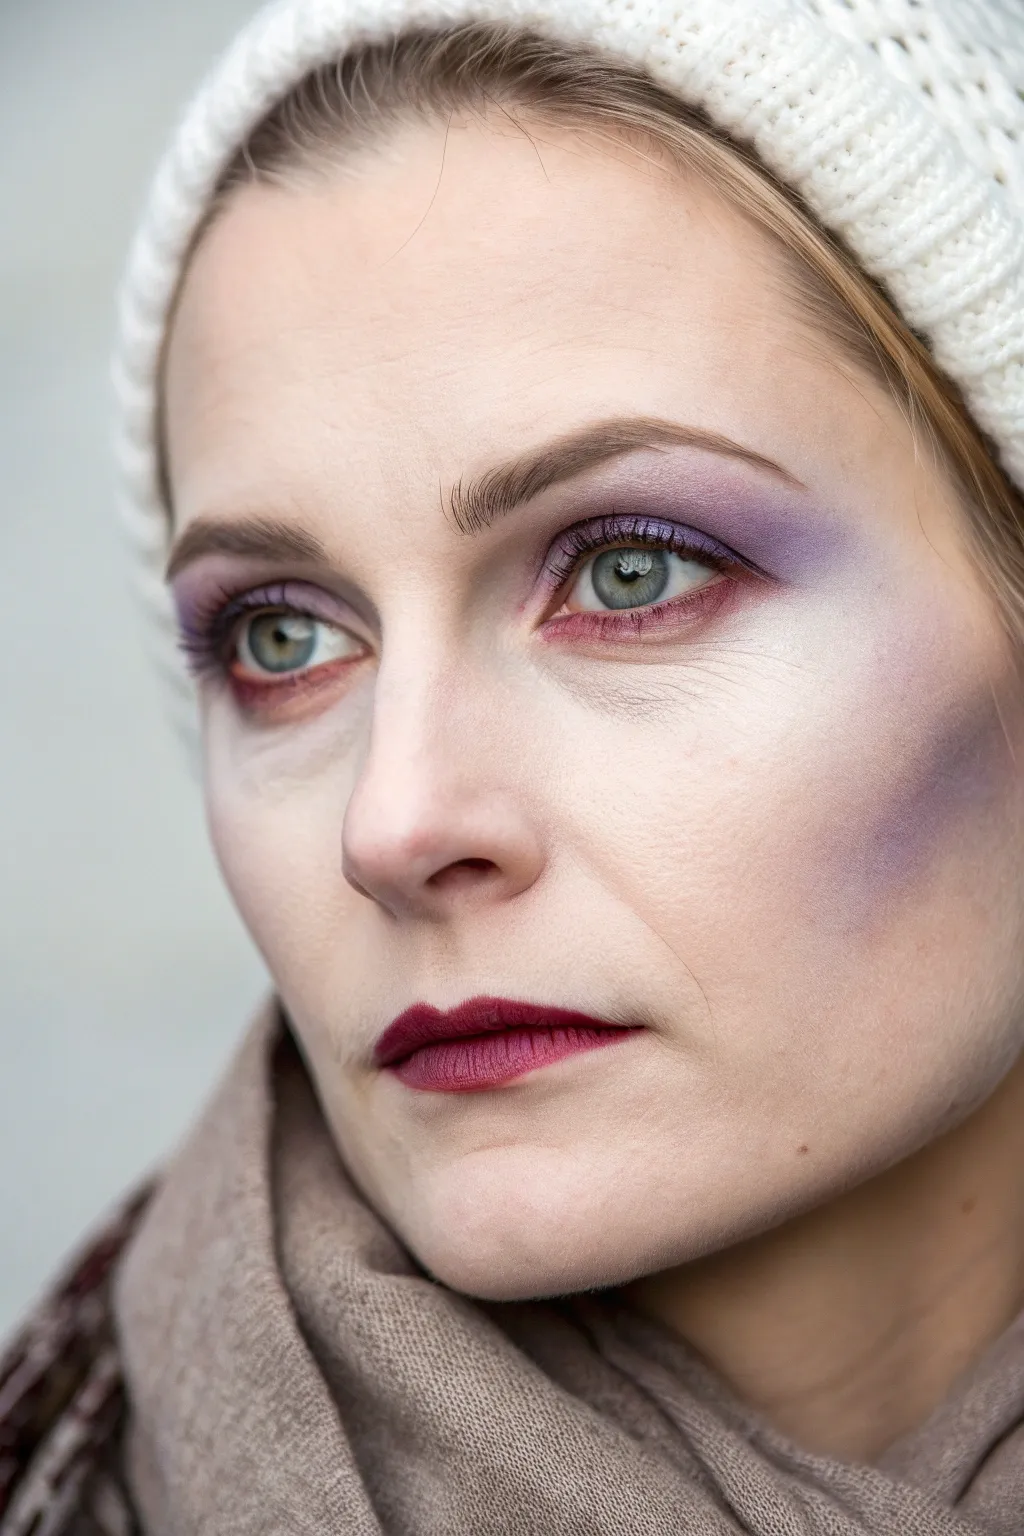

Transform into a creature of the night with this ghostly, high-fashion vampire look. Focusing on pale skin, bruised purple contours, and a blood-stained lip, this style balances the line between spooky and sophisticated.
Detailed Instructions
Materials
- Pale foundation or white face paint
- Translucent setting powder (white or lightest shade)
- Matte purple eyeshadow (plum/violet)
- Matte red or burgundy eyeshadow
- Deep berry or wine-colored lipstick
- Fluffy blending brush
- Small detail brush or pencil brush
- Angled contour brush
- Mascara (black)
- Makeup sponge
Step 1: Base and Pallor
-
Prep the canvas:
Begin with a clean, moisturized face. This look relies on skin texture, so ensure any dry patches are smoothed out beforehand. -
Apply the pale base:
Mix your lightest foundation with a drop of white face paint or use a very fair, cool-toned foundation. Apply this all over the face, blending down the neck to avoid harsh lines. -
Blur the lips:
Lightly pat a small amount of foundation over your lips as well. This neutralizes their natural pink color and helps the lipstick pop later. -
Set the face:
Dust a generous amount of translucent white powder over the entire face. You want a completely matte, lifeless finish that feels dry to the touch.
Patchy Purple?
Purple pigment is notoriously difficult to blend. If your contour looks patchy, dip your brush in translucent powder and buff over the area to smooth out the pigment.
Step 2: Bruised Eyes
-
Lay the purple base:
Using a fluffy blending brush, sweep a matte violet or plum eyeshadow across the entire upper eyelid, extending it slightly past the outer corner. -
Deepen the crease:
Take a slightly darker purple shade and concentrate it in the crease of the eye to add depth and a sunken appearance. -
Under-eye shadowing:
With a smaller pencil brush, drag that same purple shadow along the lower lash line. Don’t worry about being too neat; a slightly messy application adds to the undead vibe. -
Add the red tones:
Dip a small brush into a matte red or burgundy shadow. Apply this strictly to the inner corners of the eyes and very lightly along the immediate lower lash line. -
Blend the transition:
Use a clean blending brush to soften the edges where the red meets the purple. The transition should look like a natural bruise or irritation. -
Highlight the eyes:
Apply a tiny dot of white shimmer or matte white shadow to the very center of the eyelid to make the eyes look rounder and more piercing. -
Define the lashes:
Apply a single coat of black mascara to top and bottom lashes. Keep it light; we want the focus on the bruising, not the lashes.
Detailed Veins
Use a fine liner brush with blue face paint (watered down heavily) to draw tiny, faint squiggly veins under the eyes or at the temples for extra realism.
Step 3: Contour and Lips
-
Map the hollows:
Suck in your cheeks to find the natural hollow. Using an angled contour brush, pick up the purple eyeshadow you used on your eyes. -
Apply purple contour:
Sweep the purple shadow deeply into the cheek hollow, starting from the ear and fading out as you reach the middle of the cheek. -
Diffuse the edges:
Clean your brush and rigorously blend the edges of the cheek contour upward. The goal is a gaunt, shadowy look rather than a sharp makeup line. -
Temple shading:
If you want an extra skeletal look, lightly dust a bit of the purple shadow on your temples near the hairline. -
Apply lipstick:
Choose a deep berry or wine-colored lipstick. Apply it to the center of the lips first. -
Create the stained effect:
Instead of a crisp lip line, use your finger or a small fluffy brush to pat the color outwards toward the edges of the lips. This creates a soft, bitten effect rather than a perfect pout.
You are now ready to haunt the night with this perfectly blended, undead aesthetic
BRUSH GUIDE
The Right Brush for Every Stroke
From clean lines to bold texture — master brush choice, stroke control, and essential techniques.
Explore the Full Guide
Smoky Witch Eyes With Spiderweb Temples
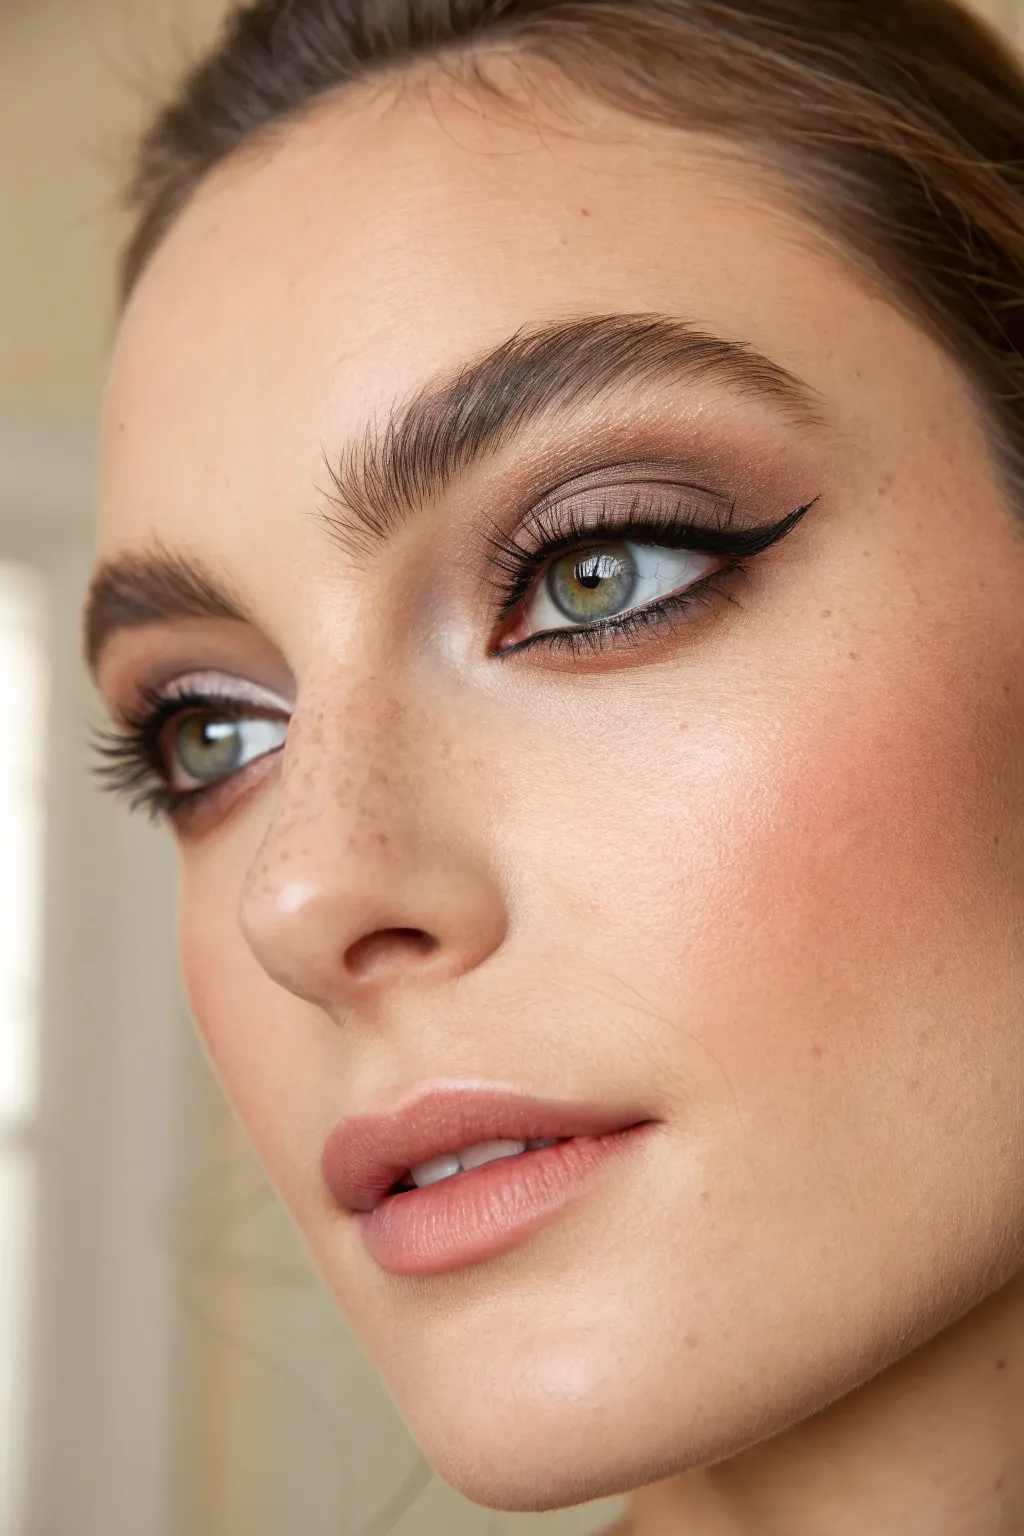
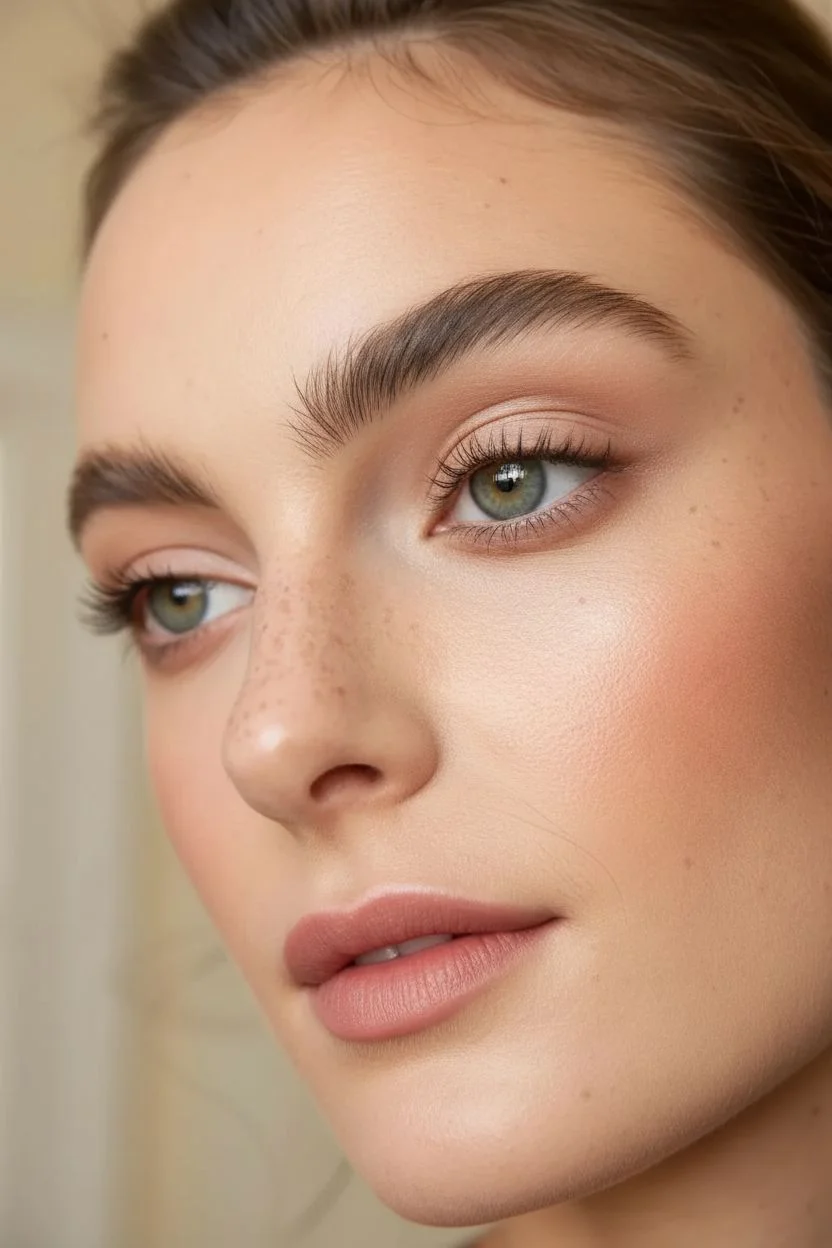
This sophisticated take on witchy makeup focuses on smoky, alluring eyes without going overboard on costume paint. It pairs a diffused brown wing with flawless, naturally blushed skin for a spellbinding look suitable for any adult Halloween gathering.
Step-by-Step Guide
Materials
- Matte skin primer
- Light-coverage foundation or tinted moisturizer
- Concealer
- Translucent setting powder
- Bronzer (neutral undertone)
- Peachy-pink cream blush
- Eyebrow gel (clear or tinted)
- Fine-point eyebrow pencil
- Eye primer
- Eyeshadow palette (neutral browns, taupe, deep espresso, and a shimmer bone shade)
- Black liquid eyeliner pen
- Black pencil eyeliner (kohl)
- Volumizing black mascara
- Rose-nude matte lipstick
- Fluffy blending brushes
- Small angled liner brush
- Beauty sponge
Step 1: Base and Brows
-
Prime and perfect:
Begin with a clean, moisturized face. Apply a matte primer to your T-zone to control shine. Follow with a light layer of foundation or tinted moisturizer, blending it out with a damp beauty sponge for a skin-like finish that allows freckles to peek through if you have them. -
Conceal strategically:
Dot a small amount of concealer under the eyes and on any blemishes. Blend this gently with your ring finger or a small brush to brighten the center of the face. -
Groom the brows:
Brush your eyebrow hairs upward using a spoolie. I like to use a clear brow gel to lock them into this fluffy, feathered shape. Once dry, fill in any sparse areas with a fine-point brow pencil, mimicking hair-like strokes.
Pro Tip: Shadow Shield
Hold a tissue folded under your eye while applying dark shadows. This catches fallout and keeps your foundation clean, plus gives you a guide for a sharper eyeshadow edge.
Step 2: The Smoky Eye
-
Prime the lids:
Tap a thin layer of eye primer across your entire eyelid up to the brow bone. This ensures your smoky gradient stays smooth and crease-free all night. -
Set the crease:
Using a fluffy blending brush, sweep a soft taupe or light brown shadow into the crease of your eye. Blend this color upwards toward the brow bone to create a soft transition shade. -
Deepen the outer corner:
Switch to a smaller, denser brush and pick up a medium-to-dark brown matte eyeshadow. Pack this color onto the outer third of your eyelid and blend it into the crease, creating depth. -
Smoke the lower lash line:
Take that same medium brown shade on a small pencil brush and smudge it along your lower lash line. Connect this shadow to the outer corner of the top lid for a cohesive, wraparound effect. -
Add inner corner brightness:
Apply a shimmering bone or champagne eyeshadow to the inner corner of your eye and slightly onto the inner third of the lid. This opens up the gaze and contrasts beautifully with the dark outer corner. -
Define the waterline:
Gently line your lower waterline with a black kohl pencil. For a softer look, don’t go all the way to the inner tear duct; focus on the outer two-thirds.
Troubleshooting: Uneven Wings
Don’t panic if wings don’t match exactly. Use a cotton swab dipped in micellar water to erase the mistake, re-powder the area, and try again. Ideally, clean them up rather than adding more liner.
Step 3: The Sharp Wing
-
Map the angle:
Look straight into a mirror. Using your liquid liner pen, mark a small dot where you want the tip of your wing to end—aim for an angle that extends the line of your lower lash line upward. -
Draw the wing:
Draw a thin line from the outer corner of your eye to your guide dot. Then, draw a second line from the dot back toward the center of your lash line, creating a triangle shape. -
Fill and refine:
Fill in the triangle with the liquid liner. Carefully drag the liner inward across the lash line, keeping it very thin as you reach the inner corner. The line should be thinnest at the tear duct and thickest at the outer edge. -
Cleaning up:
If your wing isn’t razor-sharp, dip a small angled brush in a tiny bit of concealer and swipe it under the wing to clean the edge.
Step 4: Finishing Touches
-
Mascara application:
Curl your lashes and apply two generous coats of volumizing black mascara to both top and bottom lashes. Wiggle the wand at the roots to maximize volume. -
Blush placement:
Smile slightly and apply a peachy-pink cream blush to the apples of your cheeks. Blend it upwards toward your temples to lift the face and complement the eye makeup. -
Lip color:
Finish the look with a rose-nude matte lipstick. Blot with a tissue to ensure it lasts through any potions you might be sipping. -
Artificial freckles (Optional):
If you want to enhance the youthful aesthetic, use your brow pencil or a freckle pen to dot a few faux freckles across the nose and cheeks, tapping them with a finger to soften.
You now have an enchanting, classic makeup look that works perfectly for a spooky yet elegant evening
Realistic Zombie Bruising and Undead Skin Texture
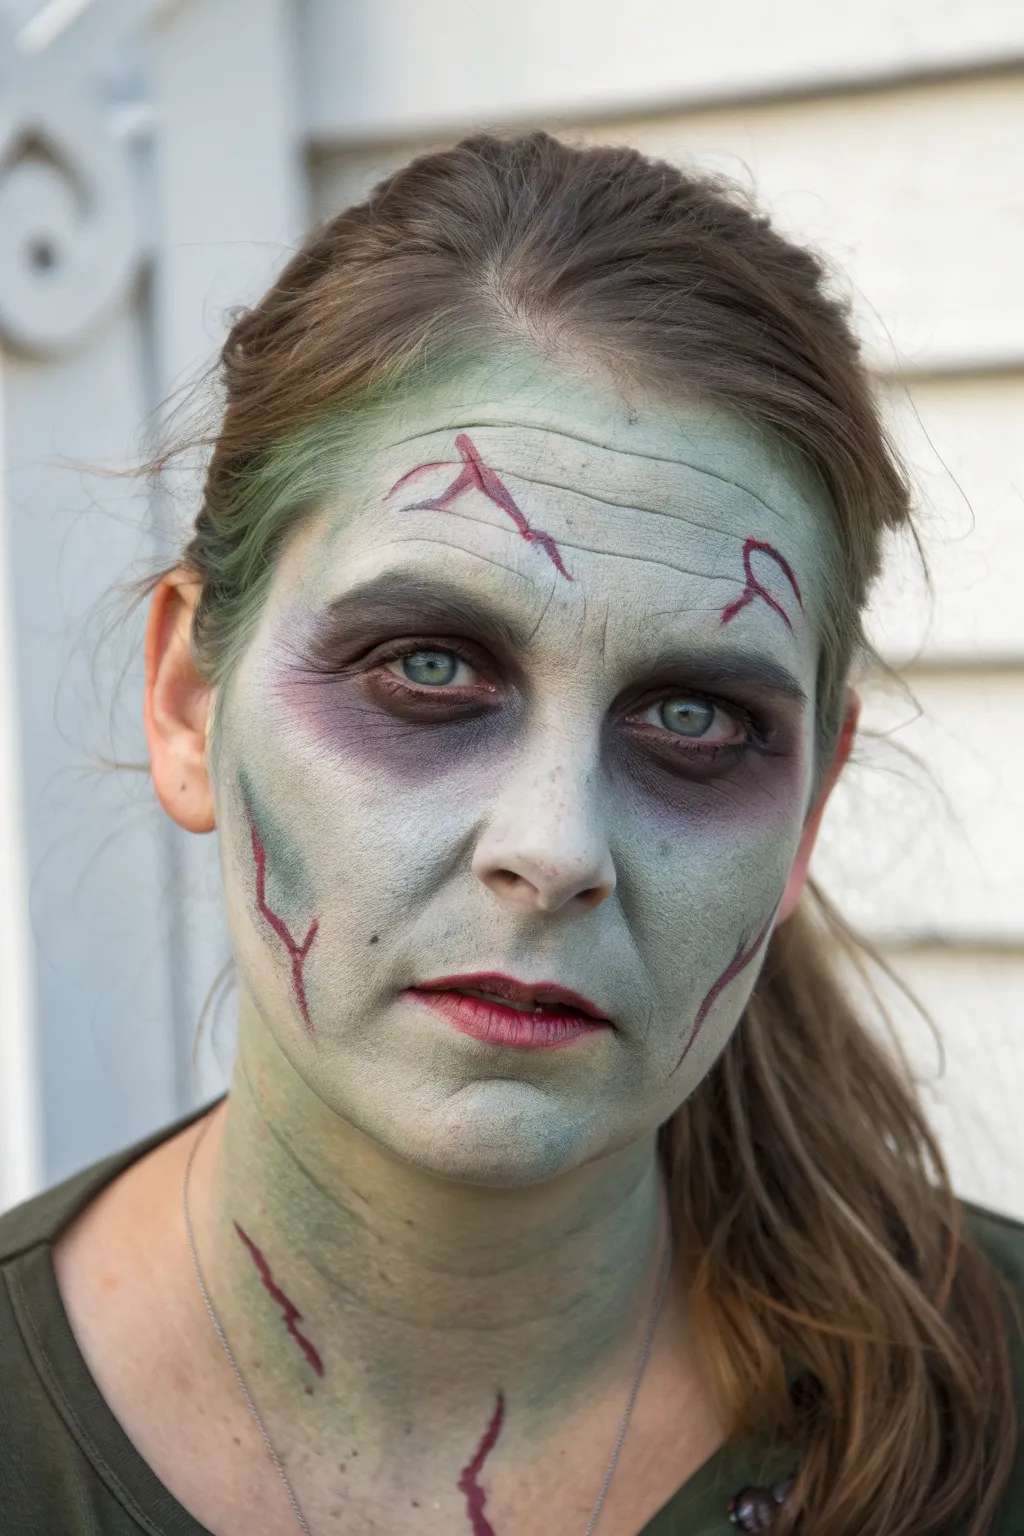
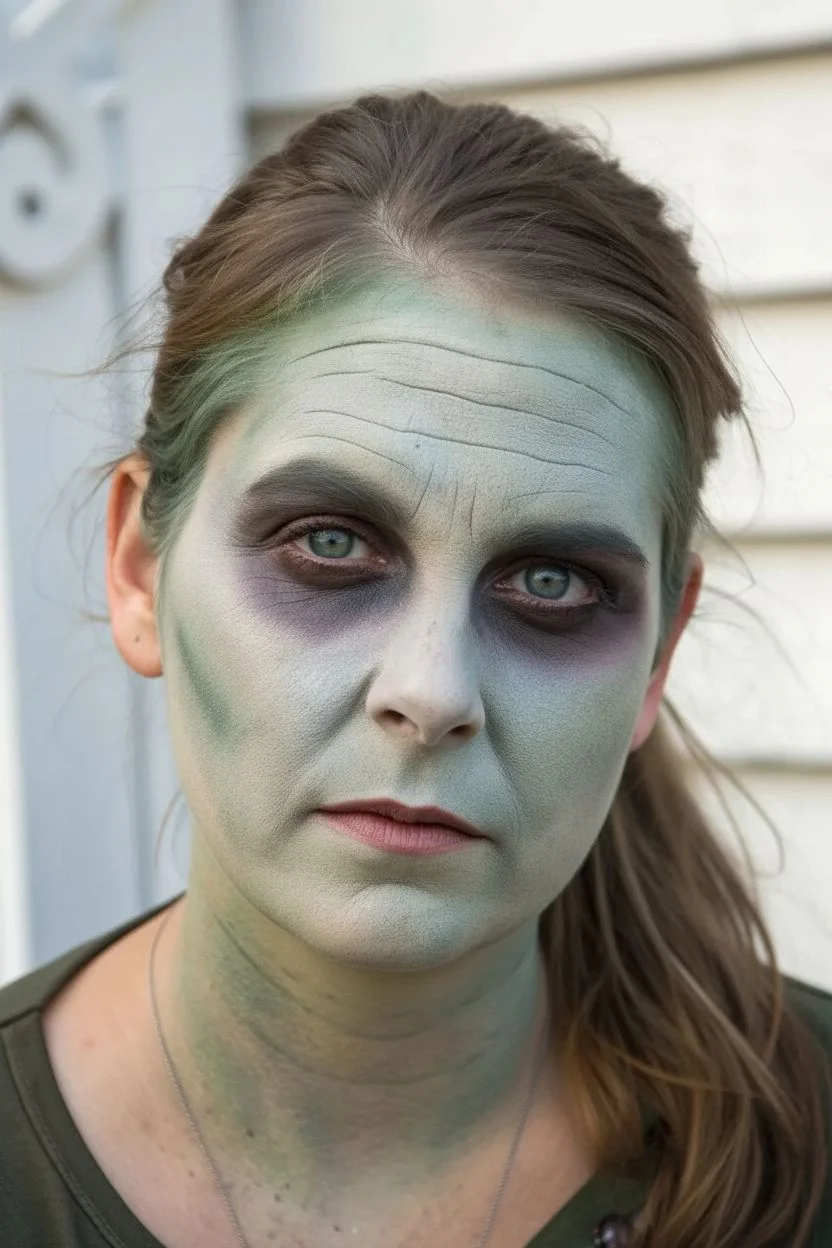
Transform into the walking dead with this chillingly realistic zombie makeup look features sallow, decaying skin tones and stark, bloody fissures. By layering cool greens and bruising purples, you’ll achieve a morbid depth that looks straight out of a horror movie.
How-To Guide
Materials
- White cream face paint or foundation (pale base)
- Green face paint (olive or sage tones)
- Grey face paint or eyeshadow
- Purple/Maroon face paint or eyeshadow
- Dark red/Burgundy face paint or lipliner
- Makeup sponges (wedges)
- Flat foundation brush
- Fine detail brush (liner brush)
- Fluffy blending brush
- Setting powder
- Barrier spray (optional)
Step 1: Base Decay Layer
-
Prep the skin:
Start with clean, dry skin. If you have sensitive skin, apply a thin layer of primer or moisturizer first to help the paint glide on smoothly. -
Create the pale base:
Using a damp sponge, apply a wash of white cream paint or a very pale foundation all over the face and down the neck. Don’t make it opaque white; you want a translucent, sickly pallor. -
Add the green tint:
Load a sponge with olive or sage green face paint. Dab the excess off on your hand so the sponge is almost dry. -
Stipple the green:
Lightly stipple the green over the forehead, cheeks, chin, and neck. Focus the color on the high points of the face, leaving the natural skin showing through slightly for a mottled, uneven texture. -
Blend the neck:
Ensure the green discoloration extends down the throat and onto the collarbone area so the face doesn’t look like a floating mask. I like to blend this out aggressively so there are no harsh start/stop lines.
Pro Tip: Hollow Effects
When darkening eye sockets, blend the purple outwards into the green skin rather than stopping abruptly. This gradient creates a natural ‘wasted away’ appearance.
Step 2: Bruising and Contouring
-
Apply eye hollows:
Using a dark maroon or purple eyeshadow (or cream paint), fill in the entire eye socket area. Apply heavily on the lid and under the lower lash line. -
Deepen the sockets:
Take a dark grey or black shadow on a fluffy brush and deepen the inner corners and the very center of the lid to make the eyes look sunken. -
Contour the face:
Use a greyish-green or taupe shadow to contour heavily under the cheekbones, along the temples, and under the jawline. This sharpens the features and makes the face look gaunt. -
Detail the forehead creases:
Using a small brush and diluted grey paint, lightly trace the natural horizontal lines on the forehead to emphasize aging and decomposition. -
Texture the skin:
Use a coarse sponge or stipple sponge with a mix of grey and purple paint to add tiny dots of ‘rot’ or discoloration randomly across the cheeks and chin.
Step 3: Veins and Fissures
-
Mix the blood color:
Create a dried blood color by mixing bright red paint with a tiny dot of black or brown. Alternatively, a deep burgundy lip liner works well here. -
Paint forehead cracks:
Using a fine detail brush, paint jagged, Y-shaped cracks on their forehead. Keep the lines thin at the ends and slightly thicker in the middle. -
Add cheek fissures:
Draw vertical, vein-like cracks running from the cheek contour down toward the jaw. Keep your hand shaky to create organic, non-linear shapes. -
Detail the neck:
Extend these red fissures down onto the neck and chest. Follow the natural lines of the sternocleidomastoid muscle for a realistic anatomical look. -
Feather the edges:
Use a clean, very small brush to slightly feather or smudge the edges of the red lines so they look like they are under the skin, not just sitting on top. -
Redden the lips:
Apply the dark red color to the inner center of the lips, feathering it outwards but leaving the outer lip line pale and green to look dehydrated. -
Set the makeup:
Dust the entire face with a translucent setting powder to remove shine—zombies shouldn’t look sweaty unless they are fresh out of the grave.
Level Up: 3D Texture
Apply small amounts of liquid latex or rigid collodion under the red painted fissures before painting. This pulls the skin tight, creating actual indented scars.
Now step back and admire your ghoulish transformation, ready to roam.

PENCIL GUIDE
Understanding Pencil Grades from H to B
From first sketch to finished drawing — learn pencil grades, line control, and shading techniques.
Explore the Full Guide
Neon Pop Art Zombie With Graphic Halftone Dots
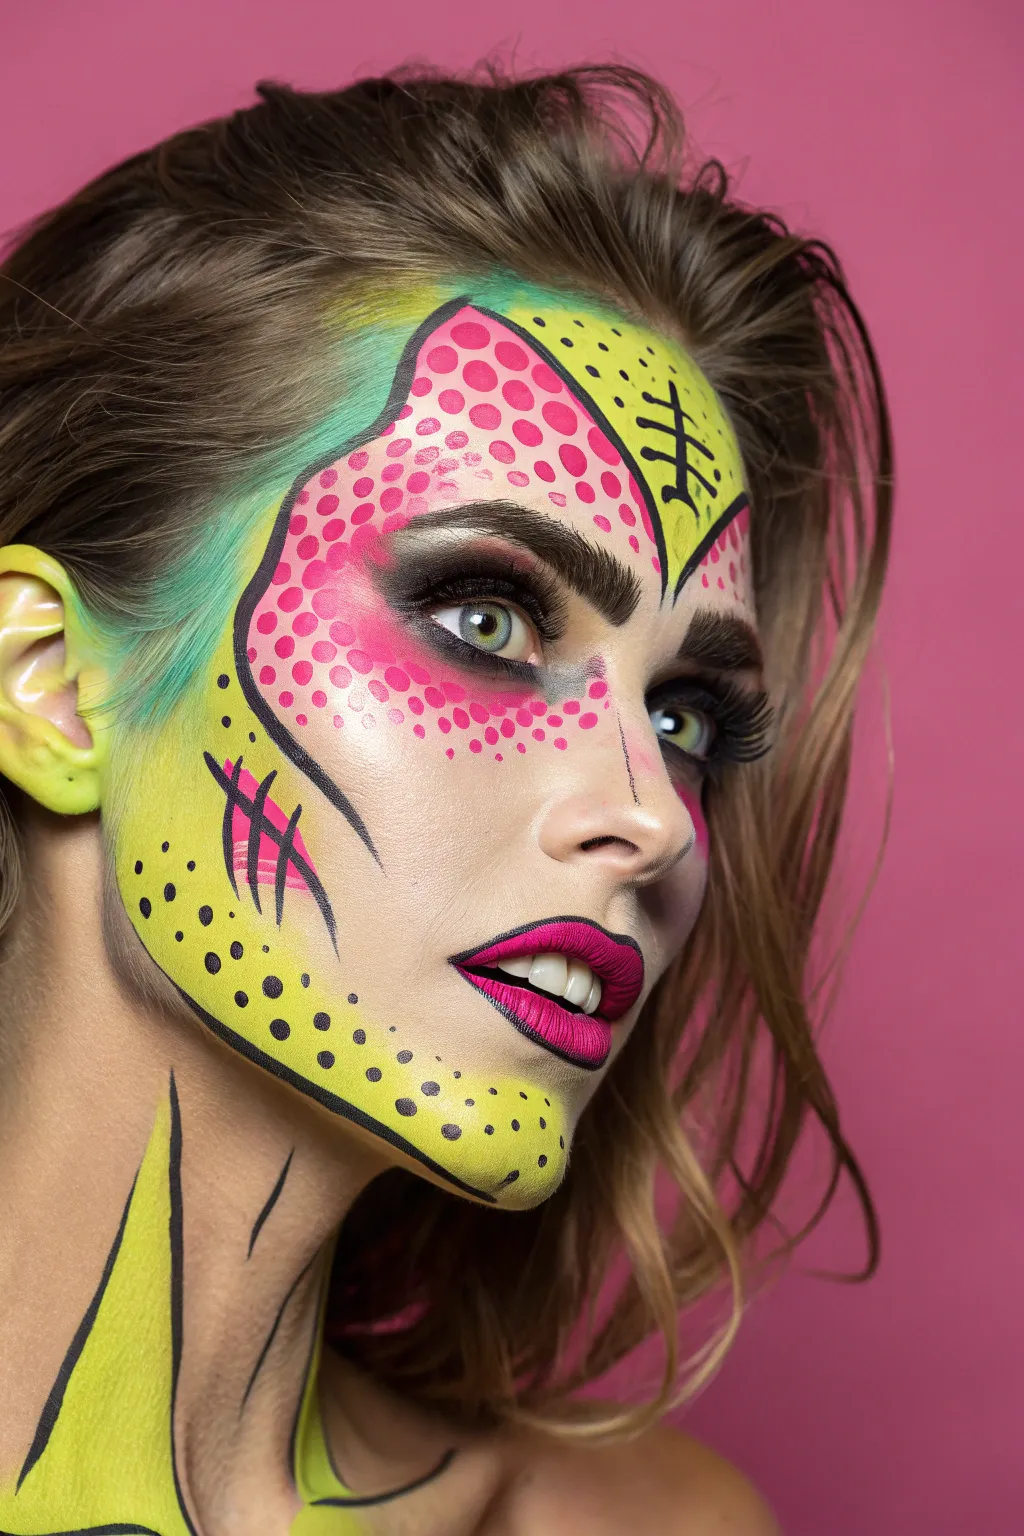
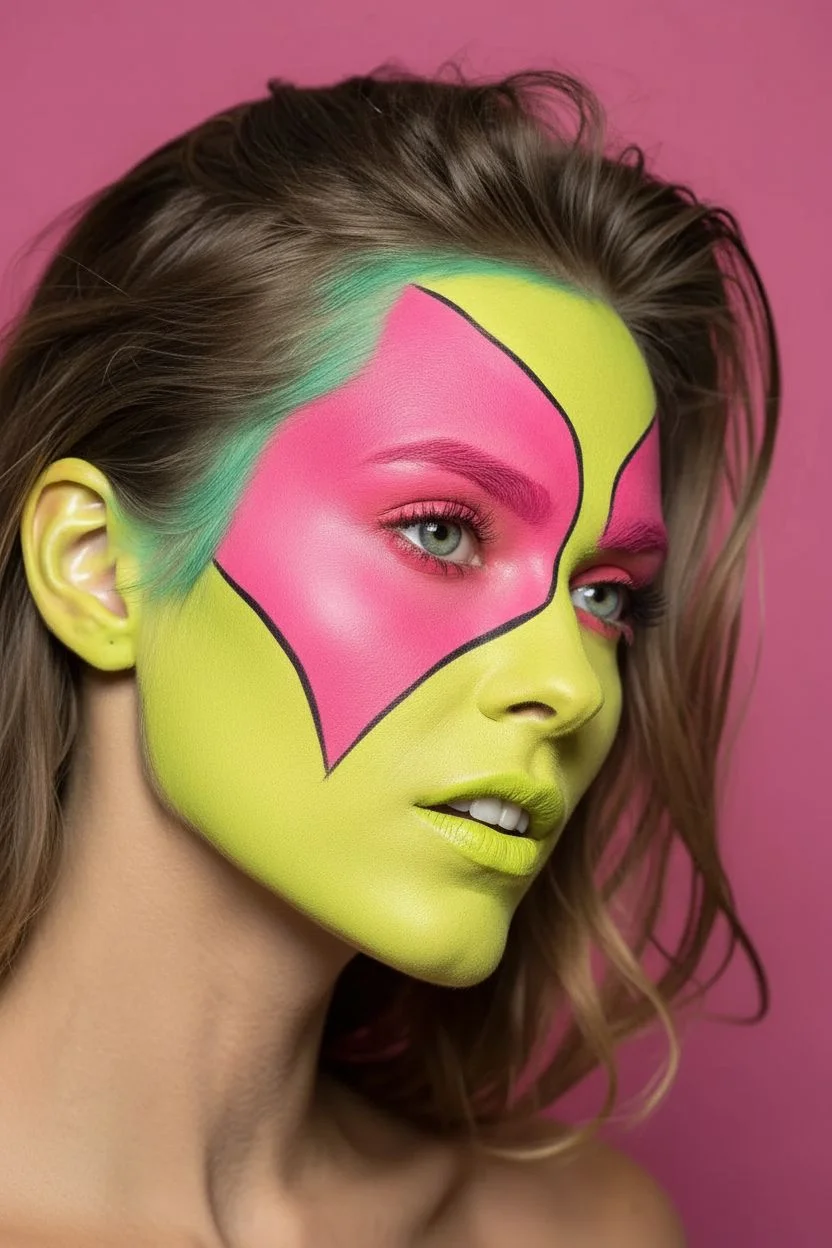
Transform yourself into a walking comic book character with this striking neon pop art zombie look. This design merges vibrant yellows and pinks with stark black outlines and classic halftone dots for a surreal, 2D effect.
Step-by-Step Tutorial
Materials
- Neon yellow water-activated face paint
- Neon pink water-activated face paint
- Teal or mint green face paint
- Black face paint (creamy or gel liner works best for lines)
- Wide flat brush
- Fine liner brush (0 or 00 size)
- Small round brush
- Dotting tool or back of a paintbrush
- Makeup sponge
- Black eyeshadow
- Mascara/False eyelashes
Step 1: Base Color Blocking
-
Prep the canvas:
Start with a clean, dry face. Tie your hair back completely to keep the hairline accessible. -
Apply the yellow base:
Load a sponge with neon yellow paint. Cover your jawline, chin, and cheek area up to a diagonal line running from your ear to your nose. Don’t worry about perfect edges yet; we’ll outline them later. -
Paint the ear:
Continuing with the yellow sponge, completely cover your ear to integrate it into the 2D illustration style. -
Add pink sections:
Using a fresh sponge or clean section, apply neon pink to the forehead area above the left eye and down the nose bridge. Leave a gap around the eye socket itself. -
Fill the hairline accent:
With a brush, add the teal or mint green paint into the hairline area on the left side, blending it slightly towards the pink and yellow sections to create that bruised, zombie transition.
Uneven Dots?
If your halftone dots get messy or vary too much in size, let them dry completely. Then, use a correction brush with a tiny bit of skin-toned foundation or the base color to tidy up the edges.
Step 2: Graphic Outlinig
-
Outline the yellow zones:
Using a fine liner brush loaded with black paint, draw a thick, bold line separating the yellow cheek area from the rest of the face. Vary the line thickness—make it thicker at curves to mimic ink pens. -
Define the pink zone:
Outline the pink shape on the forehead. Create a jagged, organic shape rather than a perfect circle to simulate a wound or torn skin area. -
Contour the nose:
Draw a thin black line down the center of the nose and outline the nostril on one side to flatten the appearance of your nose. -
Add comic book shadows:
Paint bold, tapered black lines along the jawline and under the cheekbone directly over the yellow paint. I find distinct, sharp strokes look more like a drawing than blended shadows.
Step 3: Halftone Details
-
Create pink dots:
Dip a dotting tool or the round end of a brush handle into the neon pink paint. Apply rows of uniform dots over the pink forehead area and the cheekbone. -
Apply dark accents:
Switch to black paint on your dotting tool. Add black stippling scattered over the yellow chin and jaw area to suggest texture or grit. -
Cross-hatching details:
On the yellow patch above the eyebrow, use your finest brush to paint small cross-hatch marks (#) or jagged stitching lines to emulate comic book shading. -
Stitch up the cheek:
Paint a few jagged ‘stitch’ marks in pink over the yellow cheek area, then outline them loosely in black to make them pop.
Level Up: UV Glow
For a nightclub or haunted house, use UV-reactive neon paints for the yellow and pink sections. When you step under a blacklight, the comic book effect will literally glow in the dark.
Step 4: Eyes and Neck
-
Darken the eyes:
Pack black eyeshadow heavily onto the eyelids and under the lower lash line. Blend it out into a smokey, hollow shape. -
Add lashes:
Apply heavy mascara or a dramatic pair of false eyelashes to make the eyes stand out against the flat face paint. -
Paint the lips:
Fill the lips with a bright magenta or pink lipstick. Once dry, outline the lips with a thin black line to match the comic style. -
Create neck drips:
Extend the look downwards by painting large, jagged shapes of neon yellow on your neck. -
Outline the neck:
Finish by outlining the neck shapes with thick, erratic black lines that mimic slime or melting skin.
Now you have a stunning, illustrative look that jumps right off the page
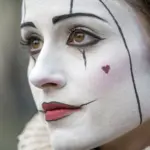
Creepy Clown Glam With Sharp Shapes and Tear Details
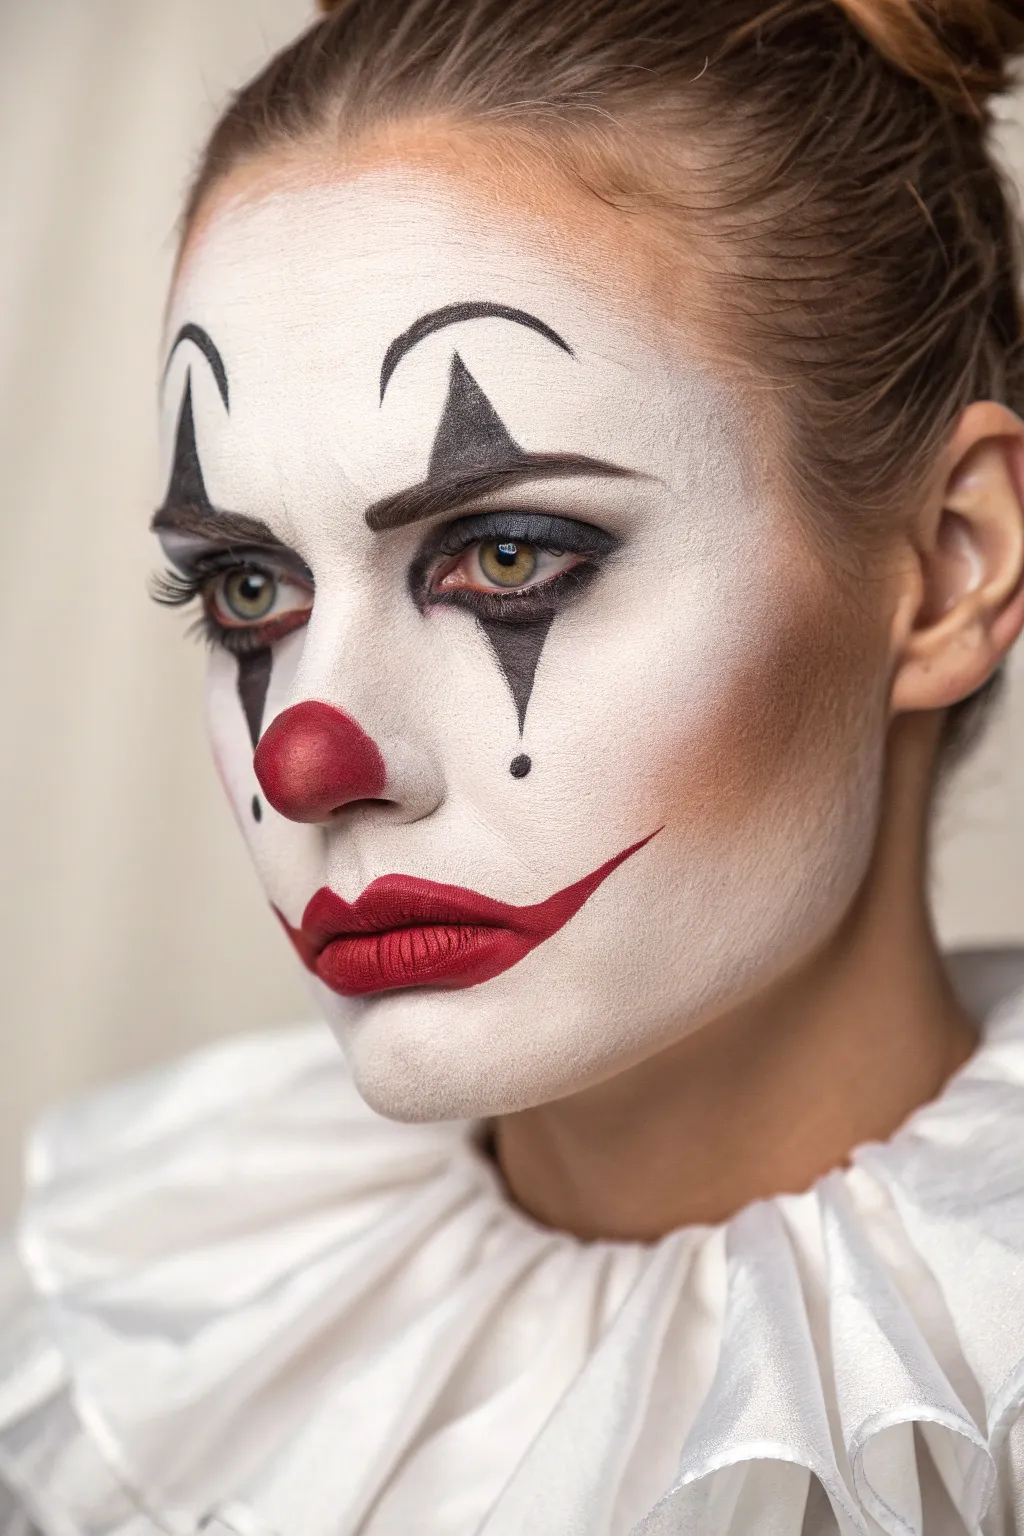
Transform into a striking character that balances eerie elegance with circus tradition using this high-contrast clown look. This design pairs a flawless white base with sharp graphic triangles and a melancholic red pout for a sophisticated take on classic costume makeup.
Detailed Instructions
Materials
- Full-coverage white cream or grease face paint
- Setting powder (translucent or white)
- Black gel liner or water-activated face paint
- Matte red lipstick or lip stain
- Cool-toned contour powder (taupe or grey-brown)
- Small shading brush
- Fine detail brush
- Makeup sponge
- Black mascara or false lashes (optional)
Step 1: The Porcelain Canvas
-
Prep and prime:
Start with a clean, moisturized face. Apply a makeup primer to ensure the white paint adheres smoothly and lasts longer. -
Apply the white base:
Using a slightly damp makeup sponge, stipple the white cream paint over your entire face. Build usage thin layers rather than one thick coat to avoid streaks. -
Extend the base:
Carry the white paint down the neck slightly to blend, though full opacity isn’t necessary here; just fade it out softly. -
Set the foundation:
Press a generous amount of translucent or white setting powder over the entire face with a powder puff to lock the cream in place and create a matte finish.
Step 2: Sculpting Shadows
-
Contour the cheeks:
Dip a fluffy shading brush into a cool-toned contour powder. Sweep it underneath your cheekbones, starting from the ear and fading towards the corner of the mouth to create a hollowed, dramatic effect. -
Shade the temples:
Lightly dust the contour powder along your temples and hairline to add dimension back to the flat white base. -
Define the nose:
Add subtle shading along the sides of the nose bridge, stopping before you reach the tip where the red nose will go.
Keep it Crisp
Clean up any jagged edges on your black triangles using a small flat brush dipped in concealer or white paint. This sharpens the geometry instantly.
Step 3: Geometric Eyes
-
Draft the eyebrows:
Using a fine brush and black paint or gel liner, draw a thin, high arch well above your natural brow line. Make the beginning rounded and the tail tapered. -
Create the upper triangles:
Draw a sharp triangle extending upwards from your natural eyebrow towards the painted arch. Fill this shape in solid black. -
Line the upper lid:
Apply a thick line of black gel liner across your upper lash line, connecting it to the base of the upper triangle. -
Draw the lower spikes:
Starting from the center of your lower lash line, paint an inverted triangle pointing down towards your cheek. Keep the edges crisp and sharp. -
Add the tear drop:
Just below the tip of the bottom triangle, place a small, perfect black dot to mimic a stylized tear. -
Line the waterline:
Apply black eyeliner to your waterline to intensify the gaze and remove any skin-tone gaps. -
Finish the lashes:
Apply two coats of mascara to top and bottom lashes. For extra drama, add fluttery false lashes on the outer corners.
Add Texture
Glue small rhinestones to the tip of each black triangle or over the ‘tear’ dot for a sparkling glam finish.
Step 4: The Painted Grin
-
Create the nose:
Using red face paint or a matte red lipstick, fill in just the rounded tip of your nose. Blend the edges slightly with a finger for a softer look. -
Paint the lips:
Apply matte red lipstick to your natural lips, blotting once to remove excess oil. -
Extend the smile:
With a fine liner brush and the same red color, draw a thin, upturned line from the corners of your mouth extending outward towards your cheeks. -
Taper the ends:
Ensure the extended smile line starts thick at the mouth corner and tapers to a very fine point at the end.
Now you are ready to haunt the circus tent with this beautifully melancholic look


Fierce Tiger Muzzle With Adult-Level Shading
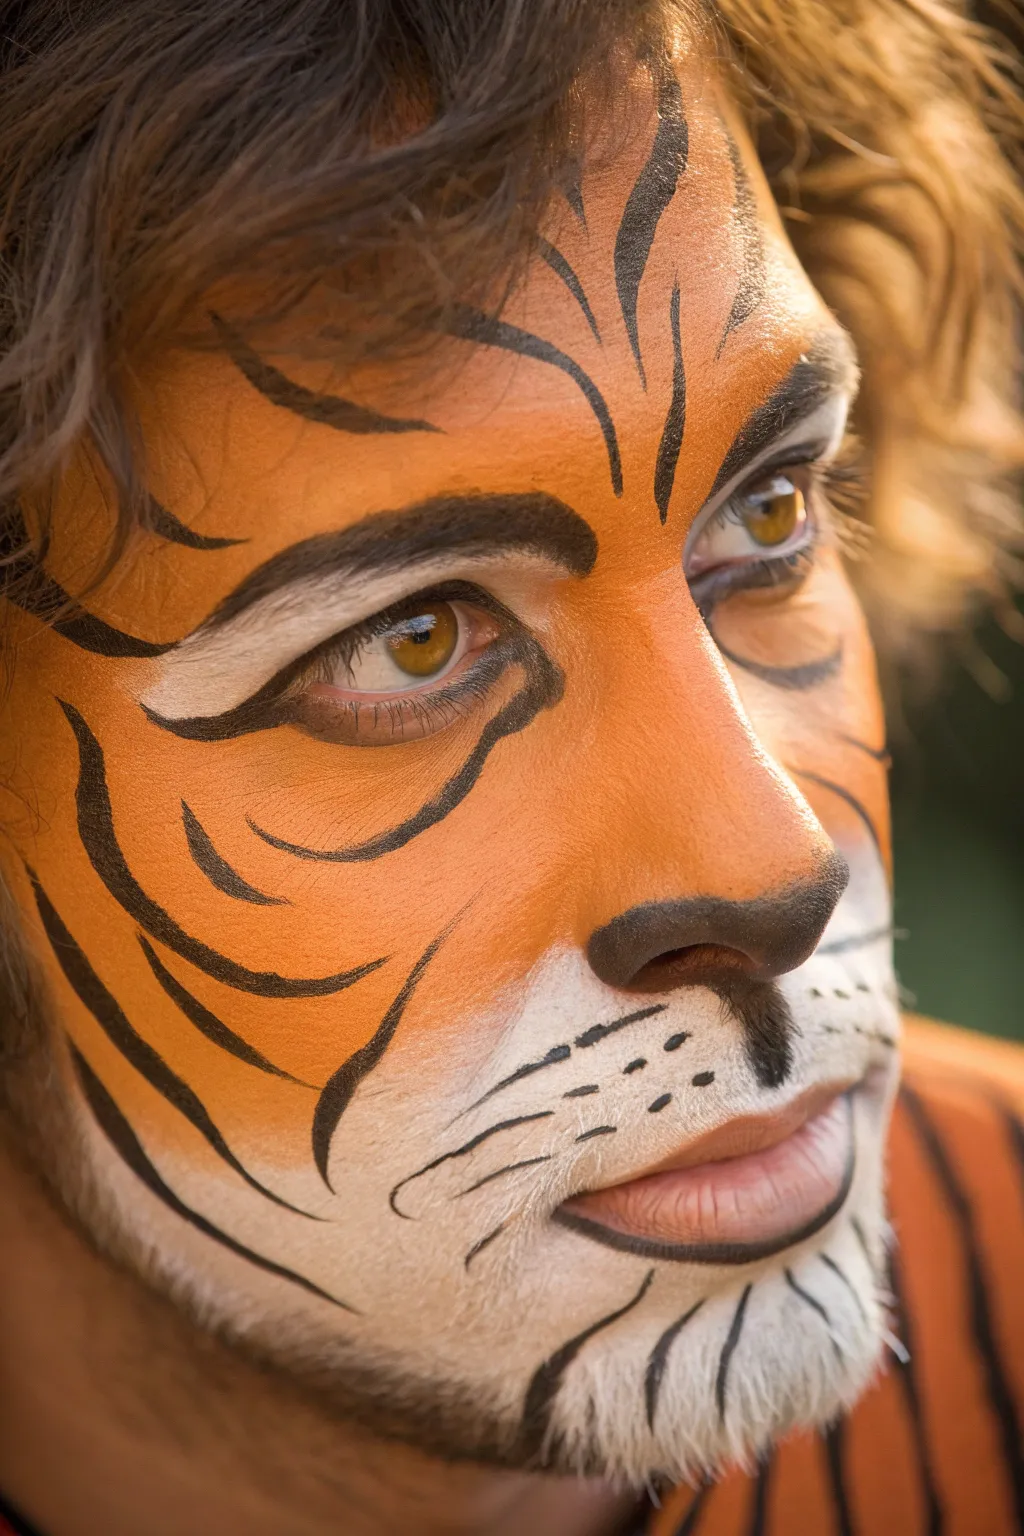
Transform into a jungle predator with this high-impact tiger design that focuses on realistic shading and sharp contrast. This adult-level look moves beyond simple stripes by incorporating a defined muzzle area and sophisticated eye detailing.
Step-by-Step Tutorial
Materials
- High-density face paint (bright orange)
- High-density face paint (white)
- High-density face paint (black)
- High-density face paint (brown/dark orange for shading)
- Makeup sponge applicator
- Round synthetic brush (size 2 or 3)
- Fine liner brush (size 0 or 1)
- Setting powder
- Small cup of water
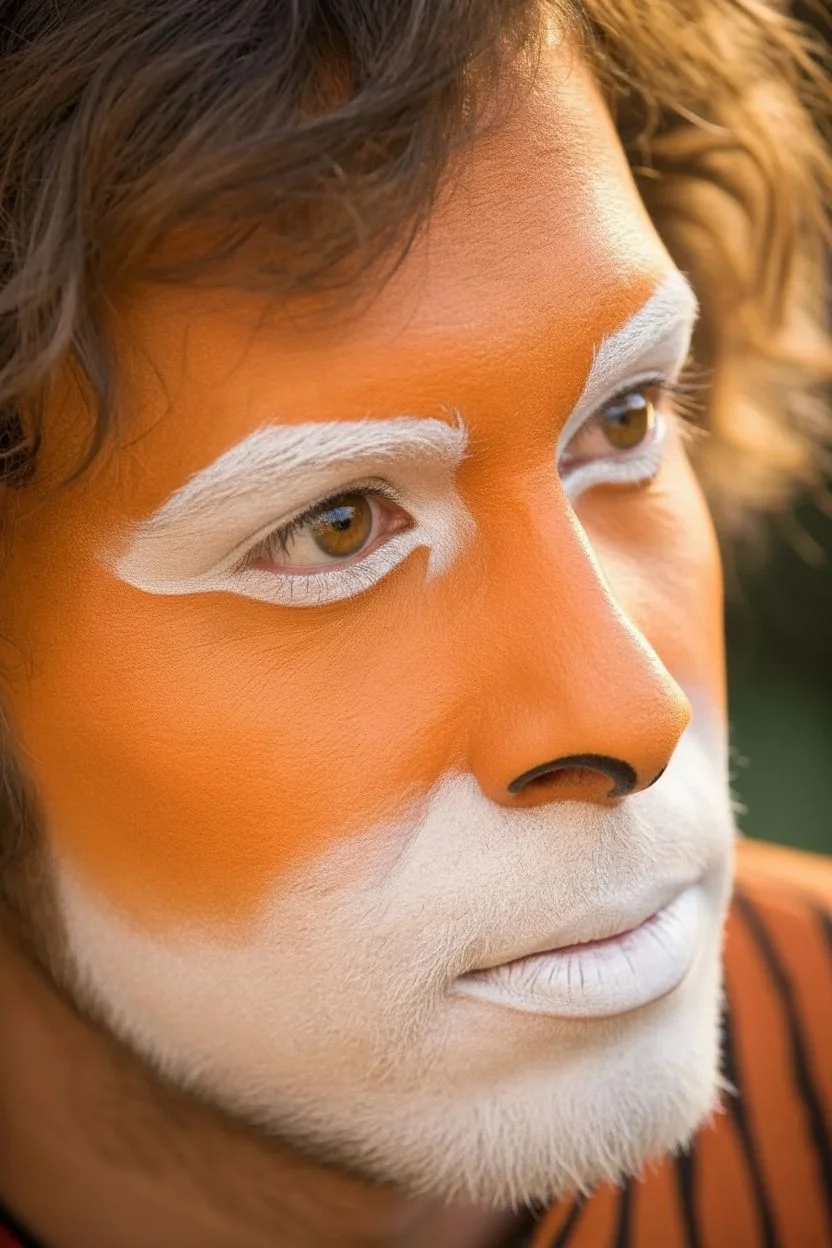
Step 1: Base Layer Application
-
Prep the Muzzle:
Start with a clean, dry face. Load your sponge with white face paint and dab it generously around the mouth area, covering the upper lip, chin, and extending slightly onto the cheeks. Keep the edges soft rather than harsh lines. -
Define the Eyes:
Using the same sponge or a smaller version, apply white paint underneath the eyes and slightly above the eyebrows to create highlights that will make the eyes pop. -
Apply the Orange Base:
Load a clean sponge with bright orange paint. Fill in the rest of the face, covering the forehead, cheeks, and nose bridge. Blend gently where the orange meets the white muzzle and eye areas to create a soft, furry gradient. -
Contour the Nose:
With a slightly darker orange or soft brown on a sponge edge or brush, shade the sides of the nose bridge. This adds dimension and mimics the skeletal structure of a big cat.
Step 2: Structuring the Features
-
Blacken the Nose:
Switch to a round brush loaded with black paint. Paint the tip of the nose completely black, creating a rounded triangular shape that extends down the philtrum (the groove above the lip) to connect with the top lip. -
Line the Muzzle:
Using a fine liner brush and black paint, draw a thin line from the nose connection point across the top lip. Outline the white muzzle area on the chin with very faint, broken strokes to suggest fur texture. -
Define the Eyes:
Paint a thick black line extending from the inner corner of the eye downwards alongside the nose bridge. Then, line the upper and lower eyelids, extending the outer corner into a slight wing. -
Create Eye Brows:
Above the natural brow, paint a solid, arching black shape that mimics a heavy tiger brow. I find it help to flick the brush upward at the top edge to simulate hair.
Feline Fur Texture
For realistic fur texture, don’t paint solid blocks of color. Use a dry brush technique or a stipple sponge along the edges where white meets orange to feather the colors together.
Step 3: Stripes and Details
-
Forehead Markings:
Using your round brush, paint symmetrical stripes on the forehead. Imagine a central focal point between the eyes and let the stripes radiate outward like a fountain. -
Cheek Stripes:
Paint bold, wavy stripes on the cheeks. Press down firmly to start the stripe thick, then lift the brush slowly as you taper off to a fine point. Vary the thickness; some stripes should be heavy, others thin. -
Chin Details:
Add smaller, curved stripes on the chin area, flowing downwards from the lip line. -
Whisker Spots:
On the white muzzle area (the upper lip), use the fine tip of your brush to dot several small black spots in rows. These represent the whisker follicles. -
Whisker Lines:
Use your finest liner brush with watered-down black paint to flick incredibly thin lines originating from the spots. Quick, confident flicks work best here.
Shaky Lines?
If your stripes look wobbly, rest your pinky finger on the model’s face (or your own cheek) while painting. This anchors your hand and gives you much cleaner, sweeping brushstrokes.
Step 4: Final Shading
-
Lowlights:
Take a small amount of thinned brown paint. Carefully shade underneath the major black stripes on the orange sections to make them look like they are sitting on top of the fur. -
Set the Look:
Once everything is dry, lightly dust a translucent setting powder over the design to prevent smudging during wear.
Now you are ready to prowl the party with this fierce and detailed design
Leopard Glam Spot Contouring Across Cheeks and Brow
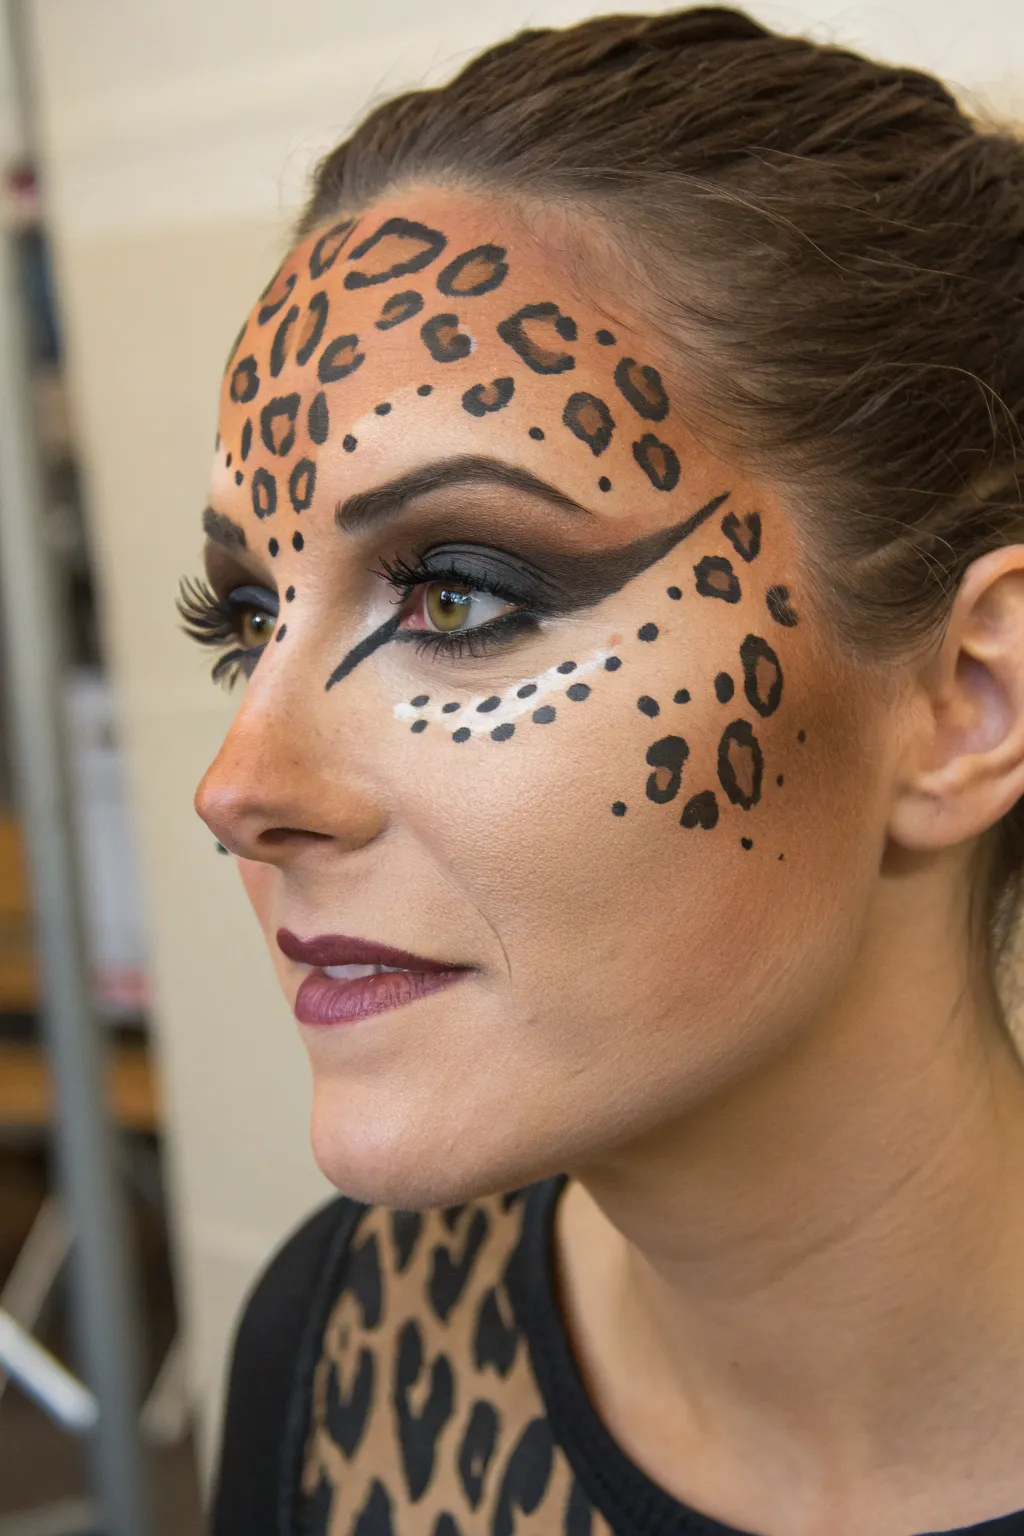
Transform your look into a fierce feline by focusing animal print detailing strictly on the forehead and cheekbones for a sophisticated contour effect. This design blends dramatic smokey eyes with artistic leopard spots, keeping the lower face clean for a wearable yet striking costume.
Detailed Instructions
Materials
- Matte brown eyeshadow (medium and dark shades)
- Black gel eyeliner or face paint
- Fine detail brush
- Angled eyeliner brush
- Liquid black eyeliner pen
- White face paint or liquid eyeliner
- Foundations (skin tone for base, lighter shade for center)
- Contour powder or bronzer
- Setting powder
- False eyelashes and lash glue
- Dark berry lipstick
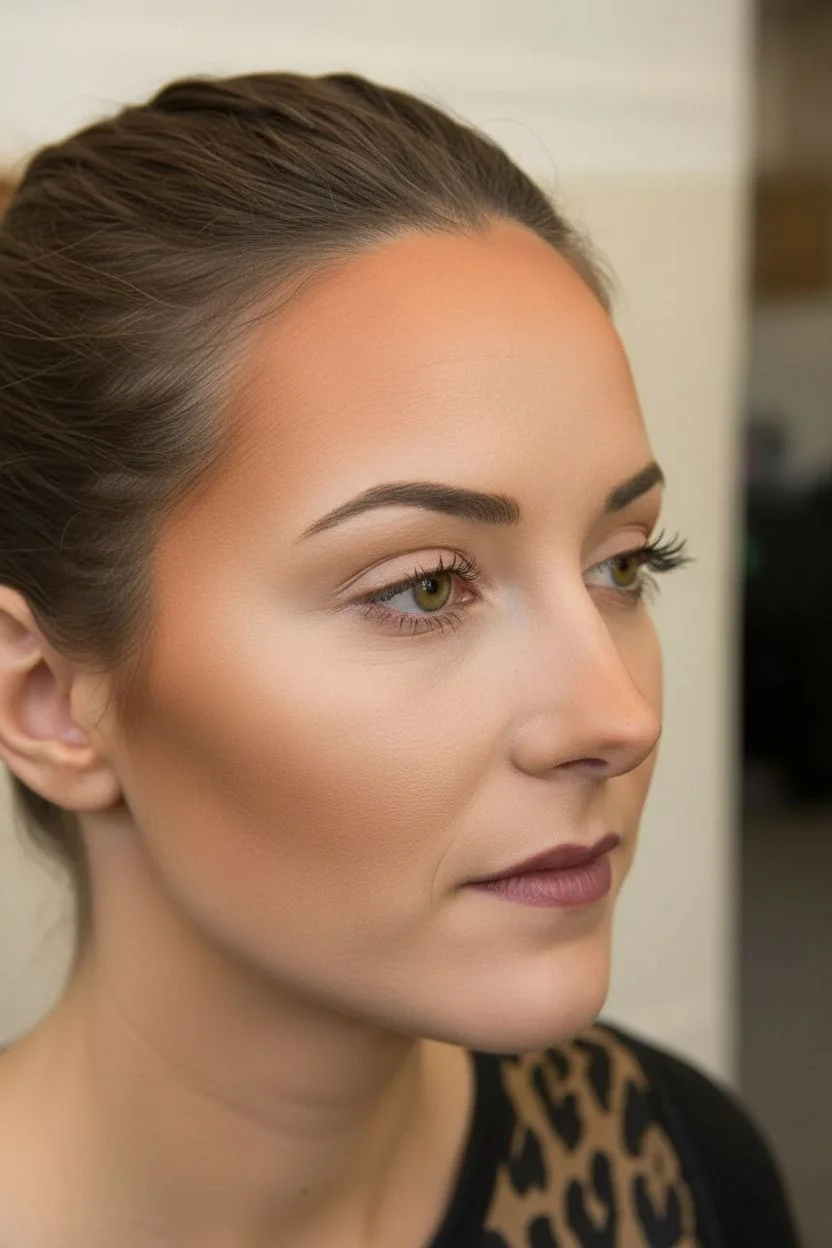
Step 1: Base and Contour
-
Prepare the canvas:
Start with a clean, moisturized face. Apply your regular foundation for an even skin tone, ensuring full coverage to make the painted details pop. -
Highlight the center:
Apply a slightly lighter concealer or foundation down the center of your nose, forehead, and chin to create dimension. -
Warm the perimeter:
Using a contour powder or bronzer, sweep color along your temples, hairline, and under the cheekbones to create a warm, sculptural base for the spots.
Smudged Lines?
If your black outlines bleed into the brown spots, wait for the paint to dry completely. Then, use a concealer brush with a tiny bit of foundation to clean up the edges.
Step 2: The Cat Eye
-
Lay down the shadow:
Pack a dark brown matte eyeshadow onto the entire mobile lid. Blend it upwards into the crease, softening the edges as you go. -
Create the wing shape:
Using an angled brush and black gel liner or shadow, draw a sharp, dramatic wing extending towards the temple. Keep the line crisp. -
Connect the lower lash line:
Bring the black liner underneath the eye, connecting it to the outer wing. Add a small inner corner point, angling it downward toward the nose bridge for that feline shape. -
Apply falsies:
Apply a strip of dramatic false eyelashes to the upper lash line to intensity the gaze.
Step 3: Leopard Spotting
-
Map the pattern area:
Visualize where your contour naturally sits. You will be placing spots primarily on the large forehead area and sweeping down the cheekbone. -
Create the brown centers:
Using a small brush and your medium brown shadow or face paint, dab irregular, organic oval shapes onto the forehead and upper cheek. Vary their sizes. -
Outline the spots:
With a fine liner brush and black face paint or liquid liner, trace partial outlines around the brown shapes. Don’t close the circles completely; use two or three brackets like ‘C’ shapes. -
Add filler spots:
In the empty spaces between the larger rosettes, dab small, solid black dots or irregular specks to mimic real fur texture. -
Detail the brows:
Be careful when painting near the eyebrows; I find it helps to fill your natural brows in darker first so the paint doesn’t look messy against the hair.
Add Some Sparkle
For a glamourous twist, press loose gold cosmetic glitter into the center of the largest leopard spots while the brown paint is still slightly tacky.
Step 4: Finishing Details
-
Add white highlights:
Using white face paint or liquid liner, add a row of precise dots just below the cat-eye wing on the cheekbone, following the curve of the black liner. -
Additional white accents:
Place a few tiny white dots near the inner eye corner or amidst the leopard spots to add brightness and contrast. -
Paint the lips:
Finish the look with a matte, dark berry or reddish-brown lipstick. Keep the lip line clean and sharp. -
Set the look:
Lightly dust translucent powder over the painted areas if you used cream products, or use a setting spray to lock everything in place.
Now you have a stunning, contoured creature design that is perfect for costume parties or festivals
Festival Butterfly Mask With Extended Neck Wings
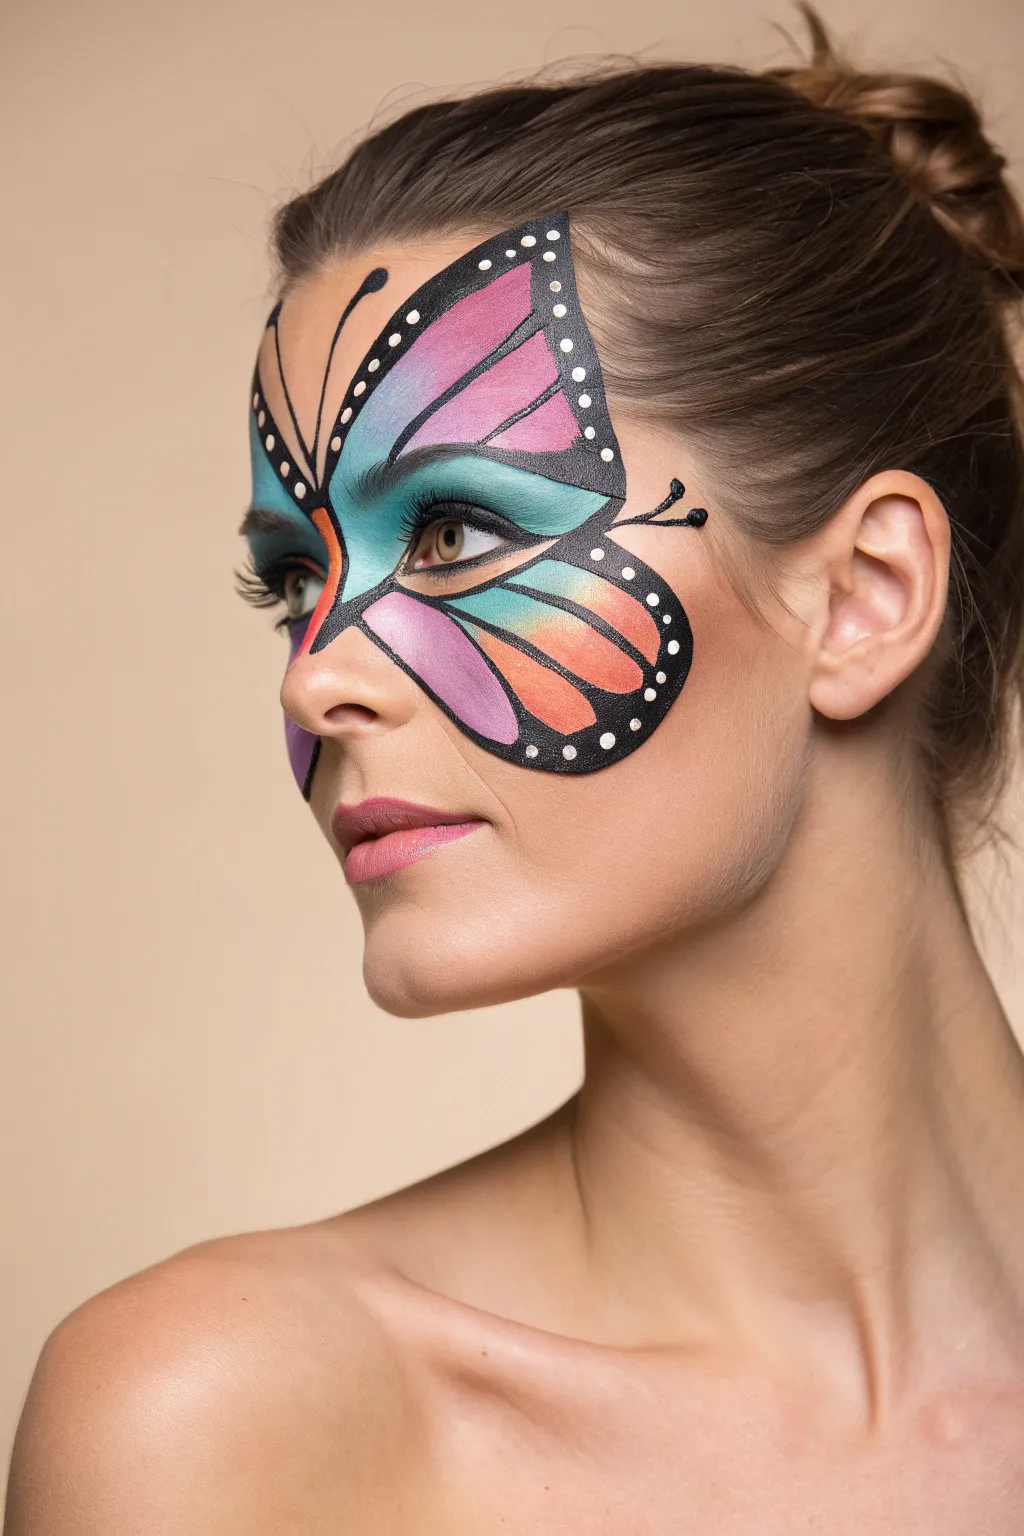
Transform your look with this vibrant, asymmetrical butterfly design that sweeps elegantly across one side of the face. Featuring a blend of teal, purple, and sunset orange framed by crisp black lineage, this festival-ready mask captures the delicate beauty of a butterfly wing.
How-To Guide
Materials
- Water-activated face paints: Teal, Purple, Peach/Orange, Black, White
- High-density face painting sponges (wedge or rounded)
- Round brush #4 (for outlines)
- Round brush #2 (for details)
- Small filbert brush (optional, for blending)
- Cup of water
- Spray bottle with water
Step 1: Base Colors & Blending
-
Load the sponge:
Start by lightly misting a wedge sponge with water and loading it with a vibrant teal face paint. You want a creamy consistency that isn’t too drippy. -
Create the upper wing base:
Dab the teal paint over the eyelid and up onto the forehead above the eyebrow on the model’s left side. Keep the shape somewhat triangular, angling outward toward the temple. -
Add the lower wing color:
With a clean side of the sponge or a new one, load a soft lavender or purple shade. Apply this to the cheekbone area, directly below the outer corner of the eye, blending it slightly towards the hairline. -
Introduce the accent color:
Load a sponge with a warm peach or sunset orange hue. Press this color onto the lower cheek area, blending it upward into the purple to create a soft gradient effect. -
Bridge the nose:
Extend the teal color slightly over the bridge of the nose to hint at the butterfly’s body and the start of the second wing on the opposite side. -
Refine the gradients:
Where the colors meet—especially the teal and purple near the temple—use a barely damp, clean sponge to gently dab the seam, softening the transition between the hues.
Clean Lines
If your black lines look shaky or translucent, your paint is likely too watery. Mix until the paint has an inky consistency for crisp, opaque strokes.
Step 2: Line Work & Structure
-
Outline the upper wing:
Load a #4 round brush with black face paint. Create a smooth, sweeping line from the inner corner of the eyebrow, curving up and out toward the hairline to define the top edge of the wing. -
Define the eye shape:
Draw a line extending from the inner corner of the eye, sweeping underneath the lower lash line and curving down onto the cheek to separate the upper and lower wing sections. -
Segment the wings:
Using the tip of your brush, draw thin veins radiating from the center (near the eye) outward to the edges of the colorful sections, mimicking the segments of a real butterfly wing. -
Thicken the outer edges:
Go back over the outer perimeter lines of the wings and thicken them significantly. This bold black border provides the necessary contrast for the colors to pop. -
Create the lower wing shape:
Outline the bottom orange section on the cheek used a distinct curved line that meets the upper wing outline near the ear. -
Add the antenna:
Using a lighter touch with the very tip of the brush, paint a delicate, curved antenna springing from the top edge of the upper wing, finishing with a small dot.
Step 3: Details & Highlights
-
Apply the white spots:
Load a #2 round brush or a dotting tool with bright white paint. Ensure the consistency is thick, almost like toothpaste, so it sits on top of the black. -
Decorate the borders:
Place a series of small, evenly spaced white dots along the thick black outer borders of both the upper and lower wing sections. -
Vary dot sizes:
I like to graduate the size of the dots, making them slightly larger near the apex of the wing curves and smaller as they taper off, which adds a nice sense of dimension. -
Highlight the body:
Add a few tiny white accents or lines on the bridge of the nose and inner corner of the eye area to brighten the center of the design. -
Final check:
Step back and check for symmetry where the design crosses the nose, and touch up any black lines that may have become transparent as they dried.
Smoother Blending
For a flawless gradient between the teal and purple, slightly dampen your sponge and tap firmly over the border while the paint is still wet.
Enjoy flaunting your colorful, fluttering masterpiece at your next festival or costume party
Romantic Floral Eye Design With Studio-Clean Petals
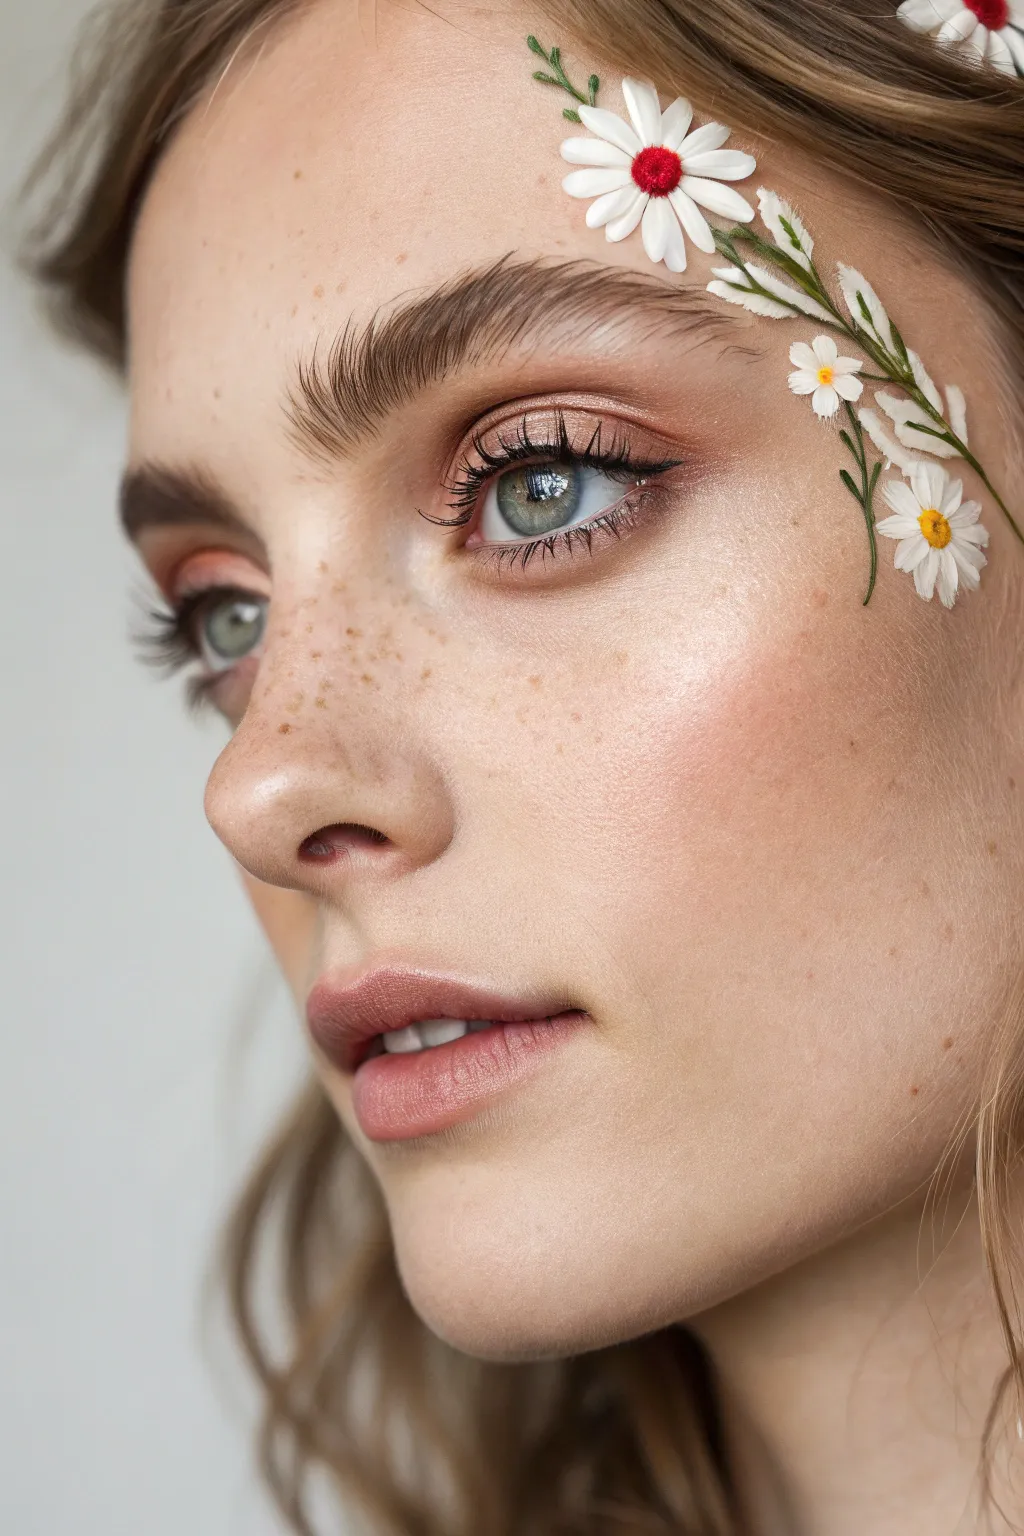
This ethereal makeup look combines soft, natural beauty with a whimsical trompe-l’œil effect, making delicate daisies appear almost embroidered directly onto the skin. The result is a studio-clean floral design perfect for festivals, photoshoots, or romantic garden parties that demand a unique artistic touch.
Detailed Instructions
Materials
- White water-activated face paint
- Leaf green water-activated face paint
- Yellow water-activated face paint
- Dark red or burgundy face paint
- Fine liner brush (size 0 or 00)
- Small round brush (size 1 or 2)
- Matte eyeshadow palette (peachy-browns)
- Fluffy blending brush
- Black liquid eyeliner
- Mascara
- Setting spray
Step 1: The Natural Base
-
Prep the canvas:
Begin with clean, moisturized skin. For this look, a sheer foundation or tinted moisturizer works best to let natural freckles or skin texture shine through, enhancing the organic feel. -
Warm the eye crease:
Using a fluffy blending brush, sweep a warm peach or soft terracotta matte eyeshadow into the crease of the lid, blending outward slightly past the eye’s outer corner. -
Add gentle definition:
Tap a slightly darker reddish-brown shadow onto the outer third of the lid to deepen the dimension without creating a harsh line. -
Define the lash line:
Apply a very thin line of black liquid eyeliner close to the upper lashes, thickening it just slightly toward the outer corner for a subtle lift. -
Finish the lashes:
Coat upper and lower lashes with mascara. Keep them separated and feathery rather than clumpy to maintain the delicate aesthetic.
Thread Textures
To sell the ’embroidery’ illusion, ensure your green stem lines are broken into tiny dashes rather than solid strokes. This small detail mimics the look of a backstitch.
Step 2: Painting the Embroidery
-
Map the layout:
Visualize a curving line starting near the brow bone and cascading down towards the temple and cheekbone. This flow mimics a vine’s natural drape. -
Create the main stems:
Load your fine liner brush with leaf green face paint. Instead of painting a solid line, use tiny, short dashing strokes to imitate the look of embroidery thread. Create a main vine curving down the temple. -
Add secondary branches:
Branch off smaller ‘stitched’ lines from the main vine. These will support the flower heads and leaves. vary their angles for a natural appearance. -
Paint the first large daisy:
Switch to the small round brush and white paint. Near the eyebrow, press and drag the brush tip inward to form petal shapes. Arrange them in a circle, leaving a small gap in the center. -
Layer the petals:
To make the flower look realistic, paint a few petals slightly overlapping others. I find that varying the opaqueness of the white paint adds lovely depth here. -
Paint the cascading flowers:
Create smaller daisy shapes further down the vine near the outer corner of the eye. For variety, paint some as half-open buds or side-profile blooms. -
Detail the leaves:
Return to the green paint and liner brush. Paint small, elongated leaves along the vine using a series of tiny parallel strokes, mimicking satin stitch embroidery. -
Add the flower centers:
For the main daisy, use a dotting tool or the back of a brush to place a textured dot of dark red or burgundy paint in the center. -
Texture the centers:
For the smaller daisies, use yellow paint to create the centers. Stipple the yellow gently to give it a pollen-like texture. -
Add stitched details to petals:
This is the secret step: mix a very diluted grey or pale beige. Using your finest liner brush, paint incredibly thin lines down the center of a few petals to suggest thread texture. -
Final stem connections:
Ensure all flower heads connect to the green vines. If any look floating, add tiny green ‘stitches’ to bridge the gap. -
Lock it in:
Close your eyes and mist the face lightly with a setting spray to prevent the water-activated paint from cracking or smudging throughout the day.
Cracking Paint?
If your white petals crack when drying, your paint was too thick. Add a drop more water to your brush for a creamier consistency that flexes with the skin.
Step back and admire your delicate, handcrafted floral artwork that brings a touch of eternal spring to your look
Forest Spirit Deer With Antler Illusion and Highlights
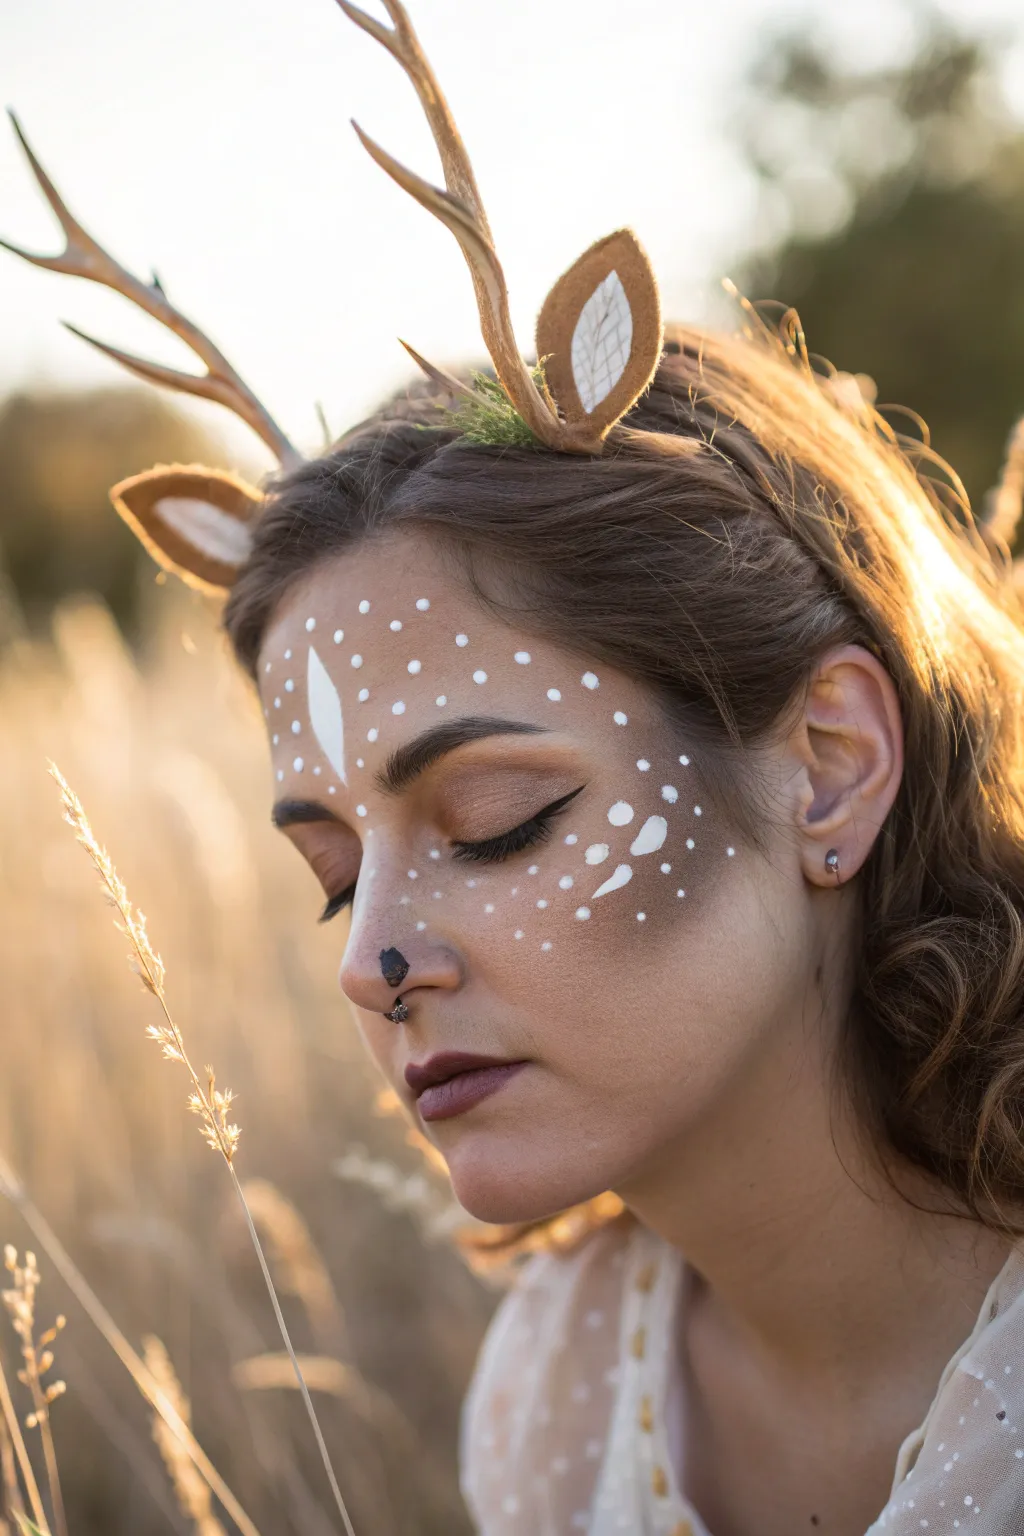

Step into the magical realm of the forest with this delicate deer makeup look, perfect for Halloween or a woodland-themed photoshoot. By combining soft contouring with crisp white detailing and a charming antler headpiece, you’ll achieve a sweet yet sophisticated doe-eyed appearance.
Step-by-Step Guide
Materials
- Matte brown eyeshadow or contour powder (warm-toned)
- White face paint or liquid eyeliner (high opacity)
- Black liquid eyeliner
- Black pencil liner
- Makeup sponges or contour brush
- Fine detail brush (size 0 or 00)
- Headband base
- Brown felt fabric (light and dark)
- White fabric or felt scraps
- Faux floral moss or greenery
- Plastic or resin antler attachments (or DIY wire/clay)
- Hot glue gun and glue sticks
- Setting spray
Step 1: Crafting the Antler Headpiece
-
Prepare the ears:
Cut two leaf-shaped ear pieces from the darker brown felt. Cut two slightly smaller leaf shapes from the lighter beige felt or fabric for the inner ear. Glue the inner pieces onto the center of the brown ears. -
Shape the ears:
Pinch the bottom of each felt ear slightly to create a curved, natural cupped shape. Secure this pinch with a small dab of hot glue at the base to hold the form. -
Attach antlers:
Position your plastic antlers on the headband so they sit angled slightly outward. Use hot glue to secure them firmly to the band. If using wire and clay, ensure they are fully dry and painted before attaching. -
Mount the ears:
Glue the prepared felt ears just below and slightly behind the antlers on the headband. Make sure they perk outwards for that alert deer silhouette. -
Add mossy details:
To hide the connection points and glue blobs, arrange small tufts of faux moss or greenery around the base of the antlers and ears. This adds a lovely organic texture to the crown.
Fixing Sheer Spots
If your white dots look translucent or streaky, let the first layer dry completely (about 2 minutes), then carefully dap a second layer directly on top for solid opacity.
Step 2: Applying the Base Makeup & Contour
-
Prep the skin:
Start with a clean, moisturized face and apply your standard foundation base to even out your skin tone. -
Heavy contouring:
Load a contour brush with warm brown matte eyeshadow or bronzer. Apply this heavily along the hairline, focusing on the temples and the top of the forehead. -
Cheekbone definition:
Sweep the brown powder under your cheekbones, blending it upwards toward the ears but keeping the edges soft and diffused. -
Nose shading:
Using a smaller fluffy brush, shade the sides of your nose bridge to connect with the brow bone, leaving the center of the nose lighter.
Step 3: Painting the Deer Features
-
Basic eye makeup:
Apply a wash of neutral brown shadow over the eyelids. Create a classic winged liner look using black liquid eyeliner for distinct definition. -
Nose tip detail:
Take your black face paint or liquid liner and paint just the very tip of your nose black. Bring the color down slightly onto the septum for a cute, animalistic shape. -
Top lip accent:
Paint a thin black line connecting the nose to the cupid’s bow, then fill in just the upper lip with a dark brown or brownish-red lipstick. -
Central forehead marking:
Using white face paint and a detail brush, paint a large, elongated teardrop shape in the center of the forehead, pointing downwards between the eyebrows. -
Dot placement – Forehead:
Begin placing white dots around the central teardrop. I like to vary the sizes here, making the ones closest to the center slightly larger and tapering them out toward the temples. -
Cheekbone highlights:
Paint a cluster of white markings specifically on the high points of the cheekbones. Use a mix of round dots and slightly elongated, dash-like strokes to mimic fawn spots. -
Layering the spots:
Continue adding smaller white dots down the bridge of the nose and scattered sparsely on the upper cheeks. Keep the paint opacity high so the white pops against the skin. -
Final touches:
Once the white paint is dry, set the entire face with a setting spray to prevent smudging during wear. Put on the antler headband to complete the transformation.
Pro Tip: Eye Opening
Line your bottom waterline with a nude or white pencil. This makes your eyes appear larger and more doe-like, enhancing the innocent animal expression.
Now you are ready to frolic through the fields with this enchanting woodland look
Mystic Mermaid Scales With Pearl-Like Highlights
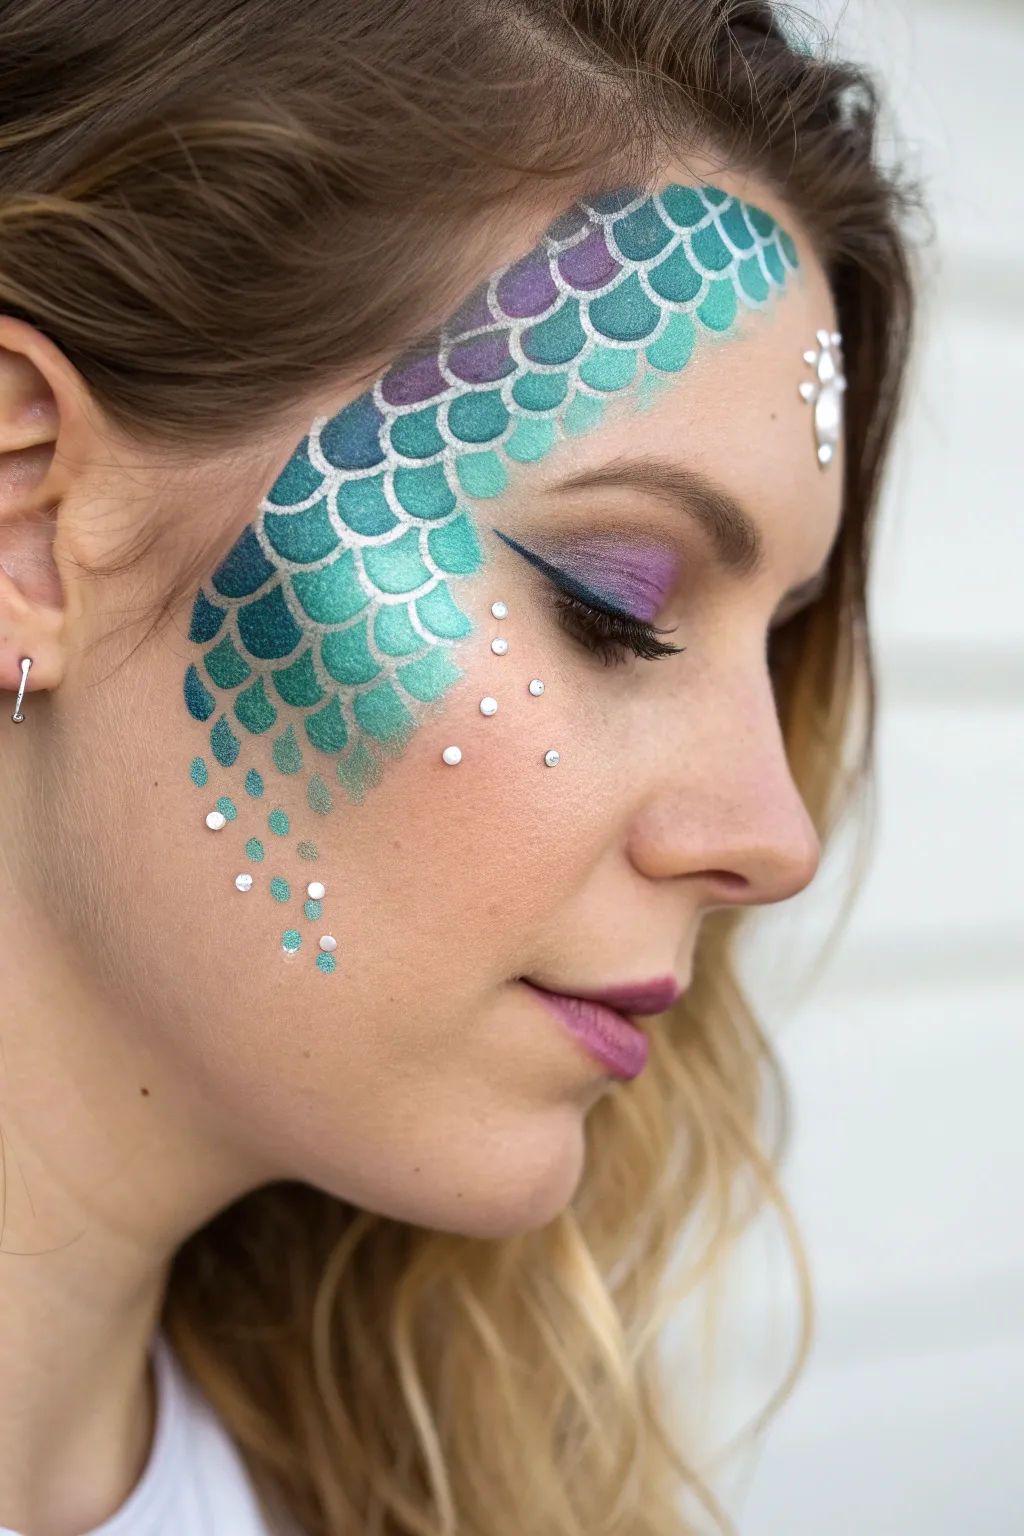
Transform into an ethereal sea creature with this shimmering design that sweeps gracefully across the forehead and temple. Using a fishnet stencil technique creates perfect, professional-looking scales in minutes, accented by iridescent pearls for a magical finish.
Detailed Instructions
Materials
- Face paint compact (Teal, Aquamarine, Sea foam Green, Metallic Purple)
- Small piece of fishnet stocking or mesh fabric bag
- High-density triangular makeup sponge
- Setting spray or water
- Purple eyeshadow palette (shimmer and matte)
- Black liquid eyeliner
- Mascara
- Small adhesive face gems or flat-back pearls
- Eyelash glue (clear drying)
- Mauve or soft pink lipstick
- Small eyeshadow brush
- Flat shader brush
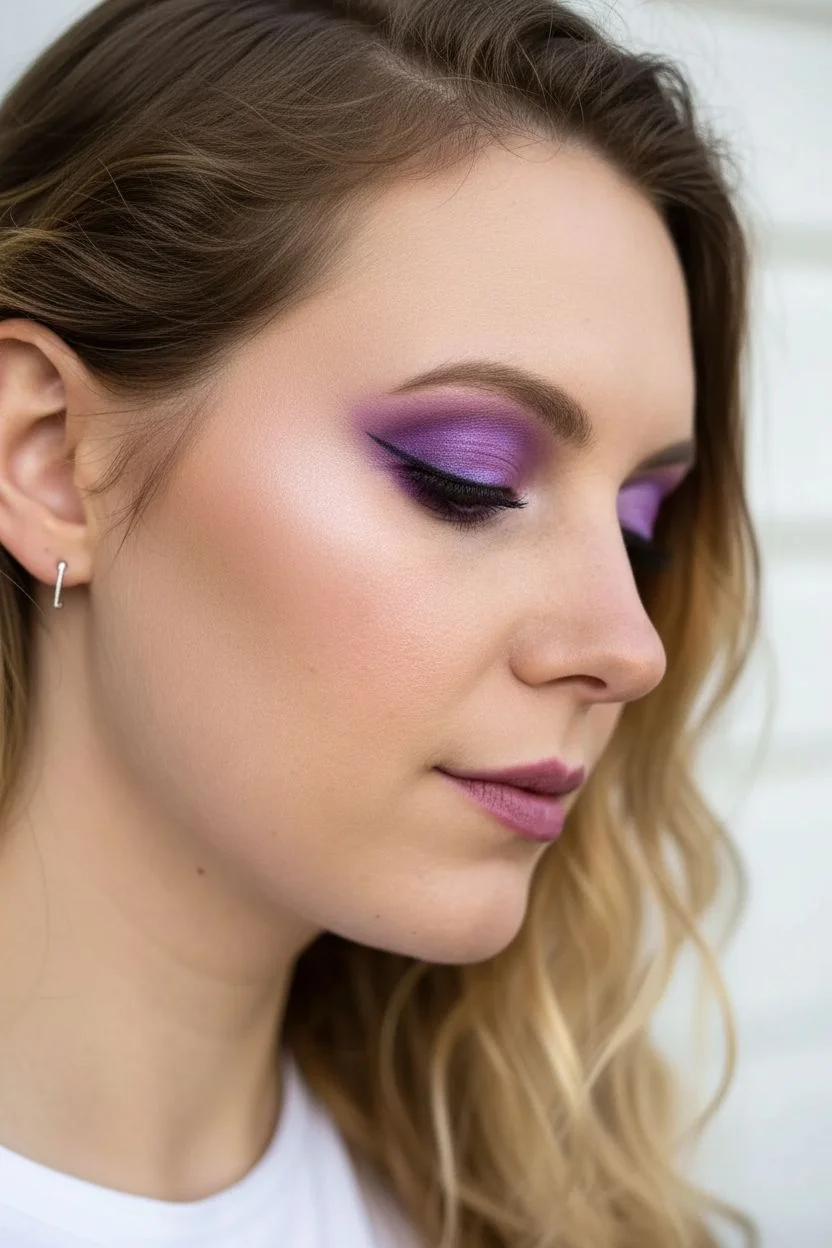
Step 1: Setting the Stage: Eye Makeup
-
Prime the eyelids:
Begin with a clean, moisturized face. Apply an eyeshadow primer to your eyelids to ensure the colors stay vibrant and don’t crease throughout the day. -
Apply base eyeshadow:
Using a flat shader brush, pat a shimmery violet eyeshadow across the entire mobile lid. -
Deepen the crease:
Take a slightly darker matte purple shade and blend it into the crease and outer corner to add depth to the eyes. -
Create the wing:
Using a sharp black liquid eyeliner, draw a dramatic winged line along the upper lash line. Start thin at the inner corner and thicken it as you extend outward. -
Add mascara:
Apply two coats of black mascara to both upper and lower lashes to define the eyes.
Step 2: Creating the Scale Effect
-
Prepare the stencil:
Take your piece of fishnet stocking or mesh fabric. Stretch it taut over your forehead and temple area where you want the scales to appear. You might need a friend to hold this, or I find using a few bobby pins to secure it into the hairline works well. -
Load the sponge:
Lightly mist your face paint cake with water. Rub your high-density sponge over the paints to pick up color. If using a split-cake (multiple colors side-by-side), swipe across all the colors—teal, green, and purple—in one go. -
Stipple the base scales:
Gently press or stipple the loaded sponge over the stretched fishnet. Do not drag or swipe, as this will smudge the pattern. Focus the darker teal and purple colors near the hairline. -
Blend the gradient:
Reload the sponge with lighter sea foam and aquamarine tones. Dab these further down the temple and cheekbone, overlapping slightly with the darker section to create a seamless Ombré effect. -
Fade the edges:
As you reach the outer edges of the design on the cheek, apply less pressure so the scales fade out softly rather than ending in a hard line. Add a few isolated dabs at the bottom to look like loose scales. -
Reveal the pattern:
Carefully lift the fishnet straight up and away from the face. Do not slide it, or you will blur the crisp white grid lines left behind by the protected skin.
Master the Mesh
Use a wig cap or stocking for the finest scale pattern. The tighter the mesh stretches, the cleaner the ‘grout lines’ between your painted scales will be.
Step 3: Embellishment & Finishing Touches
-
Highlight the center:
Place a cluster of adhesive crystals or pearls in the center of the forehead or slightly off-center near the scale pattern. -
Scatter the pearls:
Using a tiny dot of eyelash glue, apply small individual pearls or rhinestones scattered on the cheekbone below the scale design. This mimics water droplets glinting in the sun. -
Define the lips:
Apply a soft mauve or pink lipstick. The color should complement the purple eyeshadow without competing with the bold face paint. -
Set the look:
Close your eyes and lightly mist your entire face with a setting spray to lock the pigments in place.
Smudgy Scales?
If paint bleeds under the net, your sponge is too wet. Squeeze out excess water before loading pigment. The sponge should be damp and tacky, not dripping.
Step back and admire your shimmering aquatic transformation
Metallic Cyborg Panel Lines and Glowing Circuit Details
Transform into a futuristic vision with this sleek cyborg look, combining sharp geometric linework with soft, glowing skin. The contrast between the rigid white panel lines and the smoky, contoured base creates a striking synthesis of organic and synthetic beauty.
Step-by-Step Guide
Materials
- White liquid eyeliner or water-activated face paint
- Fine liner brush (size 0 or 00)
- Black eyeshadow or contour powder
- Metallic highlighter (silver or champagne)
- Bronze contour powder or cream
- Setting spray
- Nude or soft mauve lipstick
- Cotton swabs and makeup remover (for cleanups)
Step 1: Base & Structure
-
Establish the canvas:
Begin with a flawless foundation base. Since this look relies on skin sheen, ensure your skin is well-moisturized before applying your usual foundation routine. -
Deep contouring:
Apply a heavily pigmented bronze contour. Focus intensely on the hollows of the cheekbones, bringing the color down towards the jawline to create a chiselled, statue-like effect. -
Metallic highlighting:
Sweep a generous amount of metallic highlighter across the high points of your face—specifically the cheekbones, the bridge of the nose, and the brow bone. This creates the ‘metal plating’ illusion underneath the paint. -
Smoky eye definition:
Use a black or dark brown eyeshadow to create a blown-out smoky eye. Blend the darker pigment into the crease and under the lower lash line, extending it slightly outward for drama.
Step 2: Geometric Linework
-
Map the cheek panel:
Using your white liquid liner or face paint on a fine brush, draw a large angular shape on the cheek. Start near the hairline, angle down towards the jaw, and create a sharp geometric boundary that frames the contoured cheekbone. -
Double the lines:
Carefully trace a second parallel line inside the first cheek shape. Leave a consistent gap between the two lines to create a ‘panel’ effect. -
Forehead circuitry:
Draw an angular line starting from the top of the forehead, coming down towards the brow. Creating a sharp 90-degree or 45-degree angle adds to the robotic feel. -
Mirroring the brow:
Add a Chevron-style ‘V’ shape above the opposite eyebrow using parallel white lines. I find resting my pinky on the forehead helps stabilize the hand for these long strokes. -
Nose bridge detail:
Run a thin white line down the side of the nose bridge, connecting it visually to the forehead patterns. -
Neck cables:
Extend the robotic theme downwards by painting three to four long, parallel lines on one side of the neck, mimicking wires or cables running under the skin.
Clean Lines Only
If lines look shaky, clean edges with a flat brush dipped in concealer rather than wiping away. This preserves your base makeup.
Step 3: Details & Dots
-
Dot placement:
Inside the gap of your double-lined cheek panel, place evenly spaced white dots. This mimics rivets or LED lights. -
Under-eye accents:
Add a row of small dots tracing the curve from the cheekbone up towards the temple, following the highlighting you applied earlier. -
Lip accents:
Apply your nude lipstick. Then, draw a singular, wavy white line extending from the bottom lip down to the chin. -
Shadowing the lines:
To make the white lines pop, take a very small brush with a tiny amount of black shadow and lightly trace one side of the white lines. This creates a 3D drop-shadow effect.
Ultraviolet Upgrade
Use UV-reactive white paint for the lines and dots. Under blacklight, your circuitry will actually glow like real power lines.
Step back and admire your transformation into a sleek, futuristic entity ready for a sci-fi adventure
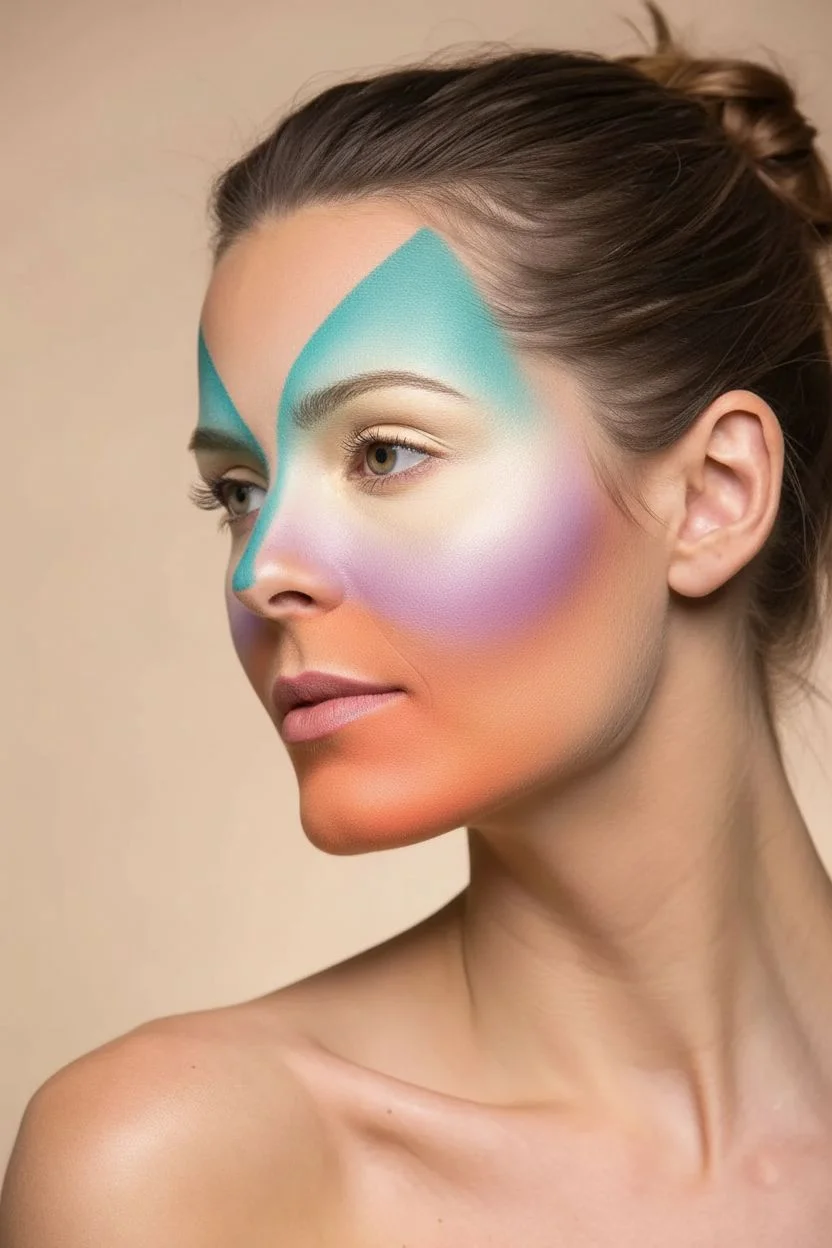
Geometric Color Block Face Paint With Crisp Edges
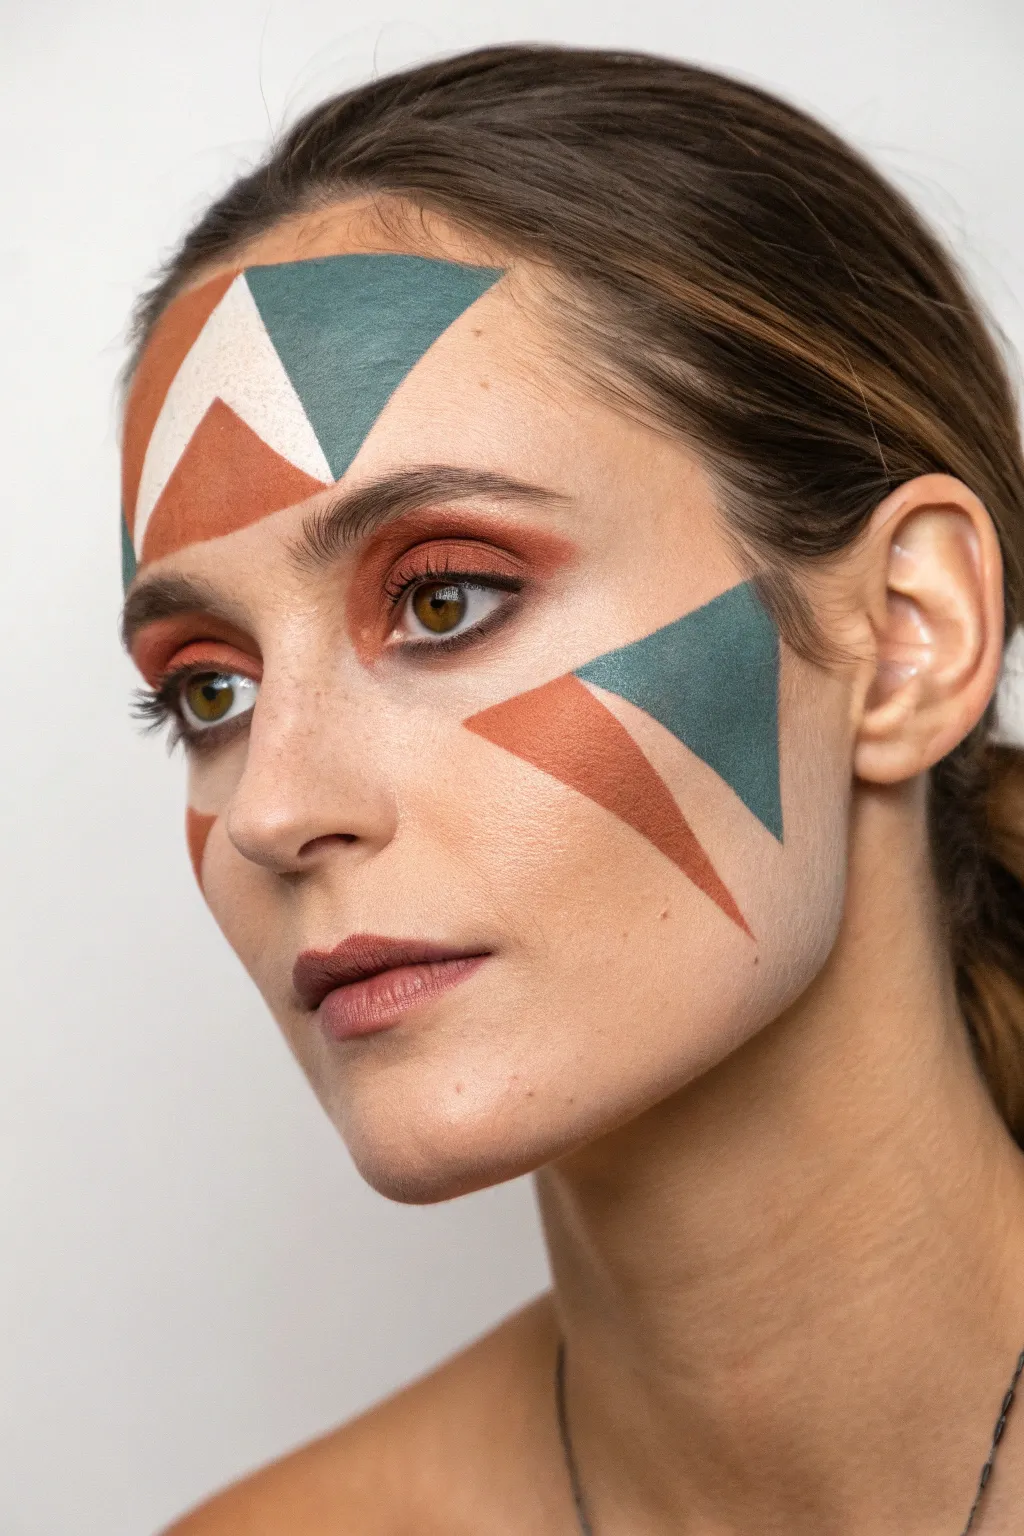
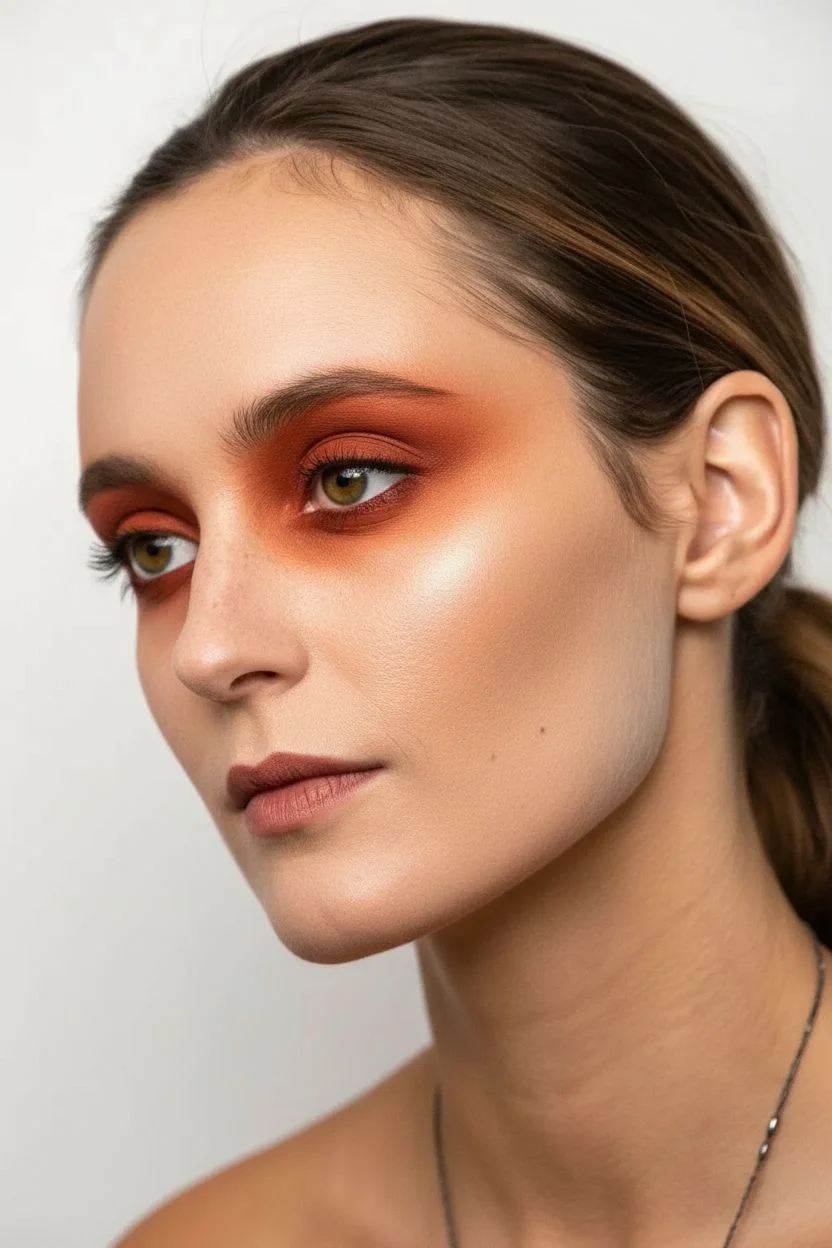
Achieve a sophisticated, modern aesthetic with this geometric face paint design using a palette of terracotta, slate teal, and cream. The sharp angles and crisp lines create a striking contrast against natural skin texture, perfect for a high-fashion or avant-garde event.
How-To Guide
Materials
- Matte face paints (terracotta/burnt orange, slate teal/green-blue, white/cream)
- Flat angled brush (small to medium)
- Small flat shader brush
- Eyeshadow blending brush
- Burnt orange/rust matte eyeshadow
- Micellar water and cotton buds (for cleanup)
- Setting spray
- Mascara (black or dark brown)
- Setting powder (translucent)
Step 1: Base Prep & Eye Shadow
-
Skin preparation:
Start with a clean, moisturized face. Apply a light layer of foundation or tinted moisturizer if desired, but keep the skin looking natural and fresh to let the paint finish stand out. -
Eye base application:
Using an eyeshadow blending brush, pick up a burnt orange or rust-colored matte eyeshadow. -
Contoured wash of color:
Sweep the eyeshadow generously over the entire eyelid, extending it slightly above the crease and diffusing it outwards. Blend the edges softly for a smoky effect that complements the sharp lines you’ll paint later. -
Lower lash line:
Run the same rust eyeshadow along the lower lash line to balance the eye look.
Clean Lines Hack
Use pieces of low-tack tape (like washi tape) on your skin as a stencil. Paint over the edge, let it dry for a few seconds, then peel the tape away for perfect lines.
Step 2: Forehead Geometry
-
Mapping the central V:
Load a flat angled brush with white or cream face paint. I find that starting with the central inverted ‘V’ shape on the forehead helps center the entire design. -
Painting the white chevron:
Draw an inverted triangle shape in the center of the forehead. The bottom point should aim right between the brows. Fill this shape in solidly with the cream paint. -
Adding the teal triangle:
Clean your brush or switch to a new one. Load it with the slate teal paint. Create a large triangle to the right of your white shape (viewer’s right). One side of this triangle should run parallel to the white shape’s edge. -
Adding the terracotta triangle:
Switch to the terracotta paint. Create a similar triangular block on the left side of the white shape. Ensure the top edges of all three shapes align roughly with the hairline for a cohesive band. -
Lower terracotta detail:
Paint a smaller terracotta triangle nestled right beneath the white chevron, pointing downwards toward the bridge of the nose. Keep the lines extremely crisp.
Add Metallic Flair
Outline one side of each geometric shape with a thin line of gold liquid liner. This adds a subtle luxurious shimmer that catches the light beautifully.
Step 3: Cheek Accents
-
Right cheek teal block:
On the left cheekbone (viewer’s right), map out a large slate teal triangle. The long edge should face the ear, with a sharp point aiming toward the corner of the mouth. -
Right cheek terracotta accent:
Below the teal triangle, paint a long, sleek terracotta triangle. This shape should feel like an extension, pointing sharply down towards the jawline. -
Left cheek detail:
On the opposite cheek (viewer’s left), add a small terracotta accent. This can be a simple stripe or partial triangle placed high on the cheekbone near the eye. -
Refining edges:
Dip a cotton bud in a tiny bit of micellar water. Carefully drag it along the edges of your painted shapes to clean up any fuzziness and make the lines razor-sharp.
Step 4: Final Touches
-
Mascara application:
Apply a coat of mascara to the top and bottom lashes to define the eyes without overpowering the paint work. -
Lip color:
Apply a matte lipstick in a brownish-nude or soft terracotta shade. Blot it with a tissue for a stained, natural finish. -
Setting the look:
Mist the face lightly with a setting spray to lock the water-activated paints in place and prevent cracking.
Step back and admire your beautifully precise work of living art
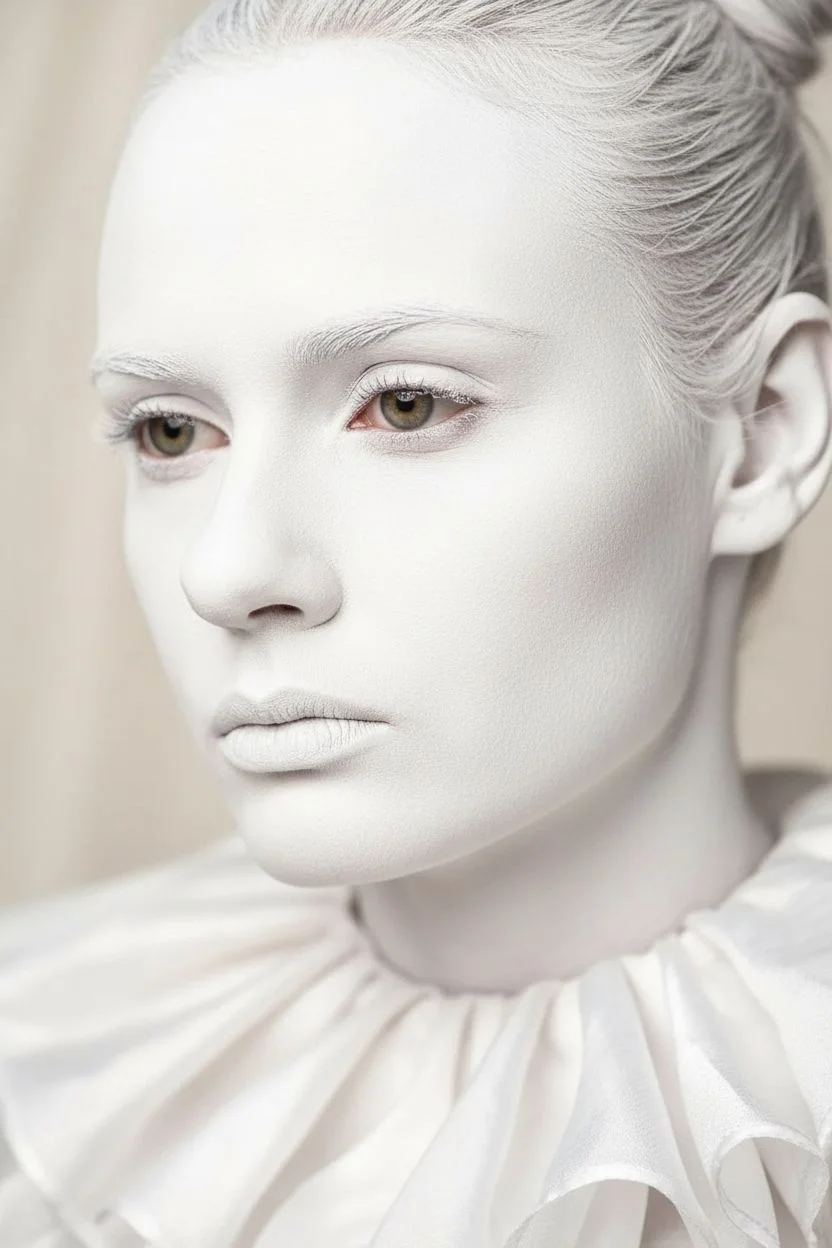
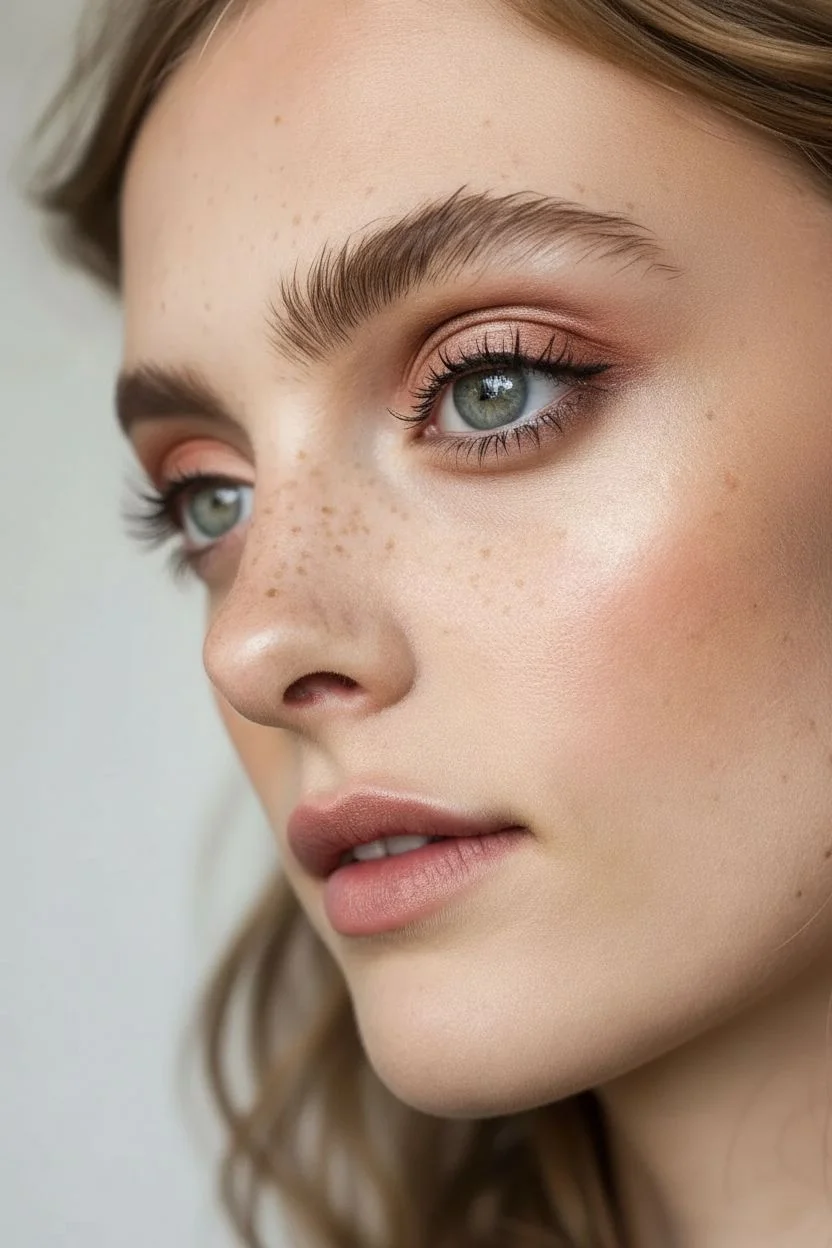
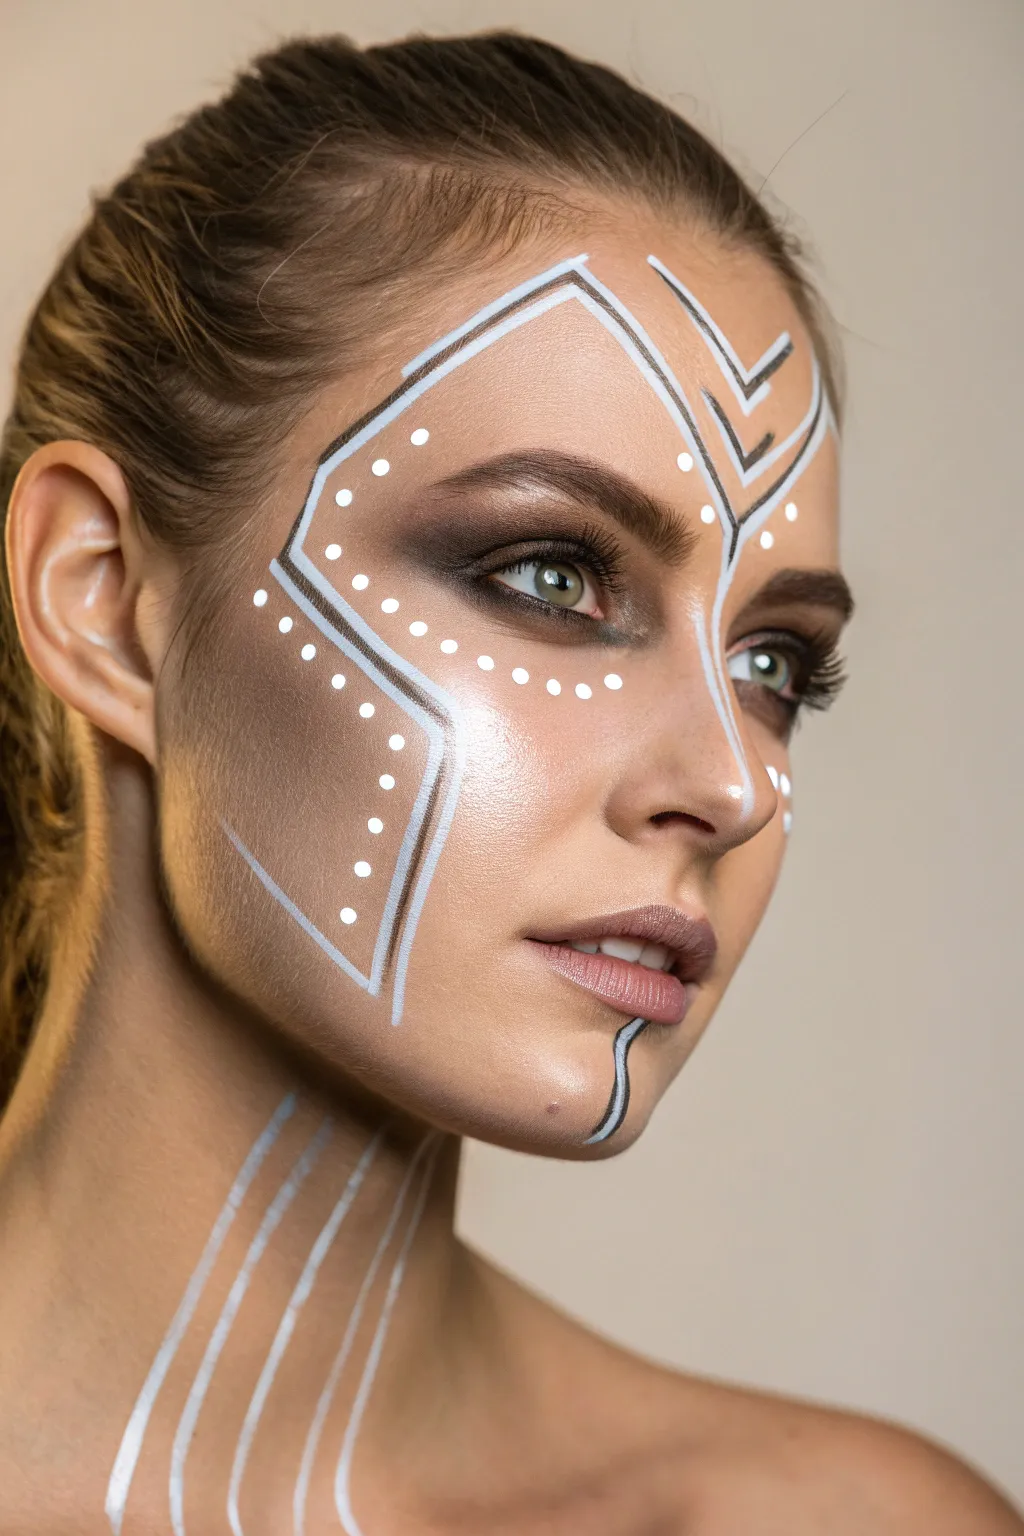
Negative-Space Minimal Line Art That Reads as High Fashion
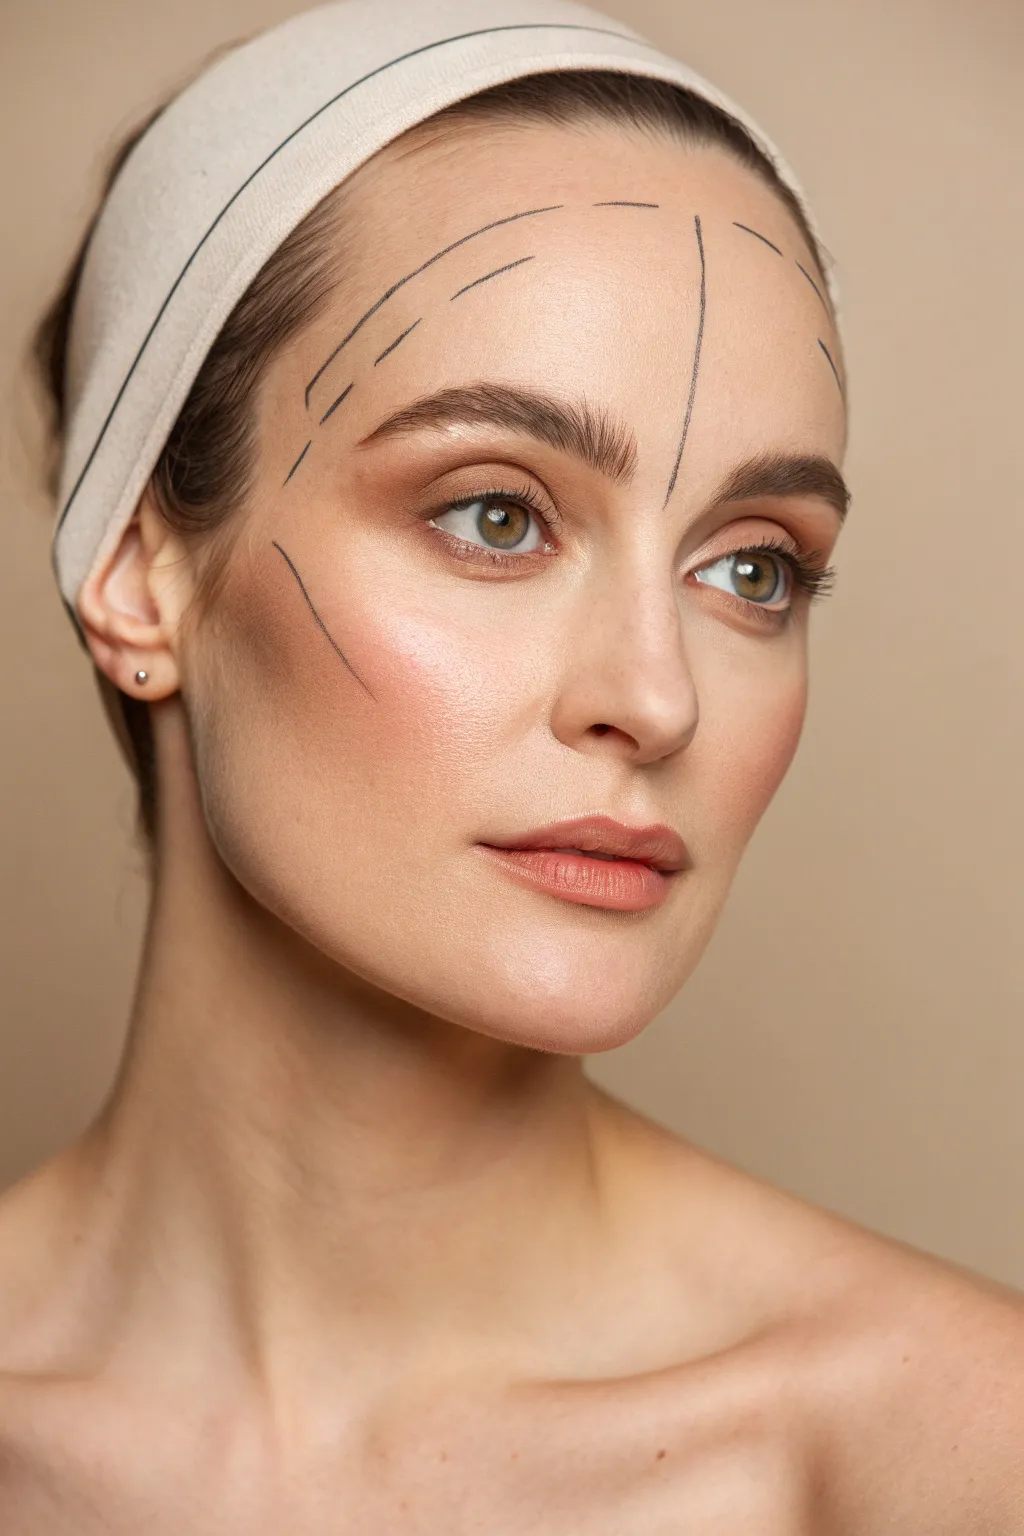
This avant-garde look borrows from the precision of medical diagrams and transforms them into high-fashion editorial art. By combining barely-there makeup with stark, deliberate linework, you create a captivating negative-space design that emphasizes skeletal structure.
Detailed Instructions
Materials
- Fine-tip black liquid eyeliner (felt tip preferred)
- Black kohl pencil (sharpened)
- Light-coverage foundation or tinted moisturizer
- Concealer
- Translucent setting powder
- Cream bronzer or contour stick
- Clear brow gel
- Peachy-nude cream blush
- Nude lip liner
- Tinted lip balm
- Wide fabric headband (beige or off-white)
- Setting spray
- Micellar water and cotton buds (for clean-up)
Step 1: Base Preparation
-
Secure the hair:
Begin by pulling all your hair back away from your face. Secure it firmly with a wide, neutral-colored fabric headband to mimic the model’s clean, clinical aesthetic. -
Even out the complexion:
Apply a thin layer of light-coverage foundation or tinted moisturizer. You want the skin to look like real skin, not a heavy mask, so blend it well with a damp sponge. -
Spot conceal:
Dab a small amount of concealer only where necessary, such as under the eyes or on blemishes, blending edges seamlessly. -
Groom the brows:
Brush your eyebrows upward using a clear brow gel to create a fluffy, natural texture. Let the hairs stand straight up for that editorial feel.
Step 2: Soft Sculpting
-
Apply cream contour:
Using a cream bronzer or contour stick, gently define the hollows of your cheeks. Blend upward towards the hairline to lift the face rather than creating harsh stripes. -
Add a flush of color:
Tap a peachy-nude cream blush onto the apples of the cheeks, blending it backward into the contour for a cohesive, healthy glow. -
Set the base:
Lightly dust translucent powder over your T-zone and eyelids. It is crucial that the areas where you plan to draw the black lines are matte and not slippery.
Steady Hand Trick
Rest your pinky finger against your cheek or temple while drawing the forehead lines. This anchors your hand, preventing shakes and ensuring smooth, surgical precision.
Step 3: The Linework
-
Map the central line:
Looking straight into a mirror, locate the center of your forehead. Using a very sharp kohl pencil or a fine-tip liquid liner, draw a vertical line starting from the hairline down towards the bridge of the nose, stopping just above the brow level. -
Draw the upper arches:
From the top of your vertical center line, draw a curved line extending outward to the right, following the natural curve of your hairline but staying about an inch below it. Repeat on the left side. -
Create the dashed guides:
Below those solid upper arches, draw a second, parallel row of dashed lines. These dashes should act as a ‘shadow’ to the first line, creating a mapped-out effect. -
Add the temple markers:
Draw short, angled diagonal lines near the temples on both sides, connecting vaguely to the ends of your forehead arches. -
Define the cheek contour:
Locate natural cheekbone shadow. Draw a clean, diagonal line starting near the middle of the cheek and angling upward toward the top of the ear. Keep this line extremely fine. -
Refine the lines:
Go over your markings with the fine-tip liquid liner to ensure opacity. The key is consistent pressure so the lines mimic technical drawing pens. -
Clean up edges:
If any lines look shaky or too thick, dip a cotton bud in micellar water and carefully erase the mistake, then patch the foundation if needed.
Add Dimension
trace a tiny amount of white concealer right next to the black lines on the highlighted side. It makes the black pop and look like it’s sitting on top of the skin.
Step 4: Final Touches
-
Define the eyes:
Apply a wash of neutral brown shadow to the crease of the eyelid for subtle depth. Add mascara to top lashes only to keep the look open and fresh. -
Prep the lips:
Outline your lips with a nude lip liner that matches your natural lip tone closely. Soften the edges with your fingertip. -
Finish the lip:
Fill in the center of the lips with a tinted balm for a hydrated, satin finish. -
Lock it in:
Mist the face with a setting spray to merge the powders and creams, ensuring your intricate linework stays crisp all day.
This striking look proves that sometimes the most impactful makeup requires the fewest distractions
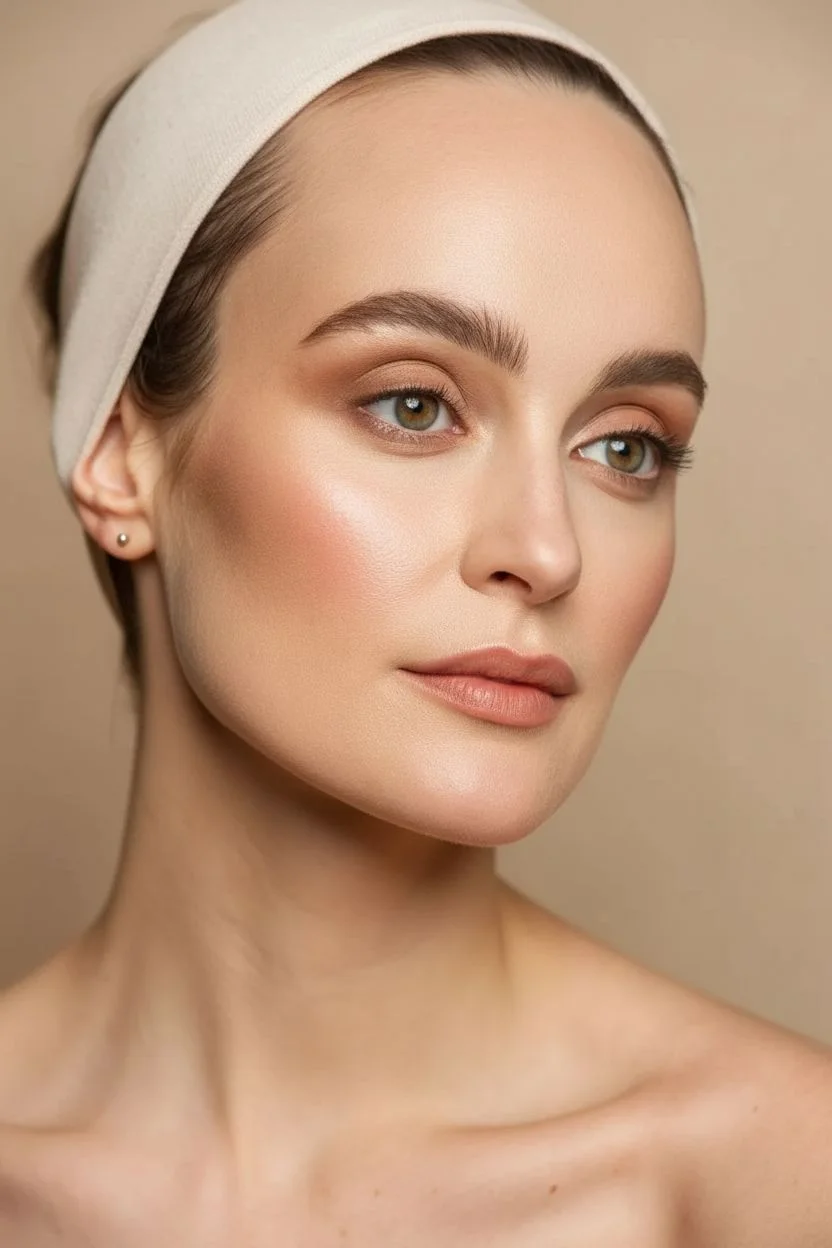
Optical Illusion Torn Skin Reveal (Painted, Not Prosthetic)
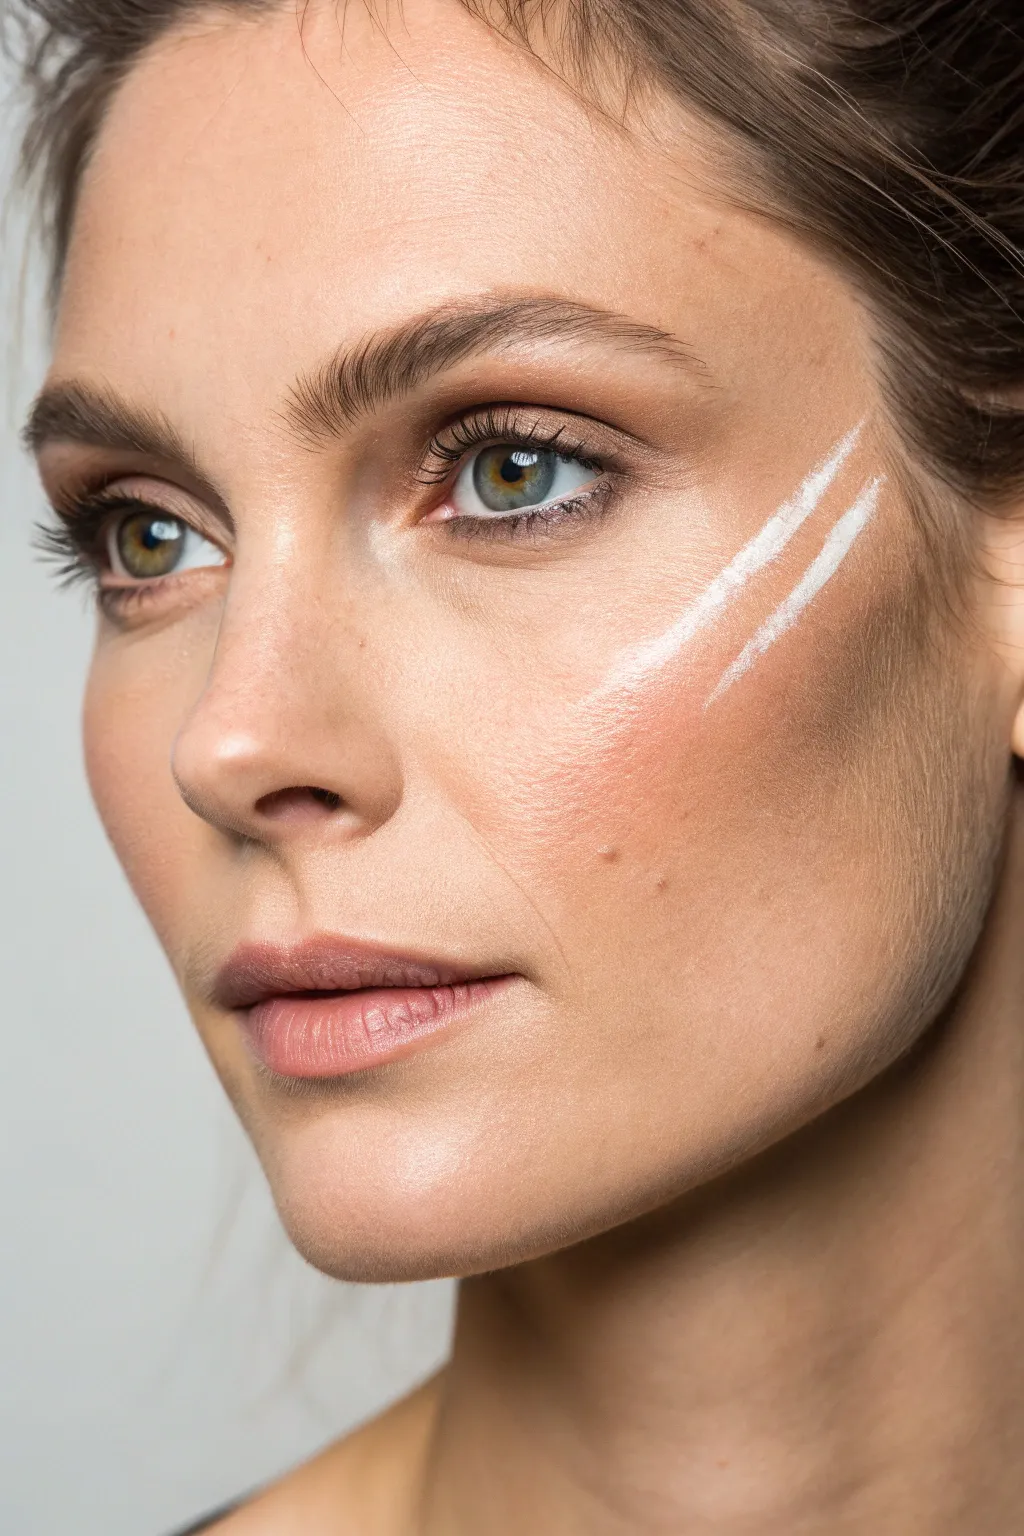
This minimal yet striking look combines fresh, dewy skin with a high-impact graphic element. It mimics the effect of a hard light reflection or a futuristic tribal marking using simple white pigment.
Step-by-Step Tutorial
Materials
- Hydrating primer or facial oil
- Tinted moisturizer or light foundation
- Concealer (matching skin tone)
- Cream blush (terracotta or peach tone)
- Brow gel (clear or tinted)
- White liquid eyeliner or water-activated face paint
- Thin liner brush (if using face paint)
- Mascara (black)
- Tinted lip balm (rose or mauve)
- Setting spray (dewy finish)
Step 1: Base Prep & Complexion
-
Prime for Glow:
Begin with a clean face and massage in a hydrating primer or a drop of facial oil. The goal is a ‘skin-first’ finish, so let this absorb for a minute to ensure the foundation glides on smoothly. -
Even the Tone:
Apply a very light layer of tinted moisturizer starting from the center of the face and blending outwards. Use your fingers or a damp sponge to keep the texture natural. -
Spot Conceal:
Instead of heavy contouring, just dab concealer onto any blemishes or reddish areas around the nose. Blend well so it disappears into the base. -
Brush Up Brows:
Comb through your eyebrows with a brow gel, directing the hairs slightly upward for a fluffy, feathery effect. Fill in sparse areas lightly only if necessary.
Dry Brush Technique
For that textured, organic look seen in the photo, wipe most of the paint off your brush before applying. A semi-dry brush creates streaks that look like light texture rather than a solid sticker.
Step 2: Adding Warmth & Contrast
-
Flush the Cheeks:
Dab a warm terracotta or peach cream blush onto the apples of your cheeks. Blend it upward toward the temples to lift the face structure. -
Subtle Eye Definition:
Sweep a tiny amount of the same blush or a soft brown shadow into the crease of your eyelid for harmony. -
Lash Enhancement:
Apply one or two coats of black mascara to top lashes only. Focus on the roots to define the eye shape without making the look too heavy.
Step 3: The Graphic Component
-
Map the Placement:
Look straight into a mirror. You want the stripes to sit high on the cheekbone, roughly parallel to your jawline, creating a lifting effect. -
Test the Consistency:
If using water-activated paint, mix it to a creamy, milk-like consistency on your hand. If using liquid liner, wipe excess product off the applicator for a clean tip. -
Paint the Upper Stripe:
Start the first line near the outer corner of the eye, dragging diagonally down towards the ear. Keep the start slightly thicker and let it taper off. -
Paint the Lower Stripe:
Draw a second parallel line immediately below the first one. I find it helpful to exhale slowly while drawing to steady my hand. -
Refine the Edges:
The lines should look slightly textured or dry-brushed rather than perfectly solid. If they look too perfect, tap them lightly with a finger to break up the pigment.
Lines Too Wobbly?
Don’t wipe the whole thing off. Dip a clean, angled brush in a little micellar water or concealer to sharpen the edges of your stripes without ruining the foundation underneath.
Step 4: Final Touches
-
Tint the Lips:
Press a rose-toned lip balm onto your lips. Focus the color in the center and diffuse the edges for a bitten, effortless look. -
Set the Look:
Mist the face with a dewy setting spray to melt all the layers together and keep skin looking hydrated.
You now have a modern, minimalist look that turns your face into a canvas for light and structure
Cosmic Galaxy Face Paint With Stars and Glow-Like Highlights
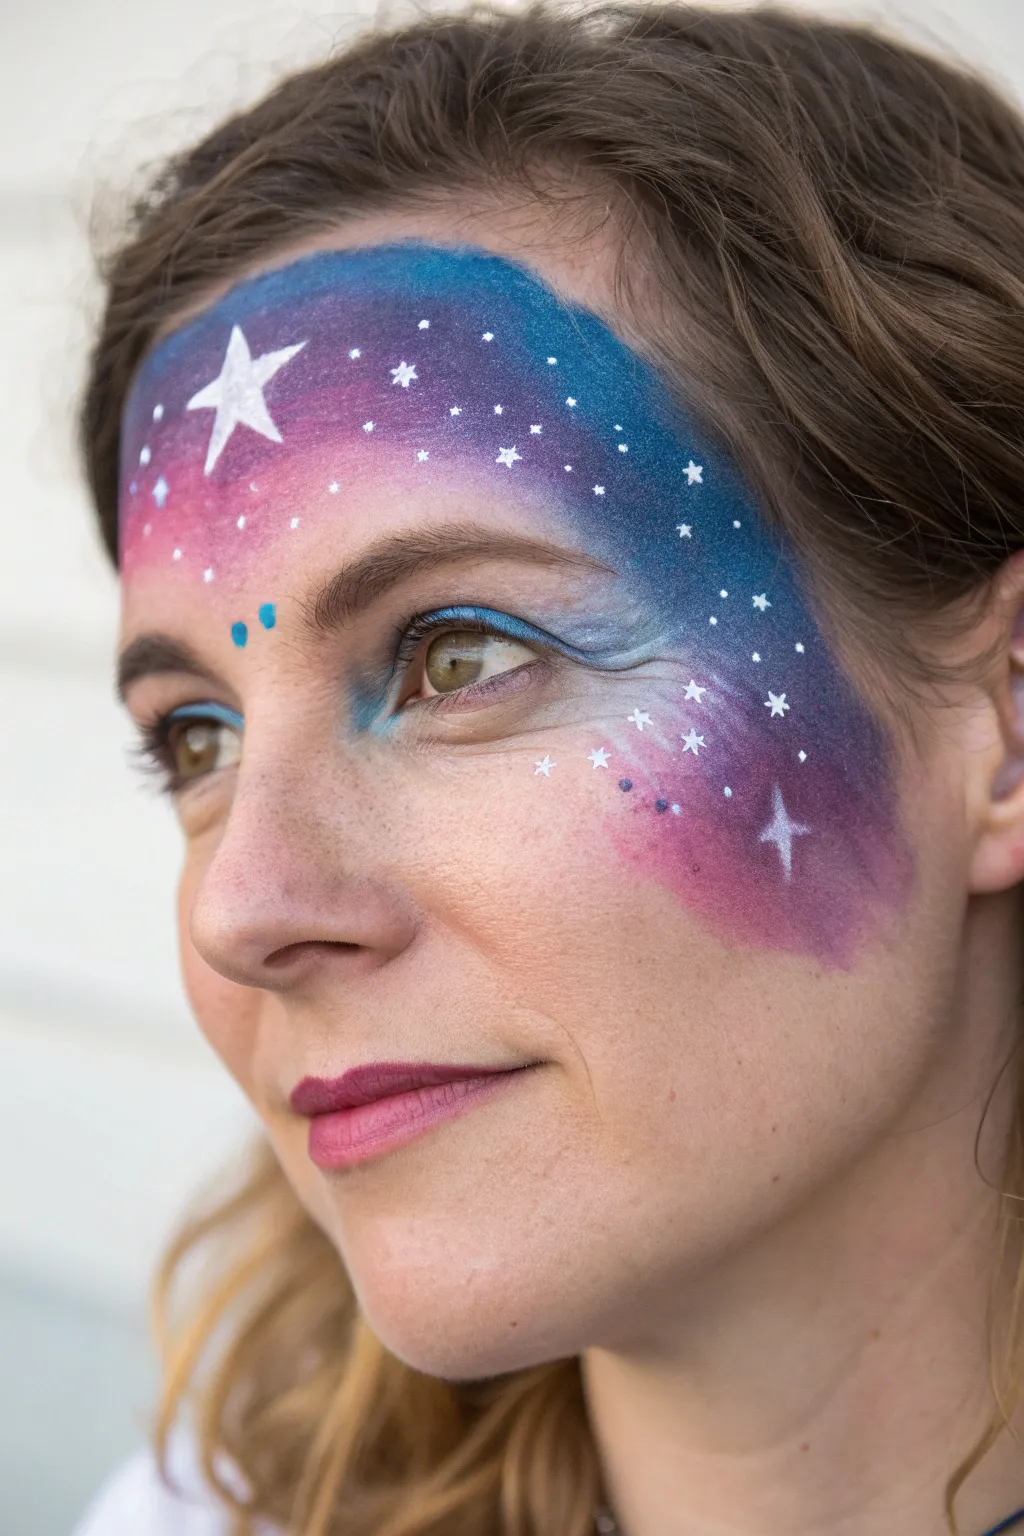
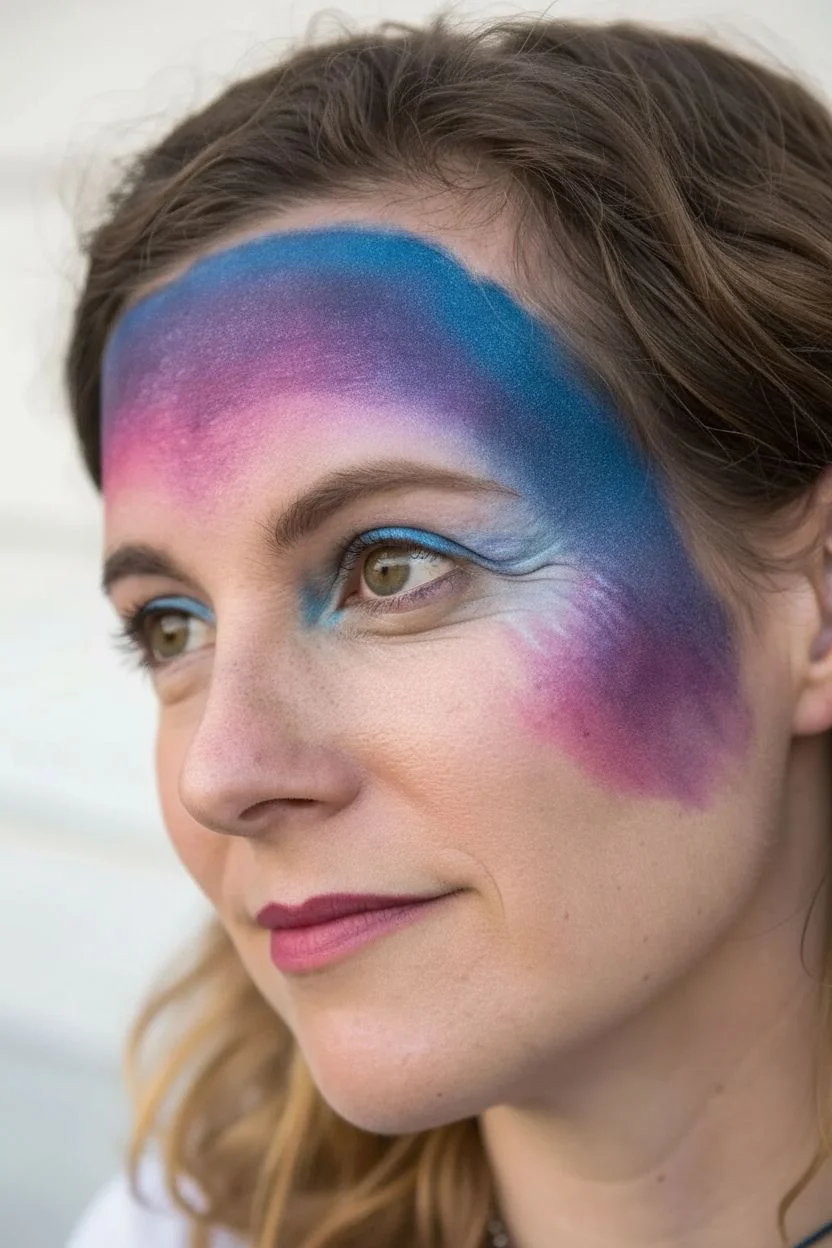
Transform your look with this dreamy galaxy design that sweeps across the forehead and cheek in a nebula of celestial colors. The blend of rich blues, purples, and pinks creates a perfect backdrop for twinkling white stars and constellations.
How-To Guide
Materials
- Face paint palette (must include light blue, royal blue, purple, magenta/pink, white)
- High-density face painting sponges (petal or round shape)
- Round synthetic brush (size 2 or 3)
- Fine liner brush (size 0 or 1)
- Water container
- Spray bottle with water
- Makeup setting spray (optional)
- Cosmetic glitter (optional)
Step 1: Creating the Nebula Base
-
Prep your sponge:
Start by lightly misting a face painting sponge with water. It should be damp but not dripping to ensure the paint activates to a creamy consistency rather than a runny wash. -
Load the base colors:
Load the wide end of your sponge with a light blue or teal shade. Immediately next to it on the same sponge, load a darker royal blue. If you are using a split-cake palette, simply swipe across the blue section. -
Apply the blue swoosh:
Begin at the top right of the forehead (above the eyebrow area). Press the sponge down and sweep it across the forehead towards the center, keeping the darker blue on the outer edge and the lighter blue facing inward. -
Curve down the temple:
Continue this sweeping motion down past the temple and onto the upper cheekbone. Use a bouncing or stippling motion as you reach the end of the stroke to soften the edges, rather than leaving a hard line. -
Load the purple and pink:
Take a fresh area of the sponge (or a new sponge) and load it with a vibrant purple merging into a bright magenta or pink shade. -
Blend the transition:
Press the purple section of the sponge slightly over the edge of the blue area you just painted on the forehead. The colors should overlap to create a blurred transition. -
Extend the galaxy:
Dab the pink and purple mixture further toward the center of the forehead and down onto the cheek area below the blue section. The shape should look organic and cloud-like, not perfectly geometric. -
Soften the edges:
With a fairly dry sponge (almost no paint), gently tap around the very edges of the entire design. This fades the paint into the skin tone so the galaxy looks like it is floating. -
Eye definition:
Using a small flat brush or the edge of a sponge, pull a little bit of the light blue paint just under the lower lash line of the eye on the painted side for extended continuity.
Keep it Creamy
For the crispest stars, ensure your white paint is the consistency of melted ice cream. If it’s too watery, the stars will drip or look transparent.
Step 2: Stars and Constellations
-
Load the white paint:
Activate your white face paint with a wet round brush (size 2 is ideal) until it has an inky, fluid consistency. It needs to flow smoothly for crisp lines. -
Paint the hero star:
Place a prominent 5-point star on the upper forehead within the pink/purple section. Start with an upside-down ‘V’, then cross the arms over. I find keeping the center wet helps fill it in solidly. -
Add secondary stars:
Paint a few smaller 5-point stars scattered through the blue section on the temple and cheek. Vary their sizes to create depth. -
Create four-point stars:
For variety, add a couple of 4-point stars (like elongated diamonds or crosses) near the bottom of the cheek design to mimic distant glimmering light. -
Dot the constellations:
Dip a fine liner brush or just the very tip of your round brush into the white paint. Gently touch the skin to create tiny dots. -
Vary dot density:
Cluster more dots in the darker blue areas to look like the Milky Way, and spread them out more sparsely in the pink areas. Make some dots tiny and others slightly larger. -
Add turquoise accents:
Clean your brush and load a bright turquoise or teal. Add two or three small dots near the inner corner of the eye or bridge of the nose for a pop of contrasting color. -
Final highlights:
If desired, add a tiny touch of white to the center of the turquoise dots to make them look like glowing orbs.
Level Up: Cosmic Shimmer
While the paint is still slightly damp, puff a tiny bit of holographic white glitter over the cheekbone area to make the galaxy truly sparkle under lights.
Step back and admire your celestial creation, ready to shine at any festival or party


Have a question or want to share your own experience? I'd love to hear from you in the comments below!