
Some of my favorite nights with a partner are the ones where we clear off the table, put on cozy lighting, and make something side-by-side. These art date night ideas at home are meant to feel easy, romantic, and totally doable—even if you’re both absolute beginners.
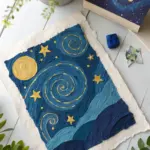
Two-Canvas Diptych Night Sky Painting
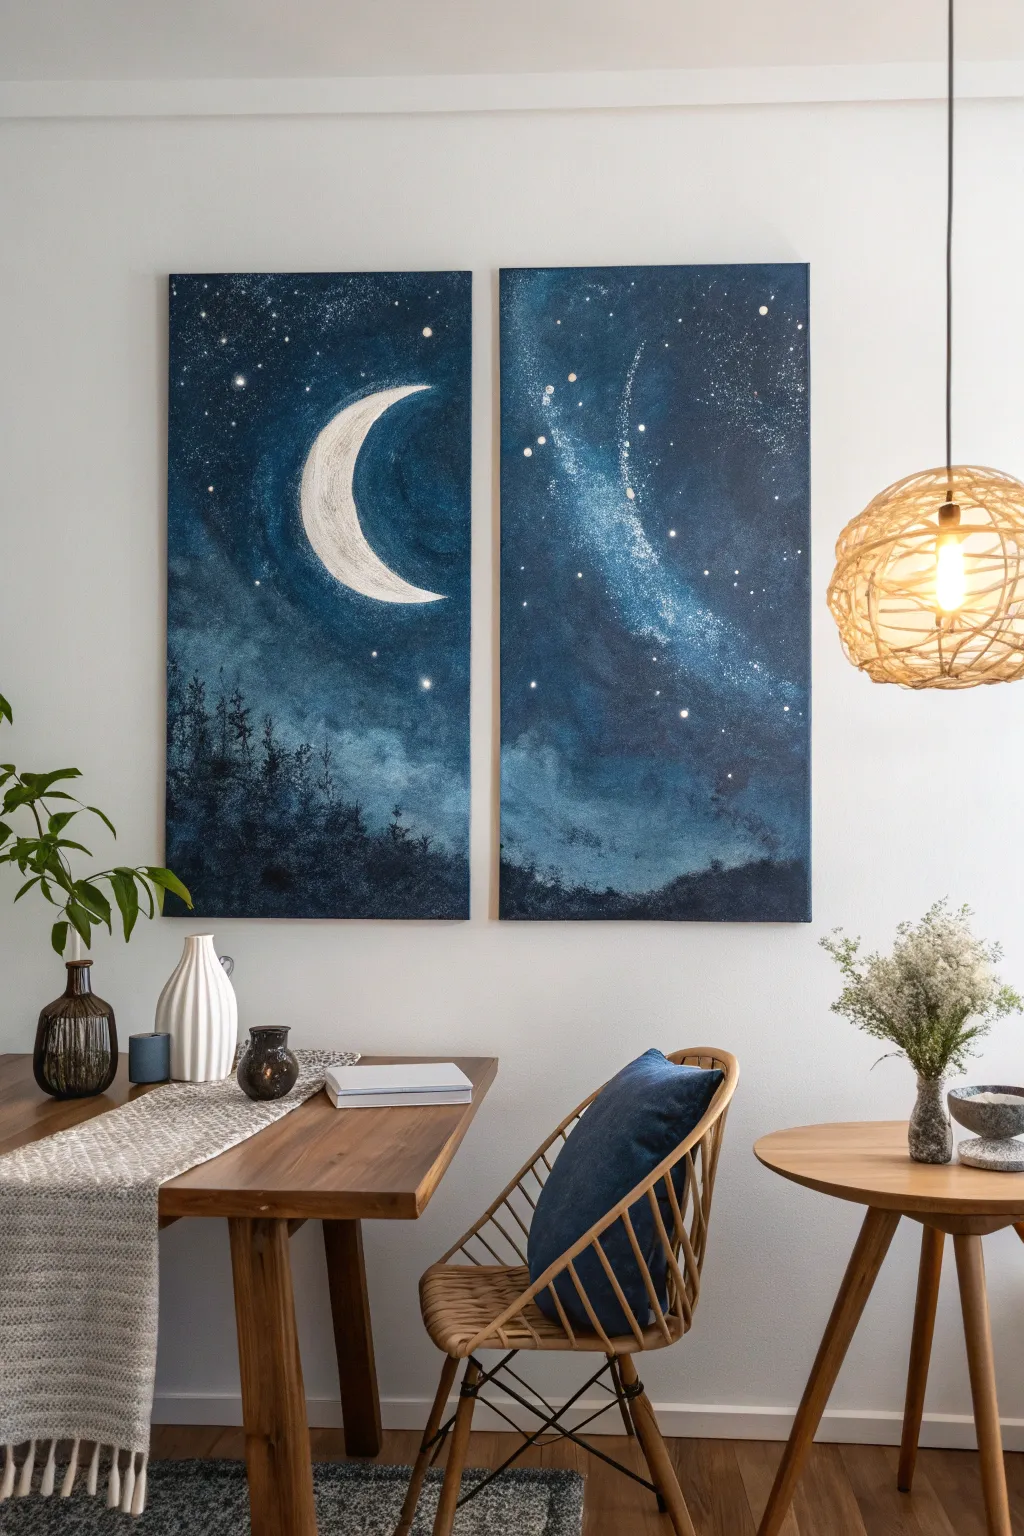
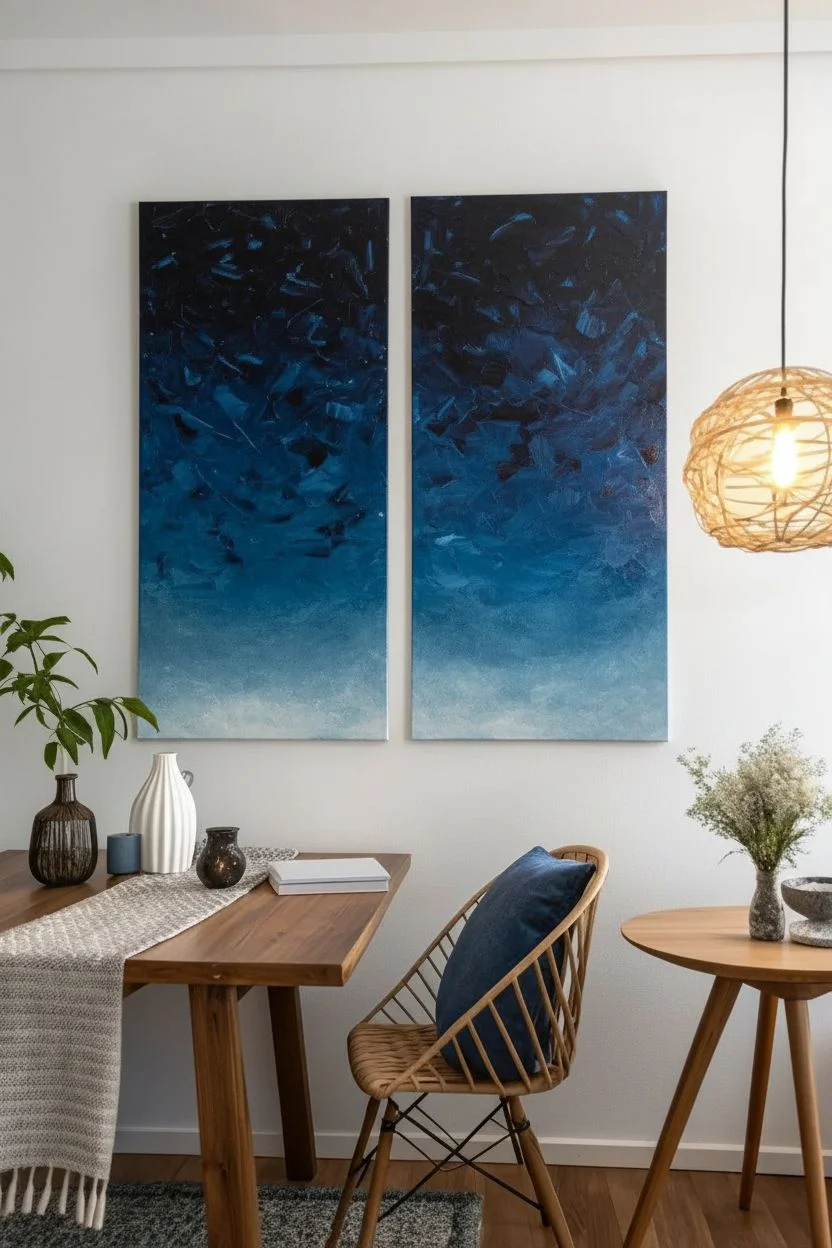
Transform your wall into a window to the cosmos with this stunning two-piece night sky painting. Using deep blues and glowing whites, you’ll create a seamless starry expanse that flows across two canvases.
How-To Guide
Materials
- Two stretched canvases (16×24 or similar tall aspect ratio)
- Acrylic paints: Phthalo Blue, Prussian Blue, Black, Titanium White, Teal
- Large flat brush (1-2 inch) for background blending
- Medium round brush
- Small detail brush or liner brush
- Old toothbrush (for star splattering)
- Palette or paper plate
- Cup of water and paper towels
- Masking tape or painter’s tape
- Optional: Easel (or flat protected table surface)
Step 1: Setting the Scene
-
Prepare the connection:
Place your two canvases side-by-side on your work surface. To ensure the painting flows naturally, you can temporarily tape them together from the back, or just keep them touching closely while painting the base layers. -
Mix your midnight gradient:
Create a gradient palette. Squeeze out ample amounts of Phthalo Blue, Prussian Blue, Black, and a touch of Teal. We want varied depths of blue, not a flat color. -
Apply the dark base:
Using your large flat brush, paint the upper sections of both canvases with a mix of Prussian Blue and Black. Keep your strokes loose and criss-crossed to create texture rather than a smooth wall-paint look. -
Transition to light:
As you move down the canvas, gradually mix in more Phthalo Blue and Teal. By the time you reach the bottom third of the canvases, introduce a tiny bit of white to the blue mix to create a hazy, atmospheric glow near the horizon. -
Blend the join:
Pay special attention to the inner edges where the canvases meet. Paint across both canvases simultaneously as if they were one surface to ensure the gradient matches perfectly.
Uneven stars?
If you spatter a ‘blob’ instead of a star, turn it into a distant planet! Wait for it to dry, then paint over the edges with your dark blue background mix to reshape it into a smaller circle.
Step 2: Creating the Cosmos
-
Sketch the moon placement:
Once the background is dry to the touch, use white chalk or a very faint pencil line to outline a large crescent moon on the upper half of the left canvas. -
Paint the moon base:
Fill in the moon shape with Titanium White. It might need two coats to be opaque against the dark background. Don’t worry about texture yet; just get the shape solid. -
Add lunar texture:
Mix a tiny dot of black or blue into your white to make a light grey. Using a smaller brush, dab this texture onto the inner curve of the moon to simulate craters and shadows, leaving the outer edge bright white. -
Draft the galaxy swirl:
On the right canvas, visualize a diagonal swoop representing the Milky Way. Using a dry brush with a very small amount of white and teal, lightly scumble (scrub) a misty path diagonally across the sky. -
Intensify the galaxy:
Layer more white paint into the center of your galaxy swirl to make it glow brighter, fading it out into the dark blue background.
Step 3: Stars and Silhouettes
-
Prepare the spatter:
Mix Titanium White with a few drops of water until it reaches an ink-like consistency. It should be runny enough to flick but not so watery that it drips excessively. -
Create the starfield:
Dip an old toothbrush into your thinned white paint. Hold it over the canvas and run your thumb across the bristles to spray fine mist stars across both canvases. Concentrate more spray along the Milky Way path on the right canvas. -
Paint prominent stars:
Use your smallest detail brush or the handle end of a paintbrush dipped in white to dot larger, specific stars throughout the sky, like the constellations seen in the right panel. -
Start the treeline:
Mix a solid Black with a little dark blue. On the bottom of the left canvas, start dabbing a vertical brush motion to create the tips of pine trees. -
Fill the forest:
Continue the pine trees, making them taller on the left edge and sloping down towards the right. Fill in the bottom area solidly black/dark blue to ground the image. -
Add distant hills:
On the right canvas, use a slightly lighter dark grey-blue to paint rolling cloud-like hills at the very bottom, suggesting distant landscape that is less distinct than the trees. -
Final highlights:
Wait for the trees to dry completely, then add very faint touches of lighter blue mist at the base of the trees to separate them from the ground.
Add some magic
Mix a tiny amount of iridescent or glitter medium into the white paint you use for the galaxy swirl. It will catch the light beautifully when you walk past the finished artwork.
Hang your masterpieces slightly apart to let the negative space enhance the connection between the moon and the stars


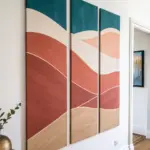
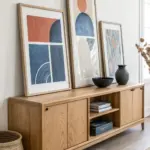
Cozy At-Home Mini Canvas Series (Three Tiny Paintings Each)
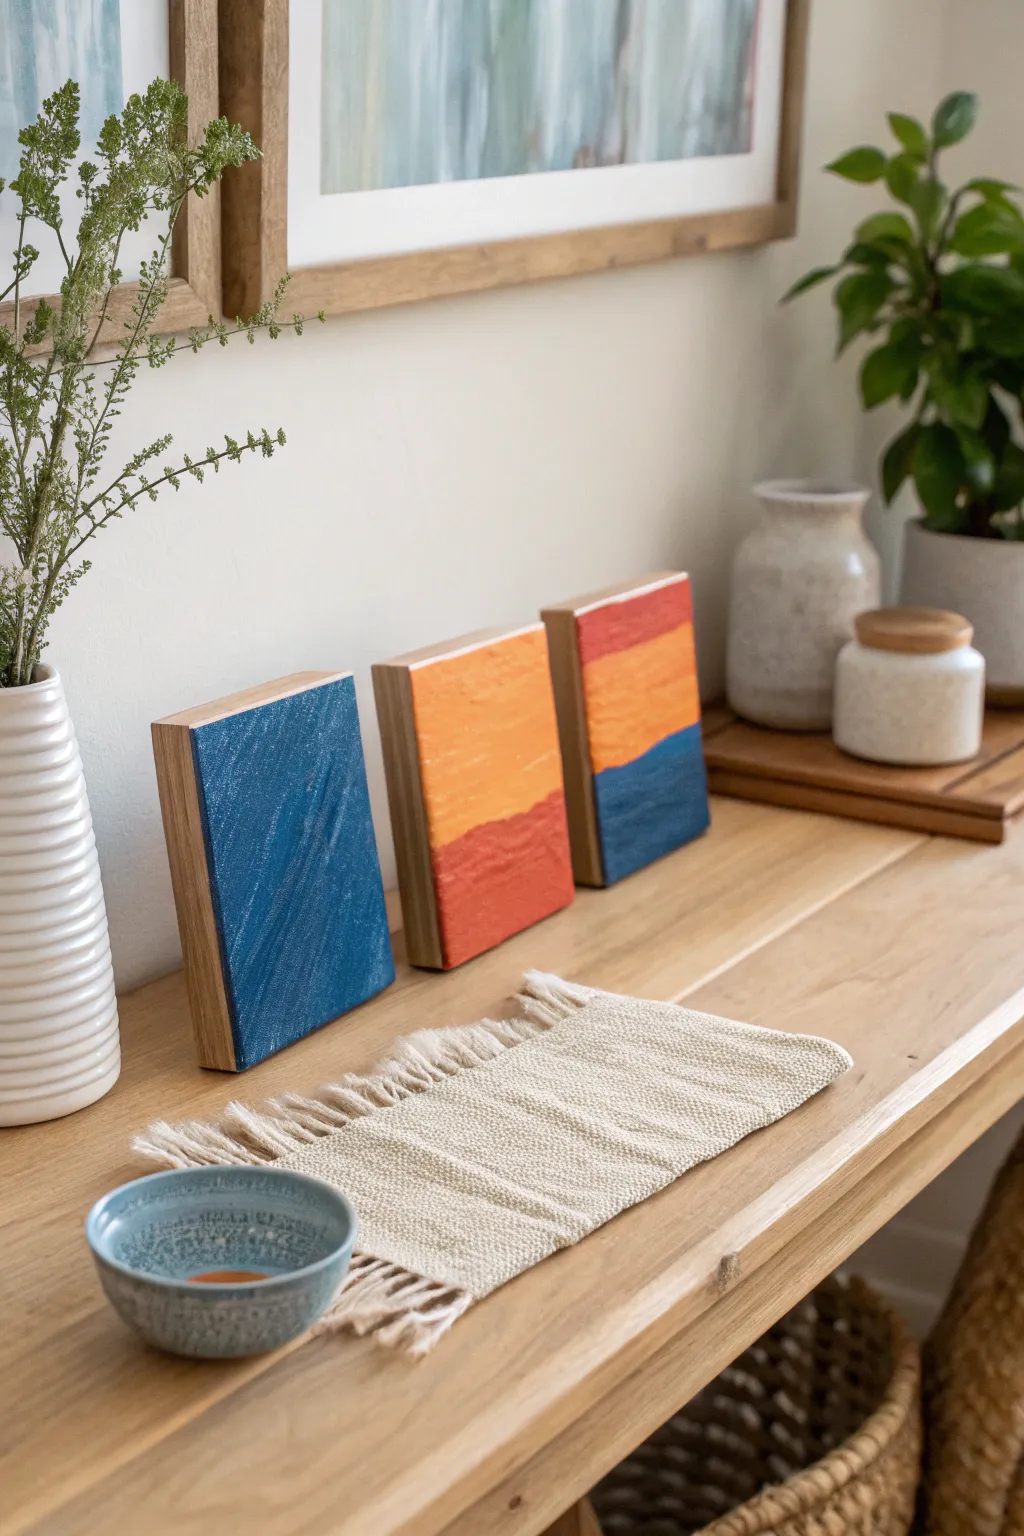
Create a modern, minimal art display with this set of three abstract wood block paintings. The warm terracotta and cool indigo tones balance perfectly on natural wood panels, offering a sophisticated yet easy-to-achieve project for your next date night.
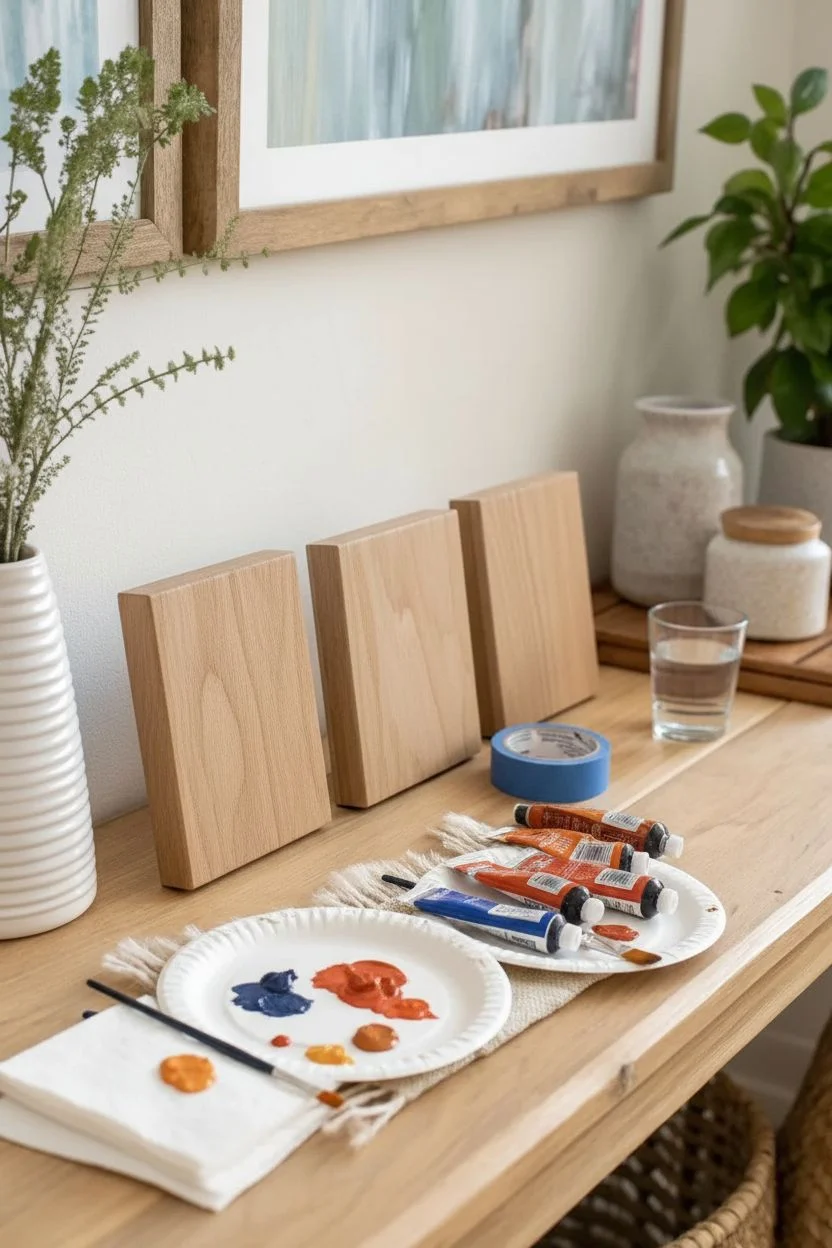
Detailed Instructions
Materials
- 3 deep-profile wood panels (approx. 4×6 or 5×7 inches)
- Acrylic paint (Deep Indigo, Terracotta Orange, Burnt Sienna, Warm White)
- Medium flat synthetic brush (approx. 3/4 inch)
- Small flat brush for edges
- Painter’s tape (optional, for crisp lines)
- Gesso (clear or white, optional)
- Palette or paper plate
- Cup of water
- Paper towels
Step 1: Preparation & Planning
-
Prepare the surface:
Wipe down your wood panels with a clean, dry cloth to remove any dust. If the wood feels rough, give it a quick light sanding. You can apply a coat of white gesso if you want the colors to pop instantly, but applying paint directly to wood, as seen here, gives a lovely organic texture. -
Plan your palette:
Squeeze out your paints. You’ll need a deep indigo blue, a bright warm orange, and a deeper, earthier red-orange (terracotta). For the third block, you’ll be mixing a lighter shade, so keep some white handy. -
Visualize the composition:
The charm of this trio relies on asymmetry. Identify which block will be the solid blue, which will be the split-tone orange/red, and which will be the tri-color block. Lay them out in order (Blue, Orange/Red, Tri-color) to visualize the flow.
Paint Bleeding?
If paint seeps under your tape or lines look messy, dampen a rigid brush with water (almost dry) and gently ‘erase’ the wet paint, or wait until dry and sand it off the raw wood.
Step 2: Painting Block 1: The Indigo Statement
-
First coat application:
Take your medium flat brush and load it with the Deep Indigo paint. Apply broad, confident strokes vertically down the entire face of the first block. Don’t worry about perfect opacity yet. -
Refining the texture:
While the paint is wet, use lighter strokes to create a slight directional texture. I like to keep the brushstrokes visible but uniform to mimic the look of canvas. -
Clean edges:
Carefully paint the side edges if you prefer a wrapped look. However, the example shows the distinct style of leaving the sides as raw wood. If doing this, use a small brush to tidy up the very edge of the front face so the line is crisp against the raw side. -
Second coat:
Once the first layer is dry to the touch (about 10-15 minutes), apply a second coat of indigo to ensure a rich, solid blue coverage.
Add Metallic Accents
For a luxe touch, paint a pencil-thin line of gold or copper leaf right along the horizon lines where your color blocks meet. It catches the light beautifully.
Step 3: Painting Block 2: The Warm Horizon
-
Mark the horizon line:
For the second block, visualize a line roughly 1/3 of the way up from the bottom. This doesn’t need to be ruler-straight; a hand-painted, slightly organic line adds character. -
Apply the top color:
Paint the top 2/3 of the block with your bright orange. Use horizontal strokes near the meeting point to define the edge, and vertical strokes elsewhere for coverage. -
Paint the bottom section:
Clean your brush thoroughly. Paint the bottom 1/3 using the darker Burnt Sienna/Terracotta shade. Carefully bring the paint up to meet the orange section. -
Create the texture:
Once the base coverage is down, go back over the wet paint with a dry brush to add texture. Dab or stipple slightly at the transition line to soften the boundary between the two colors.
Step 4: Painting Block 3: The Tri-Color Balance
-
Sectioning the block:
This final block ties the previous two together. You will need three sections: top (Terracotta), middle (Orange), and bottom (Indigo). -
Painting the top:
Start at the top with the Terracotta/Burnt Sienna color. Paint a strip that takes up about the top 20% of the panel. -
Painting the middle:
Clean the brush and apply the bright orange in the middle section. Let this be the largest section to brighten the set. Blend the seam slightly where it meets the top red color for an ombre effect. -
Adding the indigo base:
Finish the bottom section with the Deep Indigo blue. The darkness of this section anchors the trio visually. Be careful where the blue meets the orange to avoid making a muddy green; let the orange dry slightly first if needed.
Step 5: Finishing Touches
-
Check for gaps:
Inspect all three blocks for any spots where the wood grain shows through too much (unless you like that rustic look). Touch up with a small brush. -
Clean the sides:
If any paint dripped onto the raw wood sides, use a damp paper towel or a bit of fine-grit sandpaper to remove it once dry. The contrast between the painted face and raw side is key. -
Apply varnish (optional):
To protect your date night masterpiece, apply a matte or satin varnish over the painted faces once they are fully dry.
Arrange these charming minis on a shelf or mantle to enjoy your handiwork every day
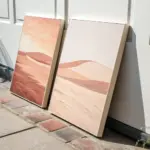

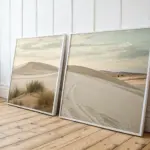
Switch-and-Finish Partner Painting Challenge
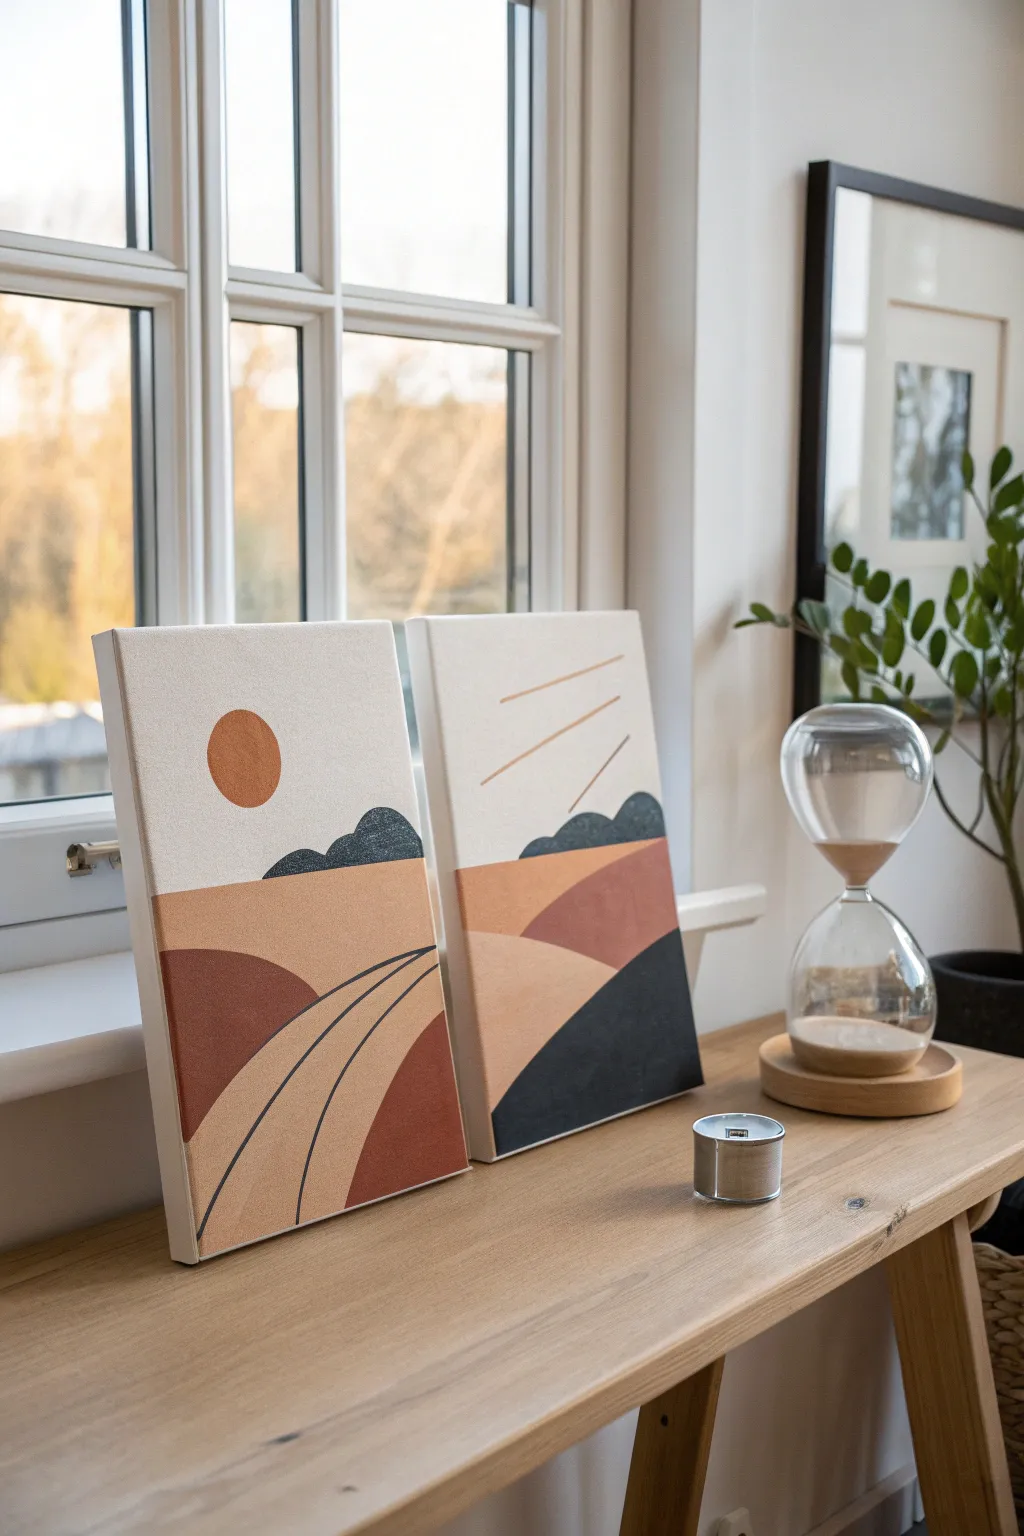
These complementary canvases capture the essence of a warm desert sunrise and sunset using simple geometric shapes and an earthy palette. The minimalist design makes this perfect for a relaxing date night where you can focus on clean lines and smooth color blocking rather than intricate details.
Step-by-Step Tutorial
Materials
- Two 8×12 or 9×12 inch stretched canvases
- Acrylic paints (Terracotta, Rust Orange, Cream/Beige, Slate Blue, Carbon Black)
- Wide flat brush (1-inch) for background
- Medium flat brush (1/2-inch) for shapes
- Fine round detail brush
- Pencil for sketching
- Ruler or straight edge
- Painter’s tape (optional)
- Palette for mixing
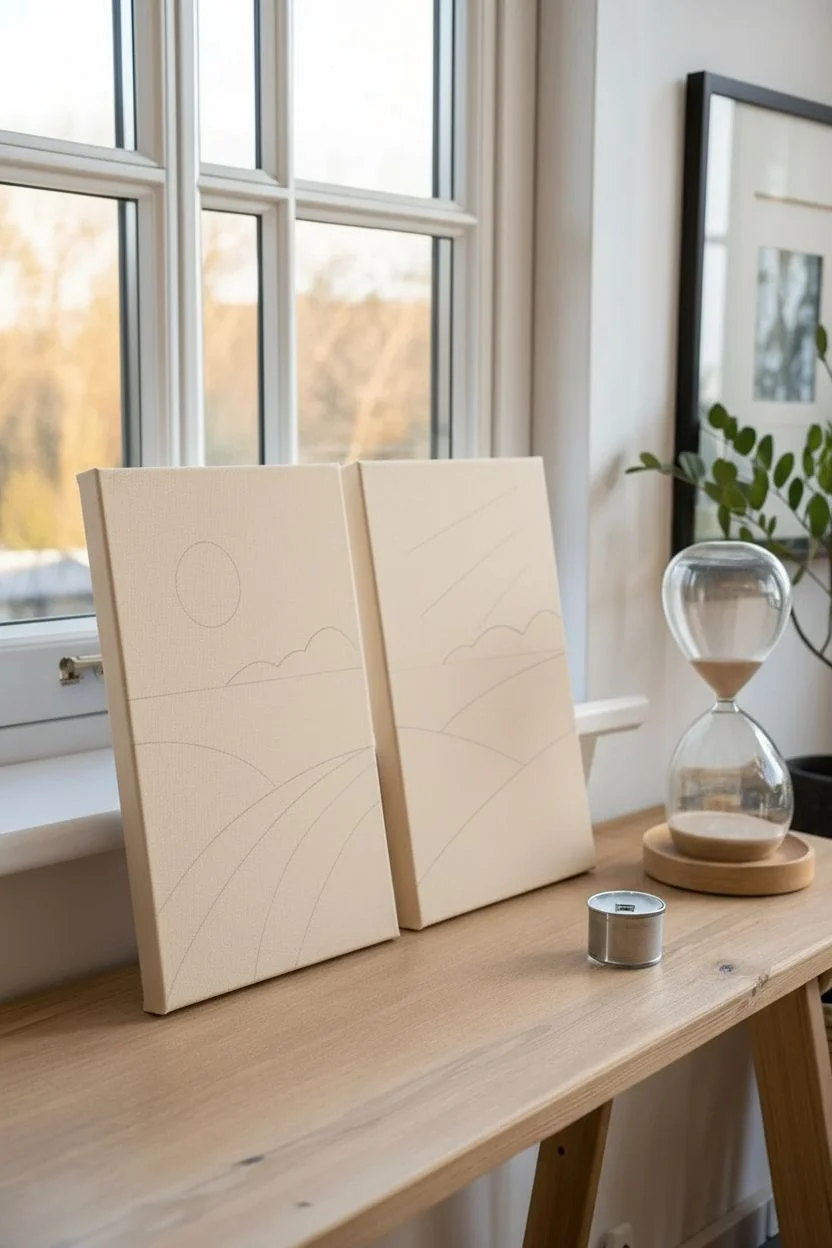
Step 1: Planning and Sketching
-
Prime the canvases:
Start by applying a base coat of warm cream or very light beige to the entire surface of both canvases. Let this dry completely to ensure your pencil lines will show up clearly and the subsequent paint layers will glide on smoothly. -
Map the horizon:
Lightly sketch a horizontal line across both canvases, positioning it slightly below the vertical center. This line doesn’t need to be perfectly straight; a gentle curve adds organic character. -
Create the sun element:
On the left canvas, use a compass or trace a small cup to draw a perfect circle in the upper left quadrant. This will be your bold sun. -
Sketch the rays:
On the right canvas capture the sun’s movement. Draw three diagonal lines extending from the upper left toward the center right, suggesting light rays breaking through. -
Outline the hills:
Below your horizon line, sketch rolling hill shapes. On the left canvas, create a curved path winding from the bottom right corner toward the center left. On the right canvas, draw overlapping mounds to create depth. -
Add distant mountains:
Above the horizon line but below the sun/rays, draw small, bumpy shapes to represent distant mountain ranges. Keep these shapes distinct on each canvas.
Step 2: Color Blocking
-
Paint the sky:
The cream base coat already serves as your sky, but if you want more coverage, apply a second fresh coat around your pencil sketches, keeping the texture smooth and even. -
Fill the sun:
Mix a vibrant rust orange and carefully fill in the circle on the left canvas. Use a medium flat brush to get crisp edges, turning the canvas as you work to maintain the curve. -
Define the rays:
Using a fine round brush and a lighter peach or diluted rust tone, paint the three diagonal lines on the right canvas. I find steadying my hand on the table helps keep these thin lines straight. -
Paint the distant mountains:
Mix slate blue with a touch of black and paint the distant mountain shapes on both canvases. This dark, cool tone pushes these shapes into the background visually. -
Block in the middle ground:
For the area immediately below the horizon, mix a warm tan or camel color. Apply this to the flat plains on the left canvas and the lighter hill sections on the right. -
Deepen the foreground:
Mix a deep terracotta or brownish-red. Paint the large bottom-left mound on the left canvas. On the right canvas, use this color for the mid-ground hill that sweeps across the center.
Smooth Operator
To get that ultra-smooth, matte finish, mix a tiny drop of water into your acrylics. It improves flow and reduces visible brushstrokes for a cleaner graphic look.
Step 3: Refining Details
-
Create the contrast hill:
On the right canvas, paint the bottom-right hill section with a very dark slate or near-black color. This heavy contrast anchors the composition. -
Define the path:
On the left canvas, paint the winding path a light beige tone. Once dry, use your fine brush and the dark slate color to outline the path’s edges with thin, confident strokes. -
Clean up edges:
Use a small angled brush dipped in the appropriate background colors to touch up any ragged lines where shapes meet. Crisp separation between colors is key to this style. -
Paint the sides:
Don’t forget the edges of your canvas. Extend the design around the sides for a gallery-quality finish, or simply paint all four sides a solid cream color. -
Final smooth check:
Look for any brush strokes that are too textured. If needed, do a final thin layer over large blocks of color to make them look matte and flat, which enhances the modern aesthetic.
Texture Twist
Mix baking soda into your terracotta paint for the hills. This creates a grainy, sand-like texture that physically contrasts with the smooth sky.
Set your finished pieces side-by-side near a window to let natural light highlight your clean lines and earthy tones.


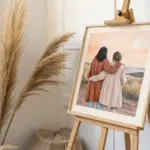
Blind Contour Drawing Date (Look at Them, Not the Paper)
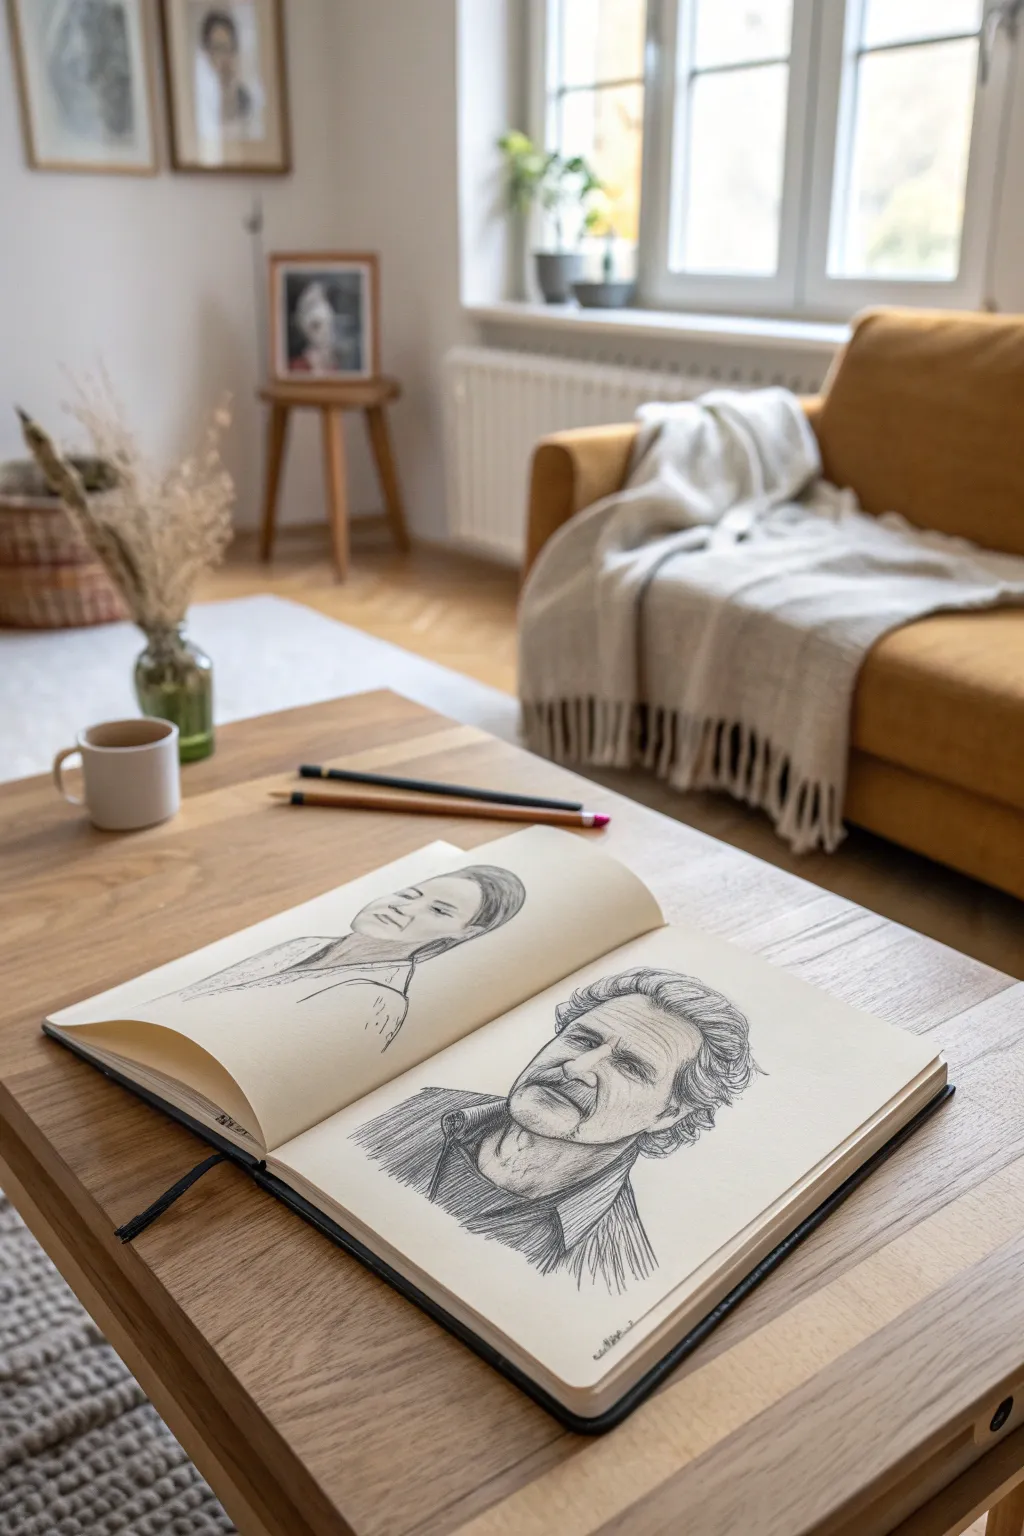

Capture the likeness of your favorite people with this relaxed sketchbook portrait session. Using simple graphite strokes, you’ll build up features and shading to create a timeless, hand-drawn keepsake right on your coffee table.
How-To Guide
Materials
- Hardbound sketchbook with cream or off-white paper (A4 or similar size)
- Set of graphite pencils (HB, 2B, 4B, 6B)
- Kneaded eraser (putty rubber)
- Pencil sharpener or craft knife
- Reference photo or a live model
Step 1: Laying the Foundations
-
Position your subject:
Begin with the portrait on the right page first. If drawing from life, have your subject sit comfortably in three-quarter view. If using a photo, place it nearby where you can easily glance back and forth. -
Establish the head shape:
Using an HB pencil with a very light hand, sketch a loose oval for the head. Mark a vertical center line to guide the direction the face is looking and a horizontal line for eye placement. -
Map the features:
Lightly indicate where the eyebrows, nose base, and mouth will sit. Keep these marks faint so they disappear into the shading later. Check the proportions—the eyes are typically halfway down the head. -
Rough in the hair:
Sketch the general volume of the hair rather than individual strands. Outline the overall shape of the hairstyle, noting where the hairline meets the forehead and ears.
Fixing Smudges
Graphite smearing on the opposite page? If you draw heavily, place a sheet of wax paper or tracing paper between the pages to protect your artwork.
Step 2: Defining the Features
-
Draw the eyes:
Switch to a 2B pencil for slightly darker lines. Carefully draw the upper eyelid shape first, then the iris. Leave a tiny white spot in the pupil for the catchlight to bring the eyes to life. -
Shape the nose:
Instead of drawing a hard outline for the nose, use light shading to suggest its form. Darken the nostrils and the shadow cast underneath the nose base. -
Detail the mouth:
Draw the line between the lips first, focusing on its unique curve. Shade the upper lip slightly darker than the bottom lip, which catches more light. -
Refine the jawline:
Strengthen the jaw and chin line. For the male subject shown, I like to use slightly angular, short strokes to suggest facial hair or a rougher texture along the chin.
Loose Grip
Hold your pencil further back, away from the tip. This forces you to draw with your shoulder, not your wrist, creating fluid, energetic lines rather than stiff ones.
Step 3: Shading and Texture
-
Block in facial shadows:
Identify where the light is coming from. Using the side of your 2B or 4B pencil, gently shade the side of the face away from the light, under the chin, and beneath the eyebrows. -
Detail the hair:
Switch to a 4B pencil. Draw flowing, confident lines that follow the direction of hair growth. Don’t draw every hair; focus on the darker shadowed areas between clumps of hair. -
Add contrast to the collar:
Use a 6B pencil to create deep, dark strokes for the shirt collar and shoulders. This high contrast anchors the head and makes the face pop. -
Cross-hatching technique:
For the shirt texture and deeper shadows on the neck, use diagonal hatching lines. Keep them consistent in direction to create a clean, sketched look.
Step 4: The Second Portrait & Finishing Touches
-
Start the left page:
Repeat the initial mapping process for the second subject on the opposite page. Ensure the scale matches the first drawing so they feel like a set. -
Softer approach for smooth skin:
For a subject with smoother features, use gentler transitions in your shading. Blend graphite slightly with your finger or a tissue if needed, but keep some pencil texture visible. -
Check values:
Step back and look at both drawings together. Reinforce the darkest darks (pupils, nostrils, deep hair shadows) with your 6B pencil to ensure both portraits have equal visual weight. -
Clean up highlights:
Take your kneaded eraser and dab away any smudges on the cheeks, forehead, or nose bridge to create bright highlights. This adds dimension. -
Finalize:
Sign or date your work discreetly in the corner. Leave the book open to prevent smudging while the graphite sets into the paper tooth.
You now have a beautiful pair of portraits that capture a moment in time
BRUSH GUIDE
The Right Brush for Every Stroke
From clean lines to bold texture — master brush choice, stroke control, and essential techniques.
Explore the Full Guide
Memory Map Artwork of Your Favorite Shared Places


Trace the path of your relationship with this charming, simplified memory map that connects the dots between your most cherished moments. Using clean ink lines on warm paper, you’ll create a playful visual journey featuring personal icons like your first home, favorite nature spots, and love notes.
Detailed Instructions
Materials
- A5 blank journal or sketchbook (cream or off-white paper)
- Fine-point black drawing pen (0.5mm)
- Medium-point black marker or brush pen (for bolder fills)
- Pencil (HB or 2B)
- Eraser
- Ruler (optional)
Step 1: Planning Your Journey
-
Brainstorm locations:
Sit together and list 4-6 key locations or memories you want to include. These could be your first apartment, a favorite hiking spot, a coffee shop, or even just a feeling represented by a heart. -
Rough layout:
Lightly sketch the general placement of these items using a pencil. Arrange them diagonally or in a flowing curve across the double-page spread to create a sense of movement. -
Define the path:
Draw a faint pencil line connecting your locations. Let the line loop and curve naturally, acting as the backbone for your ‘road’ later on.
Pro Tip: Narrative Flow
Arranging your icons chronologically from left to right turns the visual map into a timeline of your relationship.
Step 2: Drawing the Icons
-
Sketch the house:
In the bottom left corner, draw a simple house shape. Start with a square base and add a triangle roof. Add a small chimney. -
Add house details:
Detail the house by drawing a four-pane window and a door with a circular handle. Give the roof some texture by drawing small scalloped lines to mimic shingles. -
Draw the flowers:
Near the house, sketch two simple stemmed flowers with round petals. I like to keep these minimal to match the naive art style. -
Create the mushroom:
On the left page, mid-way up, draw a mushroom. Use a semi-circle for the cap with vertical lines inside, and simple stalk underneath. -
Add celestial elements:
Towards the top left, draw a moon inside a sunburst shape—a circle with a crescent moon inside, surrounded by radiating lines. -
Draw the hearts:
Place a solid black heart near the top center and an outline of a heart on the bottom right page. Varying between filled and outlined shapes adds visual interest. -
Include text:
On the left page, write a short, cryptic note or location name in your natural handwriting. Keep it small so it doesn’t overpower the drawings.
Troubleshooting: Smudged Ink
If you smudge fresh ink, turn it into a shadow or a new doodle element. A small splatter can easily become a flower center or a stepping stone.
Step 3: Inking and Connecting
-
Outline the icons:
Using your fine-point black pen, carefully go over your pencil sketches. Don’t worry if the lines are slightly shaky; it adds to the hand-drawn charm. -
Fill the solids:
Use the thicker marker to fill in the solid heart and the moon shape. Ensure the ink is fully opaque for a bold contrast. -
Create the dotted trail:
Follow your pencil path guide to draw the dotted line. Make small, evenly spaced dashes connecting all your illustrations. -
Add direction:
Ensure the dotted line meanders across the heavier ‘crease’ of the book to visually link the two pages together. -
Add decorative sparkles:
Fill empty negative spaces with tiny stars, simple flowers, or extra dots to balance the composition. -
Erase guidelines:
Wait at least 5-10 minutes for the ink to dry completely to avoid smearing. Gently erase all visible pencil marks. -
Final touches:
Review the drawing. If any lines look too thin, go over them once more to add weight, particularly on the house roof and the main heart outline.
Now you have a charming, personalized keepsake that maps out the geography of your love story
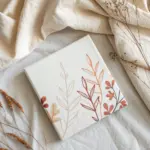
Hand Lettering Love Notes With Illustrated Borders

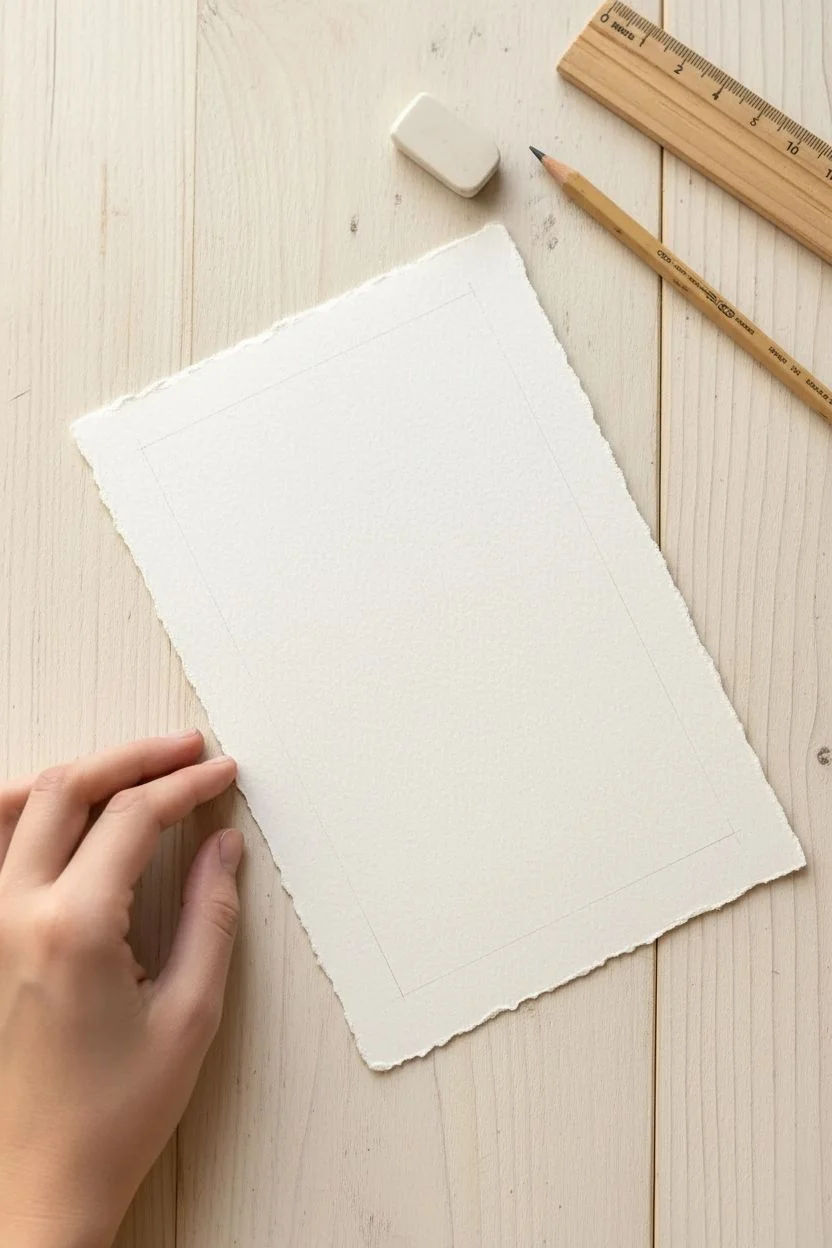
Transform simple cardstock into a keepsake love letter with delicate, hand-drawn framing. This project combines classic calligraphy aesthetics with charming organic motifs, perfect for a heartfelt note.
Step-by-Step
Materials
- High-quality textured art paper or thick cardstock (cream or off-white)
- Dip pen holder
- Pointed nib (e.g., Nikko G or Leonardt)
- Black drawing ink or India ink
- Red or pink ink (or a fine liner pen)
- Pencil (HB or H)
- Ruler
- Eraser
Step 1: Planning the Layout
-
Cut the paper:
Begin by trimming your textured paper to your desired note size. A standard 5×7 inch rectangle works beautifully for a personal letter. -
Mark the margins:
Using a ruler and a very light pencil touch, measure about 1/2 inch to 3/4 inch inward from all four edges. -
Lightly sketch guides:
Connect your measurements to draw a rectangular box in the center of the paper. This will serve as the skeleton for your ink border.
Nib Know-How
New nibs often have a factory oil coating that repels ink. Before starting, gently scrub the metal nib with an old toothbrush and toothpaste or dish soap to remove it.
Step 2: Inking the Structural Border
-
Prepare the nib:
Insert your pointed nib into the pen holder. Dip it into the black ink, wiping off any excess on the bottle’s rim to prevent drips. -
Draw the inner frame:
Trace over your pencil rectangle with the dip pen. Instead of a solid line, try a ‘dashed-and-dot’ pattern or a textured, rough line to give it an antique look. You can create a double line effect by drawing two very close parallel lines. -
Add corner details:
At each of the four corners of your rectangle, pause to leave a small gap or specifically draw a defined corner bracket. -
Let the skeleton dry:
Allow the black ink lines to dry completely before proceeding to avoid any smudging.
Step 3: Adding Organic Motifs
-
Sketch the leaves:
Returning to the black ink, draw small, simple leaves extending outward from your frame. Place them at regular intervals along the vertical and horizontal lines. -
Vary the direction:
Alternate the angle of the leaves slightly so they look natural and wind-blown rather than stiff. -
Cluster the foliage:
Near the corners, you might want to group two or three small leaves together to add visual weight to the edges. -
Incorporate tiny vines:
Draw very fine, short curved lines between the leaves to suggest a vine wrapping around your rectangular border.
Ink Bleeding?
If your ink feathers or spreads into the paper fibers, your paper may be too absorbent. Swapping to specific smooth Bristol board or hot-press watercolor paper usually fixes this.
Step 4: Applying Color Accents
-
Switch to red ink:
Clean your nib thoroughly in water and dry it, or switch to a red fine-liner pen if you prefer more control. -
Draw corner hearts:
Place a small heart directly inside each of the four corners of your frame. Keep them oriented upright. -
Add central hearts:
Position a slightly smaller heart at the midpoint of the top and bottom borders, and potentially on the sides if space allows. -
Fill or outline:
Decide if you want solid red hearts or open outlines. A solid fill often pops better against the delicate black line work.
Step 5: Final Touches
-
Erase pencil marks:
Wait at least 10-15 minutes to ensure all ink is bone-dry. Gently erase the initial pencil guidelines you drew in the first phase. -
Inspect and refine:
Look for any gaps in the border that feel too empty. You can add tiny black dots or extra leaves to balance the composition. -
Ready for writing:
Your custom stationery is now ready for your handwritten message in the center.
Now you have a beautifully framed canvas ready for your most romantic words

PENCIL GUIDE
Understanding Pencil Grades from H to B
From first sketch to finished drawing — learn pencil grades, line control, and shading techniques.
Explore the Full Guide
Make a Two-Panel Mini Comic of Your Date Night at Home
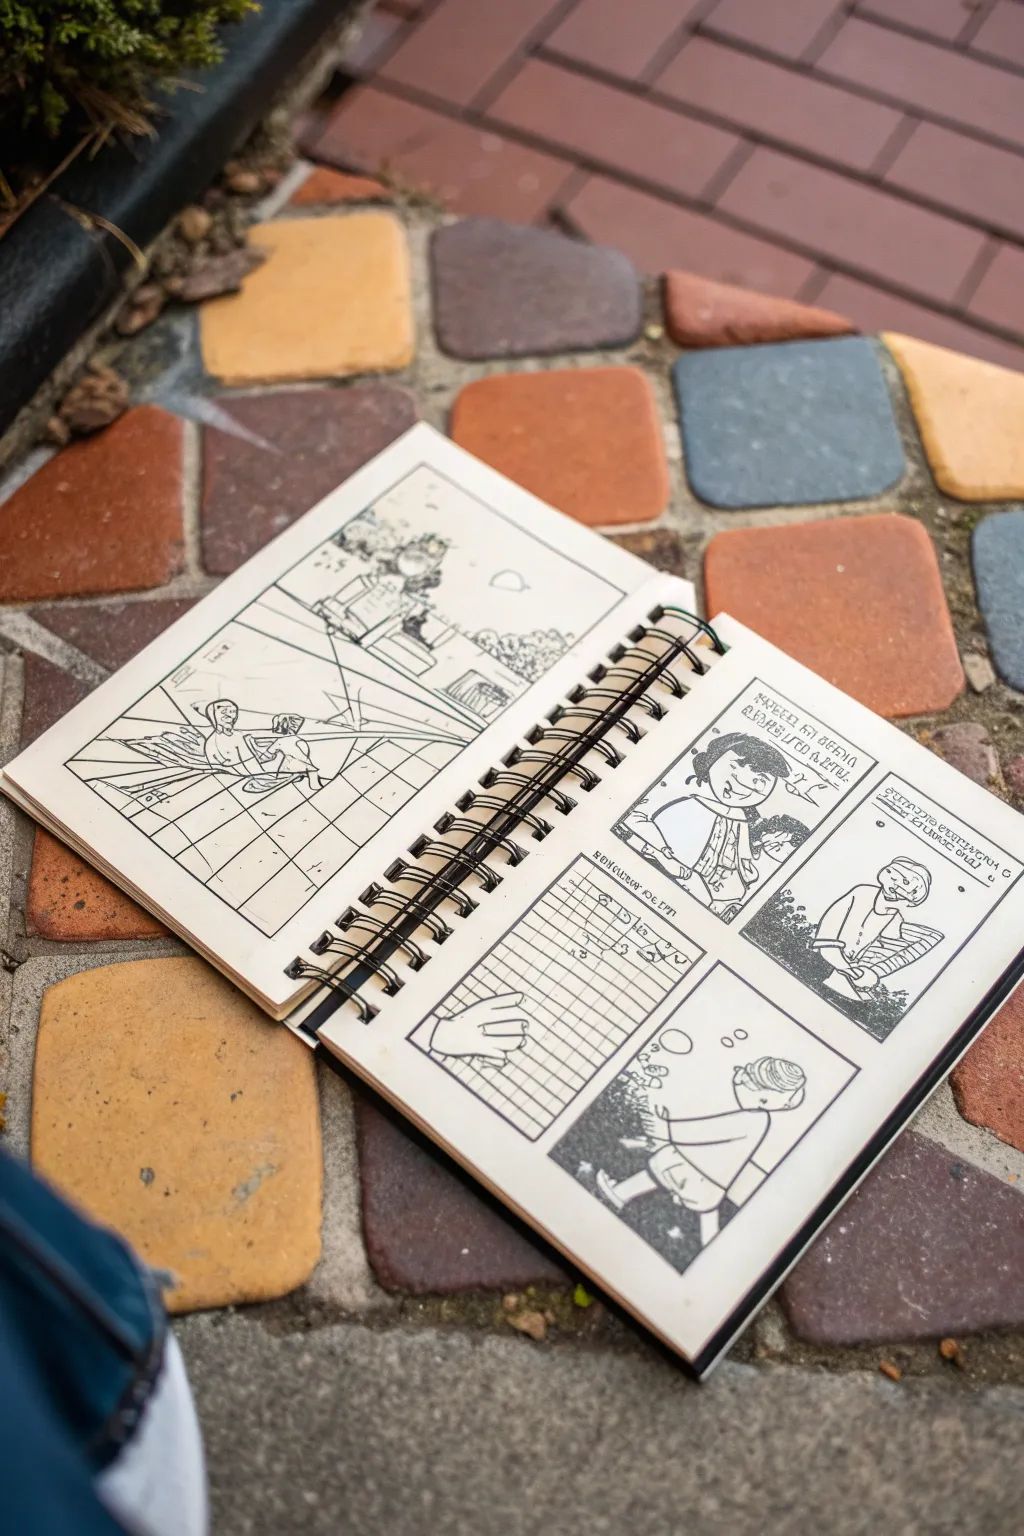
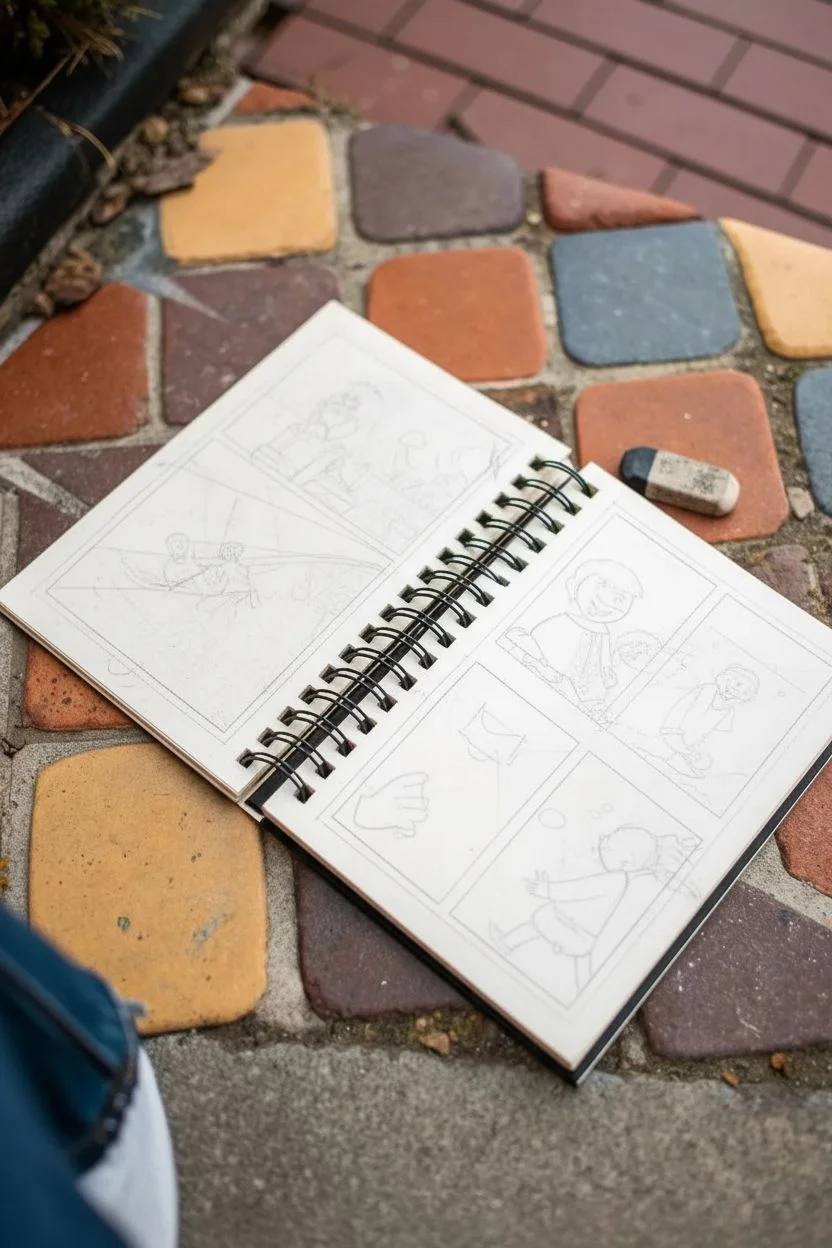
Transform a spiral-bound sketchbook into a personalized narrative of your date night with this charming comic-style spread. Combining simple line art with structured panels creates a whimsical memento that captures the feeling of the evening rather than just the facts.
How-To Guide
Materials
- Small spiral-bound sketchbook (A5 or similar size)
- Pencil (HB or H for initial sketching)
- Fine-liner pen (0.3mm or 0.5mm, black ink)
- Ruler or straight edge
- Eraser
- Reference photo of your location (optional)
Step 1: Planning the Layout
-
Choose your moment:
Decide on a single scene or a series of moments from your date night to depict. The left page works beautifully for a setting shot or a ‘wide angle’ view, while the right page is perfect for character close-ups and details. -
Establish panel borders:
On the right-hand page, use your ruler to lightly pencil in a grid of four equal rectangular panels. Leave a small margin between each box and around the edge of the paper for a clean comic-book look. -
Draft the left page scene:
On the facing left page, lightly sketch a large, single scene that fills most of the page. This establishes the context. Draw a horizon line first to ground the perspective, focusing on the environment like the room you are in or the view from a window. -
Sketch panel contents:
Return to the four-panel grid on the right. Lightly sketch simple character interactions in the top two panels. Keep figures cartoony and expressive—focus on big smiles or exaggerated actions rather than anatomical perfection. -
Add abstract details:
For the bottom left panel, try something different like a diagram or a chart. Sketch a grid representing a calendar, a game score, or a ‘love meter’ to add visual variety. -
Draft the final interaction:
In the bottom right panel, sketch the conclusion of your mini-story. This is a great spot for a sweet moment or a funny punchline to your date.
Character consistency
Keep characters recognizable by giving them one distinct feature each, like a specific hairstyle, glasses, or a striped shirt, so they look the same in every panel.
Step 2: Inking and Refining
-
Ink the borders:
Using your black fine-liner, trace over your ruler lines to create crisp, permanent borders for your panels. I usually do this first to define the space clearly before locking in the drawings. -
Outline the main figures:
Carefully go over your pencil sketches with the pen. Use confident, continuous strokes for clothing and hair. Don’t worry if lines aren’t perfectly straight; the wobble adds hand-drawn charm. -
Add texture and shading:
Use hatching (parallel lines) or stippling (dots) to create shadows. In the image, note how the grass or background texture is made with quick, repetitive scribbles or dots to differentiate it from the clean lines of the characters. -
Incorporate text bubbles:
If your characters are speaking, draw speech bubbles near their heads. Write the text lightly in pencil first to ensure it fits, then ink it carefully. Alternatively, add small captions above the panel borders. -
Detail the environment:
On the large left-page drawing, use thinner lines for background elements like brickwork, tiles, or distant trees. Perspective lines can guide the eye toward the main focus of the scene. -
Clean up:
Once the ink is completely dry (give it a few minutes to avoid smudging), vigorously erase all remaining pencil guidelines. This step instantly makes the artwork pop and look professional. -
Final touches:
Look for empty spaces that feel unbalanced. Add small floating elements like hearts, music notes, or motion lines to emphasize action and mood.
Date night twist
Swap books halfway through! Have your partner draw the left-page ‘setting’ while you draw the right-page ‘action,’ creating a collaborative memory of the night.
Close your book and save it as a captured memory of a creative evening together


Have a question or want to share your own experience? I'd love to hear from you in the comments below!