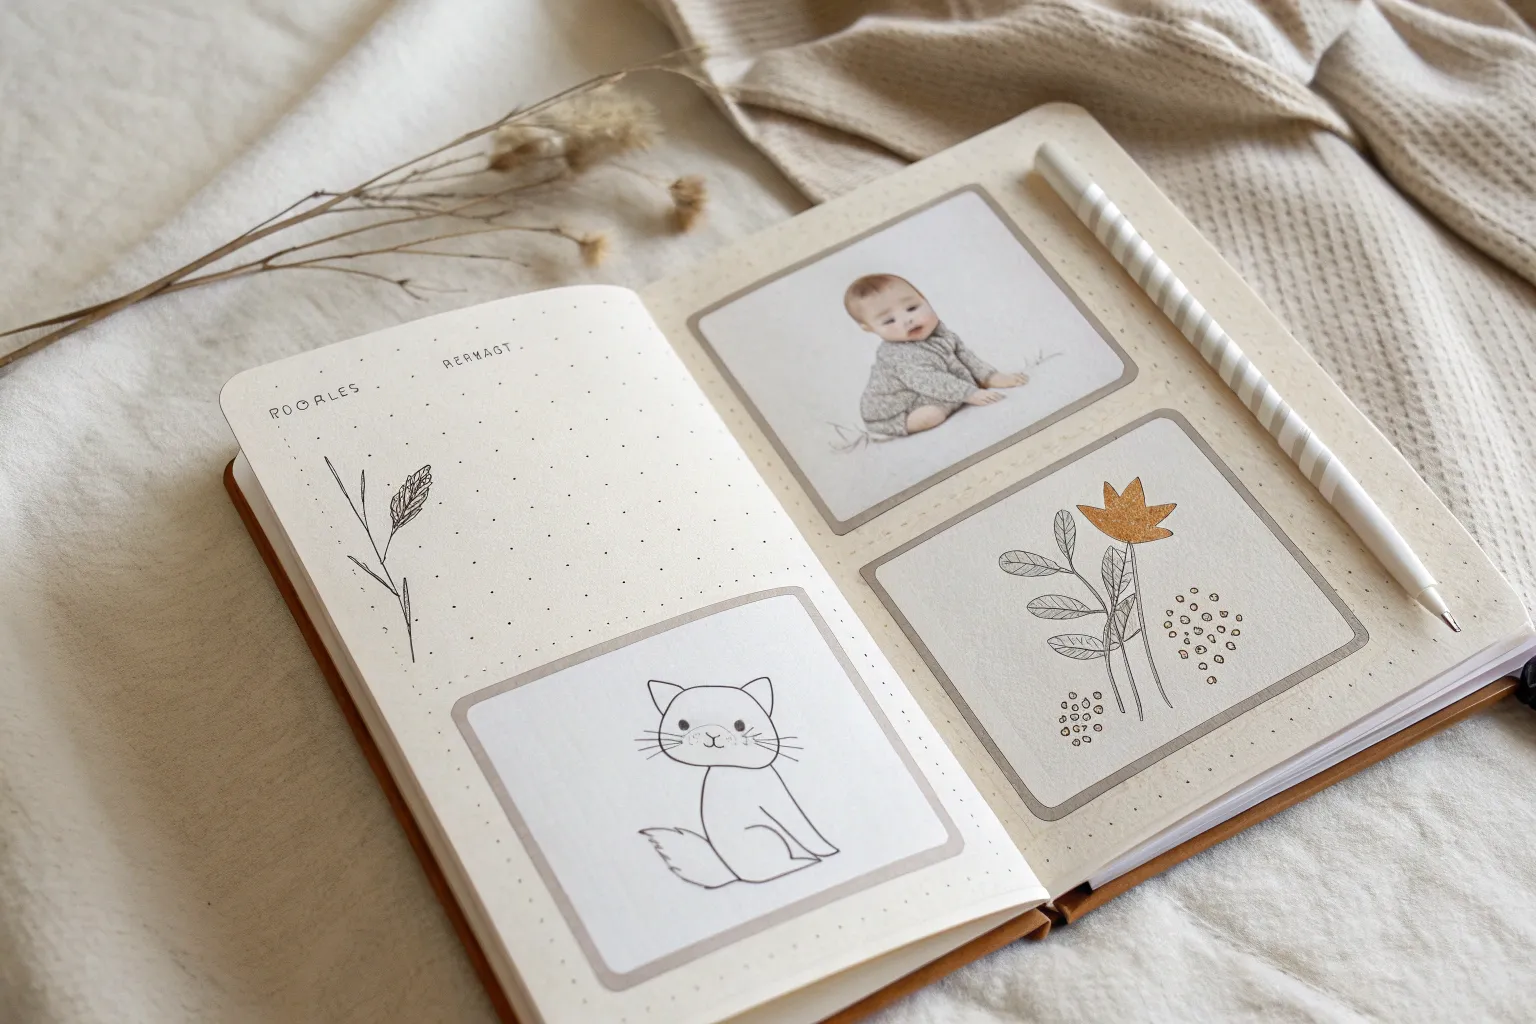
When you’re drawing babies, it’s all about capturing that mix of soft shapes, tiny features, and big feelings. I pulled together my favorite baby drawing ideas—from super simple sketches to more detailed studies you can really sink into.
Simple Baby Face Doodle
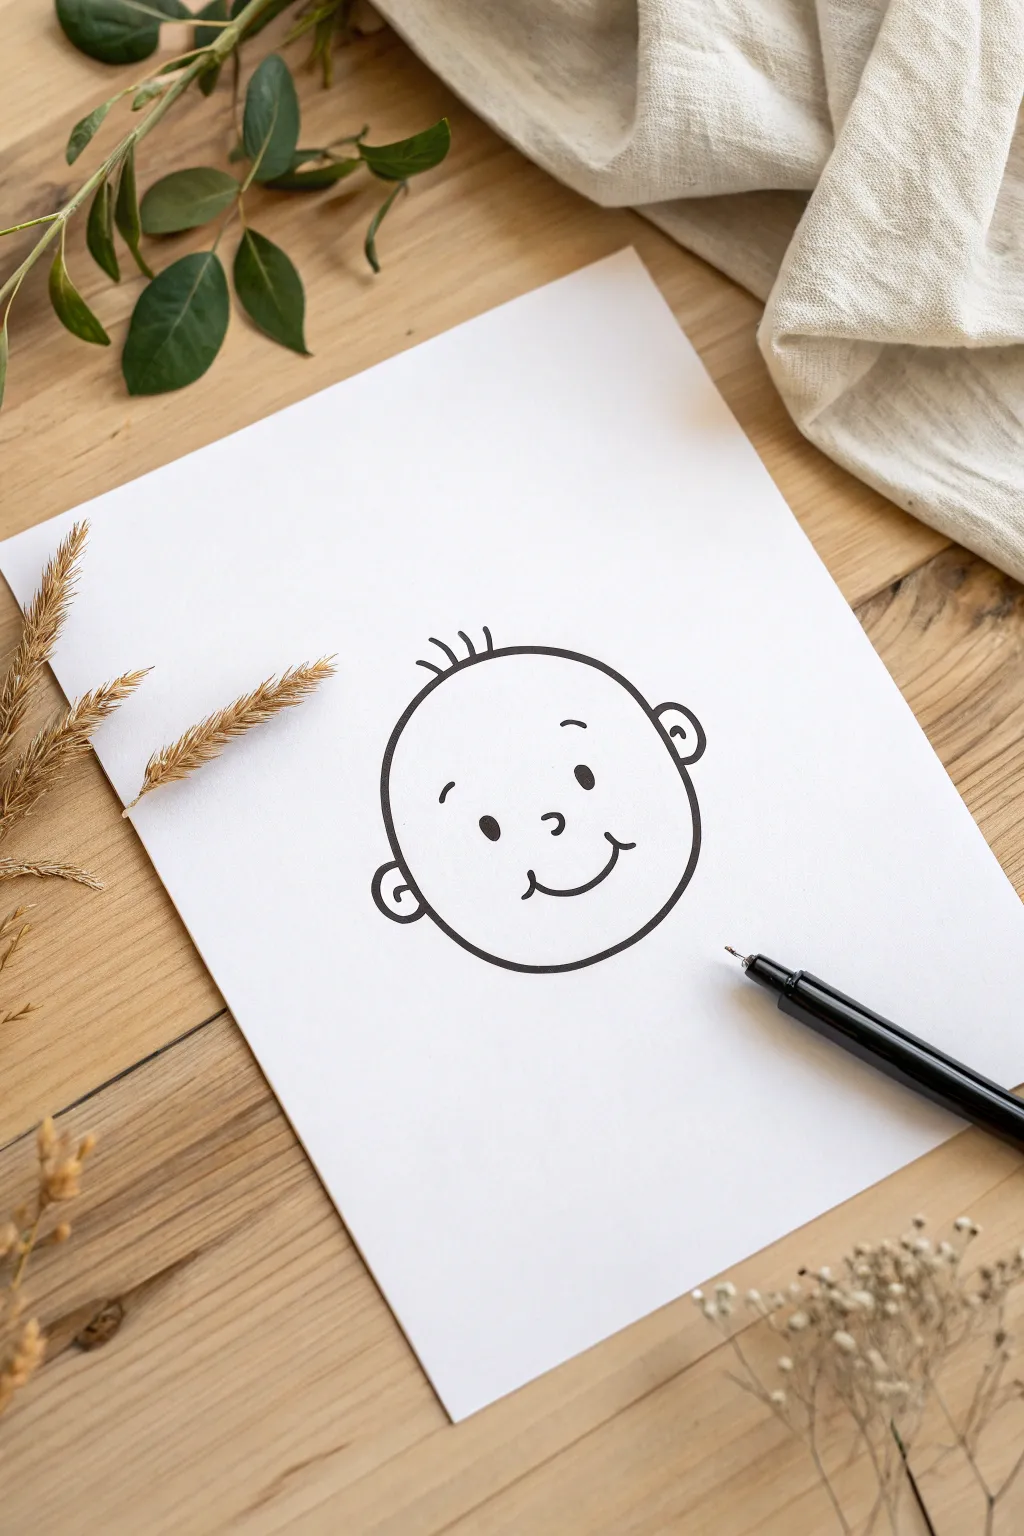
This charming, minimalist baby face doodle captures sweetness with just a few well-placed lines. It is a perfect beginner project that focuses on expression and proportion rather than realism, resulting in a playful cartoon style.
Detailed Instructions
Materials
- Smooth white drawing paper or cardstock
- Fine-liner pen (black, 0.5mm or 0.8mm)
- Pencil (HB for sketching)
- Eraser
Step 1: Shaping the Head
-
Sketch the base circle:
Start by lightly sketching a large circle with your pencil. It doesn’t need to be geometrically perfect; a slightly organic round shape works best for a cute baby face. -
Define the jawline:
Using your black fine-liner, trace over the bottom three-quarters of your circle. Keep the line weight consistent and smooth. -
Leave an opening:
As you reach the top section of the circle, stop drawing the solid line. Leave a gap at the very top where the hair will go.
Wobbly Lines?
If your circle isn’t smooth, don’t stress. Focus on your hand movement coming from the shoulder, not the wrist, for smoother curves.
Step 2: Adding Facial Features
-
Place the ears:
On the left side of the head, draw a small C-shape for the ear. Add a tiny swirl inside to suggest the inner ear detail. -
Draw the right ear:
Mirror the process on the right side, drawing a backward C-shape. Try to keep them at roughly the same height, just below the midline of the face. -
Position the eyes:
In the center of the face, draw two small, solid black ovals for eyes. Space them widely apart to enhance the cute, innocent look. -
Add eyebrows:
Floating high above the eyes, draw two small, curved dashes for eyebrows. Placing them high up gives the baby an alert, happy expression. -
Draw the nose:
Right between the eyes but slightly lower, draw a tiny backward ‘c’ shape to indicate a small button nose.
Step 3: Final Details
-
Create the smile:
Below the nose, draw a wide, shallow U-shape for the mouth. Add tiny tick marks at the ends of the smile to create cheeks. -
Add the hair:
Go back to the open gap at the top of the head. Draw three or four curved, wispy lines springing up from the unseen scalp line. -
Refine lines:
Go over any lines that look too thin with your pen to make the drawing bold and clear. -
Erase pencil marks:
Once the ink is completely dry, gently erase your initial pencil sketch lines so only the clean black ink remains.
Make It Unique
Change the expression easily by altering the eyebrows. Slanting them inward creates a confused look; raising one adds curiosity.
You now have a delightful little character ready for cards or nursery art


Baby Head Proportions Quick Study
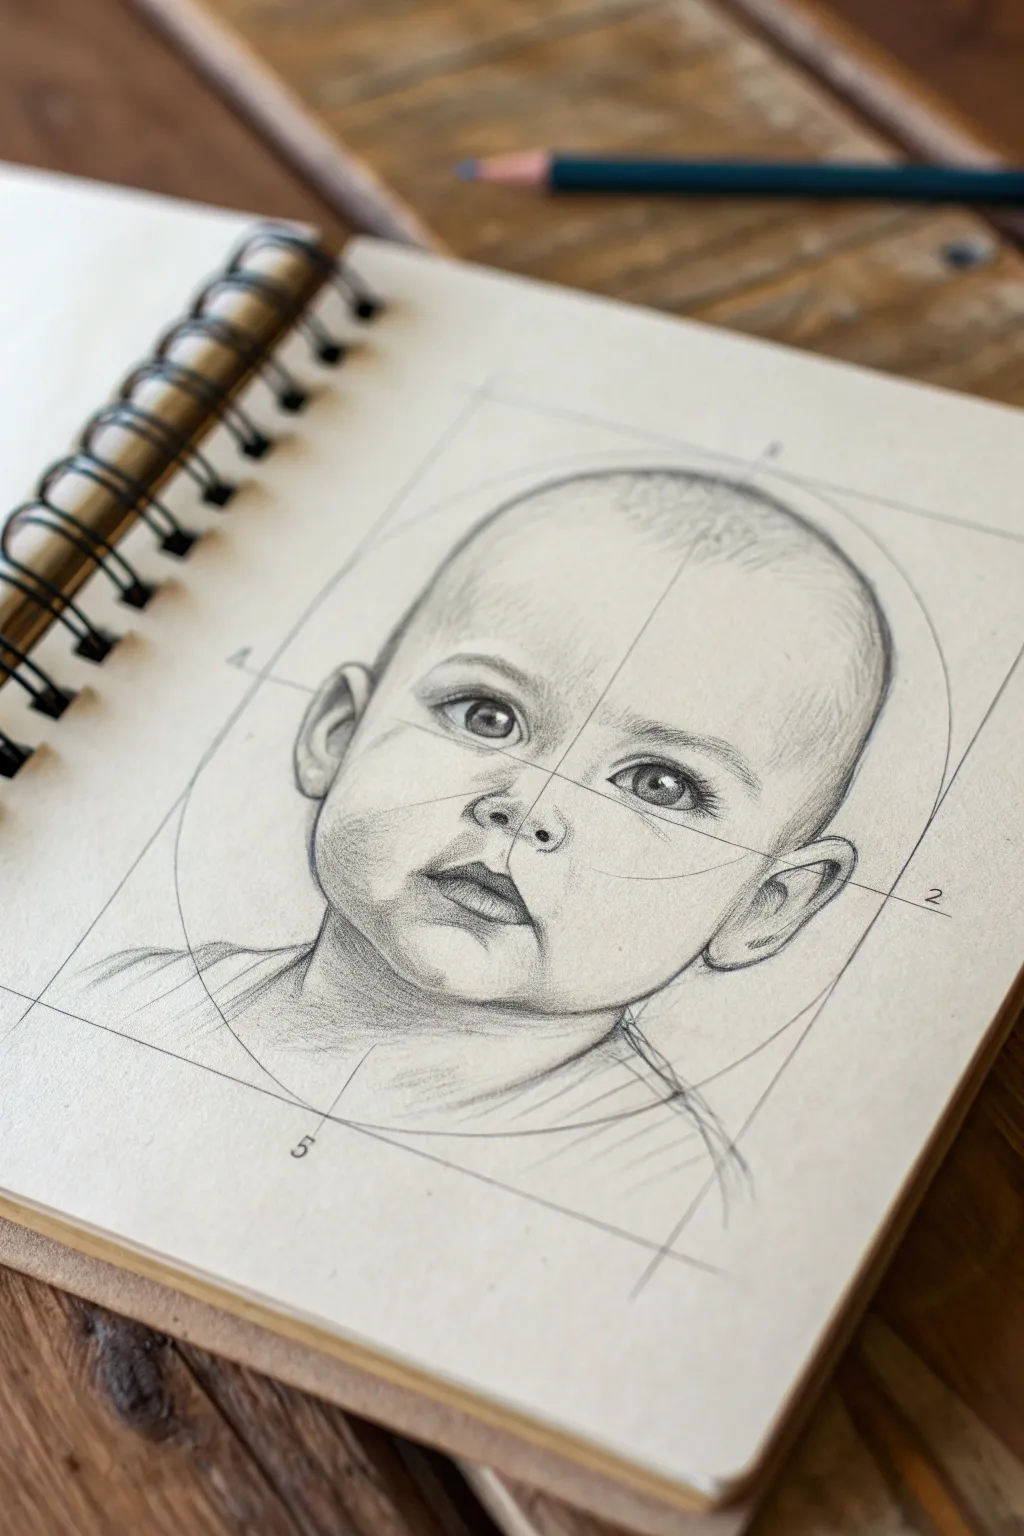
This tutorial guides you through sketching a realistic baby portrait by breaking it down into geometric shapes and essential guidelines. The visible construction lines add a classical, academic feel to the finished study, helping you understand the unique proportions of an infant’s face.
Step-by-Step
Materials
- Sketchbook or drawing paper (medium tooth)
- H or HB pencil (for light construction lines)
- 2B and 4B pencils (for shading)
- Kneaded eraser
- Ruler
- Pencil sharpener
Step 1: Setting the Foundation
-
Draw the main bounding box:
Begin by using your ruler and an H pencil to draw a large, vertical rectangle in the center of your page. Keep your lines very light, as these are guides. This box defines the outer limits of the head and shoulders. -
Establish the central circle:
Inside the upper two-thirds of your rectangle, sketch a large circle. This represents the cranial mass of the baby’s head. Unlike adults, babies have a much larger cranium compared to their face, so ensure this circle dominates the space. -
Add the vertical axis:
Draw a straight vertical line down the center of the rectangle, bisecting your circle. Tilt it slightly to the left if you want the head to have a subtle rotation, as seen in the reference, or keep it perfectly straight for a frontal view. -
Mark the eye line:
Draw a horizontal line across the lower third of the circle. Notice how low this is compared to an adult face; a baby’s eyes sit much lower on the head structure. -
Define the jawline:
From the sides of the circle, near the eye line, bring two curved lines down to meet near the center axis, forming a soft, rounded U-shape for the cheeks and chin. Babies have full cheeks, so keep these curves generous. -
Number the reference points:
For that technical study look, you can lightly label your grid points with small numbers (2, 4, 5, etc.) near the intersection lines as shown in the example.
Step 2: Placing the Features
-
Position the eyes:
On the eye line, sketch two almond shapes. The space between the eyes should be roughly the width of one eye. Because babies have large irises, draw the circular iris taking up almost the entire height of the eye opening. -
Indicate the nose:
Just below the eye line, mark a small, soft button nose. Avoid hard bridges; simply suggest the nostrils and the bottom curve of the nose tip. -
Sketch the mouth:
Place the mouth halfway between the nose and the chin. I find it helpful to focus on the corners of the mouth and the shadow beneath the lower lip, rather than outlining the lips themselves. -
Add the ears:
Draw the ears on the sides of the head. The top of the baby’s ear usually aligns with the eye line, and the bottom aligns roughly with the nose or slightly below. -
Refine the head shape:
Smooth out the connection between the cranium circle and the jawline. Infants have very little definition in their temples, so keep the outline continuous and organic.
Soft Touch
Avoid hard outlines for the nose and lips. Babies have soft transitions, so build form solely through gentle shading instead of lines.
Step 3: Shading and Definition
-
Start the shading:
Switch to your 2B pencil. Begin applying soft hatching to the shadow side of the face (the left side in this example). Focus on the curve of the forehead and the roundness of the cheek. -
Darken the eyes:
Using a 4B pencil, darken the pupils and the upper lash line. Leave a tiny white highlight in each eye to make them look wet and alive. This contrast is crucial for realism. -
Sculpt the nose and mouth:
Add shading under the nose and below the bottom lip. These cast shadows give volume to the features without needing harsh outlines. -
Detail the ears and hair:
Darken the inner folds of the ears. For the hair, use very light, wispy strokes with the H pencil at the top of the head to suggest fine, soft baby hair rather than thick strands. -
Draw the neck folds:
Sketch the neck creases and the suggestion of clothing or shoulders at the bottom. Keep these lines loose and gestural to contrast with the detailed face. -
Enhance the construction lines:
Go back over your initial straight grid lines with a ruler to make them crisp again. Don’t erase them; they are part of the ‘study’ aesthetic. -
Final contrast check:
Deepen the darkest shadows—usually the nostrils, pupils, and corners of the mouth—one last time to make the drawing pop off the page.
Digital Transfer
Scan your drawing and import it into Procreate. On a new layer, trace only the ‘final’ lines to create a clean, minimalist line art version.
Step back and admire your classical study of proportion and form


Three-Quarter View Baby Portrait
Capture the delicate features of an infant with this gentle graphite study, focusing on soft shading and soulful eyes. This project teaches you how to render the subtle roundness of a baby’s face in a classic three-quarter view, mounted elegantly for a finished presentation.
Detailed Instructions
Materials
- Smooth heavyweight drawing paper (cream or off-white tone)
- Graphite pencils (HB, 2B, 4B, 6B)
- Kneaded eraser
- Precision eraser (pencil style or mono zero)
- Blending stump or tortillon
- Soft tissue or chamois cloth
- Sketchbook with heavy paper
- Pre-cut mat board (cream/white)
Step 1: Structural Layout
-
Establish the head shape:
Begin with an H or HB pencil using very light pressure. Draw a large, slightly tilted oval for the cranium. Since this is a three-quarter view, the vertical center line should curve down the right side of the face (from your perspective), leaving more space on the left side. -
Place the features:
Mark the horizontal eye line slightly below the center of the oval—babies have larger foreheads than adults. Mark the nose line halfway between the eyes and chin, and the mouth line just below that. Sketch the ear low on the left side, aligning the top with the eye line. -
Refine the contour:
Outline the chubby cheek on the right side. It should curve outward significantly, obscuring part of the jawline. Define the chin as a soft, rounded curve rather than a sharp angle.
Pro Tip: Soft Shadows
Never use your finger to blend graphite on baby portraits. natural oils from your skin can cause the graphite to blotch and become impossible to erase. Stick to tissues or stumps.
Step 2: Rendering the Eyes
-
Sketch the eye shapes:
Draw the almond shapes of the eyes. In this view, the right eye (furthest away) will appear slightly shorter and more compressed due to foreshortening. Ensure the visible iris is large relative to the eye opening. -
Detail the pupils and irises:
Switch to a 2B pencil. carefully draw the pupils and the outer ring of the iris. Leave a distinct, crisp white circle in each eye for the catchlight—this is crucial for bringing the baby to life. -
Add depth to the eyes:
Fill in the pupils with a 6B pencil for maximum darkness. Shade the iris with radiating lines, keeping the top half slightly darker to simulate the shadow from the eyelid. Add tiny, wispy lashes; keep them sparse so the baby doesn’t look like they are wearing makeup.
Step 3: Shading and Form
-
Build the nose structure:
Avoid drawing hard lines for the nose bridge. Instead, use soft shading with a 2B pencil to suggest the ‘button’ shape. Darken the nostrils gently, making them small teardrop shapes. -
Sculpt the lips:
The upper lip usually casts a shadow on the lower lip. Shade the upper lip slightly darker. For the mouth opening, use a 4B pencil to create a deep, soft shadow in the corners, particularly the slight downturn on the right side. -
Apply initial skin tones:
Using the side of your HB pencil, lay down a light wash of graphite over the shadowed side of the face (the left side). Avoid the ‘T-zone’ (forehead, nose bridge, chin) to keep those areas highlighted. -
Blend for softness:
Take a tissue or a clean blending stump and gently smudge your graphite layers. Baby skin is incredibly smooth, so you want to eliminate almost all visible pencil strokes. -
Deepen the contrast:
Return with a 4B pencil to deepen the shadows under the chin, inside the ear, and in the crease of the eyelid. This contrast makes the highlights pop.
Level Up: Tinted Paper
Try this drawing on toned tan or gray paper. Use the paper color as your mid-tone, graphite for shadows, and white charcoal or white pencil strictly for the brightest highlights.
Step 4: Hair and Clothing
-
Suggest the hairline:
Baby hair is fine and wispy. Use a sharp HB pencil to flick rapid, short strokes following the growth direction. I find it helpful to start from the crown and flick outward toward the forehead. -
Darken the hair mass:
Layer 2B strokes over the initial hairs, clustering them slightly to show thickness without creating a solid ‘helmet’ of hair. Keep the edges feather-light. -
Sketch the collar:
Outline the rounded collar of the sweater. Use loose, hatching strokes to suggest the knit texture without drawing every stitch. A little cross-hatching here adds a nice contrast to the smooth skin. -
Add background interaction:
Add a patch of hatched shading behind the head on the left side. This negative space technique pushes the light-colored face forward and adds dimension.
Step 5: Final Presentation
-
Lift highlights:
Use a kneaded eraser to dab (not rub) the paper on the tip of the nose, the forehead, and the curve of the cheek. This retrieves the paper’s white for the brightest highlights. -
Clean up:
Use a precise eraser to clean up the whites of the eyes and remove any smudges from the background area. -
Mount the artwork:
Once finished, adhere the drawing behind a pre-cut cream mat board. Attach this assembly into your sketchbook or frame to give the piece a professional, finished gallery look.
Now you have a timeless, cherished portrait that perfectly captures a moment of childhood innocence


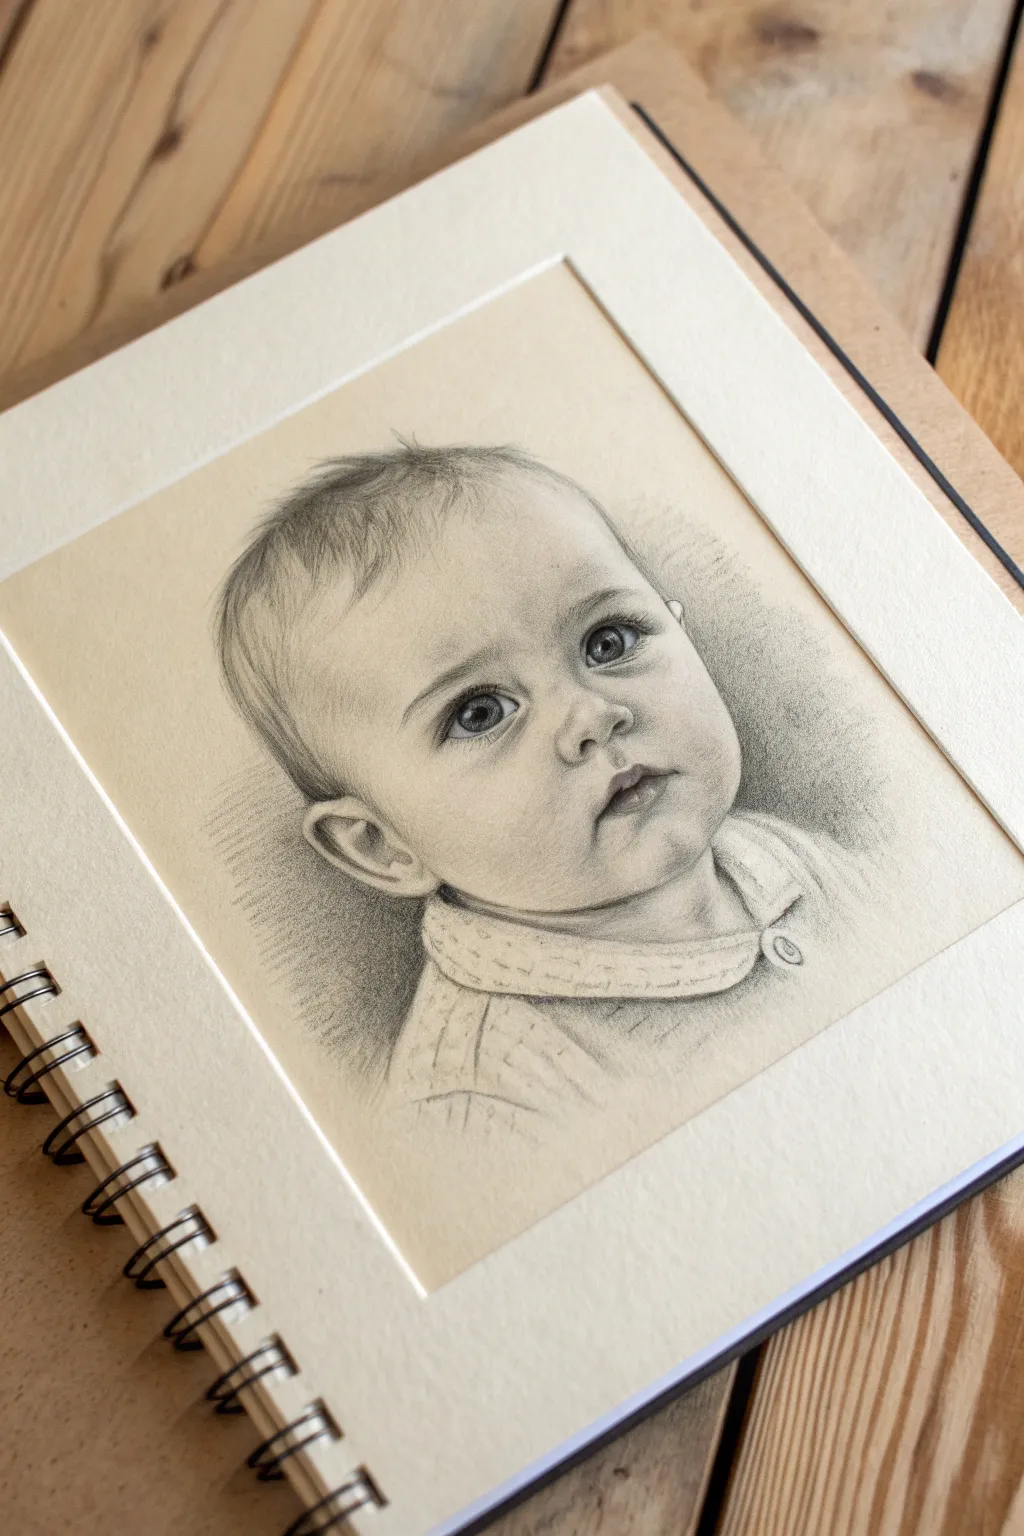
Chubby Cheeks Soft Shading
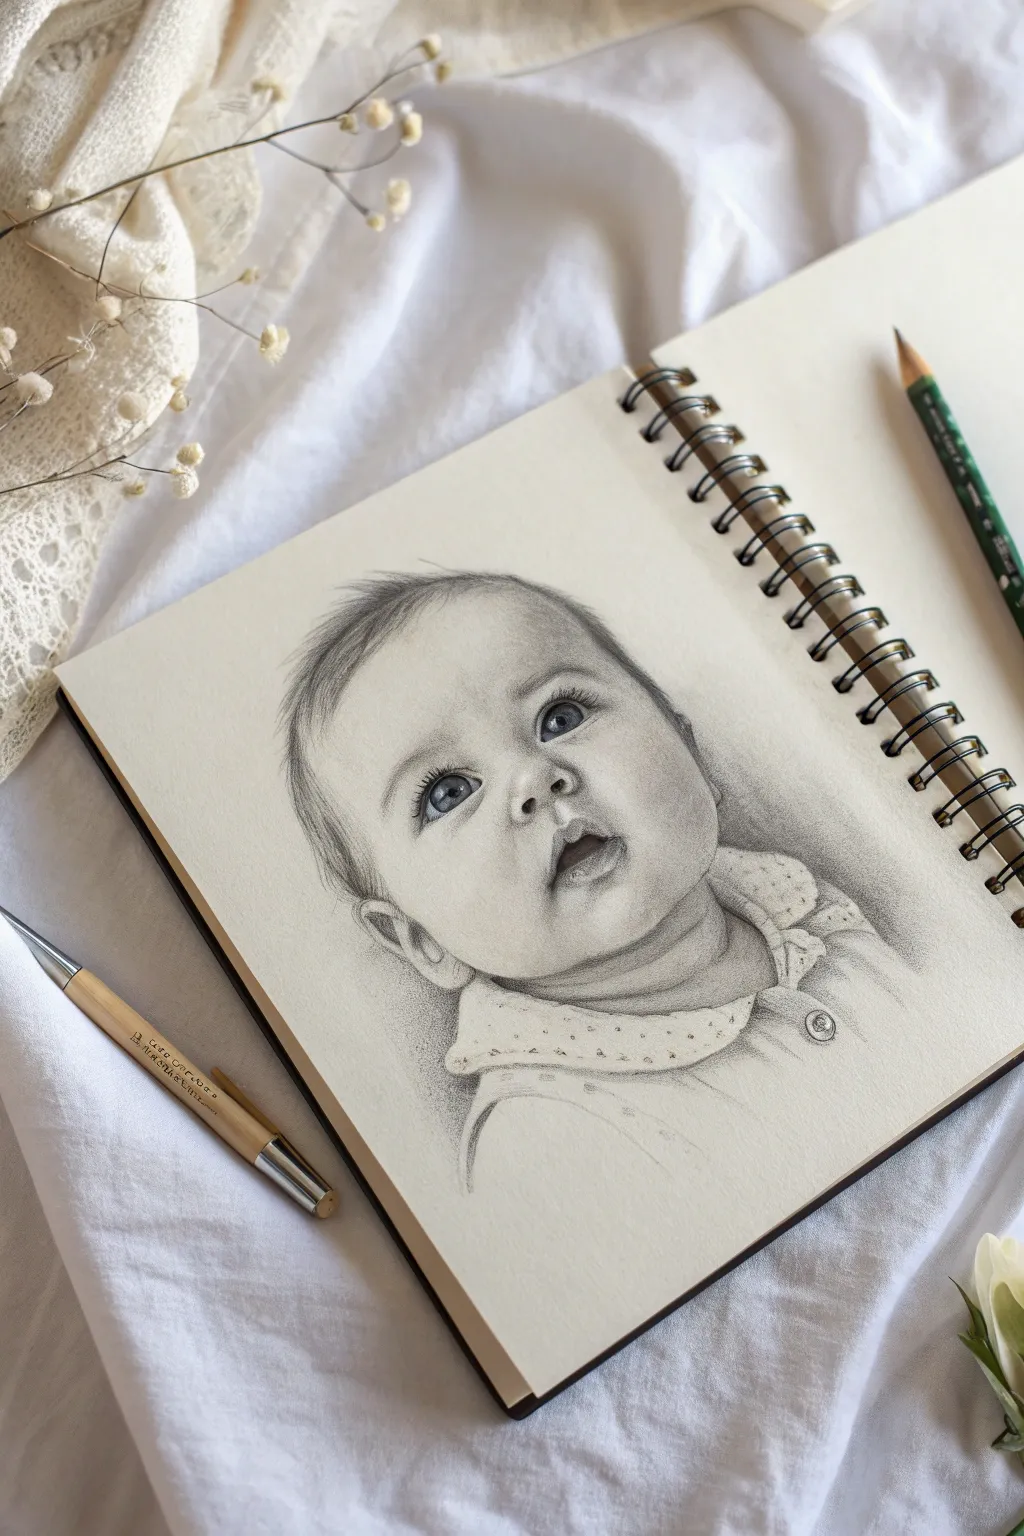
This project guides you through creating a tender, realistic graphite portrait of a baby looking upward, capturing their natural wonder. You’ll focus on mastering soft shading techniques to render chubby cheeks and delicate facial features that seem to lift right off the paper.
Step-by-Step Guide
Materials
- Sketchbook with smooth, heavy-weight drawing paper
- Set of graphite pencils (HB, 2B, 4B, 6B)
- Mechanical pencil (0.5mm HB) for fine details
- Kneaded eraser
- Blending stumps (tortillons) in various sizes
- Soft tissue or chamois cloth for broad blending
- Pencil sharpener
Step 1: Laying the Proportions
-
Establish the head shape:
Begin with a sharpened HB pencil. Lightly sketch a large, slightly tilted oval shape to represent the baby’s head. Keep your hand loose and avoid pressing hard into the paper. -
Map facial guidelines:
Draw intersecting guidelines to place the features. Since the baby is looking up and to the left, curve the horizontal eye line higher on the face and shift the vertical center line slightly to the left. -
Place key features:
Mark the position of the eyes along the horizontal line. Position the small button nose just below the intersection, and the mouth slightly below that, keeping the spacing compact to emphasize the baby’s large forehead. -
Refine the outline:
Carefully trace the contour of the chubby cheeks, the chin, and the ear on the right side. Notice how the cheek creates a soft bulge that slightly overlaps the ear’s position.
Step 2: Rendering the Eyes and Nose
-
Outline the eyes:
Switch to a 2B pencil. Define the almond shape of the eyes. Remember, the eye on the left will appear slightly more compressed due to the angle. -
Add pupils and irises:
Draw the circular iris and the dark pupil in the center. Crucially, leave a small, bright white circle in both eyes for the catchlight to bring them to life. -
Detail the lashes and brows:
Using a sharp mechanical pencil, flick tiny, curved lines for the eyelashes. Sketch soft, feathery strokes for the eyebrows, following the natural arch of the brow bone. -
Shade the nose:
Define the nostrils with small, dark shapes using a 4B pencil. Gently shade around the bottom of the nose to create roundness, avoiding harsh outlines for the bridge.
Soft Touch Secret
Use the “dirty” blending stump (one with leftover graphite) to shade delicate areas like the upper lip or eyelids. It prevents harsh lines.
Step 3: Building Form with Soft Shading
-
Apply base shading:
Using a 2B pencil held at a low angle, lay down a light layer of graphite on the shadowed side of the face (the right side) and under the chin. -
Blend for smoothness:
Take a blending stump or tissue and gently rub the graphite to create a seamless skin texture. I find circular motions work best here to eliminate pencil strokes. -
Sculpt the cheeks:
Layer darker values (4B) under the cheekbones and along the jawline to pop the chubby cheeks forward. Keep the top of the cheeks light where the light hits. -
The mouth and chin:
Define the upper lip with a definitive M-shape and shade the lower lip to look plump. Add a deep shadow underneath the lower lip to separate it from the chin. -
Neck folds:
Draw the creases of the neck using curved lines. Shade deeply within the folds using a 6B pencil and blend outwards to soften the transition.
Muddy Shading?
If skin looks dirty, you’re pressing too hard or over-blending deep graphite. Lift excess with a kneaded eraser and re-layer lightly.
Step 4: Hair and Clothing Details
-
Sketch hair direction:
With an HB pencil, map out the hairline. Babies often have fine hair, so use quick, light strokes that sweep backward from the forehead. -
Darken hair strands:
Go over the hair with 2B and 4B pencils, adding density near the roots and keeping the ends wispy. Don’t color a solid block; individual strands look more realistic. -
Outline the collar:
Sketch the simple round collar of the garment. Add a small button detail on the chest area. -
Texture the fabric:
Add tiny stippling dots or small circles on the collar to suggest a patterned fabric. Keep the shading on the clothes very light to contrast with the face.
Step 5: Final Refinements
-
Deepen contrast:
Scan the drawing for areas that need more depth—usually the pupils, nostrils, and neck creases. Strengthen these with your darkest pencil (6B). -
Lift highlights:
Use a clean edge of your kneaded eraser to tap and lift pigment from the tip of the nose, the highest part of the cheeks, and the forehead. -
Clean up:
Erase any stray smudge marks from the background paper to keep the portrait looking crisp and professional.
Step back and admire the gentle expression you’ve captured on paper

PENCIL GUIDE
Understanding Pencil Grades from H to B
From first sketch to finished drawing — learn pencil grades, line control, and shading techniques.
Explore the Full Guide
Tiny Hands Grasping a Finger

Capture the delicate serenity of a sleeping infant with this realistic graphite pencil study. By focusing on soft shading and precise proportions, you’ll create a tender keepsake that renders soft skin textures and fine hair with startling clarity.
How-To Guide
Materials
- High-quality drawing paper (smooth or vellum finish, heavyweight)
- Graphite pencils (H, HB, 2B, 4B, 6B)
- Mechanical pencil with 0.5mm HB lead (for fine details)
- Kneaded eraser
- Precision eraser (stick or mono zero style)
- Blending stumps (tortillons) or soft tissue
- Reference photo of a sleeping baby in profile
- Ruler
- Fixative spray
Step 1: Initial Sketching
-
Establish the curve:
Begin by lightly sketching the large C-curve of the baby’s posture. This sleeping pose naturally curves the spine and tucks the chin, so use faint strokes to map out where the head, shoulder, and swaddled body will rest on the page. -
Map the head shape:
Using an H pencil, draw the oval shape of the cranial mass. Newborns have larger heads in proportion to their bodies, so ensure this oval is prominent. Mark the eye line slightly below the vertical center of the face. -
Place features:
Lightly indicate the position of the ear, the closed eyelid, the small button nose, and the mouth. Keep these lines incredibly faint; baby features are defined more by shadows than by hard outlines. -
Sketch the hand:
Outline the tiny fist resting near the cheek. Pay attention to the knuckles and how they press into the soft skin of the face, but keep the shapes geometric and simple for now.
Mastering Softness
Avoid hard outlines on the face. Instead, let the edge of a shadow define the edge of the cheek or nose to keep the ‘baby’ look realistic.
Step 2: Refining Features
-
Define the ear:
Switch to an HB pencil to detail the ear. Newborn ears have complex cartilage folds but are soft. Shade the inner recesses darker (2B) to create depth without drawing hard black lines around the rim. -
Draw the sleeping eye:
The closed eye is a crescent shape. Shade the crease of the eyelid gently. I find that avoiding a hard line for the eyelashes and instead using short, feathery tapered strokes creates a much more natural look. -
Nose and mouth soft shading:
Shade the bottom of the nose and the nostril. For the lips, focus on the center line where the lips meet, keeping the upper lip slightly darker than the lower lip. -
Render the hair:
Use the mechanical pencil to draw fine, wispy hairs. Follow the growth pattern from the crown forward. Keep strokes light and varied in length to mimic the downy texture of baby hair.
Step 3: Shading and Texture
-
Build skin tone:
Using a 2B pencil and a light touch, apply a base layer of shading to the face. Focus on the roundness of the forehead and cheek. Use the side of the lead to avoid scratchy lines. -
Blend for softness:
Take a blending stump or tissue and gently buff the graphite into the paper. Baby skin needs to look flawless, so blend until the grain of the paper is minimized, being careful not to smudge your crisp details. -
Deepen the shadows:
Use a 4B pencil to darken the areas behind the ear, under the chin, and in the folds of the neck. This high contrast will make the lighted areas of the face pop forward. -
Highlighting with eraser:
Use the kneaded eraser to lift pigment off the high points: the tip of the nose, the curve of the forehead, the top of the cheekbone, and the rim of the ear.
Smudge Control
Place a scrap sheet of paper under your drawing hand. This prevents natural hand oils and friction from smearing your delicate skin shading.
Step 4: Clothing and Final Details
-
Outline clothing folds:
The clothing or swaddle creates soft, organic mountains and valleys. Sketch these folds loosely around the arm and chest area using your HB pencil. -
Shade the fabric:
Fabric texture differs from skin. Use cross-hatching or slightly rougher shading here to differentiate the material. Deepen the crevices of the folds with a 4B or 6B pencil. -
Refine the hand details:
Return to the hand near the face. Add shading between the fingers and define the fingernails with the fine point of your mechanical pencil. -
Cast shadow:
Add a soft shadow beneath the baby’s head and body on the bedding surface. This grounds the subject so they don’t look like they are floating in white space. -
Final assessment:
Step back and look at your tonal values. If the drawing looks too gray, use your 6B to punch up the darkest darks, and your precise eraser to clean up the brightest whites.
Once you’ve sealed the graphite with fixative, frame it with a wide white mat to emphasize the peaceful subject.
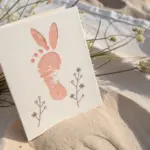
Baby Feet Close-Up
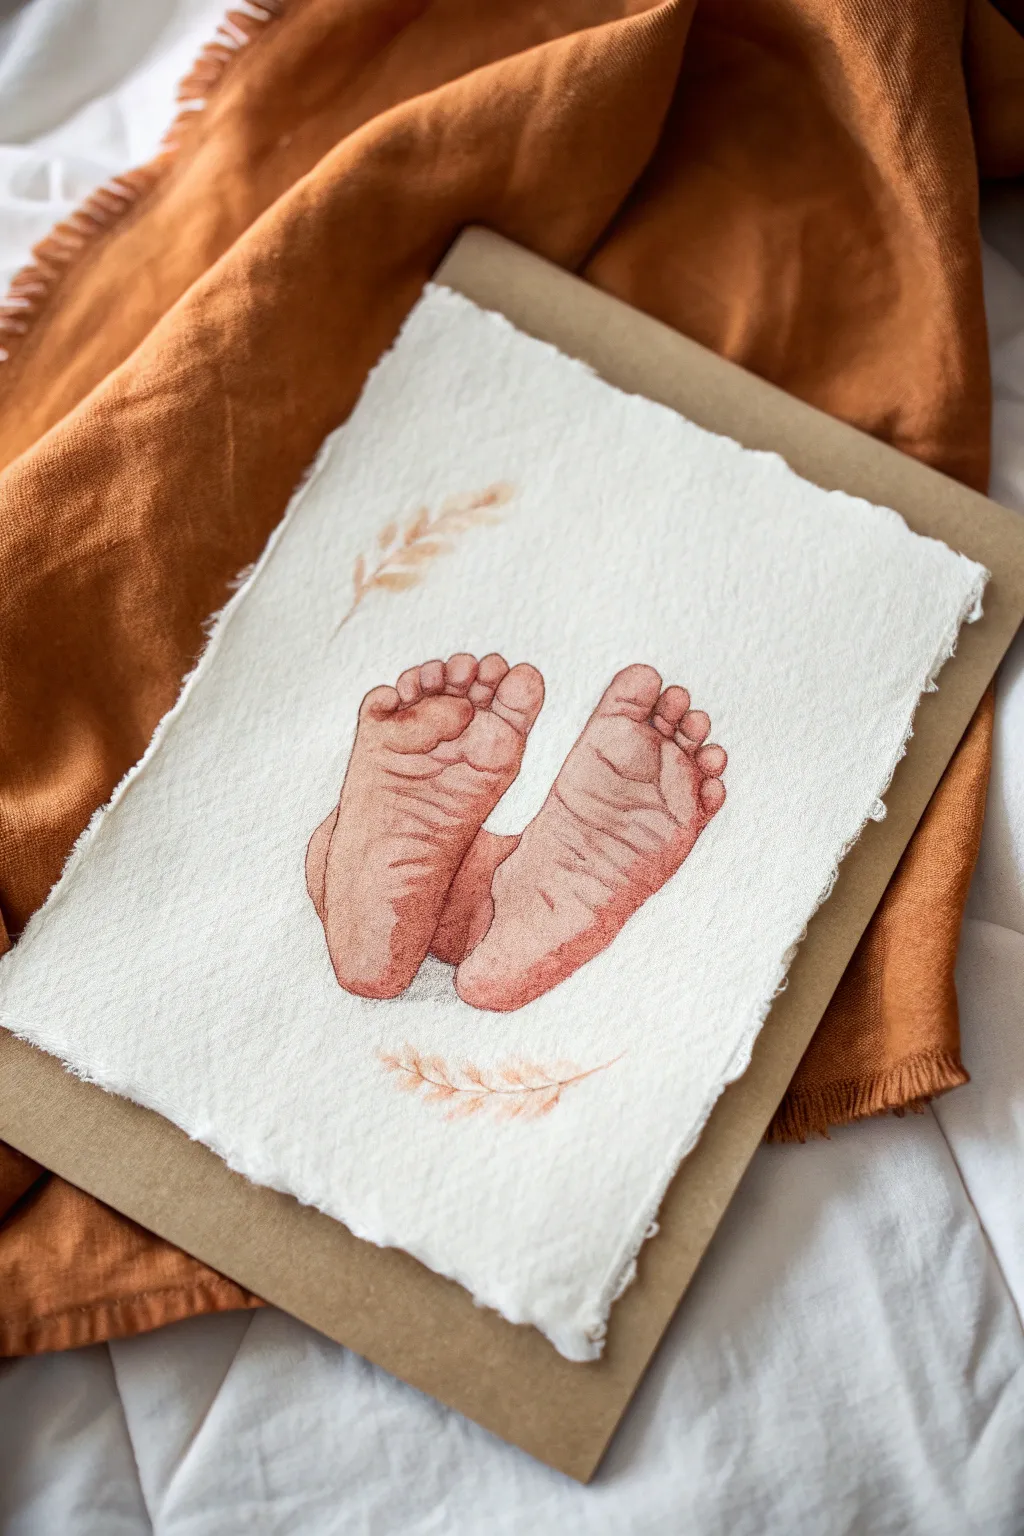
Capture the fleeting tininess of a newborn with this exquisitely detailed mixed-media drawing. Using textured handmade paper and a combination of watercolor and colored pencil creates a soft, nostalgic keepsake that feels as precious as the subject itself.
Detailed Instructions
Materials
- Heavyweight handmade cotton rag paper with deckled edges
- Pencil (HB or 2H)
- Kneaded eraser
- Watercolor paints (Burnt Sienna, Alizarin Crimson, Yellow Ochre, Burnt Umber)
- Small round watercolor brushes (Size 0 and 2)
- Colored pencils (wax or oil-based in terracotta, warm grey, and dark brown shades)
- Watercolor mixing palette
- Reference photo of baby feet
- Backing board (cardboard or sturdy cardstock)
Step 1: Sketching the Foundations
-
Prepare your surface:
Begin by selecting your handmade paper. Since this paper can be delicate to erase on, tape the corners gently to a flat surface or backing board to keep it stable while you work. -
Lightly outline the shapes:
Using an HB or 2H pencil, sketch the basic rounded triangular shape of the heels and the widening curve towards the toes. Keep your lines incredibly faint, as you want them to disappear under the paint. -
Define the toes:
Add the five distinct circles for the toes on each foot. Observe your reference photo closely—baby toes often curl or overlap slightly, which adds realism to the drawing. -
Mark the major creases:
Lightly map out the deepest wrinkles on the soles. Baby feet act like little maps; draw the main horizontal lines across the sole and the vertical arch lines without pressing hard.
Rough Paper Texture?
Handmade paper is bumpy! Use a sharp pencil and light circular motions. If the pencil skips too much, try an oil-based pencil which glides smoother than wax
Step 2: Watercolor Washes
-
Mix a skin tone base:
Combine a heavily diluted Burnt Sienna with a touch of Yellow Ochre. You want a very pale, watery tea-colored wash for the initial layer. -
Apply the first wash:
Gently paint the entire foot shape with your size 2 brush. The handmade paper is thirsty, so work efficiently to avoid hard edges. Let this layer dry completely. -
Deepen the shadows:
Mix a slightly stronger version of your base color, adding a microscopic dot of Alizarin Crimson for warmth. Apply this to the shadowed areas: the arch, directly under the toes, and the sides of the heels. -
Soften the transitions:
While the shadow paint is still damp, use a clean, slightly wet brush to feather the edges, blending the darker tone back into the lighter base layer for a soft, round look. -
Add the botanical accents:
Using a very dilute Yellow Ochre or pale brown, freely paint two simple wheat sprigs—one above the left foot and one below the right. Keep these loose and impressionistic so they don’t distract from the main subject.
Step 3: Refining with Pencil
-
Start the texture work:
Once the paint is bone dry, take a terracotta or rust-colored pencil. Sharpen it to a fine point and begin tracing the major wrinkles you mapped out earlier. -
Detail the wrinkles:
I prefer to use short, broken strokes rather than continuous lines for wrinkles. This mimics the natural texture of skin. Focus on the deep creases in the center of the sole. -
Enhance the toes:
Use the colored pencil to outline the bottom of each toe and the little creases between them. A tiny bit of circular shading on the pads of the toes will make them look plush and round. -
Add depth with brown:
Switch to a dark brown or warm grey pencil. Go back into the very deepest crevices only—like the spaces where toes touch or the deepest arch folds—to add high-contrast definition. -
Shade the perimeter:
Lightly shade the outer edges of the feet with the terracotta pencil to emphasize the rounded form, fading your pressure as you move toward the center of the foot. -
Stipple for skin texture:
Gently tap or stipple your pencil in the shadowed areas (like the heel). The texture of the paper combined with dotting creates a convincing skin-pore effect. -
Final highlights:
If you lost any highlights, you can use a white charcoal pencil or a touch of white gouache to reclaim the brightest spots on the heel and ball of the foot. -
Mounting the art:
Carefully remove any tape. Place your finished handmade page onto a sturdy cardboard backing or within a floating frame to showcase those beautiful deckled edges.
Make it Personal
Instead of generic wheat sprigs, write the baby’s name, birth date, and weight in delicate calligraphy along the curve of the drawing
Display this delicate artwork in a nursery or keep it safe in a memory box for years to come
BRUSH GUIDE
The Right Brush for Every Stroke
From clean lines to bold texture — master brush choice, stroke control, and essential techniques.
Explore the Full Guide
Knit Beanie or Sun Hat Baby
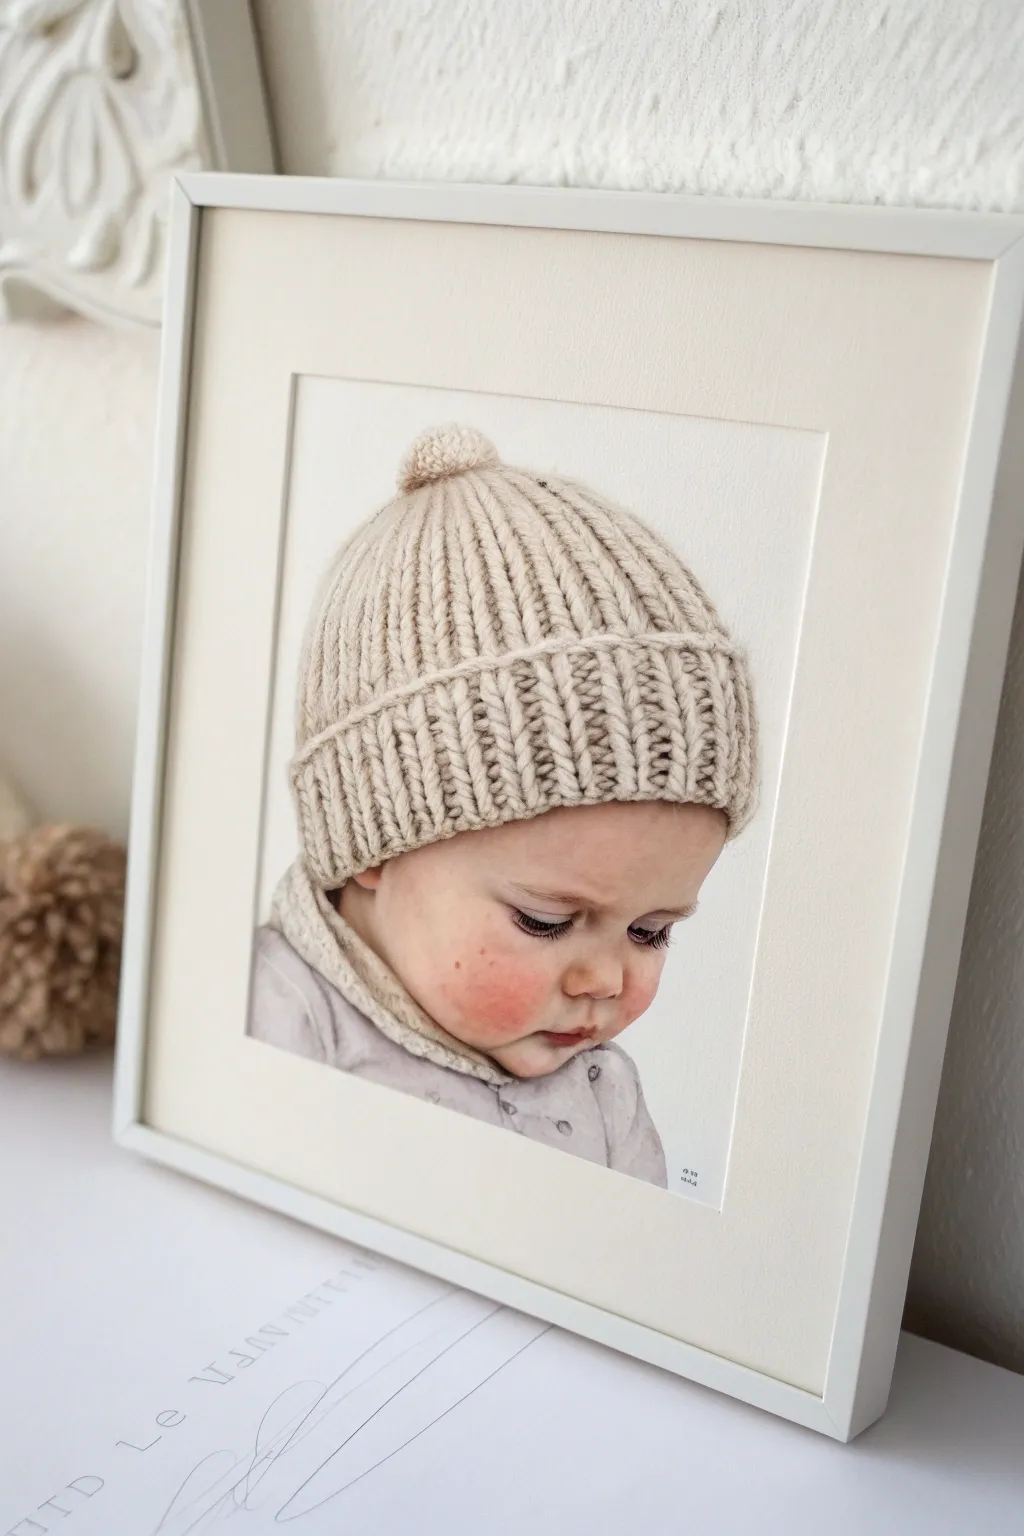
Capture the delicate softness of infancy with this realistic colored pencil drawing of a baby in a chunky knit beanie. Focusing on tactile textures, this project balances the coarse weave of wool with smoothly blended skin tones for a heartwarming portrait.
How-To Guide
Materials
- Heavyweight drawing paper (Bristol Vellum or Hot Press Watercolor paper)
- Graphite pencil (HB or H) and kneaded eraser
- High-quality colored pencils (wax or oil-based)
- Colorless blender pencil or blending stump
- Burnishing tool (optional)
- White gel pen or gouache for highlights
- Pencil sharpener
Step 1: Sketching the Foundation
-
Outline the Composition:
Begin with a light graphite sketch outlining the baby’s head shape. Draw a large, rounded dome for the hat and a smaller, softer curve for the face peeking out underneath. -
Map Facial Features:
Lightly mark the placement of the eyes, nose, and mouth. Since the baby is looking down, the eyes will appear as heavy lids with lashes, and the nose will be a small button shape. -
Define the Hat Texture:
Sketch the prominent vertical ribs of the beanie. Instead of straight lines, use slightly wavy, interlocking ‘V’ shapes to mimic the knit stitches, paying attention to how they curve around the roundness of the head. -
Add the Cuff and Pom-Pom:
Draw the folded cuff at the bottom of the hat with wider, horizontal-running textural marks. Sketch a rough, fluffy circle at the very top for the pom-pom.
Wool Texture Tip
Don’t draw every single strand of yarn. Suggest the texture with ‘C’ shaped strokes in shadow areas and let the viewer’s eye fill in the rest of the detail.
Step 2: Rendering Skin Tones
-
Base Skin Layer:
Start with a very light wash of cream or pale peach across the entire face. Keep your pencil pressure light to allow for layering. -
Building Shadows:
Use a light brown or darker beige to shade under the hat’s brim, the side of the nose, and the crease of the cheek. Soften the edges immediately with a blending stump. -
Adding Rosy Cheeks:
Layer a soft pink or coral color onto the cheeks and the tip of the nose. Start from the center of the flush and fade outward to create a natural glow. -
Refining Features:
Use a sharp dark brown or charcoal pencil (avoid pure black) to define the eyelashes and the line of the mouth. Add small, individual strokes for the lashes. -
Blending the Skin:
Go over the skin areas with a colorless blender or a white pencil to smooth out the grain of the paper, creating that creamy, baby-soft texture.
Soft Focus Background
Add a very light, blurry background using a pastel stick or powdered graphite. This mimics portrait photography and pushes the detailed drawing forward.
Step 3: Creating the Knit Texture
-
Base Hat Color:
Apply a base layer of oatmeal or light beige to the entire hat area. Follow the direction of the knit ribs with your strokes. -
Defining the Ribs:
Using a slightly darker taupe or warm grey, draw the shadows between each rib of the knitting. This creates the illusion of depth and separates the stitches. -
Creating Stitch Detail:
Inside each rib, use small, repetitive curved strokes to suggest the yarn’s twisted texture. I find varying the pressure here helps mimic the unevenness of natural wool. -
Shading the Cuff:
Darken the area under the fold of the cuff and where the hat meets the forehead to ground the object. This shadow is crucial for making the hat look three-dimensional. -
Pom-Pom Texture:
Use short, scribbly, circular motions with beige and light brown to create the fuzzy texture of the pom-pom. Leave plenty of paper white showing through for highlights.
Step 4: Final Details
-
Deepen Contrast:
Revisit the darkest areas—shadows in the knit, under the chin, and eyelashes—and deepen them with your darkest brown pencil to make the image pop. -
Clothing Hints:
Lightly sketch the baby’s collar or coat using soft greys or lavenders. Keep this area looser and less detailed to keep the focus on the face and hat. -
Textural Highlights:
Use a white gel pen or sharp white pencil to pick out the highest points of the knit ribs and the gloss on the baby’s lip. -
Final Cleanup:
Erase any stray graphite lines or smudges around the drawing. If desired, sign your work discreetly in the corner.
Frame your finished piece in a simple mat to highlight the gentle warmth of your drawing
Sitting Baby Reaching for a Toy
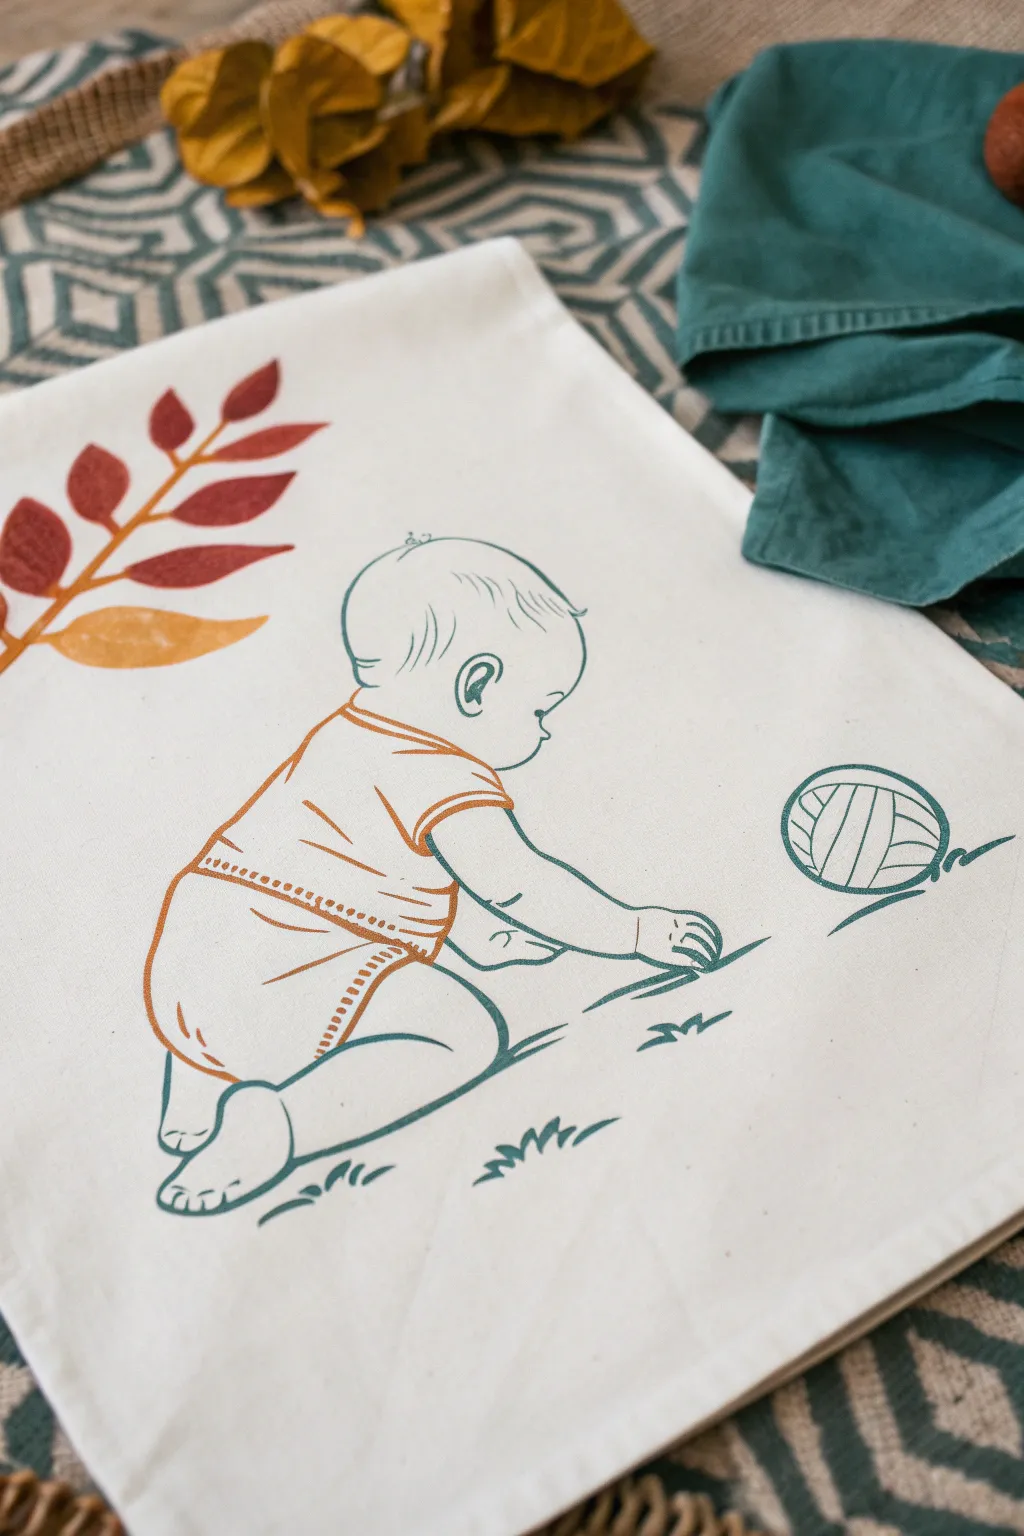
Capture the sweet curiosity of infancy with this minimalist line art design printed onto fabric. Featuring a sitting baby reaching for a rolling ball, this project uses earthy teal and terracotta tones to create a vintage storybook aesthetic.
Detailed Instructions
Materials
- Cotton canvas tote bag or tea towel (off-white/cream)
- Fabric markers (Teal/Sage Green and Terracotta/Burnt Orange)
- Pencil (HB or lighter)
- Eraser
- Iron
- Cardboard or cutting mat (to place inside the fabric)
- Printed reference image or stencil (optional)
- Fine-tip black fabric pen (optional for initial outlines)
Step 1: Preparation & Sketching
-
Prepare your canvas:
Start by washing and drying your chosen fabric item without fabric softener to remove any sizing, then iron it perfectly flat to ensure smooth lines. -
Protect the layers:
I always slip a piece of stiff cardboard or a cutting mat inside the tote bag or under the tea towel layer to prevent ink from bleeding through to the other side. -
Plan the composition:
Visualize where the baby will sit; remember to leave room for the ball on the right and the leafy branch on the left. -
Draft the head:
Using a very light pencil touch, sketch a rounded profile for the baby’s head, defining the gentle curve of the cheek and a small ear. -
Sketch the body posture:
Draw the torso leaning slightly forward, with one arm extending out toward the ground and the legs bent underneath in a crawling/sitting position. -
Add the diaper and shirt details:
Lightly sketch the lines of the t-shirt sleeve and the waistband of the diaper or bloomers, adding gentle creases where the fabric would naturally fold. -
Outline the surroundings:
Sketch a simple round ball to the right of the baby’s hand and a few jagged grass marks underneath to ground the figure. -
Draft the decorative branch:
On the upper left, lightly draw a stem with several simple, almond-shaped leaves extending outward.
Steady Hand Trick
If you are nervous about drawing directly on fabric, tape your reference image behind the fabric and treat the cloth like tracing paper against a bright window.
Step 2: Inking the Design
-
Start the teal linework:
Take your teal or sage green fabric marker and carefully trace over your pencil lines for the baby’s skin—the head, arm, and legs. -
Detail the face and hair:
Use the very tip of the teal marker to add fragile wisps of hair on top of the head and the small details inside the ear. -
Ink the surroundings:
Continue using the teal color to outline the ball and the small grass tufts on the ground. -
Add motion lines:
Draw small, curved accent lines next to the ball and under the hand to suggest movement and contact with the ground. -
Switch to terracotta:
Pick up your burnt orange or terracotta marker to define the baby’s clothing; trace the t-shirt, sleeve hem, and diaper details. -
Detail the clothing trim:
Add small dashed lines or dots along the diaper waistband and leg openings to mimic stitching or elastic gathering. -
Color the leaves:
Use the terracotta marker to outline the stem and leaves on the left. You can fill them in solidly for a bold look or leave them as outlines. -
Add leaf variety:
For visual interest, color the bottom-most leaf in yellow mustard or a lighter orange if you have one, or simply leave it lighter in saturation.
Make it Personal
Customize the design by writing the baby’s name in a matching teal script font underneath the grass line or swapping the ball for a rattle.
Step 3: Finishing Touches
-
Erase guidelines:
Wait at least 30 minutes for the ink to fully set, then gently erase any visible pencil marks, being careful not to drag the eraser across wet ink. -
Heat set the design:
Once completely dry, follow your fabric marker’s instructions to heat set the ink, usually by ironing the reverse side of the fabric for several minutes.
Enjoy your beautiful, custom-printed fabric art piece that captures a fleeting moment of childhood.


Crawling Baby With Diaper Bum
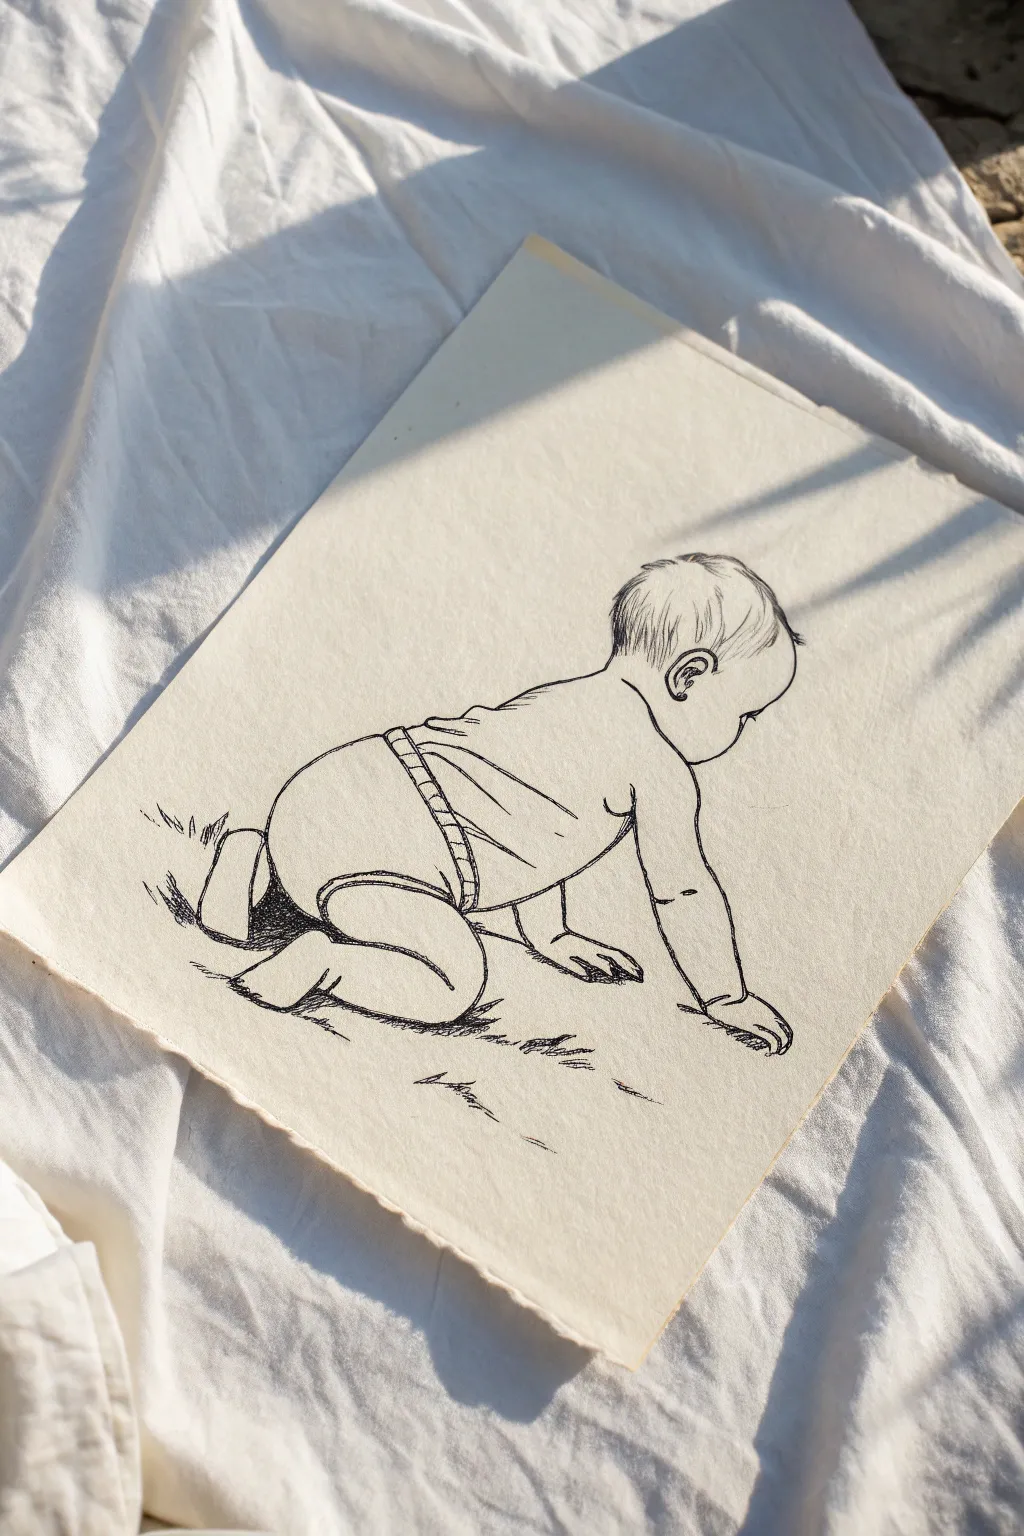
Capture a sweet moment of early movement with this delicate line drawing of a crawling baby. Using fine ink pens on textured, cream-colored paper creates a vintage, sketchbook aesthetic that perfectly suits the nostalgic subject matter.
How-To Guide
Materials
- Cream-colored heavy drawing paper (cotton rag or deckled edge preferred)
- HB graphite pencil
- Kneaded eraser
- Fine liner pen (0.1mm, black)
- Fine liner pen (0.3mm or 0.5mm, black)
- Ruler (optional for proportions)
Step 1: Sketching the Basic Forms
-
Establish the head:
Start by drawing a soft variety of an oval shape for the baby’s head on the right side of your paper. Keep your pencil pressure very light so you can erase later. The forehead should bulge slightly, dipping in for the nose area. -
Map the body orientation:
From the base of the head, draw a gentle diagonal line sloping downwards to the left to represent the spine and back. Imagine a bean shape connecting the head to the diaper area. -
Outline the diaper bum:
At the end of your diagonal line, sketch a large, rounded shape for the diaper. This should be the most prominent curve, emphasizing the ‘bum in the air’ posture typical of crawling babies. -
Position the limbs:
Sketch simple cylindrical shapes for the arms reaching forward. The right arm should be straighter and supporting weight, while the left arm (partially hidden) is slightly bent. Add rough ovals for the bent knees tucked under the diaper area.
Step 2: Refining the Pencil Sketch
-
Define the face profile:
Carefully refine the profile. Draw a small, button nose, slightly parted lips, and a rounded chin. Place the ear fairly low on the head, sketching a simple ‘C’ shape with inner details. -
Add hair and neck details:
Sketch the hairline starting from the forehead and going behind the ear. Don’t draw individual strands yet; just map out the shape of the hair growth. Add a small fold of skin at the back of the neck where the head tilts up. -
Detail the diaper and shirt:
Draw the waistband of the diaper, adding a slightly ruffled texture. Sketch the hem of the t-shirt riding up the back, showing a bit of the belly side. Add wrinkles in the fabric where the body bends. -
Refine hands and feet:
Shape the visible hand, ensuring the fingers are spread slightly for balance. For the feet, focus on the curve of the heel and the toes gripping the ground. The foot closest to the viewer is tucked under, so you mainly see the sole and heel.
Drawing Pro-Tip
Keep the hand holding the pen loose. If you grip too tightly, the lines become stiff. For babies, you want soft, fluid curves to mimic their
Step 3: Inking the Illustration
-
Begin the outline:
Switch to your 0.3mm fine liner. Start tracing your pencil lines with confident, smooth strokes. I prefer to start with the back and diaper area to establish the flow of the drawing. -
Ink the face accurately:
Use the 0.1mm pen for the face. The thinner line weight is crucial here to keep the features soft and baby-like. Be very careful with the eye—it’s just a small curve for the eyelid and lashes, looking downward. -
Texture the hair:
Using the 0.1mm pen, use short, flicking strokes to create the hair. Follow the curve of the skull. Leave the crown of the head lighter to suggest a soft sheen or highlight. -
Add clothing folds:
Return to the 0.3mm pen for the clothing. Add small hatch marks on the diaper waistband to suggest the elastic texture. Draw creases in the shirt near the armpit and waist to show movement.
Level It Up
For a true vintage look, gently tear the edges of your paper against a ruler before drawing, or dip a wet brush along the edge and tear for a soft deckle effect.
Step 4: Shading and Finishing
-
Create depth with hatching:
Identify where the shadows fall—under the tummy, beneath the diaper, and under the chin. Use diagonal hatching lines with the 0.1mm pen to create these shadows. -
Ground the figure:
Draw scribbly, grass-like strokes underneath the knees and hands. This suggests the baby is on a surface like a rug or grass, rather than floating in space. Make the shadows darker directly under the contact points. -
Strengthen the contour:
go back over the main outer lines (the back, the diaper curve, the arm) with the 0.5mm pen or by doubling up your 0.3mm line. This line variation makes the drawing pop off the page. -
Erase pencil guides:
Wait at least 15 minutes to ensure the ink is completely dry. Gently roll your kneaded eraser over the entire drawing to lift the graphite without damaging the paper texture. -
Final touches:
Assess the contrast. If the crawling surface looks too light, add a few more rapid horizontal hatches to deepen the ground shadow. Add a tiny detail inside the ear connection if it feels empty.
Now you have a timeless keepsake that perfectly captures the fleeting baby stage
Baby Hugging a Teddy Bear
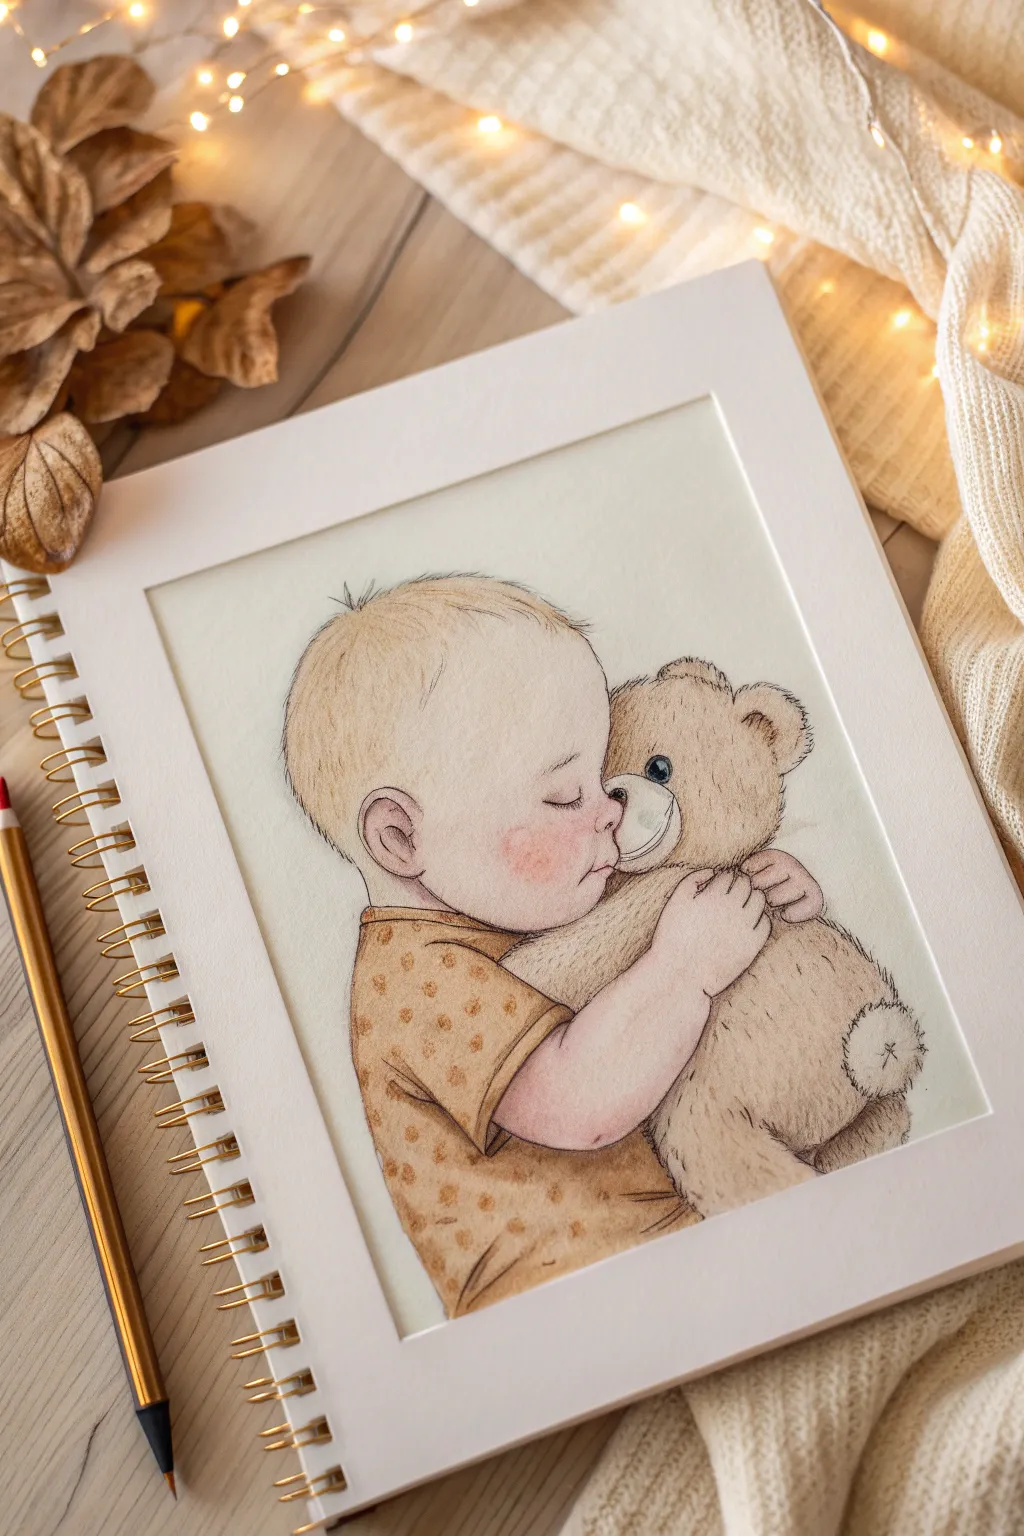
Capture the tender moment of a child’s love for their favorite toy in this soft, colored pencil illustration. This project emphasizes delicate textures, from the smoothness of baby skin to the fuzzy warmth of a classic teddy bear.
Step-by-Step Guide
Materials
- Heavyweight smooth sketchbook paper (or Bristol board)
- H or HB graphite pencil for outlining
- Kneaded eraser
- Colored pencils (Wax or oil-based preferred for blending)
- Colors: Pale peach, light pink, warm beige, ochre, soft brown, dark brown, grey, black
- White gel pen or gouache (for highlights)
- Blending stump or cotton swap
- Art masking tape (optional, to create clean border)
Step 1: Initial Sketching
-
Establish the Composition:
Start by lightly taping the edges of your sketchbook page if you want the crisp white border shown in the finished piece. Using your H pencil, draw two overlapping oval shapes: a larger one for the baby’s head and a slightly smaller one intersecting it for the teddy bear’s head. -
Outline the Features:
Refine the baby’s profile. Focus on the gentle curve of the nose pressing into the bear, the closed eyelid, and the chubby cheek. Sketch the ear low on the head, aligning roughly with the eyes. -
Define the Bear:
Draw the bear’s snout, round ears, and button nose. Make the bear’s body shapes slightly irregular to suggest fluffiness rather than smooth geometric forms. Sketch the baby’s arm wrapping around the bear’s neck and their hand gripping the fur. -
Lighten the Lines:
Once satisfied with the shapes, gently roll a kneaded eraser over the entire drawing. You want the graphite lines to be barely visible guides so they don’t dirty your light pencil colors later.
Step 2: Coloring the Baby
-
Base Skin Tone:
Using a pale peach or cream pencil, shade the entire face and arm of the baby using small, circular motions. Keep the pressure very light to allow the paper’s texture to show through slightly. -
Adding Warmth:
Layer a light pink over the cheek, the tip of the nose, and the ear. I find that applying a tiny bit of darker pink right at the corner of the mouth and the fold of the eyelid adds instant realism. -
Hair Texture:
Take a sand or light ochre pencil and flick short, wispy strokes from the forehead back toward the crown. These lines should be very fine. Add a few stray hairs sticking up at the back for a natural look. -
Refining Facial Details:
Use a warm brown to delicately define the closed eye and the curve of the ear. Do not use black here, as it will look too harsh against the soft skin. -
The Shirt Pattern:
Color the baby’s shirt with a solid ochre or mustard yellow base. Once established, use a medium brown to draw small, scattered polka dots or specks to mimic the textured fabric shown in the reference.
Pro Tip: Soft Skin
To get that ultra-smooth baby skin texture, go over your pencil layers with a colorless blender pencil or a white pencil. It burnishes the pigment without altering the hue.
Step 3: Coloring the Teddy Bear
-
Fuzzy Base Layer:
For the bear, color the main body in a warm beige. Instead of smooth coloring, use very small, tight circular scribbles (scumbling) to instantly create a nappy, fur-like texture. -
Shadows and Depth:
Take a medium brown pencil and darken the areas where the baby hugs the bear—under the chin, beneath the baby’s arm, and between the legs. Keep using that scumbling motion to maintain the texture. -
Bear’s Face:
Color the muzzle a lighter cream color. Use a dark grey or soft black for the nose, leaving a tiny spot of white paper for a highlight, or add it later with a gel pen. Draw the eye shiny and dark. -
Tail and Paws:
Add a cute detail by drawing the small round tail on the bear’s back. Use short, outward strokes to make it look extra fluffy.
Level Up: Background Magic
Add a soft, hazy background using pastel dust. Scrape a bit of blue or yellow pastel onto a scrap paper, pick it up with a cotton ball, and gently rub it around the figures.
Step 4: Final Touches
-
Deepen Outlines:
Go back over key intersections—like where the cheek meets the bear’s nose or the arm crease—with a sharper dark brown pencil to separate the forms clearly. -
Enhance the Blush:
If the baby looks too pale, lightly glaze another layer of pink or coral over the cheek area. Blend it out softly toward the ear. -
Highlights:
Use a white gel pen or a tiny dot of white gouache to add a sparkle to the bear’s eye and perhaps a tiny highlight on the baby’s nose. -
Reveal the border:
If you used masking tape, peel it away slowly at a 45-degree angle to reveal your clean, professional edge framing the sweet scene.
This heartwarming drawing is now ready to be gifted to a new parent or kept as a gentle reminder of childhood innocence
Baby With a Pacifier or Bottle
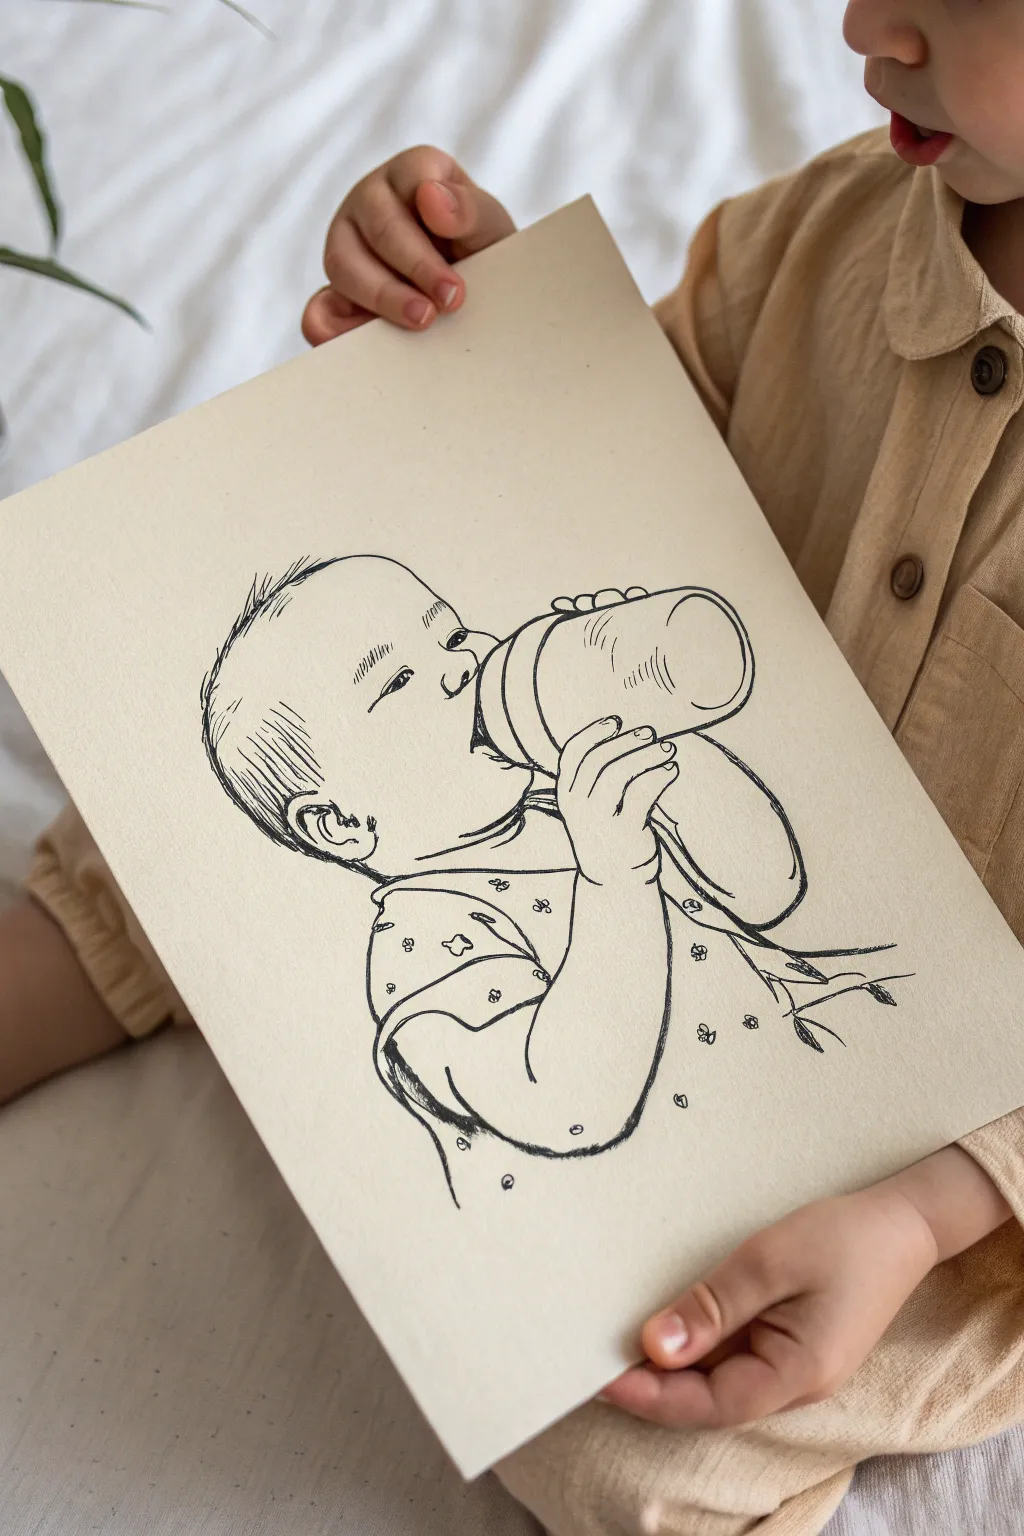
Capture the tender moment of feeding time with this sweet and simple line drawing. Using confident ink strokes, you’ll create a clean illustration of a baby enjoying their bottle, focusing on expressive facial details and natural hand positioning.
Detailed Instructions
Materials
- Heavyweight drawing paper (cream or off-white)
- HB or 2B graphite pencil (for initial sketch)
- Kneaded eraser
- Fine liner pen (0.3mm or 0.5mm, black)
- Thicker marker or brush pen (optional for varied line weight)
Step 1: Drafting the Basic Shapes
-
Outline the head shape:
Start by lightly sketching a large circle for the baby’s cranial mass. Add a slightly protruding curve on the left side to define the cheek and jawline, creating a rounded, organic profile view. -
Position the bottle:
Draw a large cylinder shape angled upward towards the baby’s mouth. Add a rounded cap at the end farthest from the face and a smaller, tapered nipple shape entering the mouth area. -
Sketch the hands:
Lightly block in the baby’s hand grasping the bottle neck. Focus on the C-shape curve of the fingers wrapping around the cylinder, positioning them close to the mouth. -
Define the body:
Extend a curved line down from the neck area to form the baby’s shoulder and arm. The arm should look relaxed but engaged, supporting the upward angle of the bottle.
Keeping Lines Fluid
Don’t lift your pen constantly. Long, confident strokes create a smoother look than short, scratchy ones, especially for the baby’s round cheeks.
Step 2: Detailing the Face and Features
-
Refine the profile:
Strengthen the lines of the forehead, nose, and lips. The nose should be a small, gentle button shape. Ensure the lips are parting slightly to accept the bottle nipple. -
Add the eye and eyebrow:
Draw the eye as a dark, elongated oval with a small highlight left white. Place a small, curved line above it for a soft eyebrow. I find that keeping the eye slightly slanted downward adds a focused, contented expression. -
Detail the ear:
Sketch the ear on the side of the head, roughly aligned with the eye and nose level. Use simple C-curves and S-curves to suggest the inner ear cartilage without overworking it. -
Texture the hair:
Add short, wispy strokes along the top and back of the head. Keep these lines sparse and directional to mimic fine baby hair, concentrating slightly more density near the hairline.
Step 3: Inking and Final Touches
-
Start the permanent outline:
Using your fine liner pen, begin tracing over your pencil lines. Start with the face, using a steady hand to create a smooth, continuous profile line. -
Ink the bottle features:
Outline the bottle, adding slight curves at the top and bottom of the cylinder to emphasize its round form. Add a few small hatched lines on the side to suggest reflection or roundness. -
Define the fingers:
carefully outline the fingers, paying attention to the knuckles and fingernails. Ensure the grip looks natural and firm around the bottle. -
Draw the clothing pattern:
On the sleeve and shoulder area, draw small, simple flower or star shapes scattered randomly. This adds a cute, decorative element to the onesie without overwhelming the drawing. -
Add line weight variation:
Go back over key areas like the jawline, the underside of the arm, and the bottle’s shadow side with a slightly thicker line. This gives the drawing volume and depth. -
Erase pencil marks:
Wait until the ink is completely dry to avoid smudging. Gently rub the kneaded eraser over the entire drawing to lift all initial graphite guidelines. -
Add final hatching:
Place very light, diagonal hatching marks under the chin and beneath the arm to cast subtle shadows. Keep these minimal to maintain the clean, illustrative style.
Wonky Bottle Shape?
If the bottle looks flat, make sure the curved lines at the cap and base match the same degree of curvature. Parallel ellipses create 3D volume.
Step back and admire your sweet illustration, perfect for a nursery decoration or a thoughtful greeting card
Bath Time Bubbles Baby Scene
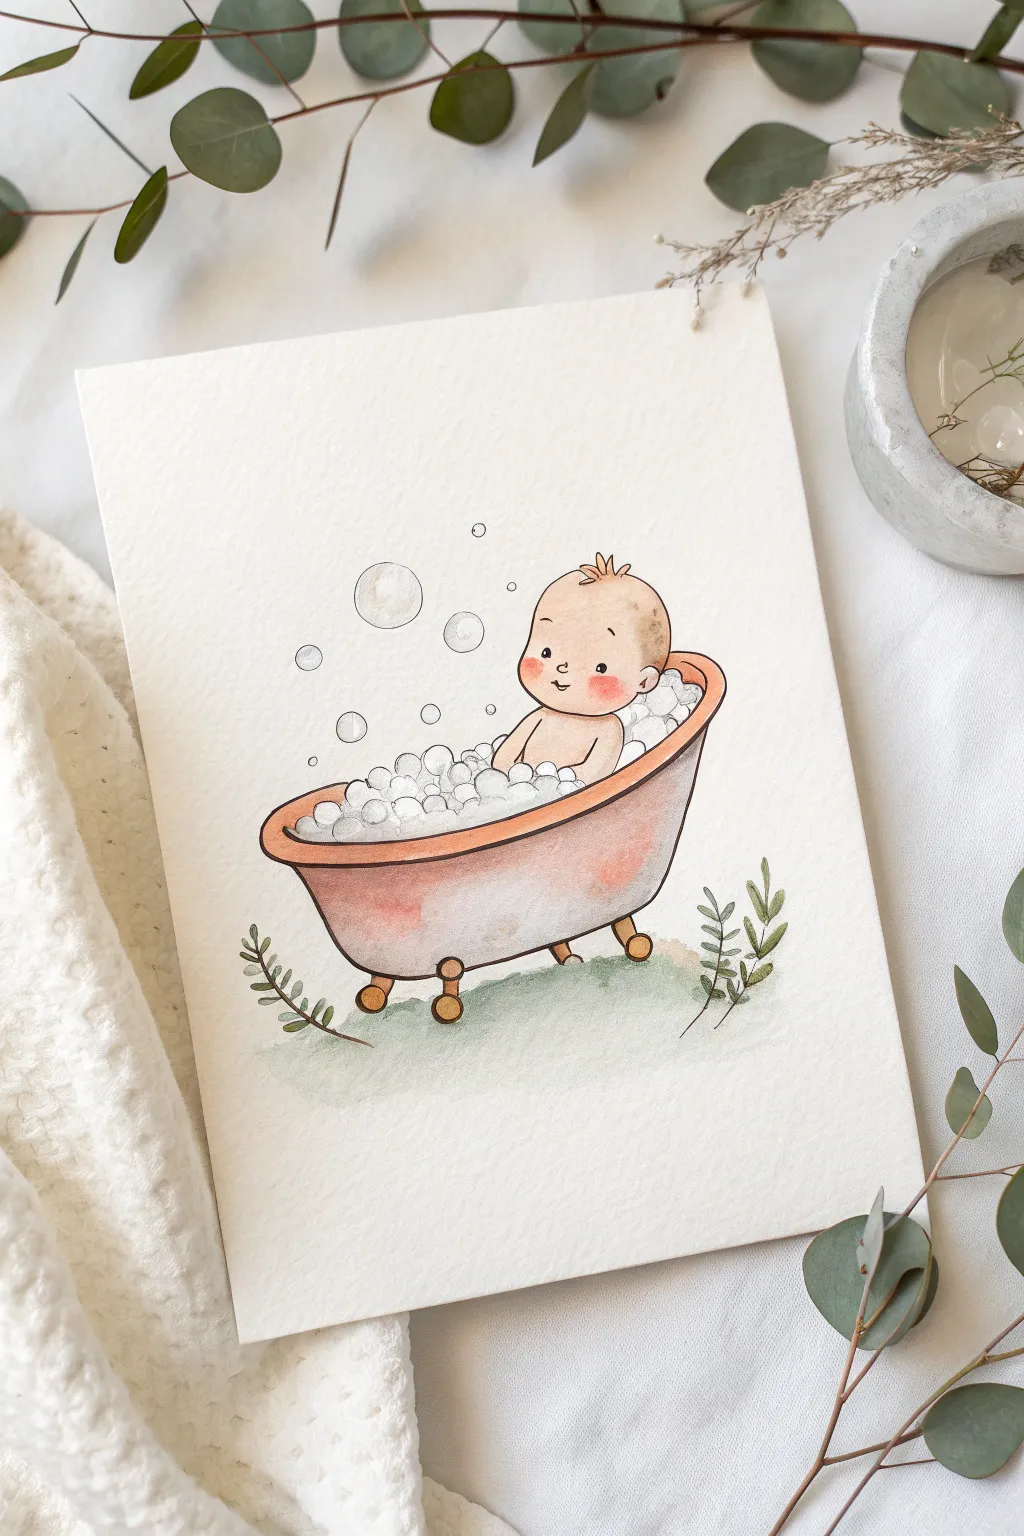
Capture the pure joy of bath time with this charming watercolor illustration featuring a happy baby in a vintage clawfoot tub. The soft washes and delicate ink lines create a gentle, classic storybook feel perfect for a nursery or greeting card.
Detailed Instructions
Materials
- Cold press watercolor paper (300 gsm)
- Waterproof fine liner pen (0.1mm and 0.3mm, black or sepia)
- Watercolor paints (Peach/Skin tone, Blush Pink, Terracotta/Burnt Sienna, Sage Green, Gray)
- Small round brushes (Size 2 and 4)
- Clean water and paper towels
- Pencil and eraser
- White gouache or white gel pen
Step 1: Sketching the Composition
-
Tub Outline:
Begin lightly with your pencil in the center of the paper. Draw a wide, shallow ‘U’ shape for the tub body and close the top with a curved rim that dips slightly in the middle to show perspective. -
Adding Feet:
Sketch four small, round feet at the bottom of the tub. The front two should appear slightly larger or lower than the back two to ground the object. -
Baby Placement:
Draw the baby nestled inside the tub. Start with a rounded square shape for the head and a small curved body. Position the baby slightly off-center for a dynamic look. -
Bubble Details:
Cluster several circles of varying sizes around the baby’s waist and spilling over the tub’s rim. Draw a few floating bubbles rising into the air above the baby’s head. -
Greenery Accents:
Sketch simple leafy sprigs on either side of the tub at the bottom, just to frame the composition gently.
Wet-on-Wet Blending
To get those delightfully soft rosy cheeks, apply the pink paint while the skin base layer is still wet. This prevents hard edges.
Step 2: Inking the Lines
-
Outline the Baby:
Using your 0.1mm waterproof pen, carefully trace the baby’s face and body. Use broken, light strokes for the hair to keep it looking soft. -
Tub and Bubbles:
Switch to a slightly thicker 0.3mm pen for the tub outline to give it weight. Ink the bubbles with very thin, incomplete circles—don’t close the loops entirely, as this suggests transparency. -
Clean Up:
Once the ink is completely dry, gently erase all your pencil guides. Be thorough so graphite doesn’t muddy your watercolors later.
Step 3: Painting the Scene
-
Skin Tones:
Mix a very watery wash of peach or pale skin tone. Paint the baby’s face and body, leaving small white highlights on the nose or forehead for dimension. -
Rosy Cheeks:
While the face is still slightly damp, dab a tiny amount of diluted blush pink onto the cheeks. Let it bleed softly into the base skin tone for a natural glow. -
The Vintage Tub:
Use a Terracotta or Burnt Sienna color for the outside of the tub. Apply the paint heavier on the bottom and sides for shadow, fading to almost clear water near the center to make the surface look curved and shiny. -
Tub Interior:
For the inside rim of the tub visible behind the bubbles, use a very pale gray wash. -
Bubble Shadows:
Bubbles aren’t white; they reflect surroundings. Use a very diluted gray-blue mix to paint tiny crescent shapes on the lower curve of each bubble. -
Golden Feet:
Paint the bathtub feet with a golden-yellow or ochre tone. A second layer of brown on the undersides adds necessary weight.
Personalize the Tub
Change the tub color to match a nursery theme! A pale robin’s egg blue or a soft vintage yellow looks just as adorable as the terracotta.
Step 4: Finishing Touches
-
Grounding the Scene:
Mix a soft Sage Green. Paint a loose, undefined patch of ground beneath the tub and color in the small leafy sprigs on the sides. -
Adding Texture:
When the tub is dry, I like to use a dry brush with a darker rust color to add slight texture or ‘age’ to the vintage tub surface. -
Highlights:
Use white gouache or a white gel pen to add a tiny ‘sparkle’ dot to the baby’s eyes and the tops of the largest bubbles.
Let your charming little painting dry completely before framing it for the nursery
Whimsical Baby on a Crescent Moon
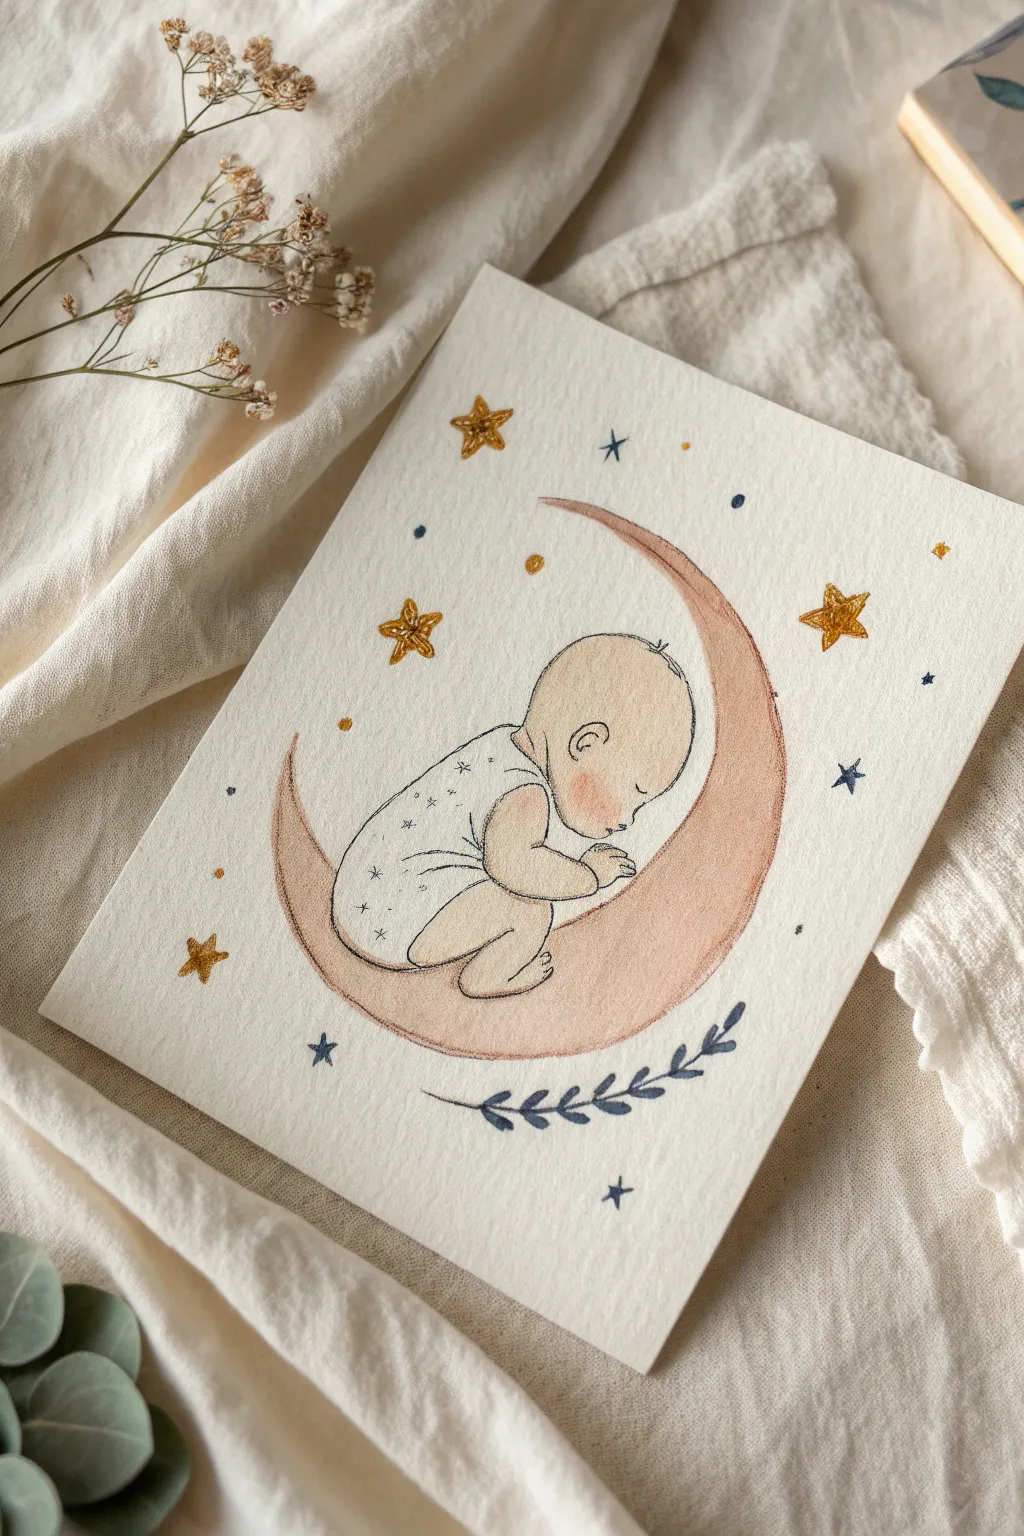
This tender illustration captures a baby snoozing peacefully on a blush-colored crescent moon, surrounded by twinkling stars. Using a combination of soft watercolors and precise ink lines, you’ll create a keepsake piece perfect for a nursery or birth announcement.
Step-by-Step
Materials
- Cold press watercolor paper (A5 size recommended)
- Pencil (HB or lighter) and eraser
- Waterproof fine liner pen (01 or 03 size, black or dark sepia)
- Watercolor paints (Peach/Skin tone, Blush Pink, Burnt Sienna, Indigo Blue)
- Gold metallic watercolor paint or gold gel pen
- Soft round brushes (sizes 2 and 4)
- Clean water and paper towel
Step 1: Sketching the Layout
-
Outline the moon:
Begin by lightly sketching a large ‘C’ shape in the center of your paper to form the crescent moon. Make the curve deep enough to cradle the baby comfortably. -
Position the baby:
Sketch the baby’s head as a rounded circle resting against the inner curve of the moon. Draw the body curled inward, with the back aligning with the moon’s curve and knees tucked up. -
Add facial details:
Lightly pencil in a small, closed eyelid, a tiny nose, and a neutral mouth. Add the ear and the little wisps of hair on top of the head. -
Draw the outfit:
Sketch a simple onesie on the body. Add faint ‘X’ or star patterns on the fabric for texture. -
Sketch surrounding elements:
Draw three five-pointed stars around the moon—two above, one to the left. Below the moon, lightly sketch a curved olive sprig with small leaves.
Uneven Skin Tone?
If the watercolor dries with hard edges on the face, use a clean, slightly damp brush to gently soften the edges while the paint is still workable.
Step 2: Inking the Lines
-
Trace the main lines:
Using your waterproof fine liner, carefully go over your pencil sketch. Use a confident, steady hand for the moon and the baby’s outline. -
Refine the details:
Ink the delicate facial features. For the hair, use short, quick flicks of the pen rather than a solid line to keep it looking soft. -
Texture the stars:
Outline the stars. If you look closely at the original, the stars have a slightly sketchy, filled-in texture, so don’t worry about making them perfect geometric shapes. -
Erase pencil marks:
Wait until the ink is completely dry—I usually give it at least five minutes to be safe—then gently erase all visible pencil lines.
Level Up: Texture
Use cold-press paper with a distinct grain. When you drag your brush lightly over it, the texture breaks up the stroke, adding a vintage feel.
Step 3: Applying Watercolor
-
Paint the skin:
Mix a very dilute wash of skin tone. Paint the face, ear, arms, and legs. Keep the wash sheer; you can always add more color later. -
Add a rosy cheek:
While the face is still slightly damp, dab a tiny amount of watered-down blush pink onto the cheek area to create a soft, diffused bloom. -
Color the moon:
Mix a soft, earthy pink or terracotta shade. Paint the crescent moon, keeping the color somewhat translucent to let the paper texture show through. -
Shade the moon:
Add a slightly darker concentration of the same pink along the bottom curve of the moon to suggest shadow and volume. -
Paint the sprig:
Use a mix of Indigo Blue and a touch of black for the leafy sprig at the bottom. Paint the leaves carefully with the tip of your brush. -
Add the stars:
Using your gold metallic paint or a gel pen, fill in the sketched stars. This adds that magical, shimmering quality to the piece.
Step 4: Final Touches
-
Scattered details:
Dip your pen or a very fine brush into dark blue or grey paint. Add tiny dots and small four-point stars scattered randomly around the composition to fill empty space. -
Enhance the onesie:
If the pattern on the baby’s outfit faded, re-dot the little stars or crosses with your fine liner. -
Define the moon:
If the moon looks too flat, add a very thin line of brown watercolor or ink along the outer edge to separate it from the background. -
Final dry:
Let the entire piece dry completely flat to prevent the paper from buckling.
Now you have a gentle, handcrafted illustration ready to frame or gift


Have a question or want to share your own experience? I'd love to hear from you in the comments below!