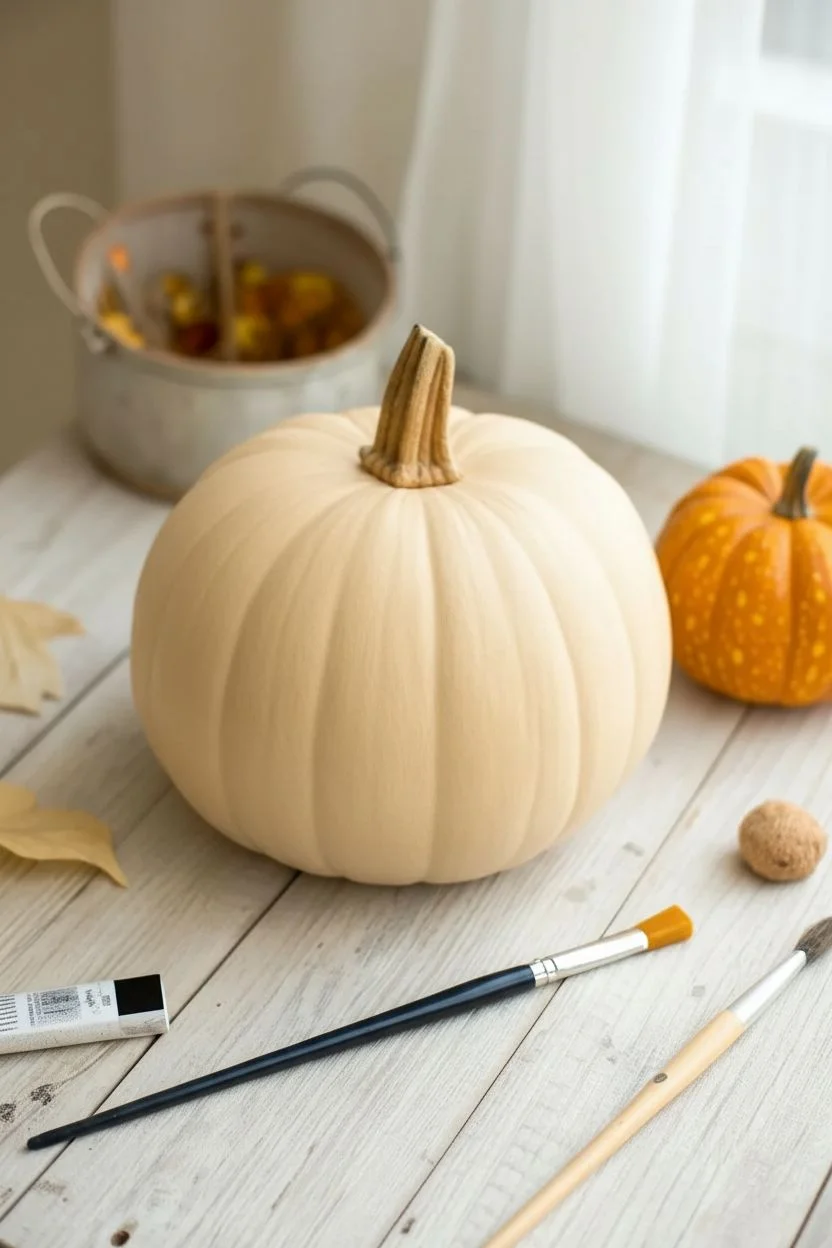
Baby pumpkins are the sweetest little canvas—no carving, no slime, just pure cuteness you can actually keep. Here are my favorite baby pumpkin painting ideas that feel safe, simple, and totally photo-worthy for First Halloween memories.
Handprint Keepsake Baby Pumpkin
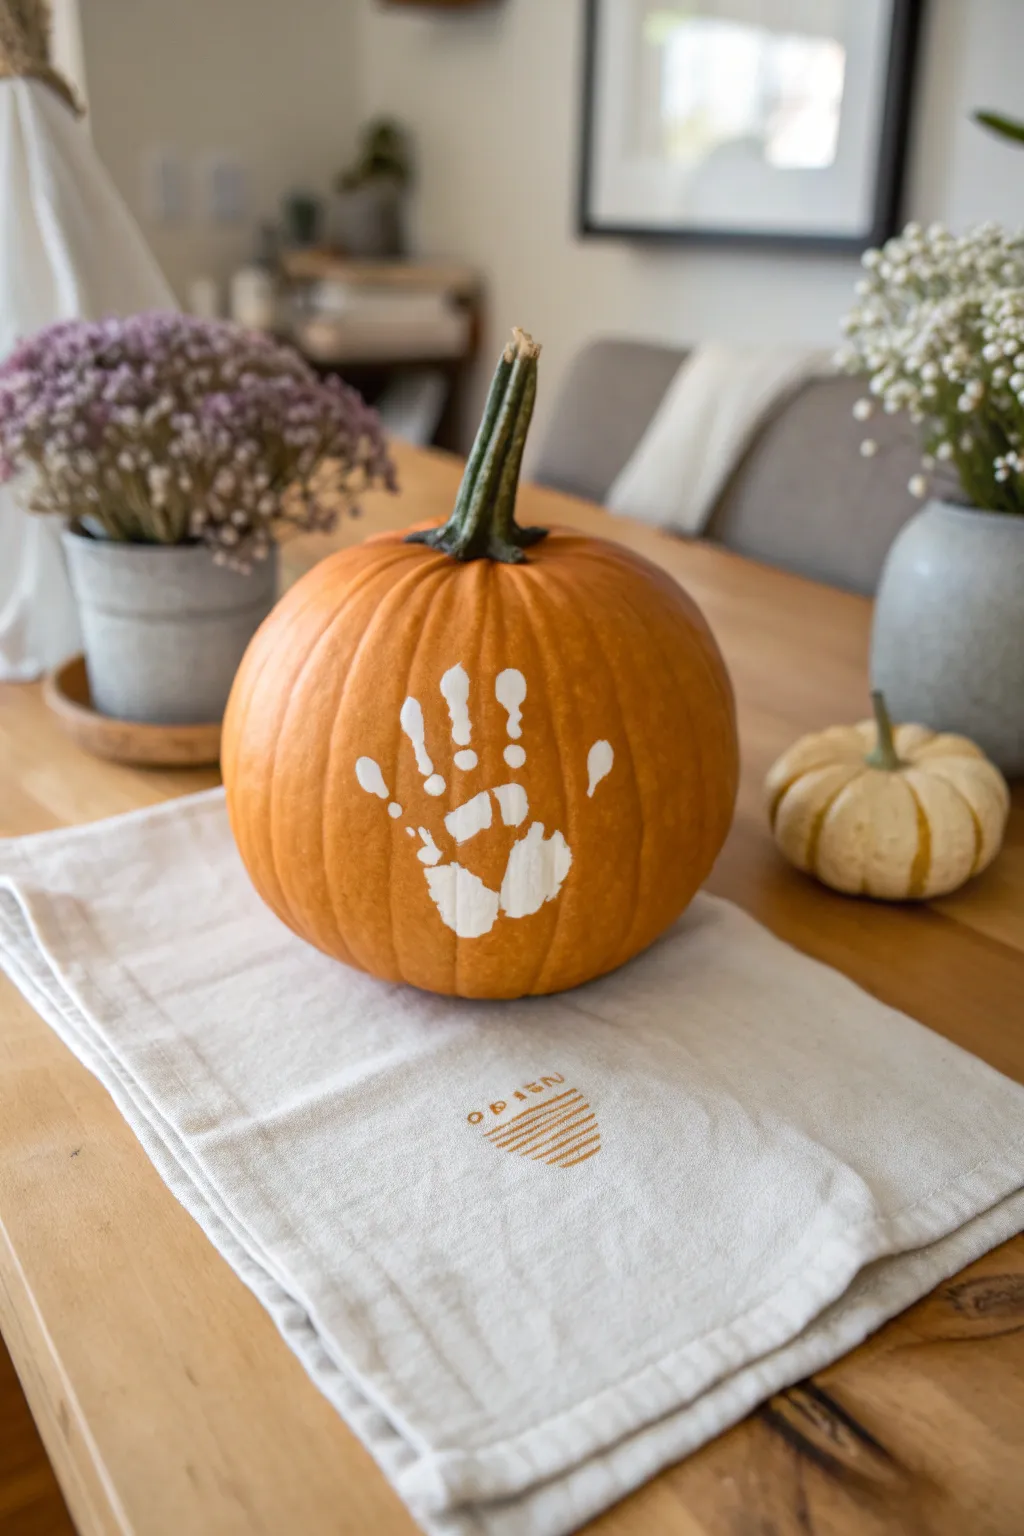
Capture a fleeting moment in time with this adorable and timeless fall keepsake. The stark white handprint against the classic orange pumpkin creates a striking, modern look that serves as a perfect seasonal memento.
How-To Guide
Materials
- Medium-sized orange pumpkin
- White acrylic craft paint (non-toxic)
- Wide foam brush or soft paintbrush
- Damp paper towels or baby wipes
- Dry lint-free cloth
- Newspaper or drop cloth
- Clear matte sealant spray (optional)
- Small artist brush (for touch-ups)
Step 1: Preparation
-
Select your pumpkin:
Choose a pumpkin with a smooth, unblemished surface. Ridges are natural, but try to find a side that is relatively flat to ensure the best possible print transfer. -
Clean the surface:
Wipe down the pumpkin’s surface with a damp cloth to remove any dirt or dust from the pumpkin patch. Paint adheres much better to a clean, dry rind. -
Dry completely:
Use a lint-free cloth to dry the pumpkin thoroughly. Even a little moisture can cause the acrylic paint to slip or bubble later. -
Set the scene:
Lay down newspaper or a drop cloth on your work surface. Since you are working with a baby, having everything within arm’s reach before paint gets involved is crucial.
Step 2: The Painting Process
-
Prepare the paint:
Squeeze a generous amount of white acrylic paint onto a paper plate or palette. -
Test the consistency:
Make sure the paint is creamy but not dripping. If it’s too thin, it won’t be opaque; too thick, and it will smudge the details of the palm. -
Capture the hand:
Hold your baby’s hand gently but firmly. It often helps to have a helper for this part—one person to hold the baby, one to manage the painting. -
Apply the paint:
Using the foam brush, apply an even coat of white paint to the baby’s entire palm and fingers. I like to work quickly here so the paint doesn’t start drying on their warm skin. -
Check coverage:
Ensure the paint covers the fingertips completely but isn’t pooling in the creases, which can create a blob rather than a print.
Sleepy Success
Is your little one too wiggly? Try doing this project while they are asleep or very drowsy. A relaxed hand opens much easier and leads to a clearer print.
Step 3: Printing and Finishing
-
Flash card practice (optional):
If you are nervous, do a quick test print on a piece of paper to get a feel for how the baby moves their hand. -
Position the hand:
Guide the baby’s painted hand toward the smooth viewing side of the pumpkin you selected earlier. -
Press firmly:
Press the palm down first, then gently uncurl and press each finger onto the pumpkin skin. A firm, rolling motion often works best on the curved surface. -
Lift carefully:
Lift the hand straight up and away from the pumpkin surface to avoid smudging the fresh paint. -
Clean up baby:
Immediately wipe the baby’s hand with baby wipes or wash it with soap and water before they touch anything else. -
Inspect the print:
Look at your transfer. If a section is slightly faint, that’s okay—it adds to the rustic charm. However, if a finger didn’t transfer at all, you can tackle that next. -
Touch up details:
Use a very small artist brush to carefully fill in any major missing gaps in the white paint, but try to keep the natural texture of the print intact. -
Allow to dry:
Let the pumpkin sit undisturbed for at least an hour until the paint is completely dry to the touch. -
Seal the memory:
Once fully dry, you can lightly spray the area with a clear matte sealant. This helps prevent the paint from chipping off as the pumpkin ages.
Add Dimension
Once the white print is dry, outline the hand with a fine-tip gold paint pen or add the baby’s name and the year underneath in modern calligraphy.
Display your charming pumpkin centerpiece with pride as a celebration of this season of life


Footprint Ghost Baby Pumpkin
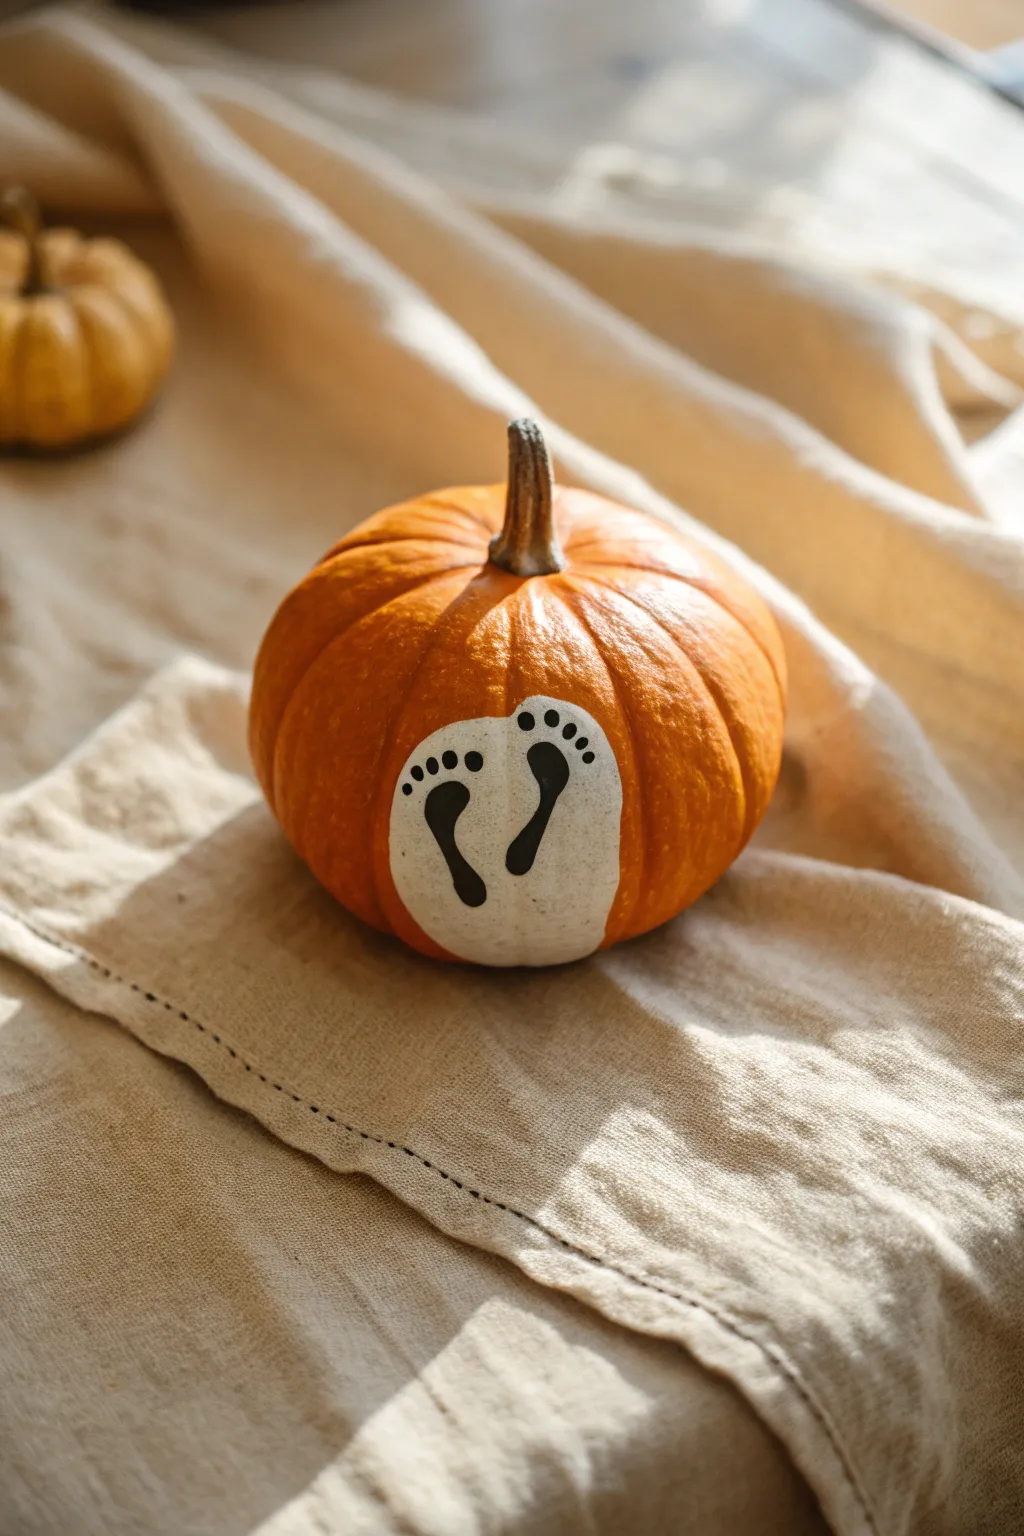

Capture the fleeting size of your little one’s feet with this adorable autumn keepsake. By turning a simple white patch into a ghostly backdrop for baby footprints, you create a charming centerpiece that’s as sweet as it is spooky.
Step-by-Step Tutorial
Materials
- Small to medium pie pumpkin (cleaned and dried)
- White acrylic craft paint
- Black acrylic craft paint
- Medium flat paintbrush (approx. 1 inch)
- Small round paintbrush for touch-ups
- Baby-safe black ink pad (optional, alternative to paint)
- Baby wipes or damp cloth (for quick cleanup)
- Pencil
- Matte spray sealer (optional)
Step 1: Preparing the Canvas
-
Clean surface:
Begin by wiping down your pumpkin with a damp cloth to remove any dirt or field dust. Dry it completely with a towel so the paint adheres properly. -
Map the shape:
Look at the front of your pumpkin and visualize where the footprints will go. Using a pencil, lightly sketch a rounded, oblong shape that is wide enough to accommodate both baby feet side-by-side. -
Adjust the outline:
Curve the top of your pencil shape slightly to mimic the rounded head of a ghost, and let the bottom curve naturally with the pumpkin’s shape.
Smudge Rescue
If the foot slides and smears the black paint, wipe it off immediately with a damp baby wipe. The dried white base coat should hold up, allowing you to retry the print.
Step 2: Painting the Ghost
-
Base coat:
Load your medium flat brush with white acrylic paint. Fill in the shape you just sketched, using smooth vertical strokes. -
Edges first:
I like to carefully outline the edge with the corner of the brush first to get a crisp line, then fill in the center. -
Let it dry:
Allow this first coat to dry for about 15-20 minutes. Acrylic dries darker and more transparent on pumpkin skin, so a second coat is usually necessary. -
Second coat:
Apply a second layer of white paint to ensure the orange rind doesn’t show through. This solid white background is crucial for the black footprints to pop. -
Full dry:
Let this white section dry completely. If it’s tacky, the footprint step will smudge the background, so patience is key here.
Make it a Ghost
Turn the footprint background into a literal ghost by painting two small black eyes and a mouth near the top of the white shape, above the heels.
Step 3: Adding the Footprints
-
Prepare the baby:
Have your black paint or ink pad ready, along with plenty of baby wipes. It helps to have a second person hold the baby while you manage the foot printing. -
Ink the foot:
Apply a thin, even layer of black paint or press the foot onto the ink pad. You want coverage, but not so much paint that it becomes slippery and slides on the pumpkin surface. -
Left foot placement:
Firmly but gently press the left foot onto the left side of the white ghost shape. Roll the foot slightly from heel to toe to capture the arch and toes. -
Lift carefully:
Lift the foot straight off the pumpkin surface to avoid smudging the print. -
Clean and repeat:
Wipe the left foot immediately. Repeat the process with the right foot, placing it parallel to the first print on the right side of the shape.
Step 4: Refining Details
-
Check the toes:
baby footprints are notoriously tricky; if a toe didn’t print clearly, use your small round brush with a tiny dab of black paint to fill in the missing toe pad. -
Connect the shape:
If the main part of the foot looks patchy, you can vary gently touch it up with black paint, but try to keep the natural texture of the footprint visible if possible. -
Cleanup edges:
If any black paint strayed outside the white area, wait for it to dry, then touch it up with a small amount of white paint essentially acting as ‘white-out’. -
Seal (Optional):
If this pumpkin will be sitting outside on a porch, lightly mist the painted area with a matte spray sealer to protect the memory from moisture.
Now you have a seasonal snapshot of just how tiny those feet once were


Baby’s First Halloween Lettered Pumpkin
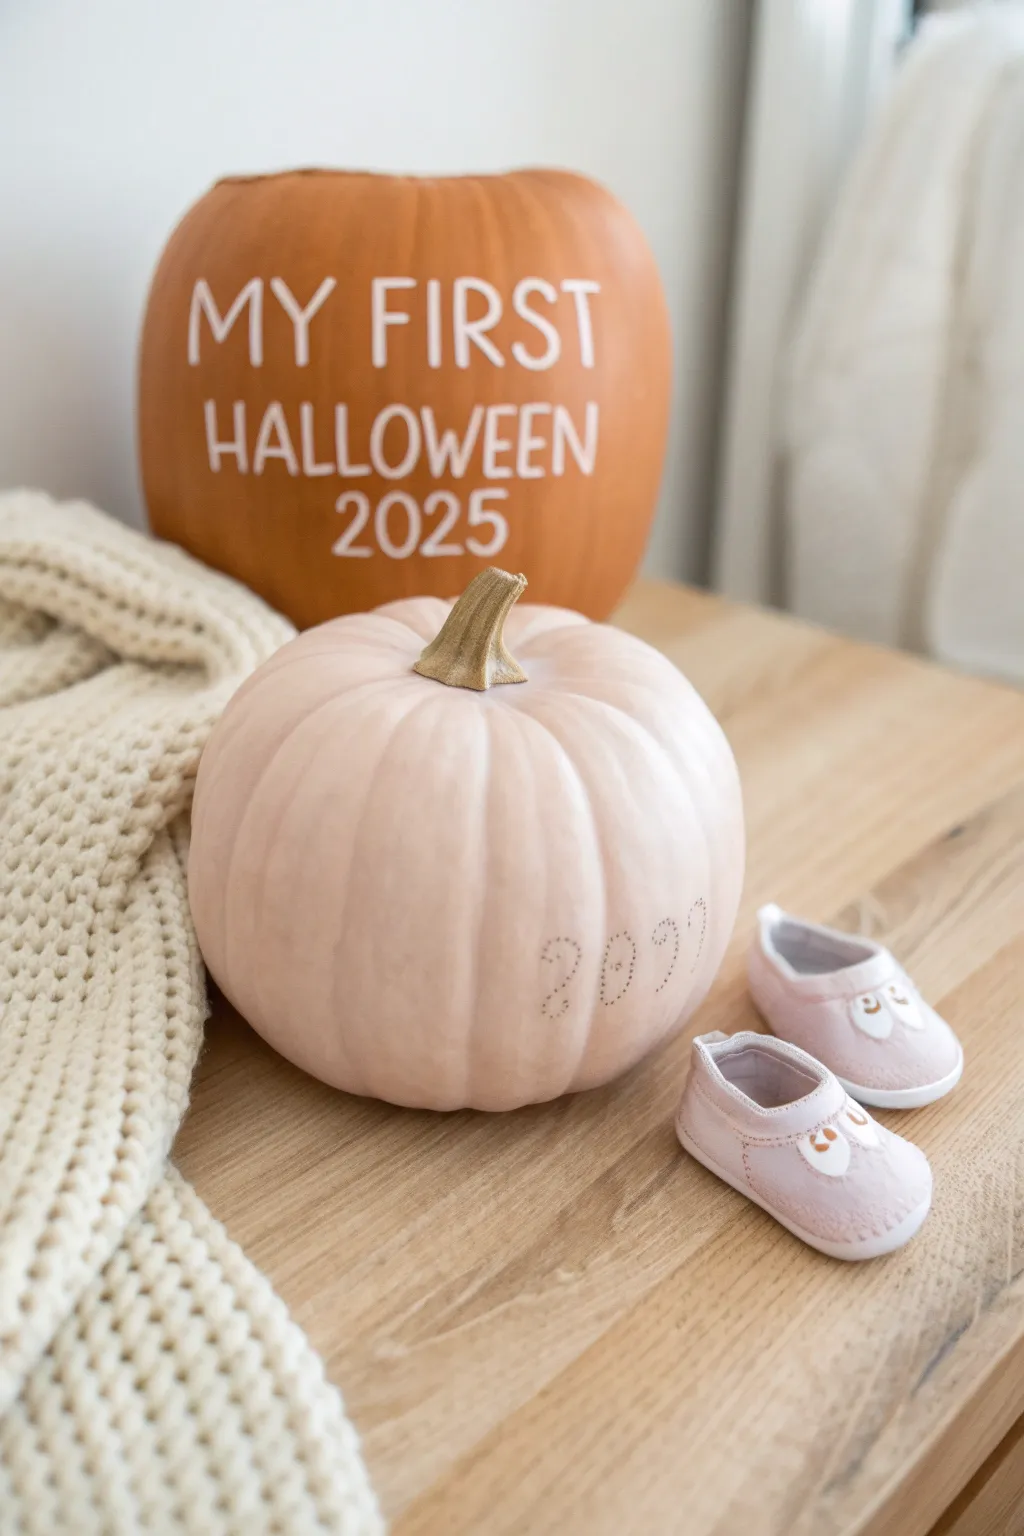
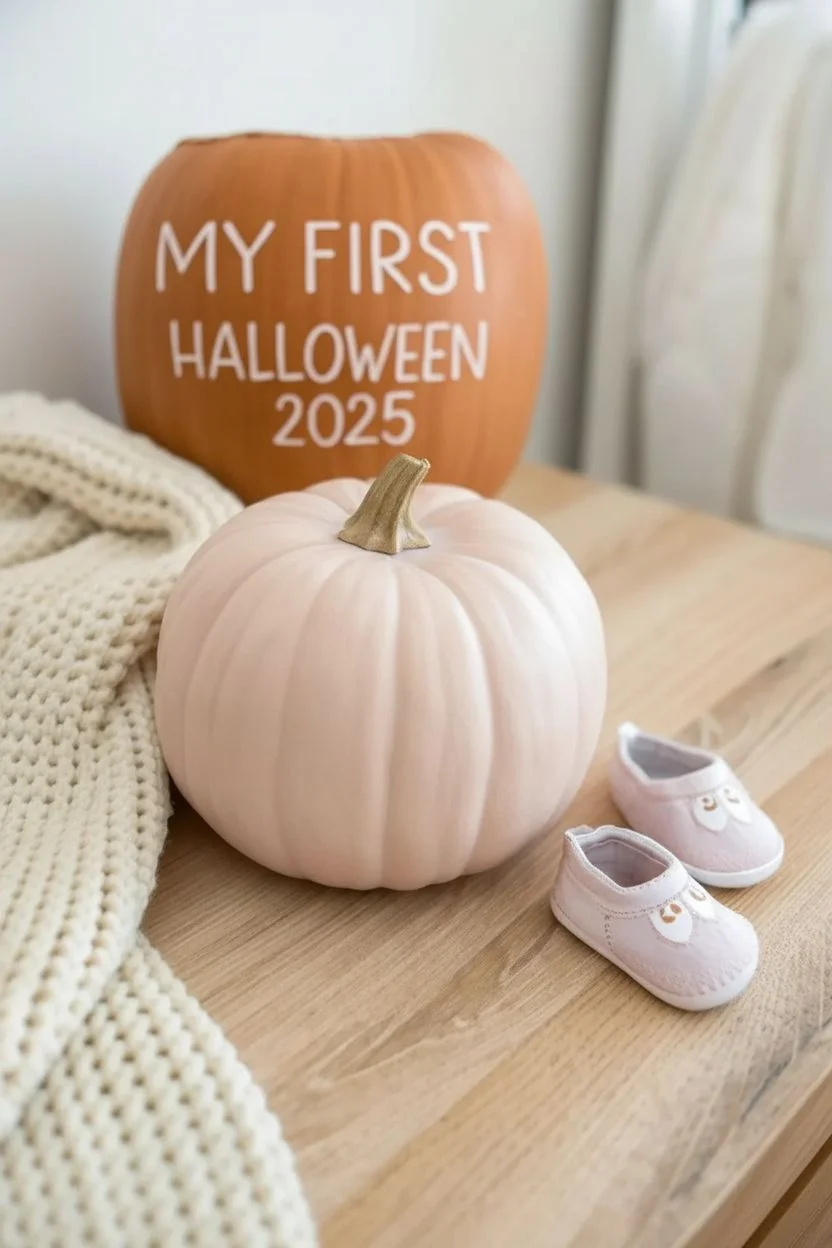
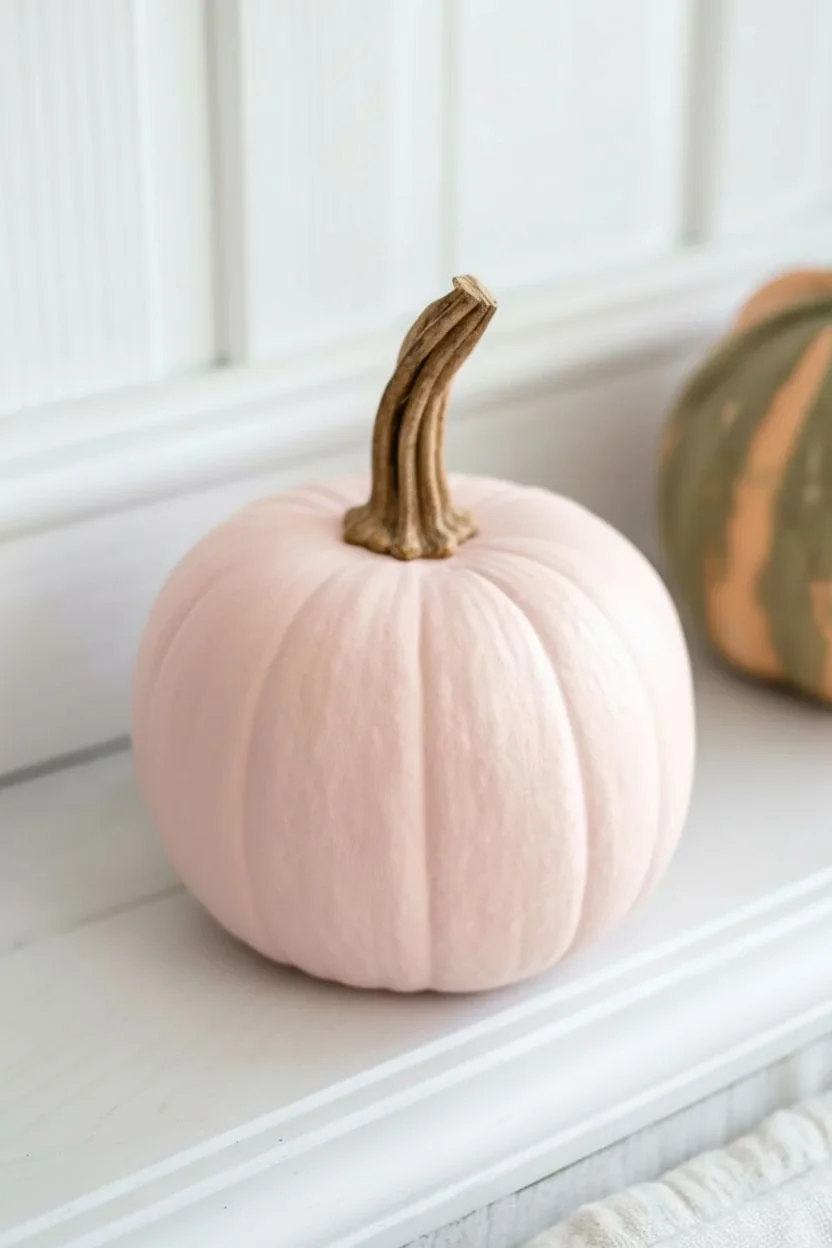
Celebrate a precious milestone with this charming pair of custom pumpkins that serve as the perfect photo prop or nursery decor. One pumpkin features bold, classic lettering announcing the occasion, while a softer pastel companion displays a delicate dotted date for a lovely visual balance.
Step-by-Step
Materials
- 1 medium round orange pumpkin (real or faux)
- 1 small-to-medium pumpkin (real or faux)
- White acrylic paint or a broad white paint marker
- Pale blush pink acrylic paint
- Gold metallic acrylic paint
- Fine tip black or dark grey permanent marker
- Sponge brush or large soft paintbrush
- Small fine-point paintbrush
- Pencil
- Eraser
- Ruler or measuring tape
- Painter’s tape (optional)
- Clear matte sealant spray (optional)
Step 1: Prepping the Pastel Pumpkin
-
Clean surface:
Begin by wiping down your smaller pumpkin with a damp cloth to remove any dirt or oils that might prevent the paint from sticking. -
Base coat application:
Using a sponge brush, apply a layer of pale blush pink acrylic paint over the entire body of the pumpkin. Don’t worry if the first coat looks streaky; this is normal. -
Layering for opacity:
Let the first coat dry completely for about 15-20 minutes. Apply a second—and possibly third—coat until you achieve a smooth, solid pink finish with no orange showing through. -
Gilded stem:
While the body dries, carefully paint the stem with gold metallic acrylic paint. I find a smaller brush helps get into the crevices near the base without messing up the pink paint. -
Final dry:
Set this pumpkin aside to cure fully before adding any text, ensuring the surface is hard and not tacky.
Step 2: Lettering the Main Pumpkin
-
Drafting the layout:
On the larger orange pumpkin, use a pencil to lightly sketch out your phrase. For ‘MY FIRST HALLOWEEN 2025,’ plan for four lines of text to keep the composition balanced and centered. -
Centering tip:
Mark the vertical center line of the pumpkin lightly with your pencil. Build your words outwards from this center line to ensure everything stays symmetrical. -
Painting the first line:
Using a white paint marker or a small brush with white acrylic paint, carefully go over your pencil lines for ‘MY FIRST’. Use steady, downward strokes for clean edges. -
Tackling the long word:
Paint ‘HALLOWEEN’ on the second line. Since this is the longest word, ensure your letters are slightly more compressed or the same width as the top line to fit comfortably. -
Adding the date:
Finish the lettering by painting ‘2025’ on the third line. Keep the numbers the same height as your letters for a cohesive look. -
Second pass:
Once the white paint is dry to the touch, go over the letters a second time to make the white pop brightly against the orange background. -
Clean up:
After the paint is fully dry, gently erase any visible pencil marks with a soft white eraser.
Use a Stencil
If freehand lettering intimidates you, print your text on paper, rub chalk on the back, and trace it onto the pumpkin to create a perfect guide.
Step 3: Detailing the Dot Date
-
Sketching the numbers:
Return to your dry pink pumpkin. Lightly pencil in the date ‘2025’ on the lower curve of the pumpkin, following the natural ribbed curve of the fruit. -
Creating the dot effect:
Take a fine-tip permanent marker or a very fine brush dipped in grey paint. Instead of drawing lines, create the numbers by tapping small dots along your pencil guide. -
Spacing the dots:
Keep the dots relatively close together so the numbers are legible, but with just enough space to maintain that airy, delicate aesthetic. -
Sealing everything:
If you plan to keep these outside or for many years, finish both pumpkins with a light mist of clear matte sealant spray to protect your work.
Paint Not Sticking?
If the acrylic paint beads up on a faux pumpkin surface, lightly sand the area with fine-grit sandpaper first to give the paint some tooth.
This lovely set is now ready to stage your commemorative photos or greet guests on your porch


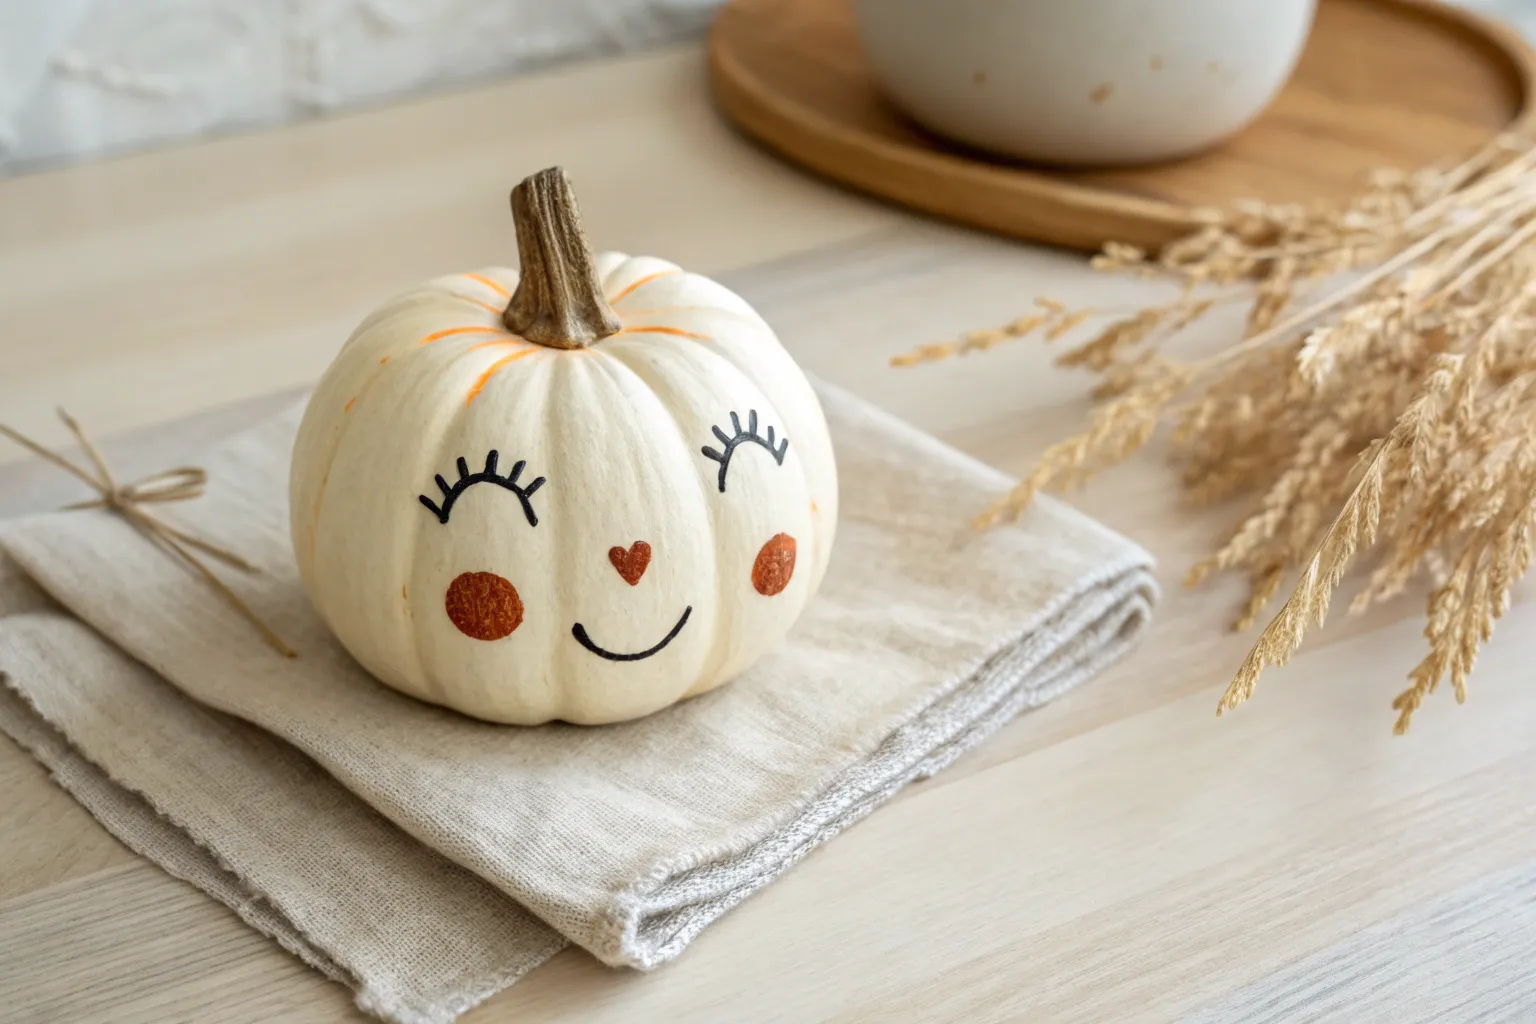
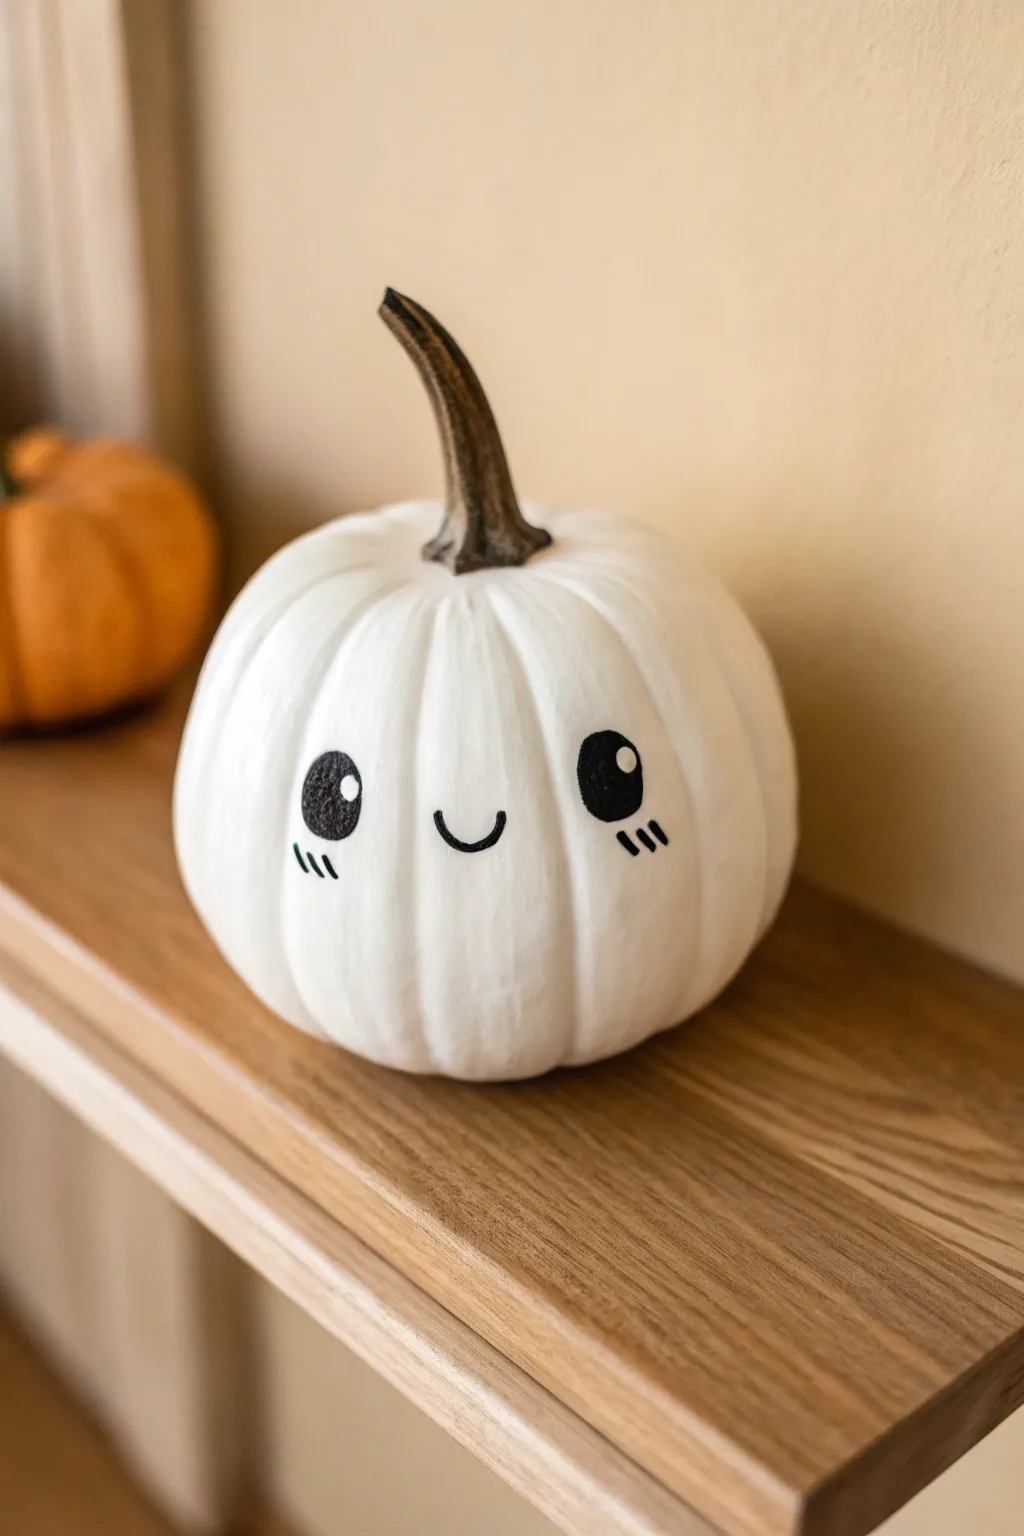
Simple Smiley Face Baby Pumpkin
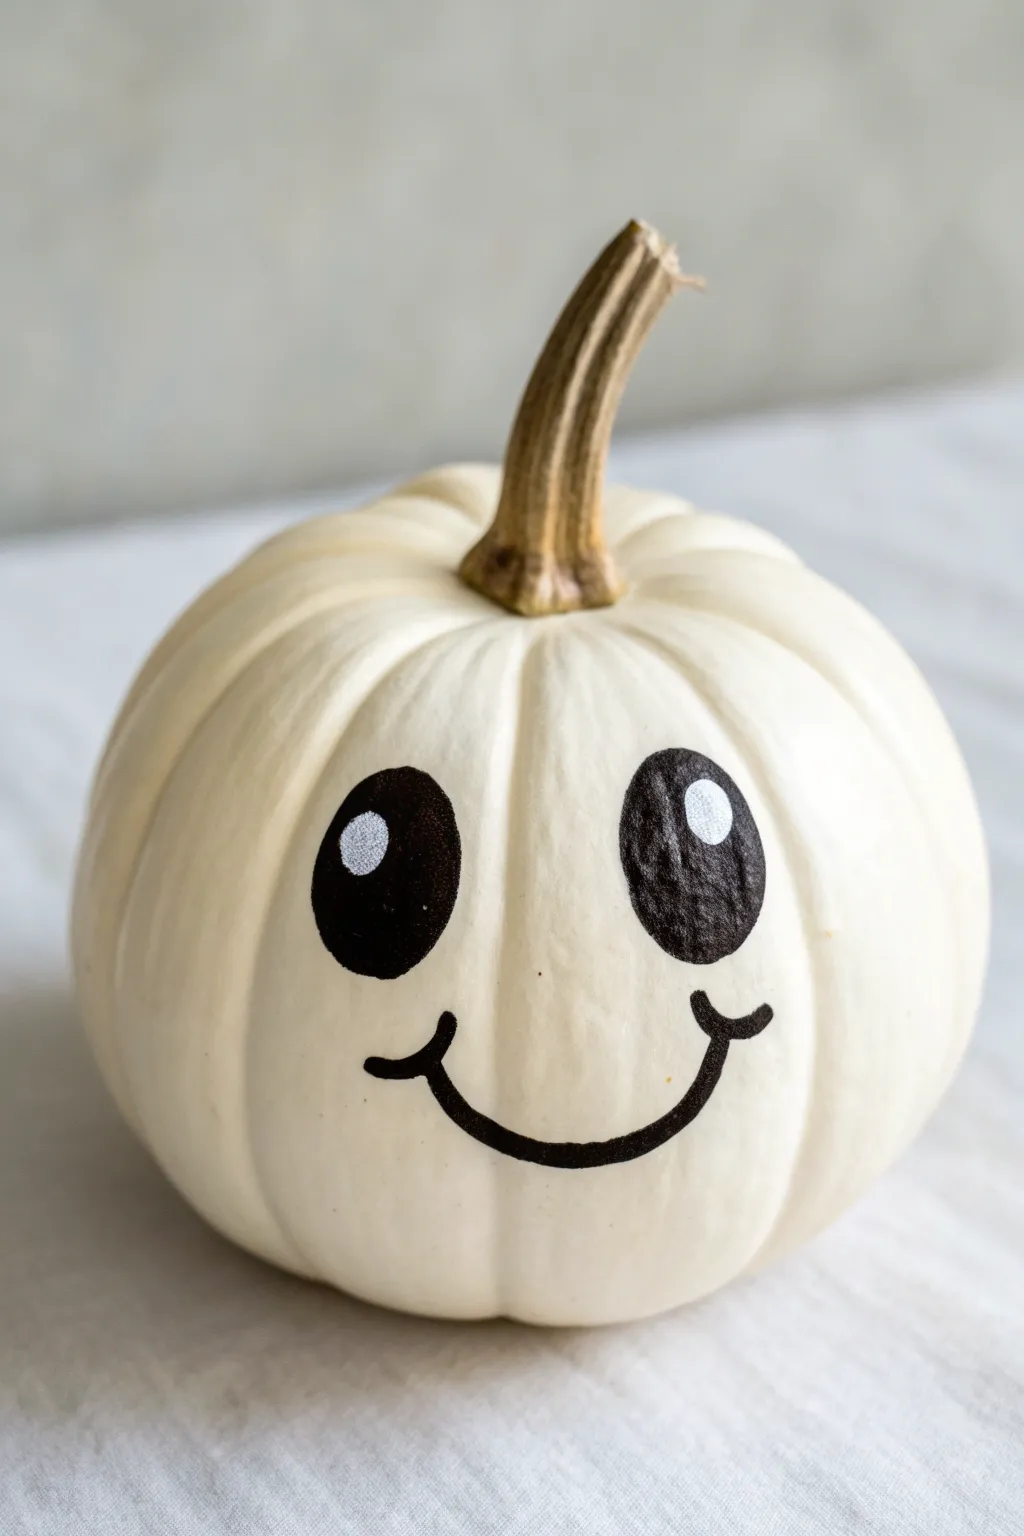
Transform a tiny white pumpkin into an adorable little character with just a few strokes of paint. This minimalist design features large, expressive eyes and a happy smile, making it a perfect, cheerful addition to your fall decor without any of the mess of carving.
How-To Guide
Materials
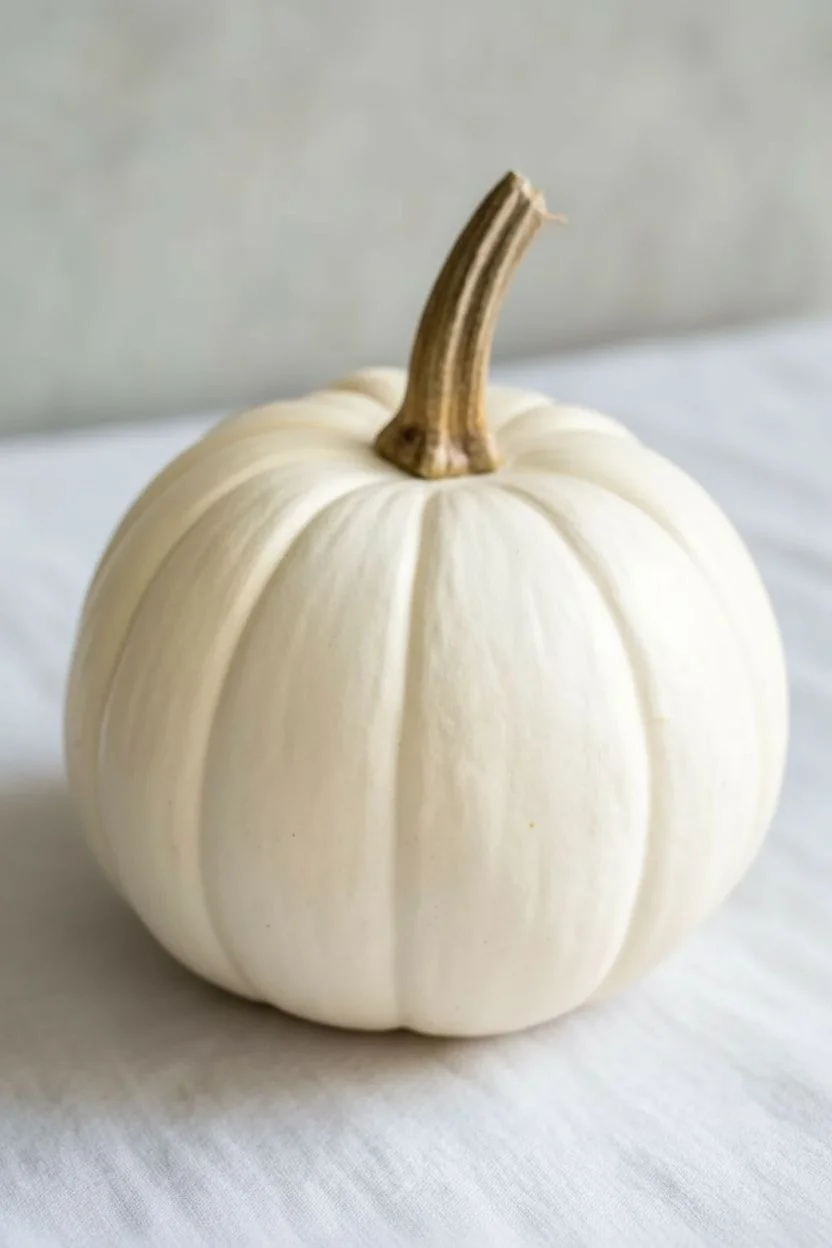
- Small white pumpkin (Baby Boo variety works best)
- Black acrylic paint or a black paint pen (medium tip)
- White acrylic paint or a white paint pen (fine tip)
- Small round paintbrush (if using bottle paint)
- Damp cloth or paper towel
- Pencil (optional for sketching)
Step 1: Preparation
-
Clean the Surface:
Before you begin, wipe down your white pumpkin with a damp cloth to remove any dirt or garden residue. Let it dry completely so the paint adheres properly to the skin. -
Select the Face Side:
Turn the pumpkin around in your hands and look for the smoothest side with the fewest blemishes. This will be your ‘canvas’ for the face.
Step 2: Painting the Eyes
-
Position the Eyes:
Visualize where the eyes should go. They sit slightly higher up on the pumpkin’s curve. You want them spaced wide enough apart to look friendly, but not too far around the sides. -
Sketch Outline (Optional):
If you are nervous about freehanding, lightly sketch two large vertical ovals with a pencil. Don’t press too hard, or you’ll scratch the pumpkin skin. -
Draw the Left Eye:
Using your black paint pen or brush, draw the outline of the first large oval. It should be tall and bean-shaped, slightly wider at the bottom. -
Fill It In:
Carefully fill in the outline with solid black paint. I like to work from the center outward to keep the edges crisp and smooth. -
Draw the Right Eye:
Repeat the process for the second eye. Try to match the size and height of the first one, keeping that symmetrical, upright oval shape. -
Check Coverage:
If the black looks a bit streaky or sheer, let the first coat dry for about 5 minutes and then apply a second layer for a deep, opaque finish.
Uneven Surfaces?
Pumpkins are naturally bumpy! If your pen skips over a ridge, just go back over that specific spot with a dabbing motion rather than a dragging stroke.
Step 3: Adding the Smile
-
Plan the Mouth:
The smile connects the eyes visually. It should be a simple ‘U’ shape placed centered below the eyes. -
Draw the Curve:
Start your stroke under one eye and curve gently down and across to the other side. A slow, steady hand helps keep the line thickness consistent. -
Add Cheek Dimples:
At each end of your smile curve, add a very tiny upward tick or slight thickening. This gives the face deeper cheeks and a sweeter expression.
Choosing Your Tools
Acrylic paint pens are far easier to control than brushes on slippery pumpkin skin. Use a medium tip for fill and a fine tip for details.
Step 4: Finishing Touches
-
Dry the Black Paint:
It is crucial that the black paint is completely dry before moving to the next step. Wait at least 10-15 minutes so the colors don’t smear together. -
Add the Gleam:
Dip the handle of a paintbrush or use a fine-tip white paint pen to place a single white dot in the upper right (or left) corner of each black eye. -
Checking Position:
Ensure both white dots are on the same side of the pupil (e.g., both top-right). This creates the illusion of a light source and makes the face look alive. -
Final Dry:
Set the pumpkin aside one last time to let the white highlights dry fully. Avoid touching the face area for at least a few hours to prevent fingerprints.
Now you have a charming little pumpkin pal ready to brighten up your desk or windowsill
BRUSH GUIDE
The Right Brush for Every Stroke
From clean lines to bold texture — master brush choice, stroke control, and essential techniques.
Explore the Full Guide
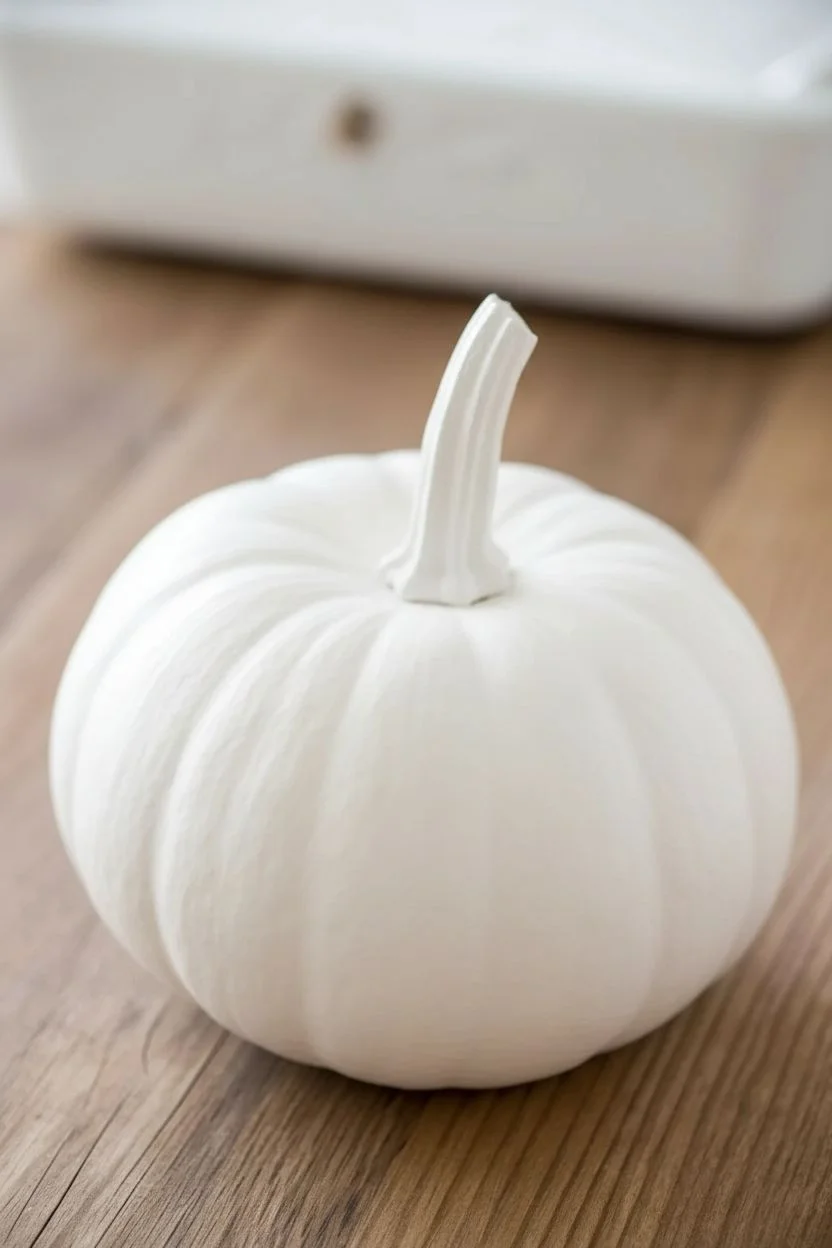
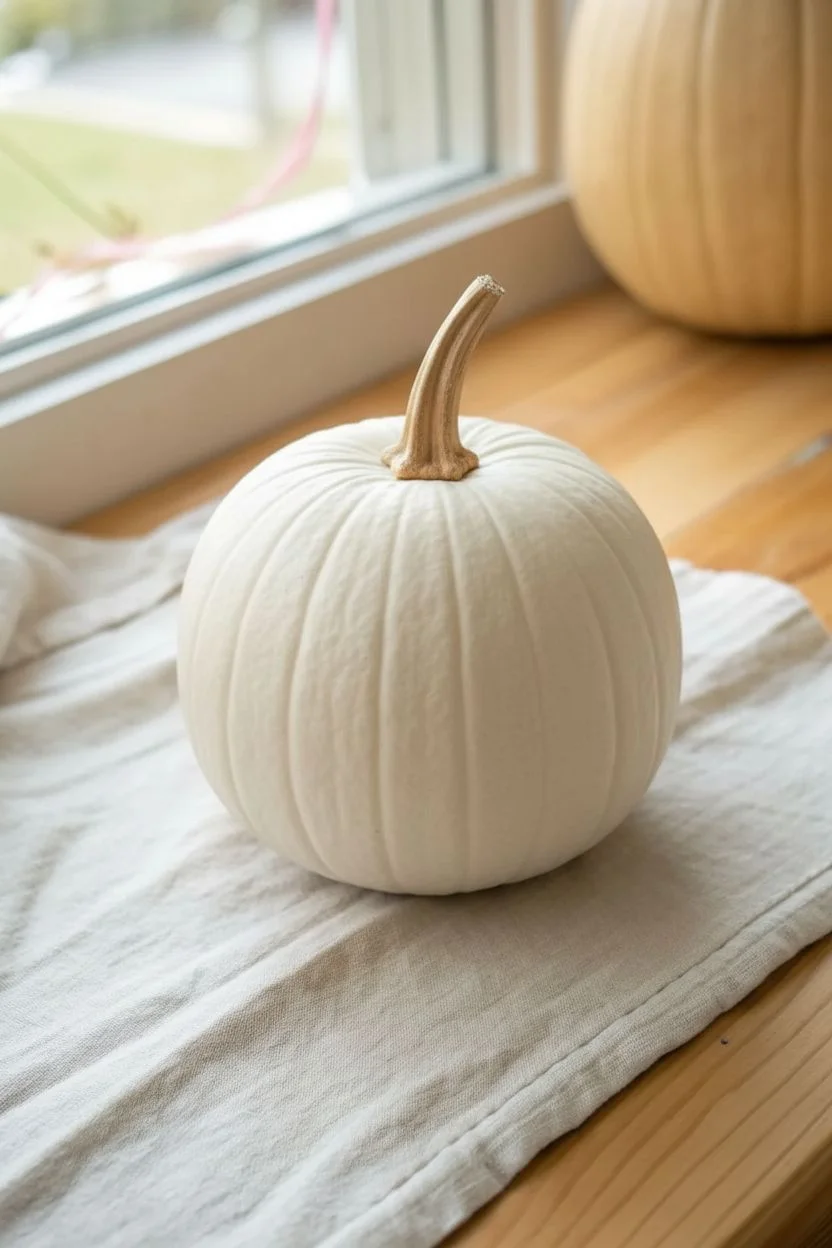
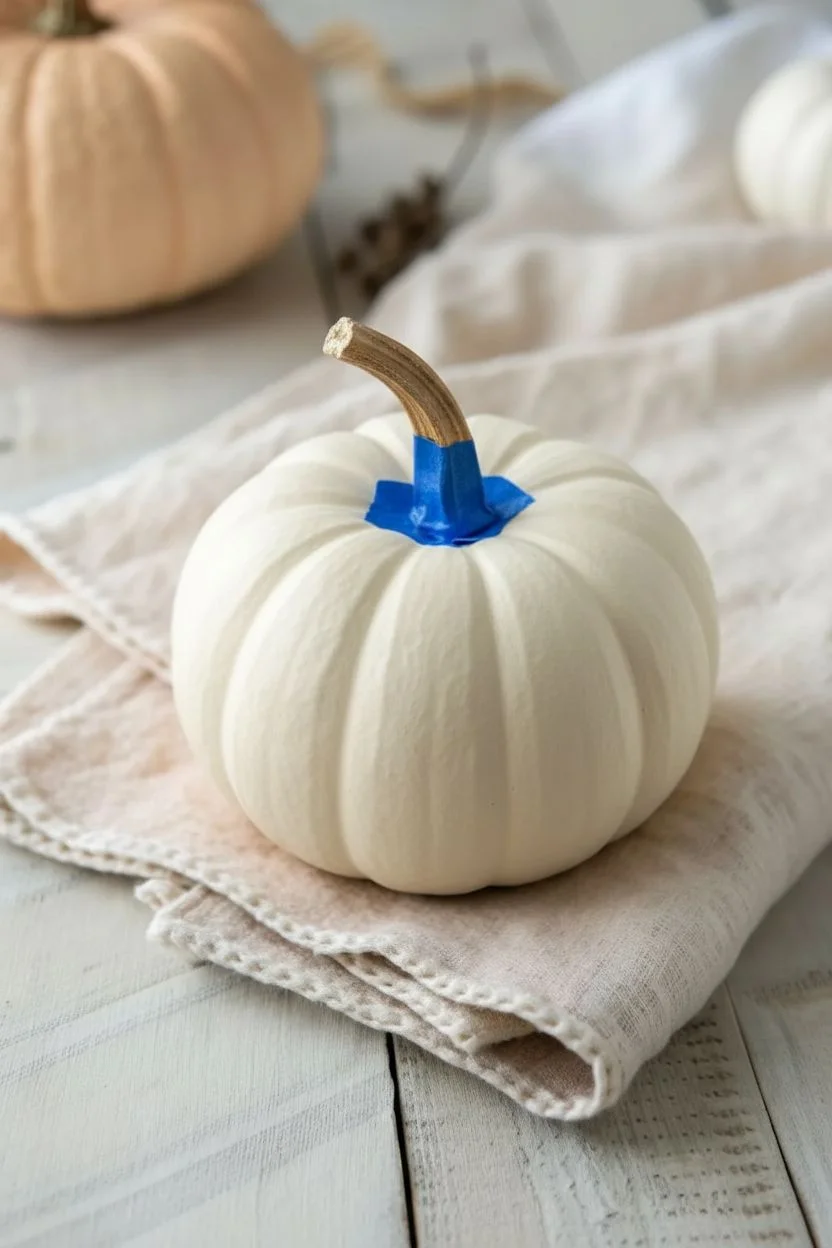
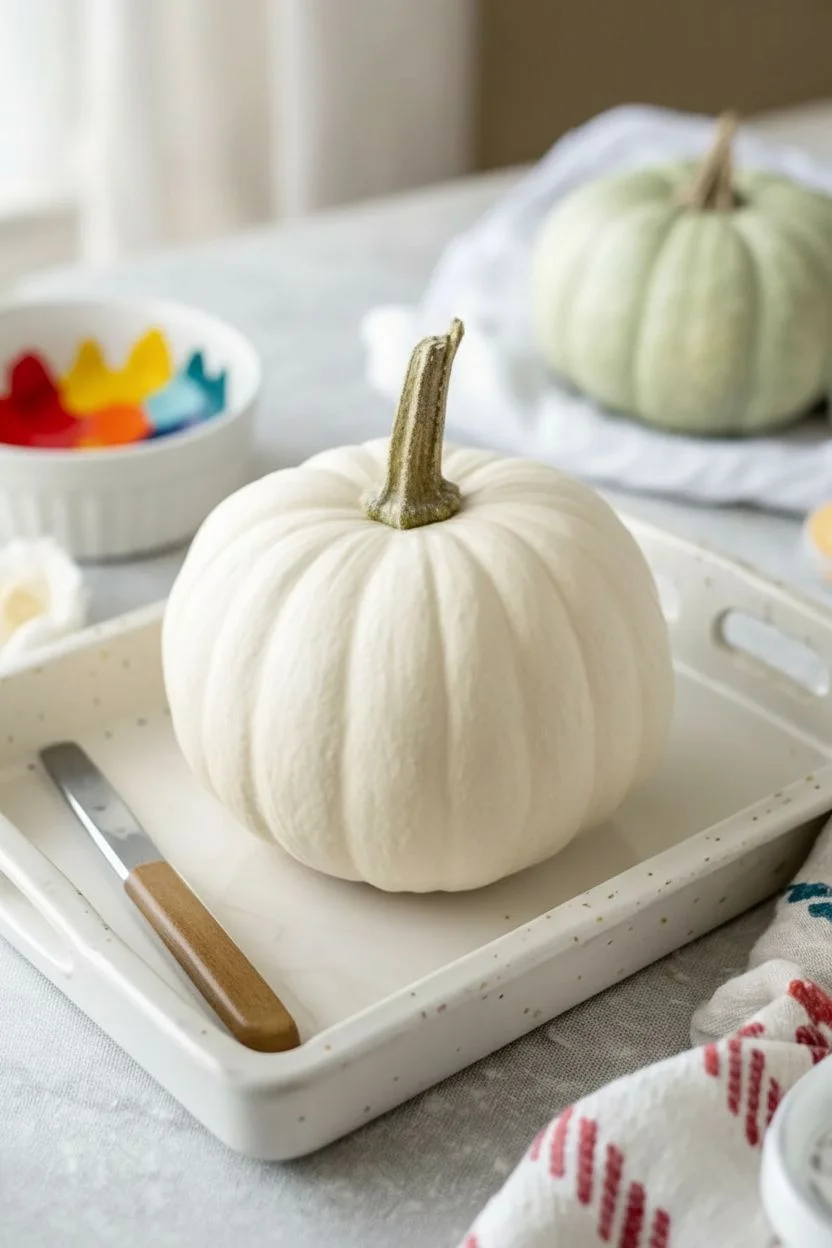
Classic White Ghost Baby Pumpkin
Transform a simple mini pumpkin into a charmingly sweet ghost character with just a coat of paint and some delicate facial details. This minimalist design relies on high-contrast black eyes and a clean white background to create a decoration that is more delightful than frightful.
Step-by-Step Tutorial
Materials
- Small pumpkin (preferably with a strong stem)
- White acrylic paint (matte finish)
- Black acrylic paint
- Medium flat synthetic brush
- Small round detail brush (size 1 or 2)
- Small dotting tool or toothpick
- Gesso primer (optional)
- Painter’s tape
- Clean cloth
Step 1: Preparation and Base Coat
-
Clean surface:
Begin by wiping the pumpkin down with a damp cloth to remove any dirt or field dust. Dry it completely before moving on. -
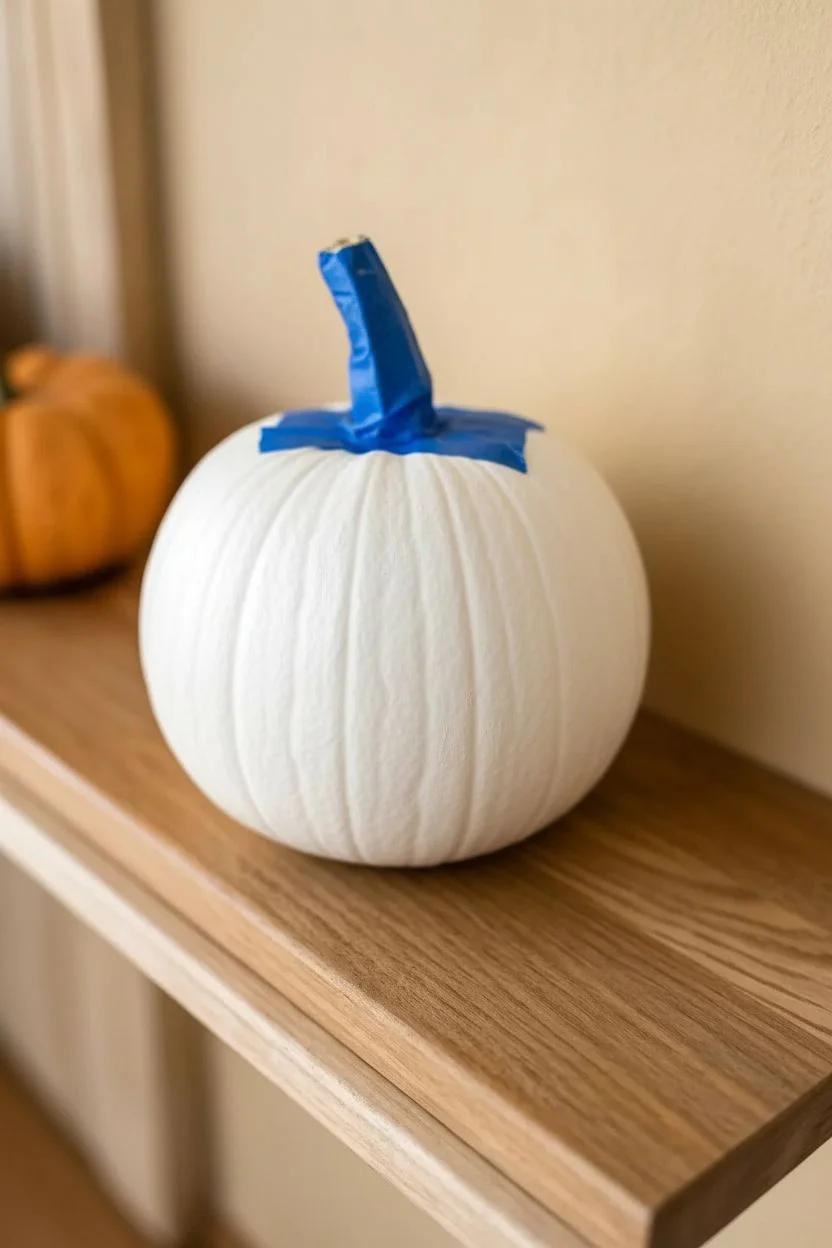
Protect the stem:
Carefully wrap a small piece of painter’s tape around the base of the stem where it meets the pumpkin skin. This keeps your stem natural while you paint the body. -
Apply primer:
For the brightest white finish, apply a thin coat of white Gesso primer first. This blocks the orange tones from showing through later. -
Paint the first white layer:
Using your medium flat brush, apply a coat of white matte acrylic paint. Work in vertical strokes following the natural ridges of the pumpkin. -
Let it dry:
Allow the first coat to dry completely for about 20 minutes. If the orange is still peeking through, it will make the white look muddy if you rush. -
Apply the second coat:
Paint a second layer of white. I like to dab the paint into the deeper crevices first, then smooth it out on the surface. -
Smooth the finish:
Check for any brush stroke ridges and gently smooth them out with the brush before the paint sets. Let this layer cure fully for at least an hour. -
Remove tape:
Gently peel away the painter’s tape from the stem. If any white paint got on the stem, wipe it off quickly with a damp paper towel.
Clean Lines Hack
Use a black permanent marker or paint pen for the smile and blush marks instead of a brush. It gives you way more control on the curved surface.
Step 2: Painting the Kawaii Face
-
Plan the placement:
Look for the smoothest, widest side of the pumpkin to be the face. Visualize where the eyes will sit—about halfway down the pumpkin’s height. -
Paint the eye outlines:
Using the small round detail brush and black paint, carefully draw two oval shapes. Space them widely apart to achieve that cute, innocent look. -
Fill in the eyes:
Fill the ovals with solid black paint. Apply enough paint so it’s opaque, but not so much that it drips down the curve. -
Paint the smile:
Directly between the eyes, but slightly lower, paint a tiny, thin ‘U’ shape. Keep the line very fine; a heavy mouth can change the expression entirely. -
Add blush marks:
On the outer cheeks, just below the eye level, paint three tiny diagonal hash marks on each side. These mimic anime-style blush lines. -
Check symmetry:
Take a step back and look at your pumpkin. If the blush marks look uneven, you can carefully wipe them with a damp cotton swab and retry. -
Add eye highlights:
Once the black paint is bone dry, dip a dotting tool or the flat end of a brush handle into white paint. -
Place the reflection:
I prefer to place a single white dot in the upper right corner of each black oval. This breathes life into the character immediately. -
Final touch-ups:
Inspect the white body one last time. If you smudged any black paint, carefully cover it with a tiny dab of white.
Make it Glow
Mix glow-in-the-dark medium into your final coat of white paint. When the lights go out, your little pumpkin ghost will softly illuminate the room.
Set your little ghost on a shelf or windowsill to add a whisper of cuteness to your autumn decor
Polka-Dot Baby Pumpkin With Sponge Dabs
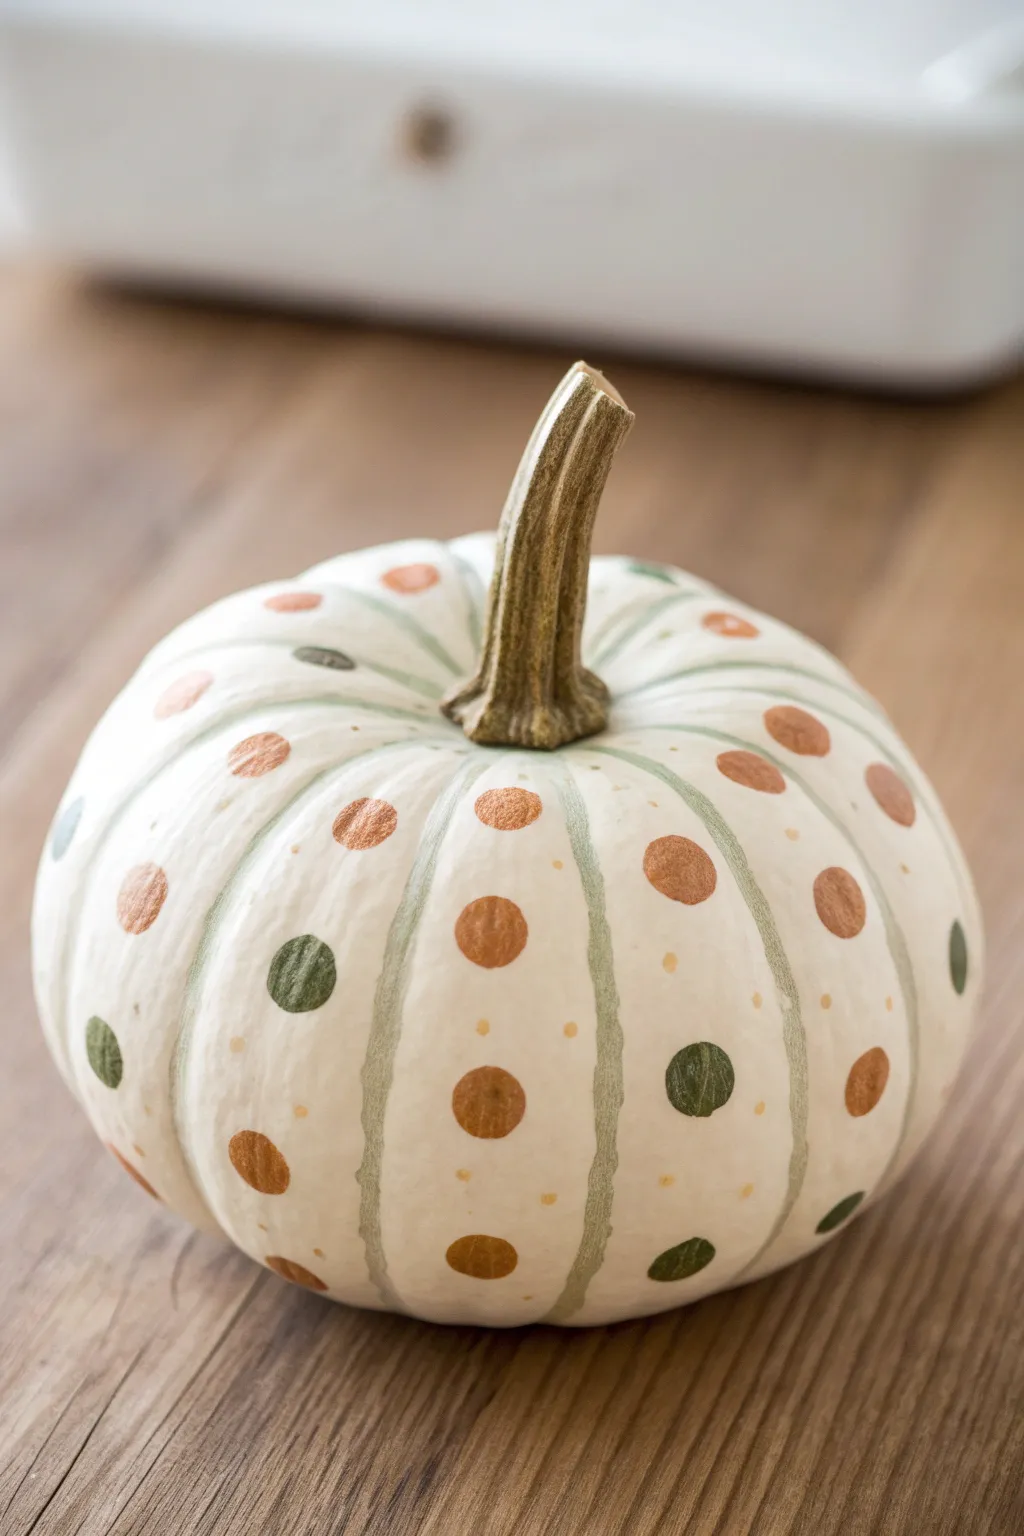
Transform a simple baby pumpkin into chic autumn decor with this sophisticated yet simple design. Featuring stripes that follow the natural grooves and perfectly round sponge-dabbed dots, this project combines metallic warmth with earthy greens for a modern farmhouse look.
Detailed Instructions
Materials
- Baby white pumpkin (natural or faux)
- Acrylic craft paint (matte white, sage green, forest green, metallic copper/gold)
- Small round paint sponge brushes/daubers (approx. 1/2 inch)
- Fine liner paintbrush
- Medium flat paintbrush
- Paper plate or palette
- Paper towels
- Cotton swabs (optional for cleanup)
Step 1: Base Prep
-
Clean surface:
Begin by wiping down your pumpkin with a slightly damp cloth to remove any dirt or oils. If you are using a real pumpkin, ensure the stem is completely dry and intact. -
Paint base coat:
If your pumpkin isn’t naturally a crisp white, or if it has blemishes, apply one two coats of matte white acrylic paint using the medium flat brush. -
Dry thoroughly:
Let the white base coat dry completely before moving on to the details. This prevents the colors from muddying later.
Step 2: Accent Stripes
-
Dilute sage paint:
On your palette, mix a small amount of sage green paint with a tiny drop of water. You want a fluid consistency that glides easily but isn’t runny. -
Follow natural ribs:
Using your fine liner brush, paint thin lines following the natural vertical crevices (ribs) of the pumpkin. Start from just below the stem and pull the brush down toward the base. -
Create variation:
Don’t worry about making these lines perfectly straight or solid. A little translucency or waviness adds to the hand-painted charm. Allow these stripes to dry.
Uneven Dots?
If sponge circles look patchy, wait for the first stamp to dry, then carefully realign the sponge and stamp a second coat directly over the first.
Step 3: Sponge Dabbing
-
Load the sponge:
Dip your round sponge dauber into the metallic copper paint. Dab it a few times on a clean part of your palette to ensure the sponge is evenly coated but not dripping with excess paint. -
Apply large copper dots:
Press the sponge firmly onto the pumpkin’s surface to create a perfect circle. Place these dots randomly, focusing on the wider sections between your painted stripes. -
Rotate and repeat:
Turn the pumpkin slowly as you work, adding more copper dots. Leave plenty of white space between them for the second color. -
Switch to green:
Using a fresh sponge dauber (or the same one thoroughly washed and dried), load it with the forest green paint. -
Add contrast dots:
Stamp forest green dots in the empty spaces remaining. Aim for a balanced distribution so no area looks too heavy in one color. -
Check edges:
Make sure to add a few partial dots near the bottom curve of the pumpkin so the pattern feels continuous.
Glam It Up
Sprinkle ultra-fine glitter over the wet metallic copper dots immediately after stamping to give your pumpkin some extra autumn sparkle.
Step 4: Tiny Details
-
Use brush handle:
Dip the non-brush end (the handle tip) of your fine liner brush into yellow or light gold paint. -
Add micro-dots:
Gently touch the handle tip to the pumpkin to create tiny, subtle speckles in empty white areas. This adds a delicate texture to the overall design. -
Clean errors:
If any dots smudged, dip a cotton swab in water (or rubbing alcohol for stubborn paint) and carefully wipe away the mistake before re-stamping. -
Final dry:
Set the pumpkin aside in a safe spot to let all paint layers cure fully, usually for at least an hour.
Now you have a stylish, spotted pumpkin ready to brighten up your festive table display

PENCIL GUIDE
Understanding Pencil Grades from H to B
From first sketch to finished drawing — learn pencil grades, line control, and shading techniques.
Explore the Full Guide
Rainbow Stripe Baby Pumpkin
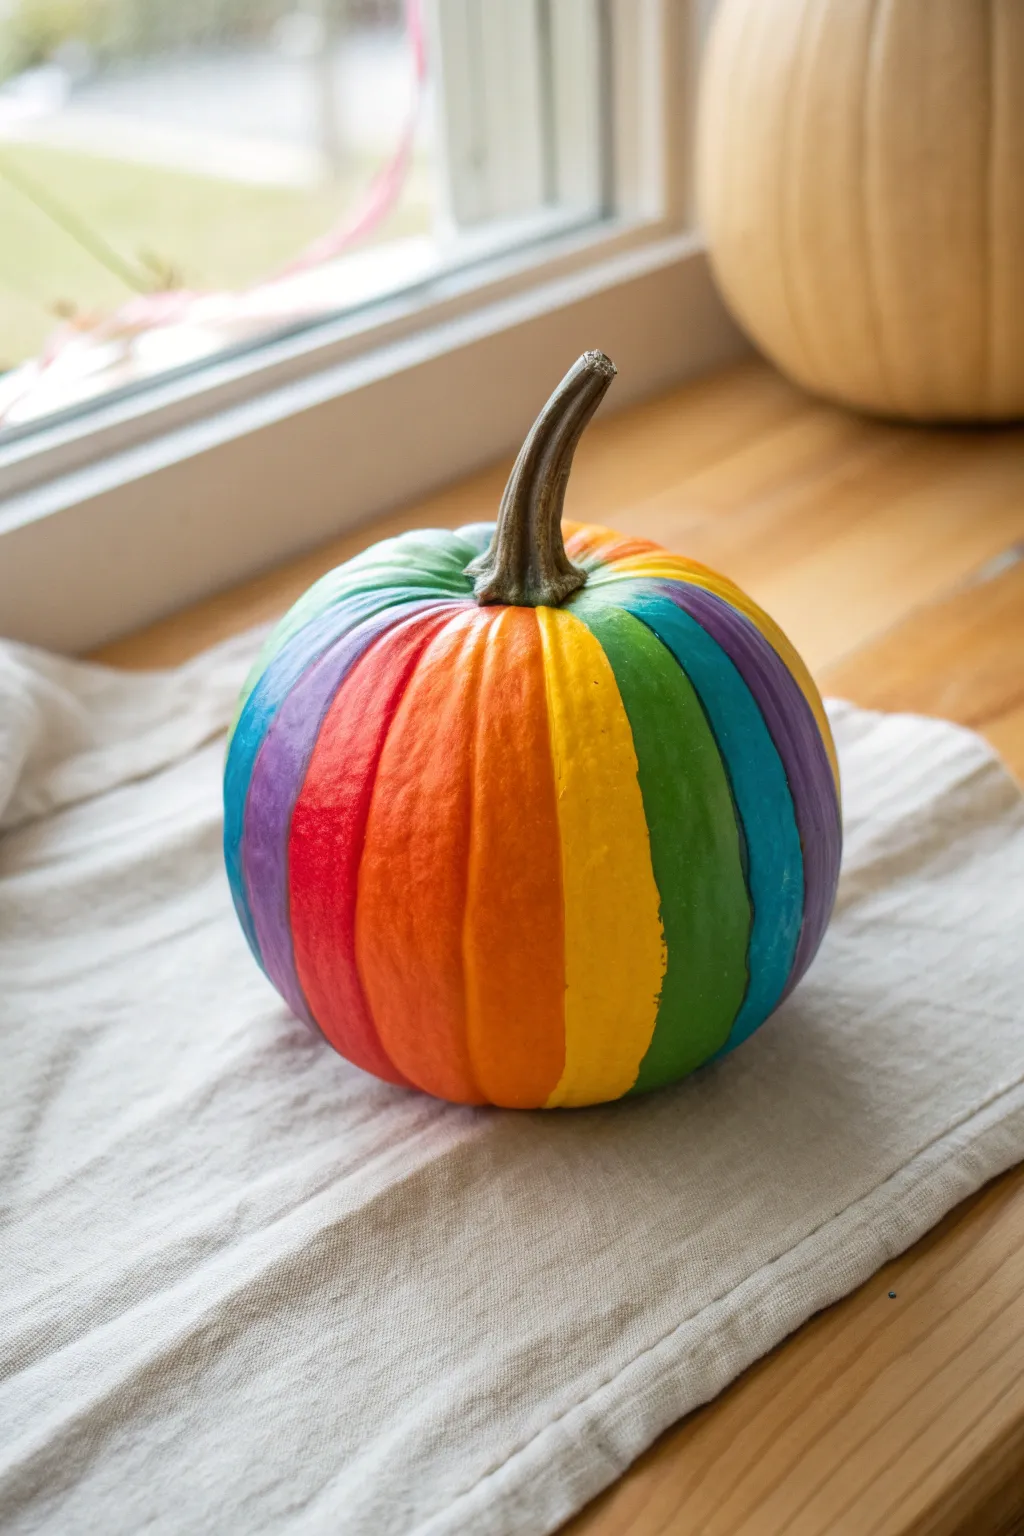
Brighten up any windowsill with this cheerful twist on autumn decor, featuring bold vertical bands of color. This project uses the pumpkin’s natural ribs as a guide to create perfect, curvy stripes for a vibrant rainbow effect.
Step-by-Step
Materials
- Small white or light-colored pumpkin (cleaned and dried)
- Acrylic craft paints (Purple, Red, Orange, Yellow, Green, Blue, Indigo)
- Flat shader paintbrush (size 6 or 8)
- Small round detail brush (size 2)
- Palette or paper plate
- Cup of water
- Paper towels
- Clear acrylic sealer spray (optional)
Step 1: Preparation and Planning
-
Clean the Surface:
Begin by thoroughly wiping down your pumpkin with a damp cloth to remove any dirt or oils. Let it dry completely, as moisture will prevent the acrylic paint from adhering properly. -
Study the Ribs:
Examine the natural vertical indentations (ribs) of your pumpkin. These grooves will serve as the dividing lines for your paint colors, so mentally map out where your rainbow sequence will go.
Step 2: Painting the Warm Tones
-
Start with Red:
Using your flat shader brush, select a prominent rib section and paint it bright red. Start from the top near the stem and pull the brush smoothly down to the base in long strokes. -
Apply Orange:
Rinse your brush and move to the segment directly to the right of the red stripe. Fill this entire section with vibrant orange paint, careful to meet the edge of the red without blending. -
Add the Yellow:
Continue moving right to the next segment. Paint this section a sunny yellow. Since yellow can be translucent, I like to apply a slightly thicker coat here or wait for it to dry and add a second layer for full opacity.
Natural Guides
Don’t stress about drawing straight lines. Let the brush naturally follow the pumpkin’s deep grooves. The recessed areas make it easy to ‘stop’ the paint between colors.
Step 3: Painting the Cool Tones
-
Paint the Green Stripe:
Next to the yellow section, apply a coat of grass green. Use the flat edge of your brush to carefully cut in the line where the green meets the yellow for a crisp edge. -
Add the Blue:
Moving along the pumpkin’s circumference, paint the next segment a deep true blue. Ensure the paint goes all the way into the deep groove of the rib for consistent coverage. -
Fill in Purple/Indigo:
Complete this section of the rainbow by painting the next segments with indigo and then purple. If your pumpkin has more ribs than colors, simply restart the pattern with red or purple depending on your direction.
Make it Sparkle
While the paint is still wet, sprinkle ultra-fine glitter over matching colored sections (red glitter on red paint, etc.) for a shimmering, magical finish.
Step 4: Refining and Sealing
-
Touch Up Edges:
Once the base coats are dry to the touch, use your small round detail brush to tidy up any messy lines between colors. Just a tiny dab of paint can fix where a color might have strayed into its neighbor. -
check for Opacity:
Spin the pumpkin around slowly and look for streaky areas. Add a second coat to any color that looks too thin, especially the lighter shades like yellow and orange. -
Clean the Stem:
If you accidentally got any paint on the stem, gently wipe it off with a damp paper towel or paint over it with a dark brown or grey for a clean finish. -
Let it Cure:
Allow the pumpkin to sit undisturbed for at least an hour to let the paint fully cure and harden. -
Optional Sealing:
For a glossy finish that lasts longer, take the pumpkin to a well-ventilated area and apply a light coat of clear acrylic sealer spray.
Place your colorful creation in a sunny spot to enjoy those vibrant hues all season long
Pastel Ombré Baby Pumpkin
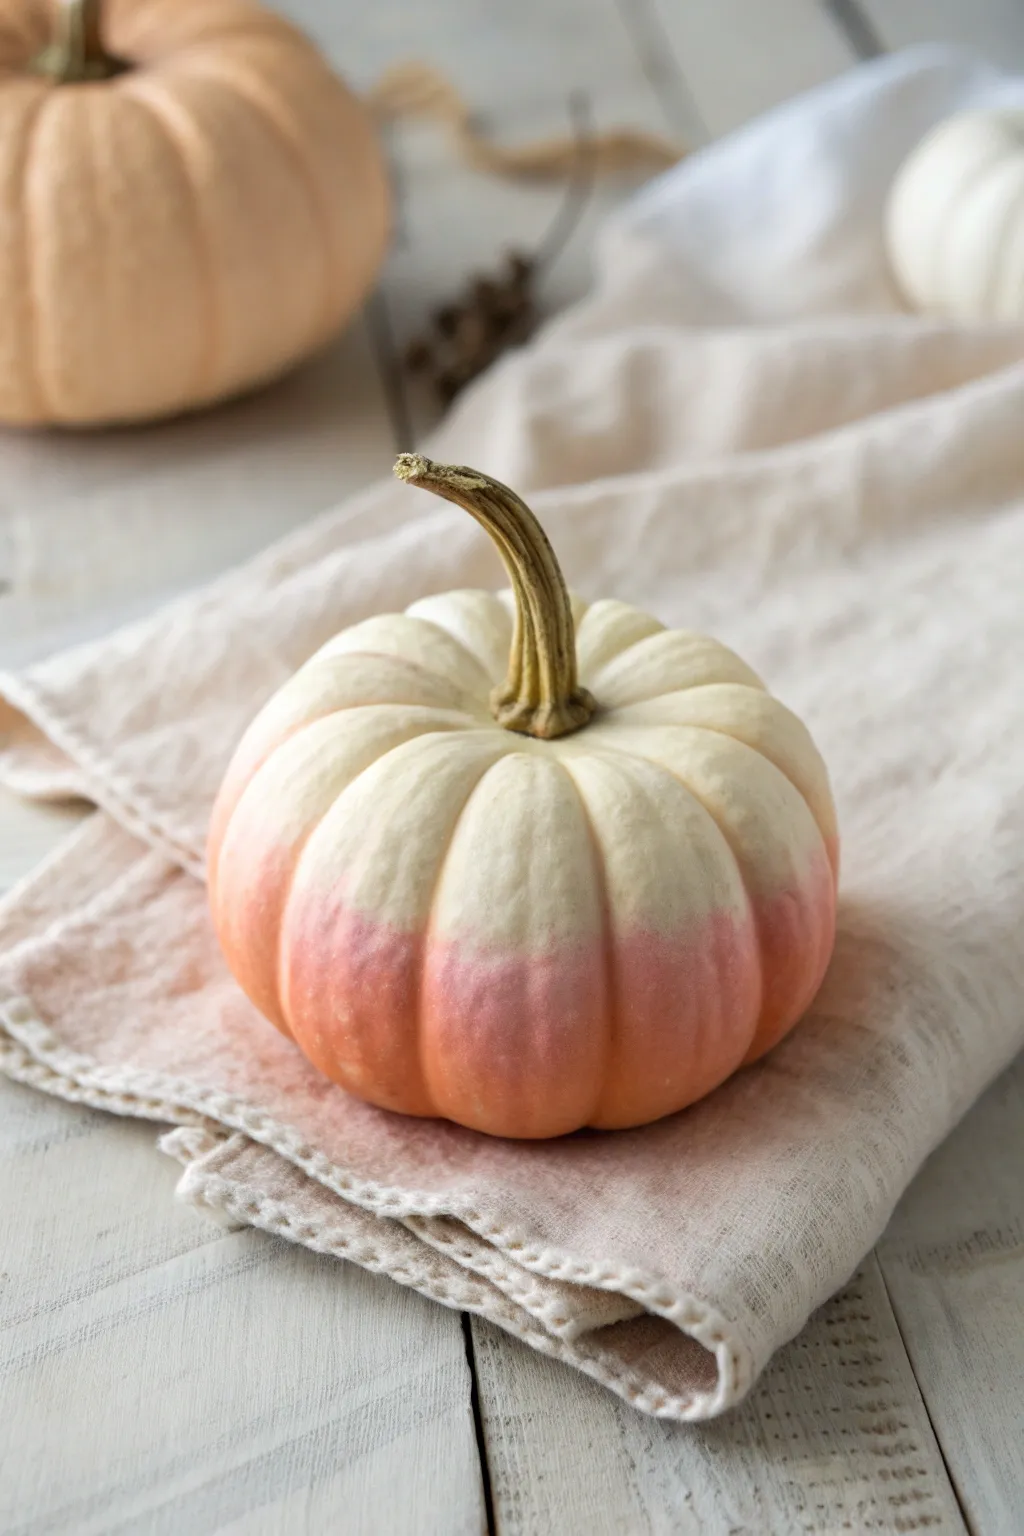
Soft, dreamy, and perfectly autumnal, this design mimics the gentle blush of a ripening peach. By blending warm coral with creamy white directly on the pumpkin’s surface, you’ll create a sophisticated gradient that elevates any Thanksgiving table setting.
Detailed Instructions
Materials
- Small white or baby boo pumpkin
- Cream or off-white acrylic paint
- Peach or warm coral acrylic paint
- Medium flat synthetic brush
- Small blending sponge or makeup sponge
- Palette or paper plate
- Painter’s tape (optional)
- Damp paper towel
Step 1: Preparation & Base
-
Clean surface:
Begin by wiping down your pumpkin with a damp cloth to remove any dirt or oils. Dry it thoroughly so the paint adheres properly. -
Protect stem:
If you want to keep the natural stem pristine, wrap a small piece of painter’s tape around its base. I find this creates a much sharper finish than trying to paint carefully around it. -
Apply base coat:
Even if your pumpkin is already white, apply a thin layer of cream or off-white acrylic paint over the entire surface. This provides a consistent, matte canvas. -
Let it dry:
Allow this base layer to dry completely for about 15 minutes before moving on to the color application.
Blending Secret
Keep a spray bottle of water handy. A very light mist over the blending zone keeps the acrylic wet longer, giving you more time to perfect the fade.
Step 2: Creating the Ombré
-
Paint the top:
Load your flat brush with the cream paint. Start at the base of the stem and paint downwards, covering the top two-thirds of the pumpkin. -
Ensure coverage:
Make sure to get the paint into the deep ribs of the pumpkin so no natural skin shows through. -
Paint the bottom:
Clean your brush, then load it with the peach or coral paint. Paint the bottom third of the pumpkin, including the underside so it looks finished from all angles. -
Meet in the middle:
Bring the peach paint up until it just touches the wet cream paint. Working quickly is key here—you want both colors to be wet for successful blending. -
Initial blend:
Where the colors meet, use your brush to lightly stroke horizontal bands, mixing the peach into the cream. -
Sponge technique:
Take a slightly damp blending sponge and dab gently along the transition line. This softens those brush strokes into a hazy gradient. -
Refining the fade:
If the transition looks too harsh, dip the sponge very lightly into the cream paint and dab downwards into the peach section. -
Deepen the color:
For a bolder look, add a second coat of peach just to the very bottom, blending it upward again before it dries.
Add Subtle Shimmer
Mix a drop of pearlizing medium into your cream paint for the top half. This gives the pumpkin a glowing, ceramic-like finish in candlelight.
Step 3: Finishing Touches
-
Check the ribs:
Inspect the vertical grooves. Often, the sponge misses the deepest parts, so use a small detail brush to feather the gradient inside these crevices. -
Dry partially:
Let the pumpkin sit for 10 minutes until it’s dry to the touch but not fully cured. -
Remove tape:
Carefully peel off the painter’s tape from the stem. If any paint seeped under, scrape it away gently with a fingernail or craft knife. -
Final dry:
Set the pumpkin aside in a safe spot for at least an hour to ensure the acrylic cures and hardens.
Group three or four of these pumpkins together for a centerpiece that feels sophisticated and organic


Confetti Fingerprint Baby Pumpkin
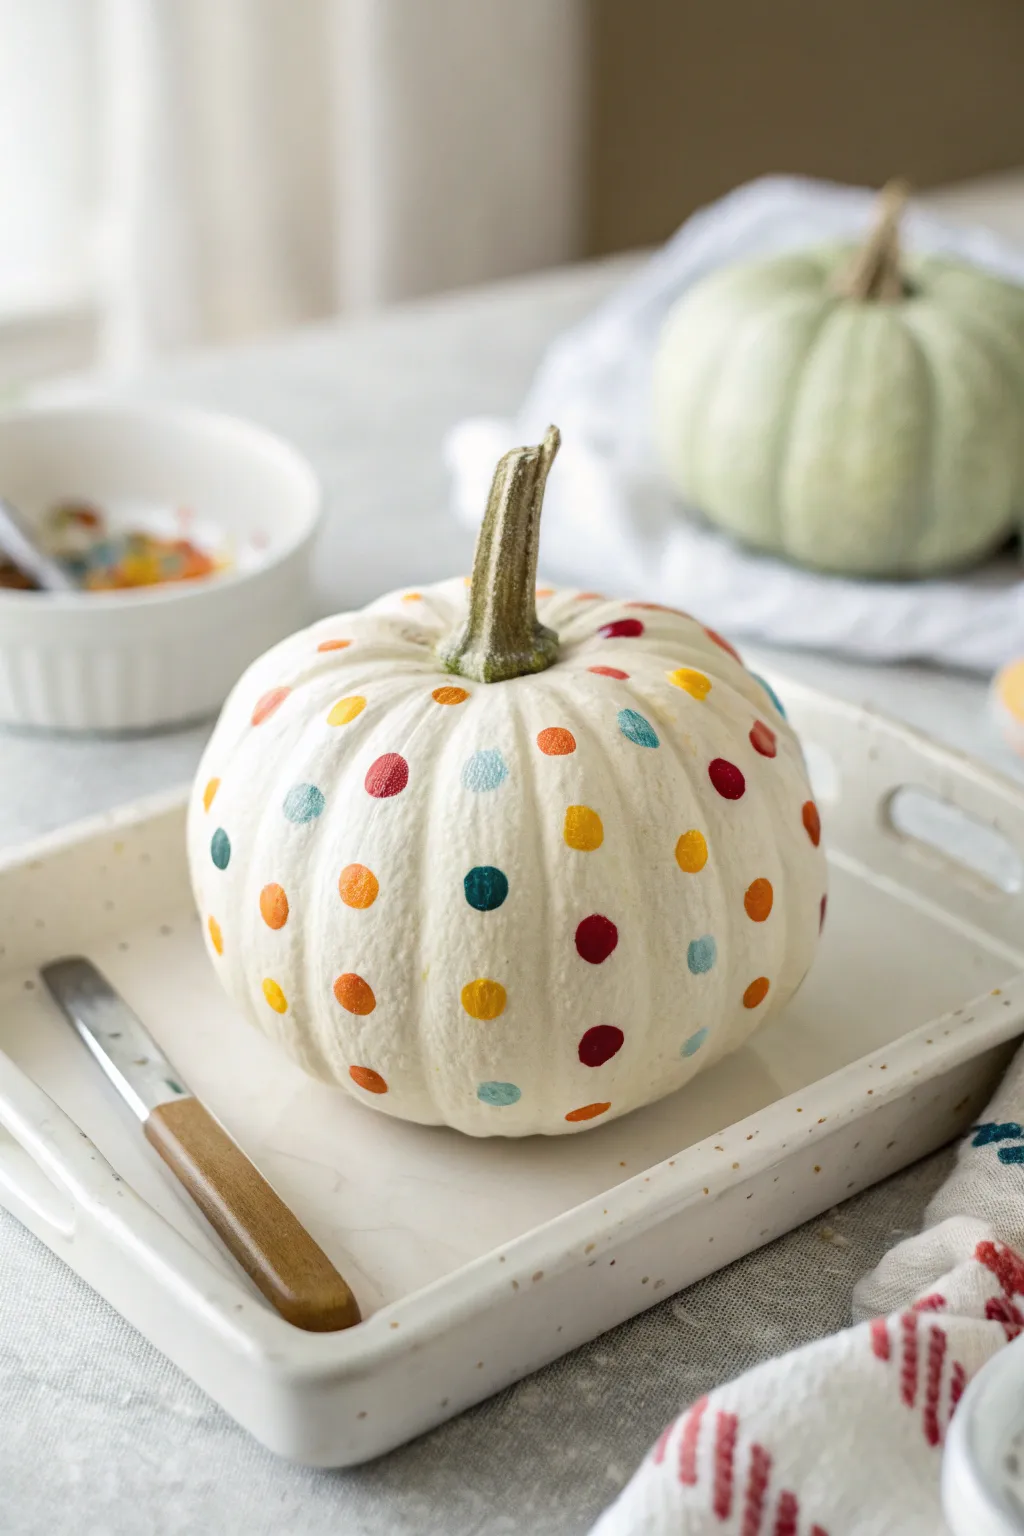
Transform a simple white pumpkin into a cheerful celebration of color with this easy and adorable fingerprint project. The result is a polka-dotted masterpiece that mimics falling confetti, perfect for brightening up any autumn table setting.
Step-by-Step Guide
Materials
- Small white pumpkin (real or faux)
- Acrylic craft paints (red, orange, yellow, teal, dark blue, light blue)
- Paper plate or palette
- Damp paper towels or baby wipes
- Paper towels for drying
- Clear matte acrylic sealer spray (optional)
Step 1: Preparation
-
Clean surface:
Begin by wiping down your pumpkin with a damp cloth to remove any dirt or residue. A clean surface helps the paint adhere much better. -
Dry completely:
Ensure the pumpkin is thoroughly dry before you start painting; any moisture will cause the acrylics to slide right off. -
Setup palette:
Squeeze dime-sized amounts of your chosen acrylic paint colors onto a paper plate or palette. Keeping them spaced out prevents accidental mixing.
Clean Prints Every Time
Does your paint look gloppy? Dab your painted finger on a scrap paper once before touching the pumpkin to get a perfect circle texture.
Step 2: Creating the Confetti
-
First color application:
Dip the tip of your index finger or pinky finger into your first color choice—let’s start with a sunny yellow. Tap off excess paint on a clean spot of the plate to ensure a clean, round print. -
Stamped placement:
Press your painted finger gently onto the pumpkin surface. I like to start near the top stem area and work my way down in a random scattering pattern. -
Rotate and repeat:
Turn the pumpkin slightly and add a few more yellow dots. Aim for random spacing, leaving plenty of white space for the other colors. -
Clean up:
Wipe your finger completely clean with a baby wipe or damp paper towel before switching colors to avoid muddying the next shade. -
Add secondary colors:
Dip a clean finger into an orange shade. Press these dots into the empty white spaces between the yellow dots, maintaining that random, tossed-confetti look. -
Incorporate cool tones:
Switch to your teal or light blue paint. Add these dots sporadically, making sure to place them near the bottom and sides as well as the top. -
Vary the pressure:
For variety, press slightly harder for larger dots or use your pinky for smaller accent dots. This size variation adds visual interest. -
Deepen the palette:
Introduce darker colors like a deep red or navy blue. These higher-contrast dots will make the lighter colors pop, so place them strategically next to paler dots. -
Fill the gaps:
Look at the pumpkin from a distance to spot any large white voids. Fill these gaps with whichever color seems least represented in that area. -
Check the bottom:
Don’t forget the lower curve of the pumpkin. Add dots near the base so the pattern looks continuous even from a low angle.
Step 3: Finishing Touches
-
Dry time:
Allow the paint to dry completely. Acrylics on pumpkin skin can take a bit longer to set, so give it at least 30 to 60 minutes. -
Cleanup edges:
If any dots smeared or look messy, you can carefully scratch away the dry paint with a fingernail or use a damp Q-tip to tidy the edges. -
Seal the work:
Once fully dry, you can lightly spray the pumpkin with a clear matte acrylic sealer. This protects the paint from chipping, especially if you used a real pumpkin.
Level Up: Metallic Pop
Swap one of your matte colors for a metallic gold or silver paint to give your confetti pumpkin a glamorous, shimmering twist.
Place your festive confetti pumpkin on a tray or mantelpiece to enjoy a handmade burst of color all season long
Pacifier Face Baby Pumpkin

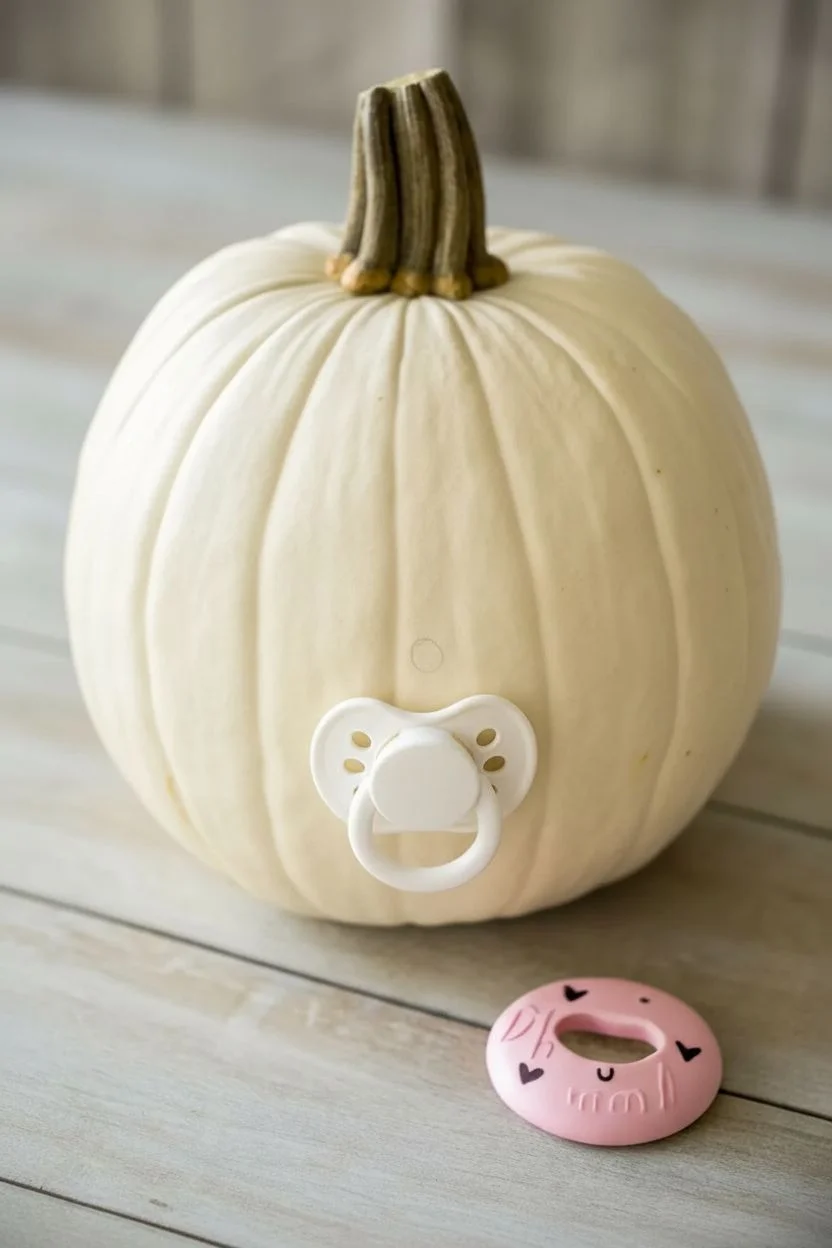
Transform a simple white pumpkin into an adorable sleeping baby with just a few strokes of paint and a clever pacifier trick. This sweet, no-carve project features gentle eyelashes, rosy cheeks, and a real pacifier to complete the illusion.
How-To Guide
Materials
- Medium-sized white pumpkin (real or faux)
- Black paint pen (fine tip) or black acrylic paint with fine liner brush
- Pink acrylic paint or pink paint pen
- Small round paintbrush or sponge dauber
- Real baby pacifier (new or sanitized)
- Pencil with eraser
- Hot glue gun and glue sticks
- Knife or carving tool (for stem removal)
- Scissors
Step 1: Preparing the Canvas
-
Clean surface:
Begin by wiping down your pumpkin with a damp cloth to remove any dirt or residue, ensuring the surface is completely dry before you start. -
Modify the pacifier:
Take your baby pacifier and carefully cut off the silicone nipple part using sharp scissors, leaving just the plastic shield and handle. -
Plan the placement:
Hold the modified pacifier against the lower center of the pumpkin to visualize where the mouth should be; mark this spot lightly with a pencil.
Step 2: Sketching
-
Draft the eyes:
Above your pacifier mark, lightly sketch two downward-curving crescents for the sleeping eyes using a pencil. -
Add detail:
Draw small, curved lashes extending downward from the crescents, spacing them somewhat evenly. -
Mark the eyebrows:
Sketch short, gentle arches just above each eye crescent to create the eyebrows. -
Nose placement:
Draw a tiny, C-shaped curve in the center area just above where the pacifier will sit to indicate a small button nose.
Uneven Surface?
If the pumpkin ribs are too deep for the pacifier to sit flush, fill the gaps behind the shield with extra hot glue to create a stable bridge.
Step 3: Painting the Features
-
Outline the eyes:
Using your black paint pen or a fine liner brush with black acrylic paint, trace over your pencil lines for the closed eyelids. -
Paint the lashes:
Carefully go over each eyelash mark with the black pen; I find quick, confident strokes prevent shaky lines here. -
Fill in brows and nose:
Trace the eyebrow arches and the small nose curve with the black pigment. -
Create rosy cheeks:
Dip a sponge dauber or a small round brush into pink paint and gently stamp a circle on each cheek area, slightly below and outside the eyes. -
Soften edges:
If the pink paint looks too heavy, blot it lightly with a paper towel immediately after applying to get a softer, flushed look. -
Let it cure:
Allow all paint to dry completely—usually about 15 to 20 minutes—before handling the pumpkin further to avoid smudging.
Lash Technique
Practice drawing the eyelashes on a piece of paper first. A flicking motion with your wrist creates a tapered, natural-looking lash line.
Step 4: Attaching the Pacifier
-
Prepare the glue:
Heat up your hot glue gun until it is fully ready. -
Apply adhesive:
Squeeze a generous ring of hot glue onto the back of the plastic pacifier shield, staying close to the edge where it will contact the pumpkin. -
Secure in place:
Press the pacifier firmly onto the pumpkin over the spot you marked earlier, holding it steady for 30 seconds until the glue sets. -
Clean up:
Once the glue is hard, gently pull away any wispy glue strings that might be hanging around the pacifier. -
Final erase:
Check for any visible pencil marks near the eyes or nose and gently erase them now that the paint is fully dry.
Now you have a quietly napping pumpkin baby that brings a peaceful charm to your seasonal display
Bow-Topped Baby Pumpkin Portrait
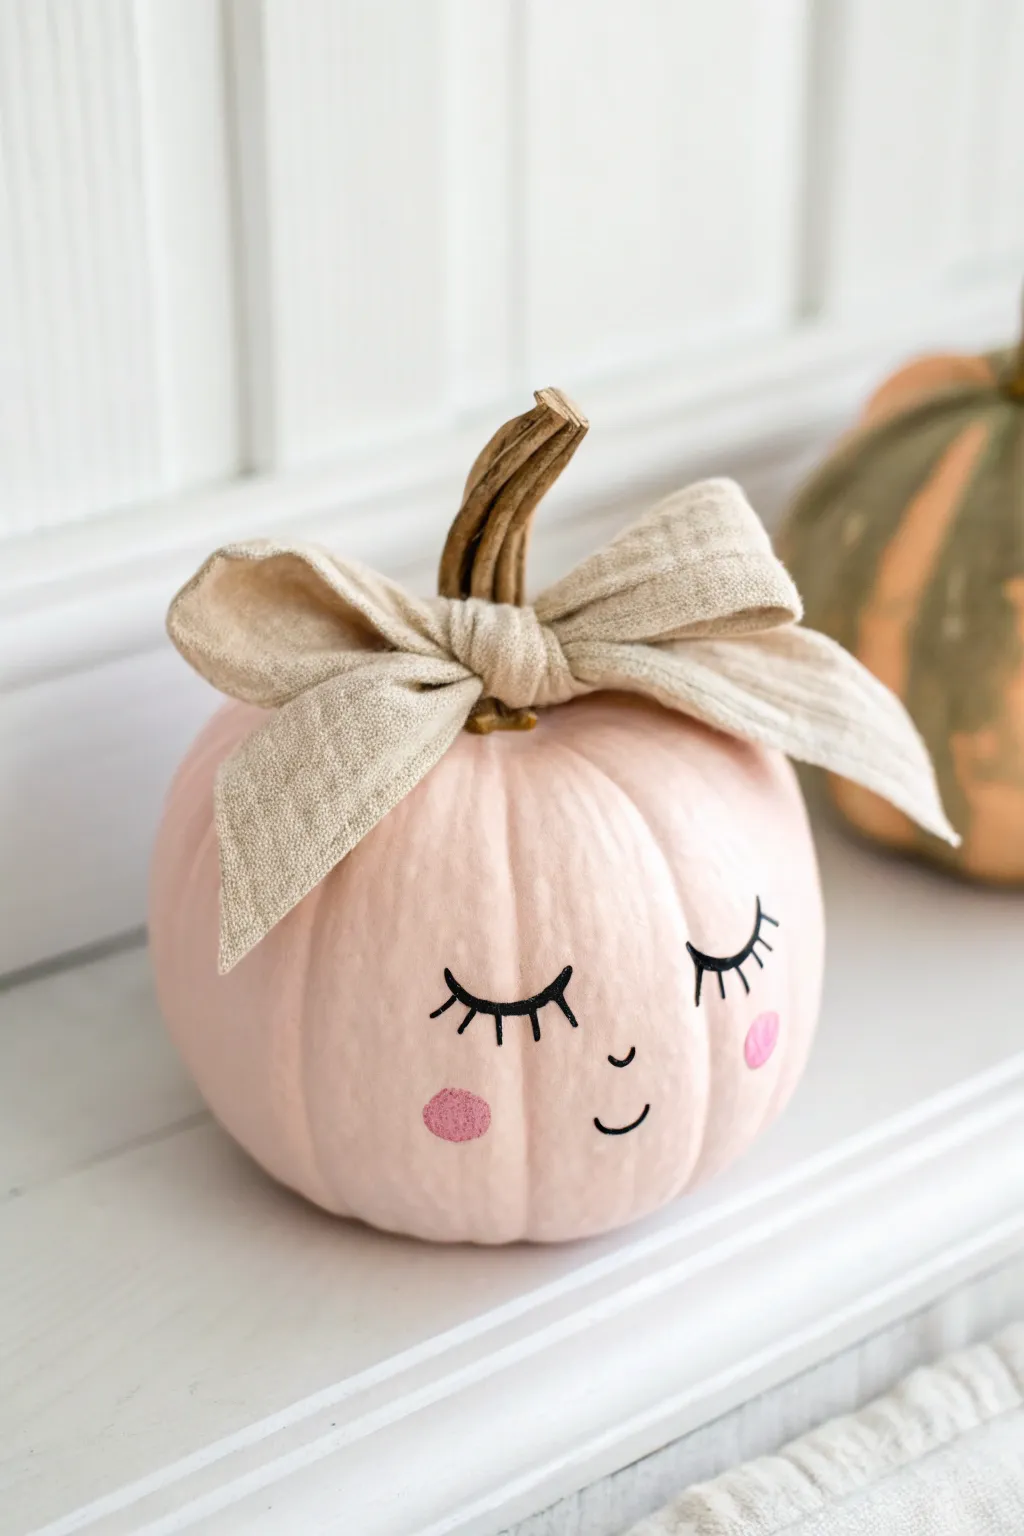
Transform a simple pumpkin into the sweetest nursery decoration with just a coat of pastel paint and a delicate fabric bow. This adorable sleepy face design is perfect for baby showers, gender reveals, or a gentle autumnal touch in your home.
Detailed Instructions
Materials
- Small to medium round pumpkin (real or faux)
- Light pink matte acrylic paint
- Soft pink acrylic paint (for cheeks)
- Black acrylic paint or fine-tip paint marker
- Medium flat paintbrush
- Small round detail brush
- Small foam pouncer or round sponge
- Beige linen or muslin fabric strip (approx. 2-3 inches wide)
- Scissors
- Paper plate or palette
- Clear matte sealant spray (optional)
Step 1: Painting the Base
-
Prep the Pumpkin:
Begin by wiping down your pumpkin with a damp cloth to remove any dirt or oils. If you are using a real pumpkin, ensure it is completely dry before starting. For faux pumpkins, give them a quick wipe to remove dust. -
Base Coat Application:
Squeeze your light pink matte acrylic paint onto a palette. Using the medium flat brush, apply a smooth, even base coat over the entire surface of the pumpkin, painting carefully around the base of the stem. -
Build Coverage:
Allow the first coat to dry completely for about 20-30 minutes. Once dry, apply a second coat to ensure full opacity so no orange or original color shows through. A third coat might be necessary for very bright orange pumpkins. -
Clean the Stem:
While the pink paint is drying, use a small damp brush or paper towel to wipe away any accidental pink smudges from the brown stem to keep it looking natural.
Step 2: Creating the Face
-
Reference Points:
Visualize where the face should sit. Find the ‘front’ of your pumpkin—usually the smoothest side without deep ridges. Mentally mark two spots for eyes about midway down the pumpkin. -
Drafting the Eyes:
Using your black paint and the fine detail brush (or a paint pen for easier control), draw two downward-curving crescents for the closed eyelids. Try to keep them symmetrical. -
Adding Lashes:
Paint three to five small lashes extending outward from the center and outer edges of each eyelid curve. Keep your strokes light and lifting at the ends for a fluttery effect. -
The Nose and Moon:
Paint a very tiny, subtle ‘u’ shape slightly below and between the eyes for a button nose. It should be barely there. -
Smiling Mouth:
Draw a small, gentle upward curve below the nose for the smile. Off-center the smile slightly to the right for a quirky, whimsical expression like the original project. -
Rosy Cheeks:
Dip your foam pouncer or round sponge lightly into the soft pink paint. Dab off excess paint onto a paper towel until the sponge is almost dry. -
Apply Blush:
Gently press the sponge onto the pumpkin cheeks, just below the outer corners of the eyes. Press straight down and lift straight up to create perfect circles.
Uneven Cheeks?
If your sponge circles aren’t perfect, use a Q-tip dipped in the base pink color to clean up the edges while the cheek paint is still wet.
Step 3: The Finishing Touch
-
Prepare the Bow:
Cut a strip of beige linen or muslin fabric about 2.5 feet long and 3 inches wide. I like to leave the edges raw rather than hemming them to add a bit of rustic texture. -
Tie the Knot:
Wrap the fabric strip around the base of the pumpkin stem. Tie a simple knot tightly against the pumpkin to secure it. -
Form the Bow:
Tie a standard bow, pulling the loops until they are fluffy and large. Adjust the center knot so the ‘right side’ of the fabric is showing if your material has one. -
Trim Tails:
Trim the tails of the bow at an angle or into a ‘V’ shape. They should be long enough to drape slightly but not cover the painted face. -
Final Adjustments:
Fluff up the bow loops again, making sure they stand upright. If you plan to keep this outdoors, give the painted area a quick spray of matte sealant to protect the face design.
Add Dimension
Add tiny white dots (‘highlights’) to the top of the cheeks or the nose using the end of a paintbrush handle to make the face look even sweeter.
Now you have a charming, sleepy pumpkin friend ready to cozy up your autumnal display
Sweet Bunny Baby Pumpkin
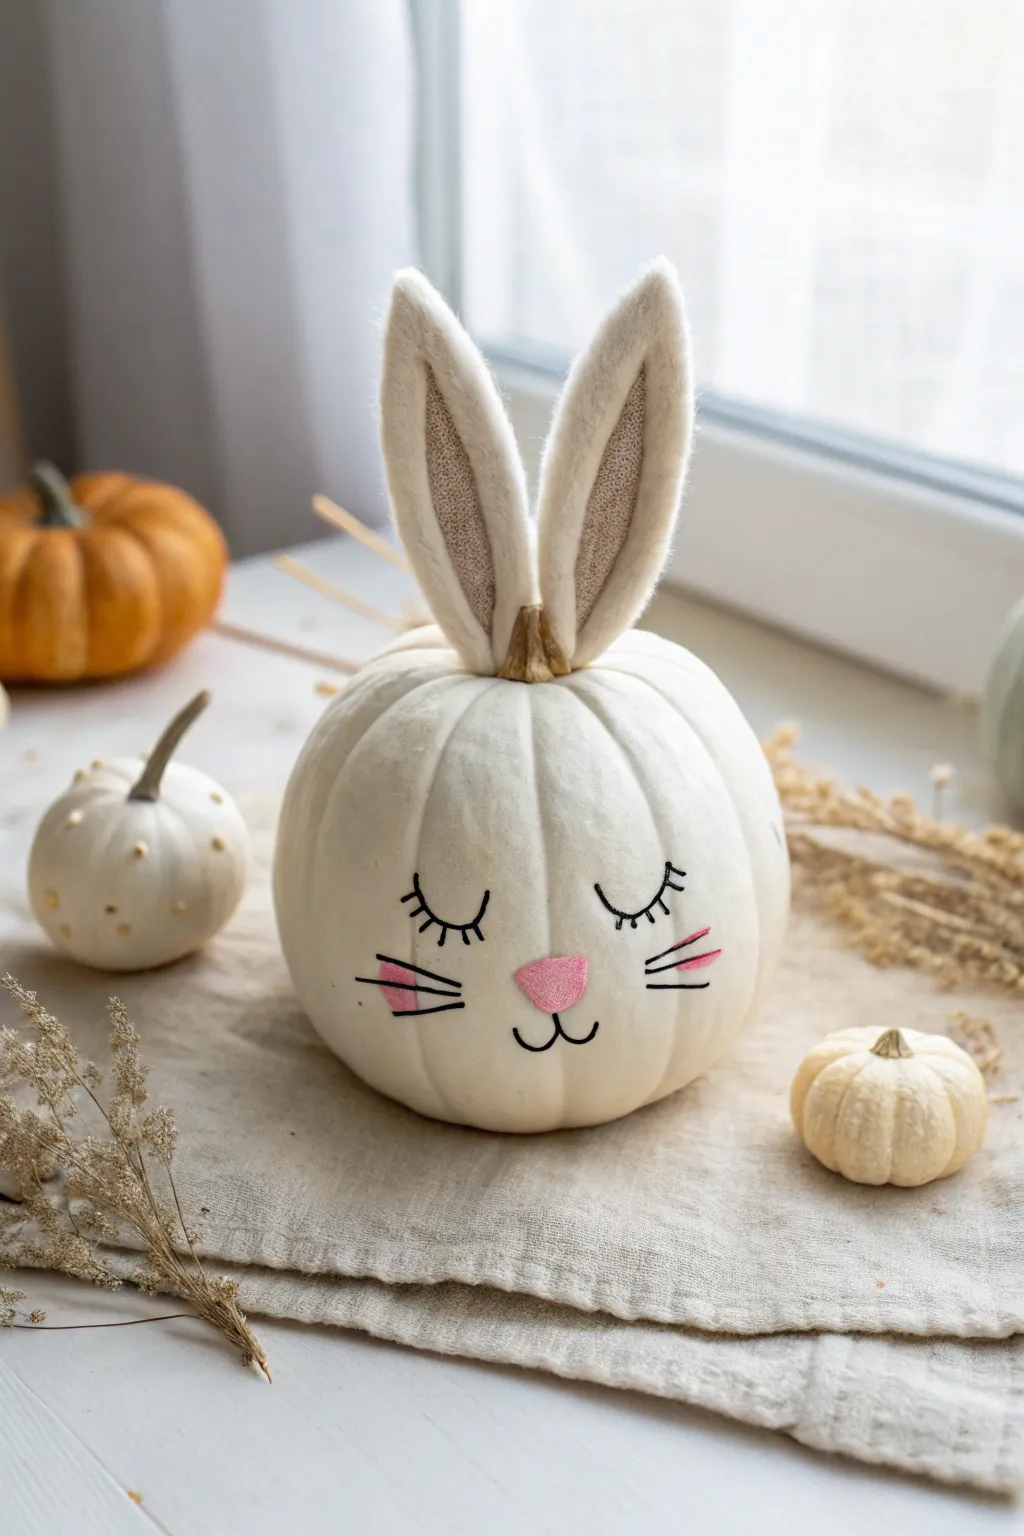
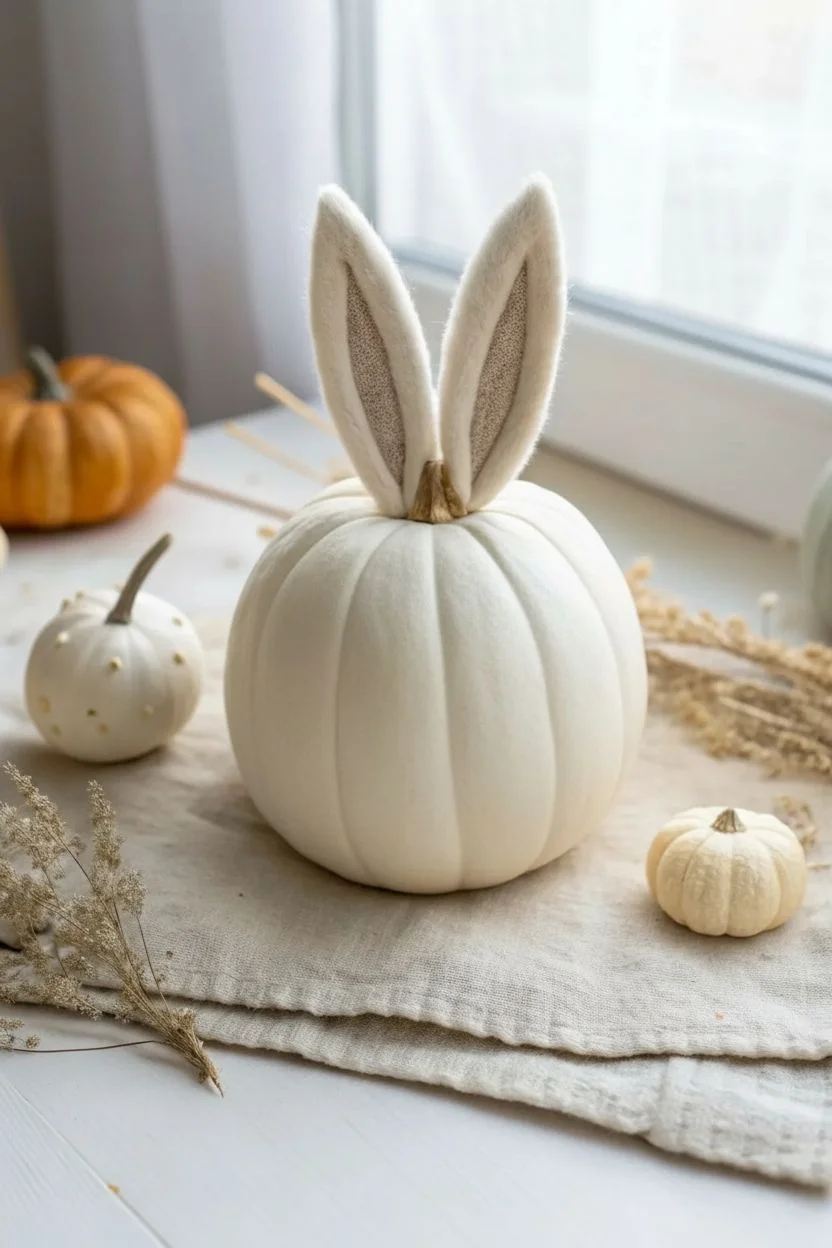
Transform a simple white pumpkin into an adorable sleeping bunny using soft felt textures and delicate painted details. This project combines the cozy charm of fall with a sweet nursery aesthetic, perfect for non-spooky seasonal decor.
Step-by-Step
Materials
- White pumpkin (real or faux)
- White or cream stiff crafting felt
- Beige or tan soft crafting felt (for inner ear)
- Pink crafting felt (for nose)
- Black acrylic paint or fine-point paint marker
- Pink acrylic paint
- Hot glue gun and glue sticks
- Scissors
- Small round paintbrush
- Pencil for sketching
- Toothpick (optional, for stabilizing ears)
Step 1: Preparation & Ears
-
Clean surface:
Begin by wiping down your pumpkin with a damp cloth to remove any dirt or oils. If you are using a real pumpkin, ensure it is completely dry before moving forward. -
Cut outer ears:
Take your stiff white felt and cut out two large, elongated oval shapes for the bunny ears. Aim for about 4-5 inches in length, slightly pointed at the top and tapered at the bottom. -
Cut inner ears:
Using the beige soft felt, cut two identical shapes that are slightly smaller than your white pieces. These will create the soft, textured inner ear look. -
Assemble ears:
Apply a thin line of hot glue to the back of the beige felt pieces and press them firmly onto the center of the white felt ears. Smooth them down to prevent any lumps. -
Shape the base:
Pinch the bottom tapered end of each ear together slightly to give them a curved, natural cupped shape. Secure this pinch with a tiny dot of hot glue. -
Attach to pumpkin:
Glue the ears directly behind the pumpkin’s stem. Hold them in place for at least 30 seconds until the glue sets so they stand upright.
Floppy Ears?
If the felt ears won’t stand up, glue a wooden toothpick halfway up the back of the white felt, leaving the bottom of the wood exposed to poke into the pumpkin.
Step 2: Painting the Face
-
Sketch placement:
Lightly sketch the face layout with a pencil. I find it easiest to mark the nose placement first, centered on the pumpkin’s ‘belly,’ to anchor the rest of the features. -
Cut the nose:
Cut a small, rounded triangle from the pink felt. Soften the corners with your scissors so it looks like a soft button nose. -
Draw eyes:
Using your black paint marker or a fine brush, carefully trace over your pencil lines for the eyes. Create two downward curved semi-circles to represent sleeping eyelids. -
Add lashes:
Paint three to four long, sweeping eyelashes extending from the outer corner and top of each eyelid curve. -
Attach nose:
Hot glue the pink felt nose onto your pencil mark in the center of the face, positioning it slightly lower than the eyes. -
Create the mouth:
Starting from the bottom point of the pink nose, paint a small vertical line down, then split it into two upward curves to form the ‘w’ shaped mouth. -
Paint cheeks:
Dip your small brush into pink paint and dab two small horizontal ovals on either side of the face. Keep the paint fairly dry for a softer look. -
Details:
Add three thin black whiskers extending horizontally from the outer edge of the pink cheek patches.
Soften the Look
Use a dry brush technique for the pink cheeks. Wipe most paint off on a paper towel before applying to create a rosy, airbrushed effect rather than solid blocks.
Place your sleeping bunny on a cozy linen napkin to complete this sweet autumnal scene
Teddy Bear Baby Pumpkin
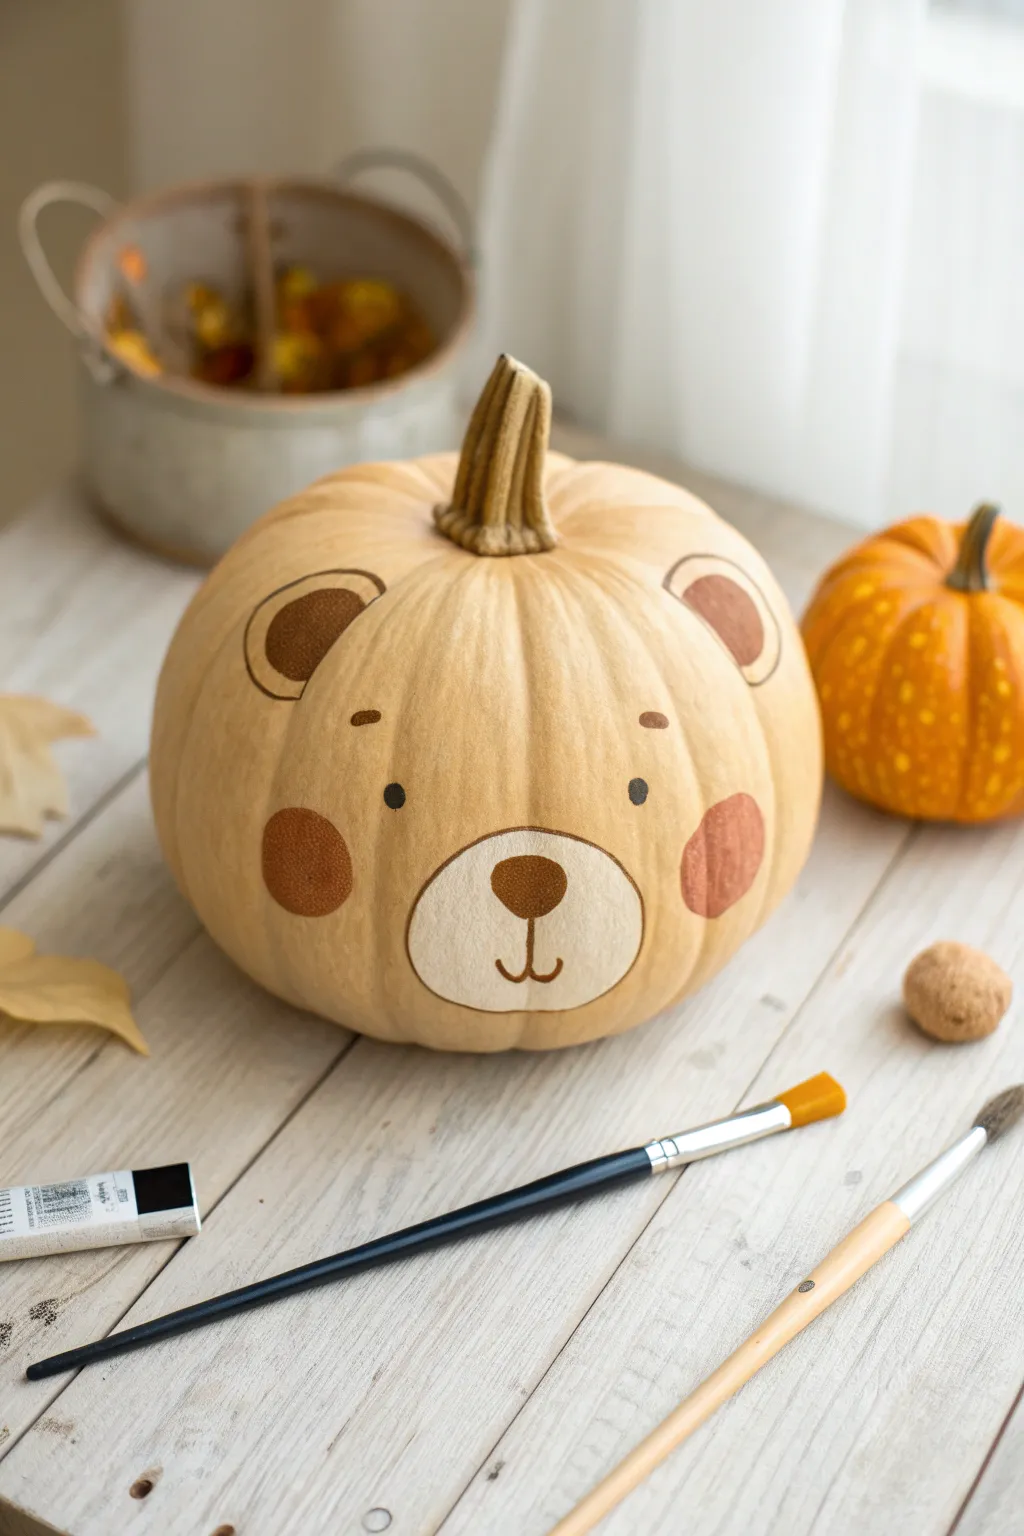
Transform a pale cream pumpkin into the most adorable teddy bear you’ve ever seen. This project uses soft, neutral tones and simple geometric shapes to create a gentle character perfect for a baby-themed autumn display or nursery decor.
Detailed Instructions
Materials
- Medium-sized cream or white pumpkin (real or faux)
- Cream or light beige acrylic paint
- Light brown/tan acrylic paint
- Dark chocolate brown acrylic paint
- Warm rosy beige or soft terracotta acrylic paint
- Black acrylic paint or paint pen
- Medium flat paintbrush
- Small round detail brush
- Pencil for sketching
- Palette or paper plate
- Paper towels and water cup
Step 1: Preparation & Base Coat
-
Clean the surface:
Start by wiping down your pumpkin with a damp cloth to remove any dirt or oils. If you are using a real pumpkin, ensure it is completely dry before you begin painting. -
Apply the base color:
While many craft pumpkins come in cream, painting a fresh coat of cream or light beige acrylic paint gives you a uniform, matte canvas. Use a medium flat brush for broad, even strokes covering the entire surface. -
Let it dry completely:
Allow this base coat to dry fully to the touch. This prevents your pencil sketches from digging into wet paint later.
Pro Tip: Sketch Lightly
Use a watercolor pencil in a tan shade instead of graphite. The lines will dissolve into your paint, leaving no dirty gray smudges behind on the cream base.
Step 2: Sketching the Bear Face
-
Outline the muzzle:
Using a pencil very lightly, draw a rounded oval shape in the lower center of the pumpkin face. This will be the bear’s snout area. -
Mark the ears:
Sketch two semicircles near the top of the pumpkin, spaced widely apart. Try to position them so they curve naturally over the shoulder of the pumpkin. -
Position the eyes and cheeks:
Place two small dots for eyes just above the muzzle line, spaced apart. Then, lightly sketch large circle outlines on the cheeks for that rosy glow.
Level Up: Fuzzy Texture
Mix a pinch of baking soda into your paint for the ears and cheeks. It creates a subtle, gritty texture that mimics the feel of a fuzzy teddy bear.
Step 3: Painting the Features
-
Fill in the muzzle:
Mix a very light cream color—slightly lighter than your base coat—and fill in the oval muzzle shape. Use your flat brush to keep the edges crisp. -
Build opaque layers:
The lighter paint might need a second coat to stand out against the beige background. Let the first layer dry before adding the second for solid coverage. -
Paint the rosy cheeks:
Dip your round brush into the warm rosy beige or terracotta paint. Fill in the cheek circles you sketched earlier. I prefer to stipple the edges slightly so they look soft rather than harsh. -
Outline the ear shapes:
Using a small round brush and light brown paint, trace the outer semicircle of the ears. -
Fill the inner ears:
Switch to a darker chocolate brown paint and carefully fill the inside semi-circle of each ear. Leave a thin rim of the lighter pumpkin color or the light brown outline visible around the dark center. -
Paint the nose:
Inside the cream muzzle area, paint an inverted, rounded triangle shape using the dark chocolate brown or a soft black. Position it near the top center of the oval. -
Initial eye placement:
Using a very small detail brush or the handle end of a paintbrush, dot two small circles for the eyes using black paint. Keep them simple and small for a sweet expression.
Step 4: Refining Details
-
Add the mouth:
With your finest liner brush and thin black paint (or ink), paint a straight vertical line down from the nose, curving outward left and right at the bottom to create the classic anchor-shaped bear smile. -
Create eyebrows:
Paint short, floating, curved dashes of brown above the eye area. These little ‘floating eyebrows’ give the bear a surprised or attentive look. -
Add eye highlights:
While not strictly necessary, adding a tiny speck of white paint to the black eye dots can bring the character to life. -
Outline the main features:
Take a very diluted light brown paint and a thin brush to gently outline the cream muzzle. This separates it visually from the face without a harsh black line. -
Define the ear outline:
Similarly, run a thin line of the medium brown paint around the outer edge of your ear shapes to define them clearly against the pumpkin skin. -
Final check:
Step back and look at your bear. If the cheeks need more warmth, you can gently glaze a little more terracotta color over them once dry. -
Seal the stem:
If your pumpkin stem looks too green or plastic, give it a quick dry-brush with some tan paint to match the earthy, natural vibe of the bear.
Now you have a cozy, charming painted pumpkin that captures the sweetness of a favorite teddy bear.
Baby Name Script Pumpkin
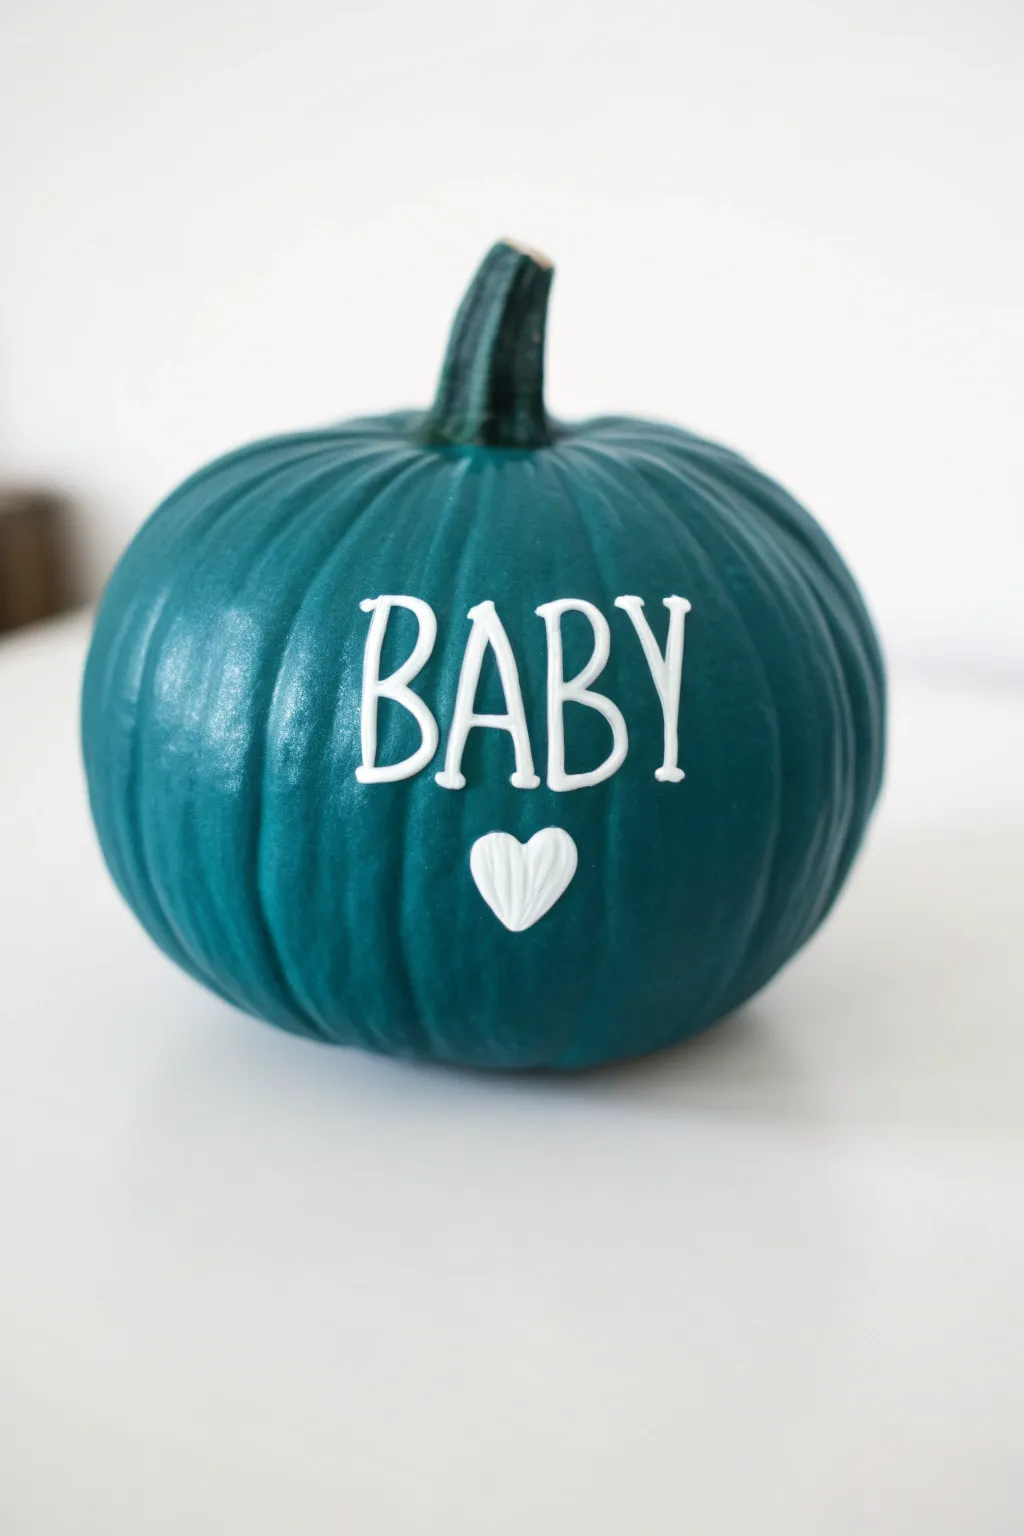
For a minimalist and modern take on fall baby announcements, this teal pumpkin features crisp white serif lettering that pops beautifully against the dark background. It’s a gender-neutral alternative to classic pinks and blues that adds a touch of sophistication to your seasonal decor.
Step-by-Step Guide
Materials
- Faux pumpkin (smooth surface works best)
- Teal or dark turquoise acrylic craft paint
- White puff paint (dimensional fabric paint) in a squeeze bottle
- Wide flat paintbrush
- Fine grit sandpaper (optional)
- Pencil or white chalk pencil
- Paper towels
- Small round paintbrush (optional for touch-ups)
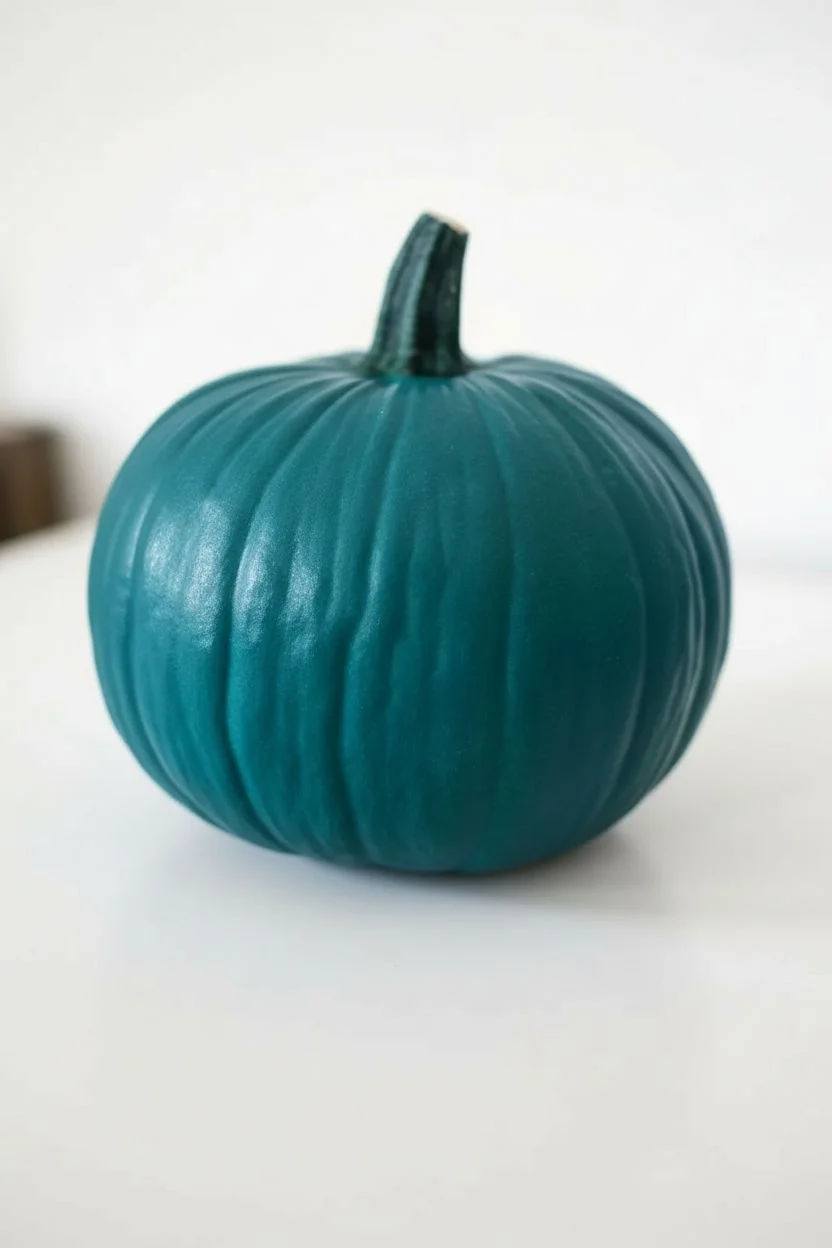
Step 1: Preparing the Base
-
Clean surface:
Begin by wiping down your pumpkin with a slightly damp paper towel to remove any dust or oils. This ensures the paint adheres properly. -
Optional sanding:
If your pumpkin has a shiny or glossy coating, you might want to lightly scuff the surface with fine-grit sandpaper. This gives the acrylic paint something to grip onto. -
First coat:
Using your wide flat brush, apply the first layer of teal acrylic paint. Use long, vertical strokes that follow the natural curve of the pumpkin. -
Stem care:
Be careful around the base of the stem. I prefer to leave the stem its original dark color for contrast, so use a smaller brush near the top if you need more precision. -
Dry and repeat:
Let the first coat dry completely, which usually takes about 20-30 minutes. Apply a second or third coat until you have opaque, solid coverage with no orange showing through. -
Final dry:
Allow the base color to cure fully for at least an hour before attempting to add any lettering.
Oops, it smeared!
Wait for the smear to dry completely. Scrape off the raised 3D paint carefully with a fingernail, touch up the teal background paint, and re-letter that spot once dry.
Step 2: Adding the Lettering
-
Draft the text:
Lightly sketch the word ‘BABY’ across the center of the pumpkin using a pencil or white chalk pencil. Aim for tall, narrow letters with slight serifs at the tips. -
Center the design:
Find the center of the pumpkin and start with the middle letters ‘A’ and ‘B’ to ensure the word is balanced horizontally. -
Sketch the heart:
Directly below the text, lightly draw a small heart shape to anchor the design. -
Test the flow:
Squeeze a small amount of white puff paint onto a scrap piece of paper to remove any air bubbles and get a feel for the flow rate. -
Outline letters:
Carefully trace over your pencil lines with the puff paint bottle tip. Keep even pressure to create a consistent, raised line. -
Refine the serifs:
Pay special attention to the ends of the letters. Add tiny horizontal lines at the top and bottom of your strokes to create that classic serif look. -
Fill the heart:
Outline the heart shape first, then fill it in with vertical lines of puff paint to give it a textured, ribbed appearance. -
Clean up edges:
If you make a mistake, quickly wipe it away with a damp Q-tip before the puff paint sets. If it smears, let it dry, paint over it with teal, and try again. -
Drying time:
Puff paint takes significantly longer to dry than acrylics. Let the pumpkin sit undisturbed overnight to ensure the letters are hard and won’t smudge.
Add some sparkle
While the white puffy paint is still wet, sprinkle ultra-fine iridescent glitter over the word ‘BABY’ for a shimmering effect, then shake off the excess once dry.
Place your finished pumpkin on a shelf or front porch for a sweet announcement piece
Faux Foam Baby Pumpkin Keepsake That Lasts
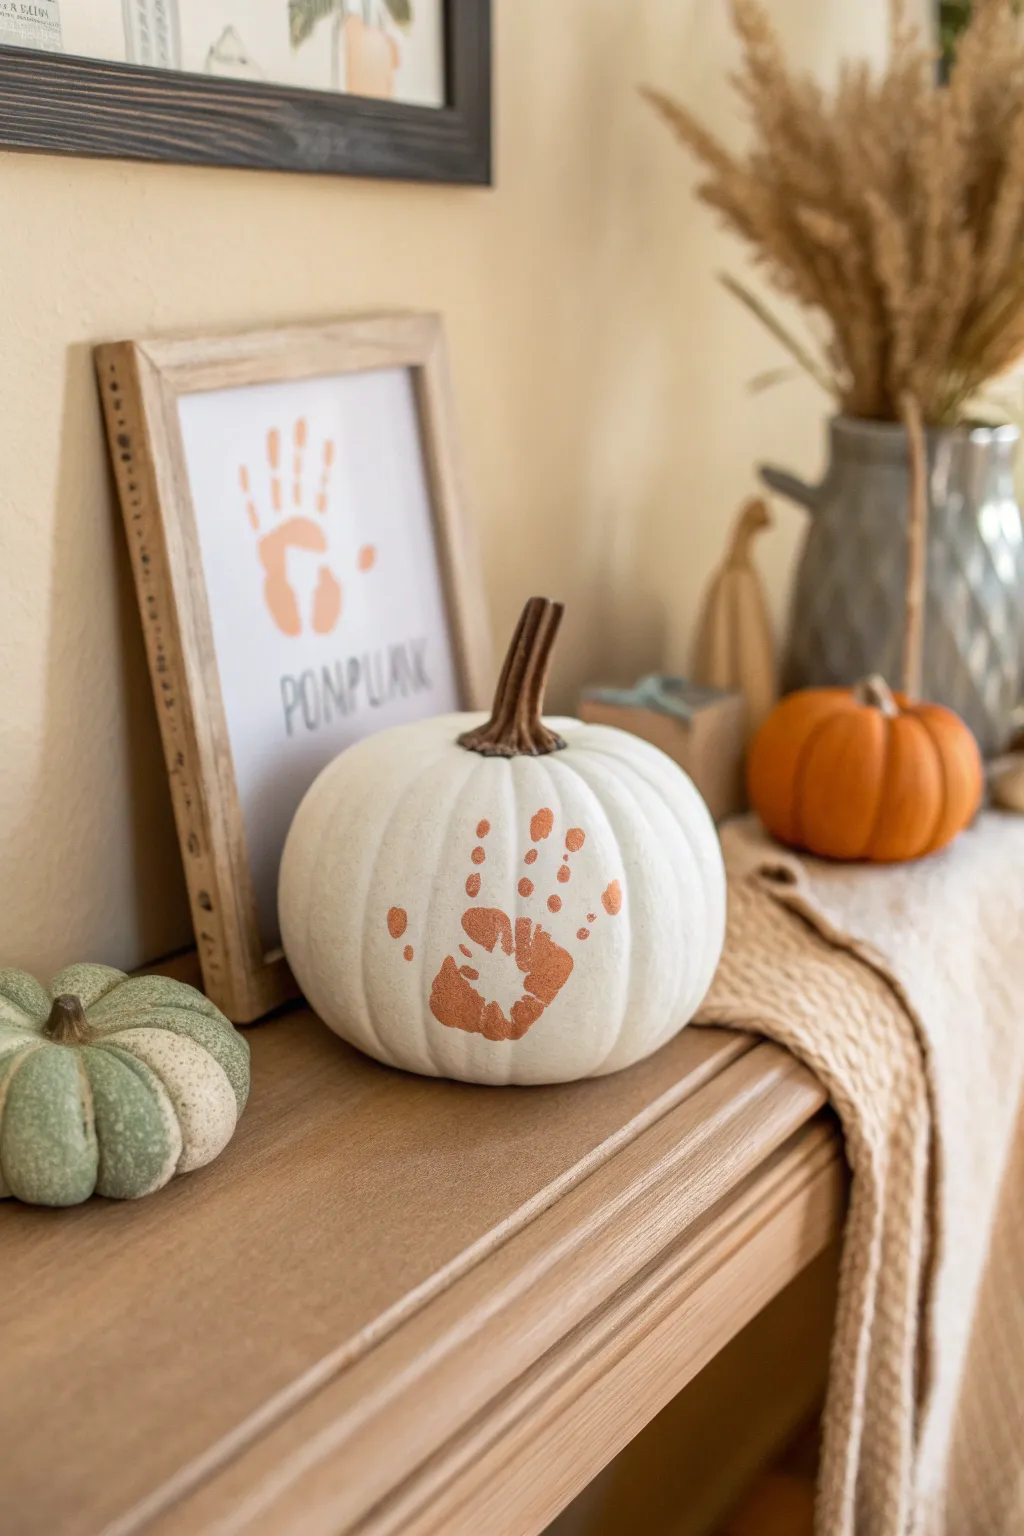
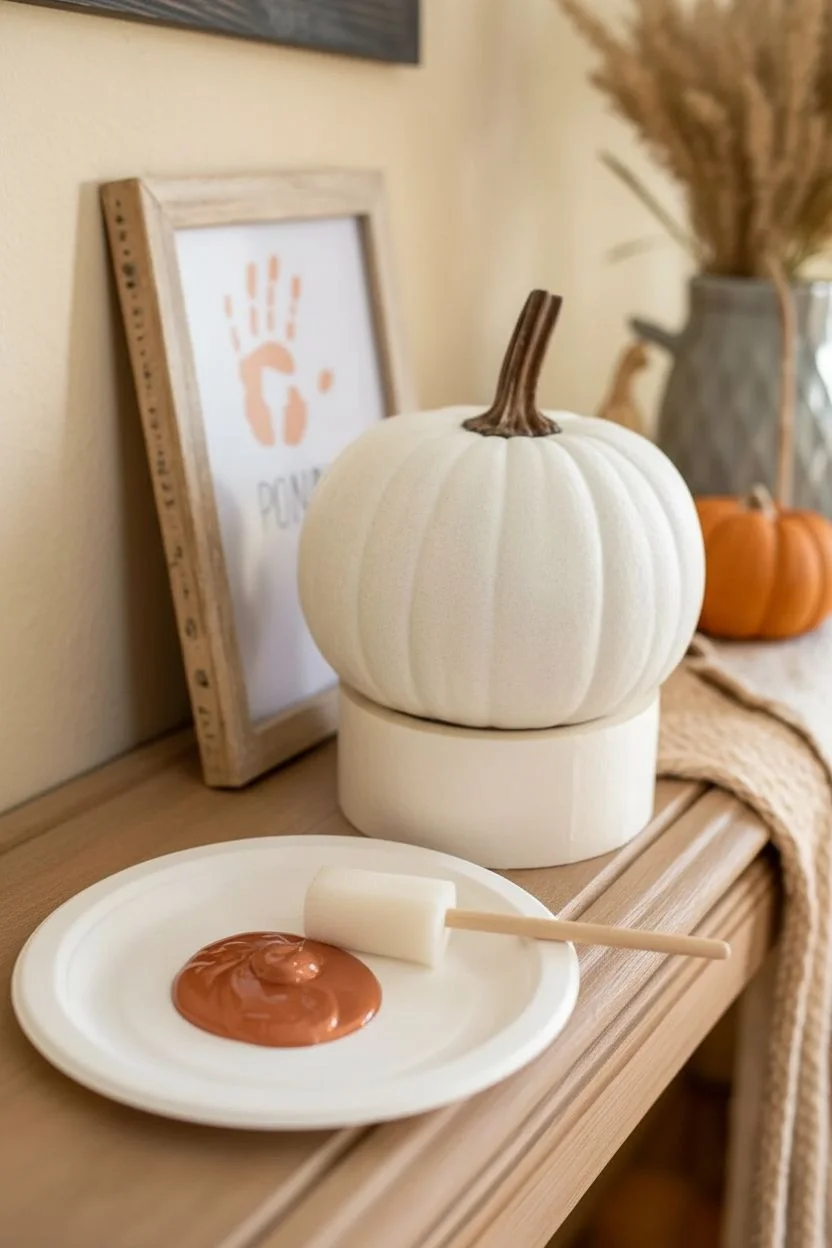
Capture those tiny fingers forever with this elegant, rustic fall keepsake that blends perfectly with neutral home decor. Using a faux white pumpkin ensures your memory lasts for years to come, featuring a shimmering copper print that pops against the matte surface.
Detailed Instructions
Materials
- White faux foam pumpkin (medium to large size)
- Metallic copper acrylic craft paint
- Foam sponge brush
- Paper plate or palette
- Baby wipes (essential for quick cleanup)
- Matte sealant spray (optional)
- Fine-grit sandpaper (optional)
Step 1: Preparation
-
Clean the surface:
Start by wiping down your faux pumpkin with a damp cloth to remove any dust or manufacturing residue. If the pumpkin has a very shiny plastic coating, lightly scuff just the area where the print will go with fine-grit sandpaper to help the paint adhere better. -
Stabilize the pumpkin:
Find a way to hold the pumpkin steady. Since pumpkins are round and prone to rolling, I like to nestle the bottom of the pumpkin into a small bowl or a roll of tape to keep it from moving while working. -
Prepare the paint:
Squeeze a generous dollop of metallic copper acrylic paint onto a paper plate. You want the paint to be accessible but not so thick that it globs.
Step 2: Creating the Print
-
Apply paint to the hand:
Using a foam sponge brush, dab the copper paint onto your baby’s palm and fingers. Use a dabbing motion rather than brushing to ensure even coverage without streaks. -
Check paint thickness:
Inspect the hand before printing. The paint should be wet and cover the skin completely, but it shouldn’t be dripping. If it’s too thick, the print will look like a smudge; too thin, and it won’t show up. -
Position the hand:
Gently guide the baby’s hand toward the center of the pumpkin. Aim for the flattest section available between the vertical ridges of the pumpkin to get the clearest impression. -
Press down:
Press the palm down firmly first, then gently press each finger down onto the pumpkin surface. You may need to rock your hand slightly to follow the curve of the pumpkin. -
Lift straight up:
This is the tricky part—lift the baby’s hand straight up and away from the pumpkin surface. Avoid dragging it sideways, which will smear the metallic paint. -
Clean up baby:
Immediately use the baby wipes to clean the paint off the little hand. Acrylic paint dries quickly, so wipe it off before it sets.
Smudged the print?
Don’t panic! Since the pumpkin surface is smooth (unlike paper), you can immediately wipe a bad print away with a wet wipe, dry the pumpkin, and try again.
Step 3: Finishing Touches
-
Inspect and touch up:
Look closely at the print. If there are small gaps where the paint didn’t transfer because of a pumpkin ridge, you can use a tiny detail brush to carefully fill in the missing copper color. -
Allow to dry:
Let the pumpkin sit undisturbed for at least 24 hours. The metallic pigments can take a little longer to cure fully than standard matte paints. -
Add a name (optional):
If you want to match the framed print in the photo, you can use a fine-tip black paint pen or a vinyl decal to add a name or the year underneath the handprint. -
Seal the project:
To ensure the handprint doesn’t scratch off over time, take the pumpkin outside and give it a very light misting of matte sealant spray. Keep the can 12 inches away to avoid drips.
Add some texture
While the copper paint is still wet, sprinkle a tiny pinch of ultra-fine copper glitter over the print for a keepsake that sparkles in the candlelight.
Place your finished pumpkin on a mantel or shelf to enjoy a timeless reminder of how small they once were


Have a question or want to share your own experience? I'd love to hear from you in the comments below!