If you’re planning a baby shower and you want an activity that feels sweet, relaxed, and actually meaningful, painting is such a good fit. I love baby-shower art because it doubles as entertainment and a keepsake the parents can hang in the nursery later.
Painted Onesies and Bibs Station

Capture the sweetness of a starry night sky combined with loving hearts on this charming bodysuit. Using soft pastel fabric markers, you’ll create a scattered, whimsical pattern that is perfect for a dream-themed baby shower station.
Step-by-Step Guide
Materials
- White cotton baby onesie (pre-washed)
- Fabric markers (fine tip and medium tip) in teal, pastel pink, and magenta
- Cardboard insert or stiff paper
- Pencil and eraser (optional for sketching)
- Iron (for heat setting)
- Drafting masking tape (optional for stenciling)
Step 1: Preparation
-
Wash and dry:
Before you begin, ensure the onesie has been washed without fabric softener to remove any sizing chemicals. This ensures the ink bonds properly with the fibers. -
Insert protection layer:
Place a piece of cardboard or stiff paper inside the onesie, positioning it directly behind the chest area where you will be drawing. This prevents the ink from bleeding through to the back of the fabric. -
Smooth the surface:
Pull the fabric slightly taut against the cardboard insert and smooth out any wrinkles with your hand so you have a flat, stable drawing surface.
Ink Bleeding Issues?
If ink spreads into the cotton fibers (feathering), your marker tip is lingering too long. Use faster, lighter strokes, or pre-treat the area with freezer paper ironed onto the back for stability.
Step 2: Drawing the Main Elements
-
Sketch the layout (optional):
If you are nervous about freehanding, use a pencil to very lightly sketch the placement of the largest stars and hearts. Aim for a loose, circular arrangement in the center of the chest. -
Draw the central heart:
Using a pink fabric marker, draw a medium-sized heart slightly to the right of the center. Instead of a solid line, try using a dashed or dotted line style to give it a ‘stitched’ look. -
Color the central heart:
Lightly shade inside this heart with a very pale pink marker or gentle strokes of the same pink, keeping the color soft rather than opaque. -
Add the large teal star:
To the left of the central heart, draw a five-pointed star using a teal or light blue marker. Outline it first, then fill it in with scribble-style shading to give it texture. -
Draw the outline hearts:
Create a few smaller open outline hearts around the main two shapes. Use a teal marker for one heart and a pink outline for another to balance the colors.
Add Some Sparkle
For a magical touch, use a silver or gold fabric glitter pen to trace over just one or two of the smallest stars. It adds a subtle shimmer without overpowering the pastel look.
Step 3: Adding Details and Filler
-
Scatter small solid stars:
Using the pink and magenta markers, draw tiny, solid five-pointed stars scattered around the main cluster. Keep these quite small, like little sparkles. -
Fill gaps with outline stars:
Switch to your teal marker and draw small outline-only stars in any empty spaces to balance out the composition. Varies their sizes slightly for interest. -
Add dashed details:
For the largest teal star you drew earlier, go back in with a slightly darker teal pen and add a dotted or dashed outline around it to match the style of the main heart. -
Incorporate tiny dots:
To make the design feel cohesive, place tiny dots of magenta and teal in the negative spaces between the larger shapes. This mimics the look of faint starlight. -
Review the balance:
Step back and look at the onesie from a distance. If one side feels empty, add a very small star or a tiny heart to even out the visual weight.
Step 4: Finishing Touches
-
Dry completely:
Let the artwork air dry flat for at least 24 hours. I usually leave it overnight to be absolutely sure the ink is settled. -
Heat set the design:
Once dry, set your iron to the cotton setting (no steam). Place a thin cloth over your drawing and iron significantly for 2-3 minutes to permanentize the design. -
Remove the insert:
Carefully slide the cardboard insert out of the onesie. Your project is now ready for gifting.
This gentle celestial design makes for a lovely, handmade addition to any new baby’s wardrobe


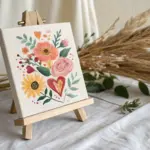
Collaborative “Welcome, Baby” Sign-In Art
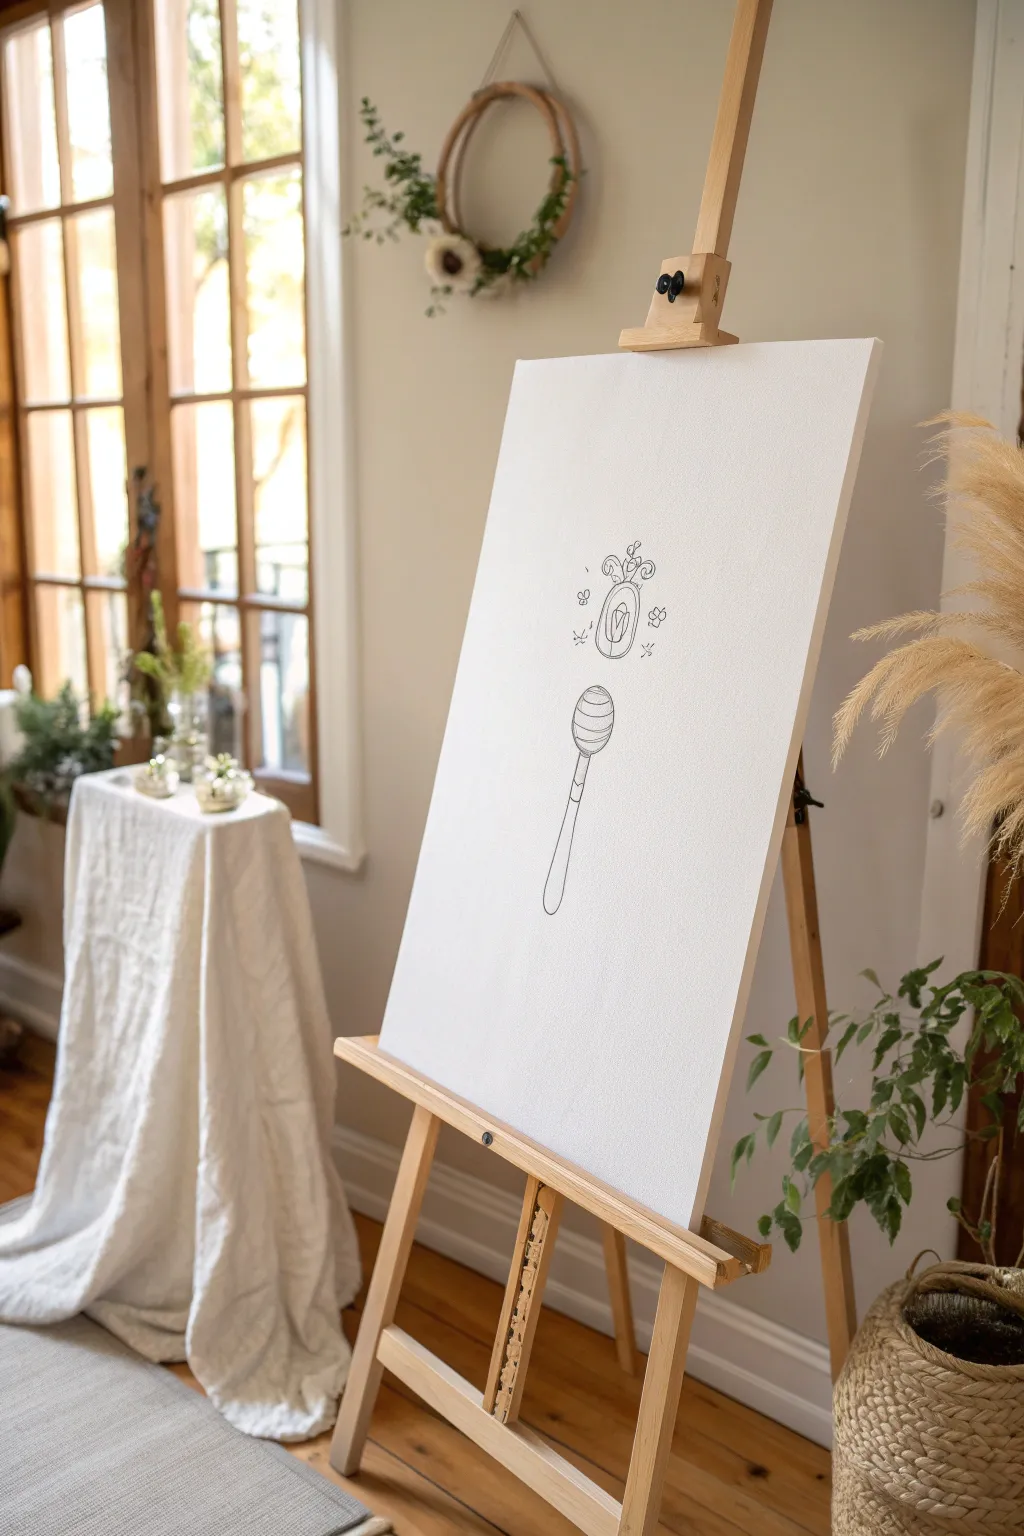
This minimalist and charming canvas serves as both a piece of nursery decor and a unique guestbook for your baby shower. Featuring a delicate line drawing of a baby rattle and a festive decorative element, it invites guests to leave their signatures or well-wishes around the central art.
Step-by-Step
Materials
- Large stretched canvas (approx. 18×24 inches or larger)
- Graphite pencil (HB or H)
- Black fine-point paint pen or permanent marker
- Mars plastic eraser
- Ruler or straight edge
- Circle template or compass (optional)
- Easel for display
- Reference image of a vintage rattle
Step 1: Planning and Sketching
-
Prepare the canvas:
Set up your canvas on an easel or a flat, clean table. Ensure the surface is free of dust or lint by wiping it gently with a dry cloth. -
Find the center:
Using a ruler, lightly measure and mark the vertical center line of the canvas with your pencil. This will ensure your artwork is perfectly balanced. -
Sketch the rattle handle:
Starting near the bottom third of the canvas, lightly sketch the handle of the rattle. Draw a long, slender stick shape that tapers slightly towards the bottom, ending in a rounded curve. -
Add the rattle head:
Draw an oval or egg shape sitting on top of the stick handle. I like to keep this shape fairly organic, but you can use a template if you prefer perfect symmetry. -
Detail the rattle banding:
Sketch three simple, curved horizontal lines across the rattle head to create the look of varying segments or stripes commonly found on vintage wooden rattles. -
Connect the pieces:
Draw a small, narrow rectangle connecting the handle to the head, refining the transition point so it looks like one cohesive object.
Whoops! Smudged Ink?
If you accidentally smudge wet ink, wait for it to dry fully. Then, carefuly apply a small amount of white acrylic paint over the error to mask it before redrawing the line.
Step 2: Adding the Decorative Feature
-
Position the floating element:
About two or three inches above the rattle, lightly sketch a vertical oval. This will be the focal point of the upper decorative illustration. -
Draw the inner motif:
Inside the floating oval, sketch a simple tulip bud or pacifier shape. Keep the lines clean and uncluttered. -
Add the crown detail:
Top the oval frame with a whimsical flourish. Sketch looping, ribbon-like curves that resemble a small crown or tied bow sitting on the frame. -
Incorporate sparkles:
Scatter small doodle elements around the upper oval. Draw tiny four-pointed stars, small hearts, or flower petals floating on either side to add a sense of magic. -
Review the composition:
Step back from the canvas to check the proportions. The drawing should feel centered with plenty of negative white space around it for signatures.
Make It Colorful
Visual interest boosts participation. Provide guests with colored paint markers or ink pads for thumbprints to turn the simple black outlines into a vibrant collaborative piece.
Step 3: Inking and Finishing
-
Trace the main lines:
Take your black paint pen or fine-point marker and carefully trace over your pencil sketch. Maintain a steady hand and a consitent line weight. -
Refine the details:
Go over the smaller details, like the sparkles and the intricate crown loops. If using a paint pen, ensure you don’t press too hard to avoid ink puddling. -
Let the ink cure:
Allow the ink to dry completely. This is crucial—smudging wet ink at this stage is heartbreaking. -
Erase guidelines:
Once you are certain the ink is dry, gently run your Mars plastic eraser over the entire drawing to remove the initial pencil marks and the center guideline. -
Clean up canvas dust:
Brush away the eraser crumbs with a clean, dry brush or cloth. -
Final display setup:
Place the finished canvas on the easel. Set out permanent markers nearby for guests to use when signing their names around the art.
You now have a beautiful, minimalist centerpiece ready to capture memories from your special day


Easy Watercolor Baby Animal Paint-Along
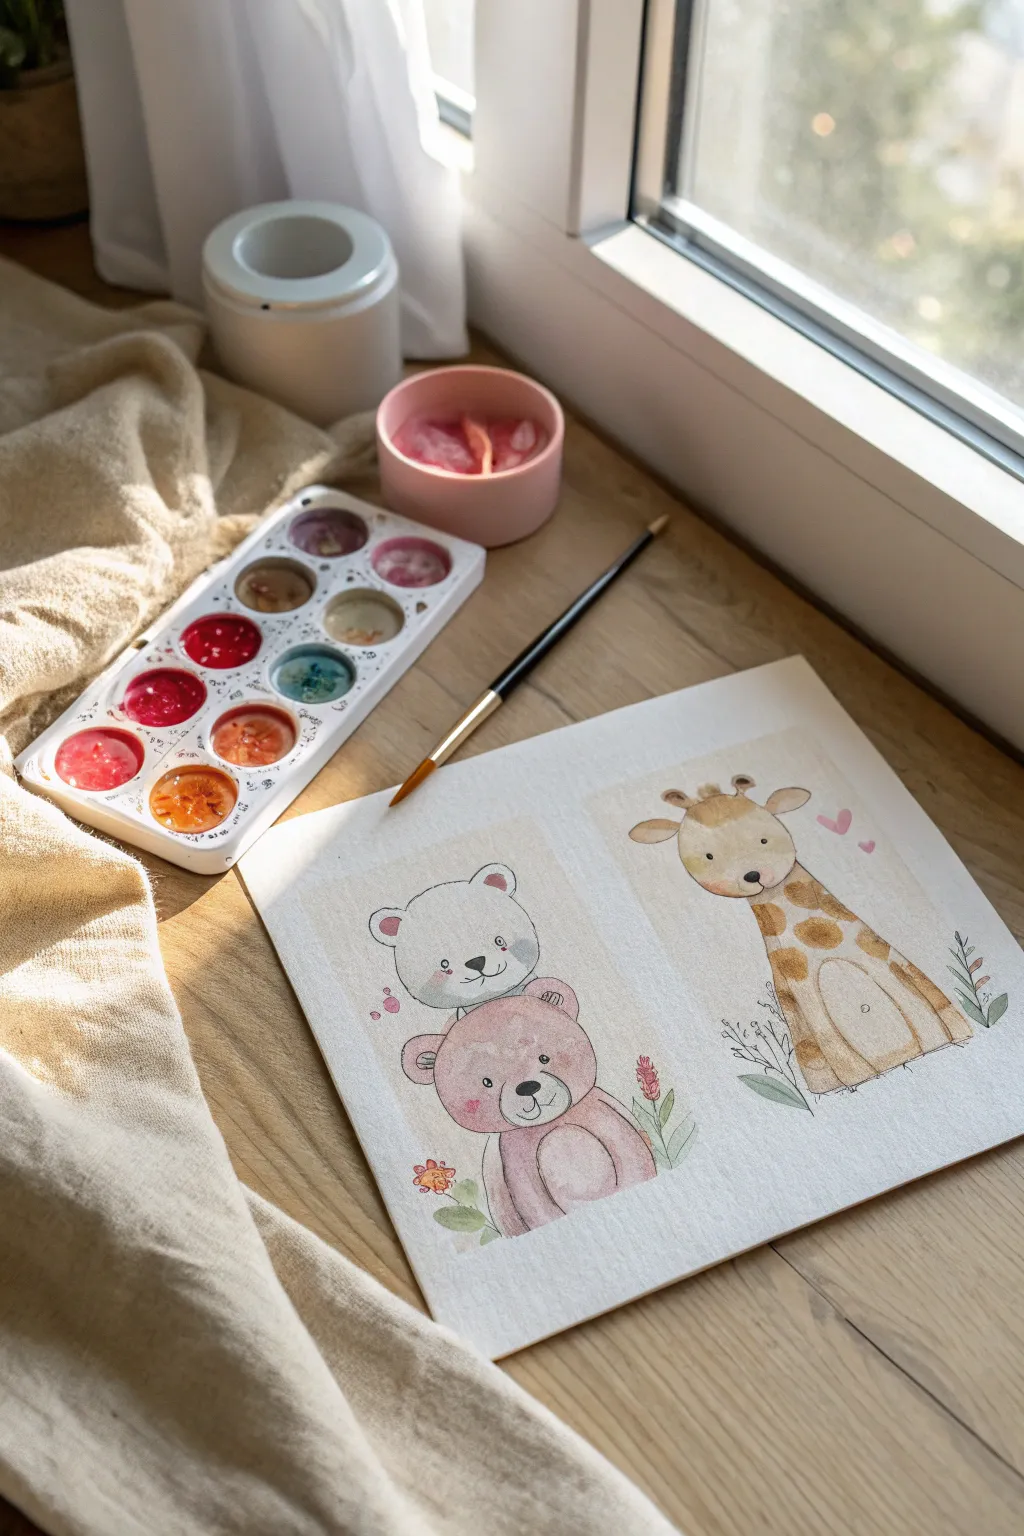
Create a charming duo of nursery-ready illustrations featuring a pair of cuddling bears and a gentle, long-necked giraffe. This project captures the soft, whimsical feel of children’s book art using simple shapes and gentle watercolor washes.
Detailed Instructions
Materials
- Cold press watercolor paper (cut into two rectangular panels or kept as one sheet)
- Watercolor paints (shades of brown, pink, sunny yellow, black)
- Round watercolor brushes (size 4 for fills, size 0 or 00 for details)
- Pencil (HB or H) for light sketching
- Water cups and paper towels
- Fine liner pen (waterproof, brown or dark grey)
Step 1: Sketching the Characters
-
Outline the Bears:
On the left side of your paper, lightly sketch two overlapping circles for heads. Draw the bottom bear slightly larger. Add rounded ears to both and define their bodies with soft, curved lines, making sure they look like they are hugging or stacked comfortably. -
Define Bear Details:
Mark faint guidelines for the eyes and snouts. Give the top bear’s snout a simple oval shape and the bottom bear a slightly larger muzzle area. -
Sketch the Giraffe:
On the right side, draw a large oval for the giraffe’s head and a smaller oval below for the snout. Connect a long, tapered neck extending downwards to a simple bell-shaped body. -
Add Giraffe Features:
Sketch small ossicones (horns) and ears pointing outward. Draw irregular organic shapes down the neck for spots.
Bleeding Lines?
If your fine liner bleeds, the paper is still damp deep down. Wait another 10 minutes or use a hair dryer on low heat before inking again.
Step 2: Painting the Bears
-
First Wash – Bottom Bear:
Mix a watery light brown or dusty rose color. Using your size 4 brush, fill the bottom bear’s body and head, avoiding the muzzle area to keep it lighter. -
Top Bear Shadowing:
Since the top bear is white (polar bear style), use a very diluted grey or pale blue to paint just the shadows: under the chin, inside the ears, and along the bottom edge of the paws. -
Blush and Details:
While the paper is still slightly damp but not soaking, drop a tiny amount of diluted pink onto the cheeks of both bears for a soft, fuzzy blush effect. -
Darkening the Coat:
Once the first layer is dry, add a second, slightly more saturated layer of brown to the bottom bear’s limbs to distinguish them from the tummy area.
Step 3: Painting the Giraffe
-
Giraffe Base Layer:
Mix a warm yellow-ochre or beige wash. Paint the entire head and body of the giraffe, leaving the snout area slightly lighter if desired. -
Adding Spots:
While the yellow base is drying (or wet-on-wet for a softer look), paint the spots with a medium brown mix. Let the edges bleed slightly if the paper is damp, or keep them crisp if dry. -
Pink Accents:
Paint the inside of the giraffe’s ears with a soft pink. Use this same pink to paint two small floating hearts next to the giraffe’s head.
Make it a Set
Paint these on folded cardstock instead of flat paper. They make perfect DIY baby shower invitations or thank-you cards for the nursery.
Step 4: Inking & Final Touches
-
Floral Elements:
Using a mossy green, paint simple stems rising from the bottom corners of both illustrations. Add small dabs of red or pink for tiny flower buds. -
Wait for Dryness:
It is absolutely crucial to let the paint dry completely before this next step to prevent ink bleeding. -
Outline Work:
Take your fine liner pen and carefully trace your initial pencil lines. Use broken, sketchy strokes rather than a solid continuous line to give it a furry, hand-drawn texture. -
Facial Features:
Ink the eyes as small black dots and draw the noses. For the giraffe, place the eyes wide apart on the snout line for that cute, innocent look. -
Whiskers and Texture:
Add tiny dots on the muzzles for whisker spots and draw very small hatch marks on the bear’s knees and giraffe’s belly to suggest fur texture.
Now you have a pair of adorable prints ready to be framed as a heartfelt gift.


Pastel Rainbow With Baby Name
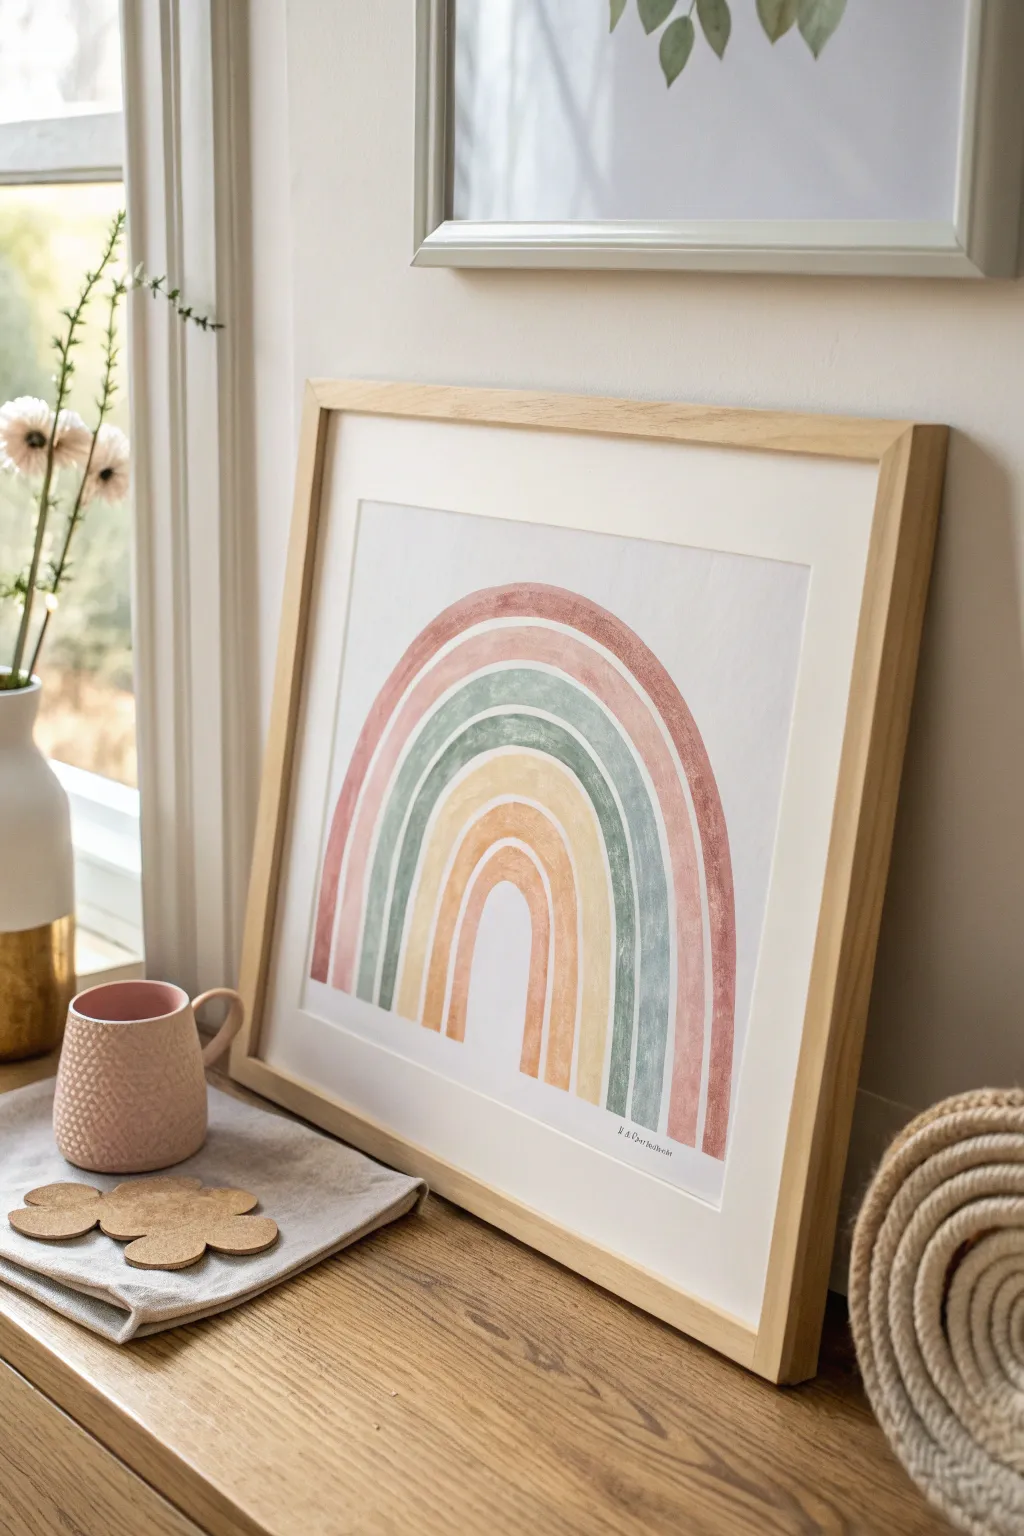
Embrace the soothing charm of muted tones with this minimalist rainbow watercolor painting. This piece features soft, organic arches in shades of rust, sage, and ochre, creating a perfectly serene addition to a modern nursery.
How-To Guide
Materials
- Heavyweight watercolor paper (300 gsm, cold press)
- Watercolor paints (Rust Red, Sage Green, Yellow Ochre, Burnt Sienna)
- Round watercolor brushes (Size 4, Size 8, Size 12)
- Pencil (HB or 2H)
- Compass or round objects for tracing
- Painter’s tape
- Eraser
- Paper towels
- Two cups of water
- Palette for mixing
Step 1: Preparation and Sketching
-
Secure the workspace:
Begin by taping down all four edges of your watercolor paper to your table or board using painter’s tape. This prevents the paper from buckling when it gets wet and creates a clean white border for framing later. -
Establish the base line:
Lightly draw a straight horizontal line across the bottom third of your paper using a ruler. This will serve as the grounding point where all your rainbow arches will begin and end. -
Mark the center:
Measure and mark the exact center point of your horizontal line. This center point is crucial for anchoring your compass to ensure symmetrical arches. -
Draw the main arches:
Using a compass set to the center point, draw four concentric semi-circles. Make the outermost arch quite large, taking up most of the page width. Leave roughly a 1-inch gap between each line to create thick bands. -
Refine the lines:
Once you have your four main guidelines, lightly sketch the inner and outer boundaries of each color band. The result should be four distinct ‘stripes’ with small gaps of white space between them. -
Lighten the sketch:
Gently roll a kneaded eraser over your graphite lines. You want the guides to be barely visible so the pencil marks don’t show through the translucent watercolor paint.
Step 2: Painting the Arches
-
Mix the rust tone:
On your palette, mix a rusty pink shade by combining a bit of red with burnt sienna and plenty of water. Test the color on a scrap piece of paper; it should be transparent and muted, not vibrant. -
Paint the outer arch:
Using your largest round brush (size 12), load it with the rust mixture. Start at the bottom left of the outermost arch and sweep upwards in a fluid motion. Reload your brush and continue to the other side. -
Perfect the texture:
While the paint is still wet, you can dab in slightly more concentrated pigment in random spots to create that organic, textured watercolor look. -
Mix the sage green:
Thoroughly rinse your brush. Mix a sage green using a deep green diluted with water, perhaps adding a touch of brown or grey to desaturate it. This will be for the second largest arch. -
Paint the second arch:
painting the green band, being extremely careful not to touch the wet rust arch. Leaving a thin sliver of dry white paper between the colors prevents them from bleeding into each other. -
Mix the mellow yellow:
Create a muted yellow ochre tone. I find adding a tiny dot of the previous sage green to the yellow helps earthy it down so it matches the other tones’ vibe. -
Paint the third arch:
Apply the ochre paint to the third arch. Focus on keeping your brush pressure consistent to maintain a relatively even width, though minor wobbles add to the hand-painted charm. -
Mix the inner terra cotta:
For the smallest, innermost arch, mix a burnt orange or terra cotta shade. It should be darker than the ochre but warmer than the outer pink ring. -
Paint the final arch:
Carefully paint the small center arch. Use a smaller brush (size 8 or 4) here if you need more control around the tight curve.
Uneven Arches?
Don’t panic if your curves aren’t perfect! The beauty of this nursery art style is its organic feel. Wobbly lines actually make it look more authentically handmade.
Step 3: Finishing Touches
-
Add the text (optional):
If customizing with a baby name or date, use a size 4 brush or a fine-tip waterproof ink pen to write small, delicate text centered directly underneath the arches. -
Dry completely:
Allow the painting to dry undisturbed for at least 2-3 hours. The paper needs to be bone dry before you attempt to remove the tape to prevent tearing. -
Remove tape:
Peel the painter’s tape away slowly at a 45-degree angle, pulling away from the painting. This reveals your crisp white border.
Level Up: Texture
Sprinkle coarse salt lightly over the wet watercolor paint. Let it dry completely, then brush it off to create beautiful, starry speckles and texture.
Frame your serene masterpiece in natural light wood to complete the gentle, earthly aesthetic
BRUSH GUIDE
The Right Brush for Every Stroke
From clean lines to bold texture — master brush choice, stroke control, and essential techniques.
Explore the Full Guide
Stroller Silhouette Signature Canvas
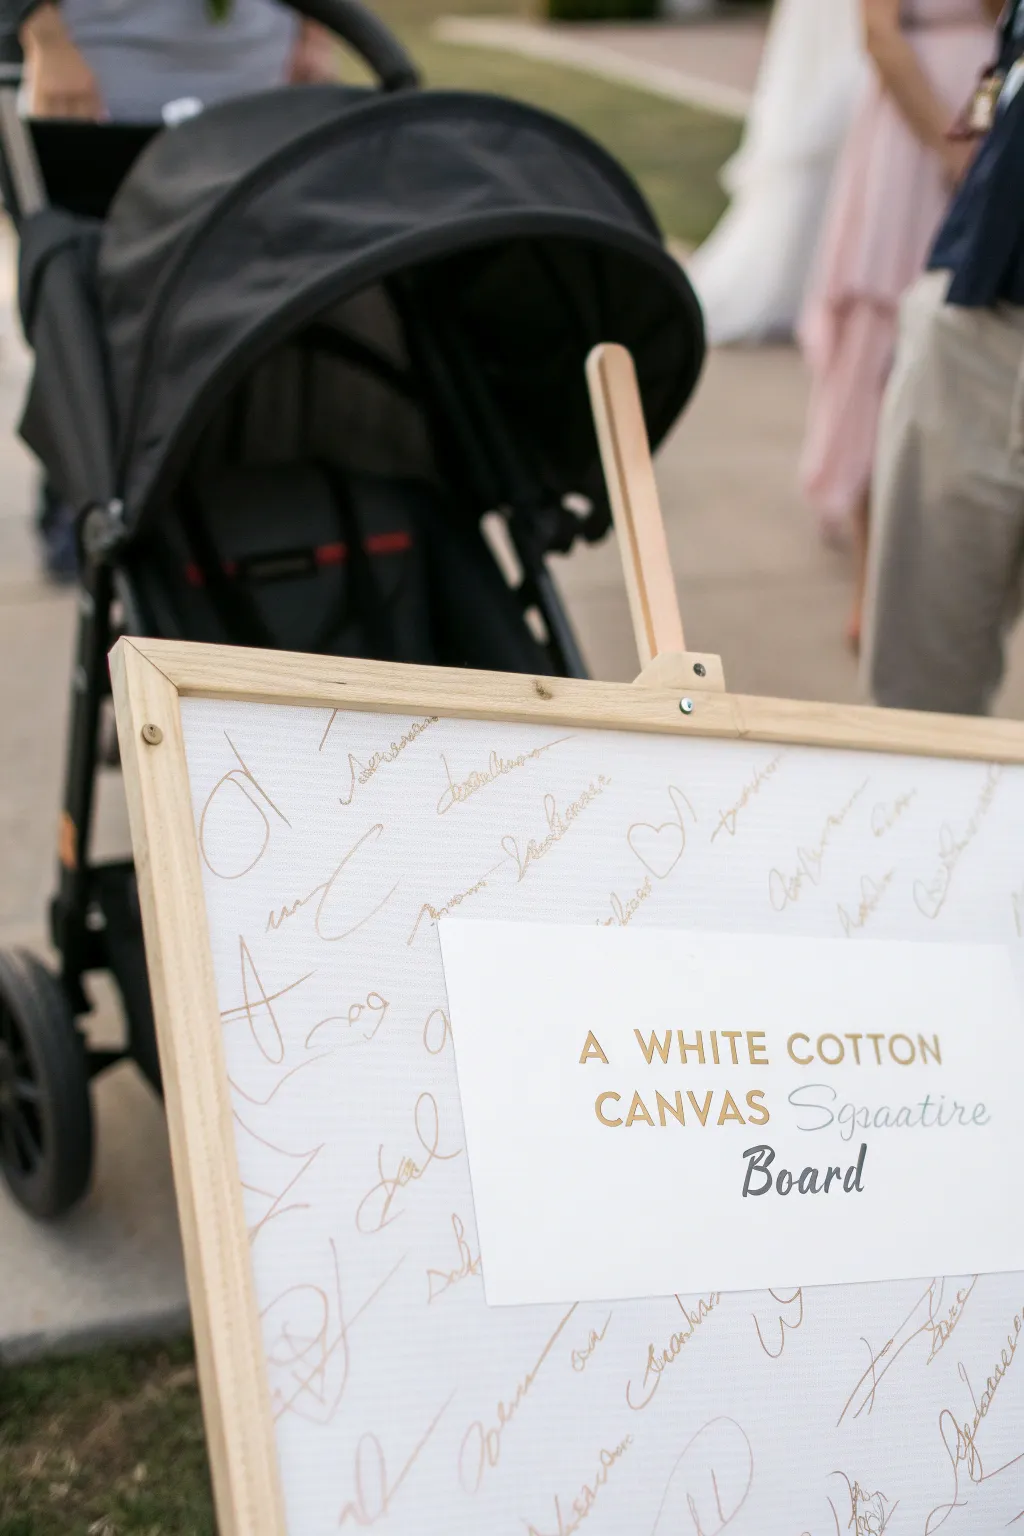
Move away from traditional paper guestbooks with this elegant collaborative art piece. By providing a high-quality cotton canvas and metallic markers, you create a shimmering keepsake filled with the love and autographs of your baby shower guests.
Detailed Instructions
Materials
- Pre-stretched white cotton canvas (16×20 inches or similar)
- Wooden display easel
- Gold metallic paint pens (fine and medium tip)
- Heavy cardstock paper (white or cream)
- Computer and printer
- Double-sided tape or adhesive foam squares
- Scissors or a paper trimmer
Step 1: Canvas Preparation
-
Select the canvas:
Choose a pre-stretched cotton canvas with a slight texture. The texture adds character to the signatures but shouldn’t be so rough that the pens snag. -
Set up the easel:
Assemble your wooden easel according to the package instructions. Place the canvas on the ledge to ensure it fits securely and stands at a comfortable height for writing. -
Test the surface:
I recommend testing your metallic markers on the back edge of the canvas first to ensure the ink flows smoothly and doesn’t bleed into the fabric grain excessively.
Prime Your Tip
Store paint pens horizontally before the party. Just before guests arrive, pump the tips on scrap paper to ensure ink is wet and ready for the first signer.
Step 2: Creating the Central Sign
-
Design the text layout:
Open a word processing or design program on your computer. Create a text box that fits comfortably in the center of your chosen canvas size. -
Choose your fonts:
Type ‘A WHITE COTTON’ and ‘CANVAS’ in a clean, all-caps serif font. Color this text a soft gold or tan to match your metallic theme. -
Add the script element:
Below the block text, type ‘Signature Board’ (or ‘Guest Board’) on two lines. Use a dark grey or black script font for ‘Board’ to make it pop against the white background. -
Emulate the crossed-out look:
To match the photo’s style, type a word like ‘Signature’ in a light grey distinct font, then layer a cursive font over it, or use a strikethrough effect to give it a whimsical, corrected look. -
Print the sign:
Load your heavy cardstock into the printer. Print the design at a high quality setting to ensure the text is crisp and the faux-gold color looks rich. -
Trim to size:
Use a paper trimmer for perfectly straight edges, cutting the cardstock into a rectangular shape that frames your text with a generous white border.
Seal the Deal
Once the event is over and ink is fully dry, spray the canvas with a clear acrylic fixative. This prevents the metallic ink from fading or smudging over time.
Step 3: Assembly and Display
-
Apply adhesive:
Flip your printed sign over. Apply double-sided tape or adhesive foam squares to the back corners and the center. -
Center the sign:
Carefully measure or eyeball the center of your blank canvas. Press the sign firmly onto the canvas fabric. -
Prepare the pens:
Prime your gold metallic paint pens by shaking them well and pressing the nibs down on scrap paper until the ink flows freely. -
Set the scene:
Place the canvas on the easel at the entrance of your event. I like to keep a small cup or jar nearby to hold the pens so they are easily accessible. -
invite guests to sign:
As guests arrive, encourage them to sign their names anywhere on the white canvas space surrounding the central card. -
Fill the space:
Watch as the white space transforms into a pattern of golden script, creating a unique texture of well-wishes.
Hang this modern, collaborative artwork in the nursery as a sophisticated reminder of everyone who welcomed your baby
Baby Blocks Initial Mini-Canvas Set
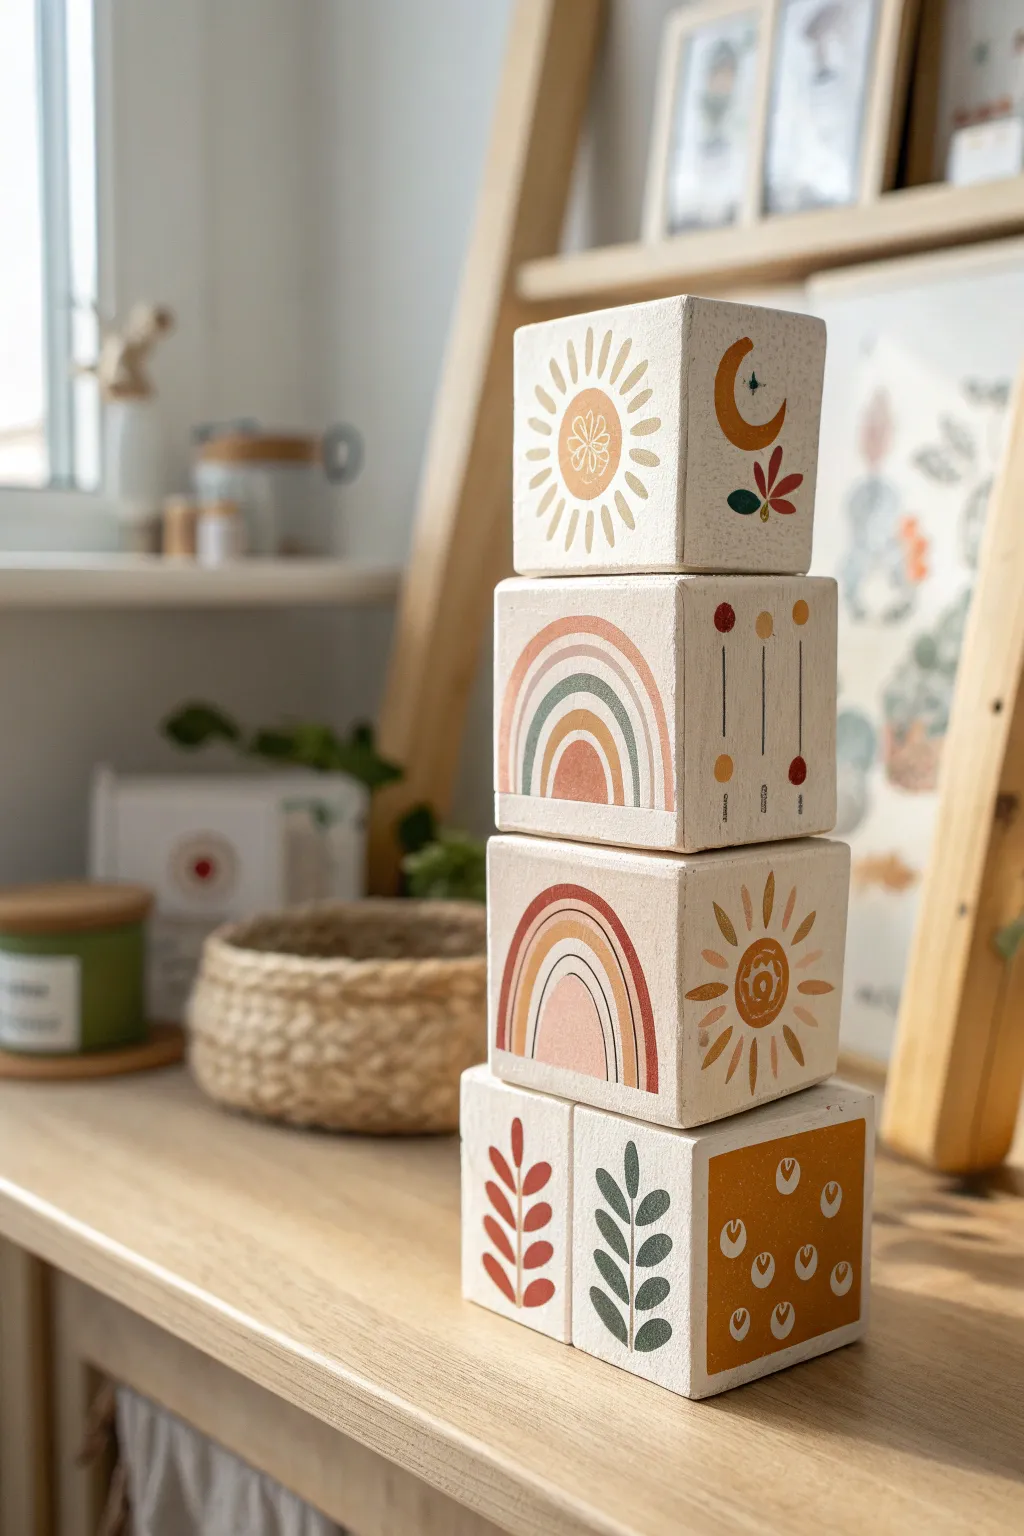
Transform simple wooden cubes into a boutique-style nursery decoration featuring warm earth tones and charming motif illustrations. This project creates a timeless stack of blocks perfect for shelf styling, using a palette of terracotta, sage, and mustard to achieve that trendy bohemian aesthetic.
Step-by-Step
Materials
- Unfinished wooden blocks (2-inch or 3-inch cubes)
- Fine-grit sandpaper (220-grit)
- Matte acrylic paints (cream/off-white, terracotta, sage green, mustard yellow, soft brown)
- Small flat paintbrushes (for base coats)
- Fine liner or detail paintbrushes (00 or 0 size)
- Pencil and eraser
- Ruler or painter’s tape
- Matte spray sealant or Mod Podge (matte finish)
- Paper palette or heavy cardstock
- Water cup and paper towels
Step 1: Preparation & Base Coat
-
Sand the surfaces:
Begin by lightly sanding all six sides of your wooden blocks. Focus on rounding any sharp corners slightly to make them safe for handling and to give them a softer, heirloom look. -
Wipe clean:
Use a dry cloth or tack cloth to remove every speck of sawdust. This is crucial for achieving a smooth, professional paint finish. -
Mix the base color:
Create a warm, creamy off-white shade by mixing a tiny drop of brown or yellow into your white acrylic paint. This looks more natural than stark white. -
Apply the first coat:
Painting with the grain of the wood, cover all sides of the blocks with your cream mixture. I find it easiest to paint four sides, let them dry, and then flip to paint the remaining two. -
Sand and recoat:
Once the first coat is completely dry, lightly sand it again if the wood grain feels rough. Apply a second coat of the cream paint for opaque, solid coverage. Let this dry fully for at least an hour.
Clean Lines Hack
For the rainbow arches or geometric squares, use narrow washi tape to mask off the areas. It’s gentle enough not to peel up your base coat but gives crisp edges.
Step 2: Designing the Motifs
-
Plan your layout:
Decide on a theme for each block face. For this look, you’ll want a mix of celestial items (sun, moon), nature elements (leaves, rainbows), and abstract patterns. -
Sketch the sun:
On the top block, lightly sketch a circle in the center. Draw radiating rays around it—alternate between long teardrop shapes and shorter lines to mimic the reference image. -
Sketch the moon and rainbow:
On other faces, sketch a crescent moon with a small floral accent beneath it. For the rainbow block, use a compass or a round object to trace three perfectly arched semi-circles. -
Create the leaf patterns:
For the bottom blocks, use a ruler to draw straight vertical stems. Sketch simple, symmetrical leaves branching off the stems—one block will feature rounded leaves, another pointed willow-style leaves. -
Outline the square graphic:
For the geometric block, measure a square border leaving a small margin of the cream base showing. Sketch small repeating teardrop shapes inside.
Step 3: Painting the Details
-
Paint the sun icon:
Using mustard yellow paint and a fine liner brush, fill in the sun’s circle and rays. Keep the paint relatively thin to avoid ridges. Add a small white flower detail in the center of the sun once the yellow is dry. -
Execute the rainbow arches:
Paint the outer arch of the rainbow in terracotta. Mix a soft sage green for the middle arch, and use a diluted brown or beige for the inner arch. Steady your hand by resting your pinky on the table as you curve the brush. -
Fill in the moon face:
Paint the crescent moon in deep mustard. Below it, paint the small floral spring using terracotta for the leaves and dark green for the stem. -
Paint the botanical blocks:
For the bottom block faces, use a terracotta red for the left leaf branch and a deep forest green for the right branch. Use a single stroke method: press the brush down to widen the leaf and lift up to taper the point. -
Block in the geometric square:
Paint the background of the square design in mustard yellow. Let it dry completely. Then, using your finest brush and the cream base color, paint the small repetitive ‘seed’ shapes over the yellow. -
Add abstract lines:
On the side of the middle block, recreate the mobile-style art. Paint thin vertical lines in dark grey or black, and add small circles at the ends in alternating earthy colors. -
Clean up edges:
Inspect your work. If any paint smudged onto the cream background, use a tiny brush with the cream paint to ‘erase’ the mistake once the colored paint is dry.
Enhance the Theme
Personalize the set by painting the baby’s initials on one side of a block using the same font style and color palette to match the boho theme.
Step 4: Finishing Touches
-
Allow extensive drying:
Acrylics dry to the touch quickly but need time to cure. Leave the blocks overnight to ensure the layers are solid. -
Seal the blocks:
To protect your art from chipping, apply a thin coat of matte Mod Podge or spray with a matte clear acrylic sealer. This also unifies the sheen of the paint.
Stack your finished blocks on a floating shelf or dresser to add a handmade touch of warmth to the nursery

PENCIL GUIDE
Understanding Pencil Grades from H to B
From first sketch to finished drawing — learn pencil grades, line control, and shading techniques.
Explore the Full Guide
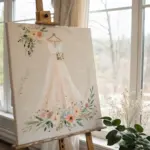
Floral Wreath Monogram Painting
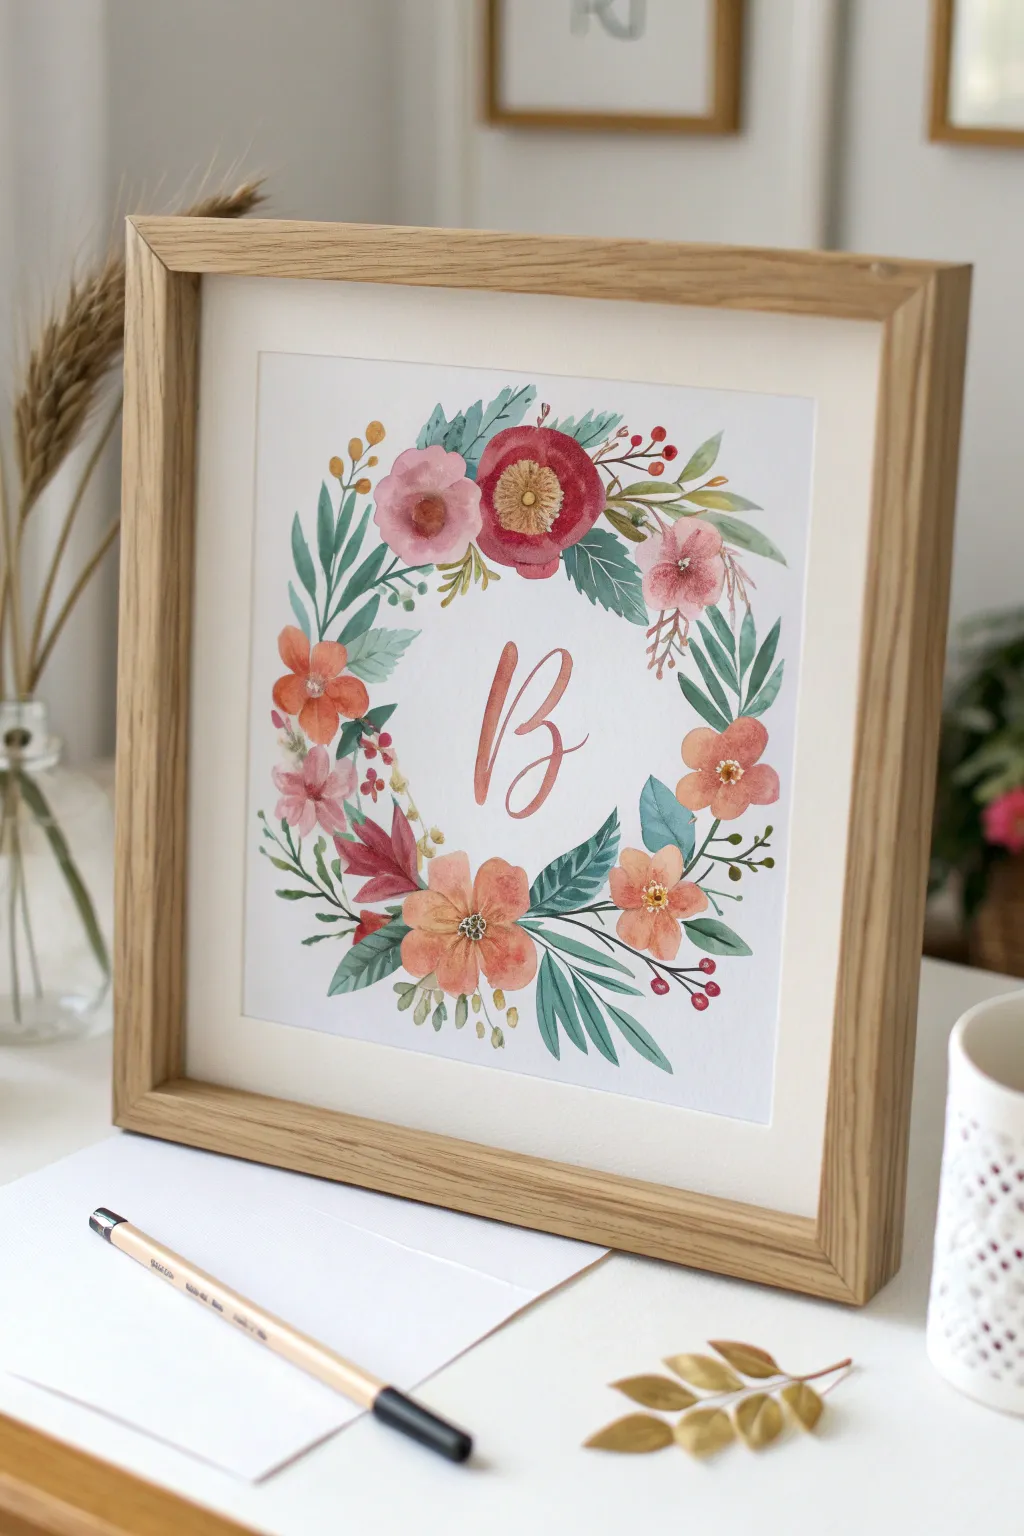
This elegant floral wreath painting combines soft botanical elements with a personalized touch, perfect for welcoming a new little one. The blend of dusty pinks, warm corals, and muted greens creates a timeless nursery decoration.
Detailed Instructions
Materials
- Hot press watercolor paper (square format, approx. 10×10 inches)
- Watercolor paints (coral, dusty rose, deep red, sap green, teal, yellow ochre)
- Round brushes (sizes 2, 4, and 6)
- Pencil (HB or H)
- Kneaded eraser
- Gold metallic watercolor paint or ink (optional)
- Mixing palette
- Two jars of water
- Paper towels
- Square wooden frame (light oak finish)
Step 1: Sketching the Layout
-
Mark the center:
Begin by lightly finding the center of your watercolor paper. You can use a ruler to make a tiny crosshair or simply eyeball it if you trust your judgement. -
Draw the circular guide:
Use a compass or trace a circular object (like a bowl) to draw a very faint circle where your wreath will sit. This circle will guide the placement of your flowers. -
Draft the monogram:
In the exact center, sketch the letter ‘B’ (or your chosen initial) in a flowing script font. Keep the lines light so they don’t show through the paint later. -
Place main blooms:
Sketch rough circles on the wreath guide to mark the spots for the largest flowers—the deep red peony at the top and the coral blooms at the bottom left and right.
Wet-on-Wet Woes?
If your flower petals are bleeding together into a blob, let the first petal dry for 2 minutes before painting its neighbor. This creates distinct edges.
Step 2: Painting the Flowers
-
Paint the top peony:
Using a size 6 brush, load it with a deep red-pink mix. Paint broad, curved strokes for the outer petals of the top centerpiece flower, leaving the center empty for now. -
Add the coral blooms:
Mix a warm coral tone using orange and a touch of pink. Paint the five-petal flowers at the bottom and sides using the same broad stroke technique. Keep the edges soft. -
Layer in pink roses:
Switch to a dusty rose color. Paint the smaller, tighter rose shapes near the top left and right. Use swirling c-curves that get smaller toward the center of the bud. -
Add depth to petals:
While the paint is still slightly damp, drop a tiny bit of darker pigment into the base of the petals to create natural shading and volume. -
Detail the centers:
Once the main blooms are dry, use yellow ochre or gold paint to dab small dots into the centers of the red and coral flowers. For the top flower, make a defined yellow circle with a textured center.
Gilded Touch
Use metallic gold watercolor for the letter ‘B’ or the flower centers. It catches the light beautifully and adds a premium nursery feel.
Step 3: Adding Foliage and Filler
-
Paint large teal leaves:
Mix a muted teal green. Using a size 4 brush, paint the large, serrated leaves tucking behind the flowers. Press the brush down to widen the leaf and lift as you pull away to create a sharp point. -
Add slender willow leaves:
With a lighter sap green, paint long, slender leaves extending outward from the wreath. These should look flowy and delicate to break up the round shape. -
Insert berry sprigs:
Using a size 2 brush and a reddish-brown mix, draw fine stems sticking out from the main arrangement. Add small red berries to the tips. -
Fill gaps with eucalyptus:
Look for empty white spaces between flowers. Fill these with small, round eucalyptus-style leaves in a pale blue-green shade. -
Add delicate buds:
Paint tiny yellow or pink buds on thin stems floating near the outer edges of the wreath to give it an airy, wild garden feel.
Step 4: The Monogram & Finish
-
Outline the letter:
Using your smallest brush (size 2) and a brownish-rose mix, carefully outline your penciled monogram letter. -
Fill the script:
Fill in the letter, thickening the downstrokes (the parts of the letter where your pen would go down) while keeping the upstrokes thin and elegant. -
Erase guidelines:
Once the painting is completely bone dry—I like to give it an extra hour just to be safe—gently erase any visible pencil marks from your initial circle guide. -
Frame the artwork:
Place your finished piece into a light oak shadow box frame to complement the warm, natural tones of the watercolors.
Hang this lovely personalized wreath near the crib or gift it to the mom-to-be as a cherished keepsake
Starry Night Sky With Birth Month
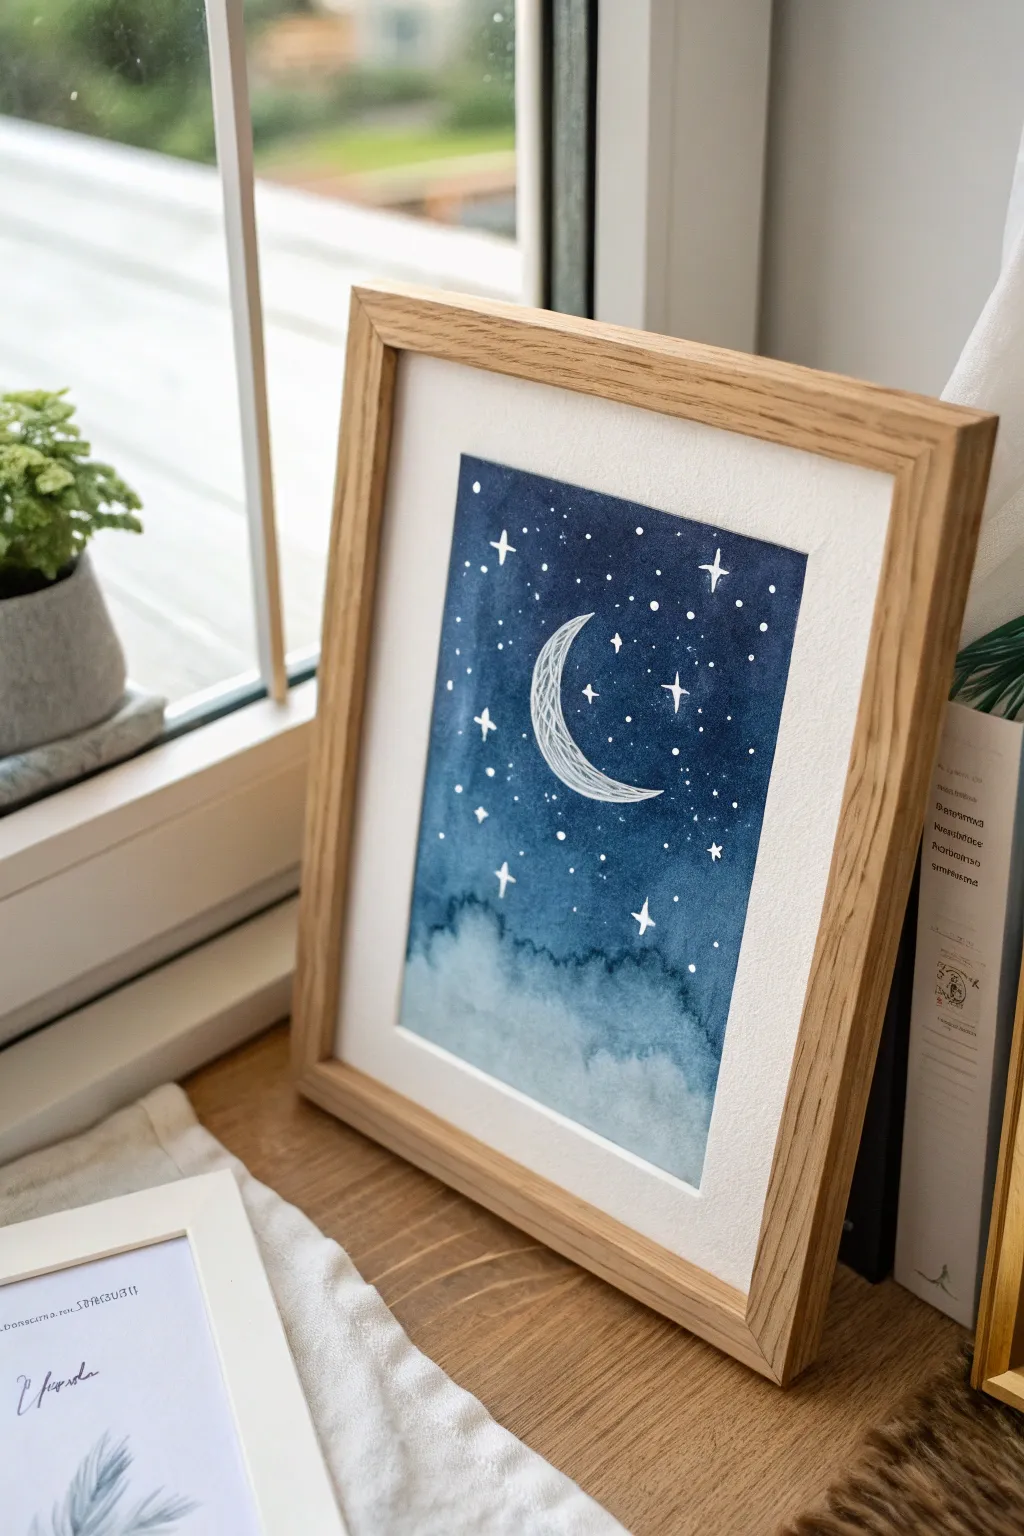
Capture the magic of a peaceful evening with this dreamy watercolor painting featuring a crescent moon surrounded by twinkling stars. The deep indigo wash blends softly into fluffy clouds at the bottom, creating a serene nursery decoration or a thoughtful birth month gift.
Step-by-Step
Materials
- Cold press watercolor paper (A4 or 5×7 size)
- Watercolor paints (Indigo, Prussian Blue, Payne’s Gray)
- Artist’s masking tape
- Pencil (HB or lighter)
- White gel pen or gouache
- Round watercolor brushes (Size 8 for washes, Size 2 for details)
- Clean water and paper towels
- Light wood frame (optional)
Step 1: Preparation and Sketching
-
Secure the paper:
Tape down all four edges of your watercolor paper to a hard board or table. This creates that crisp white border seen in the final piece and prevents the paper from buckling when wet. -
Sketch the moon:
Lightly draw a crescent moon shape in the center of the paper using your pencil. -
Add texture marks:
Within the crescent shape, draw faint, loose scribbles or loops. These will guide your white pen later to give the moon its textured, illustrative look. -
Mark the horizons:
Very faintly sketch a wavy horizon line near the bottom third of the paper where the dark sky will transition into the lighter clouds.
Uneven Washes?
If your blue sky dries with hard lines or ‘blooms’, try pre-wetting the top section of the paper with clean water before applying pigment for a smoother flow.
Step 2: Painting the Sky
-
Prepare the wash:
Mix a generous amount of Indigo and Prussian Blue on your palette. You want a deep, saturated color for the night sky. -
Start from the top:
Using your larger round brush, load it with the dark blue mix and start painting from the top edge downwards. -
Work around the moon:
Carefully paint around your pencil sketch of the crescent moon, leaving the inside of the moon completely dry and white. This negative space is crucial. -
Create a gradient:
As you move down towards the cloud line, dip your brush in water without adding more paint to dilute the color slightly. This creates a natural transition. -
Form the clouds:
At the bottom third, use a ‘wet-on-wet’ technique. Wet the cloud area with clean water first, then touch the wet blue edge to it. Let the dark paint bleed down naturally into fluffy shapes. -
Add depth to clouds:
While the bottom area is still damp, drop in tiny amounts of Payne’s Gray or a lighter blue wash to define the bottom of the cloud shapes without making them too dark. -
Dry completely:
Let the painting dry fully. The paper must be bone dry before you add the stars, or the white ink will bleed.
Step 3: Details and Finishing
-
Outline the moon:
Take your white gel pen (or a very fine brush with white gouache) and trace the outline of your crescent moon. -
Fill the moon texture:
Fill the inside of the crescent with loose, scribbly loops using the white pen. Don’t color it in solid; let the paper show through to keep it airy. -
Draw primary stars:
Draw several four-pointed stars using the white pen. Place three or four larger ones randomly in the upper sky. -
Add secondary stars:
Scatter smaller four-pointed stars and simple crosses throughout the blue area. -
Create distant shimmer:
Dot tiny specks of white ink between the larger stars to represent distant galaxies. Vary the pressure to make some dots smaller than others. -
Final inspection:
step back and check the balance. If the bottom clouds look too plain, I sometimes add a few very tiny white dots there too for a magical mist effect. -
Remove tape:
Once fully dry, slowly peel the tape away at a 45-degree angle to reveal the clean, sharp borders. -
Frame it:
Place your dried artwork into a simple light wood frame to match the organic, cozy aesthetic.
Add a Constellation
Personalize the sky by arranging the larger four-pointed stars into the baby’s zodiac constellation or their initial letter.
Hang this serene piece near the crib to inspire sweet dreams and quiet nights


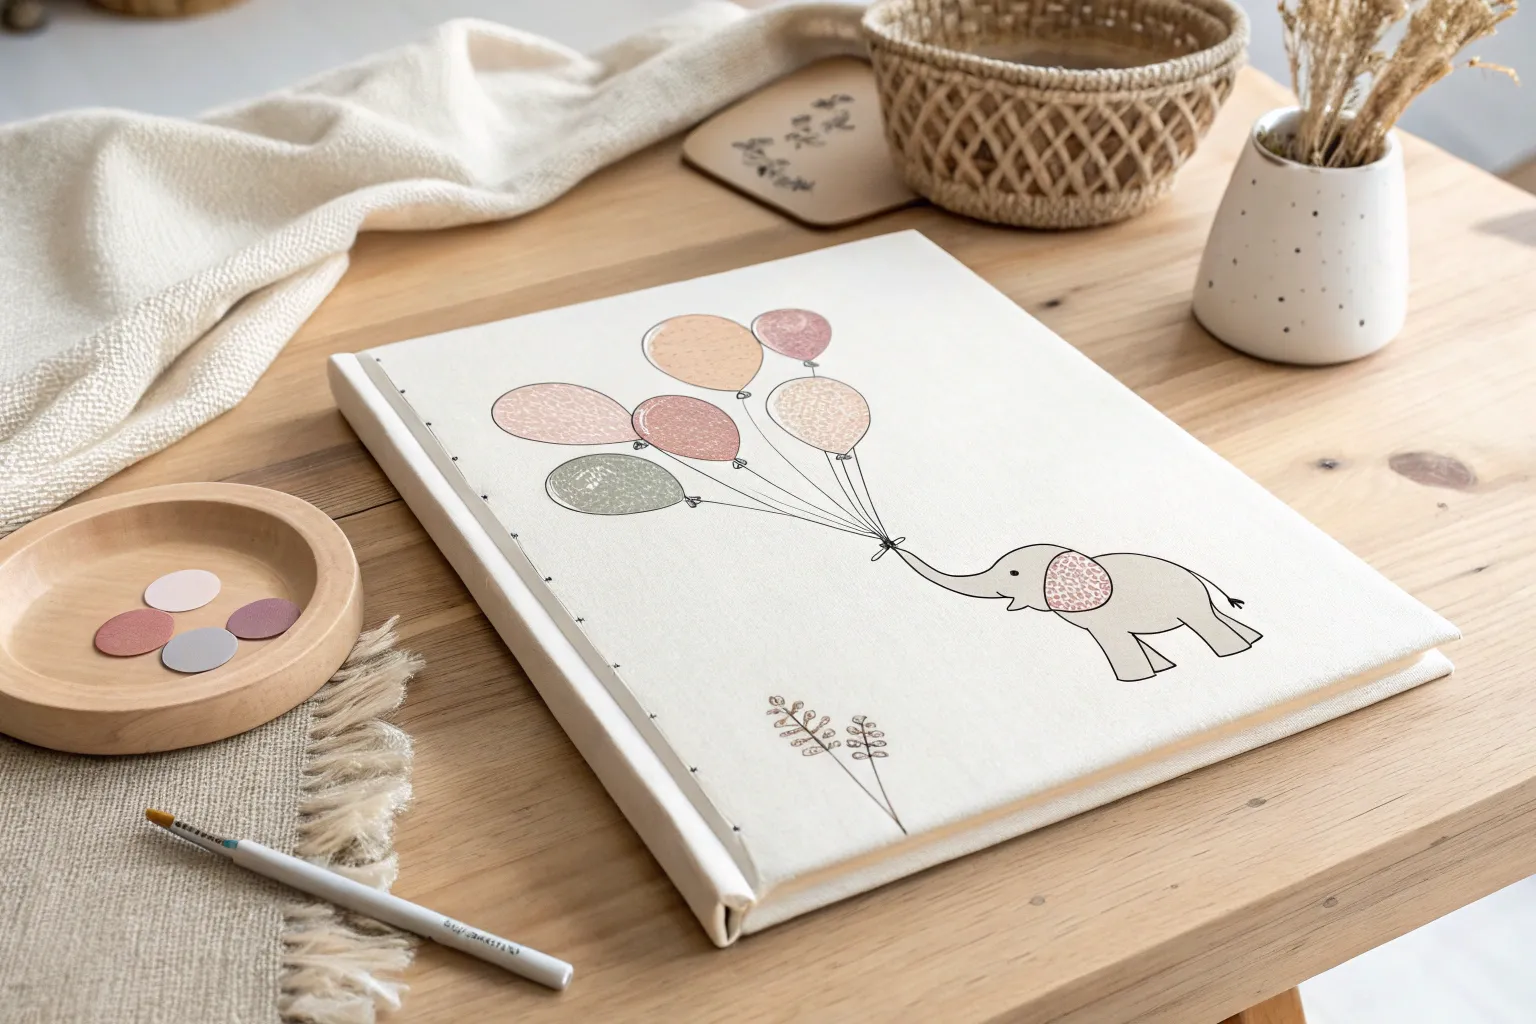
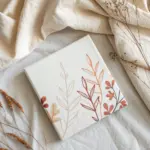
Balloon Bouquet Brushstroke Practice Cards
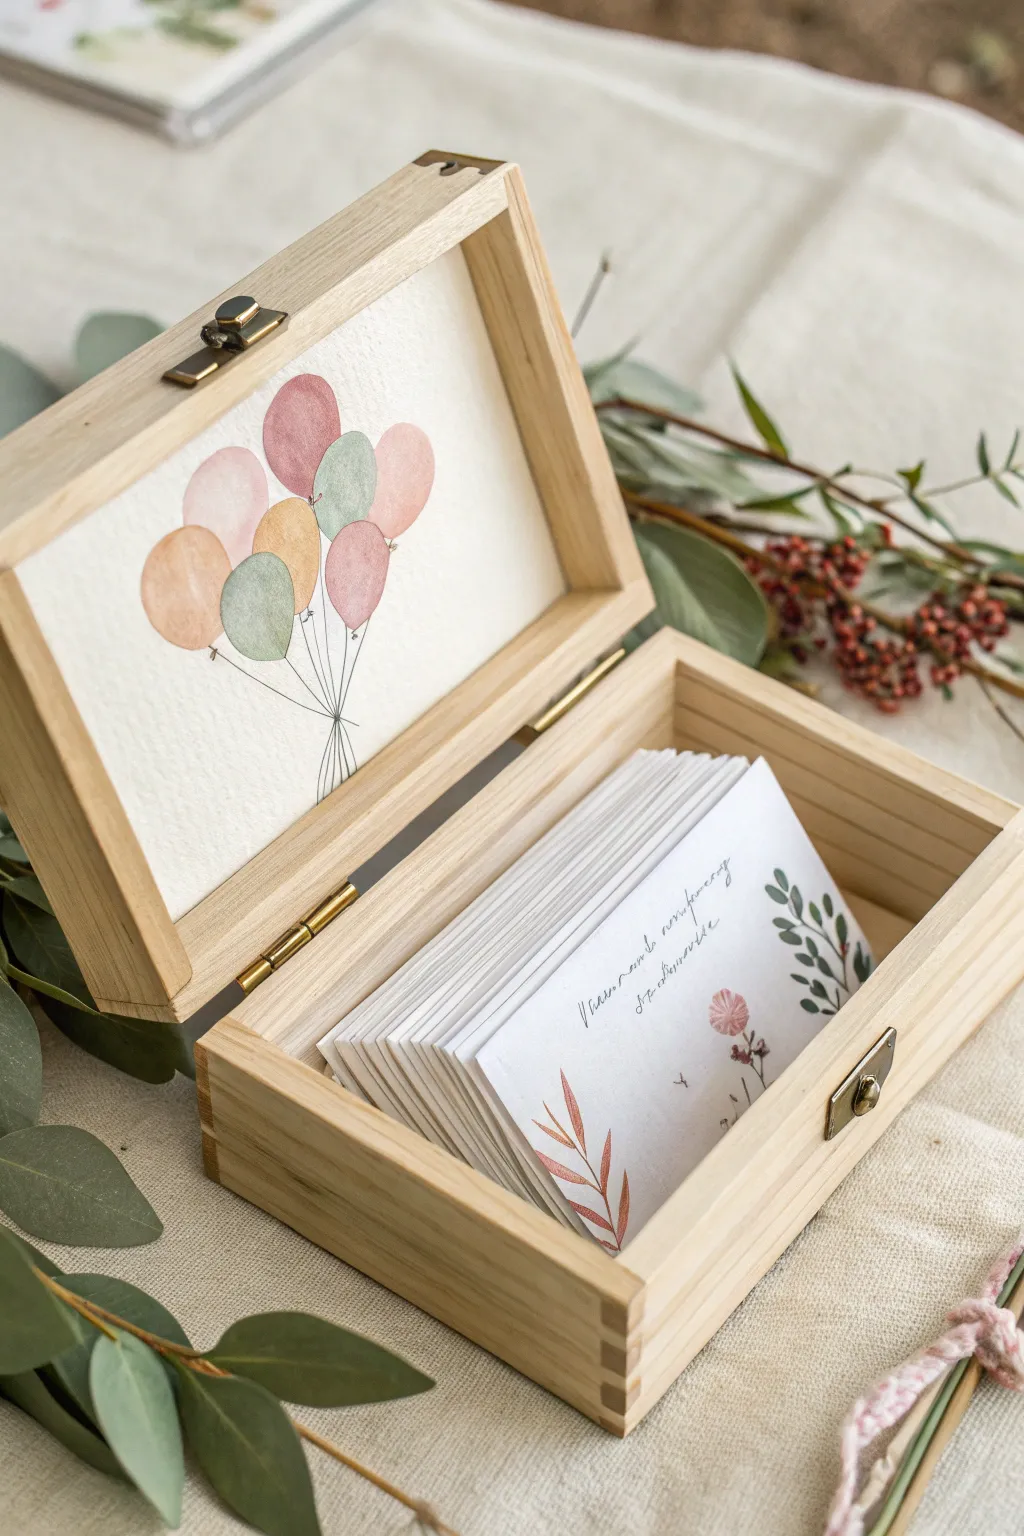
Create a charming keepsake box filled with hand-painted cards, perfect for baby shower wishes or personal notes. This project features a delicate balloon bouquet painted inside a wooden lid and matching floral note cards, all done in a soft, vintage-inspired palette.
Detailed Instructions
Materials
- Unfinished wooden keepsake box (hinged lid)
- Watercolor paper (cold press, 300 gsm)
- Watercolor paints (muted pinks, sage greens, warm ochres)
- Round watercolor brushes (size 2 and 4)
- Fine liner pen (black or dark brown, waterproof)
- Scissors or a paper cutter
- Pencil and eraser
- Double-sided tape or strong craft glue
- Ruler
Step 1: Preparing the Box Insert
-
Measure the lid:
Start by measuring the interior recessed area of your wooden box’s lid. You want your paper to fit snugly inside. -
Cut the paper:
Cut a piece of watercolor paper to those exact dimensions. Test the fit before you start painting; trim slightly if it buckles at the edges. -
Sketch the layout:
Lightly sketch a cluster of about seven ovals for the balloons in the upper center of the paper using a hard pencil so the lines remain faint.
Fixing Water Blooms
If a ‘cauliflower’ bloom appears in your balloon paint, don’t panic. Dampen a clean brush slightly and gently smooth the edges, or let it dry and call it texture
Step 2: Painting the Balloon Bouquet
-
Mix your palette:
Prepare watery mixes of muted colors: dusty rose, sage green, and a soft golden sandstone. Keep the colors transparent to maintain that airy watercolor look. -
Paint the first balloons:
Using a size 4 round brush, fill in the sketched shapes for the back layer of balloons first. Let the water pool slightly to create texture as it dries. -
Layering the colors:
Once the first shapes are dry to the touch, paint the overlapping balloons in different shades. Painting wet-on-dry prevents the colors from bleeding into each other. -
Add detailing:
Switch to your fine liner pen. Draw tiny triangle knots at the base of each balloon and extend long, thin straggly lines downward, gathering them into a single point to form the strings. -
Secure the artwork:
Apply double-sided tape or a thin layer of craft glue to the back of your painting and press it firmly into the inside of the box lid.
Step 3: Creating the Floral Cards
-
Size the cards:
Cut several pieces of watercolor paper or cardstock that are slightly smaller than the interior of the box so they stack neatly inside. -
Paint foliage stems:
On the bottom right corner of a card, paint a simple stem using the tip of your size 2 brush and sage green paint. -
Add leaves:
Press down firmly with the belly of the brush and lift up quickly to create organic leaf shapes along the stem. -
Incorporate florals:
Using the dusty rose color, dab small, irregular circles near the stems to represent abstract flower buds or berries. -
Add text (optional):
If you have steady handwriting, use the fine liner to add a sweet phrase or ‘baby shower’ in cursive script near the center. -
Repeat the process:
Continue painting similar simple motifs on the rest of your card stack. I find it relaxing to do these in batches—painting all the greens first, then the flowers.
Scented Surprise
Place a small sachet of dried lavender or a drop of essential oil on a cotton pad at the bottom of the stack to give the recipient a sensory experience
Now you have a beautiful, handmade gift set ready to be filled with memories and well wishes
Hot Air Balloon Adventure Scene

This dreamy nursery-style artwork features a gentle pink and beige hot air balloon floating among soft, fluffy clouds and scattered stars. The project uses a delicate watercolor technique on canvas to create a serene, floating adventure perfect for a baby shower gift or decor.
How-To Guide
Materials
- Stretched canvas (approx 16×20 inches)
- Watercolor ground or absorbent gesso
- Pencil (HB or H)
- Watercolor paints (Alizarin Crimson, Burnt Sienna, Yellow Ochre, Paynes Grey)
- Gold acrylic paint or gold leaf pen
- Soft round brushes (sizes 4, 8, and 12)
- Fine liner brush (size 0 or 1)
- Ruler
- Jar of water & paper towels
- Eraser
Step 1: Canvas Preparation
-
Prime the Surface:
Since regular canvas resists watercolor, start by applying two coats of watercolor ground (or absorbent gesso) to your stretched canvas. Brush it on smoothly and let it dry completely—ideally overnight—to create a paper-like texture that accepts watery paint. -
Sketch the Balloon Outline:
Using a light pencil, draw a large inverted tear-drop shape in the center of the canvas for the balloon body. It should take up about a third of the vertical space. -
Add Structural Details:
Draw the basket (a simple trapezoid shape) well below the balloon. Connect the balloon to the basket with four straight vertical lines. Use your ruler to lightly mark the vertical stripes on the balloon’s body, curving them slightly to follow the round form.
Paint Beading Up?
If your paint beads up on the canvas, your ground might be too slick. Lightly sand the dried ground with fine-grit sandpaper before painting to give it ‘tooth’.
Step 2: Painting the Balloon
-
Mix Your Palette:
Create a watery mix of Alizarin Crimson and a touch of Burnt Sienna to get that dusty rose color. You want the paint to be very transparent, like tea. -
Paint the Stripes:
Using your size 8 brush, paint alternating stripes on the balloon. Work wet-on-dry so the edges stay relatively crisp, but let the color vary in intensity to keep that hand-painted charm. -
Shade the Balloon:
While the stripes are drying, mix a very pale version of the same pink. Gently wash over the ‘white’ stripes to give them a creamy, off-white tone rather than stark white canvas. -
Add the Lattice Detail:
Near the top third of the balloon, sketch a crisscross diamond pattern over the stripes. Using a fine liner brush and a slightly darker mix of Burnt Sienna and Paynes Grey, trace these lines carefully to look like the rope netting. -
Paint the Basket:
Switch to Burnt Sienna and Yellow Ochre. Paint the basket with messy, short horizontal and vertical strokes to simulate a woven wicker texture. Keep the bottom slightly darker for weight. -
Connect the Lines:
Use the fine liner brush and grey paint to draw the ropes connecting the balloon to the basket. Keep your hand steady but don’t worry if the lines aren’t machine-perfect. -
Tiny Passenger Detail:
Dab a tiny spot of color just above the basket rim to suggest a small bear or figure peeking out, using just the tip of your smallest brush.
Make It 3D
Glue tiny distinct buttons or miniature bunting flags onto the basket ropes for an adorable mixed-media effect that pops off the canvas.
Step 3: Clouds and Atmosphere
-
Wet the Cloud Areas:
Identify 3-4 spots around the balloon where you want clouds. Brush clean water onto the canvas in rough cloud shapes at these locations. -
Bloom the Clouds:
Drop your watery dusty pink mix into the wet areas. Let the paint bleed and bloom naturally. I like to tilt the canvas slightly to encourage organic shapes. -
Add Depth:
While the clouds are still damp, drop a tiny bit of grey-purple (Alizarin mixed with Paynes Grey) into the bottom edge of the clouds to create shadow and volume. -
Soften Edges:
If any cloud edges look too hard, take a damp clean brush and gently scrub the edge to fade it into the white background.
Step 4: Magical Final Touches
-
Splatter Texture:
Load a brush with watery pink paint and tap the handle against your finger to flick tiny speckles across the canvas, concentrating them near the clouds. -
Paint the Stars:
Using gold acrylic paint or a gold leaf pen, draw small five-pointed stars scattered randomly around the sky. Vary their sizes for interest. -
Add Highlights:
Use a white gel pen or thick white acrylic to add tiny highlights to the basket and the rope netting for a bit of sparkle. -
Seal the Work:
Once fully dry (give it 24 hours), spray with a matte archival varnish to protect the delicate watercolor surface from moisture and dust.
Hang your beautiful balloon painting and enjoy the serene atmosphere it brings to the room
Handprint Tree With Guest Leaves
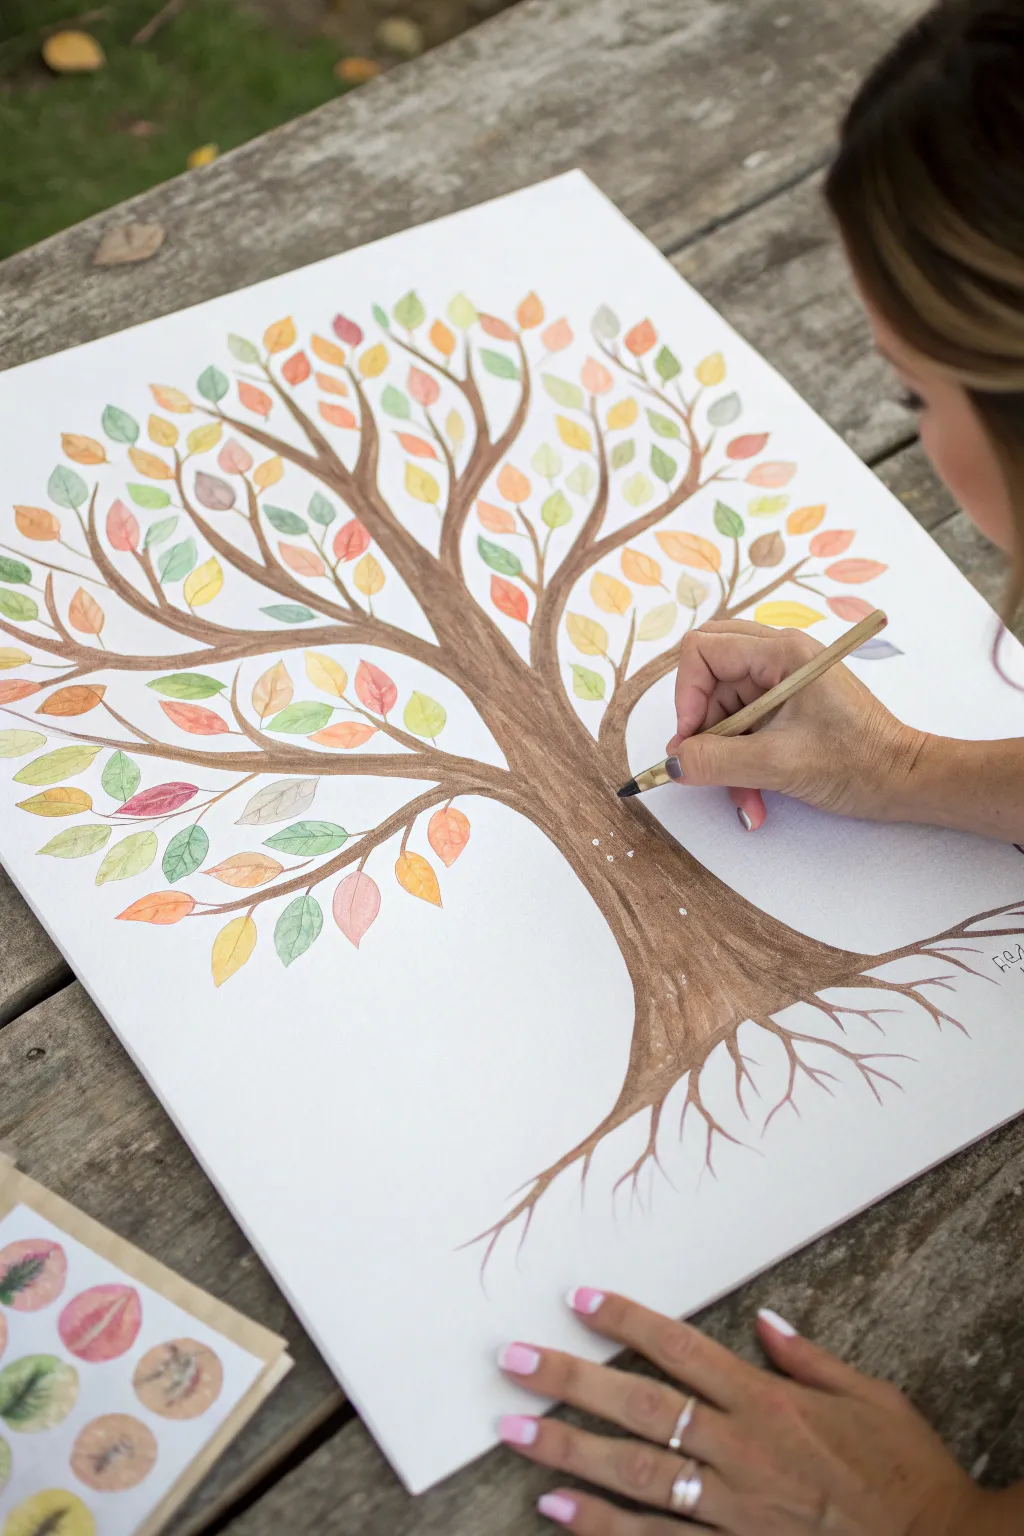
This beautiful, nature-inspired guest book alternative features a sturdy brown trunk and delicate, colorful leaves waiting for signatures. With soft watercolor details and a welcoming open-branch design, it creates a cherished keepsake that doubles as nursery art.
Step-by-Step Guide
Materials
- Large sheet of heavy watercolor paper (A2 or 16×20 inches)
- Watercolor paint set (focus on browns, greens, oranges, yellows)
- Round watercolor brushes (sizes 4, 8, and a fine liner for details)
- Pencil and eraser
- Cup of water and paper towels
- Fine-point permanent marker or pen (for signatures)
- Optional: White gel pen for highlights
Step 1: Drafting the Tree Skeleton
-
Layout the composition:
Begin by lightly sketching the main trunk in the center of your paper. Make the base wide and taper it as it moves upward, leaving plenty of negative space around the branches for leaves. -
Sketch the branches:
Draw several large primary branches splitting off from the main trunk. Let them curve naturally outward like a real tree reaching for sunlight. -
Add secondary twigs:
From your main branches, pencil in smaller, thinner twigs. Ensure these are spread out evenly so the tree looks full but not cluttered. -
Plan the roots:
Sketch a network of roots at the very bottom, mirroring the branches above but flowing downward to ground the tree. -
Review and refine:
Step back and look at your pencil sketch. Erase any lines that feel stiff and redraw them with a more organic, winding flow.
Guest-Ready Tip
Make the leaves slightly larger than normal (about thumb-size) to ensure guests have enough space to sign their names clearly inside them.
Step 2: Painting the Trunk and Base
-
Mix your brown hue:
Create a watery mix of brown paint. I like to add a tiny touch of black or dark blue to deepen the color for the main trunk. -
First wash on the trunk:
Using your size 8 brush, paint the trunk with long, vertical strokes. Keep the paint wet and allow some areas to be lighter for a natural bark effect. -
Extend to branches:
Continue the brown wash up into the main branches, switching to a size 4 brush as they get thinner. -
Paint the roots:
Use the same brown wash for the roots, letting the color fade out at the tips for a delicate finish. -
Add bark texture:
Once the base layer is damp but not soaking, take a slightly darker, thicker brown mix. Paint thin, vertical lines to simulate bark texture. -
Detail the knots:
Add small, darker ovals or knots on the trunk to give it character and dimension. -
Highlighting:
If you have a white gel pen or white gouache, add tiny dots or dashed lines on the trunk for a magical, speckled effect once the brown is fully dry.
Make it Interactive
Leave some branches bare and provide an ink pad. Let guests add their own fingerprint ‘leaves’ directly onto the branches for a personal touch.
Step 3: Creating the Canopy
-
Prepare your palette:
Mix puddles of autumnal or spring colors—sage greens, soft oranges, muted yellows, and dusty pinks. Keep them quite watery for transparency. -
Paint the first leaves:
Using a size 4 round brush, press down and lift up to create simple leaf shapes at the ends of your twigs. Start with one color, like sage green, and scatter them around. -
Layer in more colors:
Wash your brush and switch to a soft orange. Paint leaves near the green ones, varying the direction they point. -
Fill the canopy:
Continue adding leaves in different colors—yellows and pinks—until the tree looks lush. Leave small gaps between leaves so they don’t bleed into each other. -
Add vein details:
Once the leaves are completely dry, use a very fine liner brush or a colored pencil to draw a tiny central vein line in each leaf. -
Connect floating leaves:
If any leaves look like they are floating too far from a branch, paint a very fine brown stem to connect them back to the tree structure. -
Final touches:
Scan the painting for any empty spots that need a small leaf or twig to balance the overall shape.
Now you have a stunning, personalized piece of art ready to frame after the celebration
Alphabet Panel for the Nursery Wall
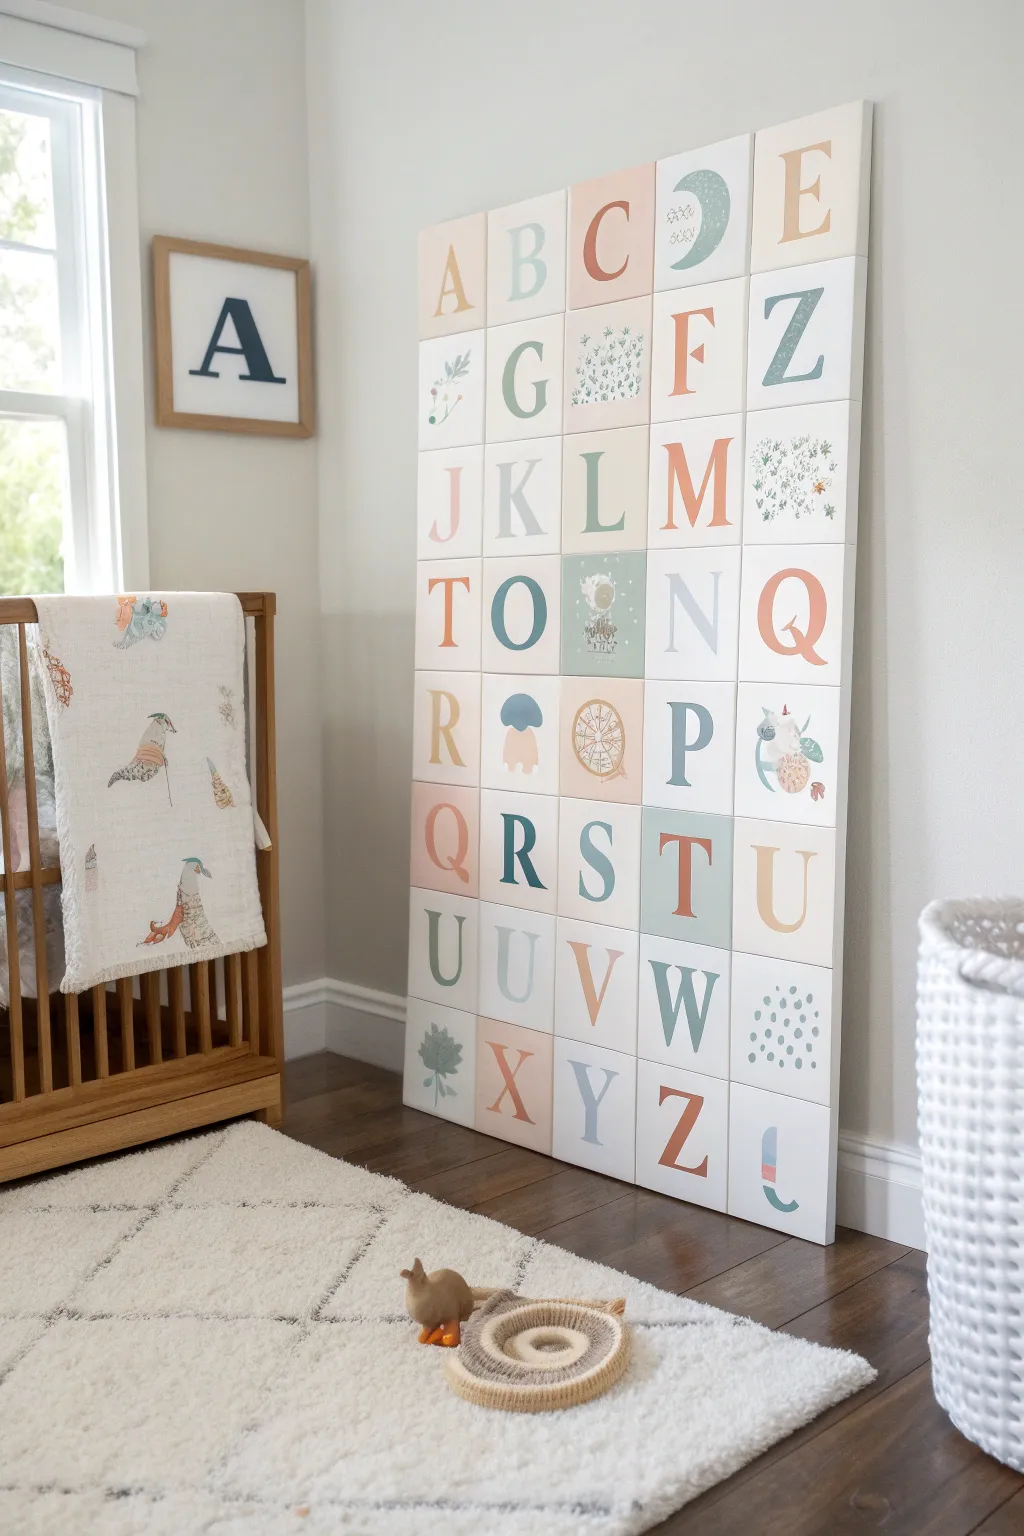
Transform a nursery wall into an educational art piece with this large-scale alphabet panel installation. Featuring soft pastels, muted earth tones, and clean serif typography, this project combines wooden tiles to create a statement piece that feels both vintage and modern.
How-To Guide
Materials
- 35 square wooden panels or canvases (approx. 6×6 or 8×8 inches)
- Acrylic craft paints (muted peach, sage green, terracotta, soft blue, cream)
- White gesso or primer
- Assorted flat artist brushes (various widths)
- Fine detail liner brush
- Alphabet stencils (serif font) or printed templates
- Graphite transfer paper (if using templates)
- Painters tape
- Mounting strips or wood glue (depending on permanence)
- Satin or matte varnish
Step 1: Planning and Preparation
-
Map your grid Layout:
Since the alphabet has 26 letters and the grid is 5 tiles wide by 7 tiles high (35 total), you need 9 ‘filler’ tiles. Sketch a grid on paper to distribute these filler tiles evenly among the letters for a balanced look. -
Prime the surface:
Lay out all your wooden panels on a drop cloth. Apply a smooth coat of white gesso or primer to the face and edges of each tile to ensure the paint colors pop and adhere properly. -
Sand for smoothness:
Once the primer is fully dry, give each tile a quick sanding with fine-grit sandpaper. Wipe away the dust with a tack cloth to create a flawless base for your letters.
Step 2: Painting the Backgrounds
-
Mix your palette:
Prepare your acrylic colors. Aim for a cohesive ‘boho’ palette: dusty rose, sage, slate blue, and warm cream. I like to pre-mix enough of each shade in small jars so color consistency is guaranteed later. -
Paint solid tiles:
Select specific tiles to be solid background colors. Paint these fully, ensuring you cover the sides for a finished look. Leave some tiles white or cream as ‘negative space’ backgrounds for colored letters. -
Create split-color tiles:
For tiles that have a background color block (like the ‘S’ or ‘R’), use painter’s tape to mask off a square or rectangle section. Paint the shape, let it dry slightly, and peel the tape for a crisp edge. -
Allow specifically for drying:
Let all base coats cure completely for at least 2 hours. If the paint feels cool to the touch, it needs more time.
Bleeding Lines?
If paint bleeds under your stencil or tape, let it dry completely. Then, use a small angled brush and the background color to paint over the bleed, sharpening the line.
Step 3: Lettering and Illustration
-
Transfer the letters:
If you aren’t confident freehanding, print out your letters in a classic serif font to fit the tiles. Place a sheet of graphite transfer paper between the printout and the tile, then trace the outline firmly. -
Fill in the letters:
Using a small flat brush for straight strokes and a round brush for curves, verify your written plan and paint the letters. Use contrasting colors—dark text on light backgrounds, and light text on colored blocks. -
Add nature motifs:
For the non-letter filler tiles, sketch simple botanical shapes like leaves, moons, or abstract dots. Simplicity is key here to keep the focus on the alphabet. -
Paint the illustrations:
Fill in your illustrations using the same color palette. For the delicate leaf veins or speckles, switch to your finest liner brush. -
Touch up edges:
Inspect each tile for messy edges or pencil marks. Use a small brush with the background color to ‘erase’ any mistakes and sharpen the letter forms.
Level Up: 3D Texture
For a tactile element, glue thin wooden letters onto the tiles instead of painting them. Paint the wood letters before gluing for a crisp, dimensional pop.
Step 4: Assembly and Installation
-
Seal the artwork:
Once all paint is cured, apply a thin layer of satin or matte varnish to each tile. This protects the art from nursery dust and potential fingerprints. -
Determine placement:
Arrange the finished tiles on the floor first to double-check your color distribution. Ensure no two similar colors are bunching up next to each other. -
Mark the wall:
Use a level and a pencil to mark a straight horizontal line on the wall where the bottom of the lowest row will sit. This creates your foundation. -
Mount the tiles:
Starting from the bottom center tile and working your way out and up, attach the tiles to the wall. Double-sided heavy-duty mounting tape works well for lightweight wood, or use small command strips for easy removal. -
Check alignment:
Step back frequently as you place the tiles to ensure the vertical columns remain straight. Small spacers can be helpful if you want gaps, though touching tiles creates a seamless mural effect.
Step back and admire how this custom grid adds immediate warmth and structure to the nursery
Template Cards of Baby Icons to Watercolor
Create a charming set of baby shower cards featuring delicate, hand-painted nursery icons like teddy bears and bonnets. These simple yet elegant watercolor illustrations are perfect for guest activities or heartfelt thank-you notes.
Detailed Instructions
Materials
- High-quality hot press watercolor paper (smooth texture)
- Fine liner waterproof pen (black, 0.1mm or 0.3mm)
- Watercolor paint set
- Round watercolor brush (size 2 and 4)
- Pencil and eraser
- Natural jute twine
- Scissors
Step 1: Preparation & Sketching
-
Size the cards:
Cut your watercolor paper into uniform varying rectangles, approximately 4×6 inches for the main cards. Create a substantial stack to allow for multiple guests to participate. -
Plan the layout:
Lightly sketch your composition. Aim for a scattered pattern of icons rather than a rigid grid. Leave open negative space in the center if you plan to add text later. -
Draw the teddy bear:
Sketch a simple teddy bear near the top center. Use circles for the head and ears, and rounded ovals for the limbs. Keep the lines soft and rounded. -
Add nursery accessories:
Draw a baby bonnet on the right side. Sketch a simple dome shape for the hat and add a small brim. -
Sketch bottles and jars:
On the left side, outline a baby bottle with fluid lines. Below the twine line, sketch a small lotion bottle or milk jug and a tiny cup or pacifier. -
Include texture details:
Add small internal details like the teddy bear’s belly patch, the band on the hat, and measurement lines on the baby bottle.
Step 2: Inking & Coloring
-
Ink the outlines:
Go over your pencil sketches with a waterproof fine liner pen. Use a steady hand but don’t worry about perfection; a slightly wobbly line adds to the hand-drawn charm. -
Erase pencil marks:
Wait for the ink to be completely dry to touch, then gently erase all visible pencil guidelines to keep the paper clean. -
Prepare the wash:
Mix a very dilute wash of brown for the teddy bear. You want a ‘tea stain’ color rather than a heavy opaque brown. -
Paint the bear:
Fill in the teddy bear shape, leaving the belly patch unpainted for now. I like to keep the brush fairly wet to encourage pooling at the edges. -
Add accent colors:
Mix a soft pastel yellow. Apply this to the band on the bonnet and the liquid inside the baby bottle sketch. -
Paint blue elements:
Use a watered-down baby blue for the bonnet’s main body and the labels on the lower bottles. Keep the colors translucent. -
Add final details:
Once the base layers are dry, add a tiny bit of darker blue or gray to the metallic parts of the bottle top or the rim of the cup for dimension.
Loose Lines
Don’t connect every line perfectly when inking. Leaving small gaps in the outline gives the illustration a breezy, professional sketch look.
Step 3: Assembly
-
Initial drying:
Allow all paint to dry completely. If the paper has buckled slightly, you can place the cards under a heavy book overnight to flatten them. -
Stack the cards:
Gather your finished cards into a neat pile. You can mix in some plain sheets or blank cards underneath the painted top card. -
Prepare the twine:
Cut a length of natural jute twine, approximately 20 inches long so you have plenty of slack for tying. -
Wrap the bundle:
Wrap the twine horizontally around the center of the card stack. -
Tie the bow:
Tie a simple shoelace bow on the front, centered over your painted design. Adjust the loops so they are symmetrical but relaxed. -
Trim ends:
Snip the ends of the twine at an angle to prevent fraying, leaving tails about an inch and a half long.
Bleeding Lines?
If your black ink bleeds when you paint over it, stop immediately. Your pen isn’t waterproof. Switch to a permanent micron pen or paint first, then ink later.
This lovely stack of cards is now ready for your guests to admire or use
Heartbeat Wave Keepsake Painting
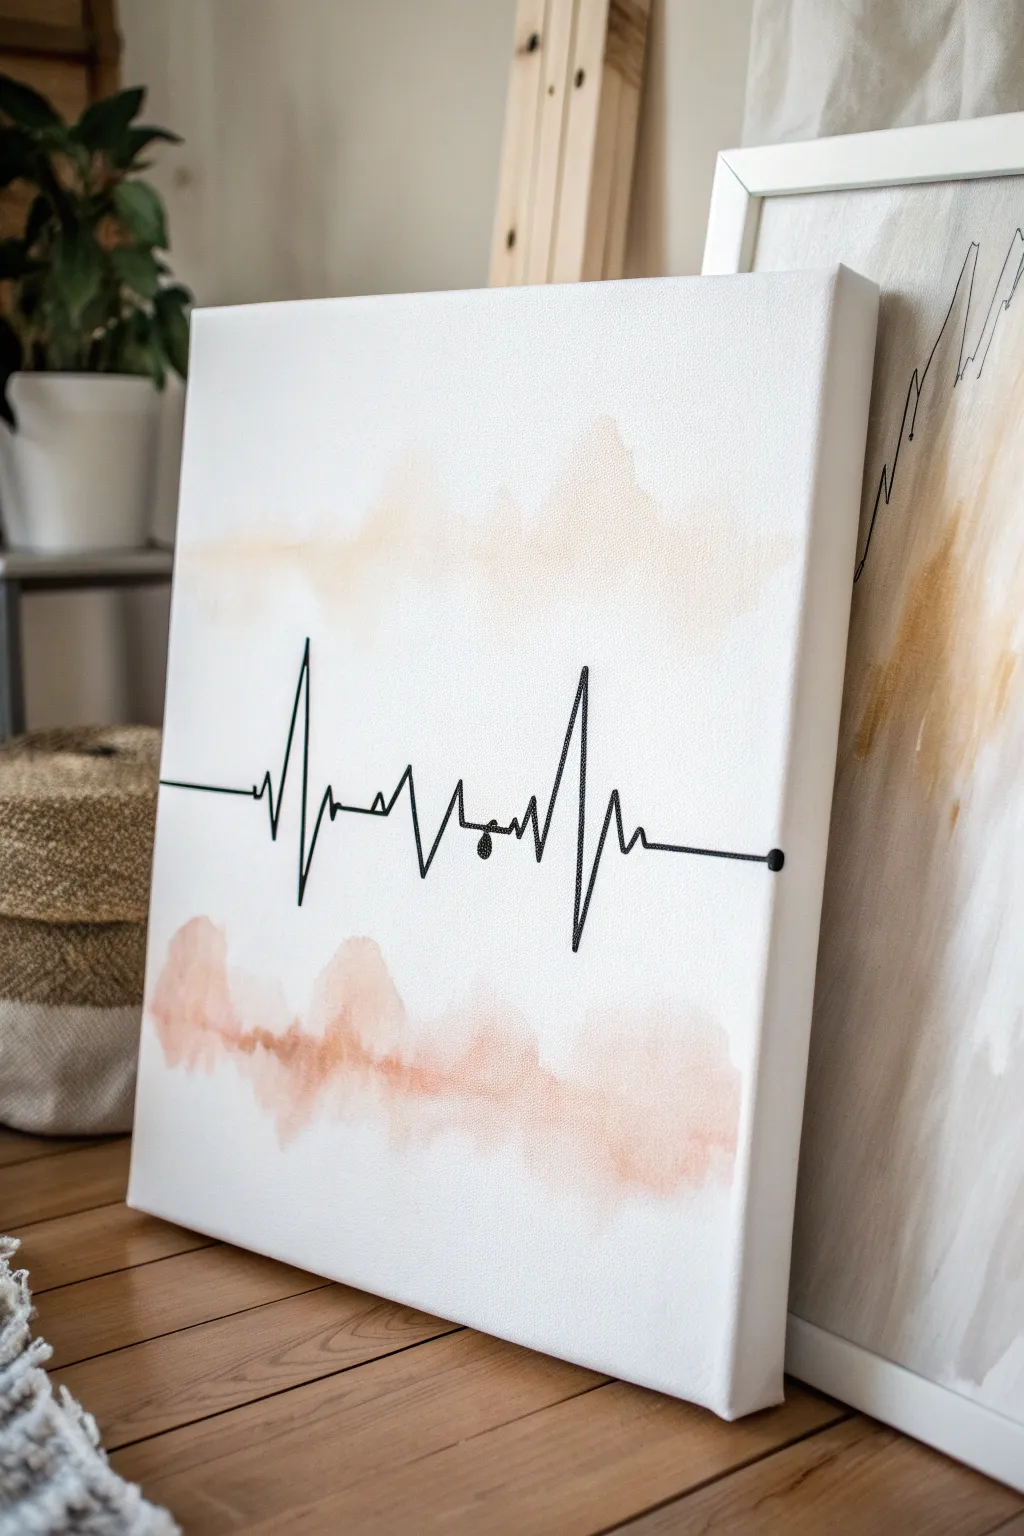
Immortalize the precious rhythm of a new life with this minimalist yet deeply sentimental artwork. Featuring a delicate watercolor-style wash and a stark, beautiful heartbeat line, this piece serves as a modern keepsake for any nursery.
Step-by-Step Tutorial
Materials
- Square stretched canvas (e.g., 12×12 or 16×16 inches)
- Acrylic paints (White, Peach/Coral, Beige/Sand)
- Textile medium or glazing liquid (to create watercolor effects)
- Black paint pen (fine or medium tip) or black acrylic paint with liner brush
- Large flat brush or sponge brush
- Spray water bottle
- Pencil and eraser
- Ruler or straight edge
- Printed copy of the ultrasound heartbeat report (optional, for reference)
Step 1: Preparing the Soft Background
-
Prime the Surface:
Even if your canvas is pre-primed, apply a coat of white acrylic paint over the entire surface. This creates a smoother, less textured base that allows the subsequent washes to flow better rather than soaking immediately into the fabric weave. -
Mix Your Washes:
On your palette, prepare two diluted mixtures. Mix a small amount of peach/coral paint with water and a drop of textile medium or glazing liquid until it’s very runny. Do the same with the beige/sand color. The medium helps the paint behave like watercolor without losing adhesion. -
Wet the Canvas:
Lightly mist the bottom third and the top third of the canvas with your water bottle. You want the surface damp but not dripping wet. This technique, familiar to watercolorists as ‘wet-on-wet’, creates those soft, dreamy edges. -
Apply the Bottom Wash:
Using a large flat brush, dab the peach/coral wash across the bottom section of the canvas. Don’t paint straight lines; instead, blot the color on irregularly to create cloud-like formations. Let the water on the canvas help diffuse the pigment upwards. -
Apply the Top Wash:
Repeat the process on the top third using the beige/sand wash. Keep the application light and airy, leaving plenty of white negative space in the middle of the canvas where the heartbeat line will eventually go. -
Soften the Edges:
If any edges look too harsh, dip a clean, damp brush into water and gently feather the edges of the paint while it’s still wet. I like to tilt the canvas slightly to encourage natural drips or movement, though keep it subtle. -
Dry Completely:
This step is crucial. Let the background dry for several hours or overnight. If the canvas is cool to the touch, it’s still wet. You cannot draw the crisp line over damp paint, or the ink will bleed.
Step 2: Drawing the Heartbeat
-
Mark the Horizon:
Using a ruler and a very light pencil touch, mark the horizontal center line across the canvas. This will serve as the baseline for your heartbeat rhythm. -
Sketch the Rhythm:
Lightly sketch the heartbeat pattern with a pencil. You can replicate the pattern from the photo—a flat line that spikes dramatically up and down—or trace the actual heartbeat from a sonogram printout for a personal touch. -
Refine the Peaks:
Go back over your sketch to ensure the vertical lines are relatively straight and the peaks are sharp. The beauty of an EKG line is in its jagged precision contrast against the soft background. -
Ink the Line:
Shake your black paint pen well to get the ink flowing. Carefully trace over your pencil lines. Start from the left edge and work your way across to avoid smudging your work with your hand. -
Thicken Key Areas:
For a more dynamic look, go back and slightly thicken the vertical parts of the spikes. This adds visual weight and makes the heartbeat look more like a digital readout. -
Add the Terminals:
Extend the line all the way to the left and right edges of the canvas. You can add a small dot at the end of the line on the right side to signify a paused moment in time or the current measurement. -
Clean Up:
Allow the black ink to dry for at least an hour. Once you are certain it is smudge-proof, gently erase any visible pencil marks with a clean, white eraser. -
Seal the Work:
Finish by applying a clear matte spray varnish. This protects the delicate ‘watercolor’ effect and prevents the black line from fading over time.
Uneven Blotches?
If the background paint creates hard water rings, lightly mist it again and dab with a damp paper towel to lift excess pigment and blend the edges.
Make it Personal
Instead of a generic line, project a photo of the baby’s actual 20-week ultrasound heartbeat onto the canvas and trace it for true accuracy.
Now you have a serene and meaningful piece of art that perfectly captures the excitement of a new arrival
Collaborative Nursery Mural Backdrop

Create a charming, interactive focal point for your baby shower with this large-scale coloring mural featuring a dreamy sky theme. The soft, muted palette of rainbows, clouds, moons, and stars sets a calming nursery vibe while offering guests a fun, collaborative activity.
Step-by-Step
Materials
- Large roll of white kraft paper or heavy-duty banner paper (at least 24 inches wide)
- Wooden dowel or slat hanger frame (top and bottom rails)
- String or twine for hanging
- Acrylic paints (muted terracotta, dusty blue, mustard yellow, soft teal)
- Assorted paintbrushes (flat and round, varying sizes)
- Paint markers or fine-tip paint pens (for guests to use)
- Pencil and eraser
- Ruler or straight edge
- Circular objects for tracing (bowls, caps) or a compass
- Washi tape or masking tape
Step 1: Planning and Setup
-
Prepare your canvas:
Cut a length of your paper roll to the desired height. Since this is a backdrop, aim for at least 4-5 feet long to create a substantial visual impact. -
Mount the paper:
Secure the top and bottom of the paper into the wooden slat hangers. This keeps the paper taut and flat, making it much easier to paint on than loose paper. -
Hang it up:
Ideally, hang the banner on the wall or an easel right now. Painting vertically allows you to step back and check the balance of your pattern as you work. -
Sketch the layout:
Using a pencil very lightly, sketch out your repeating icons. Aim for a scattered, organic pattern rather than rigid rows. Place the largest elements—the rainbows—first to anchor the design. -
Add secondary elements:
Fill the gaps between rainbows with medium-sized shapes like the crescent moons and fluffy clouds. Rotate the position of the clouds slightly to keep it feeling whimsical. -
Fill the small spaces:
Sprinkle in the smallest details: five-point stars, four-point geometric stars, simple circles, and rain droplets. These act as confetti to tie the whole composition together.
Step 2: Painting the Base Design
-
Paint the rainbows:
Start with the rainbows using your terracotta, mustard, and blue paints. Paint the outer arch first, then work inward. I like to leave a small gap of white space between each colored arch to keep the look clean and modern. -
Fill in the moons:
Paint the crescent moons with the terracotta or mustard shade. Ensure the curves are smooth; using a flat brush and rotating your wrist helps achieve that nice sharp tip. -
Detail the clouds:
Paint the cloud shapes in a dusty blue or teal. To give them texture like the reference photo, you can dab the paint on slightly unevenly or use a dry brush technique for a ‘stamped’ look. -
Add patterns to clouds:
Once the base blue is dry, use a fine white paint pen or a tiny brush to add details inside the clouds. Try little clusters of dots, snowflakes, or tiny stars to make them look magical. -
Paint the stars:
Use the mustard yellow and terracotta paints for the scattered stars. Vary their sizes; some should be solid filled shapes, while others can be outline-only stars for visual variety. -
Add finishing touches:
Look for empty spots and balance the colors. Add small clusters of dots (stippling) in neutral tones to mimic falling snow or pollen, and paint small raindrops beneath a few clouds.
Stamp for Consistency
Cut a potato or sponge into a cloud or star shape to use as a stamp. This speeds up the process and ensures all your repeating elements are uniform in size.
Step 3: Preparing for the Party
-
Clean up lines:
Once everything is fully dry, gently erase any visible pencil sketch lines that weren’t covered by paint. -
Set up the station:
Place a cup of paint markers or colored pencils nearby. During the shower, guests can color in the open white stripes of the rainbows or add their own doodles to the backdrop.
Personalize the Sky
Hide the baby’s name or due date inside one of the clouds, or make the constellation pattern match the baby’s zodiac sign for a hidden meaningful detail.
Now you have a gorgeous, custom piece of art that serves as both party decor and a keepsake for the nursery
Painted “Wishes for Baby” Envelope Set
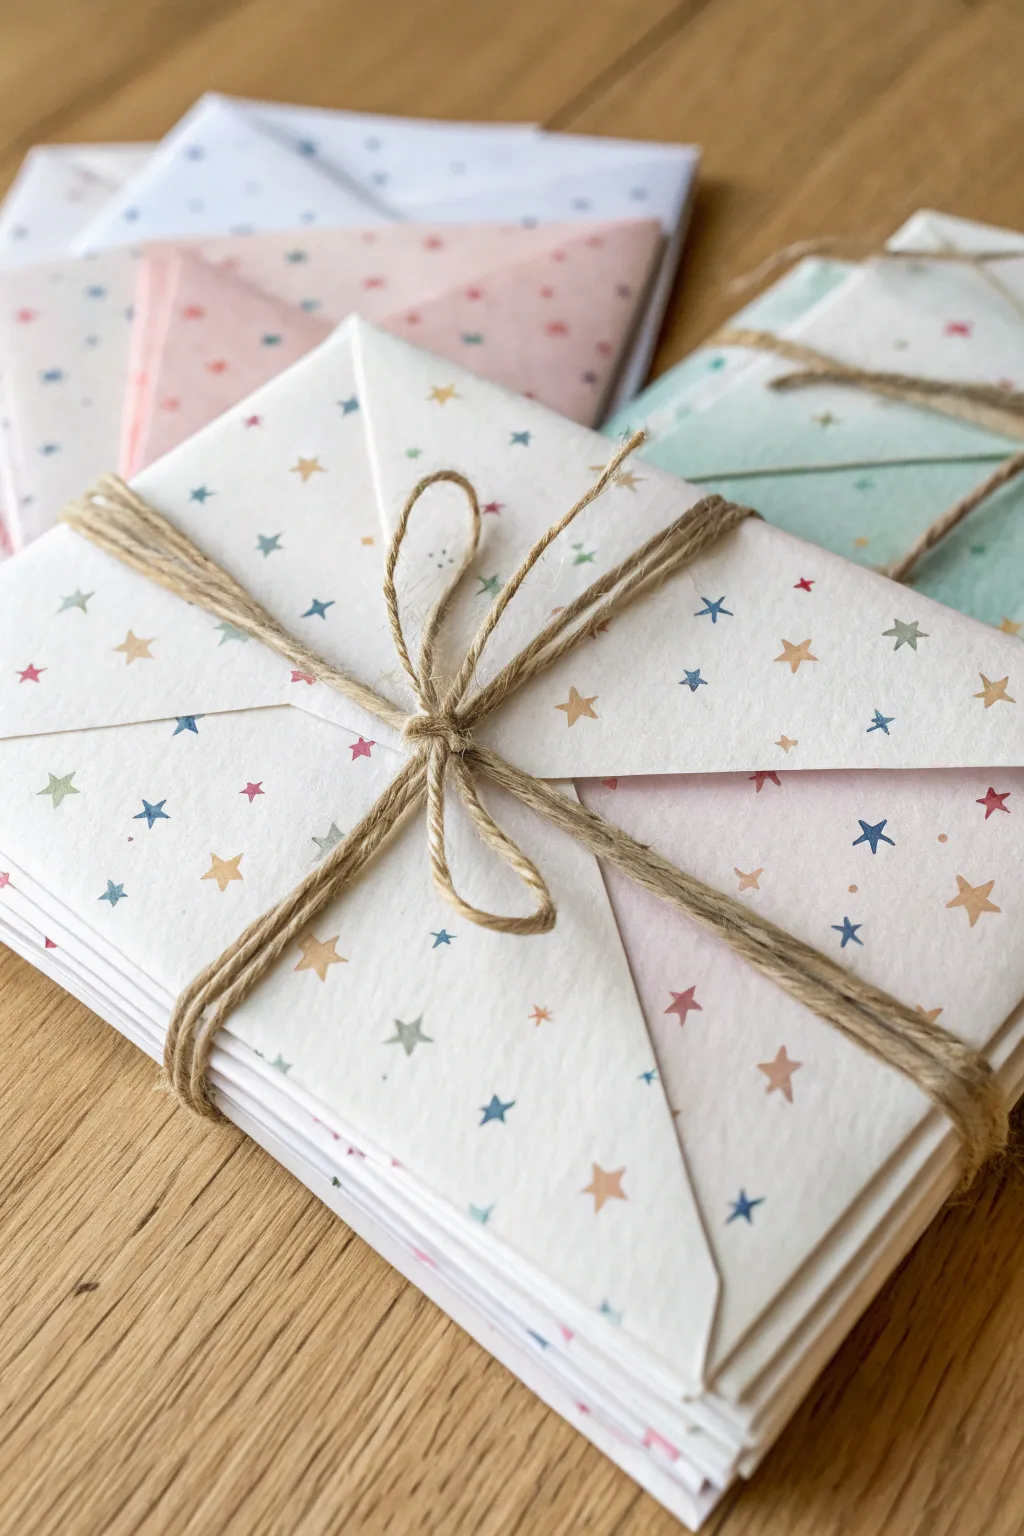
Create a whimsical collection of hand-decorated envelopes perfect for collecting heartfelt wishes at a baby shower. The delicate, scattered star pattern adds a celestial charm to plain stationery, turning simple notes into treasured keepsakes.
Detailed Instructions
Materials
- High-quality white or cream envelopes (square or rectangular)
- Small star rubber stamp (approx. 0.5 cm)
- Pigment ink pads in pastel colors (dusty blue, sage green, blush pink, mustard yellow)
- Scrap paper for testing
- Jute twine or rustic hemp cord
- Paper towels or baby wipes
- Scissors
Step 1: Preparation & Planning
-
Organize your workspace:
Lay out your envelopes on a clean, flat surface. Ensure you have good lighting to see the ink colors clearly against the paper. -
Test your color palette:
Before stamping the actual envelopes, take a piece of scrap paper that matches your envelope texture. Stamp one star of each color to see how they look together. Adjust your selection until you have a harmonious pastel mix. -
Clean your stamp:
If you are using a single stamp for multiple colors, make sure you have a damp paper towel or baby wipe nearby. You will need to clean the stamp thoroughly between color changes to avoid muddying the inks.
Step 2: Stamping the Pattern
-
Start with the dominant color:
Pick your favorite color—perhaps the dusty blue—and ink your star stamp. Lightly press it onto the paper. Avoid pressing too hard, as this can create ink halos around the star shape. -
Create a random scatter:
Stamp about 5-7 blue stars across the front of the envelope. I like to rotate the stamp slightly between each impression so the stars don’t all point in the exact same direction, which makes the pattern feel more natural. -
Switch colors:
Clean off the blue ink completely. Switch to your second color, like blush pink. Stamp these into the larger empty spaces left by the first color. Don’t worry about perfect spacing; irregularity is part of the charm. -
Fill the gaps:
Continue the process with your remaining colors (mustard yellow and sage green). Look for any large white spaces and place a star there. -
Don’t forget the edges:
To make the paper look professionally printed, stamp some stars partially off the edge of the envelope. Place a scrap piece of paper underneath to catch the ink that goes off the side. -
Repeat for the back flap:
Turn the envelope over and open the flap. Continue the scattered pattern onto the triangular flap area so the design looks consistent when the envelope is sealed. -
Dry completely:
Set the finished envelope aside to dry. Pigment inks can be juicy and slow-drying, so give them at least 10-15 minutes before stacking. -
Batch processing:
Repeat this process for your entire stack of envelopes. It is often faster to stamp one color on all envelopes first, then switch to the next color, rather than finishing one envelope completely at a time.
Smudge Alert!
If your ink smudges easily, use a heat tool or hair dryer on a low setting to set the pigment ink quickly before handling the envelopes.
Step 3: Bundling & Finishing
-
Create stacks:
Once all envelopes are fully dry, organize them into neat stacks of about 5 to 10 envelopes each. -
Measure the twine:
Cut a length of jute twine roughly four times the width of your stack. This ensures you have plenty of length for wrapping and tying a bow. -
Wrap vertically:
Place the center of the twine on top of the stack. Bring the ends underneath the stack and cross them, pulling them snug but not so tight that they bend the envelopes. -
Wrap horizontally:
Bring the ends back up to the top, crossing over the vertical strand you started with. This creates a secure cross shape that holds the stack together well. -
Tie the knot:
Tie a simple knot in the center where the twine crosses. Pull tight to secure the bundle. -
Form the bow:
Tie a standard bow on top of the knot. Adjust the loops to be roughly equal in size, giving it a rustic, handcrafted look. -
Trim the ends:
Snip the tails of the bow with scissors. I usually cut them at an angle to prevent fraying and keep them looking neat.
Pattern Pro-Tip
Visualize triangles when stamping. Place each new star so it forms a rough triangle with two existing stars to maintain balanced spacing.
Now you have a charming set of bundled envelopes ready to capture sweet messages for the new arrival


Have a question or want to share your own experience? I'd love to hear from you in the comments below!