Whenever you want something truly beautiful on your canvas, a strong sky, a simple focal point, and a few confident shapes will take you so far. Here are my favorite beautiful painting ideas that feel doable, look impressive, and leave plenty of room for your own style.
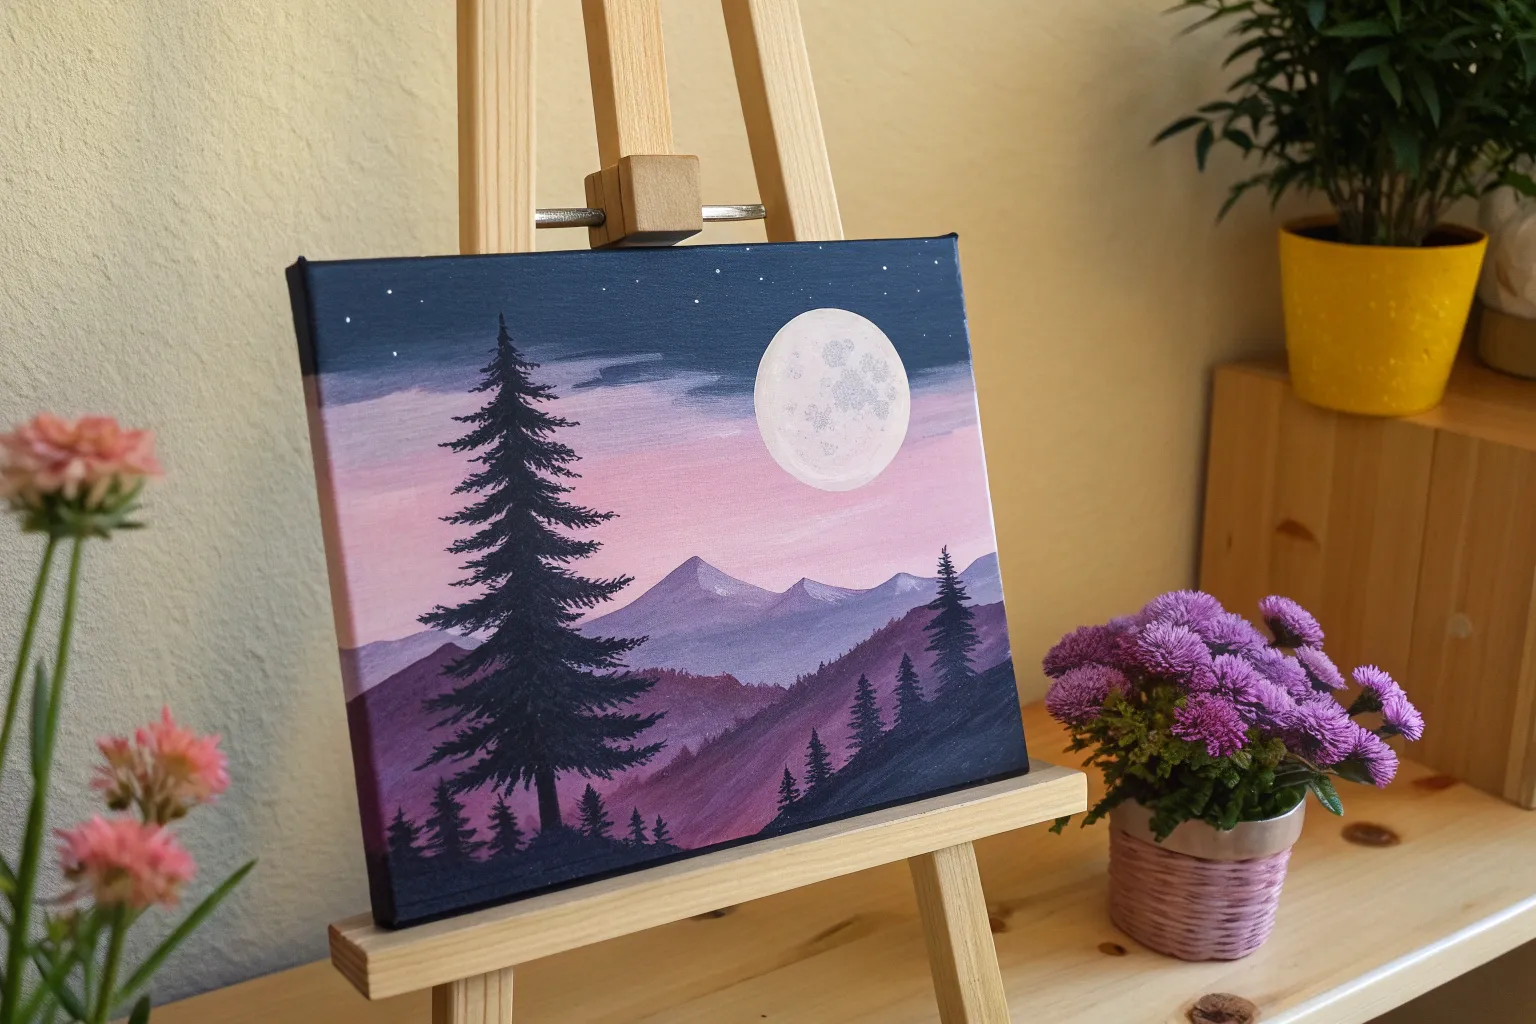
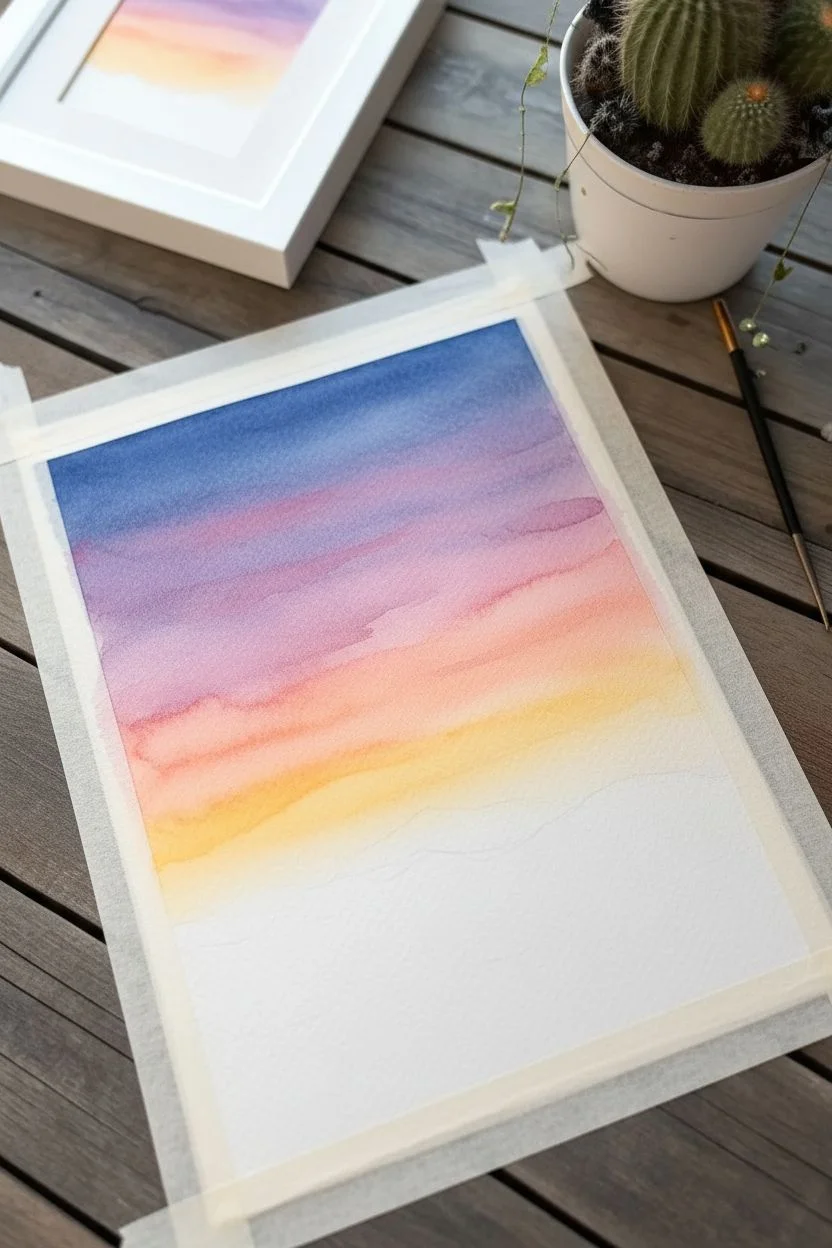
Sunset Gradient With Silhouetted Trees
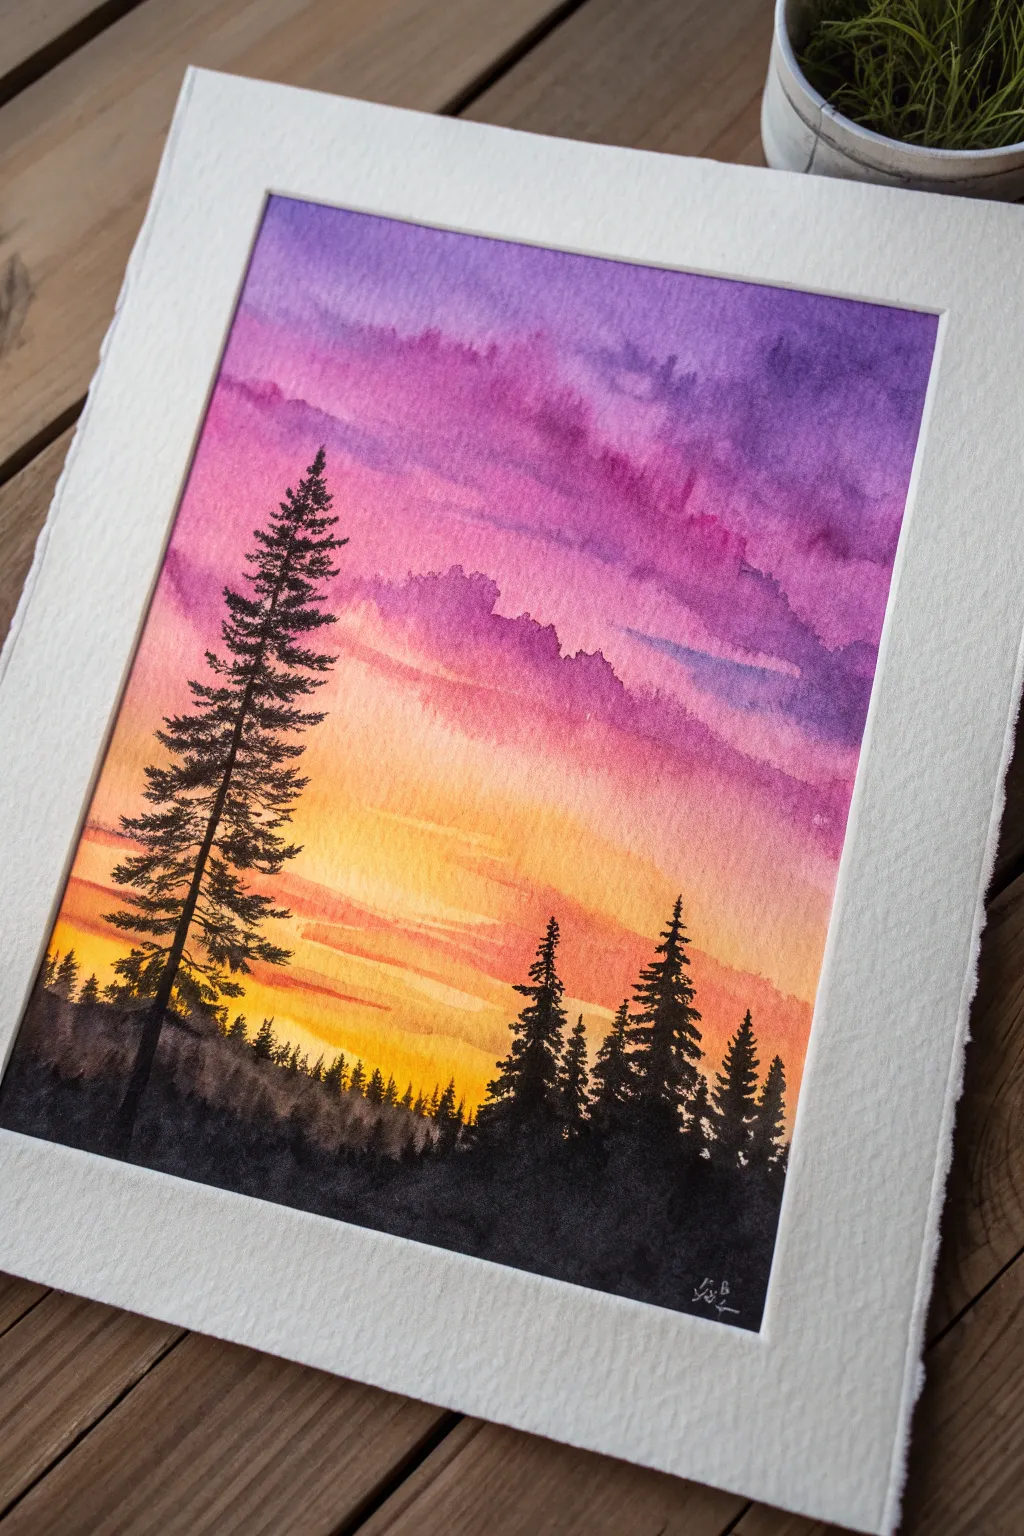
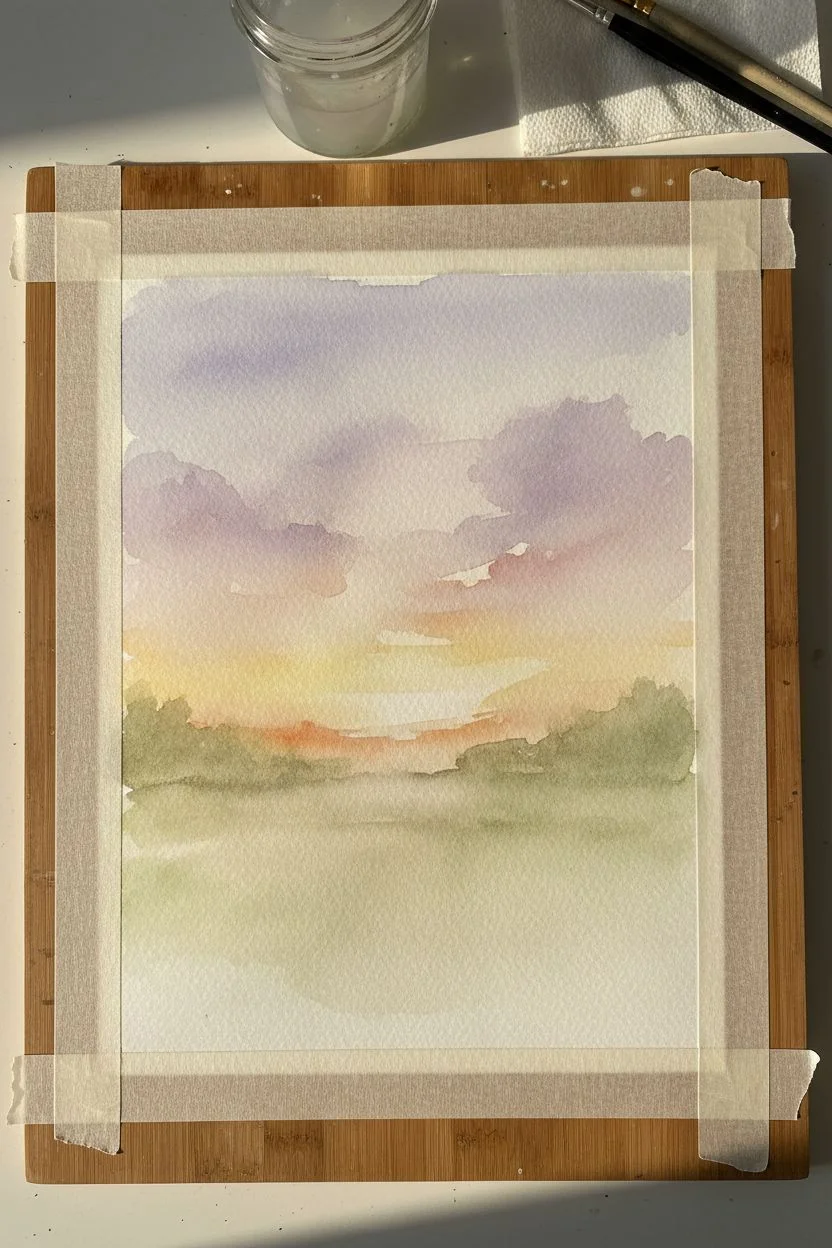
Capture the magic of twilight with this stunning watercolor landscape featuring a vibrant gradient sky and crisp pine silhouettes. The transition from deep purple clouds to a warming yellow horizon creates a dramatic backdrop for the detailed foreground trees.
Detailed Instructions
Materials
- Cold press watercolor paper (300 gsm or heavier)
- Watercolor paints (Violet, Magenta/Rose, Orange, Yellow, Black)
- Large flat wash brush
- Medium round brush (size 6 or 8)
- Fine liner or detail brush (size 0 or 1)
- Masking tape
- Clean water jar
- Paper towels
- Mixing palette
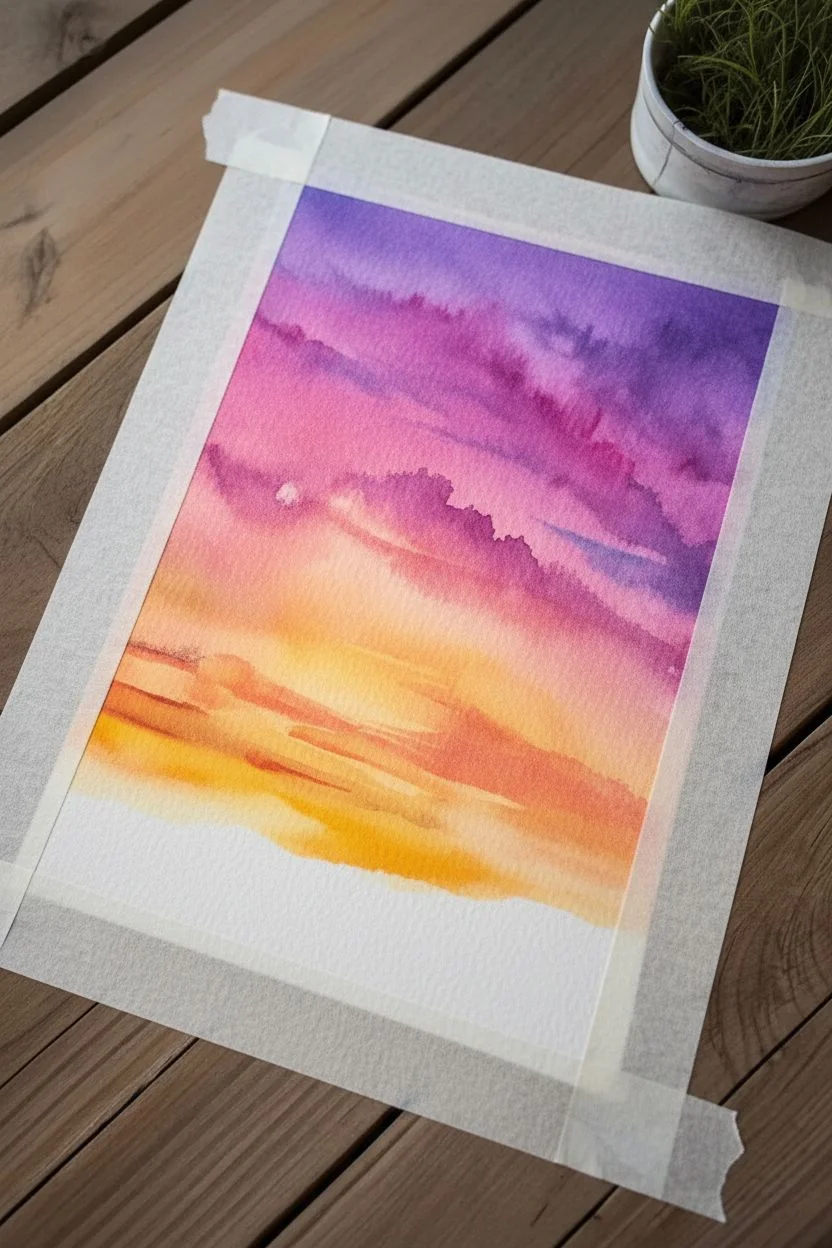
Step 1: Painting the Sky Gradient
-
Secure your paper:
Begin by taping down all four edges of your watercolor paper to a board or table. This prevents buckling and creates that crisp white border seen in the final piece. -
Pre-wet the sky area:
Using your large flat brush and clean water, apply a gentle wash over the entire sky area, stopping about an inch from the bottom edge. The paper should be glistening but not forming puddles. -
Apply the purple crown:
Load your brush with a rich violet hue. While the paper is still wet, paint the top third of the sky using horizontal strokes. Allow the paint to bleed downward naturally. -
Add the cloud texture:
While the violet is wet, drop in slightly concentrated magenta or deeper violet into the upper section. Dab the brush gently rather than stroking to create fluffy, cloud-like formations. -
Transition to rose:
Clean your brush quickly and pick up a vibrant rose or magenta color. Blend this into the bottom edge of the violet section, pulling the color downwards. -
Introduce the orange tones:
Switch to a warm orange. Paint horizontally below the pink layer, letting the wet edges touch and merge softly. I find that tilting the board slightly helps the gravity blending process here. -
Finish with golden yellow:
For the horizon line (the lowest part of the sky), use a bright, clean yellow. Blend it into the orange above, ensuring the transition is smooth and glowing. -
Create horizontal streaks:
While the yellow and orange areas are damp but not soaking, use a clean, slightly dry brush to lift out subtle horizontal lines, or add faint stripes of slightly darker orange to suggest distant stratocumulus clouds. -
Let it dry completely:
This is crucial. The paper must be bone dry before moving to the silhouettes. Use a hairdryer on a low setting if you are impatient, but air drying is safest.
Muddy colors?
If your yellow horizon turns brown, you likely dragged the purple paint down too far. Wash your brush thoroughly between color transitions to keep the yellow pure.
Step 2: Adding the Silhouettes
-
Mix a dense black:
Prepare a very concentrated black paint. It should be creamy, not watery, to ensure it covers the colorful background completely without appearing transparent. -
Paint the background hills:
Using a diluted version of your black (a dark grey wash), paint a low, rolling hill line at the very bottom. This adds depth behind the main trees. -
Start the main tree trunk:
Using the detail brush or fine liner, draw a thin, vertical line on the left side of the paper for the tallest tree trunk. It doesn’t need to be perfectly straight; organic wobbles look more natural. -
Add pine branches:
Start from the top of the tree tip. Use a stippling or tapping motion to create short, downward-sloping texture for the pine needles. Keep the top very narrow and gradually widen the branches as you move down. -
Flesh out the big tree:
Continue painting branches all the way down. Leave small gaps between some branches so the sunset colors peek through, which keeps the tree from looking like a solid triangle. -
Paint the secondary trees:
On the right side, paint a cluster of smaller pine trees. vary their heights and widths to create visual interest. The trees on the right should be generally shorter than the hero tree on the left. -
Fill the foreground:
Use the concentrated black to fill in the immediate foreground at the bottom, connecting the bases of all your trees into a solid dark mass. -
Add tiny details:
Use the very tip of your smallest brush to add tiny vertical spikes along the horizon line in the darkness, hinting at a distant forest edge. -
Reveal the border:
Once the black paint is fully dry, slowly peel away the masking tape at a 45-degree angle to reveal your clean edges.
Tree Texture Tip
For realistic pine needles, don’t paint individual needles. Instead, use the side of a small round brush and ‘stamp’ distinct, jagged shapes downwards.
Frame your sunset masterpiece and enjoy the peaceful view you have created


Dreamy Night Sky With a Glowing Full Moon
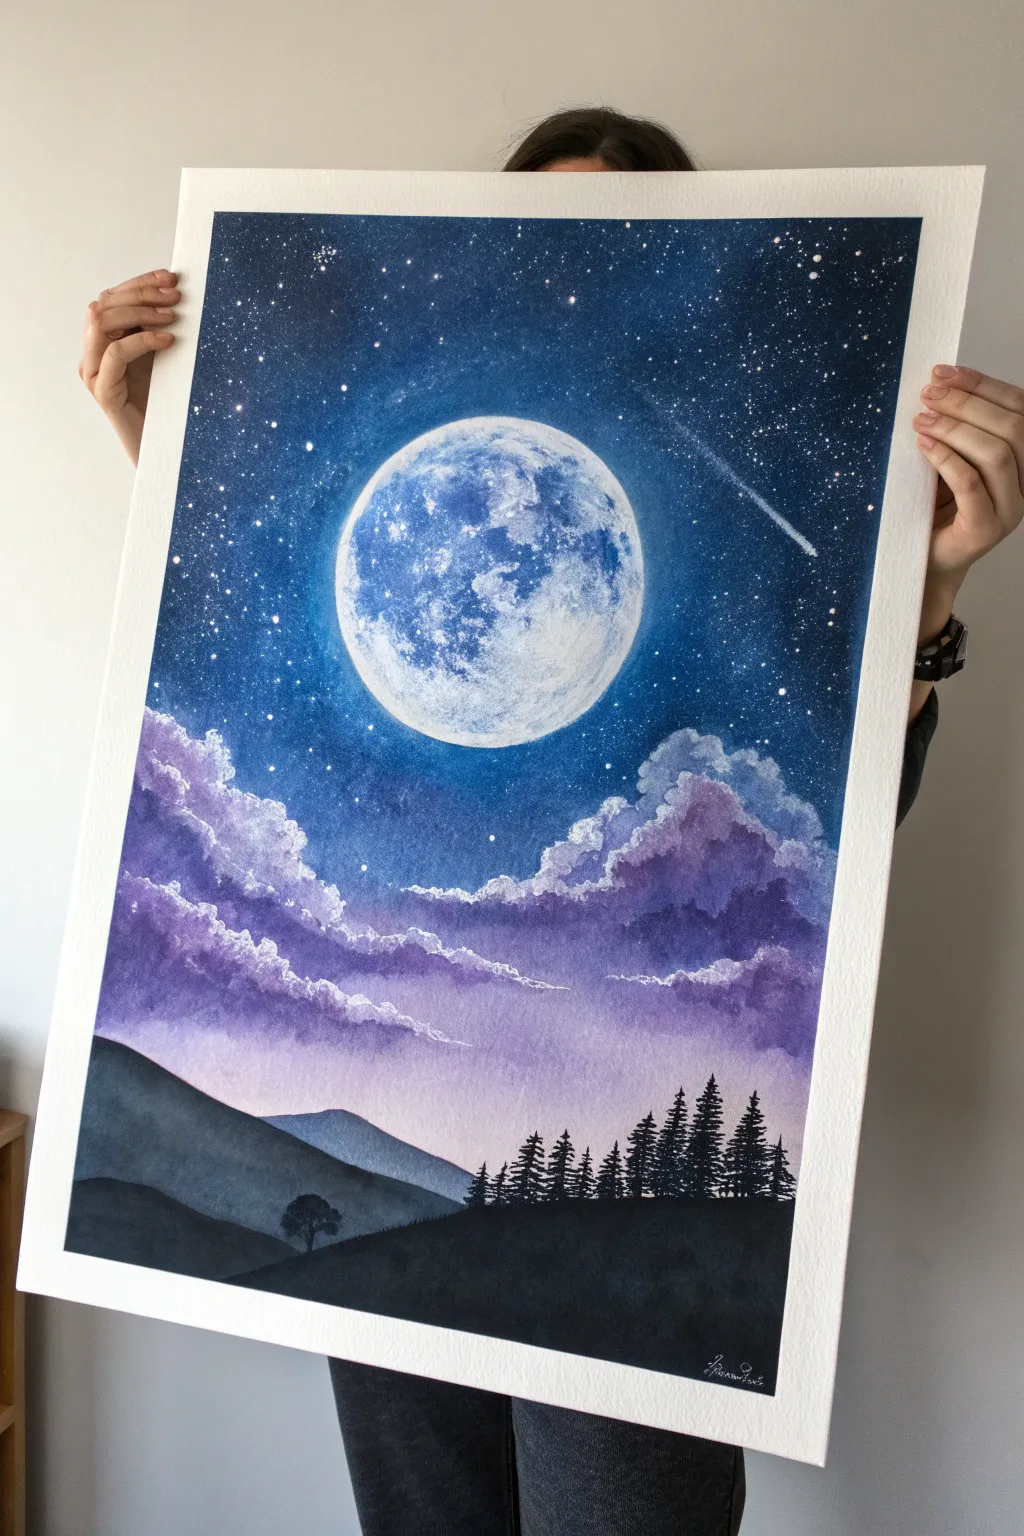
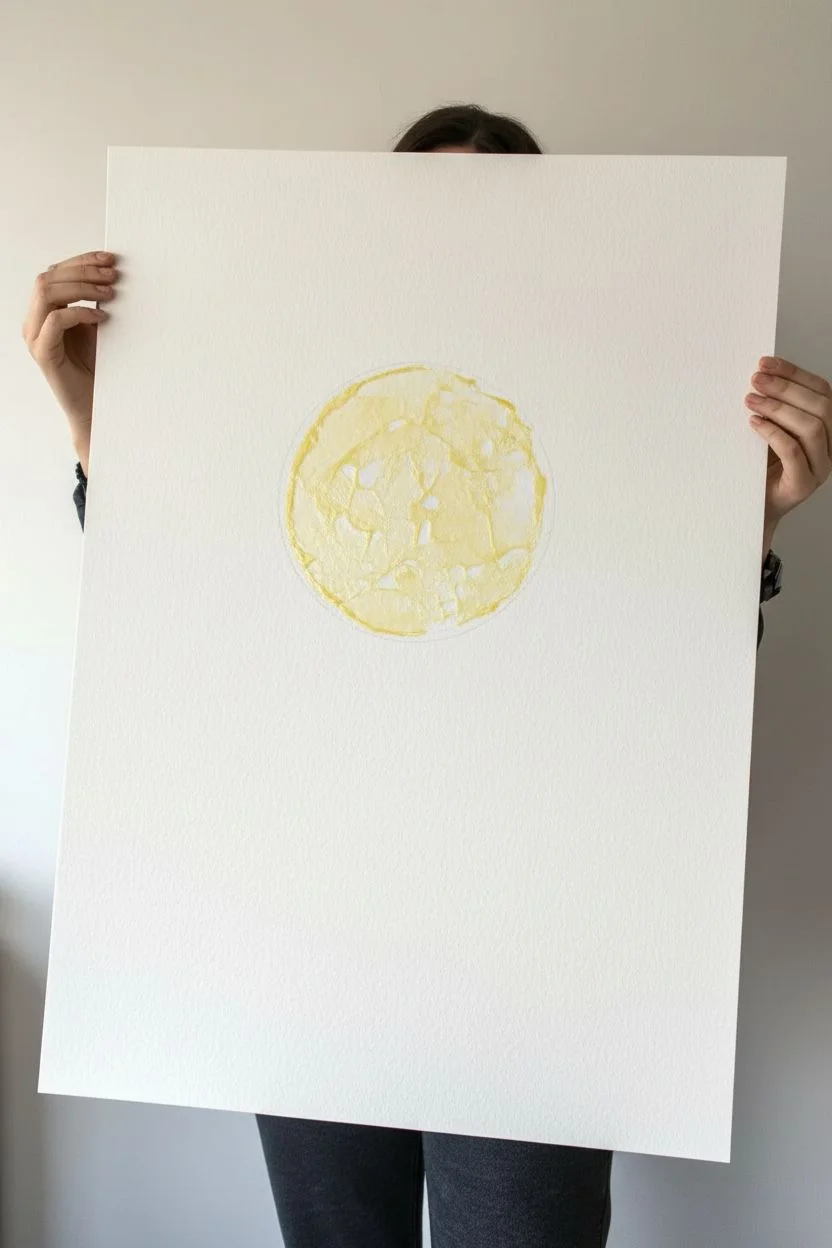
Capture the magic of a silent night with this stunning watercolor tutorial featuring a luminous full moon, ethereal clouds, and a crisp silhouette forest. The rich gradients of indigo and violet create a dreamy atmosphere that is perfect for hanging on your wall.
How-To Guide
Materials
- High-quality watercolor paper (cold press, at least 140lb/300gsm)
- Watercolor paints: Indigo, Prussian Blue, Violet/Purple, Black, Payne’s Grey
- White gouache or opaque white acrylic ink
- Masking fluid
- Large flat wash brush
- Medium round brush (size 6 or 8)
- Small detail brush (size 0 or 1)
- Old toothbrush (for splattering)
- Circular object (like a bowl or masking tape roll) for tracing
- Pencil and eraser
- Paper towels and two jars of water
Step 1: Preparation and Masking
-
Trace the Moon:
Place your circular object near the top center of your paper and lightly trace a perfect circle with a pencil. Keep the lines faint so they don’t show through later. -
Protect the Moon:
Apply masking fluid carefully inside the circle you just drew. This will preserve the pure white of the paper for our bright moon later. Let it dry completely until it’s tacky and hard.
Clean Edges?
If masking fluid fails, use white gouache to correct the moon’s shape later. It is opaque enough to cover the blue sky paint.
Step 2: The Night Sky
-
Wet the Sky:
Using your large flat brush, wet the entire paper area above the horizon line (leave the bottom third dry for the landscape). Go right over the masked moon. -
First Wash:
While the paper is wet, drop in a light wash of Prussian Blue around the moon area to create a glow, transitioning into deeper Indigo as you move toward the top corners. -
Deepen the Colors:
While the first layer is still damp, add concentrated Indigo and Black paint to the upper corners and edges. We want a deep, vast night sky, so don’t be afraid of dark values here. -
Create the Star Field:
Before the sky dries completely, you can drop in tiny specks of clean water or salt to create natural-looking texture. Allow the sky to dry completely before moving on.
Add a Lake
Instead of rolling hills, paint a flat, dark blue surface at the bottom and mirror the moon and trees for a reflective lake scene.
Step 3: Clouds and Atmosphere
-
Cloud Structure:
Mix a vibrant Violet with a touch of Payne’s Grey. Using a medium round brush, paint fluffy cloud shapes below the moon. Keep the top edges of the clouds soft and irregular. -
Cloud Shadows:
While the purple paint is wet, drop darker purple or Indigo into the bottom sections of the clouds to give them volume and weight. -
Softening Edges:
Use a clean, slightly damp brush to soften the bottom edges of the clouds, letting the color fade into a misty pale purple as it reaches the horizon line. -
Drying Time:
Let the cloud layer dry fully. This ensures your crisp foreground won’t bleed into the soft sky.
Step 4: The Glowing Moon
-
Reveal the Moon:
Gently rub off the masking fluid to reveal the stark white circle. It creates a satisfying contrast against the dark sky. -
Moon Surface Texture:
Mix a very watery, pale blue-grey. Dab this randomly onto the white moon surface to create craters and shadows, leaving plenty of pure white paper for the brightest highlights.
Step 5: Landscape and Details
-
Distant Hills:
Paint the furthest hill using a diluted Payne’s Grey. The lighter value pushes it into the background. Let this dry. -
Middle Ground:
Paint a closer, darker hill shape on top of the previous one using a more saturated mix of Indigo and Black. -
Foreground Silhouette:
With pure Black paint, fill in the closest hill at the very bottom. This needs to be solid and opaque to anchor the composition. -
Pine Trees:
Switch to your smallest liner brush. Paint vertical lines for tree trunks along the ridge of the black foreground hill. -
Tree Branches:
Using a stippling motion or quick horizontal dashes, add the pine needles to your trees. Keep the tops pointy and the bases wider. -
Shooting Star:
Using white gouache and a detail brush, paint a thin diagonal line for the shooting star trail, tapering it off at the end. -
Star Splatter:
Cover the bottom landscape with a piece of scrap paper. Dip an old toothbrush in white gouache and flick the bristles to create a galaxy of stars across the sky. -
Final Highlights:
Add a few larger, manual dots of white gouache for the brightest planets or stars, and refine the moon’s edge if needed.
Step back and admire the serene nighttime world you have brought to life on paper


Misty Mountains in Soft Layered Values
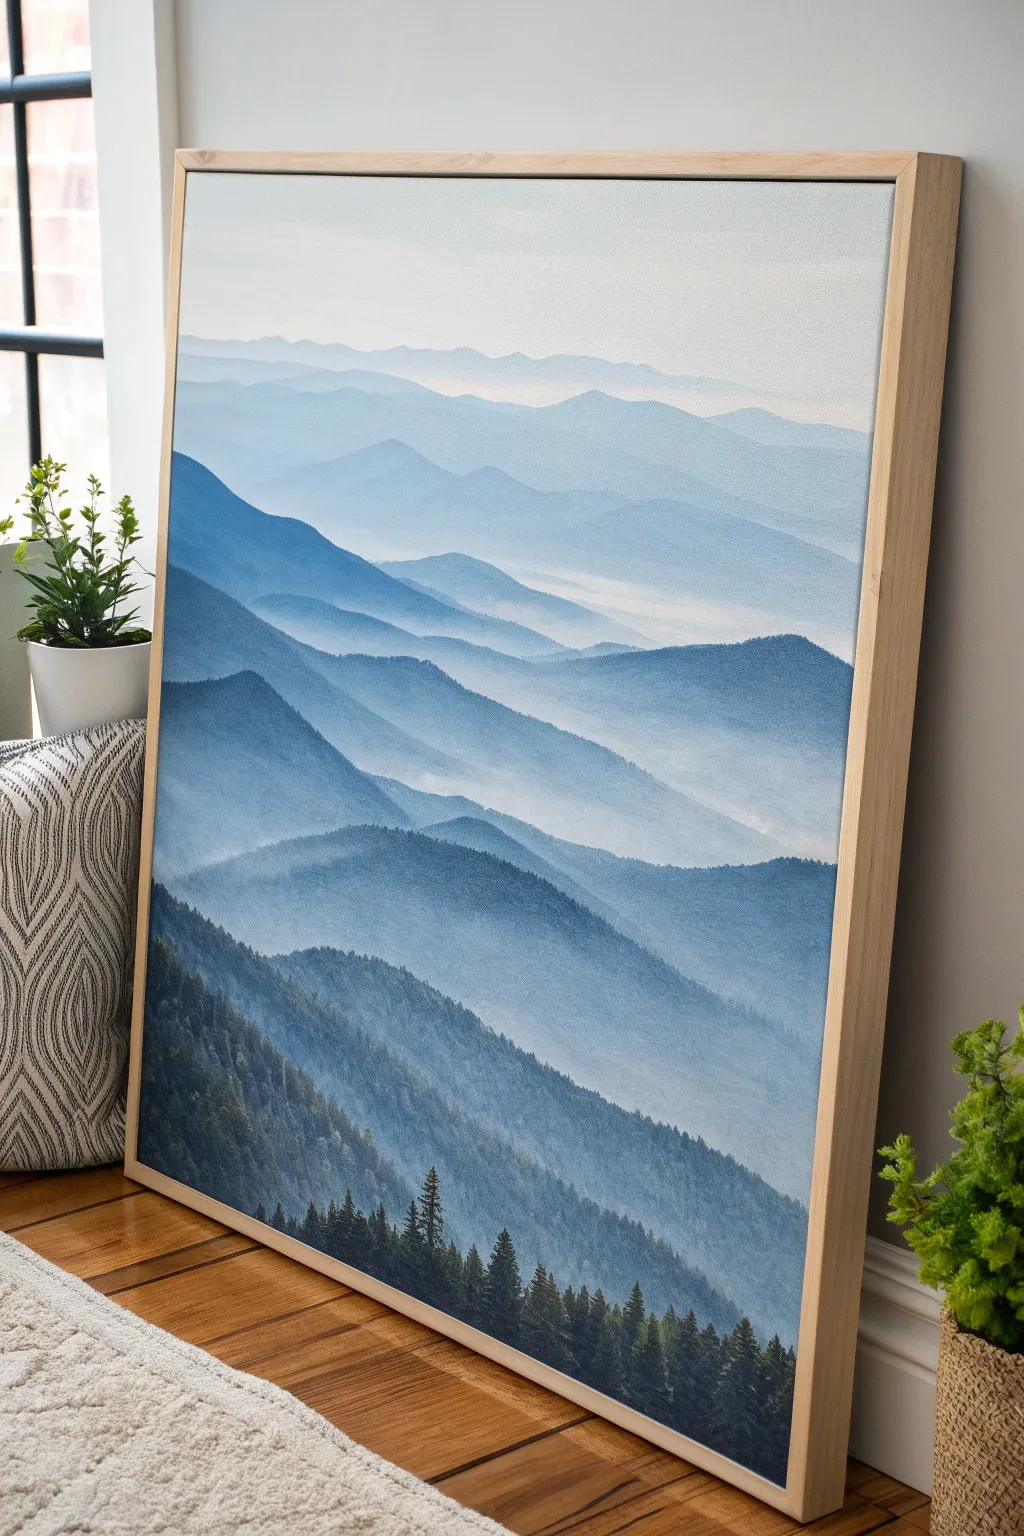
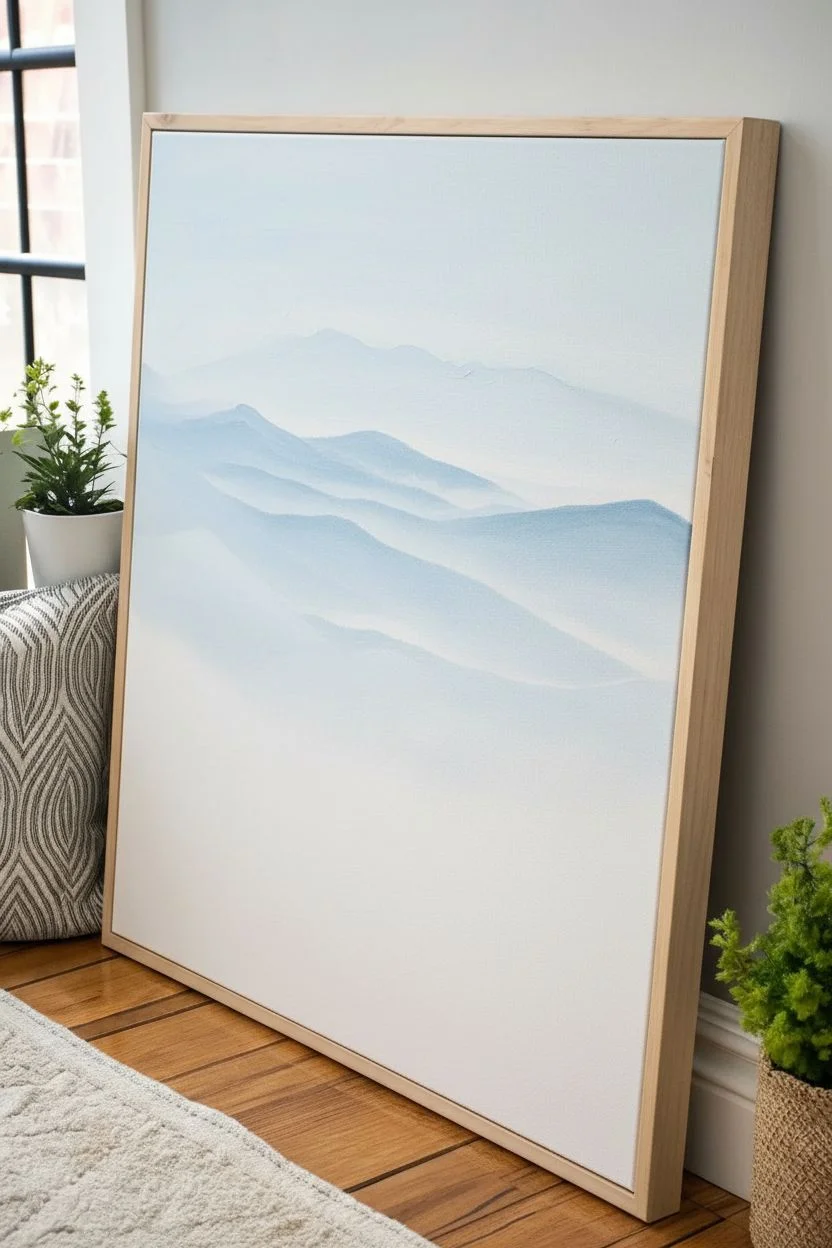
Capture the serene beauty of distant mountain ranges with this layered landscape painting project. By mastering atmospheric perspective—where objects become lighter and cooler as they recede—you will create a sense of immense depth and calm using a simple palette of blues and white.
How-To Guide
Materials
- Large stretched canvas (at least 18×24 inches recommended)
- Acrylic paints: Phthalo Blue, Ultramarine Blue, Titanium White, Mars Black, Sap Green
- Large flat brush (2-inch)
- Medium flat brush (1-inch)
- Small round brush (size 2-4)
- Palette knife for mixing
- Water container and paper towels
- Fine mist spray bottle
- Slow-drying medium (optional, for acrylics)
Step 1: Sky and Background
-
Prime the Atmosphere:
Begin by mixing a very large amount of Titanium White with a tiny dot of Phthalo Blue. Using your large 2-inch flat brush, cover the top third of the canvas with horizontal strokes to create a pale sky. -
First faint ridge:
While the sky is still slightly damp, mix a shade just one step darker than your sky color. Use the medium flat brush to paint an uneven, rolling line about a third of the way down the canvas to represent the most distant mountain range. -
Softening the edge:
Immediately rinse your brush, shake off excess water, and gently run the damp bristles along the bottom edge of this first mountain line to blur it into the white canvas below, creating a misty effect.
Muddy colors?
If your blues look dull, you likely used too much black to darken them. Rely on Phthalo Blue for depth. Only add a pinpoint of black for the very closest, darkest foreground trees.
Step 2: Mid-Ground Ranges
-
Mixing the mid-tones:
Create a new pile of paint that is a distinct, soft blue—darker than the first ridge but still pastel. Add a touch of Ultramarine Blue here to vary the hue slightly. -
Layering shapes:
Paint the next mountain range, starting slightly lower than the first. Allow its peak to overlap the previous layer. Notice how the mountain shapes in the reference are like gentle waves rather than sharp triangles; keep your hand relaxed. -
Creating the valley mist:
As you paint the body of this mountain, gradually add more white to your dirty brush as you move downward. This ensures the bottom of the mountain is lighter than the top, simulating mist settling in the valley. -
Repeat and deepen:
Mix a slightly darker, truer blue heavily for the next ridge. Paint this range across the middle of the canvas. Make the shapes slightly larger and more pronounced than the background layers. -
Adding atmospheric texture:
Use a dry brush technique here. Wipe most of the paint off your brush and lightly drag it horizontally across the base of this mountain layer to create softly broken lines that look like drifting fog. -
The transition layer:
Mix a blue-grey tone by adding the tiniest speck of black to your blue mix. Paint a range that descends from the left side, allowing it to dip deeply into the foreground area. Keep the top edge crisp but the bottom faded.
Step 3: Foreground Detail
-
Mixing the deep forest color:
Prepare your darkest value. Mix Phthalo Blue, Mars Black, and a touch of Sap Green. This should look almost black on the palette but rich green-blue on canvas. -
Blocking the foreground:
Use the medium flat brush to fill in the bottom right corner and the lowest slope with this dark mixture. This anchors the painting and pushes the lighter blue mountains backward. -
Scumbling texture:
Take a fairly dry brush with the dark mixture and scumble (scrub lightly) upwards into the mist of the layer above. This creates the illusion of a thickly forested ridge seen from a distance. -
Detailing treetops:
Switch to your small round brush or the corner of a flat brush. Along the top ridge of your dark foreground shape, dab tiny vertical marks to suggest the tips of individual pine trees breaking the skyline. -
Painting distinct pines:
For the closest trees at the very bottom edge, use the small round brush to paint distinct vertical lines for trunks. Then, use a stippling motion to add branches that are wider at the bottom and narrow at the top. -
Adding depth to the forest:
Mix a slightly lighter green-grey. I find that dabbing this sparingly onto the sun-facing side of the foreground trees adds a crucial sense of dimension, so the forest doesn’t look like a flat silhouette. -
Final mist adjustements:
Step back and look at the whole piece. If the transition between layers looks too sharp, create a very thin glaze of water and Titanium White and lightly brush it over the ‘valleys’ to enhance the foggy effect.
Framing for Impact
This style shines in a floater frame. Build a simple frame from 1×2 poplar strips, leaving a 1/4″ gap between the canvas and wood to mimic a gallery look.
Now you have a peaceful mountain vista that brings a breath of fresh air into your home


Golden Meadow With Loose Wildflowers
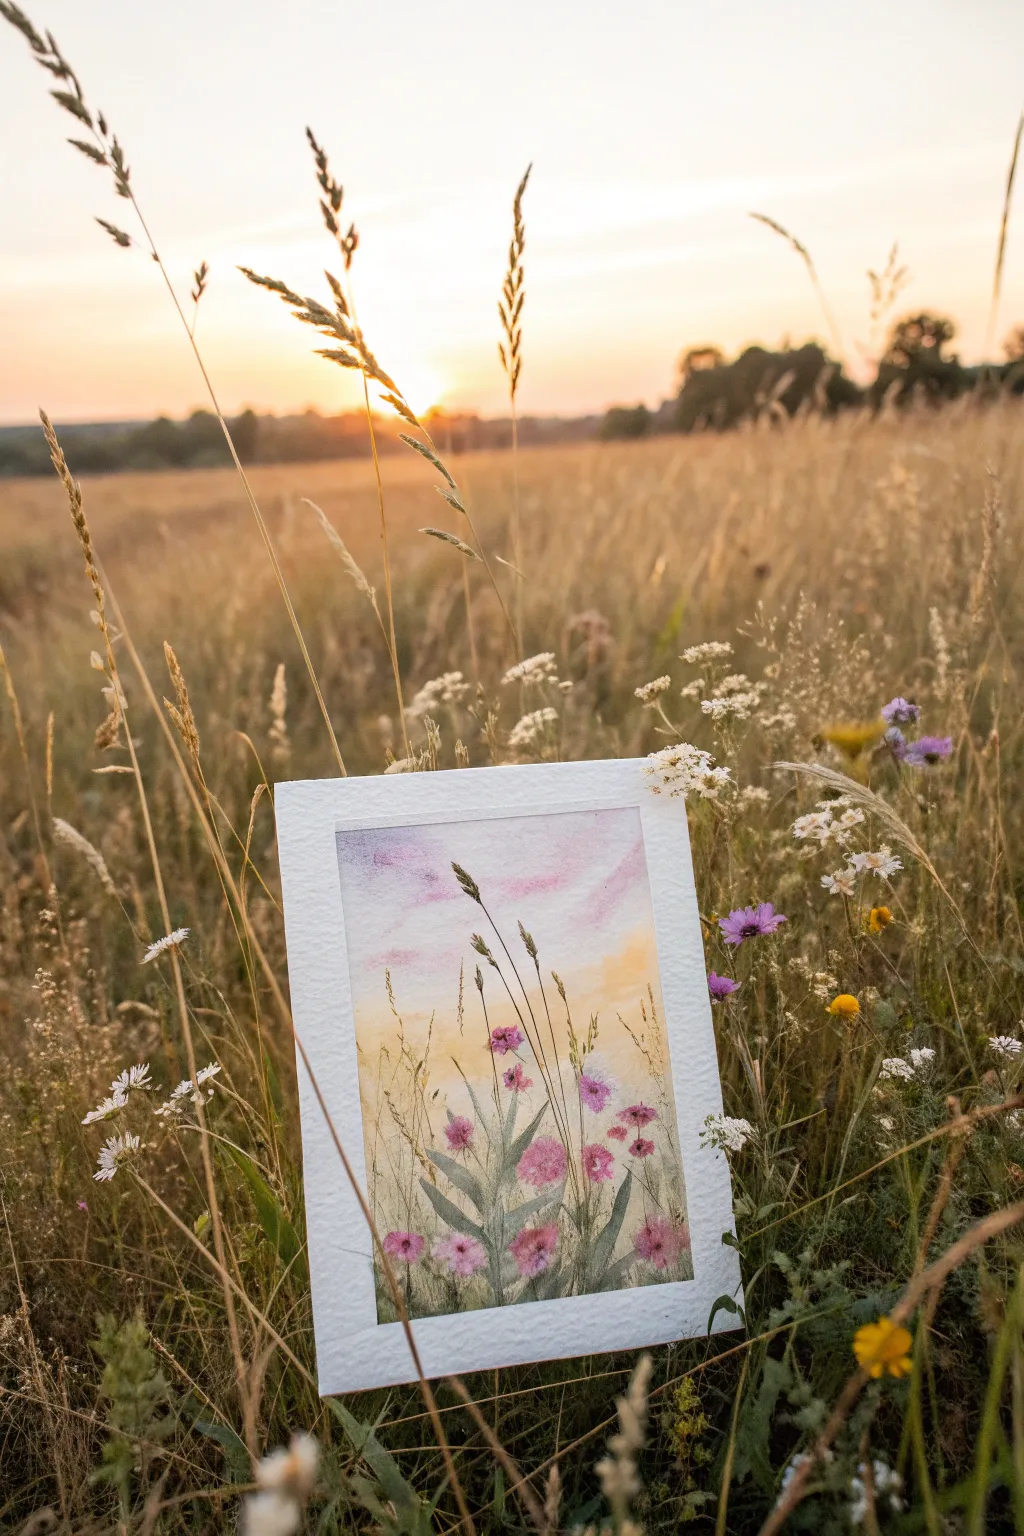
Capture the fleeting magic of a sunset field with this soft, atmospheric watercolor piece. Featuring loose pink blooms and swaying grasses against a dreamy pastel sky, this painting embodies the warmth of a summer evening.
Step-by-Step Tutorial
Materials
- Cold press watercolor paper (300 gsm)
- Masking tape
- Watercolor paints (Violet, Rose, Lemon Yellow, Hooker’s Green, Burnt Umber, Payne’s Gray)
- Round brushes (sizes 2, 6, and 10)
- Detail liner brush
- Jar of clean water
- Paper towels
- Pencil (HB or H) and kneadable eraser
Step 1: Painting the Sky and Background
-
Prepare the Paper:
Tape your watercolor paper down to a board on all four sides. This creates that crisp white border seen in the photo and prevents buckling while you work. -
Wet-on-Wet Sky:
Using your largest brush, wet the entire sky area with clean water, stopping about a third of the way up from the bottom. The paper should be glisten, but not hold puddles. -
Add Soft Clouds:
While the paper is wet, drop in diluted violet mixed with a touch of rose near the top. Let the paint bloom naturally to create wispy cloud formations. -
Create the Sunset Glow:
Rinse your brush and pick up a watery mix of Lemon Yellow. Apply this below the violet clouds, letting the yellow touch the damp purple slightly to create soft oranges, but be careful not to over-mix or it will turn muddy. -
Paint the Horizon Haze:
While the yellow area is still damp, mix a very pale, watery green-brown. Paint this near the bottom third, creating a blurry, out-of-focus background for the distant field. -
Initial Drying:
Let this entire background layer dry completely. The paper must be bone dry before you add the crisp foreground details.
Muddy Colors?
If your violet sky turns brown where it meets the yellow, wait for the violet to dry slightly more before adding yellow next time, or leave a tiny gap of white paper between them.
Step 2: Floral Foreground
-
Sketch the Composition:
Lightly sketch the placement of the three main flower groupings and a few tall grass blades. Keep the lines very faint so they don’t show through the final paint. -
Paint the Pink Blooms:
Load a size 6 brush with a Rose and Violet mix. Paint the flower heads using loose, dabbing motions. Don’t fill them in solid; leave tiny flecks of white paper to suggest light hitting the petals. -
Layering Flower Depth:
While the pink flowers are still slightly damp, drop a more concentrated, darker purple into the centers or bottoms of the blooms to add volume and shadow. -
Adding Stems and Leaves:
Switch to a green mix (Green + Burnt Umber). Using the tip of your brush, draw the stems connecting to the flowers. Vary the pressure to make the lines look organic, not stiff. -
Painting Broad Leaves:
For the larger leaves near the base, use a slightly more watery green. Press the belly of the brush down and lift up to create the tapered leaf shape. -
Simulating Grasses:
Mix a yellowish-ochre color. Using quick, upward flicking motions, paint thin blades of dry grass in the background and between the flowers.
Add Sparkle
Mix a tiny amount of iridescent medium or gold watercolor into the yellow sunset section. When the light hits the painting, it will shimmer just like a real golden hour.
Step 3: Final Details
-
Darker Accents:
Mix a dark green with a bit of Payne’s Gray. Add a few very thin, sharp lines of grass or dark stems in the immediate foreground to create depth. -
Seed Heads:
Use a liner brush and Burnt Umber to paint the tiny distinct seed heads on the very tall stalks that rise above the horizon line. -
Splatter Texture:
I like to load a brush with watery pink or yellow and tap it against my finger to splatter tiny droplets over the field area, mimicking pollen or distant wildflowers. -
Final White Highlight:
If you lost your highlights, you can use a tiny bit of white gouache to add bright spots on the flower petals or grass tips. -
The Reveal:
Once the painting is 100% dry, carefully peel away the masking tape at a 45-degree angle to reveal your clean edges.
Now you have a serene slice of nature to display on your shelf or gift to a friend
BRUSH GUIDE
The Right Brush for Every Stroke
From clean lines to bold texture — master brush choice, stroke control, and essential techniques.
Explore the Full Guide
Snowy Pines With a Quiet Winter Sky
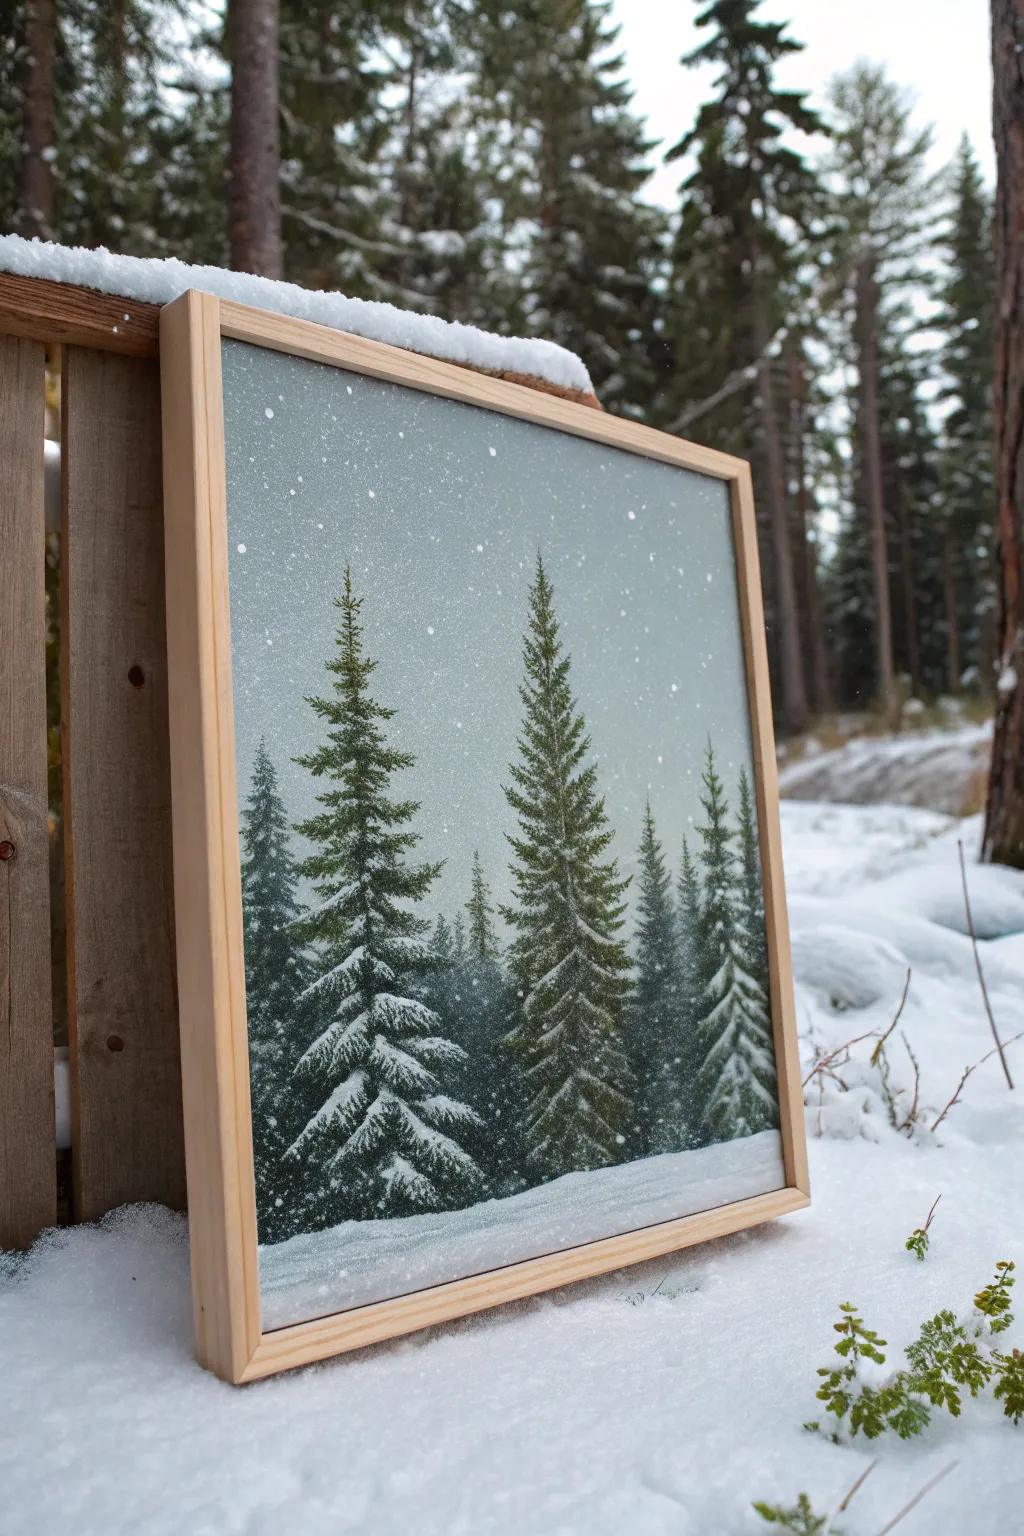
Capture the serene silence of a forest deep in winter with this atmospheric acrylic painting. You’ll layer misty backgrounds and crisp foreground pines to create depth, finishing with a gentle snowfall effect that truly brings the scene to life.
How-To Guide
Materials
- Square canvas (e.g., 12×12 or 16×16 inches)
- Acrylic paints: Titanium White, Mars Black, Phthalo Green, Burnt Umber, Paynes Grey
- Flat brushes (1-inch and 1/2-inch)
- Round pointed brushes (size 2 and size 6)
- Fan brush (optional, for texture)
- Old toothbrush (for splatter)
- Palette and water cup
- Paper towels
- Light wood floating frame (optional, for display)
Step 1: Setting the Atmosphere
-
Prepare the sky gradient:
Mix a large amount of Titanium White with a tiny touch of Paynes Grey and Phthalo Green to create a very pale, icy blue-grey. Start painting at the top of the canvas. -
Fade the horizon:
As you work your way down the canvas, gradually add more white to your mix. The bottom third of the sky area should be almost pure white to mimic the misty horizon line often seen on snowy days. -
Establish the snow base:
Paint the bottom fifth of the canvas pure Titanium White for the ground. Don’t worry about texture yet; just get good coverage to hide the canvas weave. -
Blend the transition:
While the paint is still damp, use a clean, dry brush to softly blend where the horizon meets the snowy ground. You want a soft, foggy look rather than a sharp line.
Step 2: Painting the Distant Trees
-
Mix a ghostly green:
Create a mixture of Phthalo Green, a little Black, and a significant amount of White. These distinct trees should look faded and far away. -
Block in distant shapes:
Using a flat brush turned vertically, or a larger round brush, tap in faint, vertical tree shapes in the background. Keep the edges soft and indistinct. -
Layer the mid-ground:
Add slightly less white to your green mixture to darken it. Paint a few trees in front of the ‘ghost’ trees. This value change instantly creates atmospheric perspective.
Paint looking flat?
Add a tiny drop of blue to your white snow highlights on the shaded side of the tree. This cool tone adds immediate 3D volume.
Step 3: Creating the Hero Trees
-
Mix the deep pine color:
Combine Phthalo Green, Burnt Umber, and a touch of Black. You want a deep, rich forest green that contrasts sharply with the pale background. -
Paint the trunk lines:
Use your smallest round brush to paint two or three thin vertical lines where your main foreground trees will stand. Make them slightly uneven for a natural look. -
Build the branches:
Start at the top of the trunk. Use a small flat brush or fan brush. Touch the canvas with the corner of the brush and wiggle outward and downward to create boughs. I usually work in a zig-zag motion, getting wider as I go down. -
Add foliage texture:
Reload your brush frequently. Dabbing vertically creates the look of heavy pine needles. Leave gaps between branches so the sky peeks through; this prevents the tree from looking like a solid triangle. -
Anchor the trees:
Where the tree meets the ground, taper the branches outward. Add some dark green shadow on the white snow underneath the tree to ground it.
Add some magic
Mix a tiny amount of iridescent medium or silver glitter paint into your final snow splatter for a painting that sparkles in the light.
Step 4: The First Snowfall
-
Highlight the branches:
Mix Titanium White with a tiny drop of water to make it fluid. Using a small round brush, carefully paint ‘caps’ of snow on the tops of the protruding pine branches. -
Refine the snow piles:
Focus the snow highlights on the center of the tree and the tips of the branches, leaving the undersides dark green to maintain volume. -
Texture the ground:
Using pure white, add swooping strokes to the foreground snow to suggest drifts and small hills. -
Create the falling snow:
Dilute white paint with water until it’s inky. Dip an old toothbrush into the paint, face it toward the canvas, and run your thumb across the bristles to flick tiny speckles over the entire image. -
Add larger snowflakes:
Use your smallest brush or the handle end of a paintbrush to dot a few larger, distinct snowflakes in the foreground to enhance the depth of field.
Place your finished winter scene in a simple wooden frame to complete the rustic look and hang it where it can catch the light
Desert Sunset With a Cactus Silhouette
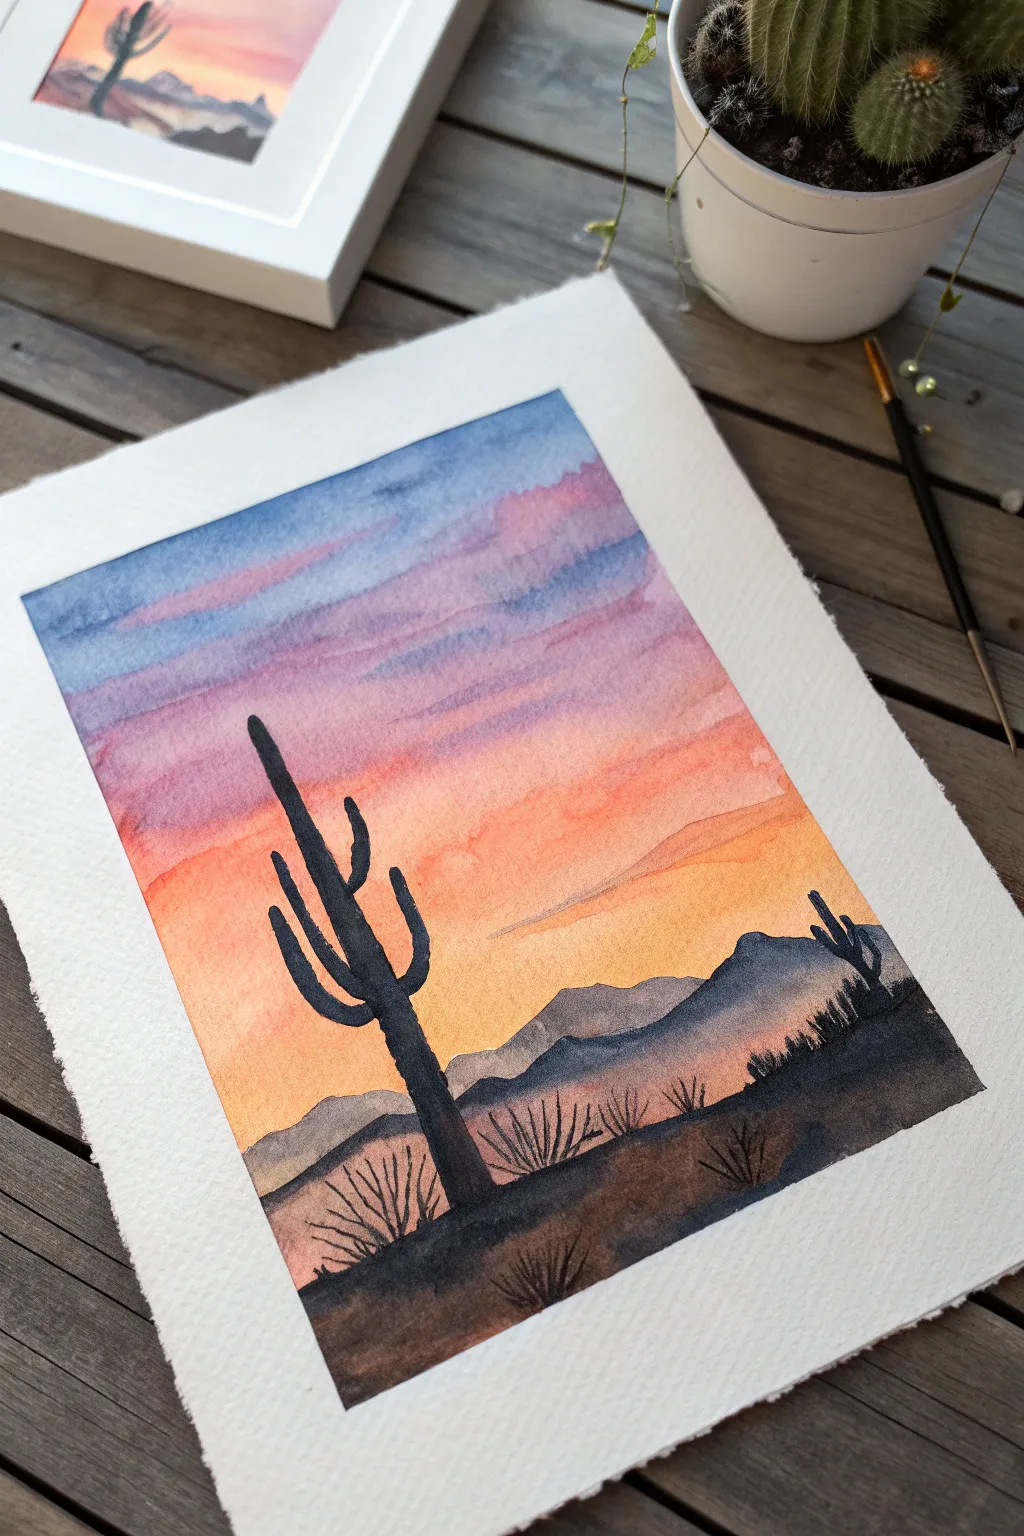
Capture the magic of the Southwest with this vibrant watercolor project featuring a glowing sunset gradient and iconic Saguaro silhouettes. The wet-on-wet technique creates a seamless transition from cool evening blues to warm horizon oranges, setting the perfect backdrop for stark, dramatic shadows.
Step-by-Step Guide
Materials
- Cold press watercolor paper (300 gsm)
- Watercolor paints (Indigo, Purple, Alizarin Crimson, Cadmium Orange, Yellow Ochre, Burnt Umber, Lamp Black)
- Masking tape or gummed tape
- Flat wash brush (3/4 inch or 1 inch)
- Round brushes (size 6 and size 2)
- Clean water jar
- Paper towels
- Pencil (HB or 2H)
Step 1: Preparation & Sky Gradient
-
Prepare the paper:
Begin by taping down all four edges of your watercolor paper to a sturdy board. This prevents the paper from buckling when we add lots of water for the sky. -
Sketch the horizon:
Lightly sketch a low horizon line about one-quarter of the way up from the bottom. Add a rough outline of where the distant mountains will sit, but keep the lines very faint. -
Wet the sky area:
Using your large flat brush, apply clean water to the entire sky area, stopping just at the horizon line. The paper should be glistening with a sheen, but not holding puddles. -
Start with the blue:
Load your brush with a watery mix of Indigo or a dark blue. Apply this to the very top edge of the paper, allowing it to flow downward slightly into the wet surface. -
Transition to purple:
Rinse your brush and pick up a purple hue. Apply this directly below the blue while the paper is still wet, blending the edges softly where they meet to avoid harsh lines. -
Introduce pinks and oranges:
Continuing downward, introduce Alizarin Crimson or a cool pink, followed essentially immediately by a band of Cadmium Orange. Gravity will help these colors merge naturally. -
Finish with yellow warmth:
Near the horizon line, paint a strip of Yellow Ochre or a warm yellow. Let this fade out right at the mountain line. Tilt your board slightly if needed to encourage the colors to bleed downward. -
Create cloud streaks:
While the sky is still damp but not soaking, use a clean, slightly damp brush to lift out horizontal streaks, or drag a slightly darker purple horizontally across the upper section to suggest wispy clouds. -
Thorough drying:
Let the sky layer dry completely. This is crucial; if the paper is cold to the touch, it’s still wet. Using a hair dryer on a low setting can speed this up.
Step 2: Mountains & Foreground
-
Paint the distant mountains:
Mix a watery greyish-purple using purple and a touch of black or blue. With a round brush, paint the distant mountain range. Keep the color transparent so they look far away. -
Add the middle ground:
Once the first range is semi-dry, mix a slightly darker, more opaque version of that same color. Paint a second, lower range of hills in front of the first one to create depth. -
Establish the immediate foreground:
Mix a dark brown (Burnt Umber) with a bit of Indigo to create a deep, near-black earth tone. Paint the ground at the very bottom of the paper, covering the bottom edge completely. -
Draft the cactus shape:
Switch to your medium round brush (size 6) loaded with a thick, creamy mix of Lamp Black and a touch of brown. Paint the main vertical trunk of the Saguaro cactus. -
Add cactus arms:
Paint the curved arms of the cactus. Saguaro arms typically curve upward. Vary the height and thickness slightly to make it look organic, not perfectly symmetrical. -
Refine the silhouette:
Use the tip of the brush to smooth out any wobbly edges on the cactus. The paint should be very opaque here to stand out sharply against the colorful sunset. -
Detail the foreground:
Using your smallest round brush (size 2), flick upward from the dark foreground ground to create thin grasses and small desert scrub bushes. -
Add a second cactus:
If you have space on the right side, paint a smaller, distant cactus silhouette using the same dark mixture, but make it significantly shorter to enhance the perspective. -
Final touches:
Check for any light spots in the silhouettes and fill them in. Once everything is bone dry, carefully peel off the tape at a 45-degree angle to reveal the crisp white border.
Wet-on-Wet Success
Work quickly on the sky layer. If the paper starts to dry while you are blending the gradient, stop adding paint or you will get ‘blooms’ or cauliflower textures.
Starry Night
Before removing the tape, shield the bottom half with paper and flick white gouache or acrylic onto the blue upper sky with a toothbrush for a starry effect.
Step back and admire the warmth of your desert evening, perfectly captured on paper


Have a question or want to share your own experience? I'd love to hear from you in the comments below!