A bedroom wall mural can turn that one blank wall into the calmest, most personal part of your whole home. I love treating the wall behind the bed like a giant canvas—an accent wall that sets the mood the second you walk in.
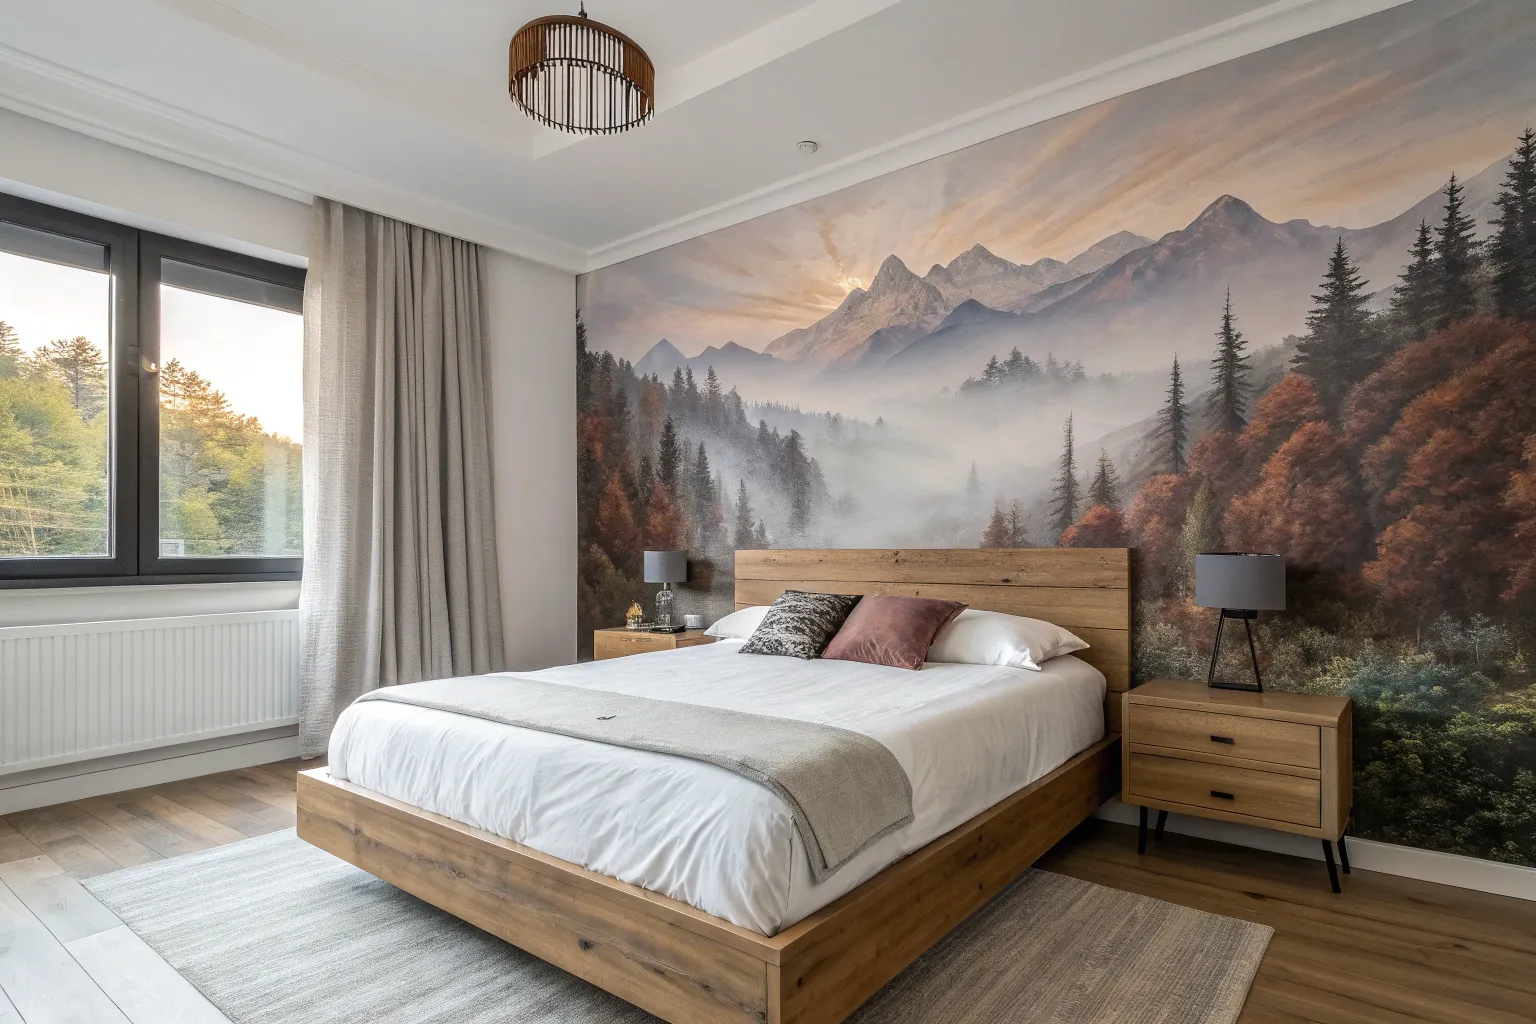
Misty Forest Behind the Headboard
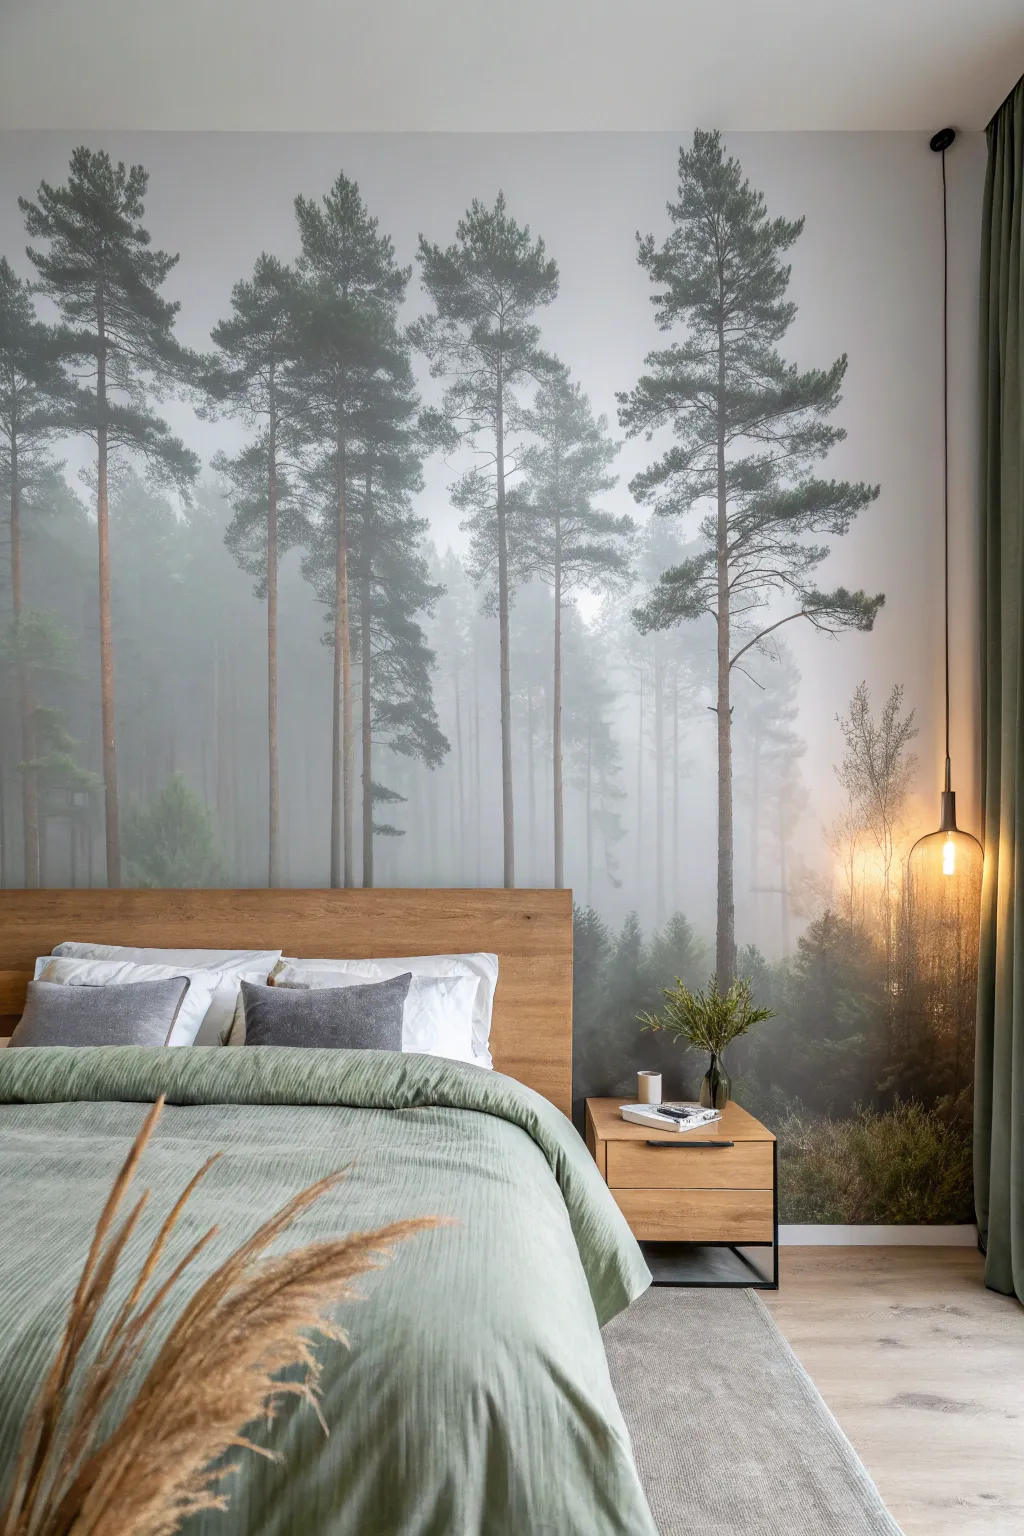
Transform your bedroom into a serene woodland retreat with this immersive wall mural project. A misty forest backdrop instantly adds depth and a calming atmosphere, turning a simple headboard wall into a window to nature.
How-To Guide
Materials
- Pre-pasted or non-woven forest mural wallpaper (custom sized)
- Wallpaper paste (if not pre-pasted)
- Paint roller and tray (for paste application)
- Smoothing tool or wallpaper smoother
- Sharp utility knife with snap-off blades
- Plumb line or laser level
- Measuring tape
- Ladder or sturdy step stool
- Sponge and bucket of clean water
- Seam roller
- Trim guide or wide metal spatula
Step 1: Preparation & Planning
-
Assess the wall surface:
Begin by ensuring the wall behind your headboard is completely smooth, clean, and dry. Fill any holes or cracks with spackle and sand them down, as imperfections can show through the mural paper. -
Clean thoroughly:
Wipe the entire wall down with a damp sponge and a mild detergent solution to remove dust or grease, then let it dry completely before starting. -
Remove hardware:
Take off any outlet covers or switch plates on the wall. If you have wall-mounted lights like the pendant shown, carefully remove or cover them. -
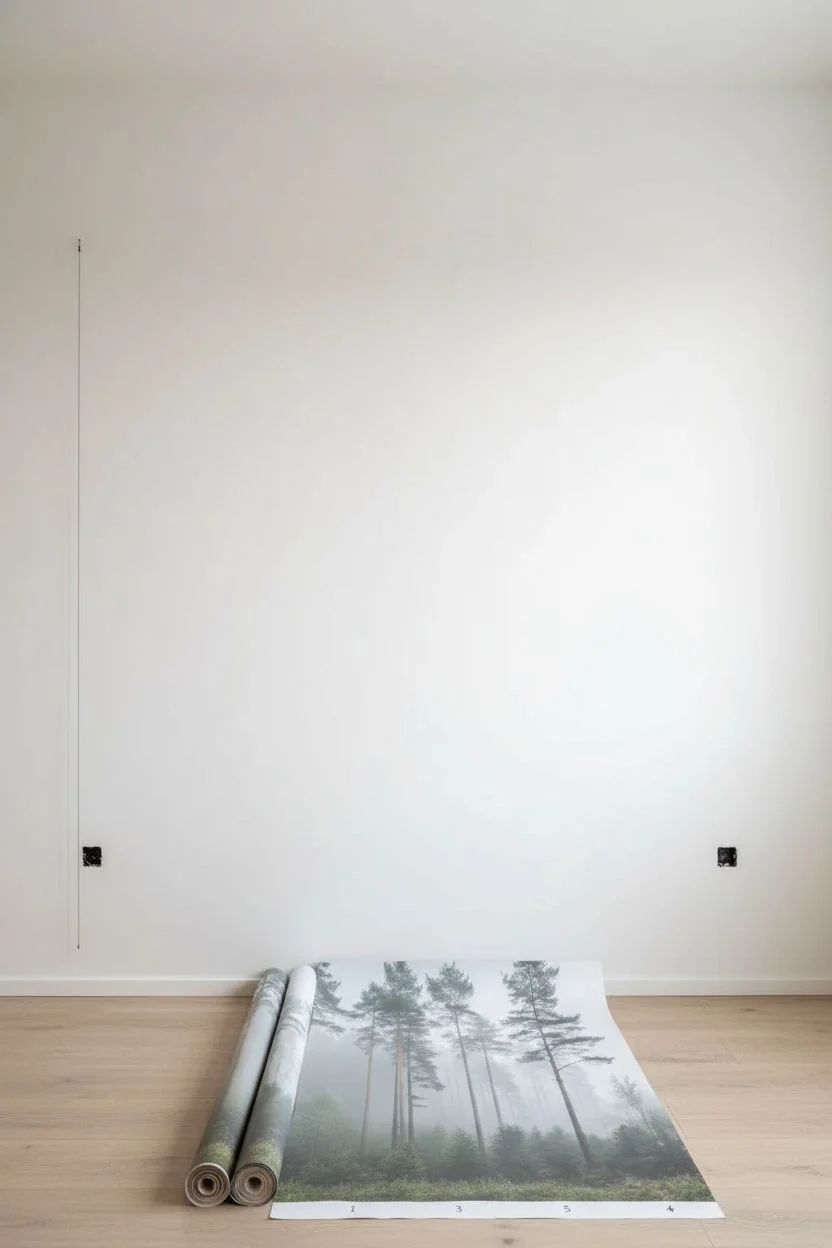
Organize your panels:
Unroll your mural panels on a clean floor. Most murals come numbered; arrange them in the correct order to ensure the forest scene flows seamlessly from left to right.
Step 2: Setting the Guideline
-
Find your starting point:
Determine where your first panel will go. Usually, it’s best to start from the left corner, but check your specific mural instructions. -
Draw a plumb line:
Measure the width of your first panel. Subtract about one inch (to allow for trimming at the corner) and measure that distance from the corner. Use a laser level or plumb bob to draw a perfectly vertical pencil line at this mark.
Sticky Situation
Use a ‘paste-the-wall’ adhesive specifically for non-woven wallpapers. It minimizes mess and makes sliding panels into alignment much easier than wetting the paper backing.
Step 3: Application
-
Apply adhesive:
If using traditional wallpaper, apply the paste directly to the wall using a roller, covering an area slightly wider than one panel. I find pasting the wall is much cleaner than pasting the paper itself. -
Hang the first panel:
Line up the right edge of your first panel with your vertical pencil line. This ensures the entire mural will be straight, even if your corners aren’t. -
Smooth it out:
Using your smoothing tool, gently press the paper against the wall, working from the center outward to push out any air bubbles. -
Align the pattern:
Apply paste for the next section. Butt the edge of the second panel against the first, carefully matching the tree trunks and branches so the image is continuous. Avoid overlapping unless the manufacturer specifies it. -
Continue across the wall:
Repeat the process for remaining panels, constantly checking that seams are tight. Use a seam roller gently on the joins to prevent them from lifting later. -
Handle corners and edges:
When you reach corners or the ceiling line, press the paper firmly into the crease using your smoothing tool.
Mood Lighting
To enhance the misty effect, consider install dimmable warm-toned LED strips behind the headboard or hanging a low pendant light to create a soft, dawn-like glow.
Step 4: Finishing Touches
-
Trim excess paper:
Use a wide metal spatula or trim guide to hold the paper tight against the ceiling or baseboard. Slice away the excess with a very sharp utility knife. -
Refresh your blade:
Snap off the utility knife blade frequently—a dull blade will tear wet paper instead of slicing it cleanly. -
Wipe away glue:
Immediately wipe off any excess paste from the surface of the mural and the ceiling with a damp, clean sponge. dried paste can leave a shiny residue on the matte forest finish. -
Re-install fixtures:
Once the paper is dry (usually 24 hours), cut small X-slits over outlet boxes and screw the covers back on. -
Place furniture:
Move your bed and headboard back into position against your stunning new backdrop.
Enjoy waking up every morning to the peaceful view of your private, misty woodland.


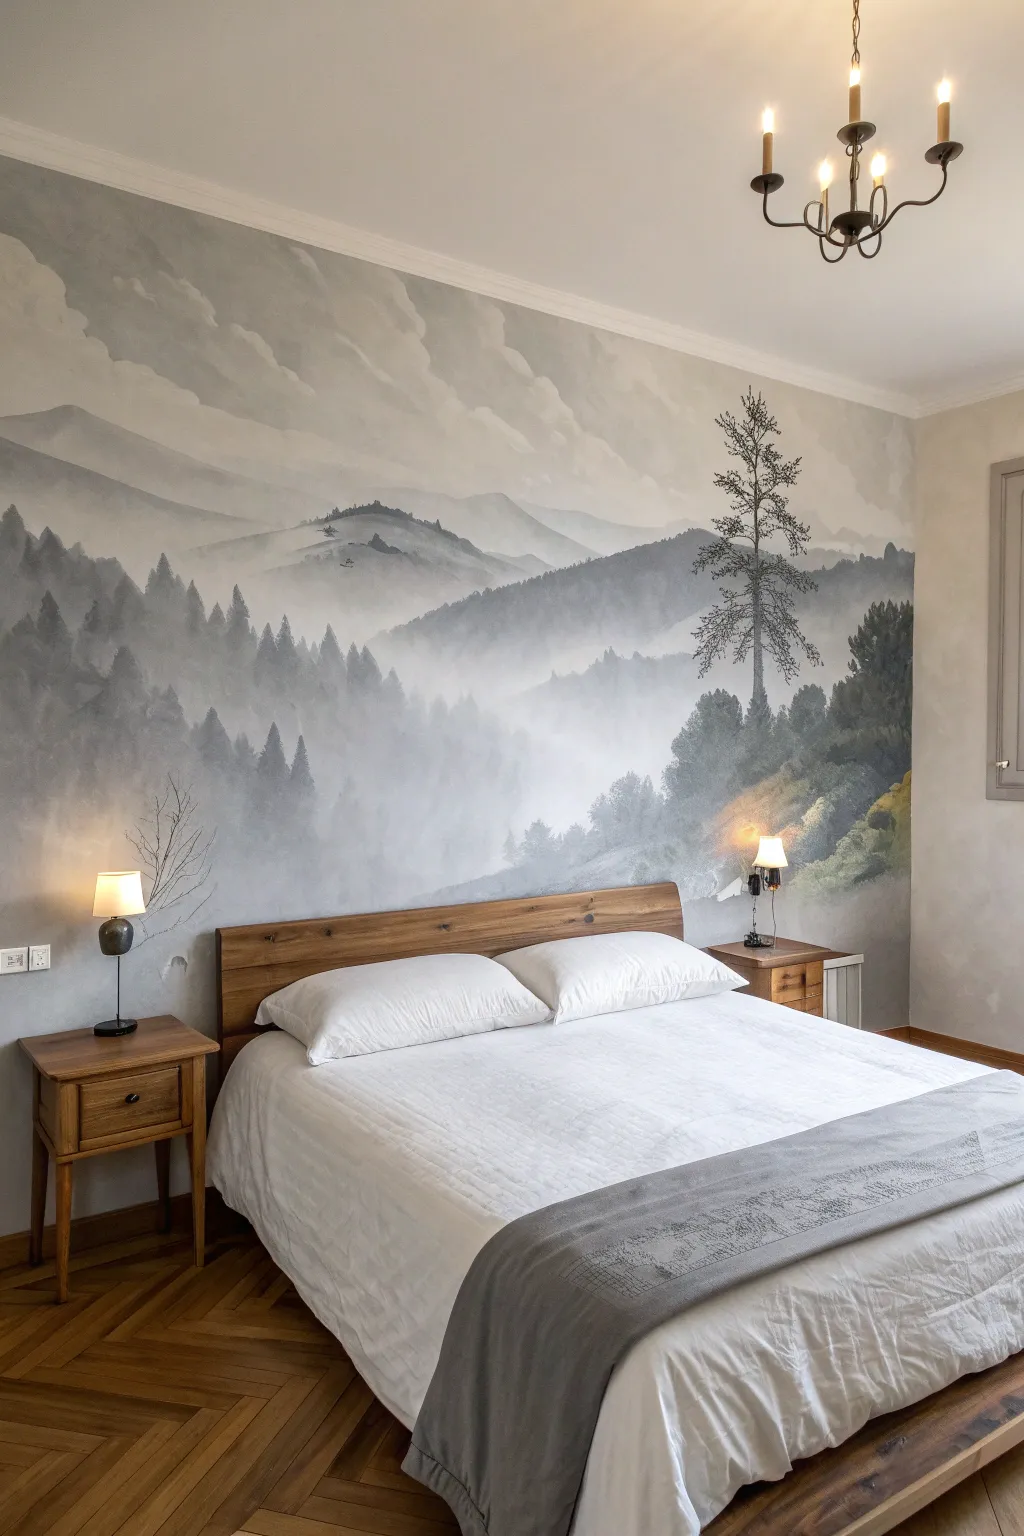
Soft Mountain Range Panorama
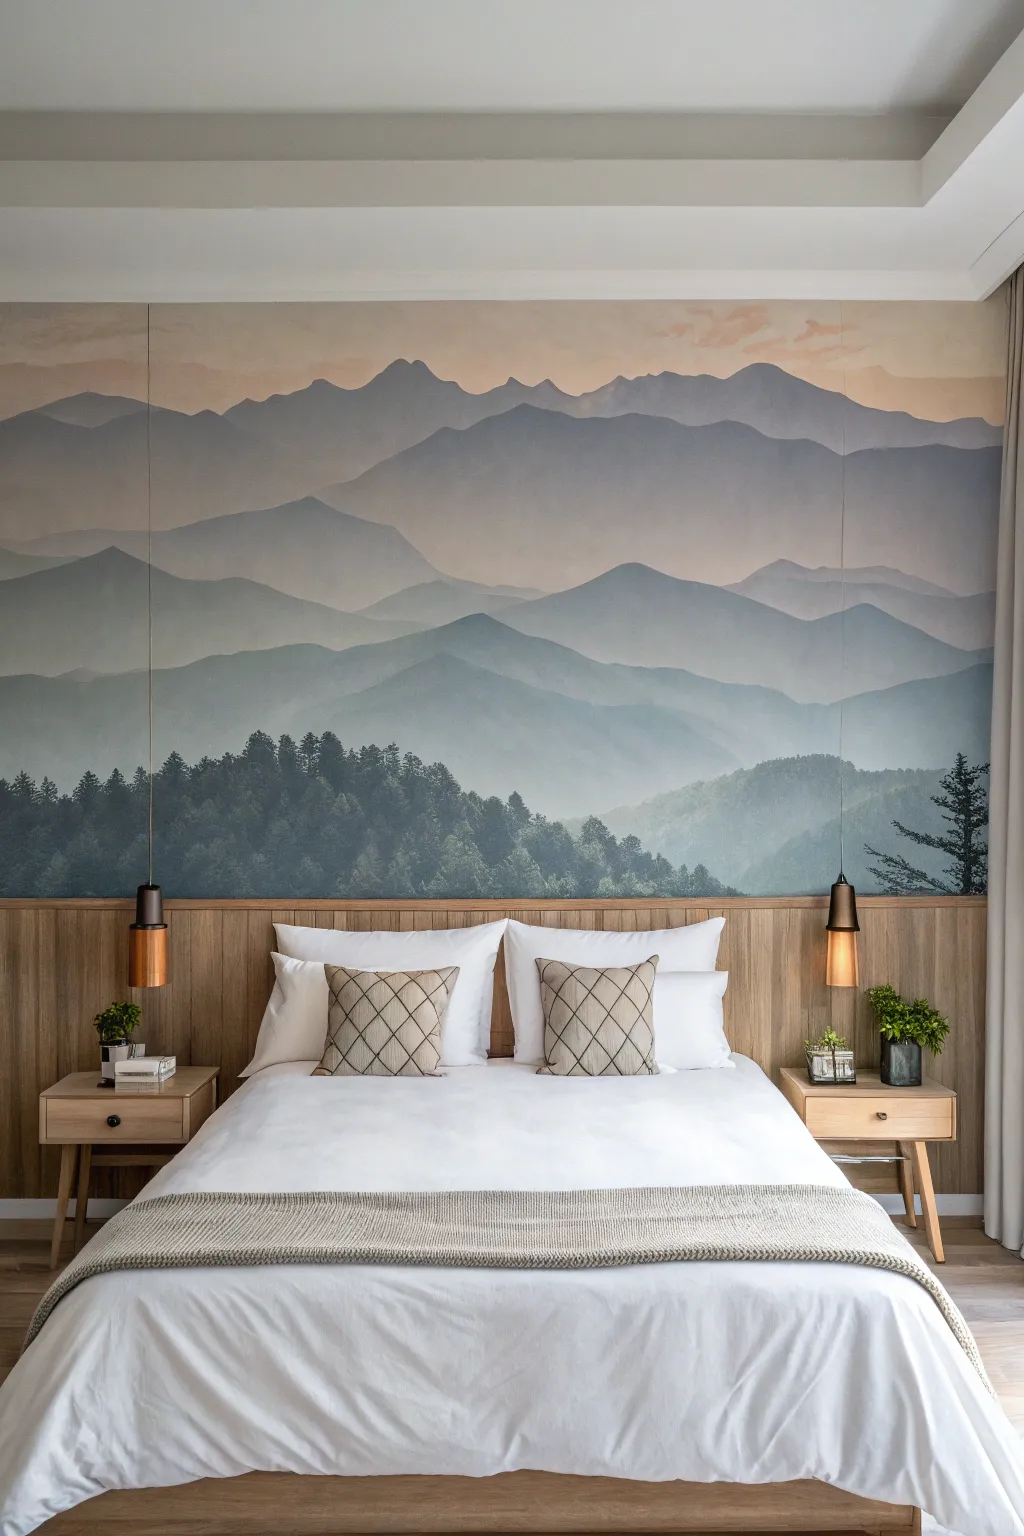
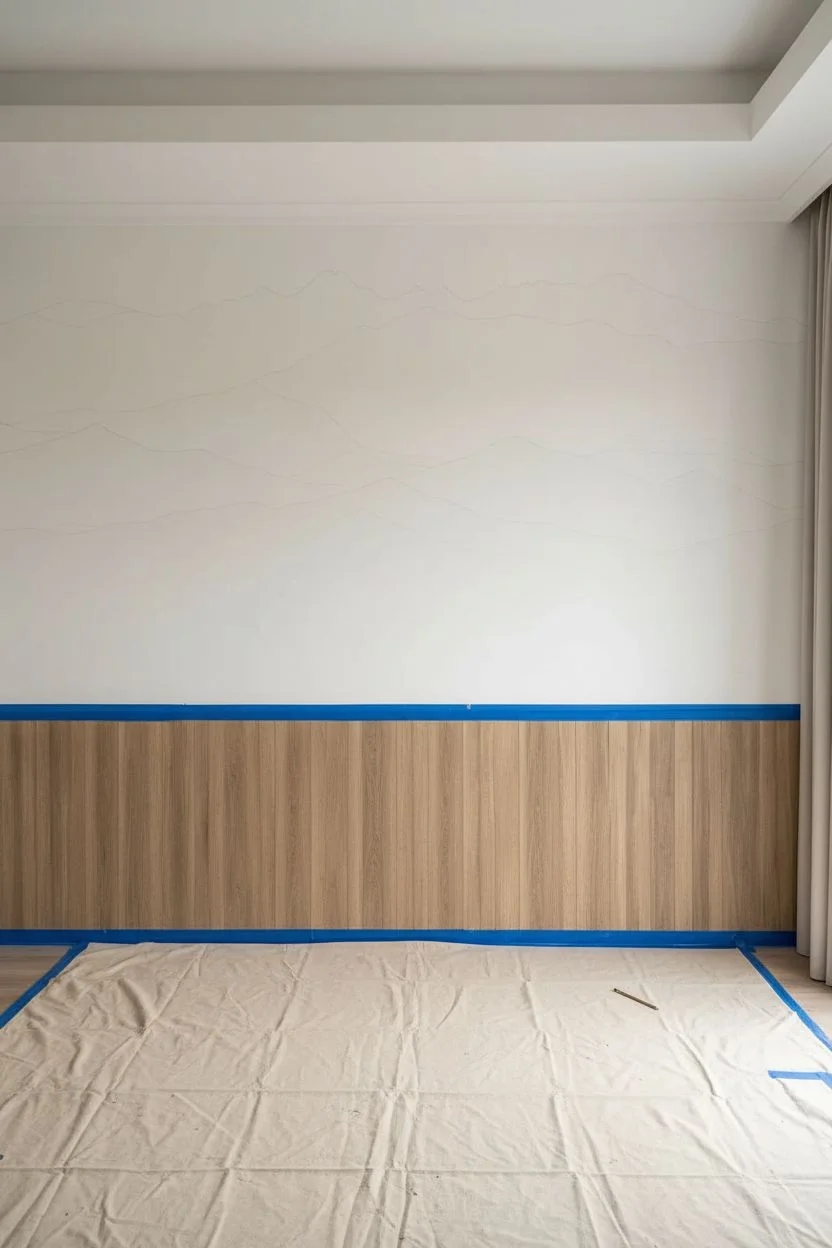
Transform your bedroom into a serene escape with this expansive mountain range mural that uses atmospheric perspective to create depth. Soft gradients of blue, grey, and sage green recede into a gentle sunset sky, bringing the tranquility of the outdoors right to your bedside.
Step-by-Step Guide
Materials
- Interior latex paint (white base)
- Sample pots of paint (charcoal grey, deep teal, sage green, warm peach)
- Glazing medium
- Large painter’s drop cloth
- Painter’s tape (2-inch width)
- Assorted paint rollers (4-inch foam rollers work best)
- Wide synthetic bristle brushes (3-inch and 4-inch)
- Pencil and large eraser
- Bubble level
- Mixing trays or disposable plates
- Sponges or lint-free rags
- Step ladder
Step 1: Preparation and Base Layer
-
Clear and prep the wall:
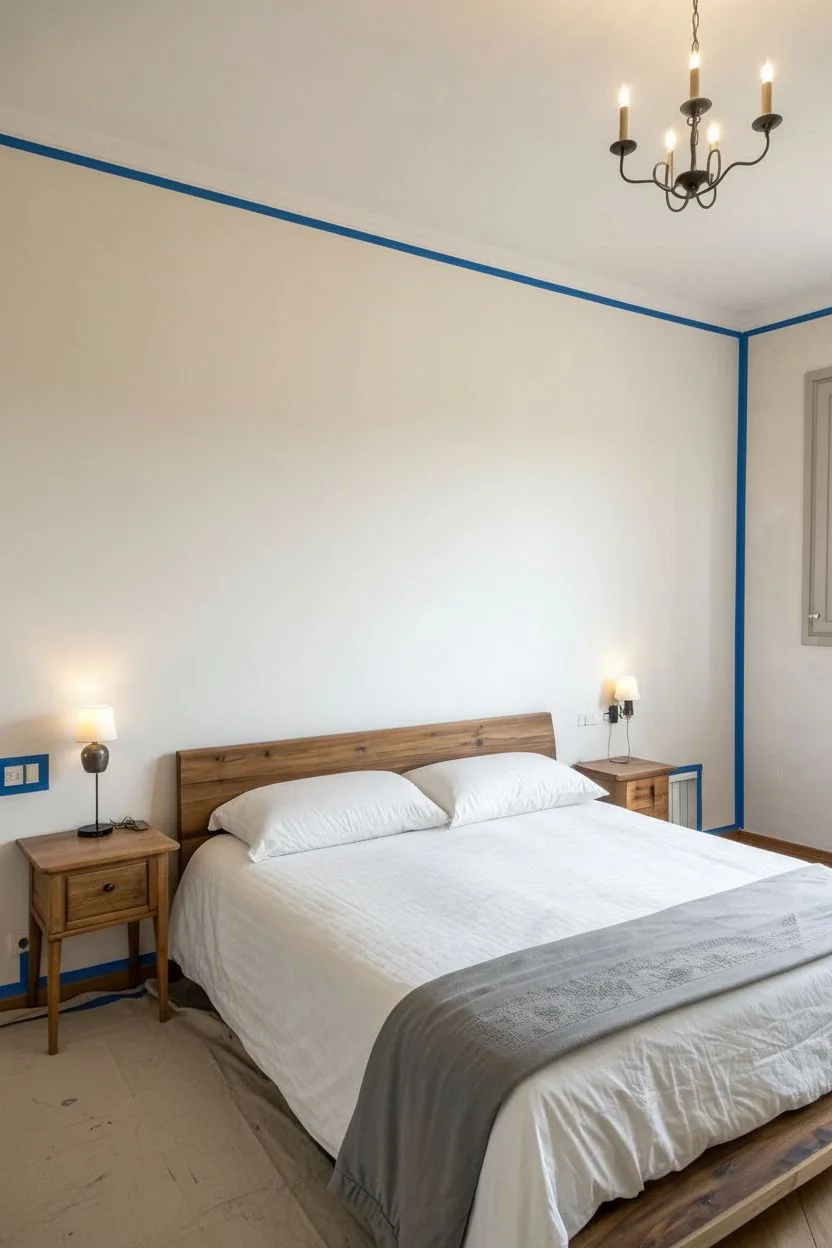
Move all furniture away from the wall, including the bed and nightstands. If you are keeping the wooden wainscoting as seen in the photo, tape off the top edge securely with painter’s tape to protect the wood grain. -
Prime the surface:
Ensure the wall is clean and dry. Apply a fresh coat of white or very light off-white base paint over the entire specific mural area. This ensures your sky colors will look luminous later on. -
Sketch the horizon lines:
Using a pencil, lightly sketch the outlines of your mountain ranges. Start from the bottom with the nearest, largest hills, and work your way up to the distant peaks. Keep the lines wavy and organic—nature rarely make straight lines.
Step 2: Painting the Sky and Distance
-
Mix the sky gradient:
Combine white paint with a tiny drop of warm peach and a hint of grey. You want a color that looks like a soft, hazy sunset. -
Apply the sky layer:
Paint the top section of the wall above your highest mountain line. Use a wide brush or roller, smoothing it out so there are no harsh brushstrokes. -
Create the furthest range:
Mix a very pale, cool grey-blue. This represents the most distant mountains. Paint the space between your top pencil line and the second one down. -
Soften the transition:
While the paint is still slightly wet, use a dry brush or a damp sponge to gently blur the edge where the mountains meet the sky, simulating atmospheric haze.
Uneven Gradients?
If your mist looks blotchy, dip a clean, damp sponge into clear water and gently rub the drying paint boundaries to reactivate and smooth the blend effectively.
Step 3: Building the Middle Ground
-
Darken the mixture:
For the next layer down, take your pale blue-grey mix and add a little more heavy teal and grey. The rule here is simple: objects get darker and more saturated as they get closer to the viewer. -
Paint the middle peaks:
Fill in the next band of mountains. Use long, sweeping horizontal strokes to suggest the grandeur of the range. -
Add glaze for transparency:
I like to mix a little glazing medium into these middle layers. This makes the paint slightly translucent, allowing the light from the layer above to peek through just a bit, enhancing the misty effect. -
Blend the valleys:
At the bottom of this band (where it meets the next lower range), lighten the paint slightly with white. This creates the illusion of mist settling in the valleys.
Add Metallic Touches
For a magical twist, mix a tiny amount of gold or silver mica powder into the glazing medium for the highest mountain peaks to catch the morning sunlight.
Step 4: Detailing the Foreground
-
Mix the darkest tone:
Prepare your darkest color for the bottom-most section using deep teal, charcoal, and sage green. This serves as the foreground forest. -
Paint the tree line base:
Fill in the solid mass of the lowest hill. Don’t worry about individual leaves yet; just get the solid color blocking done. -
Stipple technique for texture:
Take a dry, stiff-bristled brush or a sponge, dip it sparingly into the dark paint, and tap it along the top ridge of this bottom layer. This mimics the jagged texture of evergreen treetops. -
Add individual pines:
Using a smaller, detail brush, paint specific tree shapes on the far right and left edges, as seen in the photo. A simple vertical line with small, downward-dashing horizontal strokes creates a convincing pine tree silhouette. -
Unify with a wash:
If the contrast between layers looks too sharp, create a very watery wash of white paint (90% water, 10% paint) and lightly brush it over the transition lines to create more fog. -
Final dry and reveal:
Allow the entire wall to dry for at least 24 hours before removing the painter’s tape from the wainscoting. Pull the tape slowly at a 45-degree angle to ensure a crisp line.
Step back and enjoy the calming depth your new mountain vista brings to the room


Romantic Watercolor Florals
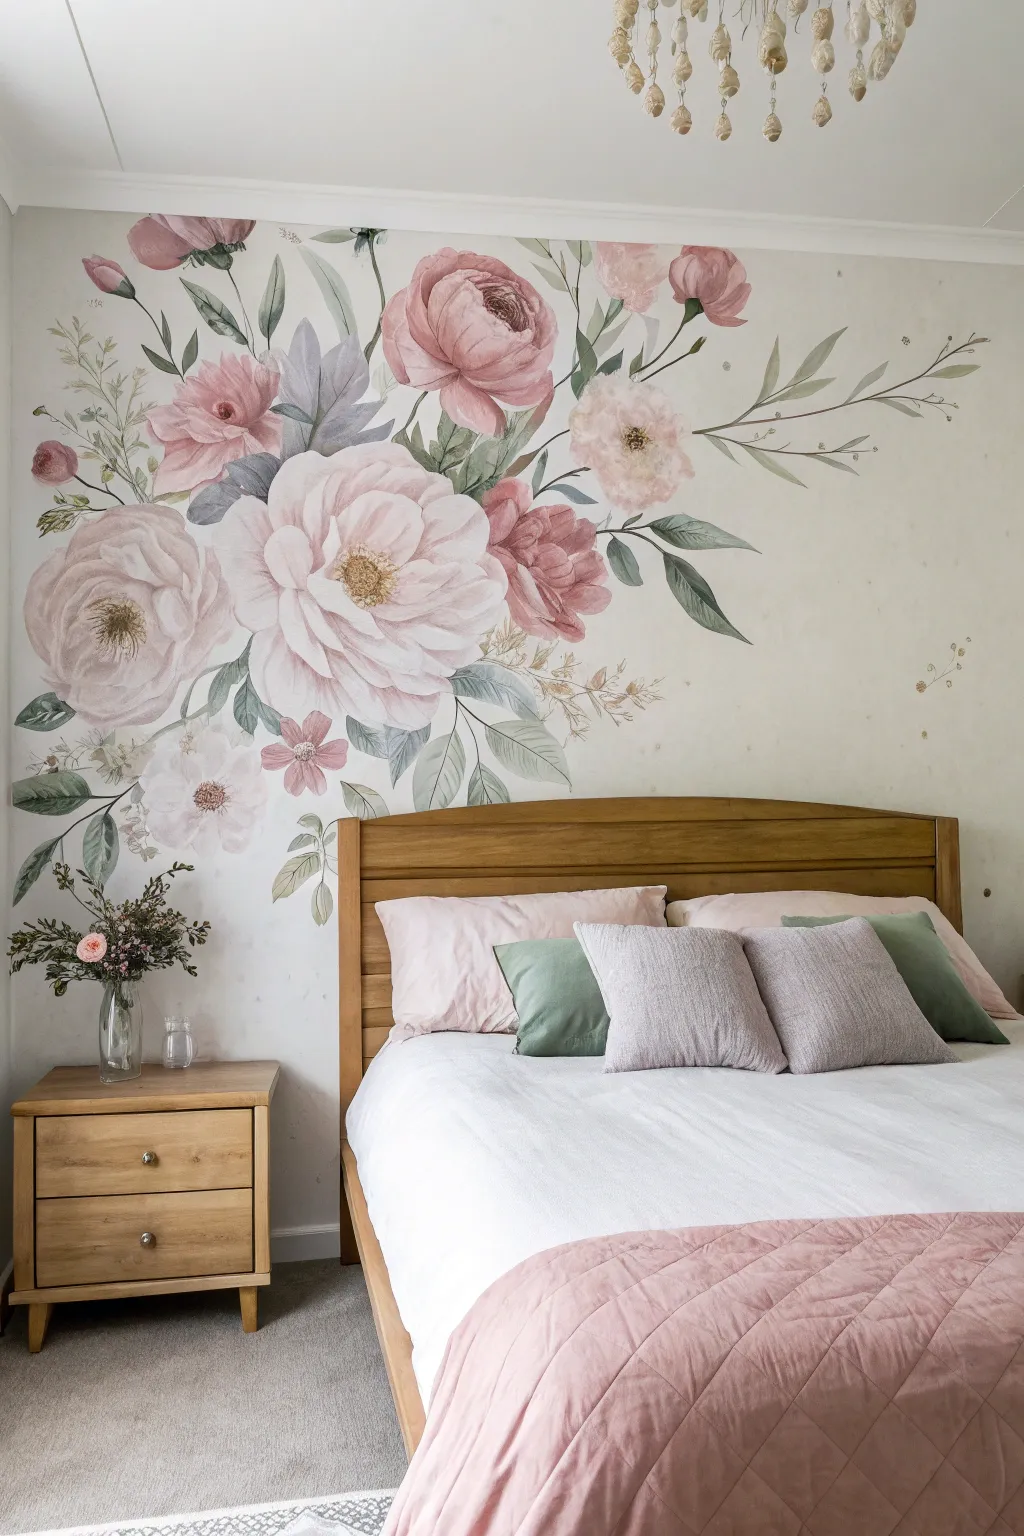
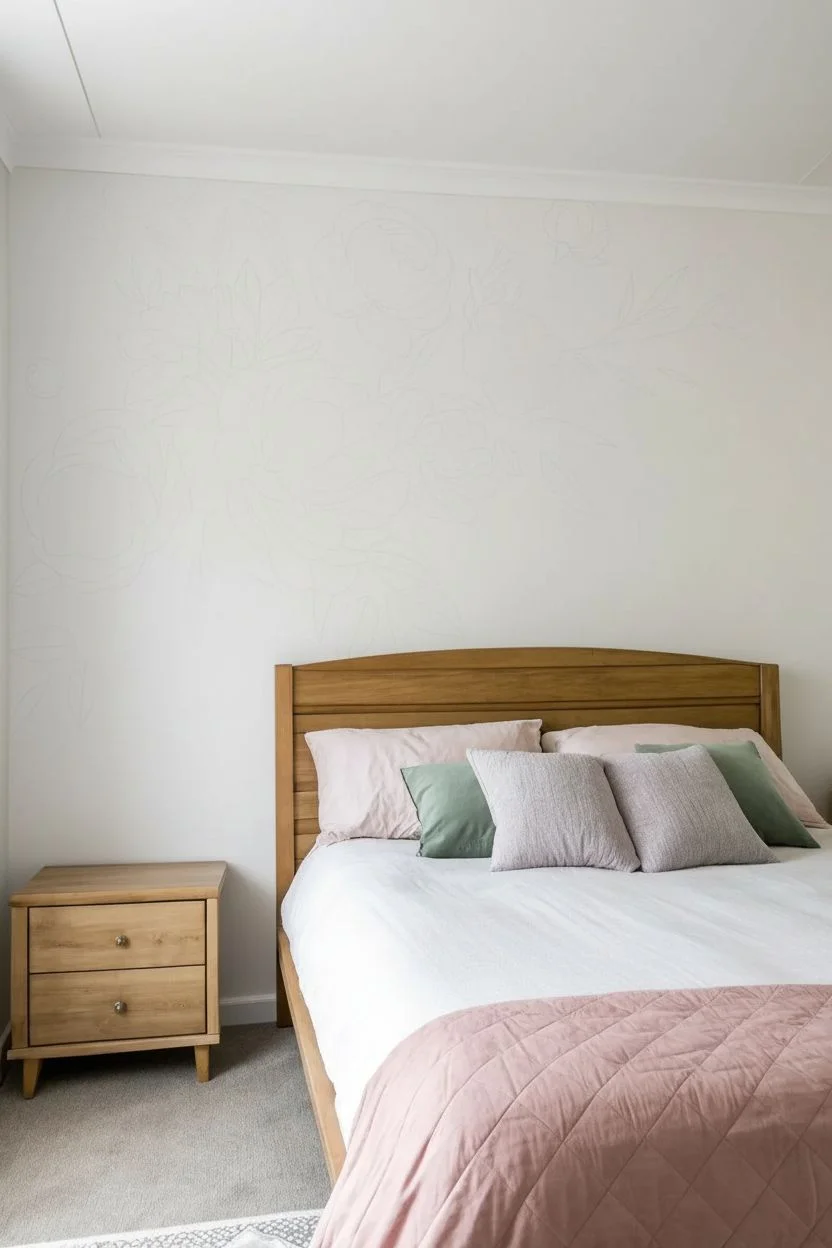
Transform your bedroom into a serene sanctuary with this breathtaking, large-scale floral mural that captures the soft, dreamlike quality of watercolor paintings. Using acrylics diluted with glaze and water, you will layer dusty pinks and sage greens to create oversized blooms that feel both romantic and modern.
Step-by-Step Tutorial
Materials
- Matte interior latex paint (white for base)
- High-quality acrylic paints (Dusty Rose, Blush Pink, Deep Magenta, Sage Green, Olive Green, Warm Grey, Titanium White, Raw Sienna)
- Clear acrylic glazing medium
- Assorted synthetic brushes (2-inch flat brush, 1-inch angle sash brush, round sizes 6, 10, and 12)
- Water spray bottle (misting setting)
- Painter’s tape
- Drop cloths
- Pencil and eraser
- Paper plates or palette
- Rags or paper towels
- Step ladder
Step 1: Preparation and Sketching
-
Prep the surface:
Begin by removing any furniture and laying down drop cloths to protect your flooring. Ensure the wall is clean, dry, and painted with a fresh coat of matte white or off-white paint; a matte base helps absorb the watery pigment better than satin or semi-gloss finishes. -
Map out the composition:
Study the reference image to understand the flow, noticing how the flowers cluster heavily on the left and swoop diagonally upwards towards the right. Lightly sketch the general placement of the three main large blooms first using a pencil, keeping your lines faint so they don’t show through the translucent paint. -
Detail the sketch:
Add the surrounding smaller buds and the sweeping stems that reach out into the negative space. Don’t worry about perfect petal shapes yet; just establish the scale to ensure the bouquet feels balanced on the wall.
Step 2: Painting the Blooms
-
Mix the base glaze:
Prepare your ‘watercolor’ medium by mixing acrylic glazing medium with water in a 1:1 ratio in a cup. This mixture is crucial because straight acrylics dry too opaque and fast; this medium extends drying time and creates that sheer look. -
Block in the large pink peony:
Start with the large central bloom. Mix a very pale blush pink with a generous amount of your glazing liquid. Using a large round brush, wash in the broad shapes of the outer petals, keeping the edges wet and loose. -
Build petal depth:
While the first layer is still tacky, mix a slightly darker dusty rose. Define the inner petals by painting curved strokes that mimic the cupped shape of a peony, leaving the very center of the flower unpainted for now. -
Create soft transitions:
Use your water spray bottle to lightly mist the wall if edges are drying too hard. I find this helps blend the darker pinks into the lighter blush tones seamlessly without harsh lines. -
Paint the darker rose blooms:
Move to the upper and side flowers, mixing Deep Magenta with a touch of Warm Grey to depower the saturation. Apply this darker color in layers, starting light and building up intensity in the shadowed areas between petals. -
Add the white flower highlights:
For the white bloom on the bottom left, use Titanium White thinned with glaze. Paint the petals over the off-white wall color to create subtle texture, and use a tiny touch of grey to shadow the petal overlaps.
Don’t Rush the Layers
Glazing medium dries slower than plain acrylics. Let the first wash of pale color dry for 15 minutes before adding darker petal details, or you’ll just create a muddy smear.
Step 3: Leaves and Greenery
-
Mix leaf colors:
Create three distinct green puddles on your palette: a light sage (Sage Green + White), a dusty olive (Olive Green + Grey), and a deep forest tone for contrast. -
Paint the main leaves:
Using the 1-inch angle brush, paint the large leaves surrounding the floral cluster. Use the “push and lift” technique: press the brush down to create the wide belly of the leaf and lift as you drag to create a sharp tip. -
Add watercolor effects to leaves:
Immediately after painting a leaf, dip a clean, wet brush into water and run it along just one edge of the leaf. This bleeds the pigment out slightly, enhancing the watercolor illusion. -
Paint delicate stems:
Switch to a size 6 round brush and mix a brownish-green using Raw Sienna and Olive. Paint the thin, sweeping stems that extend to the right side of the wall, using confident, quick strokes to keep lines smooth. -
Layer in shadow foliage:
Mix a very watery, transparent grey-blue. Paint faint, ghost-like leaves behind the main floral cluster. These should look like they are in the background, adding depth and volume to the bouquet.
Drips Happening?
If you sprayed too much water and paint starts running down the wall, don’t panic! Quickly dab it with a dry paper towel. It adds to the organic watercolor charm.
Step 4: Final Details
-
Detail the flower centers:
Mix Raw Sienna with a dot of Deep Magenta. Using the tip of your smallest brush, stipple (dot) tiny clusters in the center of the open peonies to simulate stamens. Add tiny dots of pure yellow or white on top for highlights. -
Add definition:
Step back and look at the mural from a distance. If any flower petals look like a shapeless blob, take a slightly darker version of the flower color and paint thin, defining lines to separate the petals. -
Soften harsh edges:
Inspect the outer edges of your mural. If any part looks too like a sticker or decal, take a damp rag and gently dab the perimeter to soften the boundary into the wall color. -
Erase guidelines:
Once the paint is completely bone dry (wait at least 4-6 hours), gently erase any visible pencil marks, being careful not to scrub the paint itself.
Step back and admire how your brushwork has turned a blank wall into a permanent, blooming garden.


Minimal Sun and Moon Celestial Scene
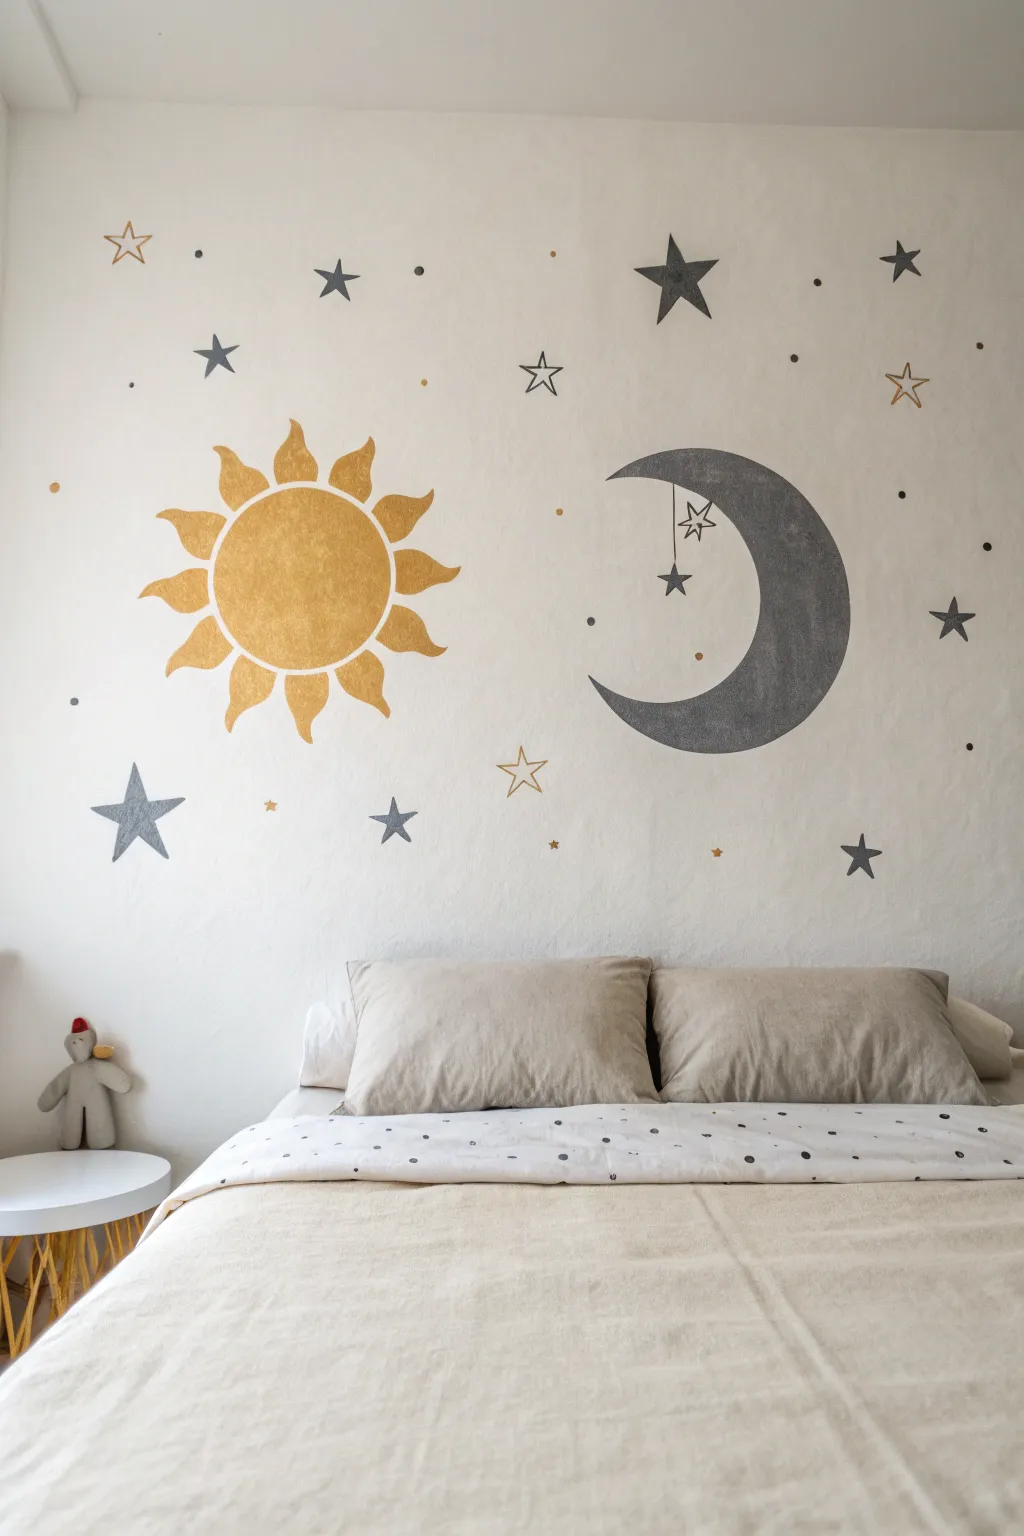

Bring the cosmos indoors with this serene, hand-painted mural featuring a warm golden sun opposite a cool grey crescent moon. This minimal celestial scene uses a simple color palette to create a dreamy focal point above a bed or crib.
Step-by-Step Guide
Materials
- Interior latex paint (white or cream for base)
- Metallic gold acrylic paint
- Dark grey matte acrylic or latex paint
- Various sized paintbrushes (1-inch flat, medium round, fine liner)
- Pencil
- String and pushpin (for drawing circles)
- Painter’s tape
- Large circular object or compass
- Ruler or straight edge
- Drop cloth
- Eraser
Step 1: Planning and Sketching
-
Prepare the workspace:
Clear the furniture away from the wall and lay down a drop cloth to protect your flooring. Wipe the wall down with a damp cloth to remove dust and ensure smooth paint adhesion. -
Mark the centers:
Decide where you want your sun and moon to sit. Measure to ensure they are at equal heights if you want symmetry, or offset them slightly for a more organic feel. Mark the center point of each with a light pencil dot. -
Draw the sun’s core:
Tie a piece of string to a pencil. Pin the other end of the string to your sun’s center dot. Pull the string taut and trace a perfect circle for the body of the sun. -
Create the crescent moon:
Using the string method again, draw a large circle on the right side. Then, move your center pin slightly to the right and draw a second, intersecting arc inside the first circle to create the crescent shape. Erase the extra line. -
Sketch the sun rays:
Lightly sketch wavy, flame-like rays around the sun circle. I find it helpful to mark the four cardinal points (top, bottom, left, right) first to keep the spacing even, then fill in the rays between them. -
Position the stars:
Using a ruler, sketch various five-pointed stars scattered across the wall. Mix up the sizes—some large, some medium—and sketch outlines for the hollow stars as well.
Uneven Coverage?
If the metallic gold looks streaky, don’t overwork wet paint. Let it dry completely, then dab the next layer on with a sponge brush for a textured, hammered-gold effect.
Step 2: Painting the Sun
-
Fill the sun circle:
Using a 1-inch flat brush and your metallic gold paint, fill in the main circle of the sun. Use curved brushstrokes that follow the shape of the circle to maintain a smooth texture. -
Paint the first coat of rays:
Switch to a medium round brush to carefully paint the wavy rays. Start from the base of the ray near the sun and pull the brush outward to a tapered point. -
Apply a second gold coat:
Metallic paints can sometimes be semi-transparent. Once the first layer is dry to the touch, apply a second coat to the sun and rays for a rich, opaque finish.
Step 3: Painting the Moon and Stars
-
Paint the moon:
Use the dark grey paint and a flat brush to fill in the crescent moon shape. Carefully cut in the edges first for a crisp line, then fill the center. -
Detail the dangling charm:
With a fine liner brush and grey paint, draw a thin vertical line hanging from the top inner curve of the moon. Paint a small grey star at the bottom of this line. -
Paint the solid stars:
Fill in the solid stars scattered around the mural. Alternate between grey and gold paint to create balance. Use your smallest flat brush to keep the star points sharp. -
Outline the hollow stars:
Using a fine liner brush, carefully trace the outlines of the hollow stars. I like to use the opposite color of the nearby solid stars to keep the visual interest high.
Add Visual Depth
Mix a tiny drop of white into your grey paint and add subtle highlights to the center of the moon or the tips of the stars to give the mural a slight 3D dimension.
Step 4: Final Details
-
Add the stardust:
Dip the back end of a small paintbrush handle into the grey or gold paint. Dot the wall randomly to create tiny circular ‘stardust’ specks. -
Review and touch up:
Step back to look at the composition as a whole. Use a small brush with your wall’s base color to clean up any smudged edges or wobbly star points. -
Erase pencil lines:
Once the paint is completely cured (wait at least 24 hours), gently erase any visible pencil marks remaining around the edges of your shapes.
Now you have a peaceful, dreamy backdrop perfect for drifting off to sleep
BRUSH GUIDE
The Right Brush for Every Stroke
From clean lines to bold texture — master brush choice, stroke control, and essential techniques.
Explore the Full Guide
Dreamy Cloudscape in Pastel Tones
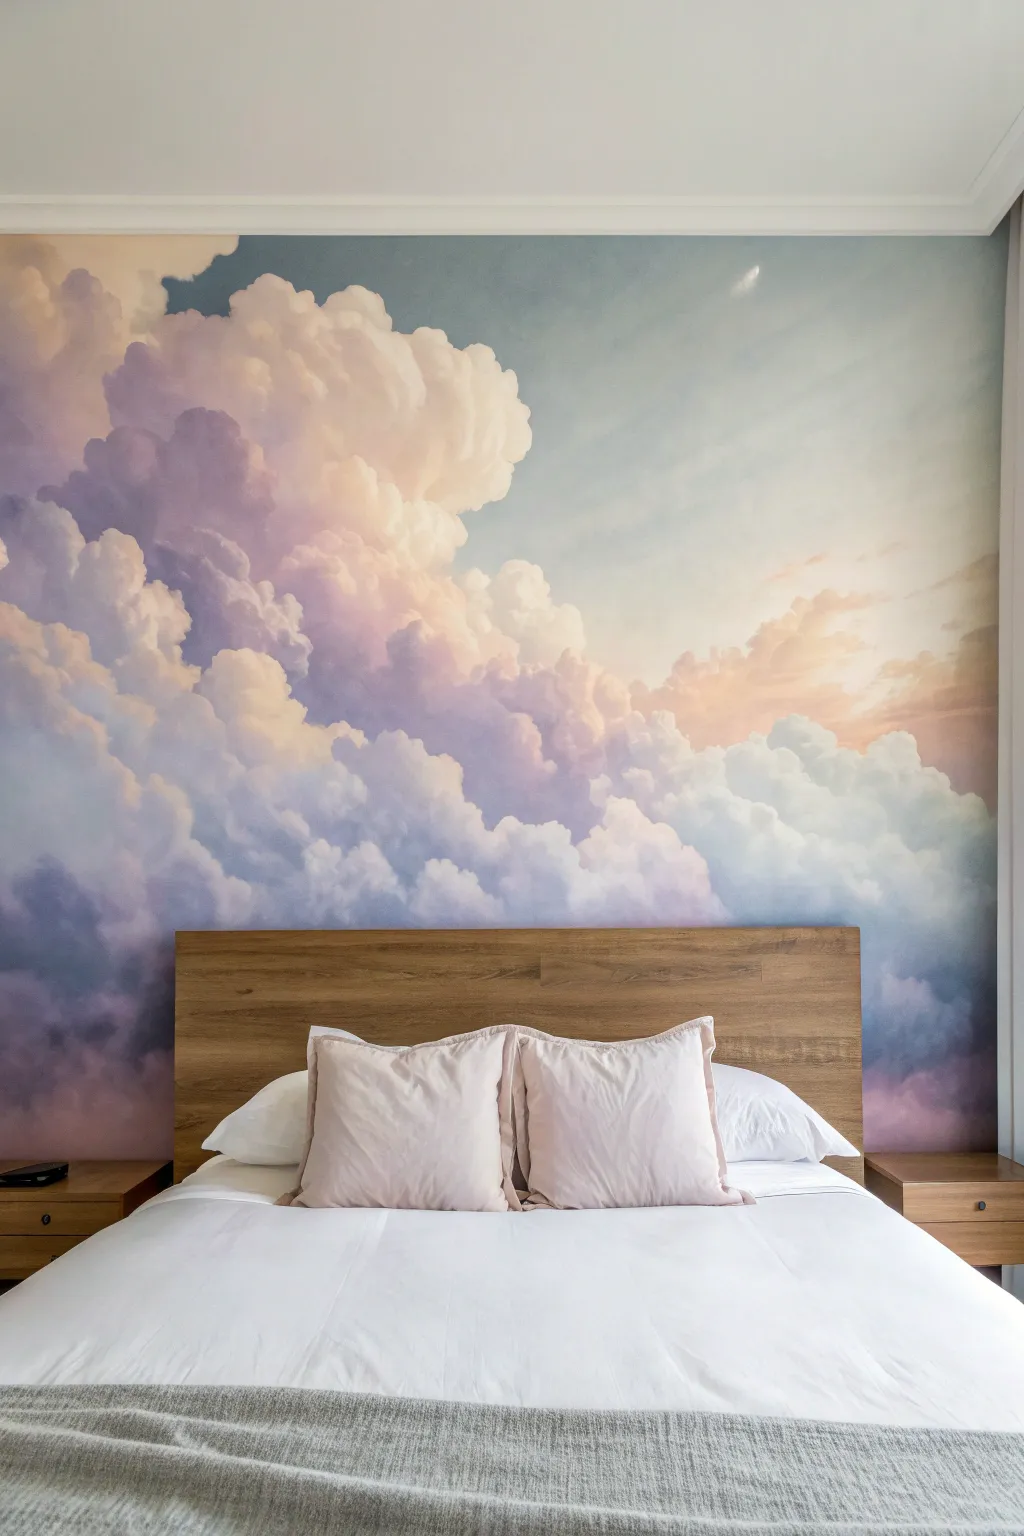
Transform your bedroom into a serene sanctuary with this ethereal cloudscape mural, featuring soft pastel purples, blues, and warm sunset tones. This project creates a stunning, painterly focal point that mimics gazing into an infinite, dreamy sky right from your bed.
Step-by-Step
Materials
- High-quality interior latex paint (White base)
- Acrylic glazing medium
- Tinting colors or sample pots: Indigo blue, violet/purple, warm pink (blush), peach, and warm yellow
- Large and medium synthetic bristle brushes
- Sea sponges or large stippling brushes
- Paint rollers and tray
- Painter’s tape
- Drop cloths
- Ladder
- Soft blending brushes (large mop style)
- Spray bottle with water
Step 1: Preparation and Base Layer
-
Prepare the workspace:
Clear the wall completely, moving the bed and furniture away. Cover the floor and baseboards with drop cloths and secure the edges with painter’s tape to protect your trim. -
Prime the surface:
Apply a fresh coat of white interior primer or a flat white base paint to the entire wall. This ensures your pastel colors appear true and vibrant without underlying wall colors bleeding through. -
Mix your palette:
Pour your paints into separate containers. Create a ‘sky blue’ mix using white and a touch of indigo, a ‘lavender’ mix, a ‘blush pink’, and a ‘soft peach’. Keep a large amount of plain white paint ready for blending. -
Add glazing medium:
Mix acrylic glazing medium into your colored paints according to the bottle instructions. This extends the drying time, which is crucial for achieving that soft, blended cloud look.
Cloud Control
Clouds looking too solid or cartoonish? You probably have too much paint on your brush. Wipe most of it off on a rag and dry-brush the edges to create a wispy, transparent look.
Step 2: Creating the Sky Gradient
-
Map out the background:
Start by visualizing the light source. In our reference, there is a brighter, warmer area on the right suggesting sunlight. Using a roller, apply a very pale blue-grey to the left side and top corners, transitioning into warmer peach and cream tones towards the lower right. -
Blend the transition:
While the paint is still wet, use a large clean brush to feather the edges where the cool blue meets the warm peach. Use crisscross strokes to avoid harsh lines.
Step 3: Painting the Cloud Formations
-
Establish the main cloud mass:
Load a large brush with your lavender and dark purple mixes. Roughly block in the large, heavy cloud formation on the left side of the wall. Don’t worry about detail yet; just focus on the overall shape. -
Add mid-tones:
While the purple base is wet, introduce mid-tone pinks and soft blues into the cloud edges. Use a stippling motion (dabbing the brush) to create texture rather than smooth strokes. -
Build the highlights:
Dip a sea sponge or round brush into white paint mixed with a tiny bit of yellow. Dab this onto the top-right edges of your purple clouds where the imaginary sunlight would hit. This creates volume and dimension. -
Soften the edges:
I like to use a dry, soft mop brush here to gently sweep over the edges of the clouds. This ‘smudges’ the wet paint into the background sky, creating that misty, ethereal effect. -
Create depth with shadows:
Mix a deeper indigo-violet shade. Apply this sparingly to the bottom and inner crevices of the large cloud mass to suggest weight and shadow.
Starry Night Upgrade
Once the mural is dry, create a subtle night effect by flicking a toothbrush loaded with diluted white paint to create tiny, distant stars in the darker purple sections.
Step 4: Details and Atmosphere
-
Layer smaller clouds:
On the right side of the wall, paint smaller, fluffier clouds using mostly white and peach tones. Keep these lighter and less defined than the main purple mass to create a sense of distance. -
Mist for blending:
If the paint starts drying too fast, lightly mist the wall with water from your spray bottle. This reactivates the acrylics slightly, allowing you to blend harsh edges continuously. -
Enhance the light source:
Intensify the brightness on the right side by adding a glaze of pale warm yellow or cream over the peach background. This makes it look like the sun is glowing from behind the clouds. -
Correct and refine:
Step back from the wall frequently. If a cloud looks too heavy, glaze over it with a thin layer of white. If it looks too flat, add more shadow to the bottom edge. -
Final softening:
Once you are happy with the composition, do one last pass with a very soft, dry brush on the outermost edges of the clouds to ensure they melt seamlessly into the ‘air’. -
Remove tape and clean up:
Carefully peel off the painter’s tape while the paint is barely tacky to prevent peeling. Reinstall wall plates and move your furniture back into place once fully dry.
Enjoy drifting off to sleep under your own personal, hand-painted sky
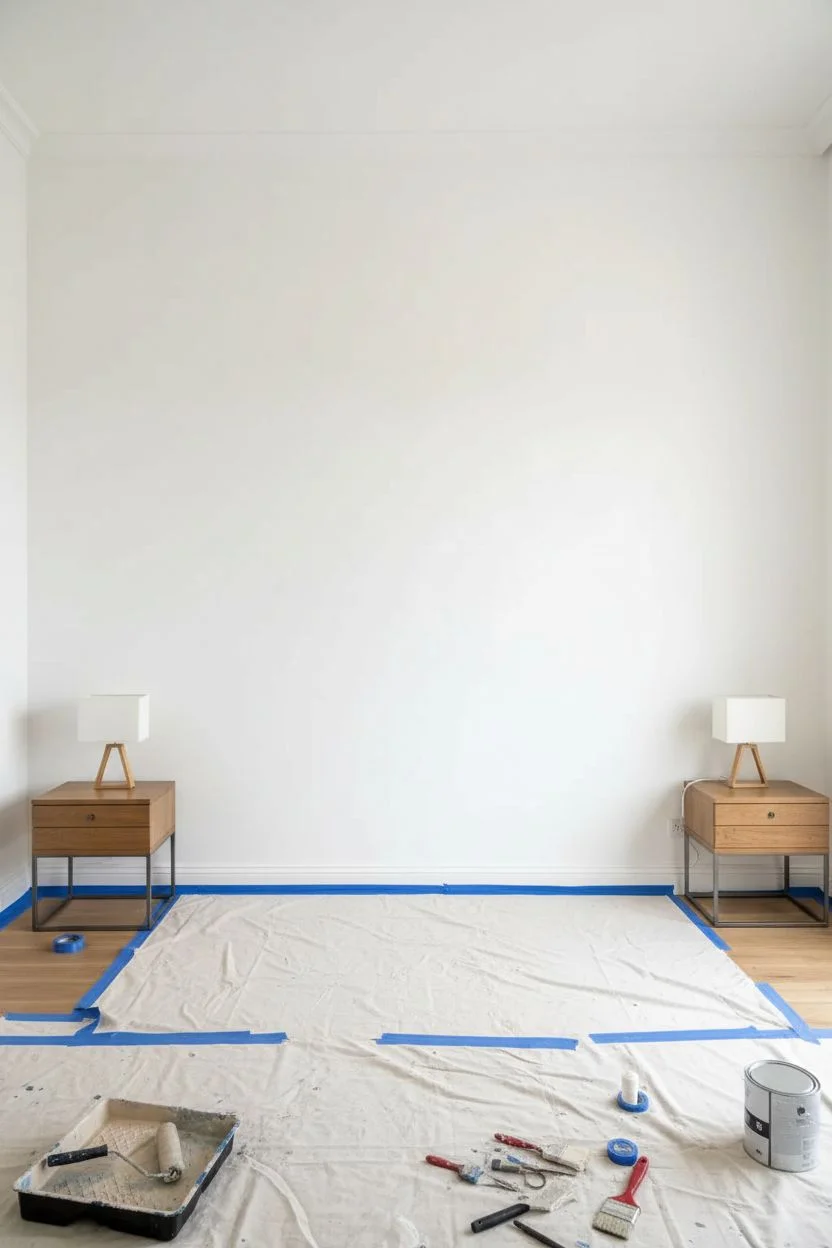
Abstract Ombre Color-Field Gradient
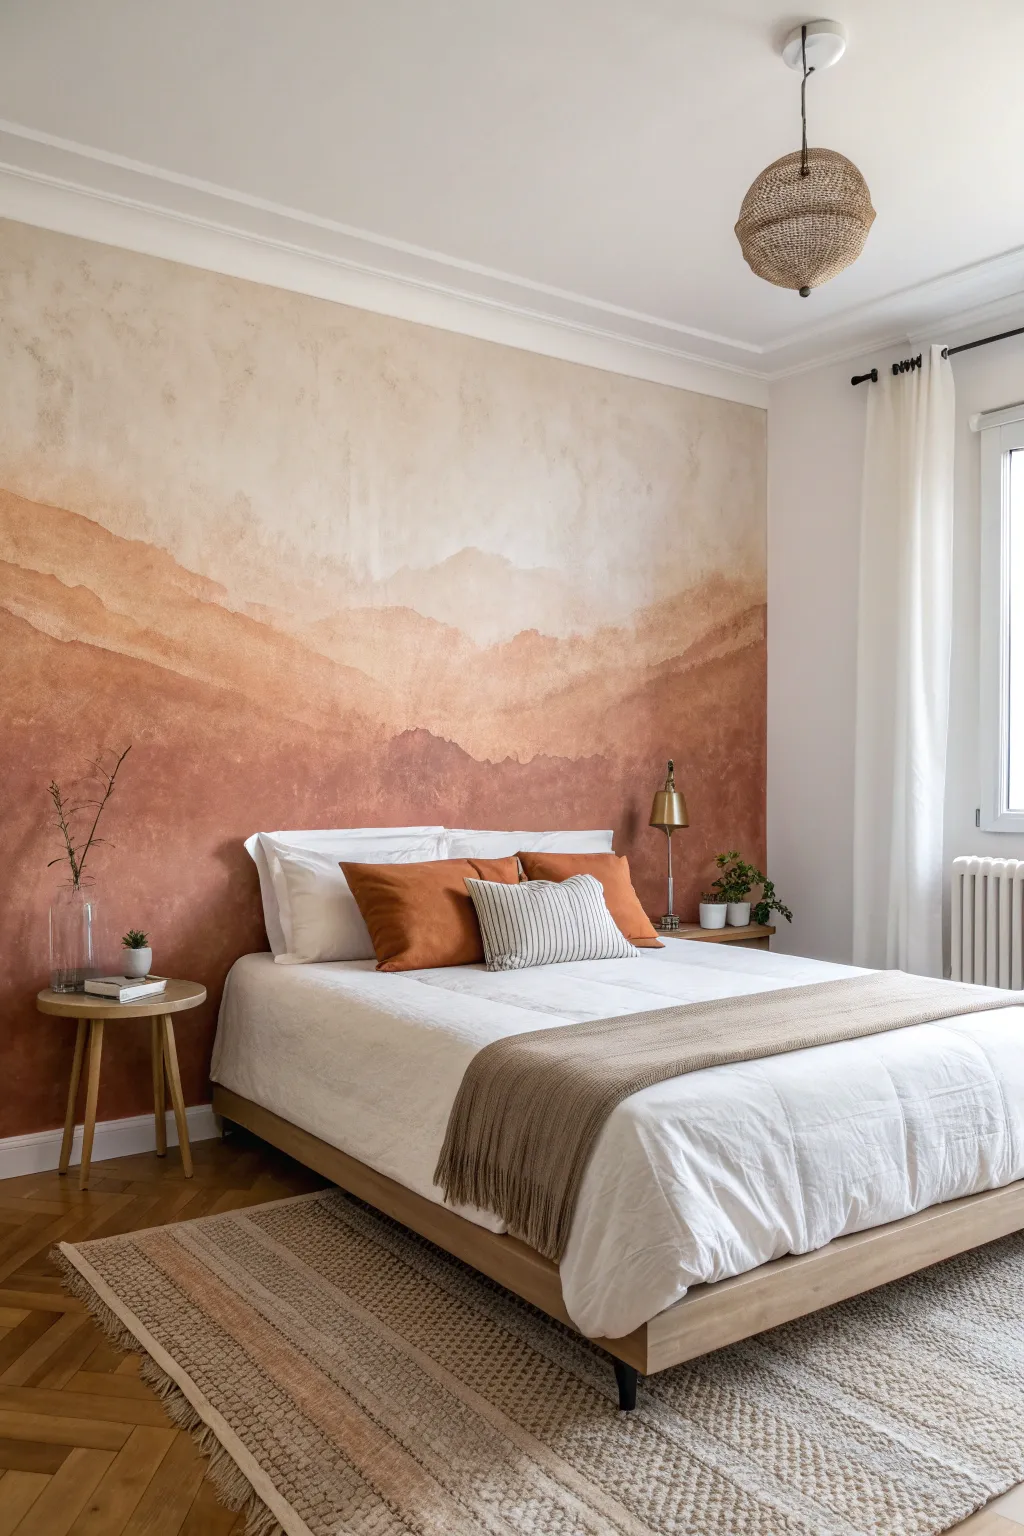
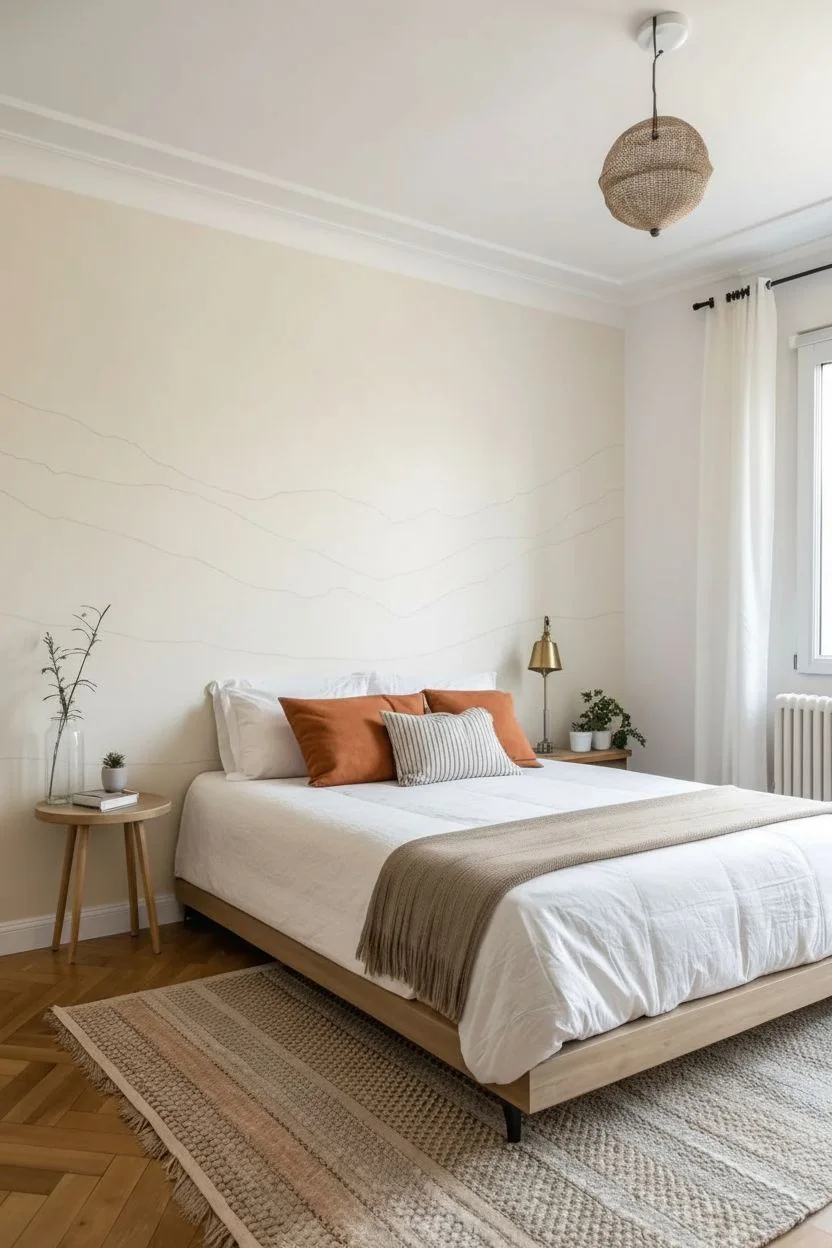
Transform your bedroom into a serene desert landscape with this painterly, abstract mountain mural. Using blending techniques and a warm, earthy palette, you’ll create soft ridges that fade gently into a creamy sky for a calming atmosphere.
Step-by-Step Tutorial
Materials
- Latex wall paint (Cream/Off-white for base)
- Latex wall paint (Deep Terracotta/Burnt Sienna)
- Latex wall paint (Warm Beige/Tan)
- Glaze medium or water (for thinning)
- Wide paint roller and tray
- 4-inch high-quality synthetic brush
- Large sponge or rag (for blending)
- Painter’s tape
- Drop cloths
- Pencil
- Mixing buckets or containers
Step 1: Preparation and Base Layer
-
Clear and prep the room:
Remove all furniture from the wall area or push it to the center of the room. Lay down drop cloths to protect your flooring, as this technique involves watery paint that can drip. -
Apply the base coat:
Roll your lightest color—the cream or off-white shade—over the entire wall. This ensures a uniform background and serves as the ‘sky’ for the top third of the mural. -
Let the base dry:
Allow the base coat to dry completely according to the manufacturer’s instructions, usually at least 4 hours, before sketching or applying new layers. -
Sketch the horizon lines:
Using a pencil, lightly draw organic, wavy lines across the wall to map out your mountain ranges. Make 3 to 4 distinct layers, keeping the ridges uneven and natural-looking rather than perfect peaks.
Wet-Edge Wisdom
Work in small 3-4 foot horizontal sections rather than trying to paint the entire length of the wall at once. This keeps the paint wet enough to blend seamlessly without drying lines.
Step 2: Mixing and First Mountain Layers
-
Create your color gradient:
Set up a mixing station. You will need your pure terracotta paint for the bottom, and then 2-3 intermediate shades created by mixing the terracotta with varying amounts of beige and white. -
Prepare the wash:
To achieve that watercolor look, mix your paints with a clear glaze medium or a small amount of water. I find a ratio of 4 parts paint to 1 part water works well to keep the color opaque but spreadable. -
Paint the darkest bottom layer:
Start at the bottom of the wall with your darkest terracotta shade. Use the 4-inch brush to paint the lowest mountain shape, following your lowest pencil line. -
Soften the edges:
While the paint is still wet, use a damp sponge or dragging brush to feather out the top edge of this dark layer slightly, preventing a hard, cartoony line. -
Apply the second layer:
Moving up, take your next lighter mixed shade (medium terracotta-beige). Paint the section above the dark bottom layer, overlapping the wet edge slightly to encourage blending.
Gilded Outline
Once the mural is fully dry, use a thin brush and metallic gold paint to trace a very fine, broken line along just one or two of the ridge crests for a subtle, luxurious shimmer.
Step 3: Blending and Fading Upward
-
Manipulate the overlap:
Where the two colors meet, use a dry brush tool or a clean rag to blot the transition area. This creates the hazy, atmospheric perspective seen in the photo. -
Continue with lighter tones:
Proceed to the third layer using a predominantly beige mixture. Paint this section up to your next pencil guide, keeping the application loose and textural. -
Create the distant mountains:
For the highest mountain range, mix a shade very close to your wall color but slightly darker or warmer. Paint this highest ridge. -
Feather into the sky:
This step makes the magic happen: take a brush with a tiny bit of water and minimal paint, and drag the top edge of the highest mountain upward into the cream sky, fading it out until it disappears. -
Add texture and depth:
Step back and look for areas that are too flat. Take a watered-down version of your terracotta paint and dab subtle shadows into the valleys of the lower mountains to add dimension. -
Refine the ridges:
If any ridge line looks too sharp, lightly mist it with water from a spray bottle and dab it with a dry cloth to blur the boundary. -
Final assessment:
Allow the wall to dry for an hour. Paints often dry darker or lighter than they appear wet, so wait to see if you need to add any highlights or deeper shadows.
Step back and admire the warm, rolling landscape you have created right in your own home

PENCIL GUIDE
Understanding Pencil Grades from H to B
From first sketch to finished drawing — learn pencil grades, line control, and shading techniques.
Explore the Full Guide
Ink-Wash Landscape for a Quiet Mood
Transform your bedroom into a serene retreat with this large-scale mural that mimics the delicate, atmospheric beauty of traditional ink-wash paintings. By layering diluted paints to create depth and mist, you’ll build a tranquil landscape of rolling hills and silent pines directly on your wall.
Step-by-Step Guide
Materials
- Interior latex paint or high-quality acrylics (Black, White, Phthalo Blue, Burnt Umber)
- Glazing medium or water for thinning paint
- Large painter’s drop cloth
- Painter’s tape
- Wide wall-painting brushes (3-4 inch)
- Assorted artist brushes (round, fan, and liner brushes for trees)
- Natural sea sponge or lint-free rags
- Mixing buckets or trays
- Pencil and eraser
- Ladder or step stool
Step 1: Preparation and Background
-
Prepare the workspace:
Clear the wall completely, removing any outlet covers or hardware. Lay down your drop cloth to protect the flooring and masking tape along the ceiling, baseboards, and adjoining walls to ensure crisp edges. -
Base coat application:
If your wall isn’t already a neutral tone, paint a base coat of soft, off-white or very light grey. This serves as the ‘sky’ and the brightest highlights of the mist; let this dry completely, preferably overnight. -
Mix your palette:
Create several gradations of grey. You’ll need a very pale misty grey (mostly water/glaze with a drop of black/blue), a medium range, and a dark charcoal for the foreground trees. I usually mix about four distinct shades in separate containers before starting.
Wet Edge Technique
Work in sections and keep a spray bottle of water handy. If paint dries too fast, a light misting re-activates acrylics enough to blend that crucial foggy gradient at the bottom.
Step 2: Farthest Mountains
-
Sketch the horizon:
Lightly sketch the highest mountain ridges using a pencil. Keep the lines wavy and organic—nature rarely has straight lines. -
Paint the distant peaks:
Using your palest grey mixture, fill in the shapes of the farthest mountains. The paint should be translucent; apply it with a wide brush using horizontal strokes to mimic distant strata. -
Create the mist effect:
While the paint is still wet, use a damp sea sponge or clean rag to gently lift the paint at the bottom edge of the mountain range. This fades the mountain into the white background, creating the illusion of fog settling in the valleys.
Unwanted Sharp Lines?
If a drying line creates a hard edge where you wanted soft mist, scrub the area gently with a damp, clean sponge and a tiny bit of the background wall color to soften it back up.
Step 3: Mid-Ground Layers
-
Define the middle ridges:
Once the first layer is dry to the touch, sketch a second range of hills slightly lower than the first. Switch to your medium-grey mixture, which should be slightly more opaque than the first layer. -
Add texture and variance:
Paint this middle layer, but this time, dap your brush slightly to suggest uneven terrain. Don’t make the color perfectly uniform; let some water streaks show through to enhance that watercolor aesthetic. -
Blend the bottom edge:
Just like before, fade out the bottom of this mountain layer using a wet brush or damp sponge. The key to atmospheric perspective is that things get clearer and darker as they get closer to the viewer.
Step 4: Foreground and Details
-
Paint the nearest hills:
Mix a darker grey-blue, perhaps adding a touch of Burnt Umber for warmth. Paint the closest hill shapes, particularly on the right side where the large tree will stand. Keep the edges crisper and the paint more opaque here. -
Start the pine forest:
Using a smaller flat brush or fan brush, begin dabbing vertical shapes along the ridges of the mid-ground mountains. These are your distant trees. They should just be simple, jagged silhouettes. -
Detail the main tree:
For the large feature tree on the right, use a liner brush with your darkest charcoal paint. Paint a thin, slightly wavering trunk line extending almost to the ceiling. -
Add branches and needles:
Use a fan brush or a worn round brush to stipple on the pine needles. Start narrow at the top and widen as you go down. Leave gaps between branches so the ‘mist’ behind shows through—don’t make it a solid block of dark paint. -
Foreground foliage:
On the immediate foreground hill (bottom right), stipple in some low bushes and grasses. You can mix a tiny bit of yellow ochre or green into your dark grey here to suggest moss or vegetation without breaking the monochrome scheme. -
Add delicate accent trees:
On the left side, paint thin, leafless branch structures reaching up from the bottom. These should be delicate and dark charcoal/black to act as a framing element. -
Final mist glazing:
Stand back and look at the whole wall. If the transition between layers looks too sharp, mix a very watery white glaze. Lightly brush this over the transition lines to push the mountains further back into the ‘fog’.
Step back and admire how the layers of grey create a sense of infinite distance right in your own room
Tropical Canopy That Feels Like a Retreat
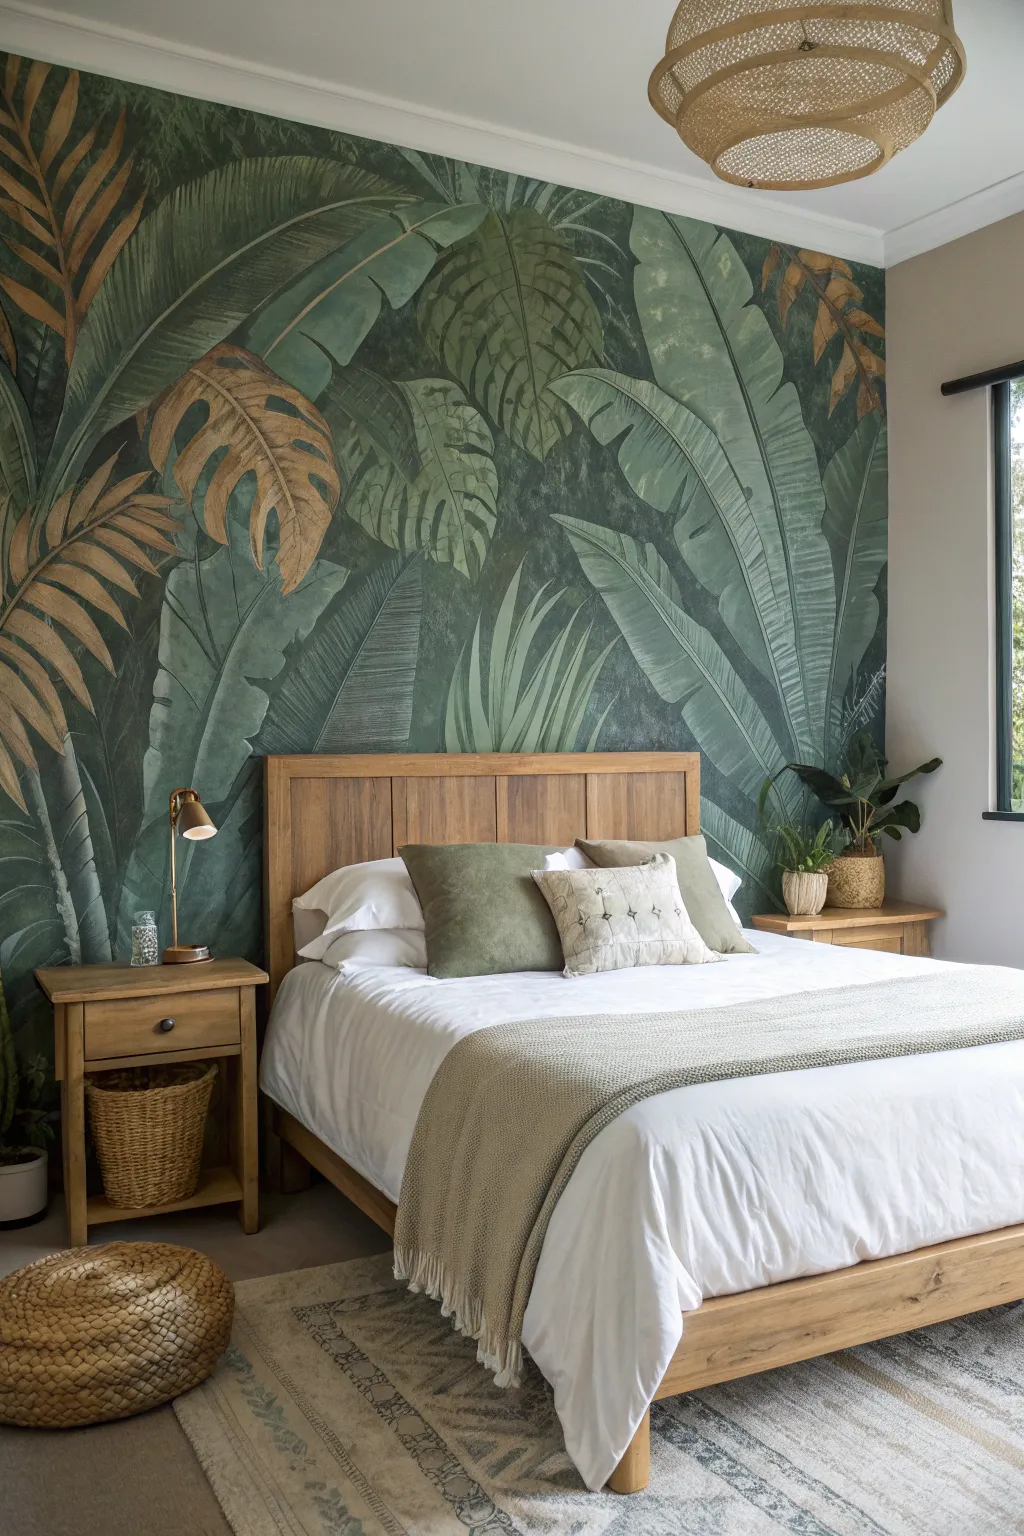
Transform your bedroom into a serene jungle escape with this immersive wall mural. Featuring broad, painterly palm leaves and monstera fronds in deep greens and earthy golds, this large-scale art project creates a sophisticated canopy feel behind your headboard.
Step-by-Step Guide
Materials
- Interior latex paint (matte finish): Deep Forest Green, Sage Green, Olive Green
- Interior latex paint (matte finish): Ochre/Antique Gold, Warm Beige, Charcoal Grey
- Chalk or pastel pencil (light grey or white)
- Painter’s tape and drop cloths
- Large foam roller and tray
- Variety of brushes: 2-inch angled sash brush, 1-inch flat brush, round artist brushes (sizes 6 and 10)
- Mixing containers or paper plates
- Step ladder
- Damp rag for corrections
Step 1: Preparation and Base
-
Prep the workspace:
Clear the wall completely, moving furniture like the bed frame away to give yourself ample room. Lay down drop cloths to protect the flooring. -
Clean and prime:
Wipe down the wall with a damp cloth to remove dust. If you are painting over a dark color, apply a coat of white primer first to ensure your greens pop true to color. -
Apply the background color:
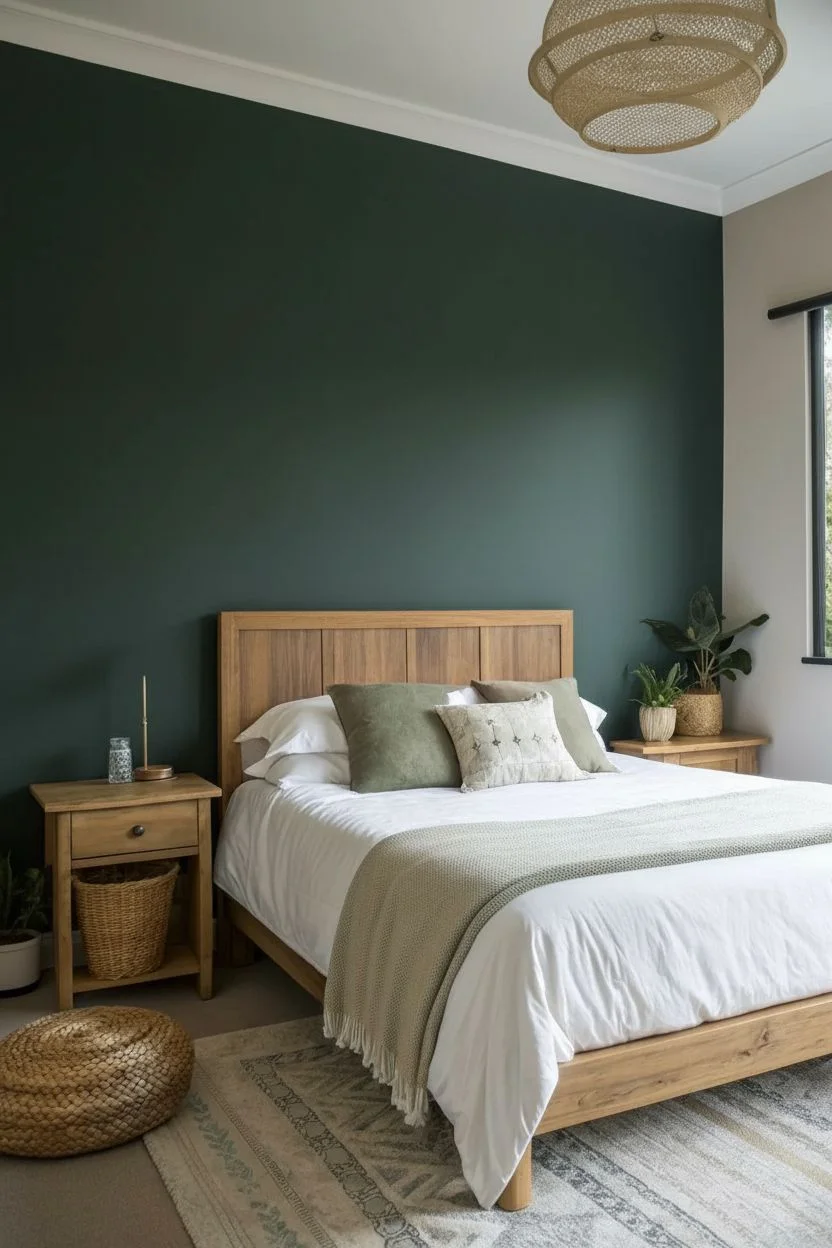
Using a roller, paint the entire wall with your darkest Deep Forest Green mixed with a touch of Charcoal Grey. This creates that shadowy, dense jungle depth. Let this base coat dry completely overnight.
Chalk Marks Won’t Go?
If a wet rag smears the chalk, try a kneaded eraser. For stubborn marks, touch up with a small brush and your base wall color rather than scrubbing, which can damage the new paint.
Step 2: Sketching the Composition
-
Rough out large shapes:
Use a light grey chalk or pastel pencil to loosely sketch the giant leaf shapes. Don’t worry about details yet; focus on placement. Draw large swooping curves for banana leaves and rounded, split shapes for monsteras. -
Layer the depth:
Plan for three layers of depth: background leaves (indistinct), middle ground (large green leaves), and foreground (the gold/ochre accents). Sketch the foreground leaves overlapping the others to create dimensionality. -
Step back and assess:
Before painting, step back to the far side of the room. Ensure the flow of the leaves feels balanced and not too clustered in one spot. Wipe away chalk with a damp rag to adjust as needed.
Pro Tip: Glazing Medium
Mix your acrylics with a clear glazing medium instead of water for the final layers. This increases transparency, allowing the underlayers to show through for a rich, realistic glow.
Step 3: Painting the Foliage
-
Block in green mid-tones:
Start with your Sage Green and the 2-inch brush. Fill in the large banana leaf shapes you sketched in the middle ground. Keep your strokes loose and directional, following the veins of the leaf. -
Add deep shadows:
While the sage paint is still slightly tacky, mix a little Deep Forest Green into it. Paint along the spine of the leaves and near the base where they overlap to create instant volume. -
Create texture with dry brushing:
Dip a dry 1-inch flat brush into a lighter Olive Green. Wipe most of it off on a paper towel, then lightly drag it over the sage leaves. This mimics the fibrous texture of tropical foliage. -
Paint the detailed monstera leaves:
Switch to a smaller brush for the monstera leaves. Use a mix of Olive and Forest Green. Carefully paint the distinct split edges, keeping the edges relatively crisp compared to the softer background leaves. -
Add the gold accent leaves:
For the striking foreground leaves, use the Ochre/Antique Gold paint. Apply this color solidly to the specific leaf shapes you planned in the foreground, typically near the edges of the composition to frame the bed. -
Shadow the gold leaves:
Mix a tiny bit of brown or dark green into the gold paint. Use this to paint the underside or shadowed side of the gold leaves, giving them a three-dimensional curled look. -
Highlighting for drama:
Mix Warm Beige with a little water to make a glaze. Use a round artist brush to add thin, highlight lines along the main veins of the foreground leaves where light would naturally hit.
Step 4: Refining and Finishing
-
Soften the background edges:
I like to take a clean, slightly damp sponge to dab at the edges of the darkest background leaves. This blurs them slightly, pushing them visually further back than the crisp foreground leaves. -
Define the veins:
Using a size 6 round brush and watered-down light green paint, add the fine vein details to the large banana leaves. Do not draw straight lines; let them wobble slightly for a natural look. -
Final contrast check:
Look for areas that feel flat. Add pure Deep Forest Green into the deepest crevices between leaves to increase the contrast and make the lighter leaves pop forward. -
Clean up chalk lines:
Once the paint is fully dry (give it at least 24 hours), gently wipe away any visible remaining chalk lines with a damp cloth.
Enjoy the calming atmosphere of your hand-painted botanical sanctuary as you drift off to sleep


City Skyline at Dusk in Muted Tones
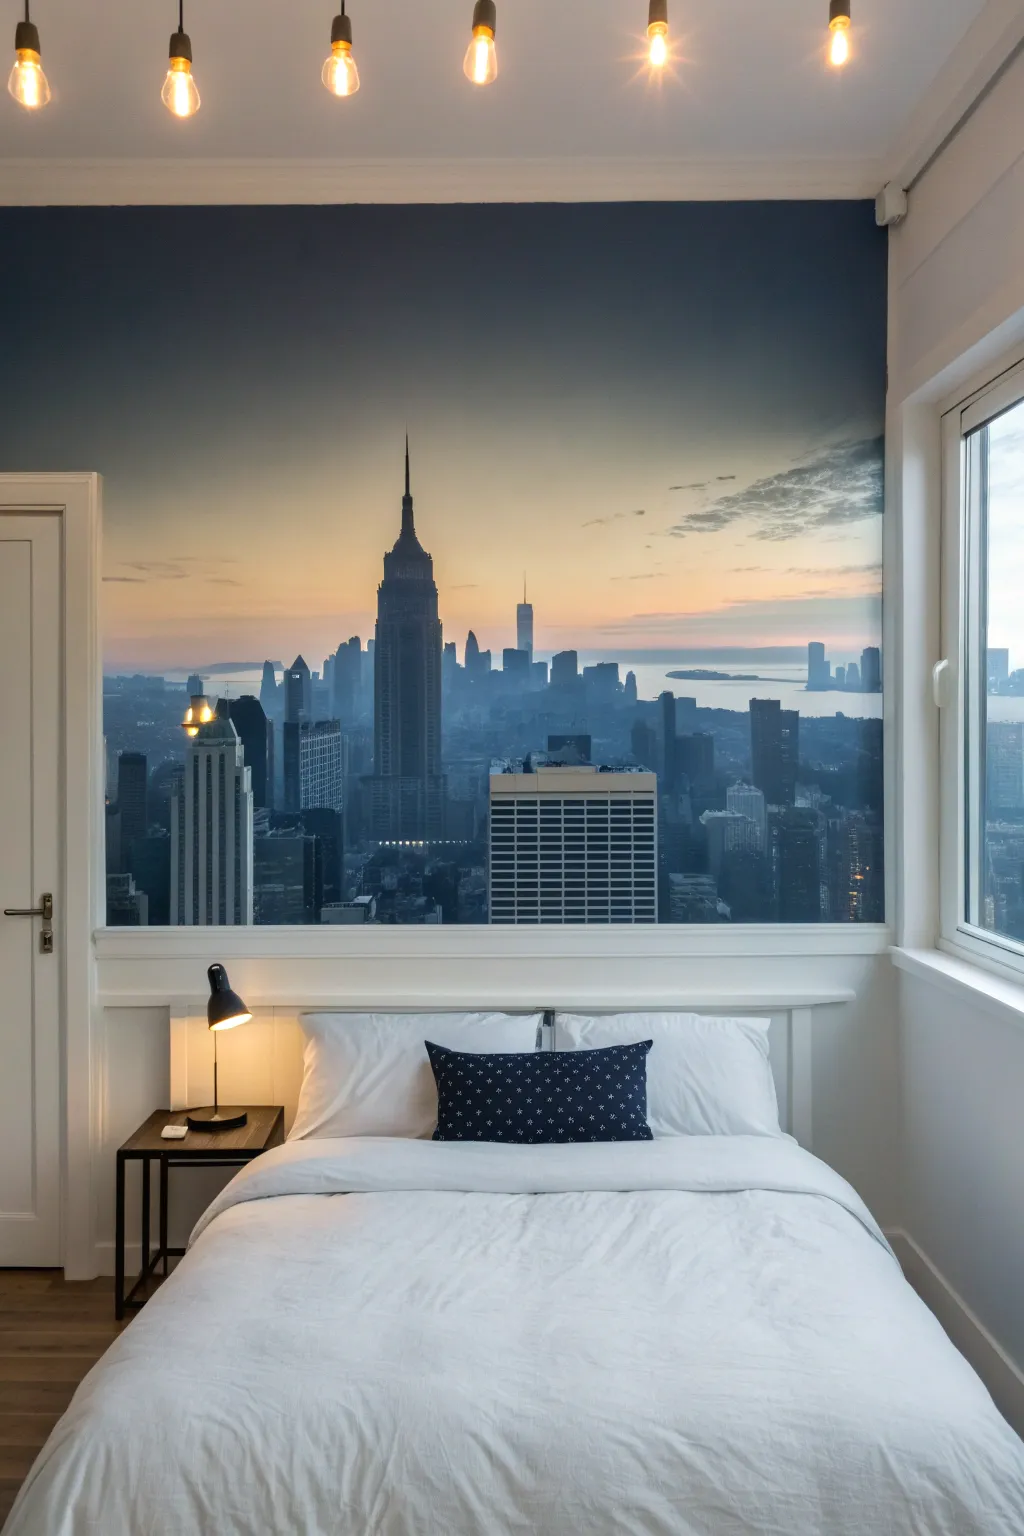
Transform your bedroom into a penthouse suite with this stunning New York City skyline mural in muted dusk tones. This project involves installing a large-scale wallpaper mural above wainscoting to create a dramatic, atmospheric focal point that anchors the sleeping area.
Step-by-Step Tutorial
Materials
- Custom vinyl or non-woven wallpaper mural (NYC skyline design)
- Wallpaper paste (heavy-duty)
- Paste roller and tray
- Smoothing tool or plastic squeegee
- Sharp utility knife (snap-off blade style)
- Metal straight edge or trim guide
- Measuring tape
- Bubble level or laser level
- Stepladder
- Sponge and bucket of clean water
- Drop cloths
- Seam roller
Step 1: Preparation and Planning
-
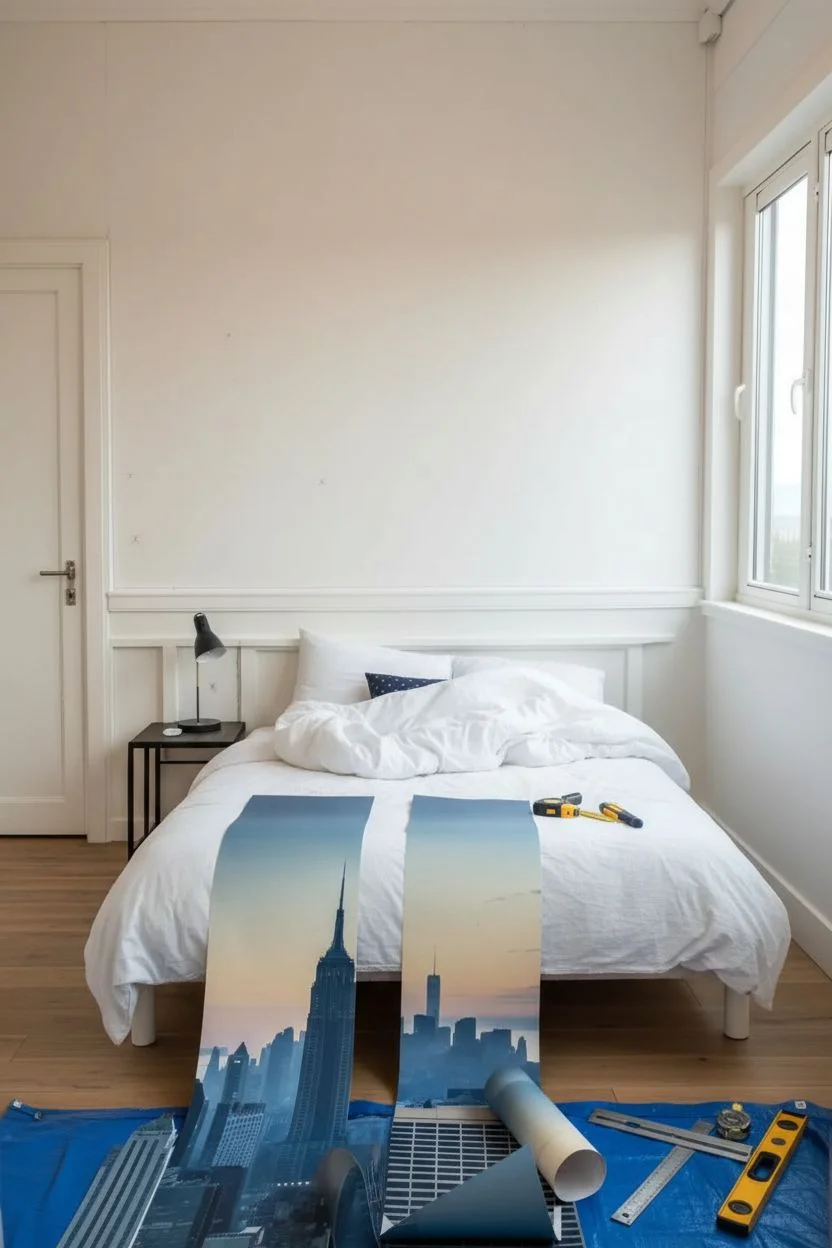
Measure the Wall Area:
Begin by carefully measuring the dimensions of the wall space above your wainscoting or headboard area. Measure both the width and height at multiple points to account for any wall irregularities. -
Select and Order the Image:
Choose a high-resolution image of the New York City skyline at dusk, ensuring the colors feature muted blues and oranges. Order your mural slightly larger than your measurements (add 2-3 inches on all sides) to allow for trimming. -
Prepare the Surface:
Clear the wall of any fixtures, nails, or outlet covers. Ensure the wall surface is smooth, clean, and dry; if you have painted recently, wait at least 3-4 weeks for the paint to fully cure before adhering a mural. -
Lay Out the Panels:
Unroll your mural panels on a clean floor area to inspect the image for pixelation or errors. Check the sequence of the panels to ensure the skyline matches up perfectly from left to right.
Step 2: Installation
-
Draw a Plumb Line:
Using your level and a pencil, draw a perfectly vertical line on the wall where the edge of your first panel will go. Starting straight is critical, as walls and corners are rarely perfectly plumb. -
Apply Adhesive to the Wall:
For non-woven wallpapers (paste-the-wall type), use a roller to apply an even coat of paste directly to the wall area for the first panel. Extend the paste slightly beyond the width of the panel to ensure edge coverage. -
Position the First Panel:
Align the top edge of the first panel with the ceiling line or molding, allowing a couple of inches of overlap at the top. Line up the side edge precisely with your pencil plumb line. -
Smooth and Remove Bubbles:
Using the smoothing tool, gently press the wallpaper against the wall, working from the center outward to push any air bubbles toward the edges. Avoid stretching the paper. -
Trim the Excess:
Once the panel is smooth, use the metal straight edge to firmly press the excess paper into the corners at the ceiling and the wainscoting. Run your sharp utility knife along the guide to trim the excess cleanly. -
Hang Subsequent Panels:
Apply paste for the next section. Butt the edge of the second panel against the first without overlapping (unless your specific mural instructions require an overlap). Match the building details in the skyline meticulously. -
Manage the Seams:
I like to use a small seam roller to gently press down the edges where panels meet. This ensures they don’t curl up later and makes the join virtually invisible. -
Clean Excess Paste:
Immediately wipe away any paste that squeezes out of the seams using a damp sponge and clean water. Dried paste can leave a shiny residue on the matte finish of the mural.
Double-Cut Technique
If your mural requires overlapping seams, use the ‘double-cut’ method: overlap the pattern, slice through both layers with a fresh blade, and peel away the excess strips for a perfect flush seam.
Step 3: Finishing and Styling
-
Final Trimming:
Continue hanging all panels, trimming the final side edge against the perpendicular wall or door frame. Ensure your blade is fresh; change it often to prevent tearing damp paper. -
Dry and Inspect:
Allow the mural to dry slowly at room temperature for 24 hours. Keep windows closed to prevent drafts that might cause uneven drying or shrinking. -
Reinstall Fixtures:
Once fully dry, replace any outlet covers or wall fixtures you removed earlier. -
Coordinate Lighting:
Position warm-toned lamps (like the black task lamp shown) nearby. The light will interact with the orange hues of the sunset in the mural, enhancing the ‘golden hour’ effect. -
Bedding Selection:
Choose crisp white bedding to contrast with the dark blues of the city buildings, mirroring the setup in the example image.
Add Ambient Lighting
Install a hidden LED strip light behind your headboard or along the top of the wainscoting ledge to gently illuminate the city buildings from below.
Enjoy waking up to this magnificent cityscape view every morning
Textured Faux Fresco With Soft, Aged Patina
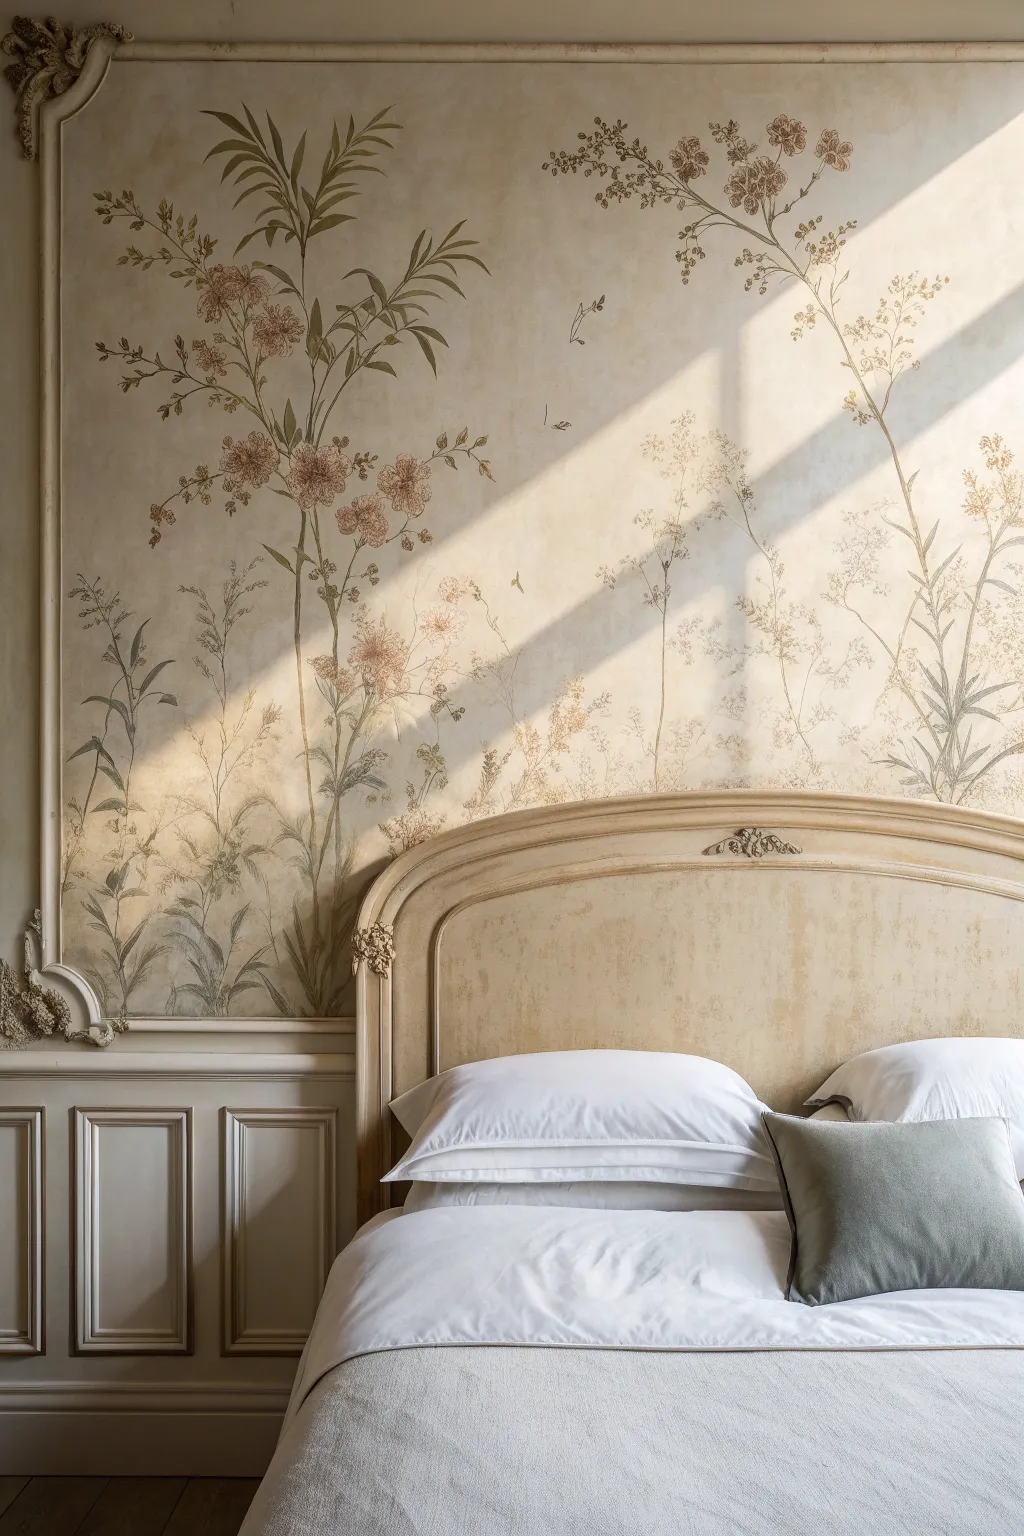
Bring the romance of an old-world Italian villa into your bedroom with this textured faux fresco technique. By layering plaster and soft glazes, you will create a surface that looks beautifully weathered and touched by time, featuring delicate climbing botanicals that feel like they’ve been fading on the wall for centuries.
Step-by-Step
Materials
- Venetian plaster or joint compound
- Tintable glaze medium
- Latex paint (creamy white, taupe, sage green, dusty pink, raw umber)
- Wide drywall knife or trowel
- fine-grit sandpaper block
- Sea sponge
- Artist brushes (various sizes: fine liner to medium round)
- Carbon paper (optional for tracing)
- Pencil
- Matte sealer or varnish
- Painter’s tape
Step 1: Creating the Aged Plaster Base
-
Prepare the Surface:
Begin by cleaning your wall thoroughly. If you have existing molding like the panel in the reference image, mask off the inner edges carefully with painter’s tape to protect the woodwork. If your wall is smooth, you can skip priming; if it’s glossy, give it a quick sand. -
Apply the Base Plaster Layer:
Scoop joint compound or Venetian plaster onto a wide drywall knife. Apply it to the wall in random, sweeping cross-hatch motions. Don’t aim for perfection here; leave some areas thicker and some thinner to create natural valleys and ridges mimicking old stucco. -
Add Texture Variation:
While the plaster is still wet, you can dab a crumpled plastic bag or sea sponge lightly into a few spots to create pitting. Let this first layer dry completely, usually overnight. -
Knock Down and Soften:
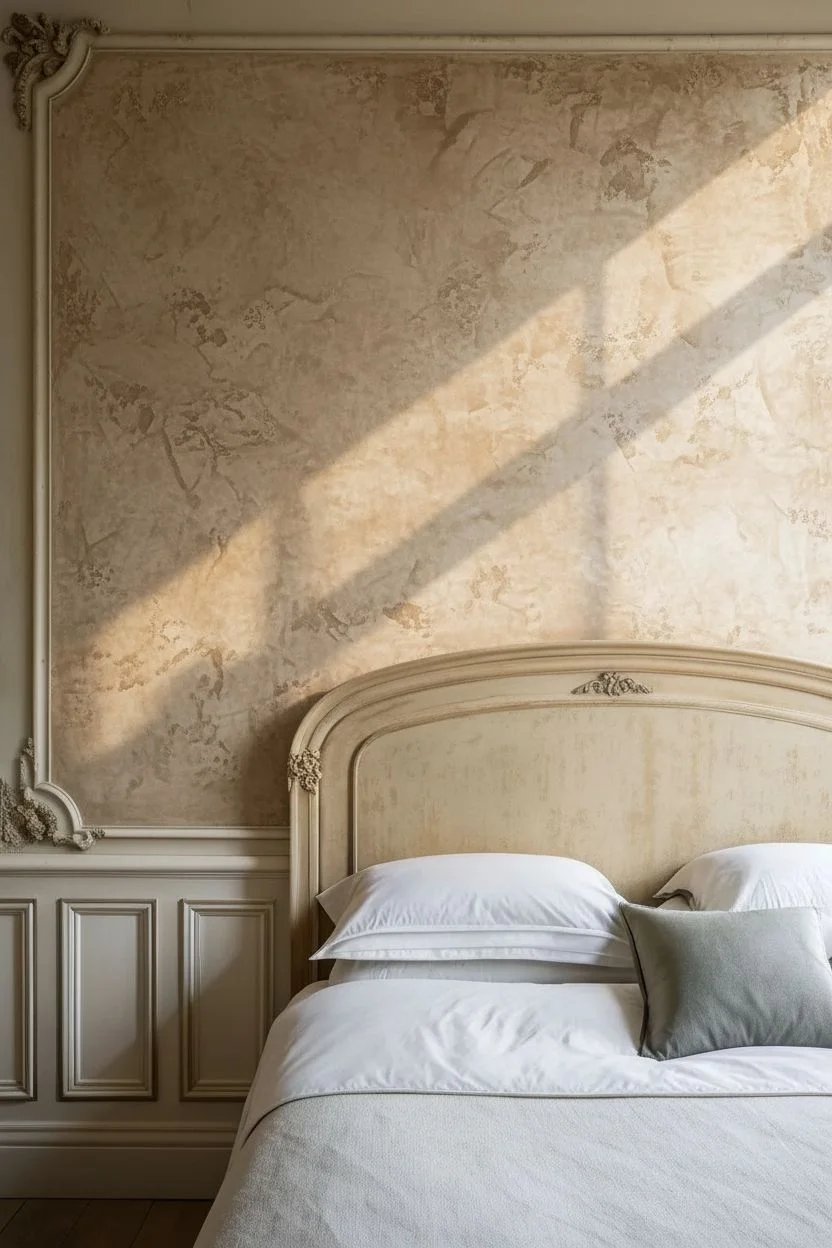
Once the plaster is bone dry, take a fine-grit sandpaper block and lightly sand the entire surface. Your goal isn’t to make it smooth, but to knock down any sharp peaks and create a tactile, velvety surface that feels like aged stone. -
Apply the Tea Stain Glaze:
Mix one part taupe or raw umber paint with four parts glaze medium and a splash of water. Using a large brush or sponge, wash this over the plaster wall. Immediately wipe it back with a damp rag, allowing the darker color to settle into the plaster’s nooks and texture for that antique patina.
Don’t Panic!
Using a “translucent” glaze? If your tea stain layer looks too dark or muddy, immediately mist it with a spray bottle of water and wipe aggressively with a clean rag to lift the pigment back off.
Step 2: Painting the Botanical Mural
-
Sketch the Composition:
Plan your botanical layout. You want an asymmetrical, organic flow, perhaps growing up from the bottom left or cascading down from the top right. Lightly sketch the main stems directly onto the glazed wall with a pencil. If you aren’t confident drawing freehand, tape up a large botanical printout and use carbon paper to transfer the main lines. -
Paint the Main Stems:
Mix a muted olive-brown using your sage green and raw umber paints. Dilute it slightly with water so it flows like ink. Using a long liner brush, paint the primary stems over your pencil lines, letting your hand wobble slightly to keep the lines organic rather than rigid. -
Layer in the Foliage:
Using a sage green that is slightly lighter than your stems, add long, slender leaves. Paint them with a quick, flicking motion to taper the ends naturally. vary the opacity; some leaves should look faded and transparent, while others can be more opaque. -
Add the Florals:
Mix a dusty pink with a touch of the creamy white base. Using a small round brush, stipple or dab clustered flowers at the ends of the stems. Don’t paint distinct petals; instead, create impressionistic clusters that suggest hydrangeas or wildflowers. -
Detail with Faded Accents:
For depth, mix a darker sepia tone. Add tiny dots in the center of the flower clusters and very fine, wispy grasses in the background. I like to keep these background elements very watery so they recede visually. -
Distress the Artwork:
This is the scary but crucial step. Once the painting is dry, take your fine-grit sandpaper and very gently scuff over parts of your painted flowers and stems. This rubs the paint away slightly, making the mural look like it’s part of the old plaster rather than sitting on top of it. -
Final Antique Glaze:
Mix a very watery wash of raw umber (lots of water, very little paint). Brush this selectively over the corners of the panel and over the densest parts of the foliage to subdue the colors further and unify the painting with the background. -
Seal the Wall:
To protect your work, roll on a coat of dead-flat or matte clear varnish. Avoid satin or gloss, as the shine will ruin the illusion of aged plaster.
Level Up
Add subtle gilded age detailing by rubbing a tiny amount of gold wax or metallic pigments onto just the highest peaks of the plaster texture after the mural is completely dry.
Step back and admire how the sunlight catches the texture of your new, centuries-old masterpiece


Have a question or want to share your own experience? I'd love to hear from you in the comments below!