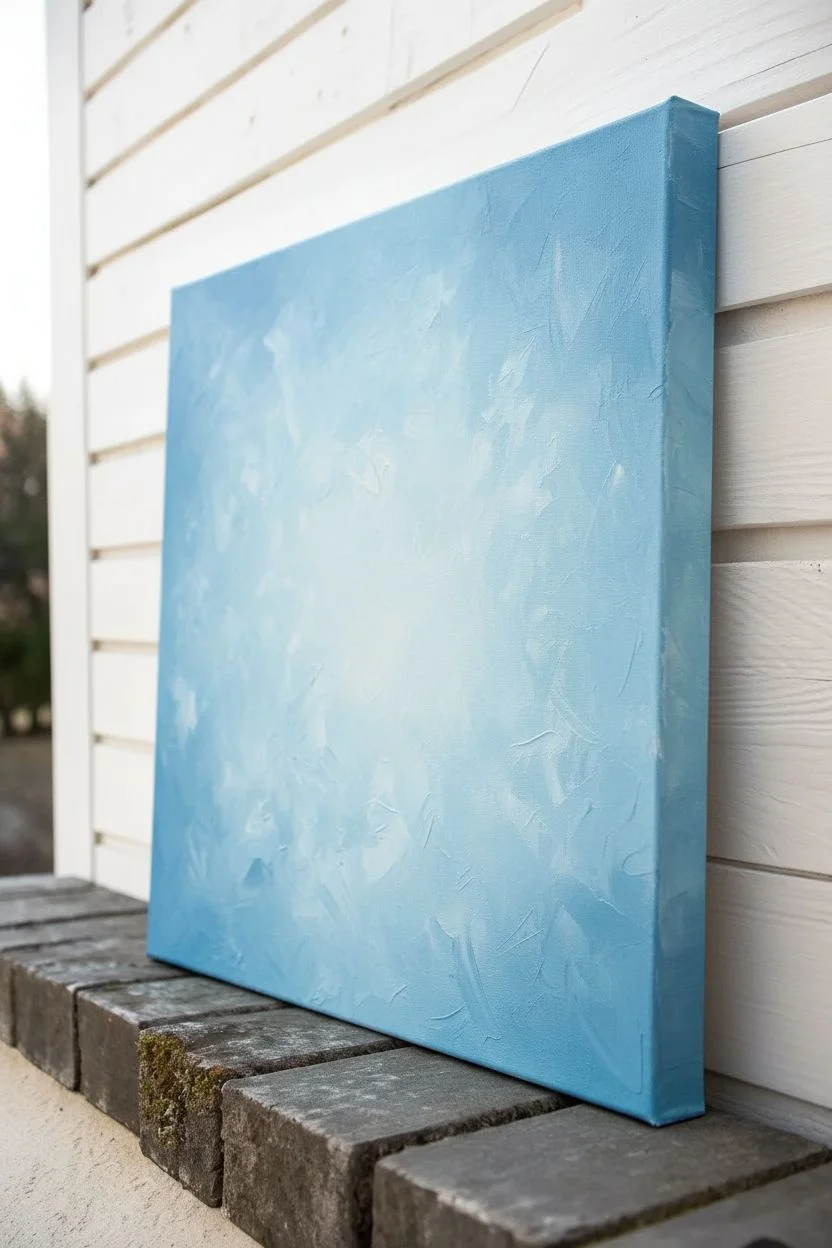
If you’re staring at a blank canvas, I’ve got you—I’ve taught enough first-time painters to know you just need one solid idea to get moving. These beginner acrylic painting ideas are all about simple techniques that look impressive fast, even if you don’t feel confident drawing yet.
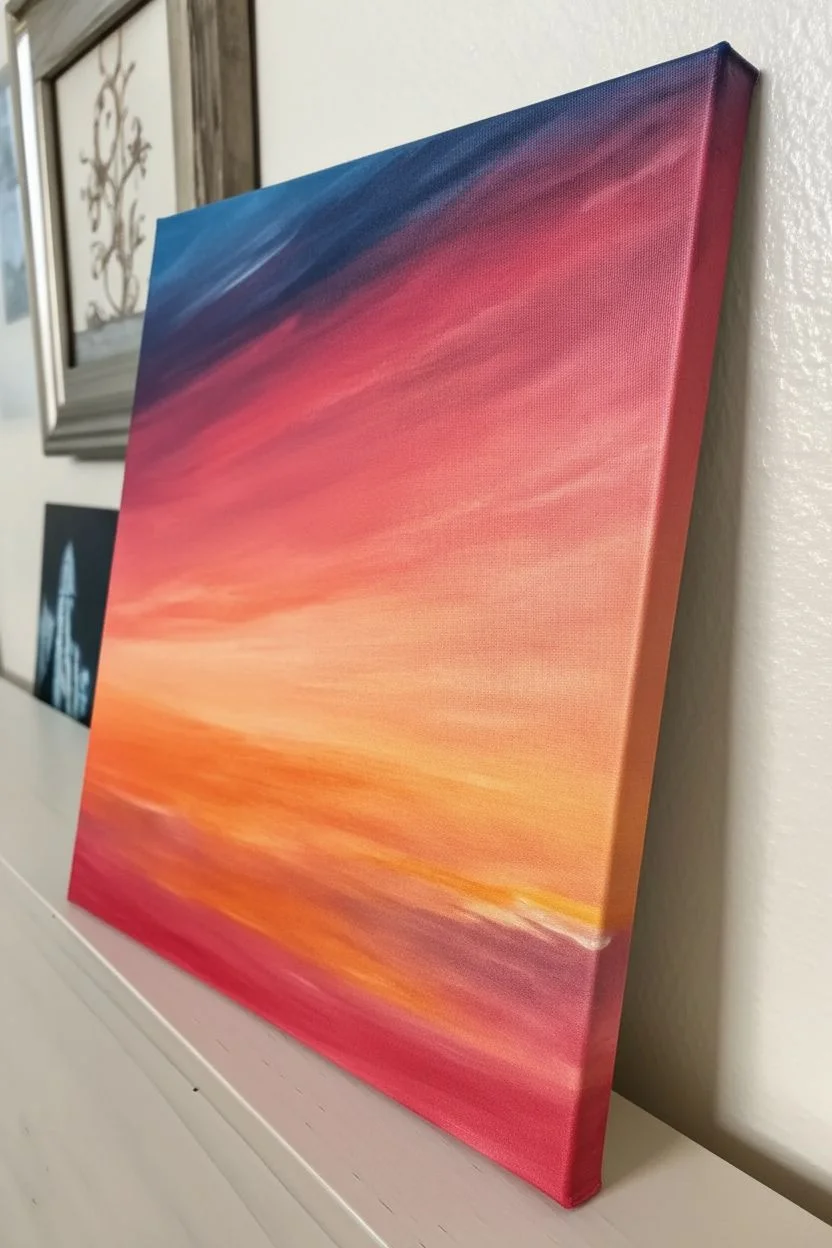
Sunset Gradient With a Simple Horizon Line
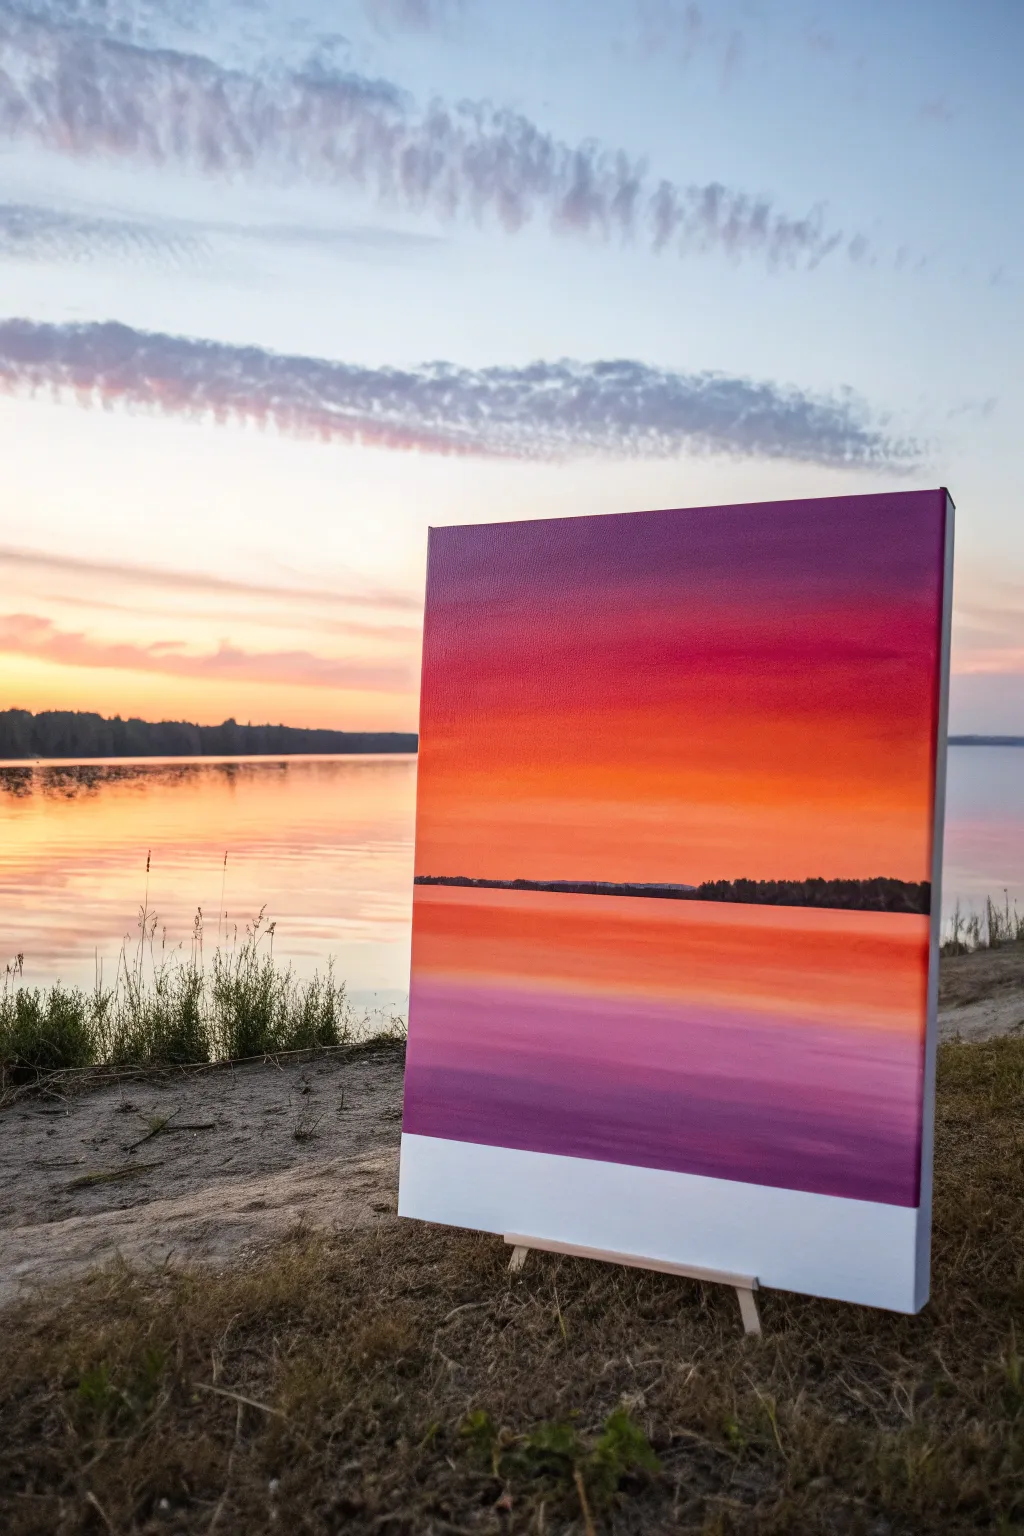
Capture the serene beauty of twilight with this striking gradient study. By blending vibrant purples, pinks, and oranges, you will create a seamless transition from sky to water, anchored by a simple silhouette horizon line.
How-To Guide
Materials
- Stretched canvas (rectangular, portrait orientation)
- Acrylic paints: Dioxazine Purple, Magenta or Alizarin Crimson, Cadmium Orange, Cadmium Yellow Medium, Titanium White, Black
- Large flat brush (1-2 inch) for blending background
- Medium filbert brush for water reflections
- Small round or detail brush for the tree line
- Palette or paper plate
- Jar of water
- Paper towels
- Painter’s tape or masking tape
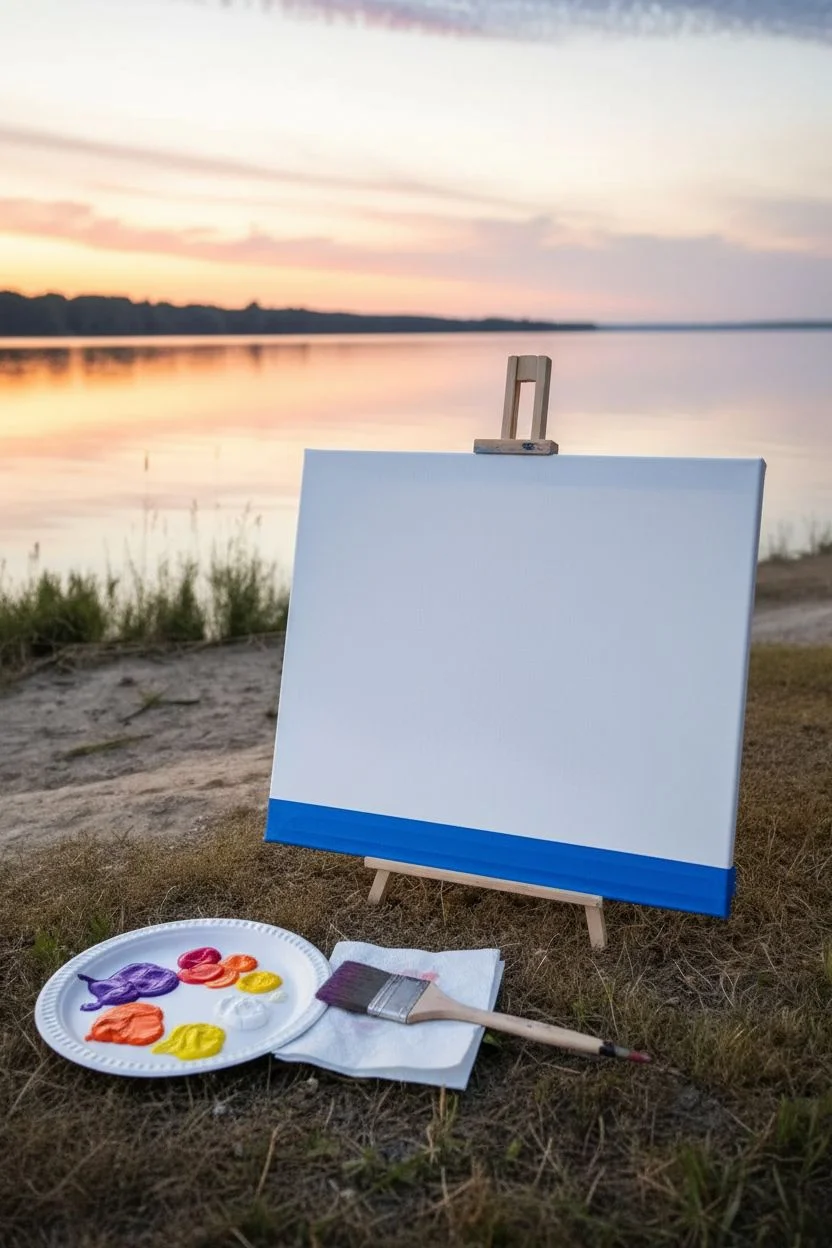
Step 1: Setting the Stage
-
Tape the Bottom Edge:
Begin by applying a crisp strip of painter’s tape across the very bottom of your canvas, leaving about 2-3 inches covered if you want that clean white border shown in the finished piece. Press the edges down firmly to prevent paint seepage. -
Prepare the Palette:
Squeeze out generous amounts of your sunset colors: Purple, Magenta, Orange, Yellow, and White. You’ll need plenty of paint to keep the canvas wet for smooth blending. -
Pre-wet the Canvas:
Dip your large flat brush in clean water and lightly dampen the entire canvas surface. This trick helps acrylics glide more smoothly and stays wet longer for the gradient effect.
Step 2: Painting the Sky Gradient
-
Deep Sky Start:
Using your large flat brush, load up on purple mixed with a tiny touch of magenta. Paint horizontal strokes across the top quarter of the canvas -
Transition to Pink:
Without cleaning your brush completely, pick up pure magenta. Blend this into the bottom edge of the purple section, working your way down. The colors should mix on the canvas to create a soft burgundy transition. -
Introduce Orange:
Now, wipe your brush significantly on a paper towel. Pick up orange paint and apply it below the pink band. Use long, sweeping horizontal strokes to melt the orange into the wet pink edge above it. -
Brightest Horizon:
Mix a little yellow into your orange to create a glowing tangerine shade. Paint this band right where your horizon line will eventually be, slightly below the halfway mark of the canvas. -
Smooth the Blend:
Dry your large brush completely. Very gently, sweep the dry brush back and forth across the transition lines between colors to soften any harsh stripes. I typically do this while the paint is still tacky.
Keep It Wet
Acrylics dry fast! Keep a spray bottle of water handy. A light mist over your canvas while blending keeps the paint workable without making it runny.
Step 3: Creating the Reflective Water
-
Mirror the Sky:
The water is essentially an inverted, slightly darker mirror of the sky. Start just below your horizon area with that same yellow-orange mix, but add a tiny dot of purple to dirty it slightly. -
Deepen the Water:
As you move lower on the canvas, transition back into your oranges and then pinks. Use horizontal strokes, but allow them to be slightly less perfect than the sky to mimic ripples. -
Base Water Tone:
For the bottom section of the water (just above your tape), mix your purple with a fair amount of white and a touch of magenta to create a hazy lavender-mauve. Paint this area solidly. -
Adding Reflection Lines:
Switch to a medium filbert brush. Using a lighter version of your pink/orange mix, add thin, streak-like horizontal lines across the mauve water section to suggest light catching the waves. -
Darker Ripples:
Conversely, mix a slightly darker purple tone. Add a few subtle horizontal streaks in the orange section of the water to create depth and movement.
Fixing Streaky Blends
If your gradient looks stripey, don’t panic. Let it dry completely, then glaze over the transition area with a very thin, watery layer of the lighter color.
Step 4: Final Details
-
Dry Time:
Let the entire background dry completely. If you paint the tree line while the orange background is wet, it will turn muddy. -
Horizon Line Base:
Using black paint and your small round brush, carefully paint a thin, straight horizontal line across the brightest part of your orange section to establish the distant shore. -
Painting the Silhouette:
Dab the tip of your small brush up and down along the top of that black line. Vary the height and shape of your dabs to mimic the uneven texture of distant treetops. -
Check the Reflection:
If you want the tree line to look reflective, you can lightly drag a tiny bit of watered-down black paint directly underneath the tree line into the water, but keep it very subtle. -
Remove the Tape:
Once the paint is dry to the touch, slowly peel off the painter’s tape at the bottom to reveal your crisp white edge.
Step back and admire your peaceful sunset—you’ve just mastered the art of the perfect gradient.


Silhouette Trees Against an Ombre Sky
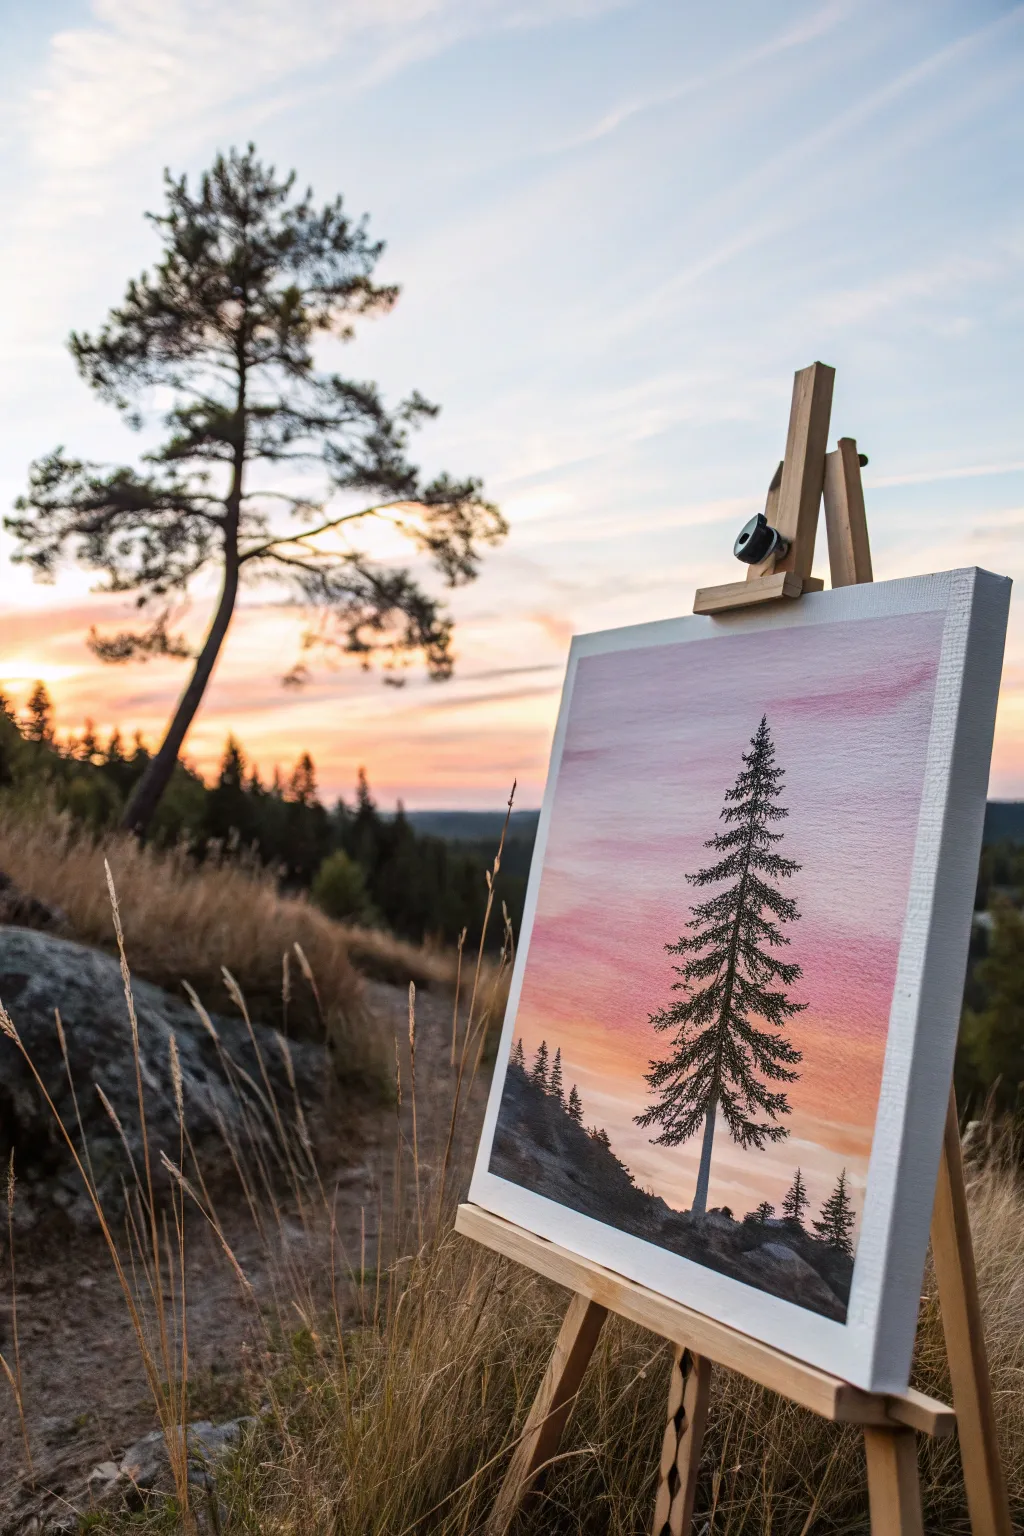

Learn to capture the serene beauty of twilight with this stunning beginner-friendly project. You’ll master smooth gradient blending to create an atmospheric sky before anchoring your composition with a striking pine tree silhouette.
Step-by-Step
Materials
- Stretched canvas (e.g., 11×14 or 12×16 inch)
- Acrylic paints: Titanium White, Pale Blue or Lavender, Soft Pink/Magenta, Light Orange, Yellow Ochre, Lamp Black, Burnt Umber
- Large flat brush (1 inch)
- Medium filbert brush
- Small round detail brush (size 0 or 1)
- Fan brush (optional but helpful)
- Palette for mixing
- Cup of water and paper towels
Step 1: The Ombre Sky
-
Prepare the palette:
Squeeze out your sky colors: Pale Blue, Soft Pink, Light Orange, and Titanium White. Having them ready is crucial for successful wet-on-wet blending. -
Start at the top:
Using your large flat brush, mix a touch of white with the Pale Blue or Lavender. Paint a horizontal strip across the very top quarter of the canvas using long, smooth strokes. -
Introduce the pink:
Without cleaning your brush fully, pick up some Soft Pink and mix it slightly with the blue on your palette. Apply this below the blue strip, overlapping the wet edges to create a soft, purple-hued transition. -
Warm up the horizon:
Clean your brush. Pick up the Light Orange and blend it into the pink section, moving downward. As you approach the bottom third, mix in some Yellow Ochre to create a warm glow. -
Smooth the gradient:
With a clean, slightly damp brush, gently sweep back and forth across the transition lines between colors. Use a light hand to blur the hard edges until the sky looks like a seamless fade. -
Add subtle clouds:
While the sky is still tacky, use a small amount of watered-down Titanium White on a filbert brush. Whispering horizontal streaks across the pink and blue sections creates faint, wispy clouds. -
Let it dry:
Allow the background to dry completely. This is essential; if the sky is wet, your sharp black silhouette will turn muddy and gray.
Brush Control Secret
For sharp pine needles, roll your damp round brush into a fine point on the palette before painting. Don’t overload it with paint, or the tips will look blobbby.
Step 2: The Silhouetted Landscape
-
Mix the dark tone:
Create a rich dark color by mixing Lamp Black with a tiny touch of Burnt Umber. Pure black can look flat, so the brown adds warmth and depth. -
Paint the terrain:
Using the medium filbert brush, paint a rolling hill shape at the bottom of the canvas. Make one side slightly higher than the other to create visual interest. -
Detail the foreground:
Tap the tip of your brush along the top edge of the black hill to simulate uneven ground, rocks, or low bushes rather than a perfectly smooth line. -
Mark the tree trunk:
Switch to your small round brush. Draw a thin, straight vertical line starting from the hill and reaching up into the pink section of the sky. This guides your tree’s height. -
Thicken the base:
Go back over the bottom third of the trunk line, making it slightly wider at the base and tapering it as it goes up. -
Start the branches:
Starting near the top of the tree, use the very tip of your small brush (or a fan brush turned vertically) to tap in short, downward-sloping branches. -
Build the foliage:
Work your way down the trunk, making the branches progressively wider. Use a messy, tapping motion rather than painting individual needles to create a natural texture. -
Create gaps:
Leave small spaces between some branch layers where the sunset sky can peek through. This makes the tree look realistic and less like a solid triangle. -
Add smaller trees:
paints a few tiny, distant trees on the lower corners of the hill using the same tapping technique but with much less detail. -
Final touches:
Add a few tiny vertical strokes at the base of the main tree to suggest tall grass growing against the trunk.
Add Depth
Mix a dark grey (black + white) and tap it gently on the ‘sunny’ side of the tree trunk and rocks. This subtle highlight simulates the sunset hitting the silhouette.
Step back and admire how your sharp, dark tree pops against that soft, glowing sky.


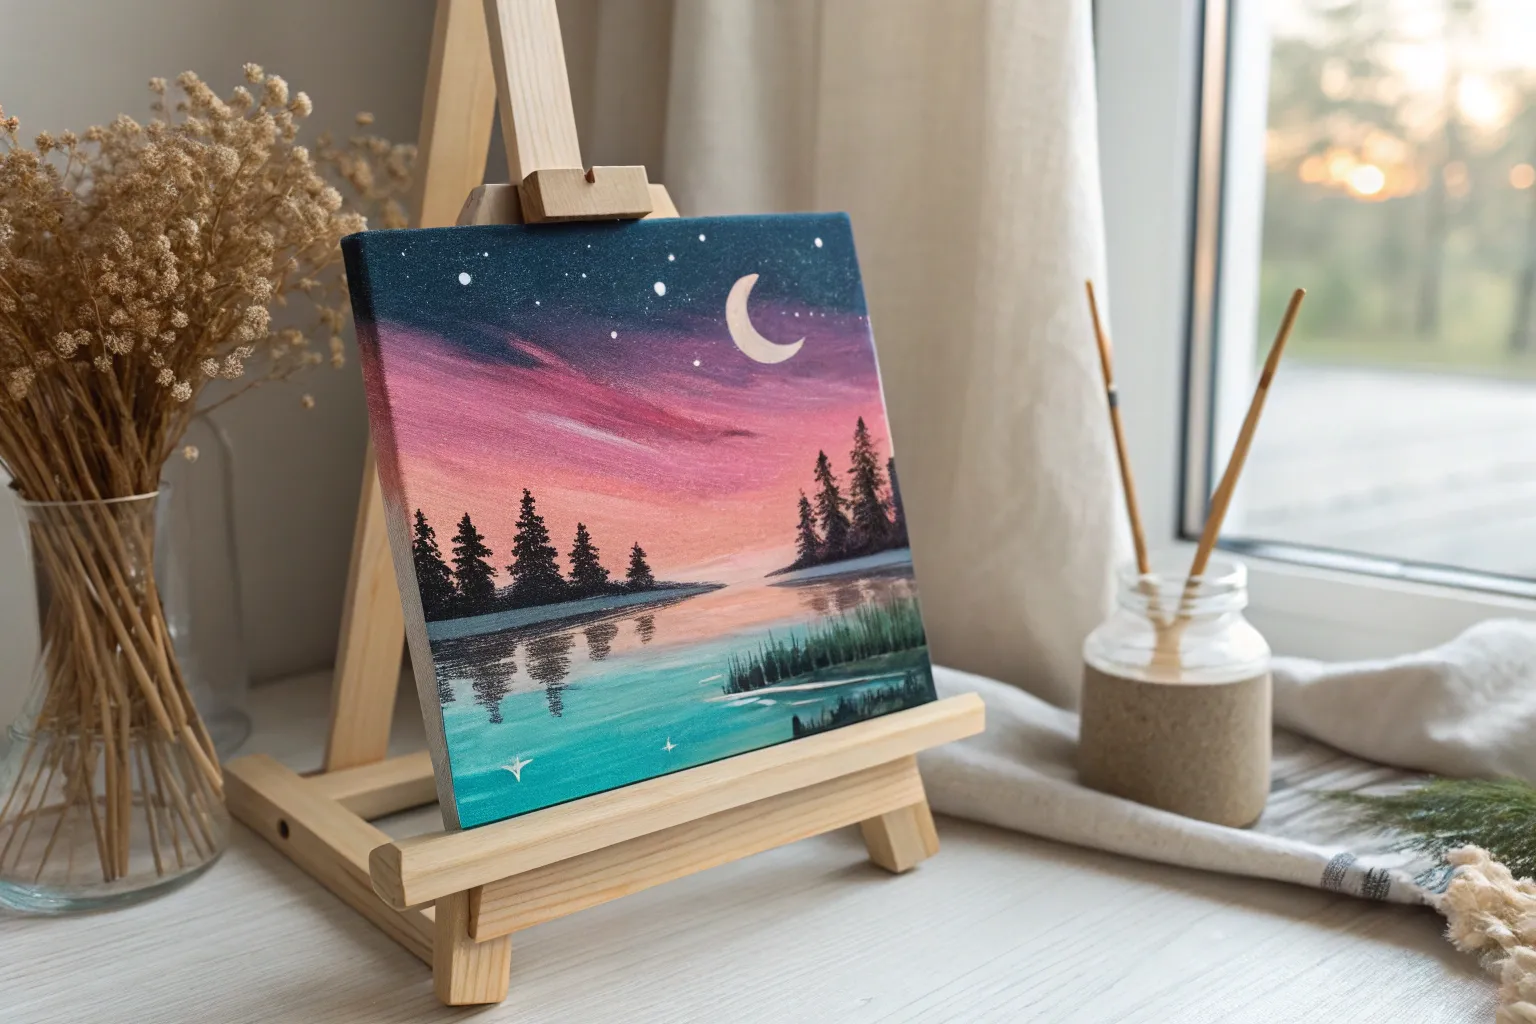
Moon and Clouds in a Dreamy Night Sky
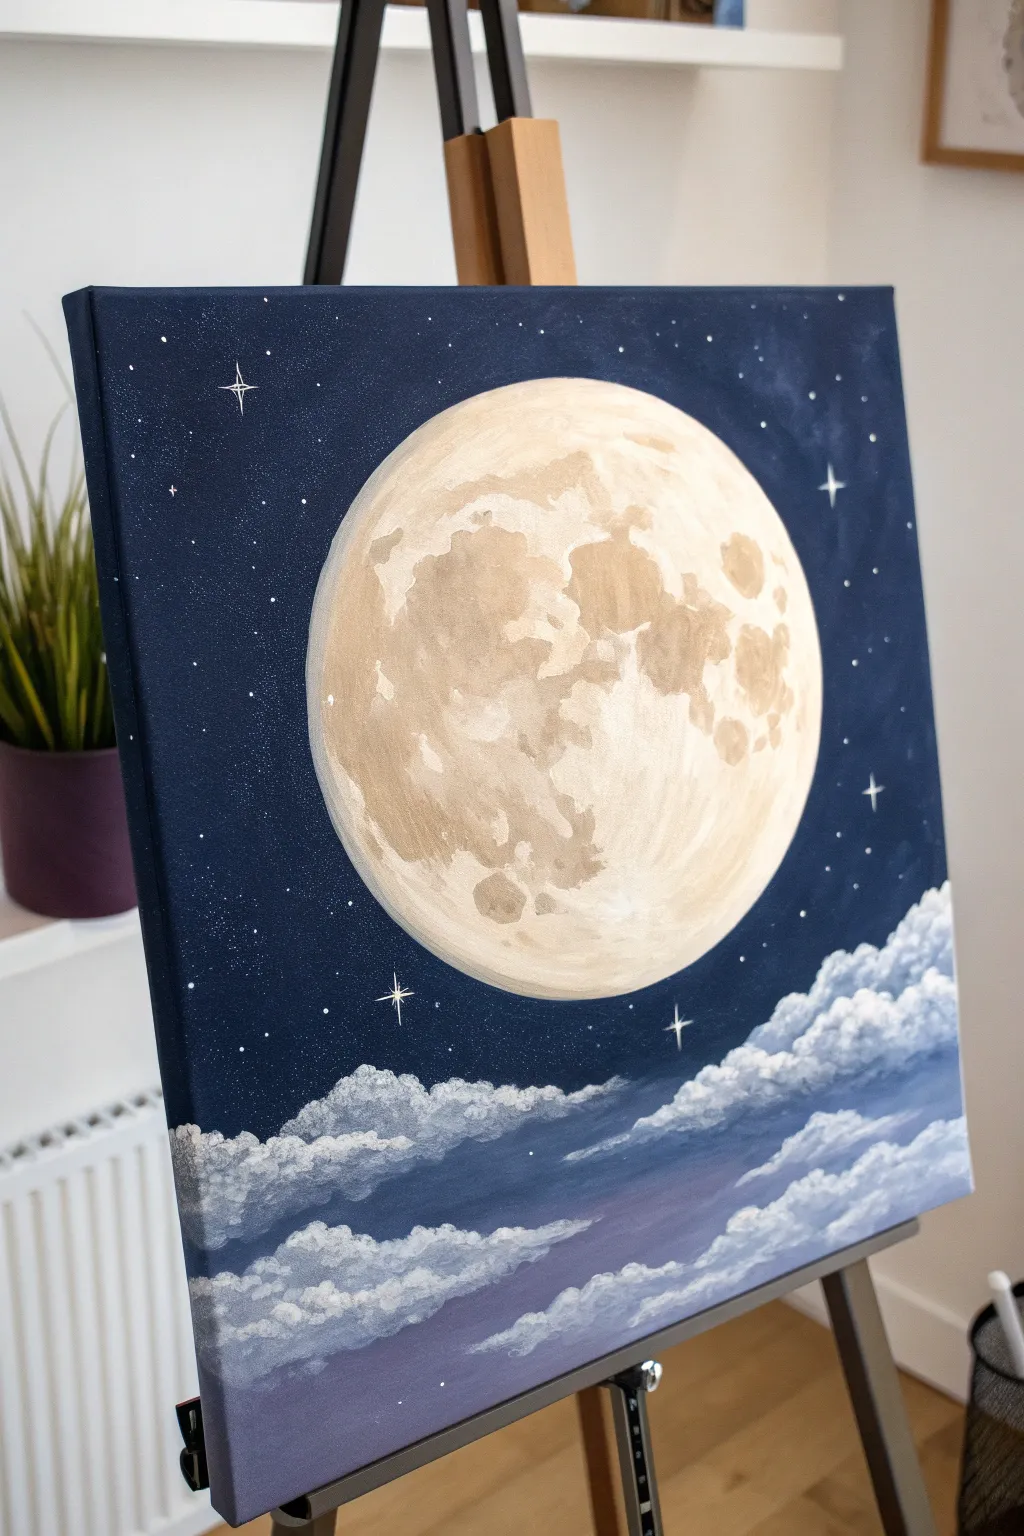
Capture the magic of a clear night sky with this serene acrylic painting, featuring a luminous, detailed full moon hovering above a bed of soft, fluffy clouds. The deep blue background provides a stunning contrast to the warm, creamy tones of the cratered lunar surface.
How-To Guide
Materials
- Square stretched canvas (e.g., 12×12 or 16×16 inches)
- Acrylic paints: Phthalo Blue (or Prussian Blue), Titanium White, Mars Black, Burnt Umber, Yellow Ochre, Purple (Dioxazine)
- Large flat brush (1-inch) for background
- Medium filbert brush for clouds
- Small round brush for details
- Fine liner brush for stars
- Compass or round object (plate/bowl) for tracing
- Pencil
- Palette and water cup
- Old toothbrush (optional for stars)
Step 1: Setting the Night Sky
-
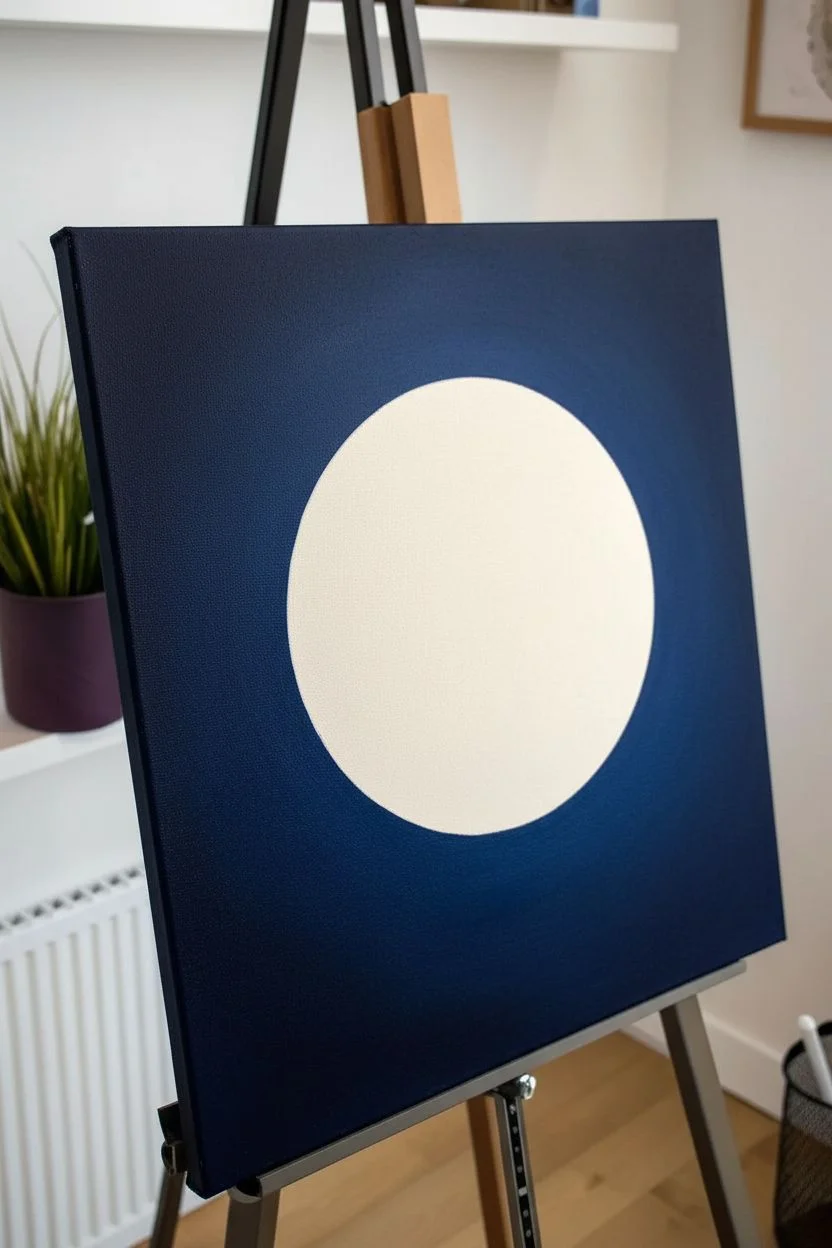
Trace the moon:
Begin by positioning your round object or compass slightly above the center of the canvas. Keep it large and prominent. Lightly trace the circle with a pencil to reserve the space for your moon. -
Mix the background color:
On your palette, mix a deep, dark blue using Phthalo Blue and a touch of Mars Black. You want a color that looks almost black but retains a rich blue undertone. -
Paint around the moon:
Using your large flat brush, paint the entire canvas outside of your pencil circle. Be careful to cut in neatly around the moon’s edge to keep that shape crisp. -
Add subtle gradients:
While the paint is still wet, mix a tiny amount of Purple or slightly lighter Blue into your dark mixture. Blend this into the corners or edges to create very subtle atmospheric depth, rather than a flat, solid color. -
Let it dry:
Allow the background layer to dry completely. If the canvas shows through, apply a second coat for a truly opaque, velvety night sky.
Perfect Circles
If painting around the circle is hard, paint into the moon area slightly, let it dry, then trace your object again and paint the moon base coat over the overlapping blue.
Step 2: Painting the Cratered Moon
-
Base coat the moon:
Mix Titanium White with just a speck of Yellow Ochre to create a warm, creamy off-white. Fill in the entire moon circle with this base color. -
Mix crater colors:
Create a ‘shadow’ color by mixing Titanium White, a small amount of Burnt Umber, and a tiny touch of Yellow Ochre. It should be a light beige-tan. -
Map the craters:
Looking at the reference photo, use a small round brush to dab the tan mixture onto the moon. Focus on the left side and the upper right area, creating organic, blotchy shapes. -
Build texture:
While the paint is wet, use a scruffy or dry brush to dab the edges of your tan spots. This softens them and creates that realistic, cratered texture. -
Deepen shadows:
Mix a slightly darker brown using more Burnt Umber. Add this selectively inside the larger tan areas to create depth within the ‘seas’ of the moon. -
Highlight the bright side:
Clean your brush and pick up pure Titanium White. dry-brush highlights along the bottom right edge of the moon to make it look spherical and glowing.
Step 3: Creating Clouds and Stars
-
Start the cloud base:
Mix a medium grey-blue using White, Phthalo Blue, and a touch of Purple. Using a filbert brush, paint rolling cloud shapes along the bottom third of the canvas. -
Fluff carefully:
Use a tapping circular motion with the tip of your brush to create the fluffy top edges of the clouds. Don’t paint straight lines; let the tops be bumpy and irregular. -
Add shadows:
Mix a darker purple-grey. Paint the undersides of the cloud formations with this color to give them volume and weight. -
Highlight the cloud tops:
Mix a very light blue (almost white). Tap this color onto the very top edges of the clouds where the moonlight would hit them. -
Splatter stars:
Dilute some Titanium White with water until it’s inky. Dip an old toothbrush or stiff brush in it and flick the bristles to spray tiny stars across the dark sky. -
Paint hero stars:
Switch to your fine liner brush. Choose 3-5 spots and paint four-pointed stars (a cross shape with elongated vertical lines) to mimic twinkling starlight.
Glow Up
Mix a transparent glaze with water and Zinc White. Lightly brush a very thin halo around the outside of the moon to create a glowing atmospheric haze.
Step back and admire the celestial calm you have brought to your canvas


Easy Starry Galaxy With Splatter Stars
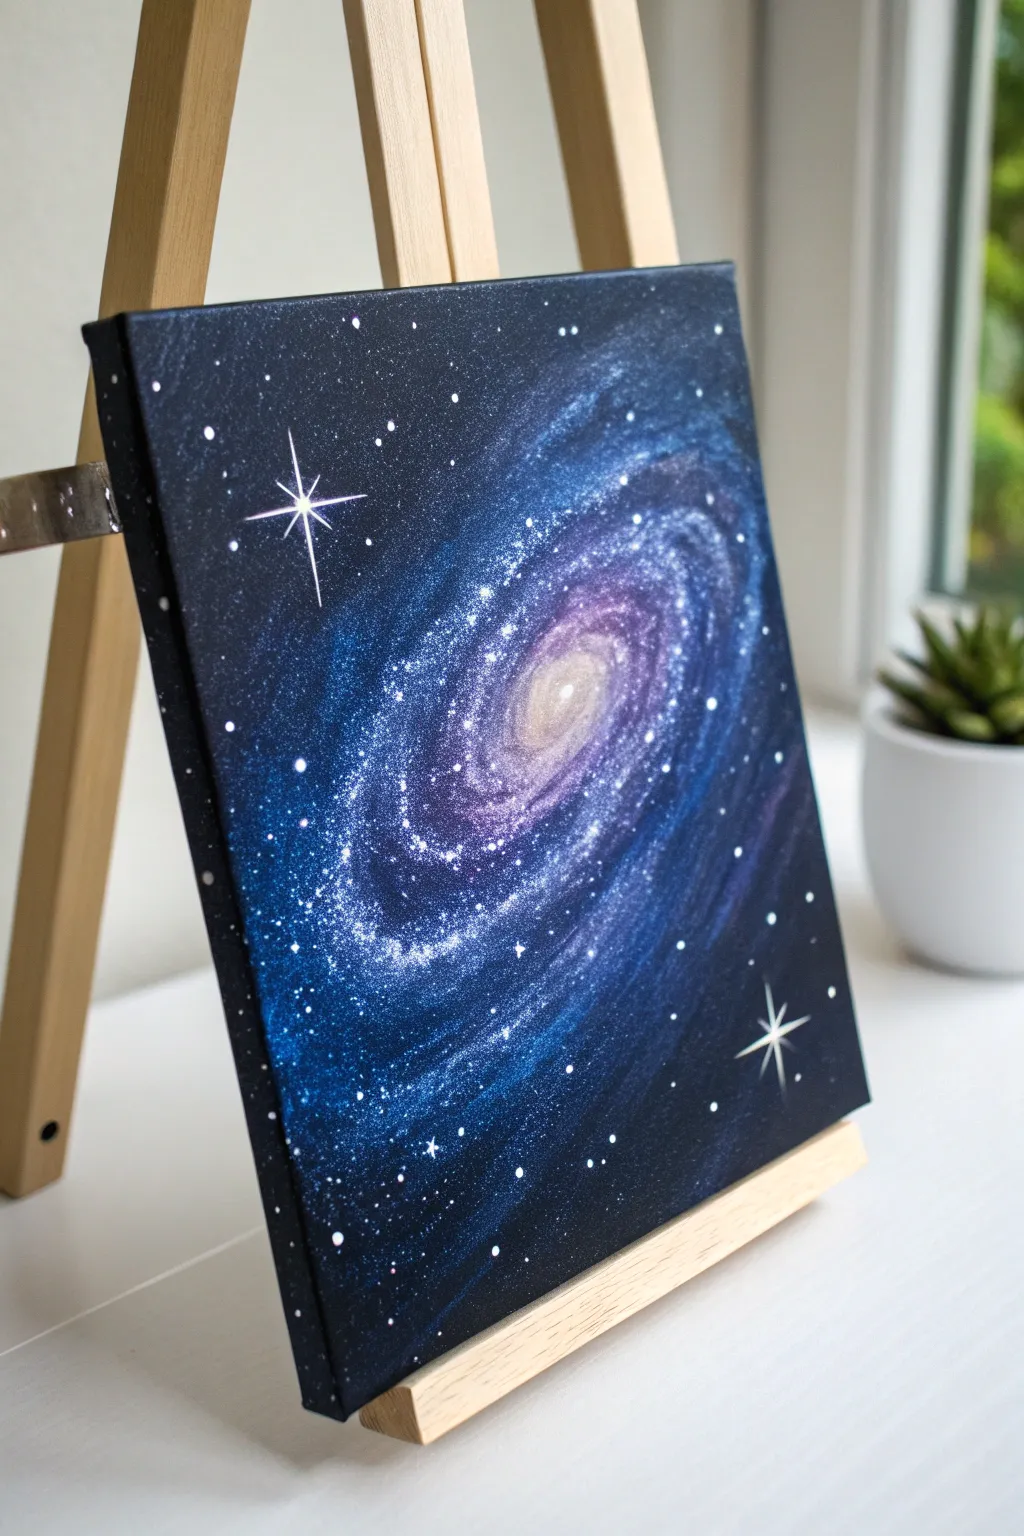
Capture the magic of deep space with this stunning spiral galaxy painting. Using simple blending techniques and splatter stars, you can create a mesmerizing cosmic scene that glows against a dark background.
Step-by-Step Tutorial
Materials
- Square stretched canvas (e.g., 8×8 or 10×10 inches)
- Acrylic paints: Black, Pthalo Blue, Dioxazine Purple, Titanium White (and optionally a touch of pale yellow)
- Flat shader brush (approx. 1/2 inch) for background
- Round brush (medium size) for galaxy blending
- Small fine liner brush for stars
- Old toothbrush (stiff bristles) for splatter stars
- Cup of water
- Paper towels or rag
- Palette or paper plate
Step 1: Setting the Background
-
Preparation:
Set up your workspace with a protective covering, as the star splattering step can get messy. Squeeze out generous amounts of black and blue paint onto your palette. -
Base coat:
Using your large flat brush, paint the entire canvas with a solid coat of black acrylic paint. Don’t forget to paint the edges of the canvas for a finished look. -
First layer of depth:
While the black is still slightly tacky (or after drying, if you prefer smoother layering), mix a dark navy blue using black and Pthalo Blue. Paint roughly around the outer corners and edges, leaving the center purely black for now. -
Drying time:
Let this dark base layer dry completely. This is crucial so your bright galaxy colors don’t turn muddy when applied on top.
Cosmic Cloud Tip
Use a dry sponge instead of a brush for the galaxy arms. lightly dabbing creates a natural, fluffy nebulous texture that looks incredible for space gas
Step 2: Creating the Galaxy
-
Mapping the spiral:
Take a slightly damp round brush and mix Pthalo Blue with a tiny bit of white to make a medium blue. Start in the center and paint an oval shape, dragging the paint outwards in curved, sweeping arms to form a basic spiral structure. -
Adding purple tones:
While the blue is still wet, clean your brush and pick up some Dioxazine Purple mixed with a touch of white. Blend this into the inner sections of the spiral arms, allowing the purple and blue to mix on the canvas. -
Brightening the core:
Mix a lighter shade of purple (add more white) and apply it closer to the center of the galaxy. Use a dry brush technique—wiping most paint off on a paper towel—to softly feather the edges so the galaxy looks like glowing gas rather than hard lines. -
The glowing center:
For the very center “eye” of the galaxy, mix Titanium White with the tiniest speck of yellow (or just use pure white). Dab this into the center and blend it outward slightly into the purple, creating a bright focal point. -
Layering light:
Go back with a lighter blue (more white, less blue) and highlight the outer edges of the spiral arms. I find that dabbing the brush rather than stroking helps create a textured, ‘dusty’ star-cloud effect. -
Deepening contrast:
If you’ve lost some contrast, take a little watered-down black on a small brush and glaze the darker spaces between the spiral arms to make the bright arms pop more.
Splatter Control
Practicing the splatter on a scrap paper first is vital. If huge drops land on your art, blot them immediately with a damp paper towel to lift the paint
Step 3: Stars and Details
-
Mixing splatter paint:
Mix a small puddle of white paint with enough water to make it the consistency of heavy cream or ink. It needs to be fluid enough to fly off a brush but opaque enough to show up. -
The splatter technique:
Dip an old toothbrush into your watery white paint. Hold it facing the canvas and run your thumb across the bristles to spray fine mist over the painting. Focus heavily on the galaxy bands and less on the dark corners. -
Alternative splatter:
If you don’t have a toothbrush, you can tap a wet, paint-loaded paintbrush against another brush handle over the canvas to create slightly larger star clusters. -
Adding large stars:
Use your fine liner brush and pure white paint to dot in a few larger, distinct stars randomly around the galaxy. -
Painting the twinkle stars:
Locate two or three spots for major stars (like the one in the top left). Paint a small white dot, then carefully pull long, thin lines outward from the center: one vertical line and one horizontal line to make a cross. -
Reinforcing the twinkle:
To make these cross-stars shine, paint a smaller ‘X’ shape diagonally through the center of the cross you just made. Keep the paint thin and let the ends of the lines fade out. -
Final touches:
Step back and assess your work. If the galaxy needs more glow, add a very thin glaze of white over the brightest spiral arm sections once everything is dry.
Allow your interstellar masterpiece to dry completely before signing your name in the corner
BRUSH GUIDE
The Right Brush for Every Stroke
From clean lines to bold texture — master brush choice, stroke control, and essential techniques.
Explore the Full Guide
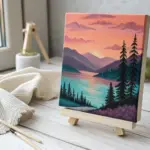
Mountain Lake With Simple Reflections
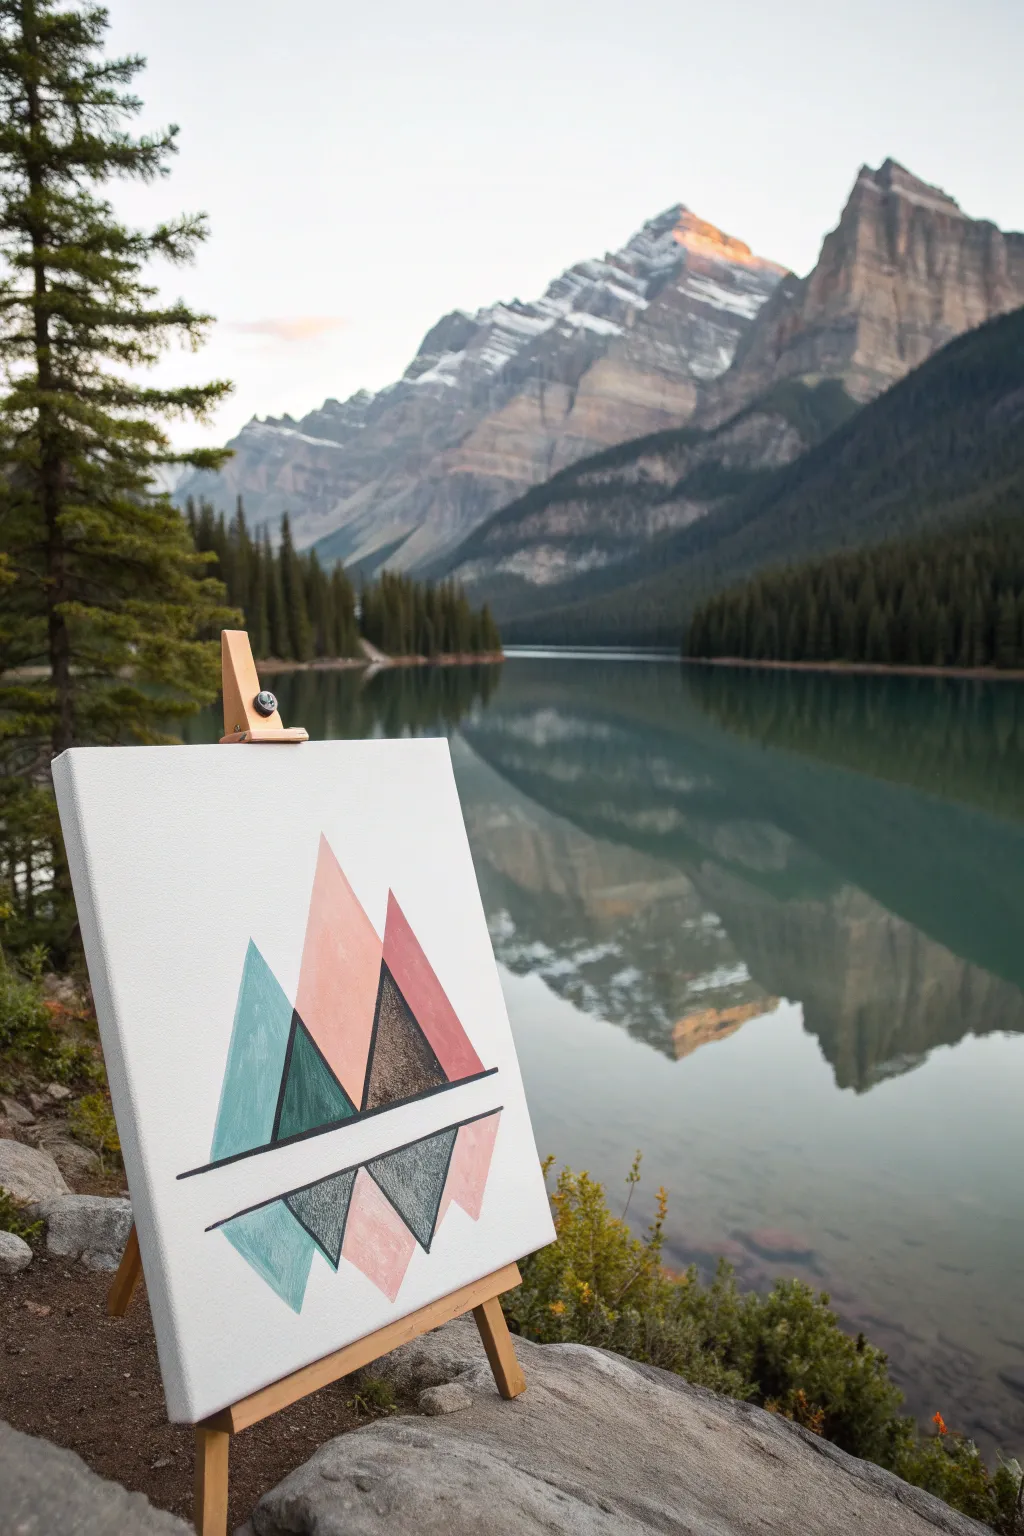
Capture the serenity of a mountain lake using a sleek, modern geometric style that simplifies complex shapes into clean triangles. This project plays with symmetry and muted, natural color palettes to create a striking abstract landscape perfect for beginners.
Detailed Instructions
Materials
- Small rectangular canvas (approx. 8×10 or 9×12 inches)
- Acrylic paints: Teal/Turquoise, Forest Green, Pastel Pink/Salmon, Dark Brown, Black, White
- Painter’s tape (low tack)
- Flat brush (medium size)
- Fine detail brush (for lines)
- Ruler
- Pencil
- Palette
Step 1: Planning and Taping
-
Prep the canvas:
Start with a clean, white canvas. If you want a smoother surface, apply a coat of gesso and let it dry, but the raw canvas texture works well for this rustic look too. -
Establish the horizon:
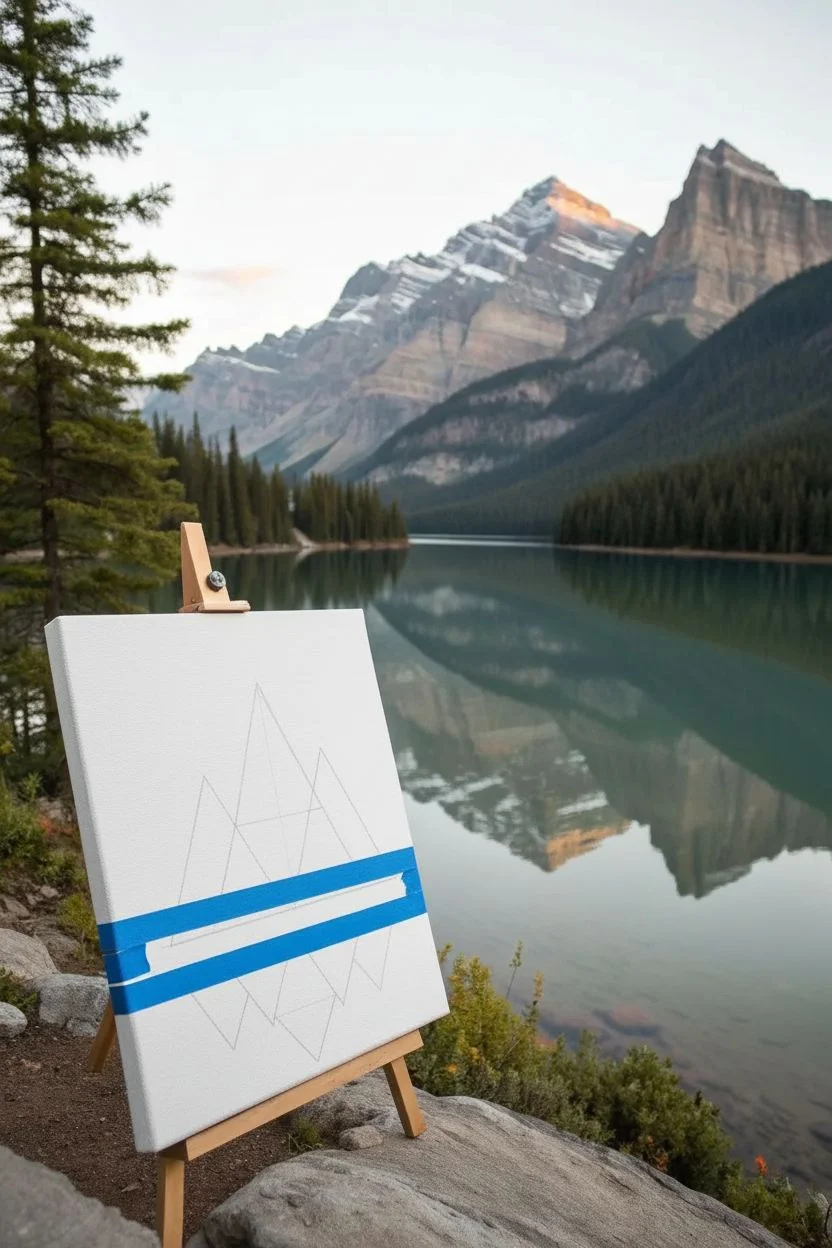
Using your ruler and pencil, draw a horizontal line across the lower third of the canvas. This line will separate the actual mountains from their reflections. -
Tape the horizon gap:
Place two strips of painter’s tape horizontally across your pencil line, leaving a small gap (about 1/4 inch) of white space between them. This negative space acts as the visual break between the sky and the water. -
Sketch the mountains:
Lightly sketch three main triangles resting on the top tape line. Make the center one the tallest and tallest, overlapping the others slightly. These are your mountains. -
Sketch the reflections:
Sketch three corresponding triangles pointing downward from the bottom tape line. They should roughly mirror the size and position of the top triangles, though perfect symmetry isn’t required for an abstract feel.
Step 2: Painting the Peaks
-
Apply tape masks:
To get crisp edges, apply painter’s tape along the outside edges of your first mountain triangle. Press the edges down firmly with your fingernail to prevent paint bleed. -
Paint the first peak:
Mix a muted teal color with white and a touch of blue. Fill in the leftmost mountain triangle using your flat brush, brushing away from the tape edge to keep the line sharp. -
Paint the reflection:
Using that same teal mix, paint the corresponding reflection triangle on the bottom half. I find it easier to do the pairs together so the colors match perfectly. -
Peel and dry:
Gently peel off the tape for the teal sections immediately while the paint is wet. Let these sections dry completely before taping over them for the next shapes. -
Tape the center peak:
Once the teal paint is dry to the touch, apply fresh tape to outline the large central triangle. It’s okay if the tape overlaps the dried teal paint. -
Mix and apply pink:
Mix a soft salmon pink using pink, orange, and plenty of white. Fill in the large central peak and its downward-pointing reflection. -
Remove tape:
Carefully remove the tape to reveal the clean pink triangles. Allow this layer to dry fully. -
Tape the final peak:
The third mountain on the right visually sits ‘behind’ the pink one. Tape off this shape, ensuring you don’t tape over wet paint. -
Paint the dark accents:
Use a darker mauvish-brown or deep terracotta for this final peak. Paint both the top mountain and the bottom reflection.
Bleeding Lines?
If paint bleeds under the tape, wait for it to dry completely. Then, simply use your white background paint and a small angle brush to paint over the mistake and straighten the edge.
Step 3: Adding Depth and Detail
-
Add intersecting shadows:
Look at where your triangles overlap. Tape off small subsections within the existing shapes to paint darker ‘shadow’ triangles—specifically a dark green overlapping the teal, and a dark brown overlapping the pink reflection. This creates the illusion of translucency. -
Enhance texture:
For the darker overlap sections, try using a slightly ‘dry brush’ technique. Dab minimal paint onto the canvas to let the weave show through, giving it a grainy, stone-like texture. -
Remove horizon tape:
Once all colored sections are fully dry, carefully peel off the two horizontal strips of tape that created the horizon gap. -
Draft the defining lines:
Using a ruler, lightly re-draw the horizontal lines if the edges look messy. Also, verify where you want your heavy black accent lines to go along the base of the mountains. -
Paint the bold lines:
Load a fine detail brush or a paint pen with black acrylic. Paint a definitive black line along the base of the top mountains and another along the top of the reflections. -
Final touch-ups:
Check for any uneven edges. You can use white paint to clean up the negative space between the horizon lines or the background if needed.
Go Metallic
Swap the grey or brown paint for a metallic gold or copper acrylic. Using metallic paint for just one of the triangles adds a modern, luxurious shine that catches the light.
Step back and admire how simple shapes can capture the majesty of a mountain landscape
Beach Waves Using Loose, Layered Strokes

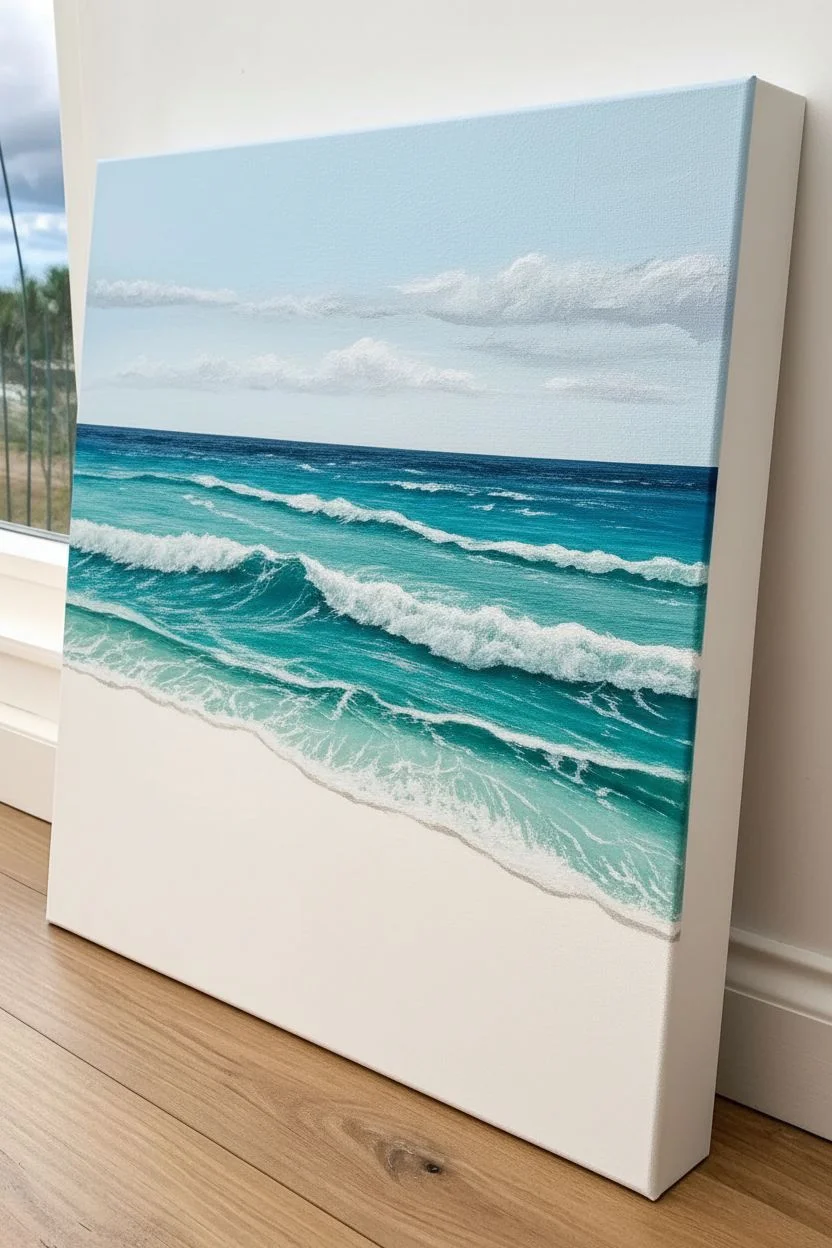
Capture the serene beauty of a turquoise coastline with this textured wave study that emphasizes depth and motion. By using thick body acrylics and strategic layering, you will build waves that seem to crash right off the canvas.
Step-by-Step Tutorial
Materials
- Gallery-wrapped canvas (rectangular, vertical orientation)
- Heavy body acrylic paints: Titanium White, Ultramarine Blue, Phthalo Green/Turquoise, Cerulean Blue, Burnt Umber
- Large flat brush (1-inch or 2-inch)
- Medium filbert brush
- Palette knife
- Texture paste or modeling paste (optional for extra foam thickness)
- Cup of water and paper towels
Step 1: Setting the Horizon and Sky
-
Prime the sky:
Start with the sky area, roughly the top third of your canvas. Mix Titanium White with a tiny dot of Cerulean Blue to create a very pale, airy blue. Apply this horizontally across the top section using your large flat brush. -
Add distant clouds:
While the sky is still slightly tacky, mix a touch of grey using White and a speck of Burnt Umber. Using a smaller brush, dab in horizontal, wispy cloud shapes near the horizon line to create atmosphere. -
Establish the horizon line:
Draw a straight horizon line across the canvas using masking tape if you want it perfectly level. Mix Ultramarine Blue with a touch of Phthalo Green for a deep, dark ocean blue. Paint a thin, dark band right at the horizon line.
Palette Knife Magic
For realistic sea foam, don’t overwork the white paint. Apply it with the knife and leave it alone; the rough ridges naturally catch light like real bubbles.
Step 2: Building the Ocean Gradient
-
Block in the deep water:
Below the horizon line, paint a band of deep turquoise. Mix Phthalo Green, Ultramarine Blue, and a little White to get a rich teal color. Apply this in horizontal strokes. -
Transition to lighter waters:
As you move down the canvas towards the middle section, gradually add more White and Phthalo Green to your mix. The water should become lighter and more vibrant turquoise as it gets ‘shallower’ or closer to the viewer. -
Paint the translucent foreground:
For the wave closest to the sand, mix a very pale, watery green-blue using mostly White with a hint of Phthalo Green. Paint this area in sweeping, curved strokes that mimic the shape of a crashing wave. -
Create the sand base:
Mix Titanium White with a tiny amount of Burnt Umber to make a warm, sandy beige. Paint the bottom section of the canvas, blending it slightly into the wet pale blue water to show transparency.
Golden Hour Glow
Glaze the top of the water and sand with a very thin, transparent layer of watered-down yellow ochre to simulate a warm sunrise lighting effect.
Step 3: Sculpting the Waves
-
Map out wave ridges:
Let the base layer dry completely. Using a darker teal mix, paint thin, undulating lines where the shadows of the waves will be. These lines define the trough behind each crashing wave. -
Start the foam accents:
Load a filbert brush with pure Titanium White. Gently dry-brush along the top edges of your wave ridges. Keep the paint relatively dry to let the canvas texture show through, mimicking broken water. -
Build the main crashing wave:
Identify the largest wave in the middle foreground. Apply thicker white paint here, using a dabbing motion to create the fluffy, churning look of crashing foam. -
Add movement to the water:
Using a thin liner brush and watered-down white paint, add fine, curved lines in the deep turquoise sections. These should follow the flow of the water, showing the currents pulling back.
Step 4: The Sea Foam Finale
-
Mix texture paste:
If you want the 3D effect shown in the image, mix your Titanium White paint with an equal part of modeling paste. If you don’t have paste, just use heavy body paint straight from the tube. -
Apply foreground foam:
Scoop the thick white mixture onto a palette knife. Spread it aggressively across the bottom ‘sand’ section where the water rushes up. Use the flat side of the knife to drag the paint, creating organic, rocky textures. -
Highlight the crests:
Take a little more of your thick white mixture on the tip of the palette knife and dab it onto the very peaks of the waves further back in the water. This catches the light and adds dimension. -
Splatter for spray:
Dilute a small amount of white paint with water until it’s inky. Load a stiff brush and flick the bristles with your finger to spray tiny white droplets over the crashing sections for sea spray. -
Paint the sides:
Don’t forget the edges of your gallery-wrapped canvas. Extend the horizon line and wave colors around the sides so the painting looks finished from every angle. -
Final highlights:
Once everything is dry, add a few pure white highlights with a small brush on the wettest part of the sand to make it look glistening and reflective. -
Sign and seal:
Sign your name in the corner using a contrasting color like deep blue. Once fully cured (which may take a day or two for thick textures), varnish with a gloss medium to enhance the ‘wet’ look of the water.
Hang your seascape in a bright spot and enjoy your permanent view of the ocean

PENCIL GUIDE
Understanding Pencil Grades from H to B
From first sketch to finished drawing — learn pencil grades, line control, and shading techniques.
Explore the Full Guide
Birch Tree Trunks With Easy Bark Marks
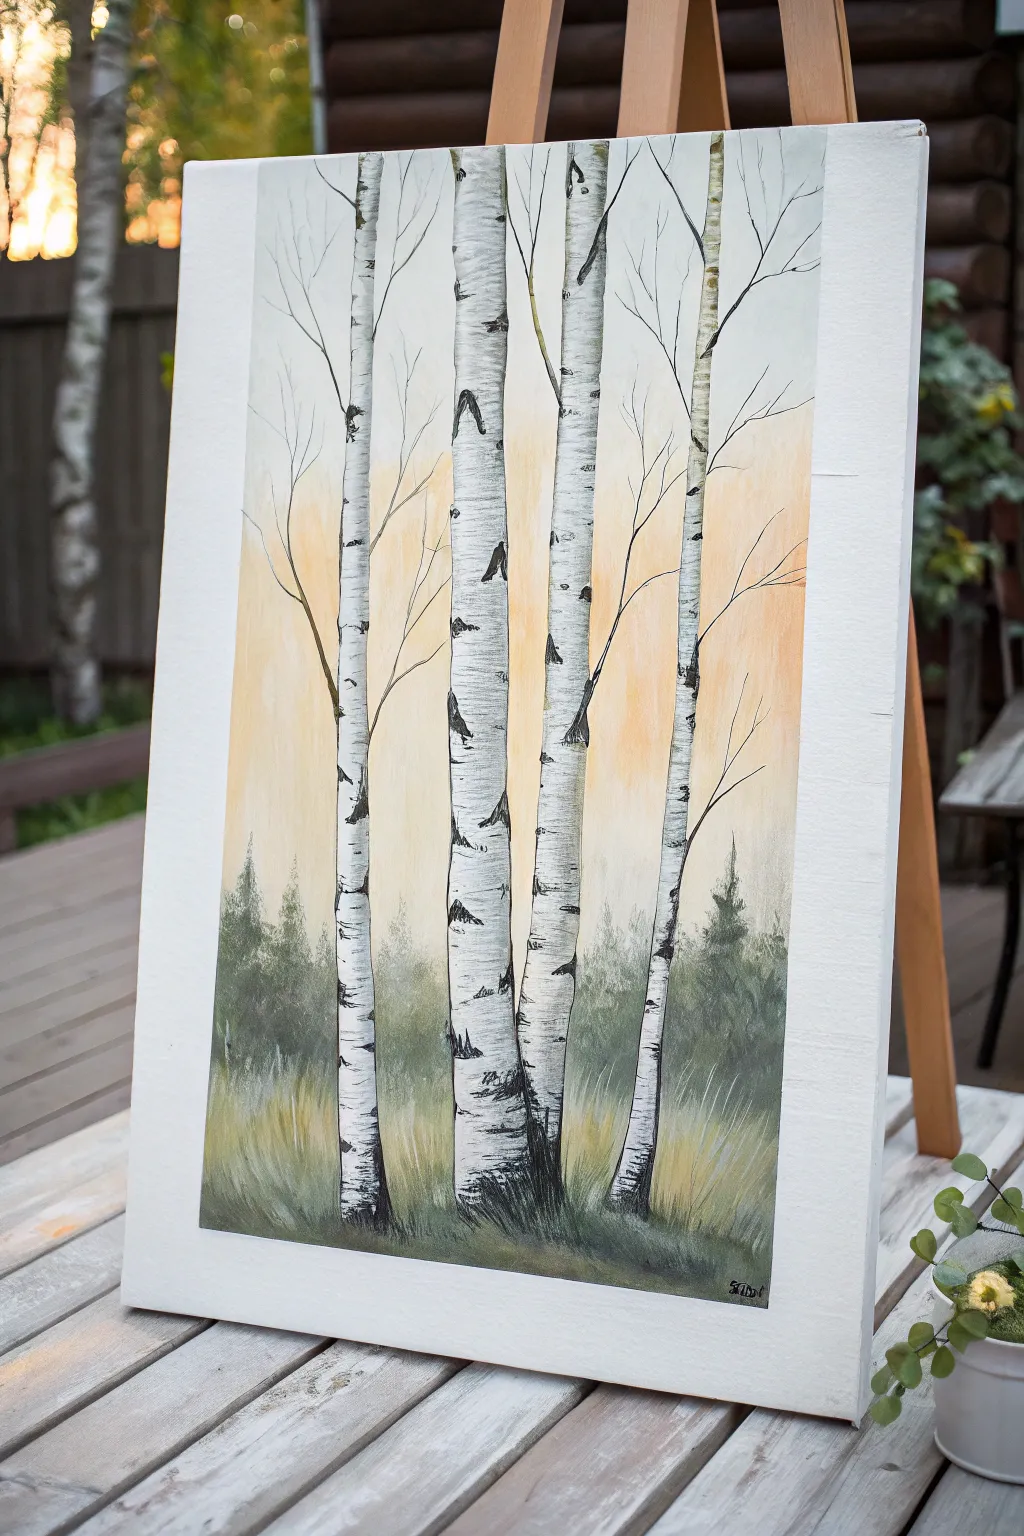
Capture the serene simplicity of a birch forest bathed in the warm glow of sunset with this beginner-friendly acrylic project. You’ll master softly blended backgrounds and learn just how easy it is to create the distinctive, papery texture of birch bark using simple brushstrokes.
Step-by-Step Guide
Materials
- Rectangular stretched canvas (e.g., 12×16 inch)
- Acrylic paints: Titanium White, Mars Black, Burnt Umber, Yellow Ochre, Cadmium Yellow Light, Olive Green, and a tiny touch of Burnt Sienna
- Flat shader brushes (large and medium)
- Round detail brush (size 1 or 0)
- Rigger or liner brush (optional, for branches)
- Old credit card or palette knife (optional for scraping)
- Cup of water and paper towels
- Painter’s tape (optional)
Step 1: Setting the Scene
-
Prepare the gradient background:
Start by mixing a very pale yellow using a lot of Titanium White and a dot of Cadmium Yellow. Paint the upper two-thirds of the canvas with vertical strokes. -
Add sunset warmth:
While the paint is still wet, introduce a mix of Yellow Ochre and a tiny bit of Burnt Sienna into the middle section. Blend this gently upward into the pale yellow to create a soft, sunset glow. -
Lay the grassy foundation:
For the bottom third, mix Olive Green with a bit of Burnt Umber and White to get a muted, earthy green. Paint this area using upward strokes to mimic the direction of grass, blending slightly into the yellow area above. -
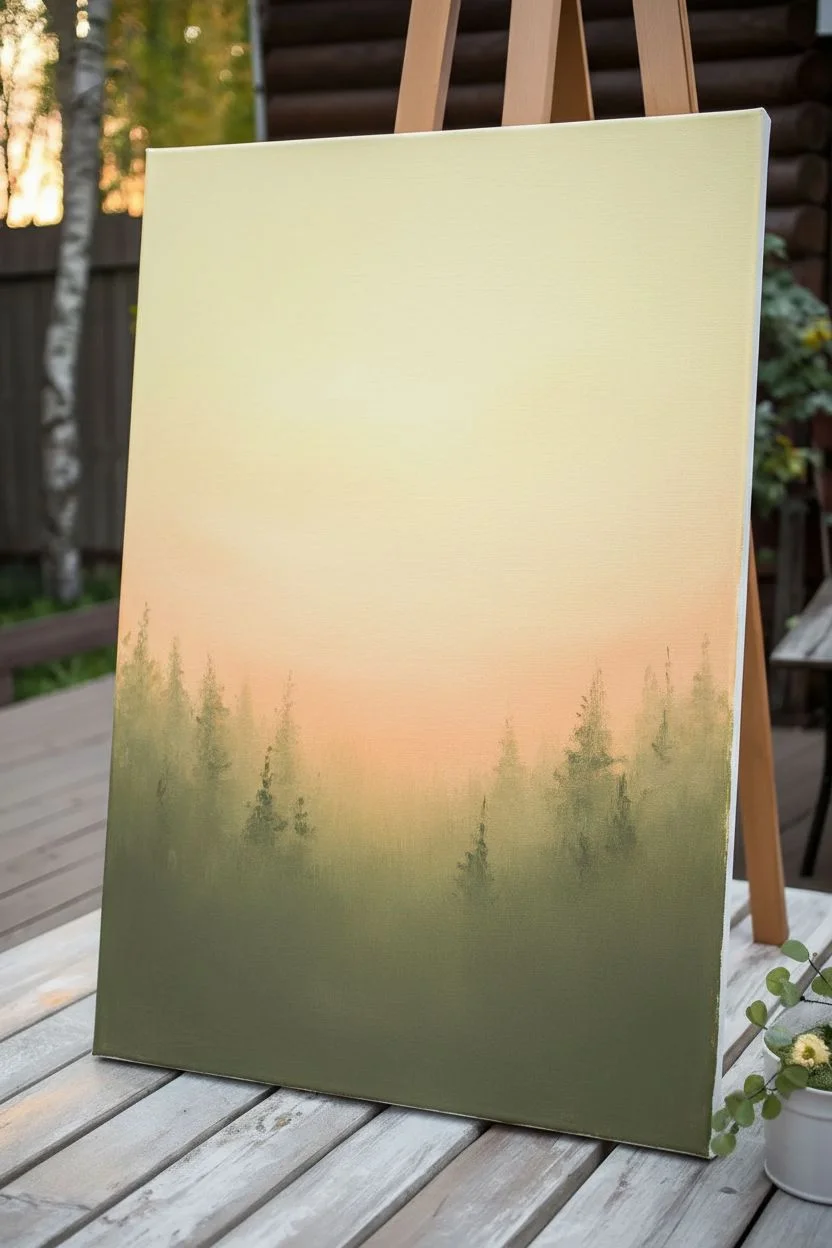
Create the distant forest:
Mix a very hazy, dark grey-green. Using a scruffy or dry brush, tap in a silhouette of distant pine trees along the horizon line where the green grass meets the yellow sky. Keep this layer soft and unfocused to create depth. -
Let it dry completely:
Allow the entire background to dry fully before moving on. This is crucial so your crisp white trees don’t muddy with the background colors.
Too wobbly?
If you struggle with steady lines for the long trunks, use two strips of painter’s tape to mask off the edges of the trees. Peel it off while the white paint is still damp.
Step 2: Painting the Birches
-
Mark tree placement:
Using thin, watered-down grey paint and a detail brush, sketch four vertical lines to designate where your trunks will go. Vary the spacing so they aren’t perfectly even. -
Block in the trunks:
Mix Titanium White with just a speck of grey (to take the brightness down slightly). Paint the long, slender trunks using a flat brush. Make the trunks slightly wider at the bottom and tapering very gradually as they go up. -
Add dimension with shadow:
While the white is fresh, take a tiny bit of light grey paint on one side of your brush. Run it vertically down the right side of each trunk to create a cylindrical shadow effect. -
Paint the thin branches:
Switch to your rigger or fine liner brush. Using thinned black or dark brown paint, pull delicate branches outward and upward from the main trunks. Remember, birch branches are often brittle and zig-zag slightly.
Level Up: Golden Leaves
For an autumn look, use a sea sponge dipped in cadmium yellow and orange to dab clusters of leaves near the top branches.
Step 3: The Distinctive Bark
-
Start the lenticels:
Using the very tip of your detail brush and straight Mars Black, paint small, horizontal dashes along the edges of the trunks. These are the classic birch markings. -
Create the heavy bark patches:
In random spots—especially where branches meet the trunk or near the base—paint larger, triangular or eye-shaped black patches. Keep the edges of these shapes rough. -
Scrape technique (optional):
I like to use the edge of an old credit card to drag black paint horizontally across the white trunk for a more natural, peeling bark texture. -
Anchor the trees:
At the very bottom of the trunks, paint darker, heavier black and brown markings to show age and dirt where the tree meets the earth. -
Refine the foreground:
Mix a fresh batch of grassy green and yellow. Using a small brush, flick distinct blades of grass upwards over the bottom of the tree trunks to make them look like they are sitting ‘in’ the landscape, not just on top of it. -
Final dry brush details:
Take a dry brush with a tiny amount of white paint and lightly whisk it over the dark grass area to simulate light catching the tips of the grass.
Step back and admire your peaceful forest scene, perfect for bringing a touch of nature indoors
Cherry Blossom Branches With Dabbed Flowers
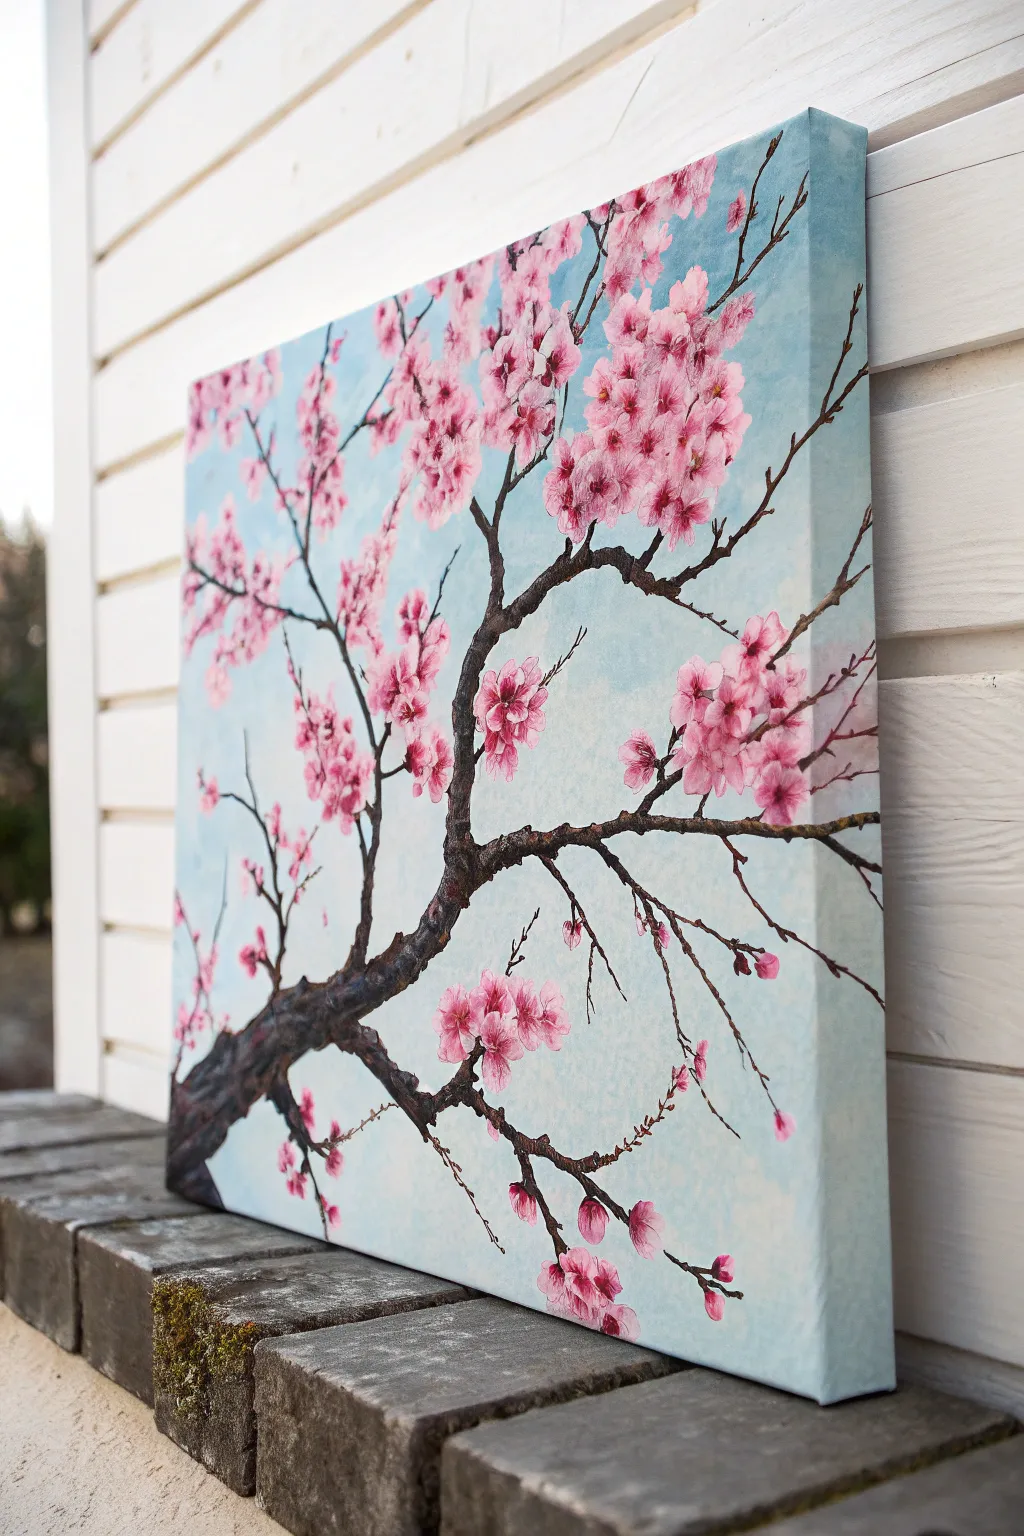
Capture the fleeting beauty of spring with this vibrant, textured cherry blossom study on canvas. Using a simple dabbing technique, youll create fluffy clusters of pink blooms that visually pop against a serene, cloud-dappled blue sky.
How-To Guide
Materials
- Stretched canvas (square or rectangular)
- Acrylic paints: Titanium White, Phthalo Blue (or similar sky blue), Burnt Umber or Raw Umber, Black, Magenta, Alizarin Crimson
- Large flat wash brush (1-2 inch)
- Medium round brush
- Fine liner or rigger brush
- Small filbert brush or an old, scruffy fan brush
- Paper towels
- Palette
- Cup of water
Step 1: Setting the Scene
-
Mix the sky gradient:
Begin by preparing two shades of blue on your palette. Mix a large amount of Titanium White with a very small touch of Phthalo Blue for a pale, icy blue. Create a slightly darker version by adding just a tiny bit more blue to a separate pile of white. -
Apply the background wash:
Using your large flat wash brush, cover the entire canvas with the darker of your two blue mixes. Don’t worry about perfect smoothness; a little texture adds interest. -
Add cloud texture:
While the base coat is still wet, dip your brush into the paler blue mixture. Use crisscross strokes to blend this lighter color into the background, creating soft, hazy patches that suggest distant clouds or sunlight filtering through. -
Ensure full coverage:
Remember to paint the sides of your canvas with these blue tones so the artwork looks finished even without a frame. Let the background dry completely (about 20-30 minutes) before proceeding.
Use an Old Brush
For the flower clusters, an old, worn-out brush with splayed bristles works better than a new one. The messy bristles create random, natural textures that mimic clustered petals perfectly.
Step 2: Building the Branches
-
Map the main bough:
Mix Burnt Umber with a touch of Black to create a deep, dark brown. Using a medium round brush, start from the lower left corner and paint a thick, gnarled main branch extending diagonally upward toward the center. -
Create secondary branches:
Switch to a smaller round brush. Paint several thinner branches splitting off from the main trunk, reaching upwards and outwards towards the canvas edges. Let your hand shake slightly to give the wood a natural, organic look. -
Add delicate twigs:
Using your fine liner or rigger brush, extend the finest twigs from the secondary branches. Use a very light touch here; the paint should be slightly thinned with water so it flows smoothly into sharp, tapered points. -
Highlight the wood:
Mix a little Titanium White into your brown mixture to make a lighter tan. With the liner brush, add thin, broken lines along the top and right edges of the thicker branches to suggest light hitting the rough bark.
Step 3: Blooming the Blossoms
-
Prepare pink values:
Create three shades of pink on your palette: a dark pink (Magenta + Alizarin Crimson), a medium pink (add some White), and a very pale, almost white pink (mostly White with a speck of Magenta). -
Create the flower clusters:
Load a small filbert brush (or a scruffy old brush) with the darkest pink. Instead of painting petals, press and lift the brush (‘dab’) to create uneven, textured clusters near the ends of the twigs. -
Layer the medium tone:
Without cleaning your brush thoroughly, pick up the medium pink. Dab this color over the dark base layers, leaving some of the dark pink showing underneath for depth. -
Add the highlights:
Wipe your brush clean. Load it with the palest pink mixture. Lightly dab the very tops and centers of the flower clusters. This creates the illusion of individual petals catching the sunlight. -
Define individual blooms:
I like to take a small round brush here and paint a few distinct 5-petal flower shapes on the outer edges of the clusters to make the shapes more readable as blossoms. -
Add falling petals:
Using the smallest brush and the pale pink color, paint tiny, solitary dots or dashes floating in the blue space around the branches to represent falling petals. -
Detail the centers:
Once the pinks are dry, use your fine liner brush with the dark crimson (or a tiny dot of brown) to add miniscule dots in the centers of the most defined flowers.
Add Metallic Touches
For a glamorous twist, mix a tiny bit of gold metallic paint into your final wood highlights, or add iridescent medium to the palest pink layer for blossoms that shimmer in the light.
Step back and admire how your simple dabs have transformed into a lively, blossoming tree branch ready to brighten any room


Loose Floral Bouquet Made of Simple Shapes
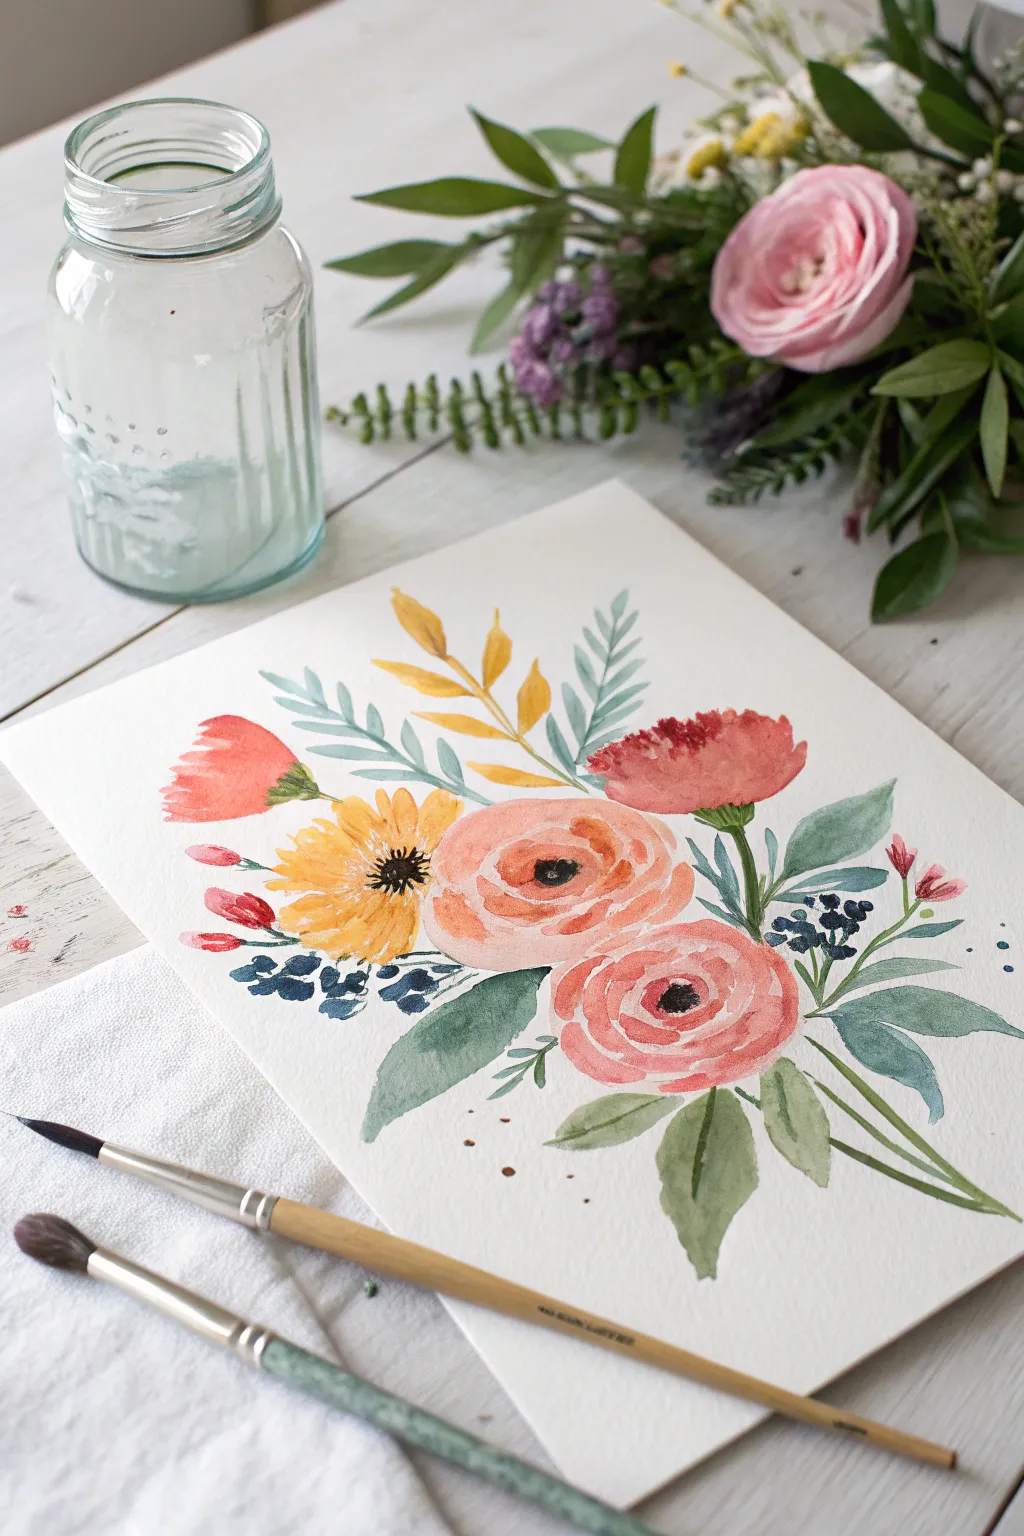
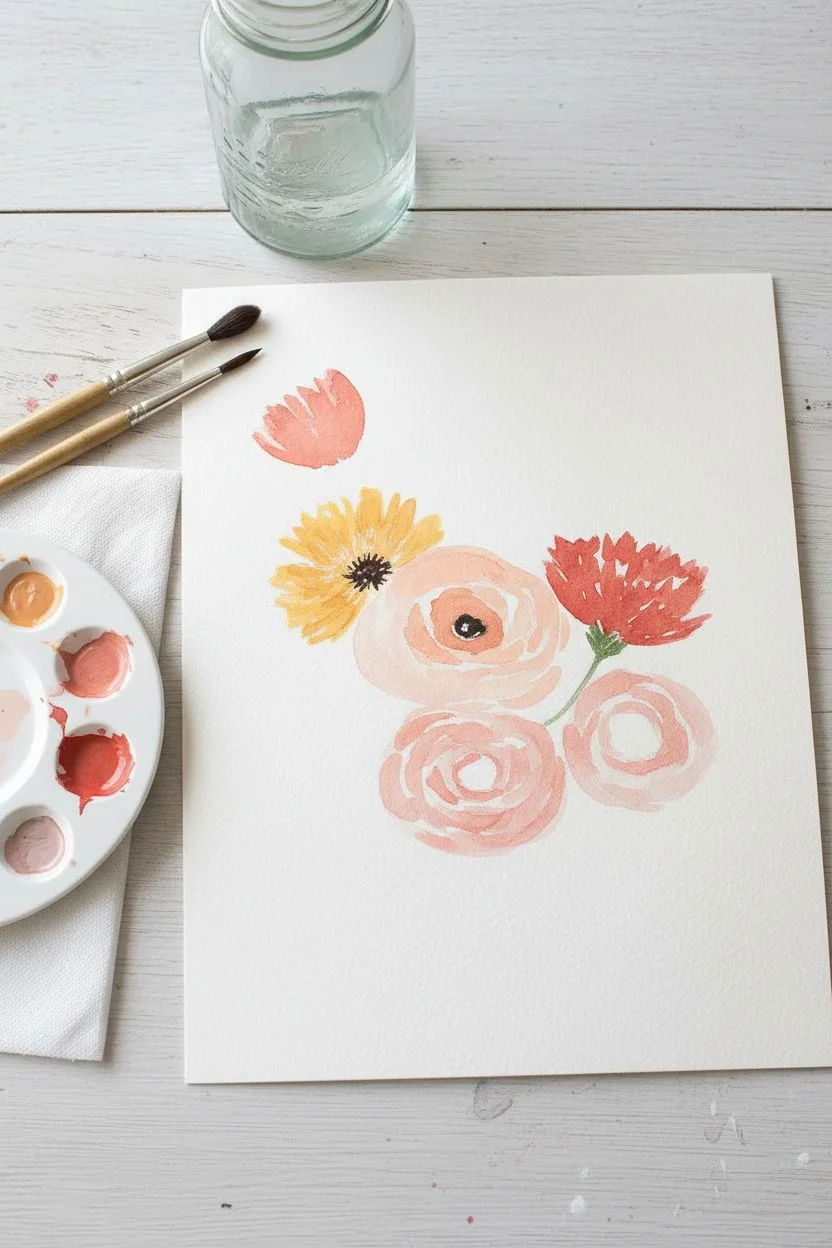
Create the delicate, translucent look of watercolor using acrylics in this loose floral bouquet project. By thinning your paints and focusing on simple, organic shapes, you’ll build a lovely composition of roses, carnations, and greenery that feels fresh and breezy.
Detailed Instructions
Materials
- Heavyweight watercolor paper (300gsm/140lb cold press)
- Acrylic paints (primary red, yellow, blue, plus white and black)
- Acrylic glazing medium or flow improver
- Water jar
- Palette (ceramic or plastic)
- Round brushes (sizes 4, 6, and 8)
- Paper towels
Step 1: Planning and Base Blooms
-
Prepare your washes:
Since we are mimicking watercolor, mix your acrylics with plenty of water or glazing medium on your palette. You want a consistency like heavy milk. Prepare a soft peach (red + touch of yellow + white), a sunny yellow, and a muted red. -
Paint the first rose shape:
Start with the main peach rose in the center. Using your size 8 brush, paint a loose, imperfect circle. Don’t fill it in completely solid; leave small gaps of white paper to suggest petals catching the light. -
Add the second rose:
Below and slightly to the right of the first rose, paint another loose circular shape using a slightly more pinkish hue. Keep the edges soft and watery. -
Paint the yellow daisy:
To the left of the center rose, paint simple, elongated oval strokes radiating from a center point to form a yellow daisy-like flower. Leave the center empty for now. -
Add the carnation shapes:
Using the muted red wash, create a fan shape at the top right for a carnation, and a smaller, tulip-like shape on the far left. Use short, jagged strokes for the edges to mimic fringed petals.
Acrylics Acting Like Water
If your paint dries too fast or leaves ridges, mix in more glazing medium rather than just water. This increases transparency without breaking the paint binder.
Step 2: Leaves and Foliage
-
Mix green variations:
Create three shades of green: a pale blue-green (sage), a vibrant yellow-green, and a deeper forest green. Keeping them translucent is key. -
Paint fern-like stems:
With a size 4 brush and the sage green, paint long, thin stems reaching upward behind the flowers. Add small, tear-drop shaped leaves on either side of the stem. -
Add broad leaves:
Using the size 6 brush and your deeper green, press the belly of the brush down and lift up to create broad, pointed leaves clustering at the base of the roses. -
Incorporate yellow sprigs:
Mix a mustard yellow tone and paint a few vertical, leafy sprigs shooting up from the center, adding height and warmth to the composition. -
Create berry accents:
Mix a dark navy blue. Using the tip of your smallest brush, dot clusters of small berries near the yellow flower and tucked between the leaves on the right side.
Add Metallic Details
Once the painting is totally dry, use a fine gold paint pen or metallic acrylic to outline random petals or leaves for a modern, shimmer effect.
Step 3: Defining Details
-
Deepen the rose centers:
Once the base roses are dry to the touch, mix a darker, more concentrated peach/red. Paint ‘C’ shaped curves in the center of the blooms to create the illusion of tightly wrapped petals. -
Detail the yellow flower:
With a dark brown or black, stipple small dots into the vacant center of the yellow daisy. Pull a few tiny lines outward into the yellow petals for texture. -
Enhance the carnations:
Add a few darker red vertical lines at the base of your red carnation shapes to show where the petals gather at the stem. -
Connect with stems:
Using a thin green mix, carefully draw fine lines to connect the floating flowers and berries to the main bouquet cluster. -
Add watercolor splatters:
For that loose, artistic feel, dilute a little brown or gold paint until it’s very watery. Tap your brush against another handle to splatter tiny droplets around the bottom of the bouquet.
Step back and admire your fresh, everlasting bouquet that captures the softness of nature with the durability of acrylics
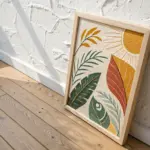
Potted Plant Trio With Clean, Bold Colors
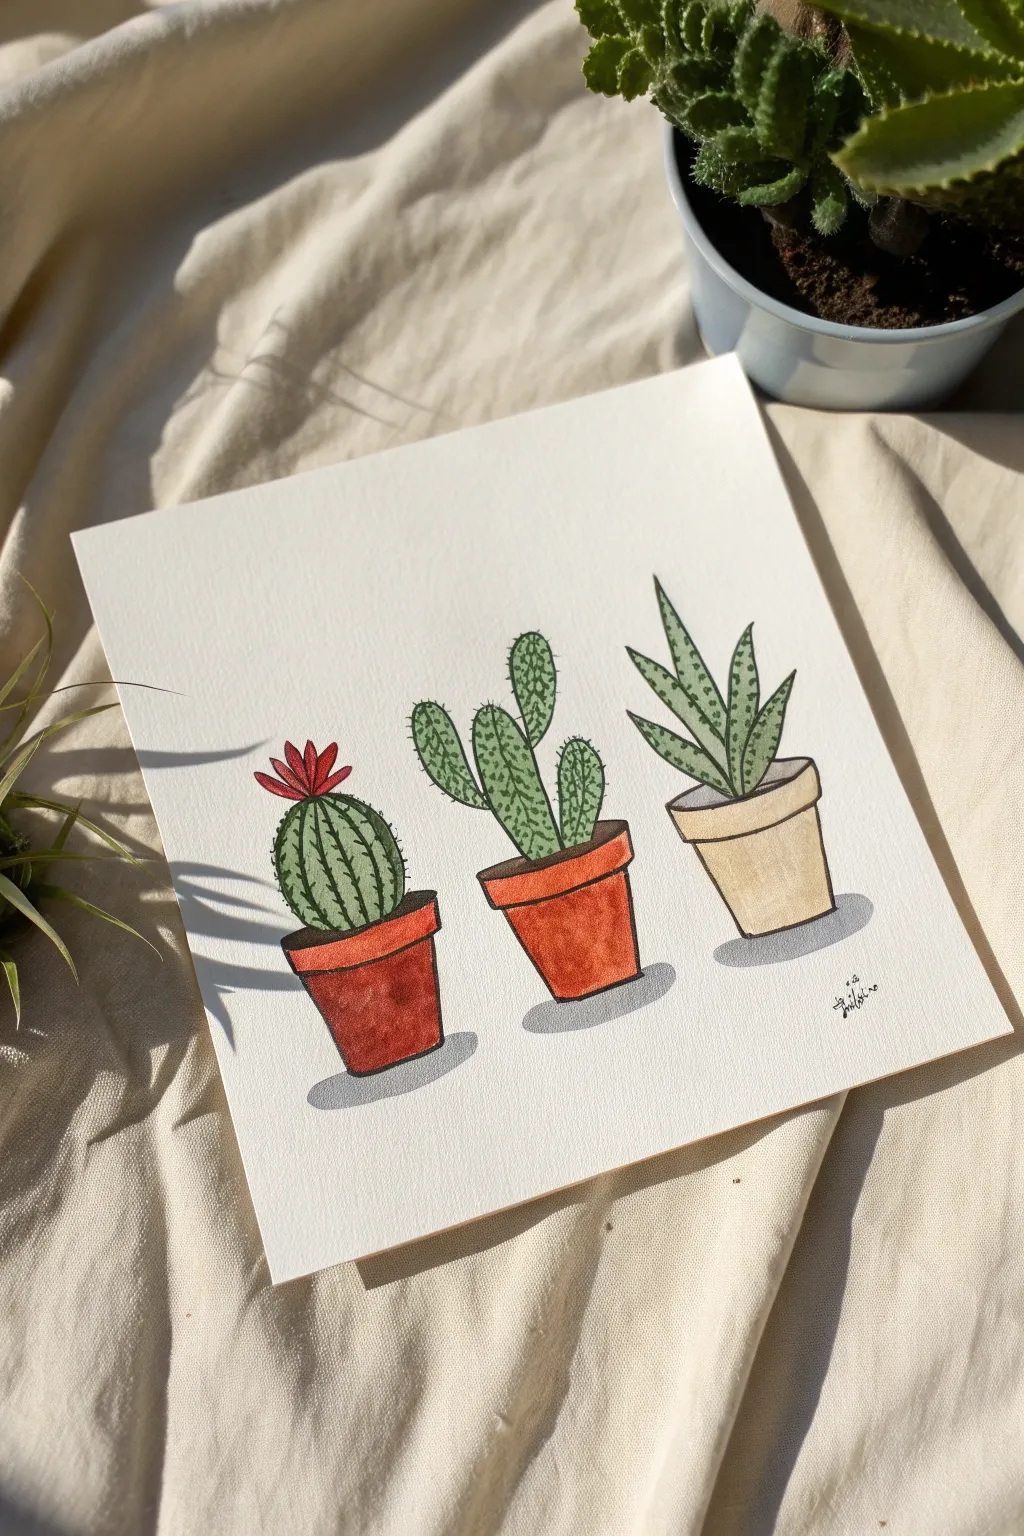
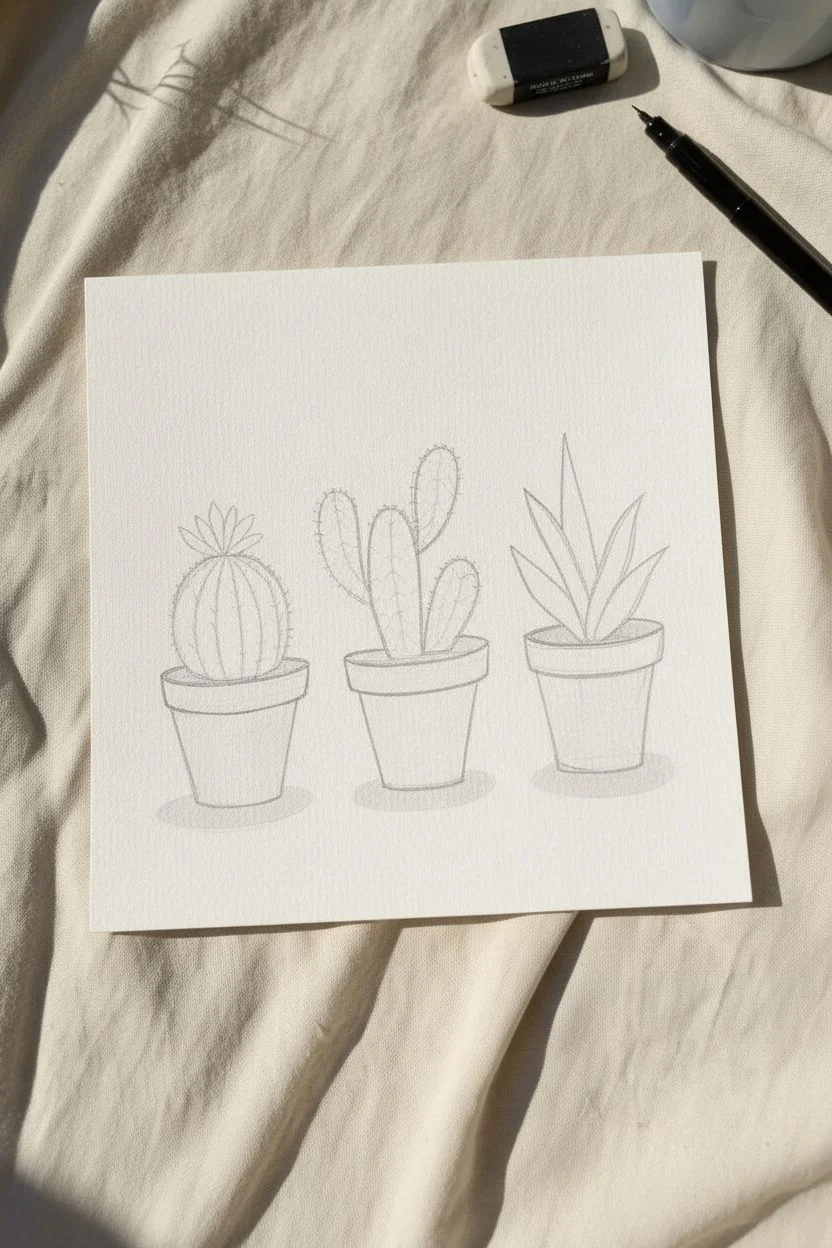
Capture the charm of desert flora with this crisp, illustrative painting featuring three distinct potted succulents. Using clean lines and bold block colors, you’ll create a delightful trio that pops right off the page.
Step-by-Step Guide
Materials
- Heavyweight watercolor paper or mixed media paper (square cut)
- Pencil (HB) and eraser
- Fine liner pen (black, waterproof, size 03 or 05)
- Acrylic paints or Gouache (Red, Orange, Yellow, Green, White, Brown, Black)
- Small round brush (size 2 or 4)
- Fine detail brush (size 0 or 00)
- Palette for mixing
- Water cup and paper towels
Step 1: Planning and Sketching
-
Establish the pot positions:
Start by lightly sketching three horizontal ovals near the bottom third of your paper. These will form the rims of your pots. Space them evenly apart so the plants have room to breathe. -
Draw the pot shapes:
For the left and middle pots, draw simple tapered cylinder shapes extending down from the rims. For the right pot, make the base slightly narrower to distinguish it. Add a thin rim band to the top of each pot sketch. -
Sketch the plants:
On the left pot, draw a round ball shape. For the middle, draw a tall central finger with two smaller arms branching out. On the right, sketch several pointed, triangular leaves shooting upward. -
Add the details:
Lightly sketch a small flower on top of the round cactus. I also mark faint vertical guidelines on the round cactus to help with shading later.
Step 2: Applying Color
-
Paint the first pot:
Mix a warm reddish-brown color using red and a touch of brown. Fill in the body of the leftmost pot. Make the rim slightly lighter by adding a tiny bit of white to your mix. -
Paint the second pot:
Create an orange-terracotta shade for the middle pot using orange and brown. Paint the body and rim solidly, ensuring the paint is opaque. -
Paint the third pot:
For the right pot, mix yellow ochre or a beige tone using yellow, brown, and plenty of white. Fill in the shape carefully. -
Base coat the greenery:
Mix a muted sage green. Fill in all three plant shapes. Don’t worry about the texture details yet; just get a solid, flat color down. -
Paint the flower:
Use a bright, pure red to fill in the flower shape on the round cactus. -
Add pot shadows (optional):
Once the base colors are dry, you can mix slightly darker versions of each pot color to paint a thin shadow line right under the rim for extra dimension. -
Paint the ground shadows:
Mix a watery grey. Paint a simple oval shadow underneath each pot, angled slightly to the left, to anchor your plants to the ground.
Uneven Lines?
If your outlines feel shaky, don’t worry. Go over them a second time to thicken the line weight. A bolder line style naturally hides small jitters and adds to the illustrative look.
Step 3: Inking and Details
-
Outline the shapes:
Wait until the paint is completely bone-dry. Take your waterproof fine liner and carefully outline every shape—the pots, rims, and plants. A steady hand works best here. -
Detail the round cactus:
Draw vertical lines following the curve of the round cactus to create ribs. Along these lines, add tiny tick marks or dots to represent spines. -
Texture the tall cactus:
On the middle cactus, draw small clusters of dots or tiny ‘v’ shapes scattered across the surface to mimic its prickly texture. -
Detail the succulent:
For the pointy plant on the right, draw small dashes or dots along the edges and centers of the leaves to give it a speckled look. -
Final touches:
Add simple lines inside the flower petals. Check your outlines and thicken any lines that look too thin to create a bold, graphic finish.
Use Metallics
For a modern twist, use gold acrylic paint for the pot rims or the spines. This adds a subtle shimmer that catches the light against the matte green.
Frame your new botanical trio in a simple wooden frame or gift it to a plant-loving friend
Birds on a Wire Using Silhouette Shapes
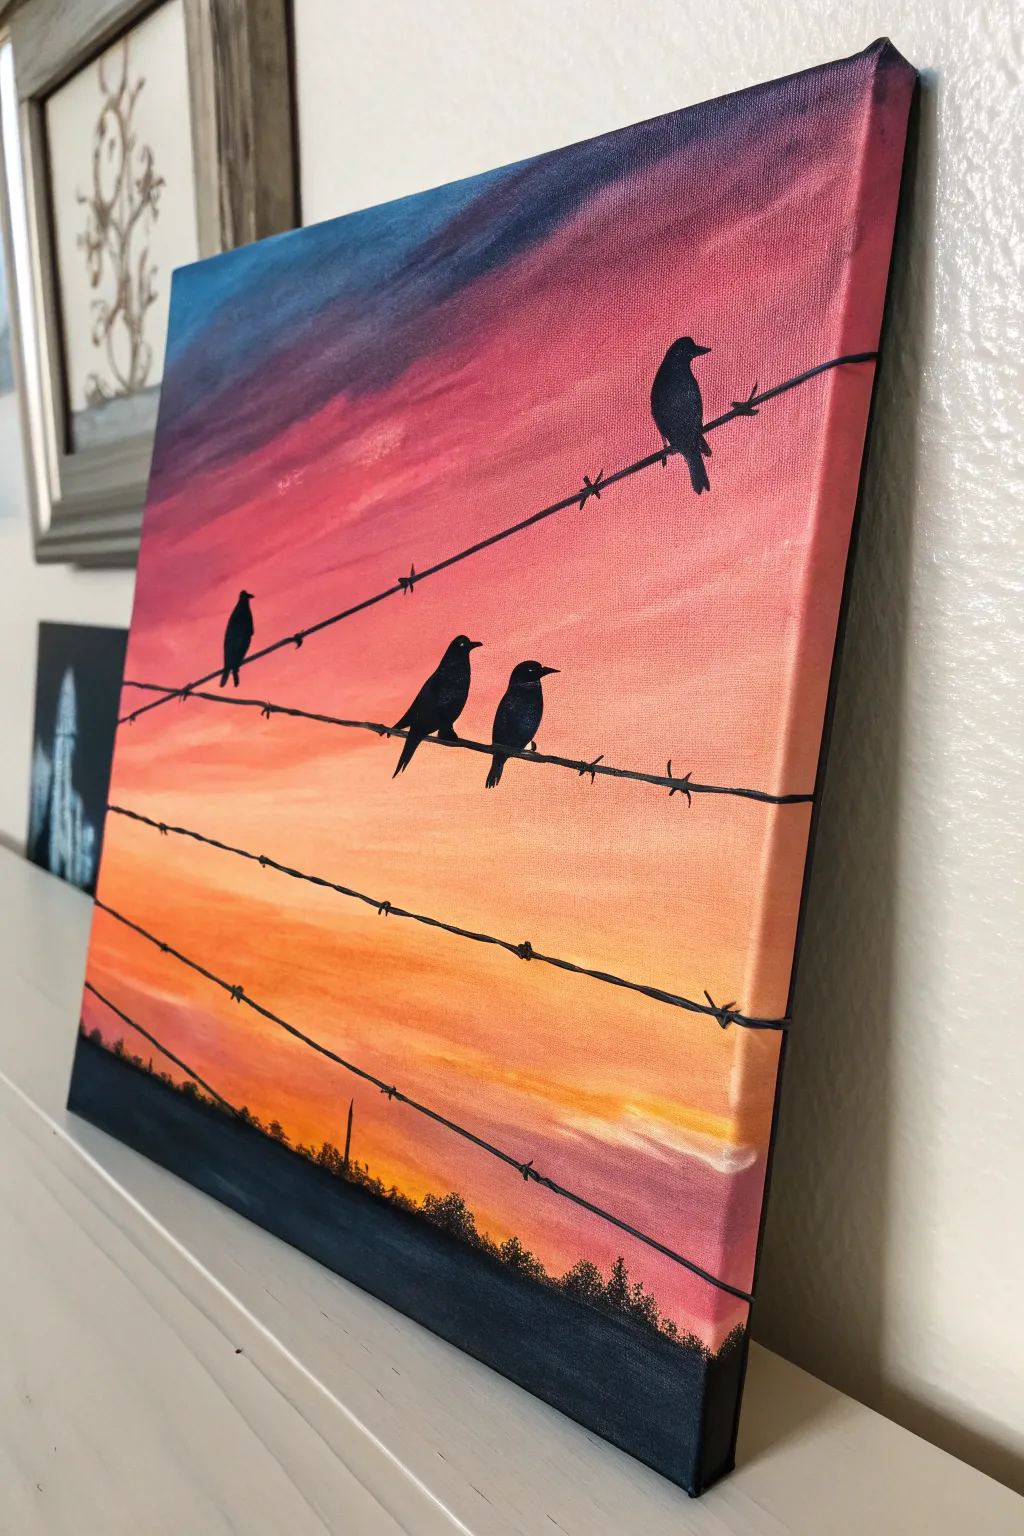
Capture the striking contrast of black silhouettes against a vibrant, fiery sky with this beginner-friendly acrylic painting. By mastering a simple gradient background and silhouette painting, you can create a dramatic piece that looks far more complex than it actually is.
Step-by-Step Guide
Materials
- Stretched canvas (11×14 or similar size)
- Acrylic paints (Titanium White, Cadmium Yellow, Orange, Alizarin Crimson, Purple/Violet, Phthalo Blue, Mars Black)
- Large flat brush or foam brush (for blending)
- Medium round brush
- Small liner or detail brush
- Palette or paper plate
- Cup of water
- Paper towels
- Pencil (optional)
- Ruler (optional)
Step 1: Painting the Gradient Sky
-
Base Color Setup:
Squeeze out your sky colors onto the palette in order: yellow, orange, red (crimson), purple, and blue. Having them ready before you start is crucial because acrylics dry fast, and speed helps with blending. -
Starting with Yellow:
Dip your large flat brush into the yellow paint with a tiny touch of white to brighten it. Paint horizontal strokes across the lower-middle section of the canvas, just above where your horizon line will be. -
Transition to Orange:
Without fully cleaning your brush, pick up some orange paint. Apply this directly above the yellow section, using long horizontal strokes. -
Blending the Seams:
While the paint is still wet, gently brush back and forth over the line where the yellow and orange meet. The colors should mix on the canvas to create a soft, peachy transition. -
Adding the Reds:
Clean your brush slightly, then load it with the crimson red. Paint the next stripe upwards above the orange, once again blending the edge downward wet-into-wet to soften the transition. -
The Purple Zone:
Move higher up the canvas with purple paint. This darker cool tone begins the shift toward the night sky. Blend it carefully into the red below; this mix might turn slightly muddy if overworked, so keep your strokes light. -
Deep Blue Top:
Finish the very top of the canvas with Phthalo Blue mixed with a tiny bit of purple. Create the darkest part of the sky here. -
Corner Accents:
Use the leftover blue mix to paint a diagonal sweep in the top left corner, mimicking cloud movement or the darkening atmosphere. -
Painting the Edges:
Don’t forget to wrap your sky colors around the sides of the canvas. This gallery-wrap style gives the piece a finished look without needing a frame. -
Drying Time:
Let the background dry completely. It must be bone-dry before you add the black silhouettes, or they will bleed into the sky.
Step 2: Adding Silhouettes and Wires
-
Horizon Line:
Using black paint and a medium brush, paint a slightly uneven dark strip across the very bottom of the canvas. This grounds the artwork. -
Create Texture:
Use the tip of your brush to tap tiny, irregular bumps along the top edge of this black horizon line to suggest distant trees or bushes. -
Drafting the Wires:
I prefer to lightly sketch the placement of the wires with a pencil first to ensure the composition looks balanced. Draw three or four lines angling slightly upwards across the canvas. -
Painting the Wires:
Load a liner brush with watered-down black paint (ink consistency). Paint over your pencil lines with a steady hand. If the line breaks, that’s okay—it adds character. -
Adding Barbs:
To make the wire look like a fence, paint small ‘X’ shapes or tiny angled dashes at regular intervals along the wires. Keep them small and sharp. -
Blocking in the Birds:
Switch to a small round brush. Paint simple oval shapes sitting on the wires where you want your birds to be. Vary their placement to keep the composition interesting. -
Defining Heads and Beaks:
Add a smaller circle on top of the oval for the head. Use your finest detail brush to pull out a tiny triangle for the beak. -
tails and Wings:
Extend a rectangular or triangular shape downwards from the body for the tail feathers. You can angle the body slightly to make the birds look like they are leaning or looking at each other. -
The Feet:
Paint tiny little curved lines connecting the body of the bird to the wire, so they don’t look like they are floating. -
Final Touches:
Step back and look at your composition. If needed, darken the black paint with a second coat to ensure it is opaque and solid against the colorful background.
Wire Confidence
When painting long thin lines like wires, move your whole arm from the shoulder, not just your wrist. This creates smoother, straighter lines.
Make It 3D
Mix a tiny drop of white into your black paint to make a dark grey. Add a sliver of highlight to the top of the birds and wires to suggest moonlight.
Enjoy the peaceful contrast of your new sunset creation as it brings a touch of dusk into your room
Color Block Painting With Crisp Tape Edges
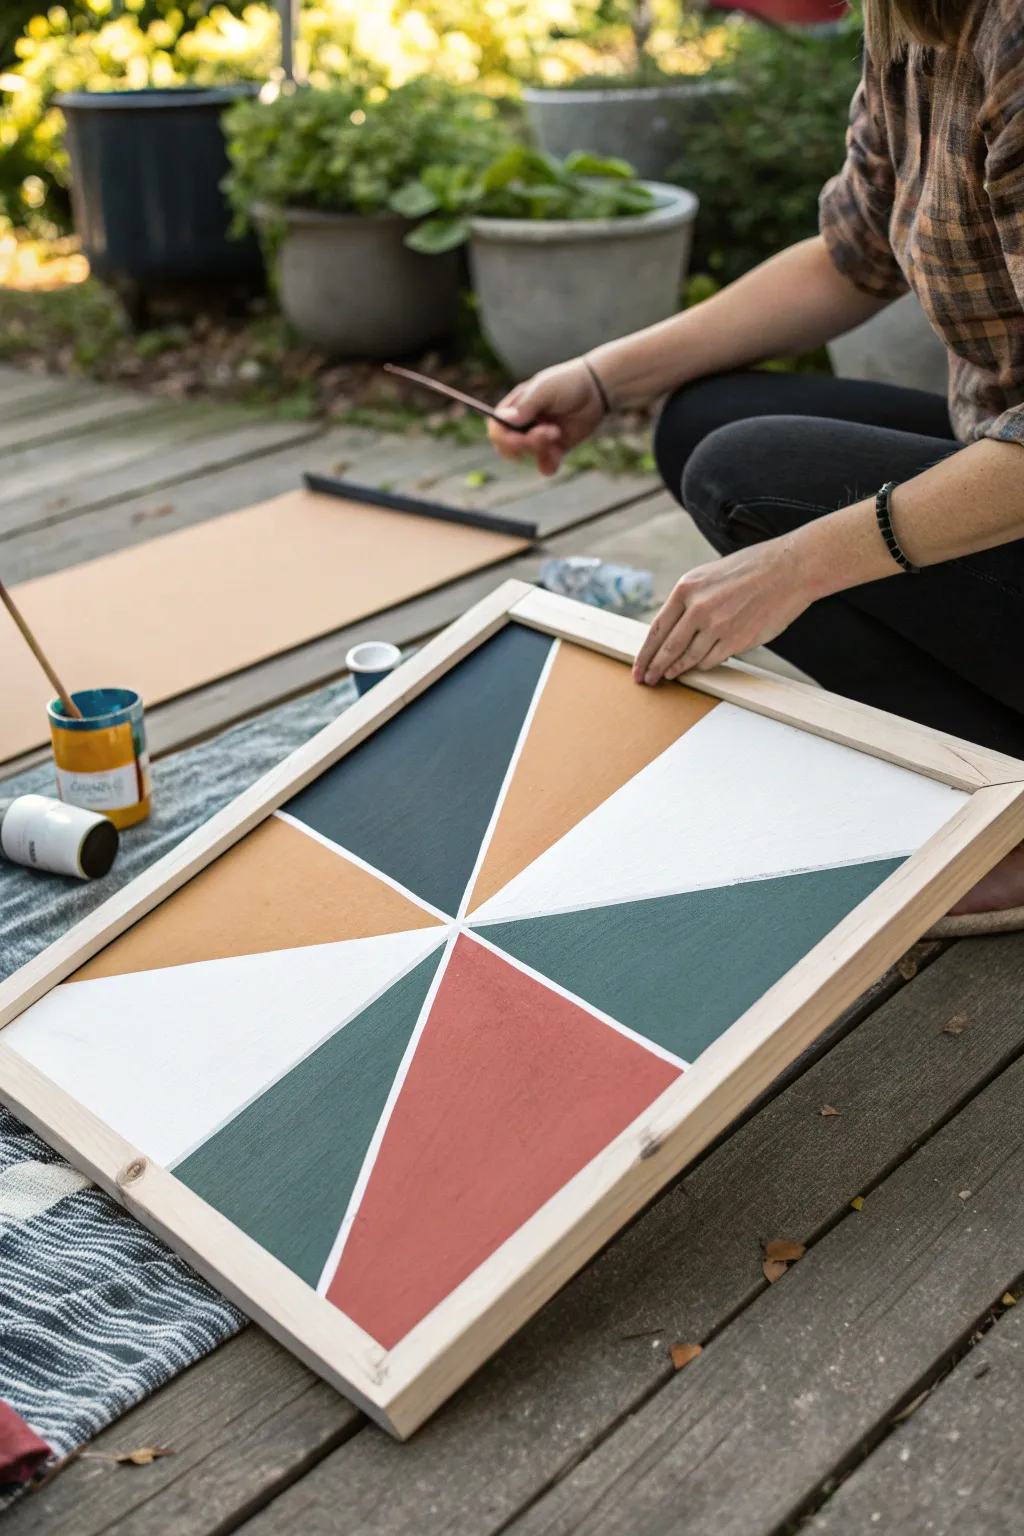
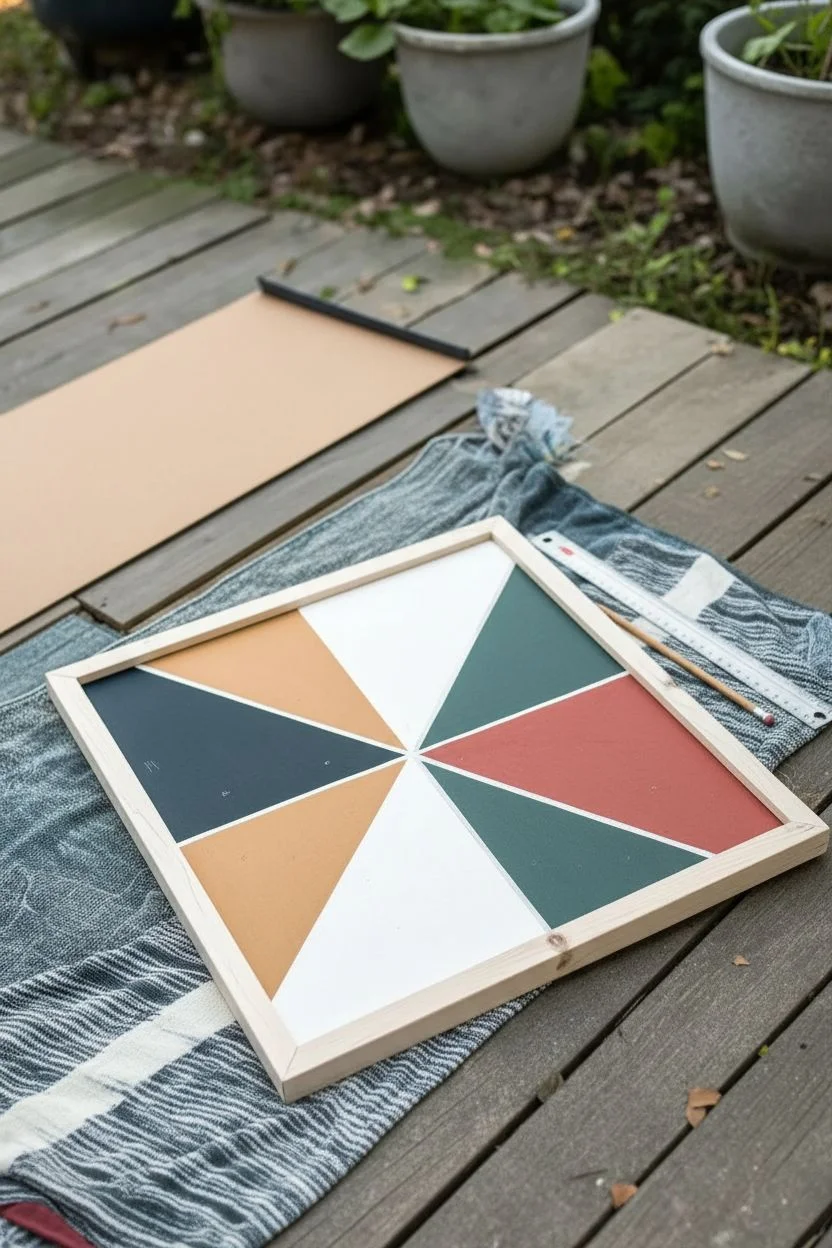
This modern, geometric artwork features a striking sunburst pattern created with crisp lines and a bold, earthy color palette. The combination of dark teal, terra cotta, ochre, white, and near-black creates a balanced and sophisticated wall piece that looks far more expensive than it is.
How-To Guide
Materials
- Square plywood board or canvas (approx. 18×18 inches)
- Wooden trim pieces for frame (1×2 inch lumber)
- Acrylic paints: Dark Teal, Terra Cotta, Ochre/Mustard, White, Deep Charcoal/Black
- Painter’s tape (high quality for crisp edges)
- Ruler or straight edge
- Pencil
- Flat paintbrushes (various sizes)
- Small round brush for touch-ups
- Wood glue
- Brad nailer or small nails/hammer
- Sandpaper (fine grit)
Step 1: Preparation and Design
-
Prepare your surface:
Start with a clean, smooth piece of plywood or a standard canvas. If you are using plywood, give the surface a quick sanding with fine-grit sandpaper to remove any rough spots that might snag your brush. -
Establish the focal point:
Decide on the center point for your sunburst. For a dynamic look, place this point just below the true center of the board, slightly closer to the bottom edge. -
Draft the rays:
Using a ruler and a light pencil, draw lines radiating from your chosen center point out to the edges of the board. You want to create eight distinct triangular sections. Don’t worry about making them perfectly equal; variety in width adds character. -
Plan your colors:
Lightly mark each section with a letter or small dot indicating which color will go where. This helps you visualize the balance of dark and light tones before you start painting.
Tape Sealing Trick
Paint over your tape edge with matte medium or white paint first. This fills gaps so your colored paint lines stay razor-sharp.
Step 2: Painting the Design
-
Tape the first set of sections:
Apply painter’s tape along the pencil lines for your first set of non-adjacent triangles. You can’t paint two touching sections at once, so you’ll work in alternate sections. -
Seal the tape edges:
Press the edges of the tape down firmly with your fingernail or a credit card. I like to apply a very thin layer of the base color (or white) along the tape edge first to seal it and prevent bleeding. -
Paint the first colors:
Using a flat brush, fill in the exposed sections with your chosen acrylic colors. Apply the paint in smooth strokes, moving from the tape inward to further minimize paint seeping under the edge. -
Apply second coats:
Let the first layer dry to the touch, then apply a second coat if needed for full opacity. Lighter colors like the white and ochre often need that second pass. -
Remove tape while damp:
Carefully peel back the painter’s tape while the paint is still slightly tacky, not fully dry. Pull the tape away at a 45-degree angle to ensure the cleanest possible line. -
Dry completely:
Allow these first painted sections to dry completely. This is crucial—if they are even slightly wet, the next round of tape will ruin the finish. -
Tape the remaining sections:
Once dry, apply fresh tape over the painted edges to mask off the remaining unpainted triangles. Align the tape precisely with your existing paint lines. -
Paint remaining sections:
Fill in the final triangles with the remaining colors (Deep Charcoal, Terra Cotta, etc.), following the same sealing and painting process as before. -
Reveal the full design:
Gently remove the final strips of tape to reveal your complete geometric pattern. If you spot any tiny bleeds, use a small round brush and a steady hand to touch them up.
Step 3: Framing
-
Measure frame pieces:
Measure the outer dimensions of your painted board. Cut your 1×2 wooden trim pieces to fit these dimensions. You can use simple butt joints or mitered 45-degree corners depending on your preference. -
Attach the frame:
Apply a bead of wood glue to the edge of the board. Position your wood trim pieces against the sides. -
Secure the trim:
Use a brad nailer or small finishing nails to secure the frame to the board. If using canvas, you can nail through the frame into the canvas stretcher bars. -
Final inspection:
Check the corners of your frame and sand lightly if sharp. Your modern geometric art piece is now ready to hang or lean against a wall.
Uneven Coverage?
If brushstrokes are visible, sanding lightly between coats with very fine sandpaper helps create a professional, flat finish.
Step back and admire how the simple geometry transforms into a stunning focal point for any room
Simple Geometric Pattern With Repeating Shapes
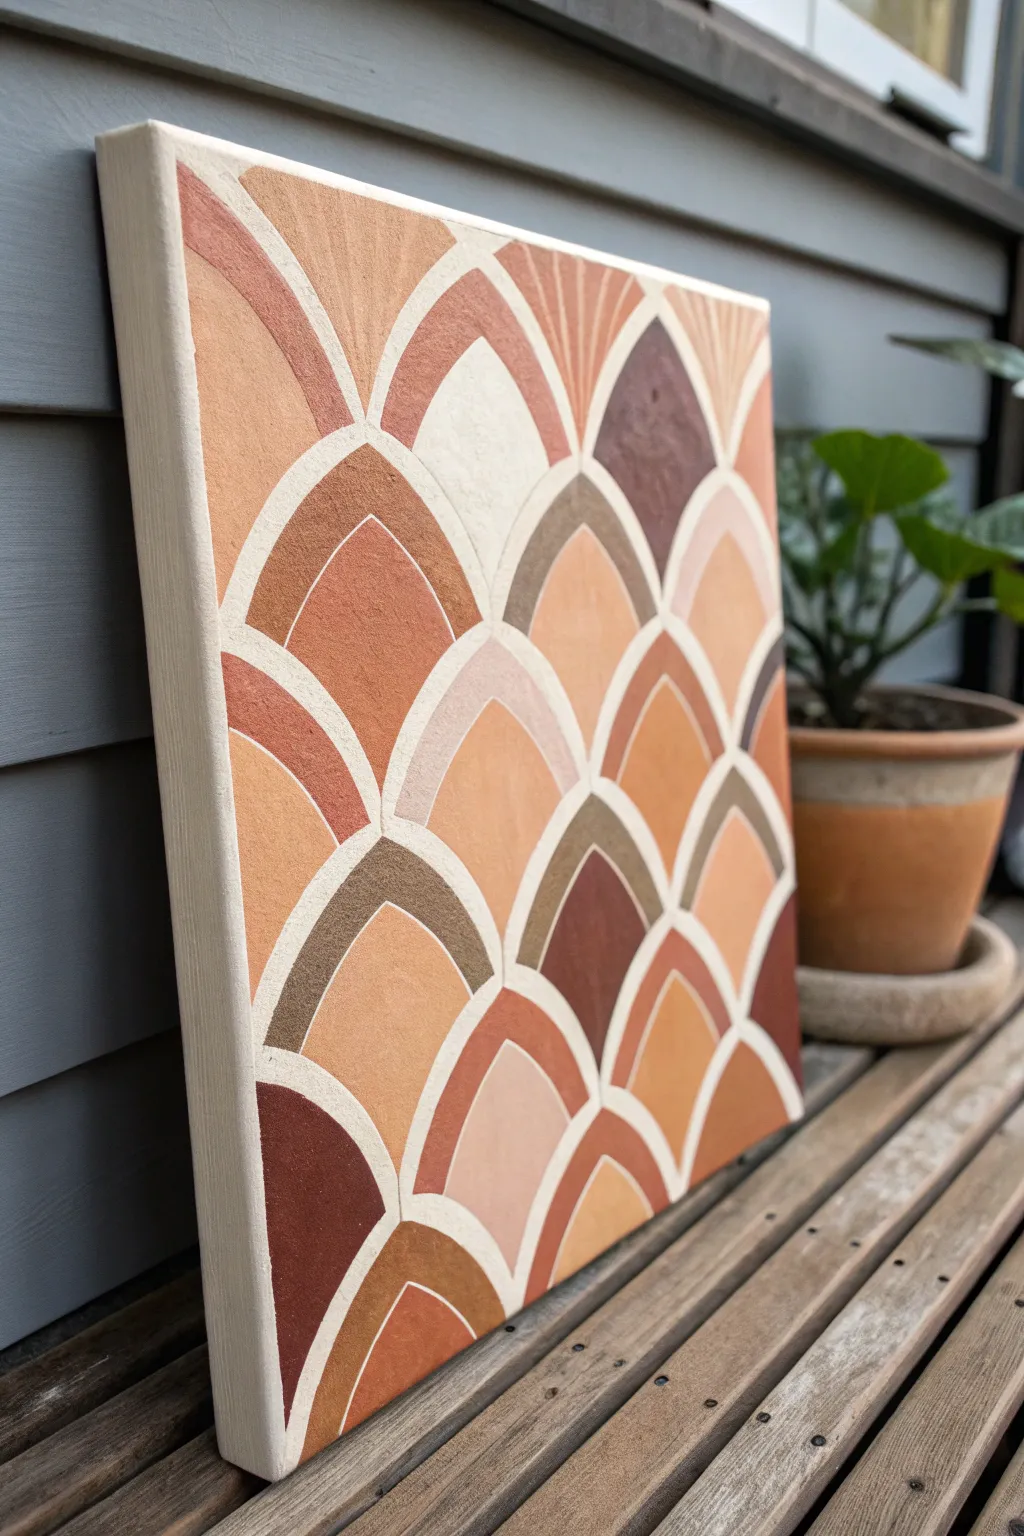
Embrace warm, earthy tones with this stylized geometric painting that features an interlocking scallop pattern. The repeating arc shapes create a satisfying rhythm, while the desert-inspired color palette makes it a cozy addition to any modern wall.
Step-by-Step Tutorial
Materials
- Stretched canvas (square or rectangular)
- Acrylic paints (terracotta, burnt sienna, ochre, cream, dark brown, burnt umber)
- White Gesso or white acrylic paint
- Compass or a circular object for tracing (like a small saucer)
- Pencil
- Flat shader brush (medium size)
- Round brush (small for details)
- Palette for mixing tones
- Paper towels
- Water cup
Step 1: Preparation & Layout
-
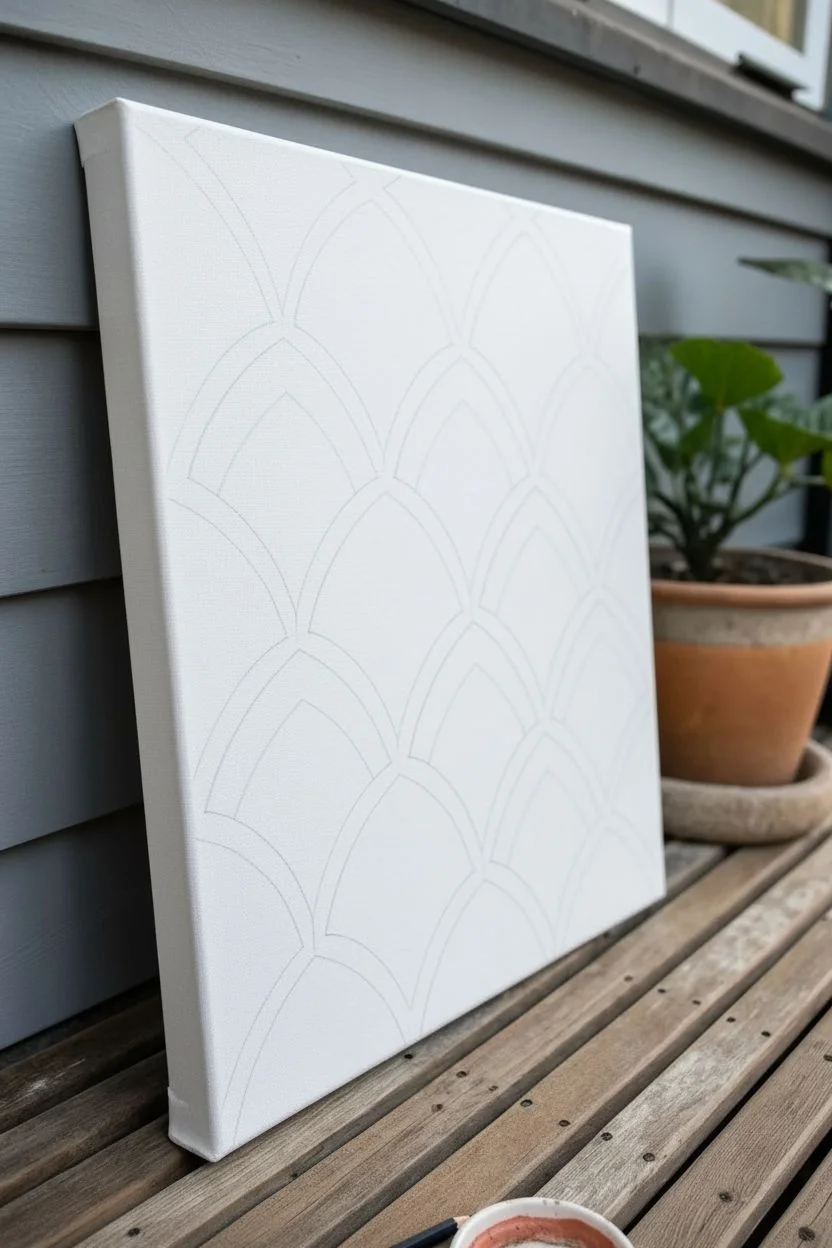
Prime the Surface:
Begin by applying an even coat of white Gesso or white acrylic paint over your entire canvas. This ensures your lines between the shapes stay crisp and bright. -
Determine Scale Size:
Decide how large you want your scallops to be. For the look in the photo, the width of each arch is roughly 3-4 inches. Adjust your compass or find a circular object that matches this diameter. -
Draft the First Row:
Starting at the very bottom edge of the canvas, use a pencil to lightly trace a row of semi-circles. They should touch side-by-side without overlapping. -
Create the Offset Pattern:
For the second row, position the center of your arch directly above the meeting point of the two arches below it. This creates that classic fish-scale or fan effect. -
Complete the Grid:
Continue tracing rows of arches all the way to the top of the canvas. Don’t worry if the shapes run off the edges; just draw partial arches to maintain the pattern’s continuity. -
Add Inner Detail:
Once the main grid is drawn, go back and draw a smaller, inner arch inside every single shape. Leave about a quarter-inch gap between the outer and inner lines to create the thick white border effect.
Wobbly Arches?
If freehand painting the curves is difficult, cut a stencil out of heavy cardstock that matches your inner shape size. Hold it down firmly and paint inside it.
Step 2: Mixing & Painting
-
Prepare the Palette:
Squeeze out your warm earth tones. You’ll want a variety of shades: deep rust, light peach, sandy beige, and chocolate brown. I find that pre-mixing 5 or 6 distinct shades beforehand helps keep the painting process fluid. -
Plan Color Distribution:
Before painting, you can lightly mark which color goes where with a tiny pencil dot if you want balanced distribution, or you can paint intuitively for a more organic feel. -
Paint the Outer Arches:
Using your flat brush, begin filling in the outer rainbow shapes. Carefully paint up to your pencil lines, leaving the gap between the shapes white. -
Vary the Textures:
Some of the shapes in the reference image look solid, while others have faint vertical stripes or “sun rays.” Use your smaller round brush to add these striped details in a lighter shade on a few random arches. -
Fill the Inner Shapes:
Now paint the smaller, inner humps. You can use the same color as the outer arch for a monochromatic look, or switch it up with a contrasting earth tone for more depth. -
Managing Edges:
Pay special attention to the partial shapes on the sides of the canvas. Painting these partial -
Clean Up Lines:
If you accidentally paint over the white gap lines, wait for the color to dry completely, then use a small brush with opaque white paint to neaten the separation. -
Painting sides:
Extend the pattern design over the sides of the canvas for a gallery-wrapped look, or simply paint the edges a solid cream color to frame the piece. -
Final Inspection:
Step back and look for any patching ness. Earth tones can sometimes dry semi-transparent, so apply a second coat to any shapes that look streaky.
Pro Tip: Texture
Mix a tiny pinch of baking soda or ceramic stucco gel into your acrylics. This gives the paint a matte, gritty texture that mimics terracotta pottery
Allow the piece to dry fully before hanging it in a spot that needs a touch of warmth and pattern
Textured Abstract Sunset With Palette-Knife Strokes
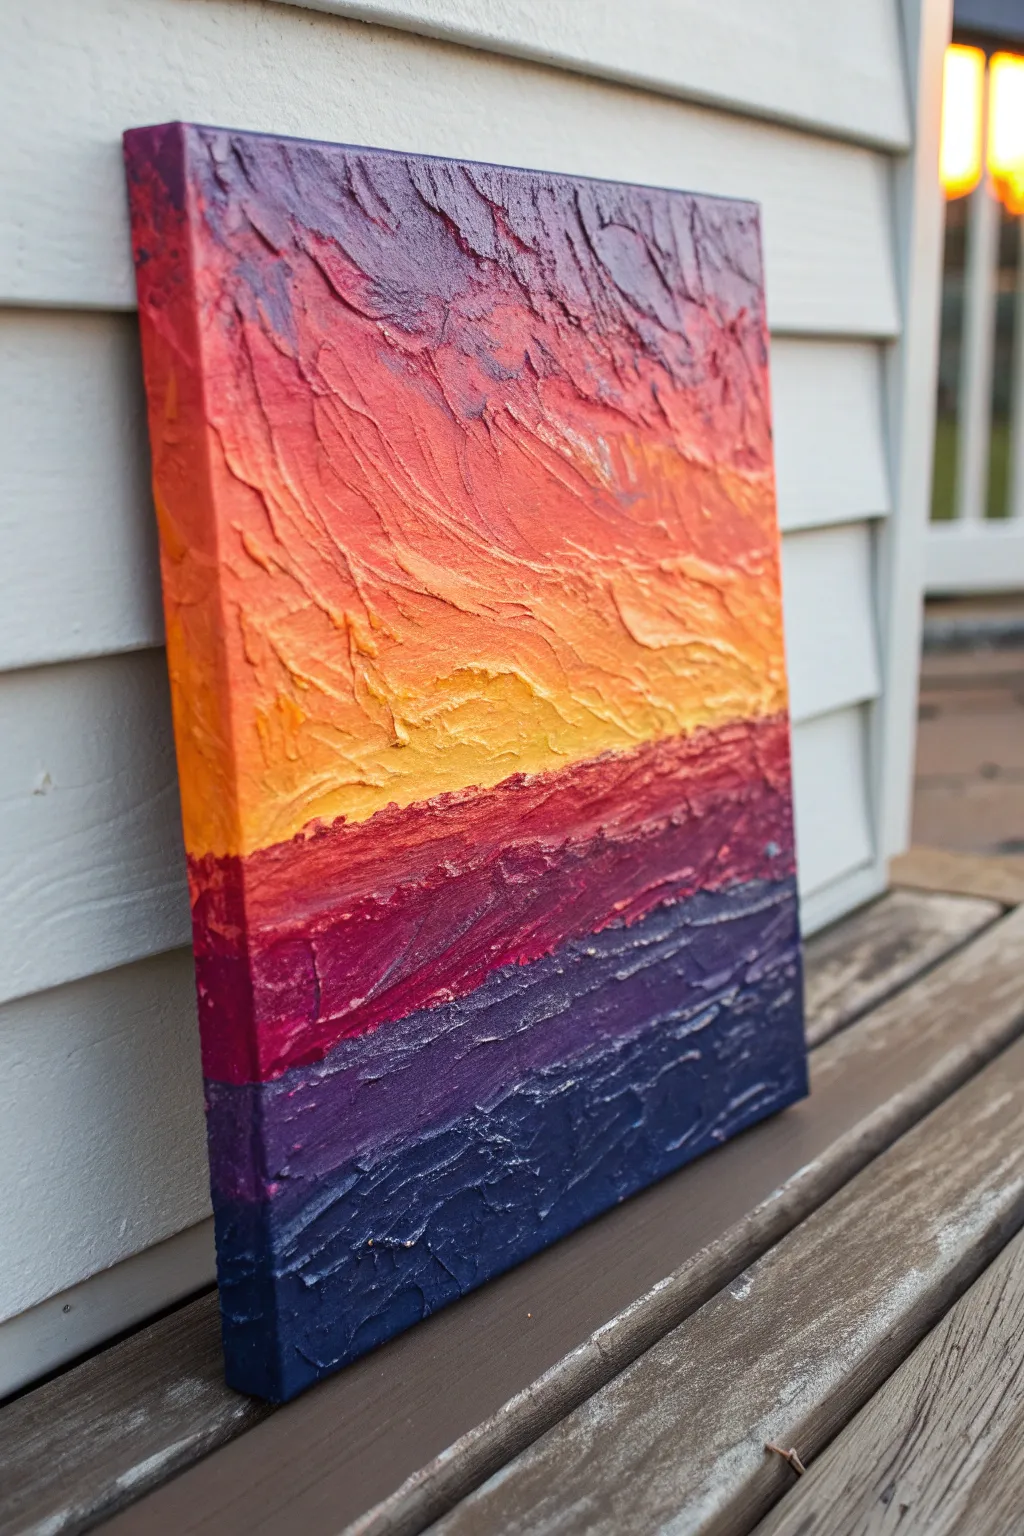
Capture the fiery hues of dusk with this heavily textured abstract painting that leaps off the canvas. Using palette knives instead of brushes allows you to build luscious, physical layers of gradient color.
Step-by-Step Tutorial
Materials
- Stretched canvas (e.g., 8×10 or 11×14 inches)
- Acrylic paints (Titanium White, Cadmium Yellow, Cadmium Orange, Cadmium Red, Alizarin Crimson, Dioxazine Purple, Ultramarine Blue, Phthalo Blue)
- Modeling paste (optional, for extra texture)
- Palette knives (assorted sizes, with one medium diamond shape)
- Palette paper or disposable plate
- Paper towels
- Easel or flat working surface
Step 1: Preparation and Base Layer
-
Prepare your palette:
Squeeze out generous amounts of your colors onto the palette. Because we are painting with texture, you will use significantly more paint than you would with a typical brush painting. -
Mix the texture medium:
If you are using modeling paste to extend your paint and add body, mix a 50/50 ratio of paste to paint for each color pile. If using just heavy body acrylics, ensure they are thick enough to hold a peak. -
Establish the horizon line:
Visualize where your horizon will sit. In this composition, the horizon is slightly below the center line, giving more prominence to the sky.
Keep It Clean
Wipe your palette knife on a paper towel between every single color change. Muddy colors happen when you don’t clean the tool frequently.
Step 2: Painting the Sky Gradient
-
Start with the darkest sky tones:
Using a palette knife, pick up a mixture of Alizarin Crimson and Dioxazine Purple. Apply this just above your imaginary horizon line using horizontal sweeping strokes. -
Introduce the red layer:
Clean your knife. Pick up pure Cadmium Red and apply it directly above the purple-crimson layer. Don’t worry about perfect blending yet; focus on getting thick paint on the canvas. -
Transition to orange:
Moving upward, apply Cadmium Orange. Allow the bottom edge of the orange to overlap slightly with the wet red paint beneath it. -
Apply the yellow highlights:
Fill the top section of the canvas with a mix of Cadmium Yellow and a touch of Titanium White for brightness. This will be the lightest part of the sky. -
Blend on the canvas:
Now, use a clean knife to gently swipe back and forth between the color bands. I like to let the knife skip slightly to create ridges. Drag a little orange down into the red, and red into the purple. -
Add directional texture:
Instead of just smooth horizontal lines, turn your wrist slightly to create diagonal, sweeping ridges in the upper corners. This mimics the movement of clouds.
Metallic Touch
Mix a tiny amount of gold paint into your yellow sky section or drag it lightly over the dry water ridges for a sunset that truly shimmers.
Step 3: Painting the Ocean
-
Begin the water base:
Below the horizon line, apply a band of your darkest purple mix (Dioxazine Purple with a tiny bit of red). -
Deepen the foreground:
For the bottom-most section, mix Ultramarine Blue with Phthalo Blue and a touch of purple. Apply this thickly at the bottom of the canvas. -
Create water texture:
Use the edge of your palette knife to cut into the wet paint, creating short, choppy horizontal strokes. This simulates waves catching the light. -
Connect the edges:
Don’t forget the sides! Wrap your colors around the edges of the canvas, matching the blue bottom and the orange top, so the painting looks finished from every angle.
Step 4: Final Details
-
Highlight the water:
Wipe your knife completely clean. Pick up a tiny amount of the sky orange or yellow. Very gently grace the tops of the texture ridges in the water area to show reflection. -
Enhance texturing:
Look for areas that seem too flat. Apply fresh, thick blobs of pure color on top of the wet layer, leaving them unblended for maximum relief. -
Refine the transitions:
If the transition between the sky and water (the horizon) looks too messy, use the edge of a clean knife to scrape a straight line or layer a distinct dark crimson stroke to separate them. -
Allow to dry:
Lay the canvas flat to dry. Because the paint is so thick, this project may take 24 to 48 hours to cure completely. Do not touch the peaks until fully firm.
Once fully dry, you will have a vibrant, sculptural piece of art that brings warmth to any room


Have a question or want to share your own experience? I'd love to hear from you in the comments below!