If you’ve got a plain bowl and a little curiosity, you’re already more than halfway to something really beautiful. These beginner bowl painting ideas are the kind you can pull off in one cozy session—simple moves, big payoff.
Classic Polka Dots Inside the Bowl
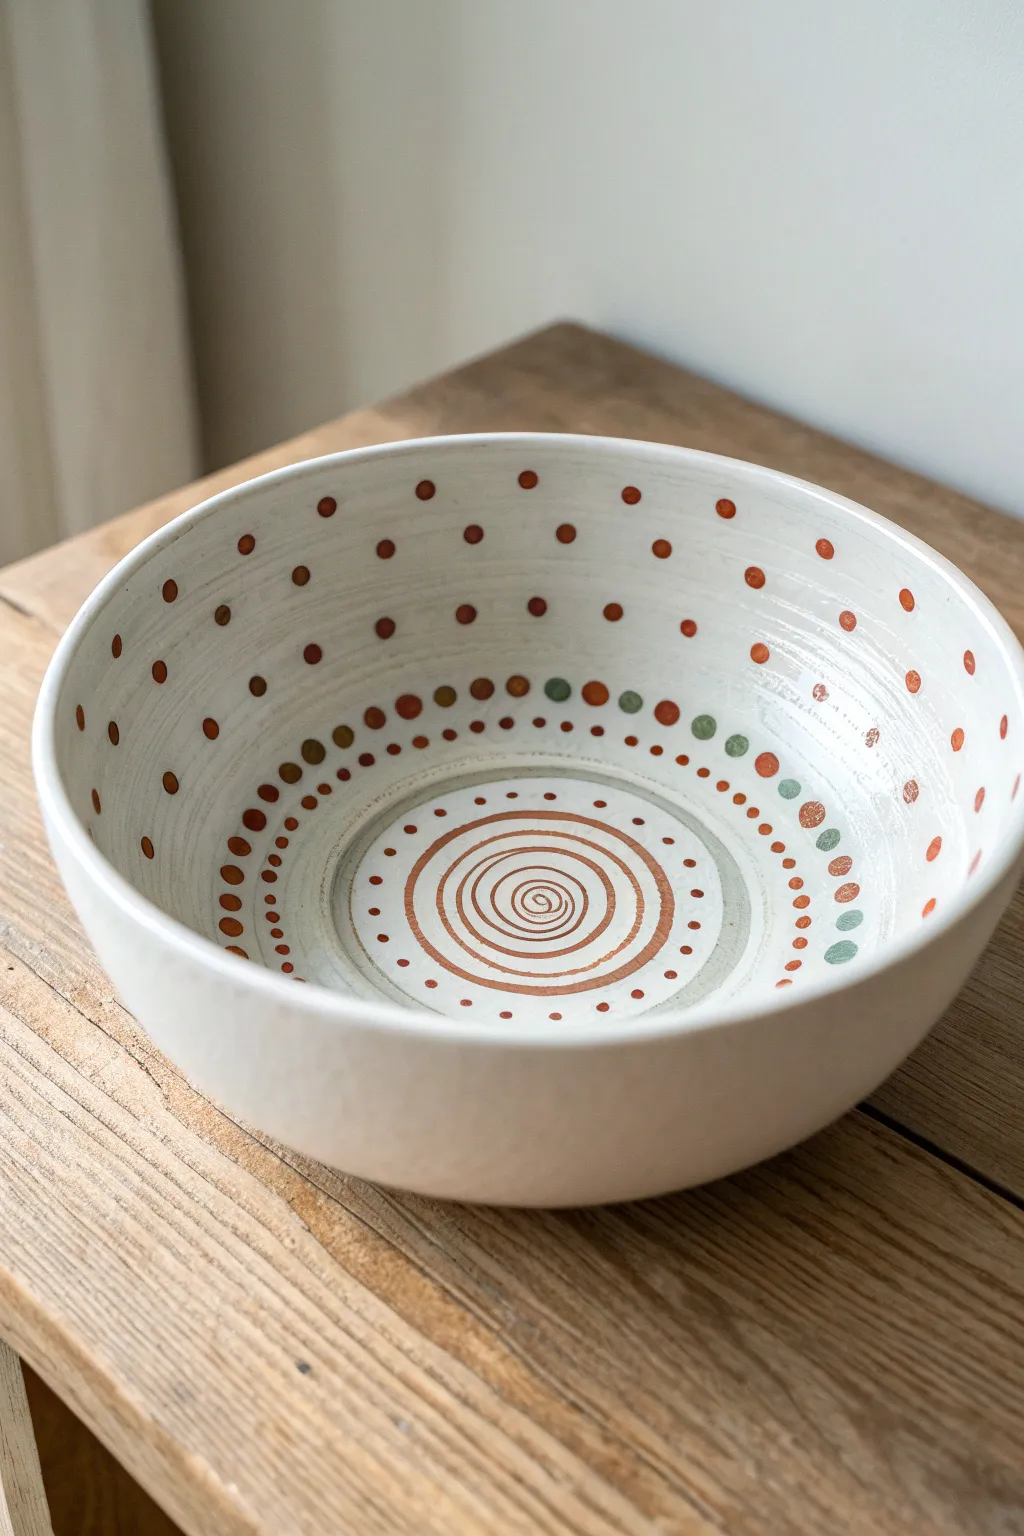
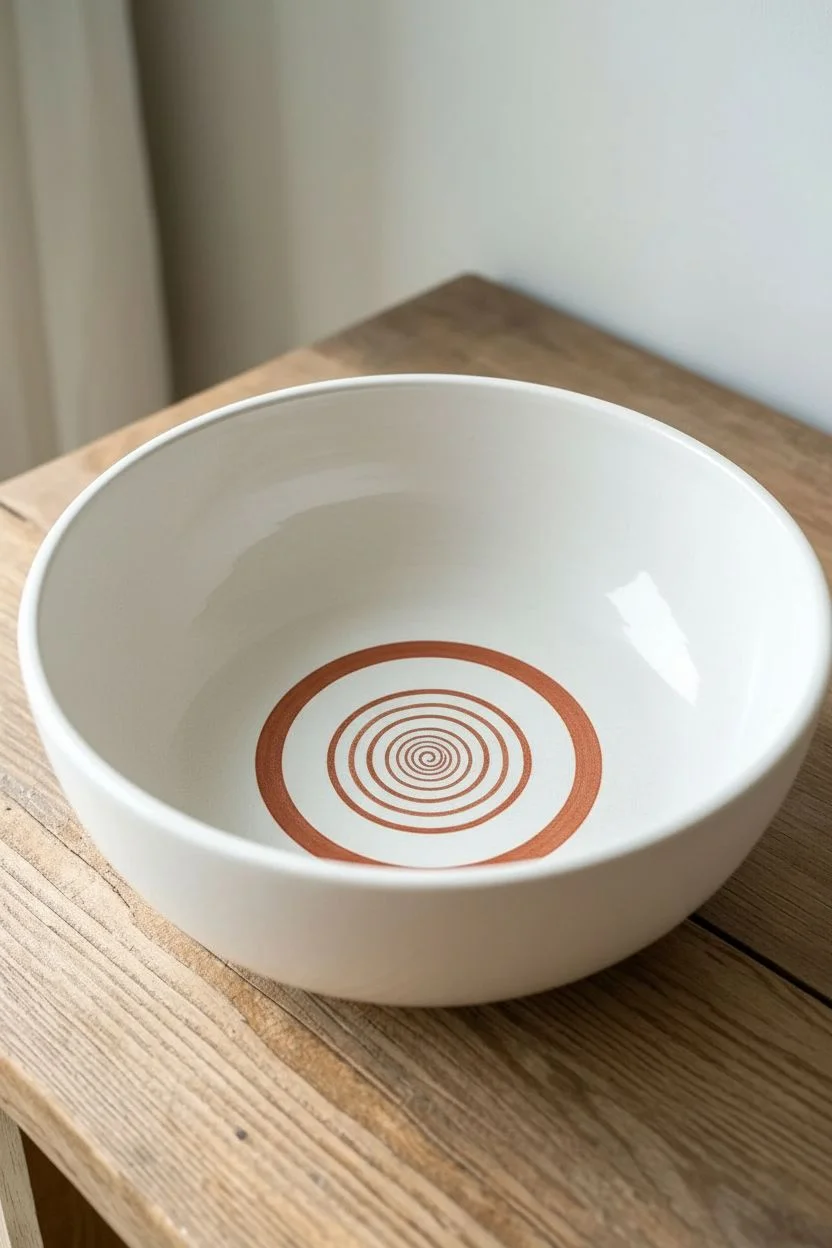
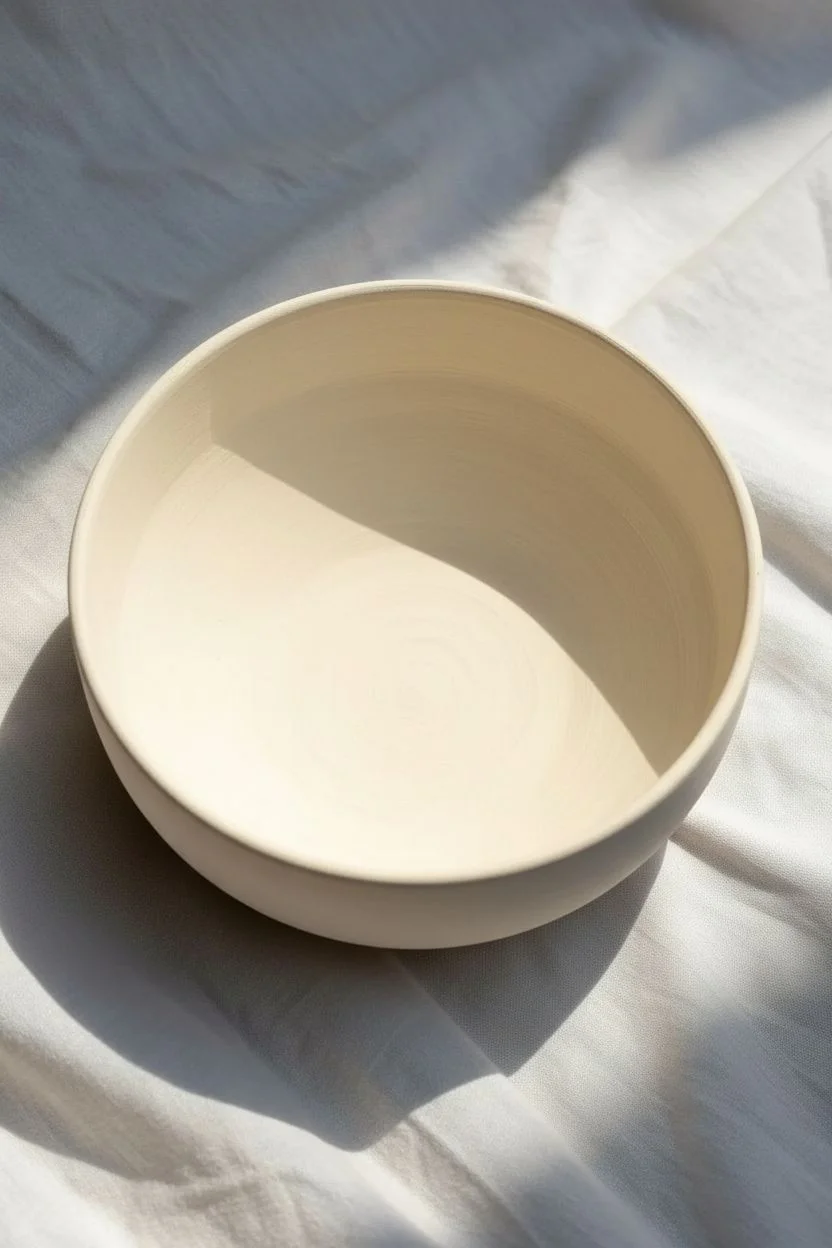
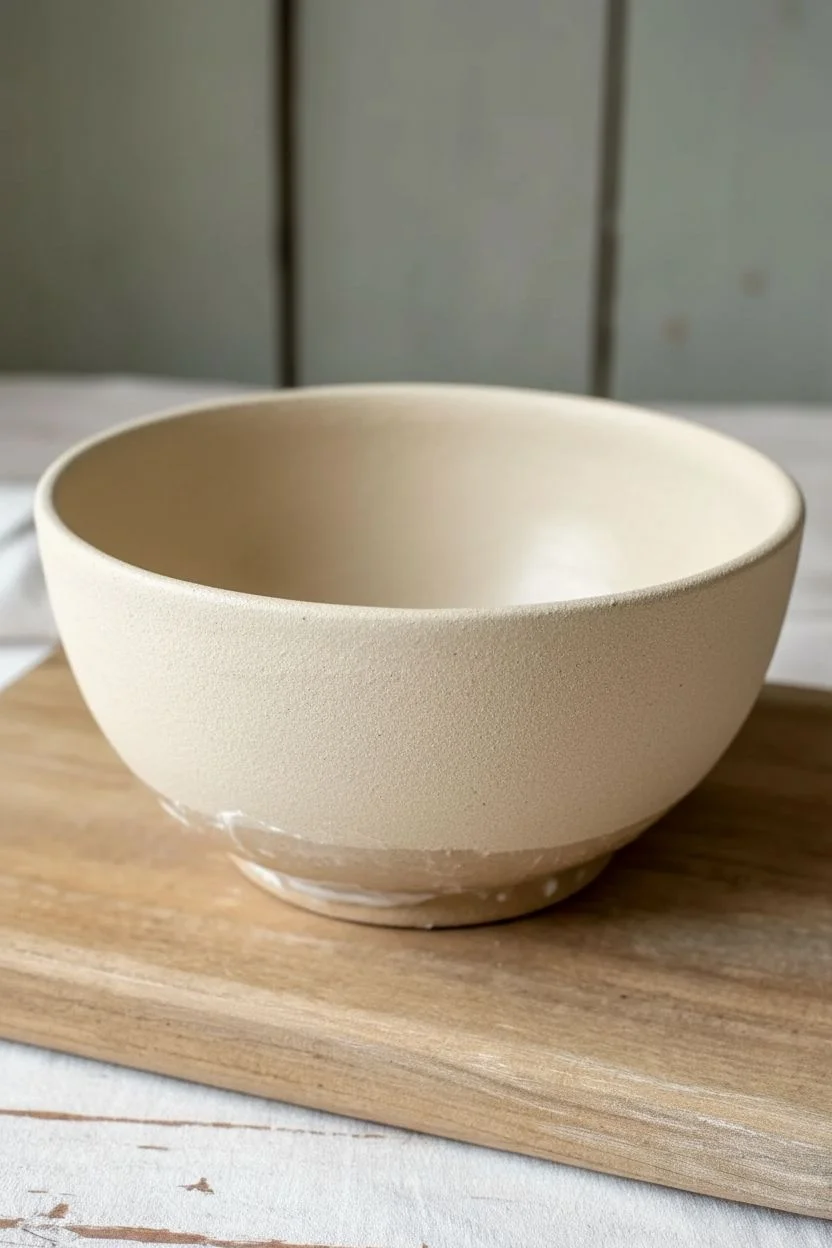
This project transforms a simple white ceramic bowl into a piece of art that draws the eye inward with mesmerizing patterns. By combining a rustic spiral center with concentric rings of playful polka dots, you’ll create a design that feels both organic and delightfully structured.
Detailed Instructions
Materials
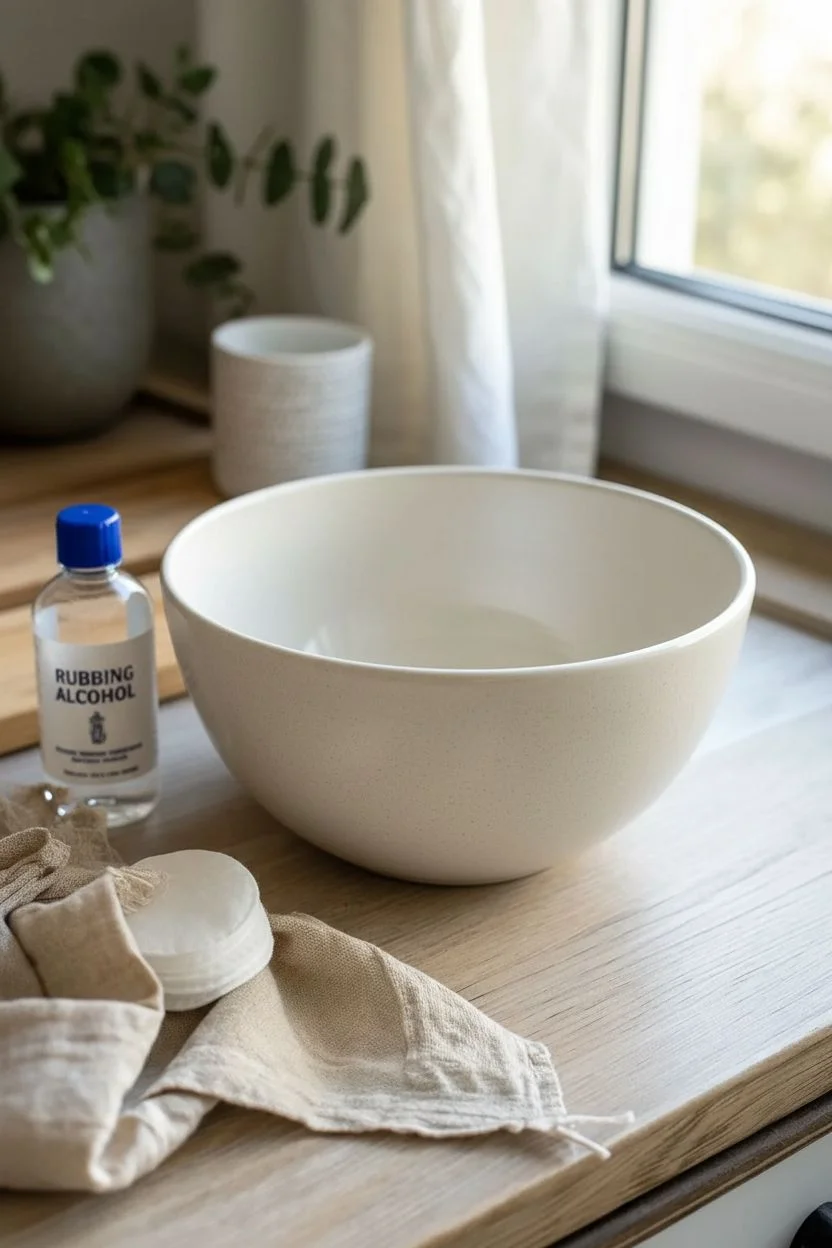
- White or cream glazed ceramic bowl
- Ceramic paints (Terracotta/Red-Brown, Olive Green)
- Fine liner paintbrush (size 0 or 00)
- Round paintbrush (size 2)
- Dotting tools (various sizes) or ends of brush handles
- Rubbing alcohol
- Soft cloth
- Palette for mixing
- Oven (if using heat-set paints)
Step 1: Preparation and Centerpiece
-
Clean surface:
Begin by thoroughly cleaning the inside of your bowl with rubbing alcohol and a soft cloth to remove any oils or dust, ensuring the paint adheres properly. -
Load fine brush:
Load your fine liner brush with the terracotta or reddish-brown ceramic paint. Ensure the consistency is fluid but not drippy. -
Start the spiral:
Locate the absolute center of the bowl’s bottom. Gently touch the brush down and begin painting a tight spiral, slowly working your way outward. -
Expand the classic spiral:
Continue the spiral motion until you have created a coil with about 5-6 distinct rings. Aim for a slightly imperfect, hand-drawn look rather than geometric perfection. -
Outer ring boundary:
Paint a solid, slightly thicker circular outline around your spiral, leaving a bit of white space between the spiral’s end and this new ring to frame the center.
Perfect Circles Every Time
If you struggle with freehand circles, place the bowl on a lazy susan. Hold your brush steady in one spot and slowly rotate the wheel to create perfectly even rings.
Step 2: Creating the Patterned Rings
-
First dot circle:
Switch to a small dotting tool. Dip it into the terracotta paint and place a ring of small, evenly spaced dots just outside the solid circle you painted in the previous step. -
Second dot circle:
Using the same tool, add a second ring of terracotta dots slightly further out. Stagger these dots so they sit in the gaps of the first ring for a dynamic look. -
Mixing the olive tone:
Prepare your olive green paint. If it’s too bright, I like to mix in a tiny drop of the brown to mute it slightly so it harmonizes with the central spiral. -
Alternating color ring:
Move outward to the lower curve of the bowl wall. Using a medium-sized dotting tool, create a ring that alternates between terracotta and olive green dots. -
Larger green accents:
For the next concentric row up the bowl wall, select a larger dotting tool and use only the olive green paint to create bold, distinct spots. -
Medium brown row:
Switch back to the terracotta paint and a medium dotting tool. Place this row of dots above the green ones, spacing them a bit wider apart to account for the bowl getting wider.
Add Rustic Texture
Before the paint dries completely, use a dry sponge to lightly dab the larger dots. This creates a weathered, stone-like texture that mimics actual pottery glaze.
Step 3: Finishing the Upper Walls
-
Scattered wall dots:
As you move up the vertical walls of the bowl, transition from strict rows to a slightly looser arrangement. Place medium-sized terracotta dots in a spacious, staggered pattern. -
Upper rim pattern:
Near the top rim, add larger, more widely spaced terracotta dots. These should be the largest dots on the bowl to balance the visual weight. -
Rim finish:
Paint a very thin, delicate line of terracotta right along the very edge of the rim to frame the entire design. -
Clean up details:
Inspect the bowl for any smudges or uneven dots. You can scratch off mistakes gently with a toothpick once the paint is semi-dry. -
Drying time:
Allow the paint to air dry completely for at least 24 hours. Don’t rush this step, as thick dots take longer to cure than thin lines. -
Baking process:
Follow the instructions on your specific ceramic paint bottle for baking. Usually, this involves placing the bowl in a cold oven, heating to 300-350°F, and baking for 30 minutes. -
Cooling down:
Turn the oven off and leave the bowl inside until it is completely cool. Removing it while hot can cause the ceramic to crack.
Now you have a stunning custom bowl ready to display fruit or simply shine on its own


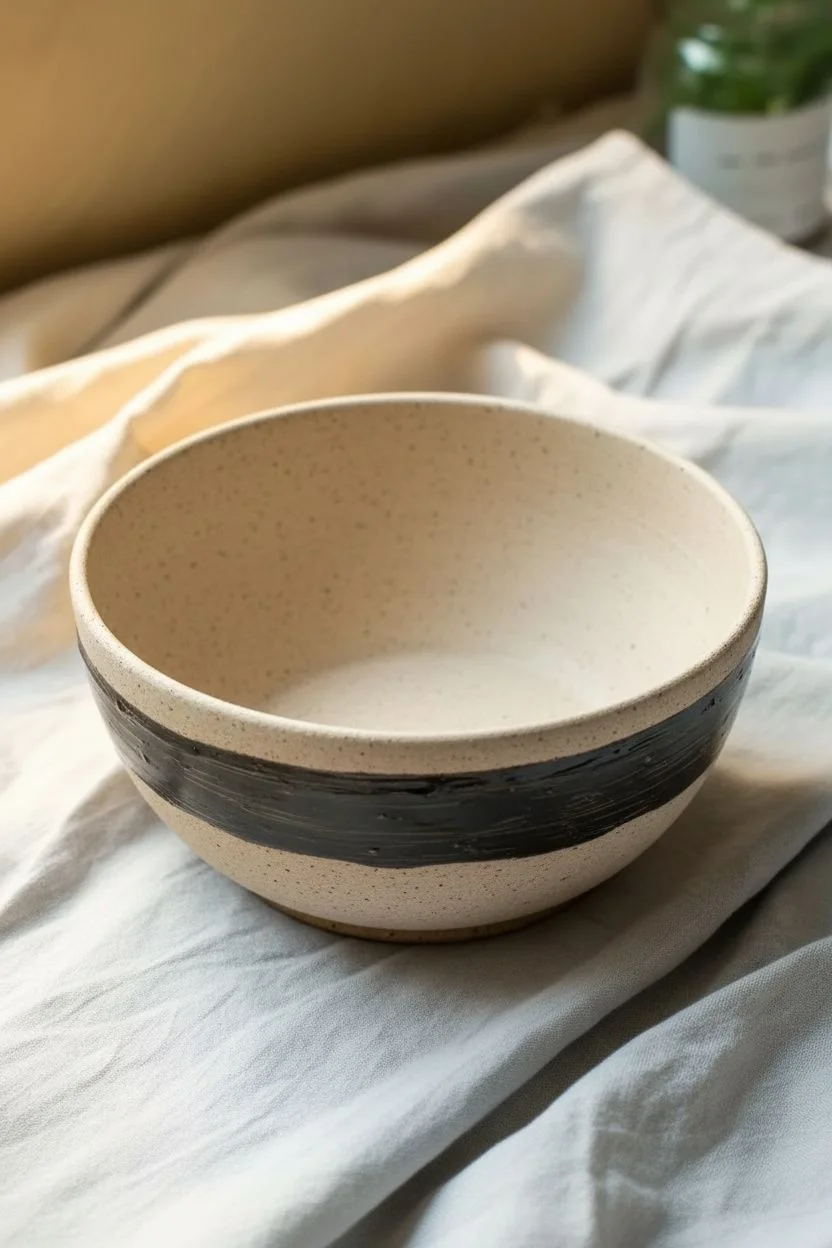
Crisp Stripes With Simple Tape Lines
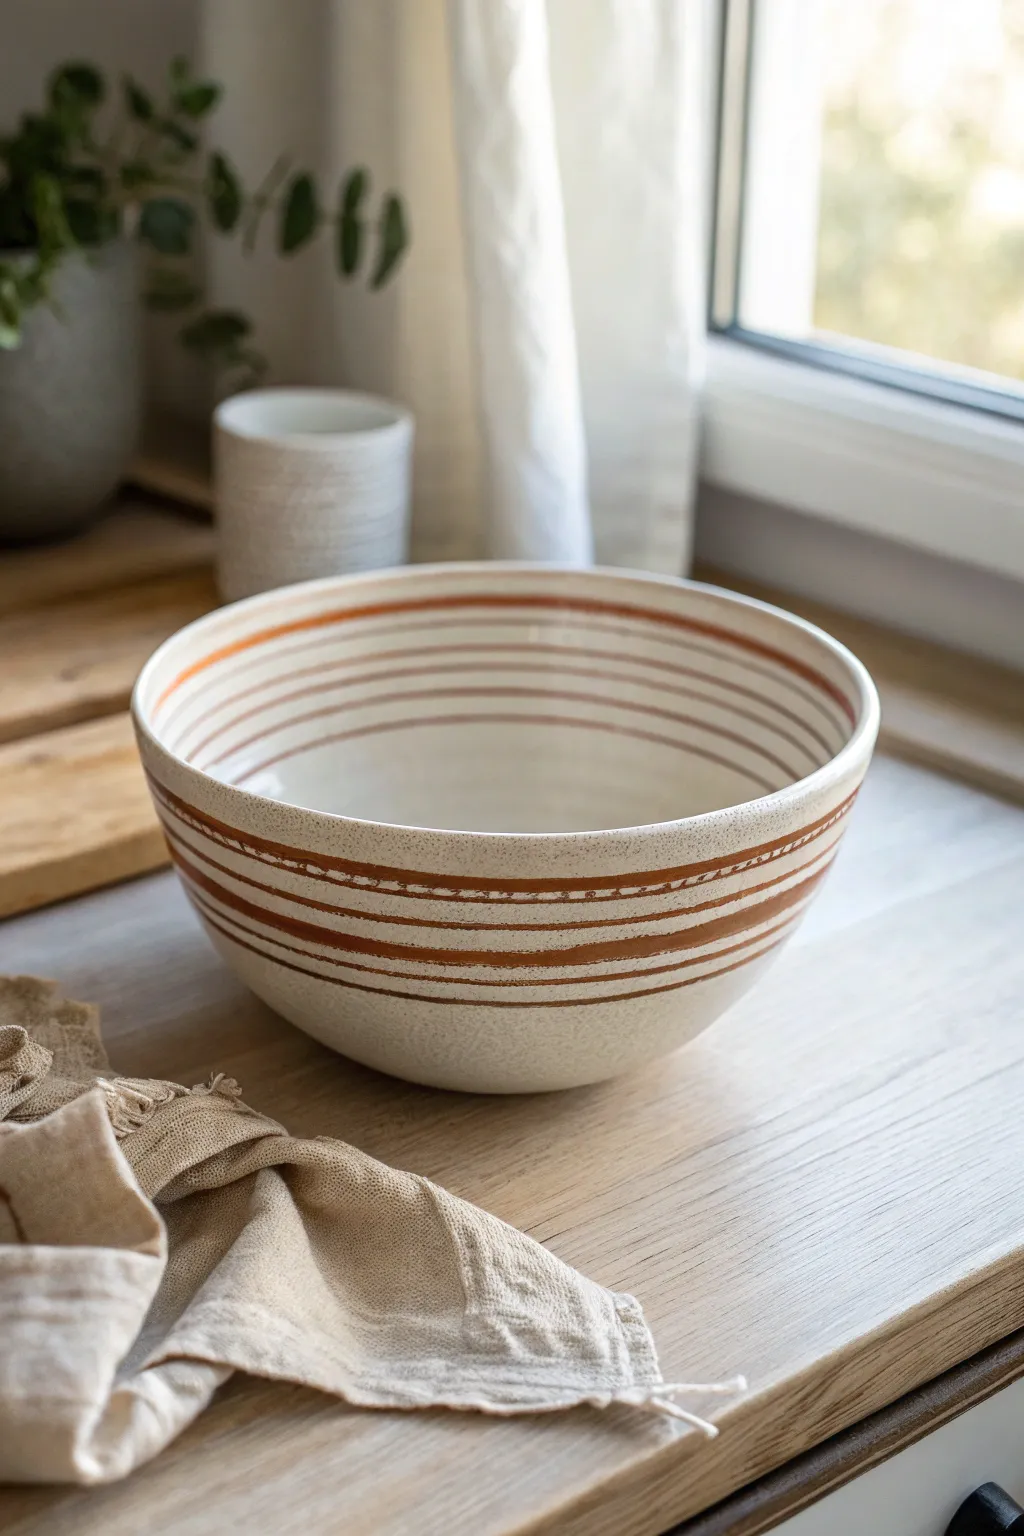
Transform a plain ceramic bowl into a stylish piece of decor with warm, earthy tones and varied stripe widths. This beginner-friendly project uses tape to achieve relatively clean lines while embracing a hand-painted, organic feel.
Step-by-Step Tutorial
Materials
- Plain ceramic or porcelain bowl (white or off-white)
- Ceramic paint or multi-surface acrylic paint (rust/copper or terracotta color)
- Peel-off masking tape or painter’s tape (various widths if possible)
- Medium flat synthetic brush
- Fine detail brush
- Rubbing alcohol
- Cotton pads
- Oven (for curing, if required by paint type)
Step 1: Preparation
-
Clean surface:
Begin by washing your bowl thoroughly with soap and warm water to remove any stickers or residue. -
Degrease:
Once dry, wipe the entire surface inside and out with rubbing alcohol on a cotton pad to ensure the paint adheres perfectly. -
Plan your spacing:
Look at the bowl and decide where you want your bands of color. This design utilizes the natural rim and base as guides.
Sticky Situation
To prevent paint from bleeding under mask tape, press the edges firm with your fingernail or a credit card before you start painting.
Step 2: Painting the Exterior
-
Tape the first line:
Wrap a strip of painter’s tape horizontally around the exterior of the bowl, about an inch below the rim. Press the edges down firmly. -
Create the second guide:
Place another ring of tape roughly half an inch below the first one. The exposed ceramic between these two pieces of tape is where your first thick stripe will go. -
Paint the main band:
Using your medium flat brush and the rust-colored paint, fill in the gap between the tape lines. Apply thin, even layers. -
Freehand the thin lines:
For the thinner stripes below the main band, I find it easier to skip the tape. Load a fine detail brush and carefully paint a thin, continuous line while slowly rotating the bowl on the table. -
Add texture:
Between two of your painted bands, dab small dots or dashes using the very tip of your detail brush to create that decorative, stitched-look line seen in the image. -
Remove tape:
While the paint is still slightly tacky (not fully dry), carefully peel away the tape at a sharp angle to reveal your crisp edges.
Step 3: Painting the Interior
-
Tape the inner rim:
Move to the inside of the bowl. Apply tape about half an inch down from the lip to protect the white space. -
Apply the rim stripe:
Paint the area between the tape and the very top edge of the bowl. Paint right over the lip to connect the outside and inside designs. -
Add inner rings:
Further down inside the bowl, freehand 3-4 consecutive thin rings. Don’t worry if they wobble slightly; it adds to the handmade pottery aesthetic. -
Clean up:
If any paint smudged where it shouldn’t be, quickly wipe it away with a damp cotton swab or scrape it off gently with a fingernail once dry.
Mix It Up
Try mixing baking soda into your acrylic paint before applying. This creates a textured, terracotta-like surface that looks like real clay.
Step 4: Finishing Touches
-
Initial dry:
Let the bowl sit undisturbed for at least 24 hours to allow the paint to set completely. -
Cure the paint:
Check your specific paint bottle instructions. Most ceramic paints require baking in a non-preheated oven at 350°F (175°C) for about 30 minutes to become dishwasher safe. -
Cool down:
If baking, turn the oven off and let the bowl cool down completely inside the oven before removing it to prevent cracking.
Now you have a stunning, custom-painted bowl ready to display fruit or simply look beautiful on your shelf


Easy Rim Border Pattern (Scallops or Dashes)
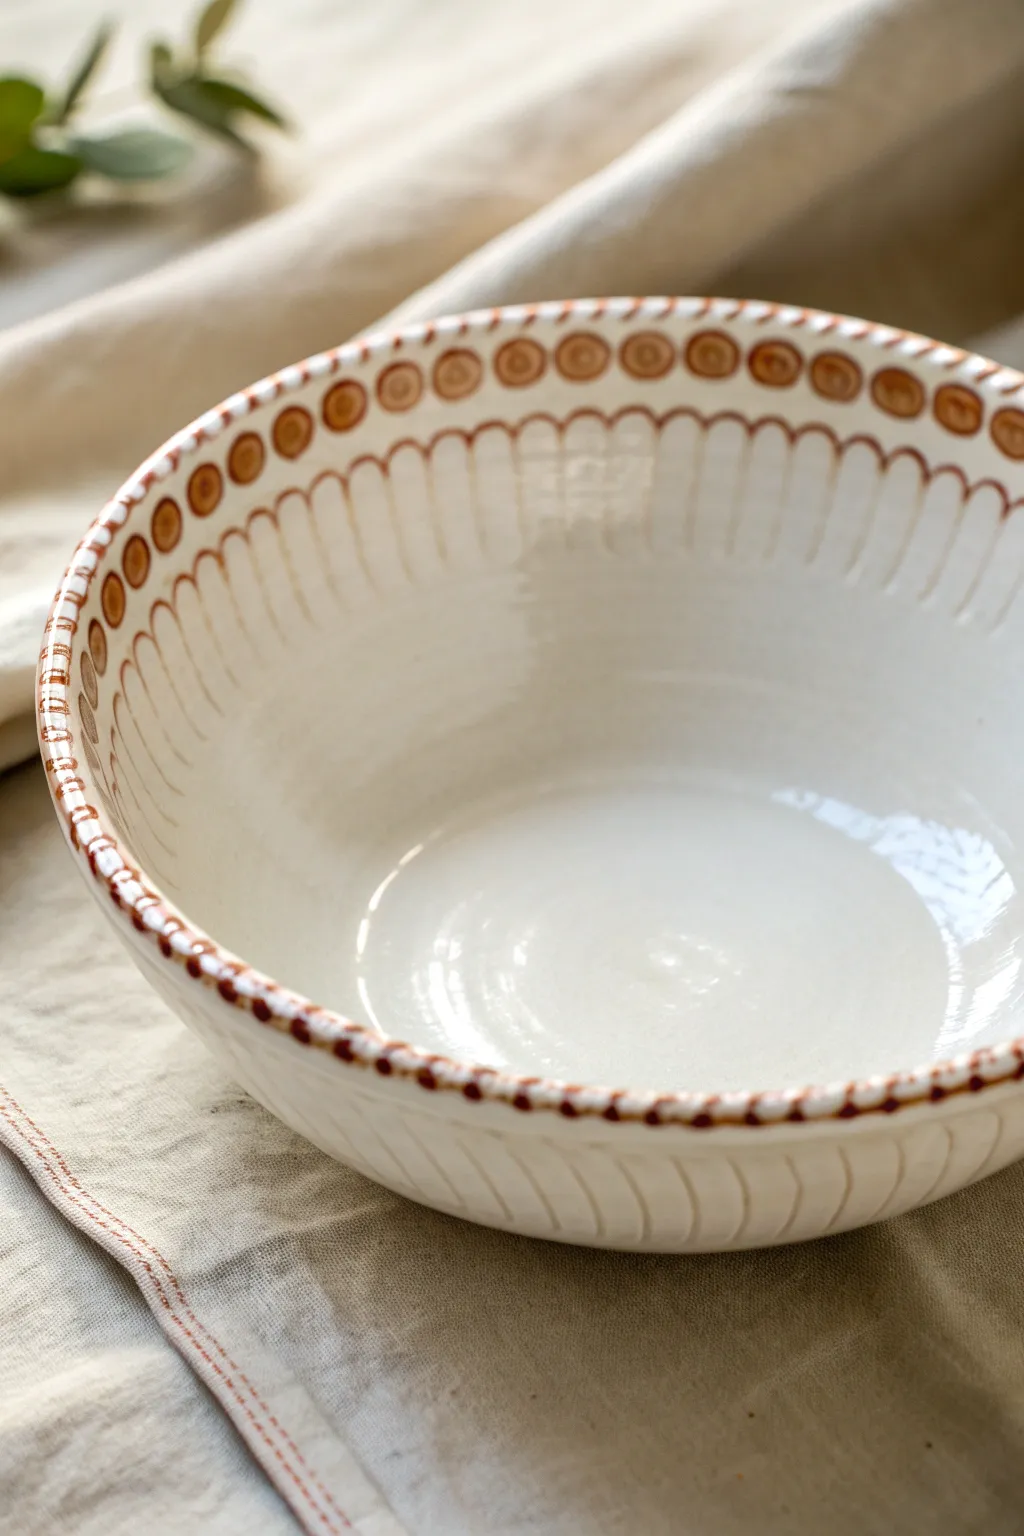
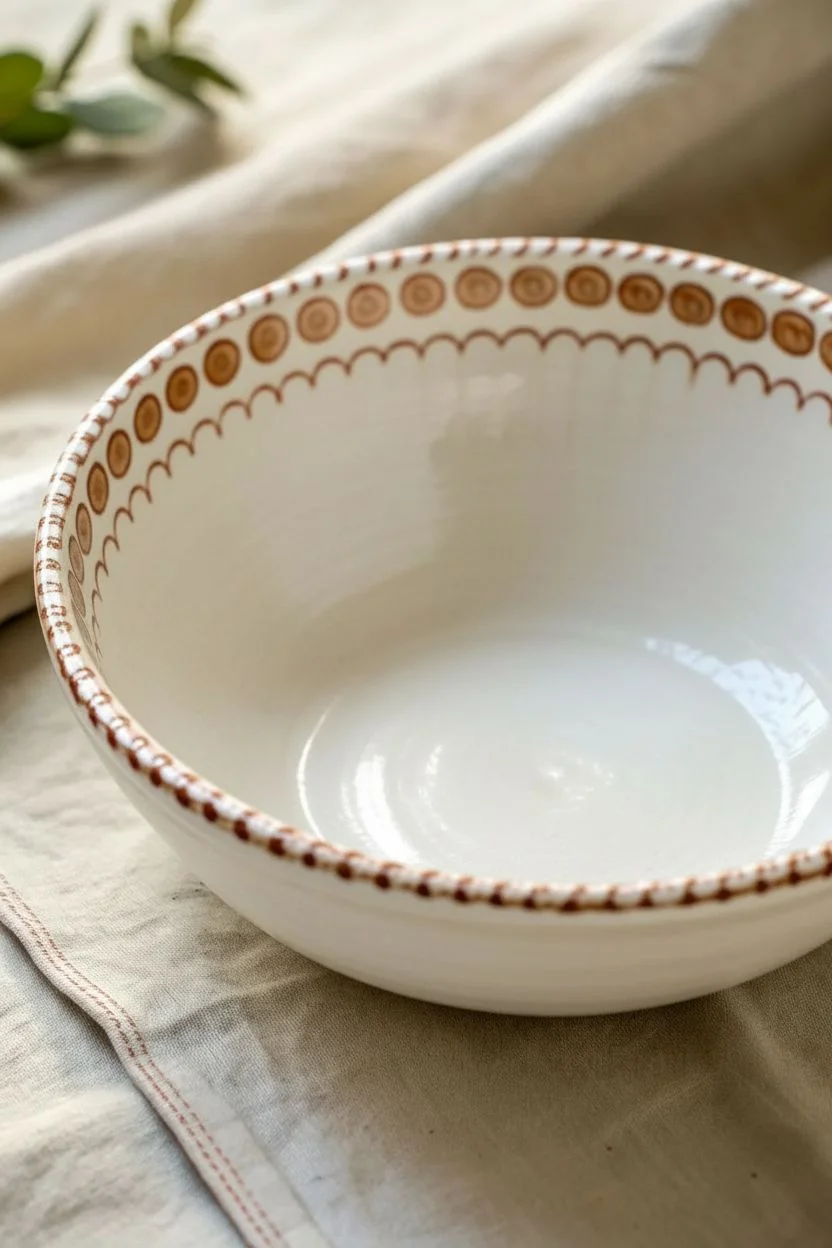
This charming project transforms a plain white bowl into artisanal tableware using just a single color of underglaze or ceramic paint. The pattern relies on simple repetitive motions—dots along the rim and swept lines down the sides—to create a cozy, vintage-inspired look without needing complex drawing skills.
Step-by-Step Guide
Materials
- Bisque-fired ceramic bowl (white clay body)
- Red-brown underglaze (e.g., Terracotta or Burnt Sienna)
- Clean sponge
- Small round brush (size 2 or 4)
- Detail liner brush (optional)
- Clear dipping glaze or brushing glaze
- Kiln access (or suitable oven if using bake-on porcelain paints)
- Damp cloth for corrections
Step 1: Preparation & Planning
-
Clean the Bisque:
Before you begin painting, take a slightly damp sponge and wipe down the entire bisque bowl. This removes any ceramic dust that might prevent the glaze from adhering properly. -
Check Your Consistency:
Stir your red-brown underglaze thoroughly. It should be the consistency of heavy cream. If it’s too thick, add a drop or two of water; if it’s too thin, the lines won’t hold their rich color.
Step 2: Painting the Rim Dots
-
Load the Brush:
Dip your small round brush into the underglaze. You want a good amount of paint on the tip, but not so much that it drips. -
Place the First Dot:
Choose a starting point directly on the top edge of the rim. Gently press the tip of the brush down to create a small, imperfect circle or heavy dot. -
Create a Spacing Guide:
Instead of painting every dot sequentially immediately, paint four ‘anchor’ dots at the 12, 3, 6, and 9 o’clock positions. This helps ensure your spacing remains relatively even around the circumference. -
Fill in the Gaps:
Go back and fill in the spaces between your anchor dots with more circles. Aim for a rustic feel—they don’t need to be perfectly identical or perfectly spaced. -
Let the Rim Dry:
Allow these dots to dry until they are chalky to the touch. This ensures you won’t accidentally smudge them while working on the next phase.
Oops! Smudged Dot?
Don’t panic! Since underglaze dries chalky, you can gently scratch off mistakes with a needle tool or stiff brush once dry, then repaint that spot cleanly.
Step 3: Adding the Vertical Lines
-
Position the Bowl:
Hold the bowl comfortably in your lap or on a banding wheel. You’ll want to paint the interior lines first. -
Paint Interior Dashes:
Reload your round brush. Starting from the space *between* two rim dots, paint a sweeping line downwards into the bowl. Lift your brush as you go down to taper the stroke. -
Establish the Rhythm:
Continue this pattern around the entire interior. Each vertical dash should align with the gap between the rim dots, creating a scalloped fence effect. -
Paint Exterior Dashes:
Repeat the exact same process for the outside of the bowl. Start under the gap between rim dots and sweep the brush downwards, curving slightly with the shape of the bowl. -
Check Density:
Look at your lines. If the underglaze looks transparent or streaky, carefully go over the stroke a second time to build up opacity, but try to keep that hand-painted texture visible.
Try Contrast
For a bolder mid-century look, switch the red-brown oxide for a deep cobalt blue or a matte black underglaze. The high contrast against white clay is stunning.
Step 4: Glazing & Finishing
-
Dry Thoroughly:
Let the underglaze dry completely. It should look matte and lighter in color than when wet. -
Apply Clear Glaze:
Using a wide fan brush or dipping tongs, apply a coat of clear transparent glaze over the entire bowl. Ensure an even coat so the white clay shines through brightly. -
Clean the Foot:
Wipe the bottom foot of the bowl with a clean sponge to remove any glaze. This prevents the bowl from sticking to the kiln shelf during firing. -
Fire:
Fire the piece according to your clay and glaze specifications (typically Cone 06 or Cone 6). Once cool, the design will be glossy and food-safe.
Your finished bowl will have a beautiful, handmade warmth perfect for serving soup or cereal


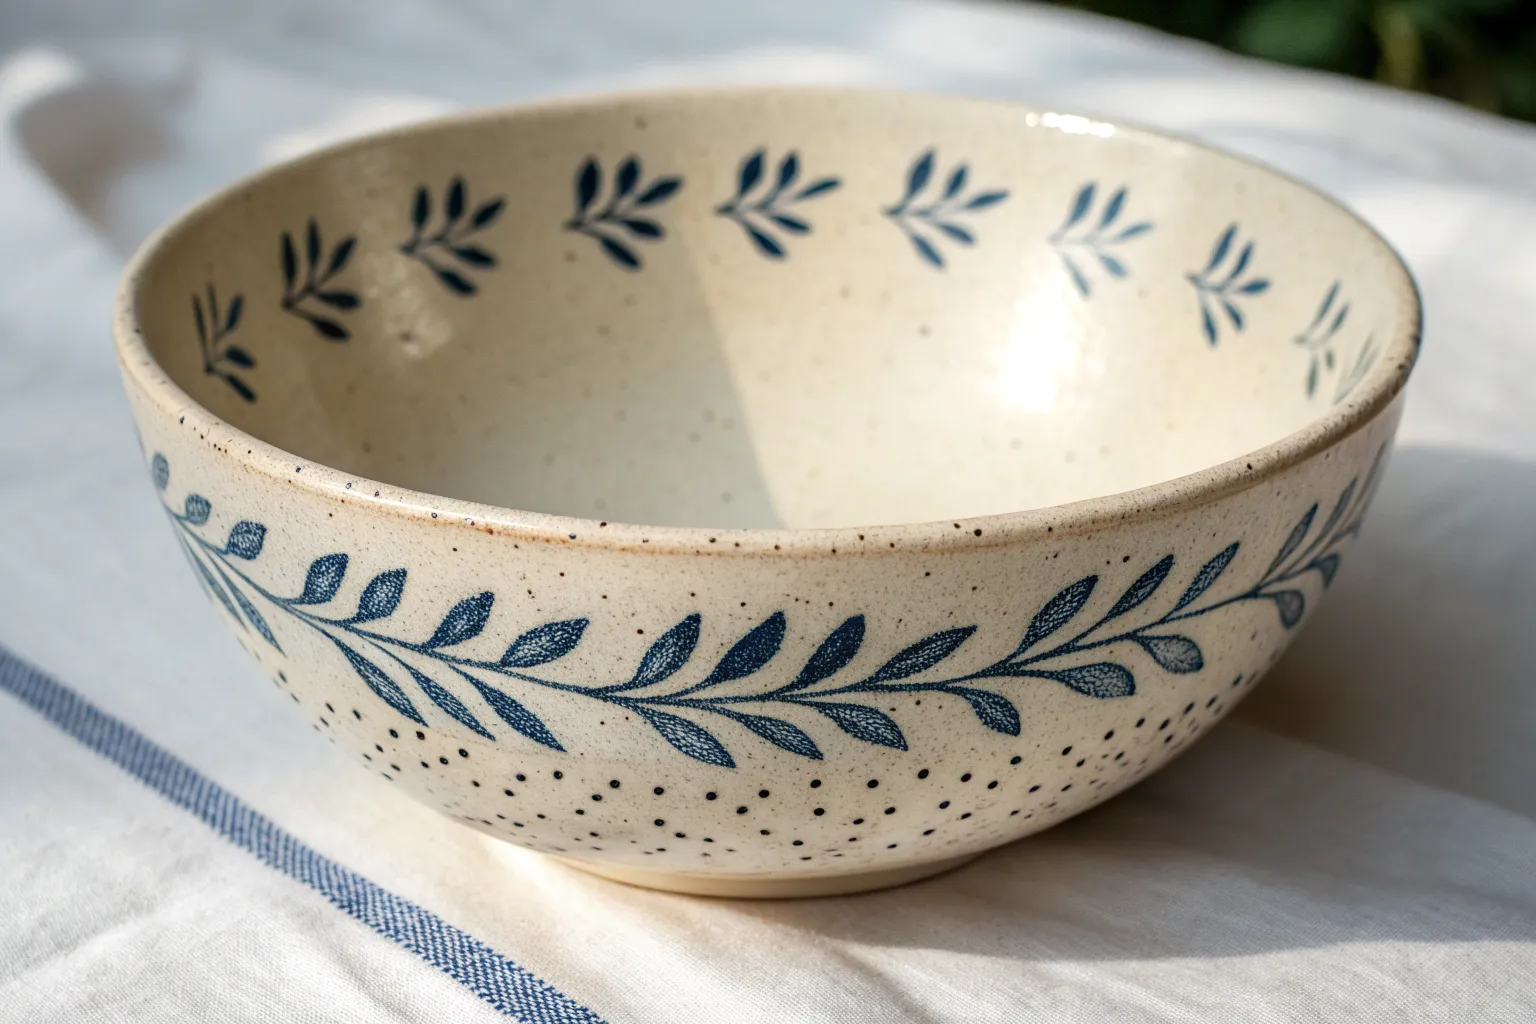
Simple Floral Sprigs Around the Edge
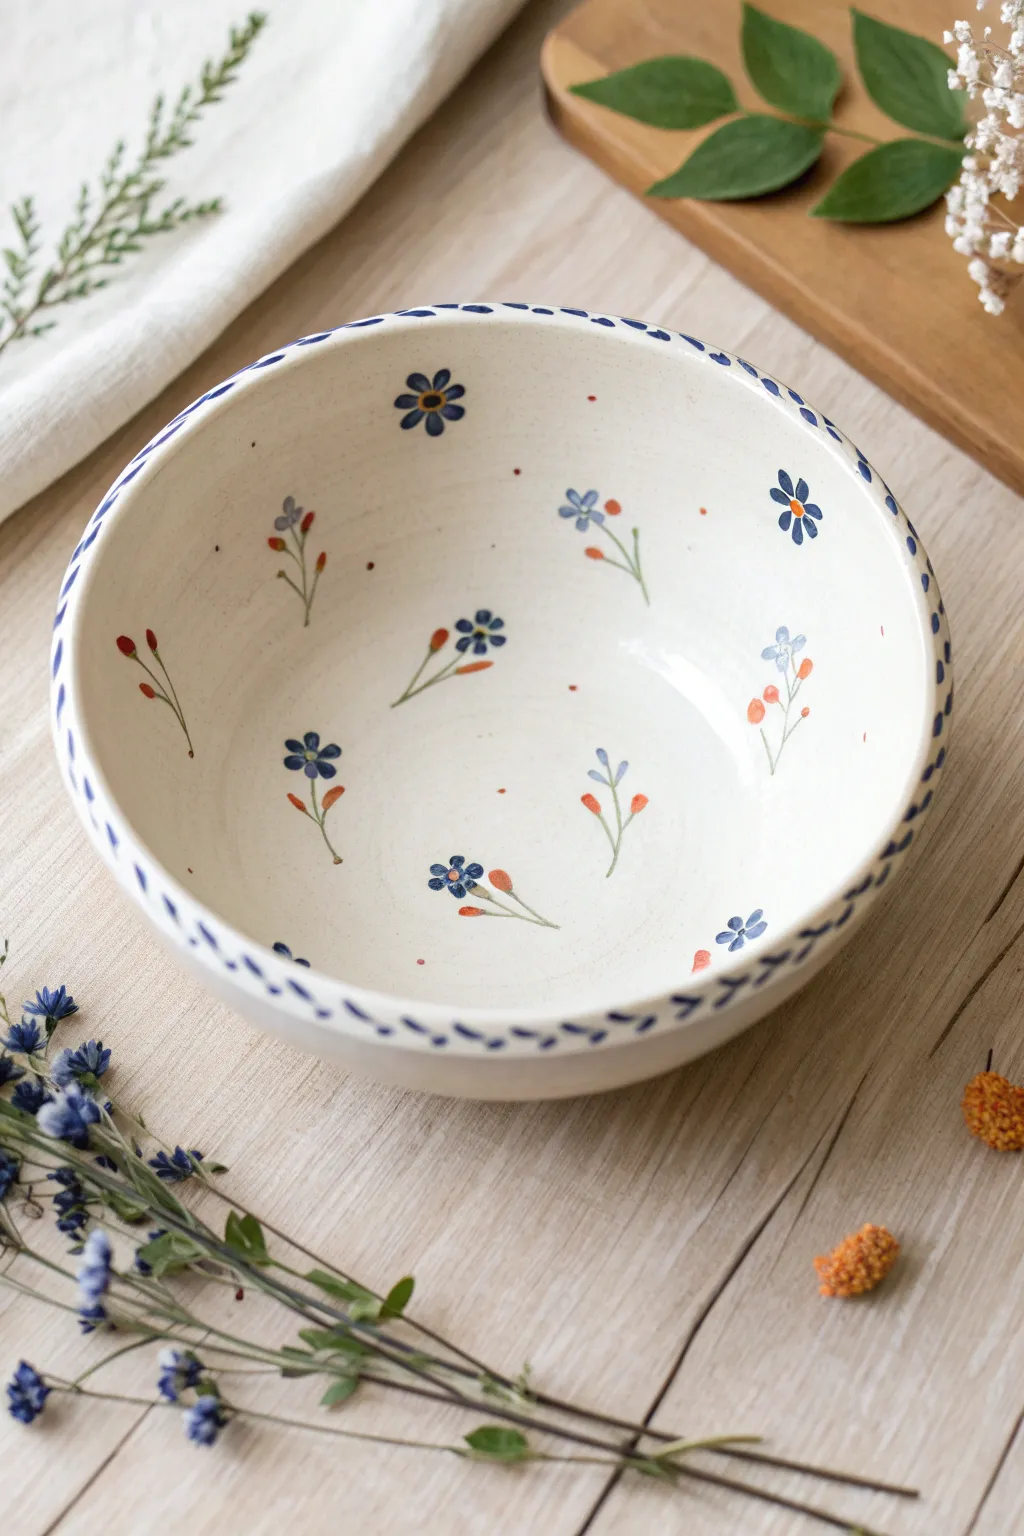

Capture the delicate beauty of a spring meadow with this charming hand-painted bowl design. Featuring scattered blue wildflowers and tiny orange buds, this project uses simple strokes to create an airy, organic feel perfect for beginners.
Step-by-Step Tutorial
Materials
- White or cream ceramic bowl (bisque ware or oven-bake ceramic)
- Ceramic paints or underglazes (Navy Blue, Light Blue, Burnt Orange, Sage Green)
- Small round paintbrush (size 0 or 1)
- Fine liner brush (size 00 or 000)
- Pallet or small plate for mixing
- Water cup and paper towels
- Clear glazing medium (if using underglazes)
- Clear gloss glaze (optional, depending on paint type)
Step 1: Painting the Rim
-
Prepare your paints:
Squeeze out a small amount of navy blue ceramic paint. If the consistency is too thick, add a drop of water to make it flow smoothly, like heavy cream. -
Start the dash pattern:
Using your small round brush, load it with navy blue paint. Starting at one point on the rim, paint a short, diagonal dash about a quarter-inch long. -
Create the rhythm:
Continue painting these diagonal dashes around the entire circumference of the bowl rim. Leave a small gap between each dash to keep the look light and airy. -
Check spacing:
As you work, try to keep the angle and spacing consistent, but don’t worry about perfection; the handmade variance adds charm.
Fixing Smudges
Made a mistake? Don’t panic. If using underglaze, gently scrape the dried mistake off with a craft knife or toothpick. For wet paint, a damp Q-tip works wonders.
Step 2: Creating Large Flowers
-
Identify placement:
Visualize a triangle inside the bowl. You will paint three larger, dark blue flowers spaced equally apart near the upper inside edge. -
Paint the petals:
Using the dark navy blue and the round brush, press down gently to form five teardrop-shaped petals radiating from a center point. Lift the brush at the end of each stroke to create a tapered point. -
Add the centers:
Once the blue petals are dry to the touch, use the fine liner brush to dab a small circle of burnt orange in the center of each navy flower. -
Detail the centers:
For a bit of depth, add a tiny dot of black or dark brown right in the middle of the orange centers.
Varying Your Grip
Hold the brush near the ferrule (metal part) for detailed centers, but slide your hand back for looser, more organic stems to prevent stiff lines.
Step 3: Scattering Small Sprigs
-
Mix a lighter blue:
Mix a little white into your navy blue or use a pre-mixed light blue shade for the smaller scattered flowers. -
Paint small blossoms:
Between the large flowers and lower down into the bowl, paint smaller four-petal flowers using the light blue. Keep these loose and less detailed than the big ones. -
Add stems:
Switch to your fine liner brush and sage green paint. Draw very thin, curving stems extending downwards from your light blue flowers. -
Paint leaves:
Add tiny, single-stroke leaves along the green stems. A quick press-and-lift motion works best here. -
Create orange buds:
In the empty spaces, paint small sprigs that feature only burnt orange buds. Draw a green stem first, then add oval-shaped orange dots at the tips. -
Add floating petals:
To fill any awkward gaps, paint solitary floating orange petals or tiny blue dots to create a sense of movement, like petals caught in a breeze. -
Review the composition:
Step back and look at the inside of the bowl. The pattern should look random but balanced. Add a few more tiny orange dots if an area feels too empty.
Step 4: Finishing Up
-
Dry completely:
Allow the paint to dry fully according to the manufacturer’s instructions. This usually takes 24 hours for air-dry paints. -
Apply glaze:
If you used underglazes on bisque ware, carefully brush on a coat of clear dipping glaze or brush-on gloss glaze, covering the entire interior and rim. -
Final cure:
Fire the piece in a kiln or bake it in a home oven, depending on the specific type of ceramic paint you selected.
Now you have a lovely, custom-painted bowl ready for your morning cereal or to display on your shelf
BRUSH GUIDE
The Right Brush for Every Stroke
From clean lines to bold texture — master brush choice, stroke control, and essential techniques.
Explore the Full Guide
Leafy Vines That Follow the Bowl Curve
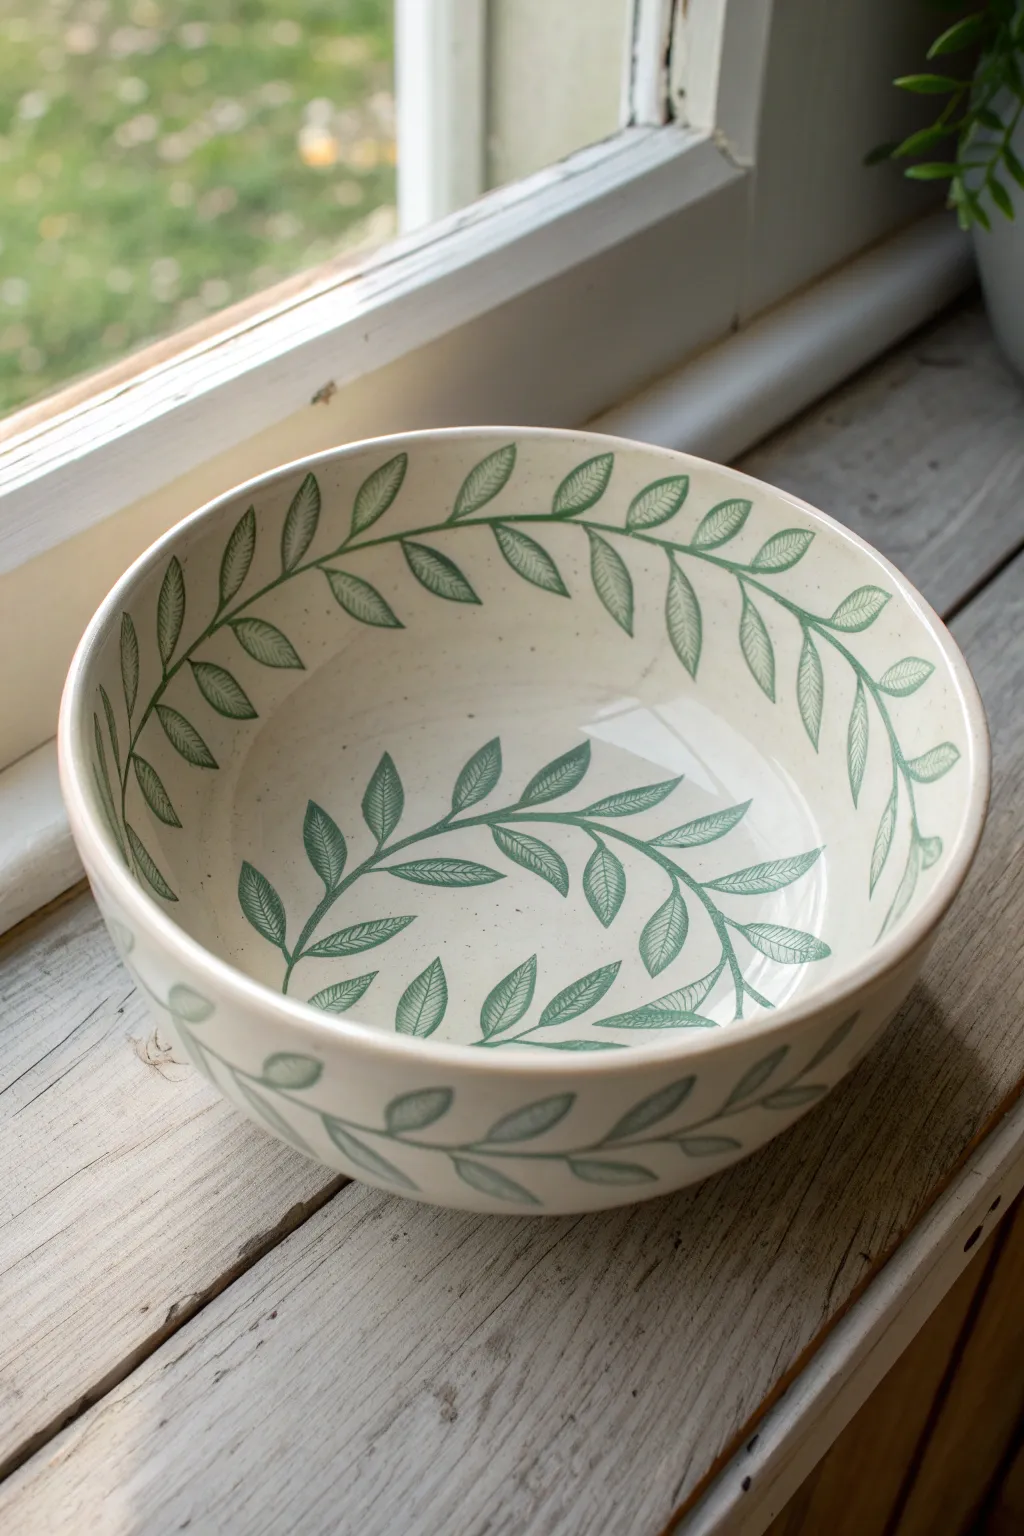
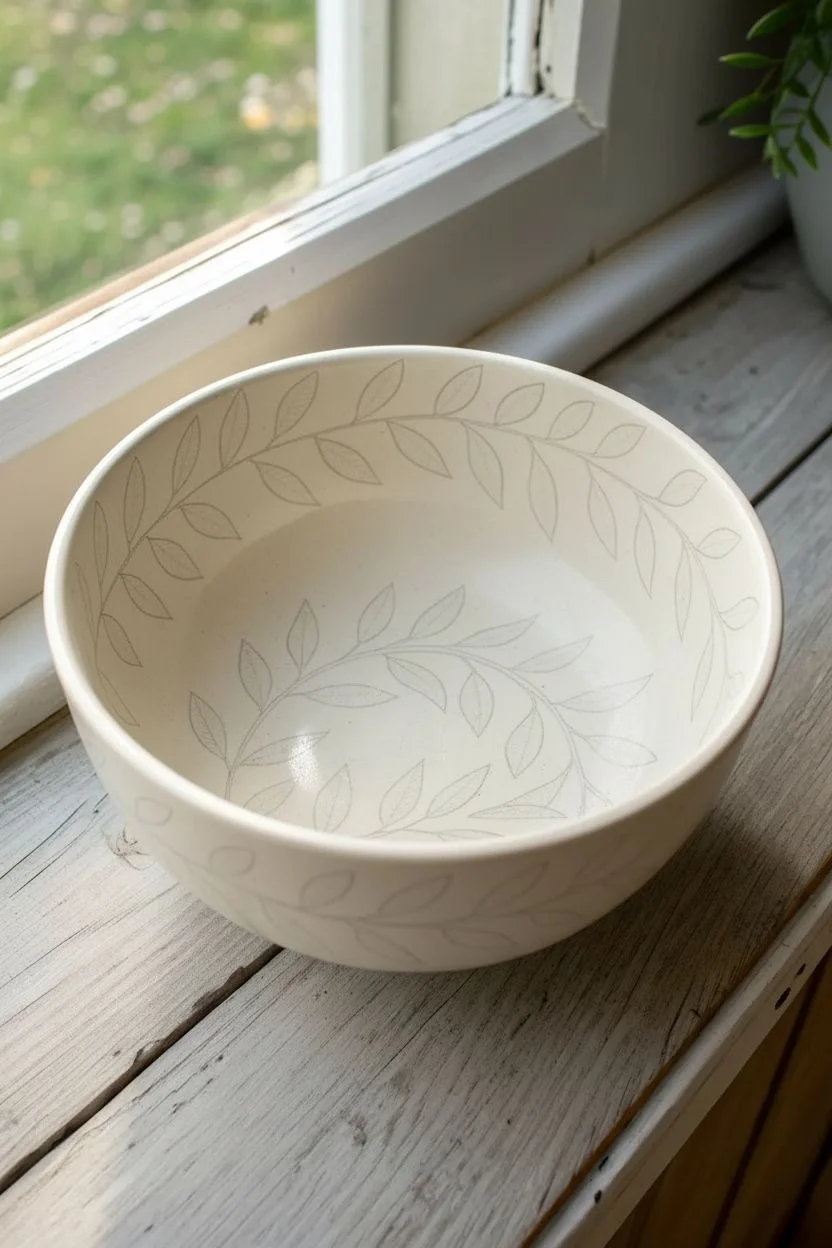
Transform a plain ceramic bowl into a piece of functional art with a delicate, continuous vine motif. This design uses the natural curvature of the vessel to create a sense of movement, with soft green leaves that look almost stamped on.
Step-by-Step Guide
Materials
- Plain bisque-fired ceramic bowl (or a glazed bowl if using overglaze paints)
- Underglaze in sage green or forest green
- Fine liner brush (size 0 or 00)
- Small round brush (size 2)
- Pencil for sketching (optional)
- Clear dipping glaze
- Palette or small dish
- Water cup
- Sponge
Step 1: Planning and Sketching
-
Clean surface:
Begin by wiping down your bisque bowl with a slightly damp sponge to remove any dust or oils from handling. This ensures the underglaze adheres properly. -
Map the curves:
Visualize where your vines will flow. The design features three main vines: one wrapping around the exterior, one circling the interior rim, and a final sweeping curve resting at the bottom of the bowl. -
Lightly sketch:
Using a regular pencil, lightly sketch the central spine of your vines. Don’t worry about the pencil marks; I find it comforting to know they will burn off completely in the kiln.
Steady Hands
Rest your pinky finger on the bowl’s surface as a stabilizer while painting fine lines. This anchors your hand and prevents shaky vines.
Step 2: Painting the Exterior Vine
-
Mix your green:
Pour a small amount of sage green underglaze onto your palette. If it feels too thick, add a drop of water to achieve a fluid, ink-like consistency. -
Paint the stem:
With your fine liner brush, trace over your exterior pencil line. Keep the pressure light to maintain a thin, delicate stem that wraps horizontally around the bowl. -
Add leaf outlines:
Switch to the small round brush. Along the stem, paint small almond-shaped outlines for the leaves. Space them evenly, alternating sides as you move along the vine. -
Angle the leaves:
Ensure the leaves angle slightly forward in the direction the vine is ‘growing.’ This creates visual momentum around the curve.
Variations
Mix a tiny bit of blue into your green for half the leaves to create a subtle, dappled light effect that adds depth to the foliage.
Step 3: Painting the Interior Details
-
Interior rim vine:
Repeat the process inside the bowl, placing a vine about an inch below the rim. This one should mirror the gentle wave of the exterior vine. -
The bottom sweep:
Paint the final vine across the bottom basin of the bowl. Make this line curve gently, like a smile, to complement the bowl’s concavity. -
Leaf detailing:
Once your leaf outlines are dry to the touch, use the fine liner brush to add the interior veins. Draw a central line down each leaf, then add tiny diagonal veins branching off. -
Create texture:
When filling the leaves, use a hatching technique—short, thin strokes close together—rather than painting them solid. This mimics the veined texture seen in the reference photo.
Step 4: Finishing Touches
-
Check consistency:
Look over your design. If any leaves look too faint, go back over the hatching with a second layer of underglaze for richer color depth. -
Clean up:
If you made any stray marks or smudges, gently scratch them off with a needle tool or wipe them away with a clean, damp brush. -
Bisque fire and glaze:
Once fully dry, the piece is ready for clear glazing. Dip the entire bowl into a clear glaze bucket, ensuring even coverage over your green vines. -
Final firing:
Fire the bowl in the kiln according to the temperature requirements of your clay and glaze combination.
Now you have a beautifully hand-painted bowl ready for your morning cereal or to display on a shelf
Fruit Slice Bowl (Lemon, Orange, or Watermelon)
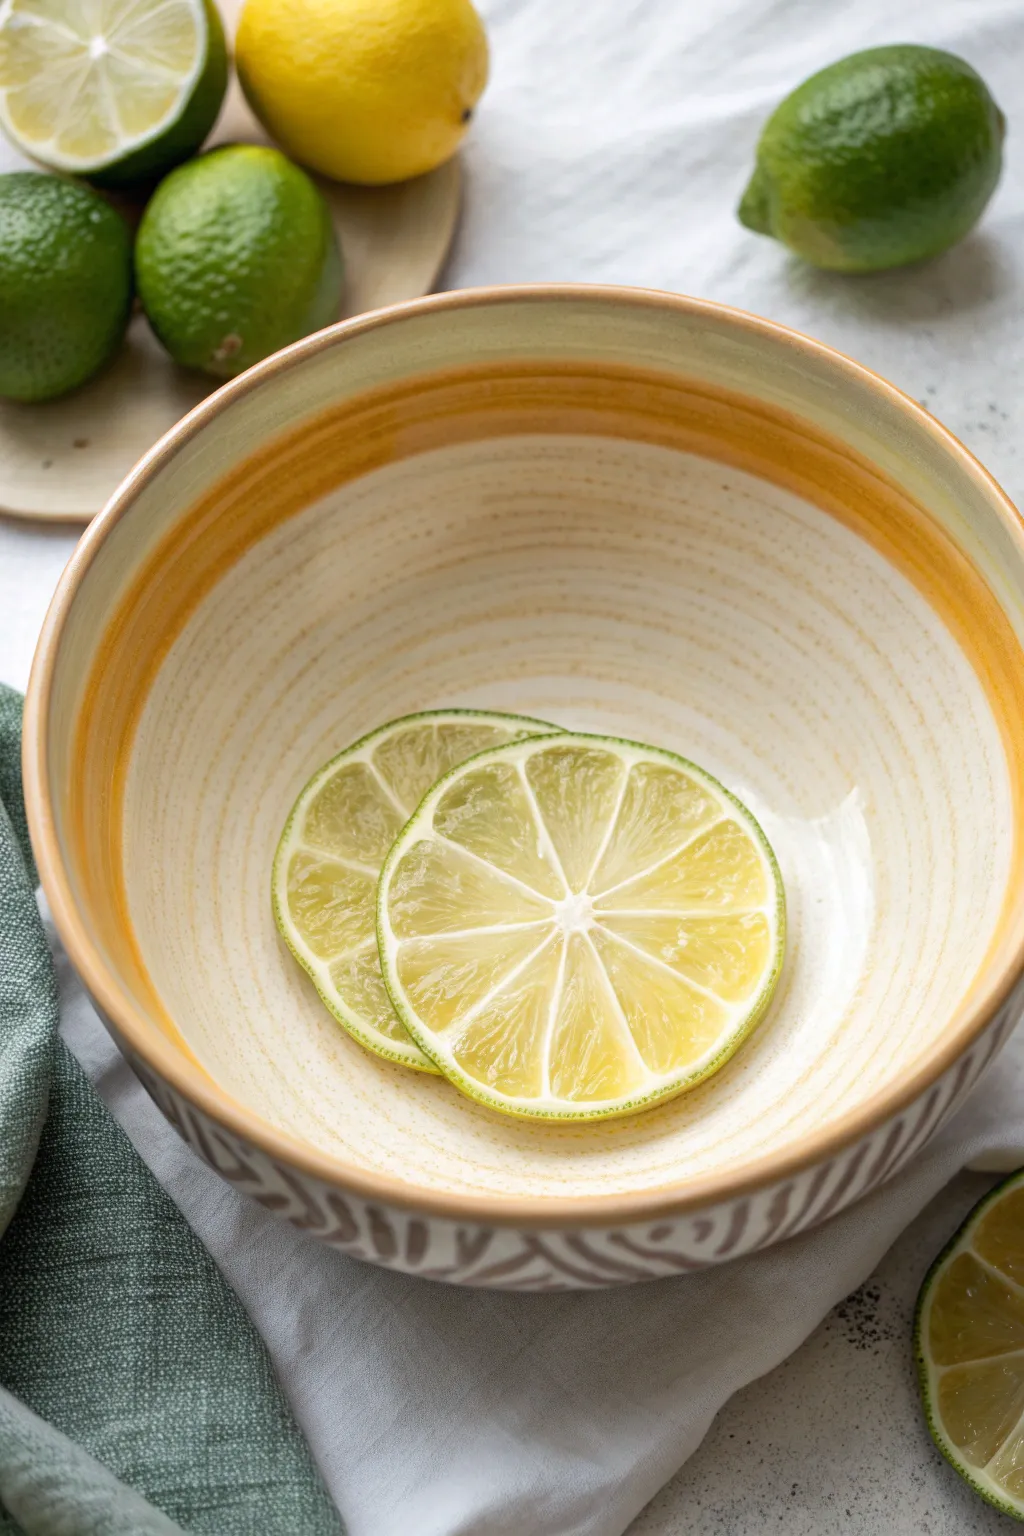
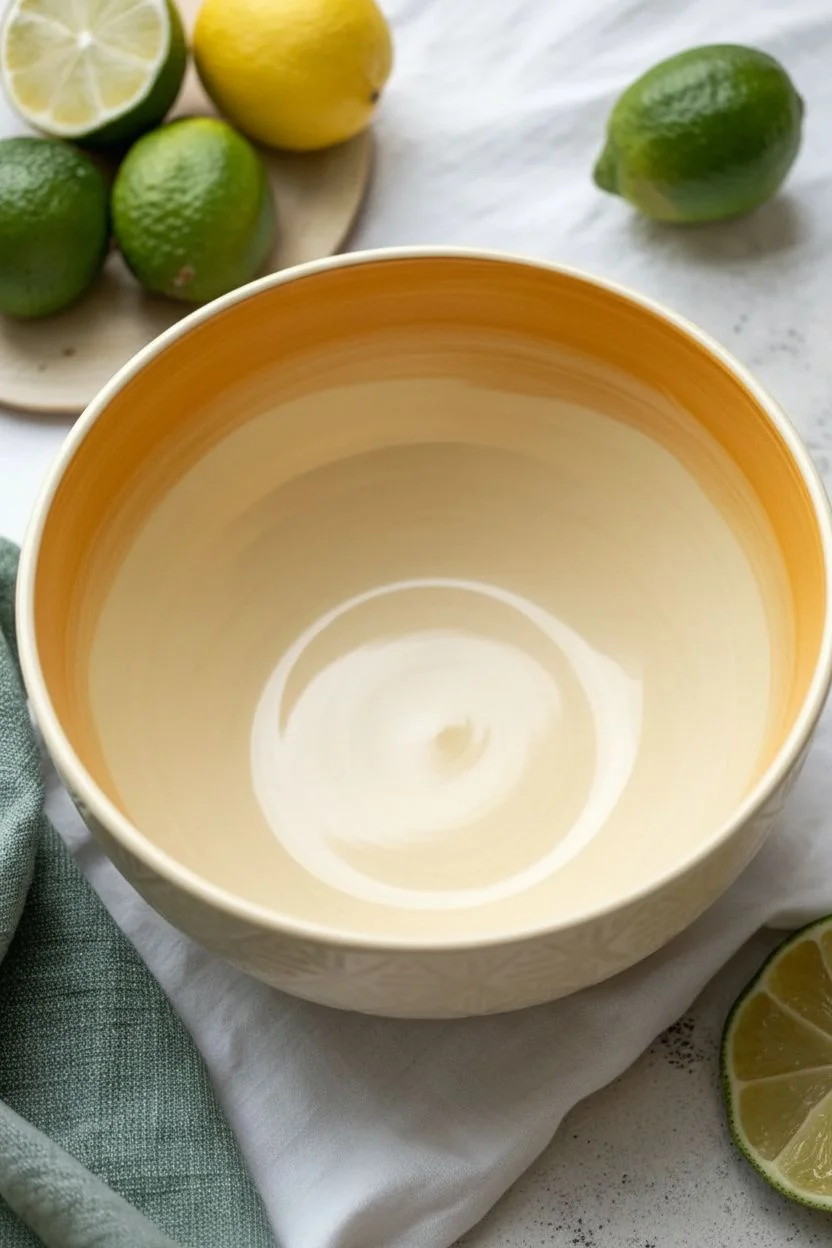
Transform a plain ceramic bowl into a refreshing piece of functional art with this citrus-inspired design. The warm gradient rim and realistic lime slice interior create a vibrant, summery look perfect for your kitchen counter.
Step-by-Step
Materials
- Bisque ceramic bowl (medium size)
- Underglaze paints (mustard yellow, warm orange, white, lime green, dark green)
- Clear ceramic glaze
- Fan brush (medium)
- Round brushes (sizes 2, 4, and 8)
- Detail liner brush (size 0 or 00)
- Sponge
- Palette for mixing
- Water cup
- Pencil (optional)
Step 1: Planning and Base Coats
-
Clean the Bisque:
Before applying any color, wipe down your bisque bowl with a slightly damp sponge to remove any dust or oils from handling. This ensures the underglaze adheres perfectly. -
Mix the Base Cream:
Mix a generous amount of white underglaze with a tiny dot of mustard yellow to create a warm, creamy off-white. This will be the base color for the interior. -
Apply Interior Base:
Using your medium fan brush, apply three even coats of the creamy mixture to the entire inside of the bowl. Let each coat dry until it loses its sheen before applying the next. -
Create the Gradient Rim:
Load your fan brush with warm orange underglaze. while spinning the bowl slowly on a banding wheel (or turning it by hand), gently apply the orange to the top inch of the interior rim. -
Blend the Ombre:
While the orange is still damp, use a clean, slightly moist brush to feather the bottom edge of the orange band downward into the cream base, creating a soft, sun-washed transition. -
Exterior Patterning:
Don’t forget the outside! Paint a simple geometric pattern or solid color on the exterior using a neutral tone to complement the bright interior.
Step 2: Painting the Lime Slices
-
Sketch the Placement:
Lightly sketch two overlapping circles at the bottom of the bowl using a pencil. The graphite will burn off in the kiln, so don’t worry about making mistakes. -
Paint the Rind:
Using a size 4 round brush and lime green underglaze mixed with a touch of white, paint the outer ring of your circles to form the pith and rind. -
Define the Segments:
With a thin liner brush and white underglaze, paint the ‘spokes’ or membranes of the lime that radiate from the center to the rind. I usually paint 8-10 segments per slice. -
Fill the Pulp:
Mix a translucent, juicy yellow-green. Fill in the triangular segments between the white membranes. Don’t make it solid—leave slight streaks to mimic pulp texture. -
Add Depth to the Rind:
Take your dark green underglaze and carefully paint a very thin line on the outermost edge of the lime circles to define the skin. -
Highlight the Pulp:
Using your smallest detail brush and pure white, add tiny teardrop shapes or flecks inside the green pulp segments near the center and outer edges to make them look wet and juicy. -
Shadowing:
To make the slices look like they are sitting *in* the bowl rather than just painted on, add a very faint, watered-down grey shadow underneath the edges of the slices.
Fixing Smudges
If you accidentally smear a darker color onto the cream base, let it dry completely. Then, gently scrape the mistake away with an X-Acto knife before touching up with base color.
Step 3: Finishing Touches
-
Dry Thoroughly:
Allow the underglaze design to dry completely, preferably overnight, to prevent smearing during the glazing process. -
Apply Clear Glaze:
Dip or brush on a clear, food-safe ceramic glaze over the entire piece. Ensure you have an even coating for a glossy, protective finish. -
Check the Foot:
Wipe any glaze off the bottom foot of the bowl with a sponge so it doesn’t stick to the kiln shelf. -
Fire the Piece:
Fire the bowl in a kiln according to the specific temperature instructions for your clay and glaze (typically cone 06 or cone 6).
Juicy Texture
For realistic fruit pulp, dab the wet underglaze with the corner of a dry sponge or a stiff brush. This stippling creates clearer texture than smooth brushstrokes.
Once fired, fill your beautiful new bowl with fresh fruit to match its delightful design

PENCIL GUIDE
Understanding Pencil Grades from H to B
From first sketch to finished drawing — learn pencil grades, line control, and shading techniques.
Explore the Full Guide
Color-Blocked Bowl With Two Bold Shapes
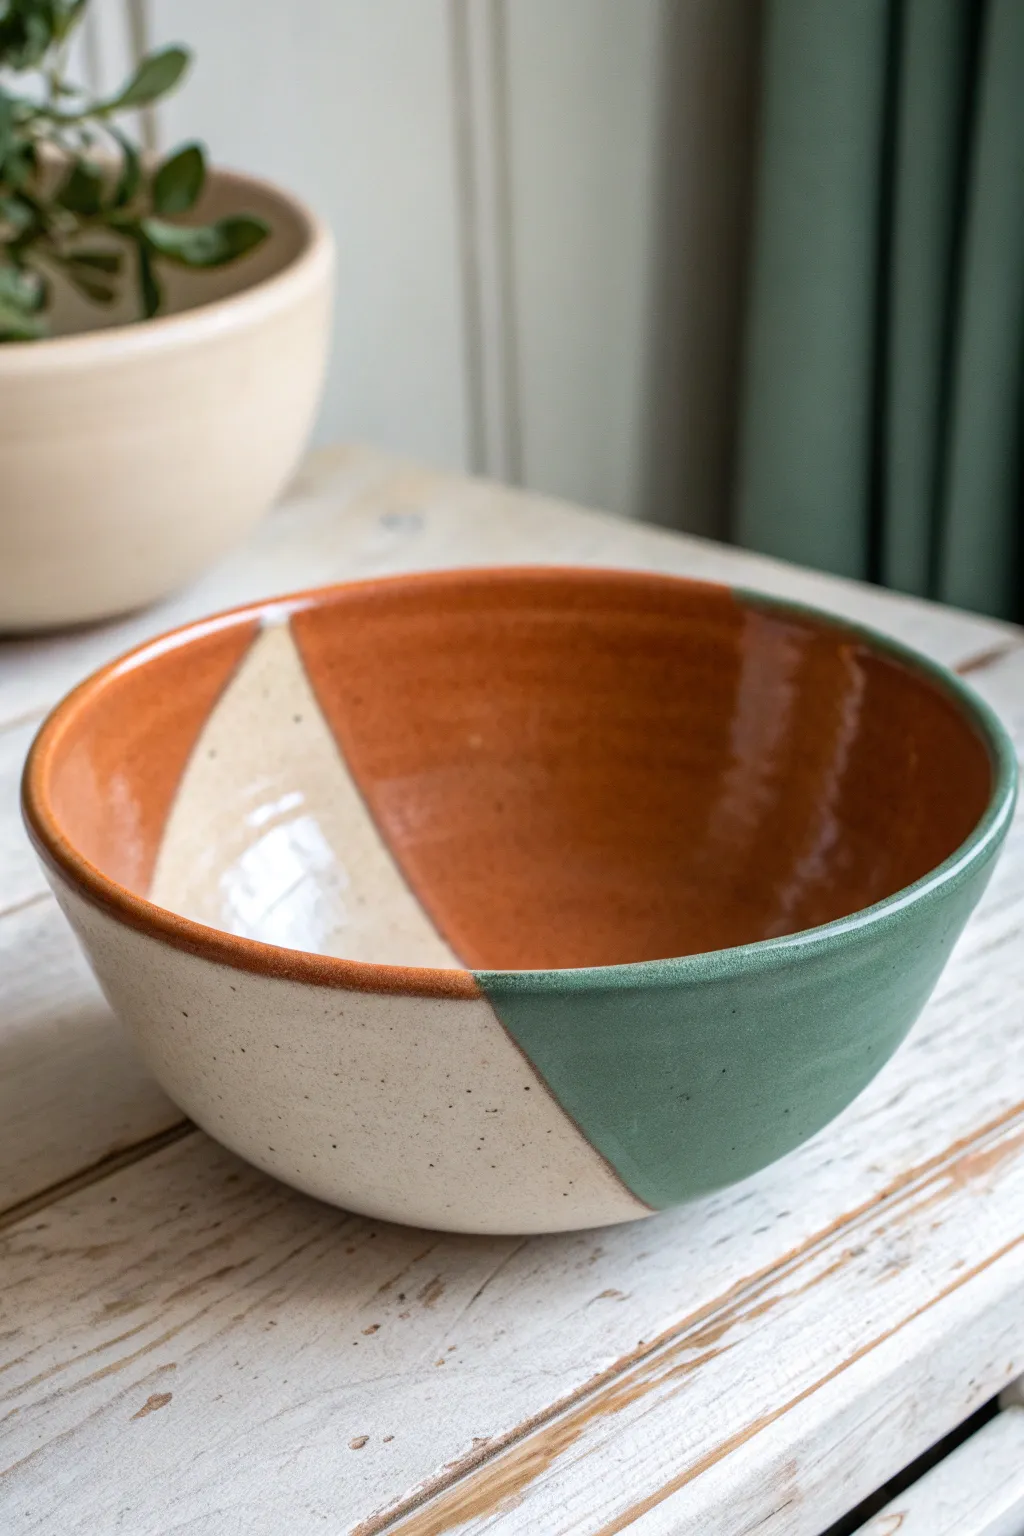

Achieve a sleek, modern look with this stunning project that combines the natural beauty of clay with bold blocks of rust and sage green. By using simple masking techniques, you can create sharp, professional lines that make this handmade bowl look like a high-end boutique find.
Detailed Instructions
Materials
- Bisque-fired ceramic bowl (light clay body)
- Painter’s tape or automotive masking tape (various widths)
- Rust or terracotta-colored ceramic glaze
- Sage or forest green matte ceramic glaze
- Clear dipping glaze (optional, depending on finish desired)
- Soft fan brush
- Medium flat shader brush
- Damp sponge
- Pencil
- Kiln (or access to a firing service)
Step 1: Preparation & Masking
-
Clean the bisque:
Begin by wiping down your bisque-fired bowl with a barely damp sponge. This removes any kiln dust or oils from your hands that might prevent the glaze from adhering properly. -
Plan the geometry:
Lightly sketch your design directly onto the bowl with a pencil. You are aiming for a distinct ‘Y’ shape or a peace-sign style division where three sections meet. The pencil lines will burn off in the kiln. -
Tape the first line:
Apply a strip of masking tape creating a long diagonal line from the rim down to the base. Press the edges of the tape down firmly with your fingernail to ensure a tight seal against the bisque. -
Tape the second line:
Apply a second strip of tape intersecting the first one. This will define the boundary between the natural speckle section and the painted sections. -
Protect the reserve area:
Since we want one large section to remain raw (the speckled white part), cover that entire triangular area with tape or a wax resist product to prevent accidental splashes.
Tape Sealing Trick
Before painting your main colors, paint a thin layer of clear glaze or wax over the tape edge. This seals the tape and ensures absolutely zero bleed-under for razor-sharp lines.
Step 2: Glazing the Sections
-
Mix the rust glaze:
Stir your rust-colored glaze thoroughly. If it feels too thick, add a few drops of water until it reaches a pouring cream consistency. -
Apply the first rust coat:
Using the soft fan brush, apply a smooth, even coat of the rust glaze to the inside of the bowl. Since the inside is fully coated in rust in our reference, broad strokes work best here. -
Details on the exterior:
Extend the rust glaze over the rim and onto the exterior section defined by your tape. Be careful near the tape edge, brushing away from the tape rather than under it to keep the line crisp. -
Dry and repeat:
Allow the first coat to dry until it’s chalky to the touch. Apply a second and third coat to ensure the color is rich and opaque. -
Switch to green:
Rinse your brush thoroughly or switch to the flat shader brush. Now, focus on the exterior section dedicated to the sage green color. -
Apply green glaze:
Carefully paint the green section on the exterior. This glaze should meet the rust glaze at the rim but stay contained within its masked area on the outside. -
Layer the green:
I like to build this up slowly; apply 2-3 coats of the green glaze, allowing the proper drying time between each layer as per the manufacturer’s bottle instructions.
Step 3: Finishing Touches
-
Remove tape:
Once the glaze is dry relative to the touch but not fully hardened, gently peel back the masking tape. Pull at a 45-degree angle away from the painted area to leave a sharp edge. -
Clean the lines:
Inspect your lines. If any glaze has crept under the tape onto the raw clay section, gently scrape it away with a cleanup tool or a stiff, damp brush. -
Sponge the rim:
If the transition where the rust meets the green at the rim feels bumpy, gently tap it with a finger to smooth the glazes together slightly. -
Add speckles (optional):
If your clay body isn’t naturally speckled like the one in the photo, you can flick a toothbrush dipped in iron oxide wash over the ‘raw’ white section to mimic that speckled pottery look. -
Check the foot:
Turn the bowl over and ensure the bottom foot ring is completely free of glaze. Wipe it with a sponge if necessary to prevent it from fusing to the kiln shelf. -
Final fire:
Load your piece into the kiln and fire it to the temperature required by your specific clay and glaze combination (usually Cone 5 or 6 for this type of stoneware).
Messy Lines?
If you pulled the tape and the line is jagged, wait for the glaze to dry completely. Then use a wooden toothpick to gently scratch and straighten the edge without damaging the bisque.
Once fired, fill your beautiful new bowl with fruit or display it on a shelf to show off those crisp geometric angles
Easy Geometric Triangles in a Repeating Ring
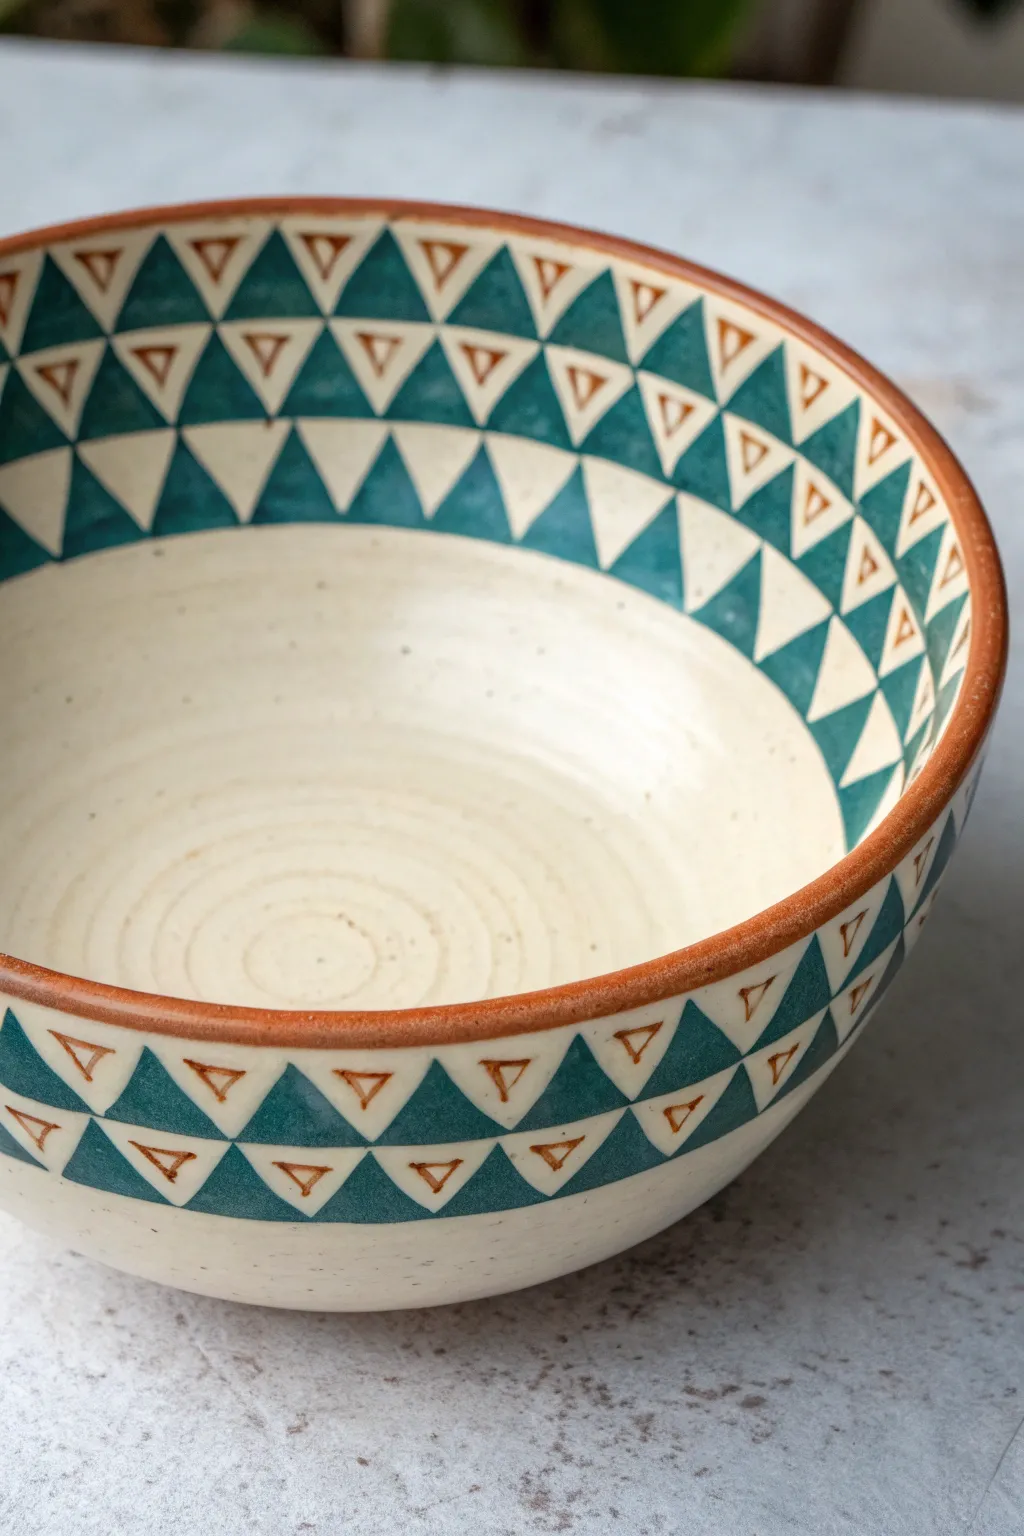
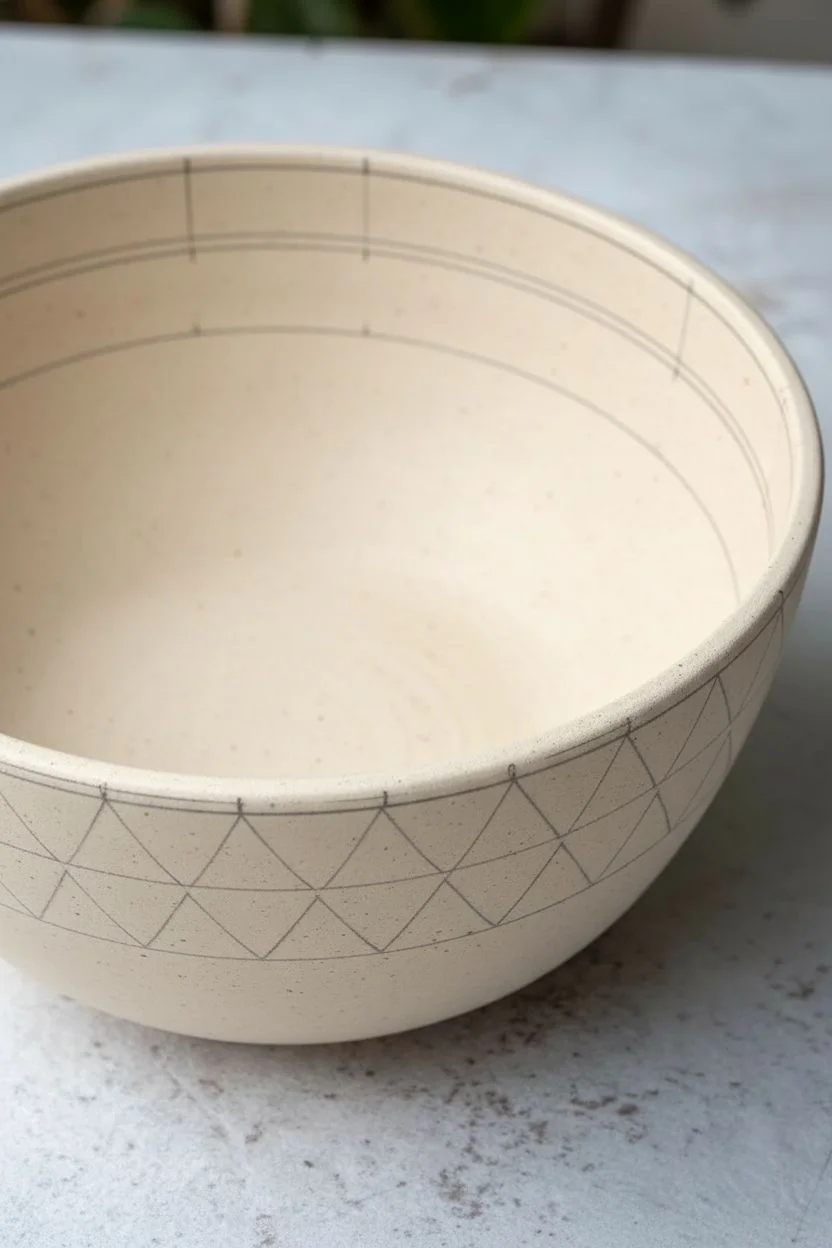
This rustic yet modern bowl design uses simple geometric forms to create a striking pattern that wraps both the inside and outside of your vessel. The combination of deep teal triangles and earthy terracotta outlines against a creamy base gives it a beautiful, hand-carved pottery aesthetic.
Step-by-Step
Materials
- Bisque-fired ceramic bowl (cream or white clay body preferred)
- Underglaze (Deep Teal/Dark Turquoise)
- Underglaze (Terracotta/Red-Brown)
- Clear transparent glaze
- Small flat shader brush (size 4 or 6)
- Fine liner brush (size 0 or 00)
- Pencil for sketching
- Flexible measuring tape
- Banding wheel (optional but helpful)
Step 1: Planning and Sketching
-
Clean surface:
Begin by wiping down your bisque bowl with a slightly damp sponge to remove any dust or oils that might repel the underglaze. -
Mark horizontal guides:
Using a pencil and a steady hand (or a banding wheel if you have one), lightly draw two parallel horizontal rings around the outside of the bowl, near the top, about an inch apart. Repeat this on the inside rim. -
Measure spacing:
Use your flexible tape to measure the circumference of your drawn rings. Divide this length by how many repeating triangle units you want, making tick marks to ensure your pattern ends up evenly spaced. -
Sketch the triangles:
Lightly sketch a zigzag line between your two horizontal rings. This creates a continuous row of triangles pointing up and down. Do this for both the interior and exterior bands.
Step 2: Painting the Teal Triangles
-
Select your triangles:
Decide which triangles in your zigzag pattern will be solid teal. In this design, the triangles pointing ‘up’ are solid, while the downward-pointing ones remain empty. -
Outline first:
Load your small flat brush with Deep Teal underglaze. Carefully outline the edges of the first upward-pointing triangle to establish clean lines. -
Fill the interior:
Fill in the rest of the triangle with the teal underglaze. Apply smooth strokes to avoid ridges. -
Complete the exterior band:
Continue around the outside of the bowl, painting every upward-pointing triangle teal. I like to rotate the bowl on a towel to keep it stable while I work. -
Paint the interior band:
Move to the inside rim and repeat the process. Ensure your teal triangles here align nicely, though they don’t have to perfectly match the outside placement. -
Second coat:
Once the first layer is touch-dry, apply a second coat of teal to ensure the color is opaque and vibrant after firing.
Pro Tip: Pencil Marks
Don’t worry about trying to erase your initial pencil sketch marks. Sketching graphite burns away completely in the kiln, leaving no trace on your finished cream-colored ceramic.
Step 3: Adding Terracotta Accents
-
Prepare the liner brush:
Switch to your fine liner brush and the Terracotta underglaze. You want the paint to flow smoothly, so you might need to add a tiny drop of water if it feels too thick. -
Paint the hollow triangles:
In the negative spaces (the downward-pointing triangles between the teal ones), paint a smaller, hollow triangle frame using the Terracotta color. -
Refine the lines:
Keep your hand steady and try to keep these terracotta lines consistent in thickness. They should look like little arrowheads floating in the cream space. -
Rim the bowl:
Load your brush generously with Terracotta underglaze and paint the very top lip of the bowl. This frames the design and ties the interior and exterior patterns together. -
Clean up edges:
If you smudged any lines, you can gently scrape away mistakes with a toothpick once the underglaze is dry.
Level Up: Sgraffito Style
Instead of painting the terracotta triangles, paint a solid band of terracotta first. Then, carve away the clay to reveal the pattern before painting the teal sections.
Step 4: Glazing and Firing
-
Bisque fire (optional):
Depending on your specific underglaze instructions, you might fire the piece now to set the design, or proceed straight to glazing. -
Apply clear glaze:
Dip or brush a coat of clear transparent glaze over the entire bowl. This will make the cream clay shine and the colors pop. -
Final wipe:
Wipe the foot of the bowl clean with a sponge to prevent it from sticking to the kiln shelf. -
Final fire:
Fire the bowl in the kiln according to your clay and glaze specifications.
Once fired, you’ll have a stunning geometric piece that balances earthy warmth with cool tones


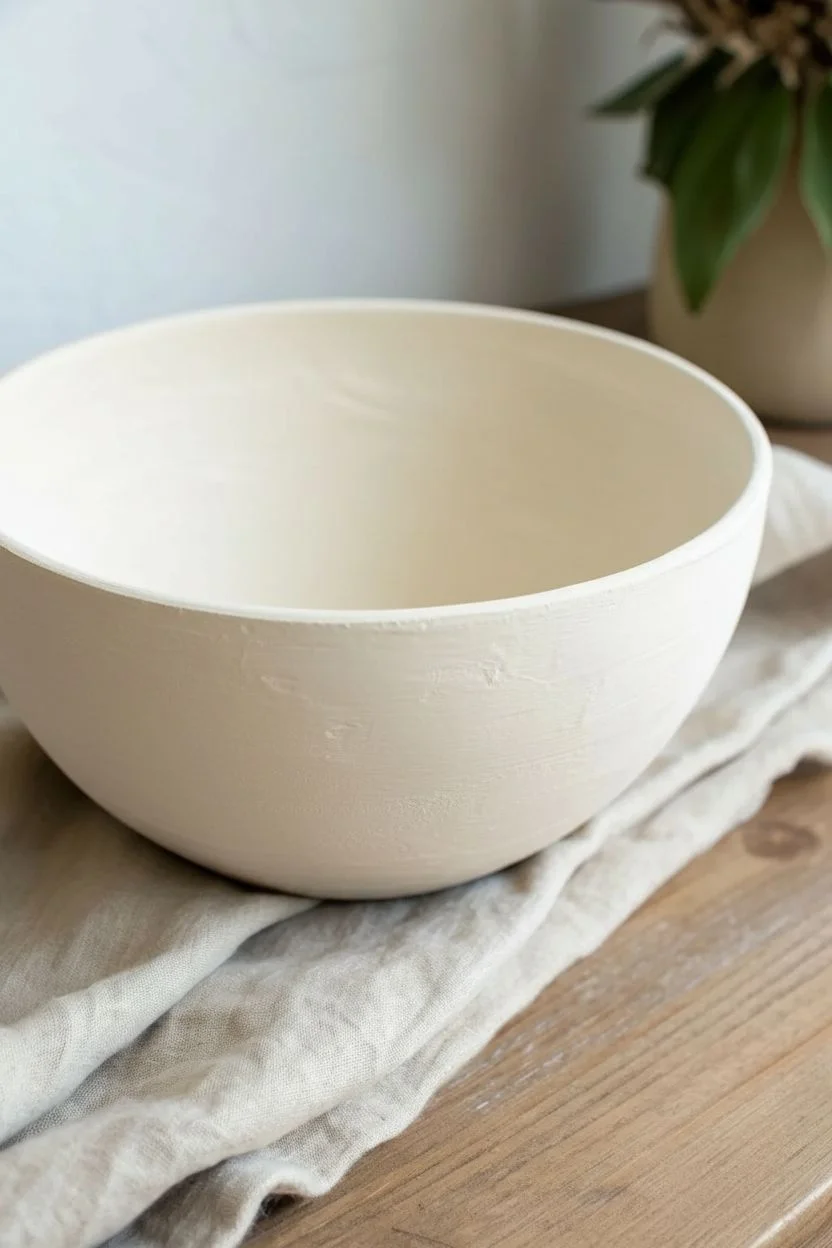
Soft Ombre Wash on the Inside
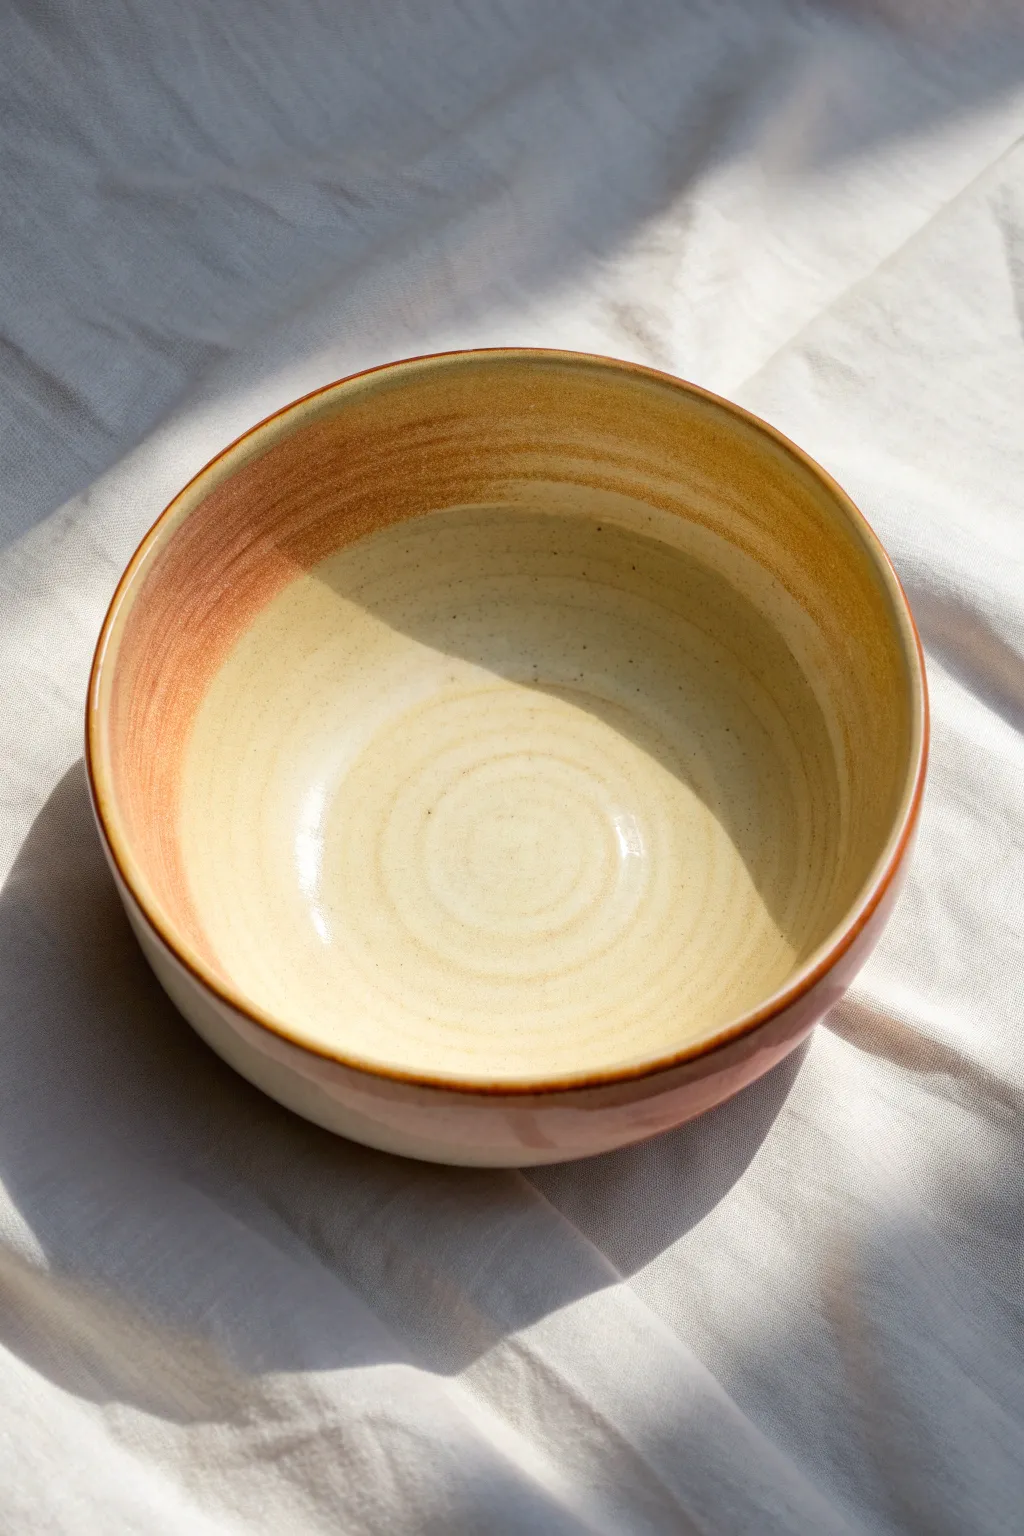
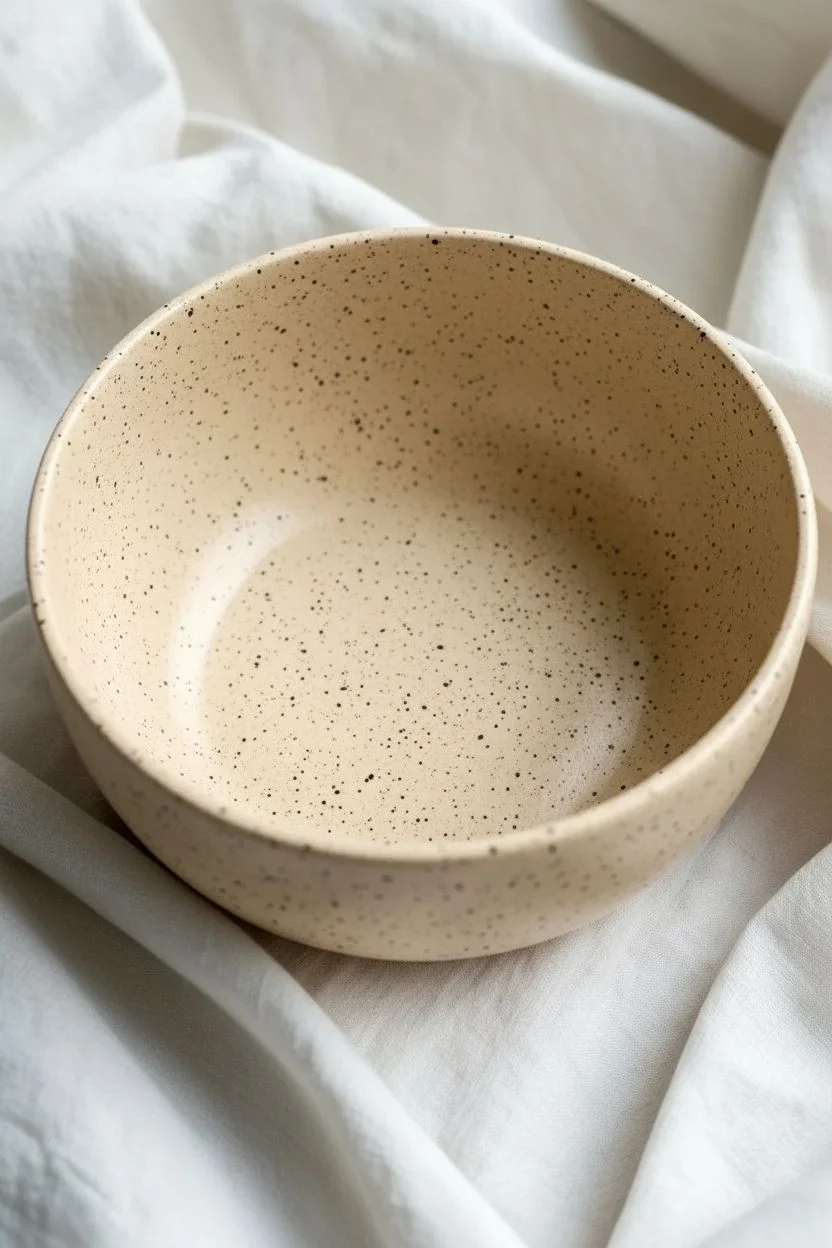
Transform a plain ceramic bowl into a piece of functional art with this warm, inviting ombre effect. The soft transition from a rich terracotta rim to a creamy center mimics the gentle hues of a sunset, adding a touch of rustic elegance to your table.
Step-by-Step Tutorial
Materials
- Bisque-fired ceramic bowl (wheel-thrown or hand-built)
- Small banding wheel (turntable)
- Cream or oatmeal-colored underglaze
- Rust, terracotta, or warm brown underglaze
- Clear dipping glaze
- Wide, soft fan brush
- Round watercolor-style brush (size 6 or 8)
- Sponge and bucket of water
- Kiln (or access to a firing service)
Step 1: Preparation & Base Coat
-
Clean the bisque:
Begin by wiping down your bisque-fired bowl with a slightly damp sponge. This removes any dust that might prevent the glaze from adhering properly. -
Set up your station:
Place your bowl exactly in the center of your banding wheel. Give it a gentle spin to ensure it’s centered; this is crucial for getting even rings of color. -
Load the base color:
Shake your cream or oatmeal underglaze well. Load up your wide fan brush until it is saturated but not dripping. -
Apply the first interior layer:
Spin the banding wheel at a moderate, steady pace. Starting from the very center of the bowl, press the brush gently and slowly pull it outwards effectively covering the entire interior surface. -
Smooth the coverage:
If you see streaks, go over the surface one more time while the wheel is spinning to even out the coat. Let this first layer dry until it’s chalky and matte. -
Repeat base application:
Apply a second and possibly third coat of the cream underglaze, allowing drying time between each. You want a solid, opaque background for your gradient.
Step 2: Creating the Ombre Rim
-
Prepare the accent color:
Pour a small amount of your rust or terracotta underglaze onto a palette. Water it down very slightly so it flows smoothly, similar to light cream. -
Target the rim:
Switch to your round brush or a smaller soft shader. Spin the banding wheel again. Touch the brush to the very top edge of the rim first to establish a solid line of color. -
Begin the gradient:
While the wheel is spinning, slowly move your brush down the inside wall of the bowl about an inch or two. Apply less pressure as you move downward to deposit less paint. -
Feather the edge:
Clean your brush and leave it just barely damp. Spin the wheel and gently run the damp brush along the bottom edge of the rust band where it meets the cream color to soften the transition. -
Add a second pass:
Load the brush with rust color again, but this time only apply it to the top half of the painted band. This intensifies the color near the rim while keeping the lower part lighter. -
Create the spiral detail:
I find this step adds lovely movement: clean your brush completely. While the cream center is still slightly damp, place the brush tip in the very center and slowly pull outward in a spiral motion as the wheel spins creates a faint texture. -
Clean the foot:
Check the outside and bottom of the bowl. If any glaze dripped down, wipe it away with a clean, damp sponge to ensure the foot is bare.
Spin Control
Keep your banding wheel speed constant. If you spin too fast, centrifugal force pushes paint out; too slow, and your lines will wobble.
Step 3: Finishing & Firing
-
Dry completely:
Allow the underglaze to dry completely, preferably overnight. It should be entirely bone dry to the touch. -
Apply clear glaze:
Using a dipping tongs, dip the entire bowl into a bucket of clear glaze. Hold it there for about 3 seconds, then lift and shake gently to remove excess drips. -
Check for pinholes:
Once the clear glaze dries to a powdery white, rub the surface gently with your finger to smooth over any tiny pinholes or bubbles. -
Fire the piece:
Load the bowl into the kiln and fire it to the temperature recommended by your clay and glaze manufacturer (typically Cone 5 or 6 for stoneware).
Rustic Speckle
Mix a tiny pinch of iron oxide or dark brown sand into your clear glaze bucket creates subtle speckles that enhance the pottery vibe.
Once cooled, your bowl is ready to hold warmth and comfort in every meal you serve
Doodle Bowl With Tiny Icons and Squiggles
Transform a plain ceramic bowl into a charming piece of functional art with a whimsical, hand-drawn look. This design features scattered hearts, stars, and tiny celestial details in a monochrome palette for a sweetly simple aesthetic.
How-To Guide
Materials
- Plain white ceramic bisque bowl (fired but unglazed)
- Black underglaze pencil or fine-tip black underglaze applicator bottle
- Clear dipping or brushing glaze (food safe)
- Damp sponge
- Pencil (standard HB)
- Kiln (or access to a firing service)
- Soft fan brush (for glaze applied by hand)
Step 1: Preparation & Planning
-
Clean the surface:
Before you begin any design work, wipe the entire bowl down with a damp sponge. This removes dust and oils that could resist the underglaze. -
Sketch the layout:
Using a regular graphite pencil, lightly map out where your larger icons will go. Don’t worry about mistakes; the graphite will burn off completely in the kiln, leaving no trace. -
Vary the spacing:
As you sketch, keep the placement random. Avoid creating strict rows or patterns. Aim for a ‘confetti’ look where shapes seem to drift naturally across the surface.
Step 2: Drawing the Icons
-
Start with hearts:
Using your black underglaze tool (fine applicator or pencil), draw open heart shapes. Keep them loose and sketchy rather than geometrically perfect; I find that slightly wonky lines add to the charm. -
Add simple stars:
In the open spaces between hearts, draw five-pointed stars. Draw these in a continuous line motion if you can, just like you doodled in school notebooks. -
Draw sunbursts:
Identify a few larger gaps and add small sun icons. Draw a simple circle and radiate short, straight lines outward from the center. -
Include smaller stars:
For variety, add tinier four-pointed stars or simple cross shapes. These act as medium-sized fillers to bridge the gap between large icons.
Smudge Alert
If you accidentally smear a line, don’t wipe it! Let it dry, then gently scratch the mistake off with a craft knife or toothpick.
Step 3: Details & Squiggles
-
Fill with dots:
Look at the remaining negative space. Add single black dots of varying sizes. Place some near the hearts and others floating independently. -
Add tiny clusters:
Create small clusters of three dots arranged in a triangle or tight line. This adds visual texture without cluttering the design. -
Check the rim:
Don’t forget the upper edges of the bowl’s interior. Ensure a few doodles drift near the rim so the design feels immersive. -
Assess the balance:
Step back and look at the bowl from a distance. If any area looks too empty, add a small dot or a tiny ‘x’ to balance the composition. -
Let it dry:
Allow the underglaze to dry completely. It should look chalky and matte before you proceed.
Add Color Pops
Use pastel underglazes to loosely color inside random hearts or stars—keep the color outside the lines for a playful, messy look.
Step 4: Glazing & Firing
-
Sponge lightly:
Once the underglaze is dry, very gently dab a clean, slightly damp sponge over the design to remove any loose dust. Do not scrub or you will smear the lines. -
Apply clear glaze:
Apply a coat of clear food-safe glaze over the entire bowl. If dipping, submerge quickly and remove. If brushing, use a soft fan brush and flow the glaze on rather than dragging the bristles. -
Check thickness:
Verify the glaze thickness is even. Too thick, and it may cloud the fine black lines; too thin, and the texture might be rough. -
Clean the distinct foot:
Wipe any glaze off the very bottom foot of the bowl with a sponge so it doesn’t fuse to the kiln shelf. -
Fire the piece:
Fire the bowl in a kiln according to the specific temperature instructions of your clay and glaze combination.
Once fired, you will have a delightful, dishwasher-safe bowl perfect for morning cereal or snacks
Animal Print Spots for a Fast Statement Bowl
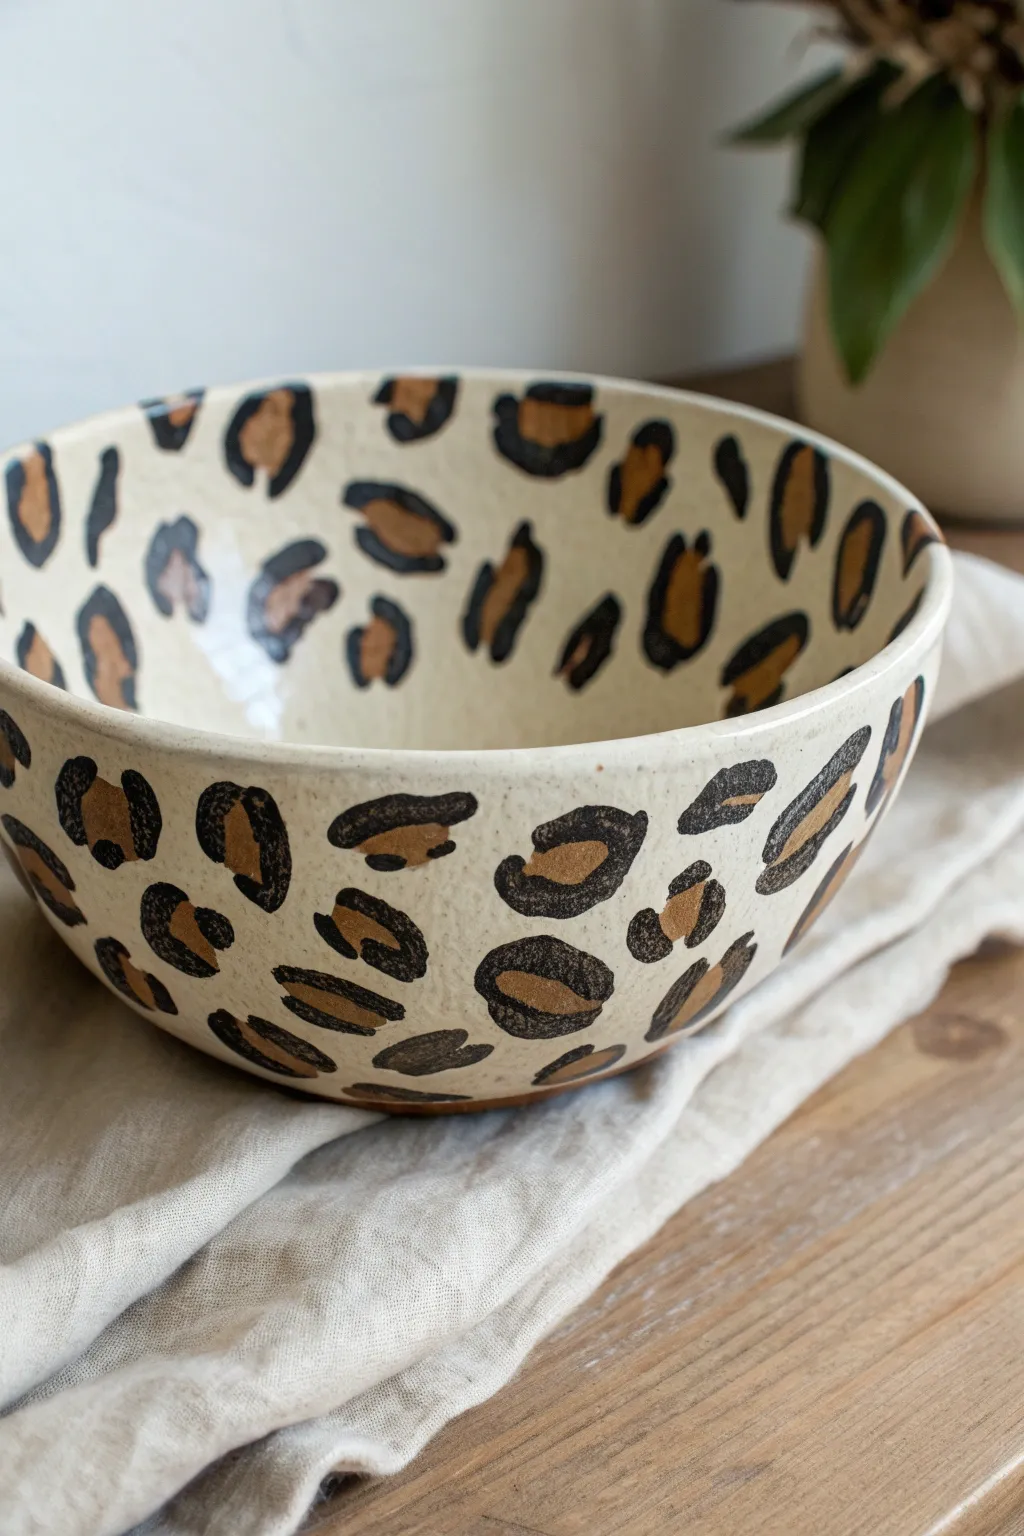
Transform a plain ceramic bowl into a wild centerpiece with this incredibly simple, high-impact leopard print technique. The contrast of the bold black and warm brown spots against creamy stoneware creates a trendy, sophisticated look that is deceptively easy to master.
Step-by-Step Guide
Materials
- Bisque-fired ceramic bowl (stoneware or earthenware)
- Underglaze in a creamy off-white (for base)
- Underglaze in warm caramel or chestnut brown
- Underglaze in jet black
- Wide flat brush (for base coat)
- Small round brush (size 2 or 4)
- Detail liner brush (size 0 or 1)
- Clear dipping glaze or brushing glaze
- Kiln access (for firing)
Step 1: Setting the Stage
-
Clean your bisque:
Begin by wiping down your bisque bowl with a slightly damp sponge. This removes any dust that could prevent the glaze from adhering properly. -
Apply the base coat:
Using your wide flat brush, apply a creamy off-white underglaze to the entire bowl, inside and out. Use long, smooth strokes to minimize brush marks. -
Add layers for opacity:
Let the first coat dry until it’s chalky to the touch. Apply a second and, if necessary, a third coat to ensure full, opaque coverage. I usually find three coats gives the richest background. -
Dry partially:
Allow the base coat to dry completely before moving on to the pattern. It should feel dry and not cool to the touch.
Smudge Patrol
If you accidentally smear a black line while handling the bowl, wait for it to dry completely, then gently scratch the mistake off with a toothpick or a cleanup tool.
Step 2: Mapping the Spots
-
Load the brown:
Dip your small round brush into the caramel or chestnut brown underglaze. You don’t need a huge amount of paint; just enough to make a blob. -
Create the spot centers:
Start dabbing random, organic shapes onto the outside of the bowl. These are the centers of your rosettes. Make them irregular ovals or kidney bean shapes rather than perfect circles. -
Vary the size:
Mix up the sizes of your brown spots. Some should be larger and prominent, while others can be smaller filler spots. Leave plenty of cream space between them for the outlines. -
Move to the interior:
Repeat this process on the inside of the bowl. Be careful not to smudge the exterior paint while handling the bowl—cradling it on a towel can help. -
Let the spots set:
Give the brown spots a few minutes to dry so they don’t smear when we add the black outlines.
Step 3: The Leopard Definition
-
Prepare the black liner:
Switch to your detail liner brush and load it with jet black underglaze. The consistency should be fluid enough to glide but thick enough to stay opaque. -
Bracket the spots:
Paint around the brown spots, but never enclose them completely. Think of painting brackets ( ) or ‘C’ shapes around the brown centers. -
Add broken lines:
For larger spots, you might use three separate line segments to surround the brown. The goal is a broken, organic outline, not a solid circle. -
Vary line thickness:
I like to vary the pressure on the brush as I paint the outlines. Start thin, press down to thicken the line in the middle of the stroke, and lift off for a tapered end. -
Fill the empty spaces:
Look for large gaps between your rosettes. Fill these empty cream areas with small, solid black spots or tiny dashes to balance the composition. -
Check the rim:
Don’t forget the rim of the bowl. Allow some spots to look like they are ‘falling off’ the edge or wrapping over the lip for a continuous feel.
Go Metallic
For a glamorous twist, apply a gold luster overglaze to the brown centers AFTER the main glaze firing. This requires a third, lower-temperature firing.
Step 4: Finishing Touches
-
Let it bone dry:
Allow the entire painted design to dry completely. The underglaze should look matte and chalky. -
Apply clear glaze:
Dip the bowl into a clear transparent glaze, or apply 2-3 coats of brushing clear glaze over your design. This will seal the underglaze and make the bowl food-safe. -
Fire the piece:
Load the bowl into the kiln and fire it to the temperature recommended for your specific clay and glaze body (usually Cone 5 or 6 for stoneware).
Once fired, you’ll have a chic, durable vessel perfect for holding fruit or serving salads with style
Silhouette Scene Bowl (Mountains, Trees, or Cityline)
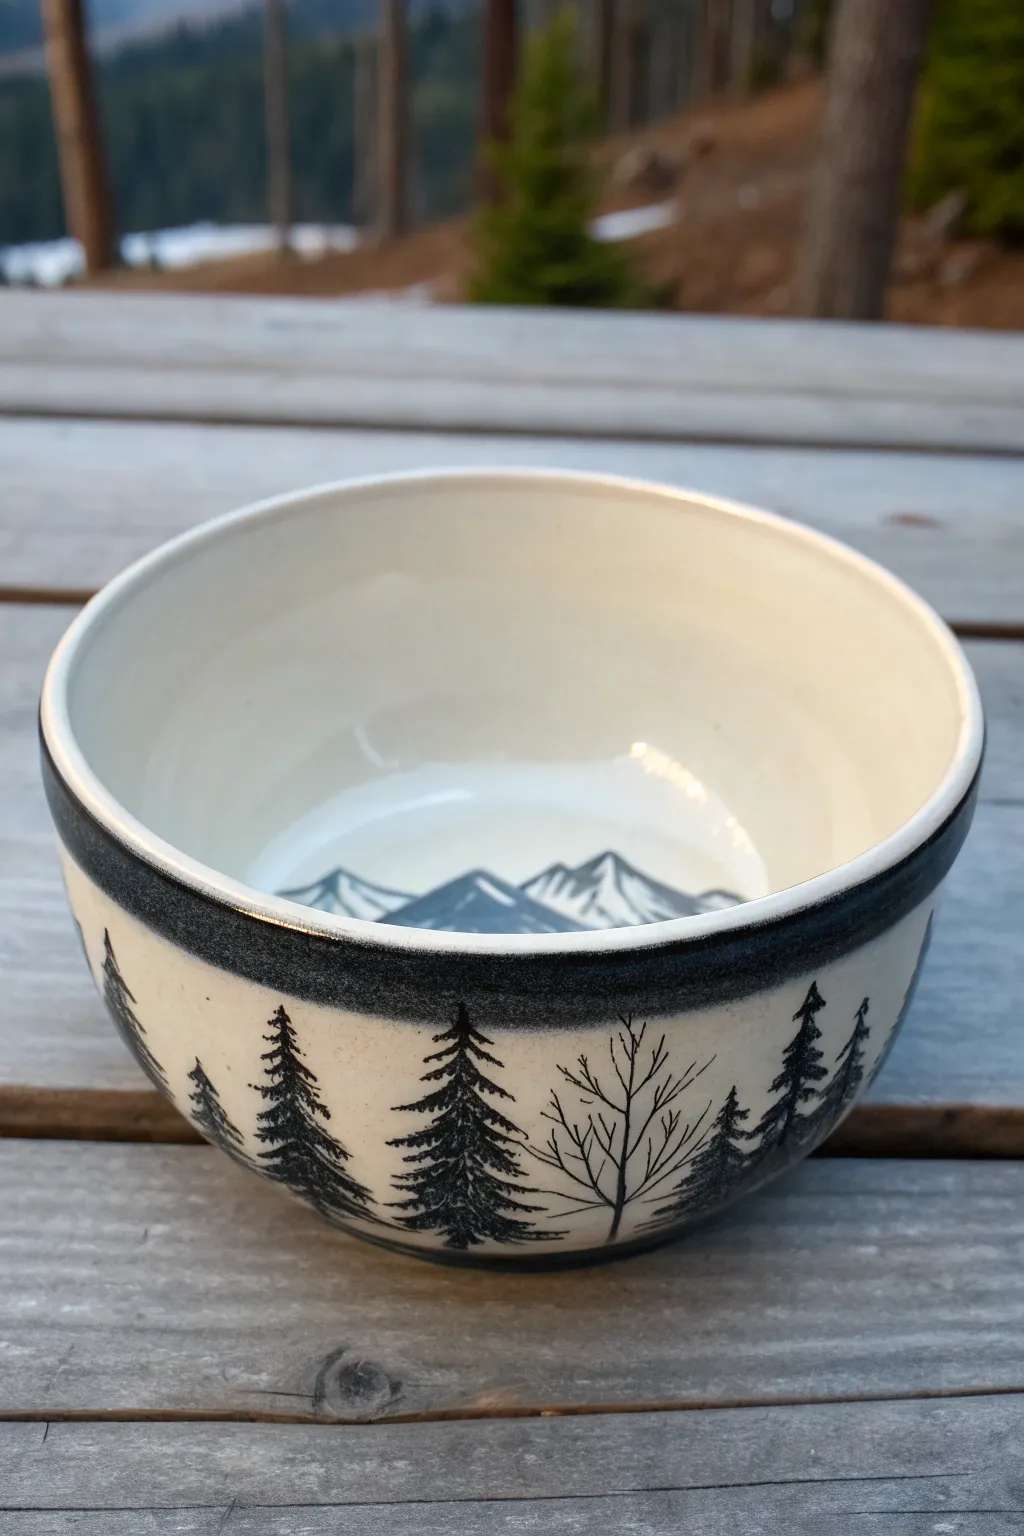
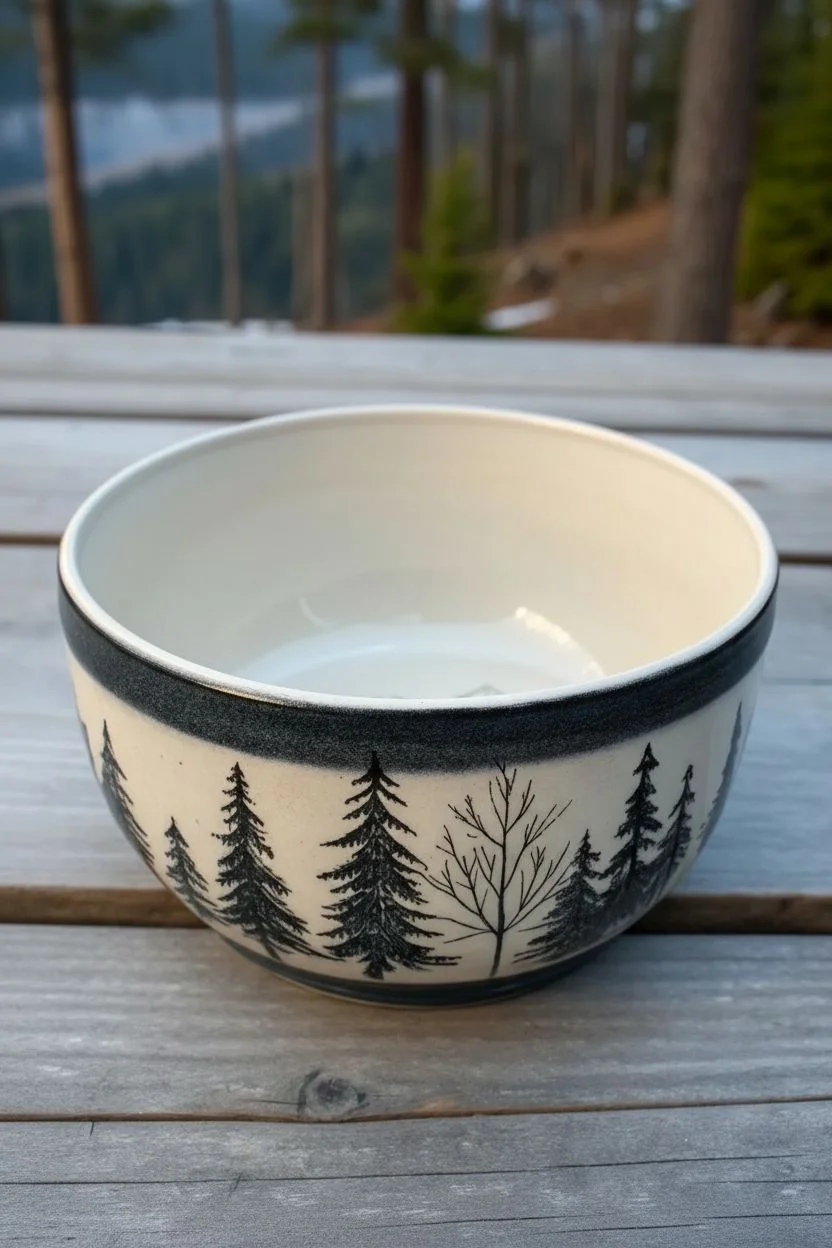
Bring the tranquility of the great outdoors into your kitchen with this serene, nature-inspired bowl design. Featuring a detailed evergreen forest silhouette circling the exterior and a surprise mountain range nestled inside, this project creates a calming visual escape with every meal.
Step-by-Step Tutorial
Materials
- White ceramic bowl (bisque or ready-to-paint pre-fired)
- Black underglaze (for pottery) or black enamel paint (for glass/ceramics)
- Fine liner brush (size 00 or 0)
- Small round brush (size 2)
- Medium flat brush
- Pencil
- Paper towel
- Water cup
- Clear glaze (if firing) or clear sealant (if painting)
- Lazy Susan or banding wheel (optional but helpful)
Step 1: Painting the Exterior Forest
-
Sketch the Horizon:
Begin by lightly sketching a guide line around the bottom third of the bowl’s exterior with a pencil. This doesn’t need to be perfectly straight; a slightly organic, uneven ground line looks more natural for a forest floor. -
Plan Your Trees:
Use your pencil to mark vertical lines where you want your tallest trees to stand. Vary the spacing and height to create a realistic rhythm—group two close together, then leave a gap for a smaller sapling. -
Paint the Upper Border:
Using the medium flat brush and black paint, create the bold band around the rim. Load your brush remarkably well and steady your hand—or spin the bowl slowly on a banding wheel—to get a smooth, consistent stripe about a half-inch below the lip. -
Start the Trunk:
Switch to your fine liner brush. Starting at the top of one of your pencil marks, paint a very thin vertical line down to your ground line. This is the central trunk of your first evergreen. -
Create the Tree Shape:
Starting at the very top of the trunk, make tiny, downward-angled dashes to form the peak. As you move down the trunk, gradually widen your strokes, making the branches longer and slightly drooping. -
Add Texture:
Don’t aim for perfect triangles; use a stippling or dab-and-drag motion to mimic pine needles. Let the brush skip a little to create airiness between branches. -
Variety is Key:
Continue around the bowl, painting trees of different heights. Mix up the species by adding a leafless deciduous tree among the pines—paint a Y-shape trunk and add fine, spider-web branches reaching upward. -
Anchor the Scene:
Once the trees are dry, use the round brush to fill in the ground area at the bottom, merging the base of the trunks into a solid black foundation line.
Step 2: The Hidden Mountain Surprise
-
Sketch the Peaks:
Look inside the bowl. lightly sketch a simple mountain range right in the center bottom. Keep the peaks rugged and triangular. -
Outline the Mountains:
With the fine liner brush, trace over your pencil sketched peaks. Be careful not to smudge the wet paint on the outside of the bowl—I sometimes rest the bowl on a soft towel or cushion for stability. -
Define the Shadows:
Decide which way the light is coming from (e.g., the right). Paint the left slopes of your mountains solid black or heavily shaded to create dramatic contrast. -
Add Snowy Details:
On the lighter side of the mountains, use very sparse, thin lines or small dots to suggest rocky textures breaking through snow, rather than filling it in completely solid. -
Clean Up:
Check the rim and the base for any stray smudge marks. You can gently scrape away dried mistakes with a toothpick or wipe them with a damp corner of a paper towel.
Pro Tip: Steady Hands
Rest your pinky finger on the bowl’s surface as an anchor while you paint fine details. This stabilizes your hand and prevents shaky lines on tree branches.
Step 3: Finishing Touches
-
Dry Thoroughly:
Allow the paint or underglaze to dry completely. If you used heavy layers for the ground line, give it extra time to prevent smearing during the glazing step. -
Seal or Glaze:
If using proper pottery underglaze, dip or brush on a clear glaze and fire according to your clay’s instructions. If using enamel paints, follow the manufacturer’s curing instructions (usually baking in a home oven).
Level Up: Starry Night
Before sealing, dip an old toothbrush in watered-down white paint. Run your thumb over bristles to speckle the sky area with tiny stars.
Now you have a rugged, beautiful vessel that reveals a hidden landscape every time you finish your soup
Starry Night Galaxy Bowl With Splattered Stars
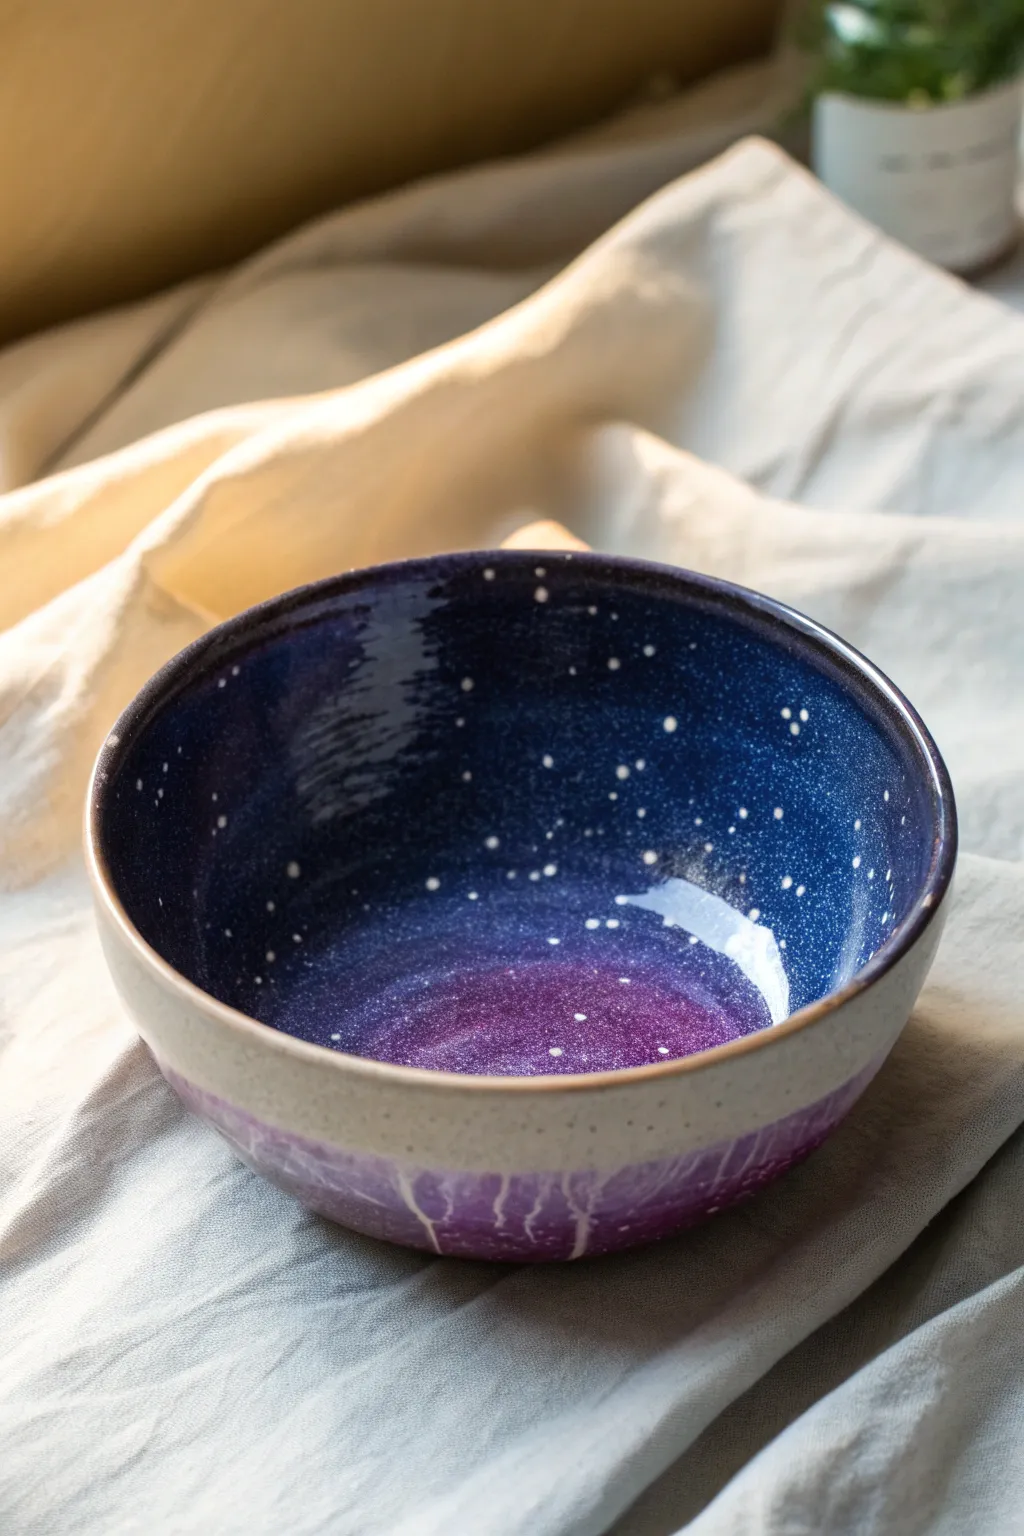
Capture the magic of deep space right inside your cereal bowl with this mesmerizing galaxy glaze technique. You’ll create a seamless gradient of midnight blues and nebulous purples, finished with a splatter of starlight that makes every breakfast feel out of this world.
Step-by-Step
Materials
- Bisque-fired ceramic bowl (stoneware or earthenware)
- Dark blue underglaze or glaze (Midnight Blue)
- Purple underglaze or glaze (Amethyst or Violet)
- White underglaze (for stars)
- Wide soft fan brush
- Medium round brush
- Old toothbrush or stiff bristle brush
- Clear transparent food-safe glaze (if using underglazes)
- Sponge and water
- Wax resist (optional)
Step 1: Base Preparation
-
Clean the bisque:
Start by wiping down your bisque-fired bowl with a damp sponge. This removes any dust that could prevent the glaze from adhering properly and ensures a smooth application. -
Map your design:
Visualize where your horizon line will be on the exterior. This bowl features a raw clay band in the middle, so plan to leave a strip of about 1 inch unglazed around the center exterior. -
Apply wax resist:
To keep lines crisp, carefully paint a ring of wax resist around the exterior center band and the foot ring. This will repel glaze in the areas you want to keep as raw, speckled clay.
Step 2: Creating the Galaxy Interior
-
Paint the purple core:
Using your fan brush, apply a pool of purple glaze to the very bottom center of the bowl’s interior. Don’t worry about perfect edges yet; just get that rich color down. -
Feather the edges:
While the purple is still damp, gently feather the visible edges outward so there isn’t a harsh line where the color stops. -
Apply the midnight blue:
Load your brush with the dark blue glaze. Start painting from the rim downwards, working your way toward the purple center. -
Blend the transition:
Where the blue meets the purple, use short, soft strokes to blend the two colors. You want a gradient effect, creating a deep violet transition zone rather than stripes. -
Second coat:
Once the first layer is touch-dry, apply a second coat to the interior. This ensures the deep, opaque color you see in the photo, especially important for that void-like blue. -
Rim detail:
Bring the dark blue glaze over the rim and just slightly down the exterior lip to frame the piece.
Star Blur Troubleshooting
If your white stars disappear or blur into the background during firing, your white glaze was too thin. Use a highly opaque white underglaze directly, or apply it slightly thicker.
Step 3: Exterior Dripping Effect
-
Glaze the bottom exterior:
Turn the bowl over. Apply a heavy coat of purple glaze to the bottom section (below your waxed band). Use a generous amount of glaze near the top of this section. -
Encourage drips:
I allow the purple glaze to pool slightly at the top edge of this bottom section. Gravity will pull it down, creating those organic, trailing vertical drips visible in the image. -
Clean the foot:
Even with wax resist, check the foot ring. Use a damp sponge to wipe away any wayward glaze beads so your bowl sits flat in the kiln.
Level Up: Nebula Clouds
Before splattering stars, sponge on faint patches of light blue or teal over the dark blue sections to create wispy nebula gas clouds for extra depth.
Step 4: Starlight Splatter
-
Prepare the stars:
Dilute a small amount of white underglaze with a few drops of water until it has a milky consistency. -
Load the tool:
Dip an old toothbrush or a stiff-bristle brush into the diluted white mixture. Shake off the excess—you don’t want big blobs. -
Flick the galaxy:
Hold the brush inside the bowl and run your thumb across the bristles to flick tiny specks of white onto the blue and purple gradient. Rotate the bowl to get even coverage. -
Create distinct constellations:
Use a fine liner brush to manually dot a few larger ‘planets’ or brighter stars among the mist of fine spray for visual interest. -
Final clear coat:
If you used underglazes for the color, let everything dry completely (at least an hour), then apply two coats of clear food-safe glaze over the entire interior and the glazed parts of the exterior. -
Final Wipe:
Do one last check on the unglazed center band. Use a damp sponge to clean off any white splatters that landed on the raw clay area.
Once fired, you will have a stunning piece of functional art that brings the beauty of the cosmos to your table
Paint-Drip Rim for an Effortless “Wow” Bowl
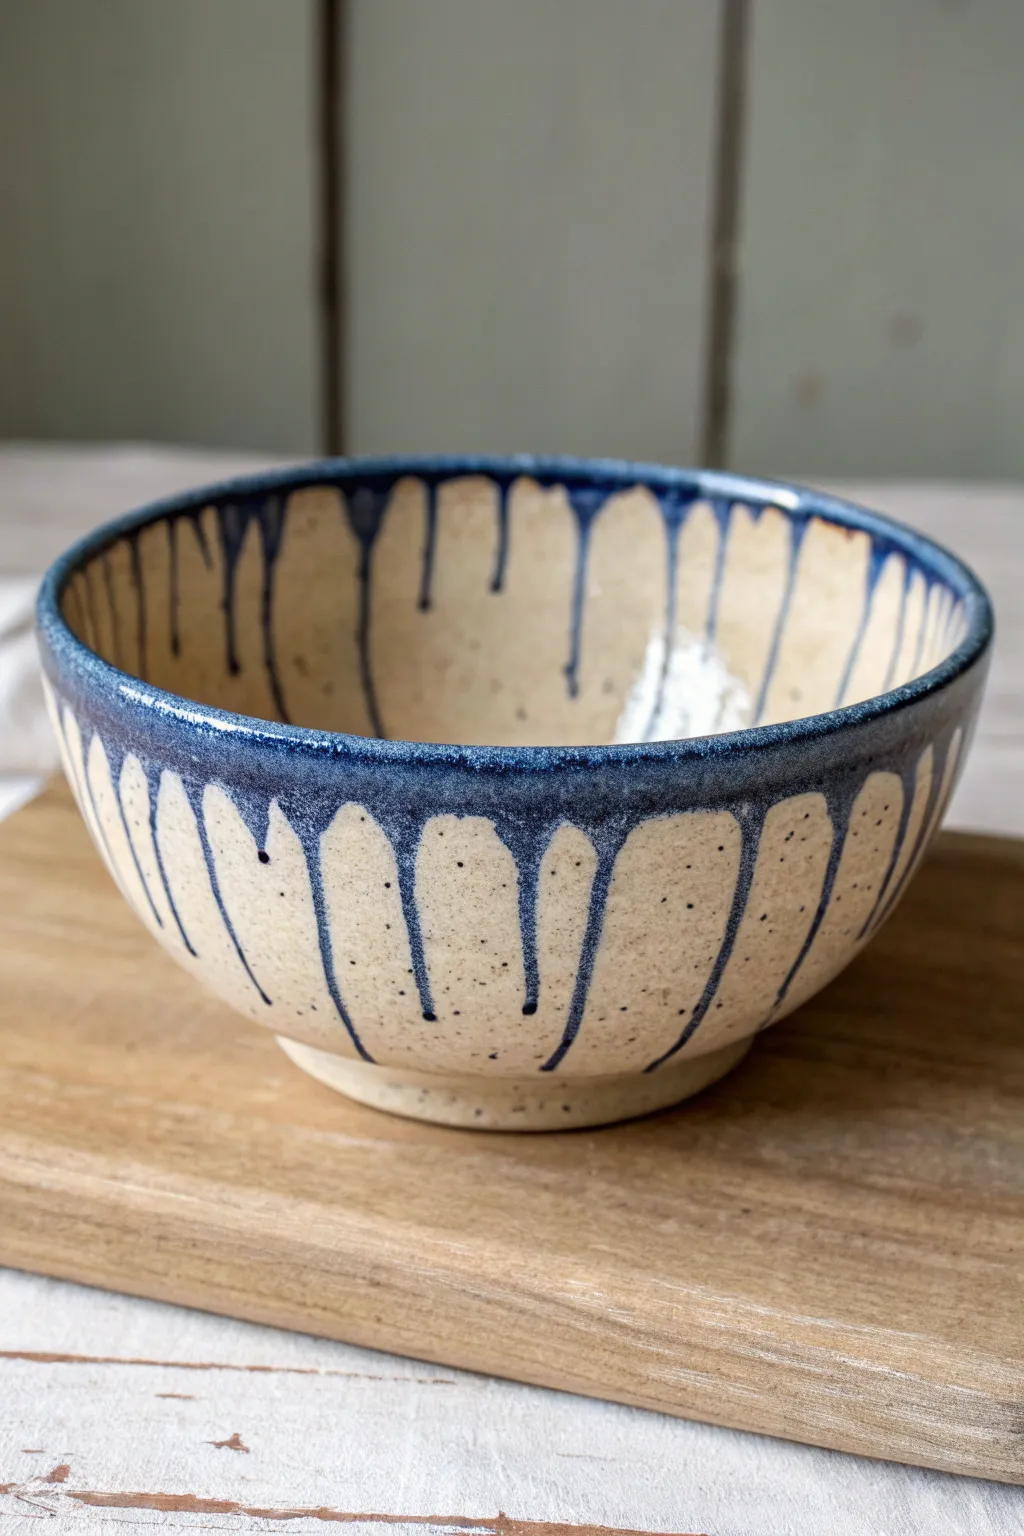
Achieve a sophisticated, artisan look with this surprisingly simple drip method that lets gravity do the heavy lifting. The beautiful contrast of deep blue glaze running down speckled beige stoneware creates distinct, organic patterns so no two bowls are ever exactly alike.
How-To Guide
Materials
- Bisque-fired ceramic bowl (stoneware clay body)
- Speckled cream or beige dipping glaze
- Deep cobalt blue fluid glaze
- Wax resist
- Sponge
- Bucket of water
- Large glaze tongs (optional)
- Small paintbrush (optional, for touch-ups)
- Kiln (or access to a firing service)
Step 1: Preparation & Base Coat
-
Clean the bisque:
Begin by wiping down your entire bisque-fired bowl with a damp sponge. This removes any dust from the shelf or sanding that could prevent the glaze from adhering properly. -
Wax the foot:
Apply a coat of wax resist to the bottom foot ring of the bowl and about 2-3mm up the side. This is crucial for preventing the glaze from fusing your bowl to the kiln shelf. -
Mix the base glaze:
Stir your speckled cream or beige dipping glaze thoroughly. You want a consistency similar to heavy cream to ensure an even coat. -
Dip the bowl:
Using glaze tongs or your hands, submerge the entire bowl into the base color for about 3 seconds. Pull it out smoothly to avoid drip marks. -
Shake off excess:
Holding the bowl upside down over the bucket, give it a gentle shake to remove excess droplets. I verify the rim is clear of bubbles before moving on. -
Dry the base layer:
Set the bowl aside and let the base coat dry completely. The surface should be powdery to the touch before you attempt the second layer.
Gravity Control
To get variation in drip lengths, tilt the bowl slightly at different angles immediately after flipping it right-side up so the glaze travels unevenly.
Step 2: Creating the Drips
-
Prepare the accent glaze:
Prepare your cobalt blue glaze. For this specific look, the glaze needs to be slightly fluid but not watery; test the viscosity on a stir stick to see if it runs slightly. -
Dip the rim:
Hold the bowl by its base, turning it upside down. Carefully lower just the top 1-2 inches of the rim into the blue glaze. -
Hold briefly:
Keep the rim submerged for a longer count—about 5 to 6 seconds. This thicker application is the secret ingredient for creating those long, dramatic drips later. -
Flip and wait:
Immediately upon lifting the bowl out of the blue glaze, flip it right-side up. This reversal uses gravity to pull the wet blue glaze down over the dry beige base. -
Control the flow:
Watch the drips form. If they are running too fast toward the foot, tilt the bowl slightly back and forth to slow them down or blow gently on the runners to dry the leading edge. -
Clean the foot again:
Check the wax resist on the bottom. If any blue drips traveled all the way down to the foot, wipe them away immediately with a damp sponge so they don’t ruin your kiln shelf.
Running Too Much?
If the second glaze is too runny, the drips often hit the shelf. Add a pinch of epsom salts to the liquid glaze to thicken it slightly without drying it out.
Step 3: Firing & Finishing
-
Final dry:
Allow the bowl to dry overnight. The thick areas where the glazes overlap take longer to lose their moisture than single-coat areas. -
Check overlap thickness:
Inspect the rim. If the glaze looks dangerously thick (cracking significantly), gently rub it with a dry finger to smooth it slightly, but try to preserve the drip structure. -
Load the kiln:
Place the bowl in the kiln. Ensure it is not too close to other pots, as the fluid glaze creates an active surface during firing. -
Fire to temperature:
Fire the kiln to the recommended cone for your clay body and glazes (typically Cone 5 or 6 for this type of stoneware finish). -
Cool slowly:
Let the kiln cool naturally to room temperature before opening. Opening too early can cause thermal shock or dull the glossy finish. -
Unload and inspect:
Remove your finished bowl. Check the rim to see how the blue interacted with the speckled base, creating that lovely fused, dripping effect.
Enjoy using your new custom bowl for morning cereal or serving side dishes at your next dinner party
Terrazzo Confetti Bowl With Random Speckles
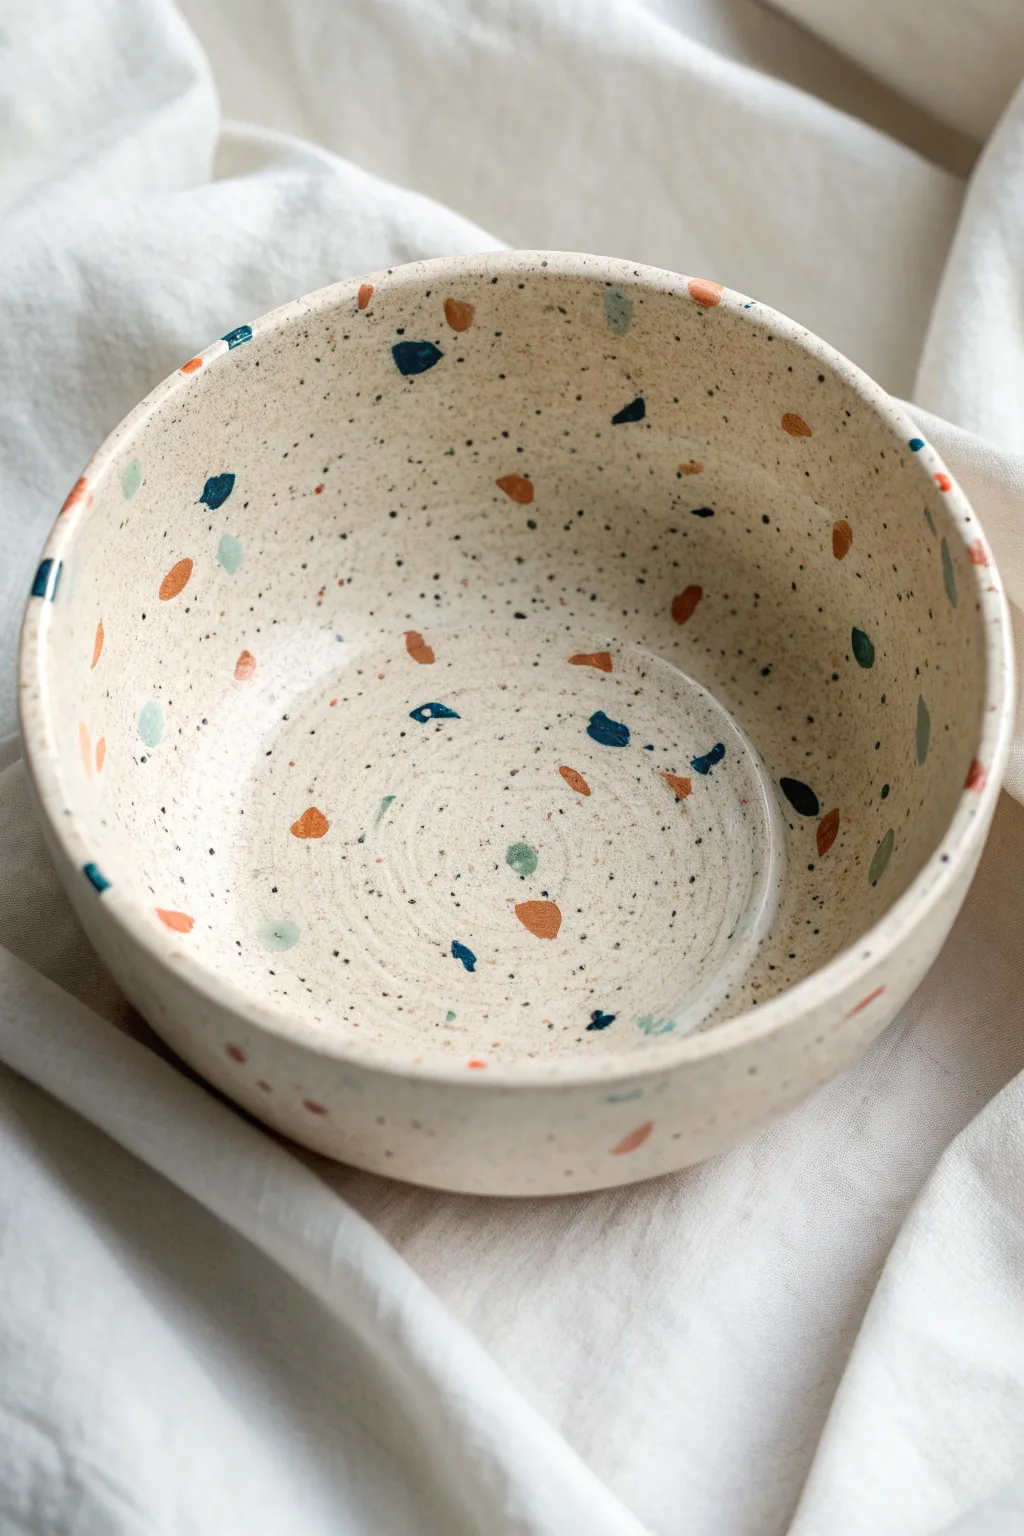
This charming bowl captures the playful energy of confetti with a modern terrazzo twist, featuring seemingly random flecks of deep blue, terra cotta orange, and soft mint green. The design sits on a natural, creamy speckled base, giving it warmth and an organic, handmade feel perfect for brightening up any table setting.
Step-by-Step Guide
Materials
- Bisque ceramic bowl (plain, ready to paint)
- Creamy beige or oatmeal ceramic glaze (base color)
- Deep teal or navy blue underglaze
- Terra cotta orange underglaze
- Mint or seafoam green underglaze
- Black underglaze (for fine speckles)
- Small flat brush (size 2-4)
- Detail liner brush (size 0 or 00)
- Old toothbrush or stiff fan brush (for splattering)
- Clear dipping glaze
- Damp sponge
Step 1: Preparing the Base
-
Clean the bisque:
Start by wiping down your bisque bowl with a damp sponge. This removes any dust that might prevent the glaze from adhering properly. -
Apply base coats:
Using a soft fan brush or wide brush, apply three even coats of the creamy beige glaze to the entire bowl, including the interior and exterior. -
Dry between coats:
Allow each layer of the base glaze to dry until it’s chalky and not cool to the touch before adding the next one to ensure solid coverage. -
Create the speckled background:
To mimic the natural clay look, dip an old toothbrush or stiff bristle brush into watered-down black underglaze. -
Splatter technique:
Hold the brush near the bowl and run your thumb across the bristles to flick tiny, mist-like dots across the surface. Do this sparingly; you want texture, not a black bowl.
Shape Variation
Avoid perfect circles or squares. The terrazzo look comes from jagged, shard-like shapes that look like broken stone chips.
Step 2: Painting the Terrazzo Stones
-
Mix the orange shapes:
Dip your small flat brush into the terra cotta orange underglaze. Paint small, irregular polygon shapes scattered randomly around the bowl’s interior. -
Vary the sizes:
Make sure some orange shapes are slightly larger than others, but keep them generally between the size of a grain of rice and a small pea. -
Add the blue accents:
Clean your brush thoroughly, then switch to the deep teal or navy blue. Paint triangular or shard-like shapes in the empty spaces between the orange spots. -
Distribute color evenly:
Check for visual balance. If you have a cluster of orange, place a blue shape nearby to break it up, but don’t let them touch. -
Introduce the mint green:
Using the mint green underglaze, add small, rounded flecks. These should be fewer in number than the orange and blue, acting as soft highlights. -
Layering the colors:
Go back over your colored shapes with a second coat of their respective underglazes to ensure the colors pop vibrantly after firing. -
Don’t forget the rim:
Paint a few shapes specifically wrapping over the rim of the bowl. This creates continuity between the inside and outside of the piece. -
Decorate the exterior:
Repeat the random pattern of orange, blue, and mint shapes on the outside of the bowl, keeping the density similar to the inside.
Smudged Shapes
If you smudge a shape while painting, wait for it to dry, gently scrape it off with a craft knife, and dab base color over the spot.
Step 3: Finishing Touches
-
Assess the spacing:
Take a step back and look at the bowl. Fill in any awkwardly large gaps with a tiny speck of color or an extra black splatter. -
Let everything dry:
Allow the underglaze shapes to dry completely. They should look matte and chalky. -
Clear dipping:
Dip the entire bowl into a clear glaze. This will seal the piece and make it food-safe and glossy after firing. -
Wipe the foot:
Use a sponge to wipe any glaze off the bottom foot ring of the bowl so it doesn’t stick to the kiln shelf. -
Fire the piece:
Fire the bowl in a kiln according to the specific cone rating of your clay and glazes (usually Cone 06 or Cone 6).
Once fired, you will have a durable, speckled serving piece that looks professionally crafted


Have a question or want to share your own experience? I'd love to hear from you in the comments below!