Capturing the joy of a celebration on paper is one of the most heartwarming ways to practice your sketching skills, whether you are designing a handmade card or filling a journal spread. I have gathered a variety of themes ranging from classic symbols to whimsical characters that will spark your creativity.
The classic tiered birthday cake
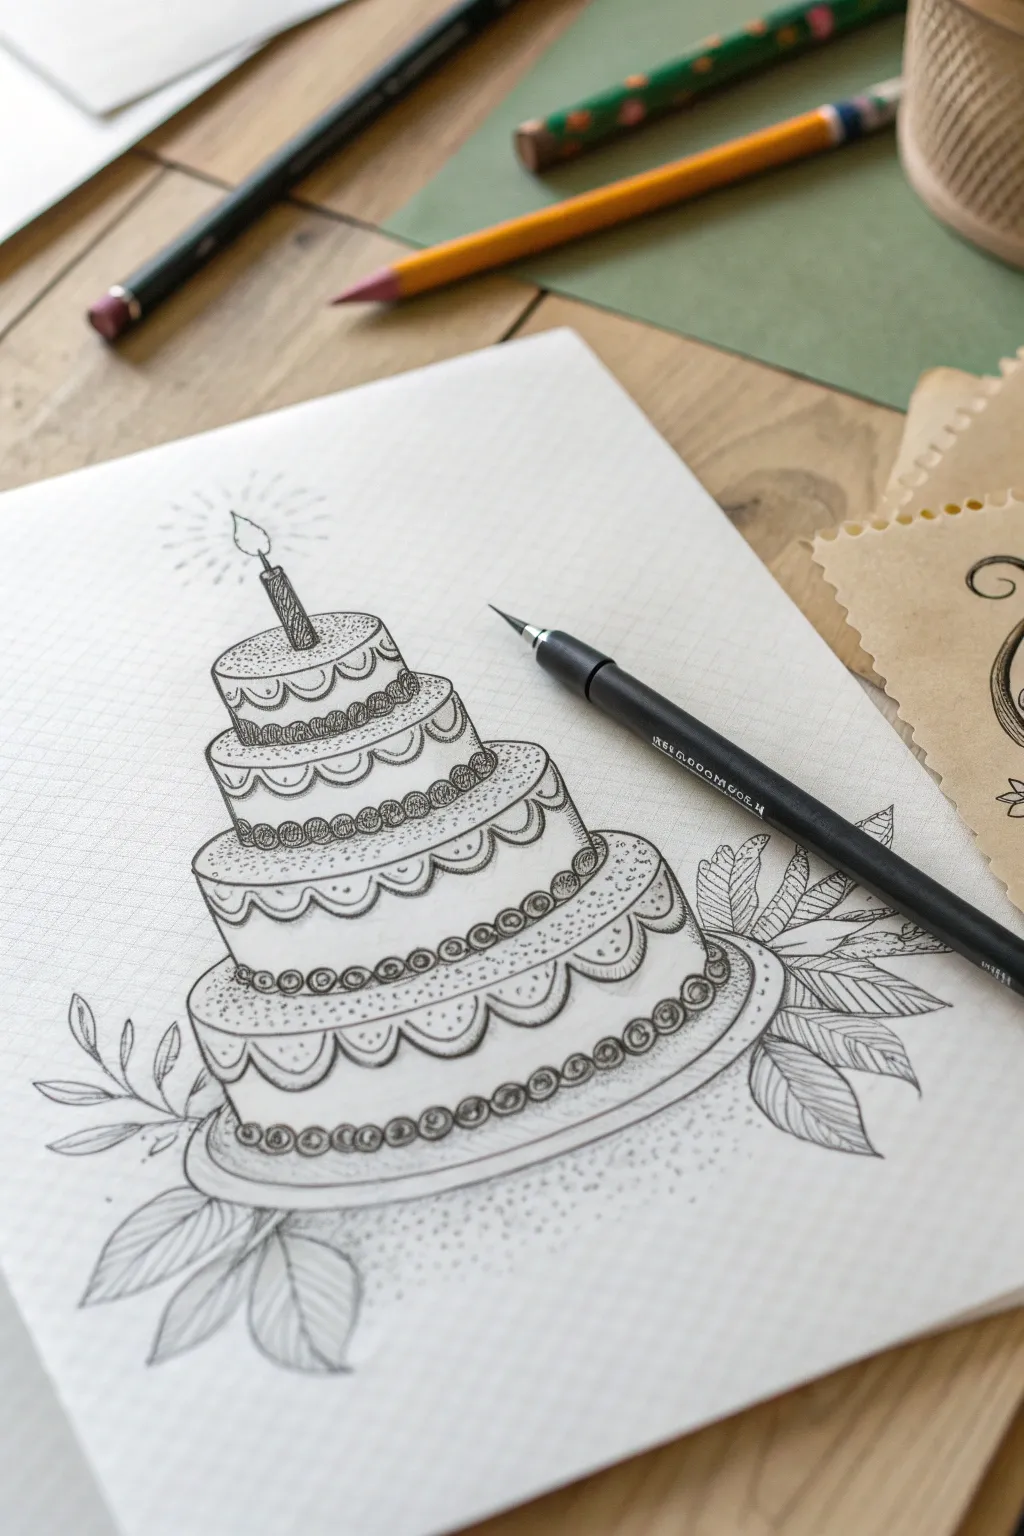
Master the art of elegant simplicity with this pen-and-ink birthday illustration. Using grid paper as your guide, you will build a whimsical four-tiered cake adorned with botanicals and classic stippled shading.
Step-by-Step Guide
Materials
- Grid or graph paper pad
- HB Pencil
- Fine liner pen (size 0.3mm or 0.5mm)
- Kneaded eraser
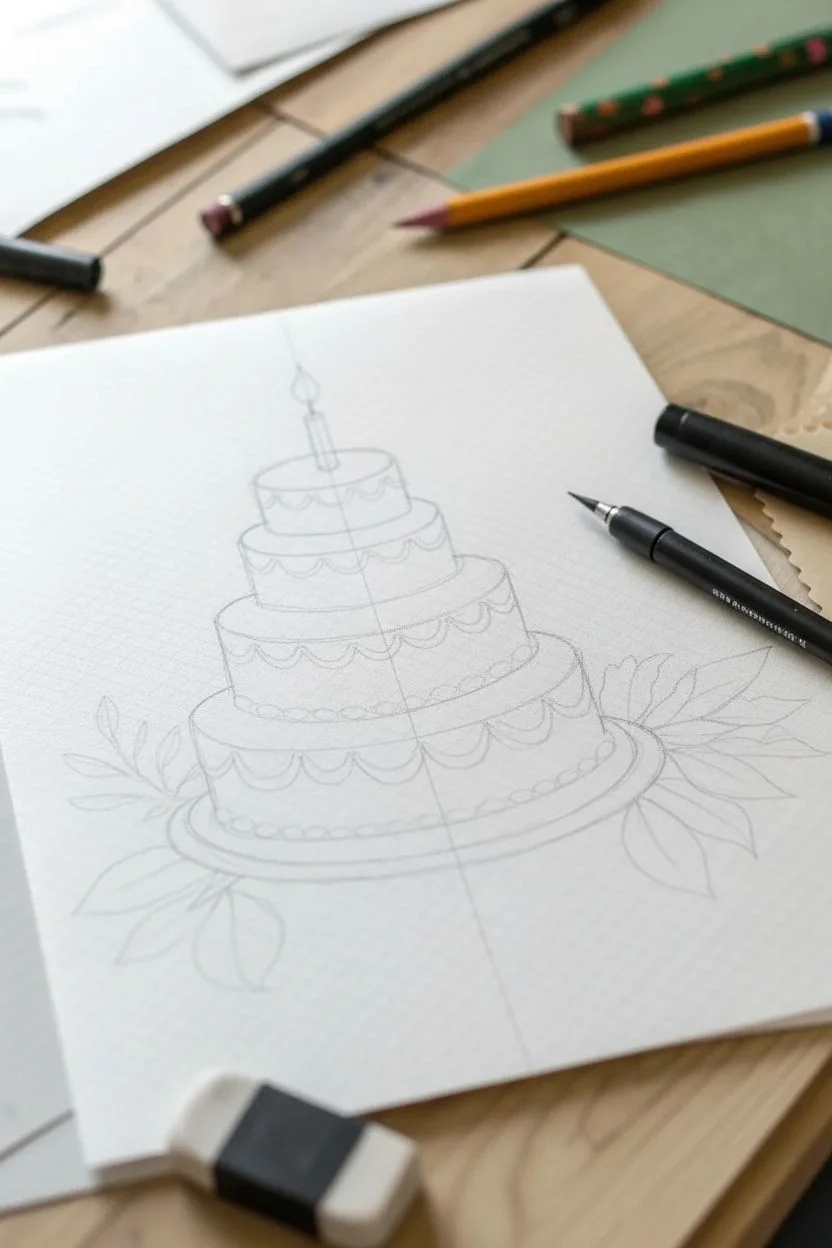
Step 1: Structural Sketching
-
Establish the center:
Begin by lightly drawing a vertical line down the center of your page using the grid lines as a guide; this will ensure your cake stands straight. -
Map the tiers:
Sketch four horizontal ovals (ellipses) stacked on top of each other, making each one slightly wider than the one above it to create the tiered shape. -
Connect the layers:
Draw vertical lines connecting the widest edges of your ovals to form the cylindrical body of each cake tier. -
Add the candle:
Sketch a small, thin cylinder on the very top center of the cake, adding a teardrop shape above it for the flame. -
Outline the leaves:
Lightly sketch large, simple leaf shapes fanning out from the base of the bottom tier on both the left and right sides.
Grid Guide
Use the squares on your graph paper to measure width. If the top tier is 4 squares wide, make sure it extends 2 squares to the left and 2 to the right of your centerline.
Step 2: Inking the Details
-
Ink the structure:
Switch to your fine liner pen and carefully trace the main outlines of your cake tiers, ignoring the parts of the ovals that would be hidden inside the cake. -
Draw scalloped icing:
On the side of each tier, draw a series of connected ‘U’ shapes creates a draped icing or swag effect. -
Double the scallops:
Add a second line parallel to your scallops just slightly above the first one to give the icing visual thickness. -
Add pearl borders:
Along the very bottom edge of each tier, draw a row of small, tight circles to resemble piping or a pearl border. -
Ink the candle:
Outline your candle, adding diagonal stripes for texture, and ink the flame with a steady hand. -
Radiate light:
Draw short, dashed lines radiating outward from the flame to create a glowing halo effect. -
Define the leaves:
Go over your leaf sketches with ink, making the tips slightly pointed for a realistic look. -
Add leaf veins:
Draw a central line down each leaf, then add smaller diagonal lines branching off to create the veins. -
Clean up:
Once the ink is completely dry, gently erase all your pencil guidelines to reveal a clean drawing.
Step 3: Shading and Texture
-
Stipple shading:
Using the tip of your pen, apply a technique called stippling—creating shading using only small dots—concentrating them on the right side of the cake to suggest a light source from the left. -
Shadow the scallops:
Add a cluster of dots directly underneath each scalloped icing curve to make the decoration pop effectively. -
Texture the tiers:
I like to sprinkle a few sparse dots across the main body of the cake tiers so the surface doesn’t look too flat. -
Ground the cake:
Stipple a faint shadow on the table surface under the bottom plate to ground the illustration so it doesn’t look like it’s floating.
Level Up: Vintage Wash
After the ink is fully cured, lightly brush a tea stain or a very pale brown watercolor wash over the drawing to give it an antique, parchment-style appearance.
Now you have a charming, hand-drawn confection ready to grace a birthday card or journal spread


Floating helium balloon bundles
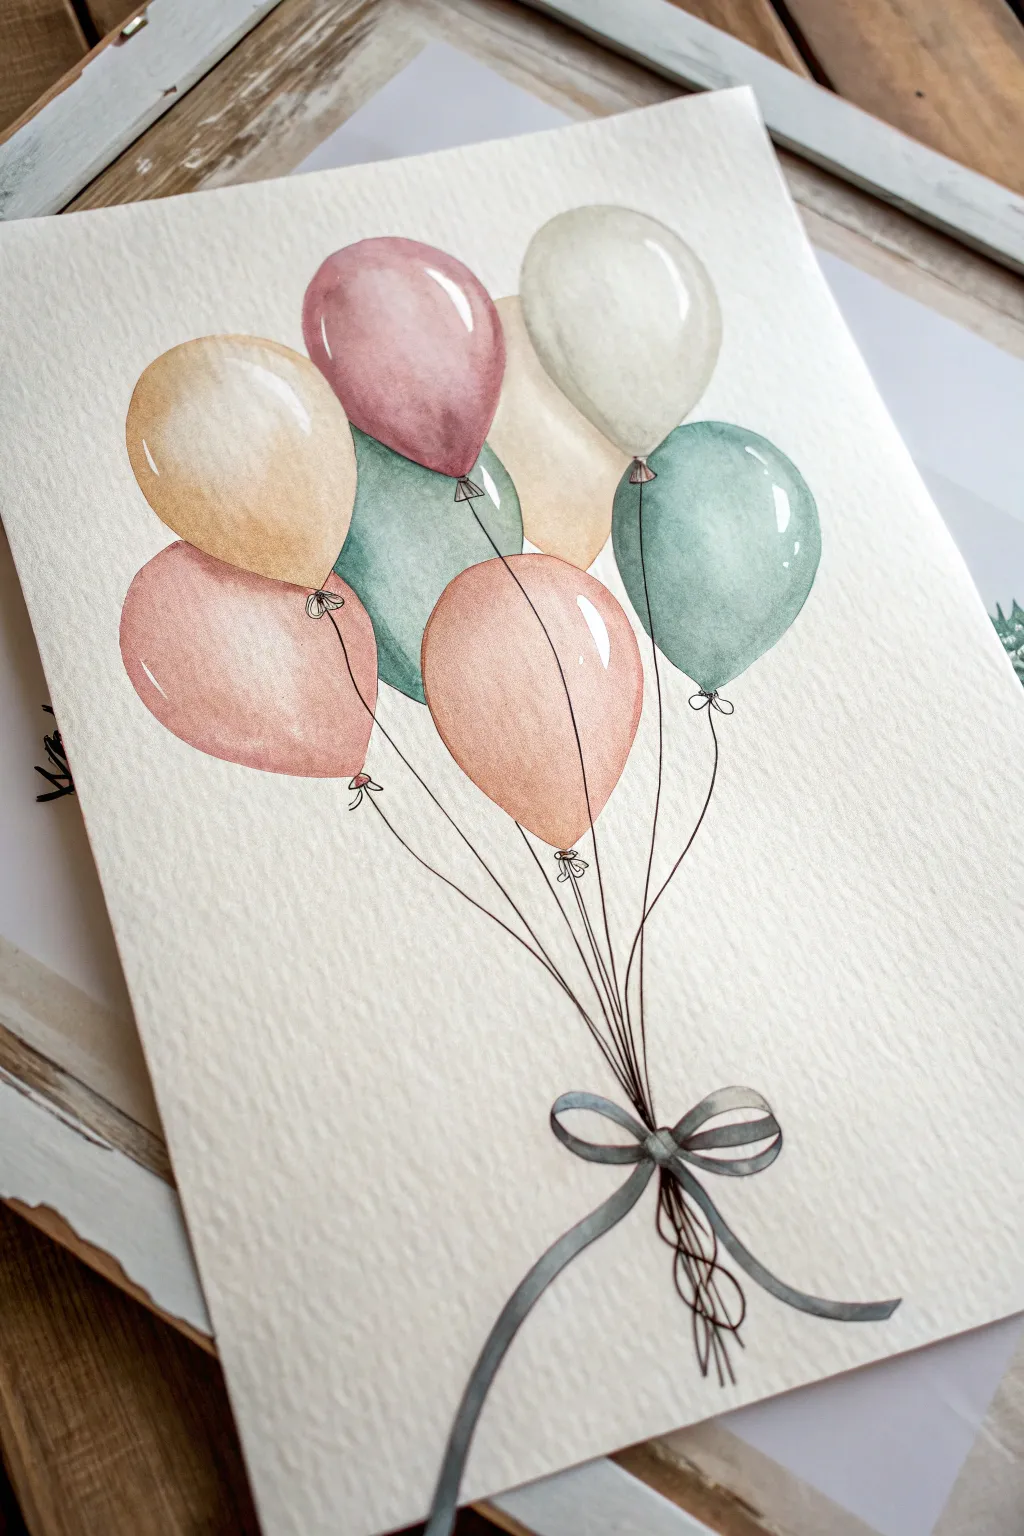
Capture the whimsy of a celebration with this soft, vintage-inspired watercolor illustration. By combining muted pastel washes with delicate ink lines, you’ll create a timeless artwork perfect for birthday cards or nursery decor.
Step-by-Step
Materials
- Cold-press watercolor paper (300 gsm)
- Watercolor paints (Yellow Ochre, Alizarin Crimson, Sap Green, Burnt Sienna, Payne’s Grey)
- Round watercolor brushes (size 4 and 6)
- Waterproof fine liner pen (0.1mm black)
- HB pencil
- Kneaded eraser
- Jar of clean water
- Paper towels
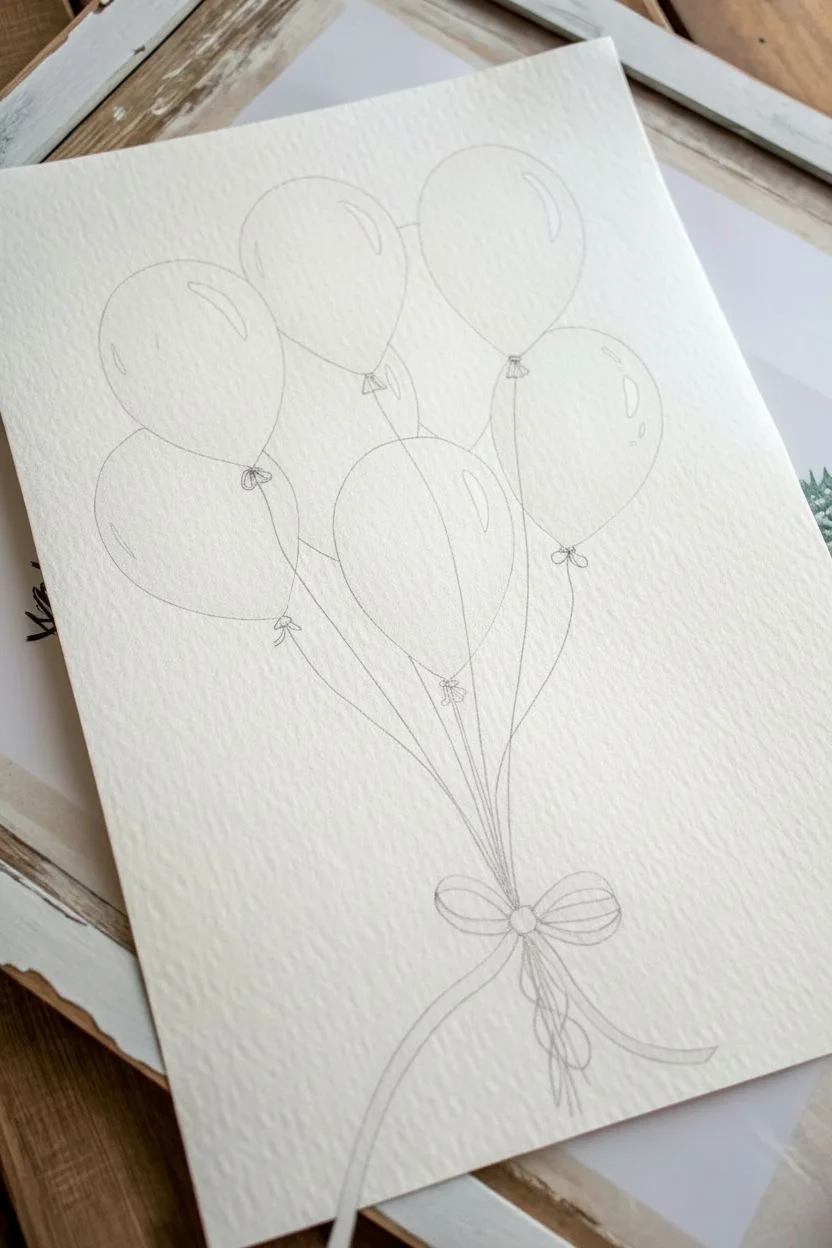
Step 1: Sketching the Composition
-
Draw the main shapes:
Using your pencil very lightly, sketch seven oval shapes clustered together. vary the angles slightly so they look like they are bobbing naturally. -
Arrange the overlap:
Place some ovals in the ‘background’ and some overlapping in the ‘foreground.’ Ensure the bunch feels balanced, with the top slightly wider than the bottom. -
Add the ties:
At the bottom of each oval, sketch a tiny triangle where the balloon is tied off. -
Mark the highlights:
Draw a small, curved kidney-bean shape on the upper right side of every balloon. This marks the reflection area we must leave unpainted.
Light Source Logic
To make the bundle look realistic rather than flat, ensure all your white highlights are in the exact same position (e.g., upper right) on every single balloon.
Step 2: Painting the Balloons
-
Mix your palette:
Prepare watered-down puddles of your vintage colors: Golden Ochre, a dusty Rose (Crimson with a touch of Brown), Sage Green, and a very pale Cream. -
Paint the first layer:
Start with the balloons that are in the background or not touching each other. Load your brush with the Golden Ochre mix for the top-left balloon. -
Preserve the white:
Paint the entire oval shape, carefully going around the highlight shape you sketched earlier. The white of the paper creates the shine. -
Soften the highlight:
While the paint is still wet, rinse your brush, dry it slightly on a towel, and gently run the damp bristles along the edge of the white highlight to soften the transition. -
Paint the remaining colors:
Proceed to paint the Sage Green and Cream balloons in the specific positions shown in the reference, using the same highlight technique for each. -
Let it dry completely:
This is crucial. Wait until the paper is cool to the touch and dry before painting the overlapping balloons to prevent colors from bleeding into each other. -
Paint foreground balloons:
Fill in the remaining overlapping balloons with the Dusty Rose and Terra Cotta (orange-brown) shades. -
Add volume with shadows:
Once the base layers are dry, glaze a slightly darker, more concentrated version of each color along the bottom-left curves of the balloons to enhance roundness.
Step 3: Inking and Details
-
Ink the ties:
Switch to your waterproof fine liner. Draw the scrunched plastic details at the bottom neck of each balloon where the knot is. -
Draw the strings:
Draw a single, slightly wavy line extending down from each knot. I find it easiest to pull the pen toward me in one confident stroke. -
Converge the lines:
Bring all the string lines together at a single point near the bottom center of the page where the bow will sit. -
Outline the bow:
With the ink pen, draw a loose bow shape at the convergence point. Outline the loops and the knot center. -
Draw the ribbons:
Sketch two long ribbon tails flowing down. Add some squiggly, loose lines at the very ends of the ribbon to mimic frayed fabric. -
Paint the bow:
Dilute a small amount of Payne’s Grey or a blue-grey mix. Fill in the bow loops and tails with this sheer wash. -
Add final depth:
Drop a tiny bit of darker grey into the center of the bow knot and under the loops while the wash is still damp to create dimension. -
Clean up:
Once the ink and paint are 100% dry, gently erase any visible pencil sketch lines to leave a crisp, professional finish.
Make it Pop
If you accidentally painted over a highlight, don’t worry! Wait for the painting to dry, then use a white gel pen or opaque white gouache to add the shine back in.
Now you have a charming bouquet of balloons ready to float off the page!


Draped party bunting banners
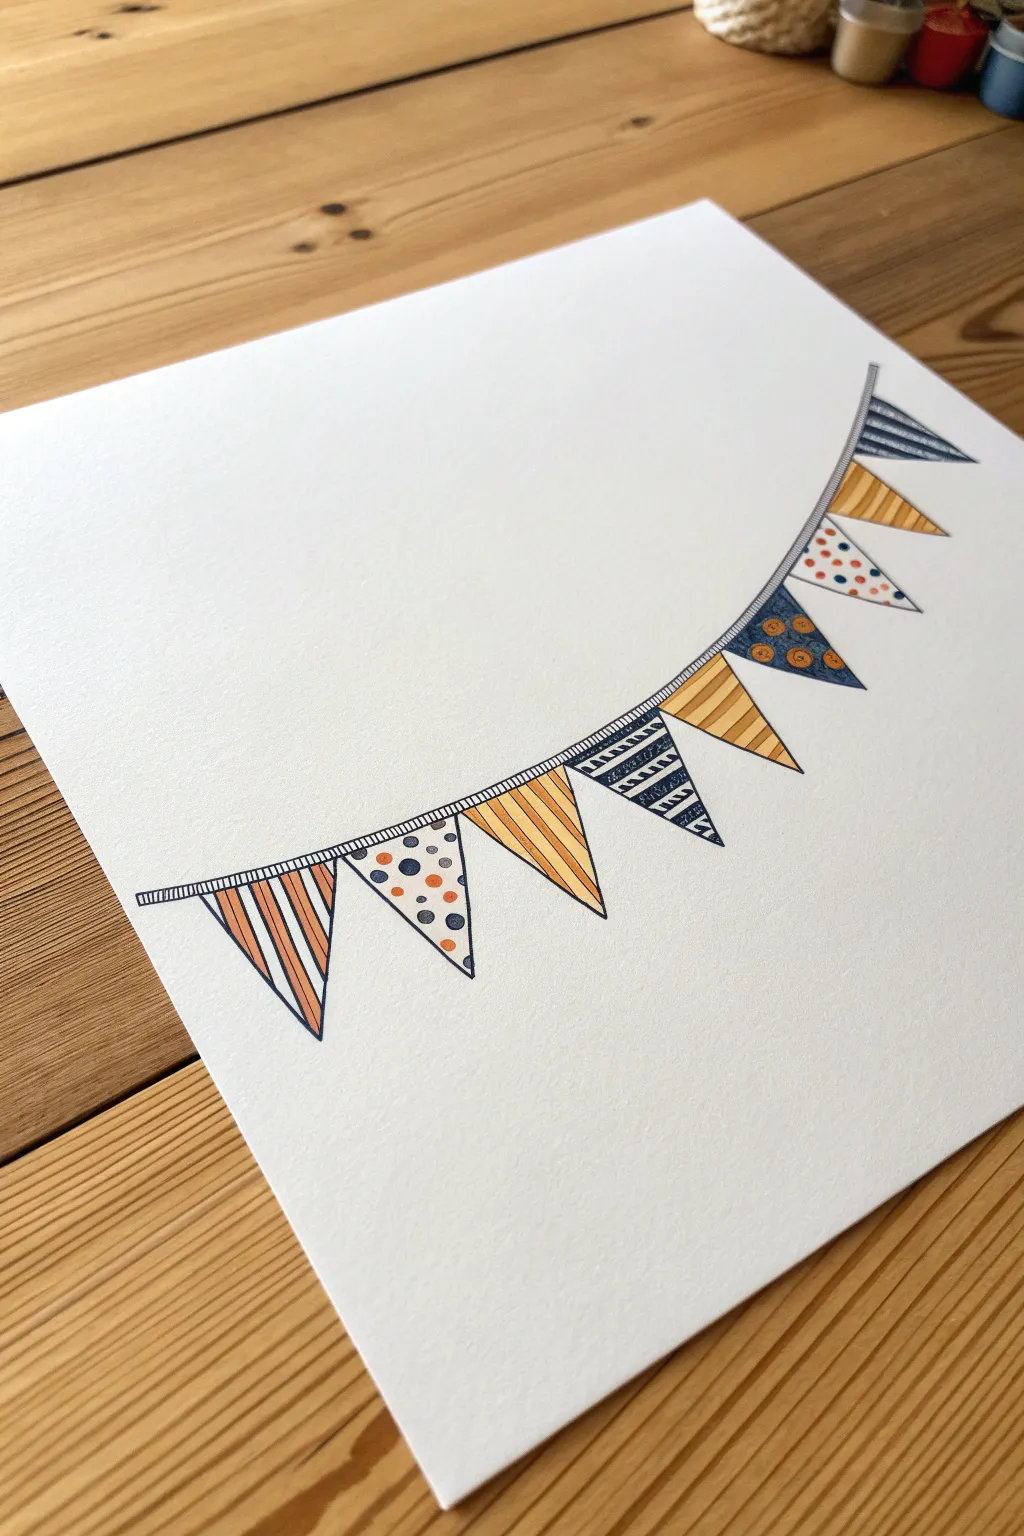
Capture the festive spirit with this charming illustration of draped party bunting featuring a cozy, vintage color palette. By combining precise fine liner details with warm mustard and navy tones, you’ll create a graphic yet whimsical artwork perfect for birthday cards.
Step-by-Step
Materials
- White mixed media or smooth watercolor paper
- Fine liner pen (Black, size 0.1 and 0.3)
- Markers or colored pencils (Mustard Yellow, Navy Blue, Burnt Orange)
- White gel pen
- HB Pencil
- Eraser
- Ruler (optional)
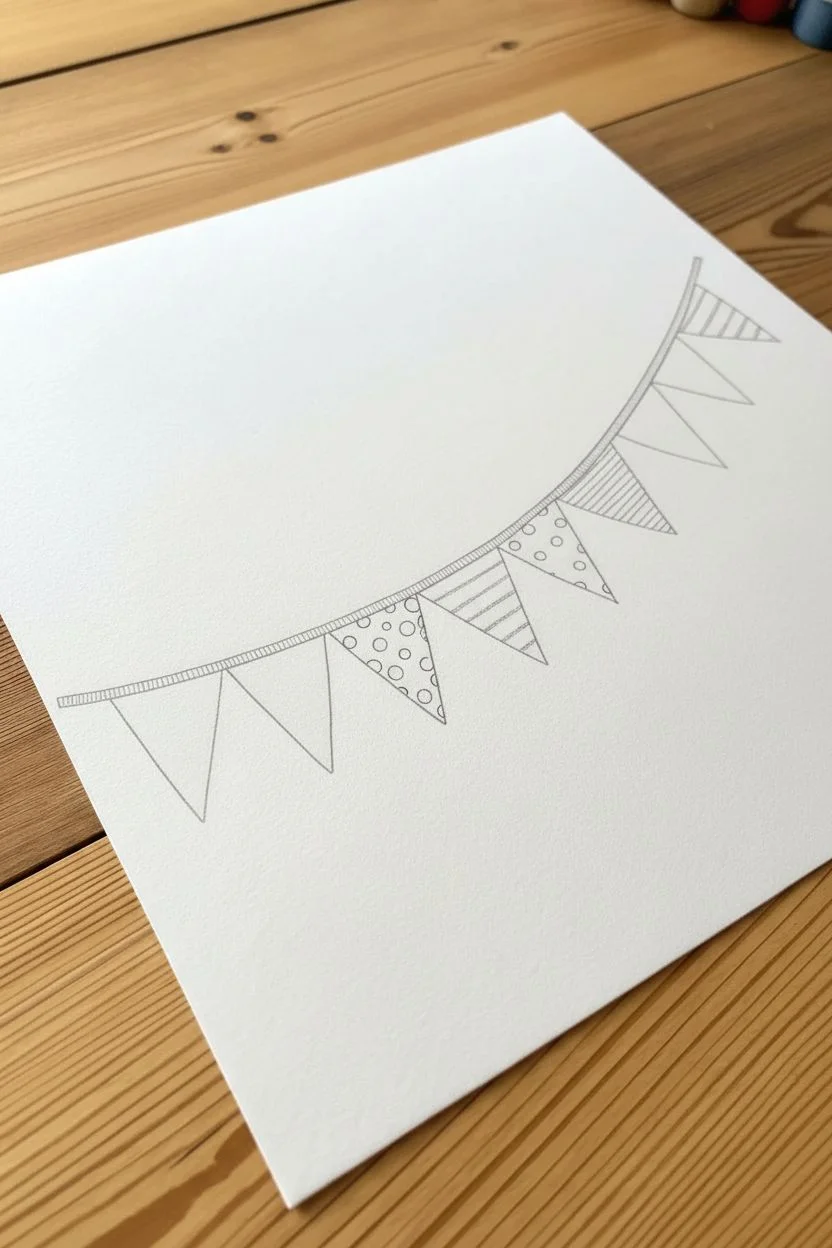
Step 1: Sketching the Structure
-
Plan the curve:
Start with your pencil by drawing a long, gentle swooping arch across the page. Begin lower on the left and curve smoothly upward toward the top right corner to create a dynamic drape. -
Define the tape:
Instead of a single line, draw a second curved line parallel to the first, about 3-4mm apart. This creates the ‘bias tape’ or ribbon that holds the flags together. -
Sketch the triangles:
Lightly sketch nine inverted triangles hanging from the band. Make them roughly equal in size, but allow them to overlap slightly or fan out as they follow the curve of the string.
Gravity Guide
Even though the string curves, the points of the triangles should generally point straight down towards the bottom of the paper, adhering to gravity, rather than angling perpendicular to the string.
Step 2: Inking the Outlines
-
Outline the ribbon:
Using your 0.3 fine liner, ink the two main curved lines that form the holding tape. -
Texture the ribbon:
Switch to a thinner 0.1 pen to draw vertical hatch marks all along the inside of the ribbon. I find that keeping these lines close together mimics the texture of fabric binding. -
Ink the flags:
Trace the outline of each triangular flag with the 0.3 pen. Ensure the top edge of each triangle connects directly to the bottom of the textured ribbon. -
Clean up:
Once the ink is completely dry to the touch, gently erase all your underlying pencil sketches for a clean base.
Variation Level Up
Use a light grey brush marker to add a drop shadow to the right of each flag. This simple addition lifts the illustration off the page and gives it a 3D effect.
Step 3: Adding Patterns & Color
-
First flag stripes:
On the far left flag, draw vertical stripes using the burnt orange marker. Leave equal white spaces between them, then outline the color strips with thin ink lines. -
Polka dot details:
For the second flag, scatter small circles. Color some navy blue and some orange, keeping the background white for contrast. -
Mustard striped flags:
Locate the third, fifth, and eighth flags. Color these entirely with mustard yellow. Once dry, use a slightly darker yellow or light orange to add diagonal stripes for subtle texture. -
Navy geometric flag:
Color the fourth flag solid navy blue. Let it dry completely. Then, use your white gel pen to draw horizontal rows of zig-zags and dashed lines across it. -
Sunburst flag:
For the sixth flag, color the background navy blue. Use the orange marker to draw small circles, then use the fine liner to draw spirals inside the circles for a button or sunburst effect. -
Scattered dot flag:
On the seventh flag, keep the background white and draw simple, small orange polka dots evenly spaced out. -
End flag stripes:
For the final flag on the right, draw thin horizontal stripes in navy blue, leaving thin white gaps between them. -
Final contouring:
Go back over the main outlines of the flags with your 0.3 pen one last time to make the shapes pop against the patterns.
Now your page is decorated with a festive banner that looks ready for a celebration


Botanical birthday wreath frame
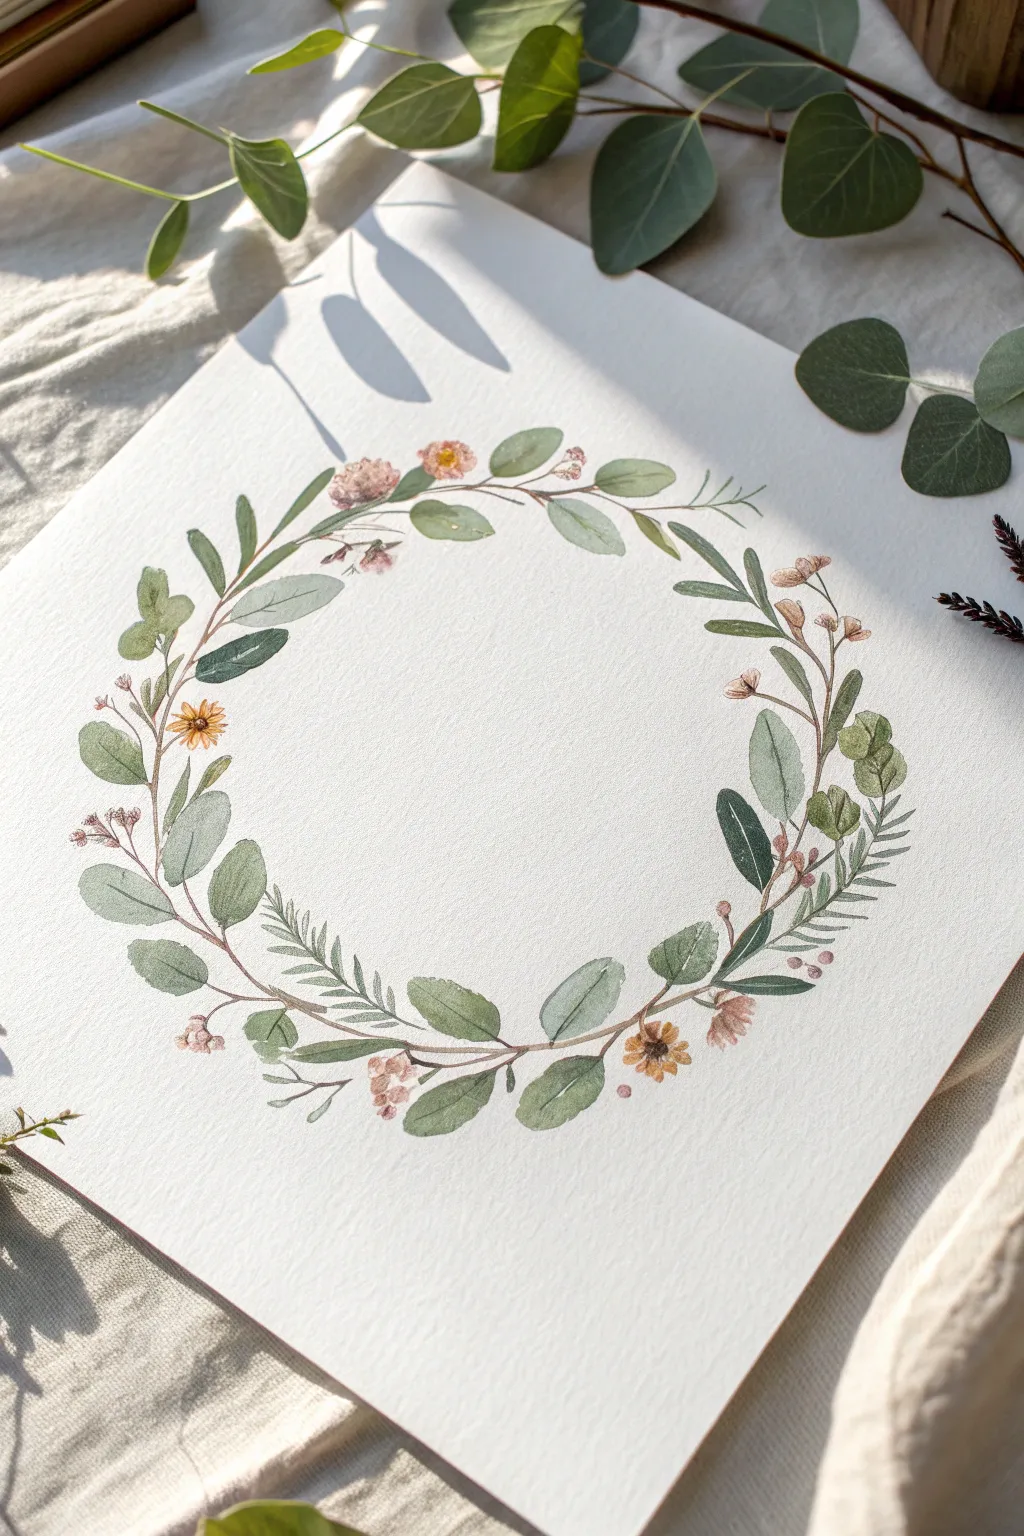

This project captures the soft elegance of wild greenery, perfect for framing a heartfelt birthday message. You’ll layer translucent sage greens and blush pinks to create a natural, organic frame on textured cold-press paper.
How-To Guide
Materials
- Cold press watercolor paper (300 gsm)
- Watercolor paints (Sap Green, Indigo, Burnt Sienna, Yellow Ochre, Alizarin Crimson)
- Round watercolor brushes (Size 2 and 6)
- HB Pencil and kneaded eraser
- Compass or round bowl (for tracing)
- Paper towel
- Palette for mixing
Step 1: Planning and Mixing
-
Trace the guide:
Lightly trace a circle in the center of your paper using a compass or a bowl. Keep this pencil line very faint, as it serves only as a rough spine for your wreath. -
Mix a sage green:
On your palette, mix Sap Green with a touch of Indigo and plenty of water to create a translucent, cool sage color. I find this watery consistency helps achieve that delicate, airy look. -
Mix an olive tone:
In a separate well, mix Sap Green with a little Burnt Sienna or Yellow Ochre to create a warmer, earthier olive green.
Bleeding edges?
If your leaves are bleeding into each other creating undefined blobs, you are working too fast. Let each leaf dry for a minute before painting a neighbor to keep crisp edges.
Step 2: Painting the Foliage
-
Paint the round leaves:
Using the size 6 brush and your sage mix, paint rounded eucalyptus-style leaves scattered along the pencil guide. Use a ‘press and lift’ motion to create organic oval shapes. -
Add tapered leaves:
Switch to the warm olive mix. Paint long, slender willow-like leaves intermittently around the circle, letting some curve inward and others outward. -
Create darker contrast:
Mix a denser, darker green (less water). Paint smaller, stiffer clusters of leaves or pine-needle shapes to fill gaps. These darker elements provide visual weight. -
Connect the stems:
With a fine size 2 brush and a watery brown mix (Burnt Sienna + hint of Blue), draw thin, winding stems connecting your floating leaves to the imaginary central vine. -
Add fern details:
Using the tip of your smallest brush and dark green paint, create delicate fern-like fronds. These add a beautiful feathery texture to the composition.
Pro Tip: Rotation
Rotate your paper constantly as you work around the circle. This keeps your hand from smudging wet paint and helps you maintain a consistent angle for your leaf strokes.
Step 3: Flowers and Details
-
Paint blush blooms:
Dilute Alizarin Crimson significantly until it’s a pale blush pink. Dab small, irregular clusters of 3-4 petals in empty spots along the vine. -
Add yellow accents:
Using Yellow Ochre, paint small, simple daisy shapes or little buds. These pops of yellow bring a cheerful brightness to the wreath. -
Darken flower centers:
Once the flower petals are dry, drop a tiny dot of brown or dark orange into the center of the yellow blooms for definition. -
Draw leaf veins:
Check that your large leaves are completely dry. Using a slightly darker shade of green and your finest brush, paint very thin central veins on the eucalyptus leaves. -
Layer for depth:
Paint a few faint, very watery grey-green leaves ‘behind’ the existing ones. This glazing technique creates a shadowy depth that makes the wreath look full. -
Refine the stems:
Go back with your brown stem color and ensure all flowers and leaves are physically connected to the main branch structure. -
Erase guidelines:
Wait until the painting is absolutely bone-dry. Gently run your kneaded eraser over the artwork to lift the initial pencil circle guide.
Now you have a serene botanical border ready to surround a special birthday wish
BRUSH GUIDE
The Right Brush for Every Stroke
From clean lines to bold texture — master brush choice, stroke control, and essential techniques.
Explore the Full Guide
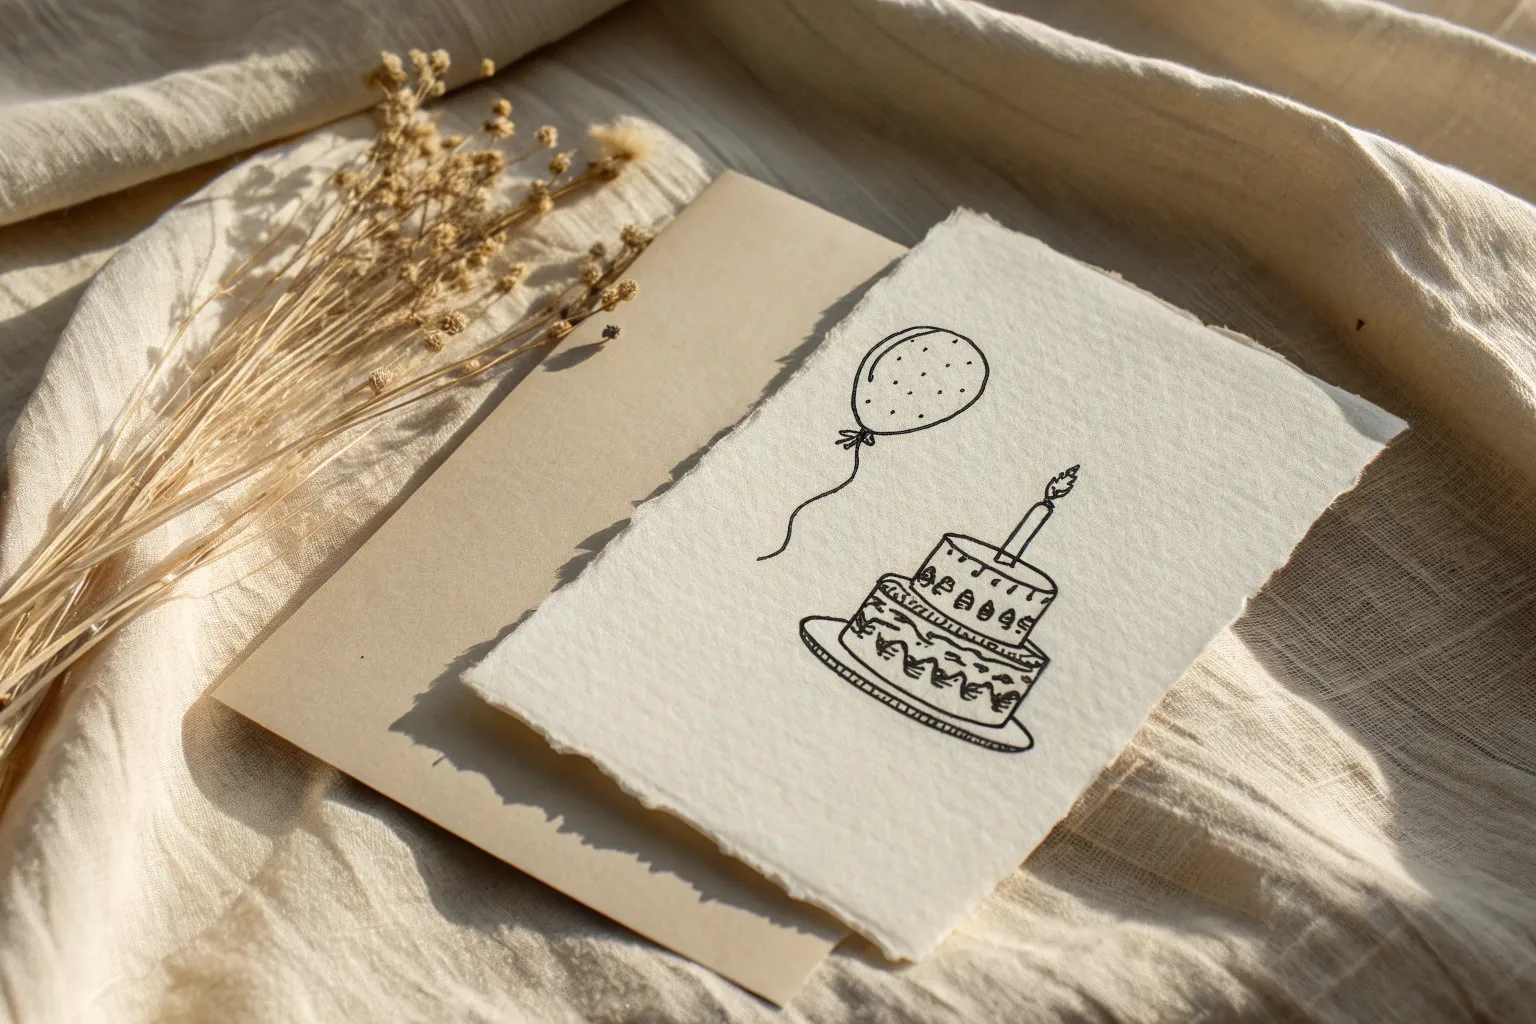
Minimalist continuous line cake
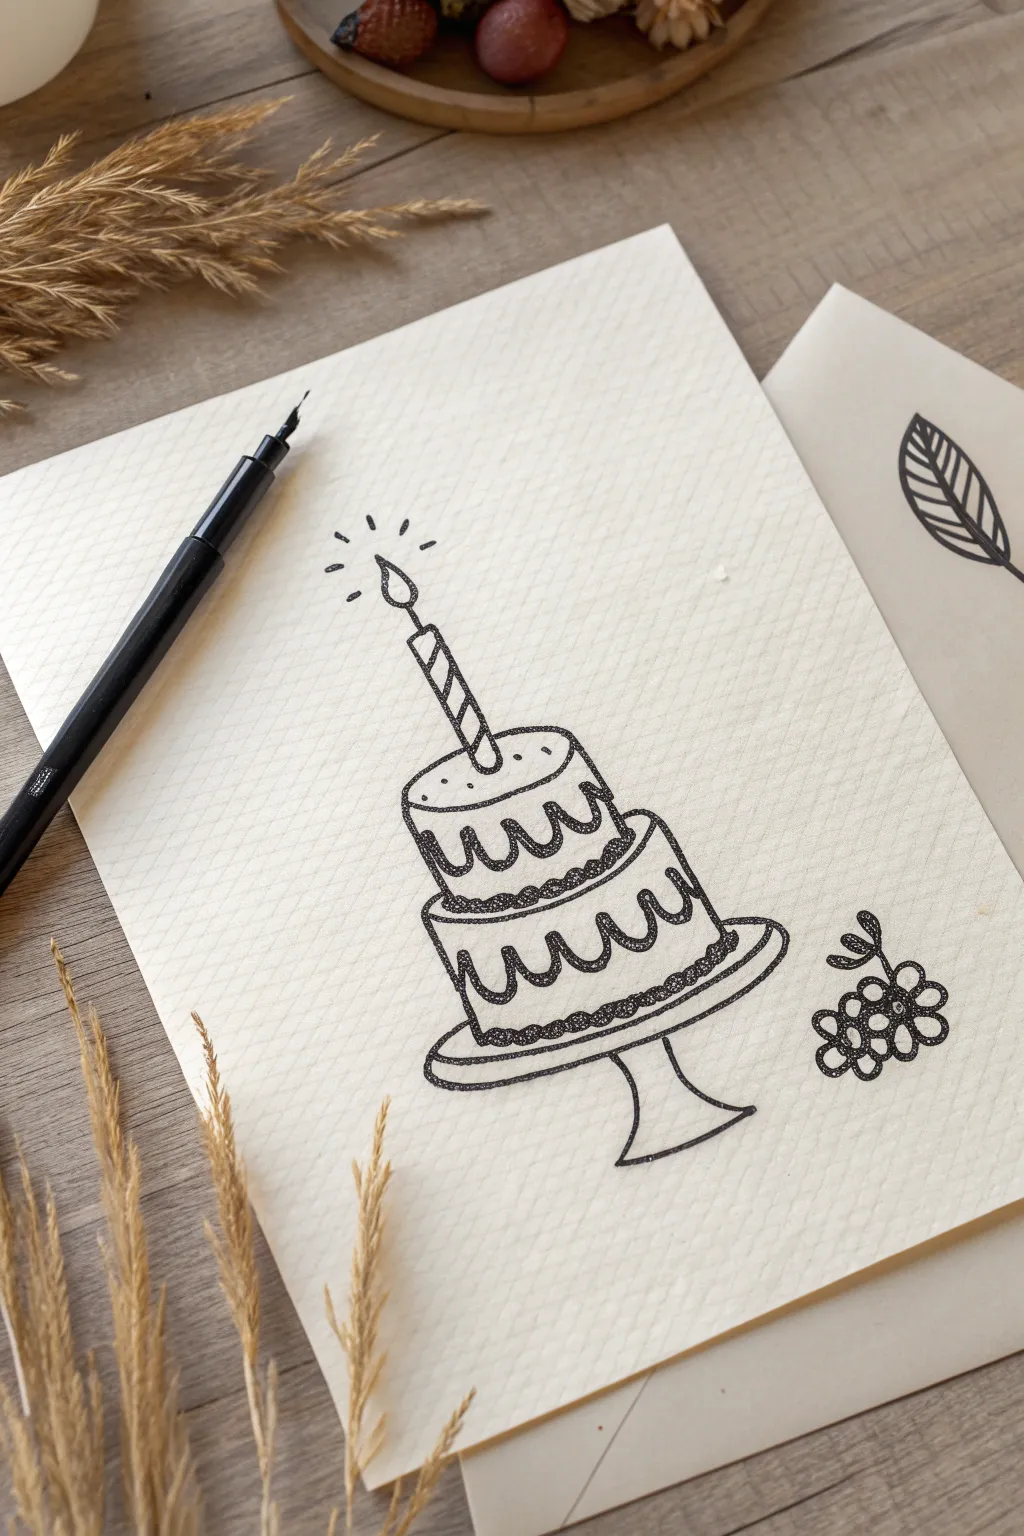
This project captures the charm of valid minimalist illustration using simple ink lines and dot work on textured paper. The result is a sophisticated, hand-drawn greeting card that feels both rustic and celebratory.
Step-by-Step Tutorial
Materials
- Textured off-white cardstock or cold-press watercolor paper
- Black fine liner pen (0.3mm or 0.5mm)
- HB Pencil
- Soft kneaded eraser
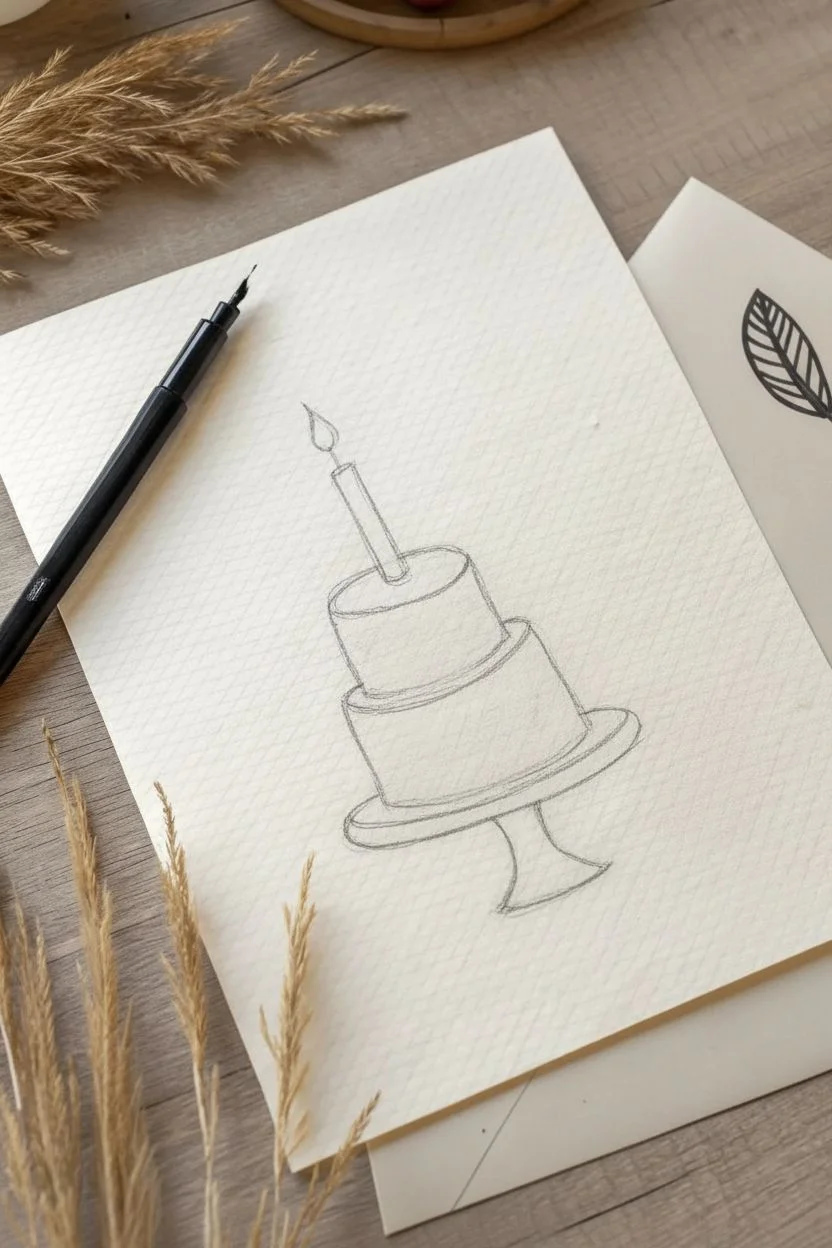
Step 1: Pencil Structure
-
Draft the stand base:
Start lightly with your pencil. Draw a wide, flattened oval near the bottom of the page to represent the rim of the cake stand. -
Add the pedestal:
Draw a curved stem extending downward from the center of the oval, flaring out into a wide, stable foot for the stand. -
Sketch the bottom tier:
Draw a cylinder sitting directly on the stand’s oval. Keep the height relatively short and stout. -
Sketch the top tier:
Center a smaller, slightly taller cylinder on top of the first one to form the second tier of the cake. -
Position the candle:
Add a thin, tall rectangle sticking out of the top tier, capped with a teardrop shape for the flame.
Ink Confidence
Don’t worry if your lines are slightly shaky! The wobble adds to the organic, hand-drawn aesthetic, especially on the textured paper.
Step 2: Inking the Lines
-
Outline the flame:
Switch to your black fine liner. Carefully trace the teardrop flame, leaving a small gap at the bottom where it meets the wick. -
Detail the candle:
Ink the sides of the candle and draw three diagonal stripes across it to create a candy-cane pattern. -
Create the top icing:
Draw the flat top of the upper cake tier. Instead of a straight line for the bottom of the icing, draw a loose, scalloped wavy line slightly down the side. -
Finish the top tier:
Draw vertical lines down from the icing waves to the bottom of this tier, curving the bottom edge slightly to match the perspective. -
Ink the bottom icing:
Repeat the scalloped, wavy line technique for the icing on the larger bottom tier along with its flat top surface. -
Complete the cake body:
Draw the sides and curved bottom edge of the lower tier, ensuring it looks like it is resting firmly on the stand. -
Define the stand plate:
Trace the main oval of the stand. Draw a second, partial curve just underneath the front edge to give the plate some thickness. -
Ink the pedestal foot:
Go over the stem and flared base of the stand with a smooth, continuous stroke. -
Clean up:
I prefer to wait a full minute for the ink to dry completely, then gently erase all visible pencil marks.
Step 3: Shading & Embellishments
-
Stipple the cake layers:
Using the very tip of your pen, tap small clusters of dots (stippling) along the bottom-right edges of the cake tiers to create shadow and texture. -
Shade the icing:
Add a tiny amount of stippling just under the scalloped icing waves to show that they are slightly raised. -
Texture the stand:
Concentrate a denser area of dots on the left side of the stand’s stem and under the plate rim to ground the object. -
Add the radiance:
Draw five small, detached floating lines around the flame to suggest light radiating outward. -
Draw the berries:
To the right of the stand, draw a small cluster of circles and loops to resemble a little sprig of berries or flowers. -
Final leaf detail:
If you want to match the scene fully, doodle a simple leaf shape on a separate scrap of paper or envelope to pair with the main drawing.
Level Up: Pop of Color
Once the black ink is 100% dry, use a water brush to add a very faint pastel pink or yellow wash to just the candle flame or the icing.
Now you have a charming, hand-sketched card ready to wish someone a happy birthday
An open envelope with confetti
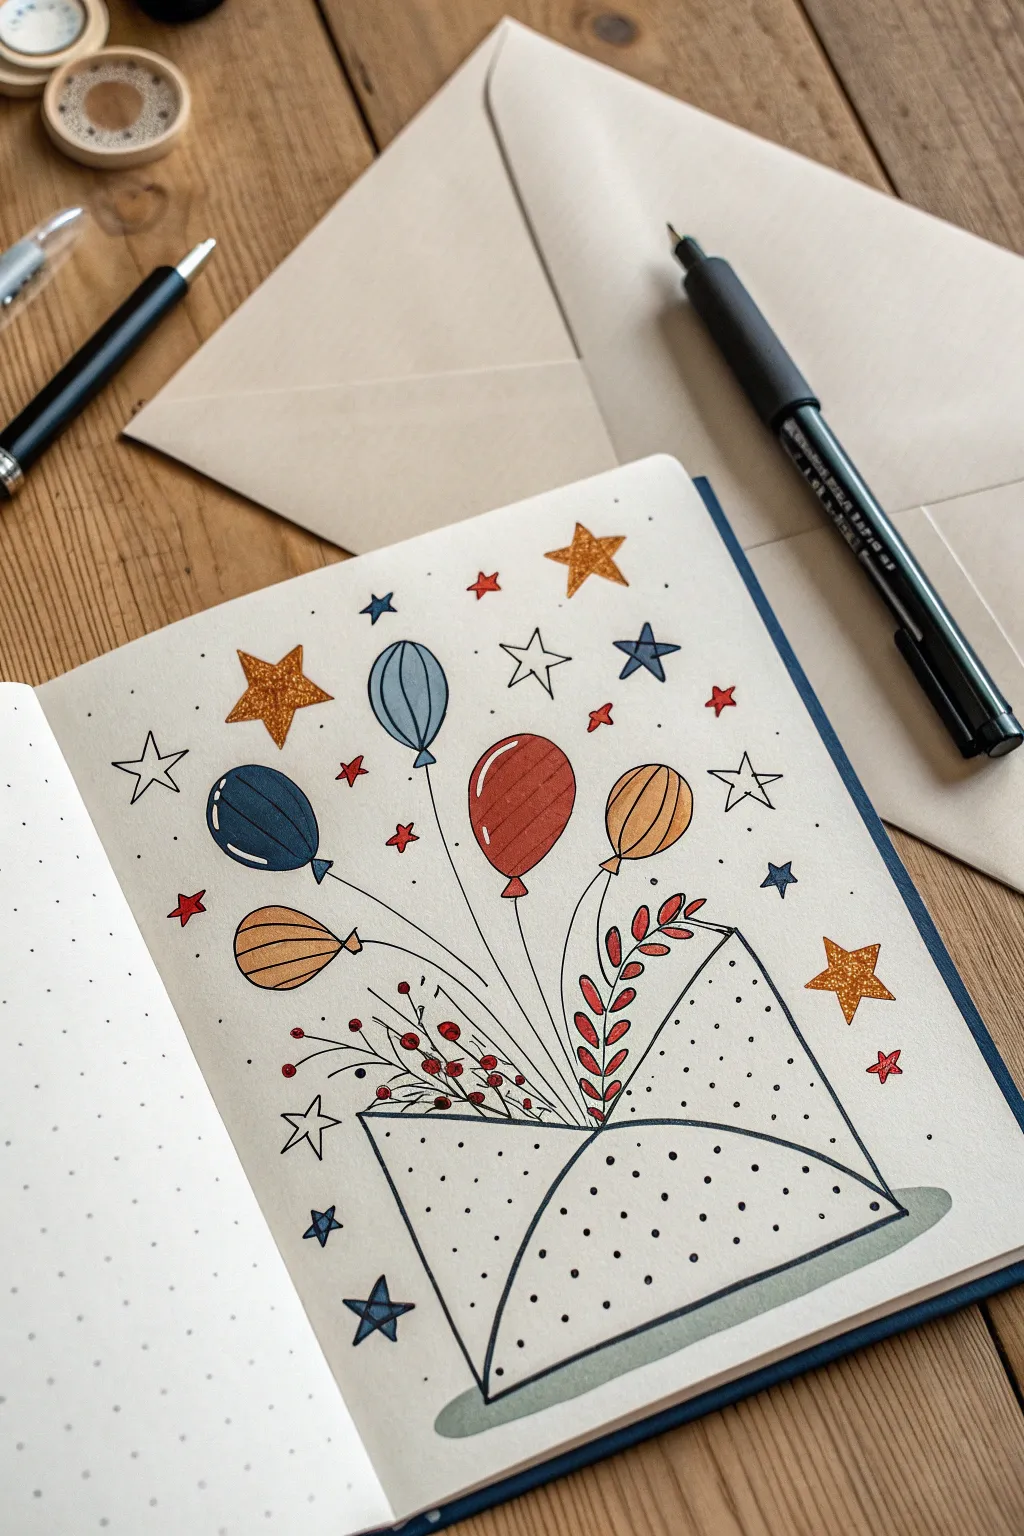
Capture the excitement of a surprise party with this dynamic bullet journal spread featuring an envelope bursting with balloons, confetti, and stars. The mix of muted primaries and glittery accents makes this a festive yet sophisticated addition to your notebook.
Detailed Instructions
Materials
- Dot grid notebook or paper
- HB pencil and good eraser
- Black drawing pens (sizes 0.3 and 0.5)
- Markers in navy blue, muted red, and mustard yellow
- Gold glitter gel pen
- Light grey brush pen or marker
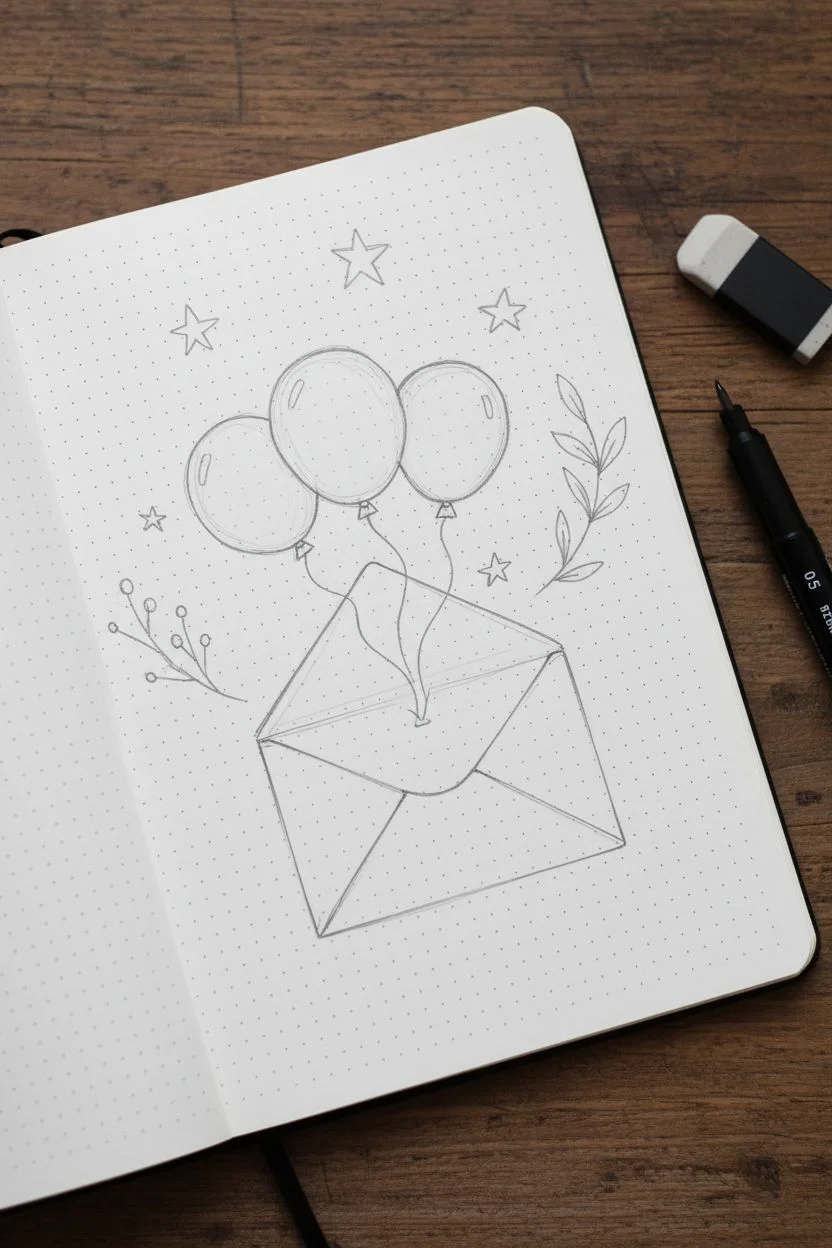
Step 1: Sketching the Composition
-
Anchor the design:
Begin at the bottom center of your page by sketching a wide, open envelope shape. Angle the side flaps inward and draw the bottom triangle flap pointing up. -
Add the opening:
Sketch a curved ‘V’ line inside the envelope shape to define the opening pocket where the items will burst out from. -
Position the balloons:
Lightly draw three main balloons floating above the envelope at different heights. Make the left one round, the center one slightly oval, and the right one equally round. -
Connect the strings:
Draw wavy lines trailing from the bottom of each balloon, converging into the center of the envelope opening. -
Botanical elements:
To the right of the balloons, sketch a curving stem with paired leaves. On the left side, add thin, bare twigs with small circular berries on the ends.
Step 2: Adding Details & Stars
-
Starry layout:
Scatter different sizes of five-pointed stars around the balloons. I like to vary the angles so they look like they are tumbling in mid-air. -
Balloon details:
Sketch a curved highlight shape on the upper left side of the blue and red balloons. For the yellow balloon on the right, sketch vertical curved stripes. -
Confetti filler:
Fill the empty spaces between the larger elements with tiny circles, miniature stars, and small ‘x’ shapes to mimic falling confetti.
Highlight Pro-Tip
To keep the balloon reflections crisp and bright white, outline the highlight shape with your color first, then fill in the rest of the balloon around it.
Step 3: Inking the Lines
-
Main outlines:
Using your 0.5 black pen, trace over your pencil lines for the envelope, balloons, and foliage. Keep your hand relaxed for smooth curves. -
Star outlines:
Ink the outlines of the hollow stars. Leave the stars intended for gold glitter pencil-free for now, or outline them thinly if you prefer a bordered look. -
Envelope pattern:
Use the finer 0.3 pen to draw small, scattered polka dots all over the front of the envelope itself, giving it a textured paper look. -
Erase guidelines:
Once the ink is completely dry, gently erase all underlying pencil sketch marks to clean up the page.
Level Up
Use a metallic gold paint marker instead of a gel pen for the gold stars. The opaque ink will sit on top of the paper for a bolder, embossed 3D effect.
Step 4: Coloring
-
Color the balloons:
Fill the left balloon with navy blue and the center one with muted red, being careful to leave the highlight shapes purely white. Color the right balloon mustard yellow. -
Botanical colors:
Use the muted red marker to color the leaves on the right branch and the berries on the left twigs. -
Blue accents:
Use the navy marker to fill in several of the medium-sized stars and a few confetti dots to balance the blue balloon. -
Gold sparkle:
Use your gold glitter gel pen to fill in the remaining solid stars. This adds that special texture that catches the light. -
Grounding shadow:
Finally, use a light grey brush pen to draw a flat, ovalish shadow underneath the envelope to ground the illustration.
Now you have a festive opening page ready to welcome a new year or celebrate a special birthday

PENCIL GUIDE
Understanding Pencil Grades from H to B
From first sketch to finished drawing — learn pencil grades, line control, and shading techniques.
Explore the Full Guide
Whimsical happy food characters
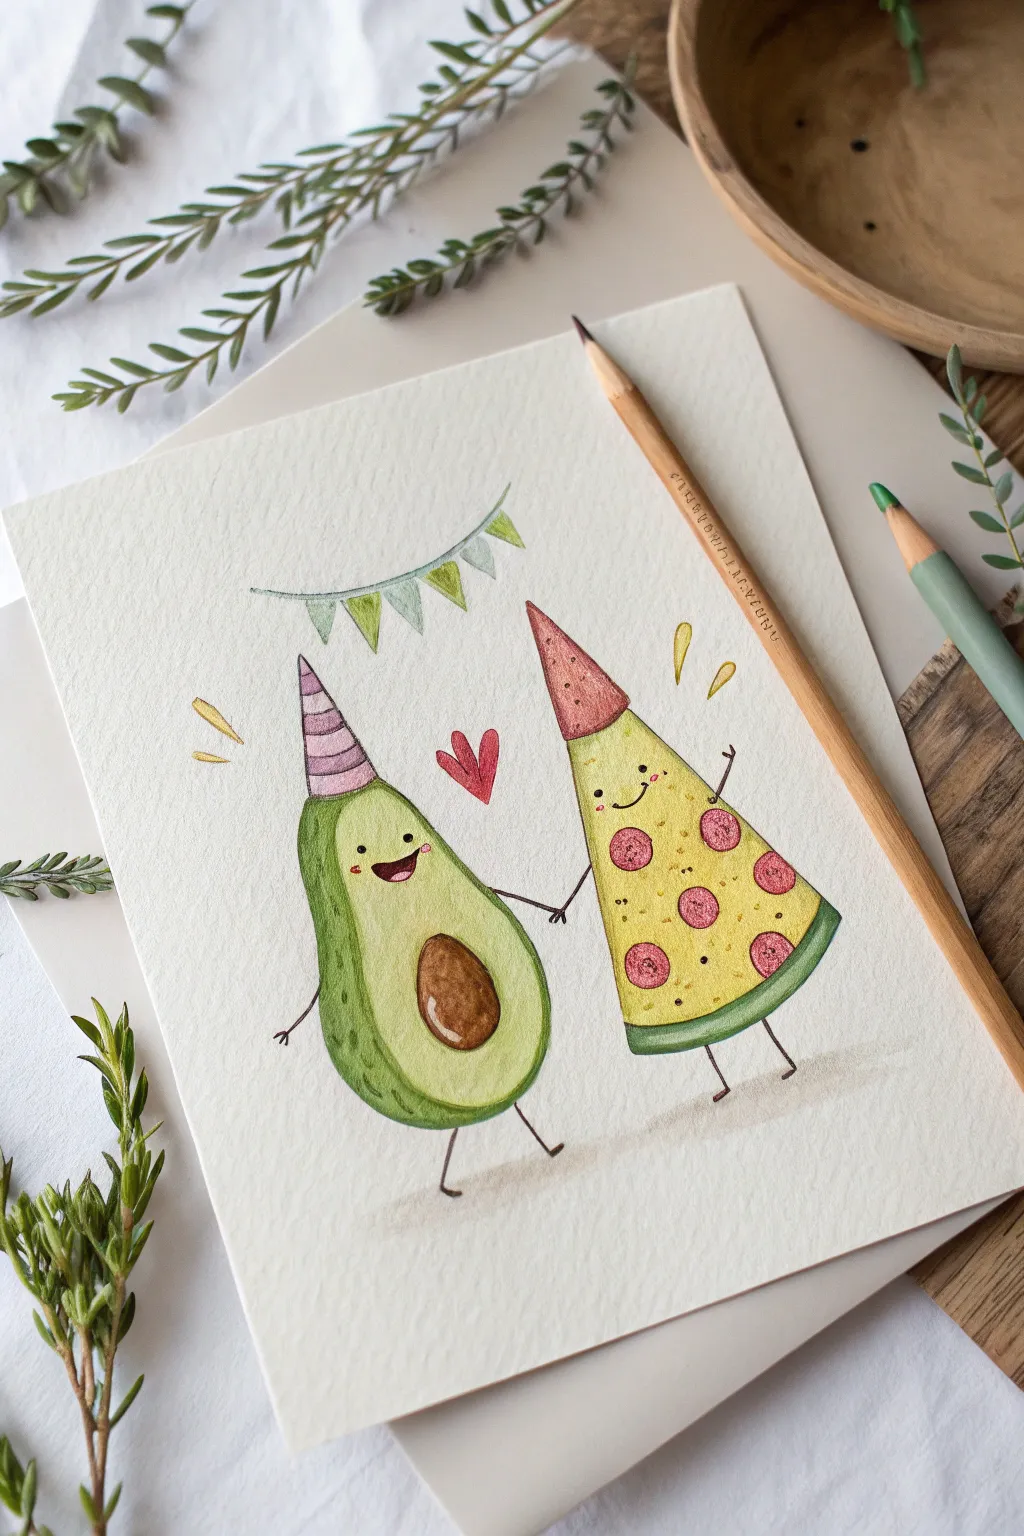
Create a whimsical and adorable birthday illustration featuring happy food friends celebrating together. This mixed-media project combines the softness of watercolor washes with the crisp texture of colored pencils to bring the characters to life.
Step-by-Step
Materials
- Cold-press watercolor paper (300 gsm)
- HB graphite pencil and eraser
- Watercolor paints (pan or tube)
- Round watercolor brush (size 4 or 6)
- Colored pencils (greens, yellows, reds, browns, black)
- Jar of water and paper towels
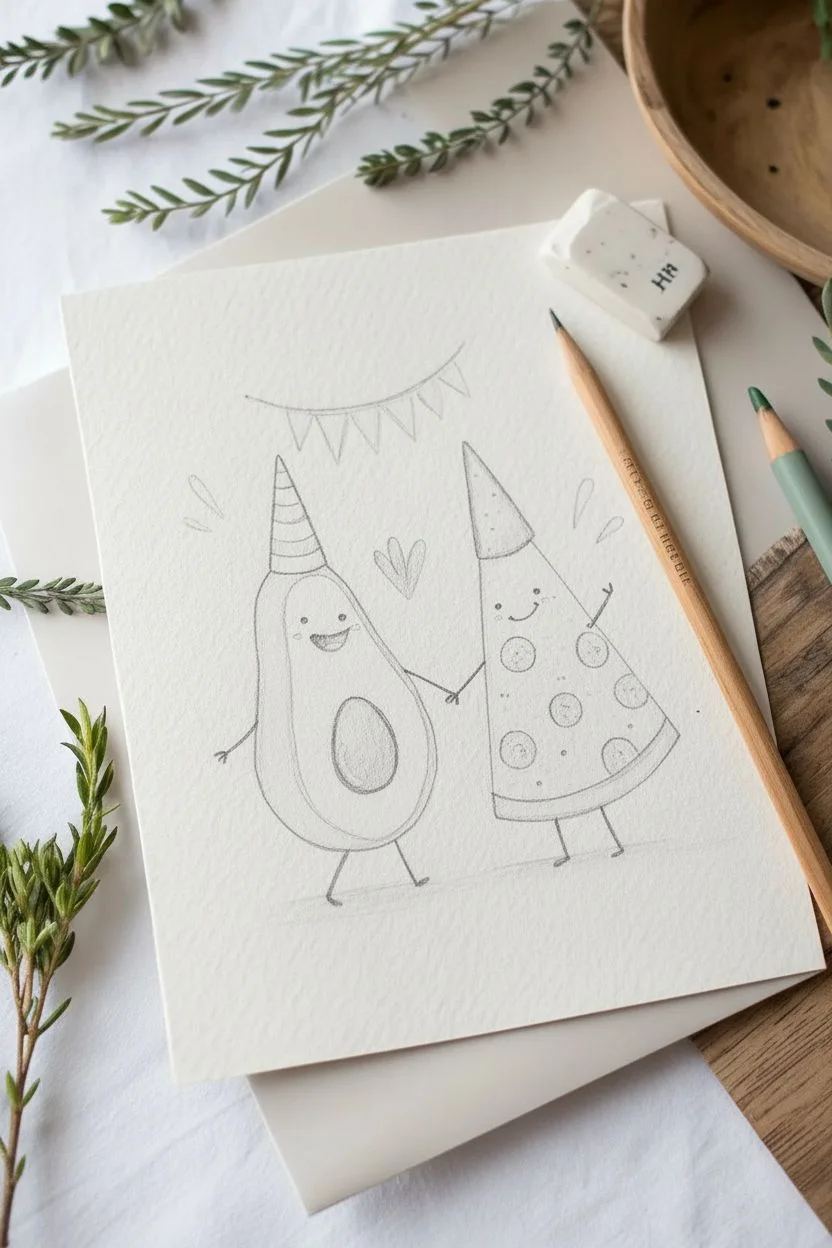
Step 1: Sketching the Party
-
Outline the shapes:
Start by lightly sketching a large pear shape for the avocado on the left and a tall, inverted triangle for the pizza slice on the right. Angle them slightly toward each other so they look like they are interacting. -
Add character features:
Draw a large oval inside the avocado for the seed (pit). For the pizza, sketch several circles for pepperoni slices. Add stick-figure arms reaching out to hold hands in the center, and small stick legs at the bottom. -
Top with accessories:
Place a triangular party hat on top of each character. Above them, sketch a curved line for the bunting banner and hang small triangles from it. Draw a small floating heart between their heads.
Textured Paper Trick
Let the rough tooth of the cold-press paper work for you. When shading with colored pencils, press lightly so the paper’s texture shows through—this naturally creates the bubbly look of the cheese and skin.
Step 2: Watercolor Base Layers
-
Paint the avocado body:
Mix a watery, pale yellow-green and fill in the avocado shape. leave the pit area unpainted for now. While the green is still slightly damp, touch a darker green pigment to the outer left edge to create a soft shadow. -
Color the pizza and pit:
Paint the pizza triangle with a warm, golden yellow for the cheese. Fill the avocado pit with a medium brown wash, leaving a small white highlight on the left side to make it look round and shiny. -
Add detail colors:
Use a diluted red or pink to fill in the pepperoni circles and the heart. Paint the pizza’s hat with a terracotta red and the avocado’s hat with a soft purple. Paint the bunting flags in alternating shades of soft green. -
Let it cure:
Allow the entire paper to dry completely. I like to wait until the paper feels room temperature to the touch to ensure the next pencil steps won’t tear the surface.
Level Up: 3D Elements
Make the card interactive by gluing tiny real pompoms to the tops of the party hats or using a small dab of clear drying glue on the avocado pit to give it a realistic glossy shine.
Step 3: Pencil Textures & Definition
-
Texture the avocado:
Take a mossy green colored pencil and refine the outline of the avocado. Use the side of the pencil to shade the outer skin (the rind) using short, textured strokes to simulate the bumpy surface. -
Define the pit:
Use a dark brown pencil to outline the pit. Shade heavily on the bottom right of the seed to deepen the curve, blending into the lighter brown watercolor base. -
Detail the pizza:
Outline the pizza slice with a dark green pencil for the crust area to match the visual style. Use a reddish-brown pencil to outline the pepperoni slices and add small stippled dots across the cheese for texture. -
Decorate the hats:
Draw horizontal stripes on the avocado’s purple hat using a darker purple pencil. Use a red pencil to stipple a glittery texture onto the pizza’s red hat.
Step 4: Bringing it to Life
-
Draw the faces:
With a sharpened dark brown or black pencil, draw wide-set eyes and happy, simple smiles on both characters. Add tiny pink circles for cheeks with a colored pencil. -
Limbs and connection:
Trace over the stick arms and legs with a clean, dark line. Ensure the hands meet clearly in the middle to emphasize their friendship. -
Final atmosphere:
Add small movement lines around the characters using a yellow ocher pencil to suggest excitement. lightly outline the bunting flags to make them pop against the white background.
Now you have a charming, hand-crafted illustration ready to brighten someone’s special day
Radiant candle flame glow
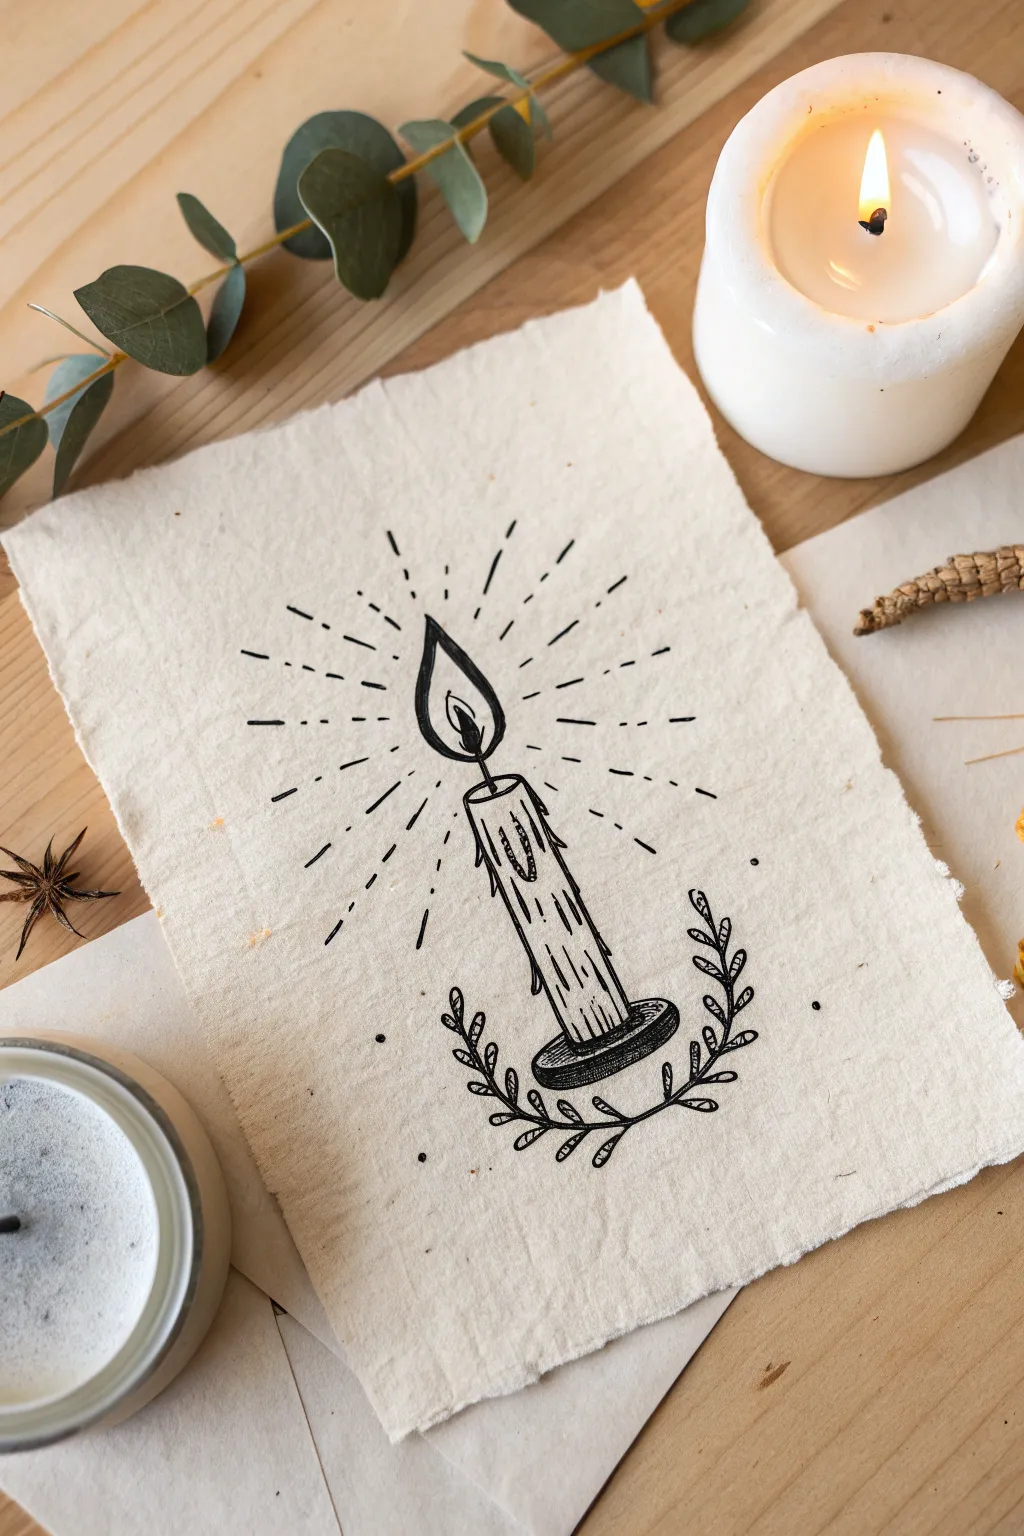
Capture the warmth of a birthday wish with this timeless, rustic illustration. Using fine liners on textured handmade paper, you will create an organic, vintage-style drawing that feels both personal and magical.
Step-by-Step Guide
Materials
- Handmade cotton rag paper (deckle edge)
- Black archival fine liner pens (sizes 01, 03, and 05)
- HB Graphite pencil
- Kneaded eraser
- Ruler (optional)
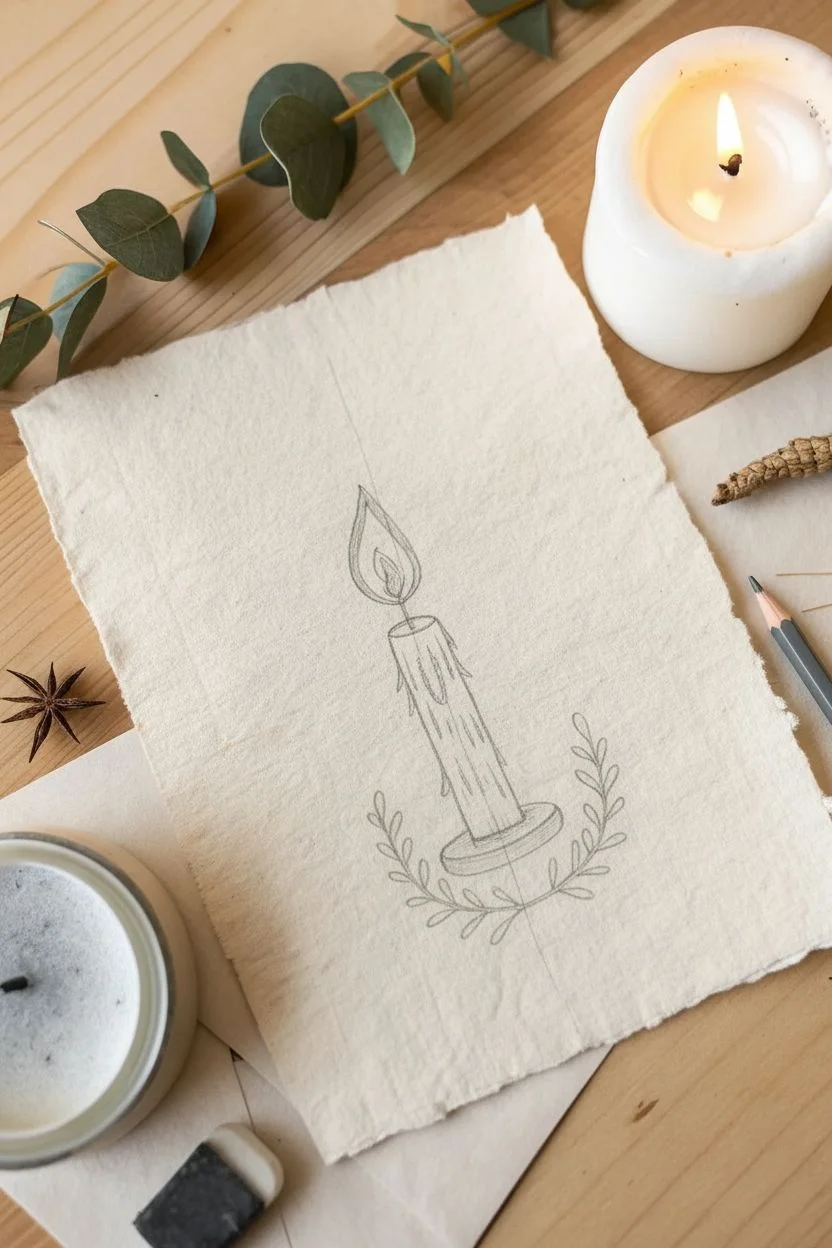
Step 1: Sketching the Structure
-
Establish the axis:
Find the center of your paper and lightly sketch a vertical axis line to keep your drawing upright. -
Form the candle:
Draw a slender cylinder for the candle body, making the top edge a slightly flattened oval to show perspective. -
Add wax details:
Sketch organic, wavy shapes dripping down from the top rim to represent melting wax. -
shape the flame:
Sketch a teardrop shape floating just above the wick, with a smaller teardrop inside it for the core. -
Frame with foliage:
Lightly draw two curved lines acting as stems encompassing the bottom of the candle, then add small almond-shaped leaves along them.
Bleeding Lines?
Textured paper is thirsty! If your ink feathers, use a lighter hand and faster strokes. Switching to a smaller nib size (like an 005) also helps control ink flow on porous surfaces.
Step 2: Inking the Details
-
Outline the flame:
Switch to your 05 pen to carefully outline the main teardrop of the flame, keeping the line bold and smooth. -
Define the melts:
Use the 03 pen to define the dripping wax, letting the lines wobble slightly for a natural, imperfect look. -
Texture the wax:
Draw vertical, broken hatching lines down the length of the candle body using the 01 pen to create a woodcut-style texture. -
Ink the base:
Define the candle holder base, adding dense horizontal hatching on the side edge to simulate a cast shadow. -
Trace the greenery:
Trace over the leafy branches with the 03 pen, adding a single line down the center of a few leaves for variety.
Gilded Touch
Add a level of sophistication by tracing just the inner flame tear and a few select light rays with a metallic gold gel pen. It makes the candlelight actually shimmer.
Step 3: Creating the Glow
-
Visualize the rays:
Imagine a series of concentric circles radiating from the flame’s center to guide your lines. -
Inner radiance:
Start with short dashes close to the flame using the 01 pen, keeping them fairly evenly spaced. -
Expand the light:
Move outward with longer dashes and solid lines, intermixing lengths to create a bursting starburst effect. -
Rotate for consistency:
I like to physically rotate the paper while drawing these rays to ensure my hand angle stays consistent and comfortable. -
Add magic dust:
Scatter a few tiny dots around the outer edges of the rays and near the leaves to add a magical, dusty texture. -
Let it set:
Allow the ink to dry completely for at least ten minutes, as soft handmade paper absorbs ink deeply. -
Clean up:
Gently dab—don’t rub—with a kneaded eraser to lift the graphite sketch lines without damaging the paper’s textured surface.
Your glowing artwork is now ready to warm up a room or brighten someone’s special day.


A collection of birthday miniature icons
Capture the whimsy of a celebration with this collection of delicate, ink-drawn miniature icons on textured paper. The torn edges give the piece a rustic, handcrafted feel that perfectly complements the simple line art.
Detailed Instructions
Materials
- Heavyweight cream watercolor paper or cardstock
- Fine liner pen (black, size 01 or 0.25mm)
- Hard pencil (2H or HB)
- Kneaded eraser
- Ruler (preferably metal)
Step 1: Preparing the Canvas
-
Create the deckled edge:
Place your ruler firmly against the paper where you want the edge to be. instead of cutting, carefully tear the paper upwards against the ruler’s edge to create that soft, fibrous look shown in the image. -
Plan the composition:
Using your pencil very lightly, sketch the rough positions of your five main elements: balloons at the top, gifts in the center, and the cake and music notes near the bottom.
Pro Tip: Line Weight
Apply more pressure on the bottom lines of objects (like the base of the cake or gifts) to create a subtle shadow effect, grounding the items so they don’t look like they are floating.
Step 2: Inking the Celebration
-
Outline the balloons:
Start with two overlapping oval shapes near the top center. Don’t close the bottom of the ovals just yet; leave a tiny gap for the knots. -
Add balloon details:
Draw small triangles for knots at the base of each oval, then sketch wavy, free-flowing lines drifting downward for strings. Add a small curved line inside each balloon for a reflection. -
Draw the eighth note:
To the left, draw two solid black ovals slightly angled. Connect them with vertical stems and join the tops with a thick, bold beam. -
Start the flat gift:
Begin with the ribbon loop in the center. Draw two teardrop shapes facing outwards for the bow loops, connected by a small central knot. -
Finish the flat gift:
Draw a flattened rectangular box beneath the bow. Add lines crossing the box vertically and horizontally to represent the ribbon wrapping around it. -
Sketch the tall gift:
To the right, draw a taller vertical rectangle. Top it with a floppier, slightly looser-looking bow compared to the first one. -
Texture the tall gift:
I like to stipple the surface of this box with tiny dots to create a wrapping paper pattern, making it distinct from the ribbon. -
Create the sparkles:
Fill the empty spaces between items with simple asterisk shapes. Draw three intersecting lines to create six-pointed stars. -
Form the treble clef:
Below the gifts, draw a vertical line with a small hook at the bottom. Loop the top back around and spiral inward to the center, crossing the vertical line twice. -
Construct the cake slice:
Start with a triangle for the top of the slice. Drop vertical lines down from the three visible corners to establish the height. -
Layer the cake:
Connect the bottom vertical lines with curves parallel to the top triangle. Draw a wiggly line across the middle of the side panel to represent the filling layer. -
Add the frosting:
Draw a small squiggle on top of the slice for whipped cream, and place a simple vertical stick with a teardrop flame shape for the candle. -
Texturize the sponge:
Add tiny dots inside the cake layers to mimic the texture of a sponge cake, keeping the icing layers smooth.
Step 3: Finishing Touches
-
Let it set:
Allow the ink to dry completely for at least five minutes to prevent any smudging during the next step. -
Clean up:
Gently gently roll your kneaded eraser over the entire paper to lift the initial graphite guide lines, revealing the crisp black ink.
Level Up: Vintage Shade
Dip a tea bag in warm water and gently dab it over the dry paper before drawing. This enhances the antique color and makes the cream paper look even more parchment-like.
You now have a charming set of handmade icons perfect for scanning into digital cards or using as a physical gift tag.
A fuzzy teddy bear holding a cake
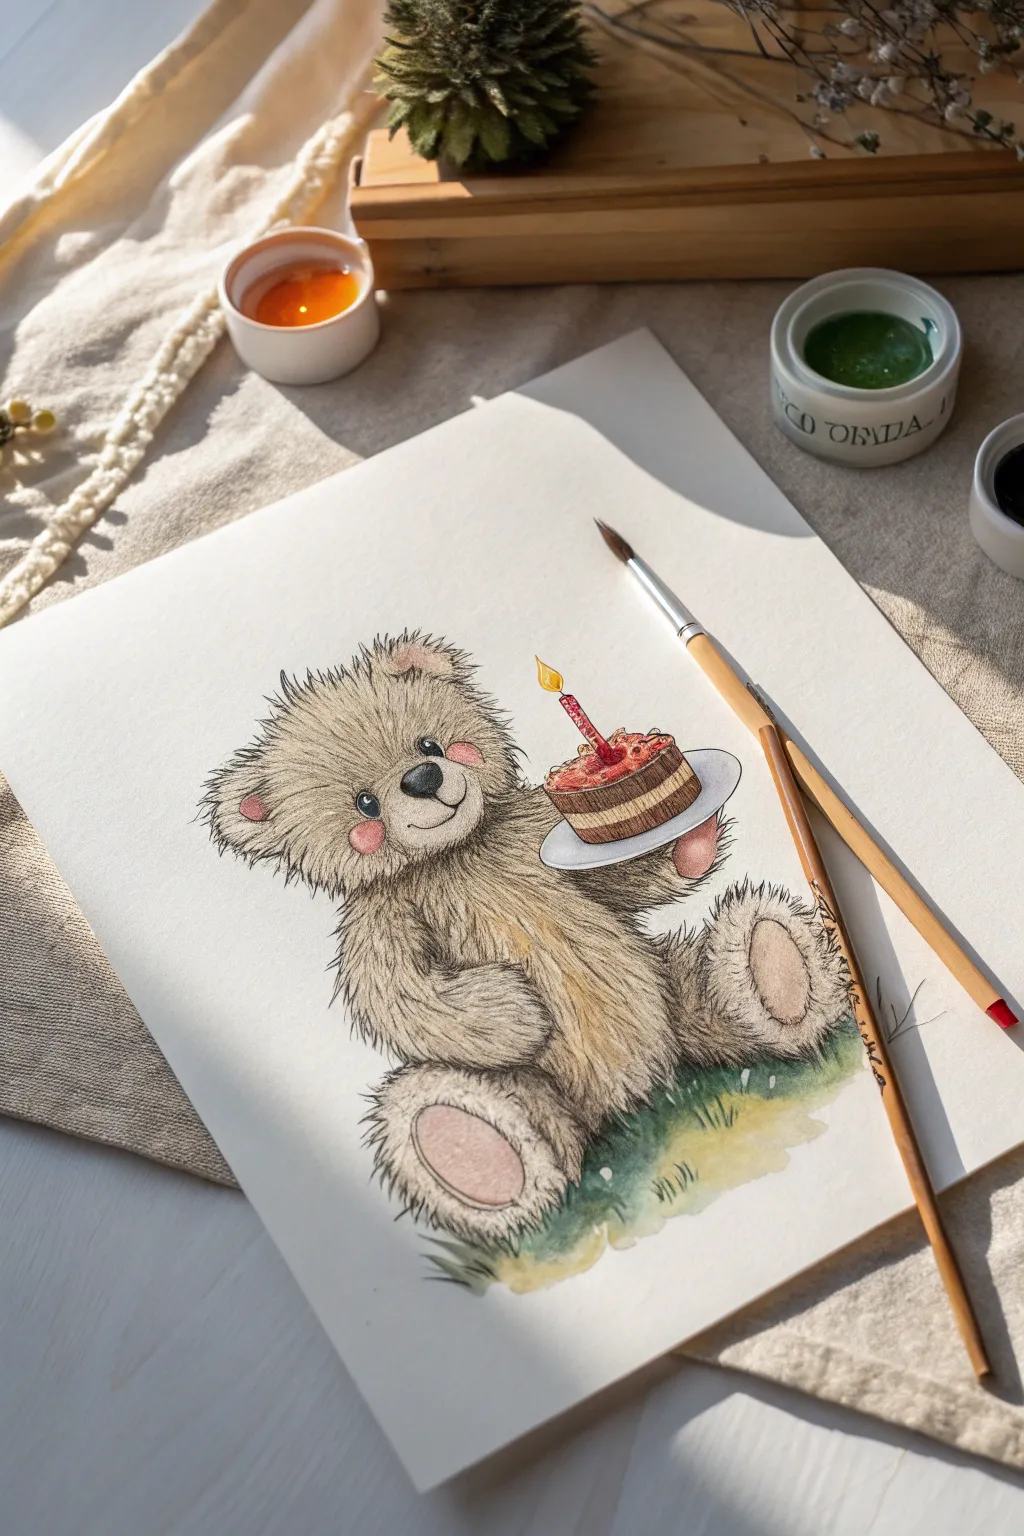
Capture the charm of a classic storybook illustration with this mixed-media project combining precise ink detailing with soft watercolor washes. You’ll create a lovable, fuzzy teddy bear holding a celebratory slice of cake, perfect for handmade birthday cards.
Step-by-Step Tutorial
Materials
- Hot press watercolor paper (smooth texture)
- HB graphite pencil and kneaded eraser
- Waterproof fine liner pens (sizes 005 and 01, black or sepia)
- Watercolor paints (Ochre, Burnt Sienna, Rose, Sap Green, Cadmium Red)
- Round watercolor brushes (sizes 2 and 6)
- White gel pen or white gouache
- Water cup and paper towels
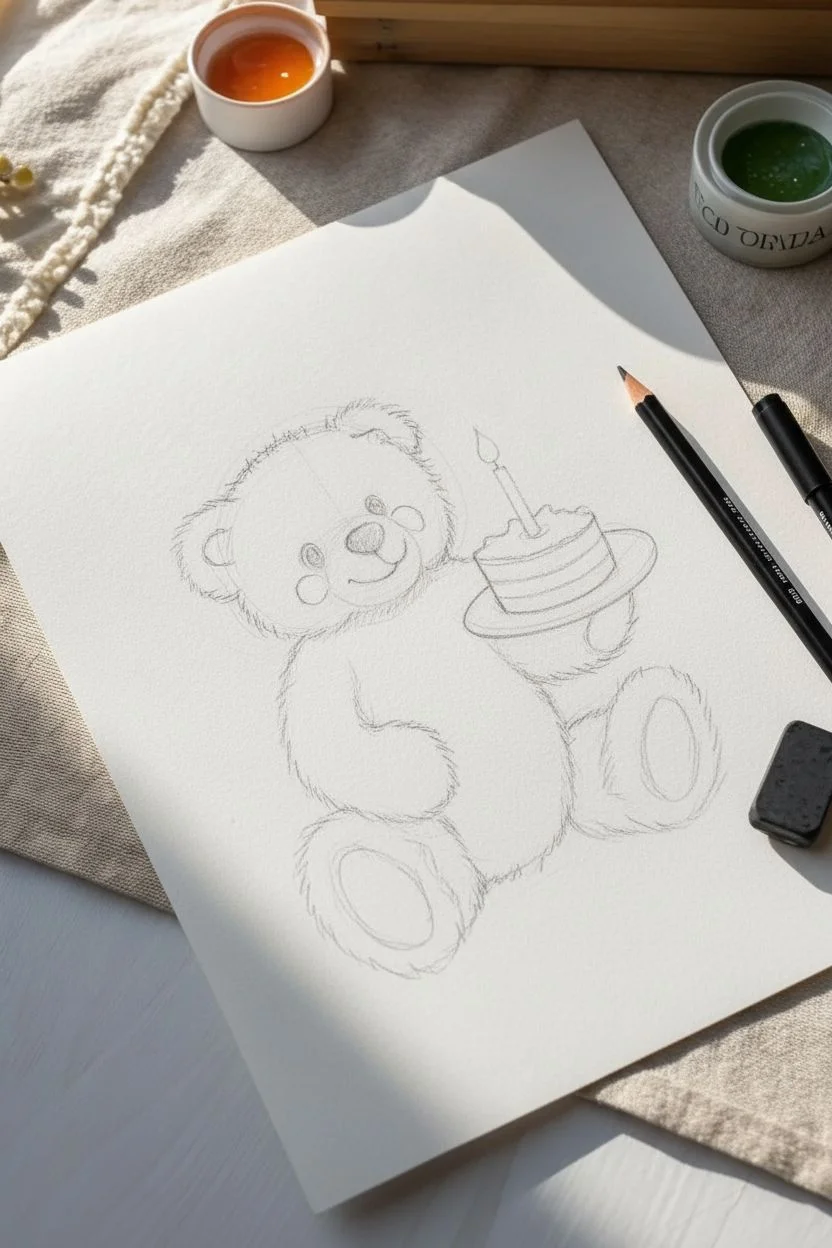
Step 1: Sketching the Character
-
Draft the head shape:
Begin lightly with your pencil, drawing a large, slightly flattened oval for the head. Add a smaller oval near the bottom center of the face for the snout. -
Add ears and features:
Sketch two semicircles on top of the head for ears. Inside the snout, draw a triangular nose, and place two small circles for eyes just above the snout line. -
Outline the body:
Draw a pear-shaped body situated directly under the head. Keep the posture slightly slouched to make the bear look relaxed and sitting. -
Position the limbs:
Sketch the legs extending forward, showing the bottoms of the feet (large ovals). Draw the arms so that they meet in the middle of the chest to hold the plate. -
Add the birthday treat:
Draw a small oval plate resting on the bear’s paws. Sketch a slice of cake on top, complete with a single candle and a flame.
Ink Smearing?
Ensure your fineliners are labeled ‘waterproof’ or ‘archival.’ If not, the ink will bleed when you paint. If you lack waterproof pens, paint first and ink last.
Step 2: Inking the Texture
-
Define the facial features:
Using your 01 fine liner, carefully ink the eyes and nose. Leave tiny white specks inside the eyes for a sparkle, or fill them solid black to add white later. -
create the fur texture:
Instead of tracing your pencil lines continuously, use the 005 pen to make short, quick hatching marks. These broken lines mimic fluffy fur. -
Ink the head and ears:
Work your way around the head contour with these short strokes. Make the fur slightly messier on top and around the ears for a scruffy look. -
Detail the snout:
Use tiny dots (stippling) on the snout area rather than lines to suggest a shorter velvet texture compared to the rest of the body. -
Outline body and limbs:
Continue the short, dashed strokes for the arms and legs. Pay attention to the direction of the fur; it should generally flow outward and downward. -
Ink the cake:
Switch to a smoother line style for the plate and the cake layers, as these surfaces are hard, not fuzzy. Add a wick and flame to the candle. -
Clean up the sketch:
Once the ink is completely dry—I usually wait at least five minutes to be safe—gently erase all underlying pencil marks.
Pro Tip: Fur Direction
Rotate your paper as you draw the fur texture. Pulling the pen strokes toward your body usually offers more control and creates more natural-looking hair tapers.
Step 3: Adding Watercolor Washes
-
Paint the base coat:
Mix a watery wash of Yellow Ochre and a touch of Burnt Sienna. Lightly paint over the fur areas, keeping the color transparent so the ink works through. -
Add blushing cheeks:
While the face is slightly damp, dab a small amount of diluted Rose paint onto the cheeks and the inside of the ears for a soft, fuzzy glow. -
Color the paw pads:
Use a mix of pale brown and pink to color the soles of the feet and the palms of the paws. Keep the edges soft. -
Define shadows:
Once the base layer is dry, mix a slightly darker brown. Paint shadows under the chin, where the arms meet the body, and between the legs to add volume. -
Frost the cake:
Paint the cake layers with a rich brown for chocolate and the topping with bright red. Use a bright yellow for the candle flame. -
Ground the subject:
Using Sap Green, paint a loose, grassy patch underneath the bear. Flick the brush upward at the edges to simulate blades of grass. -
Final highlights:
Use a white gel pen to add a tiny shine to the nose, the cherry on the cake, and the bear’s eyes if they got too dark.
Your adorable birthday bear is now ready to bring a smile to someone’s special day
An open surprise box perspective
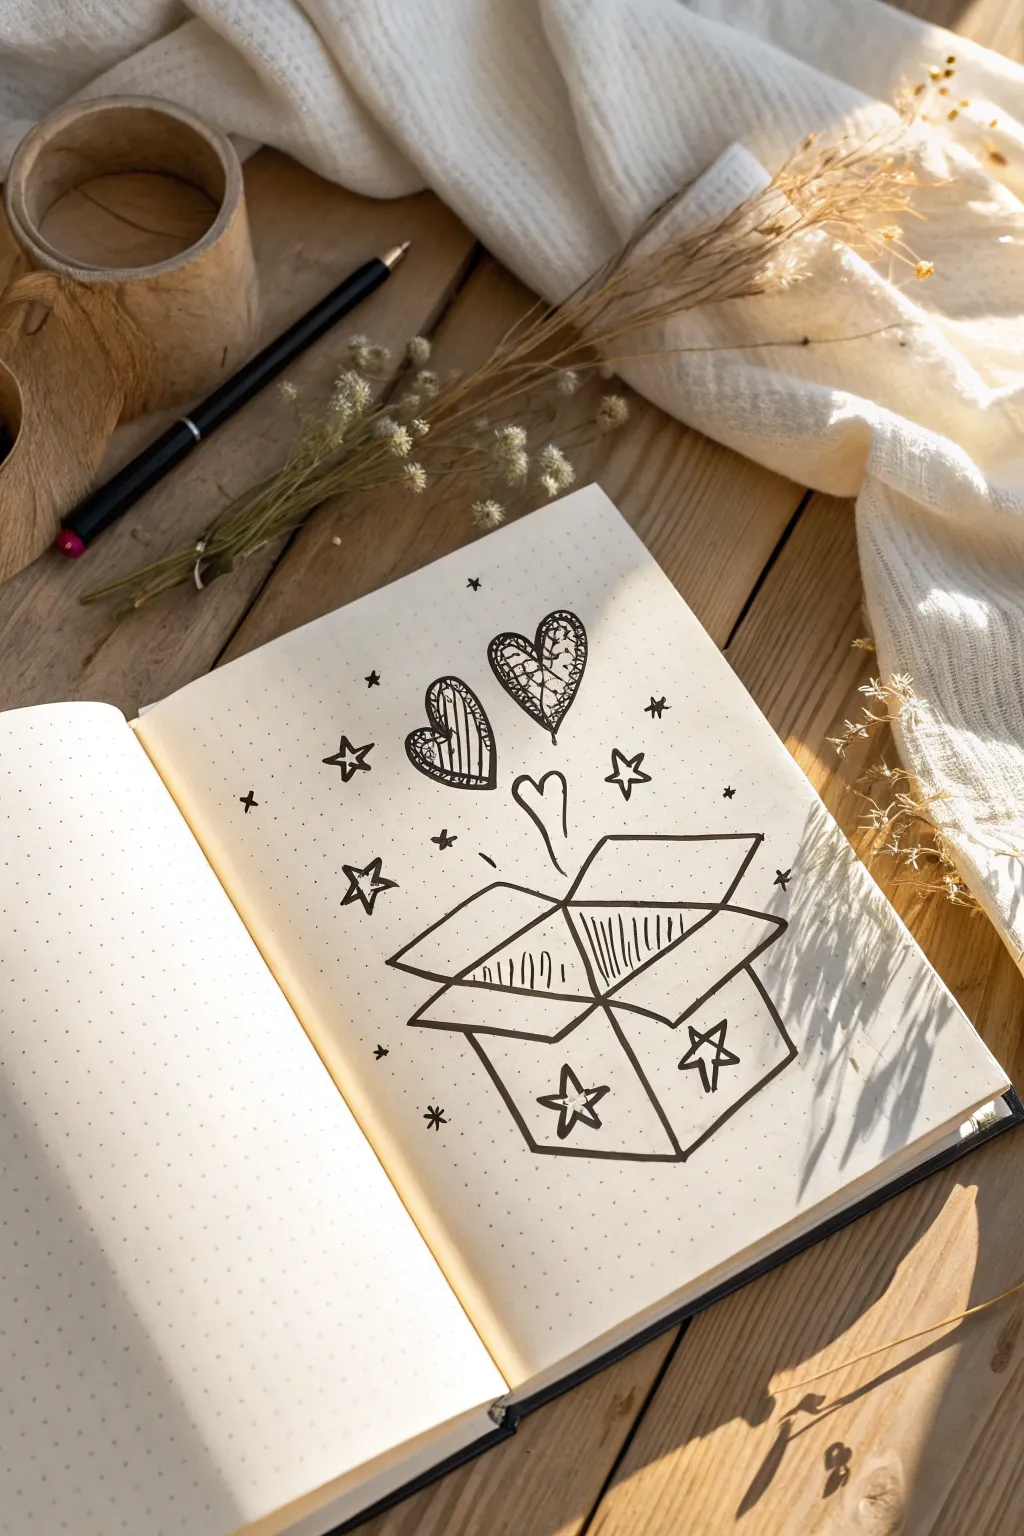
Capture the excitement of a birthday with this dynamic doodle of a box bursting with hearts and magic. Using simple geometric shapes and dotted paper guides, you can create a charming 3D perspective piece perfect for bullet journals or handmade cards.
Step-by-Step Guide
Materials
- Dot grid notebook or paper
- Pencil (HB or lighter)
- Eraser
- Black fineliner pen (0.3mm or 0.5mm)
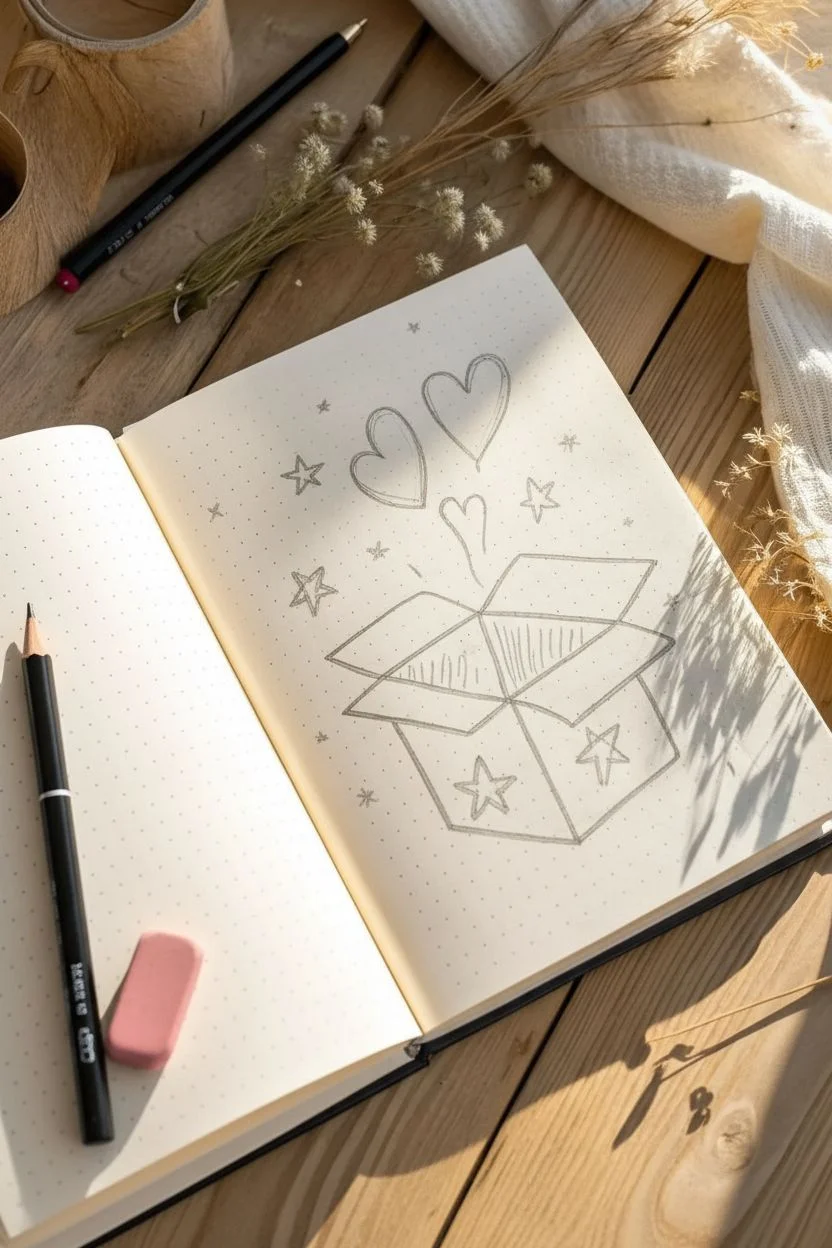
Step 1: Sketching the Structure
-
Position the base:
Start about one-third of the way up from the bottom of your page to leave room for the explosion. Using your pencil, lightly draw a square for the front face of the box. -
Create depth:
Draw angled lines extending backward from the visible top corners to establish the opening of the box, creating a rectangle top shape. -
Add the front flap:
Sketch a trapezoid shape falling forward from the bottom front edge. This is the open front flap. -
Add side flaps:
Sketch the two side flaps extending outward. Drawing these slightly shorter than the front flap helps the perspective look realistic. -
Add the back flap:
Draw the final flap extending upward from the back edge, making it slightly narrower at the top to suggest distance. -
Decorate the box:
Lightly sketch two large, five-point stars on the front face of the box and one on the right side panel.
Wonky Perspective?
If the flaps look flat, ensure the side lines of the flaps taper inward slightly as they move away from the box. This subtle angle trick forces the 3D illusion.
Step 2: Planning the Explosion
-
Flow line:
Draw a faint, curving line rising from the center of the box to guide where your hearts will float. -
Main hearts:
Sketch the outlines of two large, tilted hearts near the top of your flow line, and a smaller upright heart just leaving the box. -
Scattered magic:
Mark spots around the hearts where you want your tiny stars and sparkles to go.
Step 3: Inking and Detailing
-
Outline the box:
Switch to your black fineliner. Trace the outer edges of the box and the open flaps with a confident, solid line. -
Ink the box stars:
Carefully outline the star shapes on the box panels. I like to leave these white for high contrast. -
Inner details:
Draw the inner rim of the box opening. Add the fold lines where the flaps meet the main box body. -
Create shadow:
Inside the box opening, draw vertical hatching lines closer together on the back wall. This creates a shadow effect that gives the box delightful depth. -
The small heart:
Ink the smallest heart just above the box opening with a simple, solid outline. -
The motion line:
Draw the squiggly ‘smoke’ line connecting the box to the floating hearts, keeping the line varied in thickness for a sketchy look. -
Striped heart:
Ink the left floating heart. Fill the interior with closely spaced vertical stripes. -
Laced heart:
Ink the right floating heart. Fill this one with an irregular lattice or ‘giraffe print’ pattern for texture variety. -
Magical atmosphere:
Fill the surrounding empty space with small outlined stars, solid black dots, and little ‘plus sign’ sparkles. -
Cleanup:
Wait at least two minutes for the ink to fully set, then gently erase all your pencil guides to reveal the crisp drawing.
Level Up: Message Inside
Instead of hatching lines inside the box, try writing a tiny hidden message like ’21!’ or ‘YAY’ that is revealed as if it’s popping out with the hearts.
Now you have a dynamic, celebratory doodle that leaps off the page
Celebratory clinking glasses toast
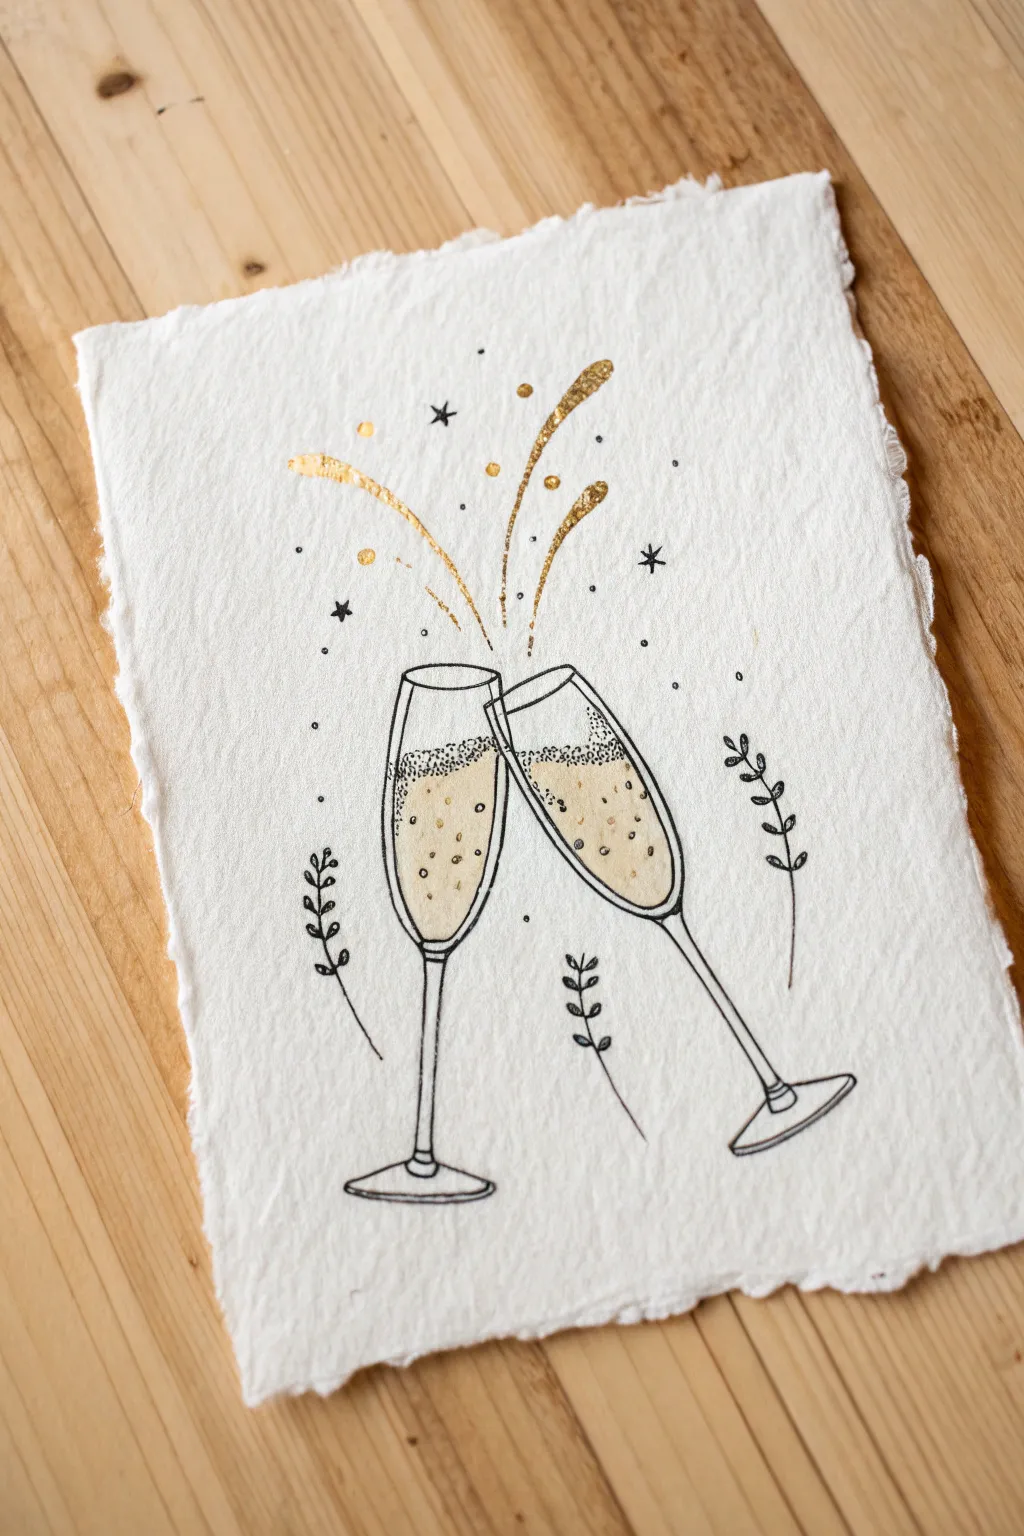
This elegant drawing combines crisp black linework with shimmering gold accents on textured handmade paper. It captures the joyful moment of a toast, making it perfect for custom birthday cards or invitations.
Step-by-Step Tutorial
Materials
- Textured deckle-edge watercolor paper
- HB pencil
- Kneaded eraser
- Waterproof fine liner pen (size 01 or 03)
- Metallic gold watercolor pan or ink
- Small round paintbrush (size 2)
- Water cup
Step 1: Sketching the Composition
-
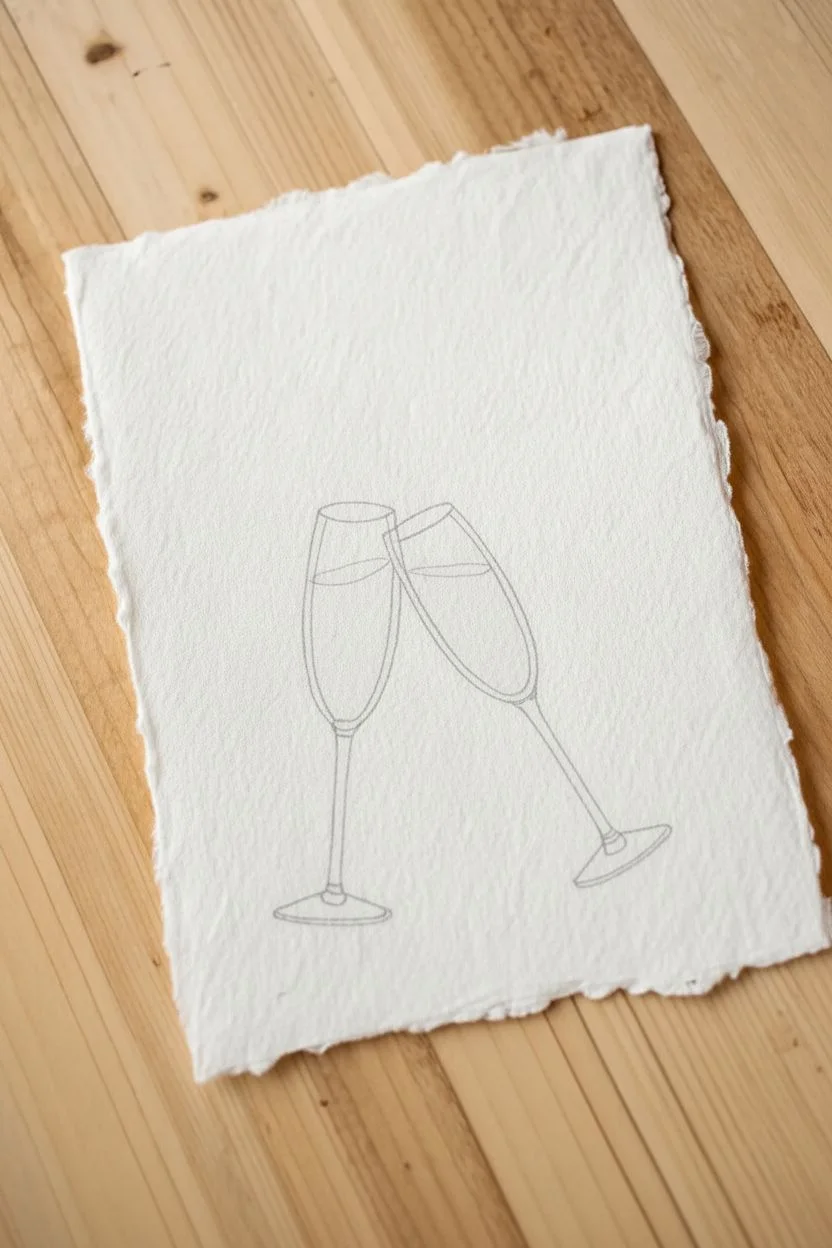
Position the first glass:
Using your pencil lightly, sketch a narrow oval for the rim of the left glass, tilting it slightly to the right. -
Draw the bowl:
Extend two curved lines down from the rim to form the tulip shape of the champagne flute. -
Add the second glass:
Sketch the second glass on the right, tilting it to the left so the rims just barely touch or overlap to suggest a ‘clink’. -
Finish the structure:
Draw long, slender stems extending from the bottom of the bowls and add a flat oval base for each. -
Mark liquid levels:
Lightly sketch a horizontal line inside each glass, about an inch from the rim, to indicate where the champagne stops.
Step 2: Inking the Lines
-
Outline the rims:
Switch to your waterproof fine liner. Carefully trace the oval rims. Where the glasses meet, define which one is in front by stopping the line of the back glass. -
Define the glass shape:
Ink the sides of the bowls and the stems. I find it helpful to pull the pen toward me for smoother vertical lines on textured paper. -
Add the fizz:
Instead of drawing a solid line for the liquid surface, use pointillism. Create a dense row of ink dots along your pencil guide to represent foam. -
Draw bubbles:
Add a few tiny open circles and dots rising from the bottom of the bowl up toward the surface line. -
Include botanical elements:
Draw simple, curved sprigs with small oval leaves floating to the left and right of the glasses for decoration. -
Clean up:
Wait at least five minutes for the ink to fully bond with the paper fibers, then gently erase your pencil marks.
Rough Paper Troubles?
Textured paper can snag fine pens. Draw slower than usual and hold the pen slightly more vertical to float over the bumps without skipping.
Step 3: Adding Gold & Details
-
Prepare the gold:
Activate your metallic watercolor with a few drops of water until it has a creamy consistency. -
Fill the glasses:
Paint the liquid area inside the glasses gold. Try to leave a microscopic gap between the paint and your black outline for a stylized look. -
Paint the splash:
Using the tip of your brush, paint three or four curved ‘swooshes’ exploding upward from the point where the glasses touch. -
Add gold splatter:
Dab small circles of gold paint around the splash lines and inside the liquid area to increase the shimmer. -
Draw black stars:
Once the paint is dry, use your pen to draw small, five-point stars or asterisks scattered around the splash. -
Final confetti details:
Finish by adding tiny black dots floating loosely around the entire upper section to mimic rising bubbles and excitement.
Personalize It
Use the empty space on the glass stems or bases to write tiny initials or a ’21’ (or other age) to customize the card for the recipient.
Let the gold paint dry completely before placing it in an envelope to ensure your sparkle stays perfect


Have a question or want to share your own experience? I'd love to hear from you in the comments below!