If you love making tiny art that feels like a big hug, birthday rock painting is such a sweet way to celebrate someone. I’m sharing my go-to birthday rock painting ideas that work as gifts, party decor, and little keepsakes you can personalize in minutes.
Classic Happy Birthday Lettering
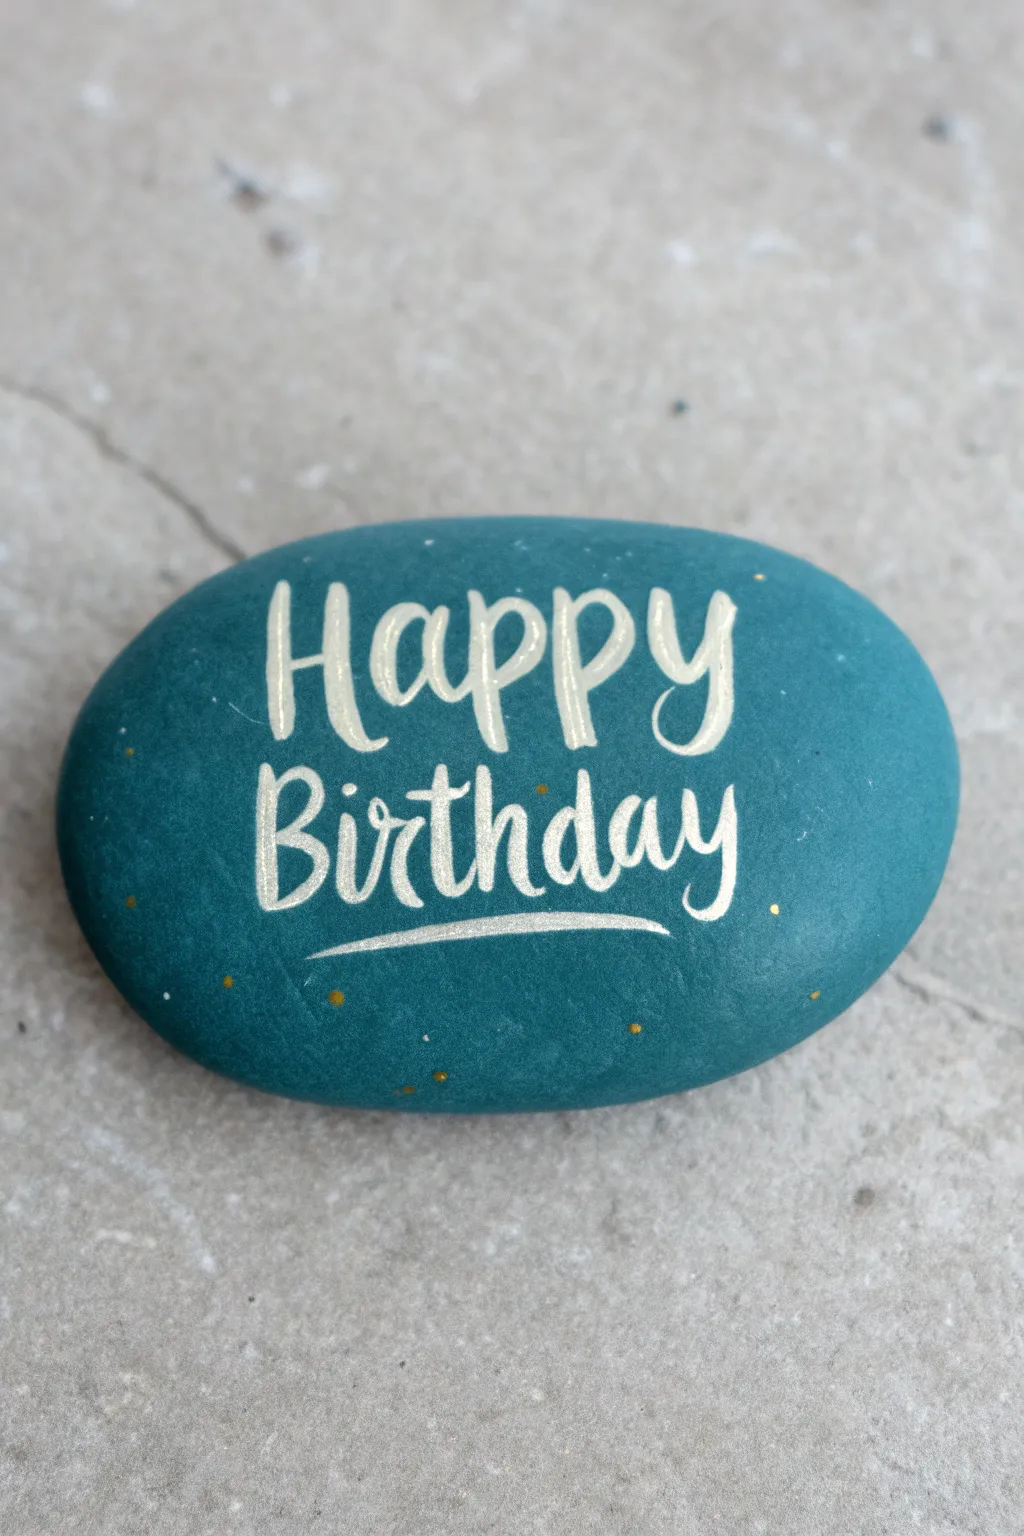
This project transforms a simple smooth stone into a sophisticated birthday greeting using a striking teal background and creamy hand-lettered script. The finish is polished and clean, making it a perfect keepsake or a unique gift topper.
Step-by-Step Guide
Materials
- Smooth, oval river rock (approx. 3-4 inches wide)
- Teal or dark turquoise acrylic paint
- Cream or off-white acrylic paint or paint pen
- Gold acrylic paint or metallic paint pen
- Flat paintbrush (medium size)
- Fine liner brush (size 0 or 00) or extra-fine paint pen
- Matte or satin sealant spray
- Pencil (optional)
- Paper towel
- Water cup
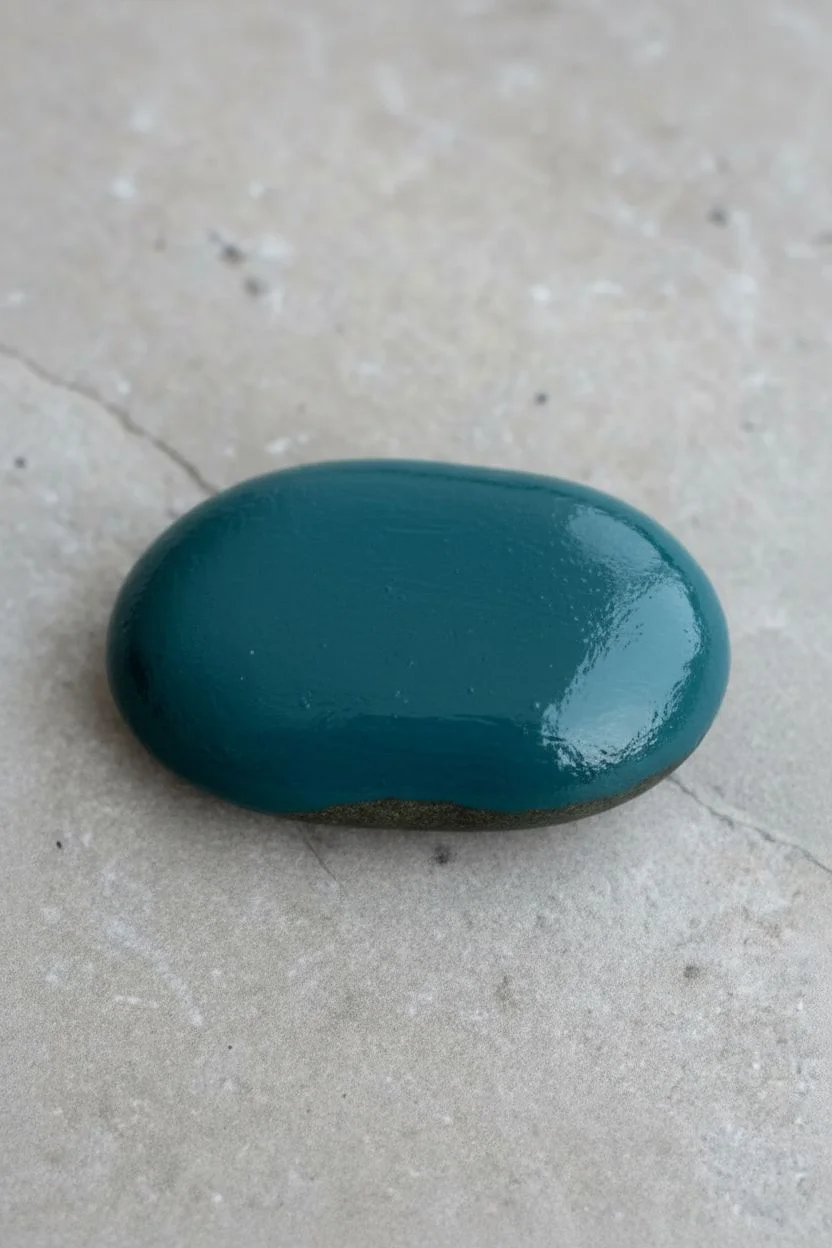
Step 1: Base Coat Application
-
Clean the surface:
Begin by washing your rock with warm soapy water to remove any dirt or grease. Dry it completely with a towel before starting. -
Apply the first layer:
Using your medium flat brush, apply a smooth coat of teal acrylic paint across the entire top surface of the rock. -
Feather the edges:
Gently feather the paint down the sides of the rock so the color transitions naturally toward the bottom, or paint the underside if you prefer full coverage. -
Let it dry:
Allow the first coat to dry completely. This usually takes about 15-20 minutes, depending on the thickness of your paint. -
Apply a second coat:
For a truly opaque and rich color, brush on a second layer of teal. I find painting in a perpendicular direction to the first coat helps eliminate brushstrokes. -
Final drying time:
Let this base layer cure fully until it is dry to the touch and no longer tacky.
Mix for opacity
If your cream paint looks too translucent against the dark teal, mix in a tiny drop of titanium white. This boosts opacity without changing the warm tone.
Step 2: Lettering the Message
-
Sketch lightly:
If you aren’t confident freehanding, use a pencil to very lightly sketch the words ‘Happy Birthday’ in a cursive style. Center the words, stacking ‘Happy’ above ‘Birthday’. -
Prepare your fine tool:
Load your fine liner brush with cream paint that has been slightly thinned with water for better flow, or shake your cream paint pen well. -
Letter the word ‘Happy’:
Start the top line. Focus on varying your line pressure—thick on the downstrokes and thin on the upstrokes—to mimic calligraphy. -
Letter the word ‘Birthday’:
Paint the second word below the first. Try to match the size and slant of the letters above for a cohesive look. -
Refine the script:
Go back over your letters to smoothen any shaky edges or add extra weight to the downstrokes to make the text pop against the dark background. -
Add the underline:
Paint a swift, tapering swoosh underneath the word ‘Birthday’ using the cream color to frame the composition.
Step 3: Details & Finishing Touches
-
Add white accents:
Dip the very tip of a toothpick or the end of your smallest brush handle into the cream paint. Gently dot a few tiny specks around the edges of the rock. -
Add gold sparkle:
Using gold paint or a gold pen, add a few more tiny dots interspersed among the white ones to give a subtle festive shimmer. -
Clean up errors:
If any stray paint marks occurred, use a damp Q-tip to wipe them away, or touch them up with a dab of the original teal base color. -
Allow final drying:
Let the lettering and dots dry completely for at least an hour to prevent smearing during the sealing process. -
Seal the rock:
Spray the rock with a matte or satin sealant in a well-ventilated area. Apply light, even coats to protect your artwork from chipping.
Use transfer paper
Print out a font you love, place white transfer paper under it, and trace the design onto the dried teal rock for perfectly shaped letters every time.
Once sealed, your elegant birthday rock is ready to be gifted or displayed as a cheerful reminder of the special day


Bright Balloon Bouquet
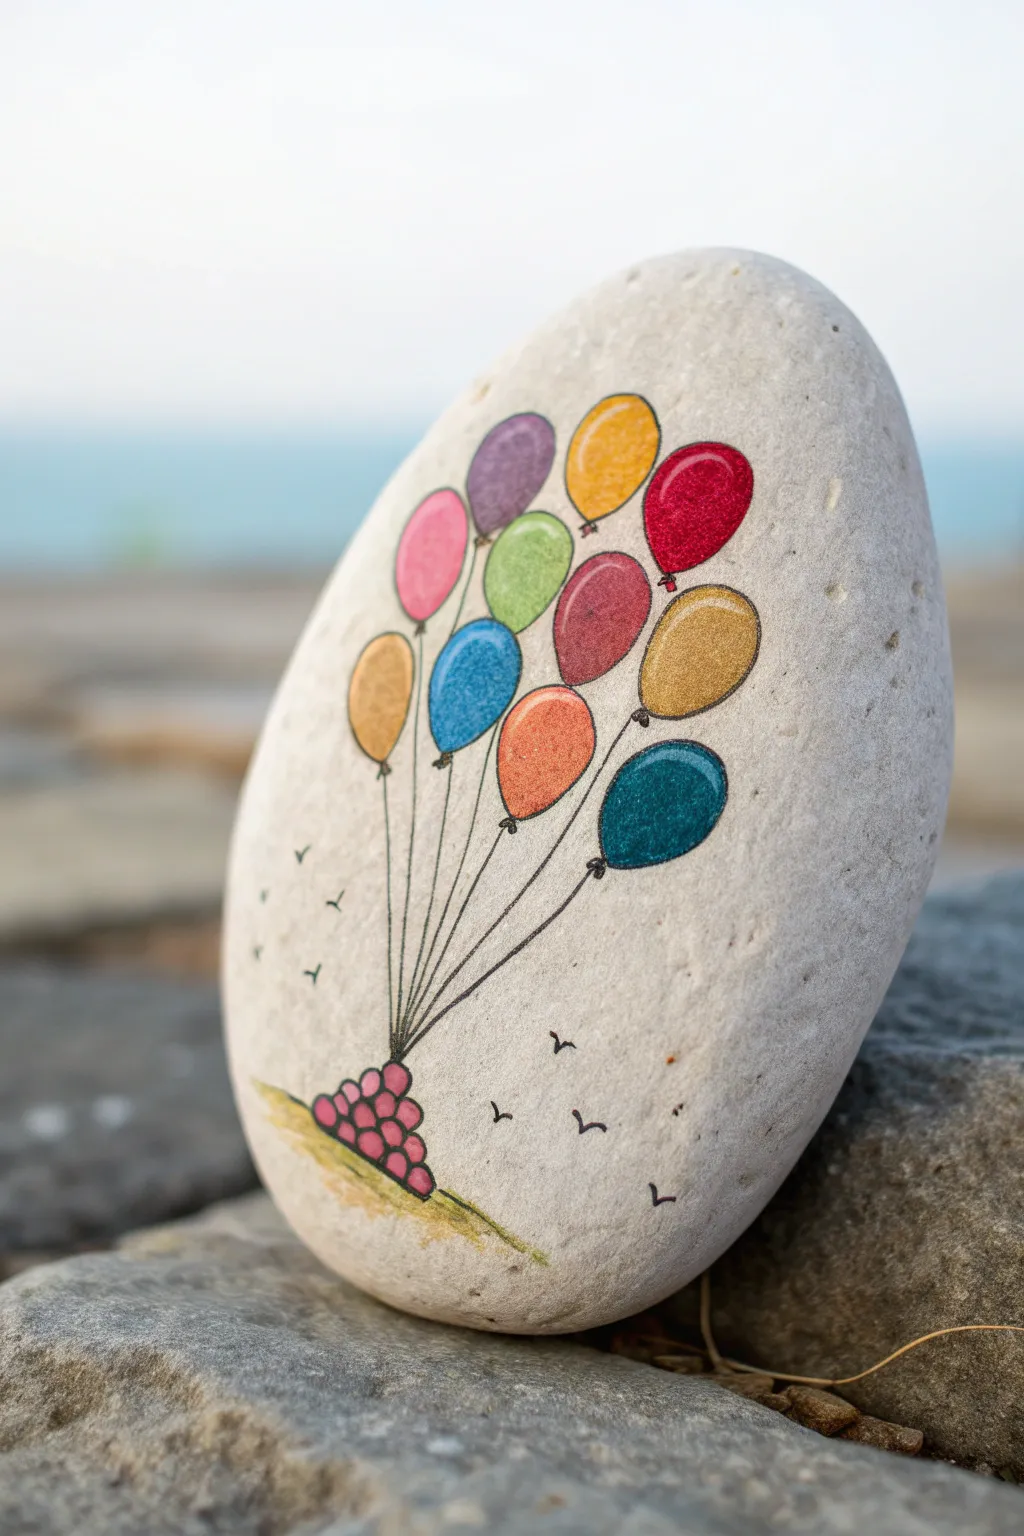
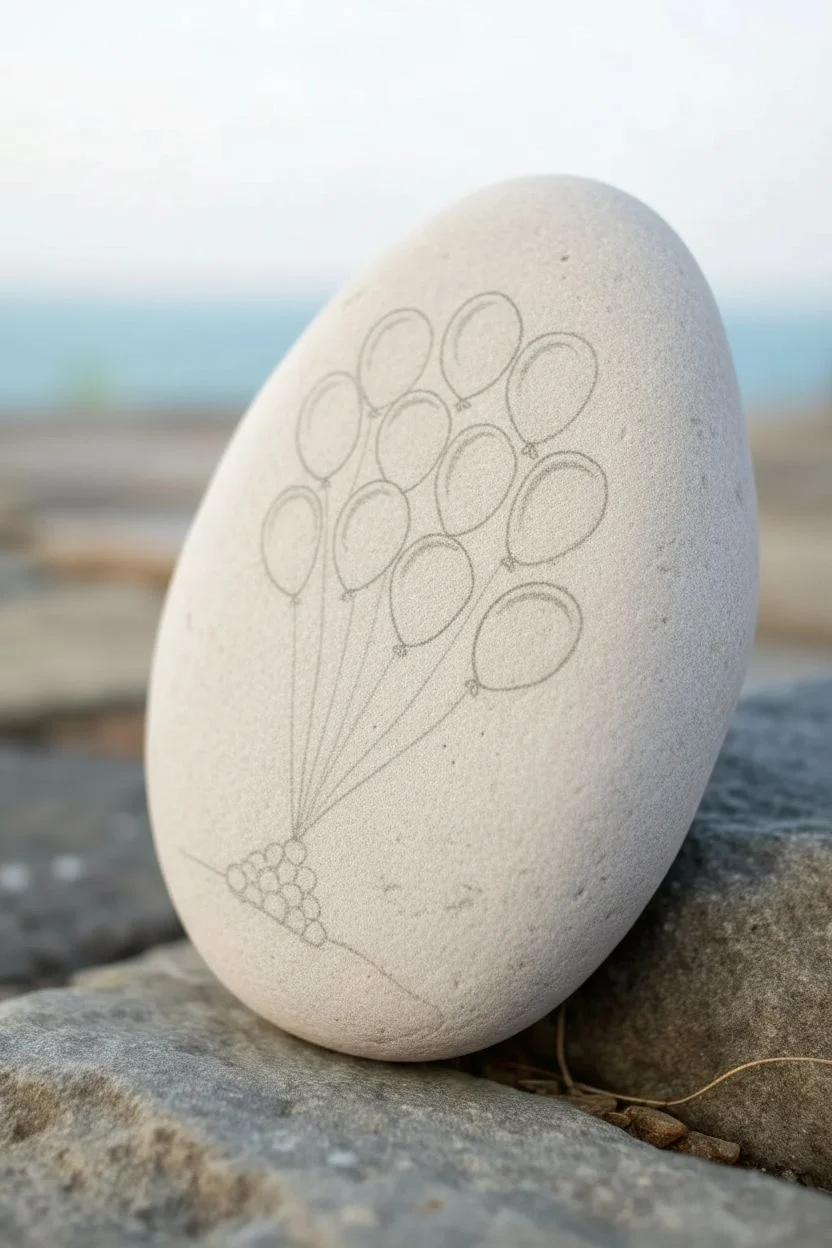
This charming design captures the joy of birthdays with a colorful cluster of floating balloons that seem to drift right off the stone. The smooth, speckled texture of a river rock provides the perfect natural canvas for this uplifting and celebratory scene.
How-To Guide
Materials
- Smooth, oval-shaped river rock (cleaned and dried)
- Pencil for sketching
- Fine-point permanent marker or liner pen (black, 0.3mm or 0.5mm)
- Acrylic paints or paint pens (yellow, red, blue, green, purple, orange, pink)
- Fine detail paintbrush (size 0 or 00)
- White or clear gloss varnish/sealer
- Small cup of water
- Paper towels
Step 1: Preparation and Sketching
-
Clean Your Canvas:
Begin by washing your stone with soapy water to remove any dirt or oils. Let it dry completely before starting; a warm, dry stone holds paint best. -
Plan the Composition:
Visualize where the balloons will sit. You want the bouquet to take up the upper two-thirds of the rock, leaving the bottom third for the string cluster and the ground. -
Sketch the Balloons:
Lightly sketch oval shapes for the balloons using a pencil. Overlap them slightly to create depth. It helps to start with a central balloon and work outwards, varying the angles slightly. -
Add the Strings:
Draw faint, straight guide lines from the bottom of each balloon converging toward a single point near the bottom of the rock. -
Sketch the Base:
At the convergence point, sketch a small pile of tiny circles to represent weights or a gift, and a simple curved line for the ground.
Ink Smearing?
If your black outline pen smears when you apply the sealer, switch to a spray sealant for the first coat instead of a brush-on varnish to lock the ink in place.
Step 2: Painting the Colors
-
Fill the First Layer:
Select your brightest yellow and fill in the top-most balloon. Acrylic paint pens offer great control here, but a fine brush works too. -
Work in Sections:
Paint the remaining balloons one by one using different vibrant colors—red, blue, purple, orange, and green. Avoid painting adjacent wet balloons to prevent bleeding. -
Add Glitter or Shimmer (Optional):
If you want the texture seen in the photo, you can use glitter pens or metallic acrylics for some balloons, specifically the red and gold ones. -
Paint the Weights:
Fill in the small cluster of circles at the bottom with a pink shade to anchor the bouquet. -
Ground the Image:
Use a light wash of yellow or ochre mixed with a tiny bit of water to paint the ground beneath the weights. -
Let it Dry:
Allow the paint to dry completely. This is crucial before outlining, as wet paint will ruin your fine-tip marker.
Step 3: Outlining and Details
-
Outline the Balloons:
Using your fine-point black waterproof pen, carefully trace the outer edge of each balloon. Keep your hand steady and rest your wrist on the table for support. -
Draw the Knots:
Add a tiny triangular shape at the bottom of each balloon where the string attaches to simulate the tied knot. -
Draw the Strings:
Trace over your pencil lines for the strings. Use quick, confident strokes to keep the lines straight and crisp. -
Highlight for Dimension:
I like to add a tiny white curved line or dot on the upper right side of each balloon to make them look shiny and round. -
Add Atmospheric Details:
Draw tiny ‘v’ shapes scattered in the background to represent distant birds flying in the sky. -
Outline the Base:
Outline the pink weights at the bottom and add a few scribbly lines for grass texture on the yellow ground patch. -
Seal the Artwork:
Once the ink is bone dry (give it at least 20 minutes), apply a coat of clear varnish or sealer to protect your design from the elements.
Make Them Pop
For a glassy 3D look, add a drop of ‘Glossy Accents’ or dimensional glaze over just the balloon ovals after the rest of the rock is completely sealed.
Now you have a cheerful, everlasting bouquet that makes for a perfect permanent birthday gift


Party Hat And Confetti
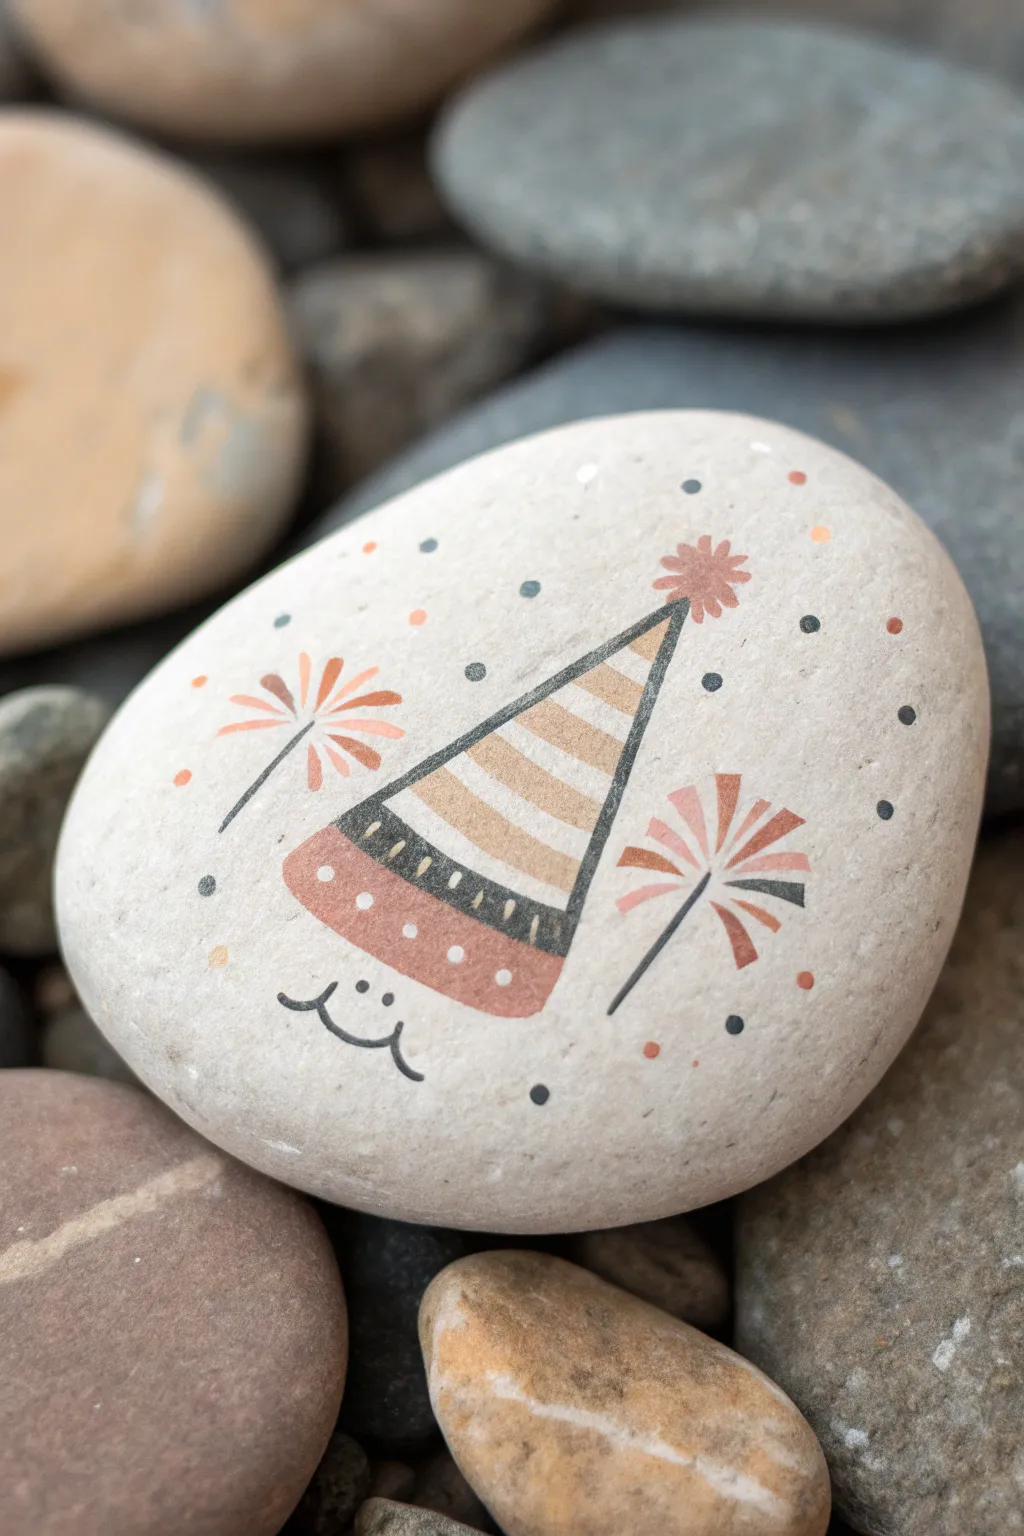
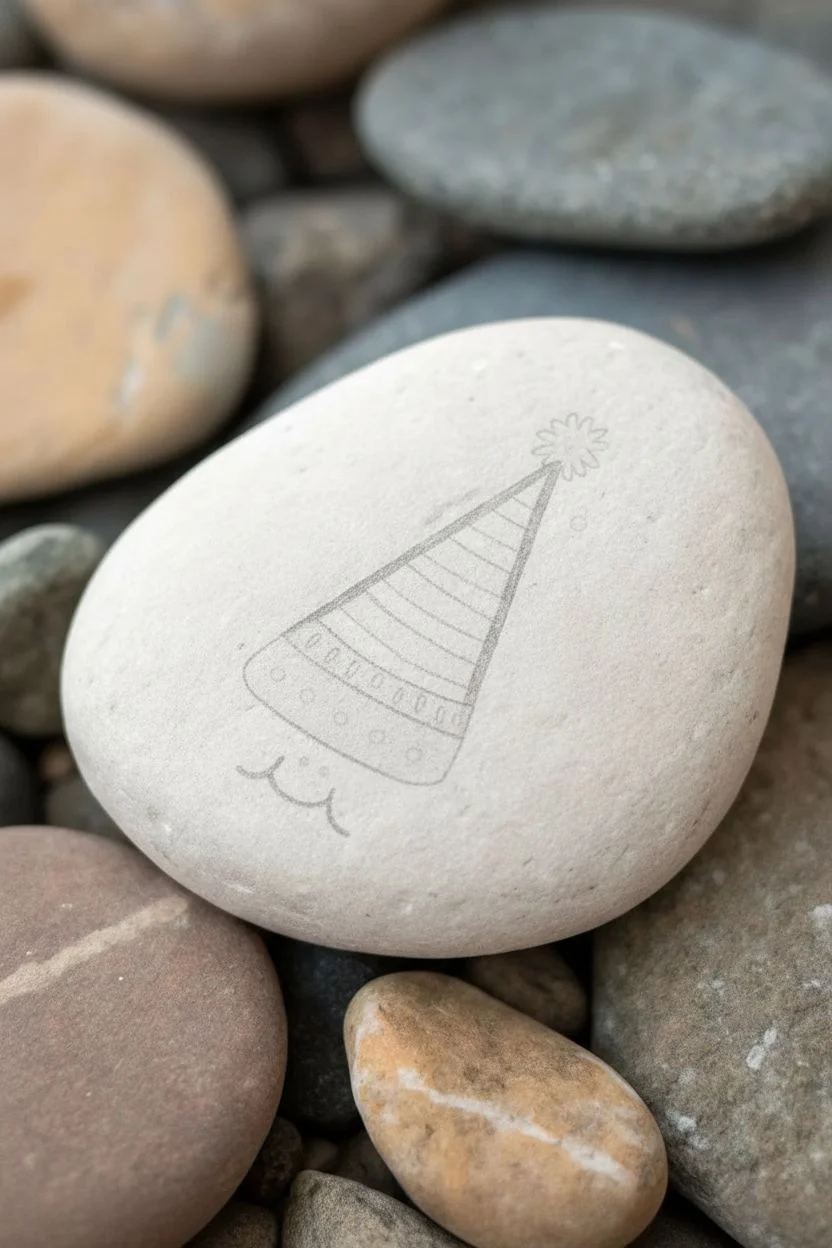
This charming, minimalistic design features a striped party hat surrounded by bursts of confetti fireworks on a smooth, pale stone. The muted color palette of terracotta, beige, and black gives it a modern, sophisticated feel perfect for gift-giving.
Step-by-Step Guide
Materials
- Smooth, light-colored river rock (flat surface is best)
- Acrylic paint pens (extra fine tip: black, terracotta/rust, beige/sand, dark grey)
- Pencil and eraser
- Matte spray sealer or varnish
Step 1: Planning the Design
-
Clean your canvas:
Start by washing your rock with soap and water to remove any dirt or oils. Let it dry completely before starting. -
Draft the hat:
Using a pencil, lightly sketch a tall, thin triangle in the center of the rock. Tilt it slightly to the right for a playful look. -
Sketch the details:
Draw four horizontal lines across the triangle to divide it into five sections. Add a small circle or pom-pom shape at the tip.
Clean Lines
If your black outline smudges or isn’t sharp, wait for it to dry totally, then gently scratch away the excess ink with a toothpick.
Step 2: Painting the Hat
-
Outline the shape:
Trace over your pencil outline of the triangle using an extra-fine black paint pen. I find it helpful to anchor my pinky finger on the table for steadier lines. -
Color the bottom band:
Fill the bottom-most section with a terracotta or rust-colored paint pen. This anchors the hat visually. -
Add the brim details:
Once the terracotta section is dry, draw a row of tiny white or light beige dots along the bottom edge. -
Paint the stripes:
Fill in the remaining sections, alternating between beige and unpainted stone (or white paint). The section just above the terracotta base should feature a black band with small white dashes for contrast. -
Top it off:
Paint the pom-pom at the peak using the terracotta color. Draw it as a small asterisk or flower shape rather than a solid circle.
Level Up
Add tiny touches of metallic gold paint to the confetti dots or the hat stripes for a subtle birthday sparkle.
Step 3: Adding Festive Elements
-
Create the fireworks:
Draw two ‘firework’ bursts on either side of the hat. Start with a thin black line for the stick or handle. -
Add the sparks:
Radiate thin lines outward from the top of each black stick. Alternate between terracotta and beige colors for these lines to create a sparkler effect. -
Sprinkle confetti dots:
Randomly dot the empty space around the hat with your paint pens. Use a mix of black, terracotta, beige, and grey dots. -
Vary dot sizes:
Make some dots tiny and others slightly larger to create depth and movement in the background.
Step 4: Finishing Touches
-
Draw the face:
Under the hat, use the fine black pen to draw a simple, cute mouth. A wavy line with two small dots for eyes works perfectly. -
Let it cure:
Allow all the paint to dry completely. If you layered any colors, ensure they are set before sealing. -
Protect your work:
Finish by applying a coat of matte spray sealer. This protects the design without making the stone too shiny, preserving that natural look.
This adorable painted rock makes a unique paperweight or a festive addition to a birthday table setting


Pennant Banner Across The Rock

Celebrate a special day with this gently illustrated rock featuring a festive pennant banner strung across a natural white background. The soft pastel tones and delicate line work give it a charming, almost watercolor-like appearance that fits perfectly as a handmade birthday keepsake.
Detailed Instructions
Materials
- Smooth, rounded river rock (cleaned and dried)
- White acrylic paint or gesso (matte finish)
- Fine-point permanent marker or liner pen (sepia or dark brown)
- Water-based paint markers or acrylic paints (pale teal, coral pink, white)
- Small round paintbrush (size 0 or 1)
- Gold metallic paint or gold paint pen
- Old toothbrush or stiff bristle brush (for splattering)
- Clear matte sealant spray
Step 1: Base Preparation
-
Clean the surface:
Before starting, ensure your rock is completely free of dirt and oils by scrubbing it with warm soapy water and letting it dry fully in the sun. -
Prime the rock:
Apply a base coat of white acrylic paint or gesso to the entire surface of the rock. This creates a uniform canvas and helps the pale colors pop. -
Ensure opacity:
If the natural color of the rock still shows through after the first coat, let it dry and apply a second layer until you have a solid, matte white finish.
Step 2: Drafting the Design
-
Draw the main line:
Using a pencil very lightly, sketch a gentle curve across the upper third of the rock. This will be the ‘rope’ holding your flags. -
Sketch the triangles:
Lightly draw inverted triangles hanging along the curve. Make them relatively uniform in size but allow them to tilt slightly to look like they are swaying naturally.
Ink Confidence
If your hand shakes while outlining, embrace it! A slightly wavering line adds to the organic, hand-drawn look of the vine string.
Step 3: Inking the Outline
-
Trace the pennants:
Switch to your fine-point sepia or dark brown pen. Carefully trace over your pencil lines for the triangles, giving them a thin, crisp outline. -
Create the vine string:
Draw the main string line over your initial curve. To add the rustic touch seen in the image, draw small loops or ‘buds’ along the string where the flags meet, resembling a dried vine or twisted twine. -
Erase pencil marks:
Once the ink is 100% dry (give it a few minutes to avoid smudging), gently erase any visible pencil guidelines.
Tiny Lettering
Before adding patterns, write a single letter inside each flag to spell a name or ‘HBD’ for a personalized birthday gift.
Step 4: Blocking in Color
-
Paint the teal flags:
Using a pale teal paint marker or watered-down acrylic, fill in alternating flags. I like to skip one or two in between to leave room for the coral color. -
Paint the coral flags:
Fill the remaining empty triangles with a soft coral pink shade. Keep the layer thin so the texture resembles stained paper. -
Leave a white flag:
For variety, leave one central flag white or extremely pale gray, as shown in the center of the design.
Step 5: Adding Details & Texture
-
Add stripes:
On one of the teal flags, use a slightly darker teal shade (or fine pen) to drawn thin horizontal stripes. -
Create polka dots:
On the coral flags, use a fine tip or a toothpick dipped in darker coral or red paint to add tiny polka dots. -
Detail the white flag:
For the white central flag, use your dark brown pen to add rows of tiny stippled dots for a minimalist pattern. -
Add white accents:
Using a white gel pen or paint marker, add tiny dots to the first teal flag to create a reverse polka-dot pattern. -
Stripe variety:
On the far right flag, alternate thick coral stripes with thin teal lines for a playful mix.
Step 6: Finishing Touches
-
Splatter effect:
Dip an old toothbrush or stiff brush into gold metallic paint. Run your thumb across the bristles to flick tiny speckles across the bottom half of the rock. -
Add larger gold spots:
Use the end of a paintbrush handle to dab a few larger, deliberate gold spots near the bottom edge for visual weight. -
Seal the artwork:
Once all paint and ink are fully dry, spray the rock with a clear matte sealant to protect the design from chipping or fading.
Place this charming decorative rock on a shelf or tuck it into a gift bag for a lovely handmade surprise
BRUSH GUIDE
The Right Brush for Every Stroke
From clean lines to bold texture — master brush choice, stroke control, and essential techniques.
Explore the Full Guide
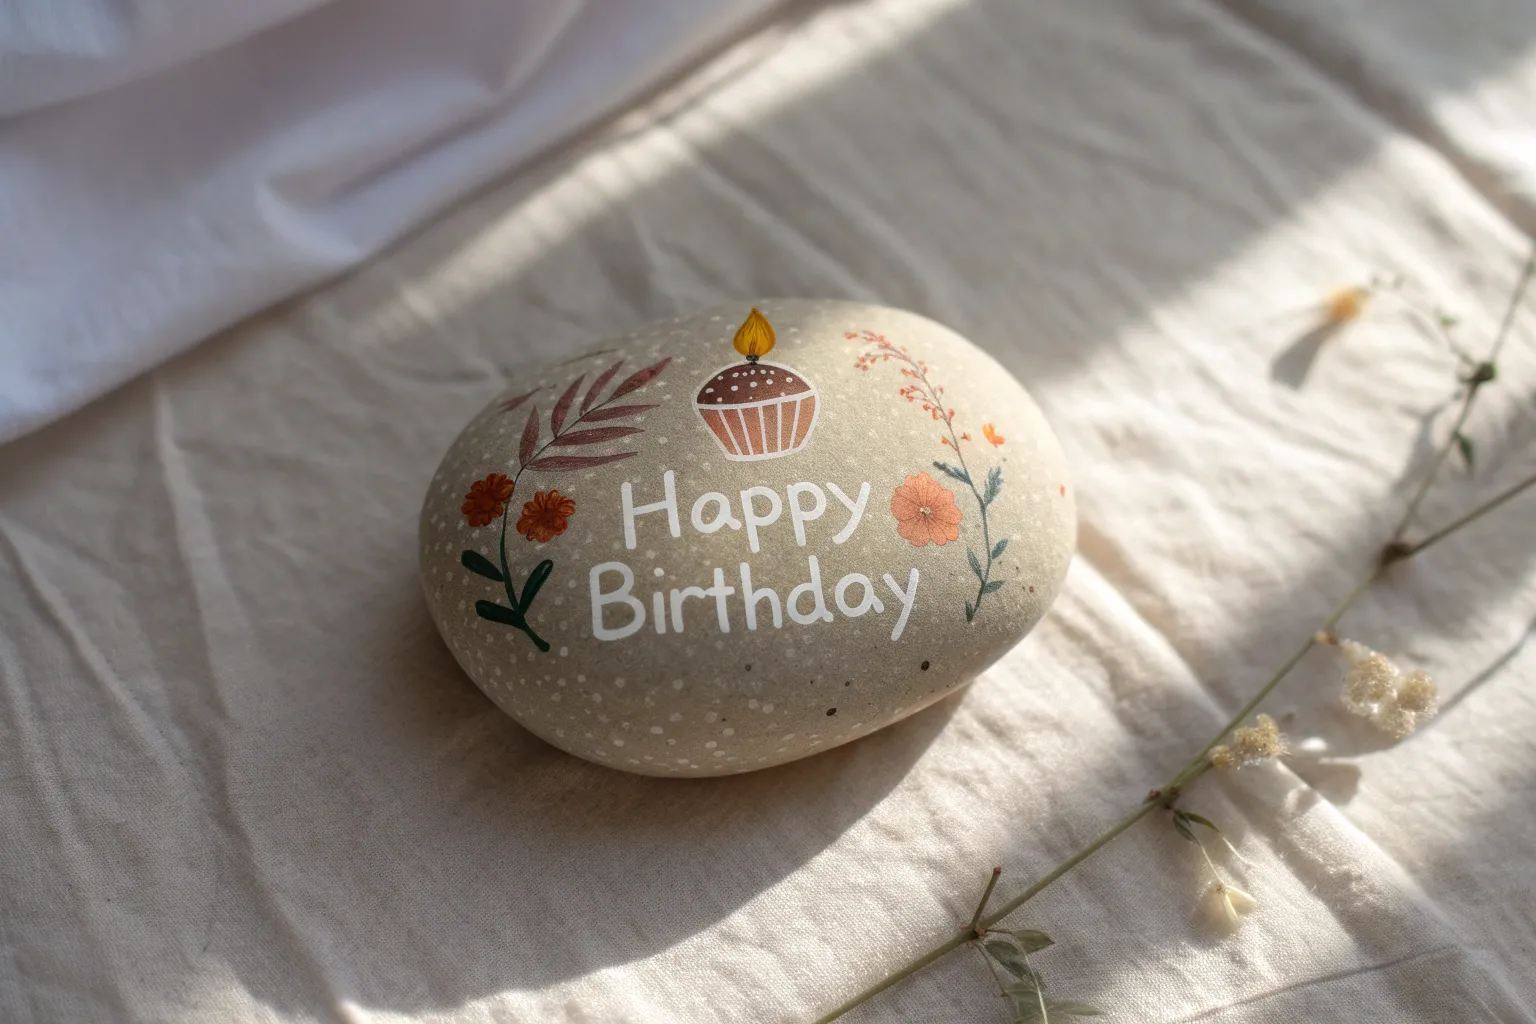
Mini Birthday Card Message Bubble
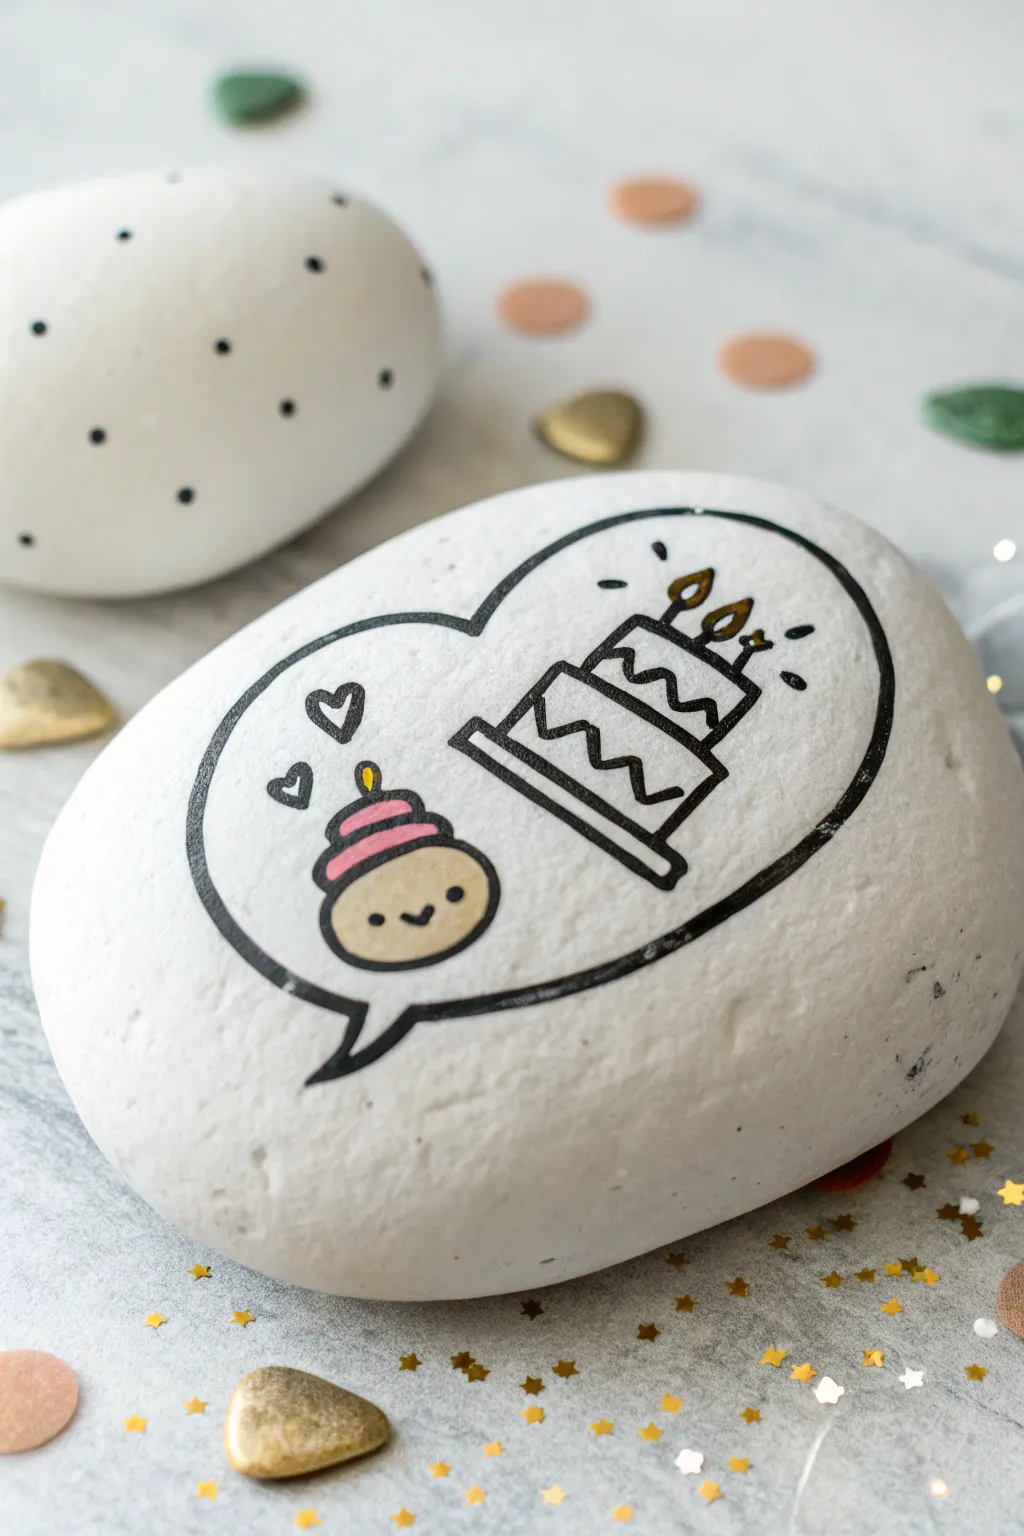
Transform a simple stone into a permanent greeting card with this adorable speech bubble design. The crisp black lines against the smooth white background make the tiny party scene pop, offering a sweet alternative to traditional paper cards.
Step-by-Step Guide
Materials
- Smooth, oval river rock
- White acrylic paint (matte finish)
- Black fine-point paint pen (0.7mm or similar) or waterproof ink pen
- Pink acrylic paint or paint pen
- Beige or light brown acrylic paint or paint pen
- Gold acrylic paint or paint pen
- Flat paintbrush (medium width)
- Pencil and eraser
- Clear spray sealer (matte or satin finish)
Step 1: Preparing the Canvas
-
Clean the Stone:
Begin by thoroughly washing your rock with warm soapy water to remove any dirt or oils. Let it dry completely in the sun or with a cloth. -
Base Coat Application:
Using a flat paintbrush, apply a generous layer of white acrylic paint to the top surface of the rock. -
Smooth Coverage:
If the first coat looks streaky or translucent, allow it to dry fully and apply a second or third coat. You want a solid, opaque white surface that mimics paper. -
Full Drying Time:
Let the white paint cure completely before moving on. I usually wait at least an hour to ensure the pencil sketch won’t scratch through the paint later.
Ink Smearing?
If your black outline smears when sealing, the ink wasn’t fully dry. Allow paint pens to cure overnight before applying spray varnish ideally.
Step 2: Sketching the Design
-
Outline the Speech Bubble:
Lightly sketch a large, rounded heart shape that tilts slightly to the left. Extend the bottom point into a curved tail to form a speech bubble shape. -
Position the Elements:
Inside the bubble, lightly create placeholders. Sketch a small circle on the left for the character and a tiered rectangle shape on the right for the cake. -
Detail the Character:
Add a small party hat on top of the character’s head and sketch a simple, happy face. -
Detail the Cake:
Refine the cake sketch by adding zig-zag lines for icing decoration and three small candles on top.
Step 3: Inking and Coloring
-
Inking the Outlines:
Using your fine-point black paint pen, carefully trace over your pencil lines. Start with the main speech bubble outline to define the space. -
Line Weight Variation:
Go over the speech bubble outline a second time to make it slightly thicker than the interior drawings, helping frame the scene. -
Coloring the Character:
Use the beige paint to fill in the round face of the character. A small detail brush works best here if you aren’t using a paint pen. -
Adding Pink Accents:
Fill in the party hat with pink paint. While you have the pink out, lightly brush the cheeks of the character for a blush effect. -
Adding Gold Accents:
Use the gold paint or pen to color the flame on the character’s hat candle and the candles on the cake. -
Drawing the Cake:
Trace the cake outline and decorations with the black pen. Keep the zig-zags sharp and angular for a fun contrast. -
Finishing Details:
Draw the character’s eyes and smile with the black pen. Add small floating hearts on the left side and little dash marks around the candles for a ‘glow’ effect.
Pro Tip: Pen Glide
If your black pen feels scratchy or gets clogged on the acrylic base, try lightly sanding the dry white paint with very fine sandpaper before drawing.
Step 4: Sealing
-
Erase Guidelines:
Once the ink is 100% dry, gently erase any visible pencil marks. Be careful not to rub too hard on the paint. -
Final Seal:
Take the rock outside and spray it with a clear sealer. This protects the white background from scuffing and keeps the ink sharp.
Your miniature birthday greeting is now ready to surprise someone special with a durable keepsake they can cherish forever
Birthday Wish Stars
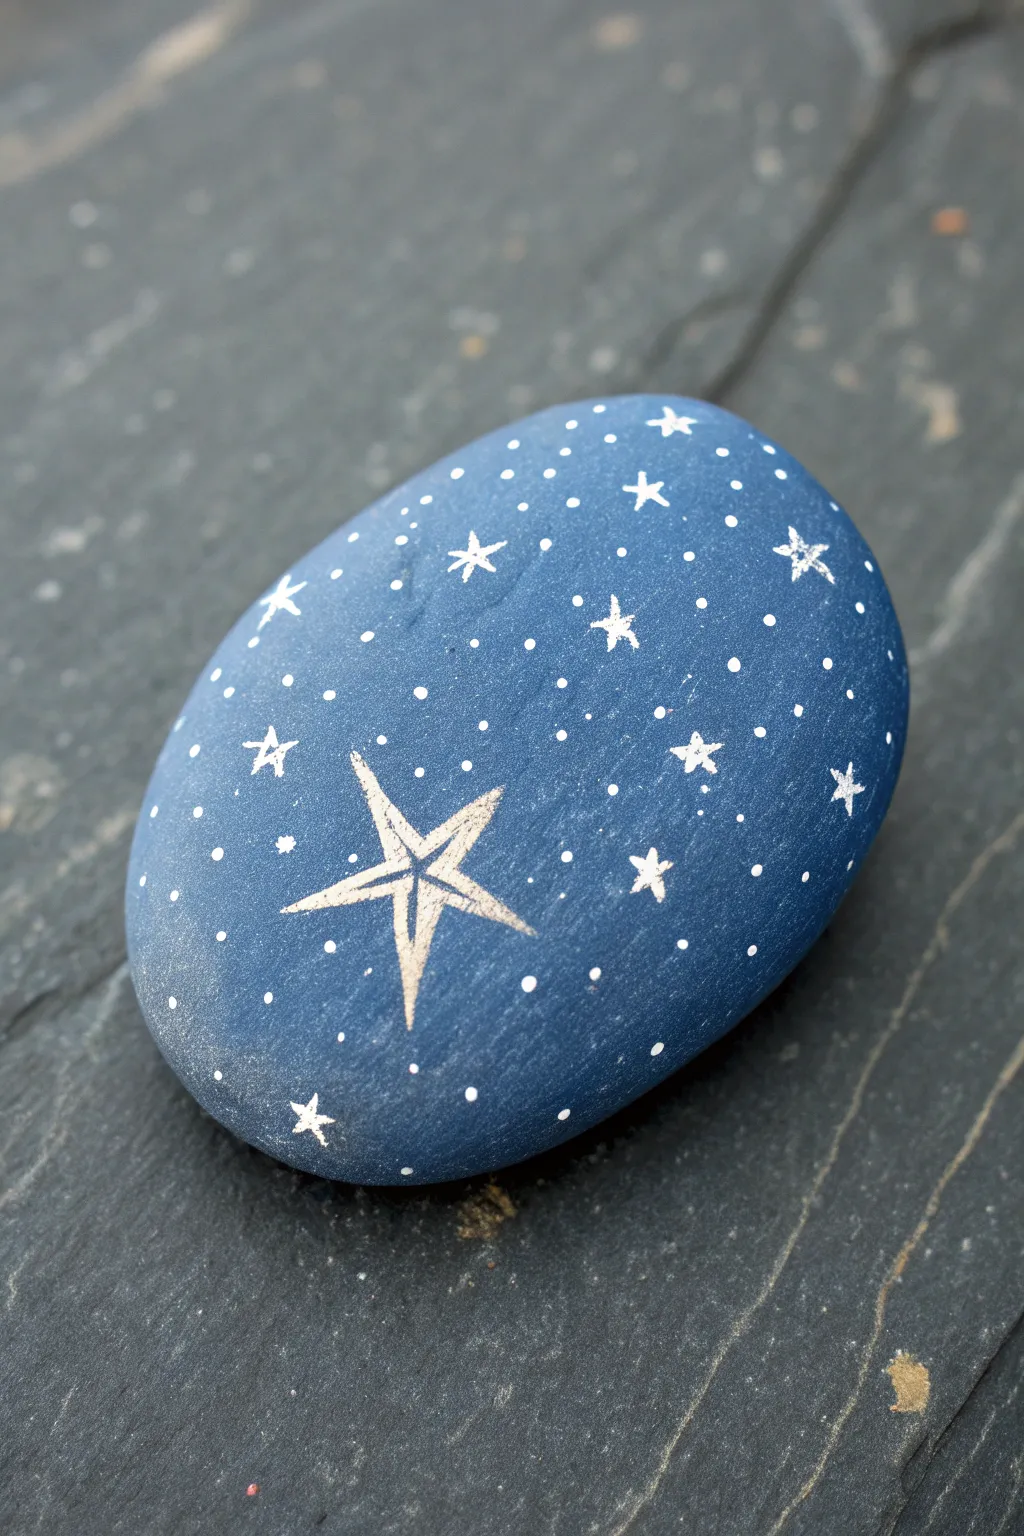
Transform a smooth river stone into a mesmerizing pocket-sized galaxy. With its deep blue background and delicate scattering of metallic and white stars, this starry night design makes a sophisticated and magical birthday gift.
Step-by-Step
Materials
- Smooth oval river rock (palm-sized is ideal)
- Acrylic paint: Navy Blue or Midnight Blue
- Acrylic paint pen: White (extra fine tip, 0.7mm)
- Acrylic paint pen: Metallic Gold or silver (fine tip)
- Flat paintbrush (medium size)
- Spray gloss varnish or sealer
- Water cup and paper towel
Step 1: Preparing the Canvas
-
Clean the surface:
Begin by washing your rock thoroughly with warm soapy water to remove any dirt or oils that might prevent the paint from sticking. -
Dry completely:
Let the stone dry completely in the sun or use a hairdryer to speed up the process. -
Base coat application:
Squeeze a generous amount of navy blue acrylic paint onto the rock. Using your flat paintbrush, spread the paint evenly across the entire top surface. -
Smooth coverage:
Ensure your brushstrokes wrap slightly around the sides of the rock so that no raw stone shows from a top-down view. -
Second coat:
Once the first layer is dry to the touch, apply a second coat of navy blue. This ensures a deep, opaque background that will make your stars pop. -
Full drying time:
Allow the navy base to dry completely—give it at least 20 minutes. If the base is tacky, your paint pens might drag or mix with the blue.
Galaxy Depth Trick
Before adding stars, sponge a tiny bit of lighter blue or purple mistily in one area. It adds a nebula effect behind the white dots.
Step 2: Stargazing Detail
-
Prime your pens:
Shake your metallic and white paint pens well and press the tips on a scrap piece of paper until the ink flows smoothly. -
Draft the main star:
Using the metallic gold pen, gently draw the outline of a large, five-pointed star in the lower-left quadrant of the rock. -
Refine the shape:
Go over the lines of your main star again to thicken them slightly, giving the star more presence. I like to leave the center somewhat open rather than coloring it in solid, which gives it a hand-drawn, sketch-like quality. -
Add secondary stars:
Switch to your white paint pen. Draw scattered, smaller five-pointed stars around the rock surface. Aim for about 8-10 of these. -
Vary orientation:
Rotate the rock as you draw the smaller stars so they aren’t all facing the same direction, creating a more natural scattered effect. -
Tiny twinkle stars:
Draw even tinier four-pointed stars (just a simple cross shape) in the empty spaces to add variety to the celestial field. -
Create the milky way:
Using the very tip of your white pen, begin dotting the empty blue spaces. -
Dot density:
Concentrate more dots in certain areas to create clusters, and spread them out in others. Vary the pressure slightly so some dots are bolder than others. -
Fill the gaps:
Look for any large empty blue patches and fill them with the tiniest micro-dots to complete the galaxy effect.
Step 3: Finishing Touches
-
Check your work:
Scan the rock for any accidental smudges. If you find one, you can often touch it up carefully with a dab of the navy blue paint. -
Seal the design:
Once the pens are entirely dry (wait at least 1 hour), seal your work. Use a spray gloss varnish. -
Apply sealer:
Hold the can about 12 inches away and do a light, sweeping coat. This protects the delicate pen work and makes the navy background look like deep, polished glass.
Make it Personal
Instead of random stars, arrange the dots to form the recipient’s zodiac constellation for a personal birthday touch.
This little piece of the universe is now ready to be gifted to your favorite star gazer


Have a question or want to share your own experience? I'd love to hear from you in the comments below!