A black background is basically instant drama—your highlights and colors get to do the talking while the darkness does half the mood-building for you. If you want that satisfying “wow, it glows” effect without overcomplicating the scene, these ideas will keep things bold, clean, and super fun to paint.
Glowing Full Moon Over Dark Water
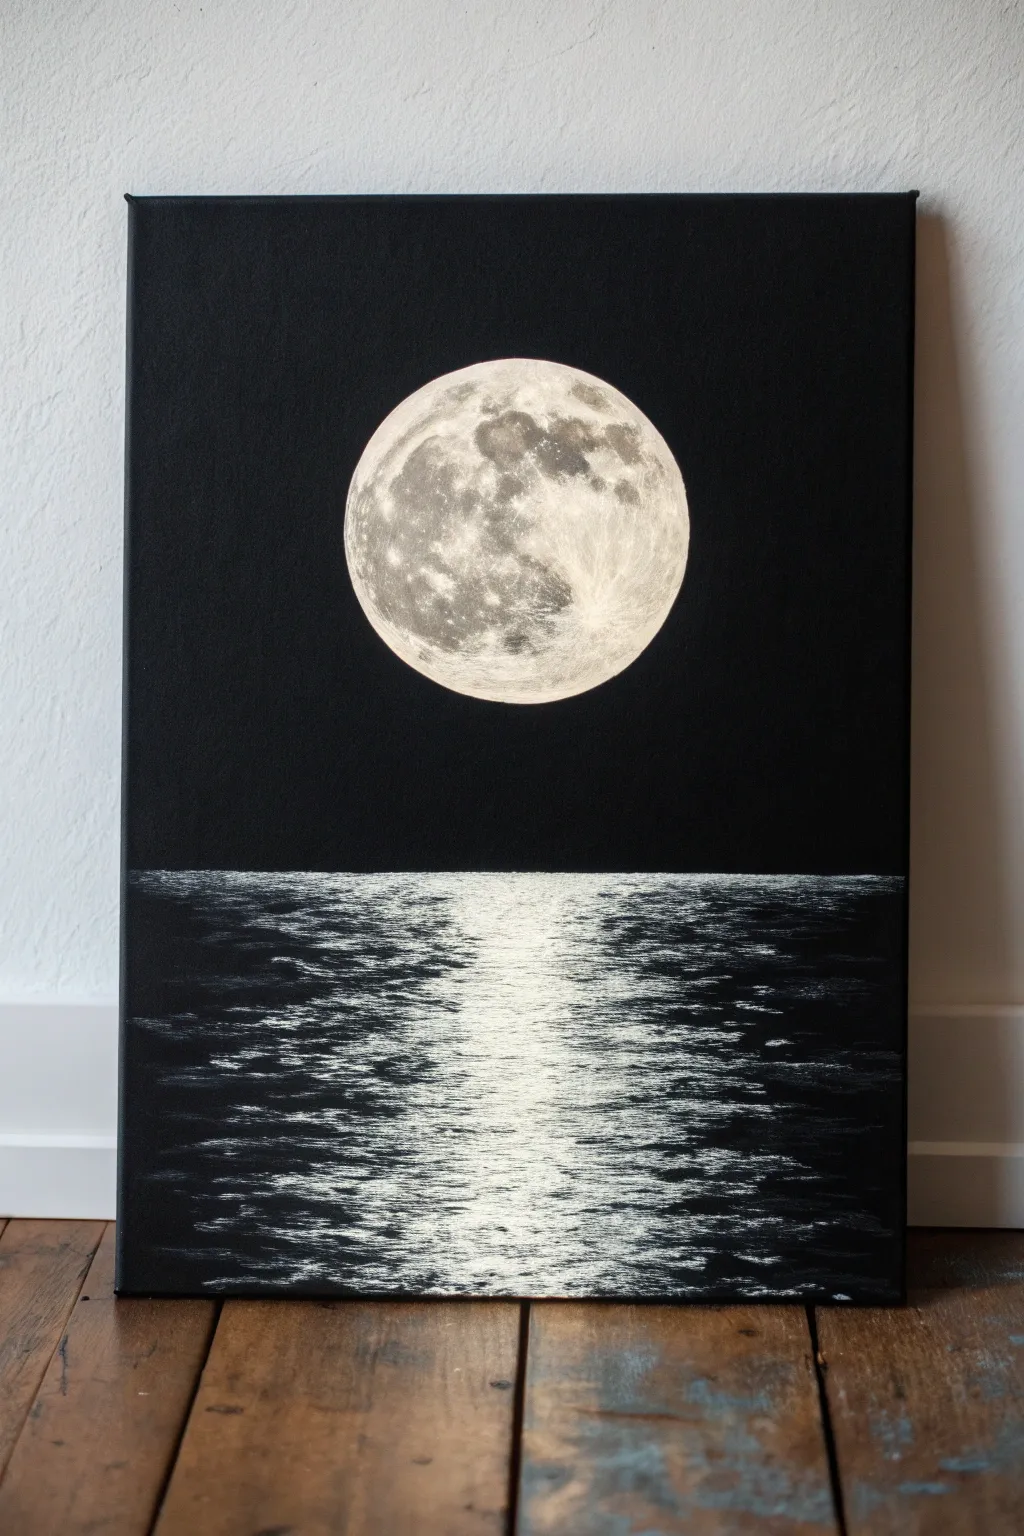
Capture the stillness of midnight with this striking acrylic painting featuring a hyper-realistic moon casting its glow over rippling water. The high contrast between the jet-black background and the silver-white details creates a dramatic focal point for any room.
How-To Guide
Materials
- Rectangular stretched canvas (e.g., 16×20 inches)
- Black acrylic paint (Mars Black or Carbon Black)
- Titanium White acrylic paint
- Gray acrylic paint (or mix black and white)
- Large flat brush or foam brush
- Small round detail brush (size 0 or 1)
- Small sponge or stippling brush
- Compass or large circular object (like a plate) for tracing
- White charcoal pencil or chalk
- Palette knife (optional)
Step 1: Setting the Night Scene
-
Prime the Surface:
Begin by covering your entire canvas with black acrylic paint. Use a large flat brush or foam brush to ensure smooth, even coverage. While you can buy black canvases, applying a fresh coat creates a richer, more uniform matte foundation. -
Dry Completely:
Allow the base coat to dry thoroughly. This is crucial because any wet black paint will mix with your white later, turning your bright moon into a muddy gray smear. -
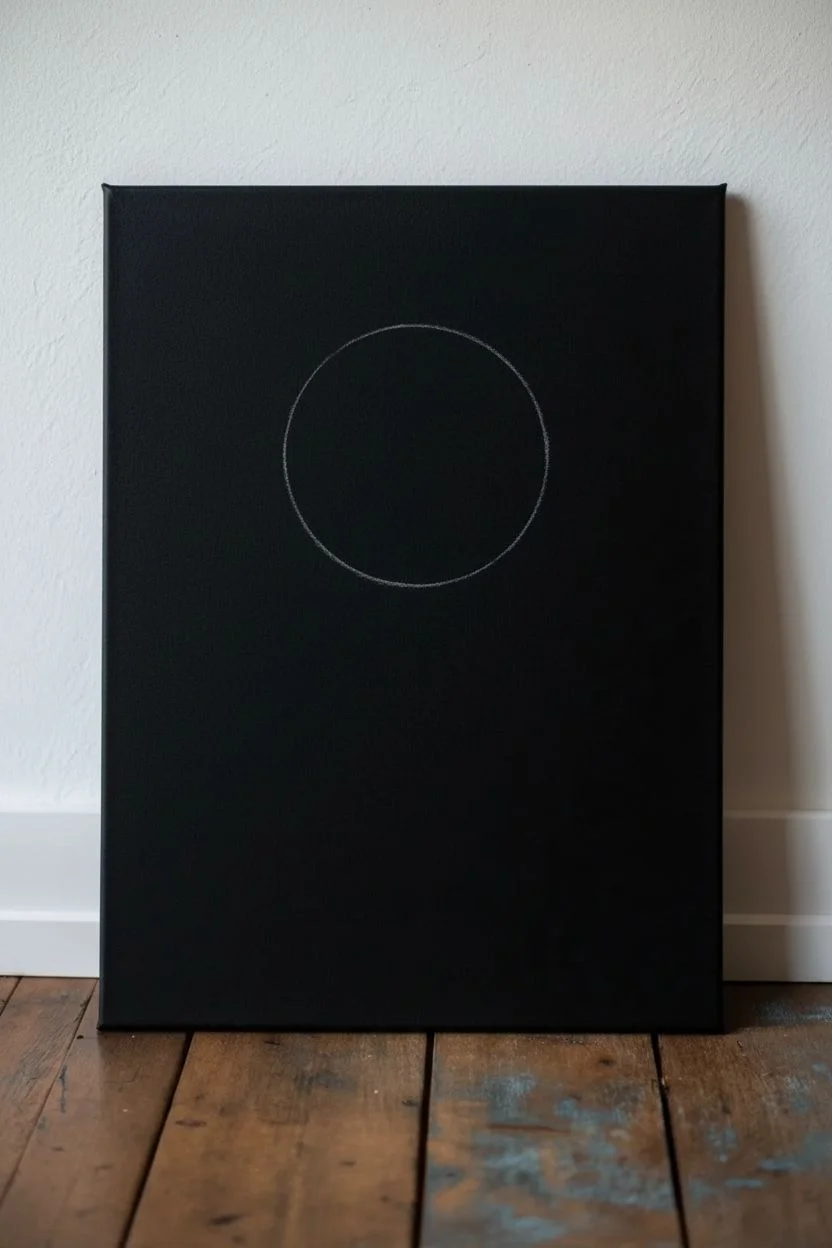
Position the Moon:
Decide on the placement of your moon. In this composition, it sits centrally in the upper half of the canvas. Use a white charcoal pencil or a piece of chalk to trace a circle using a compass or by tracing a large plate.
Sponge Texture Tip
For realistic craters, use a natural sea sponge rather than a synthetic makeup sponge. The irregular holes create much more convincing lunar geography.
Step 2: Painting the Moon
-
Base Layer:
Fill in the moon circle with a very light gray mix (mostly white with a tiny dot of black). It doesn’t need to be perfectly opaque yet; a slightly translucent layer helps build depth. -
Mapping the Craters:
Looking at a reference photo of the moon, identify the major dark patches (the maria). Use a small sponge or a scruffy brush to dab a mid-tone gray into these areas. Keep the edges soft and organic rather than drawing hard outlines. -
Adding Texture:
Dip your sponge into thick Titanium White. Dab it gently over the lighter areas of the moon, letting the texture of the sponge mimic the cratered surface. I like to twist my wrist slightly as I dab to avoid a repetitive pattern. -
Defining the Tycho Crater:
Locate the bright impact crater near the bottom (Tycho). Use a small round brush to paint a distinct white dot, then flick faint, thin lines radiating outward from it. -
Highlighting Constraints:
Reinforce the brightest white along the rim of the moon, particularly on the right side if you want a slight directional light effect. Ensure the outer edge is crisp against the black background.
Add a Glow Effect
Mix a tiny drop of glazing liquid with translucent white paint. Lightly brush it over the black sky just around the moon’s edge to create a hazy atmospheric glow.
Step 3: Creating the Reflection
-
Draw the Horizon:
Use a ruler and your chalk pencil to lightly mark a straight horizon line about one-third of the way up from the bottom of the canvas. -
Establish the Path:
Visualize a vertical column directly beneath the moon. The reflection should be widest right at the horizon and slightly distinct as it moves down, but generally keep it centered under the celestial body. -
Dry Brush Technique:
Load a flat brush with a small amount of titanium white paint, then wipe most of it off on a paper towel. You want the brush to be almost dry. -
Painting the Ripples:
Holding the brush horizontally, drag it back and forth across the water area. Start at the horizon with very short, dense strokes. -
widening the Stroke:
As you move down the canvas, let your horizontal strokes get slightly wider and more separated. The black canvas showing through creates the illusion of dark water troughs between waves. -
Concentrate the Light:
Add a second layer of white specifically down the distinct center line of the reflection. This central column represents the direct path of light and should be the brightest part of the water. -
Fade the Edges:
On the left and right sides of the reflection path, use even less paint on your brush. Let the ripples fade gently into the darkness of the surrounding water rather than stopping abruptly. -
Final Brights:
Use a detail brush or the edge of a palette knife to add a few thick dashes of pure white on the ripples closest to the foreground. These sharp highlights simulate the moonlight catching the tops of the nearest waves.
Step back and admire the serene, moonlit atmosphere you have created on the canvas


Simple Starry Night With Splatter Stars
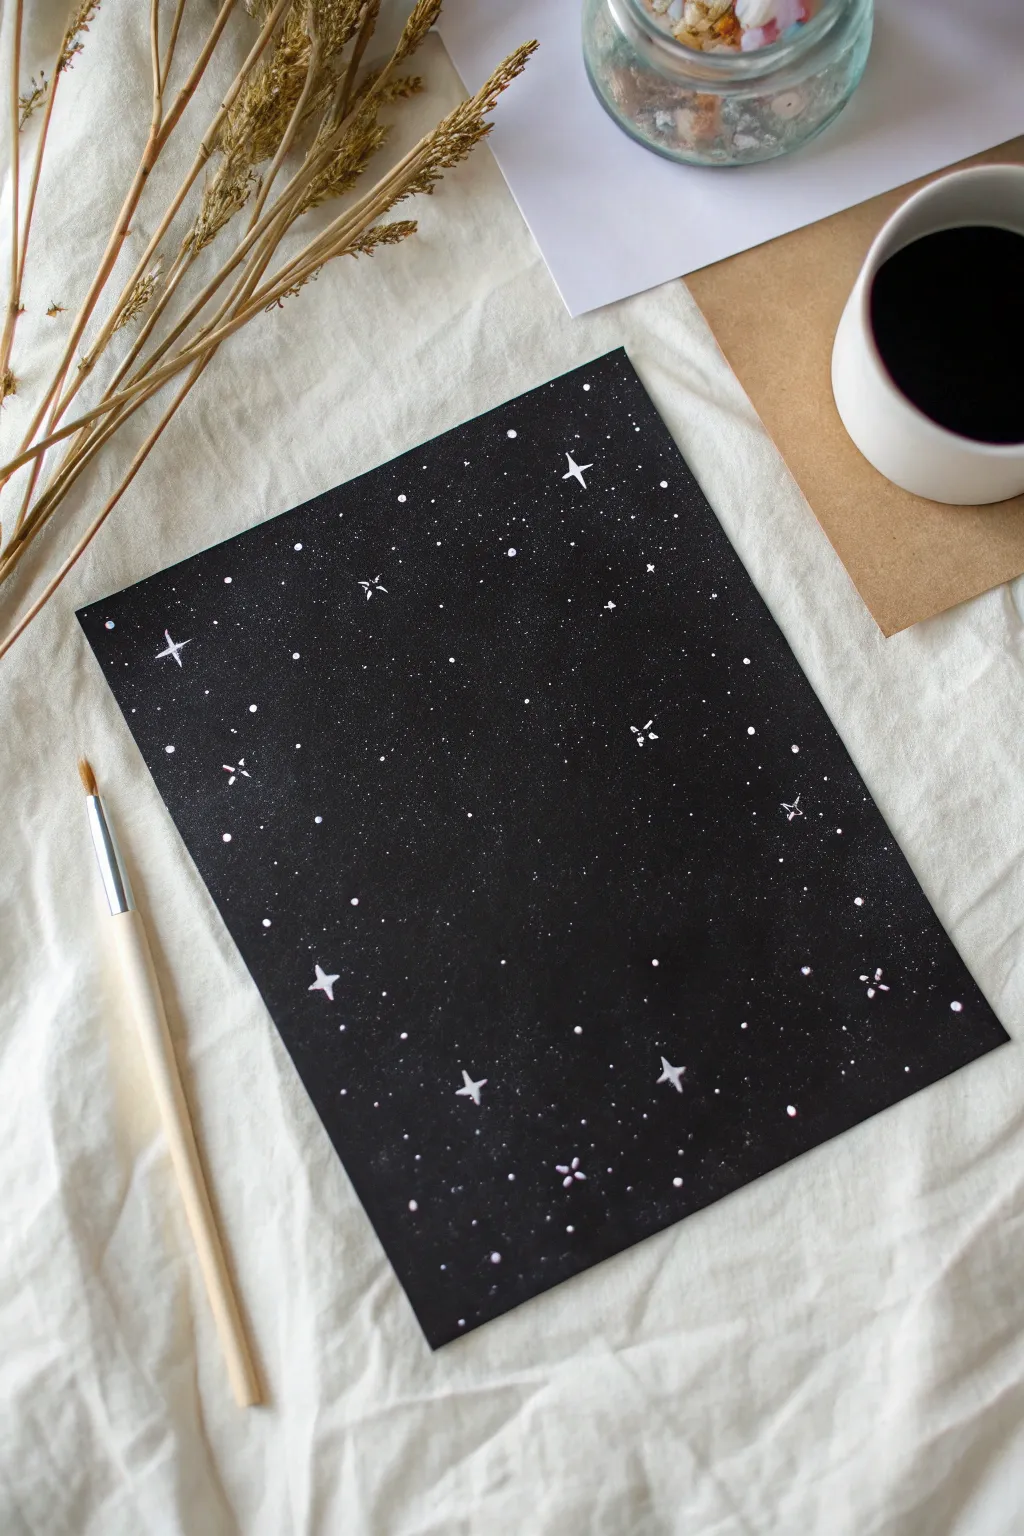
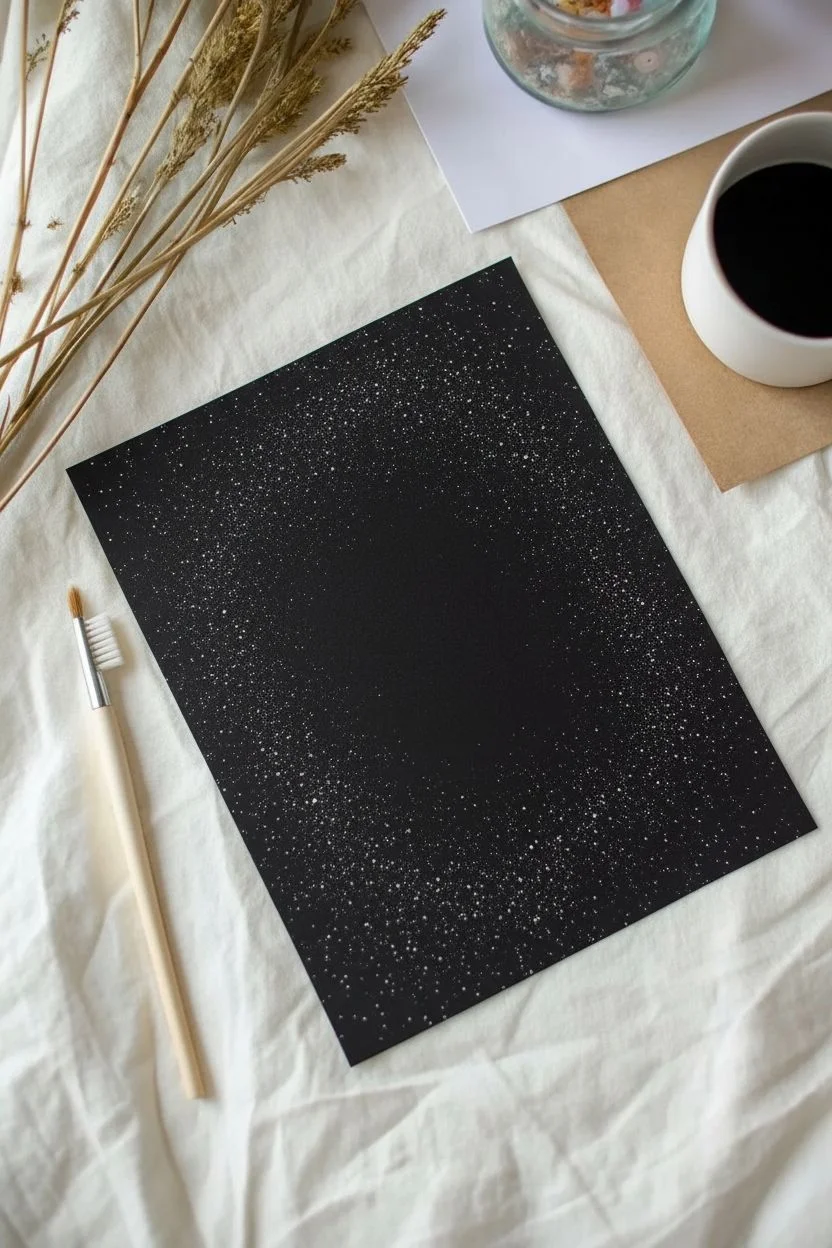
Using the simplest tools, this project creates a surprisingly deep and mesmerizing night sky effect on black paper. The combination of uncontrolled splatter and deliberate hand-painted stars gives the piece a lovely balance of chaos and order.
Step-by-Step Tutorial
Materials
- Black cardstock or watercolor paper painted black
- White opacity gouache, acrylic ink, or fluid acrylic paint
- Small round paintbrush (size 0 or 1)
- Old toothbrush or stiff bristle brush (for splattering)
- Palette or small dish for mixing
- Water cup
- Paper towels
- Scrap paper (for testing splatters)
Step 1: Setting the Stage
-
Prepare the background:
Begin with a solid black surface. If you are using black cardstock, ensure it is clean and flat. If you are painting your own background, apply an even coat of black acrylic or gouache and let it dry completely to a matte finish before proceeding. -
Mix the star paint:
Squeeze a small amount of white gouache or acrylic paint onto your palette. Add water drop by drop until it reaches a milky consistency—thin enough to splatter easily from a brush, but thick enough to remain opaque white when dry. -
Test the consistency:
Before touching your artwork, take your scrap paper and dip your stiff brush or toothbrush into the thinned paint. Run your thumb across the bristles to flick paint. If the dots are too faint, add more paint; if they are globby, add a tiny bit more water.
Splatters too big?
If you accidentally drop a large blob of paint, don’t wipe it! Let it dry, then paint over it with black to ‘erase’ it, or turn it into a larger twinkling star.
Step 2: Creating the Galaxy Dust
-
First faint layer:
Hold your splatter tool (toothbrush or stiff brush) about 10-12 inches above the paper. Gently flick the bristles to create a very fine mist of stars. Concentrate slightly more density near the corners or edges to frame the composition. -
Adding variety:
Load your brush again, perhaps with slightly less diluted paint this time. Move your hand closer to the paper in random areas to create slightly larger, brighter speckles amongst the fine mist. -
Check density:
Step back and look at the spread. You want an organic, uneven distribution—some empty void spaces are good. Avoid covering every square inch evenly, as nature is rarely uniform. -
Let it dry:
Allow these splatter layers to dry completely. Since the dots are small, this should only take a few minutes, but smudging wet splatter is a common tragedy.
Add a nebula effect
Before splattering, sponge on very faint, watered-down purple or blue acrylic in patches. Let dry, then add your stars on top for a deep space nebula look.
Step 3: Painting the Hero Stars
-
Switch brushes:
Pick up your small round detail brush (size 0 or 1). Ensure it comes to a very fine point. -
Refresh your paint:
You want the paint for the hand-drawn stars to be creamier and more opaque than the splatter mix. If your palette has dried, add fresh white paint. -
Identify placement:
Select 5 to 7 spots on the paper where you want your brightest stars to shine. Scattering them irregularly looks more natural than placing them in rows. -
Paint the cross shape:
For the larger stars, paint a simple cross or ‘plus’ sign. Start from the center and flick outward to keep the tips sharp and tapered. -
Refine the points:
Carefully extend the vertical line of the cross so it is slightly longer than the horizontal line. This elongated shape mimics the twinkle effect seen in astrophotography. -
Curved edges:
I like to gently curve the inner corners where the lines meet, giving the star a concave, diamond-like appearance rather than a blocky cross. -
Varying sizes:
Don’t make all your detailed stars the same size. Paint one or two quite large, and keep a few others tiny, barely larger than the splatters.
Step 4: Final Cosmic Details
-
Adding distinct dots:
Using the tip of your round brush, place distinct, deliberate round dots in the empty spaces between your major stars. These represent medium-brightness stars that aren’t quite twinkling. -
Cluster check:
Nature tends to cluster. Add a few tiny dots right next to your larger stars or in small groups to mimic constellations or star clusters. -
Final opacity check:
Once everything is dry, check your biggest stars. If the black background is showing through the white paint, carefully dab a second layer of white just in the very center of the star to make it pop. -
Clean edges:
If any splatters landed too close to the edge or look messy, you can touch them up with a tiny bit of black paint to eraser them. -
Dry and display:
Let the entire piece dry flat for at least 30 minutes to ensure thick droplets are set before framing or displaying.
Now you have a piece of the universe captured on paper, ready to be framed or gifted


Aurora Bands on a Black Sky Base
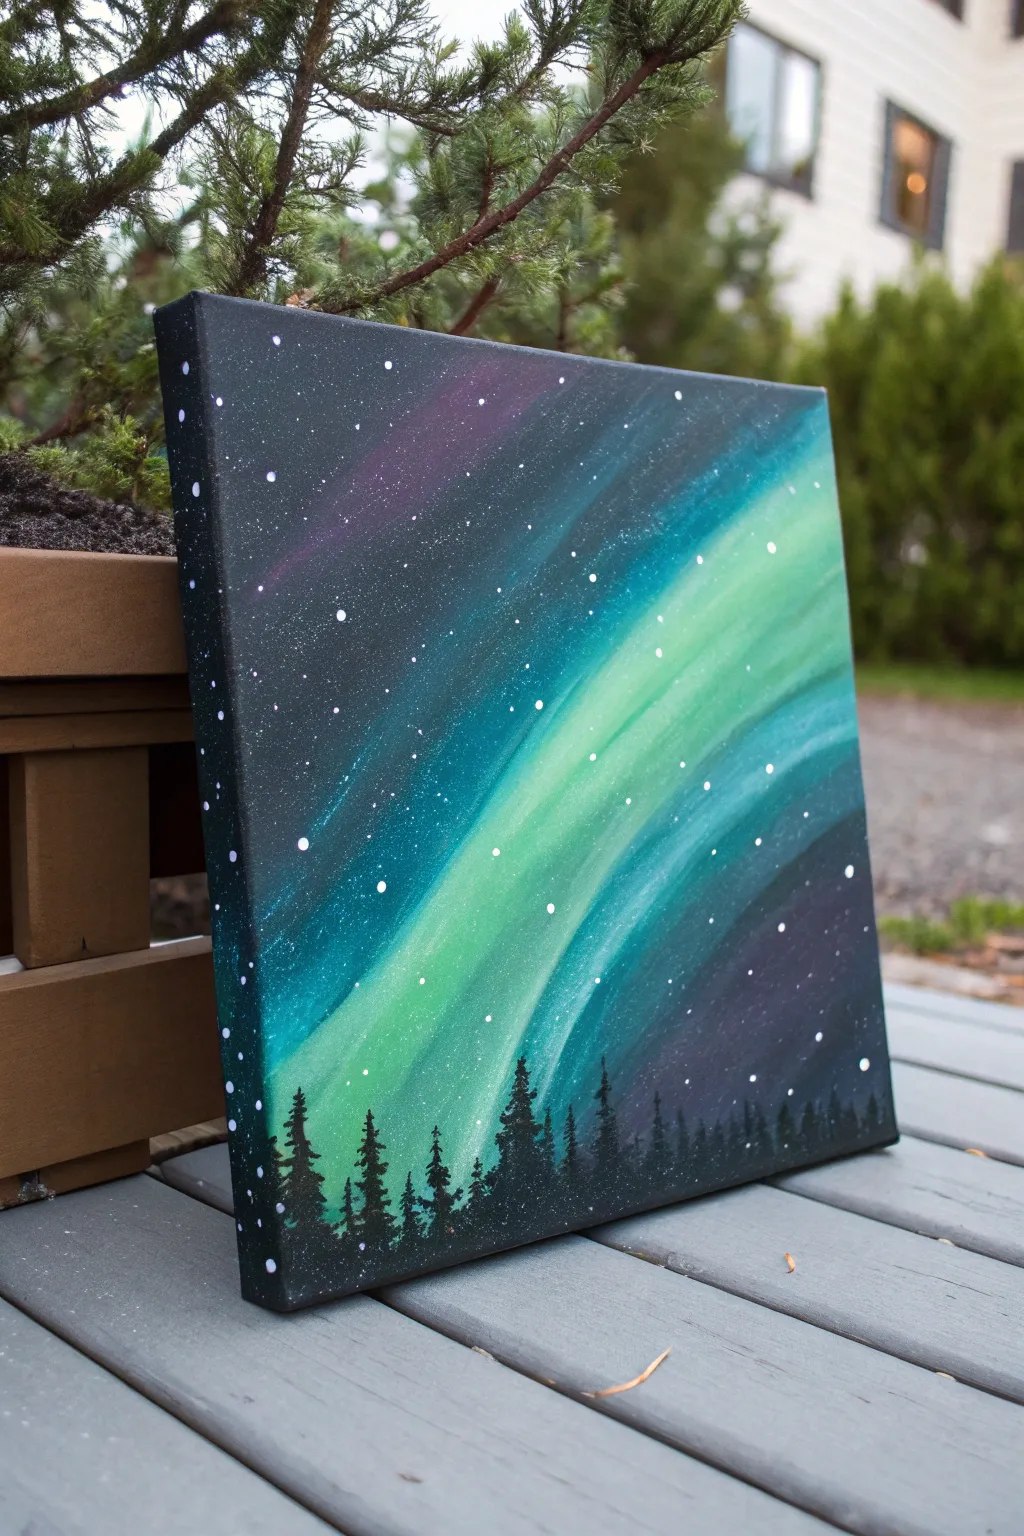
Capture the ethereal beauty of the aurora borealis using simple acrylic blending techniques on a striking black canvas. This project contrasts vibrant greens and purples against a deep night sky to create a luminous, glowing effect.
How-To Guide
Materials
- Stretched canvas (square or rectangular)
- Black acrylic paint (or pre-primed black canvas)
- Titanium White acrylic paint
- Phthalo Green acrylic paint
- Turquoise (or Teal) acrylic paint
- Dioxazine Purple acrylic paint
- Wide flat brush (1-2 inch)
- Medium filbert brush
- Small round detail brush (size 0 or 1)
- Old toothbrush (for stars)
- Cup of water and paper towels
- Palette or paper plate
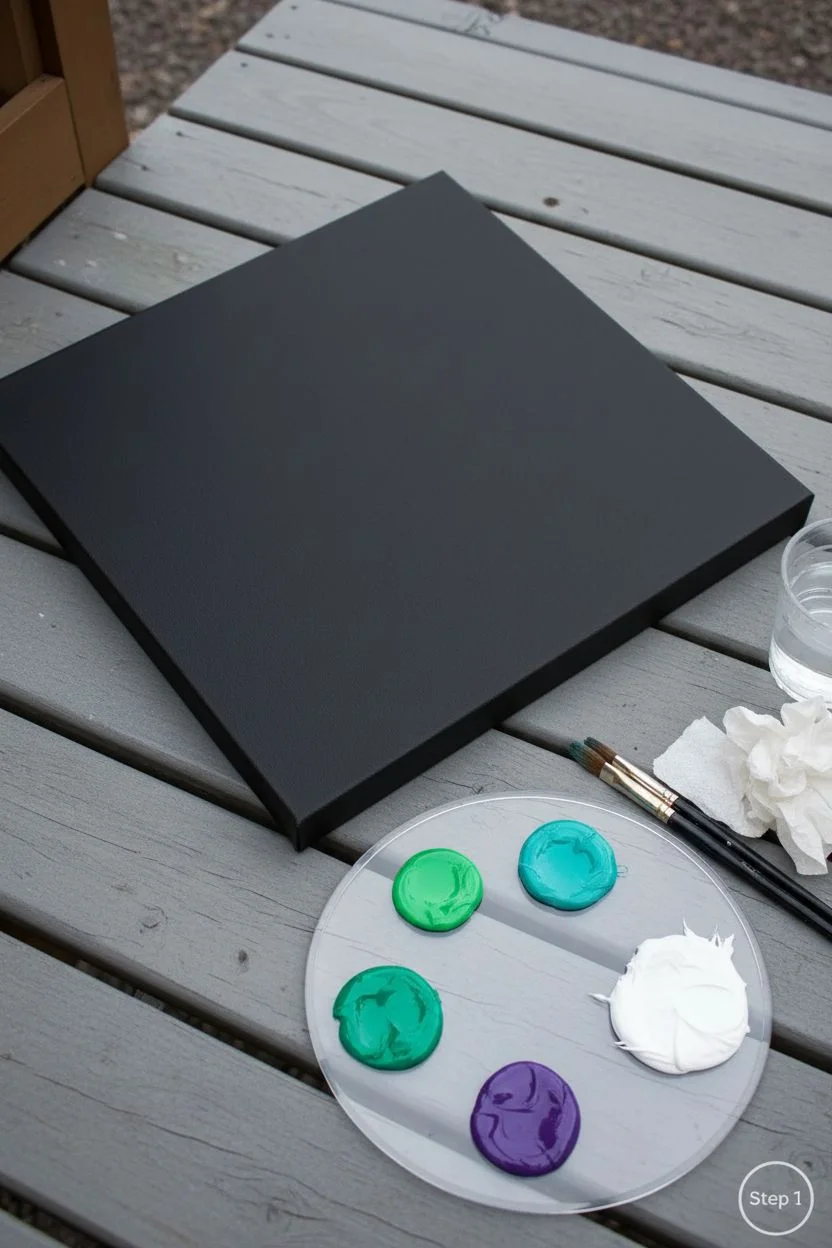
Step 1: Setting the Stage
-
Prime the canvas:
If you aren’t starting with a black canvas, paint the entire surface with a solid coat of black acrylic paint. Don’t forget to paint the sides of the canvas as well for a polished finish. -
Dry completely:
Let this base layer dry thoroughly before moving on. The colors will need to sit on top of the black, not mix with it, to remain vibrant. -
Mix your aurora colors:
Prepare your palette with Phthalo Green, Turquoise, and Dioxazine Purple. Keep a generous amount of Titanium White separate; you will need this to create the ‘glow’ behind the colors.
Step 2: Painting the Aurora
-
Map the flow:
Use a dry filbert brush to lightly sketch a curved, diagonal path across the canvas where you want your main aurora band to flow. This doesn’t need to be visible, just a guide for your hand. -
Apply the white base:
Dip your filbert brush in white paint and wipe most of it off. Dry-brush the white along your chosen path in long, sweeping strokes. This white layer underpainting is crucial because acrylics are transparent; colors painted directly on black will look dull. -
Blend the green glow:
While the white is still tacky or just after drying, glaze your bright green over the center of the white streak. Use long, fluid motions following the curve. -
Add depth with turquoise:
Take a bit of turquoise and blend it along the edges of the green band. This created a nice transition from the bright center to the dark sky. -
Introduce purple hues:
In the upper left corner or disconnected areas of the sky, add faint streaks of purple. I like to blend these extremely softly so they look distant and vague compared to the bright green band. -
Enhance the highlights:
Once the color layers handle, load a bit of pure white mixed with a tiny drop of yellow or green. Add a very thin, concentrated line right in the center of the aurora band to make it look like it’s shimmering. -
Create vertical streaks:
Using a clean, dry brush, gently pull the paint upward from the main band in short, vertical strokes. This mimics the curtains of light often seen in real auroras.
Pro Tip: The Magic White
The secret to glowing colors on a black canvas is the white underlayer. Never skip the white dry-brushing phase; it acts as a backlight for the transparent neons.
Step 3: Stars and Trees
-
Prepare the stars:
Dilute a small amount of white paint with water until it has an ink-like consistency. -
Splatter the galaxy:
Dip the bristles of an old toothbrush into the thinned white paint. Hold it over the canvas and flick the bristles with your thumb to spray tiny stars across the sky. Test on a paper towel first to avoid large blobs. -
Paint prominent stars:
Use your smallest detail brush to dot in a few larger, brighter stars manually to create variety in the night sky. -
Paint the tree line connection:
Switch back to pure black paint. Along the very bottom edge of the canvas, paint an uneven, jagged line to represent the ground. -
Form the tree trunks:
Using the small round brush, paint thin vertical lines rising from the ground. Vary the heights, making some tall and some short. -
Add pine branches:
Start at the top of a trunk line. Use a dabbing motion to create branches that get wider as you move down the tree. Keep the shape triangular. -
Fill the forest:
Continue painting trees across the bottom. Overlap them slightly to create a dense forest feel. Ensure the silhouettes are solid black to contrast sharply against the colorful sky.
Troubleshooting: Blobby Stars
If your toothbrush splatters create huge blobs, your paint is too watery. Let it dry, paint over the mistake with black, and try again with thicker paint.
Step 4: Finishing Touches
-
Wrap the edges:
Inspect the sides of your canvas to ensure the black background covers everything perfectly and, if desired, extend the stars or tree shapes around the edges. -
Final dry:
Allow the painting to dry completely overnight before handling or framing.
Hang your new masterpiece in a spot where it can catch the light and show off those vibrant northern colors


Nebula Cloud Study With Two Bold Colors
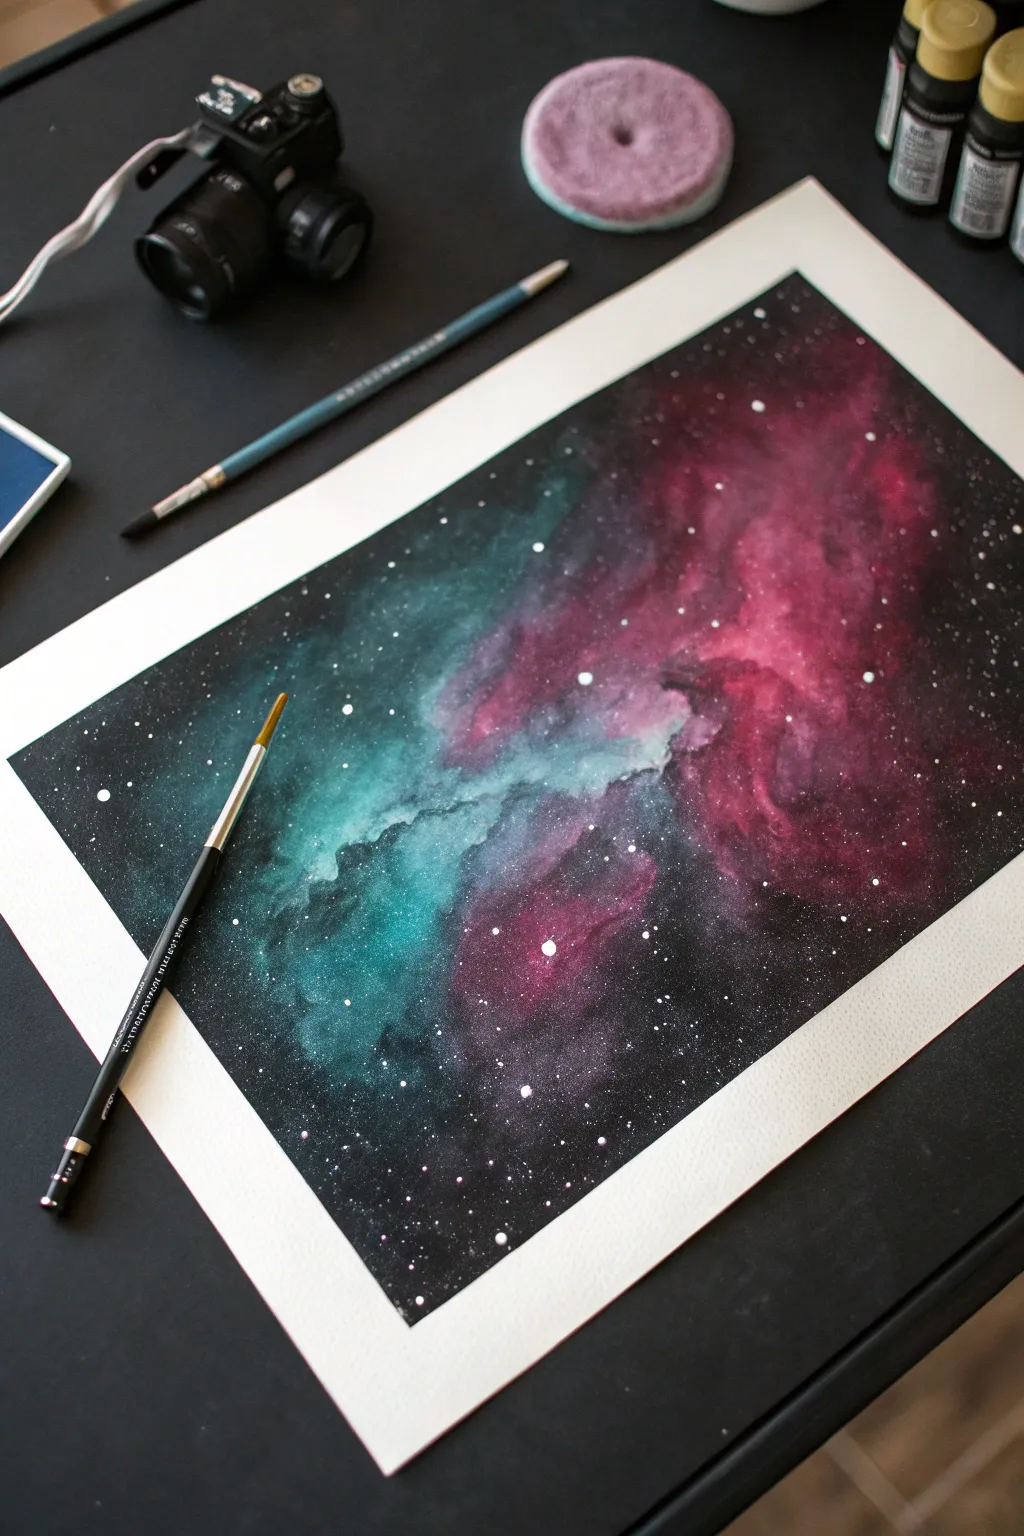
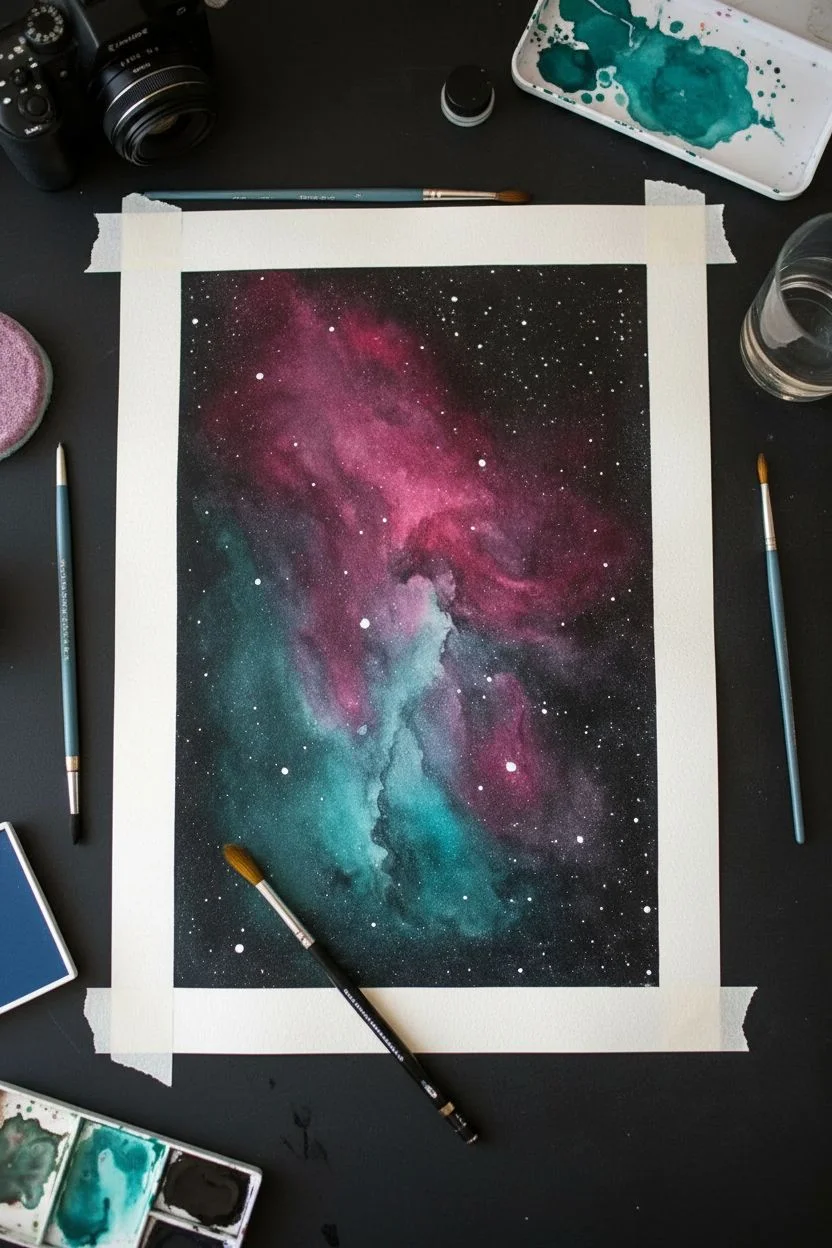
Capture the ethereal beauty of deep space with this striking nebula cloud study, featuring a dramatic clash of teal and magenta against an abyss of black. This watercolor technique relies on wet-on-wet blending to create soft, organic cloud formations that seem to glow from within.
Step-by-Step Tutorial
Materials
- Watercolor paper (140lb/300gsm cold press, taped down)
- Black watercolor paint or black gouache (for intense darks)
- Teal or Turquoise watercolor paint
- Magenta or Quinacridone Rose watercolor paint
- White gouache or white ink for stars
- Wide flat brush (for wetting paper)
- Round brush (size 6-8)
- Small detail brush (size 0-2)
- Masking tape
- Two cups of water
- Paper towels
Step 1: Setting the Stage
-
Tape and Prep:
Secure your watercolor paper to a board or table using masking tape on all four sides. Press the edges down firmly to ensure a crisp white border later and to prevent buckling when the paper gets wet. -
Map the Nebula:
Visualize a diagonal flow for your nebula. We are going to leave the center area somewhat clear for our colors while keeping the corners deep and dark.
Wet-on-Wet Magic
Work fast! If the paper dries while blending the black into the colors, you’ll get hard lines. Keep a spray bottle handy to mist the paper if needed.
Step 2: Building the Colors
-
Pre-wet the Center:
Using your large brush and clean water, gently wet the central diagonal area of the paper where the colors will go. It should be glistening but not forming puddles. -
Apply the Magenta:
Load your round brush with a vibrant mix of magenta. Dab it into the upper right section of the wet area, letting the pigment bloom and spread naturally into the water. -
Introduce the Teal:
Rinse your brush thoroughly. Now, load it with teal paint. Apply this to the lower left section of the wet area, bringing it close to the magenta but trying not to mix them excessively, as this can create mud. -
Soft Blending:
Where the two colors meet in the middle, use a slightly damp, clean brush to gently encourage them to touch. Let them swirl together slightly to create a soft, violet transition zone. -
Deepening the Saturation:
While the paper is still damp, drop in more concentrated pigment into the centers of your teal and magenta clouds to make the colors bold and intense.
Add a Supernova
For a focal point, create a ‘lens flare’ star by painting a tiny cross shape with white gouache, then softening the center with a dot of pure white.
Step 3: Creating the Void
-
Start the Black Background:
While the colored areas begin to settle (but are still slightly damp at the edges), load your brush with concentrated black watercolor or gouache. -
Define the Edges:
Paint the corners and the outer edges of the paper black. Carefully work the black paint inward toward your colorful nebula clouds. -
Feathering the Dark:
As the black paint meets the colored paint, use a damp brush to soften the edge. You want the black to look like it’s fading into the color, rather than a hard outline. -
Filling the Negative Space:
Ensure the corners are solid, opaque black. This high contrast is what makes the colored nebula appear to glow. -
Refining Shapes:
Use the black paint to ‘carve’ into the nebula shapes, creating wispy intrusions of darkness that make the clouds look more rugged and natural. I often find this step defines the whole piece. -
Second Layer (Optional):
If your black dries looking grey or washed out, wait for it to dry completely and add a second layer of black for true depth. -
Wait for Drying:
This is crucial: allow the painting to dry completely. The paper must be bone dry before the next step to prevent the stars from bleeding.
Step 4: The Starfield
-
Prepare the Stars:
Mix a small amount of white gouache with a tiny drop of water. It should be the consistency of heavy cream—fluid enough to splatter but thick enough to be opaque. -
Splatter Technique:
Load a brush with the white mixture. Hold it over the painting and tap the handle against another brush or your finger to spray fine mist droplets across the artwork. -
Specific Placement:
Focus the densest splatter on the black areas, but allow some to cross over the colored nebula clouds for depth. -
Adding Major Stars:
Dip a fine detail brush or a toothpick into the pure white gouache. Manually place a few larger, distinct dots in the dark areas to represent closer, brighter stars. -
The Reveal:
Once the white splatter is totally dry, carefully peel away the masking tape at a low angle to reveal the clean, sharp borders.
Step back and admire your personal slice of the galaxy.
BRUSH GUIDE
The Right Brush for Every Stroke
From clean lines to bold texture — master brush choice, stroke control, and essential techniques.
Explore the Full Guide
White Daisy Cluster With Soft Gray Shadows
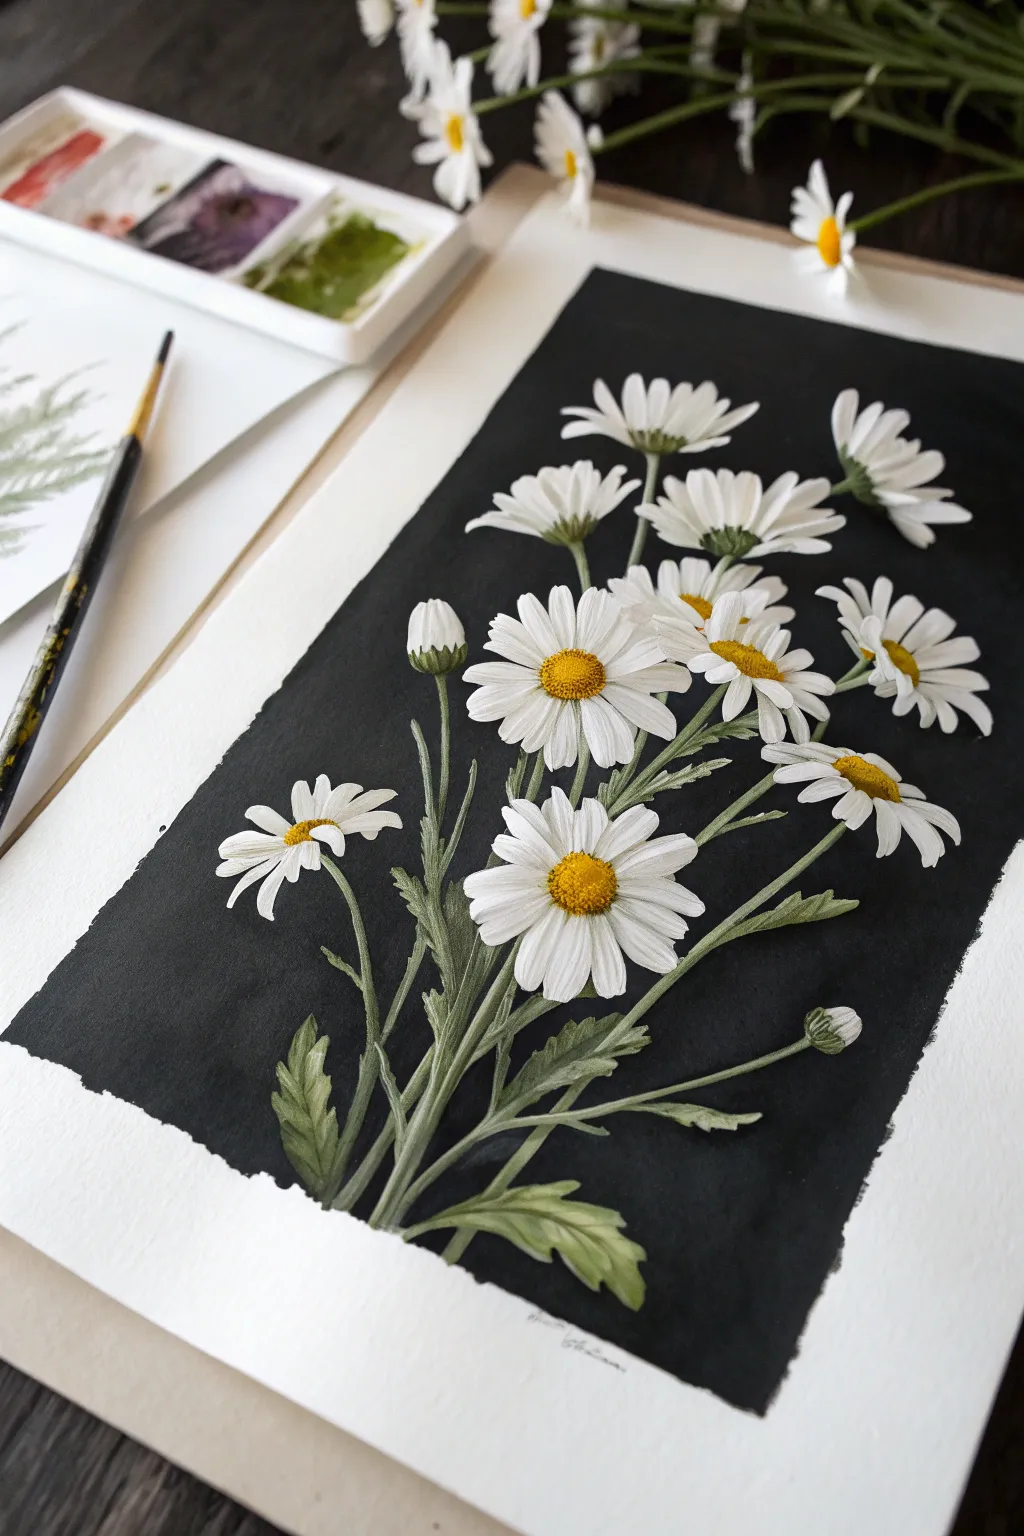
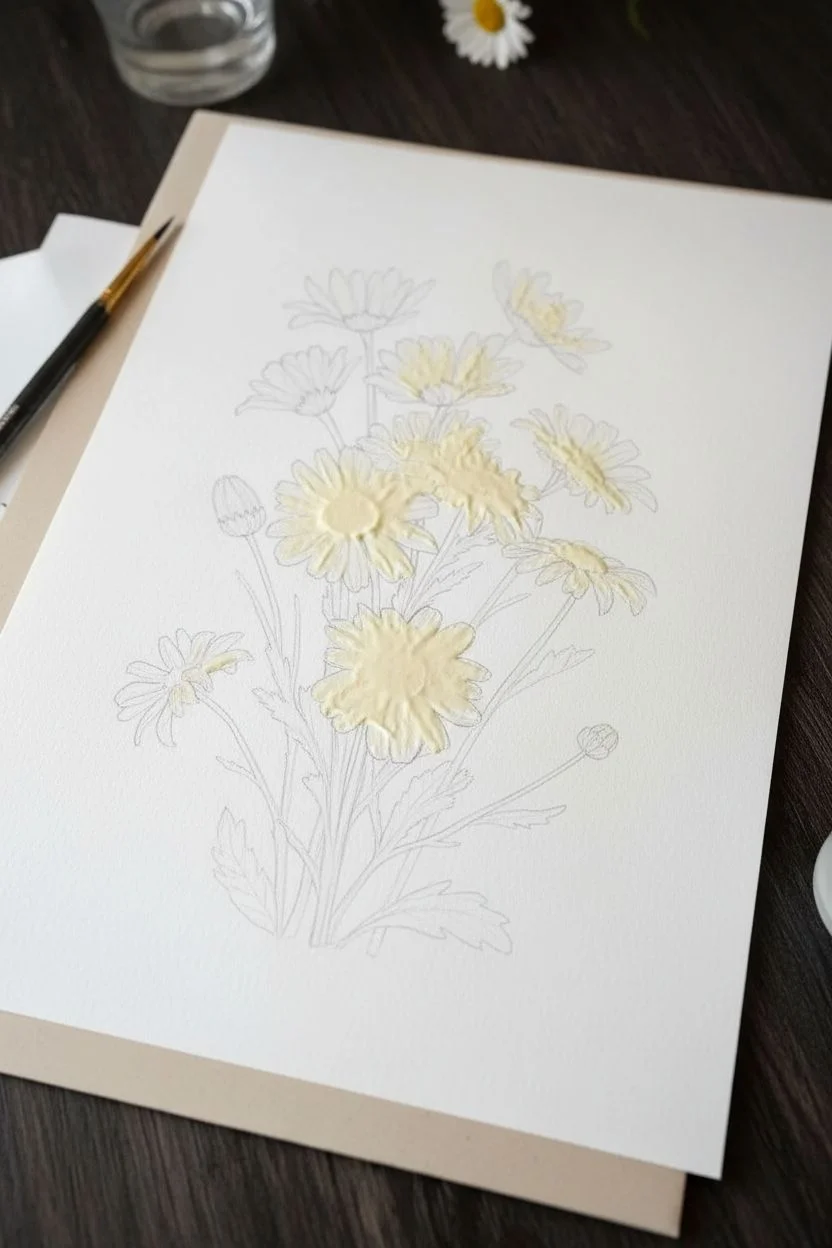
This striking botanical study uses negative space to make delicate white blooms pop off the page. By carefully painting a deep black background around your subject, you create immediate drama and focus on the subtle gray shadows of the petals.
Step-by-Step Tutorial
Materials
- Hot press watercolor paper (smooth texture)
- Black gouache or high-pigment black watercolor
- White gouache (for highlights and cleanup)
- Professional watercolors (Yellow Ochre, Burnt Sienna, Sap Green, Payne’s Grey)
- Small round brushes (sizes 0, 2, and 4)
- Masking fluid (optional but recommended)
- Pencil (HB or H)
- Mixing palette
- Two water jars
Step 1: Drawing and Masking
-
Composition sketch:
Begin by lightly sketching the cluster of daisies. Focus on the oval shapes of the flower heads first to get the angles right—some facing forward, some turning away. Add the stems radiating from the bottom center. -
Petal detailing:
Refine your sketch by drawing individual petals. Keep lines very faint so they won’t show through later. Make sure the petals are slightly irregular; perfect symmetry looks unnatural. -
Protecting the white:
If you are less confident with brush control, apply masking fluid over the entire flower and stem area. This preserves the pure white of the paper. Let it dry completely until it’s tacky-free.
Opacity Secret
Use gouache for the black background even if painting the flowers with watercolor. Gouache’s matte opacity hides brushstrokes for a velvety finish.
Step 2: The Dark Surround
-
Mixing the black:
Prepare a rich, opaque black. I find that mixing black gouache with a tiny drop of dark green watercolor makes the background feel organic rather than flattened. -
Outlining edges:
Using your size 2 brush, carefully paint the black background around the intricate petal shapes. If you skipped masking fluid, this step requires a steady hand and slow breathing. -
Filling the void:
Switch to a size 4 brush to fill in the larger black areas. Keep the edges of the painted area somewhat rough or deckled, rather than painting edge-to-edge, to give it an artistic, vignette feel. -
Remove mask:
Once the black paint is bone dry (touch it to be sure), gently rub away the masking fluid with a clean finger or rubber pickup tool.
Muddy Whites?
If your grey shadows look dirty, your wash was too dark or wet. Lift the excess paint with a clean, damp brush or white paper towel while it’s still wet.
Step 3: Painting the Blooms
-
Petal shadows:
Mix a very watery, pale wash of Payne’s Grey or violet-grey. Paint thin, translucent shadows on the petals where they overlap or curve away from the light source. Leave the majority of the petal pure white. -
Center base layer:
Paint the round centers with a wash of Yellow Ochre. Keep the edges soft where the yellow meets the white petals. -
Texturing the centers:
Once the yellow is dry, use a size 0 brush to stipple tiny dots of Burnt Sienna or orange on the bottom/shadow side of the yellow centers to create a domed, fuzzy texture. -
Stem base color:
Mix a muted Sap Green. Paint the stems and leaves, using long, fluid strokes. Vary the pressure on your brush to make the leaves taper naturally at the tips. -
Leaf shading:
While the green is still slightly damp, drop in a darker green mix near the base of the leaves and where stems overlap to create volume.
Step 4: Final Refinements
-
Defining separations:
Use your smallest brush with a slightly darker grey mix to carefully separate petals that might have blended together visually. -
Adding brightness:
If any white areas got muddy, use a touch of opaque white gouache to restore the brightest highlights on the petal tips. -
Crisping edges:
Inspect the boundary between the flowers and the black background. If you see any accidental white gaps, touch them up with black paint for a razor-sharp finish.
Step back and admire how the high contrast creates a luminous effect for your floral cluster
Red Roses for Classic Black-and-Red Drama
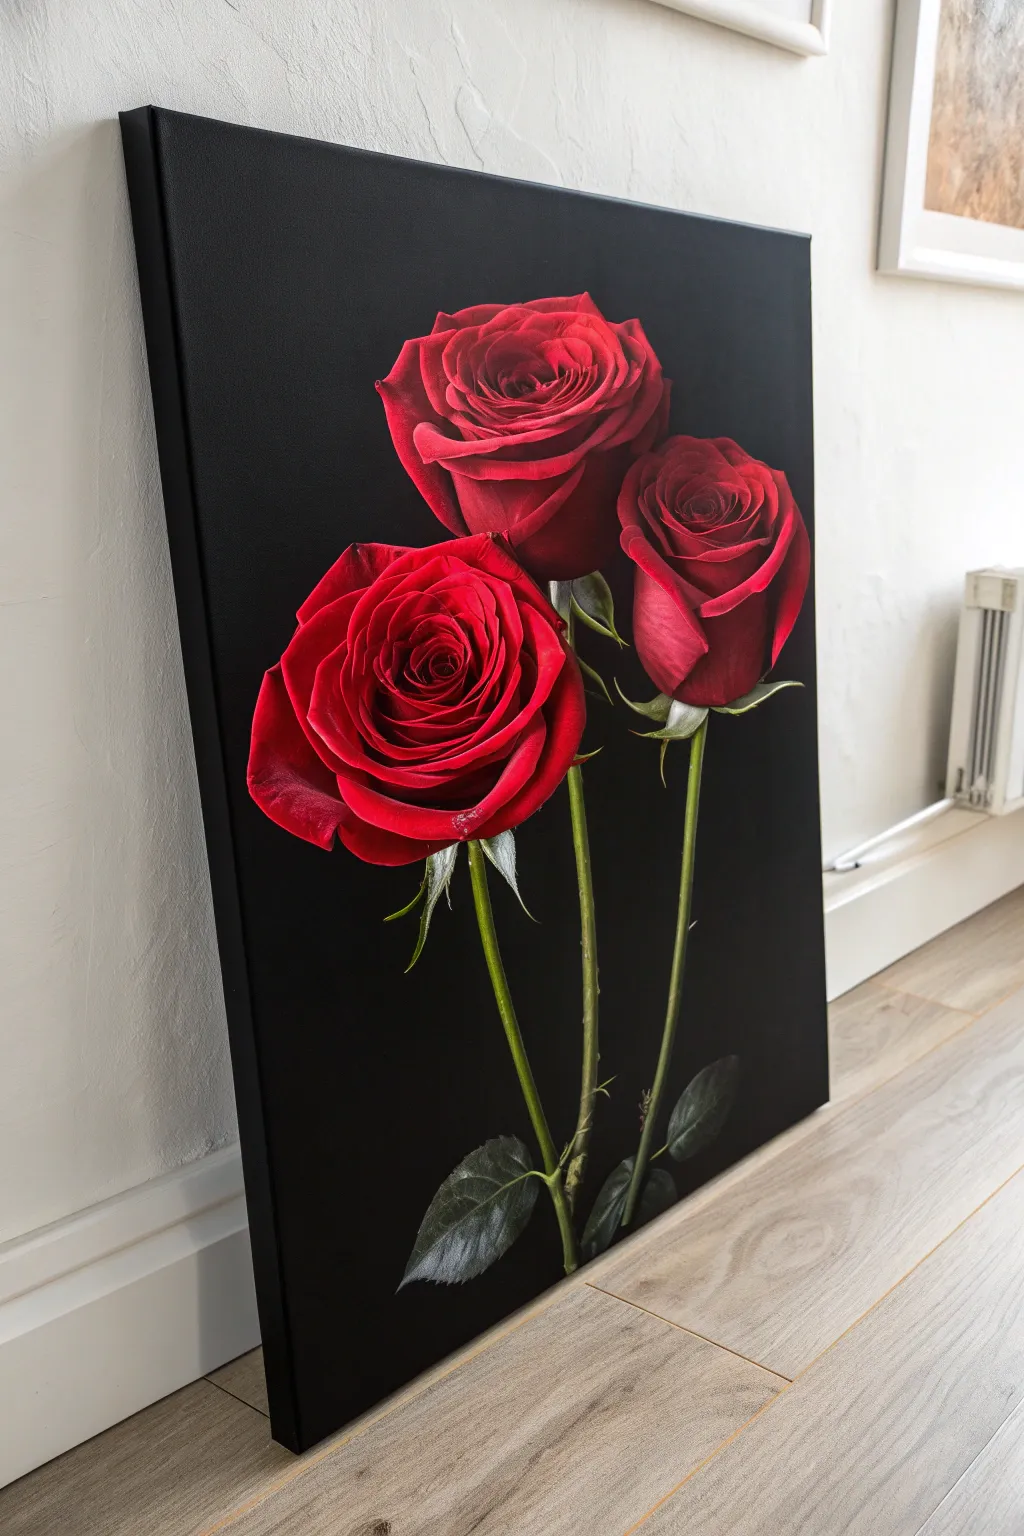
Achieve a striking level of realism and classic elegance with this tutorial on painting three red roses against a deep black void. This project focuses on high-contrast techniques to make the velvety petals pop, creating a dramatic focal point for any room.
Step-by-Step Tutorial
Materials
- Recycled stretched canvas (approx. 18×24 inches)
- Black acrylic gesso or matte black acrylic paint
- Heavy body acrylic paints: Cadmium Red Deep, Alizarin Crimson, Quinacridone Magenta, Titanium White, Hookers Green, Burnt Umber, Mars Black
- Synthetic bright brushes (sizes 8 and 12) for background
- Synthetic filbert brushes (sizes 4 and 6) for petals
- Fine liner brush (size 0 or 1) for details
- White chalk or watercolor pencil
- Slow-drying medium or retarder
- Palette knife
- Water container and lint-free rags
Step 1: Preparing the Void
-
Result-oriented Priming:
Start by coating your entire canvas with black gesso or matte black acrylic paint. While white canvases are standard, painting on black instantly establishes your deepest shadows. -
The Second Coat:
Apply a second layer of black once the first is dry. Ensure you paint the sides of the canvas as well for a gallery-wrapped finish that doesn’t require a frame. -
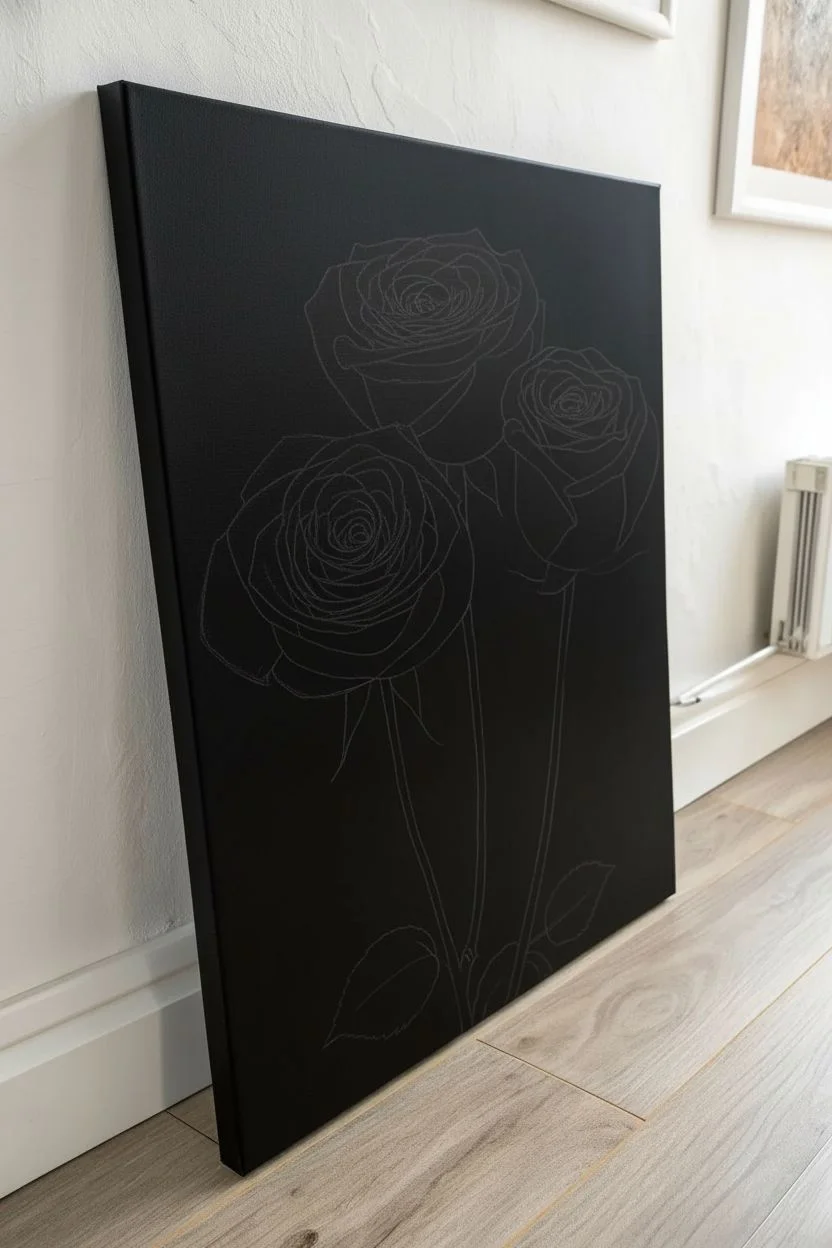
Ghost Sketching:
Using a piece of white chalk or a white watercolor pencil, lightly sketch the composition. Draw three main oval shapes to place the rose blooms: one top center, one middle right, and the largest one bottom left. Keep the pressure very light so the chalk wipes away easily later. -
Stem Placement:
Sketch long, slightly curved lines extending downward from each bloom to establish the stems. Mark the position of the few leaves near the bottom to balance the composition.
Chalk Marks Won’t Go?
If the white chalk sketch is stubborn, don’t scrub hard. Paint over the lines with a thin layer of Mars Black; scrubbing can polish the matte background.
Step 2: Blocking the Blooms
-
Base Red Layer:
Mix Cadmium Red Deep with a touch of Alizarin Crimson. Using a size 6 filbert brush, block in the general shapes of the rose petals. Don’t worry about details yet; just get the red paint onto the black canvas, leaving the black showing through for the deepest recesses between petals. -
Establishing the Centers:
For the tight centers of the roses, mix Alizarin Crimson with a tiny dot of Mars Black creates a deep wine color. Paint the spiral shapes in the middle of each bloom. -
Stem Foundation:
Mix Hookers Green with a little Burnt Umber to create a natural, shadowy green. Paint the stems and the base layer of the leaves using your size 4 filbert brush.
Step 3: Sculpting Volume
-
Mid-tone Application:
Add a small amount of slow-drying medium to your Cadmium Red. Paint the main body of the petals, blending the edges slightly into the darker base layer to create a soft, velvety transition. -
Defining Petal Edges:
I like to sharpen the edges at this stage. Load your brush with pure Cadmium Red and carefully outline the top curves of the outer petals where the light would hit them. -
Deepening Shadows:
To make the roses look three-dimensional, mix Mars Black into Alizarin Crimson. Glaze this dark mixture into the crevices between petals and at the base of the blooms where they meet the stems. -
Leaf Texture:
Using the liner brush and a mix of Hookers Green and Titanium White, paint the central veins on the leaves. Feather the paint outward slightly to mimic leaf texture.
Add Velvet Texture
Mix a tiny amount of matte gel medium into your final red highlight layer. This reduces the acrylic sheen and makes petals look like real velvet fabric.
Step 4: High Drama Highlights
-
Key Highlights:
Mix Titanium White with Cadmium Red to create a pinkish highlight tone. Apply this sparingly to the very tops of the petal curls using a size 4 brush. This mimics the light source hitting the flower. -
Blending the Highlights:
While the highlight paint is still wet, clean your brush and gently drag the paint downward into the red mid-tone. This ‘dry brushing’ technique simulates the soft texture of rose petals. -
Stem Details:
Add highlight strips to the right side of the stems using a light yellow-green mix. This gives the stems a cylindrical, rounded appearance. -
Refining the Black:
Take your large flat brush with fresh black paint and carefully cut in around the roses and stems creates a crisp, sharp outline. This cleans up any accidental red smudges. -
The Dew Drop Effect (Optional):
If you want extra realism, use a tiny dot of pure white on a petal or leaf to suggest a glistening dew drop. -
Final Cleanup:
Once fully dry, use a damp cloth to gently wipe away any visible white chalk lines from your initial sketch.
Hang your dramatic masterpiece in a well-lit area to let those high-contrast roses truly shine

PENCIL GUIDE
Understanding Pencil Grades from H to B
From first sketch to finished drawing — learn pencil grades, line control, and shading techniques.
Explore the Full Guide
Dandelion Puff With Floating Seed Sparks
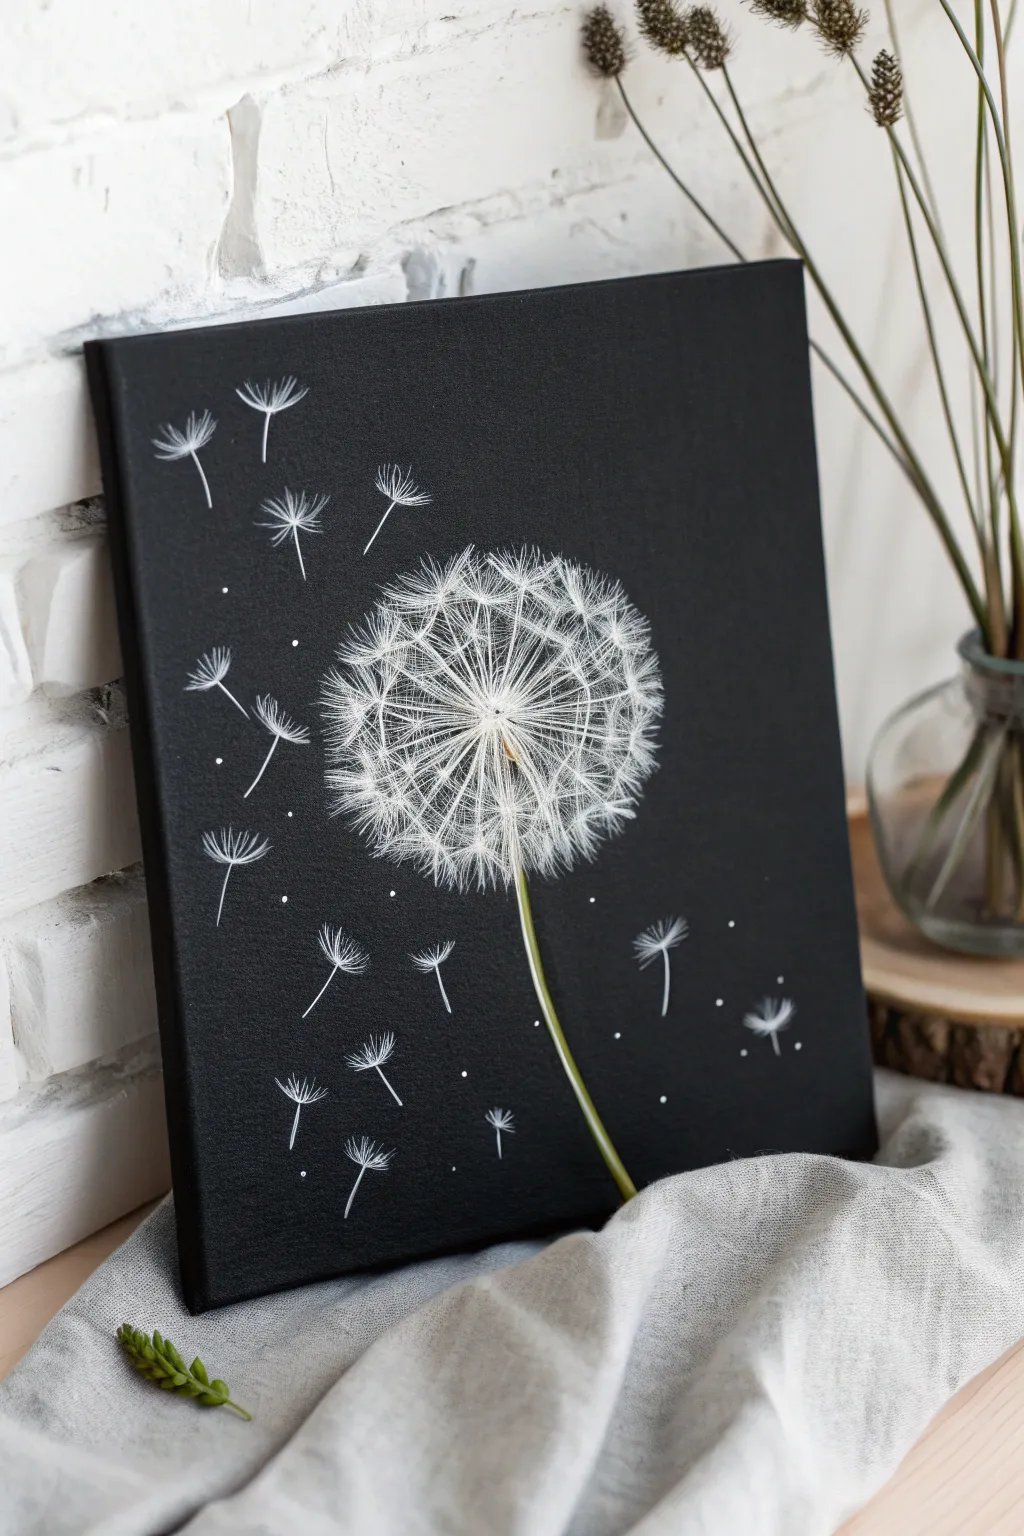
Capture the delicate, airy nature of a dandelion puff against a dramatic black backdrop with this striking mixed-media project. By combining fine white linework with a mounted 3D stem, you’ll create a piece of art that feels like a frozen wish.
Step-by-Step
Materials
- Black stretched canvas (8×10 or similar)
- White extra-fine paint pen or white gel pen
- White acrylic paint
- Fine liner paintbrush (size 0 or 00)
- Real dried flower stem or faux green stem
- Strong craft glue (E6000) or hot glue gun
- Pencil and compass (optional)
- Reference photo of a dandelion puff
Step 1: Preparation & Mapping
-
Prepare the canvas:
Ensure your black canvas is clean and dust-free. If you only have a white canvas, paint it entirely black with matte acrylic paint and let it dry completely before starting. -
Find the center:
Visualize where the center of your dandelion head will be. It should be slightly off-center to comfortably accommodate the stem later. -
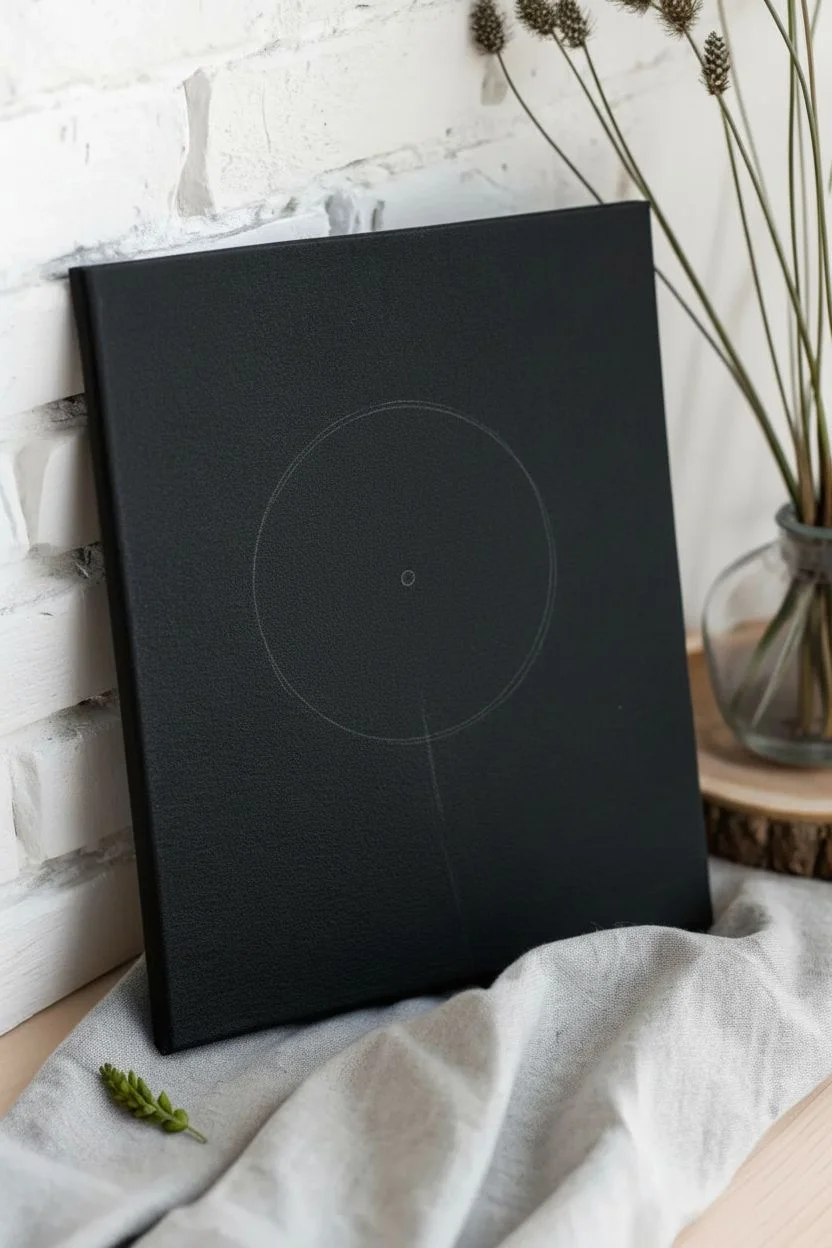
Sketch the guide:
Using a pencil very lightly, draw a faint circle about the size of a grapefruit to mark the outer boundary of the dandelion fluff. Mark a small dot in the absolute center of this circle.
Step 2: Creating the Core
-
Draw the primary spokes:
Using your white paint pen or fine brush, draw thin, straight lines radiating outward from the center dot. Stop just short of your outer circle guide. -
Add density:
Continue adding radiating lines between your first set. The center should become quite dense and bright white, while the lines spread out as they reach the edge. -
Create the seed heads:
At the end of each radiating line, draw a tiny ‘V’ or ‘U’ shape pointing outward. These serve as the anchors for the fluffy pappus filaments.
Pro Tip: Line Variation
Vary your pressure. Press harder near the center for thick lines, and lift off as you move outward for wispy, fading tips.
Step 3: Fluff & Detail Work
-
Add first layer of filaments:
From those small ‘V’ shapes, draw tiny, wispy lines spraying outward. These should be extremely delicate and short. -
Build the volume:
Start layering more white strokes over your main radiating lines. I like to use a slightly more diluted acrylic paint here for a translucent effect, making some seeds look closer and others further away. -
Create the halo effect:
Paint many tiny, floating filaments around the outer edge of your main circle to give it that fuzzy, soft halo look. -
Intensify the center:
Go back to the very center point and add solid white dots or short strokes to cover the convergence point of all your lines.
Level Up: 3D Texture
Glue a tiny pinch of real white feathers or cotton batting to the center of the dandelion for actual tactile fluff.
Step 4: The Floating Seeds
-
Plot the escaping seeds:
Decide where your wind-blown seeds will go. Scatter them across the empty black space, drifting away from the main flower. -
Paint the seed stems:
Draw single, short angular lines or curves for the seed stalks drifting in the breeze. -
Add the parachute tops:
At the top of these floaters, paint distinct fan shapes made of 3-5 tiny lines. These should look clearer and sharper than the dense center fluff. -
Add magical dust:
Using the very tip of your brush or pen, dot tiny specks of white purely randomly around the floating seeds to represent pollen or dust catching the light.
Step 5: Final Assembly
-
Prepare the stem:
Take your dried or faux stem and trim it to fit from the bottom edge of the canvas to the center of your dandelion puff. -
Curve the stem:
If using a faux stem with wire, give it a gentle, natural curve. A perfectly straight line looks rigid and less organic. -
Apply adhesive:
Carefully apply a thin line of strong craft glue along the back of the stem. -
Mount the stem:
Press the stem onto the canvas, aligning the top tip exactly with the dense white center of your painted flower. Hold it in place for a minute to ensure the bond sets.
Hang your new artwork securely and admire the contrast of simple nature against that bold darkness
Single White Feather Floating in Darkness
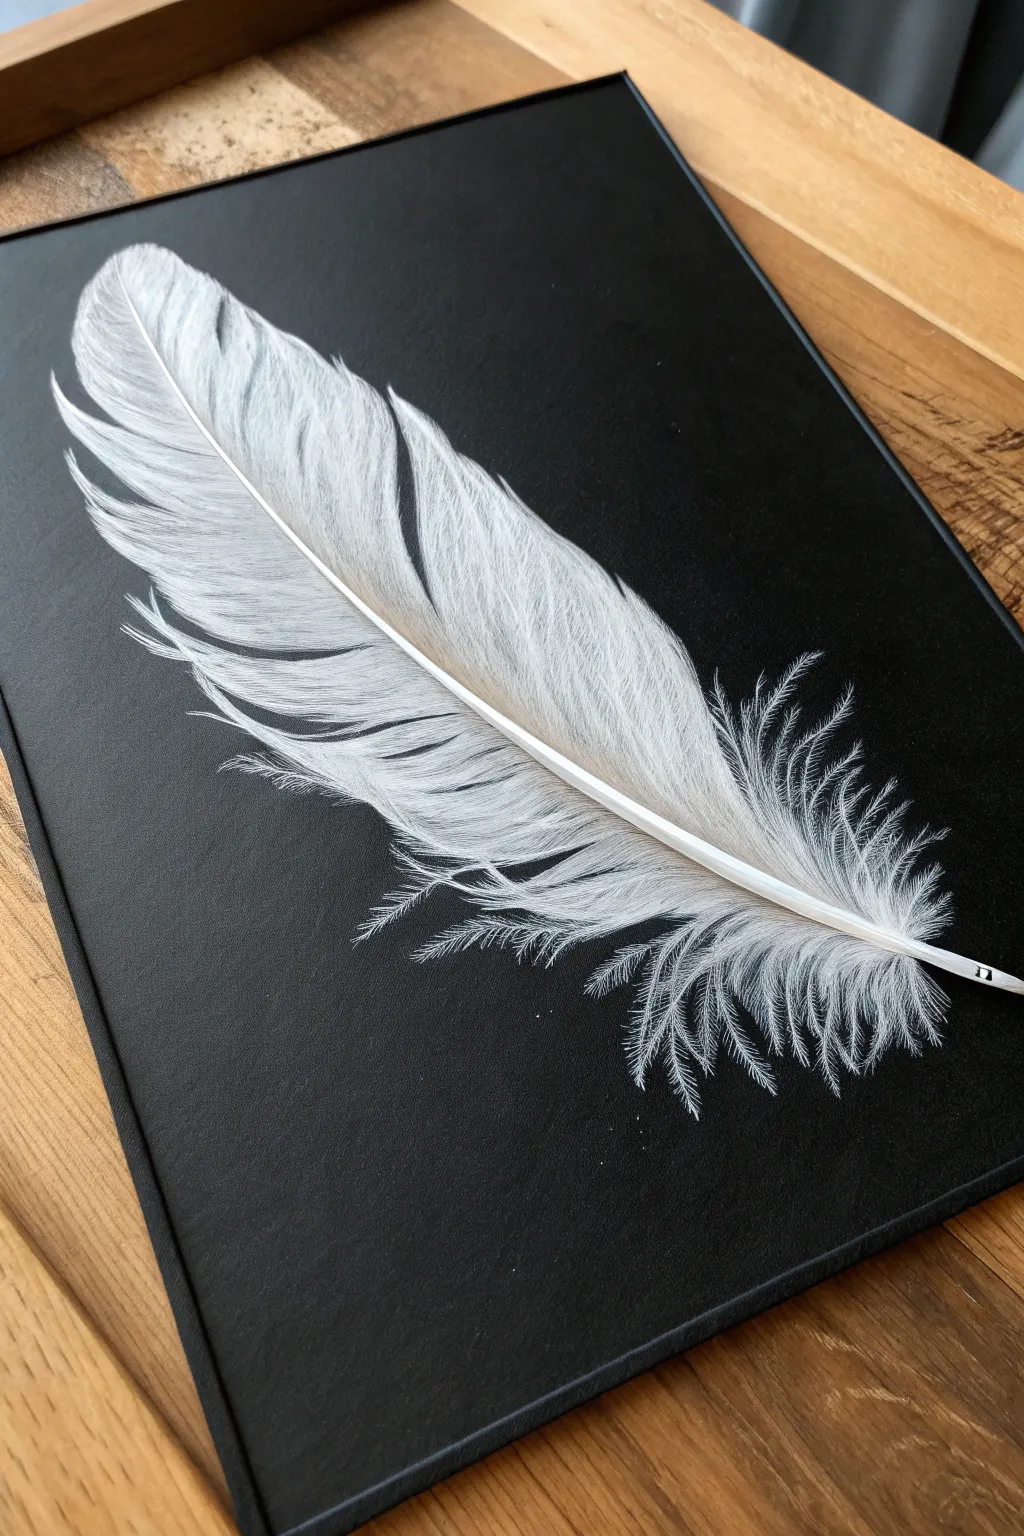

Contrast is king in this stunning study of texture and light, where a single white feather appears to float weightlessly against a void of deep black. The stark background forces the viewer to focus entirely on the delicate barbs and soft structure of the feather, making it a perfect exercise in negative space and fine detail.
How-To Guide
Materials
- High-quality black mixed media paper or black gessoed canvas board (A4 or similar size)
- White charcoal pencil (soft and hard grades)
- White pastel pencil (for brighter highlights)
- White gouache or white ink
- Fine liner brush (size 0 or 00)
- Small flat brush
- Blending stump or tortillon
- Soft kneaded eraser
- Fixative spray (matte finish)
Step 1: Laying the Groundwork
-
Prepare your surface:
If using paper, tape down the edges to a board to prevent shifting. If using canvas, ensure your black gesso layer is completely opaque and matte; apply a second coat if any canvas texture shows through too brightly. -
Establish the spine:
Using a hard white charcoal pencil, lightly sketch the central shaft (rachis) of the feather. Start from the bottom quill and curve it gently upwards to the tip. Keep this line incredibly faint; it’s just a guide. -
Outline the silhouette:
Very lightly map out the general shape of the feather around the spine. Don’t draw a solid outline; instead, use broken, whisper-thin strokes to suggest where the barbs end, keeping the shape organic and slightly asymmetrical. -
Plan the splits:
Identify the heavy ‘split’ in the feather’s structure near the top curve. Mark this negative space lightly so you remember not to fill it in later; these gaps are crucial for realism.
Smudge Patrol
If you drag your hand through the charcoal, don’t panic. Use a kneaded eraser molded into a fine point to lift the specific stray mark without damaging the surrounding black surface.
Step 2: Building Texture
-
Base layer of barbs:
Switch to your soft white charcoal pencil. Starting from the central spine, draw outward strokes to create the barbs. Use a flicking motion: press down at the spine and lift off as you move outward to create a tapered end. -
Follow the flow:
Pay close attention to the direction of growth. At the bottom, the barbs angle downward; as you move up the spine, they gradually straighten and then angle upward near the tip. -
Create softness:
Use a clean blending stump to gently smudge this initial layer of charcoal. Use an outward motion, dragging the white pigment slightly into the black background. This establishes the translucent, fluffy under-layer. -
Define the spine:
Go back to the central shaft with a sharpened charcoal pencil. Draw the edges of the quill clearly, but leave the center of the shaft slightly less bright to give it cylindrical volume. -
Layering the strands:
Apply a second layer of individual barb strokes over the smudged area using the pastel pencil. These lines should be distinct and separate. Vary your pressure to make some strands appear closer and brighter than others.
Step 3: The Fluffy After-feathers
-
The chaotic base:
At the very bottom of the quill, the structure changes from organized barbs to chaotic ‘down’. Use scribbly, loose looping motions with the charcoal pencil to create this tangled, fluffy texture. -
Extend the wisps:
Pull long, stray hairs away from the main body of the feather at the bottom and sides. These should be very faint and delicate, fading into the blackness. -
Detailing the fluff:
I like to use the very tip of the pastel pencil here to add sharp, tiny hooks to the ends of the downy feathers.
Gilded Edge
Once the white artwork is dry, try applying liquid gold leaf or metallic gold ink to just the central quill (spine) of the feather for a luxurious, modern twist.
Step 4: Highlights and Refining
-
Brighten the spine:
Mix a tiny amount of white gouache or ink with water until it flows like cream. Using your fine liner brush, paint a crisp, opaque white line down the highlighted side of the central shaft. This creates a striking 3D effect. -
Targeted highlights:
Use the same fine brush and gouache to add ultra-bright accent lines on just a few of the top barbs. Don’t overdo this; focus on where the ‘light’ would hit the curve of the feather. -
Clean the edges:
Check your negative space. If you’ve smudged too much white into the black background, use a black colored pencil or careful touches of black paint to tidy up the edges and re-establish the deep dark void. -
Deepen the split:
Enhance the ‘split’ in the feather by ensuring the black background visible through the gap is pitch black. This contrast makes the feather sections pop. -
Final fix:
Once you are happy with the balance of soft charcoal and crisp gouache, lightly mist the piece with a matte fixative to prevent the charcoal dust from transferring.
Step back and admire how the simple contrast creates a deeply peaceful piece of art


Glass Bubbles With Iridescent Highlights
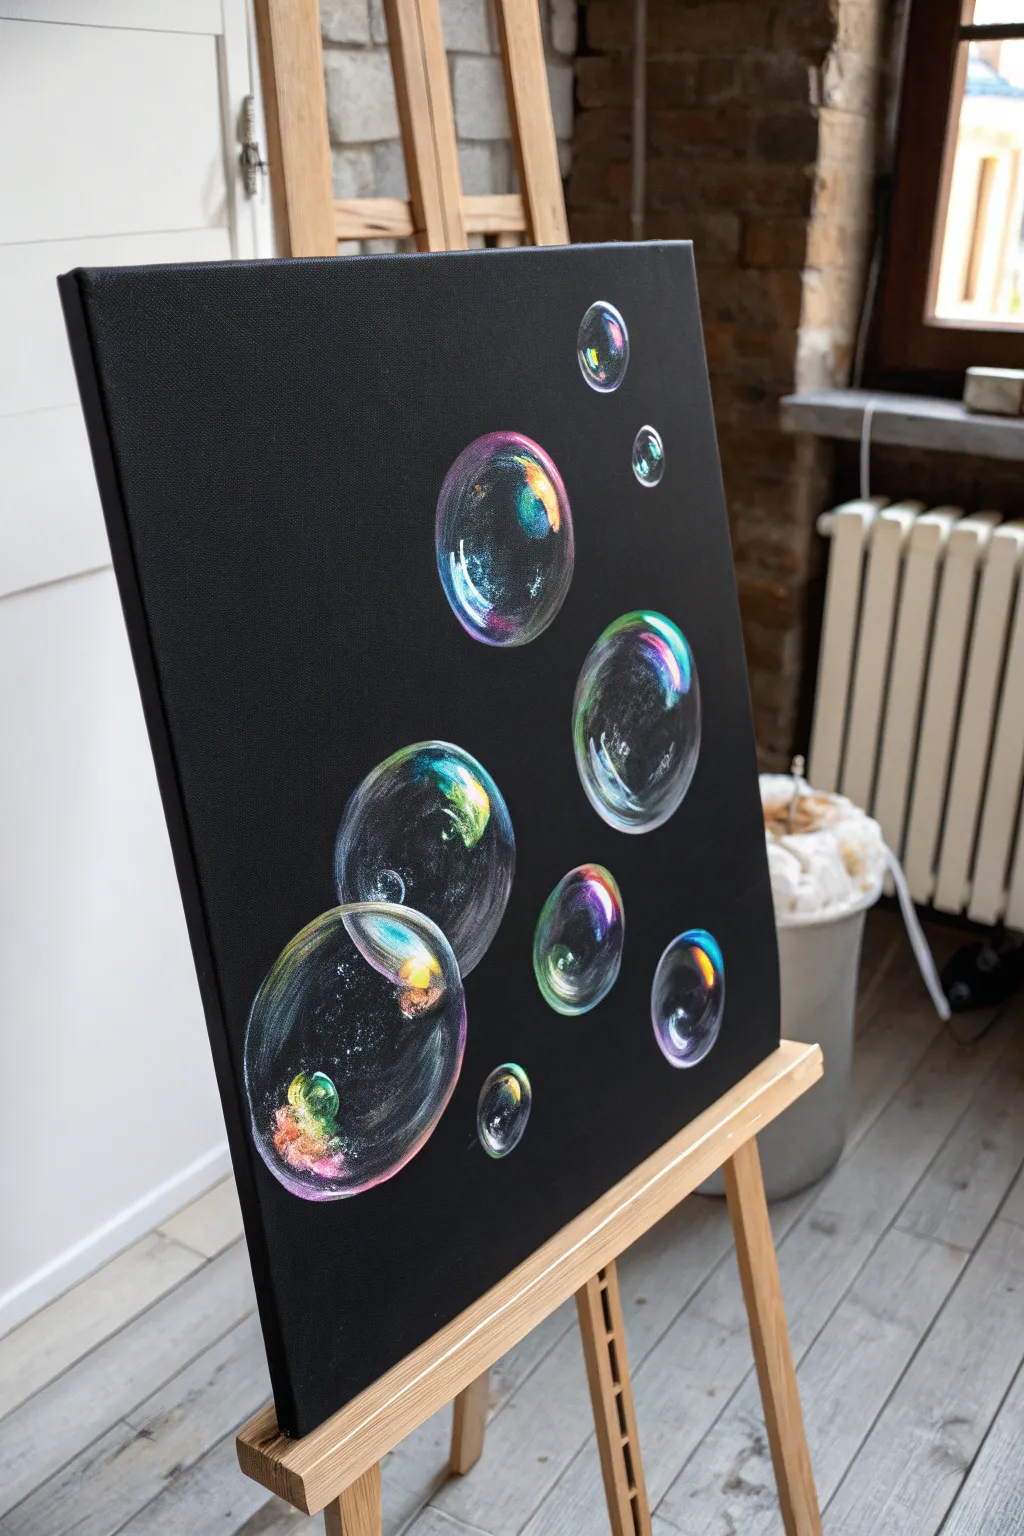

Create a sense of weightless wonder with this study of transparency and reflection. The deep black background makes the rainbow highlights of these delicate bubbles pop, resulting in a striking piece that looks far more complex than it actually is.
Detailed Instructions
Materials
- Stretched canvas (rectangular, portrait orientation)
- Black gesso or black acrylic paint
- Soft white chalk or irregular circle stencils
- Acrylic paints: Titanium White, Phthalo Blue, Dioxazine Purple, Quinacridone Magenta, Lemon Yellow, Sap Green
- Round synthetic brushes (sizes 2, 6, and 8)
- Fine detail liner brush (size 0 or 00)
- Small flat shader brush
- Water container and paper towels
- Mixing palette
Step 1: Preparation & Mapping
-
Prepare the Void:
Begin by covering your entire canvas with a layer of black gesso or heavy body black acrylic paint. Apply two coats if necessary to ensure a smooth, opaque matte finish without streaks, as this darkness is crucial for the illusion. -
Map the Composition:
Once dry, use a piece of soft white chalk to very faintly sketch the positions of your bubbles. Draw circles of varying sizes—some small near the top right, large ones clustering at the bottom left—but keep the lines extremely light so they don’t show through later. -
Soften the Outlines:
Instead of painting a solid white outline, use a dry, clean brush to gently smudge the chalk lines, creating a subtle ‘ghost’ of a circle rather than a hard edge. This creates the first sense of spherical volume.
Step 2: Painting the Transparency
-
Mixing the Haze:
Mix a very tiny amount of Titanium White with a lot of water or glazing medium to create a milky, semi-transparent wash. -
Establishing Volume:
With a size 6 or 8 round brush, lightly apply this milky wash to the interior edges of your bubbles. Keep the center of the bubble almost completely black; you only want to suggest the glass-like surface catching faint ambient light near the rim. -
Feathering Edges:
While the wash is still wet, use a dry brush to feather the edges inward. The paint should fade from a visible grey at the rim to complete transparency (black) in the center.
Circle Secrets
Don’t stress about perfect circles. Hand-drawn, slightly organic shapes actually look more like wobbling soap bubbles floating in air than perfect geometric stencils.
Step 3: Adding Iridescence
-
Color Selection:
Prepare your palette with small distinct blobs of blue, purple, magenta, yellow, and green. Do not mix them yet; bubbles refract raw spectrum colors. -
The First Glow:
Using a small flat brush, pick one color (like Phthalo Blue) and gently sweep it along a curve of one bubble’s edge. Apply it thinly so the black canvas still shows through slightly. -
Blending Gradients:
While the blue is wet, load a neighboring color (like Purple) and blend it into one end of the blue stroke. I find that creating short, curved segments of 2-3 colors mimics the oil-slick effect best. -
Varying the Spectrum:
Move to different bubbles and apply different color combinations. Use warmer tones like splashes of yellow and magenta on the lower-left bubbles to suggest a light source from that direction. -
Creating the Reflection:
On the opposite side of the bubble from your main colored curve, add a smaller, fainter reflection in a cool color (like green or blue) to show the sphere’s curvature.
Neon Pop
For an electric look, use fluorescent or neon acrylics for the colored sections. They react beautifully against the black background and make the bubbles glow.
Step 4: Highlights & Details
-
Sharpening the Rim:
load your fine liner brush with slightly watered-down white paint. Carefully paint very thin, sharp lines along the outermost edges of the colored sections to compel the eye to see a glass surface. -
The Specular Highlight:
This is the most critical step: apply thick, pure Titanium White to the brightest point of the bubble (usually within the main color curve). Paint a distorted rectangle or window shape rather than a dot to mimic a window reflection. -
Secondary Glints:
Add smaller, sharper dots of white on the opposite side of the bubble. These should be tiny pinpricks of light. -
Adding Surface Texture:
For a realistic touch, scumble a tiny bit of dry white paint randomly over the colored areas to create the look of surface tension or soap swirls. -
Final Cleanup:
Step back and assess your contrast. If any chalk lines are still visible, use a damp Q-tip or a brush with black paint to carefully tidy up the background around the bubbles.
Hang your dark masterpiece in a well-lit area to let the painted highlights interact with the real light in the room
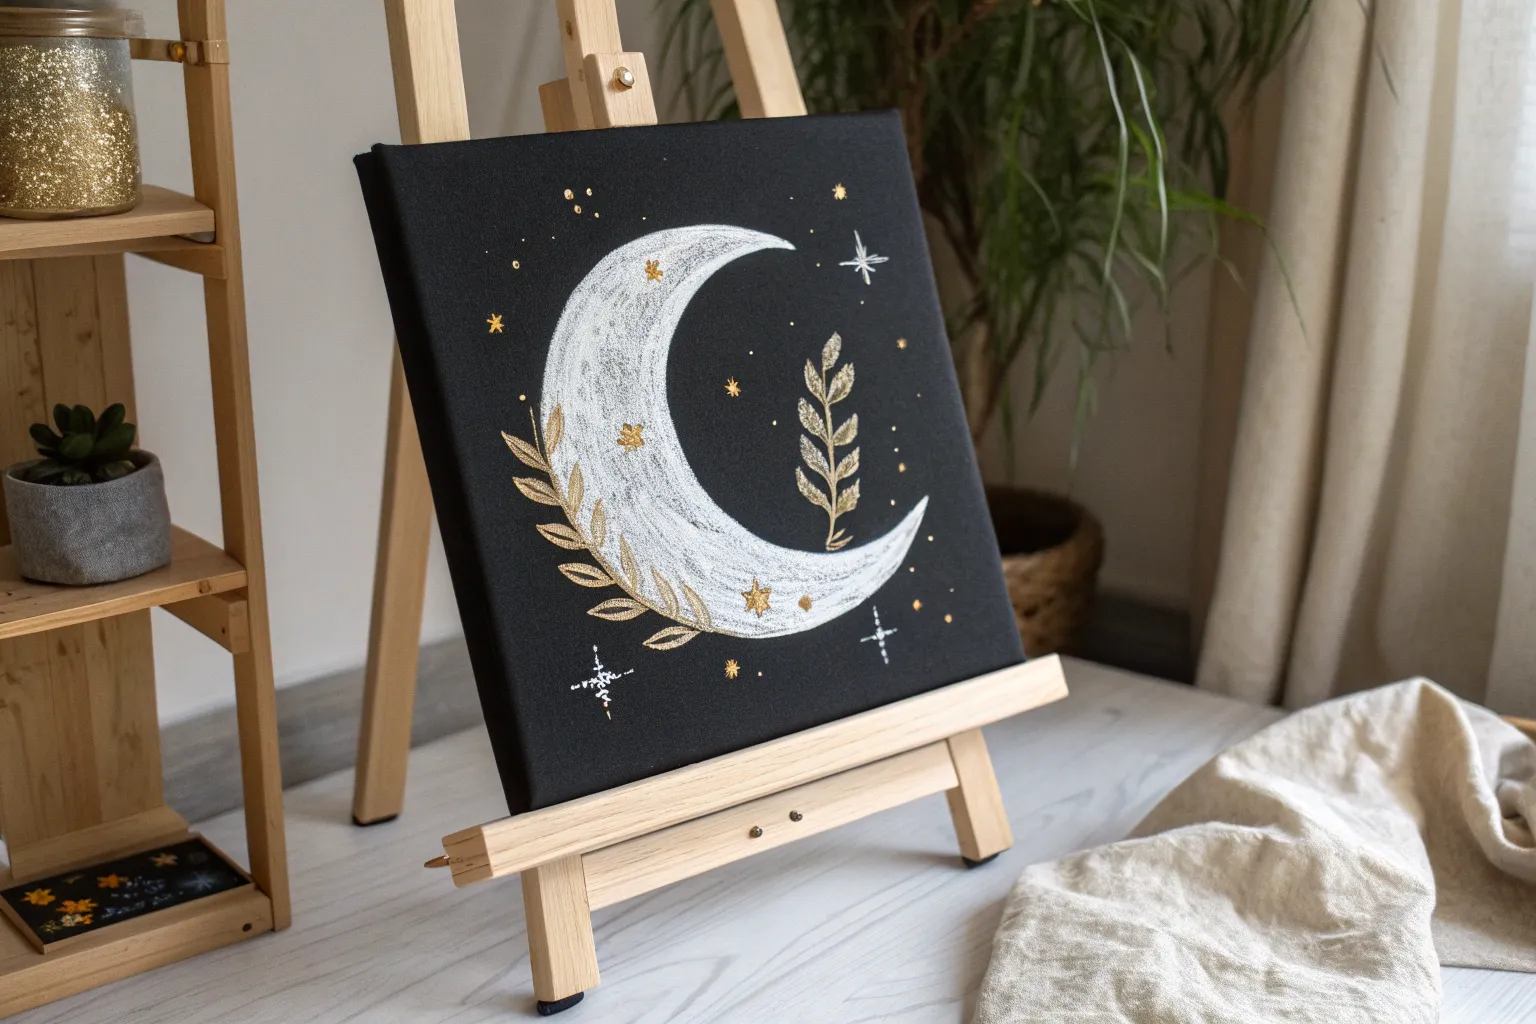
Metallic Accents That Sparkle Against Black
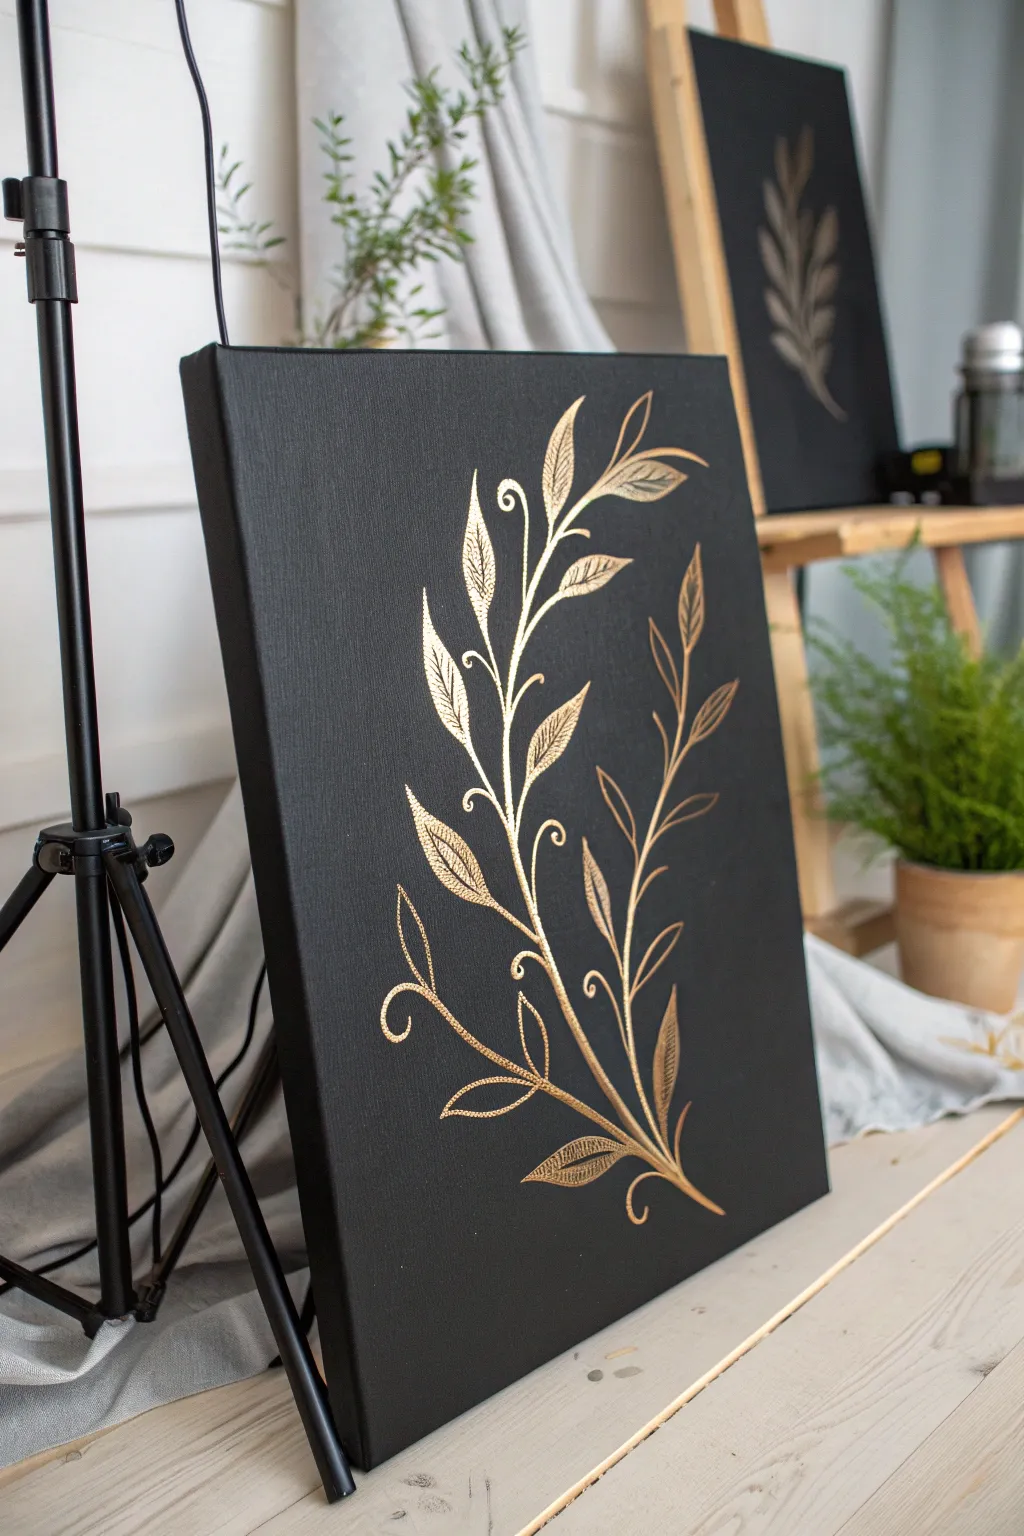
This elegant project creates a striking piece of wall art using the high contrast between deep matte black and shimmering metallic gold. The result is a sophisticated botanical design that catches the light beautifully, perfect for adding a touch of luxury to any room.
How-To Guide
Materials
- Stretched canvas (rectangular)
- Black acrylic paint (matte finish)
- Gold metallic acrylic paint or liquid gold leaf
- Wide flat brush (for background)
- Fine liner brush (size 0 or 00)
- Round brush (size 2 or 4)
- White or yellow chalk pencil
- Palette or small dish
- Cup of water and paper towels
- Reference image or sketch of a leafy branch
Step 1: Setting the Dark Foundation
-
Prepare your canvas:
Ensure your stretched canvas is clean and free of dust. If the surface feels rough, give it a very light sanding with fine-grit sandpaper and wipe it down with a dry cloth. -
Apply the first black coat:
Using a wide flat brush, apply a generous layer of matte black acrylic paint. Work in long, even horizontal strokes to ensure smooth coverage without obvious brush marks. -
Paint the edges:
Don’t forget to paint the sides of the canvas. This gives the artwork a professional, finished look even if you decide not to frame it later. -
Let it dry completely:
Allow the first coat to dry fully. This usually takes about 20-30 minutes depending on the thickness of the paint and humidity. -
Apply a second coat:
For that deep, velvety ‘noir’ look, a second coat is essential. Apply it using vertical strokes this time to cross-hatch and eliminate any pinholes of white canvas showing through. Let this dry specifically overnight or for several hours to ensure a rock-hard base.
Step 2: Drafting the Design
-
Sketch the main stem:
Using a white or yellow chalk pencil, lightly draw a graceful, curved line starting from the bottom center-right and sweeping upwards towards the top left. Keep the pressure light so the chalk is barely visible and easy to wipe off later. -
Add branch offshoots:
Sketch smaller curved lines branching off the main stem. Vary the spacing and length to create an organic, natural flow rather than a perfectly symmetrical pattern. -
Outline the leaves:
Draw simple almond or teardrop shapes at the end of each branch and along the stems. Include some delicate curling tendrils for added elegance.
Uneven Coverage?
If the black background looks streaky after drying, apply a third thin coat mixed with a tiny drop of water. This helps level the paint for a flawless, matte finish.
Step 3: Painting the Gold
-
Paint the main stem:
Load your fine liner brush with metallic gold paint. I find thinning the paint slightly with a drop of water helps it flow smoother for long lines. Trace over your main stem chalk line with a steady hand. -
Fill the larger leaves:
Switch to a size 2 or 4 round brush for the leaves. Fill in the leaf shapes, starting from the base of the leaf and sweeping outward toward the tip to mimic the natural growth direction. -
Add leaf texture:
While painting the leaves, leave tiny slivers of black showing through in the center to suggest veins, or paint the leaf solid and go back with a liner brush to add texture details once the first layer is tacky. -
Define the tendrils:
Using your finest liner brush again, paint the delicate curling tendrils. Use very light pressure—barely touching the canvas—to keep these lines razor-thin and graceful. -
Add a second gold layer:
Metallic paints often require two coats for full opacity. Once the first layer is dry, re-paint the gold areas to make them truly shine and pop against the black background. -
Refine the edges:
Look closely at your edges. If any black paint needs to be touched up, or if the gold bled slightly, use a small brush with black paint to clean up the lines. -
Erase chalk marks:
Once you are 100% certain the gold paint is fully dry, gently wipe away any visible chalk guidelines with a slightly damp cloth or a soft eraser.
Add Depth
Mix a tiny dot of copper or bronze paint into your gold for the base of the leaves. This subtle gradient adds dimension and realism to the metallic effect.
Hang your new masterpiece in a well-lit area to let the metallic accents catch the light
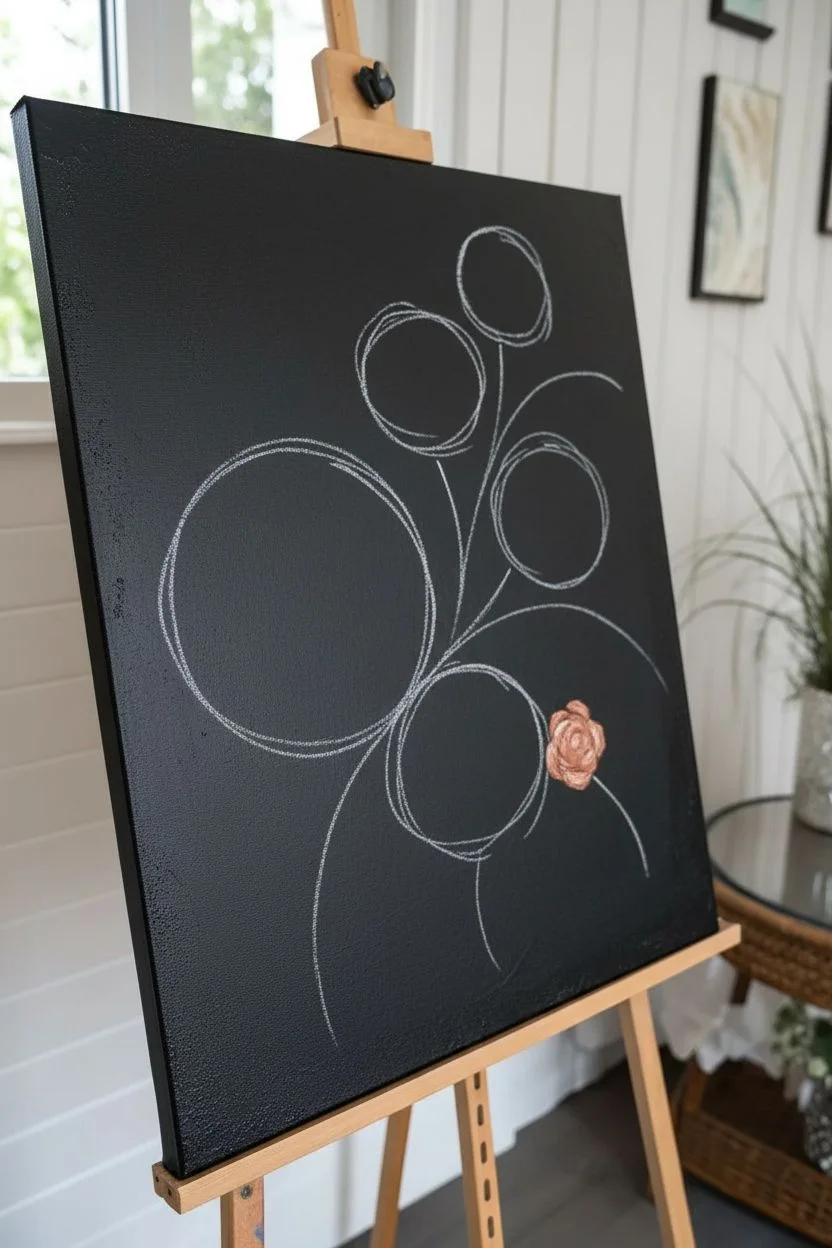
Palette Knife Florals on Black for Chunky Texture
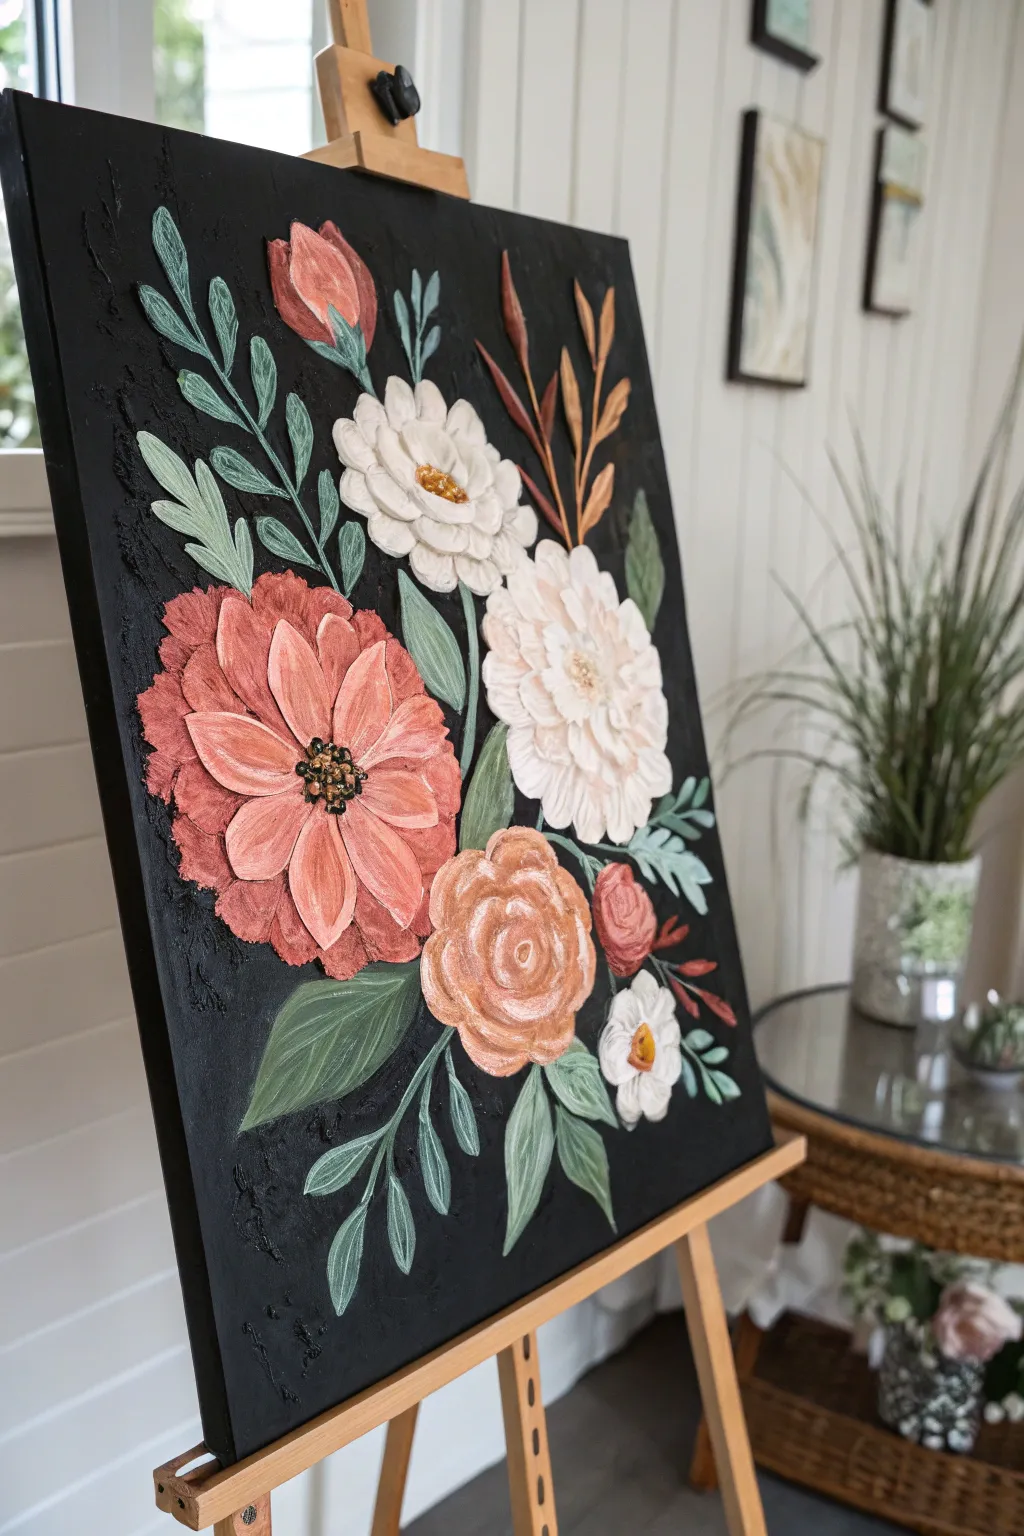
Achieve stunning depth and drama with this textured floral painting set against a stark black background. The heavy texture paste allows flowers to literally pop off the canvas, giving the artwork a sculptural, 3D quality that catches the light beautifully.
Step-by-Step Guide
Materials
- Large stretched canvas (square or rectangular)
- Black gesso or matte black acrylic paint
- Modeling paste (heavy body)
- Acrylic paints: Coral, cream, white, sage green, teal, metallic copper
- Palette knives (assorted shapes: teardrop, trowel, and thin liner)
- Small round beads or textured gel for flower centers
- Wide flat brush
Step 1: Setting the Stage
-
Backdrop preparation:
Begin by coating your entire canvas with black gesso or matte black acrylic paint. Use a wide flat brush to ensure full, opaque coverage. If you want a bit of texture in the background itself to match the floral theme, apply the paint thickly and stipple it slightly in corners. -
Dry time:
Allow the black background to dry completely. This is crucial because if you apply the paste too soon, the black may muddy your vibrant flower colors. -
Sketching the layout:
Using a white chalk pencil or a very light touch with regular chalk, sketch the basic placement of your main flowers. Don’t worry about details; just mark circles for the flower heads and sweeping lines for the stems to guide your composition.
Knife Shape Matters
Use a diamond-shaped trowel for wide petals and a thin, elongated knife for leaves. The shape of the tool does half the work for you.
Step 2: Sculpting the Blooms
-
Mixing the paste:
Mix your modeling paste with acrylic paint on your palette. For the large coral flower, mix a generous amount of paste with coral and a touch of white. The ratio should be about 70% paste to 30% paint to maintain stiffness. -
Petal formation:
Load the underside of a teardrop-shaped palette knife with the coral mixture. Press the tip down near the center of your sketched circle and pull outward, lifting the knife slightly as you reach the petal’s edge to create a tapered look. -
Layering petals:
Work in concentric circles for the large flower. Start with the outer ring of petals, letting them lay flat against the canvas. As you move inward to the next ring, apply the paste slightly thicker to build physical height. -
The white peonies:
Clean your knife and switch to the white/cream mixture. For these fluffy blooms, use shorter, choppier strokes with a rounded trowel knife. Overlap the strokes significantly to mimic the dense layers of a peony. -
Adding metallic roses:
Mix metallic copper paint with paste. I find that creating a spiral motion with the tip of a smaller knife works best here. Start at the center and swirl outward to create the illusion of a tightly wound rosebud.
Paste Too Runny?
If your paste mixes are too soft to hold peaks, let the mixture sit specifically on a cardboard palette for 10 minutes to absorb excess moisture.
Step 3: Foliage and Details
-
Mixing greens:
Create two shades of green paste: a muted sage and a deeper teal-green. This variation adds visual interest and prevents the foliage from looking flat. -
Standard leaves:
Using a long, thin palette knife, apply the sage green mixture. Press firm at the base of the leaf near the stem, then drag and lift to create a sharp point. Add texture by lightly running the knife edge down the center of each leaf. -
Vine details:
Use the edge of your smallest knife with the teal mixture to create thin, trailing stems and smaller accent leaves that weave between the main flowers. -
Dry accent foliage:
Using the copper mixture again, add a few sprigs of “dried” foliage sticking out from the top of the arrangement. These should be thin and wispy compared to the heavy main leaves. -
Flower centers:
Once the main coral flower is tacky but not fully hard, press small beads or drop dense dots of black and gold paint into the center. This creates the textural seed head. -
Highlighting:
After the paste has formed a skin (usually after an hour), gently brush a tiny amount of pure white or gold paint on the very highest ridges of the petals to enhance the 3D effect. -
Final cure:
Let the painting dry flat for at least 24 hours. Thick modeling paste takes a long time to cure all the way through, so patience is key to prevent cracking.
Hang your textured masterpiece where side lighting can hit the ridges and bring the floral dimension to life
Mystical Glow Figure Floating in a Black Void
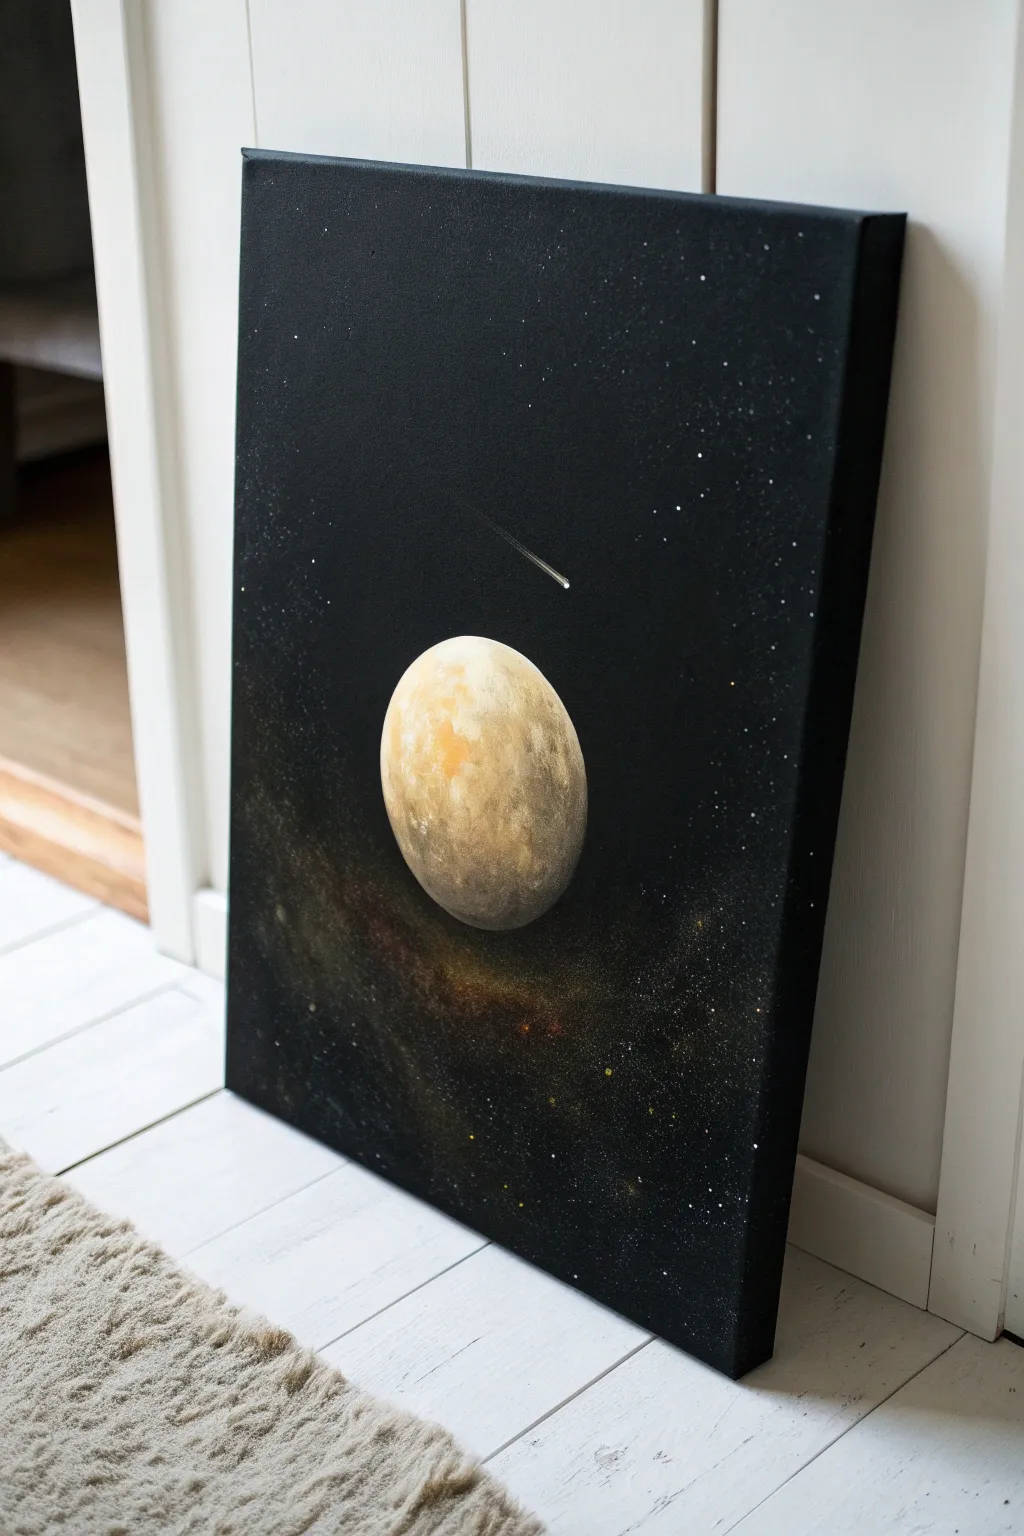
Transport yourself to the silent depths of space with this striking acrylic painting featuring a lonely, textured planet drifting through the cosmos. The high-contrast composition uses a deep black background to make the glowing celestial body and delicate stardust truly pop.
Step-by-Step Tutorial
Materials
- Rectangular stretched canvas (e.g., 16×20 inches)
- Black gesso or heavy body acrylic paint (Mars Black)
- Acrylic paints: Titanium White, Yellow Ochre, Burnt Umber, Metallic Gold (optional)
- Large flat brush or foam brush
- Medium round brush
- Small detail brush
- Old toothbrush (for splatter technique)
- Circular stencil or masking tape loop (optional)
- Sponge dabber or natural sea sponge
- Palette for mixing
- Water cup and paper towels
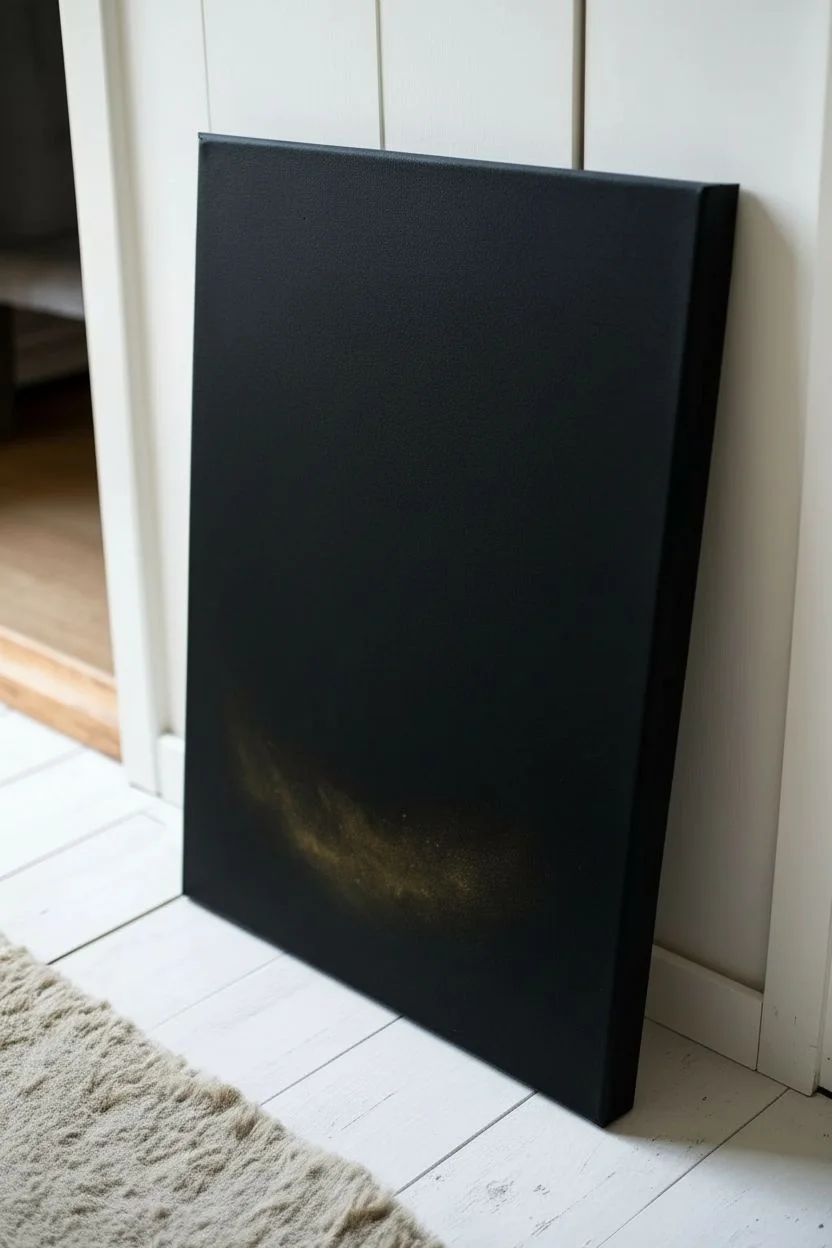
Step 1: Setting the Infinite Void
-
Base Coat Application:
Begin by covering your entire canvas with a generous layer of black gesso or heavy body black acrylic paint. Ensure you paint the sides of the canvas for a finished look. -
Ensure Opaqueness:
Let the first layer dry completely. If you can see any canvas texture or white spots through the paint, apply a second coat to achieve a true, deep void. -
Creating the Nebula Haze:
While the background is fully dry, mix a tiny amount of Yellow Ochre and Burnt Umber into a glaze (lots of water or glazing medium). Lightly sponge this near the bottom center where the planet will sit to create a faint, dusty nebula effect.
Starry Night Pro-Tip
Test your toothbrush splatter on a piece of cardboard first. The distance and speed of your flick dramatically change the size of the stars.
Step 2: Forming the Planet
-
Outline the Sphere:
Using a white chalk pencil or very watered-down white paint, lightly sketch a circle in the center of the canvas. You can trace a bowl or plate to get a perfect shape. -
Base Planet Color:
Mix a warm, muted beige using Titanium White with a touch of Yellow Ochre and the tiniest speck of Burnt Umber. -
Filling the Shape:
Fill in the circle with your beige mixture. Don’t worry about being perfectly smooth; a little brush texture actually helps build the planetary surface later. -
Adding Shadow:
Determine your light source (it appears to be coming from the top left). Mix a darker shade using Burnt Umber and black. Paint the bottom right crescent of the sphere with this shadow color, blending it softly into the beige mid-tones. -
Texturing the Surface:
Crumple a small piece of paper towel or use a natural sea sponge. Dip it into a mixture of pure Titanium White and a little Yellow Ochre. Dab this onto the top-left area to create craters and highlands. -
Deepening Surface Contrast:
Using a mostly dry sponge with a darker brown mix, lightly dab over the transition zone between the light and dark sides of the planet to create a craggy, textured terminator line. -
Highlight Glaze:
Once the texture layers are dry, apply a very thin wash of Yellow Ochre over the brightest part of the planet to give it that warm, inner glow seen in the reference.
Step 3: Stardust and Details
-
Mixing Star Paint:
Thin down some Titanium White paint with water until it reaches an ink-like consistency. It needs to be fluid but opaque. -
The Splatter Technique:
Dip an old toothbrush into the thinned white paint. Hold it over the canvas and flick the bristles with your thumb to spray tiny stars across the black void. -
Controlling the Spread:
I prefer to concentrate the splatter density slightly more around the planet and the bottom nebula area, leaving the upper corners a bit sparser for depth. -
Adding Larger Stars:
Take your smallest detail brush and manually dot a few larger, brighter stars in random spots to break up the uniformity of the splatter. -
The Shooting Star:
Locate a spot in the upper center. Using a small round brush with white paint, make a single dot for the comet head. -
Creating the Tail:
Immediately drag the paint from that dot downwards and to the right in a swift, tapering motion. Allow the brush to lift off the canvas so the tail fades out naturally. -
Final Polish:
Inspect your work. If any stars accidentally landed on the dark shadow side of the planet, simply paint over them with black or dark brown to push the planet back into the foreground.
Level Up: Cosmic Shimmer
Mix iridescent medium or metallic gold paint into your planet’s highlight color. It adds a magical sheen that changes as you walk past the canvas.
Hang your cosmic creation in a spot that receives good light to let those subtle textures really shine


Have a question or want to share your own experience? I'd love to hear from you in the comments below!