
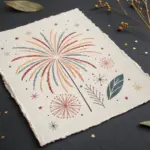
If you’ve ever flipped on a black light and watched UV-reactive paint suddenly come alive, you already know how addictive this kind of art can be. Here are my favorite black light painting ideas to help you create work that looks cool in daylight and absolutely electric in the dark.
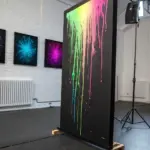
Neon Galaxy on a Black Canvas
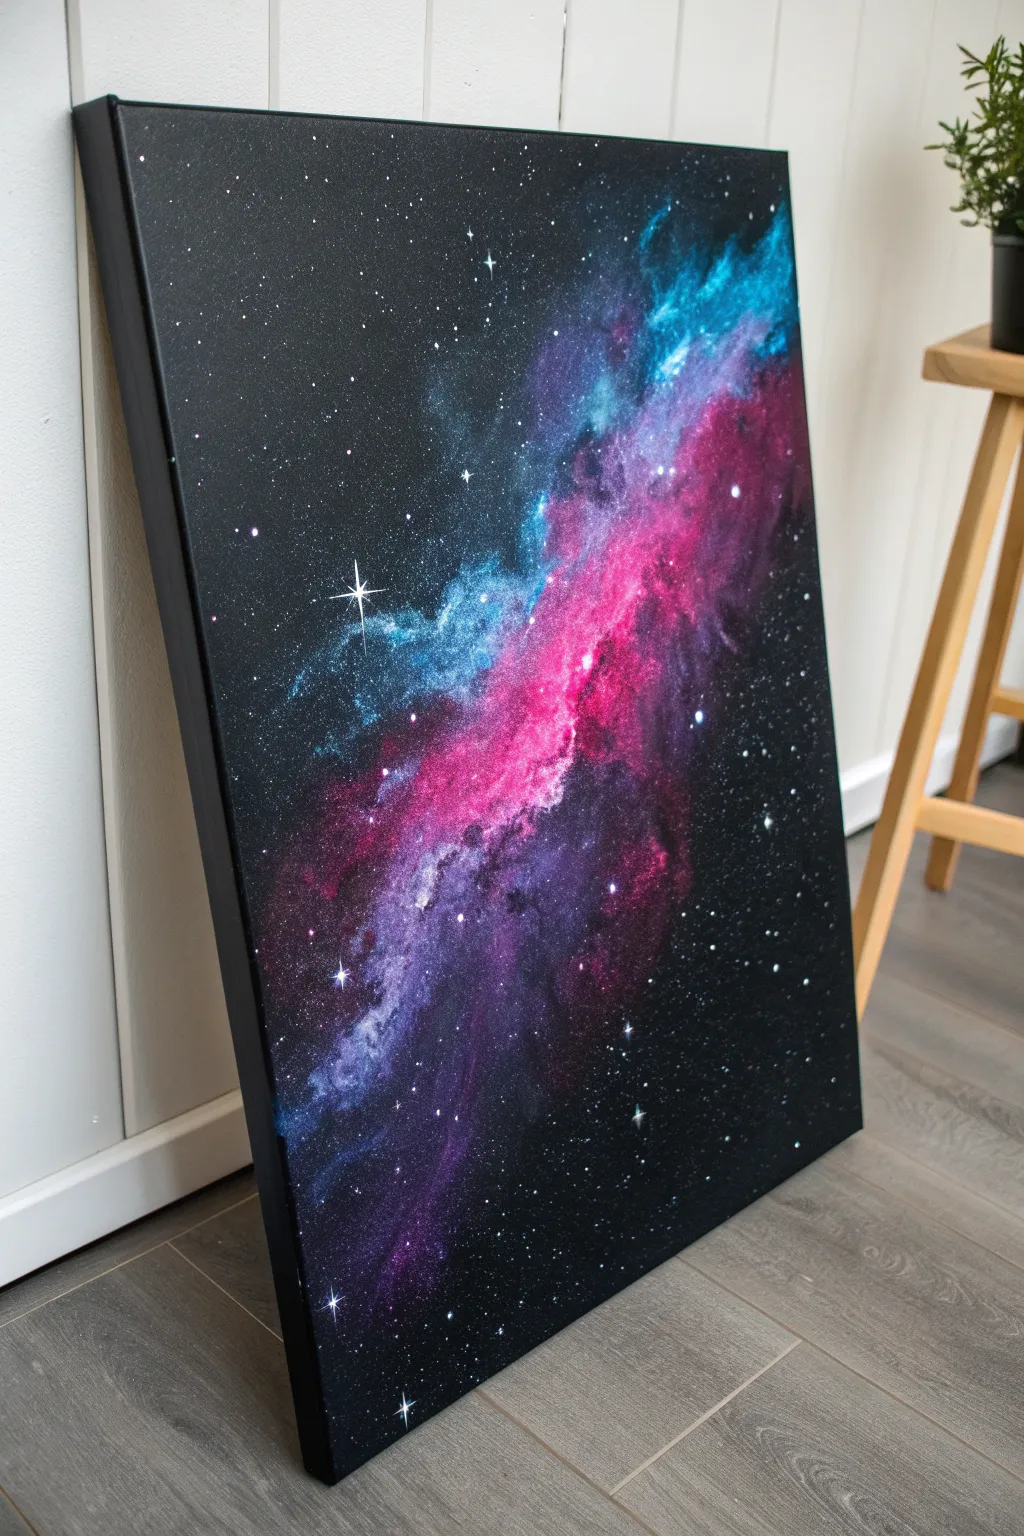
Transform a plain black canvas into a window on the universe with this striking galaxy painting. Featuring vibrant ribbons of hot pink, electric blue, and deep purple, this nebula seems to glow from within against the darkness of deep space.
Detailed Instructions
Materials
- Large stretched canvas (pre-gessoed black or painted black)
- Black acrylic paint (heavy body recommended)
- Titanium White acrylic paint
- Neon Pink acrylic paint (or magenta)
- Cyan or Bright Turquoise acrylic paint
- Deep Violet or Purple acrylic paint
- Large sponge or sea sponge
- Small round brushes (size 0 and size 2)
- Old toothbrush (for star spattering)
- Cup of water
- Paper towels
- Palette or paper plate
Step 1: Setting the Stage
-
Prepare the Void:
If your canvas isn’t already black, cover the entire surface with a solid coat of black acrylic paint. Don’t forget to paint the edges for a professional, frameless look. Let this base layer dry completely before moving on. -
Plan the Flow:
Visualize a diagonal sweeping line across the canvas where your nebula will flow. You don’t need to draw this, but keeping a mental map helps maintain the organic shape seen in the reference.
Step 2: Building the Nebula
-
Sponge the Base:
Dampen your sponge slightly and squeeze out excess water. Dip it into the Deep Violet paint. Lightly dab a wide, irregular diagonal path across the canvas, twisting your wrist to create varied textures. -
Soften the Edges:
While the violet is still tacky, use a clean part of the sponge (or a dry brush) to gently fade the outer edges of the purple into the black background so there are no harsh lines. -
Add Cyan Depths:
Load a clean corner of your sponge with Cyan or Turquoise. Dab this color alongside and slightly overlapping the violet layer, focusing on the upper and outer edges of the nebula cloud. -
Introduce the Heat:
Now for the core color. Sponge Neon Pink (or Magenta) into the center of your existing purple shapes. This creates the illusion of a glowing, hot core within the gas cloud. -
Layering for Intensity:
Let the first pink layer dry briefly. I find that going back over the center with a second, more concentrated layer of pink really makes the ‘neon’ effect pop against the dark background. -
Highlighting Gas Clouds:
Mix a tiny amount of Titanium White into your Cyan and Pink separately to create lighter pastel versions. Use the sponge to tap these highlights sparingly onto the brightest parts of the colored clouds to add dimension. -
Creating Wisps:
Using a small, dry brush, lightly drag some of the paint from the main cloud outwards to create wispy ‘arms’ of gas that drift into the black space.
Muddy colors?
If colors are blending into grey, let each layer dry completely before adding the next. Acrylics are opaque, so layering wet-on-dry keeps colors vibrant.
Step 3: Stars and Details
-
Prepare Star Paint:
Dilute a small amount of Titanium White paint with water until it reaches an ink-like consistency. It needs to be fluid enough to splatter easily. -
The Spatter Technique:
Dip an old toothbrush into the thinned white paint. Hold the brush facing the canvas and run your thumb across the bristles to flick tiny speckles onto the dark areas. Focus most density near the nebula clouds. -
Adding Distant Stars:
Repeat the spatter process with much less paint on the brush for the outer corners, keeping the stars remarkably tiny and faint in the deep space areas. -
Hand-painting Bright Stars:
Take your smallest round brush (size 0) and dot distinct, larger white stars manually. Place them randomly, avoiding a grid-like pattern. -
Constructing the Flare:
Locate a spot near the blue section of the nebula for your ‘hero’ star. Paint a simple cross shape with thin, tapered lines using thinned white paint. -
Refining the Flare:
Add a tiny ‘X’ shape over the cross center to create an eight-point flare. Place a solid white dot in the very center where all lines meet to intensify the shine. -
Final Touches:
Look for areas where the galaxy feels flat. You can glaze a very thin wash of black over areas that became too bright, pushing them back into the shadows.
Glow Up
Use actual UV-reactive fluorescent acrylics for the pink and cyan layers. Under a blacklight, your nebula will physically glow in the dark.
Hang your new celestial masterpiece on the wall and enjoy the view of deep space without leaving home


Glowing Moon and Tree Silhouettes
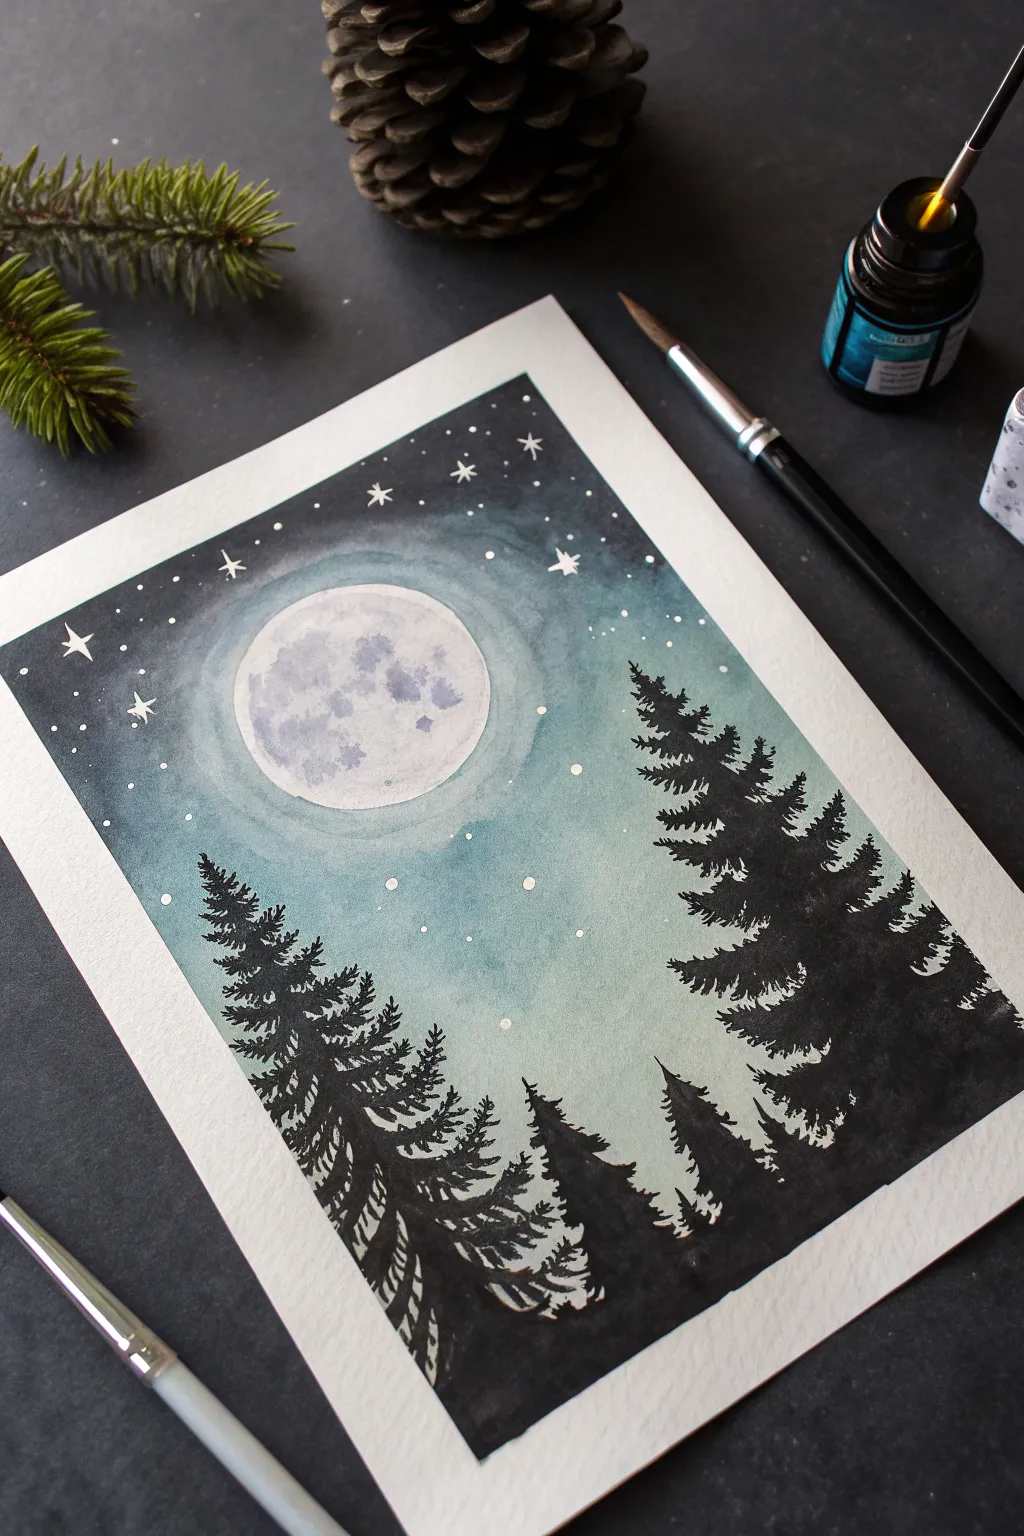
Capture the serene beauty of a moonlit forest with this stunning high-contrast painting that glows with mystery. Using a blend of cool watercolors and stark black ink, you will create a piece where silhouetted pines frame a luminous, crater-filled moon.
Step-by-Step
Materials
- Cold press watercolor paper (300gsm)
- Masking tape
- Pencil (HB) and circular object for tracing
- Watercolor paints (Indigo, Prussian Blue, Teal, White Gouache)
- Black India ink or concentrated black watercolor
- Round brushes (flats for washes, fine liners for details)
- Mixing palette
- White gel pen (optional)
- Water cups and paper towels
Step 1: Preparation and Sketching
-
Secure the paper:
Begin by taping down all four edges of your watercolor paper to a drawing board or table. This creates that crisp white border seen in the final piece and prevents the paper from buckling when wet. -
Draft the moon:
Use a roll of tape or a circular lid to lightly trace a circle in the upper-left quadrant of the paper. Keep your pencil lines very faint so they don’t show through the paint later. -
Protect the moon:
Apply masking fluid to the interior of the moon circle if you have it. If not, you will simply need to paint carefully around this shape in the next steps to keep the paper white.
Bleeding Lines?
If your black ink starts spider-webbing into the sky, your background paper is still damp. Stop immediately and let it dry or use a hair dryer on low heat before continuing.
Step 2: Painting the Sky
-
Mix your gradients:
Prepare a gradient of colors on your palette. You need a very dark indigo for the top corners, fading into a Prussian blue, and finally a lighter teal or turquoise near the horizon line. -
Apply the first wash:
Wet the sky area (excluding the moon) with clean water. Starting from the top, drop in your darkest indigo paint, letting it bleed downwards. Work quickly so the paint stays wet. -
Blend the transition:
As you move down the paper, switch to your mid-tone blue, blending it seamlessly into the indigo. Use horizontal brush strokes to ensure a smooth gradient. -
Create the horizon glow:
Near the bottom of the sky area (where the trees will eventually be), introduce the teal or light turquoise. Fade this wash out to almost clear water near the bottom edge. -
Add a halo effect:
While the paint is still damp, carefully lift a little pigment from around the moon’s edge using a clean, thirsty brush. This suggests a glowing atmospheric halo. -
Let it dry completely:
Wait until the paper is bone dry. This is crucial—painting ink on damp paper will cause fuzzy, bleeding lines.
Step 3: The Moon and Stars
-
Texture the moon surface:
Mix a very watery, pale grey-blue. Dab this onto the moon’s surface irregularly to create craters, keeping some areas white for highlights. Let the natural water blooms create the texture. -
Paint the stars:
Using white gouache or undiluted white watercolor on a fine brush, dot small stars throughout the dark upper sky. Add a few larger, four-pointed sparkles for variety.
Pro Tip: Glowing Moon
For a ‘black light’ effect, paint the moon and stars with UV-reactive white or fluorescent paint. Under a blacklight, the moon will pop against the dark ink trees.
Step 4: Silhouetted Trees
-
Block in the main shapes:
Dip a medium round brush into black India ink or concentrated black watercolor. Paint the vertical trunk lines for your trees first to establish their height and position. -
Paint the branches:
Switch to a finer brush. Starting from the top of each tree, paint downward-sloping branches. Use a jagged, scribbling motion to mimic pine needles. -
Build density:
As you move down the tree trunk, make the branches wider and denser. The trees should look heavy and solid at the bottom, merging into a black foreground. -
Add foreground depth:
Fill the entire bottom inch or two of the paper with solid black ink. Add some smaller, peaky tree shapes in the distance between the large foreground trees to create layers. -
Refine the details:
Look for empty spots in your tree silhouettes. Add tiny, erratic strokes near the tips of branches to make the foliage look more realistic and less blocky. -
The final reveal:
Once the black ink is totally dry, slowly peel away the masking tape at a 45-degree angle to reveal your crisp, professional border.
Step back and admire the tranquil atmosphere created by the contrast between the deep night sky and the delicate tree lines

UV Aurora Over Mountain Shapes
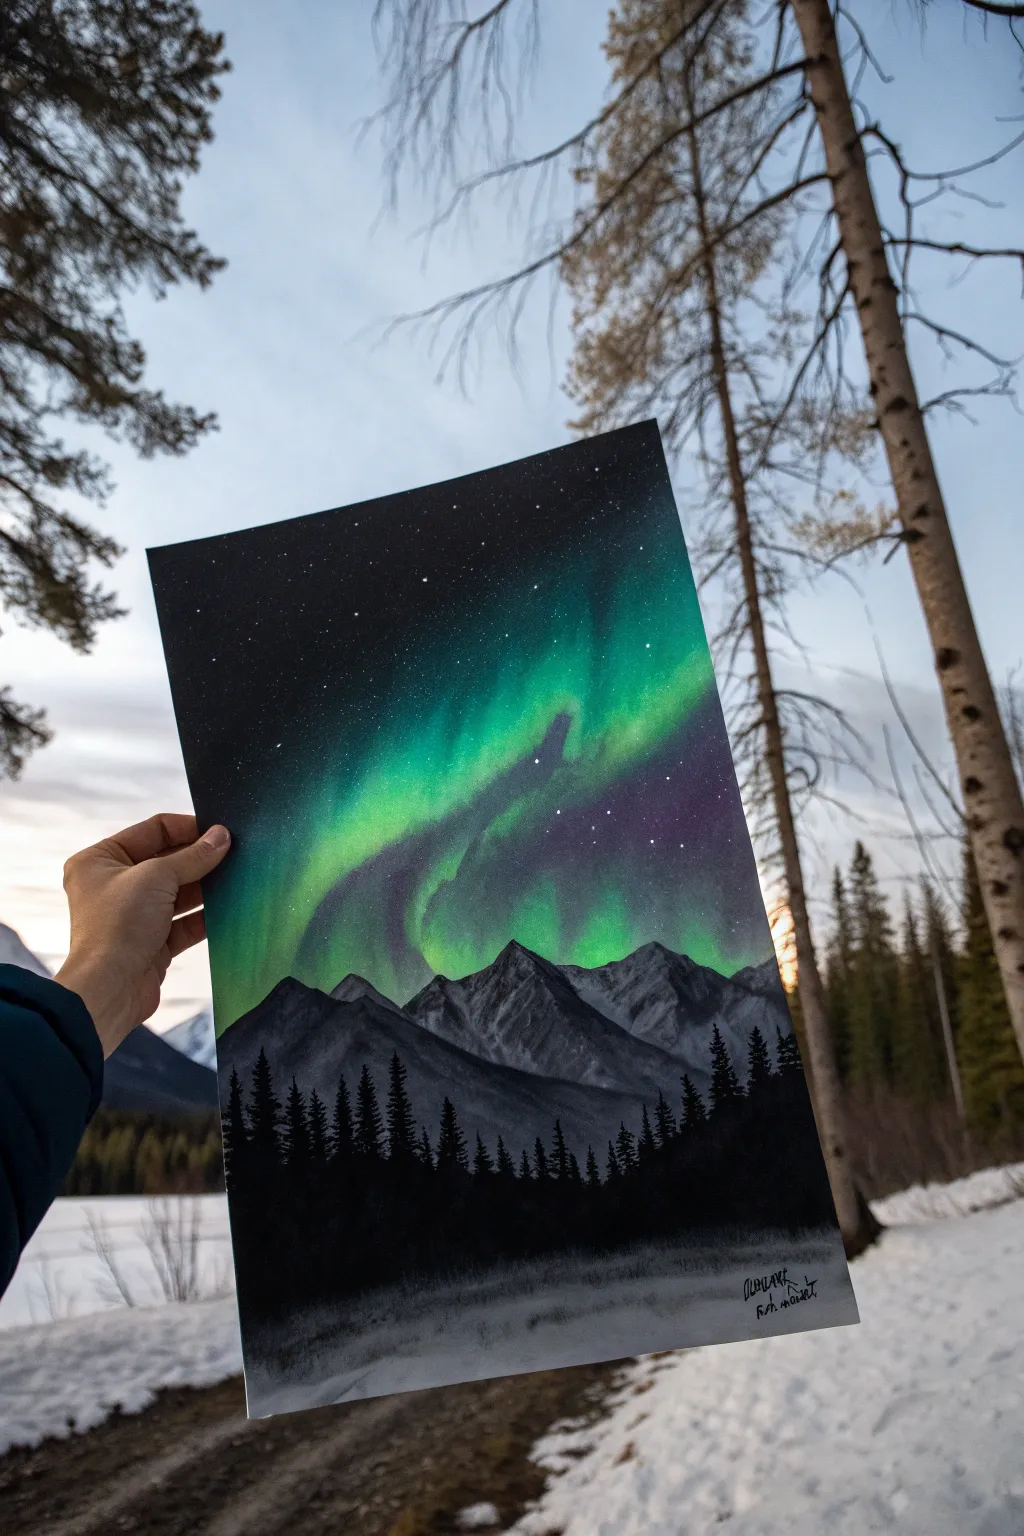
Capture the ethereal beauty of the northern lights with this dramatic high-contrast landscape painting. Using bright fluorescents against a deep black sky creates a stunning piece that looks great in daylight but truly comes alive under black light.
Detailed Instructions
Materials
- Heavyweight watercolor paper or mixed media board (A4 or A3 size)
- Black gesso or matte black acrylic paint
- UV-reactive or neon acrylic paints (Green, Teal, Purple, White)
- Standard acrylic paints (Black, Dark Grey, Light Grey)
- Sponge applicators or sea sponge
- Fan brush and small detail brushes
- Old toothbrush (for stars)
- Masking tape (for clean borders)
Step 1: Setting the Night Stage
-
Prime the Surface:
Begin by covering your paper entirely with black gesso or matte black acrylic paint. I find that a matte finish absorbs the light better and makes the neon colors pop more intensely later on. -
Let it Dry:
Allow the base coat to dry completely. It must be solid black with no white showing through. -
Map the Mountains:
Using a piece of chalk or a very faint pencil line, lightly sketch the outline of your mountain range about two-thirds of the way down the paper. Keep the peaks jagged and irregular for realism.
Glow Check
Keep a UV flashlight nearby while you paint. Periodically check your work under the black light to ensure your green layers are fluorescent enough.
Step 2: Creating the Aurora
-
Initial Glow:
Load a sponge or dry brush with a mix of deep teal and neon green. Gently dab and sweep color in waving patterns across the sky area, starting fainter near the edges. -
Building Intensity:
While the first layer is tacky, add pure neon green to the center of your aurora bands. Use vertical, sweeping brushstrokes that pull upward to mimic the ‘curtain’ effect of the lights. -
Adding Depth:
Introduce hints of neon purple or dark blue at the edges of the green bands to create a transitional shadow effect within the sky. -
Brightest Highlights:
Mix a tiny amount of titanium white or fluorescent white into your neon green. Apply this sparingly to the very center of the aurora swirls for the brightest glowing points. -
Starry Night:
Dip an old toothbrush into thinned white paint (or UV white). Flick the bristles with your thumb to spray a fine mist of stars over the black sky, concentrating some over the top of the aurora for depth.
Step 3: The Frozen Landscape
-
Mountain Base:
Paint the mountain shapes with a dark grey acrylic. Don’t worry about details yet; just block in the silhouettes. -
Adding Snow and Rock:
Using a palette knife or a flat brush with mostly dry paint, drag light grey and white paint down the lit side of the mountain peaks. This dry-brush technique creates the texture of rugged rock and snow. -
Tree Line Silhouette:
Load a fan brush or precision brush with pure black paint. Tap the brush vertically along the bottom of the mountains to create a dense forest of pine trees. -
Tree Details:
Use a fine liner brush to pull up solitary, taller tree tips to break the uniformity of the forest line. -
Foreground Frost:
At the very bottom of the painting, use a dry brush with a tiny amount of diluted white or light grey. Swipe horizontally to create a misty, frozen lake or snowy field effect that fades into the black forest.
Level Up
Use glow-in-the-dark medium mixed with the white paint for the stars and mountain peaks, so the painting reveals a new scene when the lights go out completely.
Hang your masterpiece near a UV light source to watch the sky dance with color

Trippy Neon Mandala Medallion
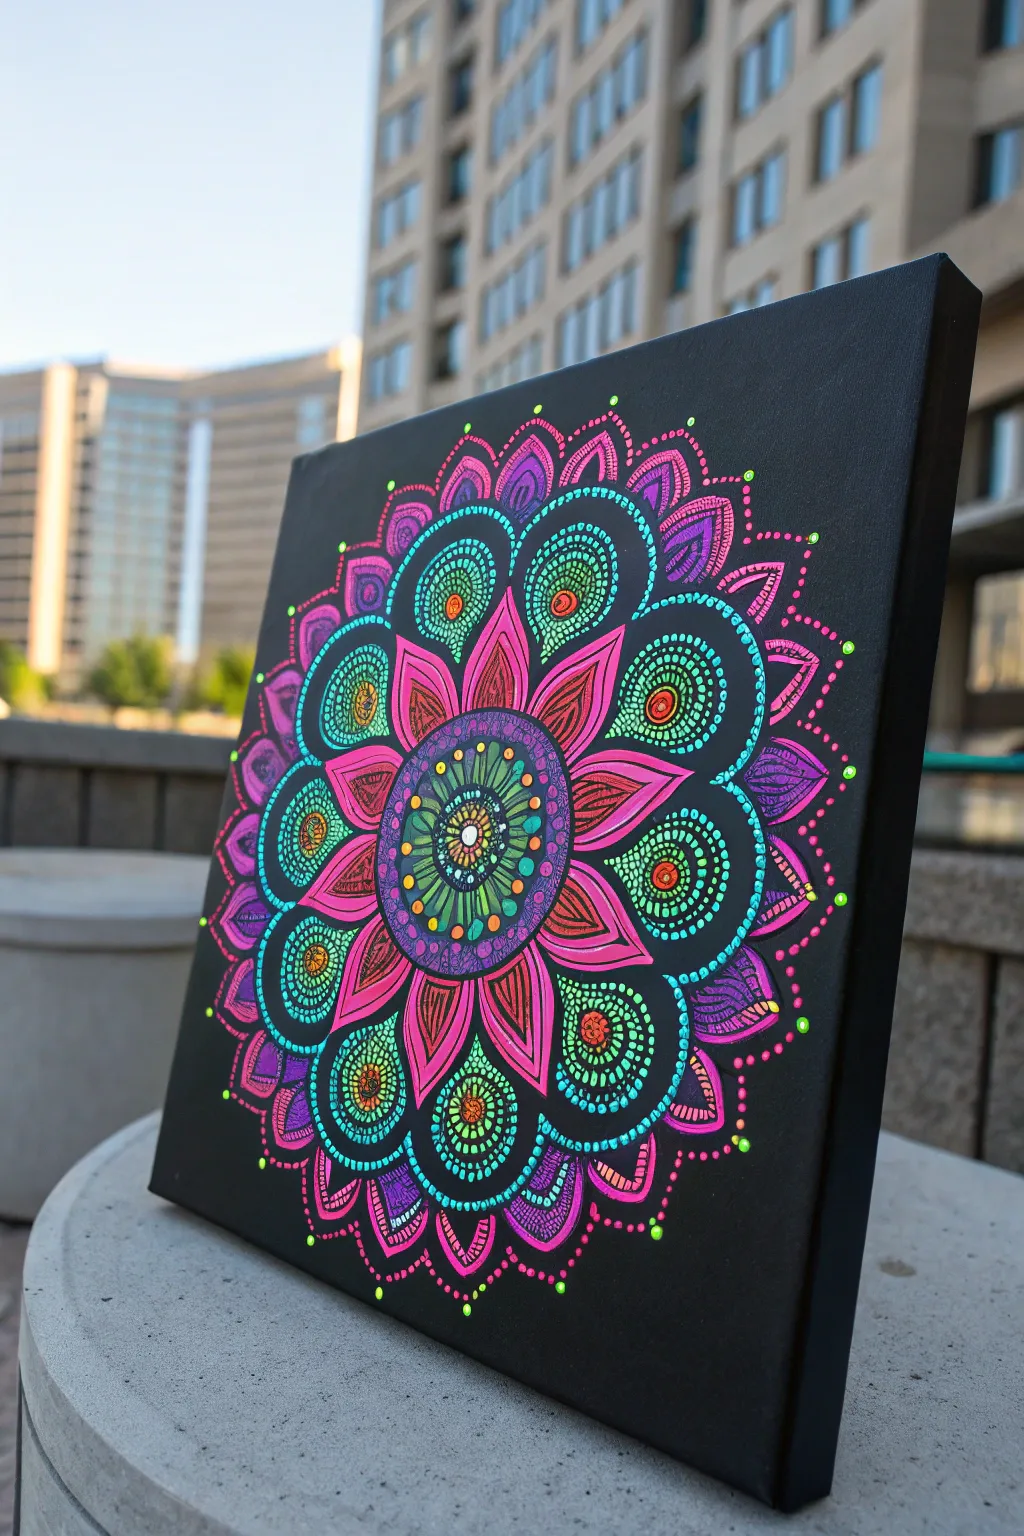
Transform a plain black canvas into a glowing psychedelic centerpiece with this intricate dot-style mandala. Using high-contrast neon acrylics, you’ll layer precise dots and sweeping lines to build a medallion that looks stunning in daylight and electrifying under black light.
Step-by-Step Tutorial
Materials
- Square stretched black canvas (or white canvas painted black)
- Neon/fluorescent acrylic paints (pink, orange, yellow, green, blue, purple)
- White liquid acrylic paint or paint pen
- Set of dotting tools (various diameters)
- Fine liner detail brush (00 or 000 size)
- Compass and white chalk pencil
- Ruler
- Palette for mixing
- Damp cloth for mistakes
Step 1: Preparation and Grid
-
Prepare the Base:
If your canvas isn’t already black, apply two smooth coats of matte black acrylic paint. Let it dry completely between coats to ensure a solid, non-reflective background. -
Find Center:
Using a ruler, lightly draw an ‘X’ from corner to corner with a white chalk pencil to locate the absolute center of your canvas. -
Draw Guide Circles:
Place your compass point on the center mark. Draw a series of faint concentric circles expanding outward. These don’t need to be specific measurements, just evenly spaced rings to guide your petal lengths and dot alignment. -
Mark Radiant Lines:
Use a protractor or just your eye to divide the circle into 8 or 16 equal pie slices using the chalk pencil. These radial lines ensure your mandala remains symmetrical as it expands.
Step 2: The Core Medallion
-
Paint the Center Dot:
Load a medium-sized dotting tool with bright white paint. Place a single, perfect dot right in the center. I like to let this dry briefly so I don’t accidentally smudge the focal point. -
First Ring of Dots:
Using a smaller tool and neon yellow or green, place a ring of tiny dots immediately surrounding the white center. -
Create the Central Petals:
With a fine liner brush and neon purple, outline a small flower shape within the first couple of guide circles. Fill the negative space inside these petals with concentric rows of tiny dots in contrasting colors like teal and green. -
Add the Pink Burst:
Switch to neon pink. Paint pointed petal shapes radiating from your central purple flower. Ensure the tips of these pink petals touch one of your chalk guide circles to keep them uniform. -
Detail the Pink Layer:
Inside each pink petal, paint a smaller, thinner ‘internal’ petal shape using orange or a lighter pink to add dimension.
Fixing Smudges
For accidental smears on the black background, don’t wipe wet paint! Let it dry completely, then paint over the mistake with your matte black base color.
Step 3: Expanding the Design
-
Paint Large Cyan Petals:
Between the tips of the pink petals, paint large, rounded lobes using cyan or teal paint. These should extend further out, creating the main body of the mandala. -
Fill with Dot Gradients:
This is the most time-consuming but rewarding step. Fill these large cyan lobes with rows of dots. Start with larger dots on the outside and gradually use smaller tools as you spiral inward, creating a gradient effect. -
Add Central ‘Jewels’:
In the center of each large cyan lobe, paint a solid circle of contrasting color, like neon orange, to act as a ‘jewel.’ Surround this jewel with a ring of tiny white or yellow dots. -
Outer Purple Scallops:
Using purple paint, create scalloped edges that bridge the gap between the large cyan lobes. These should look like little connections holding the design together. -
Internal Line Work:
Use your finest brush to add delicate stripes or veins inside the purple scallops. This linear texture contrasts beautifully with the dot work elsewhere.
Glow-up Time
Mix a tiny amount of glow-in-the-dark medium into your white paint dots. When the black light turns off, the pattern will still emit a ghostly glow.
Step 4: Final Flourishes
-
The Dotted Halo:
To finish the outer edge, use a medium dotting tool to place a sequence of neon pink dots that follow the outer contour of the entire shape. -
Accent Dots:
Look for empty black spaces between petals. Place tiny ‘walking dots’ (dots that get progressively smaller) in neon green or yellow in these gaps to make the design pop. -
Clean Up:
Once the paint is 100% dry, gently wipe away visible chalk lines with a damp Q-tip or a soft eraser. -
Seal (Optional):
If you want to protect the dot work, apply a clear gloss varnish spray lightly over the canvas.
Hang your masterpiece near a UV light source and watch the colors leap off the canvas.
BRUSH GUIDE
The Right Brush for Every Stroke
From clean lines to bold texture — master brush choice, stroke control, and essential techniques.
Explore the Full Guide
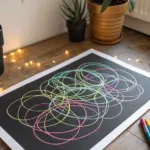
Geometric Neon Lines and Grids
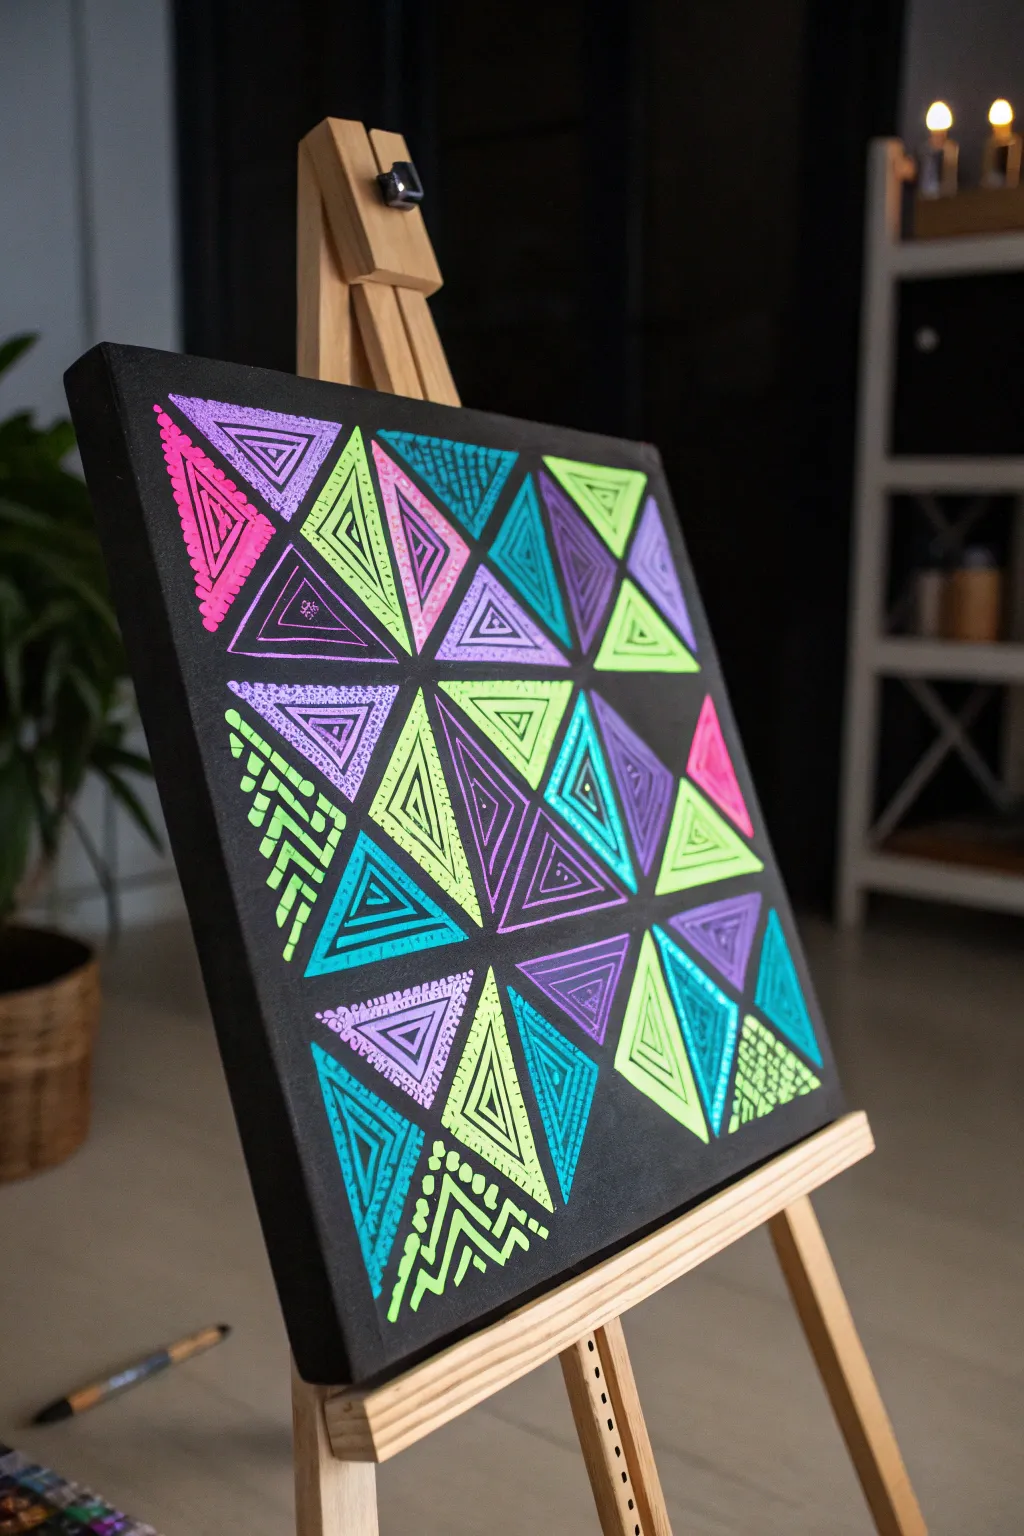
Transform a simple black canvas into a glowing geometric masterpiece using vibrant neon paints. This project uses a repetitive triangular grid pattern filled with unique doodles to create a striking, modern look that pops under black light.
How-To Guide
Materials
- Square pre-stretched black canvas (or white canvas painted black)
- Neon/fluorescent acrylic paints (pink, green, purple, blue, yellow)
- White pencil or chalk
- Ruler
- Fine liner brushes (sizes 0 and 1)
- Cup of water
- Paper palette or plate
- Paper towels
Step 1: Grid Preparation
-
Prepare the Base:
If you aren’t starting with a pre-made black canvas, apply two even coats of matte black acrylic paint to a white canvas. Let it dry completely between coats to ensure a solid, opaque background that will make the neon colors sing. -
Mark the Grid:
Using a ruler and a white pencil or chalk, lightly mark out a grid of squares across the entire canvas. A 3×3 or 4×4 grid works well depending on your canvas size; the example uses a roughly 4×4 layout. -
Create Triangles:
Draw diagonal lines through each square to split them into two right-angled triangles. Vary the direction of the diagonal lines (some tilting left, some right) to create a randomized, quilt-like pattern.
Paint opacity fix
If your neon paint looks too transparent against the black, paint the design in white first. Let it dry, then layer the neon color on top for maximum pop.
Step 2: Painting the Motifs
-
Select Color Palette:
Squeeze out small amounts of your neon paints. I like to keep the colors unmixed to maintain their maximum fluorescent brightness. -
Outline the First Triangle:
Choose a triangle and outline just the inside edge with a fine liner brush and neon green paint. Leave a very small gap of black space between your painted line and the actual pencil grid line. -
Fill with Concentric Triangles:
Inside that first outlined triangle, paint progressively smaller triangles, nesting them like Russian dolls until you reach the center. -
Switch Styles: Hatching:
Move to an adjacent triangle. Instead of concentric shapes, fill this one with tight, parallel hatch marks. Use a contrasting color like electric blue or purple. -
Switch Styles: Dots and Dashes:
For the next section, try a pattern of dotted lines or small dashes. The variety in texture prevents the grid from looking too rigid. -
Switch Styles: Mazes:
In another triangle, create a right-angled maze pattern. Paint short vertical and horizontal lines that connect at 90-degree angles, resembling a retro video game level. -
Distribute Colors:
As you work across the canvas, try not to place two areas of the same color directly next to each other. If you paint a bright pink triangle, make its neighbors green, purple, or blue. -
Detail Work:
Go back into some of your solid triangles and add tiny embellishments. You can add dots inside the concentric lines or small circles in the corners for extra detail. -
Scalloped Edges:
For a softer look in a few cells, paint scalloped or wavy lines instead of straight geometric ones. This organic touch adds a nice visual break. -
Check Consistency:
Step back periodically to check the overall balance. Ensure the paint thickness is consistent; neon paints can sometimes be translucent, so you might need a second pass on some lines. -
Clean Up Edges:
Once all triangles are filled, you can use a small flat brush with black paint to touch up the ‘gaps’ between the triangles if any neon paint smudged into the negative space. -
Erase Guidelines:
Allow the painting to dry fully—preferably overnight. Then, gently wipe away any visible white pencil or chalk marks with a slightly damp cloth or a soft eraser.
Glow-in-the-dark upgrade
Mix a clear glow-in-the-dark medium into your neon paints or apply it as a top coat over specific triangles so the artwork glows even when the black light is off.
Hang your new geometric artwork near a UV light source to watch the colors electrify the room
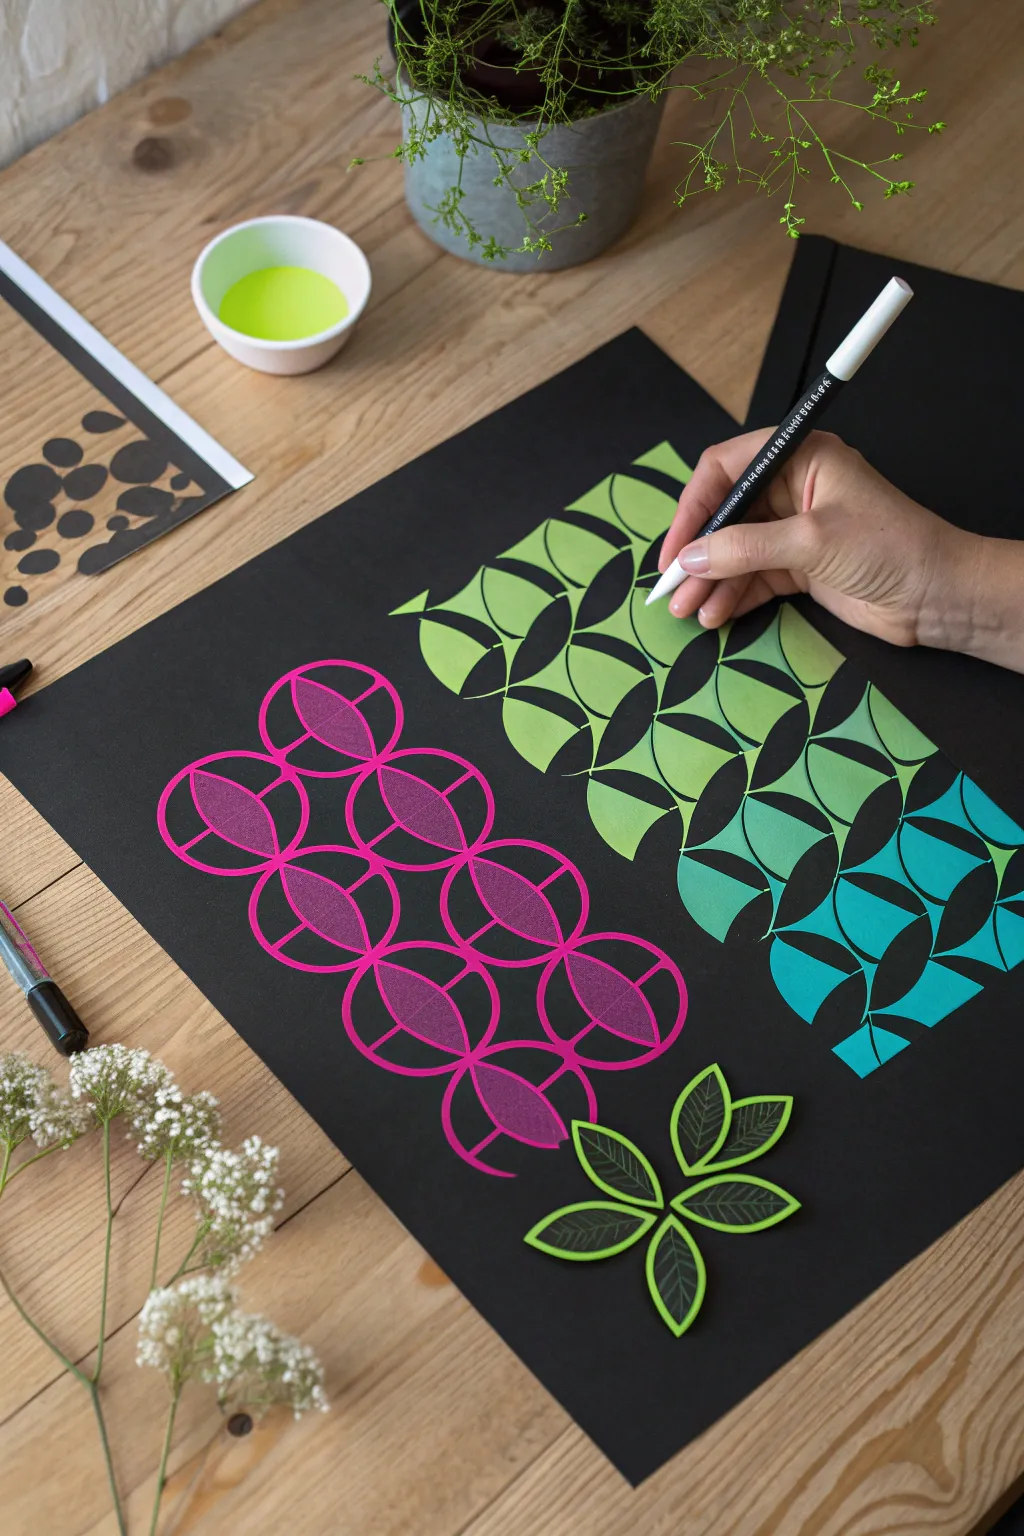
Electric Neon Flowers With Dark Leaves
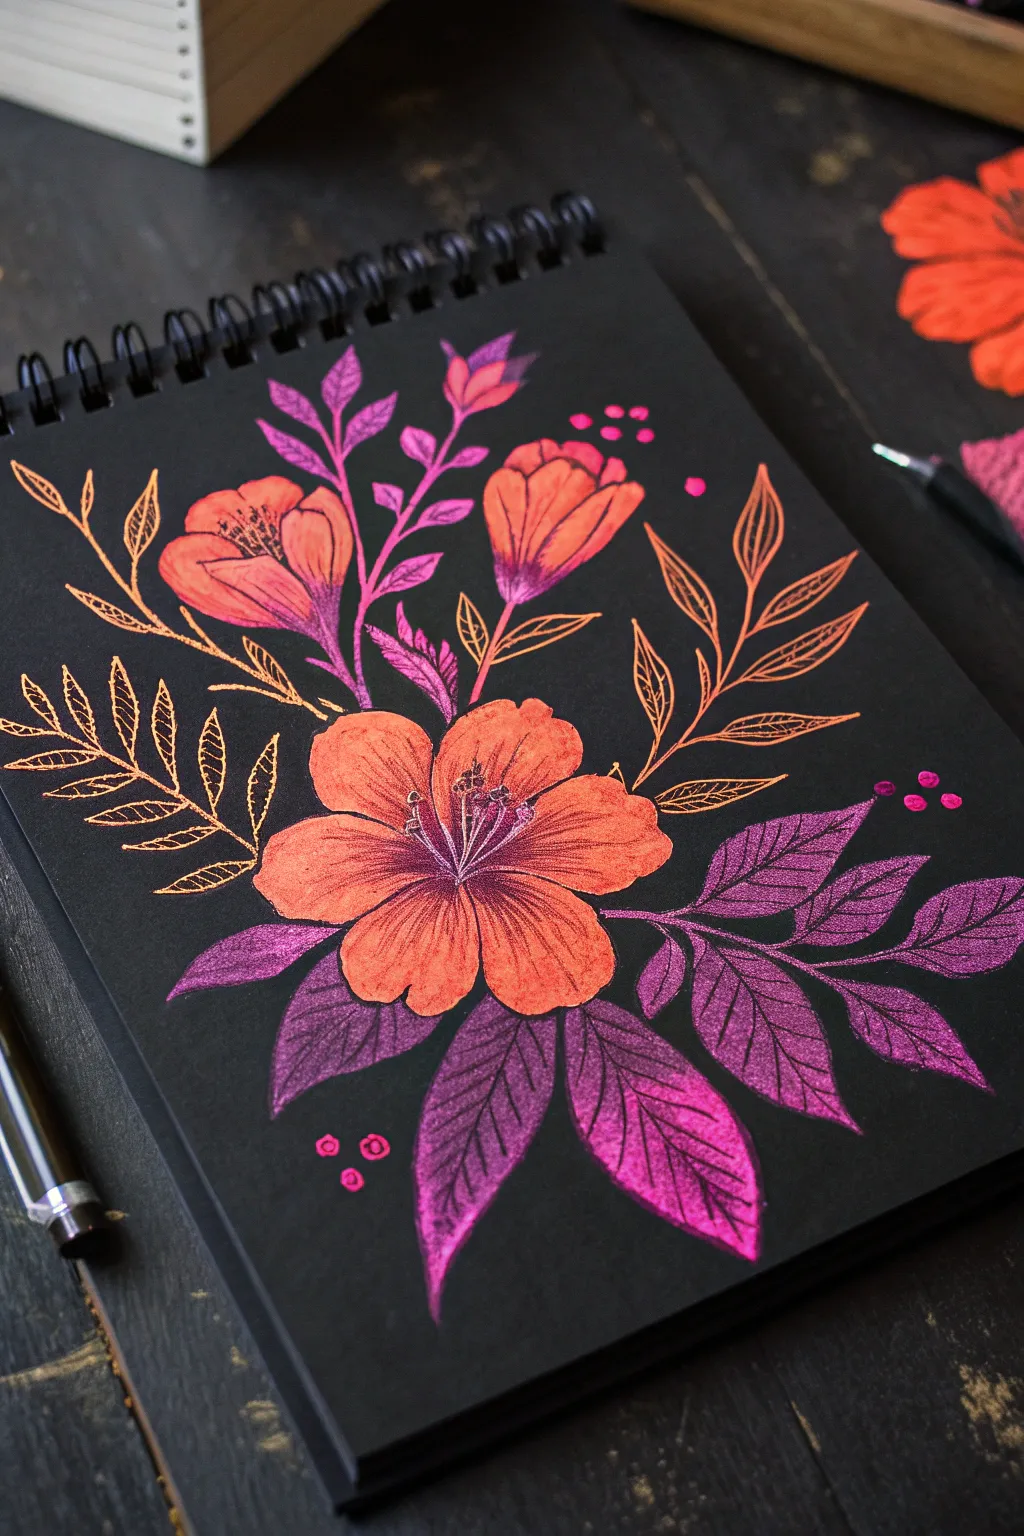
Using opaque gel pens or colored pencils on black paper creates an incredibly striking, luminous effect that mimics black light art without the electricity. This project features a central hibiscus-style bloom surrounded by neon foliage and delicate metallic accents.
Step-by-Step Guide
Materials
- Black sketchbook paper (heavyweight, 140lb or similar)
- Neon gel pens (orange, pink, purple)
- Metallic gel pen (bronze or copper)
- Opaque colored pencils (neon orange, magenta, violet)
- White charcoal pencil or chalk pencil (for sketching)
- Fine liner pen (black, optional for deepening shadows)
- Kneaded eraser
Step 1: Sketching the Composition
-
Rough placement:
Begin by lightly marking the center of your page with a white charcoal pencil. Draw a loose circle for the main flower’s position slightly below the center. -
Main flower outline:
Sketch the five large, ruffled petals of the central hibiscus. Keep lines faint so they don’t show through the ink later. -
Secondary blooms:
Add a tulip-shaped bud to the upper right of the main flower and a smaller, open bloom to the upper left. These should feel like they are reaching upward. -
Leaf placement:
Draw large, pointed leaf shapes clustering at the bottom right. Balance this with wispy, fern-like stem lines extending to the left and right sides. -
Clean up:
Use a kneaded eraser to dab away excess charcoal dust, leaving only the faintest ghost of a guideline visible.
Ink Not Showing Up?
Black paper absorbs ink quickly. If colors look dull, lay down a base layer of white colored pencil first, then color over it with your neons.
Step 2: Coloring the Blooms
-
Base layer – Main Flower:
Using a neon orange colored pencil or opaque gel pen, fill in the petals of the central flower. If using pencil, press firmly to ensure opacity against the black paper. -
Adding depth:
Take a magenta or deep pink pen and feather color from the center of the flower outward. This creates the deep throat of the hibiscus. -
Detailing the stamen:
Draw the central pistil and stamen with a fine white or pale pink gel pen, adding tiny dots for pollen at the tips. -
Upper buds:
Color the upper two flowers using a gradient. Start with pink at the base and blend into neon orange at the tips. I find blending while the ink is wet works best here. -
Veining details:
Once the base color is dry, use a fine-tip purple or dark red pen to draw delicate veins on the petals to add texture.
Pro Tip: Blending
To get smooth gradients with gel pens, work quickly! Smudge the transition line between two colors with your finger or a cotton swab while wet.
Step 3: Foliage and Accents
-
Lower leaves base:
Color the large leaves at the bottom right using a gradient of purple to neon pink. Keep the purple near the stem and pink near the leaf tip. -
Leaf texture:
Add intricate veining to these purple leaves using a darker violet pen or pencil to create a realistic, ribbed look. -
Metallic stems:
Switch to your metallic copper or bronze gel pen. Trace over the fern-like stems on the left and right sides of the composition. -
Metallic leaves:
Fill in the small leaves on these metallic stems. Don’t color them solid; use small strokes to mimic the texture of a fern. -
Upper stems:
Connect the top flower buds to the main cluster using a pink or purple gel pen, adding small thorns or leaves along the stem. -
Background dots:
Add small clusters of three dots using pink or orange ink scattered around the composition to fill negative space and add whimsy. -
Final assessment:
Step back and check contrast. If any orange areas look dull, add a second layer of neon to make them truly pop against the black background.
Your vibrant, glowing floral arrangement is now ready to brighten up any dark corner

PENCIL GUIDE
Understanding Pencil Grades from H to B
From first sketch to finished drawing — learn pencil grades, line control, and shading techniques.
Explore the Full Guide
Glowing Butterfly Wing Patterns
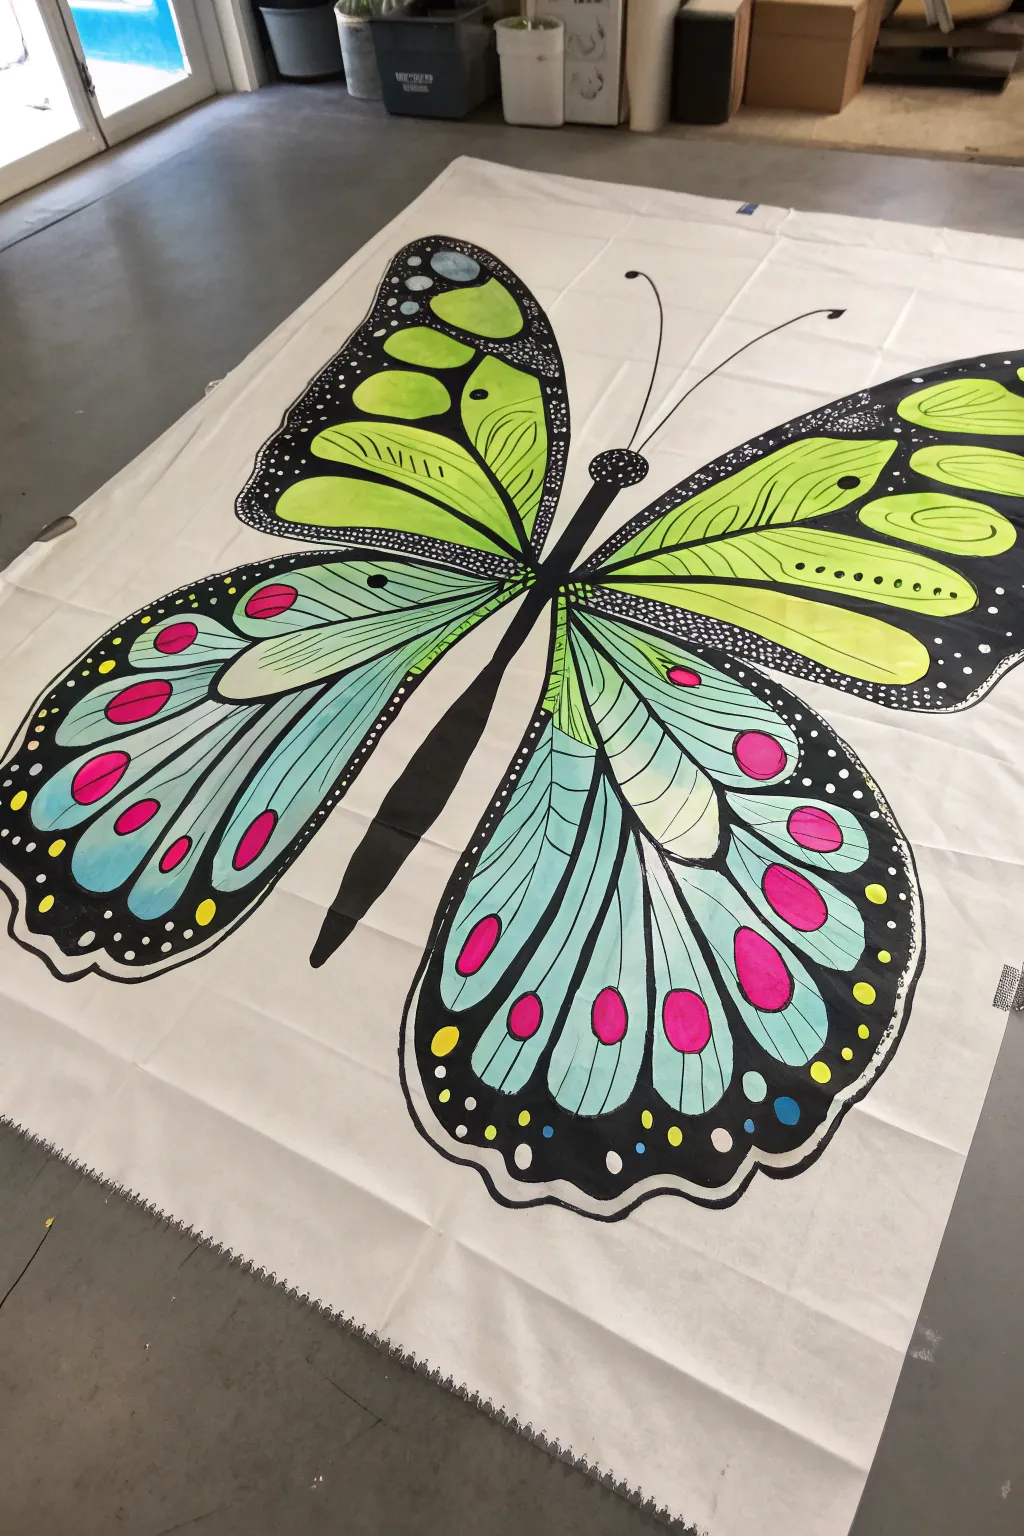
Transform a simple canvas drop cloth into a glowing masterpiece with this oversized butterfly mural. Featuring striking neon greens, bright teals, and hot pink accents, this high-contrast design is perfect for black light parties or bold wall decor.
Step-by-Step
Materials
- Large canvas drop cloth (primed or unprimed)
- Black acrylic paint or gesso
- Neon green acrylic paint
- Neon yellow acrylic paint
- Teal/turquoise acrylic paint
- Neon pink acrylic paint
- White acrylic paint
- Large flat paintbrush (2-3 inch)
- Small round paintbrush for details
- Chalk or pencil for sketching
- Ruler or yardstick
Step 1: Preparation and Sketching
-
Prepare the surface:
Lay your drop cloth flat on a clean floor or large table, smoothing out any major wrinkles. If the canvas is very rough, applying a coat of white gesso first can help the colors pop, but painting directly on the raw canvas works for a rustic texture. -
Draw the center axis:
You want symmetry, so lightly sketch a vertical line down the center of your canvas using a yardstick. This will be the body of the butterfly. -
Map out the body:
Sketch a long, thin oval for the abdomen along your center line, making it taper at the bottom. Add a smaller, rounded shape at the top for the thorax and a small circle for the head. -
Outline the upper wings:
Starting from the thorax, sketch large, triangular wing shapes that extend upward and outward. The top edge should curve gently, coming to a soft point before swooping back toward the body. -
Outline the lower wings:
Below the upper wings, draw two larger, rounded lobe shapes for the lower wings. These should extend further down than the abdomen, creating a classic monarch silhouette. -
Sketch the internal veins:
Inside each wing section, draw lines radiating outward from the body to the wing edges. These will divide the wings into the ‘panes’ you will fill with color later.
Glow Pro Tip
For maximum UV reactivity, paint a layer of white primer exactly where your neon colors will go first. The white base makes neon pigments fluoresce much brighter under black light.
Step 2: Adding the Color
-
Paint the upper wing base:
Mix a vibrant lime green using neon green and a touch of neon yellow. Fill in the ‘panes’ of the top wings, leaving a small gap between the color and your sketched vein lines. -
Paint the lower wing base:
Switch to your teal or turquoise paint. Fill in the main sections of the lower wings, using long, smooth strokes to work the paint into the canvas weave. -
Add highlights:
While the green and teal paint is still slightly tacky, brush a little white or pale yellow into the center of the largest wing sections to create a glowing, dimensional effect. -
Create the pink accents:
The lower wings feature distinctive spots. Paint bold, oval spots in neon pink near the outer edges of the teal sections. I like to do two sizes—larger near the middle and smaller near the edges. -
Add yellow details:
Add small circles of neon yellow along the very bottom edge of the lower wings for extra detail.
Level Up: Glitter
Mix iridescent glitter medium into your topcoat or sprinkle loose body glitter onto the paint while it’s still wet to make the butterfly wings sparkle even when the black lights are off.
Step 3: Defining the Lines
-
Fill the body:
Using deep black paint and a steady hand, fill in the central body shape completely solid. -
Paint the main outlines:
Using a thinner brush, trace over your original pencil lines for the wing edges. Make these outer lines thick and bold, roughly an inch wide depending on your canvas size. -
Define the veins:
Paint the veins radiating through the wings black. These lines should be thinner than the outer border but still substantial enough to separate the colors clearly. -
Detail the borders:
The upper wings have a specific border pattern. Thicken the black line along the top edge of the green wings and paint small white or pale green dots inside that black strip. -
Final border touches:
Go around the entire perimeter of the butterfly with a final pass of black to smooth out any shaky edges. Add tiny white dots along the black scalloped edges of the lower wings for high contrast. -
Add antennae:
Draw two long, thin curved lines extending from the head. Top each line with a small dot.
Allow the entire canvas to dry flat overnight before hanging your glowing creation
Neon Coral Reef With Fluorescent Fish
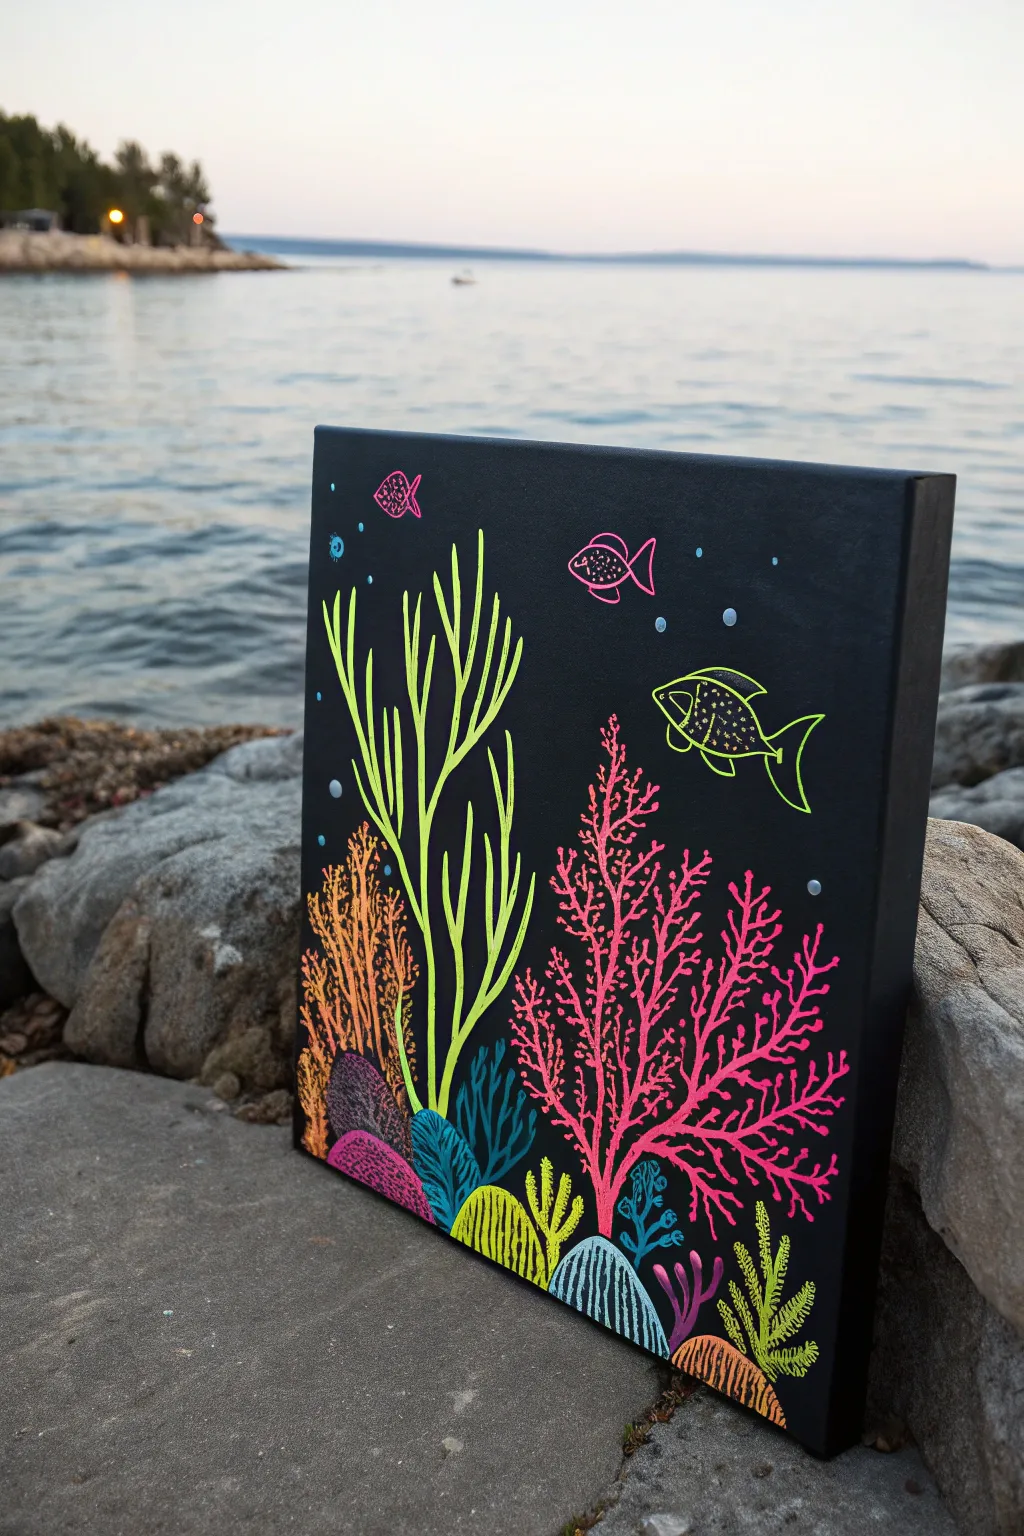
Bring the ocean floor to life with this vibrant black light painting that pops against a dark background. Using UV-reactive paints on a black canvas creates stunning contrast, making your coral and fish appear to float in the deep sea.
Step-by-Step
Materials
- Black stretched canvas (square format, e.g., 12×12 inches)
- Neon/fluorescent acrylic paints (pink, green, yellow, orange, blue)
- White acrylic paint or gesso (for priming)
- Fine round detail brushes (sizes 0, 1, and 2)
- Flat shader brush (small)
- Pencil (white or regular)
- Palette
- Water cup and paper towels
Step 1: Preparation and Sketching
-
Prepare the canvas:
If your canvas isn’t pre-primed black, paint the entire surface with black acrylic paint. Apply two coats to ensure a solid, opaque background, allowing it to dry completely between layers. -
Map out the composition:
Using a white charcoal pencil or a very light graphite touch, sketch the main elements. Start with a large central kelp structure, a prominent coral fan on the right, and various rock formations along the bottom edge. -
Add detail elements:
Sketch a few fish swimming in the open water areas—one large fish on the right and two smaller ones near the top. Add small circles for bubbles to balance the negative space.
Paint opacity issues
Neon paints can be translucent. If the black canvas shows through too much, paint a layer of white primer where the neon will go first. This makes the top color explode with brightness.
Step 2: Painting the Sea Floor
-
Base coat the rocks:
Start at the bottom by painting the rounded rock shapes. Use different neon colors for variety—purple, blue, and yellow work well here. Don’t worry about patterns yet; just get solid color coverage. -
Detail the rocks:
Once the base color is dry, use a fine brush with a contrasting neon color or white to add texture. I like to use vertical stripes on some rocks and small stippling dots on others to create visual interest. -
Paint the small bottom plants:
Between the rocks, paint small clusters of sea grass and short corals. Use neon green and orange, painting upward strokes that taper to a point.
Glow-in-the-dark finish
Mix phosphorescent powder into a clear varnish and glaze over specific elements like the fish or bubble edges. This way, the painting will continue to shine even after the black light is off.
Step 3: Structuring the Reef
-
Paint the tall orange coral:
On the left side, paint the tall, finger-like coral structure using neon orange. Use a stippling motion or small, messy dabs to give it a rough, organic texture rather than smooth lines. -
Create the central kelp:
For the large green plant in the center, use long, flowing strokes with neon green paint. Start from the base and pull the brush upward, letting the lines wave slightly to mimic water movement. -
Add the pink fan coral:
On the right side, paint the intricate pink coral fan. Start with a main vertical stem, then branch out repeatedly with thinner lines. The lines should get more delicate as they reach the outer edges. -
Layer the dark blue foliage:
Paint the dark blue, leaf-like coral nestled between the central green kelp and the pink fan. These shapes are simpler and help ground the brighter neons.
Step 4: Fish and Finishing Touches
-
Outline the large fish:
For the large yellow fish on the right, paint a crisp outline first. Fill in the center with a pattern of small dots or scales rather than solid color to keep it semi-transparent. -
Paint the smaller fish:
Paint the two smaller fish near the top using bright pink. Like the large fish, keep the designs simple—an outline with a few internal details like fins and eyes is sufficient. -
Add bubbles:
Dip the handle end of a brush into light blue or white paint and dot it onto the canvas to create perfect circular bubbles rising from the reef. -
Highlight and refine:
Check your colors under a black light if possible. If any neon areas look patchy, apply a second coat to make them truly glow. Add tiny white highlights to the bubbles and fish eyes.
Hang your new masterpiece near a UV light source to see the underwater world vividly come to life.


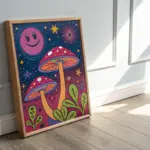
UV Mushroom Grove With Glowing Gills
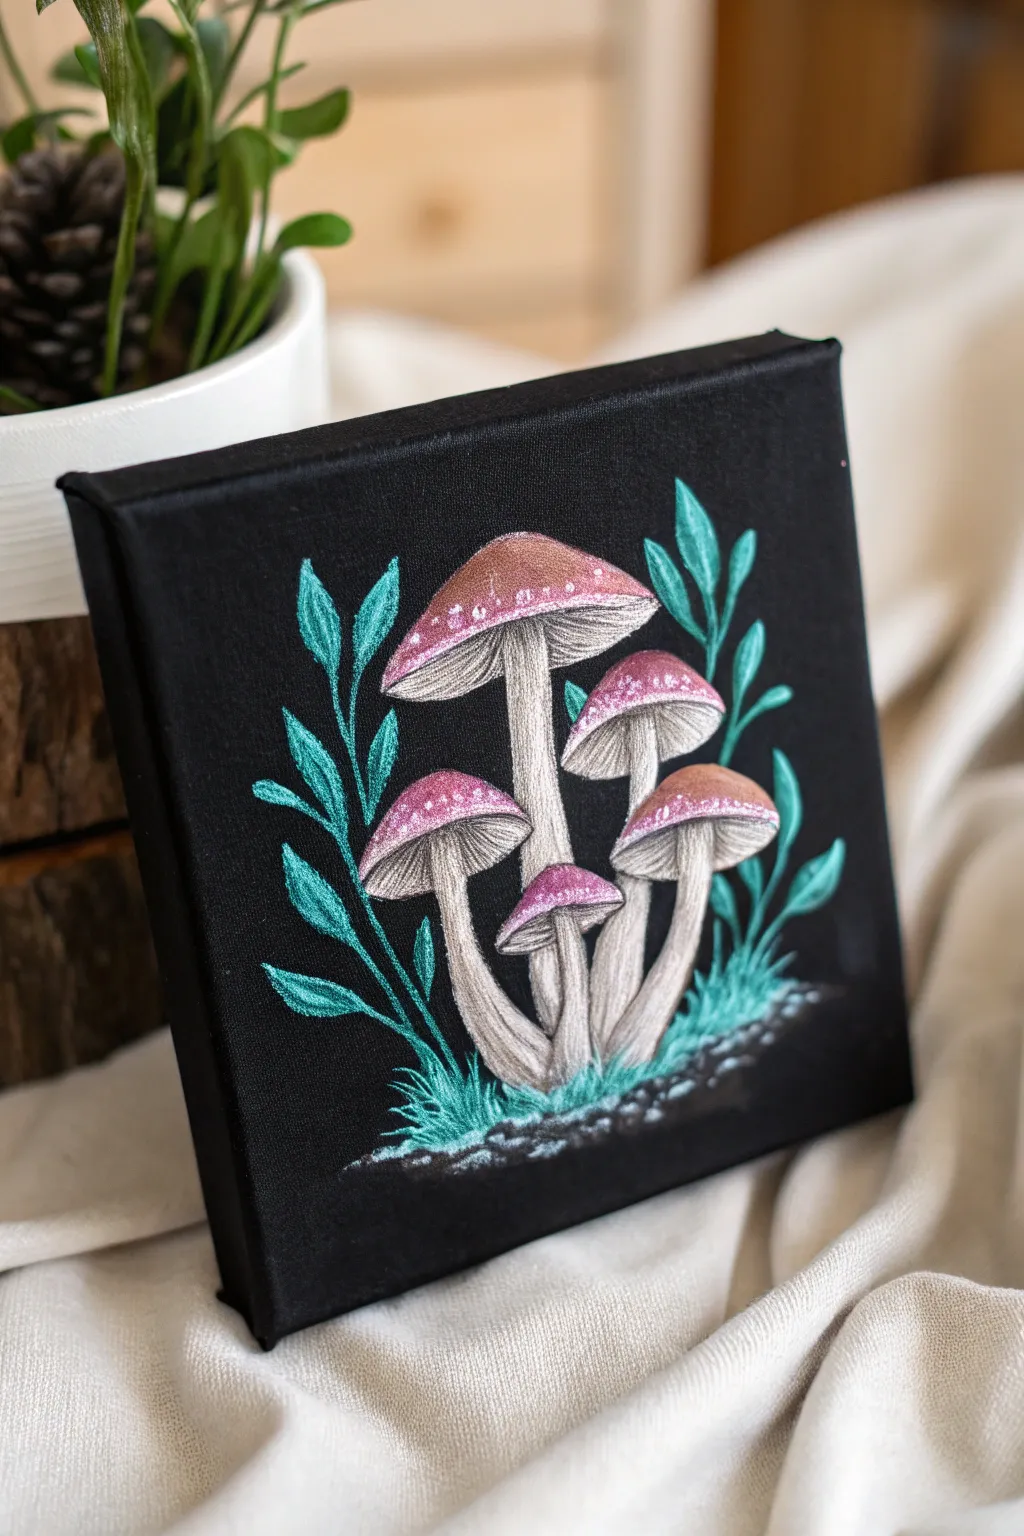
Transform a simple black canvas into a glowing botanical study with this neon-infused painting project. Using high-contrast acrylics and UV-reactive paints, you’ll create a cluster of mushrooms that looks elegant in daylight and electrifying under black light.
Detailed Instructions
Materials
- Small square canvas (stretched)
- Black gesso or matte black acrylic paint
- Titanium white acrylic paint
- Neon/UV-reactive acrylic paints (Pink, Cyan/Teal)
- Metallic rose gold or copper acrylic paint (optional)
- Set of detail brushes (sizes 0, 00, and 2)
- Wide flat brush (for base coat)
- White charcoal pencil or chalk
- Palette and water cup
Step 1: Preparation and Sketching
-
Prime the Surface:
Even if your canvas came pre-primed, apply a fresh coat of black gesso or matte black acrylic. Use a wide flat brush to ensure solid, opaque coverage without streaks. Don’t forget to paint the edges of the canvas for a polished look. -
Let it Cure:
Allow the base coat to dry completely. It must be bone dry to prevent your sketch lines from snagging or the black paint from lifting into your lighter colors later. -
Draft the Composition:
Using a white charcoal pencil or chalk, lightly sketch the outlines of your mushroom grove. Start with the largest central mushroom, then add the medium flanking ones and the two smallest stems. Keep your pressure light so the lines remain erasable. -
Map the Foliage:
Sketch in the surrounding leaves. Draw long, curved stems extending upward on either side of the mushrooms, adding small, pointed oval leaf shapes. I like to keep these loose and organic rather than perfectly symmetrical.
Paint Tip: Pop Factor
To make UV paints truly scream, paint a layer of pure white underneath any area where you plan to put neon colors. The white base acts as a reflector.
Step 2: Painting the Mushrooms
-
Block in Stems:
Mix a tiny amount of black into your white paint to create a very light grey. Using a size 2 brush, fill in the stems of the mushrooms. The grey base helps add dimension; we will add bright white highlights later. -
Paint the Caps:
Fill in the mushroom caps with a base layer. You can use a mix of white and neon pink here to create a pastel pink base. This provides a bright background for the darker details to sit on top of. -
Create the Gills:
With your smallest detail brush (size 0 or 00) and slightly watered-down dark grey or black paint, draw fine lines radiating from the stem to the edge of the cap on the underside. These are the gills. -
Highlight the Gills:
Go back over the gills with pure white paint, adding thin strokes between the dark lines. This high contrast is crucial for the illustrative style seen in the photo. -
Shade the Stems:
Dilute a little black paint to create a transparent wash. Gently brush this along one side of each stem and underneath the cap to create shadow and volume. -
Texture the Stems:
Use a dry-brush technique with pure titanium white to drag vertical texture lines down the stems. This mimics the fibrous nature of mushroom stalks.
Help! My Paint is Streaky
Neon acrylics often have low mood opacity. Don’t glob it on thick. Instead, paint thin layers, letting each one dry fully before adding the next.
Step 3: Adding Color and Glow
-
Glow Up the Caps:
Apply your UV-reactive neon pink paint to the tops of the caps. For a textured look, stipple the paint on (dabbing repeatedly) rather than brushing it smooth. Focus the brightest pink at the center of the caps. -
Add Cap Dots:
Dip the very tip of your brush or a dotting tool into white paint. Add tiny clusters of dots across the pink caps to mimic the speckles often found on Amanita mushrooms. -
Paint the Leaves:
Switch to your neon cyan or teal paint. Fill in the leaves you sketched earlier. You may need two coats here, as neon paints can be somewhat transparent against black backgrounds. -
Detail the Foliage:
Mix a lighter tint of your teal (add white) and paint a thin vein down the center of each leaf. Add highlights to the tips of the leaves to make them pop. -
Create the Ground:
At the base of the stems, use rough, short upward strokes with teal and white to simulate grass blades. Stipple some grey and white underneath to suggest rocky soil. -
Final Cleanup:
Once everything is dry, use a damp Q-tip or a brush with black paint to clean up any chalk lines or stray marks. Sharpen the edges of any leaves that look fuzzy with a quick touch of black paint.
Check your work under a black light to see your magical forest floor come to life
High-Contrast Black Outlines That Pop
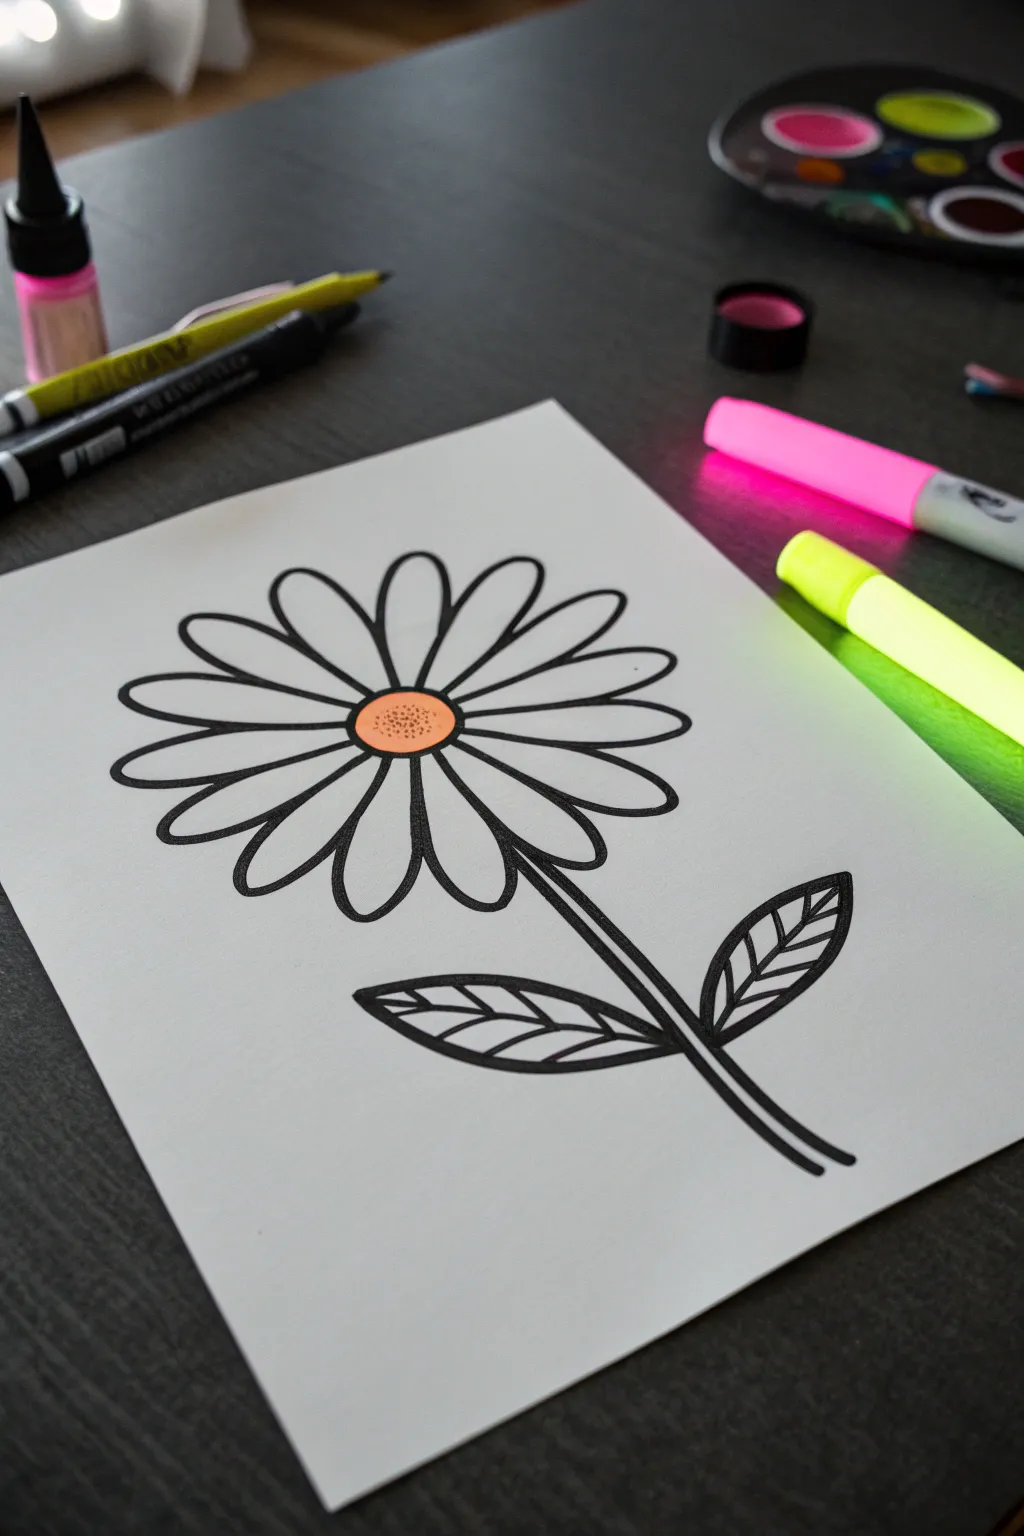
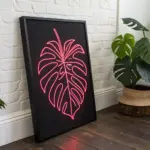
Embrace the bold simplicity of high-contrast art with this striking daisy design that practically jumps off the page under black light. By combining thick, confident black outlines with a singular pop of neon color, create a mesmerizing effect that proves sometimes less really is more.
Step-by-Step Guide
Materials
- White mixed media or heavy cardstock paper
- Thick black permanent marker (chisel tip)
- Fine black permanent marker (bullet tip)
- Neon orange highlighter or UV-reactive paint marker
- Pencil
- Eraser
- Ruler (optional)
Step 1: Sketching the Flower
-
Draw the center:
Begin by lightly sketching a medium-sized circle in the upper-middle area of your paper with a pencil. This will be the focal point of your flower. -
Map out the petals:
Sketch long, oval-shaped petals radiating outward from the center circle. Aim for about 12-14 petals to create a full bloom, ensuring they are relatively evenly spaced. -
Add the stem:
Draw a long, slightly curved line extending downward from the bottom center of the flower head towards the bottom right corner of the page. -
Create the stem thickness:
Draw a second line parallel to the first stem line to give it width, closing it off at the bottom. -
Sketch the leaves:
Draw two large, almond-shaped leaves branching off the stem near the bottom—one pointing left and one pointing right. -
Detail the leaves:
Add a central vein line down the middle of each leaf sketch.
Uneven Lines?
If your hand shakes while tracing, try rotating the paper so you are always drawing lines in a direction that feels comfortable and natural for your wrist.
Step 2: Inking the Outlines
-
Outline the center:
Switch to your thick black permanent marker. Carefully trace the circle in the center of the flower, keeping your hand steady for a smooth curve. -
Trace the petals:
Outline each individual petal with the thick marker. Make sure each line connects firmly to the center circle so there are no gaps. -
Ink the stem:
Trace the long sides of the stem. I find it helps to pull the marker towards you rather than pushing it away for straighter lines. -
Outline the leaves:
Go over the outer edges of your almond-shaped leaves with the thick marker. -
Refine the leaf details:
Draw the central vein in the leaves. Then, add smaller diagonal veins branching from the center line to the edge of the leaf for a stylized look.
Step 3: Coloring and Finishing
-
Erase pencil marks:
Wait a moment for the ink to fully dry, then gently erase all visible pencil sketches underneath your marker lines. -
Fill the center:
Take your neon orange highlighter or UV paint marker and fill in the center circle completely. Ensure the color is solid and vibrant. -
Add texture:
Once the orange ink is dry, use your fine-tip black marker to add tiny stippling dots over the orange area. This mimics pollen texture and adds depth. -
Check contrast:
Review your black outlines. If any areas look thin or gray, go over them a second time to ensure they are pitch black and opaque. -
Final inspection:
Place your artwork under a black light to test the fluorescence of the center and clean up any stray marks if necessary.
Glow Power
For maximum pop, layer the neon highlighter twice. Let the first layer dry completely before adding the second to prevent the paper from pilling.
Hang this piece near your black light source to watch the simple orange center glow intensely against the crisp darkness of the linework
Splatter-Star Background With Neon Comets
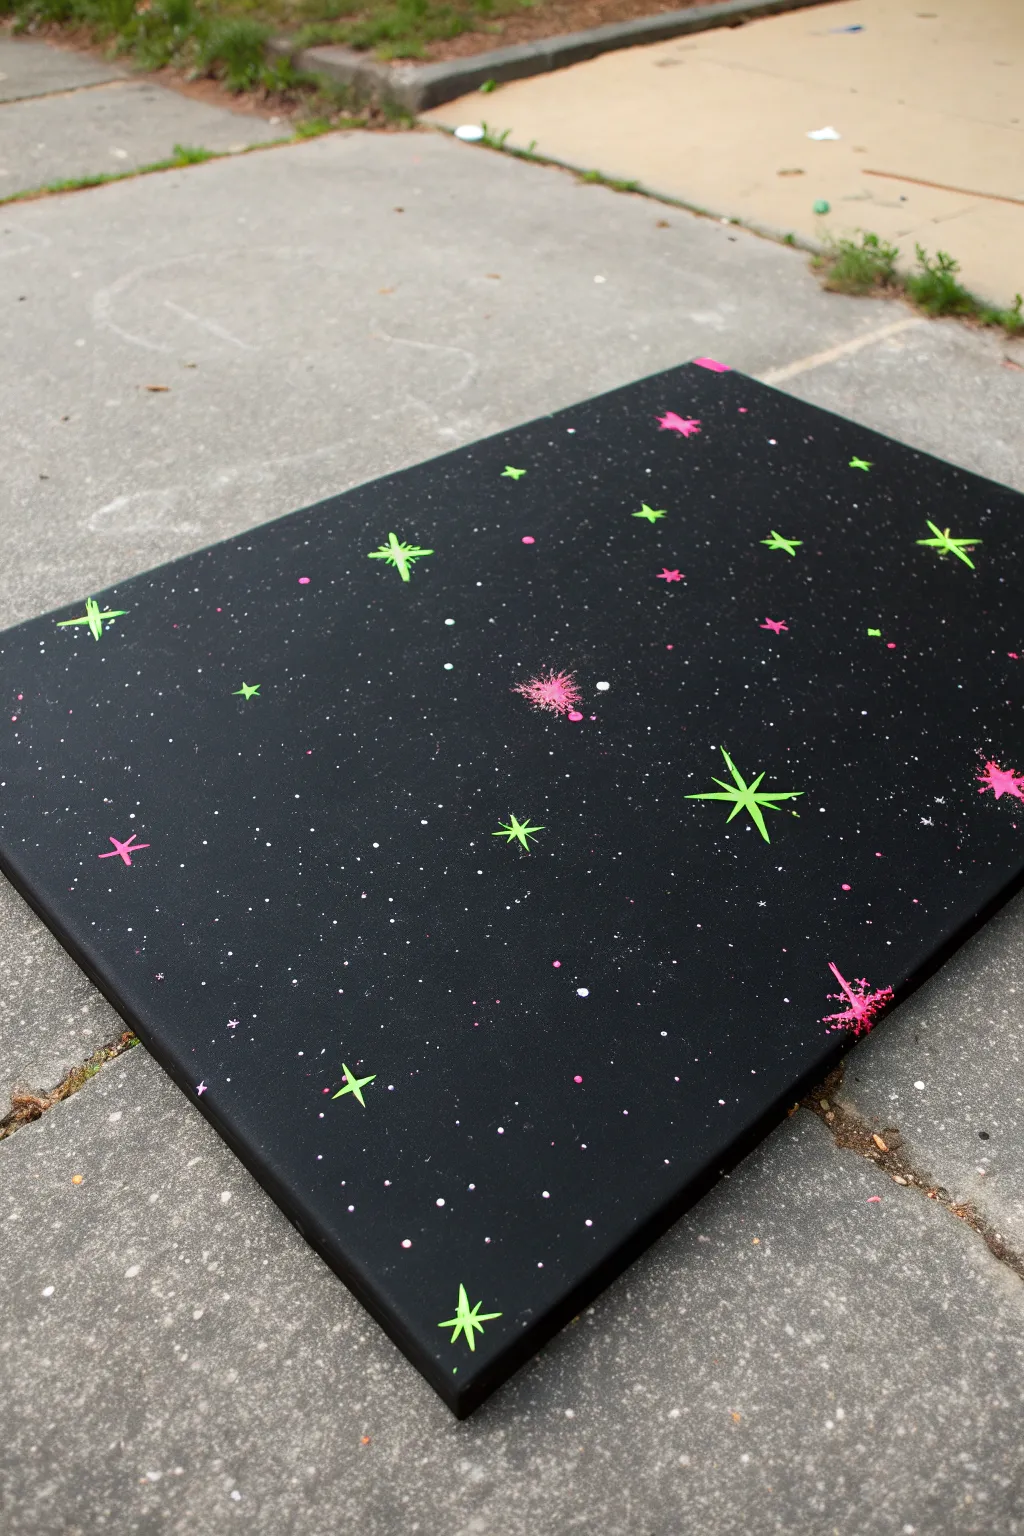
Transform a plain black canvas into a vibrant slice of the cosmos with this high-contrast space scene. Using neon paints against a deep void, you will layer splatter techniques with hand-painted celestial bodies to create a piece that truly pops under UV light.
Step-by-Step
Materials
- Stretched canvas (rectangular)
- Black acrylic gesso or heavy body black acrylic paint
- Wide flat brush or foam brush
- White acrylic paint (fluid or ink consistency works best)
- Neon green acrylic paint
- Neon pink acrylic paint
- Old toothbrush or stiff bristle brush
- Small round detail brush (size 0 or 1)
- Medium round brush (size 4)
- Cup of water
- Palette or paper plate
Step 1: Setting the Void
-
Prime the canvas:
Begin by coating your entire canvas with black acrylic gesso. Even if you bought a pre-primed black canvas, I find adding a fresh coat ensures a deeper, truer black that makes the neons stand out more. -
Cover the edges:
Don’t forget to paint the sides of the canvas. This gives the artwork a polished, gallery-ready look without needing a frame. -
Let it dry completely:
Allow the black base layer to dry fully. If the surface is cool to the touch, it still needs more time; painting over damp black paint will muddy your crisp star colors.
Step 2: Creating the Starfield
-
Prepare splatter paint:
Mix a small amount of white acrylic paint with water. You want a consistency similar to heavy cream or melted ice cream—thin enough to fly off bristles, but thick enough to be opaque. -
Load the toothbrush:
Dip an old toothbrush or a stiff bristle brush into your thinned white paint. Test the splatter on a scrap piece of paper first to gauge the density. -
Create distant stars:
Hold the brush over the canvas and run your thumb across the bristles to flick tiny droplets onto the black surface. Aim for an uneven distribution to make it look organic. -
Add neon dust:
Repeat the splatter process using a very small amount of thinned neon pink paint. Keep this layer much sparser than the white stars to add depth without overwhelming the scene. -
Create larger clusters:
For a few larger ‘distant’ stars, dab the end of a paintbrush handle into white paint and dot it randomly onto the canvas.
Star Shape Pro-Tip
For sharper star points, drag your brush from the center of the star outward, lifting the brush quickly at the end of the stroke to create a tapered point.
Step 3: Painting the Foreground Stars
-
Start the green stars:
Using your small round detail brush and undiluted neon green paint, select 3-5 spots for your largest stars. Paint a simple vertical line about an inch long at each spot. -
Cross them:
Paint a horizontal line across the center of each vertical line to create a cross shape. Try to taper the ends of the lines so they look sharp. -
Add diagonals:
For the biggest ‘hero’ stars, paint two smaller diagonal lines through the center point, creating an eight-pointed starburst effect. -
Fill in medium green stars:
Scatter smaller four-pointed green crosses (without the diagonals) around the rest of the canvas. Keep them varied in size and angle for a natural look. -
Add pink accents:
Switch to neon pink paint and a clean detail brush. Paint small four-pointed stars in the empty spaces between the green ones. -
Create pink nebulas:
To make the ‘exploding’ pink stars seen in the image, load a slightly larger round brush with pink paint. Press it down firmly in a spot and flick outward quickly in multiple directions to create a messy, energetic sunburst. -
Layer the highlights:
Once the neon stars are dry, add a tiny dot of pure white in the absolute center of the largest green and pink stars. This simulates intense light and makes them glow. -
Final touches:
Step back and assess your galaxy. If any area looks too empty, add a few tiny single dots of neon green or pink to balance the composition.
Fluorescent Upgrade
Paint the major stars with a layer of white first, let it dry, and then paint the neon color on top. This makes the fluorescence punchier under black light.
Hang your cosmic creation on the wall and wait for nightfall to see it truly shine
Fluorescent Skull With Botanical Accents
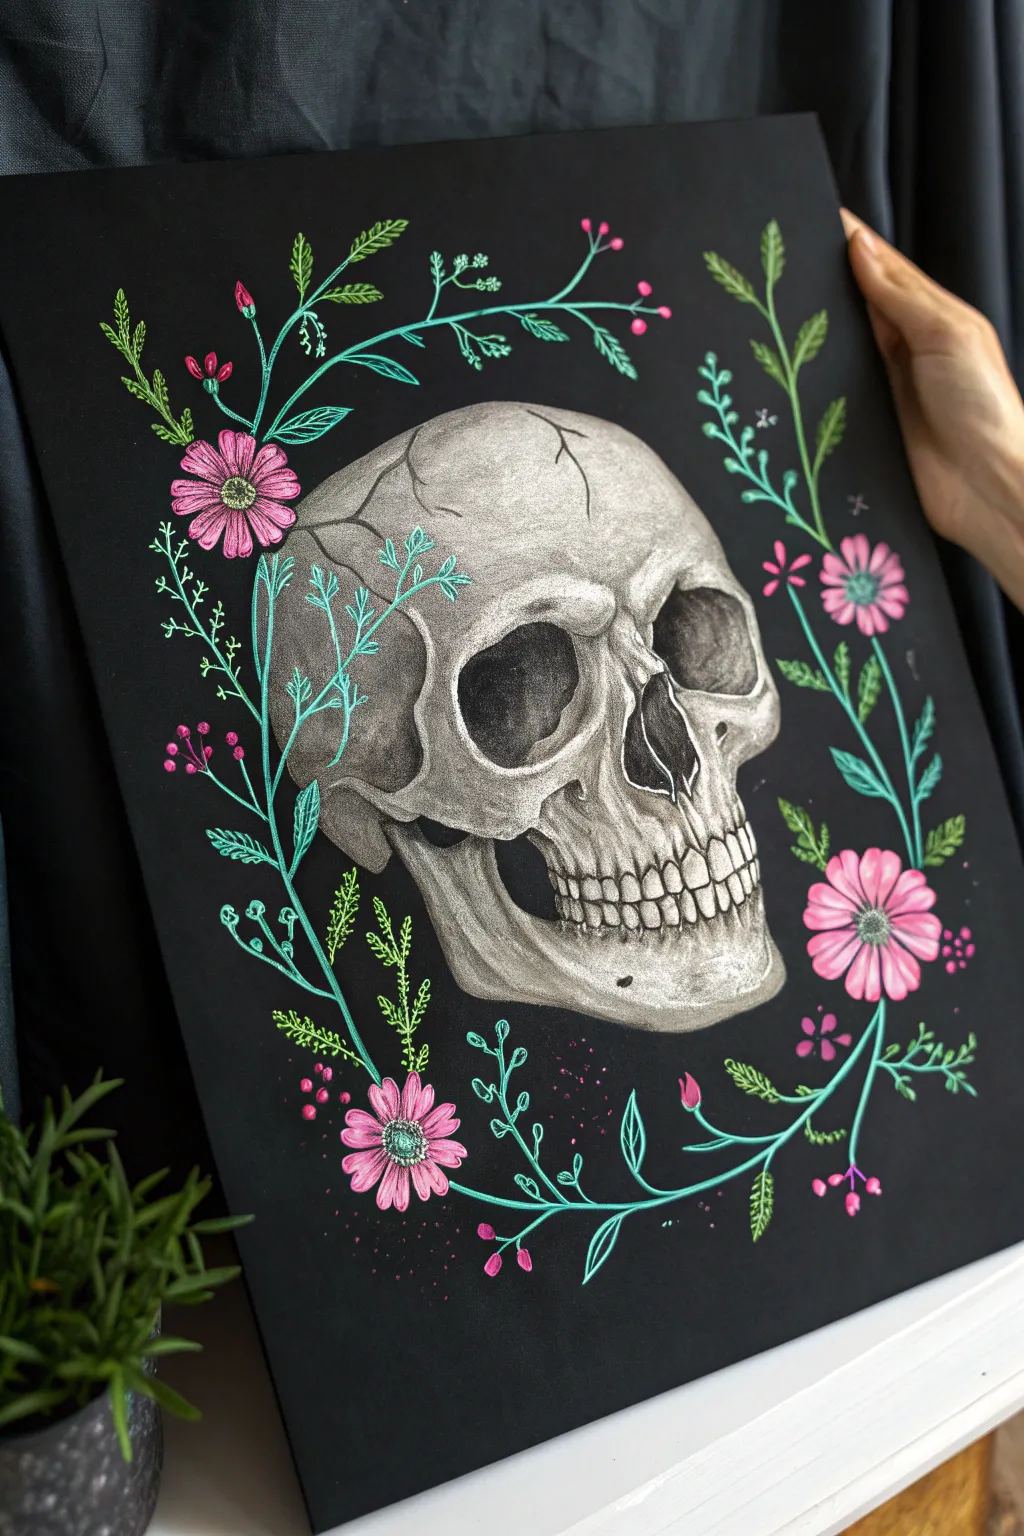
Contrast is king in this striking piece, where a hyper-realistic graphite or white pencil skull is framed by electric, glowing florals. The deep black background makes the fluorescent greens and pinks pop violently, creating a modern twist on the classic memento mori.
Step-by-Step
Materials
- Black mixed media paper or black canvas board (smooth texture preferred)
- White charcoal pencil or white pastel pencil
- Graphite pencils (HB, 2B, 4B)
- Fluorescent gel pens or fine-tip paint markers (neon pink, neon green, teal)
- Kneaded eraser
- Blending stump (tortillon)
- Reference photo of a human skull
- Fixative spray (matte)
Step 1: Drafting the Foundation
-
Center and sketch:
Begin by lightly sketching the outline of the skull in the center of your black paper using a hard graphite pencil or a very light touch with your white charcoal. Don’t press hard; you want these lines to be easily erasable. -
Map the features:
Mark the eye sockets, nasal cavity, and the line where the teeth meet. Pay attention to the jagged ‘suture’ lines on the top of the skull for added realism. -
Establish the darkest voids:
Since we are working on black paper, the paper itself provides our deepest shadows. Leave the eye sockets, nose hole, and the gaps between teeth completely uneven and untouched by white pencil.
Step 2: Rendering the Skull
-
Layering the mid-tones:
Using your white charcoal or pastel pencil, gently shade the rounded areas of the skull—the cranium, the cheekbones, and the chin. Keep this layer soft and faint. -
Building highlights:
Press harder with your white pencil on the areas that would catch the most light, typically the forehead ridge and the top of the cheekbones. This creates volume. -
Blend for smoothness:
Use a blending stump or your finger to smudge the white pigment into the black paper. This creates that smooth, bone-like texture and transitions the white into the black background seamlessly. -
Defining the edges:
Sharpen your white pencil to a fine point. Go back in and crisply outline the teeth, the cracks in the skull, and the jagged edges of the eye sockets. -
Shadow play:
If you need shadows that aren’t pitch black, lightly layer graphite over your white charcoal areas. This muddies the white slightly, creating a perfect grey mid-tone for subtle shading.
Smudge Alert
Working with white charcoal on black can get messy. Keep a piece of scrap paper under your drawing hand to prevent dragging your palm through your finished shading.
Step 3: Adding the Neon Flora
-
Sketch the vine path:
Decide on a circular flow for your botanicals. Lightly map out a main vine stem encircling the skull using a faint graphite line. -
Draw the main stems:
Using a neon teal or light blue gel pen, trace over your vine path. Keep the lines smooth and flowing, allowing them to overlap the skull slightly in places to create depth. -
Add leaves and fronds:
With a neon green pen or marker, draw small, fern-like leaves branching off your main stems. Vary the size, keeping some tiny and others more prominent. -
Create the flowers:
Select 3-5 spots around the wreath for focal flowers. Using neon pink, draw daisy-like blooms with distinct petals radiating from a center point. -
Detail the blooms:
I like to add a tiny dot of teal or green in the exact center of each pink flower to tie the color palette together. -
Add filler elements:
Fill any empty negative space with small pink buds, tiny dots, or extra wisps of greenery to make the wreath feel lush and full.
UV Pop
To ensure this glows under black light, double-check your pens. Not all ‘neon’ pens are UV reactive. Shine a UV flashlight on them before starting to be sure.
Step 4: Finishing Touches
-
Audit the contrast:
Step back and look at the skull. If the white parts look too dull next to the neon, add one final layer of bright white pressure to the highest highlights. -
Protect the work:
Once fully dry, spray the piece with a workable fixative to prevent the charcoal or pastel skull from smudging over time.
Now you have a stunningly contrasted piece that looks elegant in daylight and electrifying in the dark
Layered Stencils for Crisp UV Shapes
Create stunning, high-contrast artwork that pops under UV light using simple geometric stencils and vibrant neon colors. This project combines precise shapes with a gradient effect to turn a basic piece of black cardstock into a glowing masterpiece.
Detailed Instructions
Materials
- Heavyweight black cardstock or mixed media paper
- Geometric stencils (circles, semicircles, and leaf shapes)
- Fluorescent/neon paint pens (pink, green, blue)
- Small stencil sponges or dabbers (optional, for gradient)
- White gel pen (for fine details)
- Washi tape or low-tack painter’s tape
- Black ink fineliner (for outlines)
- Reference sheet or scrap paper
Step 1: Planning the Layout
-
Prepare the surface:
Lay out your black cardstock on a flat, clean surface. Secure the corners with a little washi tape if the paper tends to curl. -
Design the composition:
Visualize two main vertical columns for your pattern. Leave space at the bottom right for a standalone leaf element. -
Test your colors:
On a scrap piece of black paper, test your neon markers to ensure they are opaque enough. If they look dull, shake them vigorously to mix the pigment.
Step 2: Creating the Pink Column
-
Position the first stencil:
Place a circular or semicircular stencil near the bottom left to start your pink column. -
Outline the shapes:
Using the neon pink paint pen, trace the inner geometric lines of the stencil. Keep your hand steady to maintain crisp edges. -
Fill with texture:
Instead of coloring it solid, use a stippling motion or very light cross-hatching to fill the inner sections. This creates a textured, fabric-like appearance. -
Repeat vertically:
Move the stencil up, aligning the bottom of the new shape with the top of the previous one. Repeat this process until you have a column of about four or five stacked motifs. -
Allow to dry:
Let the pink ink dry completely. Neon pigments can smear easily on smooth black paper.
Clean Edges Trick
If your stencil moves, secure it with low-tack tape. Use a cotton swab dipped in a tiny bit of alcohol to quickly clean up any neon ink paint smears on the black paper.
Step 3: Drafting the Gradient Column
-
Start the second column:
Position your stencil to the right of the pink column. For this section, you will use a transition of colors. -
Apply the top color:
Start at the top of this column with a neon lime green pen. Trace the upper geometric shapes. -
Blend downwards:
As you move the stencil down, switch to a darker green or teal. I like to overlap the colors slightly while they are wet to encourage a bit of blending. -
Finish with blue:
For the bottom-most shapes of this column, switch to a bright neon blue. This creates a lovely cascading gradient effect from green to teal to blue. -
Add highlights:
Once the main colors are dry, use a fine-tip white gel pen or a very thin white marker to add tiny accents or define the edges where the shapes overlap.
Make It 3D
Once the neon ink is fully dry, use a dark gray colored pencil to add drop shadows behind the stencil shapes. This makes the glowing pattern look like it’s floating.
Step 4: The Leaf Detail
-
Stencil the leaves:
Place a leaf-shaped stencil in the bottom right corner. Outline four or five leaves radiating outward from a central point. -
Fill the veins:
Using a fine green marker, draw the central vein and side veins inside each leaf outline. -
Texturize the leaves:
Gently hatch the space between the veins with green, leaving some black paper showing through for contrast. -
Outline for pop:
To make the leaves really stand out, go over the outer edges one last time with your brightest neon green marker.
Turn on a blacklight to see your geometric garden glow with electric intensity
Neon Paint-Pour Cells Under Black Light

This striking fluid art piece combines the deep void of space with vibrant bursts of neon nebulas. Using a straightforward acrylic pouring technique, you’ll create organic, swirling patterns that glow intensely under black light.
Step-by-Step Guide
Materials
- Square stretched canvas (10×10 or 12×12 inch)
- Black acrylic paint (heavy body)
- Neon pink acrylic paint
- Neon green acrylic paint
- Metallic teal or turquoise acrylic paint
- Pouring medium (Liquitex or Floetrol)
- Silicone oil (treadmill belt lubricant works well)
- Plastic cups (one for each color)
- Wooden craft sticks for stirring
- Heat gun or culinary torch
- Drop cloth or large garbage bag
- Gloves
- Push pins (4 large ones)
Step 1: Preparation and Mixing
-
Prepare your workspace:
Cover your entire work surface with a drop cloth or garbage bag, as fluid art gets messy. Level your surface if possible to prevent the paint from sliding off one side as it dries. -
Canvas setup:
Flip your canvas over and insert four large push pins into the wooden frame corners. This elevates the canvas, allowing paint to drip freely off the edges without sticking the canvas to the table. -
Mix the black base:
In a larger cup, mix your black acrylic paint with pouring medium. Aim for a ratio of about 1 part paint to 2 parts medium, but check the consistency—it should flow like warm honey. -
Mix the neon colors:
In separate, smaller cups, mix the neon pink, neon green, and metallic teal paints with pouring medium using the same ratio. Stir thoroughly to remove any lumps. -
Add cell activator:
Add 2-3 drops of silicone oil into the teal, neon green, and neon pink cups. Do not add silicone to the black base. Stir practically just once or twice; over-mixing the silicone will break the cells into tiny specks instead of large, beautiful circles.
Step 2: The Pouring Process
-
create the negative space:
Pour a puddle of the black paint mixture directly onto the center of the canvas and spread it slightly towards the edges. This ‘wet bed’ helps the colored paints glide smoothly. -
Layer the dirty pour cup:
Take a clean empty cup. Pour a small amount of black in first, followed by a layer of teal, then neon pink, then neon green. Repeat these layers until the cup is about half full, adding a splash of black between some color layers to create separation. -
The flip cup technique:
Place the canvas face-down on top of your layered cup using a steady hand. Holding cup and canvas tight together, quickly flip them over so the cup is sitting upside down on the canvas face. -
Release the paint:
Let the cup sit for a moment to allow the paint to settle. Gently lift the cup straight up and watch the puddle of neon colors expand onto the black base. -
Tilt and stretch:
Gently tilt the canvas in a circular motion. Guide the paint to the corners, letting it flow over the edges. Try not to over-stretch the paint too quickly, or your cells might lose their shape.
Torch Carefully
Only torch the painting immediately after pouring. Torching it once a skin begins to form (after 10+ mins) can burn the paint or create unwanted texture.
Step 3: Creating Cells and Finishing
-
Activate the cells:
If you don’t see enough cells popping up naturally, light your torch or heat gun. Carefully sweep the heat over the surface (keep it moving and about 6 inches away) to pop air bubbles and bring the silicone oil to the surface. -
Refine the composition:
If there’s too much black in one area, or you want to elongate a color stripe, tilt the canvas slightly again. I often find that a final slow tilt helps orient the composition diagonally for a dynamic look. -
Check the edges:
Run a finger along the underside of the frame to wipe away dripping drips. Inspect the sides to ensure they are fully covered in paint; dab a little extra paint from the table onto any bald spots on the sides. -
Final drying setup:
Place a large cardboard box or inverted plastic tub over the wet canvas. This protects it from dust and slows the drying process, which helps prevent crazing or cracking. -
Dry and seal:
Let the painting cure for at least 72 hours. Once fully dry and cured (which can take a few weeks), apply a high-gloss varnish to protect the surface and make the neon colors pop even without black light.
Add Stardust
Sprinkle fine iridescent glitter into the white or black negative space while wet. Under black light, this adds a shimmering galaxy star-field effect.
Now turn off the main lights, flip on the UV lamp, and watch your new masterpiece glow with electric energy
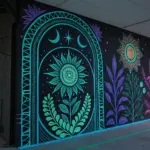
Interactive Glow Wall of Handprints and Doodles

Transform a blank wall into a vibrant, interactive canvas using oversized blackboards and high-pigment neon chalks. This large-scale project creates a stunning, doodle-style mural with glowing botanical motifs that pop against the dark background, perfect for collaborative art spaces.
Step-by-Step Tutorial
Materials
- Large plywood sheets (amount depends on wall size)
- Blackboard paint (black)
- Paint roller and tray
- Wooden framing strips (1×2 inch lumber)
- Wood screws and wall anchors
- Drill/driver
- Sandpaper (medium grit)
- Neon/fluorescent chalk pastels
- Standard blackboard chalk (white)
- Microfiber cloth or chalkboard eraser
- Measuring tape
- Level
Step 1: Building the Blackboard Canvas
-
Prepare the Boards:
Start by sanding your plywood sheets lightly to remove any rough splinters while keeping enough texture for the paint to grip. -
Apply Primer:
If your wood is very absorbent, roll on a coat of primer first; otherwise, you can move directly to the specialty paint. -
Paint the Background:
Apply the blackboard paint using a foam roller or short-nap roller to ensure a smooth finish. You will likely need 2-3 coats for a deep, solid black. -
Cure the Paint:
Allow the paint to cure completely according to the manufacturer’s instructions—usually 24 to 48 hours—before writing on it. -
Condition the Surface:
Once dry, take a stick of broad white chalk and rub it sideways over the entire surface, then wipe it off with a dry cloth. I find this creates that classic ‘lived-in’ chalkboard look and prevents ‘ghosting’ from your first drawings. -
Mount to Wall:
Secure the painted plywood sheets to your wall using wall anchors and screws, ensuring they are level and flush against each other. -
Add Framing:
Install the wooden framing strips vertically between the panels and around the outer edges to create a polished, window-pane effect that separates the drawing zones.
Chalk Too Faint?
If colors look dull, dip the tip of your chalk in water for 5 seconds before drawing. This creates a paint-like consistency that dries much brighter.
Step 2: Creating the Neon Artwork
-
Plan the Composition:
Visualize your design as a series of organic flows rather than a rigid picture; aim for vines, leaves, and abstract shapes that move upward. -
Sketch the Spine:
Using a light touch with blue or green neon chalk, draw the main ‘spines’ of your botanical shapes—these are the long curved lines that will become leaves or vines. -
Flesh Out the Leaves:
Add the leaflets or ferns branching off your main spines. Use confident, sweeping strokes to mimic the natural curve of heavy foliage. -
Layering Colors:
Trace over some of your initial lines with a second, contrasting neon color (like hot pink over teal) to create a vibrating, dimensional effect. -
Add Textural Details:
Fill in larger blank areas with patterns like cross-hatching, scribbles, or small circles using different colors to build visual density. -
Incorporate Symbols:
Intersperse the botanical elements with small doodles—hearts, stars, geometric shapes, or even short words—to give it a playful, sketchbook vibe. -
Create a Focal Point:
Near the bottom, use warmer colors like orange, red, and yellow to create a dense ‘garden bed’ or stylized volcano shape from which the cool-colored vines erupt. -
Smudge and Blend:
Use your fingers to lightly smudge the chalk in certain areas, creating a soft glow effect around the sharper lines. -
Highlighting:
Go back in with bright white or yellow chalk to add distinct highlights on the tips of leaves or edges of shapes for maximum contrast. -
Final Cleanup:
Use a slightly damp cloth to wipe away any chalk dust that has fallen onto the wooden frame borders to keep the edges crisp.
Go Ultraviolet
Install a UV blacklight fixture above the boards. Since you used neon pastels, the artwork will vividly fluoresce and glow in the dark.
Step back and enjoy the vibrant energy your new interactive art wall brings to the room


Have a question or want to share your own experience? I'd love to hear from you in the comments below!