A plain little wooden box is basically a tiny canvas that can turn into something you’ll actually want to display (and use). These box painting ideas are all about simple, doable techniques that look amazing on lids, sides, corners, and even the inside surprise.
Classic Floral Vines That Wrap Around the Box
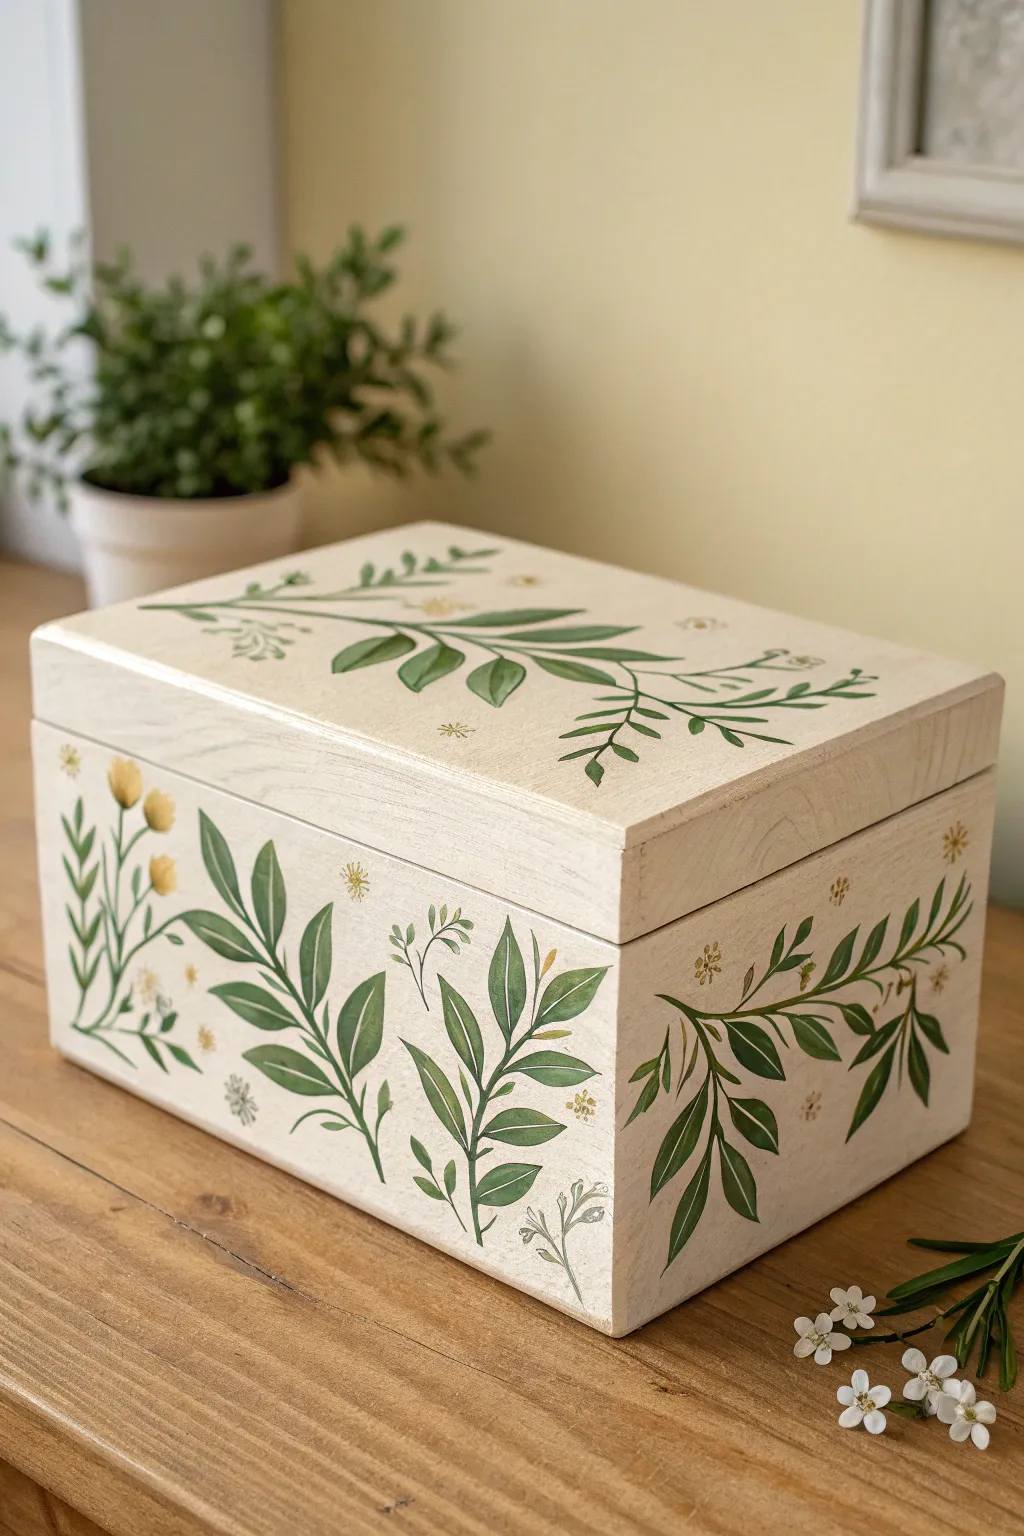
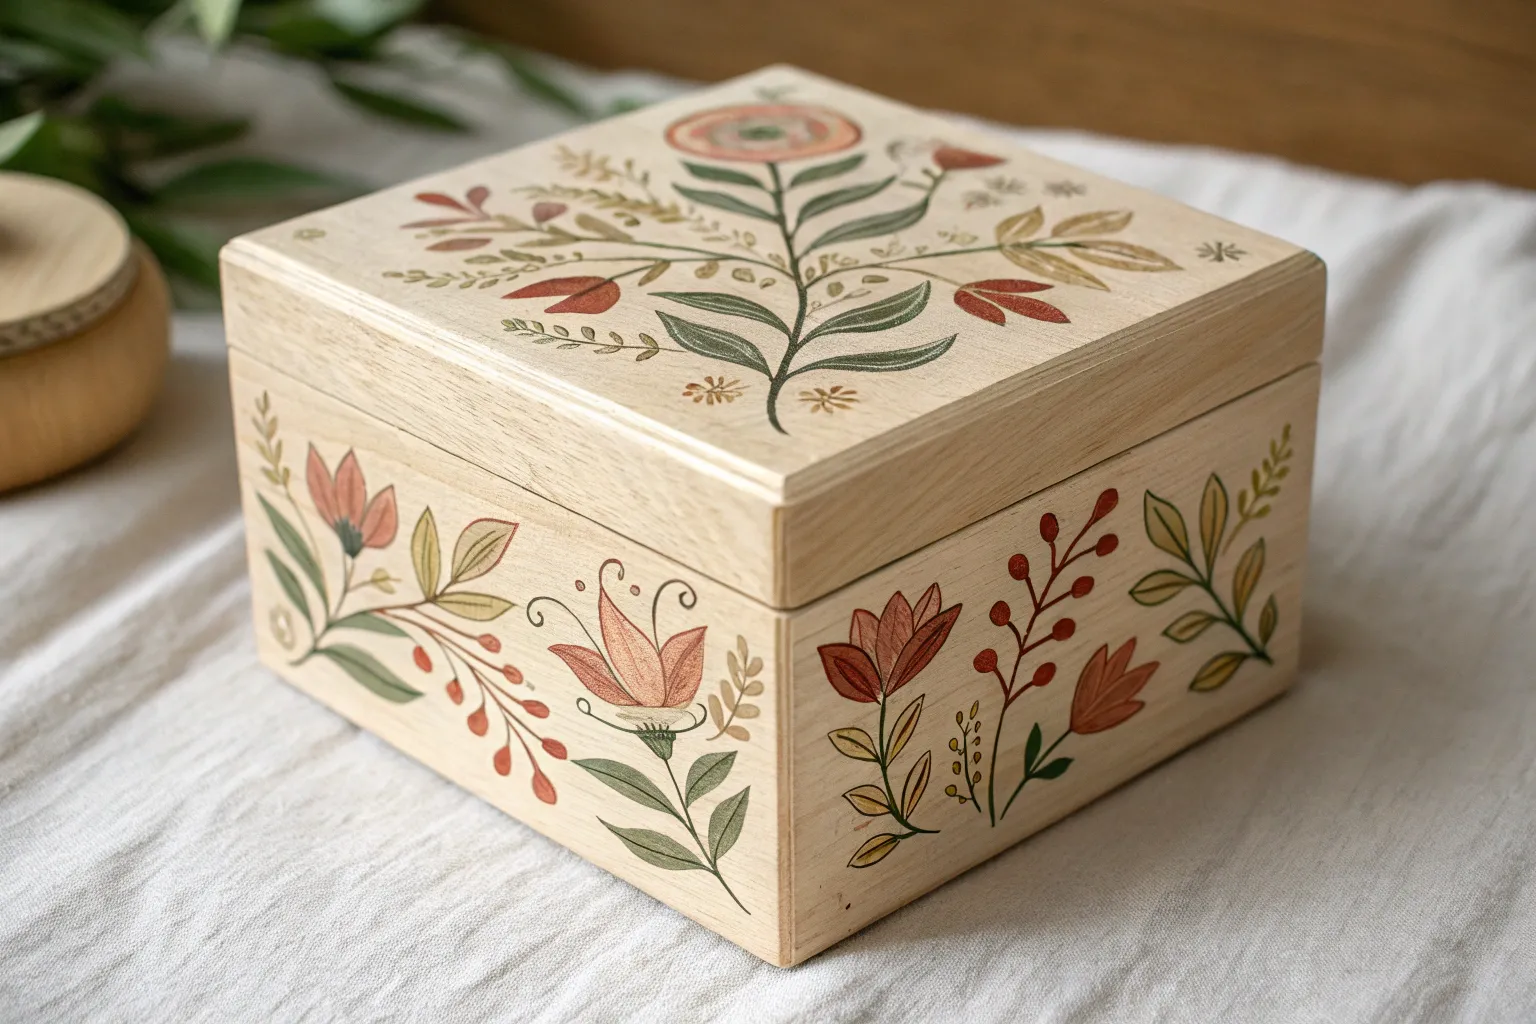
Transform a plain wooden box into an elegant heirloom with this classic floral vine design. The soft white-washed background provides the perfect canvas for trailing greenery and delicate yellow blooms that seem to grow organically around the corners.
Detailed Instructions
Materials
- Unfinished wooden box with lid
- Sandpaper (220-grit)
- White or cream chalk paint
- Acrylic paints (olive green, sap green, forest green, mustard yellow, white)
- Small round brushes (sizes 0, 2, and 4)
- Linear or rigger brush (size 1)
- Matte acrylic varnish or sealer
- Paper towels
- Painter’s tape (optional)
- Pencil and eraser
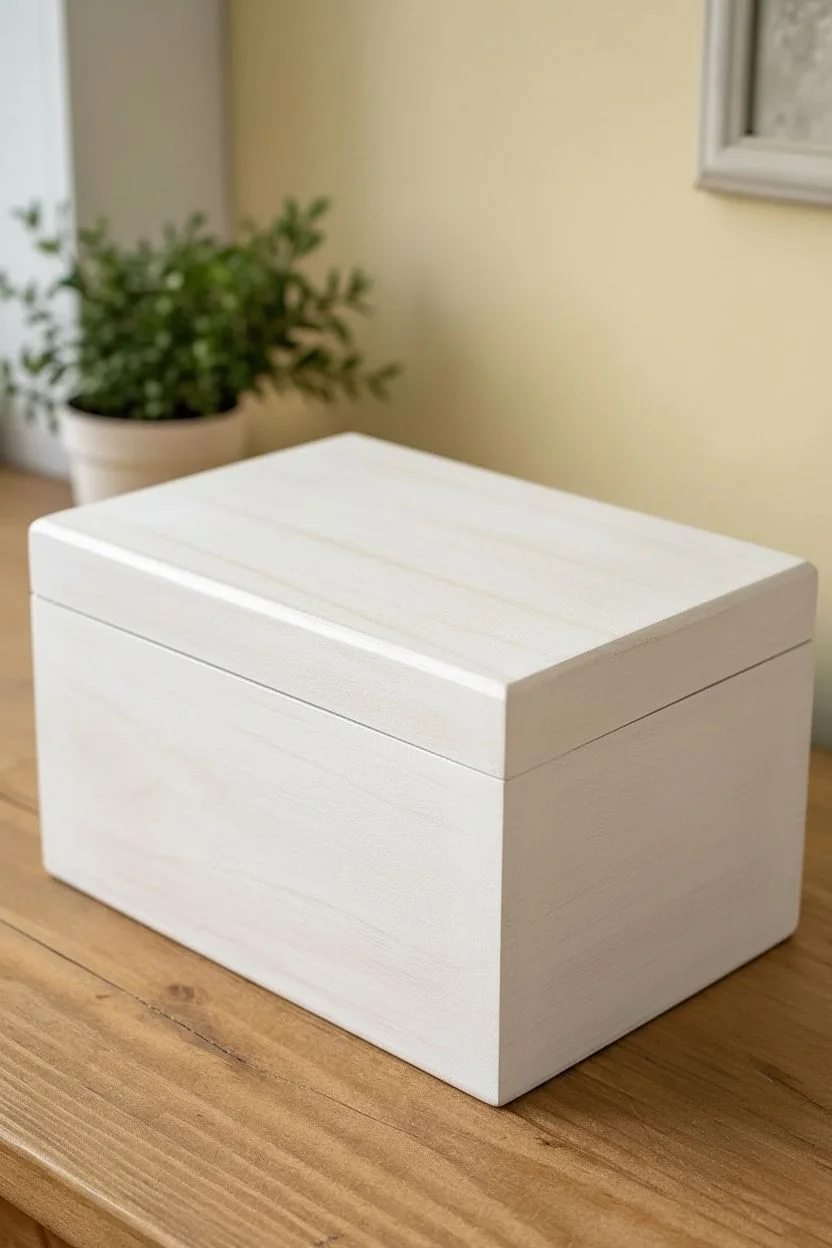
Step 1: Preparation and Base Coat
-
Prepare the surface:
Begin by lightly sanding the entire wooden box using 220-grit sandpaper to remove any rough patches or splinters. Wipe away all dust with a slightly damp cloth or tack cloth. -
Apply the wash:
Dilute your white or cream chalk paint with a small amount of water (about 2 parts paint to 1 part water). Paint the entire exterior of the box, including the lid. This watered-down consistency allows some of the natural wood grain to show through, creating a lovely rustic texture. -
Sand for smoothness:
Once the base coat is completely dry to the touch, do a very light sanding over the flat surfaces to ensure they are ultra-smooth for detailed painting. Wipe away the dust again.
Oops, smudged paint?
Don’t panic! If the paint is still wet, quickly wipe it with a damp Q-tip. If dry, paint over the mistake with a bit of your background base color, let it dry, and try again.
Step 2: Sketching the Vines
-
Plan the composition:
Using a pencil, very faintly sketch the main sweeping lines of your vines. Aim for long, S-shaped curves that start near the bottom corners and extend upward and inward. On the lid, center a large horizontal vine. -
Add leaf placement:
Mark small dashes along the vine stems where you want your leaves to go. Vary the spacing and angles to keep it looking natural rather than perfectly symmetrical.
Make it Personalized
Hide a small initial or a significant date within the vine leaves using a very fine liner brush and disjointed strokes that mimic leaf veins.
Step 3: Painting the Greenery
-
Mix your greens:
Prepare a palette with three shades of green: a light olive, a medium sap green, and a darker forest green. I like to keep them separate but close enough to blend slightly on the brush. -
Paint the main stems:
Using your liner or rigger brush loaded with sap green (thinned with a tiny drop of water for flow), trace over your pencil lines to create the thin, main stems. Keep your hand steady and lift pressure at the ends for tapered tips. -
Start the base leaves:
Switch to a size 4 round brush. Load it with the medium sap green. Press the belly of the brush down to create the wide part of the leaf, then lift as you pull away to create a sharp point. -
Add depth and variety:
While the first leaves are still slightly wet or just tacky, paint adjacent leaves using the darker forest green. Painting wet-on-wet or layering creates a nice sense of depth. -
Highlighting:
Mix a little white or yellow into your lightest olive green. Use the size 2 brush to add lighter leaves near the tips of the vines and to add veins or highlights to the larger, darker leaves once they are dry. -
Connect the foliage:
Use the liner brush again to attach all floating leaves to the main vine with tiny, delicate stems.
Step 4: Adding Florals and Details
-
Paint yellow buds:
Using the mustard yellow and a size 2 brush, dab small, rounded shapes near the ends of some branches to create closed flower buds. Make them teardrop-shaped. -
Create open blooms:
For open flowers, use small strokes radiating from a center point. You can add a tiny dot of brown or dark green in the center for contrast. -
Add white accents:
For the tiny white filler flowers or berries shown in the design, use the handle end of a paintbrush dipped in white paint to stamp perfect small dots, or use the size 0 brush for tiny star shapes. -
Detail work:
Mix a dilute brown-green shade. Use your smallest brush to add tiny sepals at the base of the yellow flowers and thin stems connecting the white berries to the main vine.
Step 5: Finishing Touches
-
Erase guidelines:
Ensure the paint is 100% dry (give it at least an hour). Gently erase any visible pencil marks that weren’t covered by paint. -
Seal the work:
Apply a coat of matte acrylic varnish over the entire box. Use long, even strokes to avoid brush marks. This protects your artwork from scratches and dust.
Now you have a charming, hand-painted storage piece that brings a touch of nature indoors


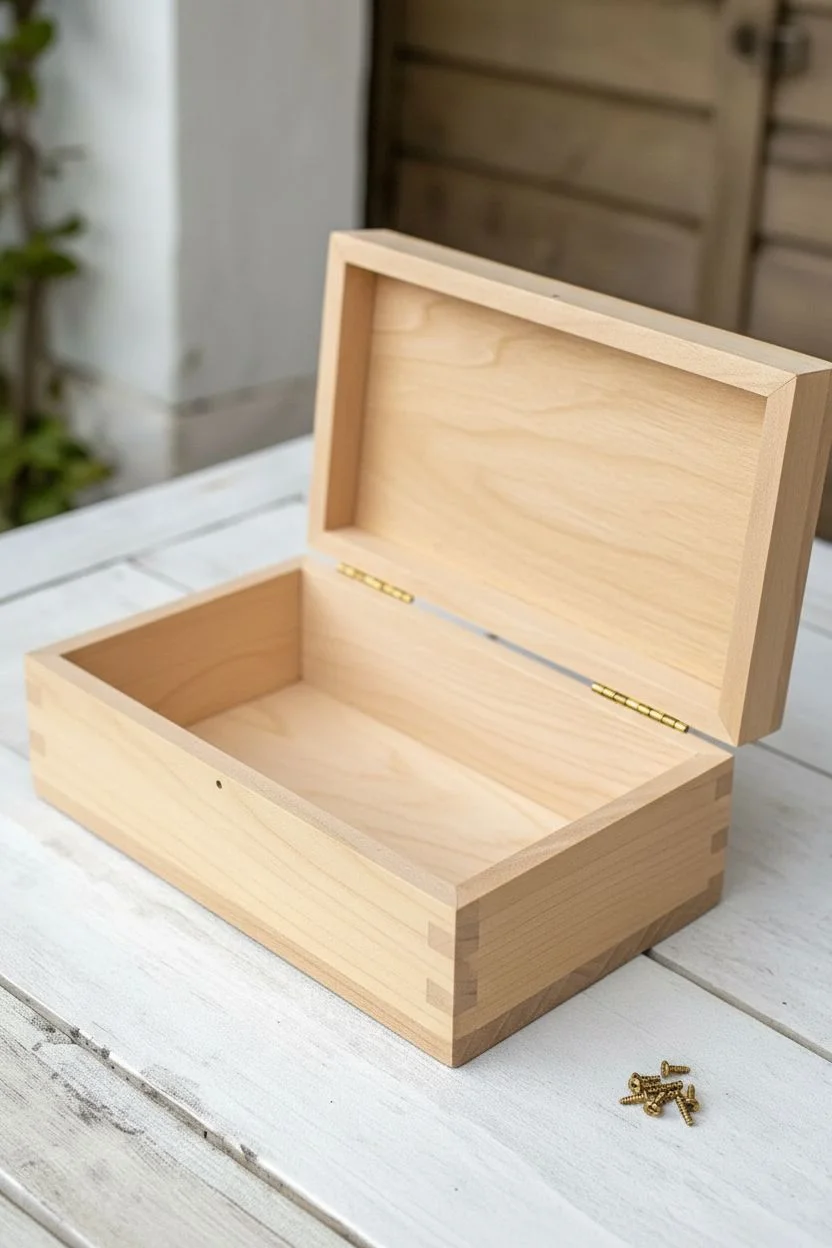
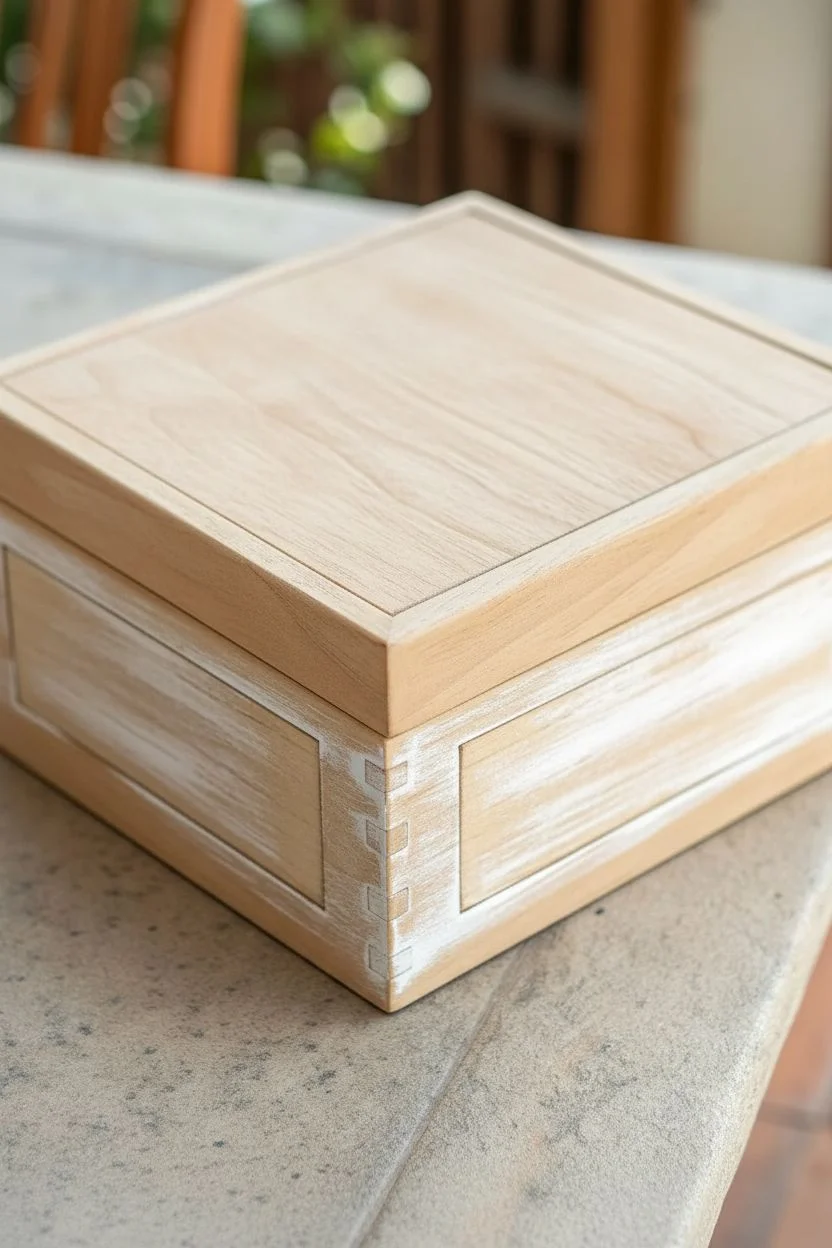
Clean Minimal Stripes Using Tape Guides
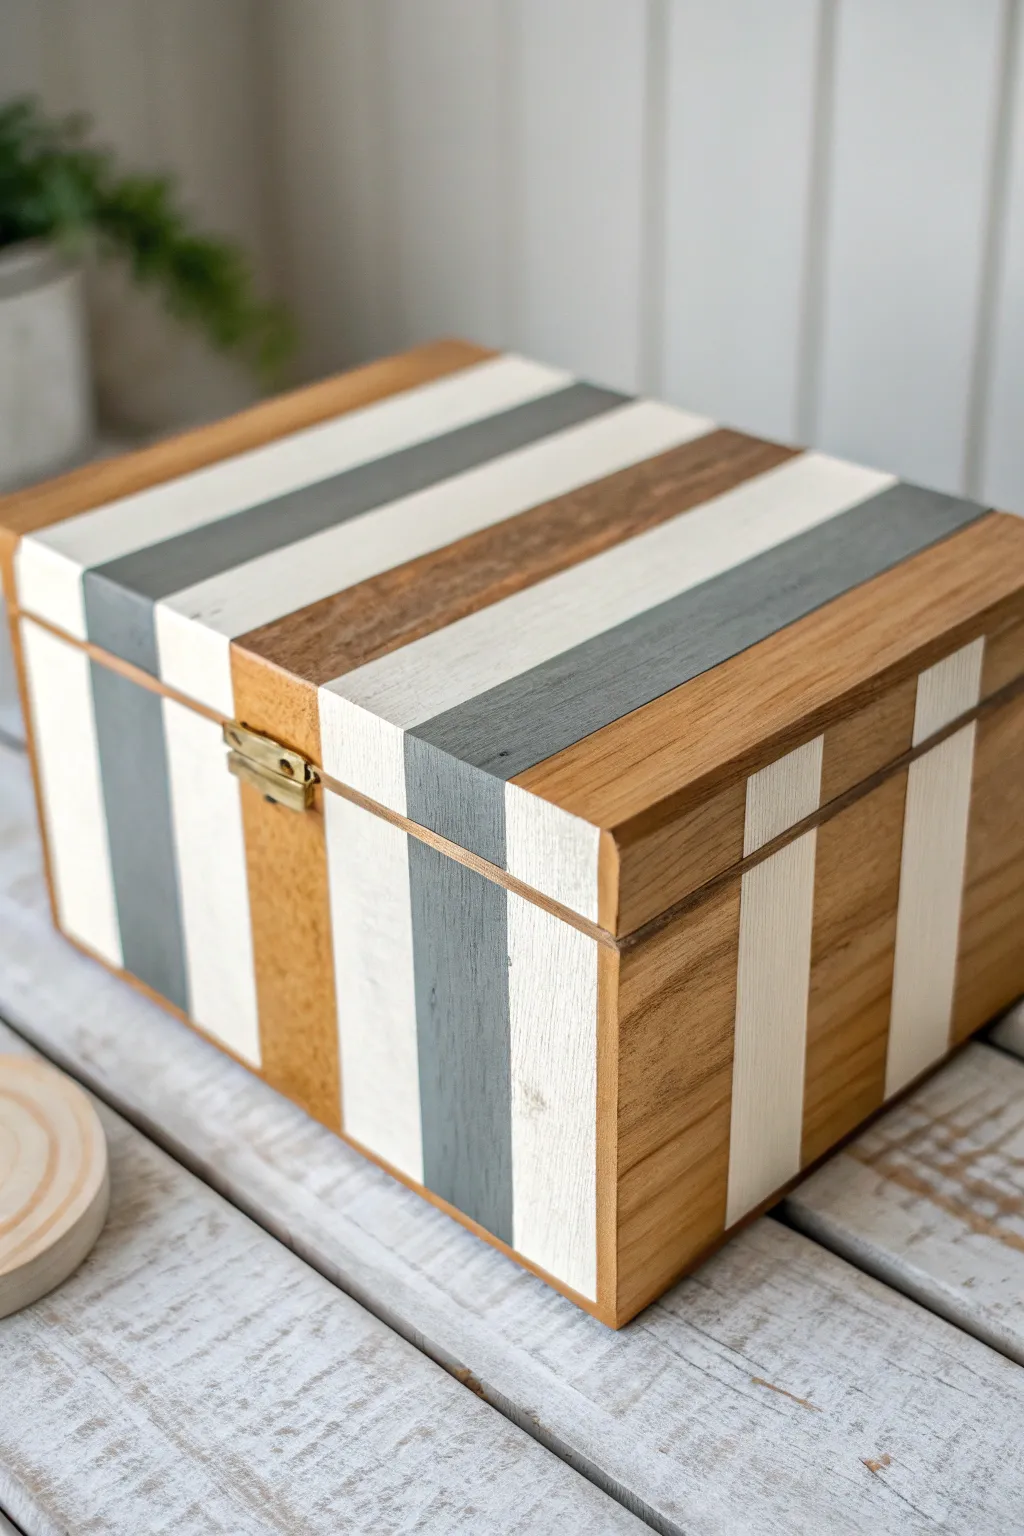
Transform a plain, unfinished wooden box into a modern decor piece using clean lines and a soft, neutral palette. By leaving sections of the natural wood grain exposed between painted stripes of slate grey and cream, you create a sophisticated, tactile finish perfect for a coffee table or dresser.
How-To Guide
Materials
- Unfinished wooden box with hinged lid
- Painter’s tape (multi-surface or delicate surface)
- Chalk paint or matte acrylic paint (Cream/Off-White)
- Chalk paint or matte acrylic paint (Slate Grey)
- Small flat synthetic paintbrush (1/2 inch to 1 inch)
- Fine-grit sandpaper (220 grit)
- Ruler and pencil
- Clear matte sealer or wax
- Screwdriver (to remove hardware)
- Clean cloth
Step 1: Preparation & Planning
-
Remove hardware:
Using your small screwdriver, carefully remove the clasp, hinges, and any other hardware from the box. Store these screws in a safe place so they don’t get lost. -
Sand the surface:
Lightly sand the entire exterior of the box with 220-grit sandpaper. This removes any rough splinters and opens the wood grain slightly for better paint adhesion. -
Clean the wood:
Wipe away all sanding dust thoroughly using a tack cloth or a slightly damp microfibre rag. The surface must be perfectly dust-free for tape to stick properly. -
Establish the centerline:
Measure the width of your box lid. Mark the exact center with a very faint pencil mark. This will serve as the anchor for your symmetrical stripe pattern.
Bleed Prevention
Before applying your colored paint, brush a thin layer of clear matte medium or sealer over the tape edges. This seals the gap, so any bleeding is clear and invisible.
Step 2: Taping the Pattern
-
Place the central tape:
Start by laying a strip of painter’s tape directly over your center mark. For this specific design, we want the center to be a painted stripe, so you actually want to place two pieces of tape to create a gap in the middle. -
Map out the stripes:
Work outward from the center. Decide on your pattern sequence: Paint, Wood, Paint, Paint. Use spacers (scrap pieces of tape or a ruler) to ensure consistent widths. -
Bridge the gap:
Crucially, run your tape strips continuously from the back of the lid, over the top, down the front lip, and all the way down the front of the box body. This ensures the stripes align perfectly when the box is closed. -
Cut the seam:
Once the long tape strips are pressed down firmly, take a craft knife or sharp blade and carefully slice the tape at the gap between the lid and the box body so the lid can open. -
Seal the edges:
Runs a credit card or your thumbnail firmly along the edges of every piece of tape. This prevents paint from bleeding under the tape and ruining your crisp lines.
Step 3: Painting & Revealing
-
Paint the grey stripes:
Identify which gaps will be slate grey. Apply a thin, even coat of grey paint. Brush away from the tape edge initially to minimize bleed-through risk. -
Paint the cream stripes:
Apply the cream/off-white paint to its designated sections. I find that lighter colors often need two thin coats for full opacity, so let the first coat dry to the touch before adding a second. -
Let it dry slightly:
Wait until the paint is dry to the touch but not fully cured—usually about 20-30 minutes. -
Remove the tape:
Slowly peel back the tape at a 45-degree angle. Pulling while the paint is slightly tacky helps ensure a super sharp line without chipping dry paint. -
Touch up:
If any paint bled under the tape, wait for it to dry completely, then gently scrape it away with your craft knife or touch it up with a tiny artist’s brush.
Mix Up Finishes
For added texture, keep the wood stripes matte but use a high-gloss varnish only on the painted stripes. The contrast in sheen makes the design pop.
Step 4: Finishing Touches
-
Check the interior:
Open the lid and check the rim where the tape was cut. You may need to dab a tiny bit of paint on the raw edge of the wood to make the stripe look continuous from the outside. -
Apply sealer:
Once the paint is fully cured (check your paint can for times), apply a clear matte wax or polycrylic sealer over the entire box to protect both the wood and the painted design. -
Reattach hardware:
Screw the hinges and the front clasp back into their original pilot holes.
Enjoy styling your new geometric storage box on a shelf or gifting it to a friend


Easy Polka Dots for a Playful Trinket Box
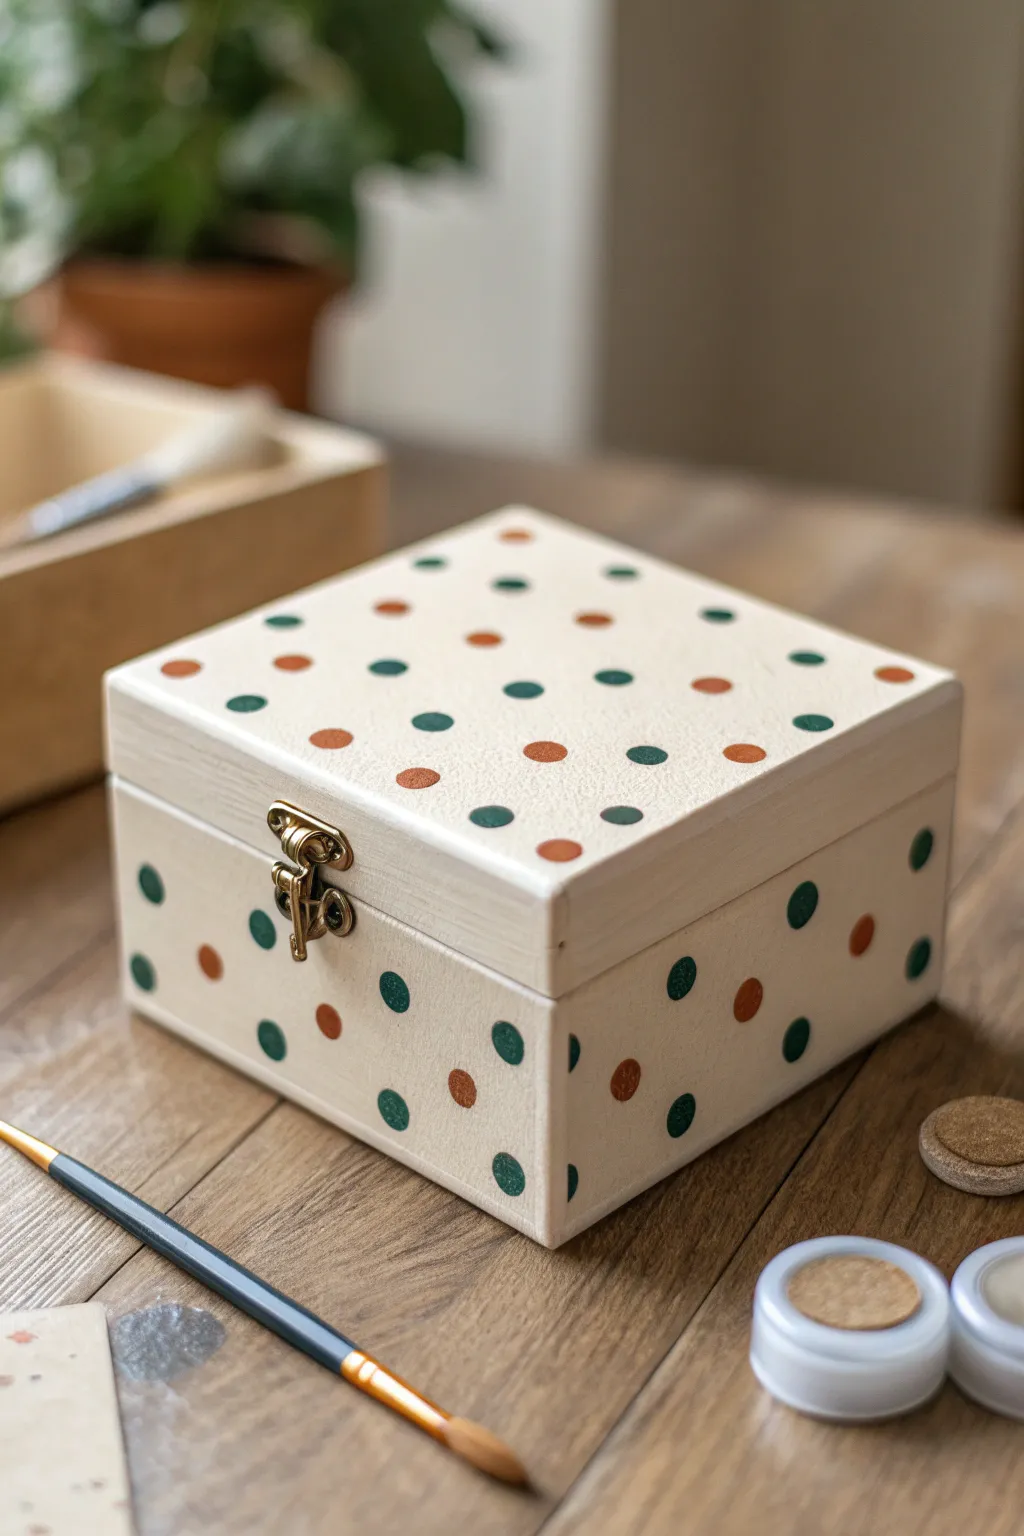
Transform a plain wooden box into a cheerful storage solution with this simple yet striking polka dot design. The pattern combines burnt orange and deep teal dots against a creamy white background for a look that feels both vintage and fresh.
Step-by-Step Tutorial
Materials
- Unfinished wooden box with metal latch
- Sanding block or fine-grit sandpaper (220-grit)
- Creamy white acrylic craft paint
- Burnt orange acrylic craft paint
- Deep teal or forest green acrylic craft paint
- Flat paintbrush (approx. 1 inch width)
- Small foam pouncer or round sponge dauber
- Small detail paintbrush
- Painter’s tape (optional)
- Matte finish clear sealant spray or mod podge
- Paper plate or palette
- Damp cloth
Step 1: Preparation & Base Coat
-
Remove hardware (optional):
If your box allows, unscrew the small metal latch on the front. This makes painting much easier, but if you can’t remove it, carefully cover it with a small piece of painter’s tape to protect it. -
Smooth the surface:
Gently gently sand the entire exterior of the wooden box using your sanding block. Focus on the lid edges and corners to ensure there are no splinters or rough patches. -
Wipe it down:
Use a damp cloth to wipe away all the sanding dust. A clean surface is crucial for the paint to adhere smoothly. -
Apply the first base layer:
Using your flat paintbrush, apply a coat of creamy white acrylic paint to the entire outside of the box, including the sides of the lid. Paint in the direction of the wood grain for the best finish. -
Let it dry completely:
Allow this first coat to dry for about 20-30 minutes. If the wood grain still shows through more than you’d like, applying a second thin coat will give you that opaque, solid finish seen in the photo.
Step 2: Creating the Dot Pattern
-
Prepare your colors:
Squeeze a small amount of burnt orange and deep teal paint onto your palette or paper plate. Make sure they aren’t touching so the colors stay pure. -
Test your spacing:
Before touching the box, practice your spacing on a scrap piece of paper. This design uses an alternating checkerboard pattern. -
Start the lid pattern:
Dip your foam pouncer or round sponge dauber into the teal paint first. Dab off excess paint on the palette to avoid globs. Press gently onto the top left corner of the lid to make your first dot. -
Continue the teal row:
Create a diagonal-style or offset row pattern. I like to leave about an inch of space between dots of the same color. -
Add the orange accents:
Clean your pouncer or switch to a fresh one. Dip it into the burnt orange paint and fill in the empty spaces between the teal dots, maintaining that repeating offset pattern. -
Address the edges:
Don’t be afraid to let some dots ‘fall off’ the edge of the box. Use the pouncer to stamp a half-circle right on the rim where the lid meets the side for a continuous, wrapped look. -
Paint the sides:
Move down to the bottom section of the box. Continue the pattern, ensuring the spacing aligns roughly with the pattern on the lid so it looks cohesive. -
Touch up imperfections:
If any dots look uneven or thin, use your small detail brush to carefully fill them in or round out the edges once the initial stamp is dry.
Bleeding Dots?
If paint bleeds under your pouncer, the paint is too thin or you’re pressing too hard. Use less paint on the sponge and use a swift up-and-down motion.
Step 3: Finishing Touches
-
Dry thoroughly:
Let the polka dots dry completely, usually for about an hour, to prevent smearing during the sealing process. -
Seal the box:
Apply a coat of matte clear sealant spray or brush on a layer of Mod Podge. This protects the paint from chipping and gives the box a professional, non-shiny finish. -
Reattach hardware:
Once the sealant is dry and no longer tacky, remove the painter’s tape or screw the metal latch back into place.
Level Up
Use a gold paint pen to outline each dot after they dry. This adds a subtle metallic shimmer that makes the simple pattern look elegant and expensive.
Now you have a charming, custom storage box perfect for jewelry or keepsakes that brightens up any shelf


Two-Tone Color Block With a Bold Lid
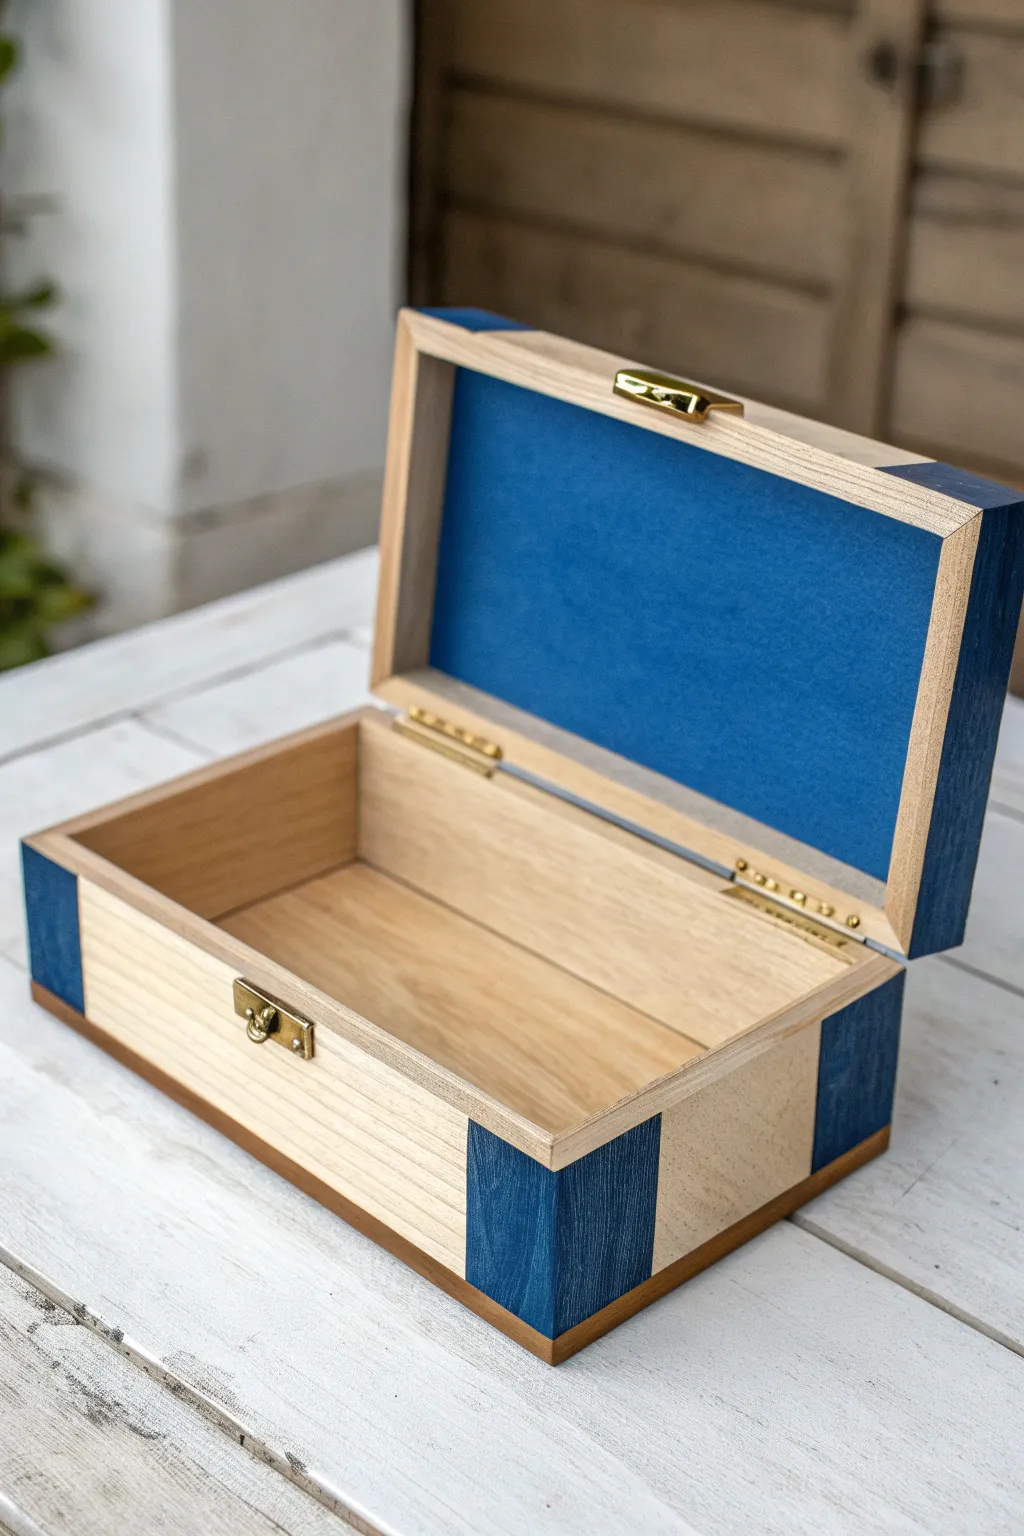
Transform a plain wooden box into a modern keepsake with striking cobalt blue accents against natural light wood. This project uses precise taping and rich acrylic paint to create a clean, sophisticated two-tone effect perfect for storing jewelry or letters.
Detailed Instructions
Materials
- Unfinished wooden box with hinged lid
- Medium-grit sandpaper (150-grit)
- Fine-grit sandpaper (220-grit)
- Painter’s tape or dedicated masking tape
- Deep cobalt blue acrylic or chalk paint
- Flat shader brush (medium width)
- Small angled brush (for edges)
- Matte or satin clear varnish (spray or brush-on)
- Screwdriver (for hardware removal)
- Tack cloth or microfiber rag
Step 1: Preparation
-
Remove the hardware:
Before you begin, use a small screwdriver to carefully unscrew the latch and hinges. This is the most crucial step for a professional finish—painting around hardware never looks quite right. Place the tiny screws in a bowl so they don’t roll away. -
Sand the surfaces:
Give the entire box a light sanding with 150-grit sandpaper to remove any rough patches or splinters. Follow up with 220-grit for a smooth, touchable finish. -
Clean off the dust:
Ensure the wood is completely free of sawdust by wiping it down with a tack cloth or a slightly damp microfiber rag. Any leftover dust will get trapped under your tape.
Clear Coat Trick
Before painting blue, brush a tiny bit of clear matte medium over the tape edge. This seals the gap so any bleed is invisible clear coat, not blue paint.
Step 2: Masking the Design
-
Measure the corners:
Decide how wide you want your blue corner blocks to be. Measure about 1.5 to 2 inches from each corner edge inward and mark lightly with a pencil. -
Tape the vertical lines:
Place strips of painter’s tape vertically on the front and back panels, aligning the edge of the tape with your pencil marks. This defines the boundary between the natural wood center and the painted corners. -
Tape the horizontal lines:
Continue the tape line across the top of the lid and down the sides. The goal represents a ‘stripe’ of painted area wrapping around the box’s profile. -
Mask the interior lid:
Open the lid. Carefully tape off the raised wooden frame on the inside of the lid, leaving only the recessed center panel exposed for painting. -
Seal the tape edges:
Run your fingernail or a credit card firmly along all tape edges. I like to do this twice to ensure no paint bleeds underneath, keeping those lines razor-sharp.
Sticky Hardware?
If the latch is tight after painting/sealing, rub a tiny bit of candle wax on the moving metal parts to lubricate the mechanism without making a mess.
Step 3: Painting
-
First coat on corners:
Using your flat shader brush, apply the cobalt blue paint to the exposed corner sections. Paint in the direction of the wood grain for the smoothest application. -
Paint the interior panel:
Apply the same blue paint to the recessed panel inside the lid. Use the small angled brush to get crisp lines right up to the taped frame. -
Let it dry completely:
Allow the first coat to dry according to the paint manufacturer’s instructions. If the wood grain is still showing through too much, apply a second coat. -
Check for coverage:
Inspect the corners and edges. Sometimes raw wood soaks up paint unevenly. A third thin coat might be necessary for that deep, opaque blue look.
Step 4: Finishing Touches
-
Peel the tape:
This is the satisfying part. Carefully peel back the painter’s tape while the final coat is still slightly tacky (or fully dry, depending on your tape brand) to reveal your crisp lines. -
Touch up if needed:
If any paint bled under the tape, wait for it to dry fully, then gently scrape it away with a craft knife or lightly sand it off. -
Seal the wood:
Apply a coat of clear matte varnish over the entire box, both the painted areas and the raw wood. This protects the wood from yellowing and seals the paint against scratches. -
Reattach hardware:
Once the varnish is cured and no longer sticky, screw the hinges and latch back into their original holes.
Now you have a stylish, custom storage piece that looks professionally designed right on your desk
BRUSH GUIDE
The Right Brush for Every Stroke
From clean lines to bold texture — master brush choice, stroke control, and essential techniques.
Explore the Full Guide
Modern Geometric Shapes for a Neat Patterned Box
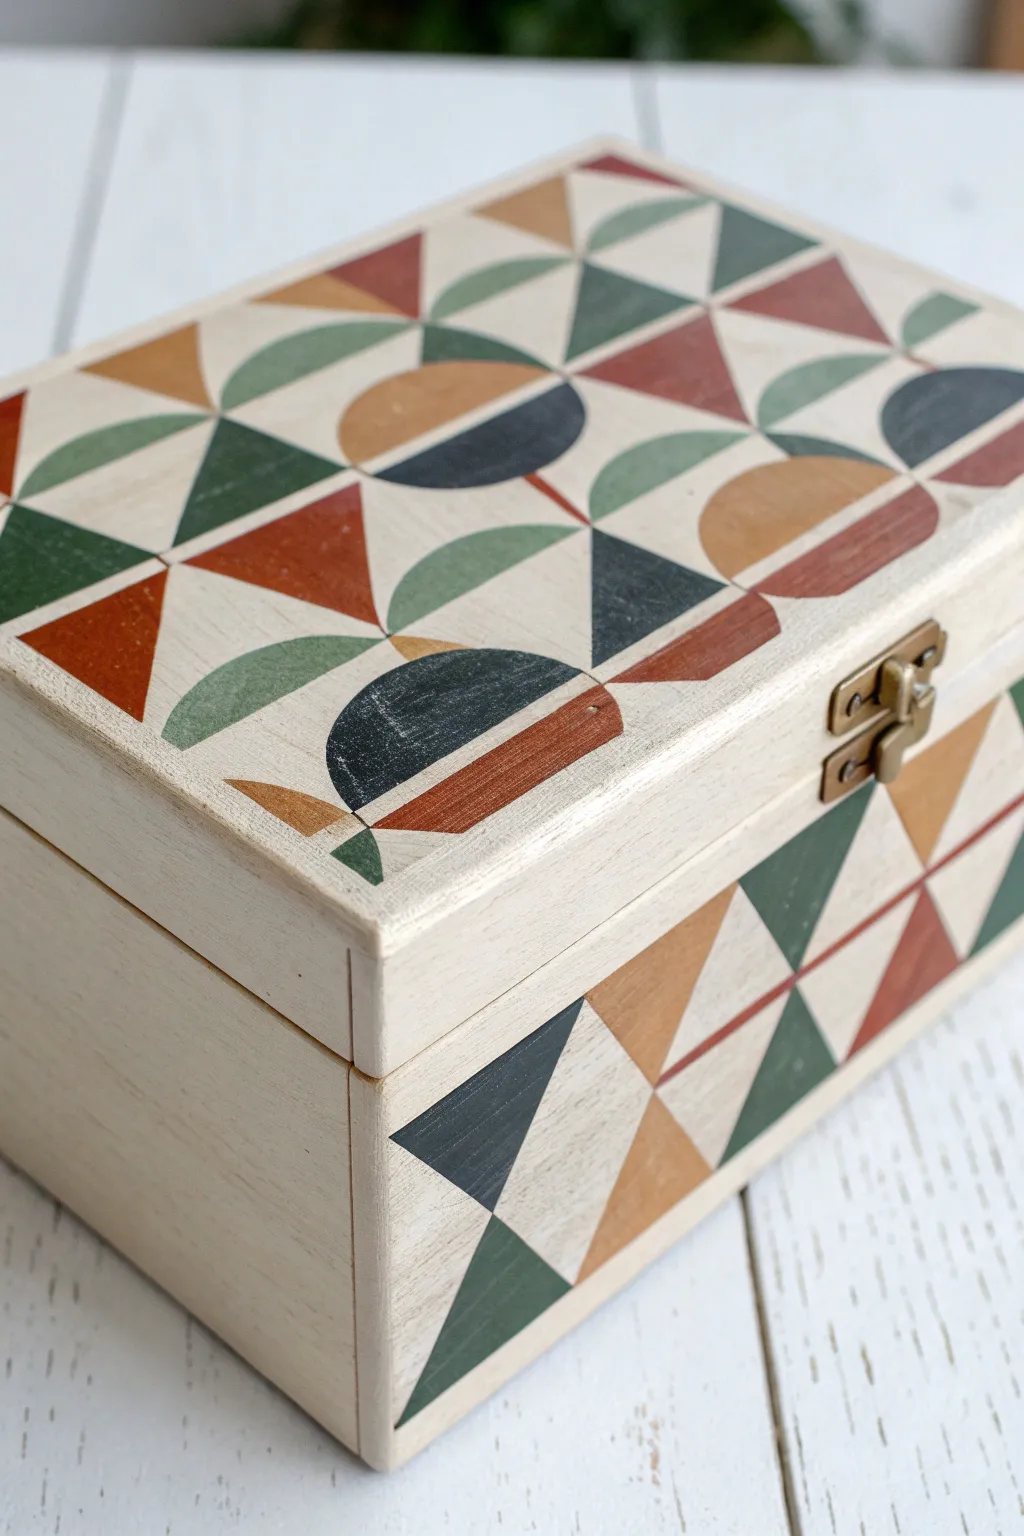
Transform a plain wooden craft box into a stylish storage piece featuring a retro-inspired geometric pattern. With its earthy palette of rust, mustard, sage, and navy against a creamy background, this project brings a sophisticated modern touch to any shelf.
Step-by-Step Guide
Materials
- Unfinished wooden box with hinged lid
- Fine-grit sandpaper (220 grit)
- Tack cloth or slightly damp rag
- Acrylic craft paints (Cream/Off-White, Rust/Terracotta, Mustard Yellow, Forest/Sage Green, Navy Blue)
- Small flat shader brushes (sizes 4 and 6)
- Linear or detail brush (size 0 or 1)
- Pencil
- Ruler
- Circle stencil or compass
- Painter’s tape (optional but helpful)
- Matte clear acrylic sealer (spray or brush-on)
Step 1: Preparation and Base Coat
-
Sand the surface:
Begin by sanding the entire wooden box with 220-grit sandpaper. Pay extra attention to the corners and edges to ensure they are smooth to the touch. -
Clean the dust:
Remove all sanding dust using a tack cloth or a clean, slightly damp rag. A clean surface is crucial for smooth paint application. -
Remove hardware:
If possible, unscrew the latch and hinges. Painting is much easier without having to work around the metal hardware, and it ensures a cleaner finish. -
Paint the base color:
Apply a coat of the Cream/Off-White acrylic paint to the entire exterior of the box. Use broad, even strokes going with the wood grain. -
Apply a second coat:
Once the first layer is fully dry, apply a second coat of the cream paint for opaque, solid coverage. Let this dry completely before moving on.
Fixing Wobbly Lines
If your geometric edges aren’t sharp, don’t panic. Let the paint dry fully, then use a tiny piece of painter’s tape to mask the area and repaint the clean edge.
Step 2: Mapping the Design
-
Mark the grid:
Using a ruler and a pencil, lightly draw a grid on the lid of the box. For this specific pattern, divide the lid into quarters or eighths depending on your box size. -
Sketch the lid shapes:
Within your grid, lightly sketch the geometric shapes seen in the photo. Alternate between triangles and semicircles to create the dynamic pattern. Use a circle stencil or compass for perfect curves. -
Map the sides:
On the front and side panels of the box, draw a simpler geometric pattern. Based on the reference, this uses a series of triangles forming ‘hourglass’ shapes or diamonds. -
Review the layout:
Take a step back and look at your pencil lines. Ensure the spacing looks balanced before you commit with paint.
Level Up: Texture
For a truly vintage feel, apply a thin coat of antiquing wax over the finished paint. It settles into the wood grain and gives the colors a warm, aged patina.
Step 3: Painting the Pattern
-
Start with lightest colors:
Begin painting your varied shapes, starting with the Mustard Yellow. Fill in specific semicircles and triangles according to your plan using a flat shader brush. -
Add the earthy reds:
Next, move to the Rust/Terracotta color. Paint the adjacent shapes, being careful to keep your edges crisp where the colors meet. -
Paint the greens:
Fill in the designated green sections using your Forest/Sage shade. I find that rotating the box while painting helps get the best angle for these curved edges. -
Finish with dark accents:
Apply the Navy Blue to the remaining shapes. This dark color adds depth and anchors the lighter tones. -
Refine the edges:
Use your smallest detail brush and a tiny bit of the base cream color to touch up any areas where the colored paint might have strayed over the lines.
Step 4: Finishing Touches
-
Distress lightly (optional):
If you want the lived-in look shown in the image, very lightly run fine-grit sandpaper over the painted design once it is 100% dry. This reveals a tiny bit of the wood grain texture. -
Seal the box:
Apply a matte clear acrylic sealer over the entire box to protect your artwork from scratches and dust. -
Reattach hardware:
Once the sealer has cured, screw the hinges and latch back into place.
Now you have a beautifully bespoke box ready to organize your treasures on a desk or vanity
Hand-Painted Checkerboard for Instant Charm
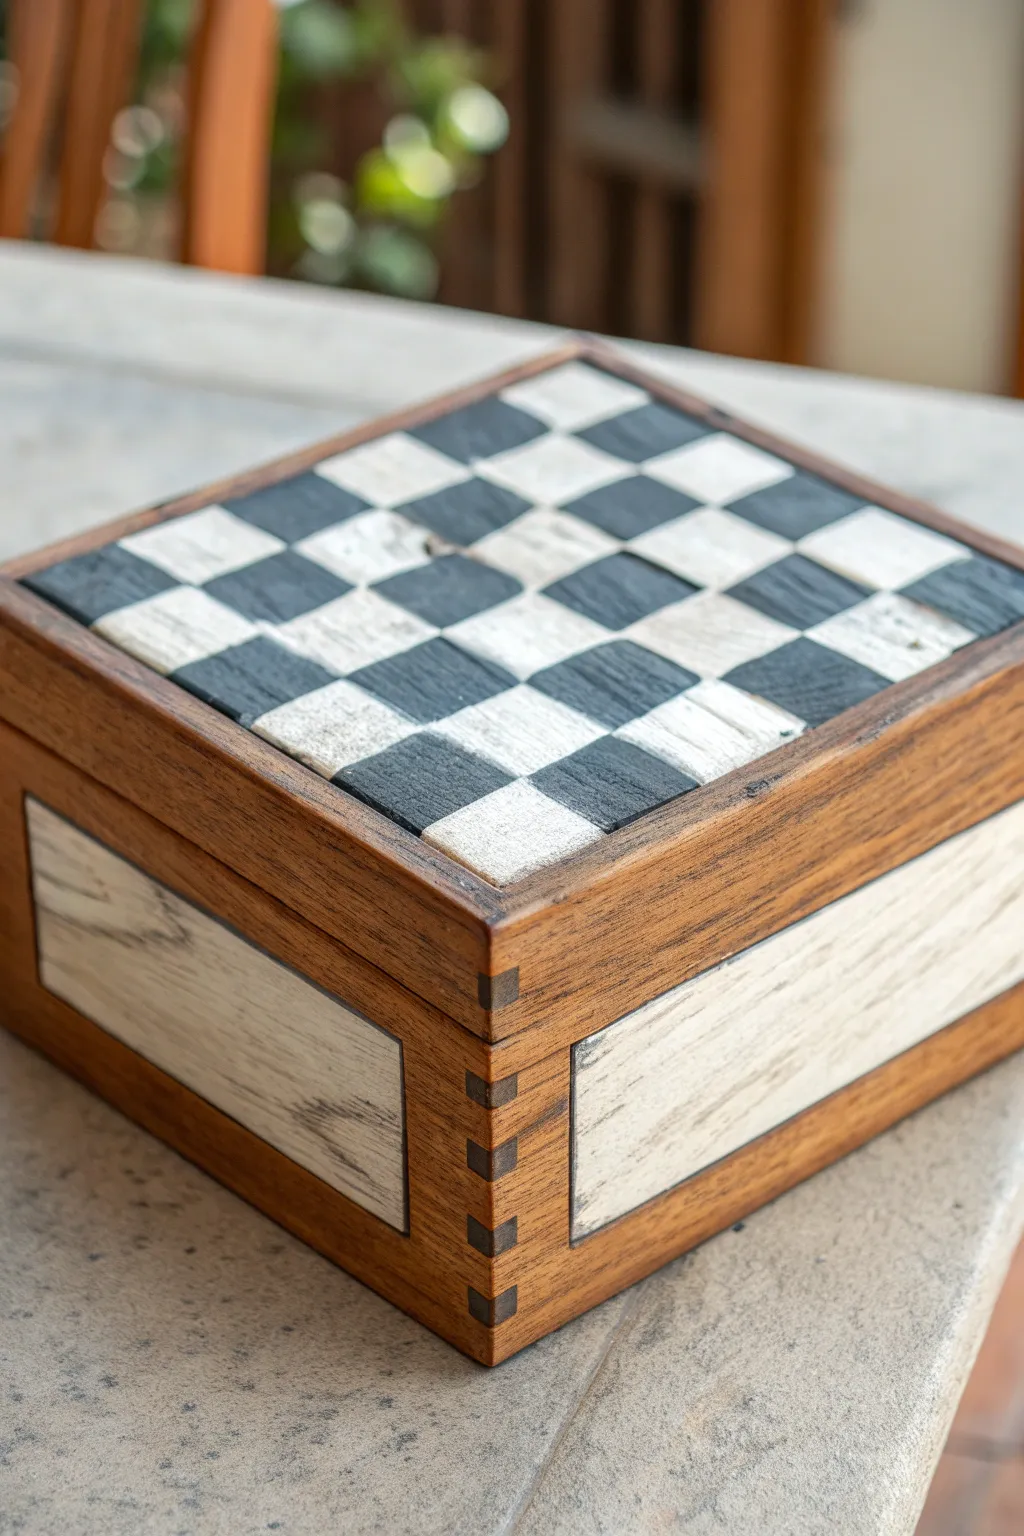
Transform a plain wooden keepsake box into a classic game piece with this elegant, rustic checkerboard design. The finished look combines stark black and white geometry with the warmth of natural wood grain for a timeless aesthetic.
How-To Guide
Materials
- Unfinished wooden box (preferably with finger joints)
- Painter’s tape (choose a quality, sharp-line brand)
- Acrylic craft paint (Black)
- Acrylic craft paint (Warm White or Antique White)
- Fine-grit sandpaper (220 grit)
- Medium-grit sandpaper (150 grit)
- Flat shader brush (small)
- Foam brush or medium flat brush
- Ruler or measuring tape
- Pencil
- Matte clear coat sealer (spray or brush-on)
- X-Acto knife or craft blade
Step 1: Preparation & Side Panels
-
Prepare the surface:
Begin by lightly sanding the entire exterior of the wooden box with 220-grit sandpaper. This smooths out any rough grain and prepares the wood to accept the paint evenly. Wipe away all dust with a tack cloth or slightly damp rag. -
Mark the side borders:
Using your ruler and pencil, mark a rectangle on each side of the box, leaving about a 1/2-inch border of natural wood around the edges. This creates the ‘framed’ look for the white panels. -
Tape the side boundaries:
Apply painter’s tape carefully along the outside of your pencil lines. Press the edges of the tape down firmly with your fingernail or a credit card to prevent paint bleed. -
Paint the side panels:
Load your foam brush with the Warm White paint. Apply thin, even coats inside the taped area. I like to keep the strokes horizontal to mimic the wood grain direction. -
Create the distressed look:
Once the white paint is completely dry, take your 150-grit sandpaper and gently sand over the painted area. Focus on the edges and random spots in the center to let the wood grain peek through, giving it that rustic, weathered vibe. -
Reveal the sides:
Carefully peel away the painter’s tape to reveal the crisp wood border framing your distressed white panels.
Bleeding Lines?
If paint bleeds under the tape, wait for it to dry fully. Then, gently scrape the excess off with an X-Acto knife or use a tiny brush with the base wood color to correct it.
Step 2: The Checkerboard Top
-
Measure the grid:
Measure the top of your box lid. Divide the width and length by 8 (for a standard chess board look) or by a smaller number if you want chunkier squares. Mark these intervals lightly with a pencil along the edges. -
Draw the grid lines:
Connect your marks using a ruler to draw a full grid across the lid. Keep your pencil lines very faint so they are easier to cover later. -
Tape the horizontal rows:
Apply strips of painter’s tape across the lid, covering every *other* row completely. You are creating a stencil for the first set of squares. -
Cut the vertical divisions:
Lay tape perpendicular to your first rows. Use an X-Acto knife to gently cut away the squares that need to be painted, or alternatively, cut small squares of tape to block off the ‘white’ squares manually. -
Paint the first set of black squares:
Using the small flat shader brush, paint the exposed squares with black acrylic paint. Don’t overload the brush; multiple thin coats are better than one thick, gloopy one to avoid ridges. -
Remove tape and dry:
While the paint is still slightly tacky (not fully dry), carefully remove all the tape. Let the black squares dry completely before moving to the next step. This prevents smudging. -
Tape for white squares:
Once the black paint is cured, repeat the taping process to expose the alternating empty squares. Ensure you protect the black squares you just painted. -
Paint the white squares:
Paint the remaining squares with your Warm White paint. You may need an extra coat here to ensure good opacity over the wood tone. -
Final reveal:
Remove all remaining tape. Check for any small bleeds; you can gently scrape them away with your craft knife or touch them up with a tiny brush. -
Distress the top:
To match the sides, very lightly sand the checkerboard top with 220-grit paper. This unifies the surface and makes the paint look worn into the wood rather than just sitting on top.
Seal Before Painting
Apply a thin layer of matte medium or clear sealer over your tape edges before painting color. This seals the tape line and ensures your colored squares stay perfectly crisp.
Step 3: Finishing Touches
-
Clean up interior edges:
If any paint got onto the lip where the lid meets the box, sand it off carefully so the box closes flush without sticking. -
Seal the project:
Apply a matte clear coat sealer over the entire box, including the unpainted wood areas. This protects the finish and enriches the natural wood color of the frames and joints.
Now you have a charming, rustic box perfect for storing game pieces or trinkets on your coffee table

PENCIL GUIDE
Understanding Pencil Grades from H to B
From first sketch to finished drawing — learn pencil grades, line control, and shading techniques.
Explore the Full Guide
Cozy Plaid Lines That Feel Like a Heirloom Box
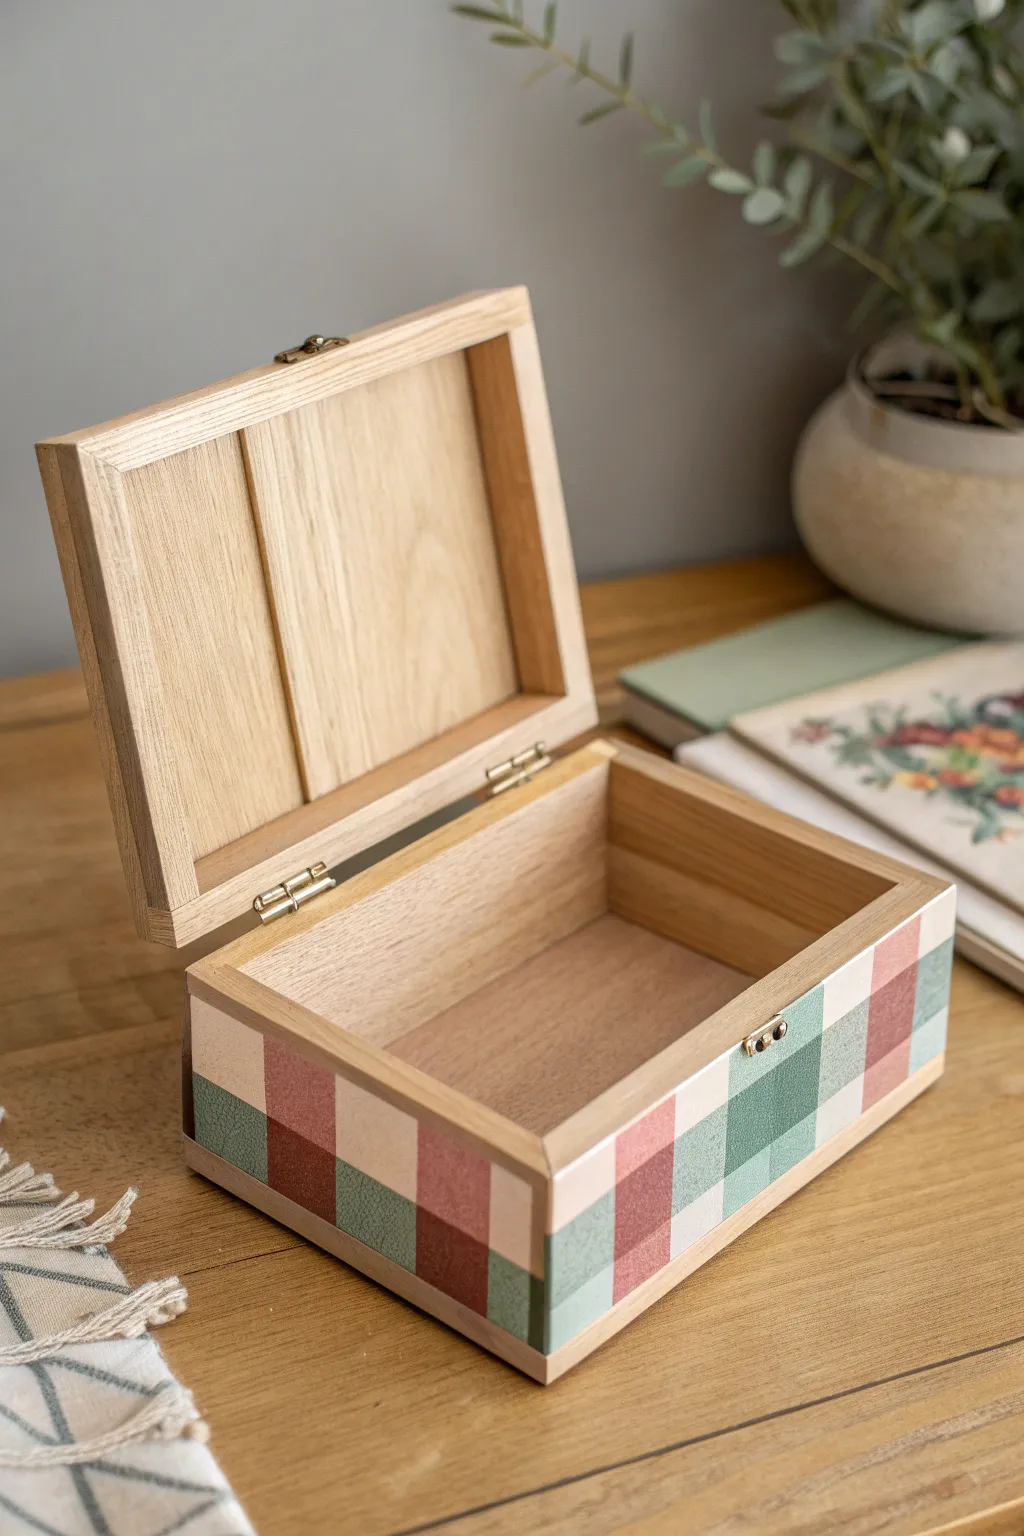
Transform a plain wooden box into a charming, heirloom-quality piece with this warm plaid design. The intersecting blocks of sage green, blush pink, and deep rust create a cozy, nostalgic pattern that feels both modern and timeless.
Step-by-Step
Materials
- Unfinished wooden box with hinged lid
- Acrylic craft paints (creamy white, sage green, blush pink, deep rust/maroon)
- Painter’s tape or masking tape (approx. 1 inch width)
- Flat shader paintbrushes (medium and small)
- Ruler and pencil
- Fine-grit sandpaper (220 grit)
- Matte or satin varnish/sealer
- Small screwdriver (to remove hardware)
Step 1: Preparation & Base Coat
-
Remove hardware:
Before you start painting, use a small screwdriver to carefully remove the latch and hinges from the box. Keep the tiny screws in a safe dish so they don’t roll away. -
Sand the surface:
Lightly sand the entire exterior of the box with 220-grit sandpaper to remove any rough splinters or factory gloss. This helps the paint adhere better. -
Wipe clean:
Use a tack cloth or a slightly damp paper towel to wipe away all the sanding dust. The surface needs to be completely clean. -
Paint the base color:
Apply a coat of creamy white acrylic paint to the bottom exterior portion of the box. You want a solid, opaque background for your plaid. -
Dry and repeat:
Let the first coat dry completely. If the wood grain is still showing through too much for your liking, apply a second coat of the cream paint and let it dry fully.
Bleeding Lines?
If paint bleeds under tape, let it dry fully. Then, gently scrape the excess away with an X-Acto knife or touch it up with the base color using a liner brush.
Step 2: Creating the Grid
-
Measure the grid:
Using your ruler and pencil, lightly mark vertical lines around the box at intervals equal to the width of your painter’s tape (or your desired square size, usually about 1 inch). -
Apply vertical tape:
Place strips of painter’s tape vertically based on your marks. You should have alternating stripes of exposed wood (painted cream) and covered tape. -
Seal the tape edges:
Here I like to press the edges of the tape down firmly with my fingernail or an old credit card to prevent paint from bleeding underneath. -
Paint the first vertical color:
Paint the exposed vertical stripes with your sage green paint. Use a flat brush and brush away from the tape edge initially to further prevent bleeding. -
Remove and dry:
Carefully peel off the tape while the paint is still slightly tacky to get a crisp line. Let the green stripes dry completely before moving on.
Step 3: Weaving the Plaid
-
Tape horizontal lines:
Once the vertical stripes are bone dry, apply horizontal strips of tape around the box. This creates the ‘weft’ of your plaid pattern. -
Paint horizontal stripes:
Paint these exposed horizontal rows with the blush pink paint. This will paint over both the cream background and the green stripes you already made. -
Peel and reveal:
Remove the horizontal tape carefully. You will now see a grid forming, but we need to add the darker intersection points to create the true plaid effect. -
Identify intersections:
Look at where your horizontal pink lines cross over the vertical green lines. These specific squares are where the colors would ‘blend’ in a real fabric. -
Paint the checkered intersections:
Using a small flat brush and a steady hand (or fresh tape if you prefer), paint these intersection squares with the deep rust color. This dark square makes the plaid pop.
Level Up: Texture
Mix a tiny amount of fabric medium into your paint or scuff the final dried paint lightly with sandpaper to give the box a genuine, worn-fabric feel.
Step 4: Finishing Touches
-
Clean up edges:
Inspect your lines. If any paint bled, use a tiny brush with the cream base color to touch up the edges and sharpen the squares. -
Seal the work:
Once all paint is fully cured, apply a thin layer of matte or satin varnish over the painted area to protect it from scratches and fingerprints. -
Reattach hardware:
Grab those tiny screws you set aside earlier and reattach the hinges and latch. Ensure they are screwed in straight so the lid closes properly.
Now you have a lovely little storage piece that brings a touch of cottage warmth to any shelf
Marbled Swirls That Make Every Box One of a Kind
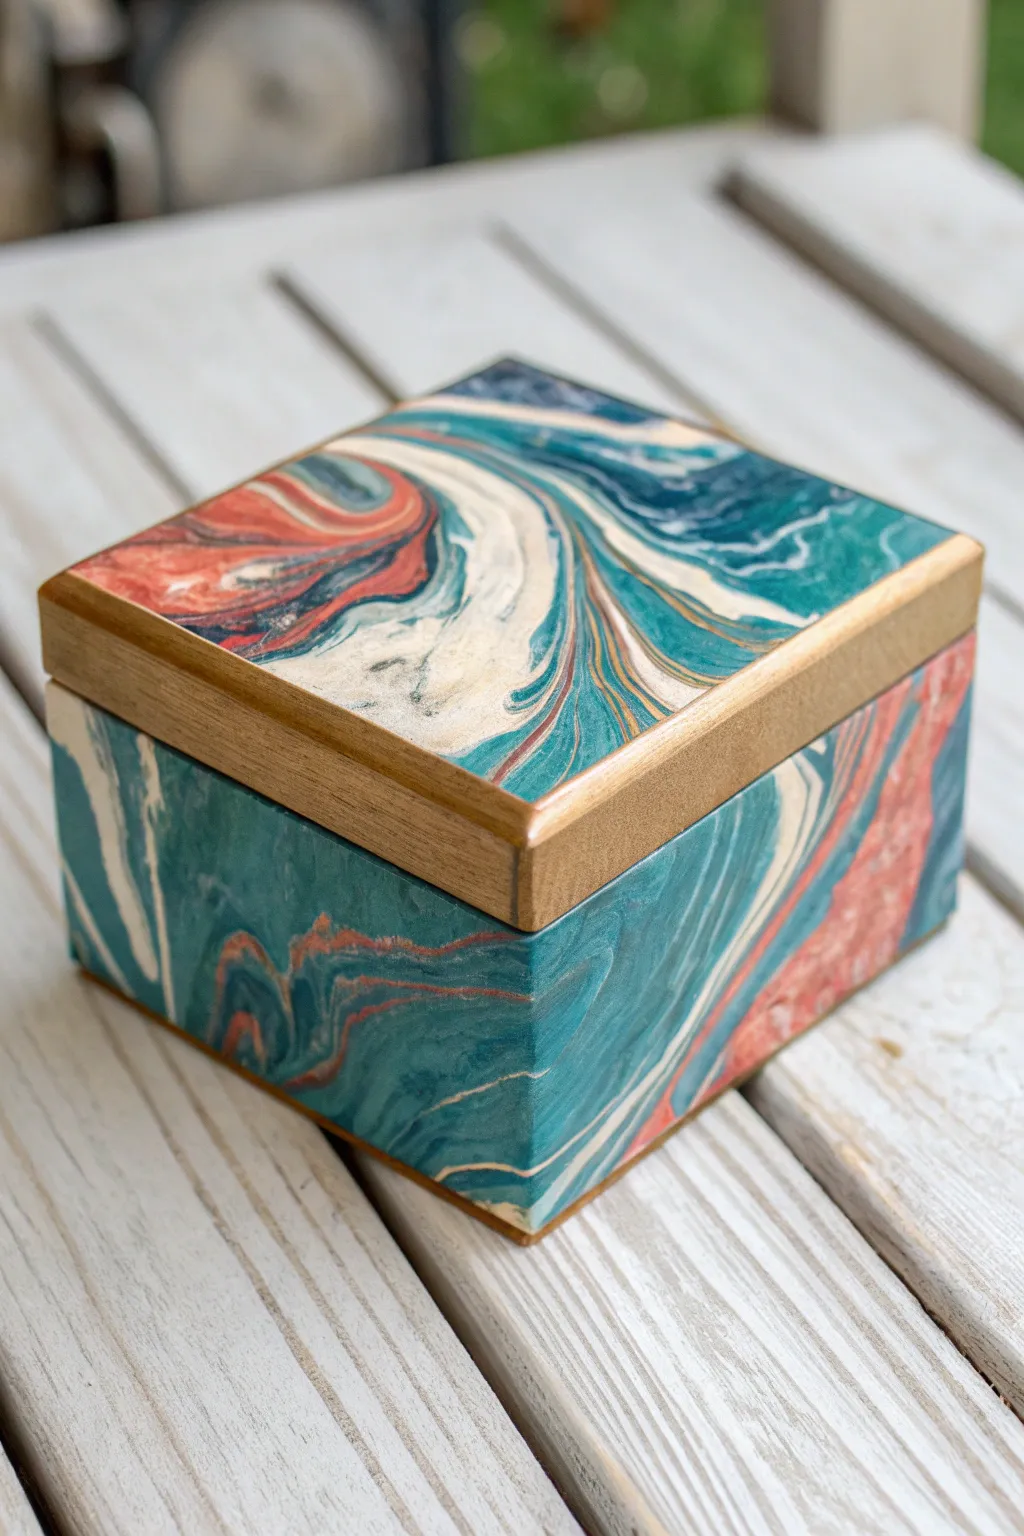
Transform a plain wooden box into a mesmerizing piece of functional art featuring fluid swirls of teal, coral, and cream. Using a simple hydro-dipping technique, you will achieve an organic, stone-like finish that makes every single box essentially unrepeatable.
Step-by-Step Tutorial
Materials
- Unfinished wooden box with lid
- Sandpaper (220 grit)
- White acrylic primer or gesso
- Painter’s tape
- Large plastic tub (deep enough to submerge the box)
- Marbling paints or acrylic paints thinned with pouring medium (Teal, Coral, Cream/White)
- Wooden skewer or toothpick
- Gloves
- Clear matte or satin sealant spray
- X-acto knife
Step 1: Preparation
-
Sand the surface:
Begin by lightly sanding the entire wooden box using 220-grit sandpaper to remove any rough patches or splinters. Wipe away the dust with a clean, slightly damp cloth. -
Prime the dipping area:
For the colors to pop like they do in the photo, you need a white base. Apply a coat of white primer or gesso to the exterior of the box’s body and the top panel of the lid. Let this dry completely. -
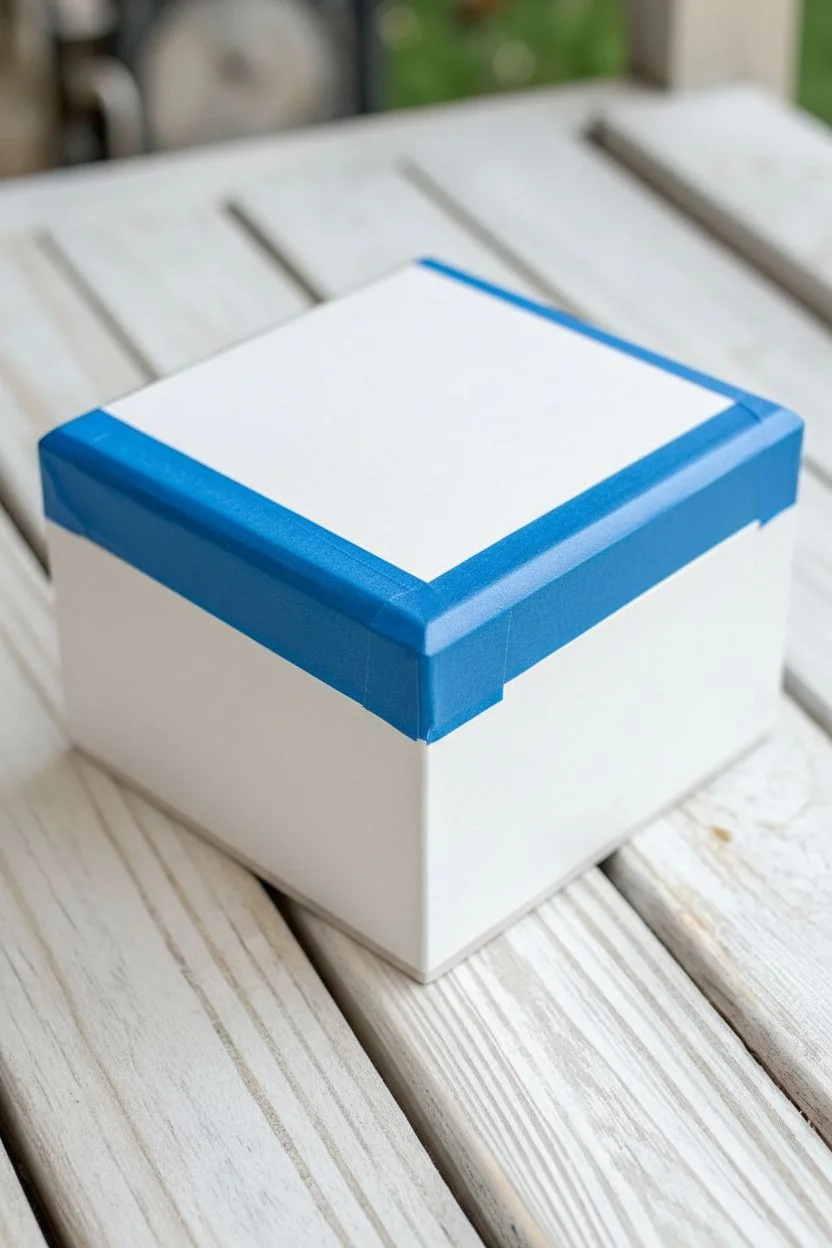
Mask the wood accents:
This design features a beautiful natural wood rim on the lid. Carefully apply painter’s tape to cover the vertical sides of the lid completely. Use an X-acto knife to trim the tape perfectly flush with the edge of the top panel so the line is crisp. -
Protect the interior:
Tape off the inside lip of the box and stuff the interior with newspaper or tape it shut to prevent water and paint from ruining the inside.
Water Temp Matters
Use room temperature water. If the water is too cold, the paint can seize up and clump; if it’s too hot, the paint film might break apart too quickly.
Step 2: Creating the Swirls
-
Prepare the water bath:
Fill your plastic tub with room temperature water. It needs to be deep enough to fully submerge the tallest part of the box you plan to dip. -
Drop the colors:
Shake your paints well. If using standard acrylics, ensure they are thinned to a milky consistency. Gently drip your teal, coral, and cream paints onto the surface of the water, alternating colors. -
Manipulate the pattern:
Take your wooden skewer and gently drag it through the floating paint. Create swirls and ‘S’ shapes, but don’t over-mix—you want distinct bands of color like the strata in agate stone. -
Dip the box body:
Wearing gloves, hold the box body securely. Slowly but steadily plunge it into the water at a 45-degree angle. The angle helps wrap the paint around the corners smoothly without trapping air bubbles. -
Clear and remove:
While the box is submerged, blow on the water surface or wave your hand to disperse the remaining paint film so it doesn’t double-coat the box as you pull it out. Lift the box out and set it aside. -
Dip the lid:
Repeat the paint dropping and swirling process for the lid. Dip the top face of the lid onto the water surface, submerging just enough to coat the top panel, then lift straight up.
Step 3: Finishing Touches
-
Dry thoroughly:
Place the dipped pieces on prolonged drying racks or upside-down cups. Painting on water adds moisture to wood, so I like to let this dry overnight to ensure no water is trapped. -
Remove tape:
Once the paint is fully dry to the touch, carefully peel away the painter’s tape from the lid rim and the box interior. Go slowly to ensure a sharp line between the marble pattern and the raw wood. -
Touch up edges:
If a little paint bled under the tape onto the wood rim, use your fine sandpaper to gently buff it away. -
Seal the artwork:
To protect the finish from scratches and moisture, spray the entire exterior (including the wood rim) with a clear matte or satin sealant. Two light coats are better than one heavy coat.
Paint Sinking?
If your paint drops sink to the bottom instead of floating, your paint is too heavy. Try thinning it slightly more with water or a flow medium.
This sophisticated storage solution is now ready to hold your jewelry or treasured keepsakes in style


Sponge-Painted Galaxy for a Dramatic Night-Sky Box
Transform a plain wooden box into a mesmerizing slice of the cosmos with this stunning sponge-painting project. Using deep blues, violets, and clusters of twinkling stars, you’ll create a dramatic night-sky effect that feels infinitely deep and magical.
Detailed Instructions
Materials
- Unfinished wooden box (hinged lid)
- Fine-grit sandpaper (220 grit)
- Acrylic paints: Black, Navy Blue, Violet/Purple, Magenta, White
- Medium flat paintbrush (for base coat)
- Small natural sea sponge or cosmetic wedge sponges
- Fine detail paintbrush (size 0 or 00)
- Old toothbrush (optional for spattering)
- Paper plate or palette
- Water and paper towels
- Matte or satin clear sealant spray
Step 1: Preparing the Canvas
-
Sand the Wood:
Begin by lightly sanding the entire surface of your wooden box. Even if it looks smooth, a quick pass with 220-grit sandpaper helps the paint adhere better and removes any microscopic splinters. -
Wipe it Clean:
Use a damp paper towel or a tack cloth to thoroughly remove all sanding dust. Every speck of dust can create a bump in your smooth galaxy finish, so be thorough. -
Apply the Base Coat:
Using a flat paintbrush, cover the entire outside of the box with a solid coat of Navy Blue acrylic paint. Paint with the grain of the wood for the smoothest application. -
Deepen the Edges:
While the blue is still slightly wet, mix a tiny bit of black into your blue and darken the corners and very bottom edges of the box. This creates a subtle vignette effect that adds dimension before you even start the stars. -
Dry completely:
Let this base layer dry fully. It usually takes about 20-30 minutes, but it must be dry to the touch so the sponge layers don’t lift the paint underneath.
Starry Pro-Tip
When sponging, rotate your wrist slightly between every few dabs. This prevents a repetitive “stamp” pattern and keeps your nebula clouds looking organic and random.
Step 2: Creating the Nebula
-
Prepare the Sponge:
Dampen your sea sponge or cosmetic wedge and wring it out completely—it should be barely moist, not wet. Dip it lightly into the Purple or Violet paint. -
Test the Dab:
Before touching the box, blot the sponge on a paper towel until the texture looks soft and cloudy, rather than like a solid blob of paint. -
Paint the first clouds:
Gently dab irregular cloud shapes onto the center of the lid and slightly down the sides. Keep the edges feather-light and transparent so the navy base shows through. -
Add Magenta Highlights:
Clean your sponge or grab a fresh wedge. Pick up a small amount of Magenta paint and blot it heavily. Dab this into the center of your purple areas to create a glowing core for your nebula. -
Blend the Transitions:
I like to go back with a sponge lightly dipped in the original Navy Blue to soften any edges where the purple looks too harsh against the background. The goal is a seamless, misty transition.
Level Up: Metallic Magic
Mix a tiny amount of iridescent mixing medium or metallic pearl paint into your purple nebula layer. It adds a subtle shimmer that only appears when the light hits the box.
Step 3: Painting the Stars
-
Mix Watery White:
On your palette, mix a drop of water into your white acrylic paint. You want an ink-like consistency that flows easily from a thin brush but isn’t drippy. -
Create Distant Stars:
Using an old toothbrush or a stiff bristle brush dipped in the watered-down white, run your thumb across the bristles to flick tiny speckles across the box. Start sparingly; you can always add more. -
Hand-Paint Major Stars:
Dip your fine detail brush (size 00) into the white paint. touching the surface vertically, dot larger, brighter stars in clusters, focusing heavily on the lighter ‘nebula’ areas you sponged earlier. -
Paint the Starbursts:
Select 3-5 spots on the lid and sides for ‘hero’ stars. Paint a small cross shape (+) with tapering lines. Then, paint a smaller ‘x’ shape over the center to create an eight-pointed glimmer. -
Add Tiny Crosses:
Scatter a few simple four-point stars (just a cross shape) around the larger ones to vary the celestial shapes.
Step 4: Finishing Touches
-
Check the Interior:
Open the box. If any paint dripped onto the rim where the lid meets the base, carefully sand it away or paint over it for a clean, professional edge. -
Seal the piece:
Once the stars are bone dry (give them at least an hour), take the box to a ventilated area. Apply a thin coat of matte or satin clear spray sealant to protect your galaxy from scratches and dust.
Now you have a unique celestial treasure chest ready to hold your favorite keepsakes.
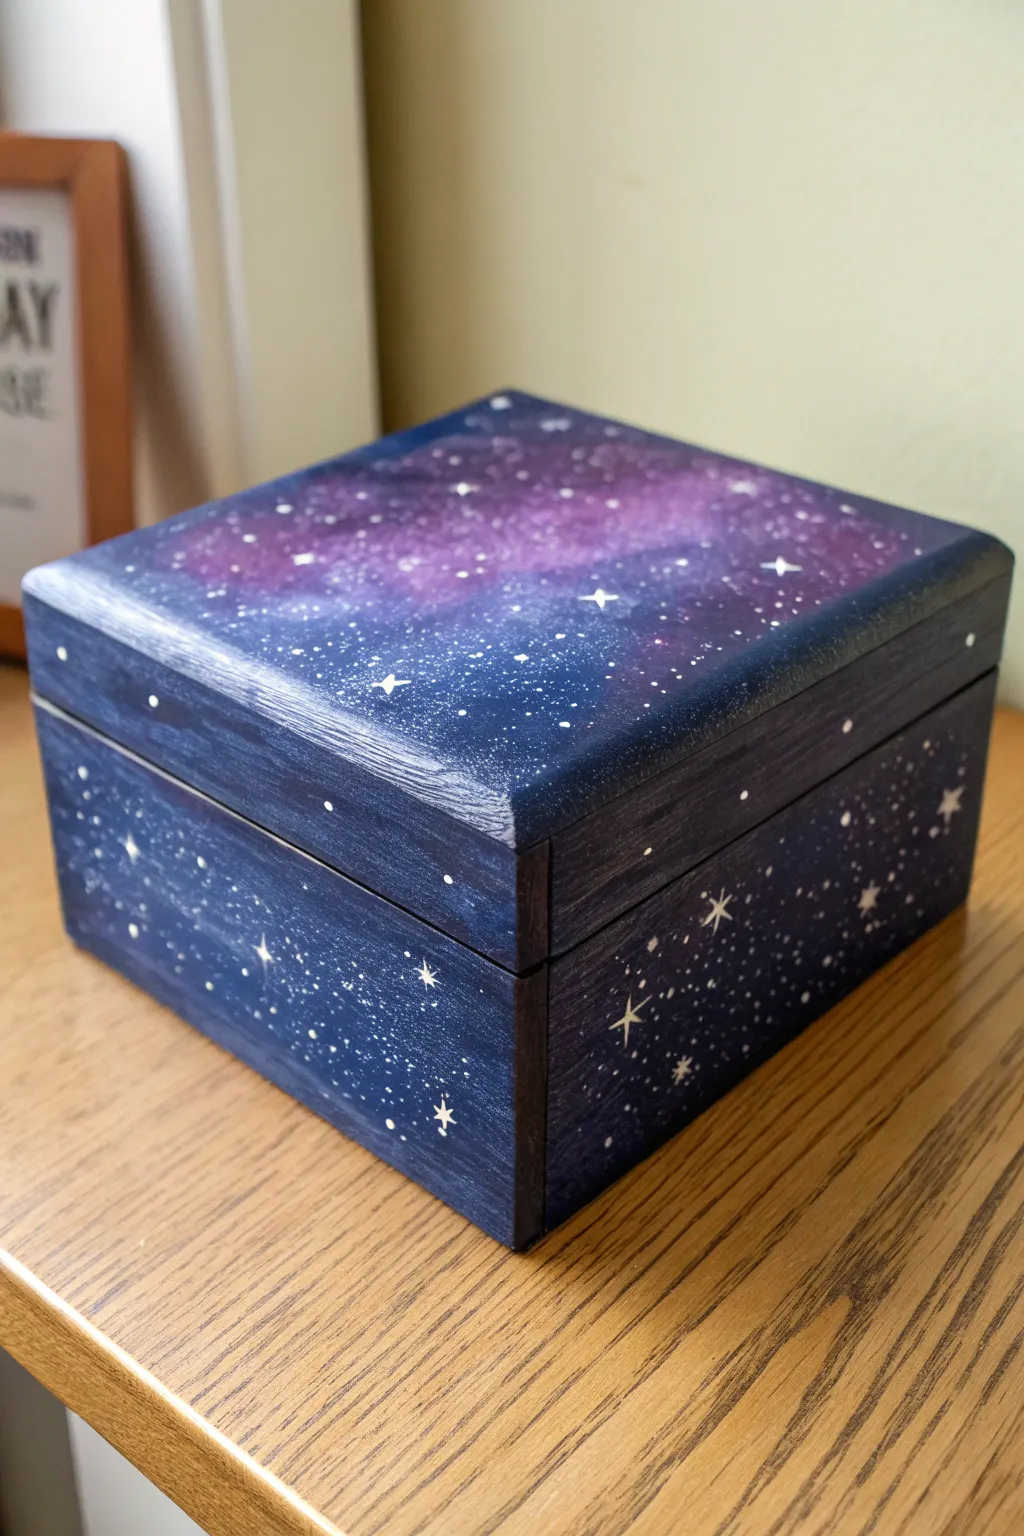
Constellations and Moon Phases on a Small Keepsake Box
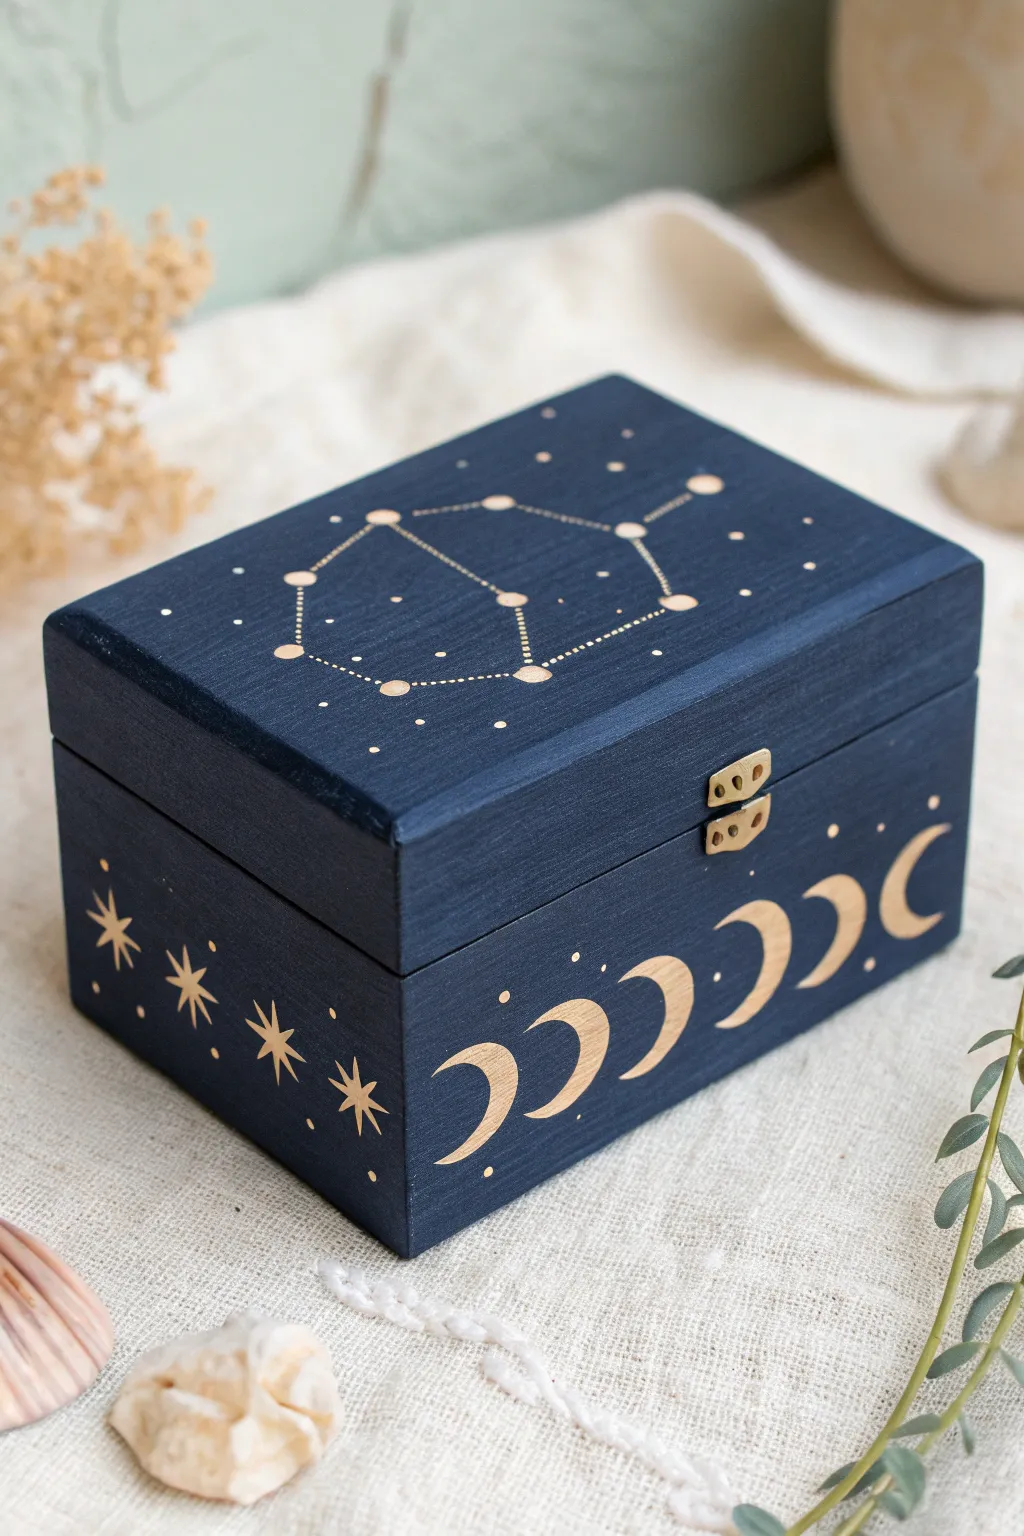
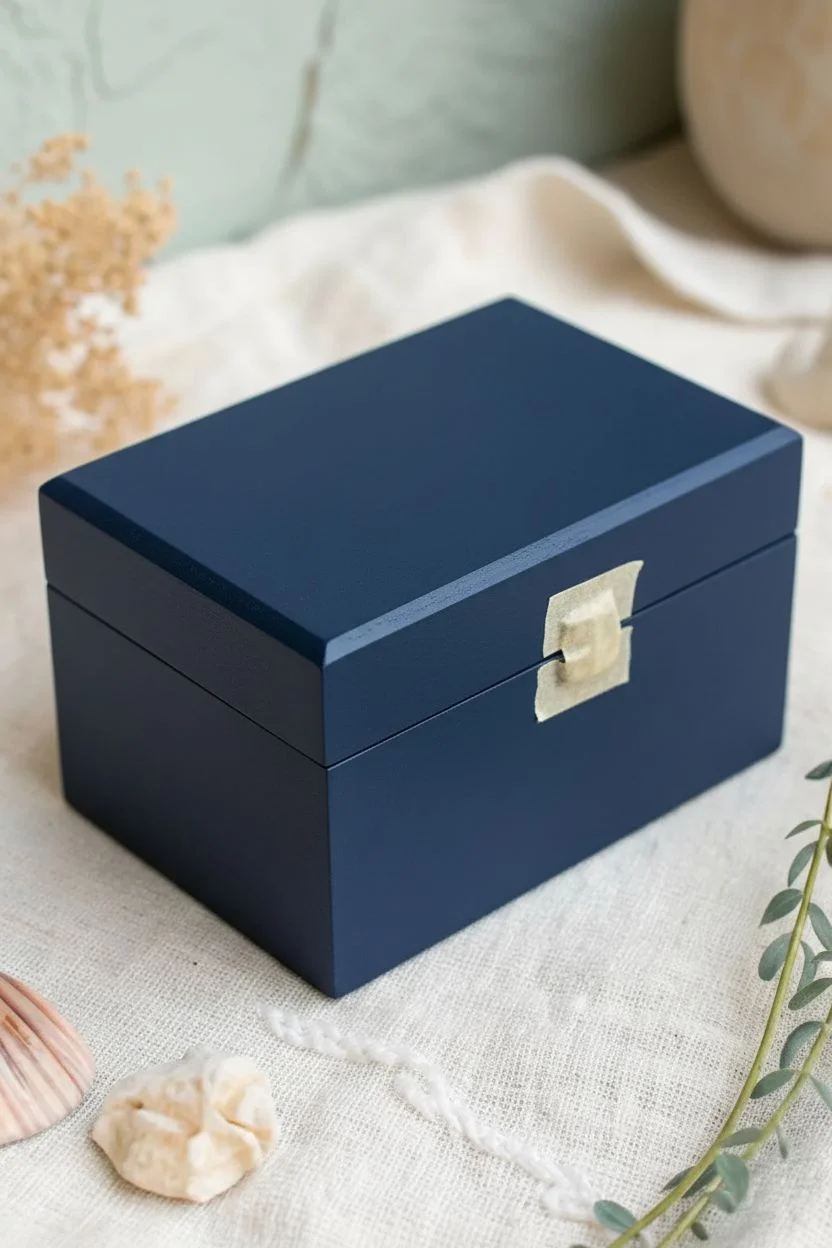
Transform a plain wooden box into a mystical night sky treasure chest with this elegant celestial design. The deep midnight blue base pairs beautifully with shimmering gold accents, featuring a delicate constellation on the lid and a lunar cycle wrapping around the base.
How-To Guide
Materials
- Small unfinished wooden box with latch
- Deep navy blue acrylic paint
- Gold metallic acrylic paint or paint pen
- Flat paintbrush (medium width)
- Small round detail brush (size 0 or 1)
- Pencil
- Ruler
- Compass or small circular object for tracing
- Medium-grit sandpaper
- Matte or satin varnish
Step 1: Preparation and Base Coat
-
Sand the wood:
Begin by lightly sanding your unfinished wooden box. Run your fingers over the corners and edges to ensure there are no splinters or rough patches that could snag your brush later. -
Wipe it clean:
Use a dry cloth or a tack cloth to remove all sanding dust. A clean surface is crucial for a smooth paint finish. -
Remove hardware:
If possible, unscrew the small metal latch and hinges. If they are glued or nailed in, carefully cover them with small pieces of masking tape to keep them paint-free. -
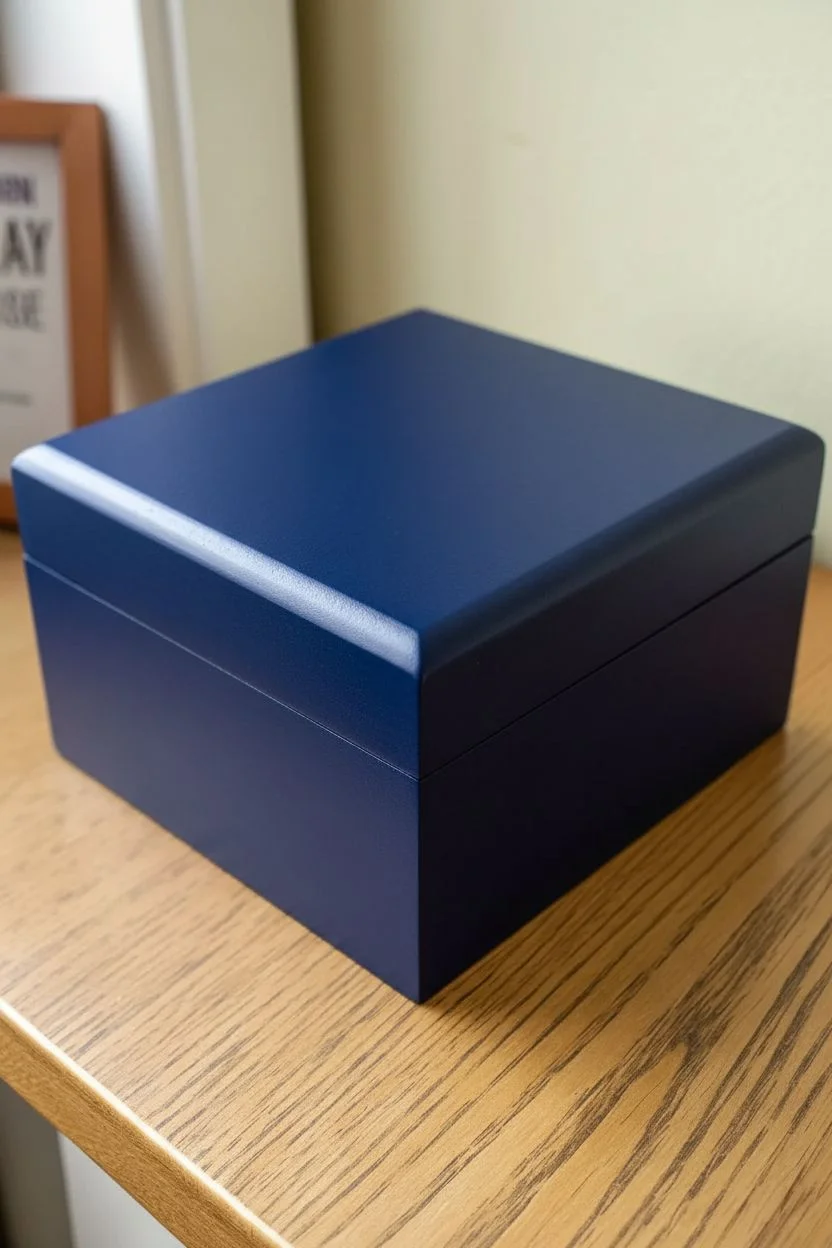
Apply the first coat:
Using a flat brush, apply a coat of deep navy blue acrylic paint to the entire exterior. Paint with the grain of the wood for the smoothest texture. -
Let it dry and repeat:
Allow the first coat to dry completely, which usually takes about 20 minutes. If the wood grain still shows through, apply a second coat for a solid, opaque midnight look.
Step 2: Painting the Constellation Lid
-
Plan your stars:
Lightly sketch your chosen constellation on the lid using a pencil. Mark the position of the main stars first to ensure the scale fits nicely within the rectangular space. -
Connect the dots:
Use a ruler to lightly draw the lines connecting your main stars. This acts as a guide for your intricate dotted lines later. -
Paint the main stars:
Dip the handle end of a paintbrush into your gold metallic paint to use as a dotting tool. Press firmly onto your pencil marks to create consistent, round main stars. -
Create the connections:
Switch to your smallest detail brush or a fine-tip gold paint pen. Instead of solid lines, paint tiny, evenly spaced dots along your connecting pencil lines. -
Add background stars:
Fill the empty negative space around the constellation with tiny random dots of gold to represent distant stars.
Wobbly Lines?
If painting fine details feels shaky, steady your painting hand by resting your pinky finger on the dry surface of the box as you work.
Step 3: Adding the Lunar and Solar Details
-
Sketch the moon phases:
On the front panel of the box, use a pencil to mark the crescent moon shapes. I like to start from the center and work outward to keep the pattern symmetrical. -
Fill in the moons:
Carefully paint the crescent shapes with gold metallic paint. Use the very tip of your round brush to get sharp points on the ends of the crescents. -
Add side details:
Move to the side panel of the box. Sketch a large eight-pointed starburst in the center and smaller four-pointed stars on either side. -
Paint the stars:
Paint these star shapes in gold, using straight strokes that taper outward from the center of the star. -
Clean up sketches:
Once all gold paint is bone dry, gently erase any visible pencil marks with a clean eraser. Be gentle to avoid rubbing off the gold paint.
Starry Hack
For perfectly uniform small dots on the constellation lines, use a toothpick or the head of a sewing pin dipped in paint instead of a brush.
Step 4: Finishing Touches
-
Reattach hardware:
Remove any masking tape you applied or screw the latch and hinges back into place. -
Seal the artwork:
Apply a layer of matte or satin varnish over the entire box. This protects the paint from chipping and gives the box a professional, unified sheen.
Place your finished box on a shelf or dresser to hold your favorite jewelry or crystals
Vintage Lace-Imprint Pattern for a Romantic Box Finish
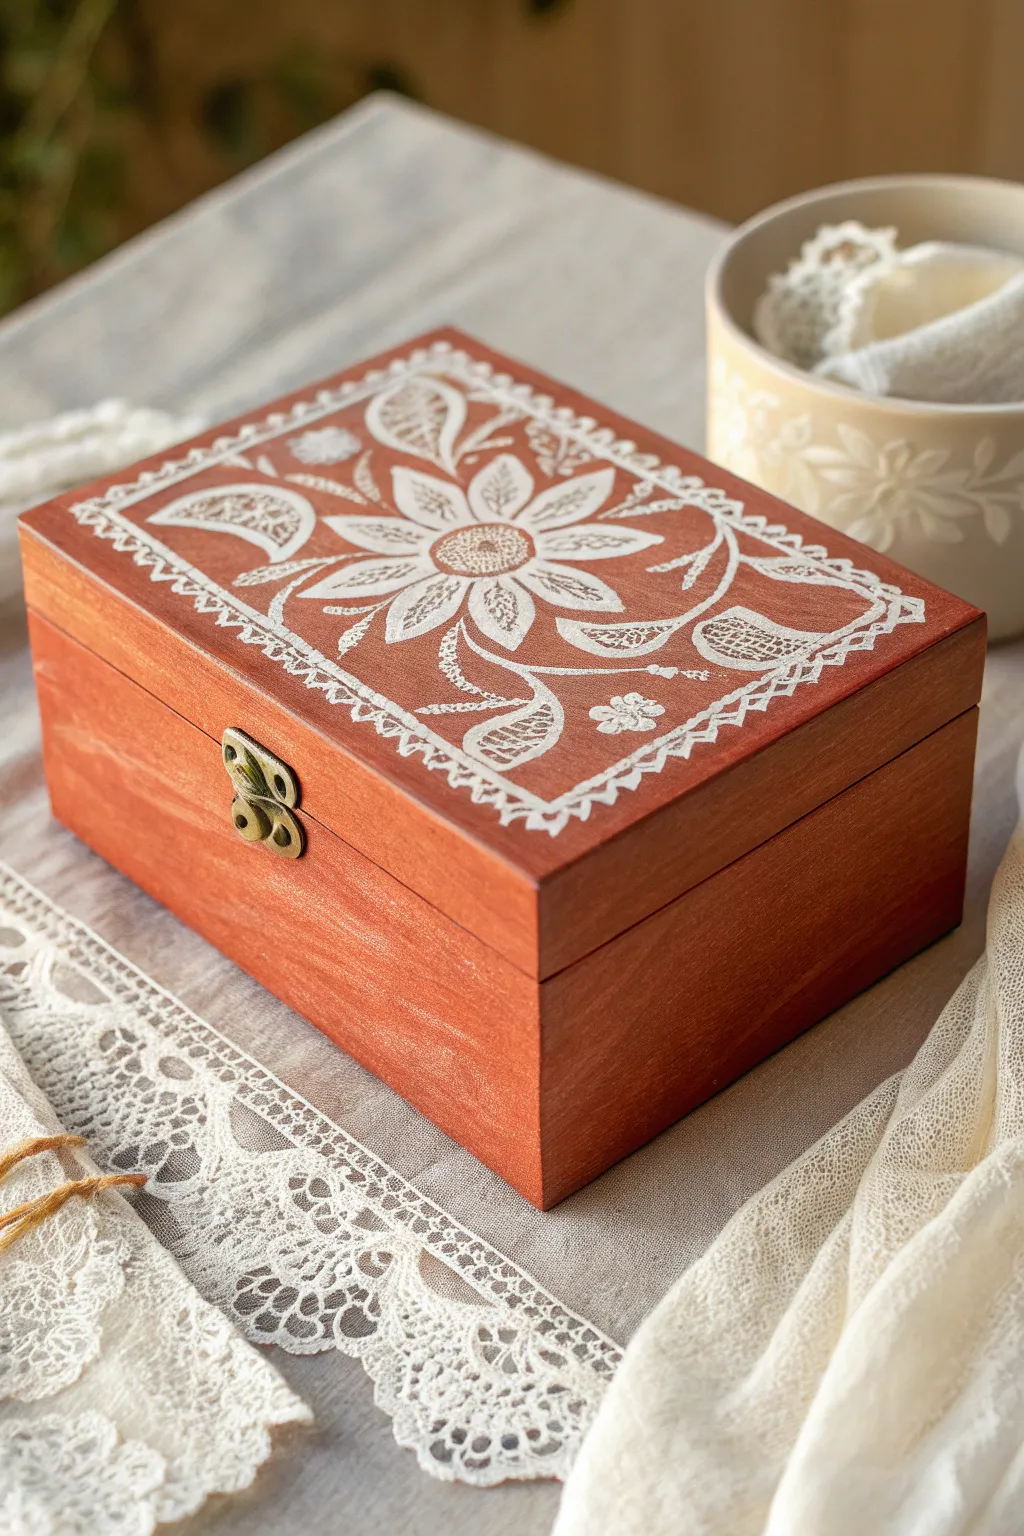
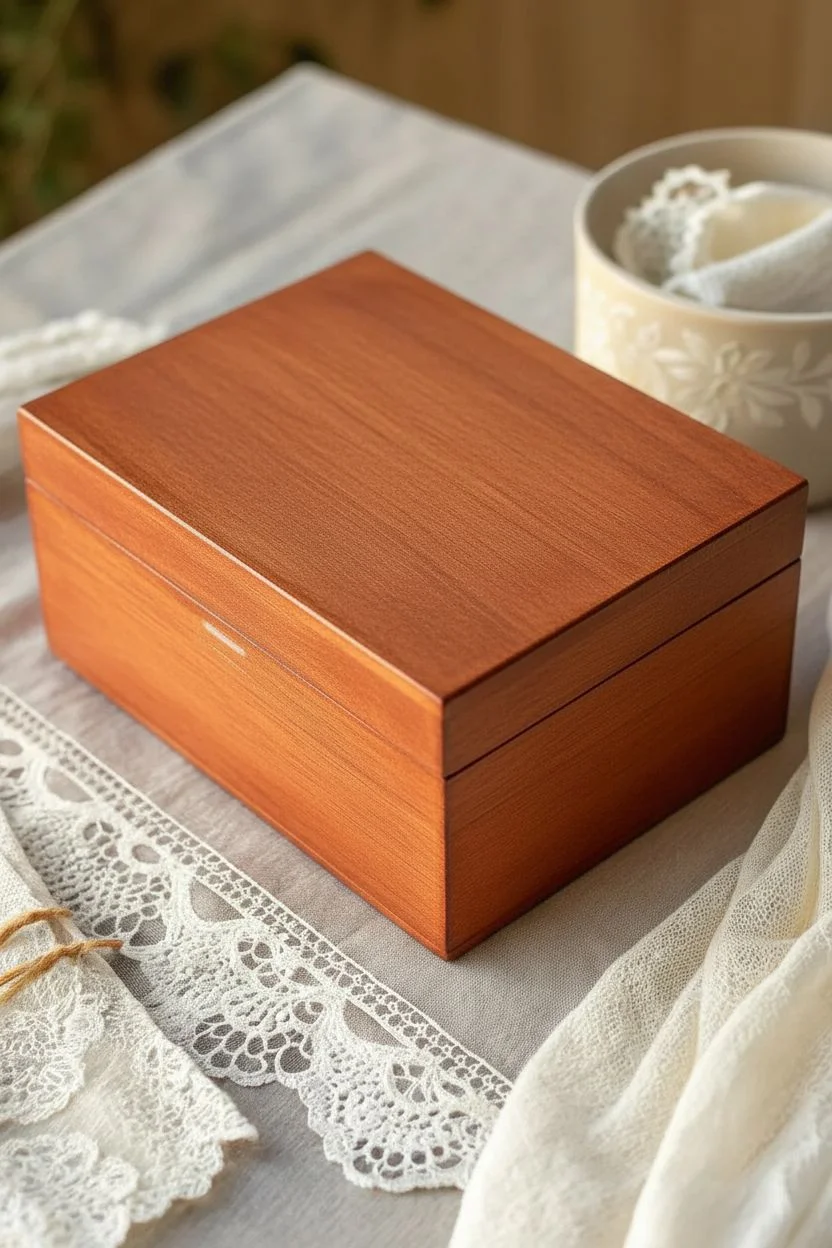
Transform a plain wooden keepsake box into a romantic heirloom using this clever lace-imprint technique. The contrast between the warm, reddish-brown wood stain and the crisp white floral design creates a delicate, vintage aesthetic that looks far more complicated than it actually is.
Step-by-Step Guide
Materials
- Unfinished wooden box with latch
- Reddish-brown wood stain (e.g., cherry or mahogany)
- White acrylic craft paint (matte finish)
- Piece of textured lace or a lace stencil
- Fine-grit sandpaper (220 grit)
- Small lint-free cloth or staining sponge
- Small fine-point detail brush (size 0 or 1)
- Flat shader brush
- Carbon transfer paper (optional)
- Pencil
- Painter’s tape
- Matte spray varnish
Step 1: Preparation & Staining
-
Prepare the surface:
Begin by removing any hardware from the box if possible, specifically the latch, to avoid staining it. If it can’t be removed, carefully mask it off with small pieces of painter’s tape. -
Sand for smoothness:
Lightly sand the entire exterior of the box using 220-grit sandpaper. You want to knock down any rough fibers so the stain absorbs evenly. -
Clean the dust:
Wipe the box down thoroughly with a tack cloth or a slightly damp paper towel to remove all sanding dust. Let it dry completely before proceeding. -
Apply the stain:
Dip your lint-free cloth or sponge into the reddish-brown wood stain. Rub the stain into the wood grain using long, even strokes, covering the lid and all sides. I like to work in sections to ensure I don’t miss a spot. -
Wipe excess stain:
After letting the stain sit for about 1-2 minutes (or according to package directions), wipe away any excess liquid with a clean rag. The color should be rich and uniform. -
Dry time:
Allow the stain to dry fully. This is crucial—if the wood is damp, the white paint you apply next will bleed or turn pink. Give it at least 4-6 hours, or overnight if possible.
Step 2: Creating the Lace Design
-
Plan the layout:
Decide on your design. The image features a large central sunflower-style bloom flanked by leaves and paisley shapes, framed by a rectangular border. You can sketch this lightly with a pencil directly on the dried stain. -
Transfer the pattern:
If you aren’t confident freehanding, print a similar floral line art design. Place carbon paper over the box lid, tape your printed design on top, and trace the lines to transfer the guide. -
Paint the main shapes:
Using your fine-point brush and white acrylic paint, outline the main flower petals and leaves. Keep the paint consistency creamy—not too watery—so it sits opaque on top of the dark wood. -
Fill with texture:
Instead of coloring the shapes in solidly, use a stippling motion or small, varying brush strokes to create a textured ‘lace’ look inside the petals. Leave tiny specks of the wood showing through to simulate fabric weave. -
Detail the center:
For the flower center, dab the tip of your brush repeatedly to create a dense collection of dots, mimicking seeds or pollen. -
Add the border frame:
Paint the rectangular border roughly half an inch from the edge of the lid. To get that lace-trim effect, paint small scallops or loops along the inner edge of your straight line. -
Connect the elements:
Draw thin, flowing stems to connect your main flower to the smaller background leaves. Keep your hand loose to achieve organic curves. -
Add smaller motifs:
Fill any large empty spaces with simple small flowers or geometric shapes to balance the composition, similar to the small floral accent seen in the corner. -
Refine the edges:
Go back over your main white lines to ensure they are crisp. The contrast is key here, so a second coat on the primary outlines might be necessary.
Fixing Bleeds
If your white paint bleeds into the wood grain, let it dry completely. Then, use a tiny brush dipped in the original wood stain to carefully ‘erase’ the mistake by painting over the stray white mark.
Step 3: Finishing Touches
-
Remove tape and hardware:
Once the white paint is bone dry, carefully peel off any painter’s tape you used on the latch. -
Seal the artwork:
Take the box to a well-ventilated area and apply a light coat of matte spray varnish. This protects the painted design from scratching without making the box look glossy or modern. -
Reattach hardware:
If you removed the metal latch earlier, screw it back into place carefully.
Pattern Shortcut
Can’t paint freehand? Use an actual piece of cheap lace as a stencil. Tape it tight over the lid and sponge white paint lightly over it for an instant, authentic lace pattern.
Now you have a charming, vintage-style box perfect for storing jewelry or gifting to a friend
White Botanical Line Art Over a Color Base
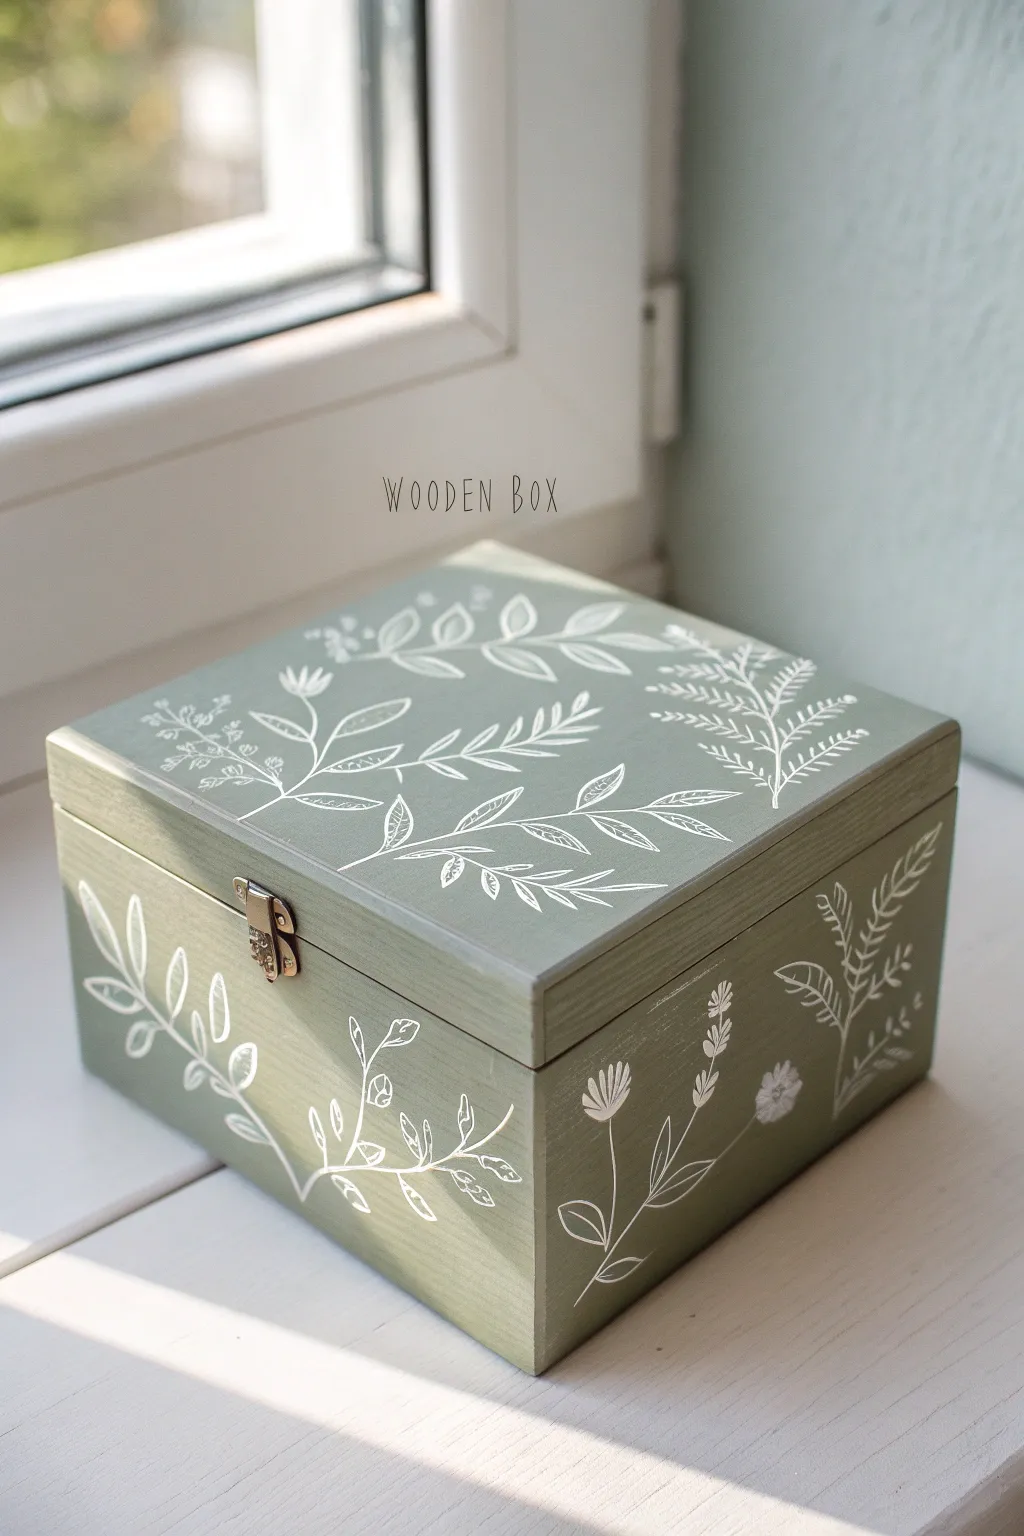
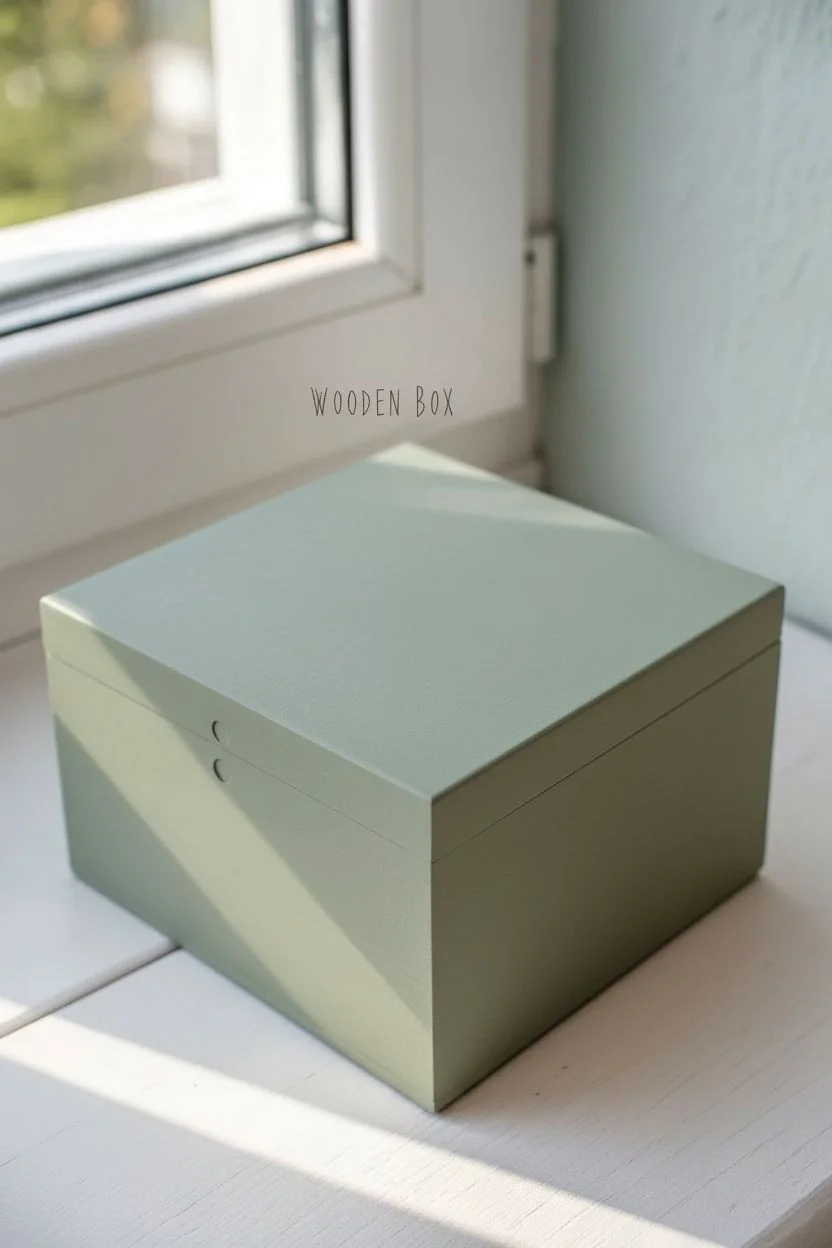
Transform a simple wooden container into an elegant heirloom with this calming sage green and white botanical design. The crisp white line art creates a beautiful contrast against the matte base, resulting in a modern yet timeless piece perfect for storing jewelry or letters.
Step-by-Step Tutorial
Materials
- Unfinished wooden box with hinged lid
- Fine-grit sandpaper (220-grit)
- Tack cloth or microfiber rag
- Sage green acrylic paint (matte finish)
- White paint pen (fine and extra-fine tips) or white acrylic paint with a liner brush
- Flat synthetic paintbrush (1-inch width)
- Graphite transfer paper (optional)
- Pencil and eraser
- Matte clear varnish or spray sealer
- Painter’s tape or screwdriver (for hardware removal)
Step 1: Preparation & Base Coat
-
Prepare the hardware:
Before you begin painting, use a small screwdriver to carefully remove the latch and hinges. This ensures a clean finish and prevents paint from gumming up the metal. If removal isn’t possible, cover the hardware completely with small pieces of painter’s tape. -
Sand the surface:
Lightly sand the entire exterior of the box using 220-grit sandpaper. Focus on smoothing out any rough grain or sharp edges. Wipe away all dust using a tack cloth so your paint glides on smoothly. -
Apply the first coat:
Using your flat synthetic brush, apply a coat of sage green acrylic paint. Brush with the grain of the wood for the best texture. Cover the lid and all sides, but be careful not to paint the rim where the lid meets the box too thickly, or it might stick. -
Sand and recoat:
Allow the first coat to dry fully (about 20-30 minutes). Lightly sand it again to knock down any raised wood fibers, wipe clean, and apply a second coat for solid, opaque coverage. Let this base cure completely for several hours or overnight.
Step 2: Drafting the Design
-
Plan your placement:
Sketch your botanical ideas on a scrap piece of paper first. For the lid, aim for a loose wreath shape or scattered sprigs. For the sides, visualize stems growing upward from the bottom edge. -
Sketch onto the box:
Lightly draw your design directly onto the green paint using a soft pencil. Keep the lines faint so they are easy to cover later. If you aren’t confident drawing freehand, place graphite paper under your paper sketch and trace the lines onto the box. -
Establish main stems:
Draw the main curved lines for your stems first. On the lid, create sweeping, curved lines that suggest movement. On the sides, draw vertical lines that curve slightly as they ‘grow’ toward the corners.
Steady Hand Pro-Tip
Rest your pinky finger on a dry part of the box while drawing to stabilize your hand. This acts as a pivot point and prevents your palm from smudging wet ink.
Step 3: Painting the Botanicals
-
Prime the paint pen:
Shake your white paint pen vigorously. Press the nib down on a scrap paper until the ink flows smoothly. If using a brush, mix your white acrylic with a drop of water to improve flow. -
Trace the stems:
Start by tracing over your pencil lines for the main stems. Use steady, confident strokes. I like to pull the pen toward me rather than pushing it away for better control. -
Add basic leaves:
Begin adding leaves to the stems. For the standard leaves, press slightly harder at the base of the leaf and lift up as you reach the tip to create a tapered point. Vary the spacing so it looks natural. -
Vary the foliage:
Mix in different leaf styles. Add some fern-like fronds with tiny dash strokes radiating from a central vein, and some rounded eucalyptus-style leaves to create visual interest like the box in the image. -
Create floral details:
Intersperse small floral elements among the leaves. Draw simple three-petal buds or small clusters of dots to represent berries or flower centers. These small details break up the heaviness of the leaves. -
Detailing the sides:
Rotate the box and repeat the process on the sides. Ensure the plants ‘ground’ themselves at the bottom edge. Let the leaves wrap around the corners naturally for a cohesive 3D effect. -
Refine the lines:
Once the initial white ink is dry, check for any patchy areas. Go over lines that need more opacity with a second pass, especially on the larger leaves. -
Cleanup:
After the white paint is fully dry (wait at least an hour), gently erase any visible pencil marks with a clean, white eraser.
Level Up: Gold Accents
Add a touch of luxury by tracing just the tips of the leaves or the centers of the flowers with a metallic gold paint pen after the white ink dries.
Step 4: Finishing Touches
-
Seal the artwork:
Apply a clear matte varnish or spray sealer over the entire box. This protects your delicate line art from scratching and makes the box easier to dust later. applies thin coats to avoid drips. -
Reassemble:
Once the sealer is completely dry and no longer tacky, screw the hardware back into place or peel off your painter’s tape.
Now you have a charming, personalized storage box that brings a breath of nature indoors
Mini Landscape Painting on the Lid Like a Tiny Canvas
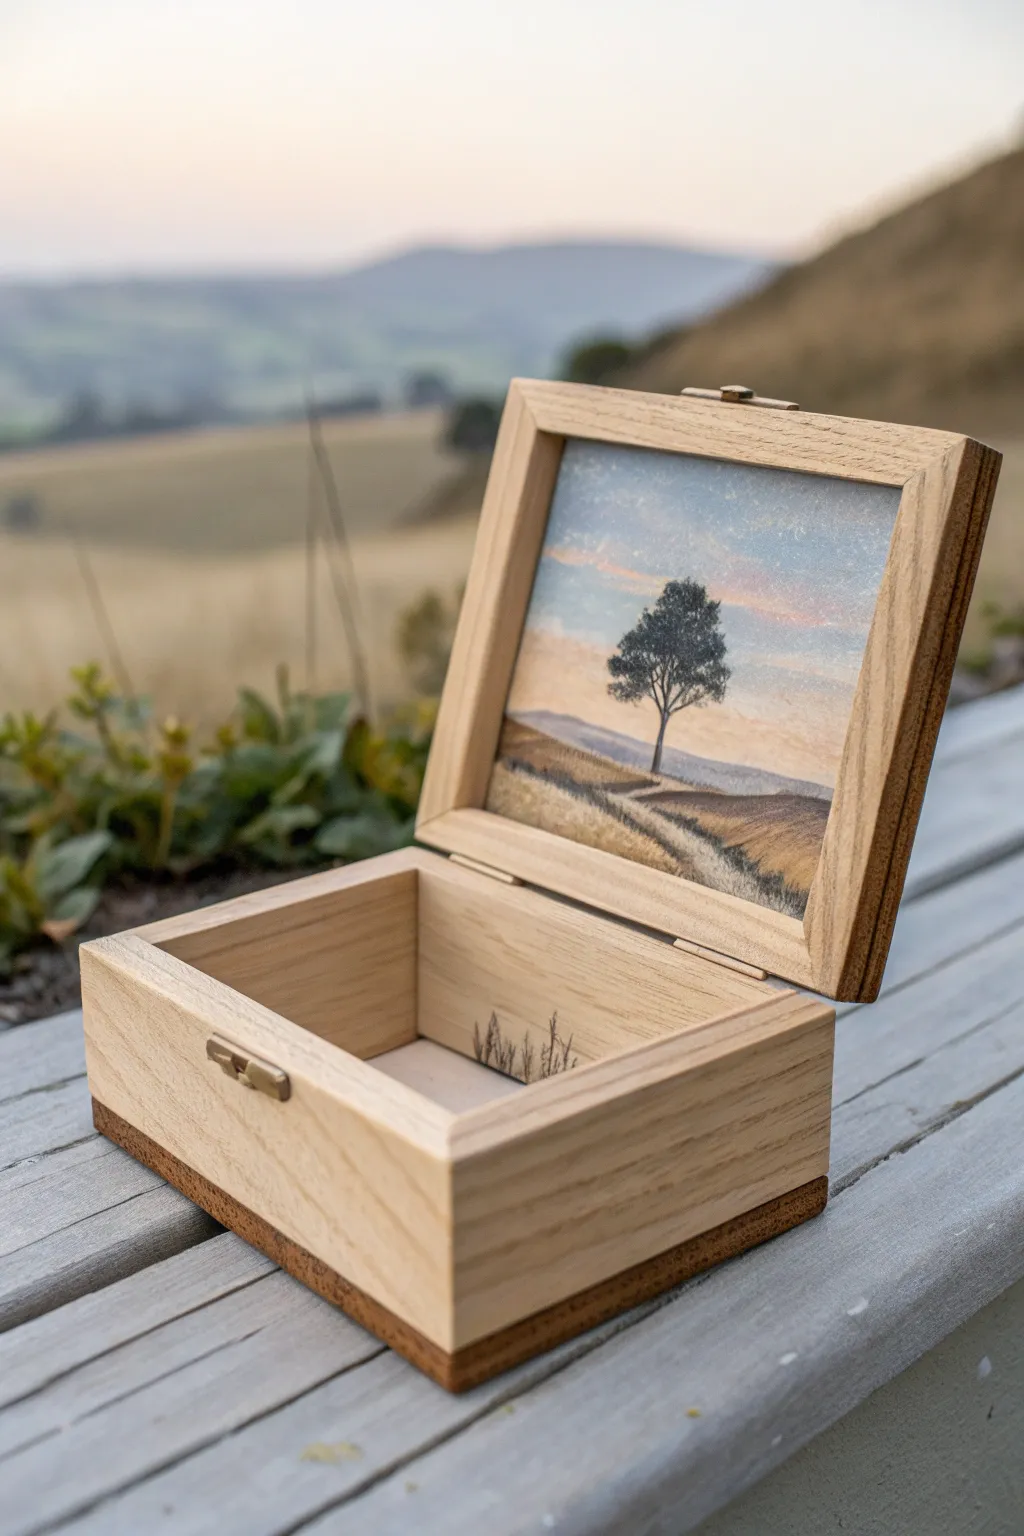
Transform a simple wooden keepsake box into a secret window to nature by painting a delicate landscape on the inside of the lid. This project creates a delightful surprise every time the box is opened, featuring a serene solitary tree against a soft twilight sky.
Step-by-Step Guide
Materials
- Unfinished wooden box with hinged lid
- Acrylic paints (Titanium White, Payne’s Grey, Burnt Umber, Yellow Ochre, Alizarin Crimson, Ultramarine Blue)
- Small flat synthetic brush (size 4 or 6)
- Fine liner brush (size 0 or 00)
- Sandpaper (220 grit)
- Painter’s tape or masking tape
- Matte varnish or sealant
- Tacky glue or strong craft glue
- Tiny dried grass tufts or miniature modeling weeds
- Palette and water cup
Step 1: Preparation & Sky Base
-
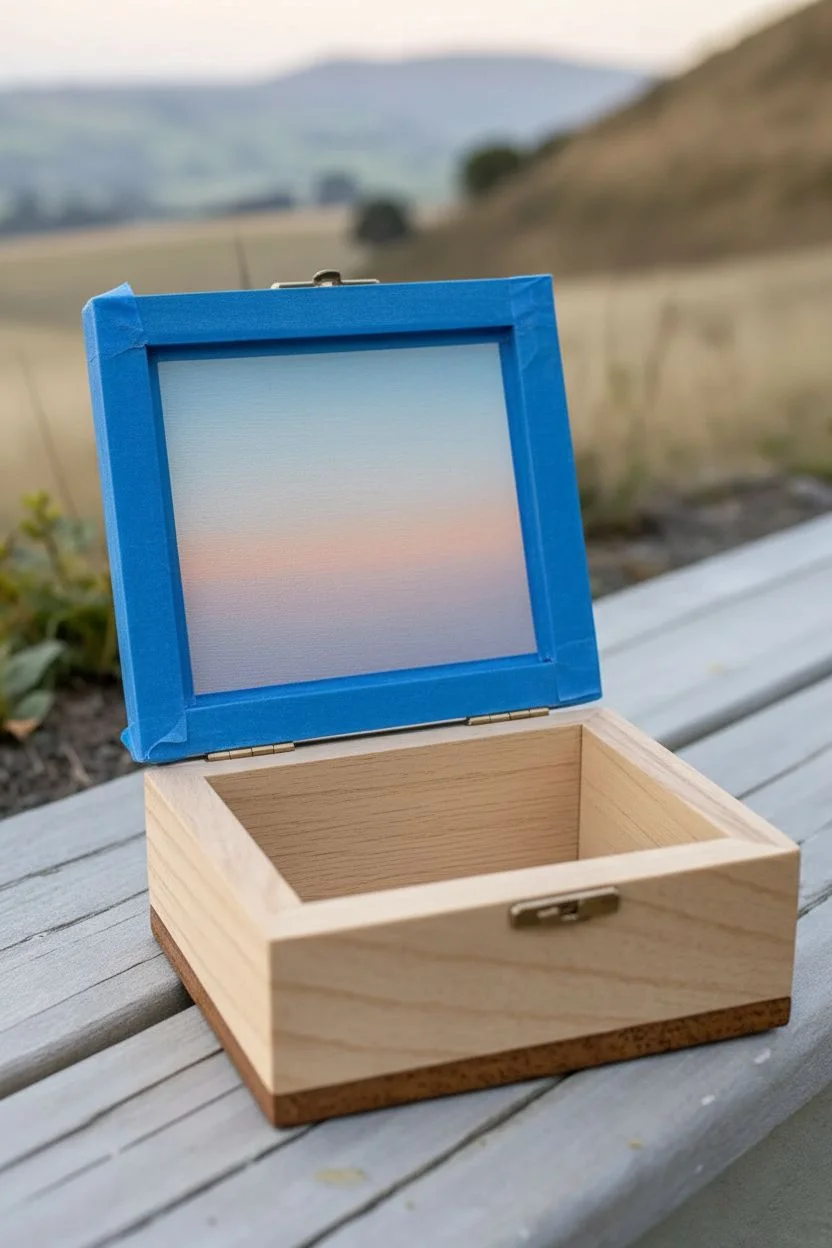
Prepare the surface:
Begin by lightly sanding the inside of the wooden lid to ensure a smooth painting surface. Wipe away any dust with a damp cloth or tack cloth. -
Mask the edges:
Carefully apply painter’s tape to the recessed wooden frame around the central panel. This ensures you get a crisp, clean border and don’t accidentally get paint on the beautiful wood grain. -
Prime the panel:
Apply a thin layer of Titanium White acrylic paint to the entire recessed panel where you will be painting. This seals the wood and ensures your sky colors will look bright rather than soaking into the grain. -
Paint the sky gradient:
Mix a very pale blue using White and a tiny dot of Ultramarine. Paint the upper third of the panel. While wet, blend in a soft peach tone (White mixed with a touch of Alizarin Crimson and Yellow Ochre) just below it to mimic a setting sun. -
Add the horizon haze:
For the lowest part of the sky, mix a pale purplish-grey using White, Alizarin Crimson, and Payne’s Grey. Blend this upward into the peach tone to create that soft, distant atmospheric haze often seen at dusk.
Uneven Wood Texture?
If the wood grain is very deep and makes painting details impossible, apple a layer of clear gesso or wood filler first. Sand it perfectly smooth once dry to create a paper-like surface.
Step 2: Landscape & Details
-
Block in distant hills:
Using the same purple-grey mix but slightly darker, paint the silhouette of distant hills along the horizon line. Keep the edges soft to suggest they are far away. -
Paint the foreground fields:
Mix Yellow Ochre with Burnt Umber and plenty of White to get a dry grass color. Paint the rolling hills in the middle ground, using sweeping, curved strokes to suggest land contours. -
Add shadows and depth:
I find it helpful to mix a darker brown-grey to add shadows in the dips of the hills and along the bottom edge. This creates the illusion of undulating terrain. -
Create the path:
With a mix of White and a tiny touch of Burnt Umber, paint a winding path that starts wide at the bottom right and narrows until it disappears over the hill. This leads the viewer’s eye into the scene. -
Paint the tree trunk:
Switch to your fine liner brush. Mix Payne’s Grey with Burnt Umber for a near-black color. Paint a delicate, slender trunk in the center-left area, ensuring the base is anchored in the grass. -
Stipple the leaves:
Using an old, frayed brush or the tip of your small flat brush, tap on the foliage using a dark green-grey mix. Keep the canopy airy so the sky peeks through providing a sense of lightness. -
Highlight the tree:
Add tiny highlights to the right side of the tree trunk and the tops of the foliage clusters using a lighter grey-green to suggest the direction of the light source. -
Enhance texturing:
Use the liner brush to add tiny vertical strokes of lighter ochre and darker brown in the foreground grass to suggest individual stalks and dry weeds.
Seasonal Variations
Make a set of four boxes representing the seasons. Change the tree’s foliage to bright orange for autumn, pink for spring blossoms, or bare branches with white ground for winter.
Step 3: Finishing Touches
-
Remove tape:
Once the paint is completely dry to the touch, very slowly peel back the painter’s tape at a 45-degree angle to reveal your crisp wooden frame. -
Seal the artwork:
Apply a coat of matte varnish over the painting to protect it from scratches and fading. A matte finish looks more natural for this rustic style than a gloss one. -
Prepare the box bottom:
Turn your attention to the bottom of the box. Gather your tiny dried grass tufts or modeling weeds. You want these to look like they are growing *inside* the box. -
Glue the physical weeds:
Apply tiny dabs of tacky glue to the bottom corner of the box interior. Using tweezers, carefully place the dried grass tufts upright, creating a 3D echo of the painted landscape above. -
Final clean up:
Check the exterior wood for any stray paint smudges and sand them off gently if needed. Ensure the hinges still move freely.
Now you have a serene little world captured inside a box, ready to hold your most precious treasures.
Ocean Waves and Bubbles That Wrap Around the Sides
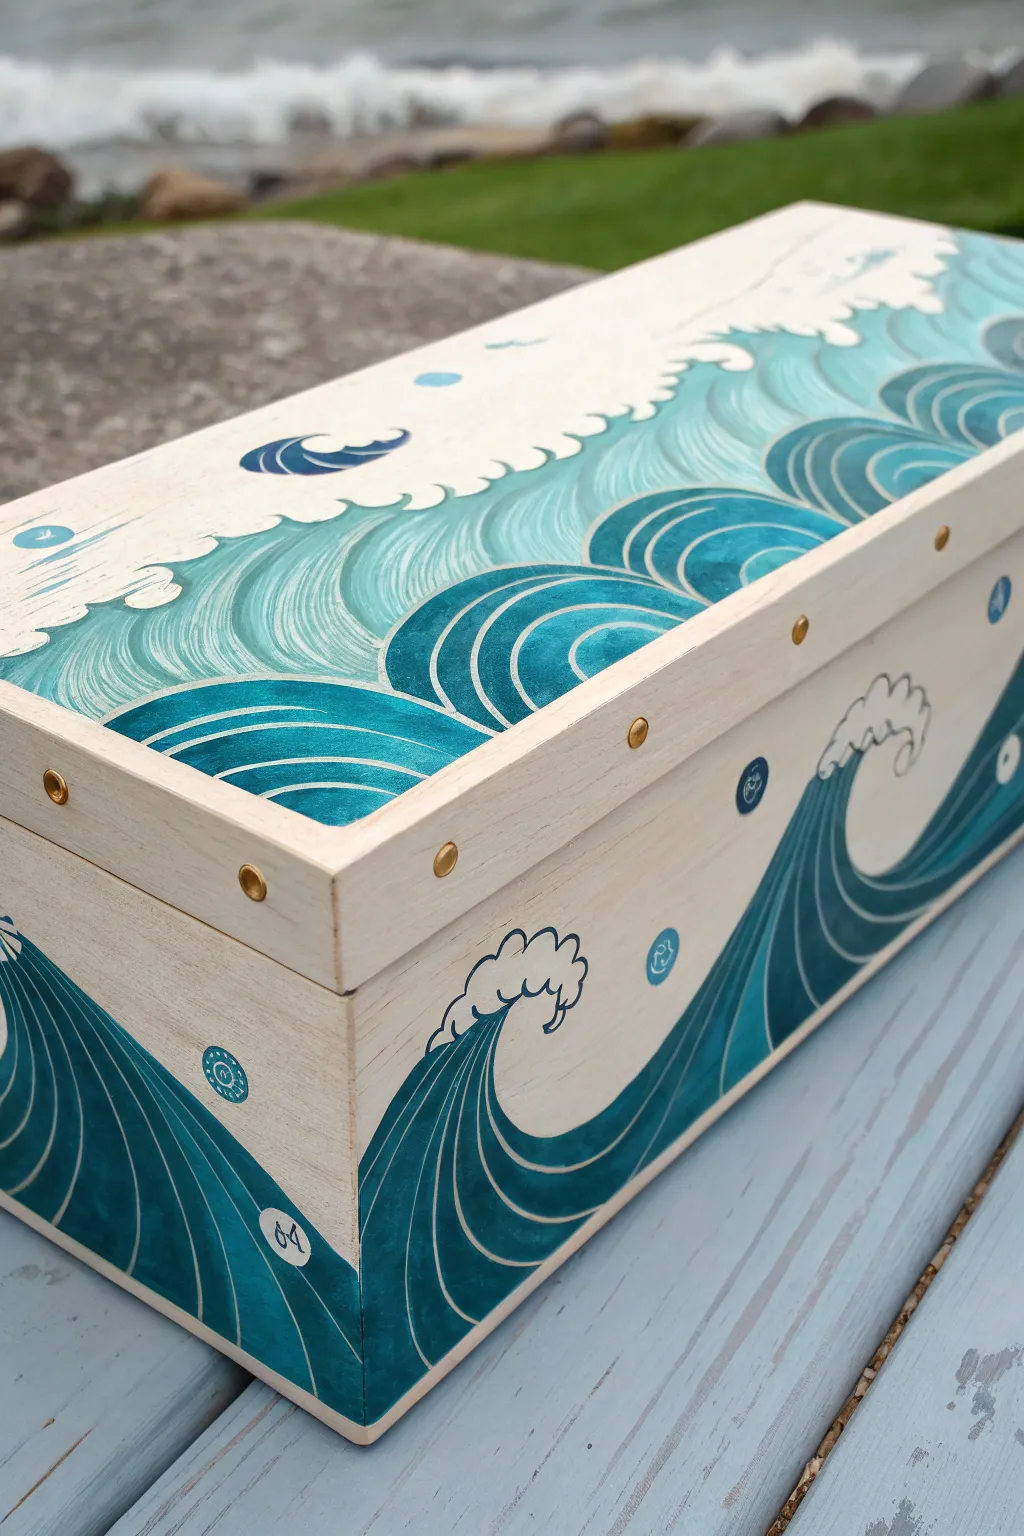
Transform a plain wooden chest into a seascape treasure with this Japanese-inspired wave design. The stylized rolling waves wrap continuously around the corners, creating a fluid sense of motion in calming teal and turquoise hues.
Step-by-Step Tutorial
Materials
- Unfinished wooden box with hinged lid
- Sandpaper (220 grit)
- White acrylic gesso or primer
- Acrylic paints: Teal, Turquoise, Phthalo Blue, White
- Flat shader brushes (medium and large)
- Round liner brush (size 1 or 0)
- Small brass upholstery tacks or studs
- Hammer
- Pencil
- Matte or satin water-based varnish
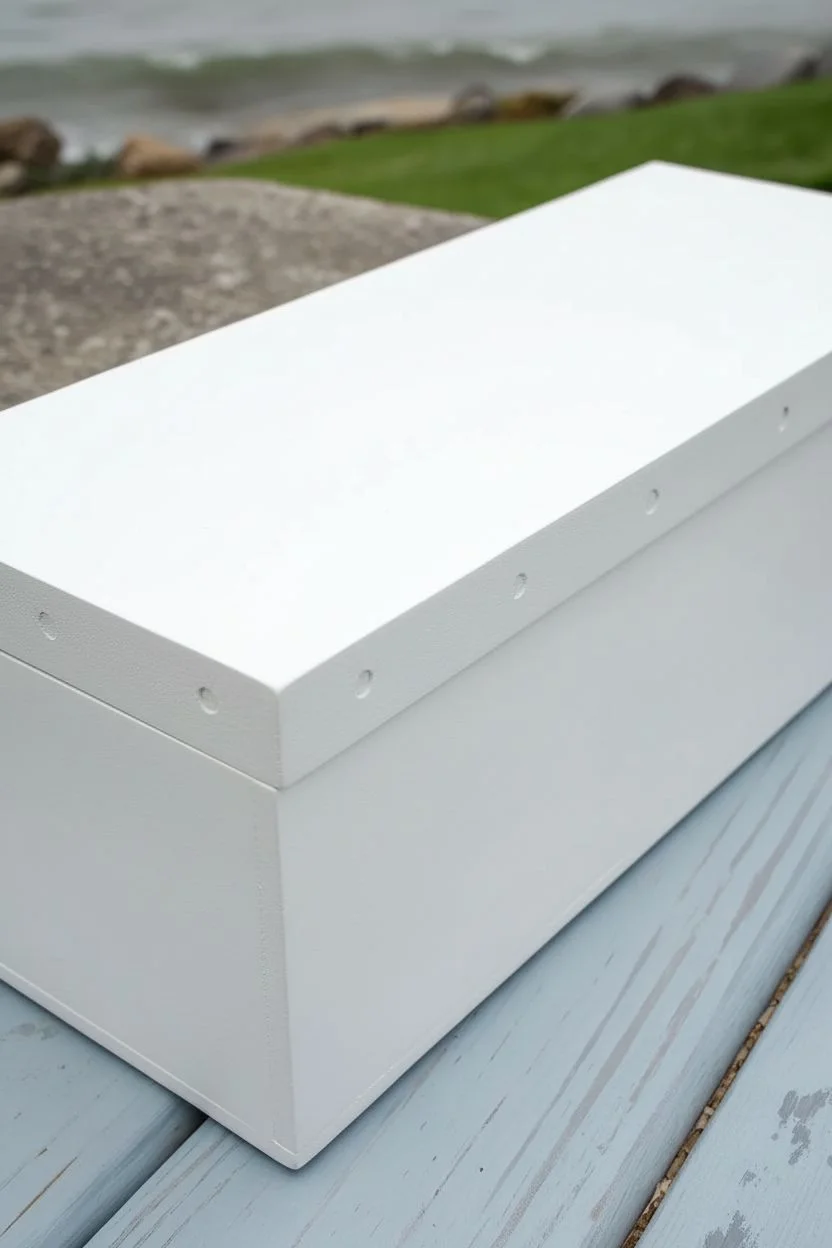
Step 1: Preparation and Base Coat
-
Sand the surface:
Begin by lightly sanding the entire exterior of the wooden box. Pay special attention to the corners where the design will wrap, ensuring they are smooth to the touch. -
Remove hardware:
If possible, unscrew the hinges and latch. This makes painting much easier and keeps your hardware clean; if they can’t be removed, mask them off tightly with tape. -
Apply the base:
Paint the entire exterior with a coat of white acrylic gesso or white paint. This bright underlayer is crucial because it helps the translucent blue tones pop later on.
Fixing Wobbly Lines
If your fine lines look shaky, thin your paint slightly with water or a flow medium. The improved viscosity helps the brush glide smoothly for crisp strokes.
Step 2: Drafting the Design
-
Sketch the horizon:
Using a pencil, lightly draw a horizon line that undulates slightly. On the lid, this will be near the back; on the front face, drawing large, swooping U-shapes suggests the troughs of waves. -
Connect the corners:
Ensure your pencil lines meet at the corners of the box. The wave starting on the front panel should appear to continue naturally onto the side panel. -
Draft the wave crests:
Sketch the iconic ‘claw’ shapes of the foam at the top of your largest waves. Keep them stylized and curvy rather than jagged.
Level Up: Hidden Details
Paint the inside bottom of the box with a solid deep blue, so opening the lid feels like diving underwater beneath the waves you just painted outside.
Step 3: Painting the Ocean
-
Block in the darkest blues:
Mix a deep teal using Phthalo Blue and a touch of Teal. Use a flat brush to fill in the bottom-most sections of the waves on the sides and the deep troughs on the lid. -
Apply mid-tones:
Switch to pure Turquoise. Paint the middle sections of the rolling waves, blending slightly where it meets the dark teal while the paint is still wet to create a soft gradient. -
Add the lightest water:
Mix White with a little Turquoise to create a pale aqua. Paint the upper curves of the water just below where the white foam will be. -
Paint the background:
For the sky area (the negative space above the waves), use a creamy off-white or very pale beige to create a vintage feel, contrasting nicely with the cool blues.
Step 4: Detailing and Outlining
-
Create the wave texture:
Using a liner brush and a lighter teal shade, paint thin, curved strokes inside the large wave bodies. These lines define the volume and movement of the water. -
Define the foam:
Use significant amounts of white paint to fill in the crests and foam caps. I like to apply this totally opaque to make it stand out against the wash-like blues. -
Outline the shapes:
Take your finest liner brush and thin down some white paint with a drop of water. Carefully outline the tops of the blue waves to separate them from the background. -
Add bubbles:
Paint small, scattered circles in the negative space or floating near the waves. Paint them solid blue, then add a tiny white dot and line inside to look like stylized bubbles.
Step 5: Finishing Touches
-
Seal the artwork:
Once the paint is completely dry (give it at least an hour), apply two thin coats of matte or satin varnish to protect the surface from scratches. -
Reattach hardware:
Screw the hinges and latches back onto the box. -
Add brass accents:
To mimic the look in the photo, gently hammer small brass upholstery tacks along the edge of the lid. Space them evenly—about 1.5 inches apart—for a nautical, trunk-like appearance.
Step back and admire how the rhythm of the waves brings a sense of calm motion to your new storage piece
Dot Mandala Centered on the Lid for Calm, Balanced Detail
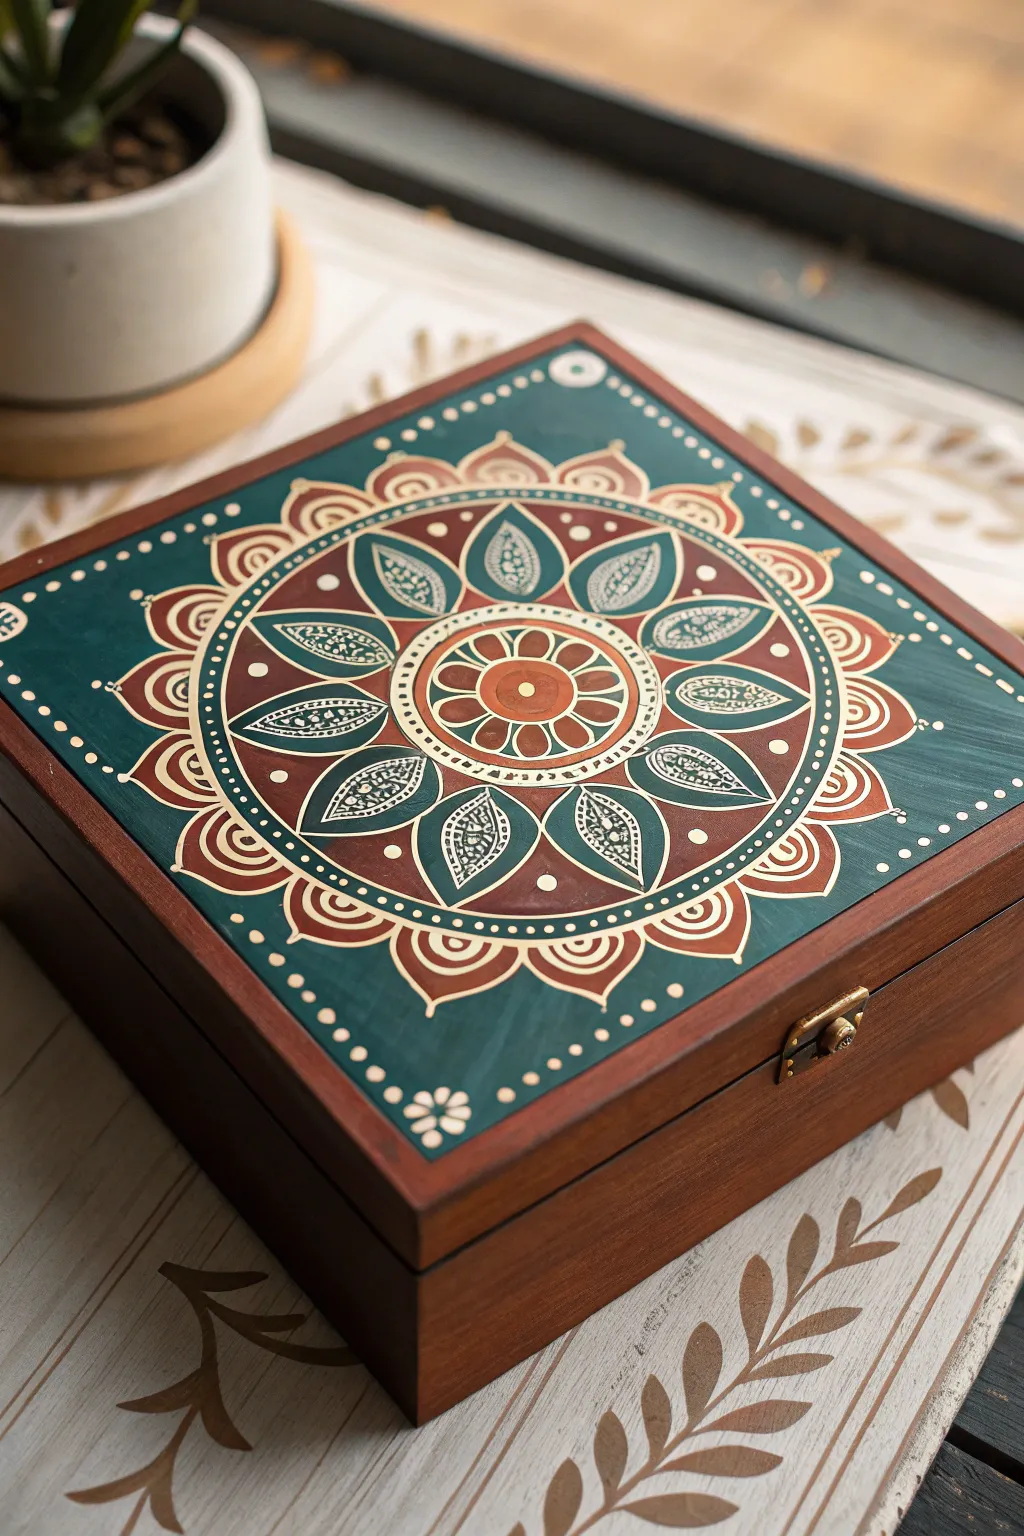
Transform a plain wooden box into a bohemian keepsake with this hand-painted mandala design. Featuring a calming palette of deep teal, rich terracotta, and cream, the pattern balances intricate details with earthy warmth.
Step-by-Step
Materials
- Unfinished wooden box with latch
- Sandpaper (220 grit)
- Acrylic paints: Deep teal/slate blue, terracotta/rust orange, cream/off-white, titanium white
- Flat shader brush (medium size)
- Round detail brushes (sizes 0, 1, and 2)
- Dotting tools or toothpicks
- Pencil and ruler
- Compass or circular objects for tracing
- Matte or satin varnish
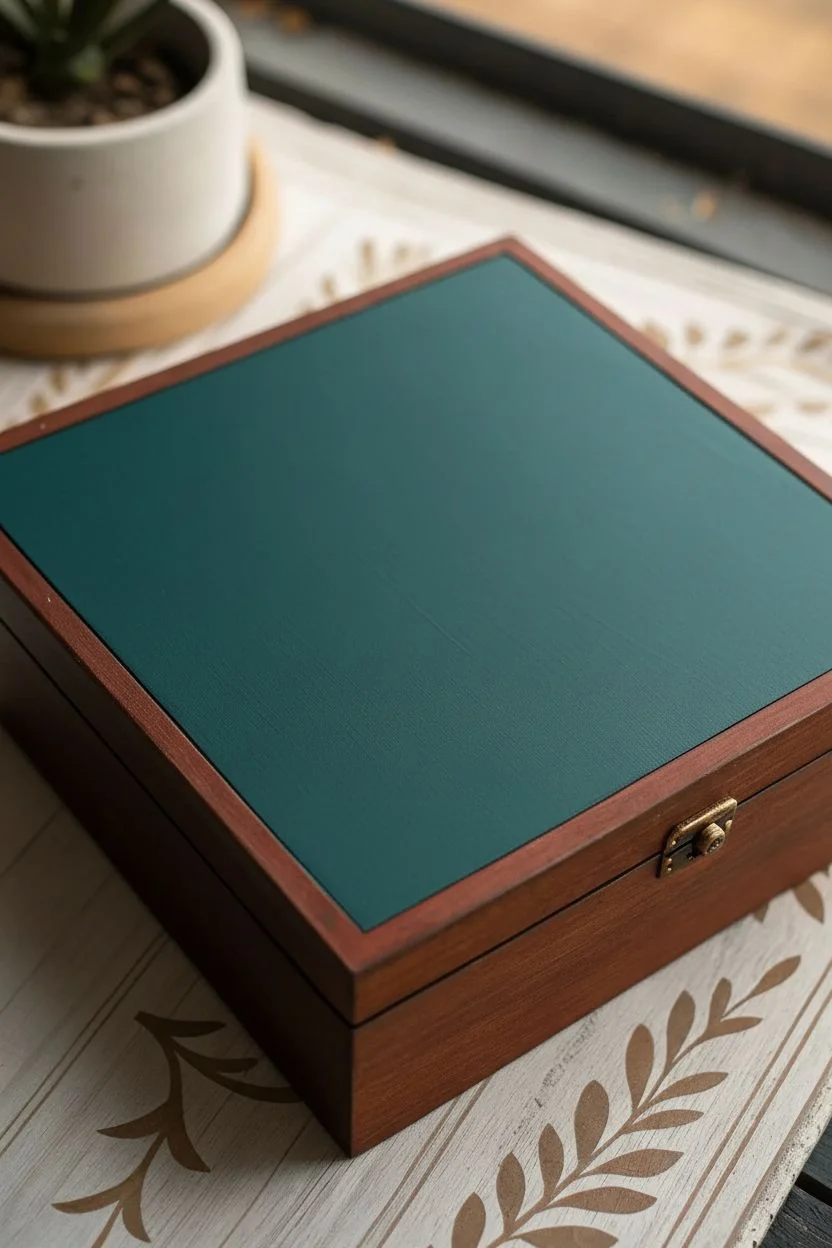
Step 1: Preparation & Base Coat
-
Surface Prep:
Begin by removing any hardware, like the front latch, if possible. Lightly sand the entire surface of the wooden box with 220-grit sandpaper to smooth out rough grain, then wipe away the dust with a damp cloth. -
Staining the Wood:
Before painting the lid design, the rest of the box needs a rich tone. Apply a thin wash of brown paint (or a wood stain) to the sides and bottom of the box to deepen the natural wood color. Let this dry completely. -
Creating the Canvas:
Using your flat shader brush, paint a square onto the lid using the deep teal paint. Leave about a half-inch border of unpainted wood around the edges to frame the design naturally. -
Second Coat:
Once the first teal layer is dry to the touch, apply a second coat to ensure solid, opaque coverage without streaks. Allow this base to cure for at least 30 minutes.
Step 2: Drafting the Design
-
Finding Center:
Use a ruler to lightly mark the exact center of your painted teal square with a pencil. -
Drawing Guidelines:
Using a compass starting from the center point, lightly draw four concentric circles. The smallest will be the center flower, the next for the main petal ring, a larger one for the outer border, and the final one near the edge of the paint. -
Sketching Petals:
In the middle ring, lightly sketch eight large, pointed leaf shapes radiating outward. This ensures your symmetry is correct before you commit with paint.
Fixing Wobbly Lines
If your fine lines look shaky, your paint is likely too thick. Mix a drop of water or flow medium into the cream paint to make it fluid like ink for smoother strokes.
Step 3: Painting the Mandala Core
-
Center Circle:
Paint the innermost circle with terracotta paint. Let it dry, then use a small dotting tool to add a single cream dot in the very center. -
Inner Petals:
surrounding the center circle, paint small, rounded terracotta flower petals. Outline them thinly with cream paint using your size 0 detailing brush. -
Main Leaf Ring:
Fill in the eight large leaf shapes you sketched earlier with the deep teal paint (it will just look like texture on texture for now) or leave them negative space if your base is solid. Actually, looking closely, these are painted teal with white outlines. Paint a thin terracotta outline around the shape of these leaves to define them against the background. -
Leaf details:
Inside each teal leaf, paint a smaller, intricate leaf shape using white or cream. Add tiny dots or vein lines inside this white shape for the ‘printed’ look. -
Negative Space Accents:
In the V-shaped gaps between the main teal leaves, paint triangular shapes or smaller petals using the terracotta color to create contrast.
Level Up: Antique Look
After the design dries, lightly sand the painted edges with high-grit sandpaper to distress it, then apply a dark wax for an aged, vintage heirloom appearance.
Step 4: Outer Borders & Details
-
Scalloped Border:
Around the main floral burst, paint a scalloped border using terracotta. Each scallop should align with the tips of the teal leaves. -
Cream Outlining:
Using your finest brush (size 0), carefully outline the terracotta scallops with cream paint. Add a small arch inside each scallop for a layered effect. -
The Dotted Frame:
Move to the outermost pencil circle near the edge of the square. Dip a medium-sized dotting tool or the back of a brush into cream paint and stamp dots evenly along this line. -
Corner Accents:
In the four corners of the teal square—outside the circle boundary—paint a small, simple four-petal flower or a cluster of dots in cream to fill the empty space. -
Final White Highlights:
Go back fast over the design and add tiny pure white dots to the center of the terracotta shapes and the tips of the leaves to make the design pop.
Step 5: Finishing Touches
-
Cleanup:
Check for any pencil marks that are still visible. If the paint is fully dry, gently erase them. I find a kneaded eraser works best here as it doesn’t damage the acrylic. -
Sealing:
Apply a coat of matte or satin varnish over the entire lid (and box if desired). This protects the detailed work from scratches and dust. -
Reassembly:
Once the varnish is non-tacky and fully cured, screw the metal latch back onto the front of the box.
Now you have a beautifully intricate storage box perfect for jewelry or small treasures
Inside-Outside Surprise: Hidden Art Under the Lid
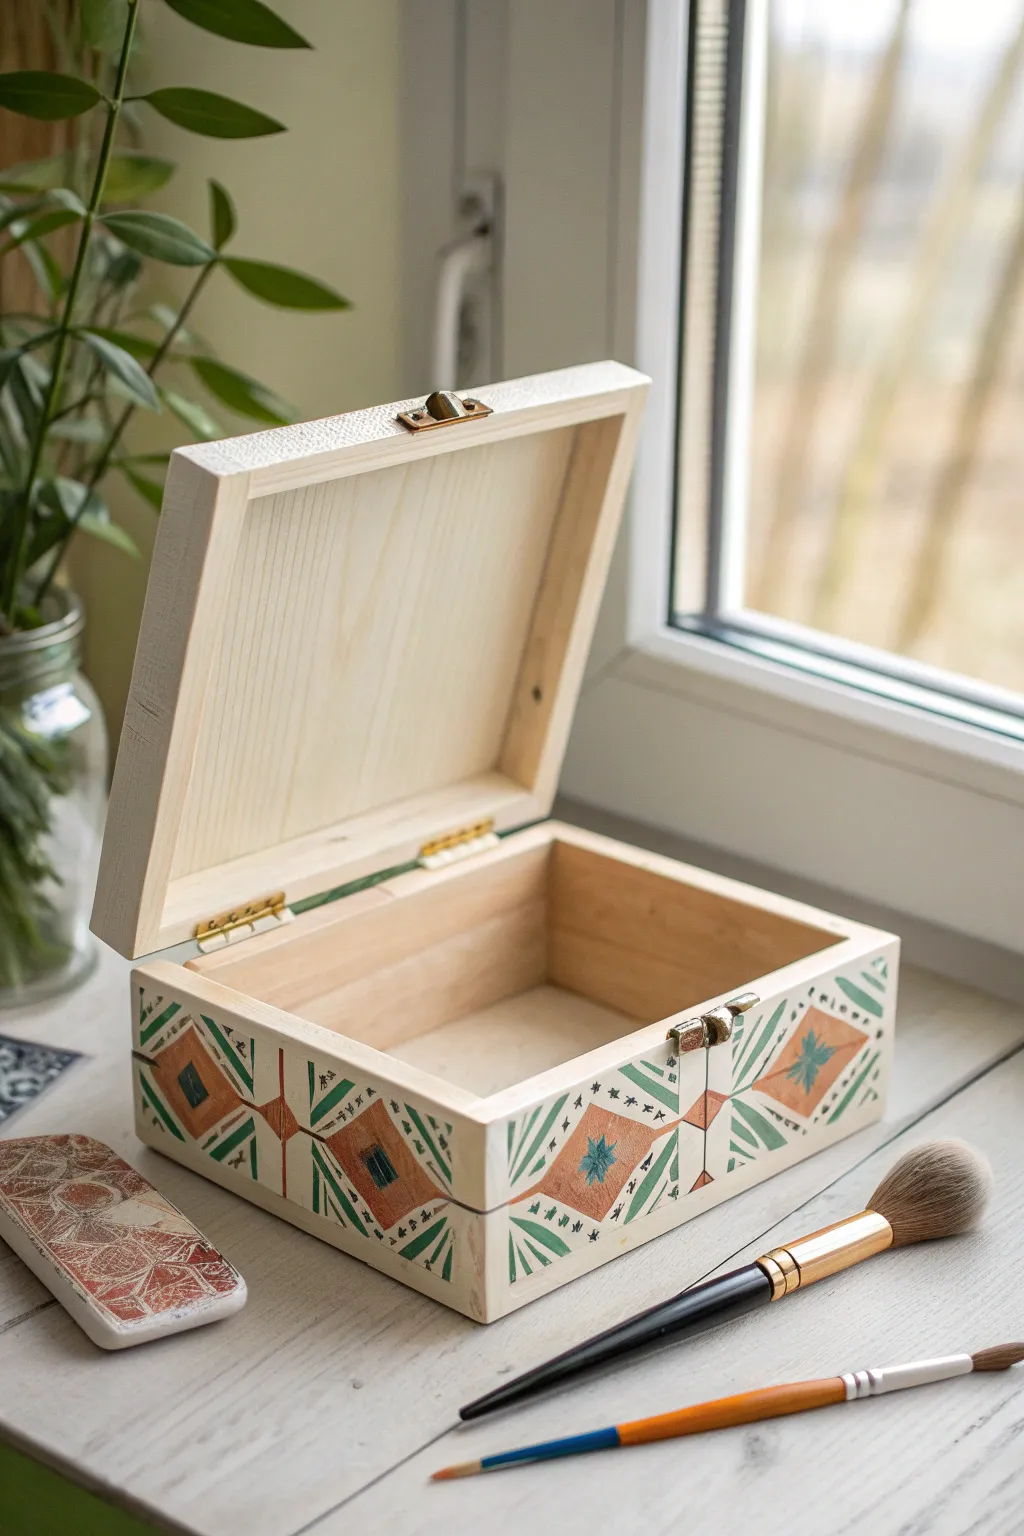
This elegant wooden box design combines the raw beauty of natural pine with a striking geometric pattern featuring warm terracotta and cool sage green tones. The clean lines and folk-art inspired diamonds give it a timeless, handcrafted appeal perfect for storing keepsakes.
Step-by-Step Guide
Materials
- Unfinished wooden box with hinged lid
- Fine-grit sandpaper (220 grit)
- Painter’s tape or masking tape (thin width)
- Acrylic paints: Cream/Off-white, Terracotta/Burnt Orange, Sage Green, Dark Teal
- Small flat shader brush
- Fine liner brush (size 0 or 00)
- Ruler and pencil
- Matte varnish or sealant
- Clean cloth
Step 1: Preparation and Base Coat
-
Sand the surface:
Begin by gently sanding the entire exterior of the wooden box with fine-grit sandpaper. Focus on smoothing out any rough patches or splinters, especially around the corners and edges. -
Wipe clean:
Use a clean, dry cloth or a tack cloth to thoroughly remove all sanding dust. -
Paint the background:
Using a flat shader brush, apply an even coat of cream or off-white acrylic paint to the exterior sides of the box. Leave the top of the lid and the interior raw wood for contrast, just like in the photo. -
Let it dry:
Allow the base coat to dry completely. If the wood grain still shows through too much for your liking, apply a second thin coat and let it dry.
Step 2: Drafting the Pattern
-
Measure the diamonds:
Using a ruler and pencil, lightly mark the center point of each side of the box. This will be the center of your main diamond shape. -
Draw the grid:
Lightly sketch a large diamond shape on each face of the box. The points should almost touch the top and bottom edges. Connect the side points of these diamonds around the corners of the box to create a continuous pattern. -
Add internal details:
Inside each large diamond, draw a smaller concentric diamond. Sketch vertical lines intersecting the corners where the diamonds meet, creating the triangular sections for the greenery.
Sharper Lines
For ultra-crisp geometric edges on the diamonds, use thin washi tape or painter’s tape to mask off the shapes before painting the terracotta sections.
Step 3: Painting the Design
-
Fill the diamonds:
Dip your clean flat brush into the terracotta paint. Carefully fill in the large diamond shapes, keeping your edges crisp against the cream background. -
Create the center motif:
Once the terracotta is dry to the touch, use a small amount of dark teal paint to paint a small rectangle or square in the very center of each diamond. -
Detail the center star:
Using your fine liner brush and the teal paint, draw a small eight-pointed star or simple cross-hatch pattern over the center rectangle to create a focal point. -
Outline the shapes:
Mix a tiny bit of water into your dark teal paint to help it flow. With the liner brush, carefully outline the terracotta diamonds and draw the vertical dividing lines between the pattern sections. -
Add the greenery:
Switch to the sage green paint. In the triangular spaces between the diamonds, paint simple leaf shapes or fan-like strokes radiating outward. -
Add distinct leaf details:
I like to use a swift, flicking motion with the brush tip to sharpen the ends of the leaves, giving them that stylized, fern-like appearance. -
Paint the corner accents:
Don’t forget the corners of the box. Carry the sage green leaf pattern onto the corners where the design wraps around.
Age It Up
After the paint is dry, lightly sand the edges of the box and the painted design with 220-grit paper to give it a charming, distressed vintage look.
Step 4: Finishing Touches
-
Clean up lines:
Inspect your work. If any paint went outside the lines, touch it up with a small dab of the cream base color. -
Erase pencil marks:
Gently erase any visible pencil guidelines that weren’t covered by paint, ensuring the paint is 100% dry before rubbing. -
Seal the work:
Apply a thin layer of matte varnish over the painted sections to protect the artwork from chipping and fading. -
Clean the hardware:
If any varnish got onto the metal clasp or hinges, wipe it away immediately with a damp cloth or cotton swab.
Now you have a beautifully customized box ready to hold your treasures or serve as a heartfelt gift


Have a question or want to share your own experience? I'd love to hear from you in the comments below!