If you’re craving fresh boy drawing ideas, you’re in the right place to play with faces, hair, and those little style details that make a character feel real. I’m sharing a mix of classic sketch prompts and fun twists so you can fill your pages with confident, expressive boy characters.
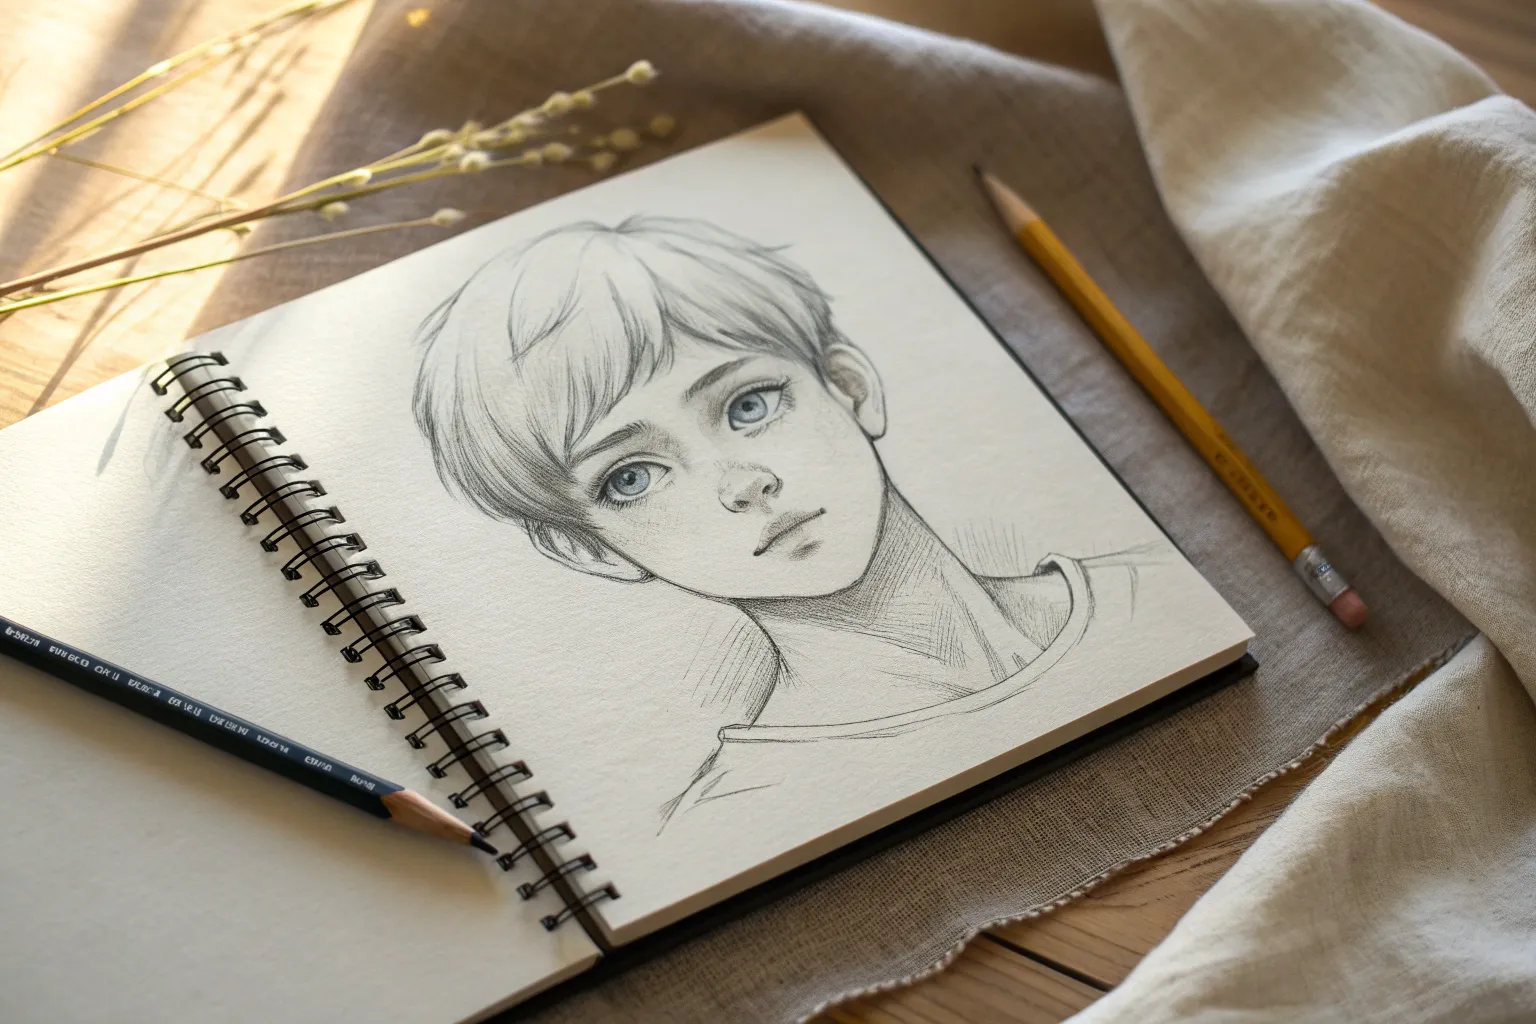
Simple Boy Face in 3/4 View
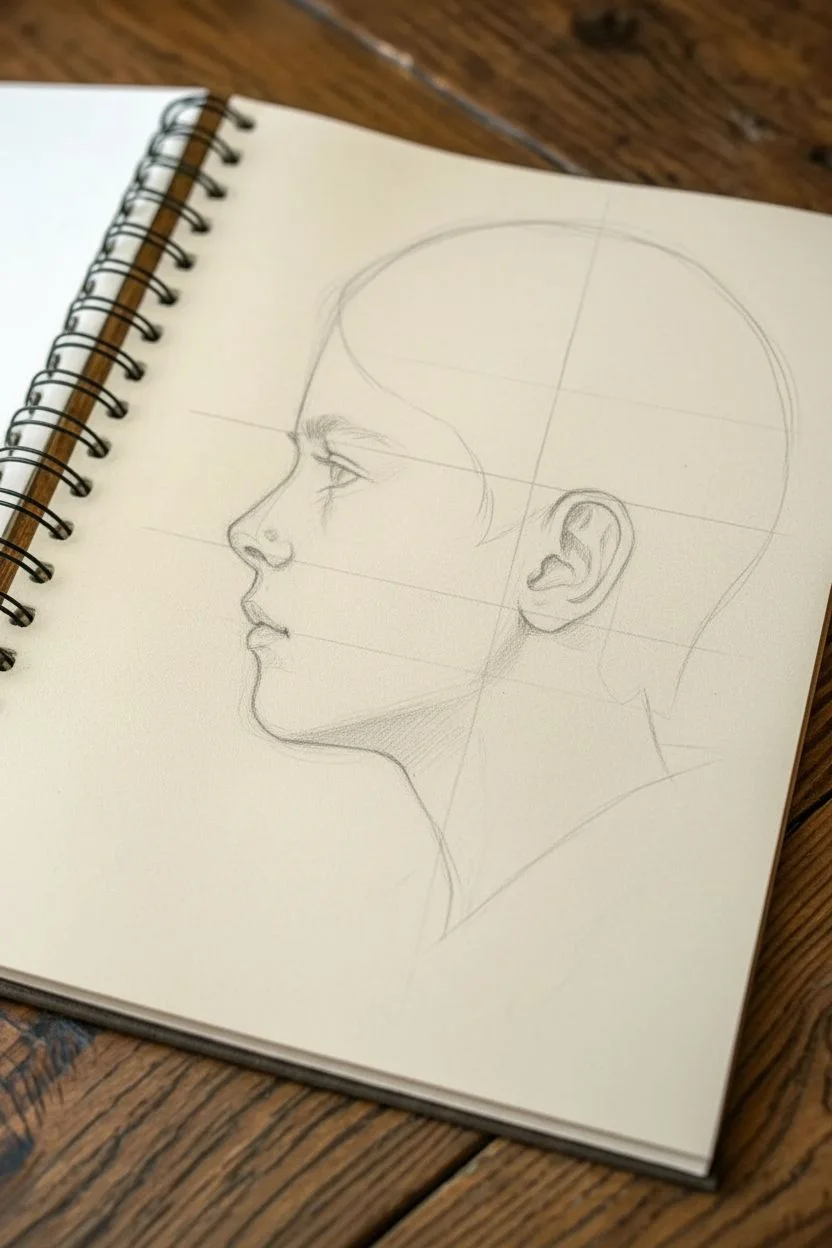
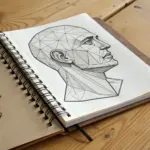
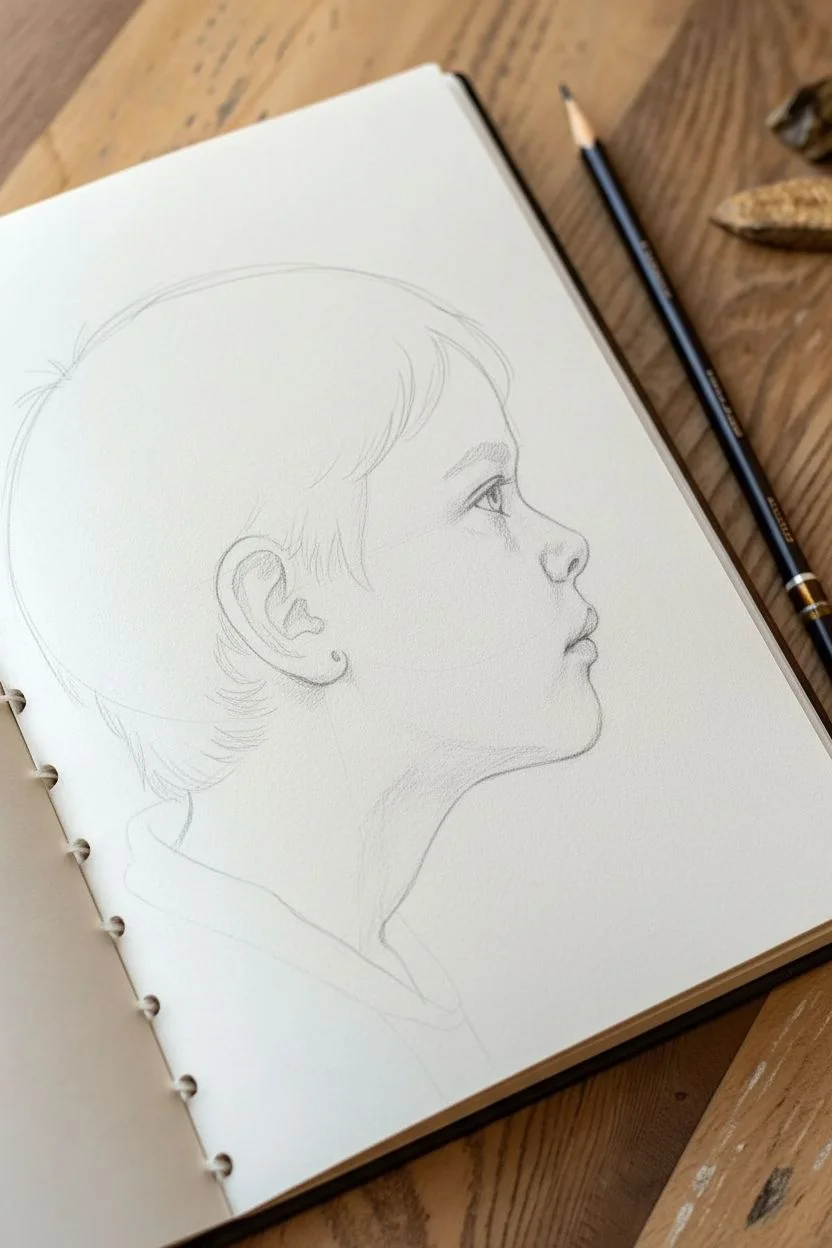
Master the art of pencil portraiture with this detailed profile study of a young boy. Using a structural grid method helps ensure accurate proportions for the facial features and hair texture, resulting in a realistic and expressive finished piece.
Step-by-Step Guide
Materials
- Quality drawing paper (smooth bristol or sketchbook paper)
- Graphite pencils (HB, 2B, 4B)
- Ruler
- Eraser (kneadable and standard white)
- Pencil sharpener
- Blending stump or tissue
- Red colored pencil (optional, for grid visibility)
Step 1: Setting the Structure
-
Establish the Grid:
Begin by lightly drawing a 4×4 grid on your paper using a ruler and a hard pencil (like an H or HB). The squares should be roughly 1.5 to 2 inches wide. Ensure your lines are very faint so they can be erased later. -
Outline the Head Turn:
Focusing on the center-left quadrants, sketch the basic oval shape of the skull. The back of the head should curve gently within the left vertical column. -
Map the Facial Profile:
Using the grid lines as coordinate points, lightly plot the forehead, the bridge of the nose, and the chin. Notice how the nose tip extends slightly past the vertical grid line that marks the center of the face.
Grid Lines Won’t Erase?
If your grid is still visible, try lifting the graphite by ‘stamping’ with a kneaded eraser rather than rubbing. Next time, use a lighter H-grade pencil.
Step 2: Drawing the Features
-
Define the Nose and Lips:
Refine the curve of the nose. Below it, sketch the upper lip protruding slightly more than the lower lip. Keep the mouth slightly open or relaxed. -
Position the Eye:
Place the eye in the upper-right quadrant of the face area. Since this is a profile, draw the eye as a triangular wedge shape rather than an almond. Add the iris looking forward. -
Sketch the Ear:
Move back to the intersection of the grid lines near the jaw. Draw the C-shape of the ear. Pay close attention to the intricate folds of the cartilage inside the ear specifically. -
Outline the Jaw and Neck:
Draw a firm line from the earlobe down to the chin to define the jaw. Then, add the neck lines sliding down into what will become the shirt collar.
Step 3: Adding Texture and Detail
-
Block in Hair Direction:
Using long, sweeping strokes with an HB pencil, map out the flow of the hair. The hair grows from the crown forwards toward the forehead and downwards over the ear. -
Layer Hair Value:
Switch to a 2B pencil to darken the roots and the areas where hair clumps together. I find it helpful to leave white paper gaps for highlights to give the hair sheen. -
Shade the Face:
Lightly shade the skin using the side of your pencil lead. Focus on the shadow under the jawline, the hollow of the cheek, and the eye socket to create depth. -
Refine Facial Contours:
Use a blending stump to smooth out your skin shading, making the transition from light to shadow very gradual on the cheek. -
Detail the Ear:
Deepen the shadows inside the ear folds with a 4B pencil. High contrast here makes the ear look three-dimensional rather than flat.
Level Up: Texture
Use a mechanical pencil to add ultra-fine stray hairs around the crown and nape of the neck. This tiny messiness adds significant realism to the portrait.
Step 4: Clothing and Final Touches
-
Sketch the Shirt:
Loosely sketch the collar and shoulder line. Keep these lines sketchier and less precise than the face to keep the focus on the portrait. -
Add Pattern Hints:
If desired, draw faint vertical lines on the shirt to suggest a striped pattern, following the curvature of the shoulder. -
Clean Up the Grid:
Carefully erase all the initial grid lines that pass through the face and background. careful not to smudge your shading. -
Final Contrast Check:
Take a step back. Use your darkest pencil (4B) to re-emphasize the pupil, the corner of the mouth, and the deepest hair shadows.
Now you have a captured a quiet moment in time with this classic pencil study


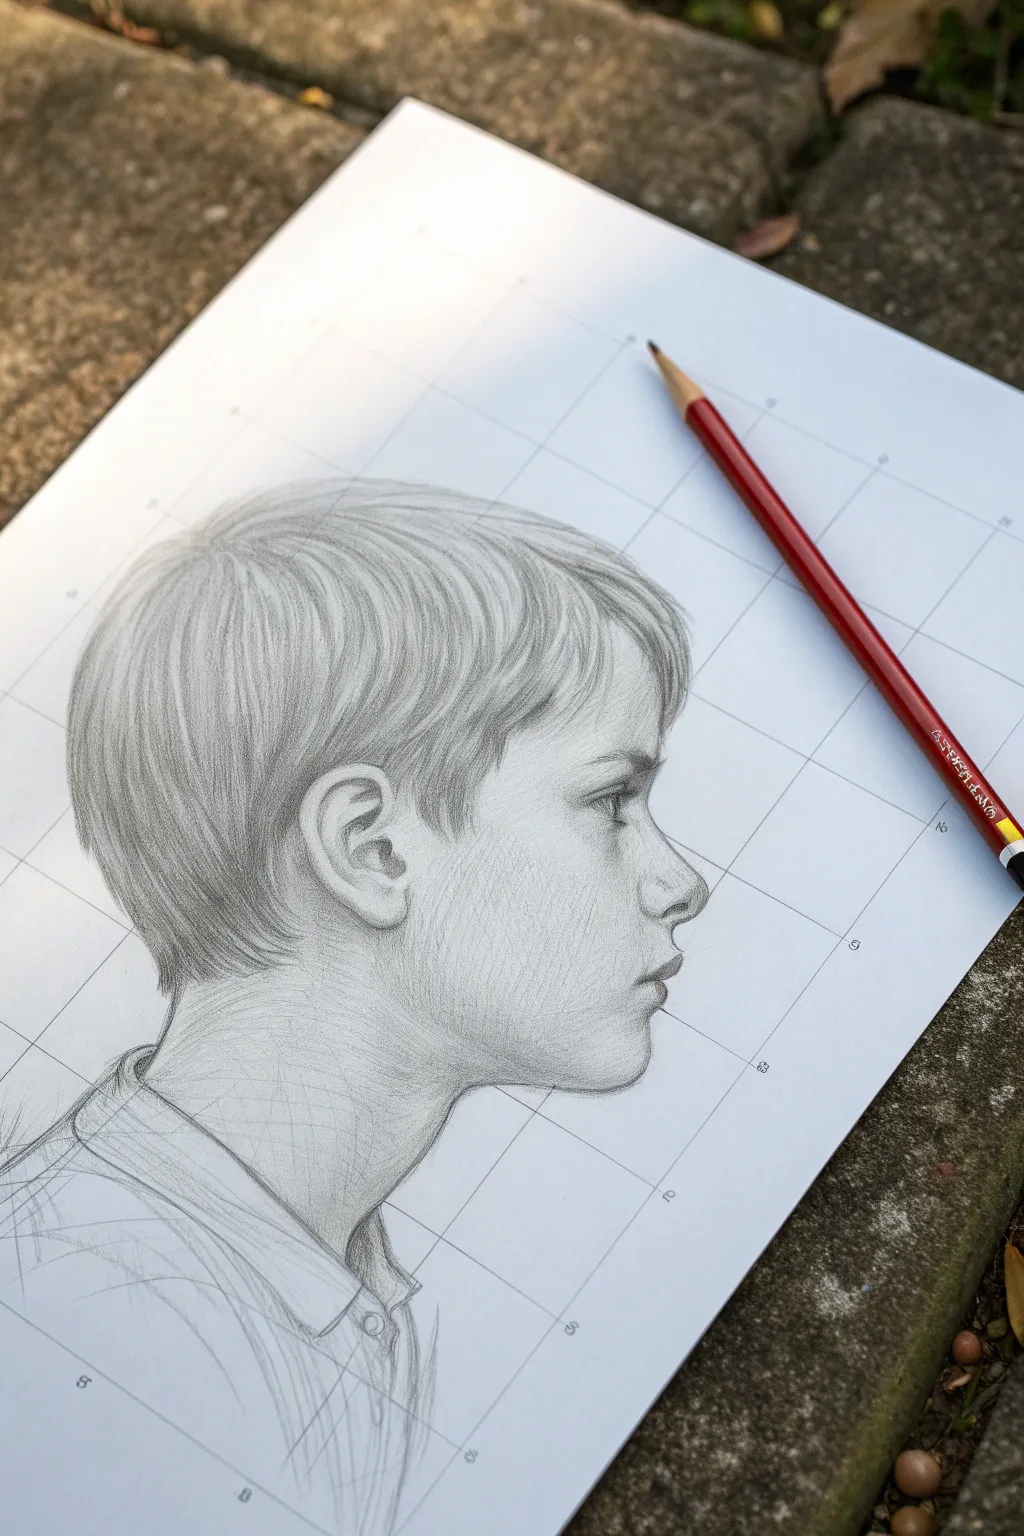
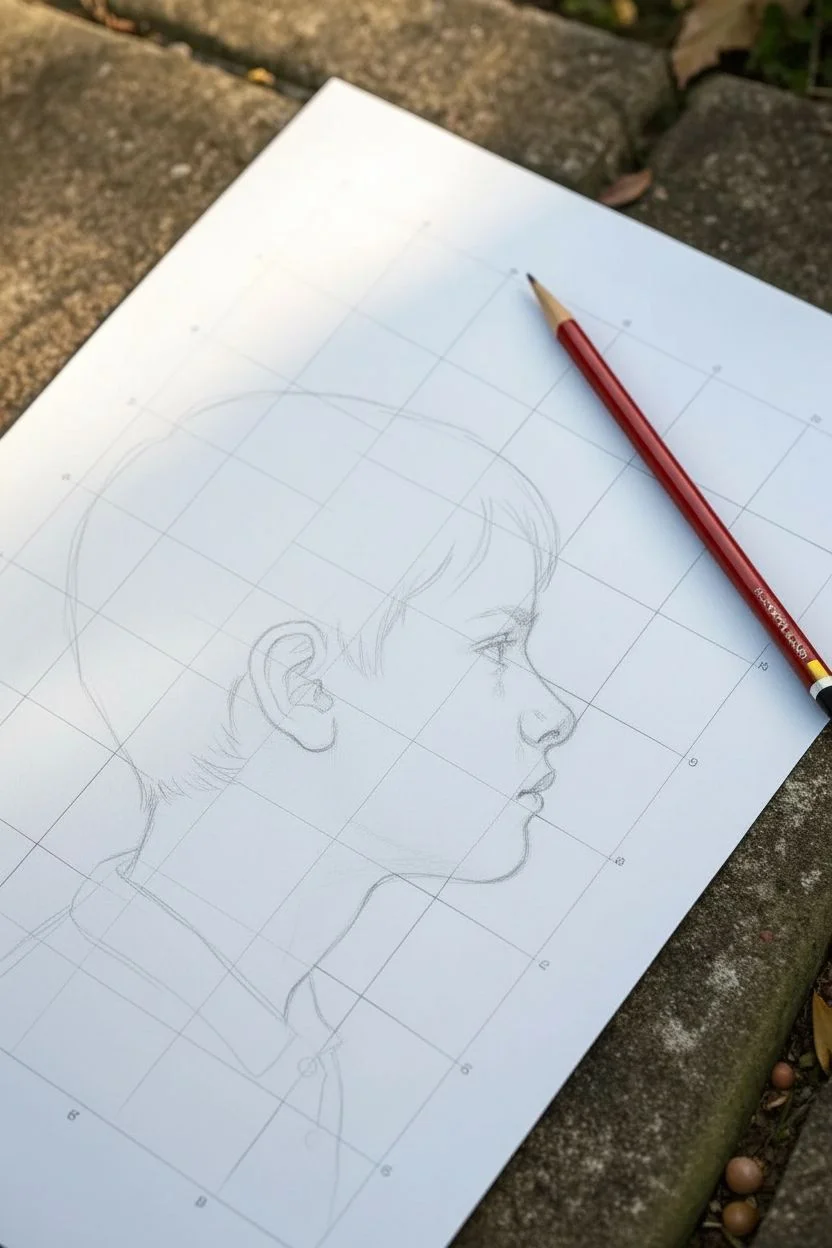
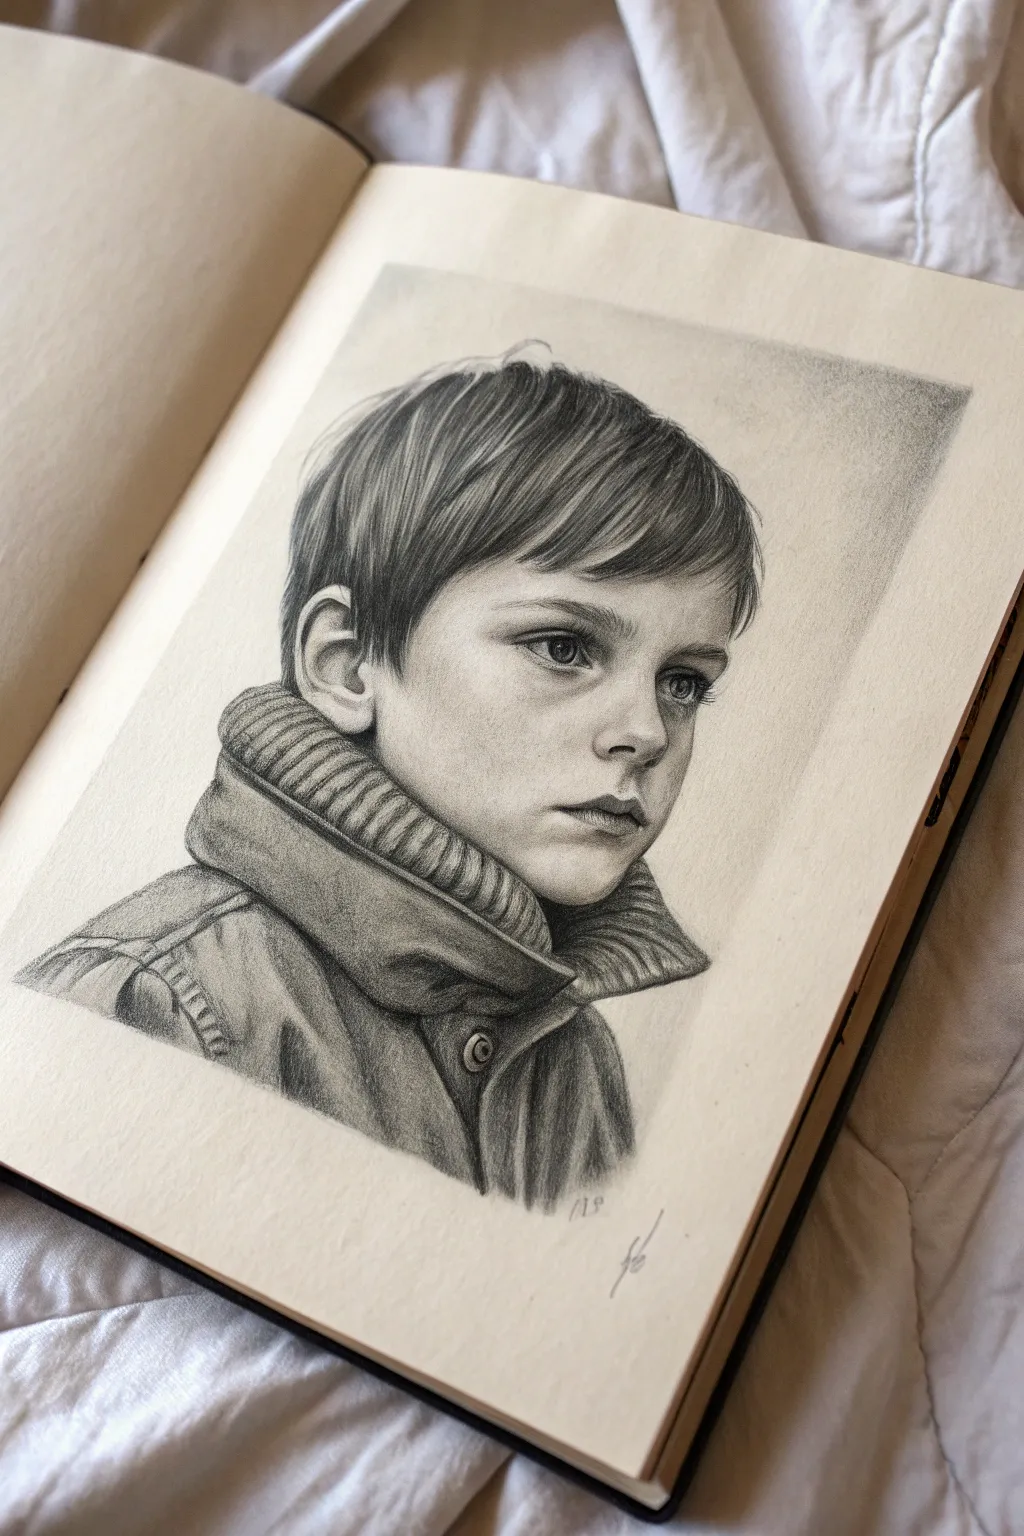
Side Profile With a Defined Jawline
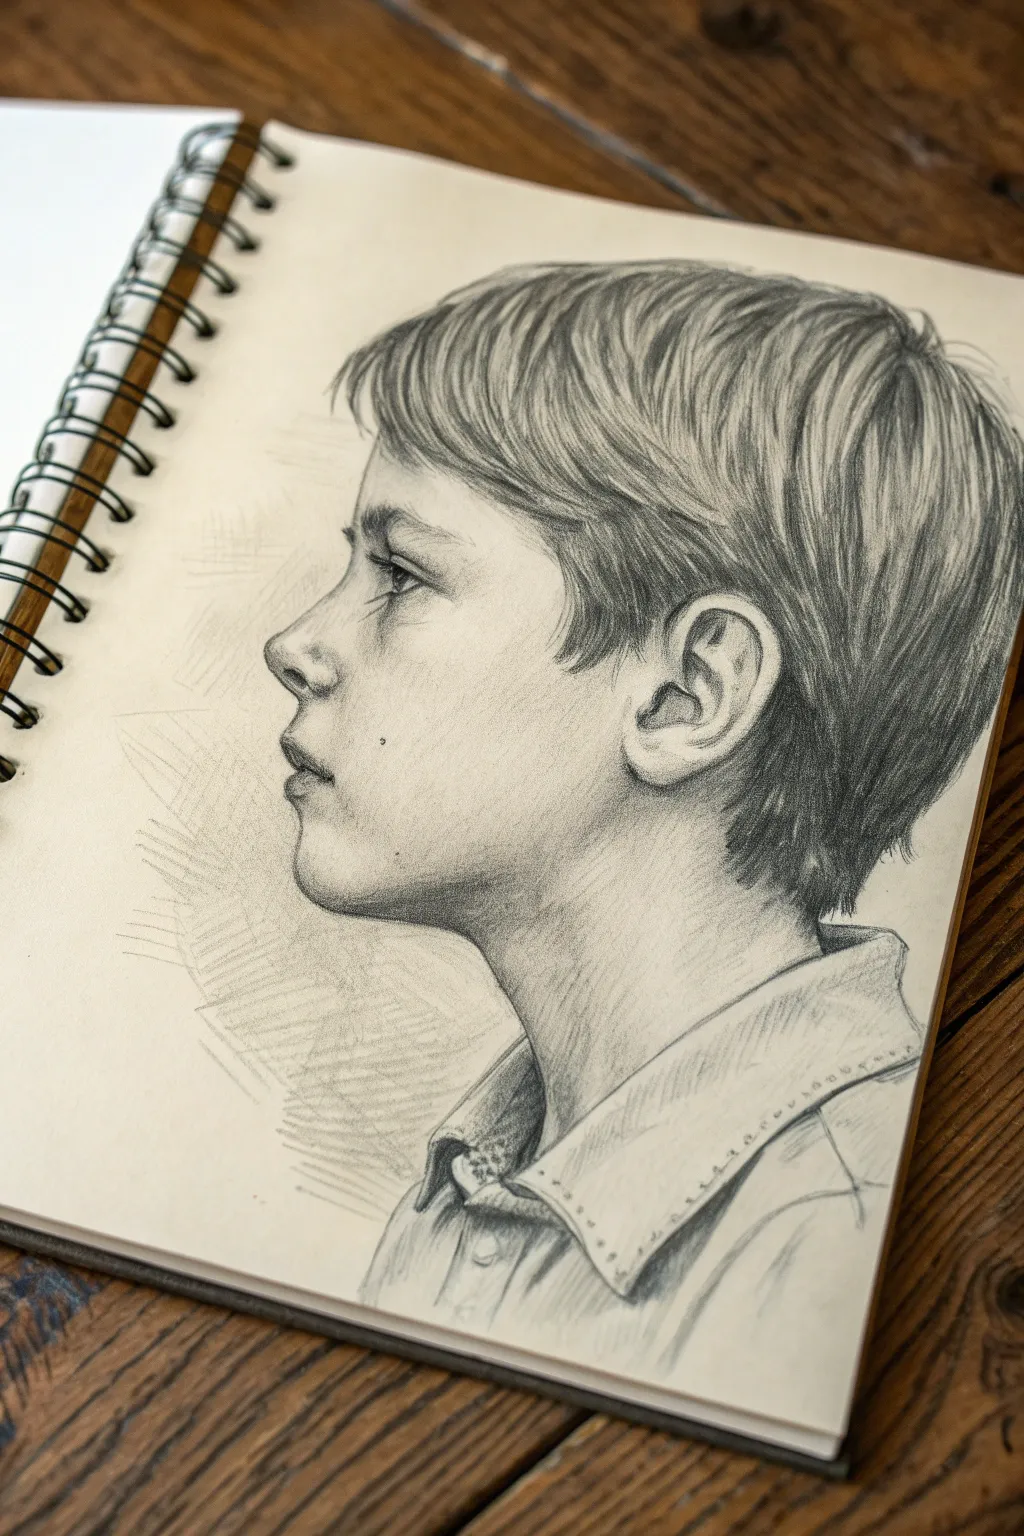
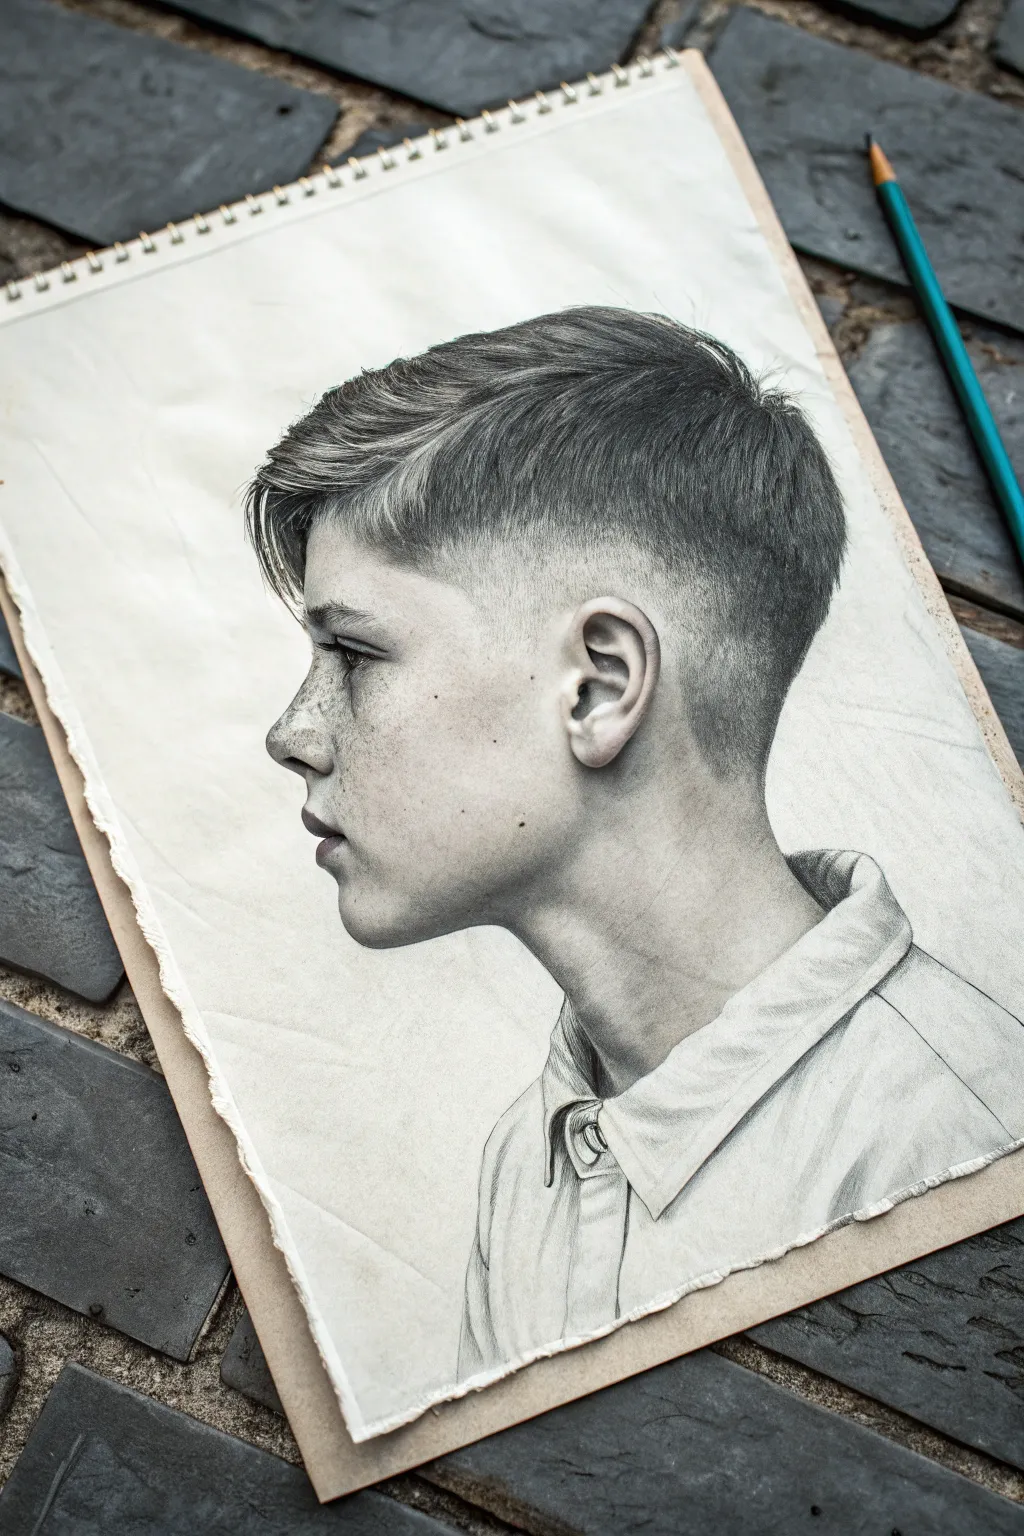
This classic pencil study captures the tender features of a young boy in side profile, focusing on realistic shading and hair texture within a sketchbook. The unfinished edges and hatched background give it an artistic, practiced feel suitable for intermediate artists.
Detailed Instructions
Materials
- Spiral-bound sketchbook (smooth or vellum bristol paper)
- Graphite pencils (HB for sketching, 2B and 4B for shading)
- Kneaded eraser
- Pencil sharpener
- Blending stump (paper tortillon) or tissue
- Ruler (optional for initial alignment)
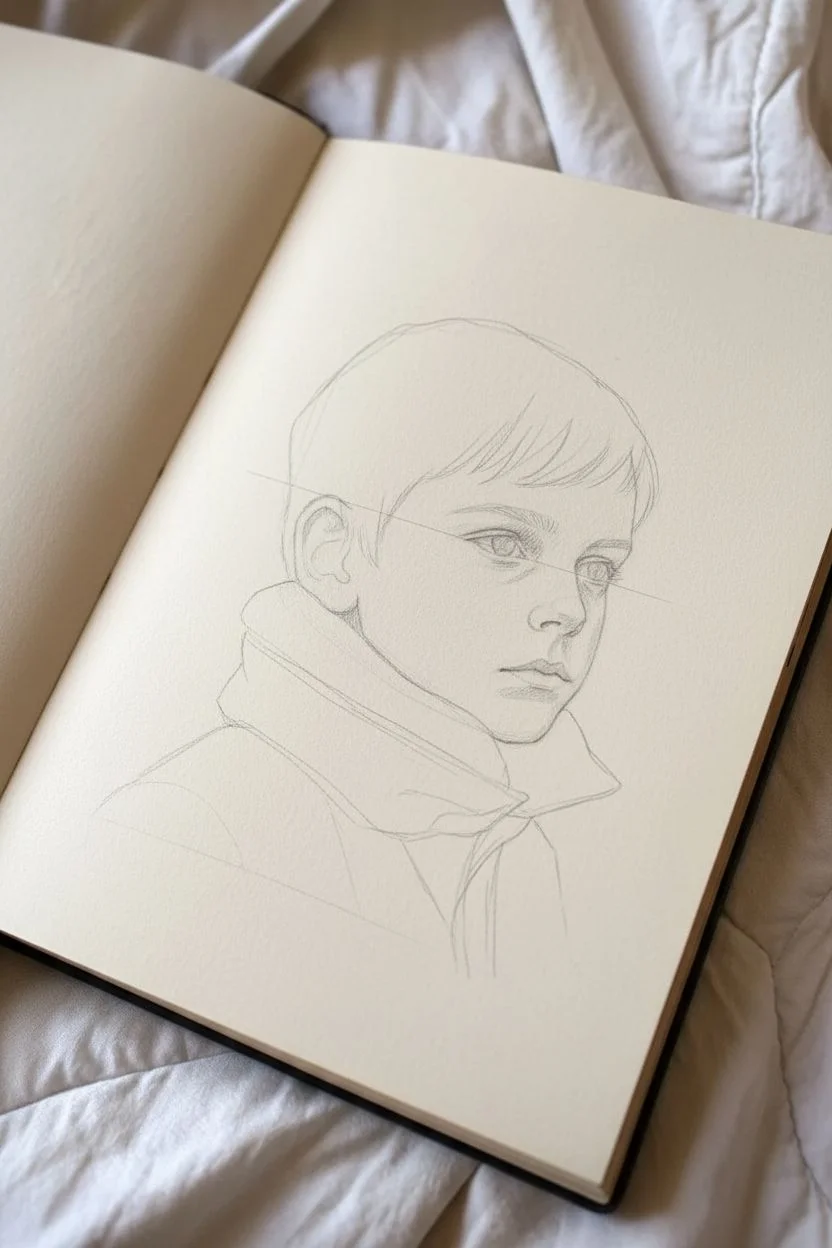
Step 1: Structural Layout
-
Establish the head shape:
Begin lightly with an HB pencil by drawing a circle for the cranium. This will form the main bulk of the head behind the face. -
Map the profile line:
Draw a slightly curved vertical line extending down from the front of your circle to indicate where the forehead, nose, and chin will align. -
Define the jawline:
Sketch the jawline by connecting the bottom of your vertical line back toward the circle, creating a soft angle for the jaw that leads up toward the ear position. -
Locate the features:
Mark horizontal guidelines for the eyes (halfway down the head), the nose base, and the mouth line. Place an oval shape for the ear, aligning the top of the ear with the eye line.
Fixing Odd Proportions
If the profile looks “flat,” the ear is likely too far forward. The ear should sit further back on the head than you think—roughly centered on the side of the skull.
Step 2: Refining the Profile
-
Draw the forehead and nose:
Outline the actual profile now. Bring the forehead down into the bridge of the nose. Keep the nose slightly upturned and youthful, avoiding sharp, adult angles. -
Shape the lips and chin:
Sketch the lips, noting that the top lip usually overhangs the bottom slightly in profile. Round out the chin and connect it smoothly back into that defined jawline you sketched earlier. -
Detail the eye:
Draw the visible eye as a triangular shape (since it’s seen from the side). Add the iris and pupil, leaving a small white highlight to make the eye look alert. -
Refine the ear:
Add the inner folds of the ear using C-shaped curves. The ear is a complex shape, so refer to the reference photo closely to get the anatomy right.
Step 3: Hair and Clothing
-
Block in hair distinct strands:
Instead of drawing individual hairs immediately, outline the major clumps of hair. Create a sweeping motion from the crown of the head forward toward the forehead. -
Sketch the collar:
Draw the shirt collar around the neck. Suggest a stiff fabric texture by using straight lines for the edges and adding a few small circles for stitching details. -
Erase guidelines:
Take your kneaded eraser and gently lift away your initial circular construction lines and facial grid, leaving only the clean outline.
Level Up: Eye Sparkle
Use a white gel pen or white charcoal pencil to add a tiny, brilliant highlight to the eye and the tip of the nose for extra realism.
Step 4: Shading and Texture
-
Apply base shading:
Switch to a 2B pencil. Lightly shade the face, focusing on the shadow under the chin, beneath the nose, and inside the ear. -
Build hair volume:
Use long, fluid strokes to fill in the hair. Press harder in the shadow areas—like behind the ear and at the crown—to create depth. Leave lighter areas for highlights. -
Define facial planes:
Darken the pupil and the lash line. Add subtle shading around the corner of the mouth and the side of the nostril to give the face 3D form. -
Add deep contrast:
Using a 4B pencil, deepen the darkest shadows in the hair and the crease of the collar. This contrast is what makes the drawing pop off the page. -
Texture the background:
Create the hatched background effect by using rapid, diagonal back-and-forth pencil strokes behind the profile. I find this creates a nice separation between figure and paper.
Step 5: Final Touches
-
Enhance the collar:
Sharpen your pencil to add tiny, precise dots along the collar’s edge to mimic stitching. -
Refine skin tone:
Use a blending stump to smooth out harsh pencil lines on the cheek and neck, creating a soft, youthful skin texture. -
Final assessment:
Check the silhouette one last time. If the jawline feels too sharp, soften it slightly with the eraser to maintain the boyish look.
Now you have a timeless profile study that captures the delicate transition from childhood to adolescence


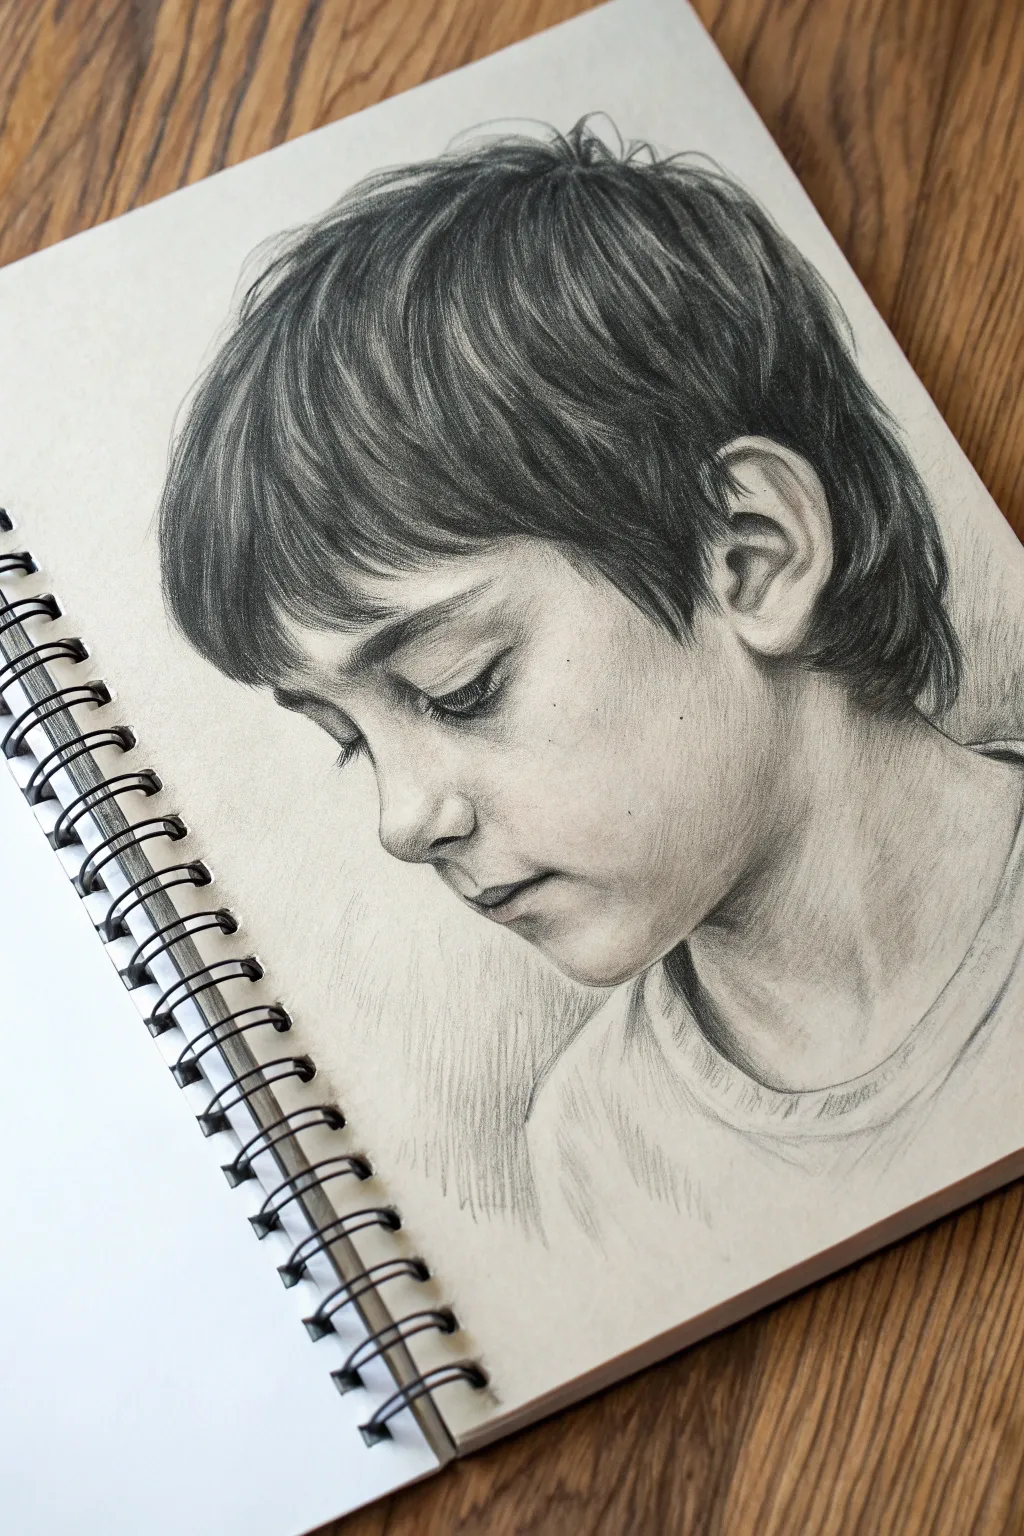
Messy Layered Hair With Strands Over the Forehead
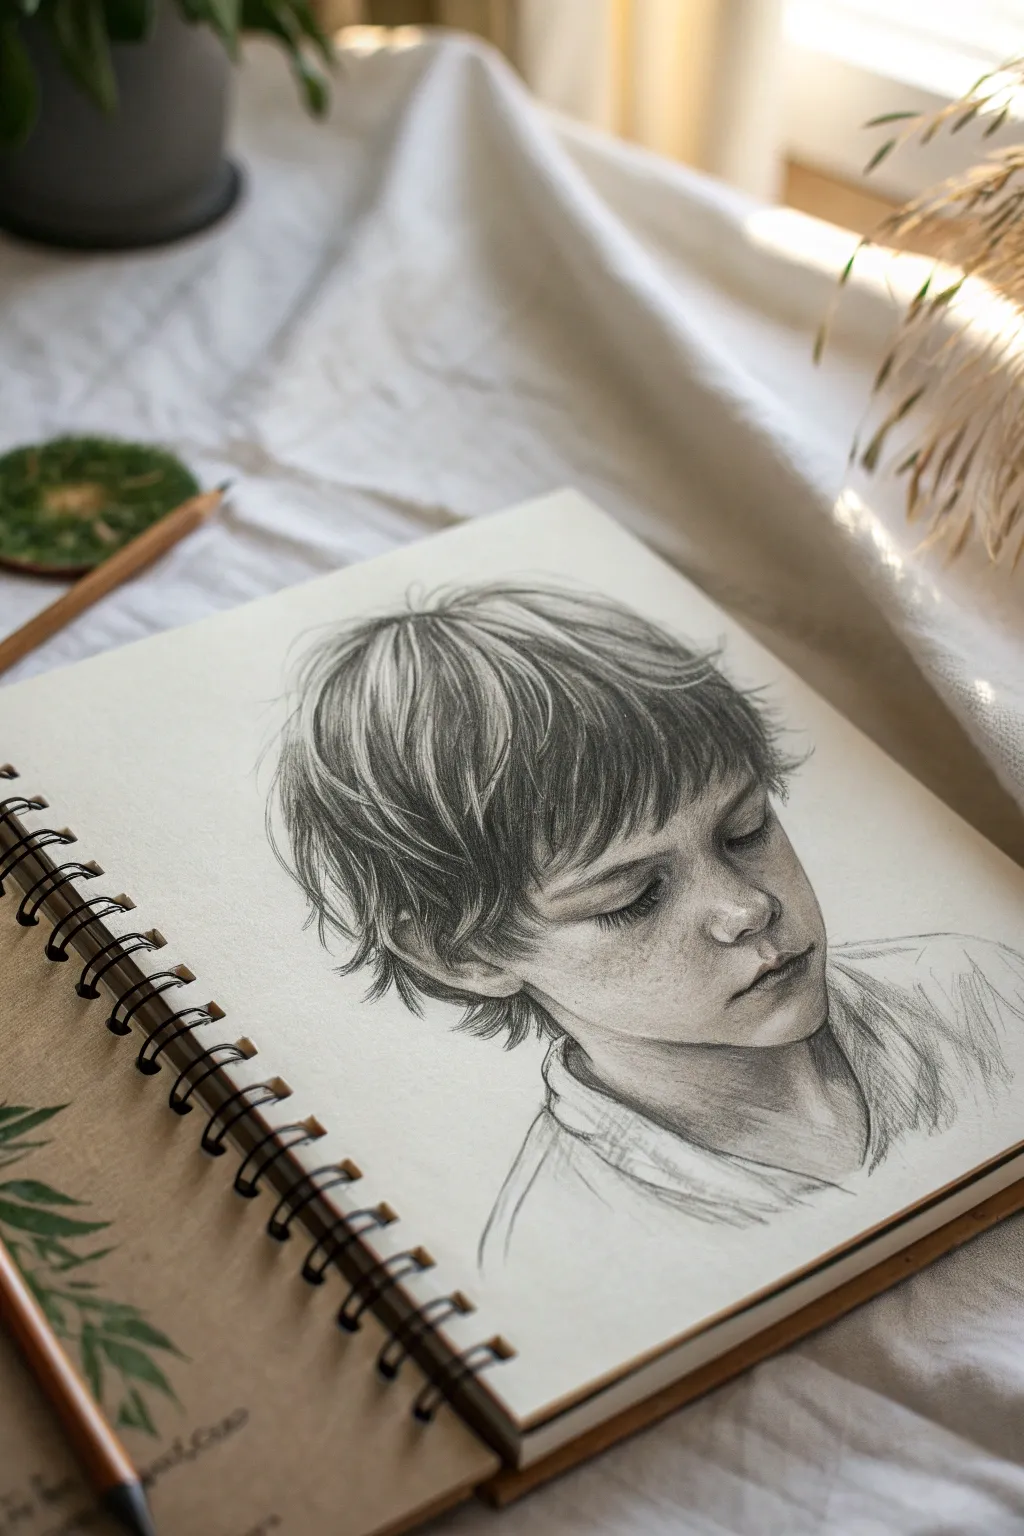
Capture a moment of quiet reflection with this graphite portrait focusing on texture and depth. The key to this drawing lies in the contrast between the soft shading of the face and the sharp, detailed strokes of the messy, layered hair.
Step-by-Step Tutorial
Materials
- Smooth heavyweight drawing paper (sketchbook)
- Graphite pencils (HB for sketching, 2B, 4B, and 6B for shading)
- Mechanical pencil (0.5mm, HB or 2B) for fine hair details
- Kneaded eraser
- Blending stump or tortillon
- Tissue or soft cloth
Step 1: Laying the Foundation
-
Initial outline:
Begin with a light HB pencil to sketch the basic oval shape of the head. Mark guidelines for the eyes, nose, and mouth, noting that the subject is looking down, so facial features will be positioned lower than usual. -
Mapping the hair:
Sketch the general volume of the hair around the skull. Don’t draw individual strands yet; instead, outline large shapes or ‘clumps’ of hair to establish the direction of growth and the layered style. -
Facial features placement:
Lightly place the eyes, nose, and mouth. The eyes should be downcast with eyelids heavy, and the mouth slightly relaxed. Keep these lines very faint so they do not show through the final shading.
Hair Stroke Technique
Always draw hair from the root outward, lifting your pencil at the end of the stroke. This tapering mimics the natural thinning of hair strands.
Step 2: Shading the Face
-
Base skin tone:
Using a 2B pencil, lightly shade the entire face, avoiding the brightest highlights on the nose and forehead. Use a tissue to blend this into a smooth, even grey tone. -
Shadows and form:
Deepen the shadows around the eye sockets, under the nose, and beneath the lower lip using a 4B pencil. Observe how the light hits the cheekbones and leave those areas lighter to create three-dimensionality. -
Refining the eyes:
Detail the eyes and eyelids. Since the boy is looking down, focus on the eyelashes casting shadows on the cheeks. Use a sharp 2B pencil for delicate lash lines. -
Adding skin texture:
I like to lightly tap the kneaded eraser over the nose and cheeks to lift tiny highlights, creating a subtle freckled or porous texture. Add tiny, darker freckles with a sharp HB pencil if desired.
Step 3: Building the Hair
-
Darkest values first:
Identify the darkest areas of the hair—usually the roots, behind the ears, and the tips of layers overlapping others. Fill these in with a 6B pencil to establish contrast. -
Mid-tone strands:
Switch to a 4B pencil to draw the main body of the hair sections. Follow the curve of the head, using long, confident strokes that taper at the ends. -
Creating the messy look:
To achieve the layered effect, focus on where strands overlap. Darken the area underneath a clump of hair to make the top layer pop forward. -
Fine details:
Use a mechanical pencil to add individual stray hairs (‘flyaways’) sticking out from the main shape. These should be erratic and lighter to look natural. -
Forehead strands:
Draw the bangs falling over the forehead. Ensure the pencil strokes follow gravity but curve slightly. Lift a few highlights within these strands using the edge of your kneaded eraser.
Fixing Muddy Shading
If skin tones look muddy or too dark, roll your kneaded eraser into a cylinder and gently roll it over the area to lift excess graphite without smearing.
Step 4: Clothing and Final Touches
-
Sketching the shirt:
Keep the clothing loose and sketchy to maintain focus on the face. Use quick, broad strokes with a 2B pencil to suggest the collar and shoulder line. -
Fabric folds:
Add a few deeper shadows where the fabric bunches at the neck and shoulder using a 4B pencil. Blend these slightly but leave visible pencil strokes for an artistic feel. -
Final contrast check:
Step back and assess the drawing. Darken the pupils, nostrils, and deepest hair shadows with your softest pencil (6B) to maximize depth. -
Cleanup:
Use the kneaded eraser to clean up any smudge marks on the background paper, ensuring the silhouette remains crisp.
You now have a soulful portrait that masters the balance between intricate hair details and soft facial features


Undercut Hair With Short Sides and Longer Top
Master the art of texture contrast in this realistic graphite profile of a boy with a modern undercut hairstyle. You will learn to render smooth skin tones alongside crisp, detailed hair strands to create a striking and lifelike drawing.
Detailed Instructions
Materials
- High-quality sketching paper (e.g., Bristol vellum or heavy cartridge paper)
- Graphite pencils (HB, 2B, 4B, 6B)
- Mechanical pencil (0.5mm, 2B lead)
- Kneaded eraser and stick eraser
- Blending stumps or tortillons
- Tissue or soft cloth for smoothing
- Ruler (optional for grid method)
Step 1: Structural Foundation
-
Map the Profile Outline:
Begin with a very light HB pencil to sketch the basic contour of the head in profile. Focus on the angles of the forehead, nose, and chin to capture the boy’s distinct facial structure without pressing hard. -
Place Facial Features:
Mark the horizontal alignment for the eye, the bottom of the nose, and the mouth. Keep your lines loose; accuracy here prevents issues later when we start shading. -
Outline the Hairline:
Define the distinct shape of the undercut. Draw a curved line from the temple area back around the ear to separate the longer top hair from the shorter, faded sides. -
Sketch the Shirt Collar:
Add the simple geometry of the collar and shoulder. The clothing should feel relaxed and not overly stiff, so include a few folds around the neck.
Uneven Fade?
If the short hair looks patchy, use a blending stump to smooth the graphite into a solid grey tone, then use a sharp stick eraser to lift tiny vertical ticks to re-introduce texture.
Step 2: Facial Shading
-
Establish Skin Tone:
Using the side of a 2B pencil, lightly shade the face with a uniform, pale layer. Use a tissue to buff this graphite into the paper for a seamless base tone. -
Sculpt the Features:
Deepen the shadows around the eye socket, the nostril, and under the chin using a 4B pencil. The ear needs careful attention; shade the inner folds to create depth, leaving the outer rim lighter. -
Refine the Eye and Lips:
Switch to a mechanical pencil for crisp details. Draw the eyelashes and the pupil clearly, ensuring you leave a tiny white highlight in the eye. Shade the lips softly, making the upper lip slightly darker than the lower one. -
Add Texture and Freckles:
To achieve that realistic skin texture shown in the reference, gently tap the tip of your pencil across the cheeks and nose bridge. Vary the pressure to create natural-looking freckles.
Step 3: Hair and Fade Texture
-
Draw the Top section:
Starting at the crown, use a 4B or 6B pencil to draw long, sweeping strokes following the hair’s growth direction toward the forehead. Group strands together rather than drawing every single hair individually. -
Create Depth in the Hair:
Darken the roots and the areas where hair clumps together. Use your eraser to pull out thin highlights along the curves of the hair to simulate shine. -
Render the Fade:
This is the most critical part for the ‘undercut’ look. Use short, vertical hatching strokes near the transition line, making them denser at the top and gradually spacing them out as you move down the neck. -
Soften the Sides:
Gently gently blend the lower fade area with a dirty blending stump. This creates the illusion of very short, buzzed hair against the skin without harsh lines. -
Detail the Hairline:
With a sharp mechanical pencil, add tiny, fine baby hairs at the temple and nape of the neck to break up any unnatural outlines.
Add Texture
Place a piece of textured paper (like watercolor paper) underneath your sketching sheet. Rub over the cheek area lightly with a soft lead to pick up a subtle skin pore texture.
Step 4: Clothing and Final Touches
-
Shade the Shirt:
Apply broad shading to the shirt, paying attention to the cast shadows under the collar. I usually keep the clothing looser and less detailed than the face to keep the focus on the portrait. -
Refine Contrast Values:
Step back and squint at your drawing. Darken the very deepest shadows (like the ear canal and hair roots) with your 6B pencil to make the image pop. -
Clean the Edges:
Use a kneaded eraser to clean up any smudges on the background paper, ensuring a crisp silhouette against the white space.
Finish by fixing your drawing with a spray fixative to prevent the dark graphite from smearing over time

PENCIL GUIDE
Understanding Pencil Grades from H to B
From first sketch to finished drawing — learn pencil grades, line control, and shading techniques.
Explore the Full Guide
Hair Tucked Behind the Ear
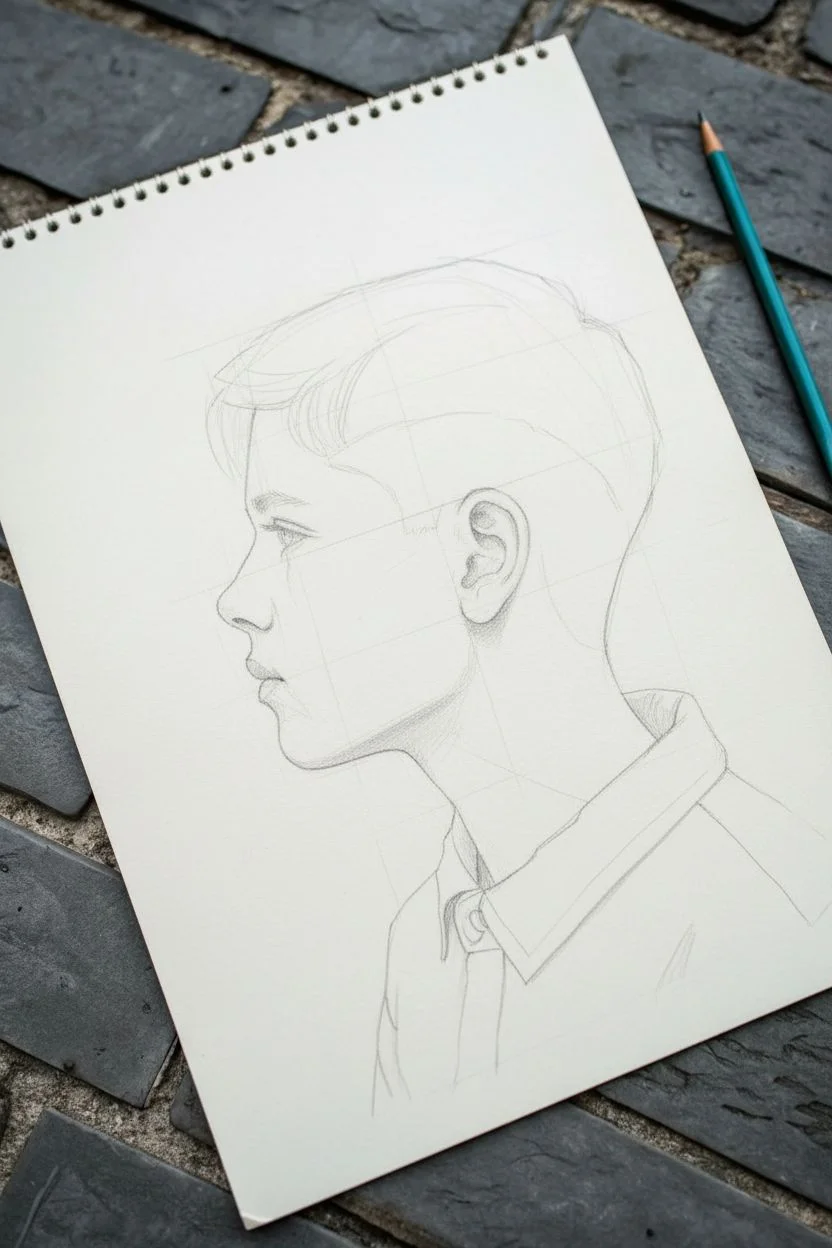
This classic pencil study captures the delicate profile of a young boy looking upward, focusing on soft shading and flow. The drawing emphasizes the texture of short, layered hair tucked neatly behind the ear, creating a timeless and nostalgic feel.
How-To Guide
Materials
- Quality sketchbook paper (smooth or fine tooth)
- Graphite pencils (HB, 2B, 4B)
- Kneaded eraser
- Blending stump or tortillon
- Precision eraser (stick or pencil style)
- Pencil sharpener
Step 1: Laying the Foundation
-
Establish the head shape:
Begin with a light HB pencil. Draw a circle for the main part of the skull. Add a curved line extending down for the jawline and chin, angling it upward, as his head is tilted back slightly. -
Map the profile line:
Lightly sketch the contour of the face. Mark the indentation for the eye socket, the curve of the button nose, the gentle protrusion of the lips, and the soft curve of the chin connecting to the neck. -
Place the ear:
Locate the ear placement carefully. Since we are focusing on hair tucked behind the ear, the ear needs to be positioned correctly relative to the jaw—roughly aligned horizontally with the nose and eye level. -
Outline the features:
Refine the shapes of the eye, nostril, and mouth. The eye should be looking upward; draw the iris tucked slightly under the upper lid. Keep lines faint so they can be adjusted or erased later. -
Indicate the hair flow:
Sketch the general direction of the hair. Draw long, sweeping curves originating from the crown and moving toward the forehead, with shorter strokes curving around the ear to show the ‘tucked’ effect.
Step 2: Defining the Features
-
Shade the eye:
Switch to a 2B pencil. Darken the pupil and the upper lash line. Use a blending stump to soften the iris shading, leaving a tiny white highlight to bring life to the gaze. -
Sculpt the nose and mouth:
Add subtle shading underneath the tip of the nose and the bottom lip. I like to keep the bridge of the nose fairly light, using the paper’s white as a highlight. -
Detail the ear:
The ear is a focal point here. Darken the inner folds of the ear (the helix and antihelix) with the 2B pencil to create depth, ensuring the lobe looks soft and rounded. -
Soft skin tones:
Using the side of your HB pencil, lightly shade the cheek, neck, and jawline. Use your blending stump to smooth this graphite out, creating a gentle transition from light to shadow under the chin.
Muddy Shading?
If your skin shading looks dirty or smudged, your blending stump might have too much old graphite on it. Sand it down with a sandpaper block or use a clean tissue.
Step 3: The Hair Texture
-
Base layer for hair:
With an HB pencil, draw consistent strokes following your initial flow lines. Start from the crown and flick outward. Keep the pressure even to create a mid-tone base. -
Darkening the roots and shadows:
Use a 4B pencil to add depth. Focus on the areas where hair layers overlap and underneath the hair where it meets the forehead and neck. This creates separation between strands. -
Tucking behind the ear:
Pay special attention to the hair right above and behind the ear. These strokes should be shorter and curve tightly around the ear structure, emphasizing that ‘tucked’ look. -
Adding highlights:
Take your precision eraser (or a pinched edge of a kneaded eraser) and lift out thin lines of graphite in the hair. This simulates light catching the individual strands and adds volume. -
Refining hair strands:
Go back in with a sharp 2B pencil to add crisp, individual hairs over the erased highlights and shadowed areas. This mix of hard lines and soft shading creates realistic texture.
Add Freckles
For extra character, use a sharp HB pencil to lightly stipple a few freckles across the bridge of the nose and cheek. Twist the pencil slightly for varied dot shapes.
Step 4: Final Touches
-
Sketch the collar:
Draw the collar of the shirt loosely. Don’t over-detail this; simple sketchy lines suggest a checkered pattern without distracting from the face. -
Deepen the darkest values:
Using the 4B pencil, strengthen the darkest shadows one last time—specifically the pupil, nostrils, deepest ear folds, and the shadow under the chin. -
Clean up edges:
Use the kneaded eraser to clean up any smudges on the background paper, keeping the negative space around the profile crisp.
Take a moment to step back and admire the quiet emotion captured in your profile study
Curly Boy Hair With Big Soft Shapes
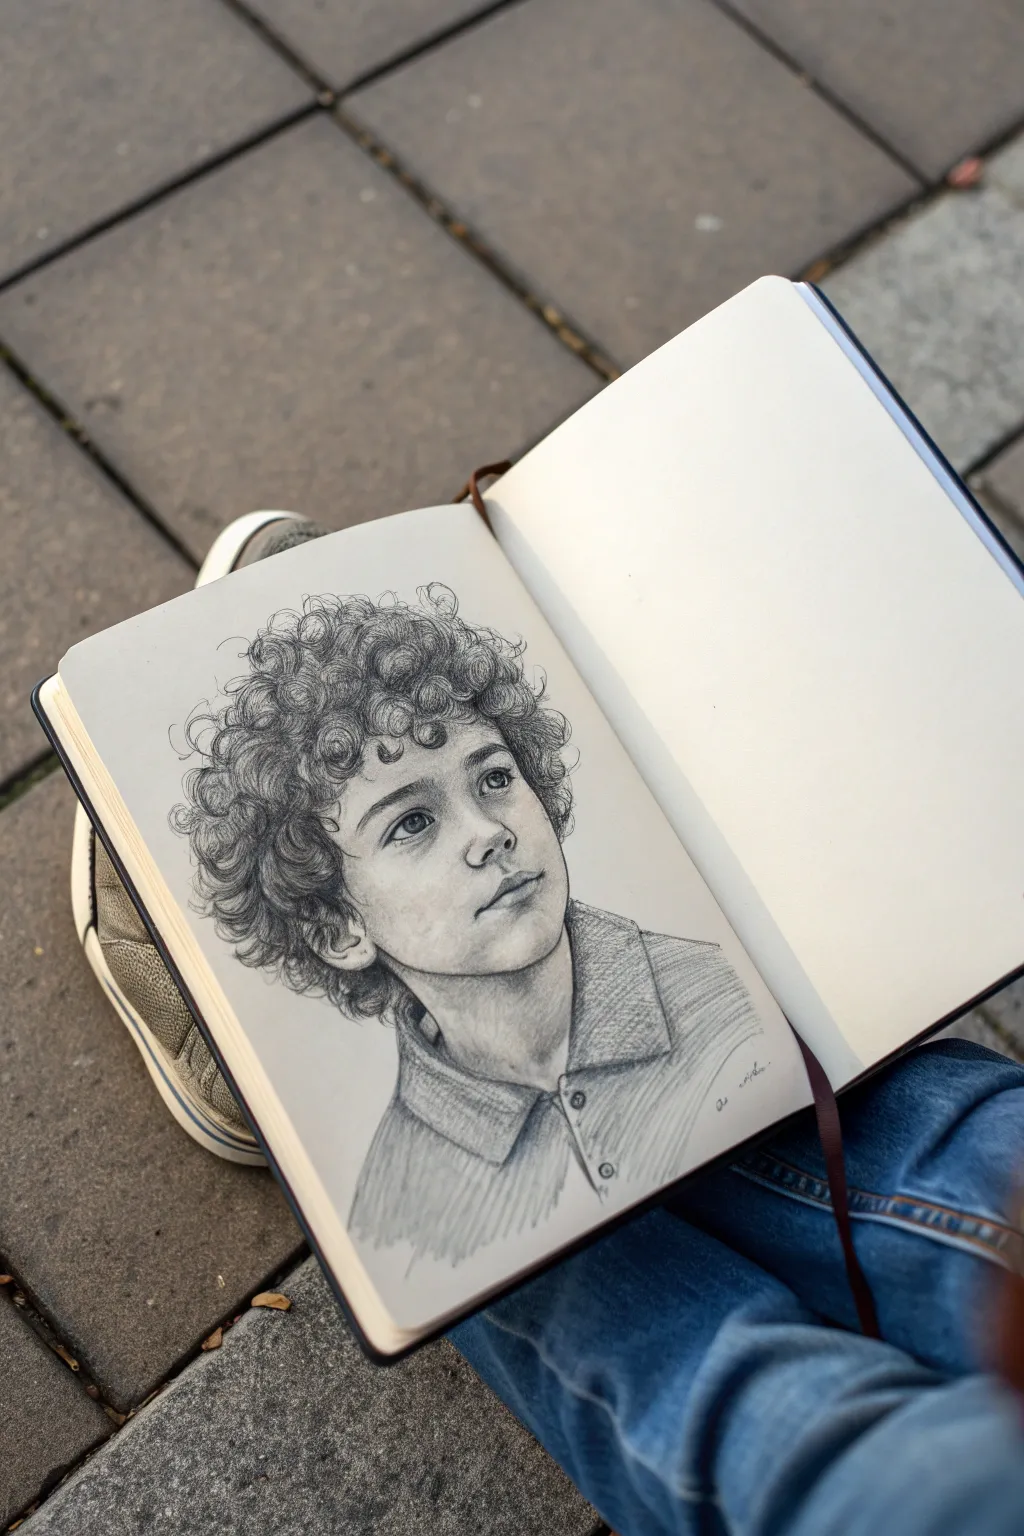

This project focuses on capturing the innocent expression of a young boy with a stunning mop of curls. Using soft pencil shading and distinct circular motions, you’ll create a lifelike portrait that emphasizes texture and volume.
Step-by-Step Tutorial
Materials
- Sketchbook or drawing paper (heavyweight)
- Graphite pencils (HB, 2B, 4B)
- Kneaded eraser
- Fine mechanical pencil (0.5mm, optional)
- Blending stump or tissue
- Pencil sharpener
Step 1: Laying the Foundation
-
Map out the head shape:
Start with a light HB pencil to draw a basic oval for the face. Keep your lines very faint so they can be easily erased later. Add a rough, larger rounded shape on top to indicate the volume of the hair. -
Place facial guidelines:
Draw a vertical centerline slightly curved to the right, showing that the head is turned. Add horizontal lines for the eyes, nose base, and mouth. The eyes should be roughly in the middle of the total head height. -
Sketch the features:
Lightly outline the almond shape of the eyes, the small button nose, and the lips. The mouth slightly slightly open or relaxed. -
Refine the jawline:
Carve out the jawline and chin, making sure the line is soft and youthful rather than angular. Connect the neck to the shoulders with simple sloping lines.
Hair Looking Flat?
Avoid drawing curls as perfect circles. Vary the size and shape of your loops. Ensure you have ‘negative space’ (dark shadows) between the light curls to create 3D depth.
Step 2: Developing the Face
-
Detail the eyes:
Using a sharp 2B pencil, darken the upper lash line and draw the iris. Leave a small, crisp white circle in each pupil for the catchlight—this brings the drawing to life. -
Shade around the eyes:
Add gentle shading under the eyebrows and around the eye sockets. This establishes the depth of the gaze. -
Define the nose:
Instead of drawing hard lines for the nose, use soft shading to suggest the nostrils and the rounded tip. The shadows should do the work here. -
Render the lips:
Darken the line where the lips meet. Shade the upper lip slightly darker than the lower lip, which catches more light. -
Add facial contouring:
Lightly cross-hatch or smudge shade along the right cheek and under the chin to create a three-dimensional form.
Step 3: Creating the Curls
-
Outline the curl masses:
Before drawing individual hairs, break the hair area into large, cloud-like clumps. This helps you manage the volume without getting overwhelmed. -
Start the coil motions:
Switch to a 4B pencil for darker values. Use circular, scribbling motions to start defining the tight curls. Think of drawing tiny springs or interconnected loops. -
Build density:
Working from the roots outward, layer your circular strokes. Keep the pencil moving in different directions to simulate the chaos of natural curls. I find it helpful to vary pressure here. -
Define individual ringlets:
Select a few prominent curls, especially around the forehead and perimeter, to detail more carefully. Draw ‘C’ and ‘S’ curves to show how the hair clumps together. -
Add deep shadows:
Press harder with your 4B pencil in the gaps between the curls. These dark pockets create the illusion of depth and make the lighter curls pop forward. -
Soften the edges:
Use a few loose, stray hairs around the outer edge of the hair to make it look soft and airy, rather than like a solid helmet.
Squint Test
Squint your eyes at your reference and your drawing. This blurs the details and lets you see if your big shapes of light and dark value match closer than looking at details.
Step 4: Clothing and Final Touches
-
Outline the collar:
Draw the collar of the polo shirt. Pay attention to how the fabric folds around the neck. -
Texture the shirt:
Use a wide, consistent diagonal hatching technique to shade the shirt. This directional shading distinguishes the fabric texture from the organic texture of the hair and skin. -
Add shirt details:
Draw the small buttons and the placket of the shirt. Add a slightly darker shadow under the collar to lift it off the shoulder. -
Clean up highlights:
Use your kneaded eraser to tap (don’t rub) the cheeks, nose tip, and forehead curls to lift off graphite and create soft highlights. -
Final contrast check:
Step back and look at your drawing. Deepen the darkest shadows—usually the pupils, nostrils, and deepest hair crevices—to ensure the full range of values is used.
Take a moment to sign your work near the shoulder as you admire the character you’ve captured on the page
BRUSH GUIDE
The Right Brush for Every Stroke
From clean lines to bold texture — master brush choice, stroke control, and essential techniques.
Explore the Full Guide
Winking Boy Expression
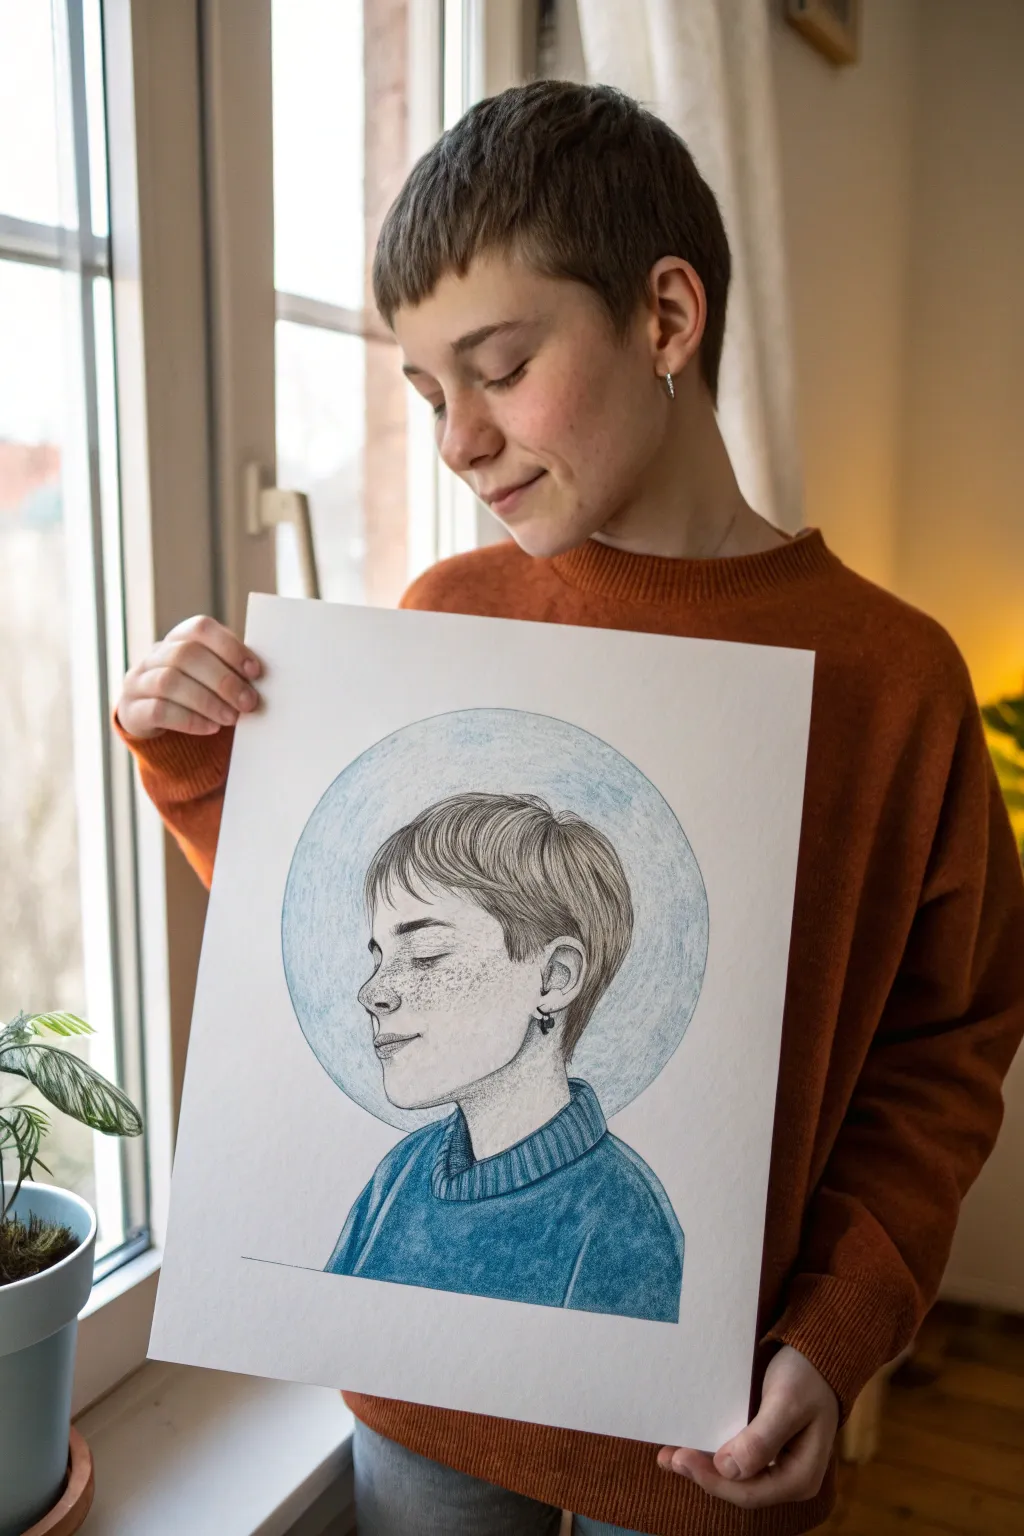
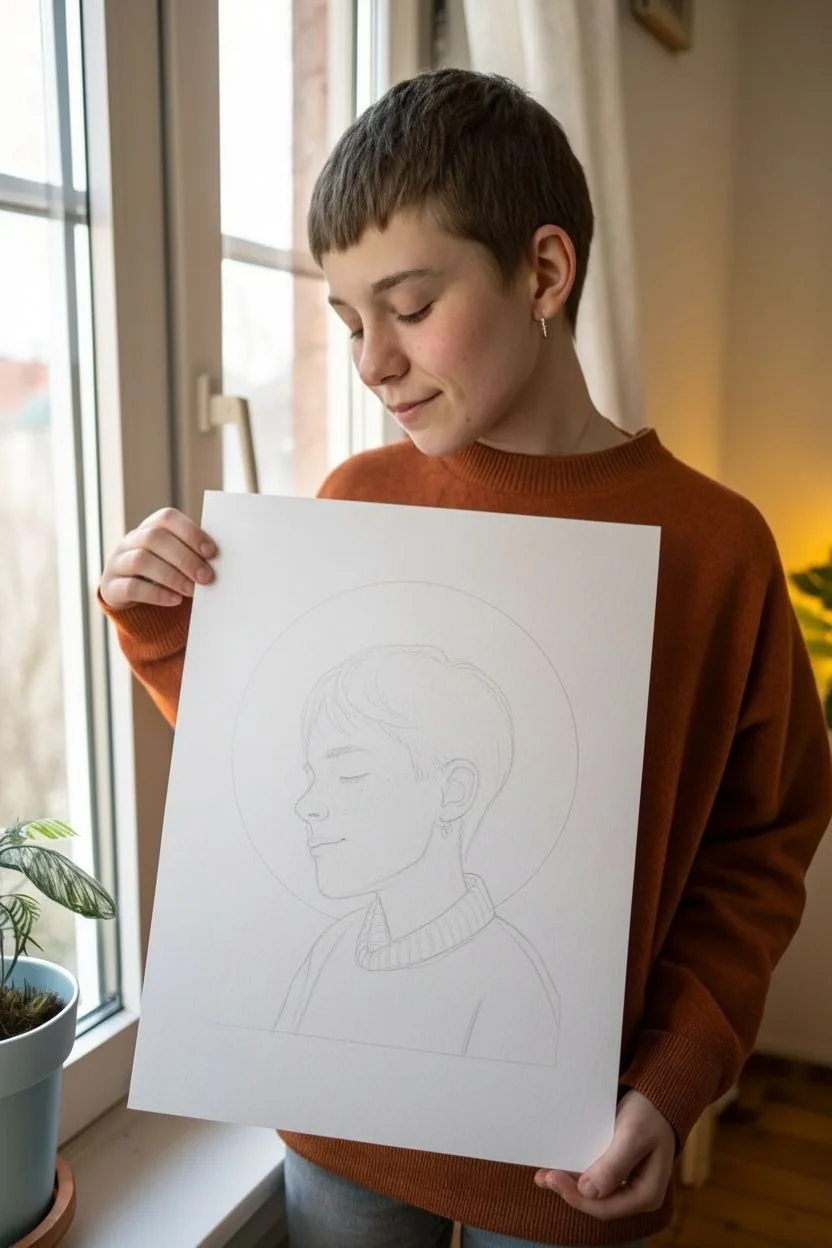
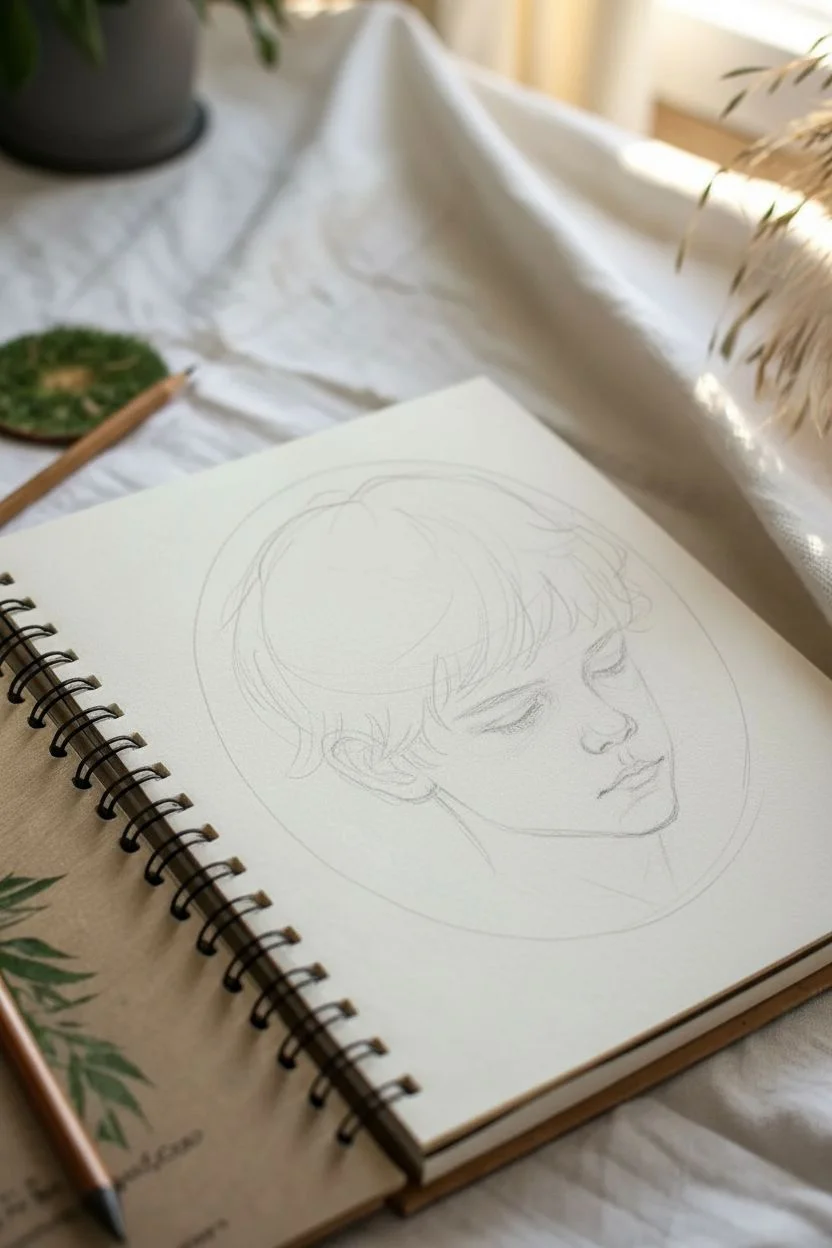
Capture a moment of quiet reflection with this mixed-media portrait that combines delicate line work with soft fields of color. The distinctive circular framing and monochromatic blue palette create a modern, peaceful aesthetic perfect for studying facial features.
Step-by-Step Guide
Materials
- Heavyweight drawing paper (e.g., bristol smooth or hot press watercolor paper)
- Graphite pencils (HB, 2B)
- Fine liner pens (0.1mm, 0.3mm, 0.5mm, black)
- Colored pencils (cerulean blue, cobalt blue, dark indigo)
- Soft blending stump or tissue
- Compass or round object for tracing (approx. 8-10 inches diameter)
- Kneaded eraser
Step 1: Drafting the Composition
-
Establish the frame:
Begin by lightly tracing a large circle in the center of your paper using a compass or a round household object like a dinner plate. This will act as the boundary for your background and help frame the subject. -
Sketch the profile:
Lightly sketch the profile view of the boy’s head within the circle. Position the head slightly off-center to the left, ensuring the neck and shoulders extend down to the bottom edge of the circle boundary. -
Refine facial features:
Map out the features lightly with an HB pencil. Focus on the closed eye with delicate lashes, the upturned nose, and a gentle smile. Sketch the general shape of the short, textured hair. -
Detail the clothing:
Draw the collar of a ribbed sweater or turtleneck. Indicate the folds of the fabric where the shoulder meets the neck, keeping the lines loose for now.
Step 2: Inking the Portrait
-
Outline the face:
Using a 0.3mm fine liner, carefully ink the profile of the face. Use a very light touch for the lips and nose to avoid making them look too harsh. -
Texture the hair:
Switch to a 0.1mm pen for the hair. Draw individual strands following the direction of growth—sweeping down from the crown and tucking behind the ear. Build up density near the roots and parting. -
Define the ear and earring:
Ink the ear shape, paying attention to the intricate cartilage curves. If you’d like to match the reference, add a small dangling earring using a thicker 0.5mm pen for contrast. -
Add freckles:
With your finest 0.1mm pen, gently tap small dots across the nose and cheeks. Vary the pressure and spacing so the freckles look organic rather than uniform. -
Erase pencil marks:
Wait for the ink to dry completely to prevent smudging. I usually give it at least 10 minutes. Then, gently use a kneaded eraser to lift all the graphite sketch lines from the face and hair.
Hair Texture Tip
Don’t draw every single hair. Draw ‘clumps’ or sections of hair first, then add individual stray strands over the top to make it look realistic and soft.
Step 3: Adding Color and Depth
-
Base layer for the shirt:
Take a cerulean blue colored pencil and fill in the sweater area. Apply the color using small circular motions to get even coverage without leaving harsh directional streaks. -
Shade the fabric folds:
Using a dark indigo or cobalt blue pencil, add shadows to the sweater. Focus on the ribbed texture of the collar and the deep folds in the shoulder area to create volume. -
Create the background halo:
Lightly shade inside the large circle using a very pale blue pencil. Keep the pressure minimal to create a soft, airy atmosphere behind the head. -
Intensify the outline:
Darken the outer edge of the background circle slightly to clearly separate the artwork from the white paper. You can blend this edge inward with a tissue for a soft gradient. -
Final shading touch-ups:
Return to the face with a 2B graphite pencil. Very lightly shade under the chin and jawline to curve the form, blending it out smoothly with a stump so it doesn’t clash with the ink. -
Review and seal:
Check your darker values in the hair and clothing. If the shirt looks grainy, go over it one last time with the base blue color to burnish and smooth out the wax.
Fixing Smudged Ink
If you accidentally smudge ink before it dries, turn it into a shadow. Use your stippling technique (dots) to blend the smudge into the cheek shading or hair.
Step back and admire the calm atmosphere you have created in your new portrait piece
Shy Boy Looking Down
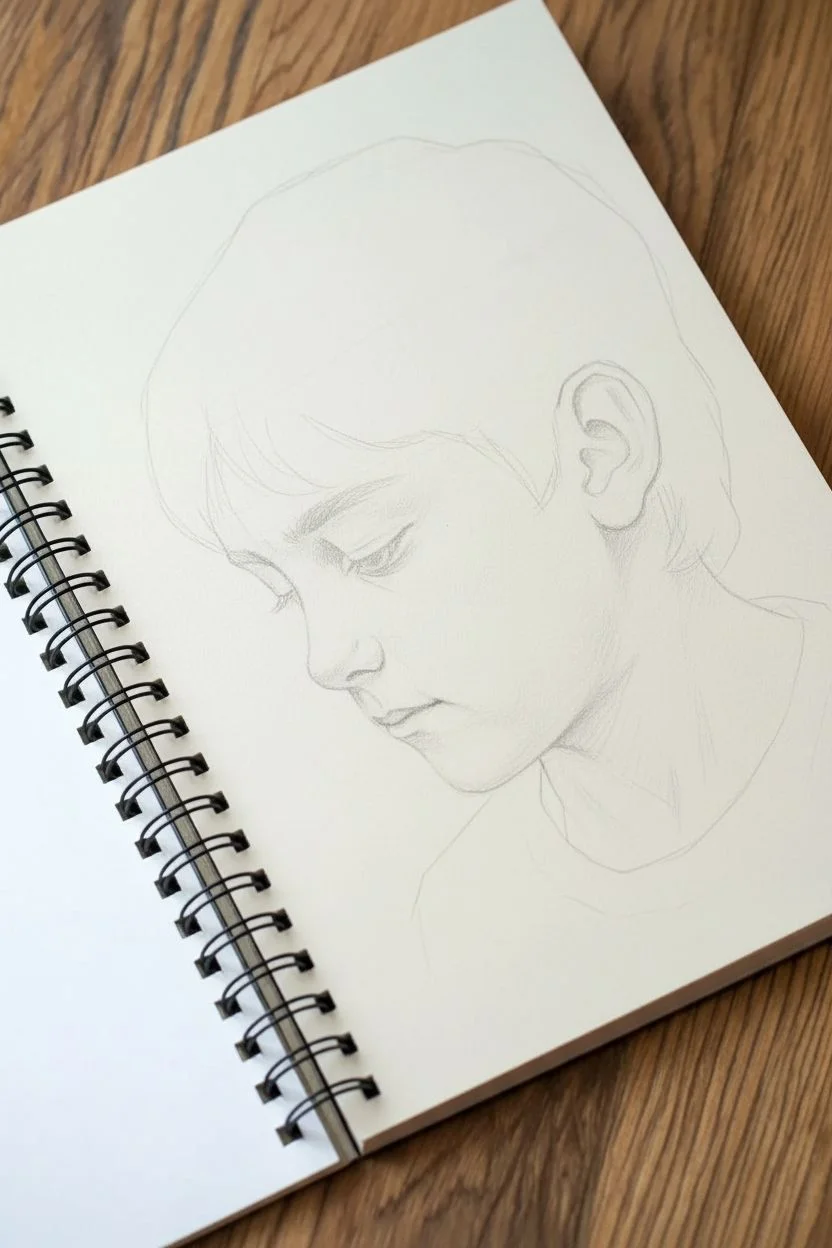
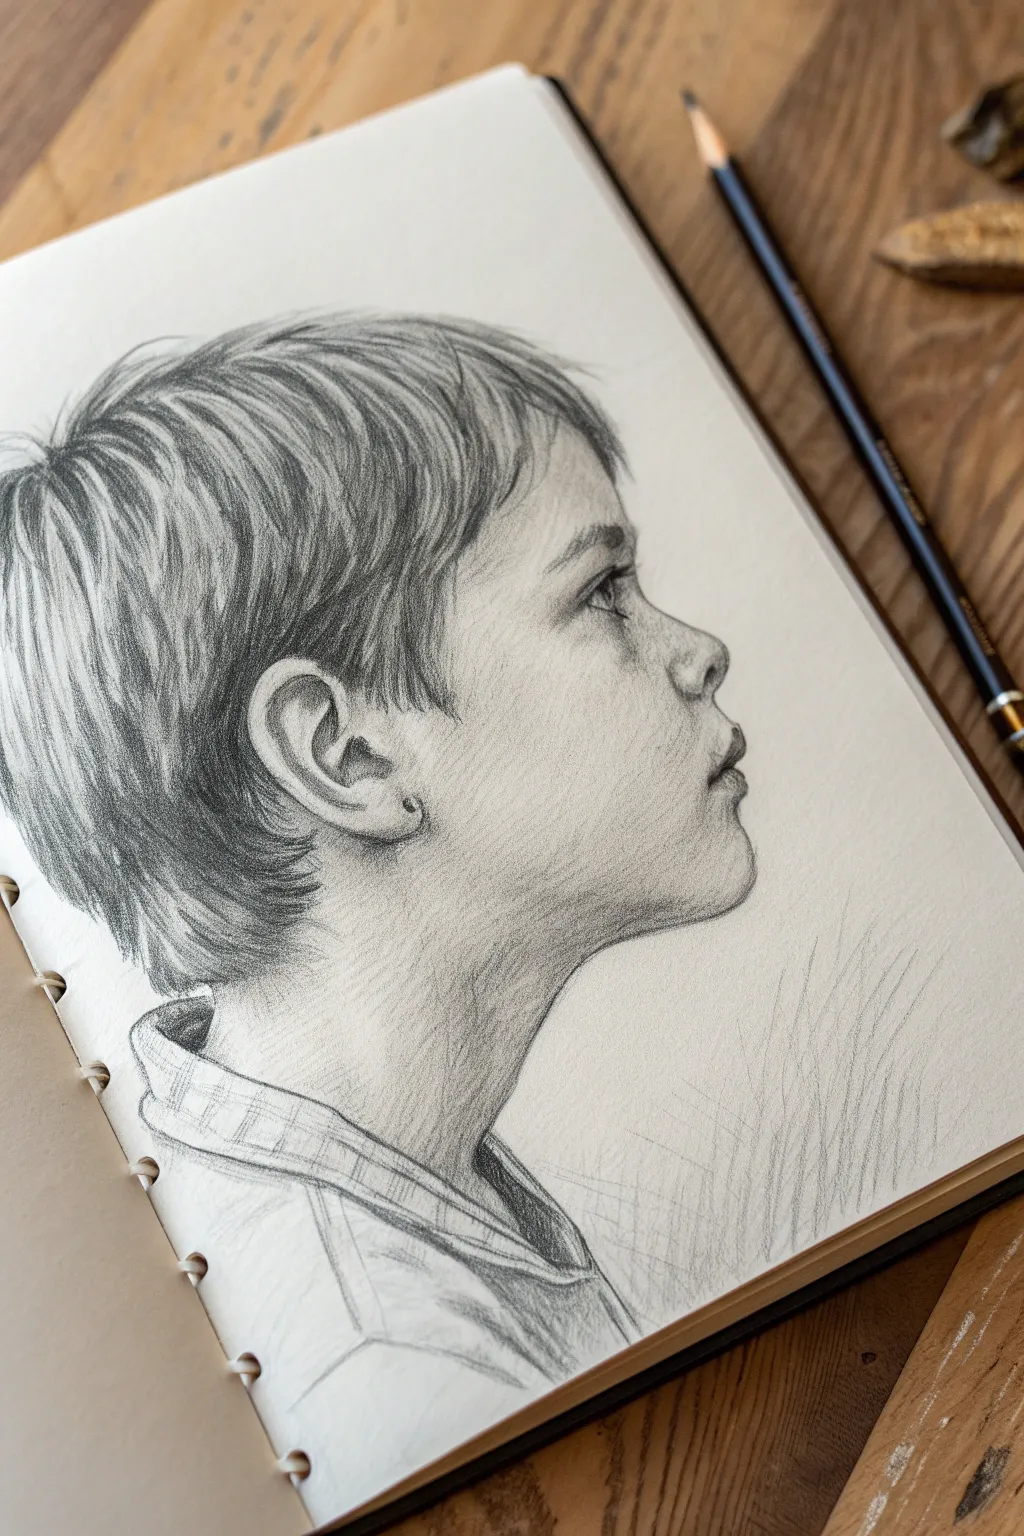
Capture the quiet introspection of youth with this realistic pencil portrait of a boy looking down. By focusing on soft shading and directional hair strokes, you’ll create a touching study of mood and expression.
Detailed Instructions
Materials
- Sketchbook with smooth drawing paper (A4 or similar)
- Graphite pencils (HB, 2B, 4B, 6B)
- Mechanical pencil (0.5mm HB) for fine details
- Kneaded eraser
- Blending stump or tortillon
- Tissue or chamois cloth for soft blending
- Pencil sharpener
Step 1: Laying the Foundation
-
Initial outline:
Begin with a light HB pencil to map out the basic shape of the head. Draw a large oval for the cranial mass and a smaller, tapered shape for the jawline to establish the profile view. -
Placing features:
Lightly sketch guidelines for the eye, nose, and ear. Since the boy is looking down, the eye line will be lower than usual, and the eyelid should appear heavy and closed or nearly closed. -
Defining the profile:
Refine the outline of the forehead, nose bridge, and the soft curve of the upper lip. Pay attention to the negative space around the chin and neck to ensure the proportions feel natural. -
Mapping the hair:
Sketch the general boundary of the hair, noting the growth pattern from the crown. Don’t draw individual strands yet; just block in the major clumps and the hairline over the forehead.
Muddy Shading?
If skin looks dirty, you’re pressing too hard or over-blending. Switch to a harder pencil (H or HB) for light layers and clean your blending stump on scrap paper often.
Step 2: Rendering the Features
-
Shading the eye:
Switch to a mechanical pencil or a sharp 2B. Draw the thick lashes pointing downward. Shade the crease of the eyelid deeply, but keep the skin below the brow soft to show the depth of the eye socket. -
Sculpting the nose:
Instead of outlining the nose, use soft shading to define its form. Darken the nostril area with a 4B pencil, but blend the edge so it doesn’t look like a harsh black hole. -
Ear details:
Work on the ear’s complex curves. The inner folds are darkest; use a 4B heavily here. Leave the cartilage ridges light or lift graphite with a kneaded eraser to create highlights. -
Soft skin tones:
Using a 2B pencil held at a low angle, lay down a light layer of graphite across the cheek and jaw. Smooth this out with a tissue or blending stump to create a flawless, youthful skin texture.
Step 3: Hair and Texture
-
Establishing hair flow:
Identify the crown of the head as your origin point. Using an HB pencil, draw long, sweeping strokes that radiate outward and forward towards the forehead to mimic hair growth. -
Building darkness:
Switch to a 4B or 6B pencil to deepen the shadows between hair clumps. Focus on the areas behind the ear and at the roots where the hair is densest. -
Creating volume:
I like to use a sharp eraser here to ‘draw’ light back into the hair. Lift out thin, curved lines in the dark masses to represent strands catching the light. -
Refining hair tips:
Use a sharp mechanical pencil to flick fine hairs at the fringe and nape of the neck. These should be varied in length and direction to look natural rather than uniform.
Hair Pro Tip
Don’t draw every single hair strand. Focus on drawing ‘ribbons’ or clumps of hair, shading the gaps between them. The brain fills in the rest.
Step 4: Final Touches
-
Deepening contrast:
Revisit your darkest darks—the pupil (if visible), the corner of the mouth, and the deepest hair shadows. Push these values with a 6B pencil to make the portrait pop. -
Neck and shirt suggestion:
Keep the neck shading very subtle to push it visually behind the face. Sketch the collar of the shirt loosely with sketchy lines; avoid over-detailing the clothes so focus remains on the face. -
Freckles and imperfections:
Tap your pencil tip very lightly across the nose and cheeks to add faint freckles or skin texture. This breaks up the smoothness and adds realism. -
Cleanup:
Use your kneaded eraser to clean up any smudges on the background paper, ensuring a crisp silhouette against the white page.
Take a moment to appreciate the quiet emotion you’ve captured in the tilt of the head and the soft shading of the face


Boy With Over-Ear Headphones
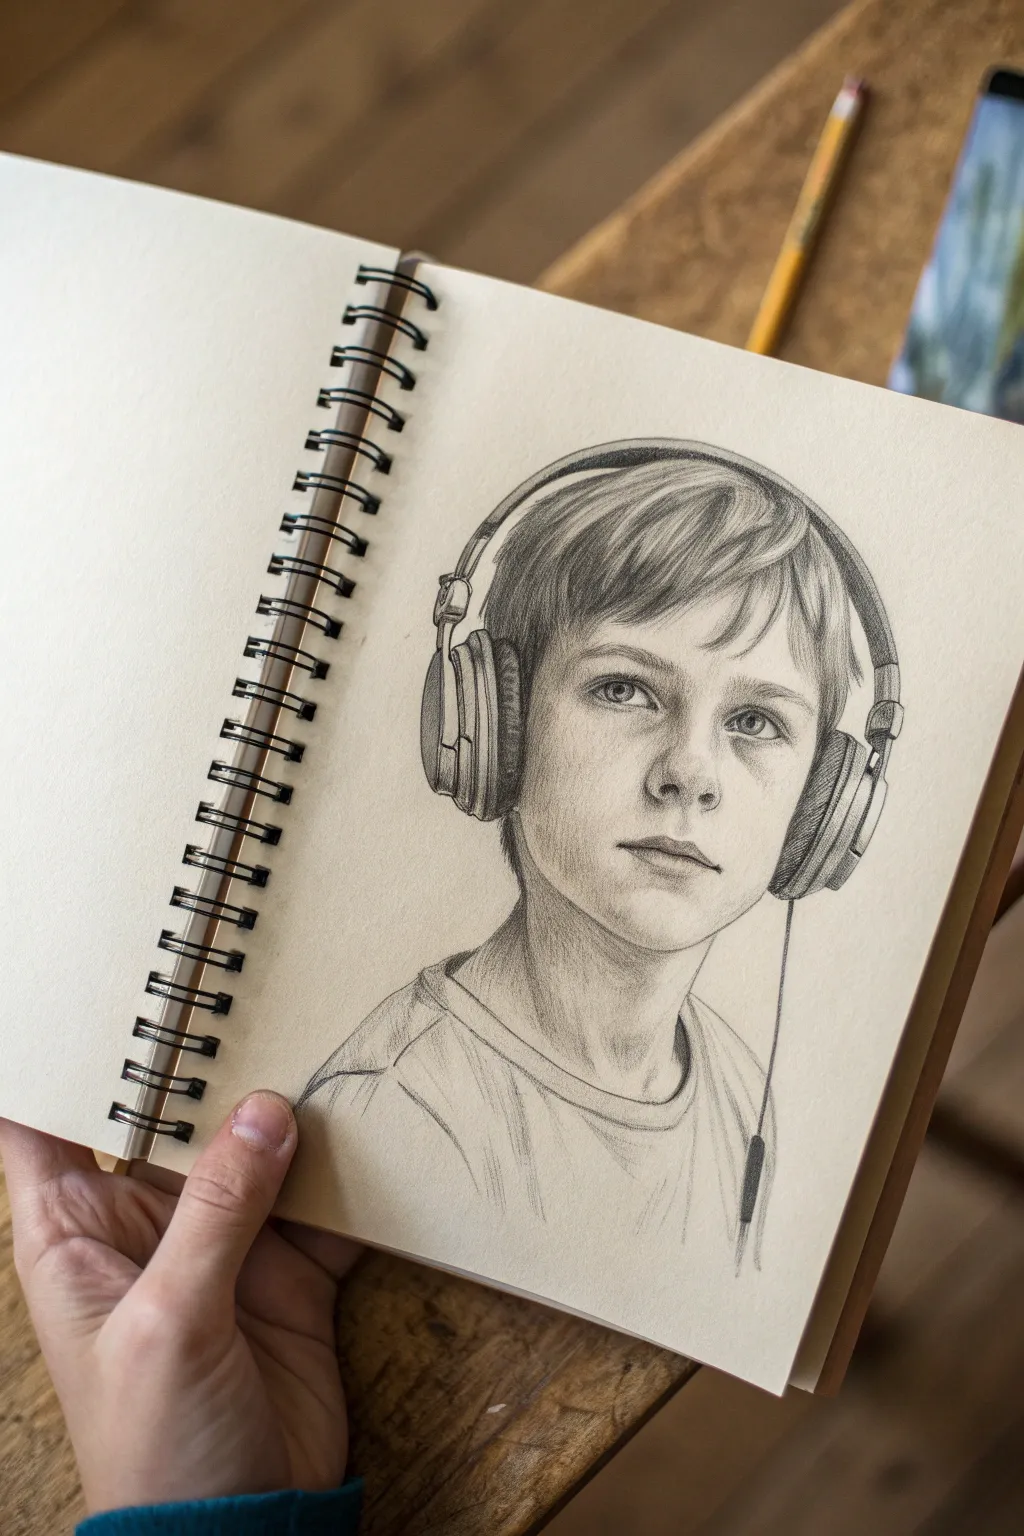
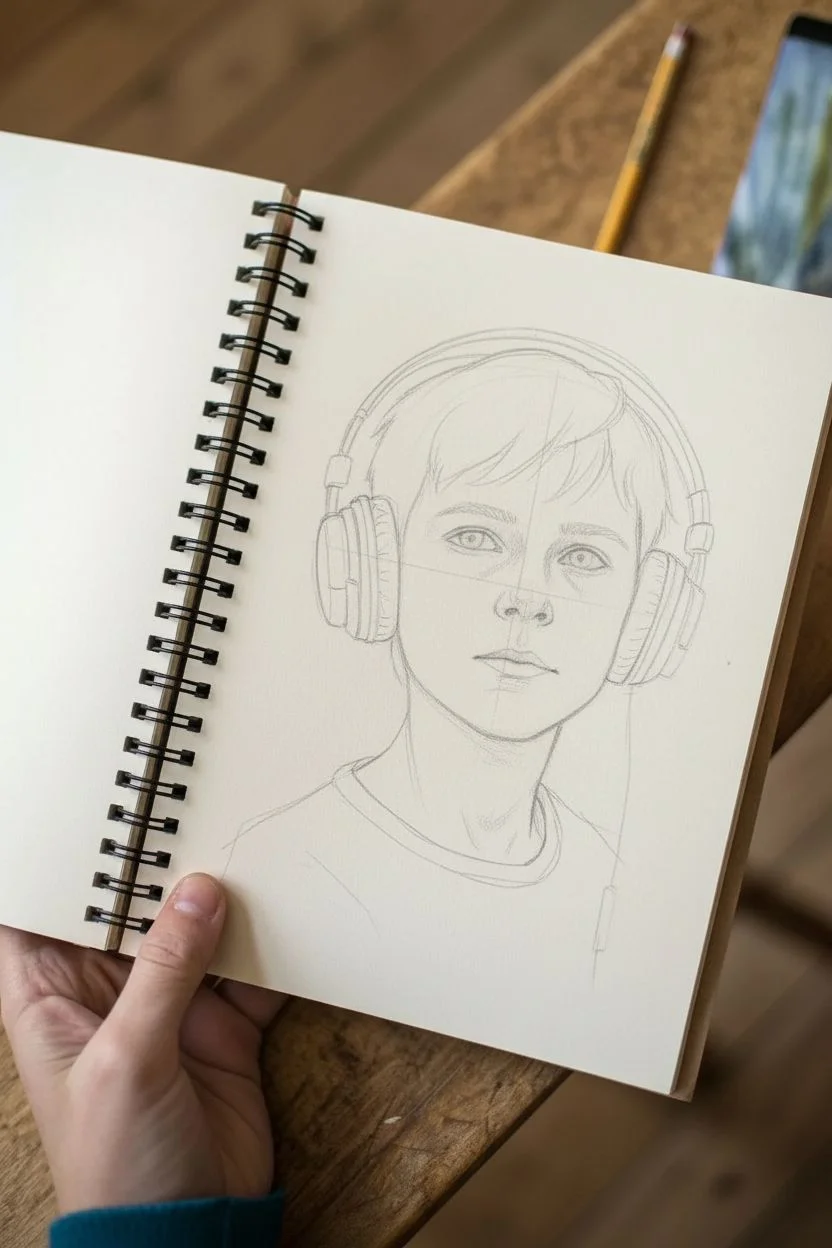
Capture the thoughtful expression of a young music fan with this detailed pencil sketch tutorial. By focusing on realistic shading and hair texture, you’ll create a portrait that feels both quiet and full of life.
Step-by-Step Tutorial
Materials
- Sketchbook with smooth or medium-tooth paper (spiral bound shown)
- Set of graphite pencils (HB, 2B, 4B, 6B)
- Kneaded eraser
- Precision mechanical eraser (optional)
- Blending stump or tortillon
- Tissue or clean cloth for hand rest
Step 1: The Framework
-
Head shape:
Begin with a light HB pencil to sketch a basic oval for the head. Add a vertical centerline to help with symmetry and a horizontal line roughly halfway down for the eye placement. -
Headphone placement:
Sketch two large ovals on the sides of the head where the ears would be. These are the ear cups. Connect them with a curved arch over the top of the head for the headband. -
Facial features:
Mark the positions for the eyes on your horizontal line. Roughly sketch the nose base halfway between the eyes and chin, and the mouth line halfway between the nose and chin. -
Neck and shoulders:
Draw cylindrical lines descending from the jawline for the neck. Add the slope of the shoulders and sketch the rough collar of a t-shirt.
Keep it Clean
Place a piece of clean scrap paper under your drawing hand. This prevents your palm from smearing the graphite you’ve already laid down on the face.
Step 2: Refining the Face
-
Eyes:
Switch to a sharp 2B pencil. Define the almond shape of the eyes. Draw the iris and pupil, leaving a tiny white circle in each for the catchlight to bring them to life. -
Nose and mouth:
Refine the nostrils and the tip of the nose using soft shading rather than hard outlines. Define the lips, making the upper lip slightly darker than the lower one. -
Shading the face:
Using a 2B pencil, lightly shade the contours of the face—around the eye sockets, under the nose, and beneath the lower lip. I like to use a blending stump here to keep the skin looking smooth.
Step 3: Texturing the Hair
-
Hair flow:
Observe the direction the hair grows. Using an HB pencil, draw long, sweeping strokes starting from the crown and moving down towards the forehead and ears. -
Building depth:
Switch to a 4B pencil to add darker tones in the shadowed areas of the hair, particularly near the roots and where strands overlap. Keep your strokes loose and flick the pencil at the end of each stroke for a tapered look. -
Highlights:
Use a kneaded eraser to lift pigment from the high points of the hair waves, creating natural-looking shine.
Add a Beat
Customize the headphones by adding a faint logo to the ear cup or drawing a specific recognizable brand design to personalize the character’s style.
Step 4: Detailing the Headphones
-
Defining the cups:
Outline the mechanical parts of the headphones with a 4B pencil. Pay attention to the joint where the headband meets the ear cups. -
Cushion texture:
Shade the ear cushions using a 6B pencil to get a deep, dark value. Add small, curved hatch marks to simulate the wrinkles in the soft material. -
The cable:
Draw a single, clean line dropping from one of the ear cups. Thicken it slightly at the connection point to represent the jack housing.
Step 5: Final Touches
-
Clothes:
Sketch simple folds in the t-shirt around the neckline and shoulders. Use light, loose hatching to suggest fabric without drawing attention away from the face. -
Contrast check:
Step back and look at your drawing. Darken the pupils, the underside of the headphones, and the deepest hair shadows with your softer 6B pencil to make the image pop. -
Clean up:
Use your eraser to clean up any stray guidelines or smudges on the background paper, leaving a crisp, finished portrait.
Now you have a soulful portrait ready to be admired in your sketchbook
Boy With a High Collar Covering the Mouth
Capture the solemn expression of youth with this realistic graphite study, featuring detailed textures from soft skin to a ragged wool collar. This project focuses on building depth through subtle shading and precise hair rendering.
Step-by-Step
Materials
- High-quality sketchbook paper (medium tooth)
- Graphite pencils (HB, 2B, 4B, 6B)
- Mechanical pencil (0.5mm HB or 2B)
- Kneaded eraser
- Blending stump (tortillon)
- White gel pen (optional for highlights)
- Workable fixative
Step 1: Laying the Foundations
-
Initial Outline:
Begin with a very light HB pencil sketch. Draw a slightly oval shape for the head and mark the eye line about halfway down. Sketch the high collar rising up to just below the chin, creating a distinct triangular composition. -
Placing Features:
Lightly indicate the position of the eyes, nose, and mouth. The boy is in a three-quarter view, so the far eye will be slightly smaller and closer to the nose bridge. Don’t press hard; these are just guides. -
Refining Shapes:
Define the shape of the ear and the jawline. Sketch the basic flow of the hair, noting how it sweeps across the forehead from left to right.
Step 2: Rendering the Face
-
The Eyes:
Switch to a sharp mechanical pencil or 2B. carefully draw the eyelids and pupils. Leave a tiny white spot in each pupil for the catchlight to bring the eyes to life. -
Shading the Skin:
Using an HB pencil, lightly shade the face. Focus on the shadow mainly on the left side of his face (from the viewer’s perspective) and under the nose. Use a blending stump to smooth the graphite for that soft, youthful skin texture. -
Nose and Mouth:
Define the nostrils with a 4B pencil for depth. Shade the lips gently, keeping the upper lip slightly darker than the lower lip. Ensure the corners of the mouth are soft to avoid a rigid look. -
Deepening Shadows:
Layer 2B over the shadow areas—under the hair fringe, beside the nose, and the hollow of the ear—to increased the contrast.
Muddy Shading?
If skin looks dirty rather than shadowed, your stump might be too saturated with graphite. Clean it with sandpaper or switch to a fresh tortillon for cleaner gradients.
Step 3: Texturing the Hair
-
Hair Flow:
Using sharp strokes, follow the direction of the hair growth. Start from the crown and flick outward. Don’t draw every single strand, but rather distinct clumps of hair. -
Adding Volume:
Use a 4B or 6B pencil to darken the roots and the areas where hair overlaps. This created depth and makes the lighter strands on top appear to shine. -
Flyaways:
With an ultra-sharp HB or mechanical pencil, add tiny, loose hairs escaping the main shape to make it look natural and not like a helmet.
Hair Realism Tip
Don’t shade hair as a solid block. Treat it as ribbons. Darken the ends and roots, but leave the middle of the hair strands lighter to mimic the sheen of healthy hair.
Step 4: The Coat and Collar
-
Ribbed Collar Texture:
The collar is a key feature. Draw curved, parallel lines to simulate the ribbed knit. Use a 4B pencil to deepen the grooves between the ribs. -
Shadowing the Fabric:
The coat casts a shadow on the neck and partially obscures the chin. Darken the area heavily where the collar folds over to create a sense of thick fabric. -
Outer Jacket Details:
Sketch the epaulet on the shoulder and the visible button. Use looser, cross-hatched shading here to differentiate the smooth jacket material from the wooly collar and soft skin. -
Wrinkles and Folds:
Add deep creases in the jacket material using your softest pencil (6B). Focus on where the arm bends and fabric bunches under the collar.
Step 5: Final Touches
-
Background Tone:
Lightly shade a rectangular background behind the head using the side of an HB pencil. Keeping the background distinct from the white paper edge gives it a completed, portrait feel. -
Lifting Highlights:
Use the kneaded eraser to tap and lift graphite from the bridge of the nose, the forehead, and the top of the cheekbones for final highlights. -
Final Contrast Check:
Step back. If the drawing looks flat, darken the pupils, nostrils, and deepest fabric folds one last time with your 6B pencil.
Sign your work subtly in the corner and preserve those delicate darks with a spray of fixative
Faceless Boy Portrait to Practice Hair and Head Shape
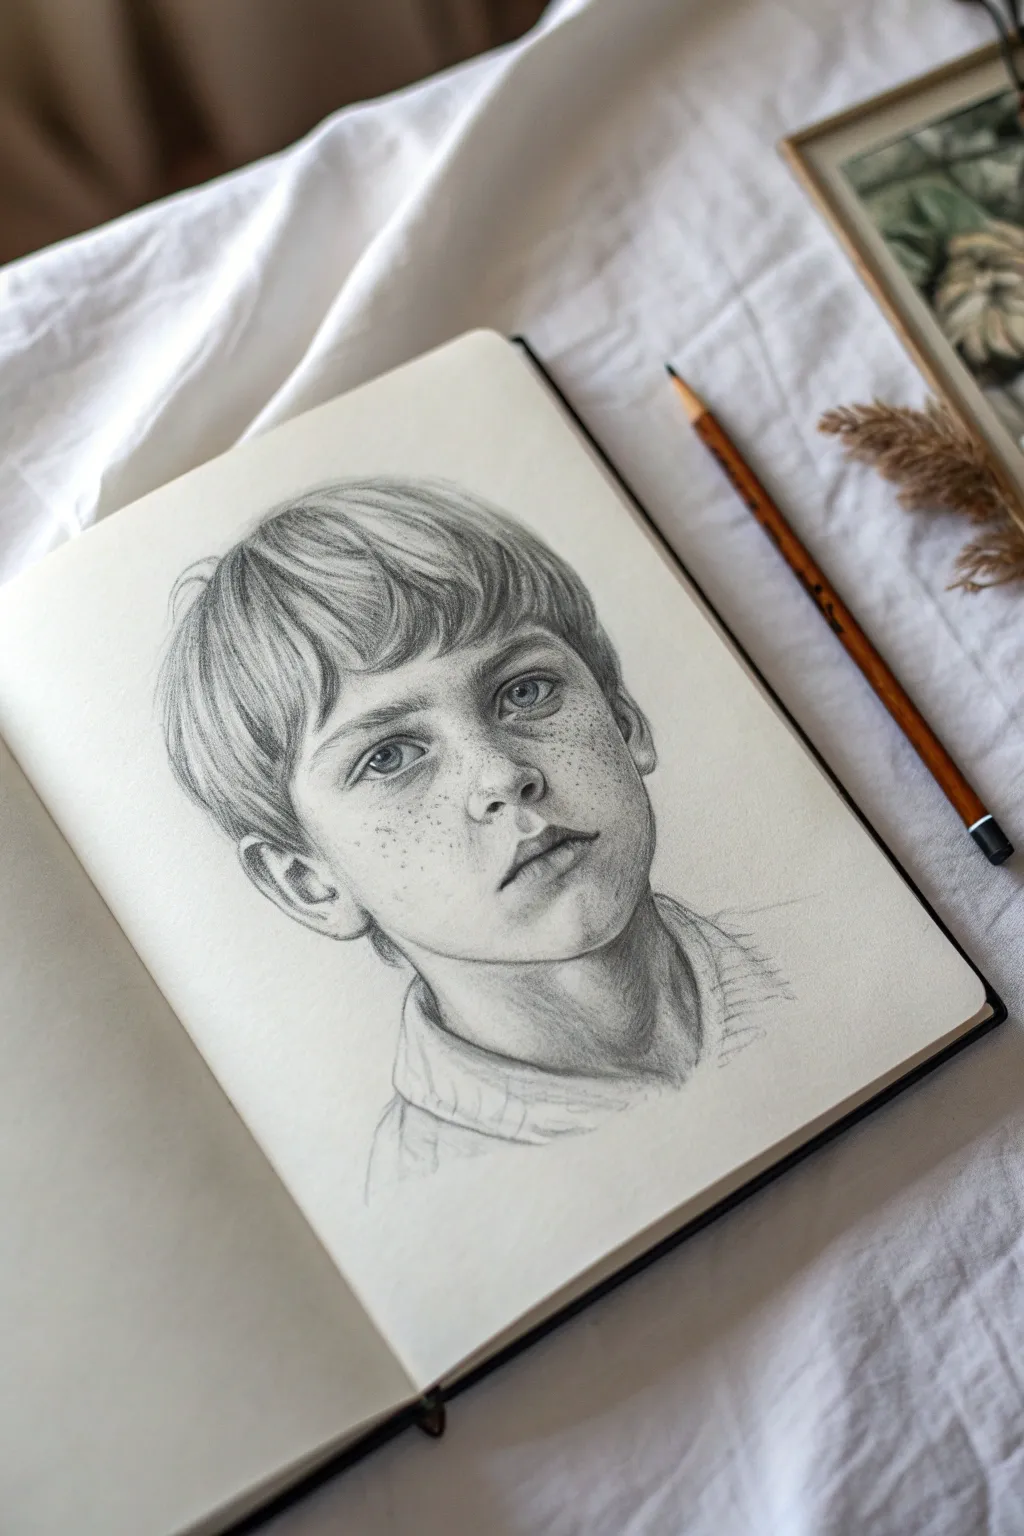
This detailed graphite portrait captures a young boy with a thoughtful expression, featuring intricate hair texture and delicate freckles. It is a fantastic exercise for practicing facial proportions, shading depth, and realistic hair flow.
Step-by-Step Tutorial
Materials
- Sketchbook with smooth or medium-tooth paper
- HB pencil (for initial outlines)
- 2B and 4B pencils (for shading and depth)
- Mechanical pencil (0.5mm, HB or 2B for details)
- Kneaded eraser
- Blending stump or tortillon (optional)
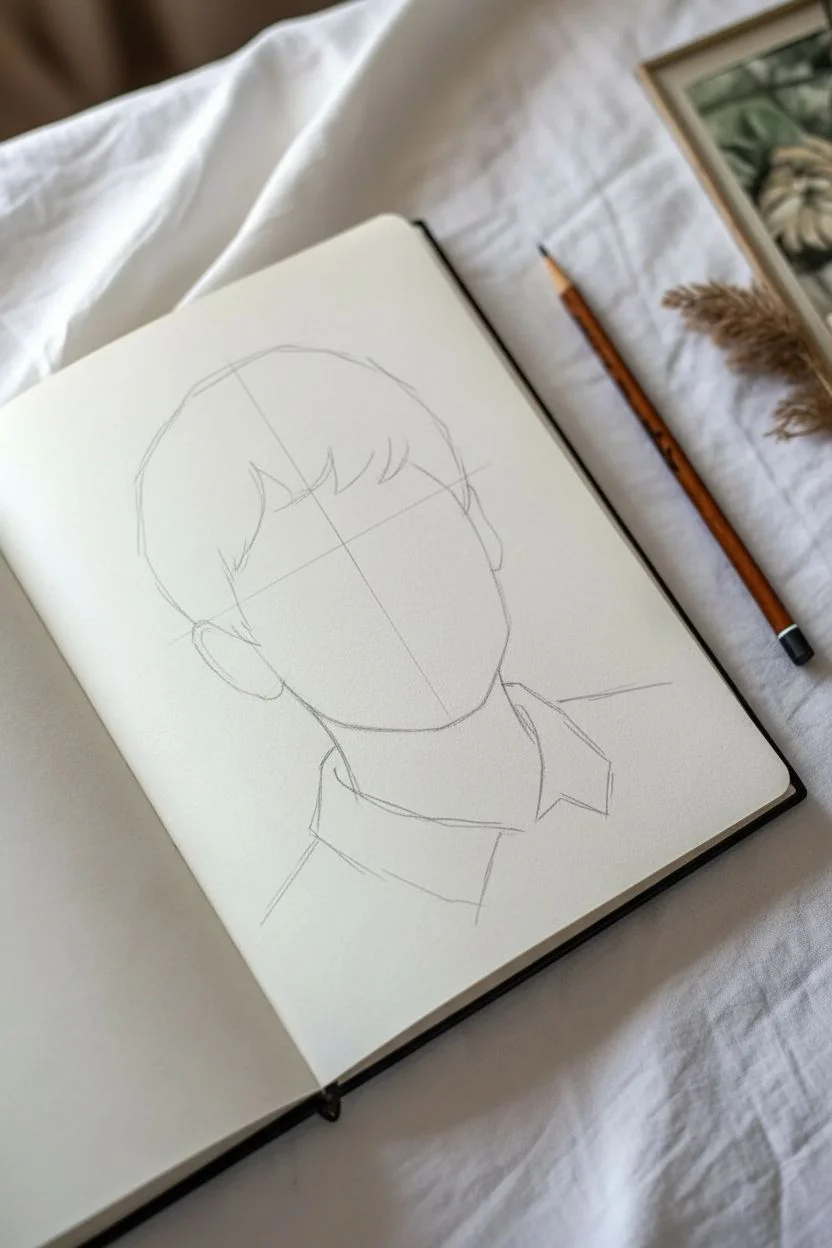
Step 1: Constructing the Framework
-
Establish the head shape:
Begin with a gentle oval shape for the cranium, tapering slightly towards the chin. Draw a vertical centerline that curves slightly to the left to indicate the head’s rotation, and a horizontal eye line just below the halfway point. -
Map facial features:
Sketch the nose line halfway between the eye line and chin, and the mouth line one-third of the way down from the nose. Lightly mark the placement of the ears, which should align roughly between the eyes and the nose base. -
Outline the hair mass:
Instead of drawing individual strands, outline the general shape of the hair as it sits on the head. Note the fringe area, sweeping across the forehead from right to left. -
Define the neck and collar:
Draw the neck cylinder extending from the jawline, keeping it slightly thinner than the head width. Sketch the basic geometric shapes of the shirt collar resting around the base of the neck.
Natural Freckles
Avoid perfect circles for freckles. Use a dull pencil tip and tap quickly and randomly. Group them slightly denser across the nose bridge and fade them out toward the cheeks.
Step 2: Developing the Face
-
Draft the eyes:
Draw the almond shapes of the eyes on the horizontal guideline. Since he is looking upward, place the irises higher, slightly tucked under the upper eyelid. Don’t press too hard yet. -
Shape the nose:
Define the nostrils and the bulb of the nose using soft shading rather than hard lines. The bridge should be subtle, suggested mainly by the shadow on the side. -
Sketch the mouth:
Draw the parting line of the lips, giving it a slight curve to show volume. The upper lip should be slightly darker and thinner than the fuller lower lip. -
Refine the jaw and ears:
Strengthen the jawline contour. Detail the visible ear on the left, noting the intricate curves of the cartilage and the shadow inside the ear canal.
Add Atmosphere
Try lightly shading the background immediately surrounding the head. This pushes the portrait forward and makes the highlights on the skin and hair pop more dramatically.
Step 3: Shading and Texture
-
Base shading:
Using the side of a 2B pencil, lay down a light layer of graphite over the shadowed areas of the face—mainly under the brow bone, the side of the nose, under the chin, and the right side of the face. -
Deepen the eyes:
Switch to a 4B pencil or mechanical pencil to darken the pupils and the upper lash line. Leave a tiny white highlight in each eye to bring them to life. -
Detail the hair:
Start drawing individual locks of hair. Follow the growth pattern, sweeping strokes from the crown down towards the forehead. Use a mix of long, confident strokes and shorter flicks for the ends. -
Add contrast to hair:
I like to go back in with a sharpened 4B pencil to darken the gaps between hair clumps. This negative space separates the layers and creates depth. -
Define the freckles:
With a sharp pencil tip, lightly tap irregular dots across the nose bridge and cheeks. Vary the pressure so some are faint and others more distinct for a natural look. -
Shade the neck and shirt:
Cast a strong shadow under the jaw onto the neck to separate the head from the body. Roughly shade the shirt color, drawing distinct lines for the ribbed texture of the fabric. -
Final highlights:
Use a kneaded eraser to lift pigment from the tip of the nose, the forehead, and the center of the lower lip to emphasize volume.
Take a moment to step back and appreciate the character and emotion you’ve captured in your drawing


Have a question or want to share your own experience? I'd love to hear from you in the comments below!