
If you’re dreaming up boy pumpkin ideas that feel bold, funny, and just a little bit mischievous, you’re in the right creative headspace. I pulled together a mix of classic and wow-factor designs that make pumpkins look extra cool, extra scary, or delightfully gross—depending on your vibe.
Classic Scary Jack-o’-Lantern Grin
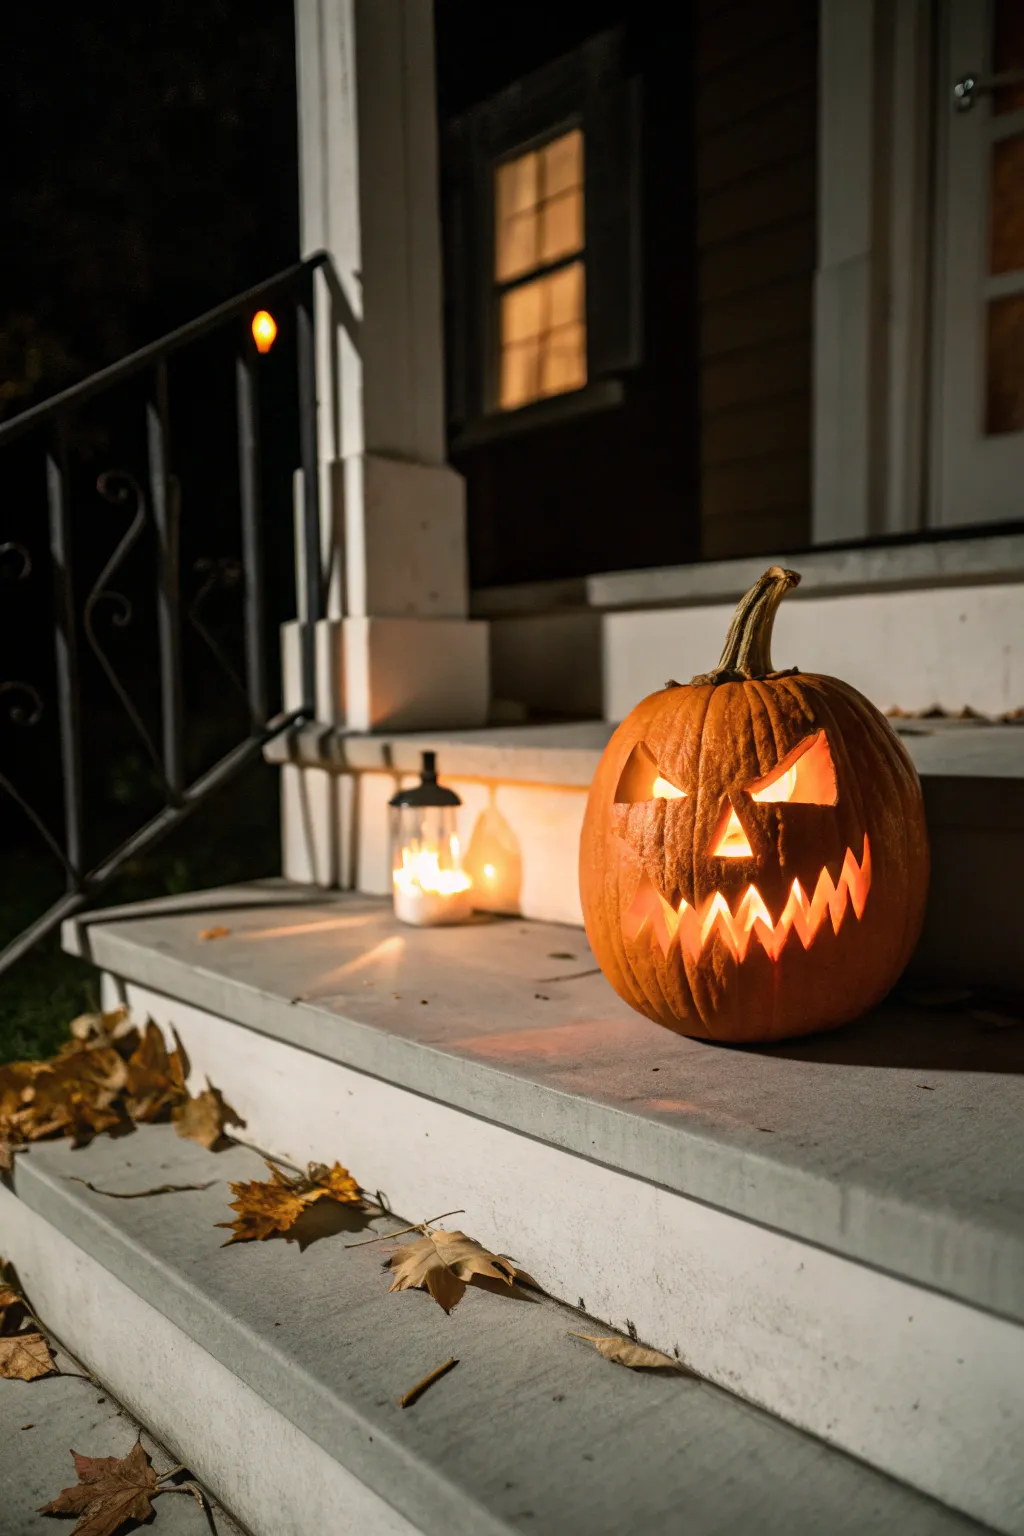
This project captures the quintessential Halloween look with sharp angles and a mischievous, toothy smile that glows brilliantly at night. It is a straightforward yet impactful design perfect for adding a touch of classic spookiness to your front porch.
Step-by-Step Tutorial
Materials
- Medium to large orange pumpkin
- Serrated pumpkin carving knife (or drywall saw)
- Poker tool or push pin
- Large metal spoon or scraping tool
- Water-soluble marker or dry-erase marker
- Newspaper or disposable tablecloth
- Bowl for pumpkin seeds
- Tea light candle or LED light
Step 1: Preparation & Cleaning
-
Set up your workspace:
Lay down plenty of newspaper or a disposable tablecloth on a sturdy surface to catch the mess. -
Cut the lid:
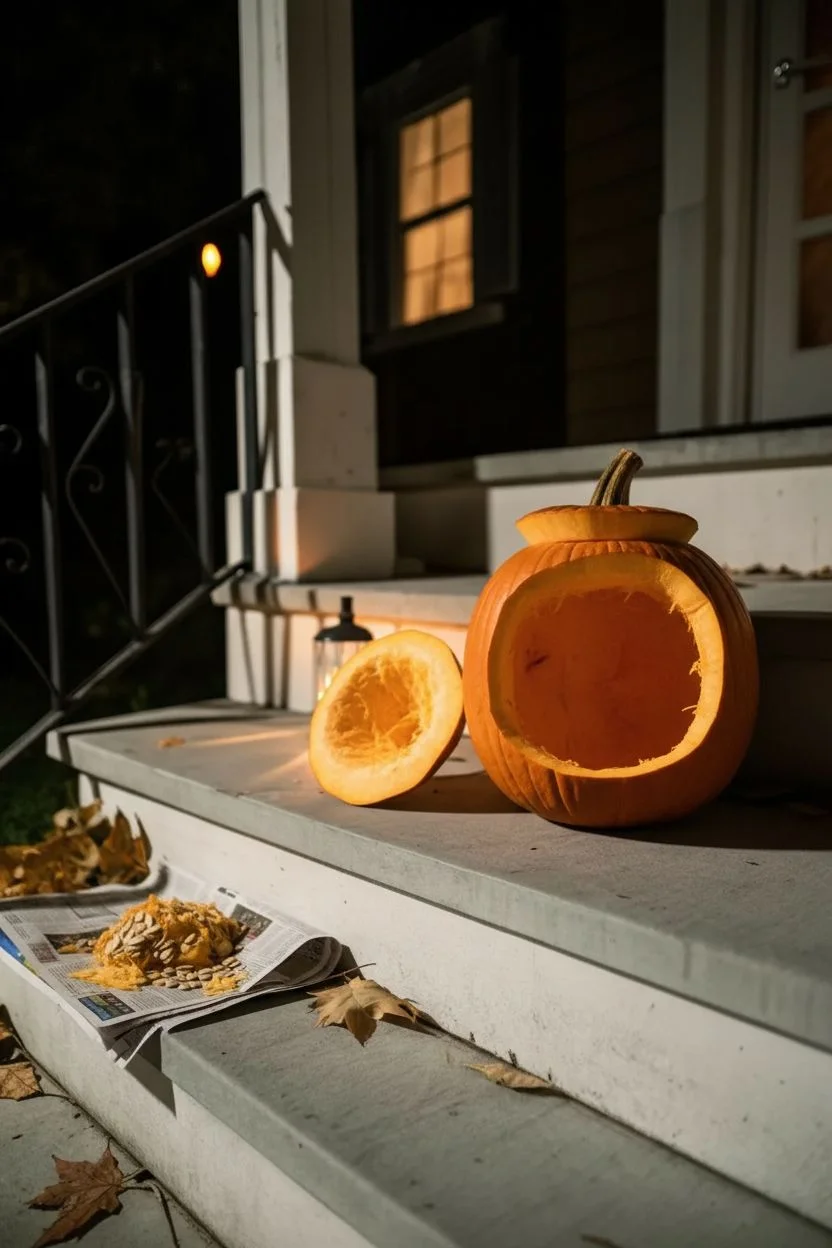
Using your serrated knife, cut a circle around the stem. Angle the knife inward towards the center of the pumpkin as you cut; this creates a ledge so the lid won’t fall inside later. -
Remove the lid:
Gently pry off the top using the stem and trim off any dangling seeds or pulp from the underside of the lid. -
Scoop the insides:
Use a large metal spoon or a specialized scraper to remove all seeds and stringy pulp. Save the seeds in a bowl if you plan to roast them. -
Thin the wall:
Scrape the inner wall of the side you intend to carve until it is roughly one inch thick. This makes carving much easier and allows more light to shine through.
Step 2: Designing the Face
-
Draft the eyes:
With a water-soluble marker, draw two large, menacing right triangles for eyes. Position them angled slightly downward toward the center to create an angry expression. -
Draw the nose:
Center a small triangle below the eyes for the nose. I like to keep this shape simple to not distract from the mouth. -
Sketch the grin:
Draw a wide, crescent-shaped mouth. Instead of a smooth line, draw sharp, zigzagging peaks and valleys for the teeth. Ensure the teeth mesh together visually but leave enough space to carve comfortably. -
Review the design:
Step back and look at your drawing. Make any adjustments to the expression now before the knife touches the pumpkin skin.
Preserve the Pumpkin
Rub petroleum jelly on cut edges to seal in moisture and prevent shriveling. This can extend the life of your jack-o’-lantern by several days.
Step 3: Carving & Display
-
Transfer points:
If you sketched on paper first, tape it to the pumpkin and use a poker tool to make small holes along the lines. If you drew directly on the skin, skip this step. -
Carve the eyes:
Insert your serrated saw at a 90-degree angle and use a gentle sawing motion to cut out the eye triangles first, pushing the pieces out from the inside. -
Carve the nose:
Carefully saw out the small nose triangle. Be precise here as small shapes can break easily if forced. -
Start the mouth:
Begin carving the mouth at the center point of the top lip and work outward. Cut the top row of teeth first to maintain structural integrity. -
Finish the grin:
Carve the bottom row of teeth. Take your time navigating the sharp corners of the zigzags; turning the saw blade in place helps navigate tight angles without snapping the pumpkin wall. -
Pop out the mouth:
Gently push the carved mouth piece out from the inside. If it sticks, re-trace your cuts with the knife rather than forcing it. -
Clean up edges:
Use a small knife to trim away any ragged pumpkin bits or dangling flesh from the cutouts to ensure clean, sharp lines. -
Erase marks:
Wipe away any remaining marker lines with a damp paper towel or sponge. -
Light it up:
Place a tea light or LED candle inside the pumpkin. Replace the lid and position your creation on the porch steps, perhaps scattering a few autumn leaves around the base for effect.
Spooky Smoke Effect
Place a small cup of water inside the pumpkin with a chunk of dry ice. The thick fog will roll out of the toothy grin for an eerie atmosphere.
Enjoy the warm glow of your spooky creation as it welcomes trick-or-treaters to your door


Goofy Gap-Tooth Laughing Face
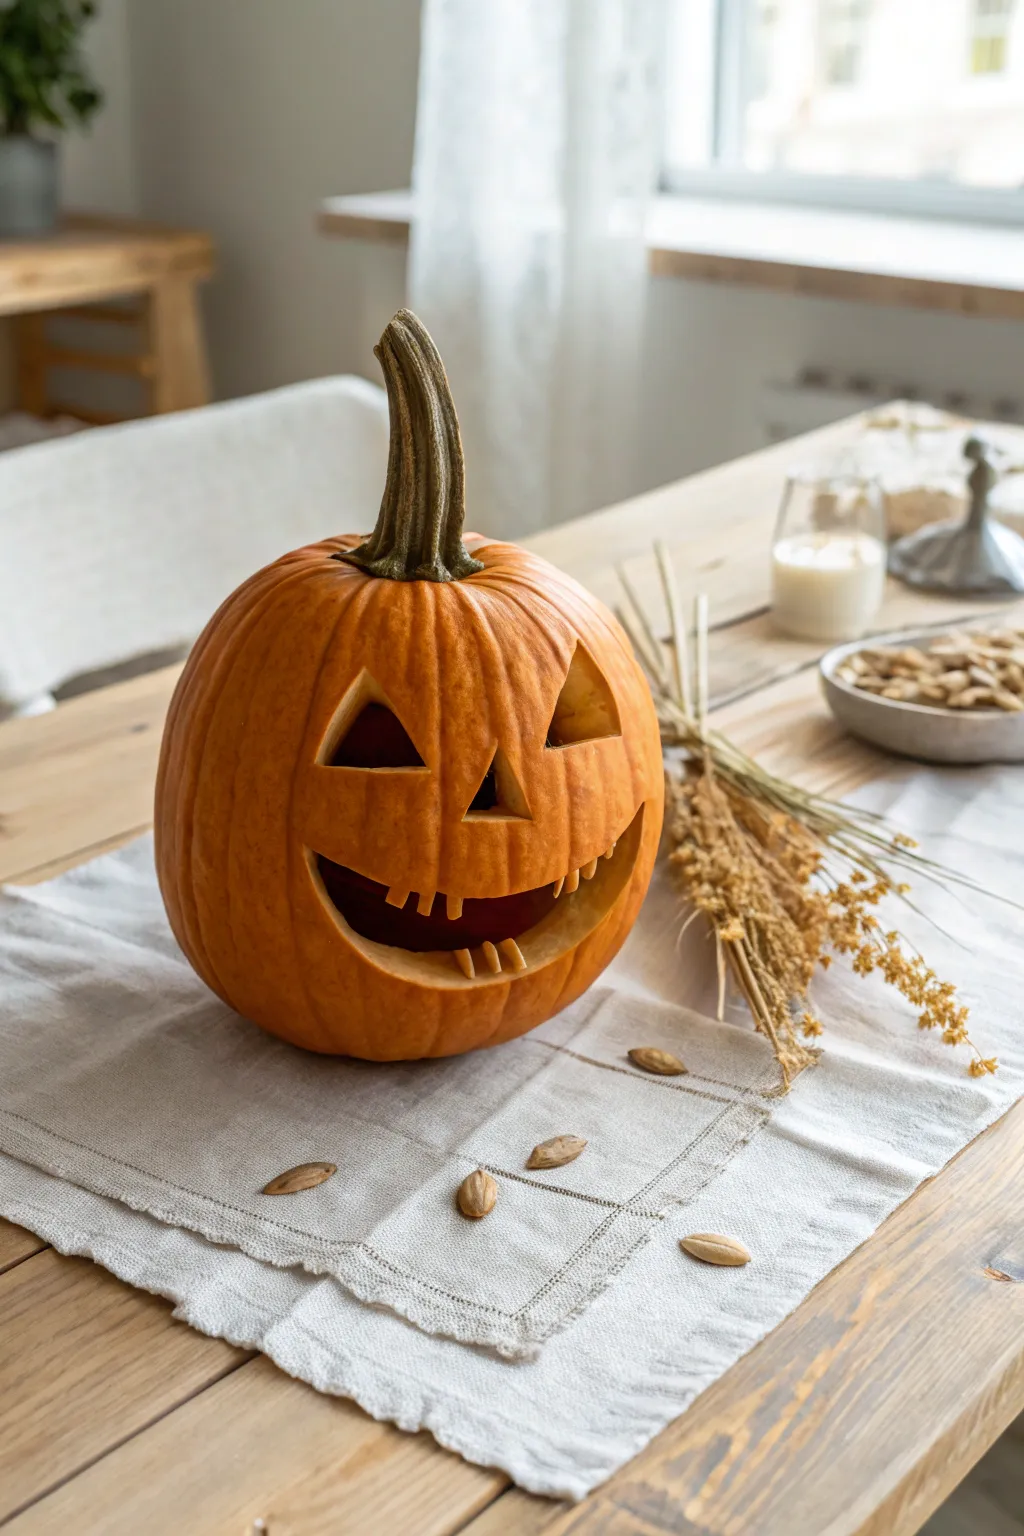
This classic, cheerful design brings out the playful side of Halloween with a wide, toothy grin and friendly triangular eyes. It’s a perfect ‘boy’ pumpkin idea that balances a traditional spooky vibe with a goofy, welcoming personality.
Step-by-Step
Materials
- One medium-sized orange pumpkin with a sturdy stem
- Serrated pumpkin carving knife (saw)
- Small paring knife or X-Acto knife
- Large metal spoon or pumpkin scraper
- Dry-erase marker or washable pen (red or black)
- Newsprint or plastic tablecloth
- Bowl for seeds
- Tea light or LED candle
Step 1: Preparation and Cleaning
-
Set the Stage:
Lay down your newsprint or plastic tablecloth on a sturdy table to catch all the mess. This makes cleanup significantly easier later on. -
Carve the Lid:
Using your serrated knife, cut a circle around the stem. Angle the knife inward toward the center of the pumpkin as you cut; this creates a ledge so the lid won’t fall inside later. -
Remove the Seeds:
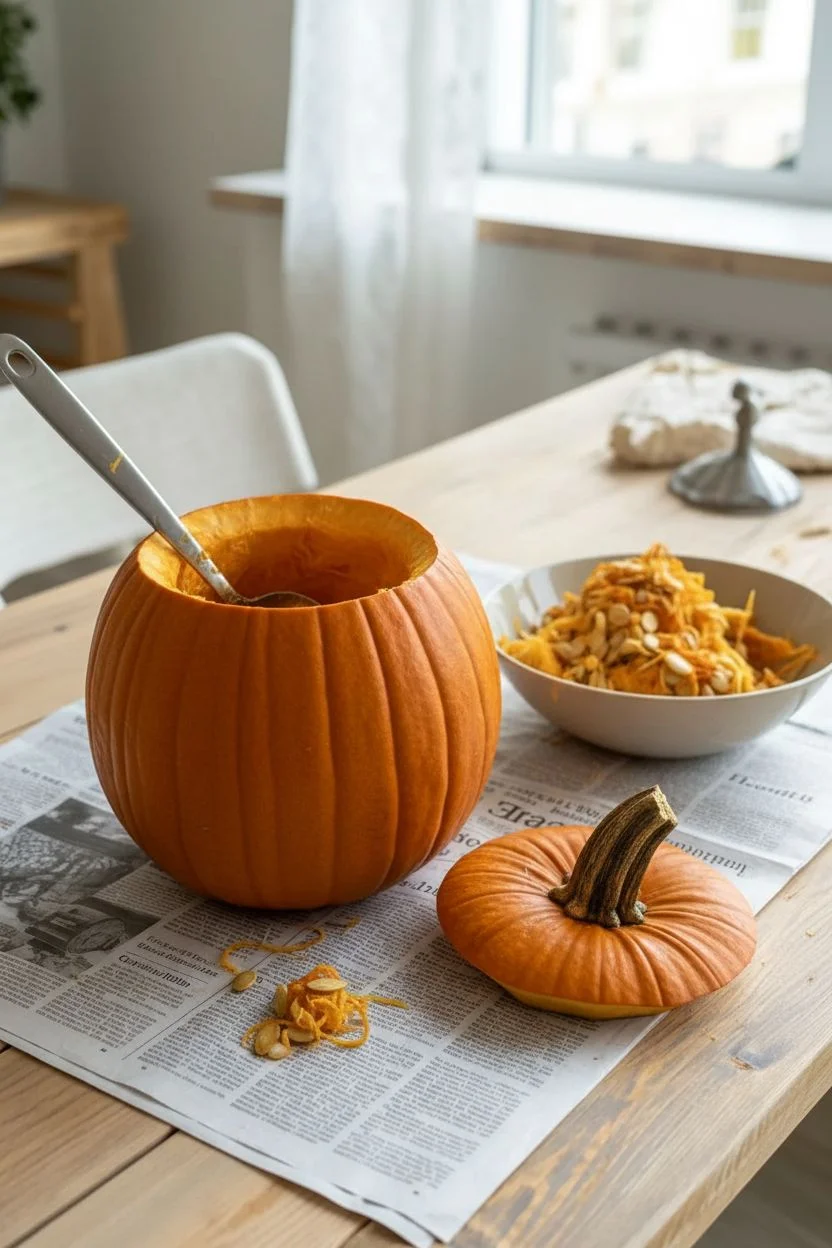
Pull the lid off and trim away the stringy bits attached to it. Reach inside and pull out the bulk of the seeds and ‘guts’ by hand, placing them in your bowl if you plan to roast them. -
Scrape the Walls:
Take your large specific metal scraping spoon and thin out the inner walls, focusing especially on the side you plan to carve. I find getting the wall down to about an inch thick makes the carving process much smoother.
Broken Tooth Repair
Did a tooth snap off while carving? Don’t panic. Insert a toothpick into the bottom of the broken piece and stick it back into place on the gum line.
Step 2: Drafting the Face
-
Plan the Eyes:
Using your washable marker, draw two large, leaning triangles for the eyes. The inner corners should point slightly upward while the outer corners droop down, giving that goofy, relaxed look. -
Draw the Nose:
Sketch a smaller, simple triangle right in the center, slightly below the eyes. -
Outline the Smile:
Draw a wide crescent shape for the mouth. Make the bottom curve deep and round to exaggerate the smile. -
Add the Teeth:
Inside your mouth outline, draw square tabs hanging down from the top lip and poking up from the bottom lip. Leave gaps between them to create the signature ‘gap-tooth’ effect shown in the photo.
Step 3: Carving the Details
-
Start with the Nose:
Insert your serrated saw perpendicular to the pumpkin skin. Saw gently back and forth to cut out the small nose triangle first, as the pumpkin is most stable now. -
Pop Out the Piece:
Push the nose piece gently from the inside out to remove it cleanly. -
Carve the Eyes:
Move on to the eyes, using steady up-and-down sawing motions. Support the pumpkin wall with your free hand inside the gourd to prevent the skin from cracking under pressure. -
Refine the Corners:
If the corners of the eyes look ragged, use the small paring knife or X-Acto blade to clean up the edges for a sharp, defined look. -
Cut the Main Mouth Line:
For the mouth, carefully saw along the long curved lines first, skipping over the areas where the teeth connect to the pumpkin flesh. -
Detail the Teeth:
This is the trickiest part. Use the smaller saw or paring knife to cut the vertical lines of the teeth. Take your time here to ensure you don’t accidentally knock a tooth out. -
Remove Mouth Sections:
Push out the negative space pieces (the gaps between teeth) gently. It helps to push them inward into the pumpkin so you don’t break the delicate tooth structures. -
Clean Up Edges:
Scrape away any excess flesh or hanging bits from the inside of the cutouts so light can pass through cleanly. -
Erase Guidelines:
Wipe away any remaining marker lines with a damp paper towel.
Level Up: Spooky Glow
Sprinkle a little cinnamon or pumpkin spice inside the lid. When the candle warms the pumpkin, it will smell like pumpkin pie.
Step 4: Final Touches
-
Preserve the Pumpkin:
Rub a thin layer of petroleum jelly on the cut edges. This helps seal in moisture and keeps the face looking fresh longer. -
Light It Up:
Place your light source inside, replace the lid, and admire that goofy grin.
Enjoy the warm glow of your friendly new porch decoration


Angry Monster With Big Teeth
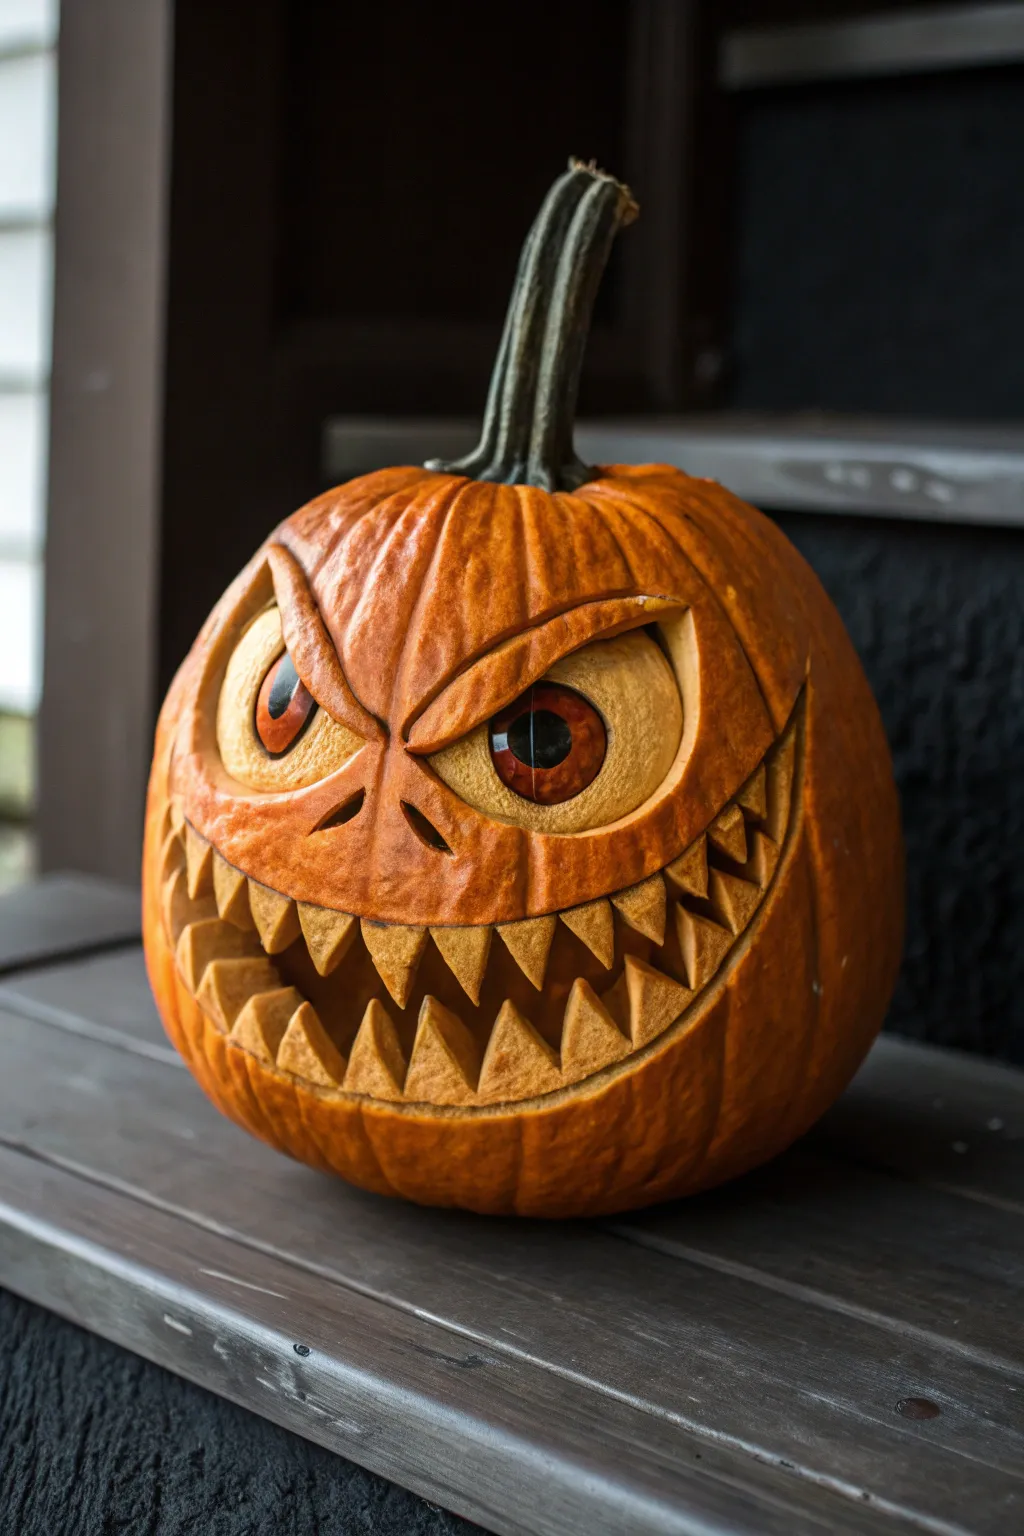
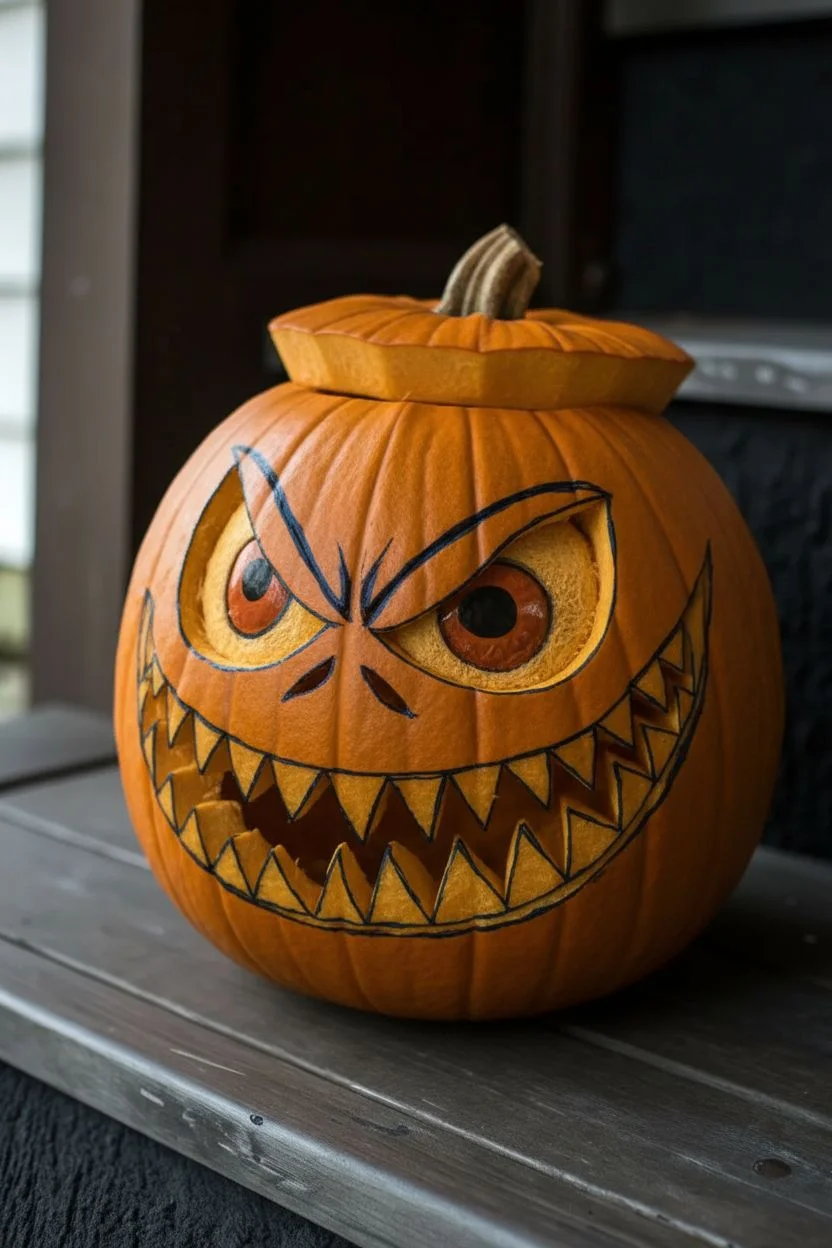
Transform a standard pumpkin into a fearsome creature with this advanced sculpting project. Instead of just cutting holes, you’ll use skin-shaving techniques to create realistic eyeballs, expressive brows, and a deeply terrifying set of three-dimensional teeth.
Detailed Instructions
Materials
- Large, thick-walled pumpkin
- Dry-erase marker or washable pen
- Large clay ribbon loop tool
- Small clay ribbon loop tool
- Exacto knife or craft scalpel
- V-gouge carving tool
- Serrated pumpkin saw
- Scoop or large spoon
- Scrubbing pad
- Paper towels
Step 1: Preparation and Mapping
-
Clean surface:
Before putting blade to gourd, wipe down the pumpkin’s surface with a damp cloth to remove dirt, then verify it rests stably on your work surface. If it wobbles, you might need to level the bottom slightly with a saw. -
Gut the pumpkin:
Cut a lid around the stem at an angle (so it doesn’t fall in later) and remove it. Use your scoop to thoroughly scrape the inside walls. For this style of 3D carving, you want the front wall—where the face goes—to be at least 1-1.5 inches thick, so avoid scraping it paper-thin. -
Sketch the face:
Using a dry-erase marker, draw your design directly onto the pumpkin skin. Outline two large slanted eyes, a furrowed V-shape brow, and a wide, U-shaped mouth that stretches far up the sides. Sketch the vague shapes of the teeth, but don’t worry about perfect detail yet.
Broken Tooth Fix
If a tooth snaps off while carving, don’t panic. Use a toothpick as a dowel: push half into the broken piece and half into the jaw, pinning it back in place.
Step 2: Sculpting the Eyes
-
Outline the eyes:
Use your Exacto knife to cut just through the orange skin along the outline of the eye sockets and the angry brows. Do not punch all the way through the pumpkin wall. -
Remove skin for the eyes:
Using a large ribbon loop tool, peel away the orange skin inside the eye outlines to reveal the yellow meat underneath. This creates the ‘whites’ of the eyes. -
Define the pupils:
In the center of each eye oval, leave a circle of pumpkin meat slightly raised. Use a smaller loop tool to dig deeper around this circle to make the eyeball look round. -
Detail the iris and pupil:
Carefully remove the skin from the center of the pupil area. I like to use a small V-gouge here to create a rim around the iris, and use a dark marker or paint later to darken the center pupil if shadows aren’t enough. -
Carve the brows:
Use the V-gouge to cut deep trenches immediately above the eye sockets. This creates the overhang of the brow, making the face look angrier.
Level Up: Glossy Eyes
For a terrifyingly wet look, apply a coat of clear gloss varnish or clear nail polish just to the eyeballs and teeth after the pumpkin surface has dried slightly.
Step 3: Carving the Mouth and Teeth
-
Outline the grin:
Trace the outer perimeter of the lips with your Exacto knife. Score the skin, but again, keep these cuts shallow initially. -
Clear the mouth cavity:
Using your ribbon loop tools, shave away all the orange skin inside the mouth area. You need a clean, yellow canvas to start carving the individual teeth. -
Draft the teeth:
With the tip of your knife, lightly score the triangular shapes of the upper and lower teeth onto the exposed yellow flesh. Make sure they interlock slightly, zig-zag fashion. -
Deepen the gaps:
Use a small loop tool to carve out the negative space between the teeth. You want to dig deeper into the pumpkin wall here than the surface of the teeth, creating depth. -
Shape the individual teeth:
Use your Exacto knife to bevel the edges of each tooth, making them look sharp and conical rather than flat. The tips should be the highest point. -
Create the mouth darkness:
Once the teeth are defined, cut all the way through the pumpkin wall only in the deepest gaps between the teeth. This allows light to shine through from the inside and creates the black background for the jaw.
Step 4: Refining and Texturing
-
Shave the lips:
Carve away a thin layer of skin around the immediate outside of the mouth to create a ‘lip’ line that separates the teeth from the rest of the facial skin. -
Add wrinkles:
Use a V-gouge to carve dynamic wrinkle lines radiating from the corners of the eyes and the nose bridge. Vary the depth of these cuts to create realistic texture. -
Clean up debris:
Use a scrubbing pad to gently buff away any hanging bits of pulp or rough tool marks on the exposed flesh areas. -
Preserve the pumpkin:
Because you’ve exposed so much flesh, rub a thin layer of petroleum jelly over the cut areas to prevent them from shriveling too quickly. -
Lighting check:
Place a bright LED light inside. Check where the light hits the eyes; you can thin the pumpkin wall from the inside behind the eyes to make them glow brighter without cutting through.
Light up your creation and watch how the shadows bring your monster’s angry expression to life


Spooky X-Eyes Creature
Embrace the quintessential spirit of Halloween with this traditionally carved pumpkin featuring a sharp, toothy grin and angular eyes. This project captures that warm, spooky glow perfectly, making it an ideal centerpiece for any porch display.
Step-by-Step Guide
Materials
- Medium to large orange pumpkin
- Serrated pumpkin carving saw or knife
- Large metal spoon or pumpkin scraper
- Washable marker or pencil
- Tea lights or LED candles
- Newspaper or disposable tablecloth
- Bowl for seeds/guts
Step 1: Preparation & Cleaning
-
Set up your workspace:
Begin by laying down newspaper or a disposable tablecloth on a sturdy surface. Since pumpkins can be messy, I always find it helpful to have a trash bag and a separate bowl for seeds within arm’s reach. -
Cut the lid:
Using your serrated saw, cut a circle around the pumpkin stem to create the lid. Angle the blade inward toward the center of the pumpkin rather than straight down; this creates a ledge so the lid won’t fall inside later. -
Remove the lid:
Gently pry the lid off by pulling on the stem. Trim off the fibrous pulp from the bottom of the lid so it is clean. -
Scoop the insides:
Use a large metal spoon or a specialized scraper tool to remove the seeds and stringy pulp. Dig into the walls slightly to thin them out. -
Thin the designated face area:
Pay special attention to the side where you plan to carve the face. Scrape the inner wall until it is about 1 inch thick, which makes carving much easier and cleaner.
Step 2: Drafting the Design
-
Plan the eyes:
With a washable marker, draw two distinct triangles for the eyes. Position them fairly high up on the pumpkin face, angling the inner points downward for a slightly menacing look. -
Add a nose:
Draw a small triangle right in the center of the face tailored to the size of your pumpkin. A smaller nose keeps the focus on the dramatic mouth. -
Sketch the mouth outline:
Draw a wide, crescent-shaped curve for the top of the mouth and a mirroring curve for the bottom to establish the grin’s width. -
Draw the teeth:
Inside your mouth outline, sketch sharp zig-zag patterns for teeth. Aim for large, triangular peaks on both top and bottom that interlock visually but don’t actually touch.
Fixing a Broken Tooth
If a tooth snaps off while carving, don’t panic. Stick a toothpick into the broken piece and reattach it to the pumpkin flesh. The seam will be invisible in the dark.
Step 3: Carving feature by feature
-
Carve the eyes:
Insert your serrated saw perpendicular to the pumpkin skin. Use a gentle sawing motion to cut along your drawn lines for the eyes, removing the pieces carefully. -
Cut the nose:
Follow the same technique for the small triangle nose. Be gentle here, as the area between the eyes and nose can be fragile. -
Start the mouth center:
Begin carving the mouth at the center point. It is often easier to carve out one tooth at a time rather than trying to saw the entire zig-zag line in one go. -
Work outward:
Continue carving the teeth, moving from the center toward the corners of the mouth. Use your finger to gently pop out the cut sections from the inside. -
Clean up edges:
Once the main pieces are out, go back with a smaller knife to shave off any dangling pumpkin strings or jagged bits of flesh to ensure the silhouette is sharp. -
Wipe away marks:
Take a damp cloth and wipe off any remaining marker lines from the pumpkin’s surface.
Preserve the Pumpkin
Rub petroleum jelly on the cut edges of the eyes and mouth. This seals in moisture and prevents the pumpkin from shriveling quickly, keeping that grin fresh longer.
Step 4: Lighting & Display
-
Insert lighting:
Place 2-3 tea lights or a bright LED puck light inside the pumpkin base. Multiple light sources help illuminate the wide grin effectively. -
Replace the lid:
Place the lid back on top, rotating it until it fits snugly into the notch you created earlier.
Set your finished creation on the porch steps next to a rustic lantern and watch the neighborhood enjoy its glow
BRUSH GUIDE
The Right Brush for Every Stroke
From clean lines to bold texture — master brush choice, stroke control, and essential techniques.
Explore the Full Guide
Webbed Superhero Mask Pumpkin
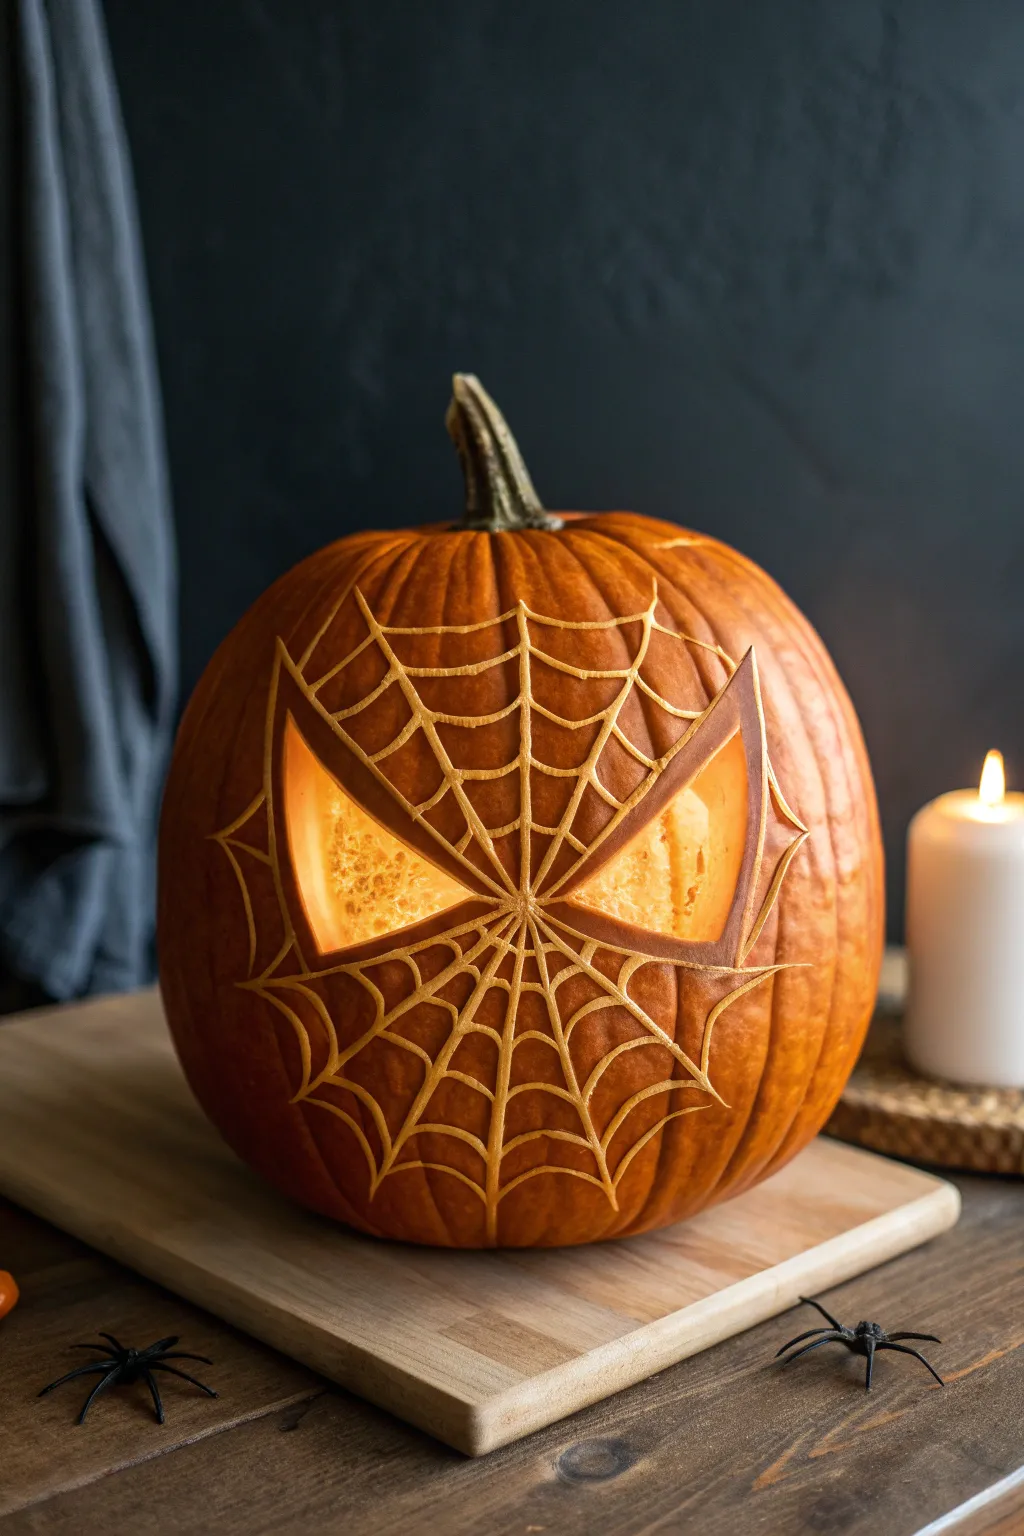
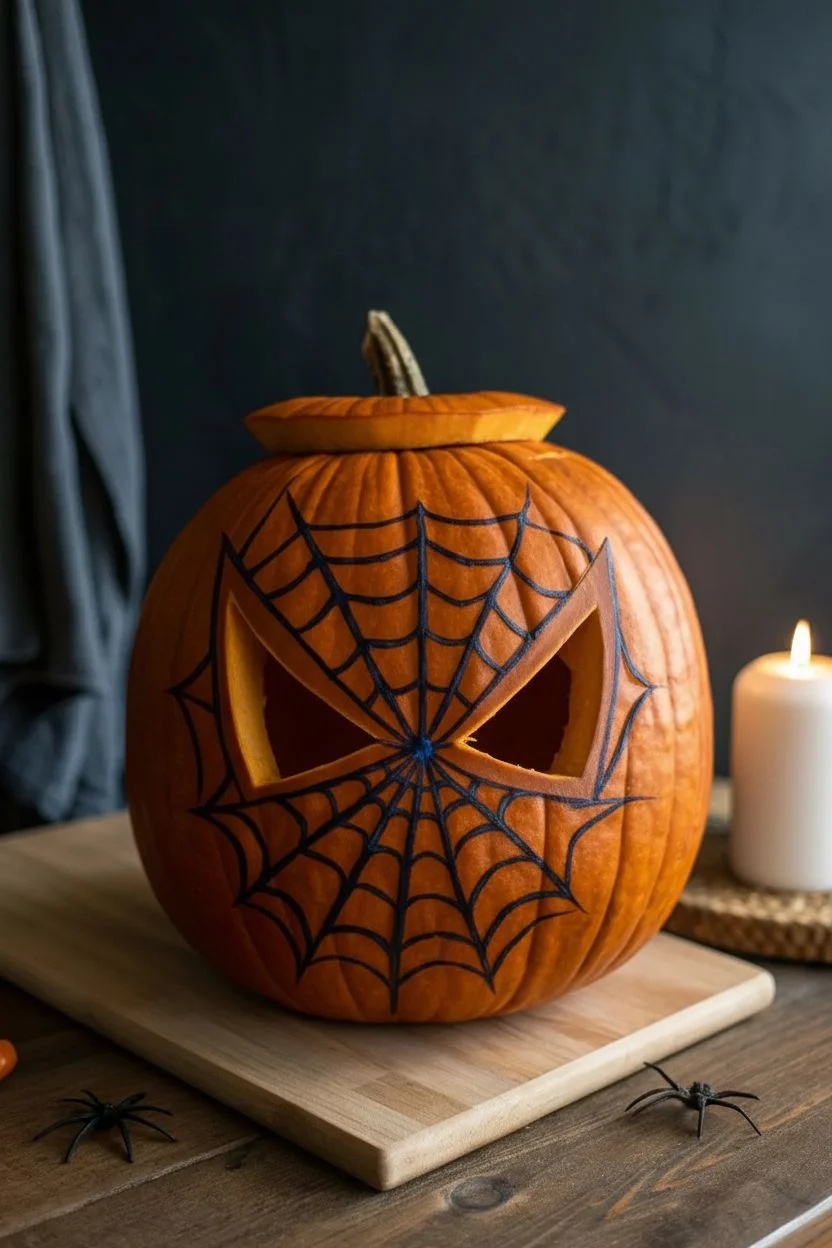
Bring a friendly neighborhood vibe to your porch with this striking superhero mask pumpkin. By combining deep carving for the eyes with delicate surface etching for the webbing, you create a dual-texture effect that looks impressive by day and spectacular by candlelight.
Detailed Instructions
Materials
- Medium to large perfectly round pumpkin
- Serrated pumpkin carving knife
- Linoleum cutter or V-groove carving tool
- Dry-erase marker or washable stencil pencil
- Large metal spoon or pumpkin scraper
- Paper template (optional but recommended)
- Masking tape
- Tealight or electric candle
Step 1: Preparation and Mapping
-
Open and scoop:
Begin by cutting a circle around the stem (or bottom) to open the pumpkin. Remove the lid and thoroughly scoop out all seeds and pulp. Scrape the inner wall where the face will be until it is about 1 inch thick, making it easier to carve later. -
Clean the surface:
Wipe the pumpkin skin down with a damp cloth to remove dirt and dry it completely. This ensures your marker lines will stick and not smudge immediately. -
Draft the eye shape:
Using a dry-erase marker, draw two large, triangular eyes that slant downward toward the center. They should look aggressive yet heroic. Start slightly smaller than you think; you can always widen them, but you can’t put pumpkin back. -
Map the center point:
Mark a small dot directly between the lowest inner points of the eyes. This will be the center focal point where all your web lines originate. -
Sketch radial lines:
Draw straight lines radiating outward from that center point, extending past the eyes and wrapping slightly around the sides of the pumpkin. Space them relatively evenly like spokes on a wheel. -
Add the webbing arcs:
Connect the radial lines with curved, scalloped lines to create the web effect. The curves should dip toward the center point. I find it helpful to start the first ring close to the center and work my way outward.
Slip-Up Solution
If your carving tool slips and cuts a web line you didn’t want, turn it into a ‘broken web’ feature by adding a tiny spider dangling from the mistake.
Step 2: Carving the Eyes
-
Cut the eye outlines:
Take your serrated carving knife and cut along the marker lines for the two large eye shapes. Keep your knife perpendicular to the pumpkin surface for a clean, straight edge. -
Remove eye segments:
Gently push the cut eye pieces from the inside out to pop them loose. Discard these chunks. -
Clean up edges:
Use a smaller knife or the tip of a vegetable peeler to trim away any ragged pumpkin flesh clinging to the inside of the eye holes. This ensures the light shines through crisply.
Step 3: Etching the Web
-
Select your tool:
Switch to a linoleum cutter (lino tool) or a V-groove wood carving tool. These are perfect for shaving off just the top layer of skin without punching through the wall. -
Trace the radial lines:
Begin carving the straight radial lines first. Apply steady, moderate pressure to reveal the lighter orange flesh underneath the skin. You don’t need to go deep—just deep enough to remove the dark rind. -
Etch the scalloped connections:
carefully carve the curved webbing lines connecting the spokes. Go slowly here, as the tool can slip on the pumpkin’s curved surface. -
Refine intersection points:
Go back over the points where the webbing lines meet. I like to clear out these tiny corners to make the joints look sharp and deliberate. -
Extend the design:
Continue etching the pattern until the web covers the entire front face of the pumpkin, fading out naturally as it wraps toward the sides.
Level Up: Dual Tone
Make the eyes pop by attaching a sheet of white parchment paper or vellum inside the pumpkin behind the eye holes. It diffuses the light for a glowing white look.
Step 4: Finishing Touches
-
Wipe away markings:
Take a slightly damp paper towel and gently wipe away any remaining dry-erase marker lines. Be careful not to get the exposed flesh too wet. -
Preserve the Etching:
Rub a tiny amount of petroleum jelly or vegetable oil over the etched web lines. This seals the moisture in and prevents the shaven areas from shriveling too quickly. -
Light it up:
Place a bright light source inside. An LED light works great, but a real candle offers a flickering effect that makes the simple eyes look intense.
Step back and admire how the detailed webbing frames those glowing hero eyes for a perfect Halloween display
Masked Turtle-Style Hero Pumpkins
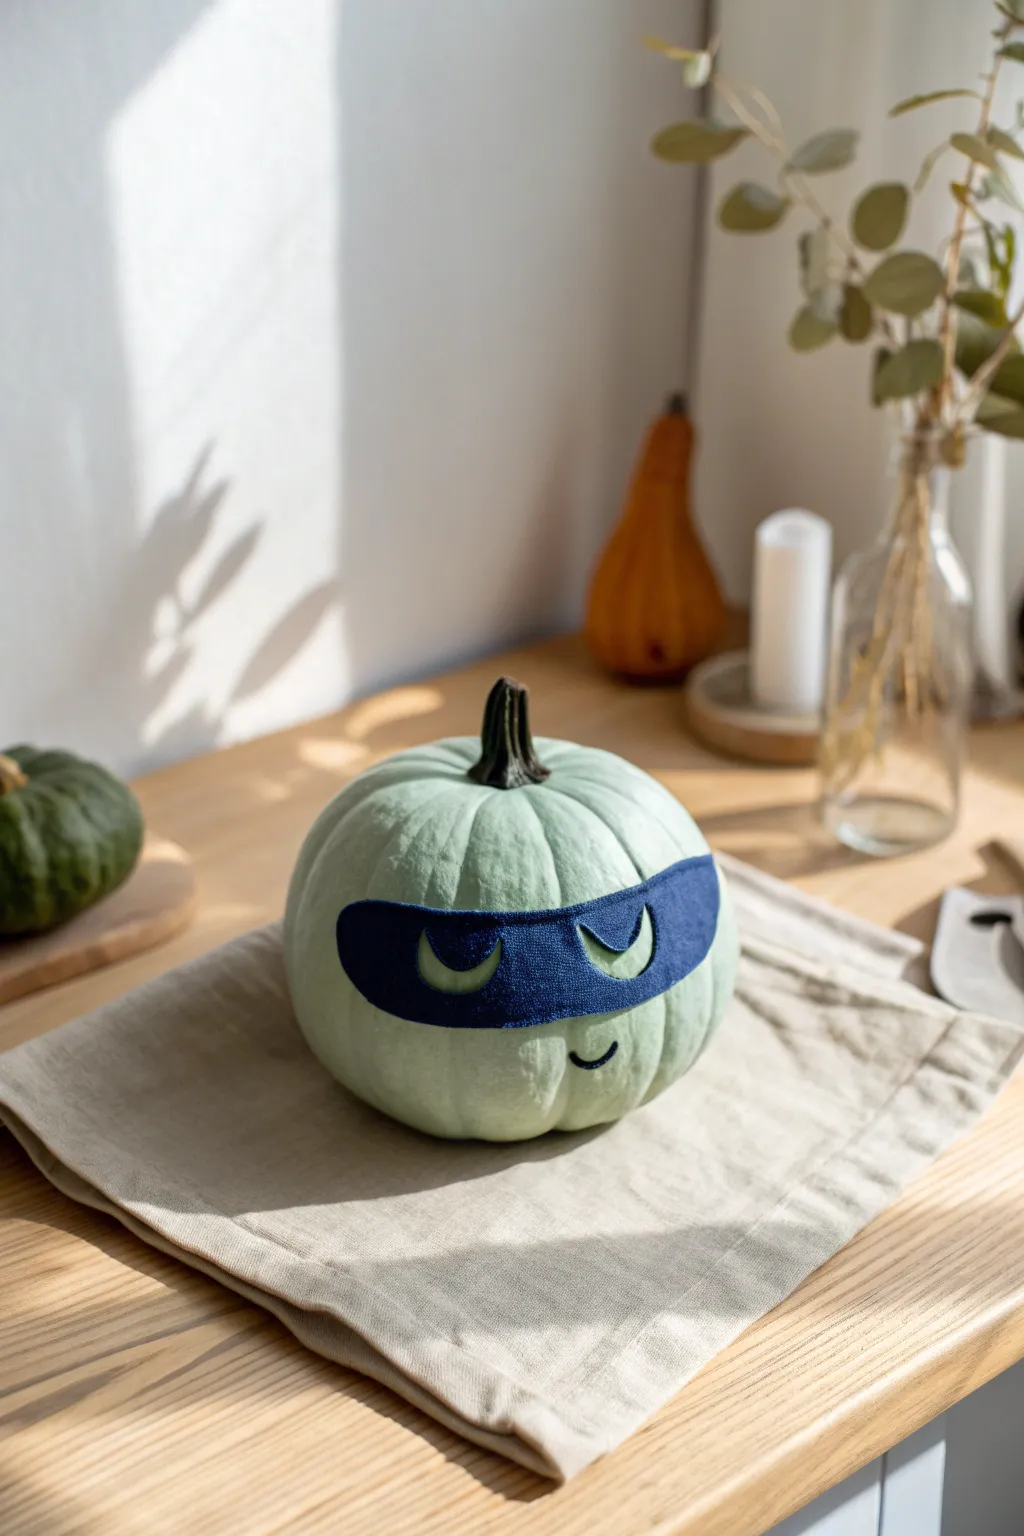
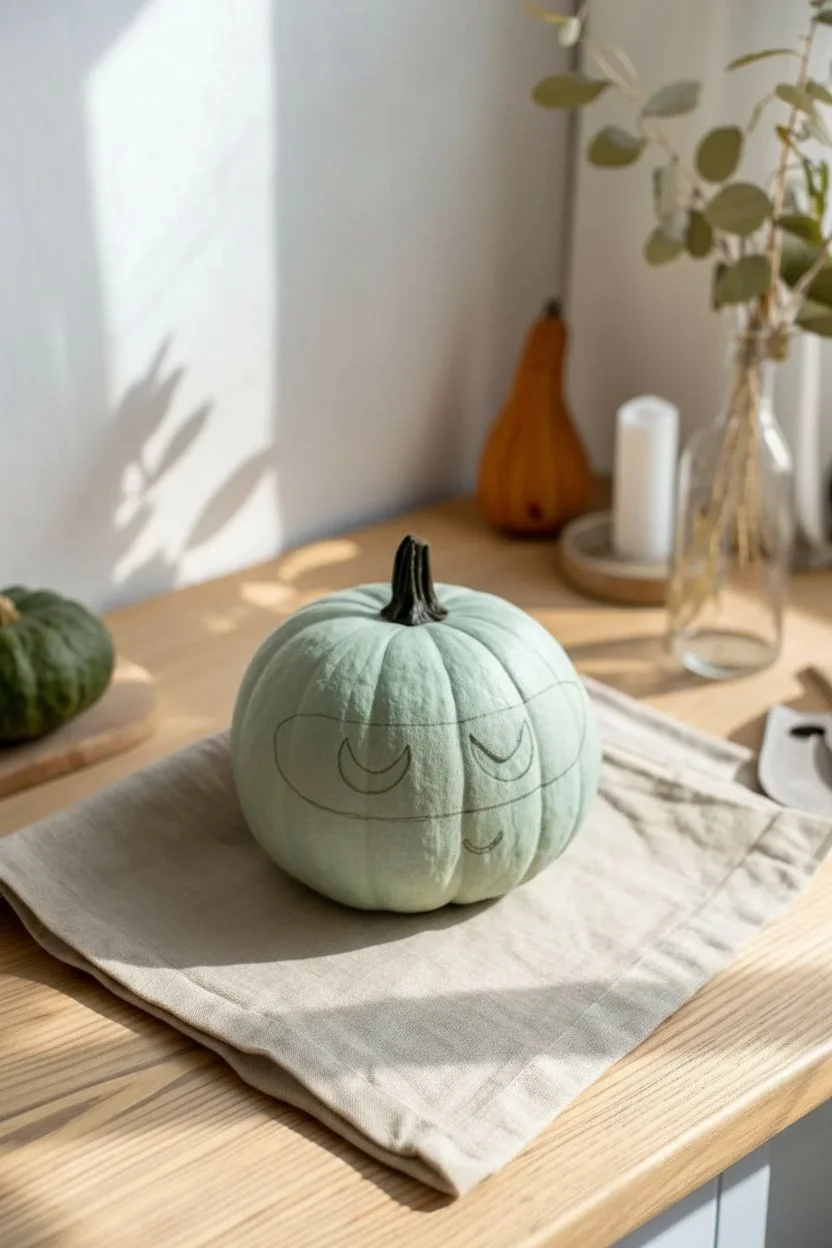
Transform a pale green pumpkin into a charming masked crusader with this simple yet striking painting project. The muted sage green skin of the pumpkin provides the perfect natural base for a bold navy blue mask and quirky expression.
How-To Guide
Materials
- Medium-sized pumpkin (featureless, pale green variety like Jarrahdale or Blue Doll)
- Navy blue acrylic craft paint
- Light mint or pale blue acrylic craft paint (for eyes)
- Black acrylic paint or paint pen
- Pencil or white chalk pencil
- Small flat brush (size 4 or 6)
- Fine liner brush (size 0 or 1)
- Matte spray sealer (optional)
- Lint-free cloth
Step 1: Preparation & Mapping
-
Clean surface:
Begin by wiping down your pale green pumpkin with a damp lint-free cloth to remove any dirt or field dust. Let it dry completely so the paint adheres properly. -
Find the face:
Rotate your pumpkin to find the smoothest side with the most pleasing shape; this will be the ‘face’ of your hero. -
Sketch the mask:
Using a pencil or white chalk pencil, lightly sketch the outline of the eye mask. Aim for an elongated oval shape that spans across the center of the pumpkin, slightly dipping in the middle over the ‘nose’ area. -
Define the eyes:
Inside the mask outline, sketch two half-moon shapes for the eyes. These should be crescent shapes with the curve facing downward to create a determined, squinting expression.
Pro Tip: Chalk It Up
Use a white chalk pencil for your initial sketch instead of graphite. It shows up better on dark green skin and wipes away easily with a damp Q-tip if you make a mistake.
Step 2: Painting the Mask
-
Outline the perimeter:
Dip your small flat brush into the navy blue acrylic paint. Carefully paint along the outer pencil lines of the mask to establish a crisp edge. -
Fill the mask:
Continue using the navy blue paint to fill in the rest of the mask area, being careful to paint *around* the eye shapes you sketched earlier. -
Smooth the texture:
Apply the blue paint in smooth, horizontal strokes to minimize brush marks. If the pumpkin’s natural green shows through, let the first coat dry for about 15 minutes and apply a second coat.
Step 3: Adding Details
-
Paint the eyes:
Switch to a clean brush and use the light mint or pale blue paint to fill in the crescent eye shapes. This light color against the dark mask makes the eyes pop. -
Outline the eyes:
Once the eye paint is dry, use a fine liner brush with black paint (or a black paint pen) to carefully outline the bottom curve of the eyes for definition. -
Add pupils:
Using the same black paint, add two small semi-circles inside the eyes, positioned toward the upper inner corners, to give the character focus. -
Create the smile:
below the mask, locate a central spot for the mouth. Using the fine liner brush and black paint, create a small, simple ‘U’ shape for a smirk. -
Add a dimple:
Add a tiny tick mark or dot at one end of the smile to give the expression a bit of cheeky personality.
Level Up: Fabric Texture
Instead of painting, cut the mask shape out of blue felt and glue it onto the pumpkin surface. This adds a tactile, costume-like element to your hero.
Step 4: Finishing Touches
-
Clean up edges:
Inspect the edges of your blue mask. If any lines look wobble, use your liner brush and a tiny bit of paint to sharpen the borders. -
Seal the work:
If you plan to display this pumpkin outdoors, wait 24 hours for the paint to fully cure, then lightly mist the painted area with a matte spray sealer to protect it from moisture.
Now your stoic little hero is ready to guard the front porch with style

PENCIL GUIDE
Understanding Pencil Grades from H to B
From first sketch to finished drawing — learn pencil grades, line control, and shading techniques.
Explore the Full Guide
Sports Ball Pumpkin Face-Off
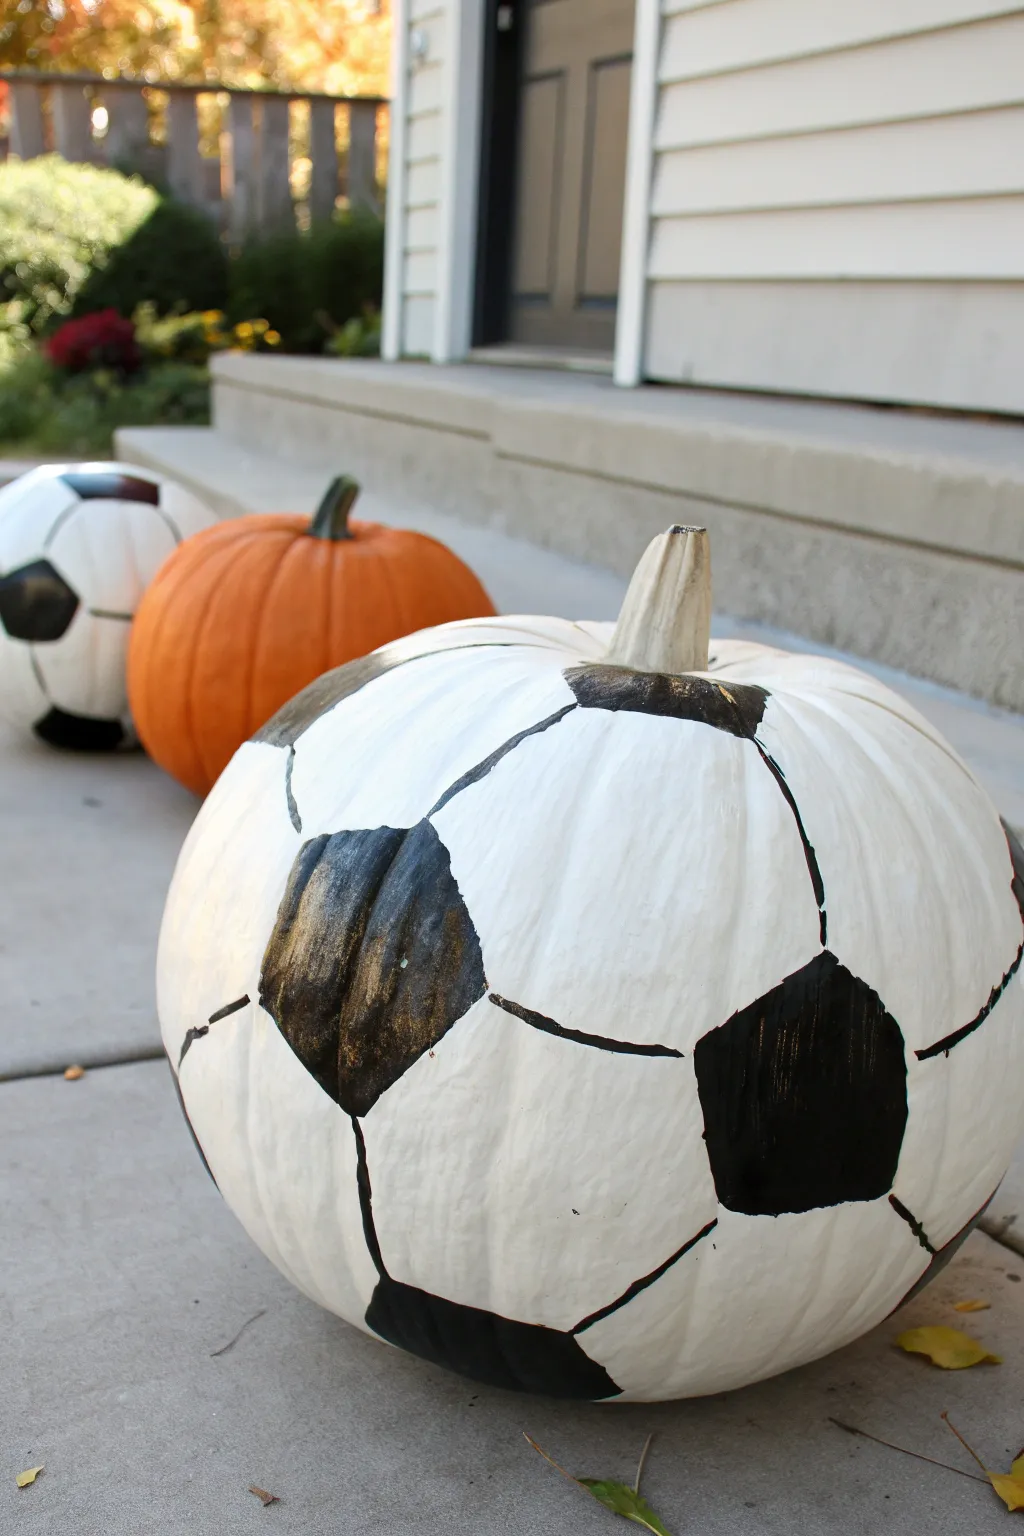
Transform a simple pumpkin into the ultimate sports fan decoration with this realistic soccer ball design. Using just a few classic colors, you’ll create a striking black-and-white pattern that looks ready for the field right on your front porch.
Step-by-Step Tutorial
Materials
- Medium to large perfectly round pumpkin
- White acrylic paint (outdoor friendly)
- Black acrylic paint (outdoor friendly)
- Wide flat paintbrush (1-2 inch)
- Medium round paintbrush
- Small fine-tip paintbrush
- Pencil
- Cardstock or stiff paper
- Scissors
- Ruler
- Clear acrylic sealer spray (optional)
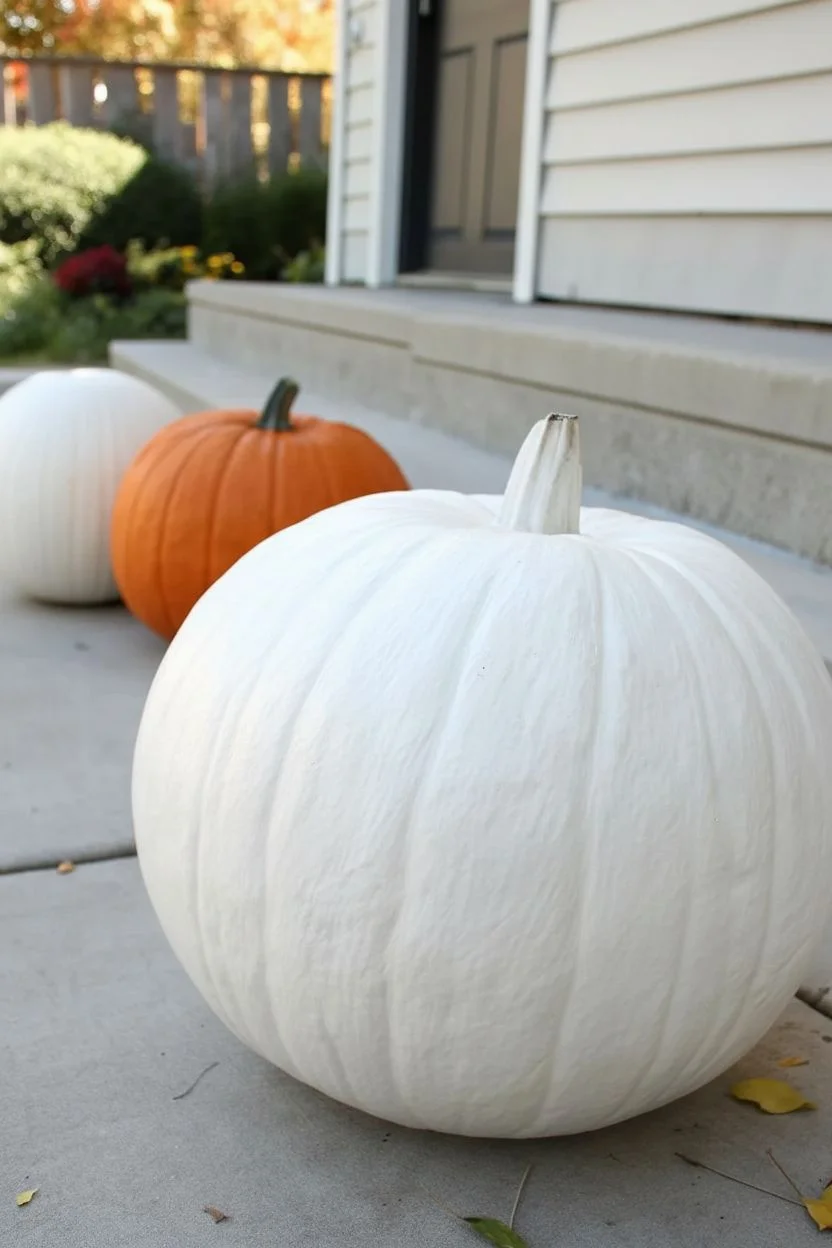
Step 1: Preparation & Base Coat
-
Clean the surface:
Start by wiping down your pumpkin with a damp cloth to remove any dirt or field debris. Dry it completely to ensure the paint adheres properly. -
Apply the first white coat:
Using the wide flat brush, cover the entire pumpkin in white acrylic paint. Don’t worry if the orange peeks through slightly; this is just the foundation layer. -
Let it dry completely:
Allow the first coat to dry for about 20-30 minutes. Touching it too early can lift the paint, so patience is key here. -
Add a second white layer:
Apply a second coat of white paint to get that solid, opaque look characteristic of a new soccer ball. If your pumpkin is naturally very orange, a third coat might be necessary for full coverage.
Step 2: Mapping the Pattern
-
Create a pentagon stencil:
While the paint dries, draw a regular pentagon (five sides) on your cardstock. A side length of about 2-3 inches usually works well for a medium pumpkin. -
Cut out the template:
Carefully cut out your pentagon shape. This will be your guide for the black patches on the ball. -
Place the first shape:
Identify a spot halfway up the side of the pumpkin to be your starting point. Hold the stencil flat against the curve and trace lightly around it with a pencil. -
Create the spacing:
Soccer balls have hexagons (white spaces) between the pentagons (black spots). To mimic this, estimate a gap of roughly one to two inches between your traced shapes, keeping the pattern consistent. -
Trace remaining shapes:
Continue placing and tracing the pentagon stencil around the pumpkin. I find it helpful to work in a ring around the middle first, then fill in the top and bottom sections. -
Connect the lines:
Using your pencil, lightly draw straight lines connecting the corners of neighboring pentagons. These lines form the hexagonal grid structure of the ball.
Uneven Lines?
If your lines are wobbly, don’t stress. Use a black permanent marker for the outlines instead of a brush for better control, then fill in with paint.
Step 3: Painting the Details
-
Outline the black patches:
Take your medium round brush and carefully paint the outline of your visible pencil pentagons with black acrylic paint. -
Fill in the spots:
Fill the inside of the pentagons completely with black paint. Use smooth strokes to keep the texture even, mimicking the leather panels of a ball. -
Define the seams:
Switch to your small fine-tip brush. Dip it in black paint and trace over the connecting lines you drew earlier to create the appearance of seams between the white panels. -
Refine the edges:
Go back with a small brush and touch up any white paint that may have been accidentally smudged with black, keeping the lines crisp. -
Add a second black coat:
If the black patches look streaky after drying, apply a second layer to make them deep and glossy. -
Seal the deal:
Once everything is fully dry (give it a few hours), spray the entire pumpkin with a clear acrylic sealer to weather-proof your masterpiece for the outdoors.
Turf Texture
Create a grass-stained look by dry-brushing faint streaks of green paint near the base of the pumpkin for an authentic game-day vibe.
Now you have a sporty centerpiece that kicks off the autumn season with style
Stealth Ninja Eyes in Matte Black
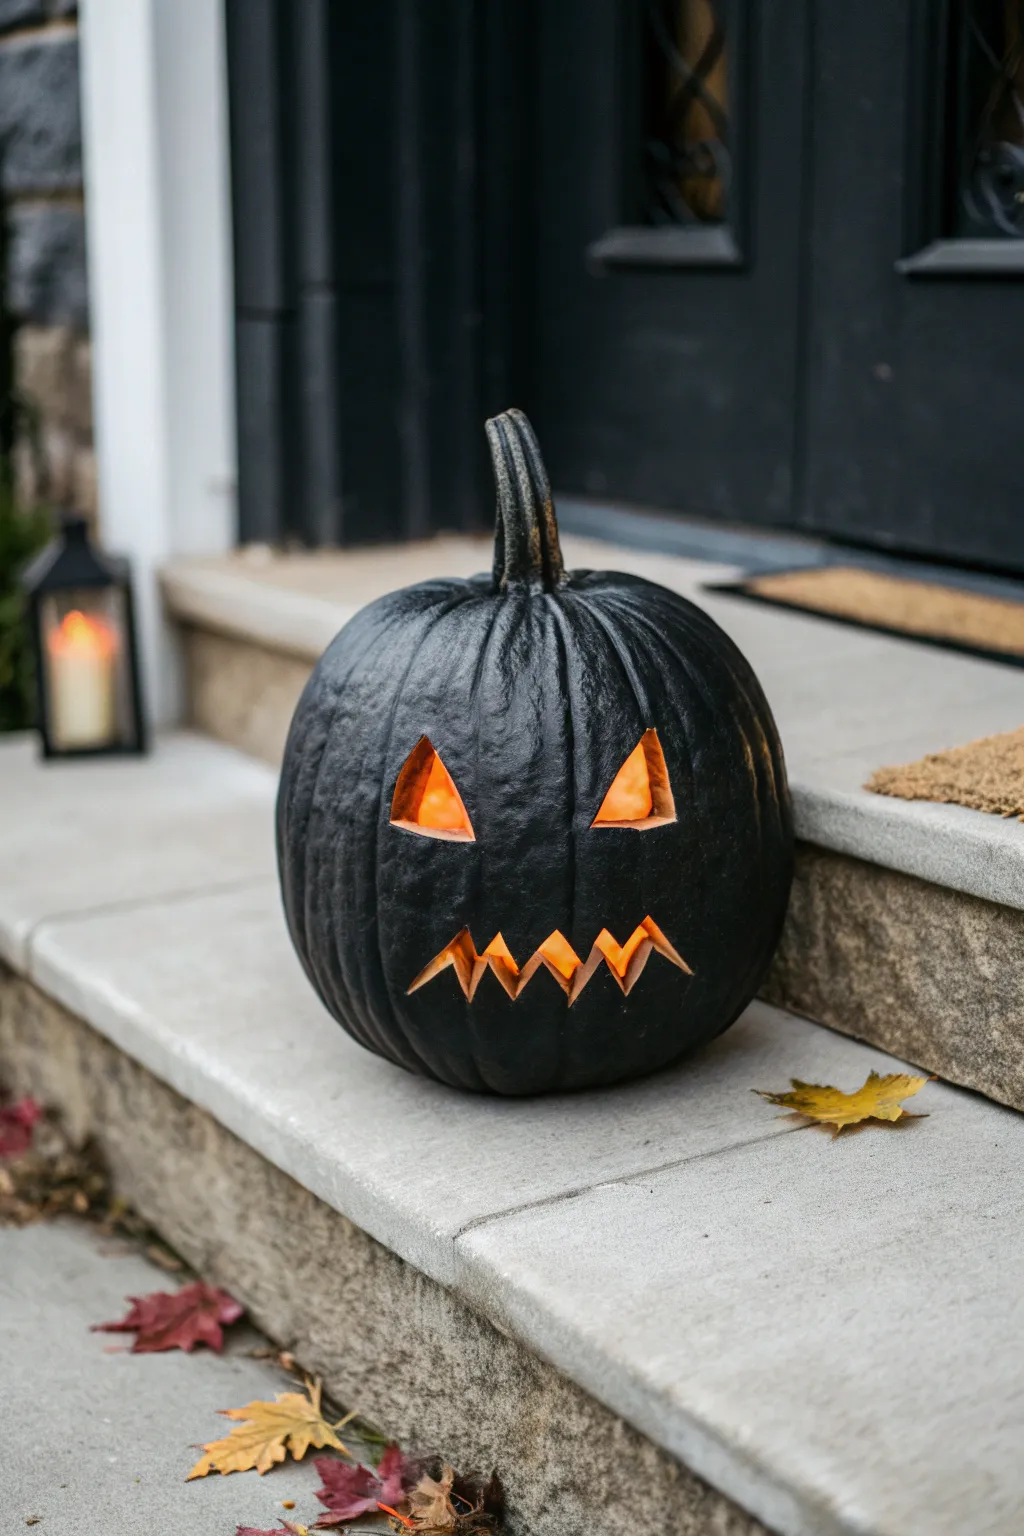
Transform a standard orange pumpkin into a mysterious figure of the night with nothing but matte black paint and a few geometric cuts. This project delivers a sleek, modern aesthetic that looks especially striking when glowing from within against a dark porch.
Step-by-Step
Materials
- Medium-sized pumpkin with a sturdy stem
- Matte black acrylic craft paint or spray paint
- Painter’s tape or newspaper (if spraying)
- Wide foam brush or soft bristle brush (if painting by hand)
- Pumpkin carving kit (serrated saw)
- Small sharp knife (X-Acto or paring knife)
- Large metal spoon or scraping tool
- Dry erase marker or dark pencil
- Paper towels or cloth
- Battery-operated LED candle or tea light
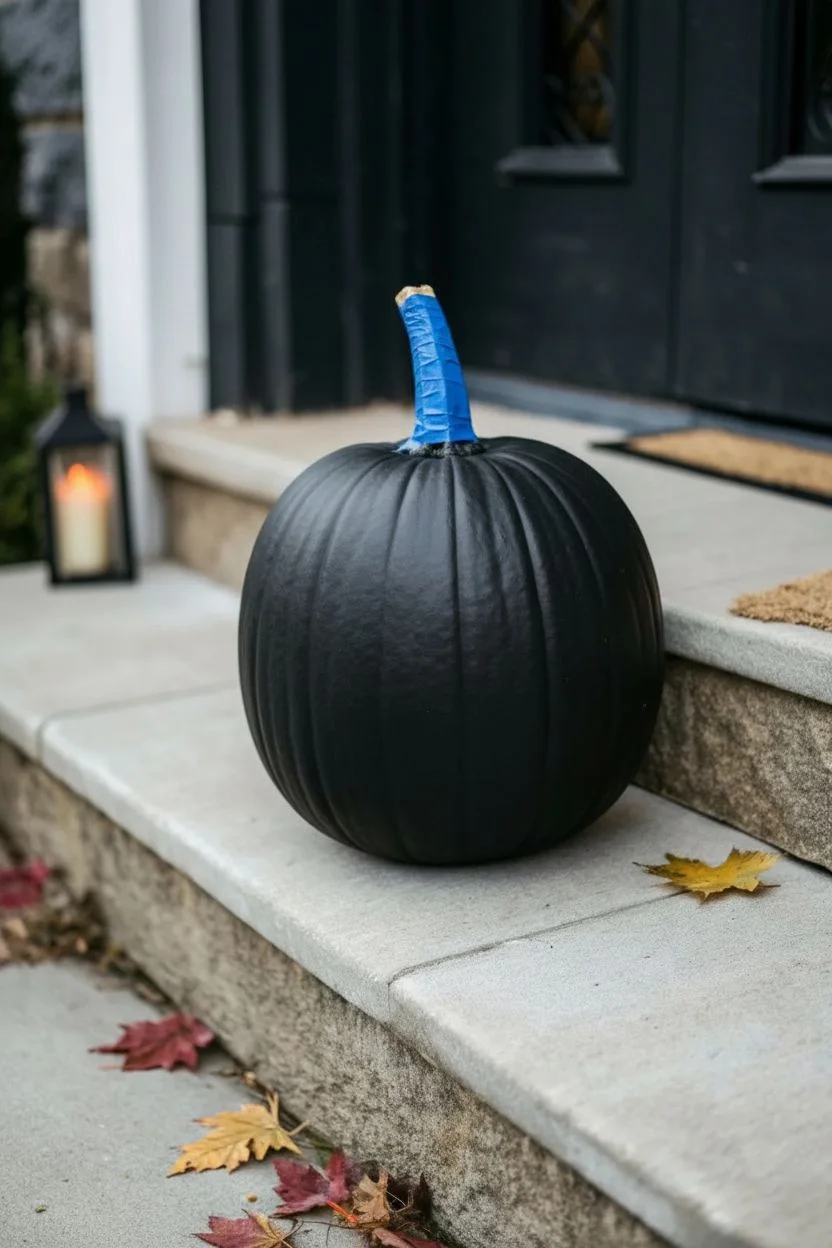
Step 1: Transformation Prep
-
Clean surface:
Begin by wiping down the entire exterior of your pumpkin with a damp cloth to remove any dirt or field debris. -
Dry thoroughly:
Ensure the pumpkin is completely dry before proceeding; moisture will prevent the paint from adhering properly. -
Mask stem:
If you want to keep the stem natural like in the photo, wrap it carefully with painter’s tape. I like to tear small pieces to get right down to the base without covering the pumpkin skin. -
Apply base coat:
Apply the first coat of matte black paint. If spraying, use light, sweeping motions about 12 inches away. If brushing, use long vertical strokes following the pumpkin’s ribs. -
Let dry:
Allow the first coat to dry completely. This usually takes about 20-30 minutes for acrylics or 15 minutes for spray paint. -
Second coat:
Apply a second layer of black paint to ensure total opacity. You shouldn’t see any orange peeking through. Let this layer cure fully, preferably for an hour or more, so it doesn’t chip during carving.
Paint Persistence
If the paint flakes while carving, apply a clear matte sealer over the black paint BEFORE carving. This binds the paint to the skin.
Step 2: Carving the Face
-
Open the lid:
With the paint dry, carefully cut a circle around the stem to create a lid. Angle your knife inward so the lid sits on a ledge and doesn’t fall inside. -
Gut the interior:
Remove the lid and use your large metal spoon to scrape out all the seeds and strings. Scrape the inner wall where the face will be until it’s about 1 inch thick for easier carving. -
Sketch the design:
Using a dry erase marker (which wipes off glossy surfaces but works okay on matte too if gentle), lightly draw your face design directly onto the black paint. -
Eye placement:
Draw two sharp, identical triangles for eyes. Angle them slightly inward to create a menacing or focused glare. -
Mouth design:
Sketch a jagged, zigzag mouth. Keep the teeth sharp and angular to match the ninja-like aesthetic. -
Initial cuts:
Take your serrated pumpkin saw and insert it straight into the pumpkin wall at a 90-degree angle. Start with the intricate corners of the mouth. -
Sawing technique:
Use a gentle up-and-down sawing motion. Do not force the blade; let the teeth do the work to prevent cracking the painted skin. -
Remove pieces:
Once a shape is fully cut, push the piece gently from the inside out to pop it free without damaging the surrounding paint. -
Clean edges:
Use a small sharp knife or X-Acto blade to clean up any ragged pumpkin flesh or paint chips around the cut openings.
Fiery Eyes
Sprinkle cinnamon inside the lid before lighting a real candle—it will smell like pumpkin pie and the heat makes the interior glow warmer.
Step 3: Final Touches
-
Touch up paint:
Inevitably, carving might chip a tiny bit of paint at the edges. Dab a small brush with black paint to cover any exposed orange skin on the exterior surface. -
Wipe away markings:
Gently wipe away any remaining marker lines with a barely damp cloth. -
Remove tape:
Peel the tape off the stem to reveal the natural contrast. -
Add light:
Place your LED candle inside. The bright orange interior flesh will reflect the light, creating a fiery glow against the black shell.
Set this dark sentinel on your porch steps and watch the orange glow pierce through the shadows.


Pirate Skull and Crossbones Pumpkin
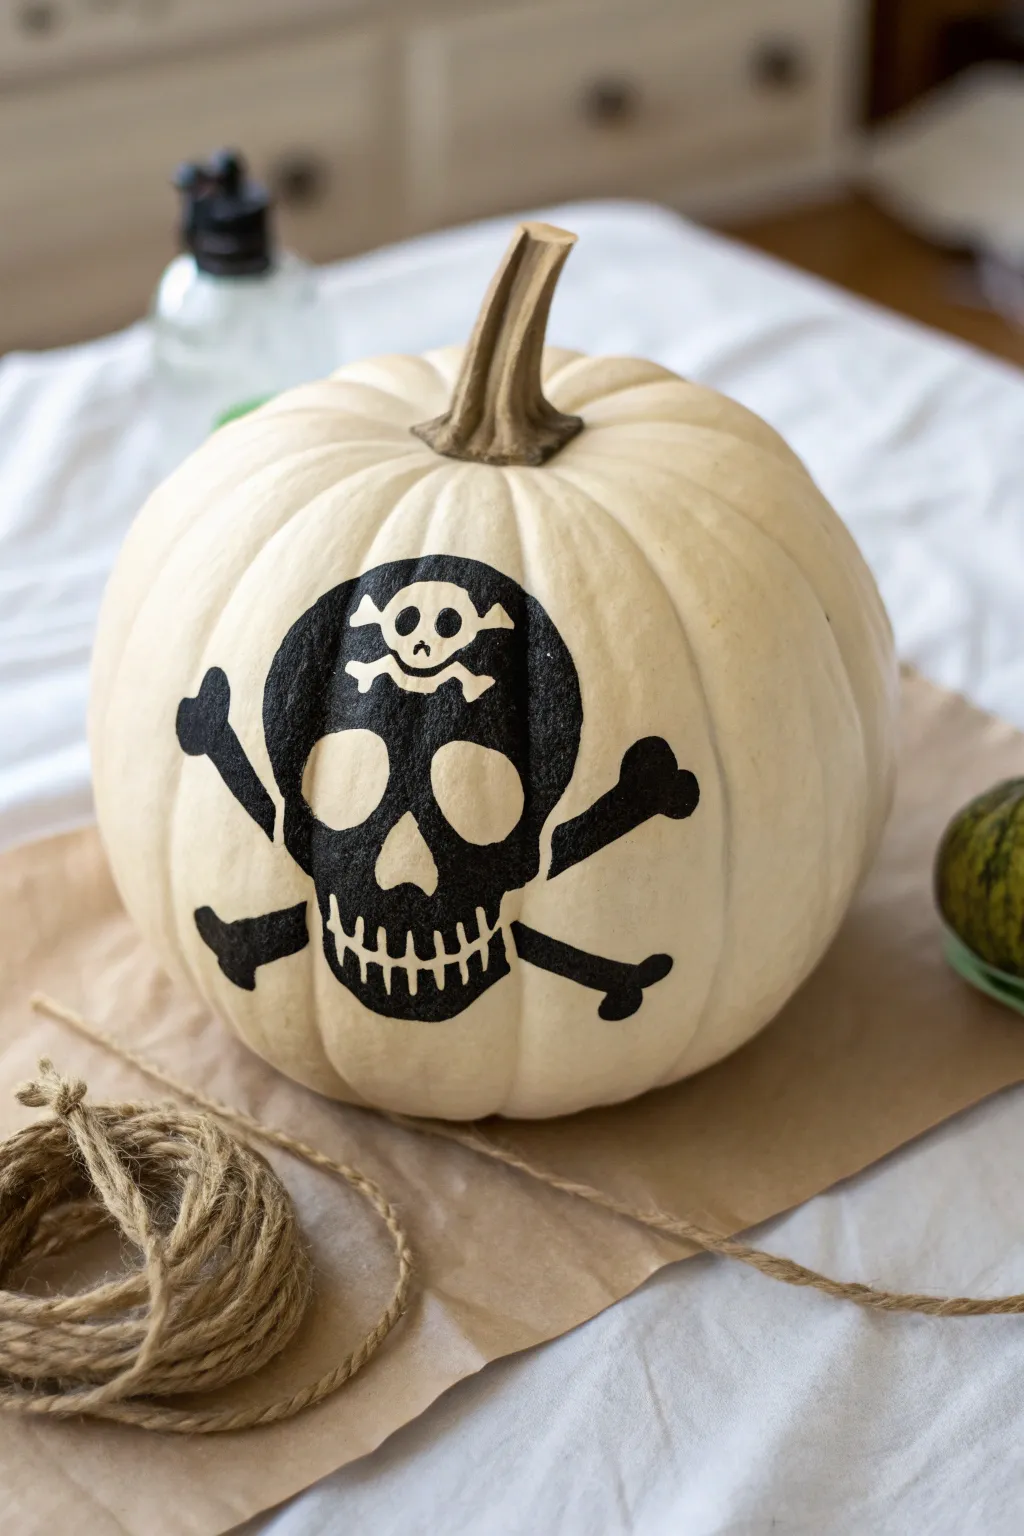
For a sleek and slightly spooky twist on Halloween decor, transform a white pumpkin into a pirate’s warning. This design features a bold black skull and crossbones with a clever meta-detail: a tiny matching symbol right on the forehead.
How-To Guide
Materials
- White craft pumpkin (or real white pumpkin, cleaned)
- Black acrylic paint (matte finish)
- Wide painter’s tape or masking tape
- Computer and printer (optional for stencils)
- Pencil or chalk
- Scissors or craft knife
- Small flat paintbrush
- Medium round paintbrush
- Fine liner brush (for details)
- Paper plate or palette
- Paper towels
Step 1: Preparation & Planning
-
Prepare the surface:
Wipe down your pumpkin with a damp cloth to remove any dust or oils. If using a real pumpkin, make sure it is completely dry before starting. A clean surface ensures the acrylic paint adheres properly without peeling. -
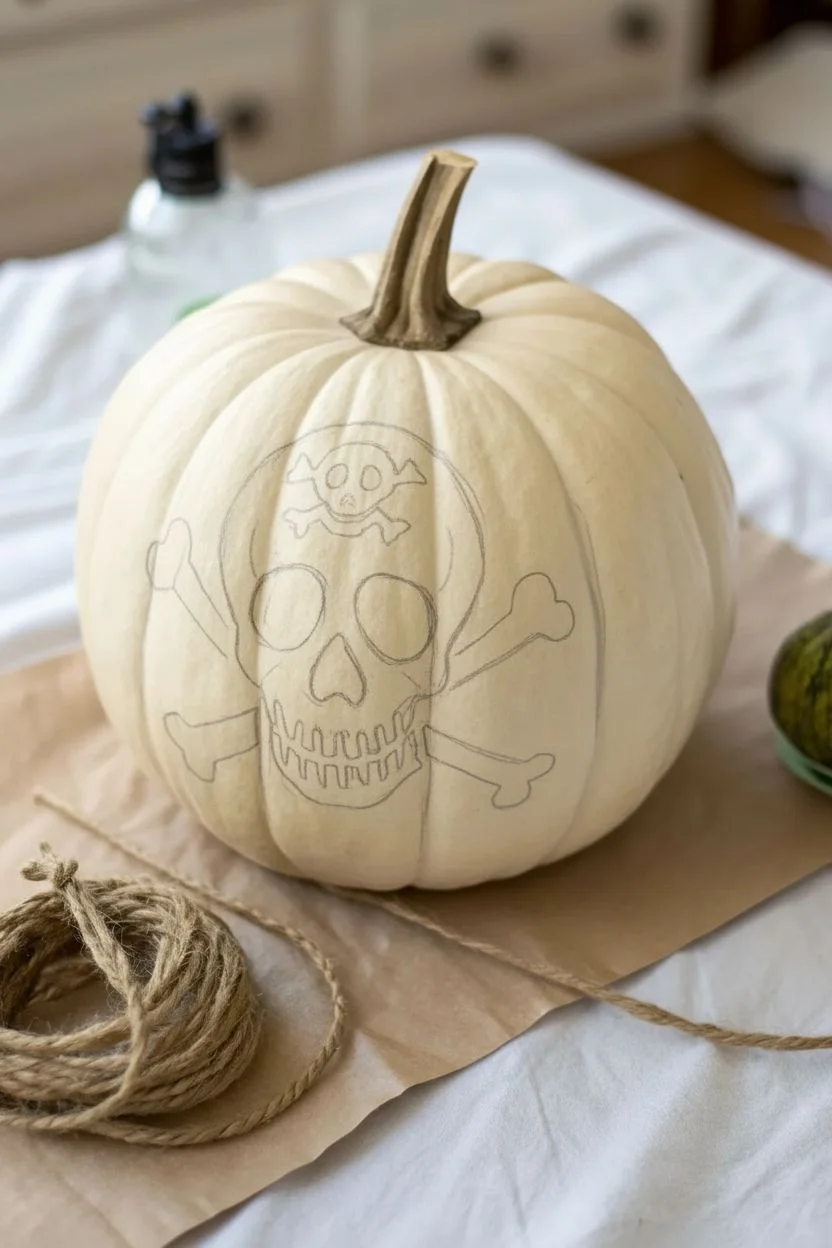
Design the main shape:
Visualize the placement of the large skull. It should take up the majority of the front face. You can lightly sketch a large oval shape with a jawline using a pencil or chalk directly on the pumpkin’s ribs. -
Map out the crossbones:
Mark four points radiating outward from behind the skull area to indicate where the bone ends will sit. This ensures your crossbones are symmetrical and don’t run off the bottom or sides of the pumpkin.
Step 2: Creating the Outline
-
Drafting the skull features:
Within your skull outline, sketch two large, slightly teardrop-shaped eye sockets and a triangular nose cavity. Below that, draw a simple jawline. Don’t worry about the teeth just yet; we will add them later. -
Adding the forehead detail:
This is the unique twist! At the top center of the main skull’s forehead, sketch a small, miniature version of a skull and crossbones. Keep it simple—just the basic shapes are needed. -
Refining the edges:
Go over your sketch lines to darken them slightly. If you aren’t confident in your freehand drawing, you can print a skull image, cut it out, and trace around it as a stencil. -
Initial painting:
Squeeze a generous amount of black matte acrylic paint onto your palette. Using the medium round brush, carefully paint the outline of the main skull shape first to establish your boundaries.
Clean Lines Hack
Use a black permanent marker to trace the final outline before painting. It acts as a barrier, helps seal the edges, and makes filling in the paint much faster.
Step 3: Filling & Detailing
-
Blocking in the black:
Switch to a larger flat brush if you have one, or continue with the round brush. Fill in the entire skull shape with black paint, but represent the eyes, nose, and the mini-skull on the forehead by leaving those areas unpainted (white). -
Defining the void spaces:
As you fill in the black, carefully paint around the eye sockets and nose hole. The white pumpkin skin shows through to create these features. I find it easiest to work from the center outward to avoid smudging. -
Painting the crossbones:
Extend thick black lines outward from the skull for the crossbones. At the ends of each bone, paint the knobby, heart-shaped ends. Since pumpkins are ribbed, dab the paint into the crevices to get solid coverage. -
Detailing the mini-skull:
Using your fine liner brush, carefully paint the black background of the forehead emblem. Leave tiny dots of white for the mini-skull’s eyes and nose. This requires a steady hand! -
Adding the teeth:
For the mouth, paint thin vertical lines extending down from the upper jaw area into the black chin area. You want to create the illusion of teeth by painting the negative space—painting the black lines between the teeth creates the skeletal grin. -
Second coat:
Let the first layer dry for about 15 minutes. If the black looks streaky or translucent, apply a second coat. Matte black paint looks best when it is completely opaque. -
Cleanup:
Dip a clean, damp brush or a cotton swab in water to tidy up any wobbly edges or stray paint marks while the paint is still tacky. -
Final drying:
Allow the entire project to dry completely for at least an hour before moving the pumpkin. This prevents fingerprints from ruining your crisp black finish.
Smudge Rescue
Did you accidentally get black paint inside the eye socket? Don’t panic. Let it dry completely, then paint over the mistake with white acrylic paint to mask it.
Place your finished pirate pumpkin on the porch or a table to greet adventurous trick-or-treaters
Monster Truck Tire-Track Pumpkin
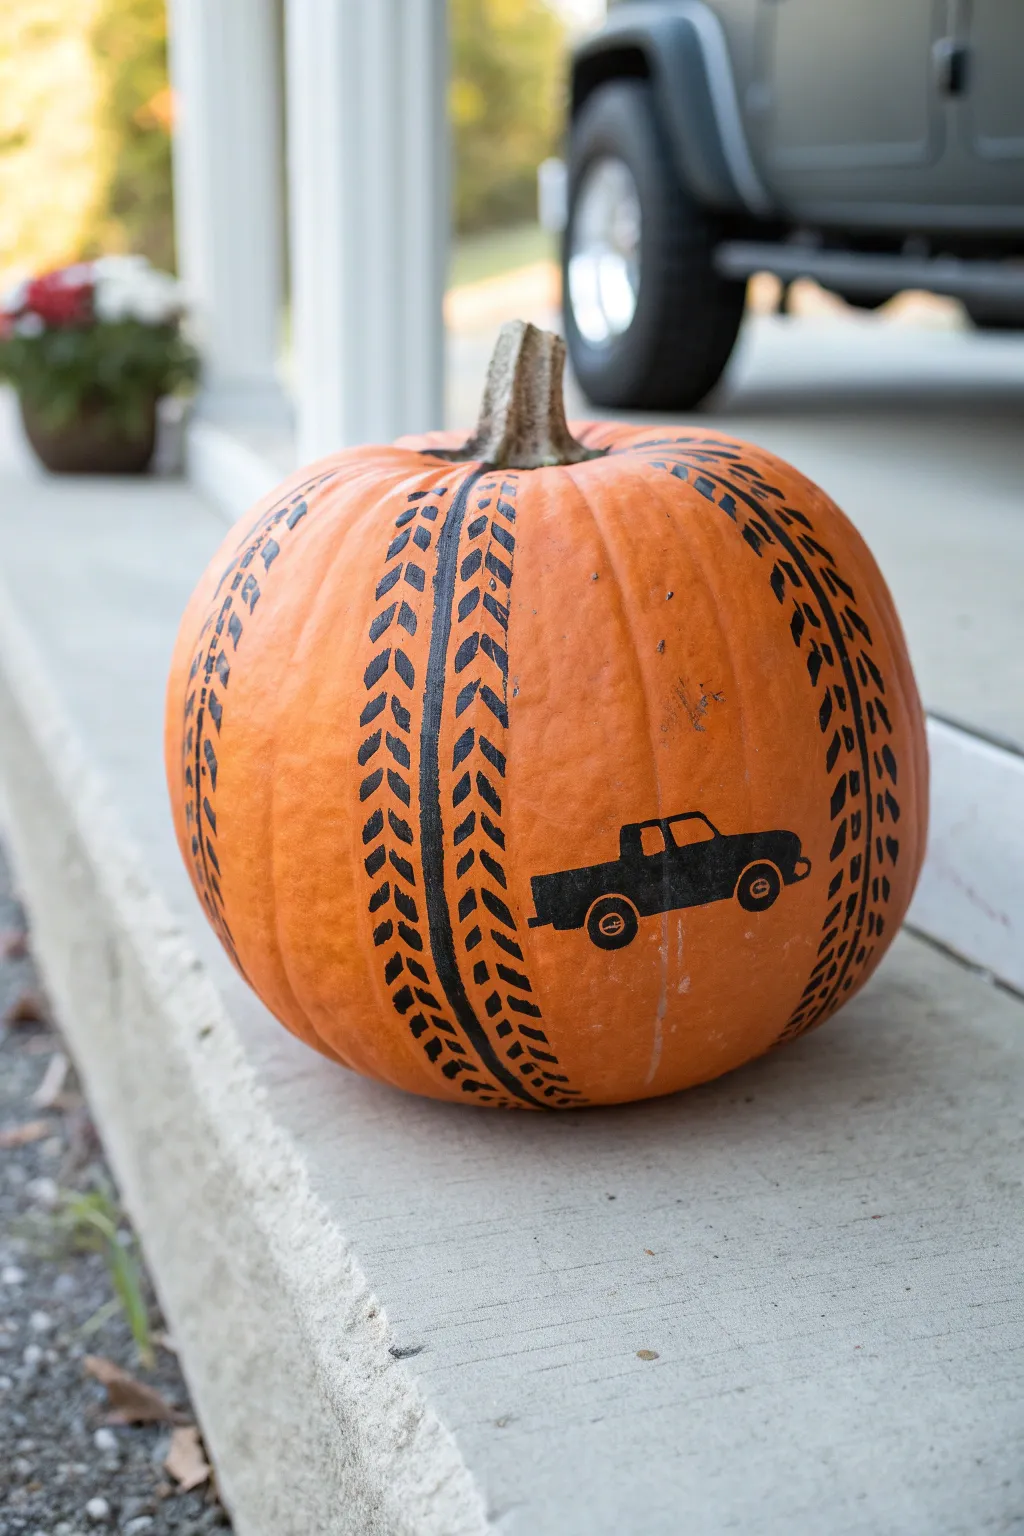
Transform a classic orange pumpkin into a rugged, off-road masterpiece perfect for any truck-loving kid. This no-carve design uses bold black paint to mimic muddy tire treads and features a sleek truck silhouette cruising right along the pumpkin’s curve.
How-To Guide
Materials
- Medium-sized orange pumpkin (cleaned and dried)
- Black acrylic paint (matte finish works best)
- Small flat paintbrush
- Medium round paintbrush
- Pencil for sketching
- Painters tape or masking tape
- Truck stencil (optional, can be printed or freehanded)
- Paper towels
- Cup of water
Step 1: Setting the Scene
-
Clean the canvas:
Before you begin, wipe down the entire surface of your pumpkin with a damp cloth to remove any dirt or field dust. A clean, drying pumpkin ensures the paint adheres properly and doesn’t flake off later. -
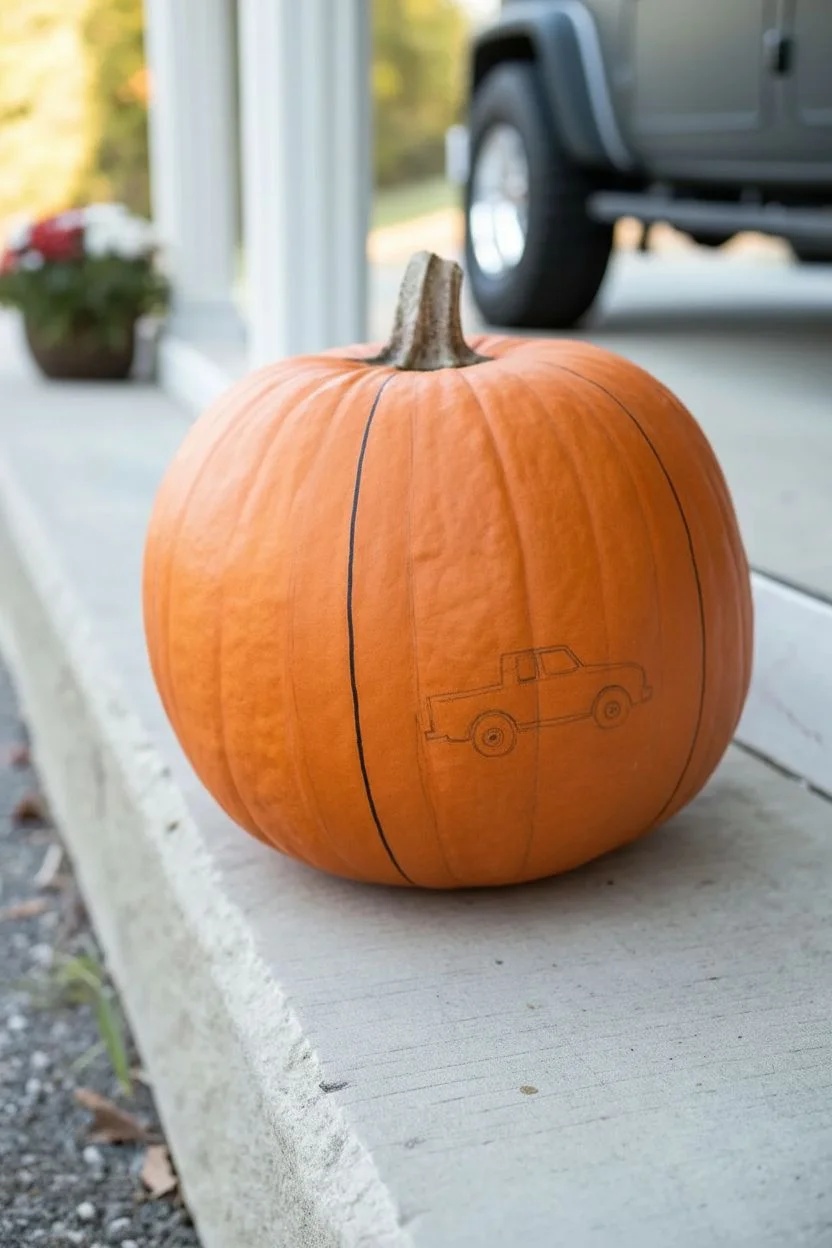
Mark the track path:
Visualize where your tire tracks will go. You want them to curve naturally from the stem down to the base. Lightly mark vertical guidelines using a pencil to keep your tracks centered. -
Establish the centerline:
Using your medium round brush and black acrylic paint, paint a thin, continuous vertical line down the center of your sketched path. This acts as the spine of the tire tread and helps keep the V-shapes symmetrical. -
Sketch the truck placement:
Find a smooth spot on the side of the pumpkin between the tire tracks. Lightly sketch the outline of a pickup truck using your pencil. If you aren’t confident freehanding, you can print a simple truck silhouette, cut it out, and trace around it.
Step 2: Creating the Tread
-
Start the left treads:
Beginning at the top near the stem, paint small, angled rectangular dashes on the left side of your center line. Angle them downward slightly, like an inverted V shape. -
Mirror the right side:
Paint matching dash marks on the right side of the center line. Try to line them up with the left marks so they create a cohesive arrow-pointing-down pattern, mimicking a mud-terrain tire. -
Build the pattern down:
Continue this alternating pattern all the way down the pumpkin. Don’t worry if the spacing isn’t perfectly uniform; real tire tracks have irregularities, which adds to the rugged look. -
Thicken the outer edges:
Go back over your dash marks and slightly thicken the outer ends of each dash. This gives the ‘tread’ more weight and makes it look like a heavy-duty truck tire. -
Add a second track:
Repeat the entire process to create a second tire track on the opposite side or further around the pumpkin, keeping the spacing consistent with the first track.
Straight Track Hack
Use two strips of painter’s tape to create a vertical channel for your tire tracks. This helps keep the overall width consistent as you paint the tread pattern down the pumpkin.
Step 3: Painting the Truck
-
Outline the body:
Switch to your small flat brush for better control. Carefully paint over your pencil outline for the truck body, creating a crisp black edge. -
Fill in the silhouette:
Fill in the entire body of the truck with solid black paint. Apply the paint thick enough to be opaque, but thin enough to avoid drips. -
Detail the wheels:
Paint two circles for the tires. You can leave a tiny dot of orange in the center of the wheels to represent hubs, or paint them solid black. -
Define the windows:
If you want the windows to stand out, leave the window areas unpainted so the orange pumpkin shows through. If you accidentally painted them black, wait for it to dry and paint over it with an orange that matches the pumpkin skin. -
Add subtle details:
Use the very tip of your small brush to add bumpers or a tow hitch if desired. Keep it simple, as silhouettes work best with clean lines.
Muddy Enhancement
For a grittier look, mix a little brown paint or actual dirt into a clear glue and dab it randomly on the tire tracks to simulate fresh mud splatter from off-roading.
Step 4: Finishing Touches
-
Clean up edges:
Check your tire tracks and truck for any smudges. A damp Q-tip works wonders for wiping away fresh mistakes before they set. -
Check opacity:
Once the first coat is dry to the touch, see if any orange is showing through the black paint. I usually find a quick second coat on the truck body makes the silhouette pop much better. -
Let it cure:
Allow the pumpkin to dry completely in a safe spot where it won’t be bumped. Minimal handling for the first hour ensures the design stays crisp.
Place your truck-themed pumpkin on the porch step and enjoy the rugged charm it brings to your autumn decor
Puking Pumpkin Gross-Out Gag
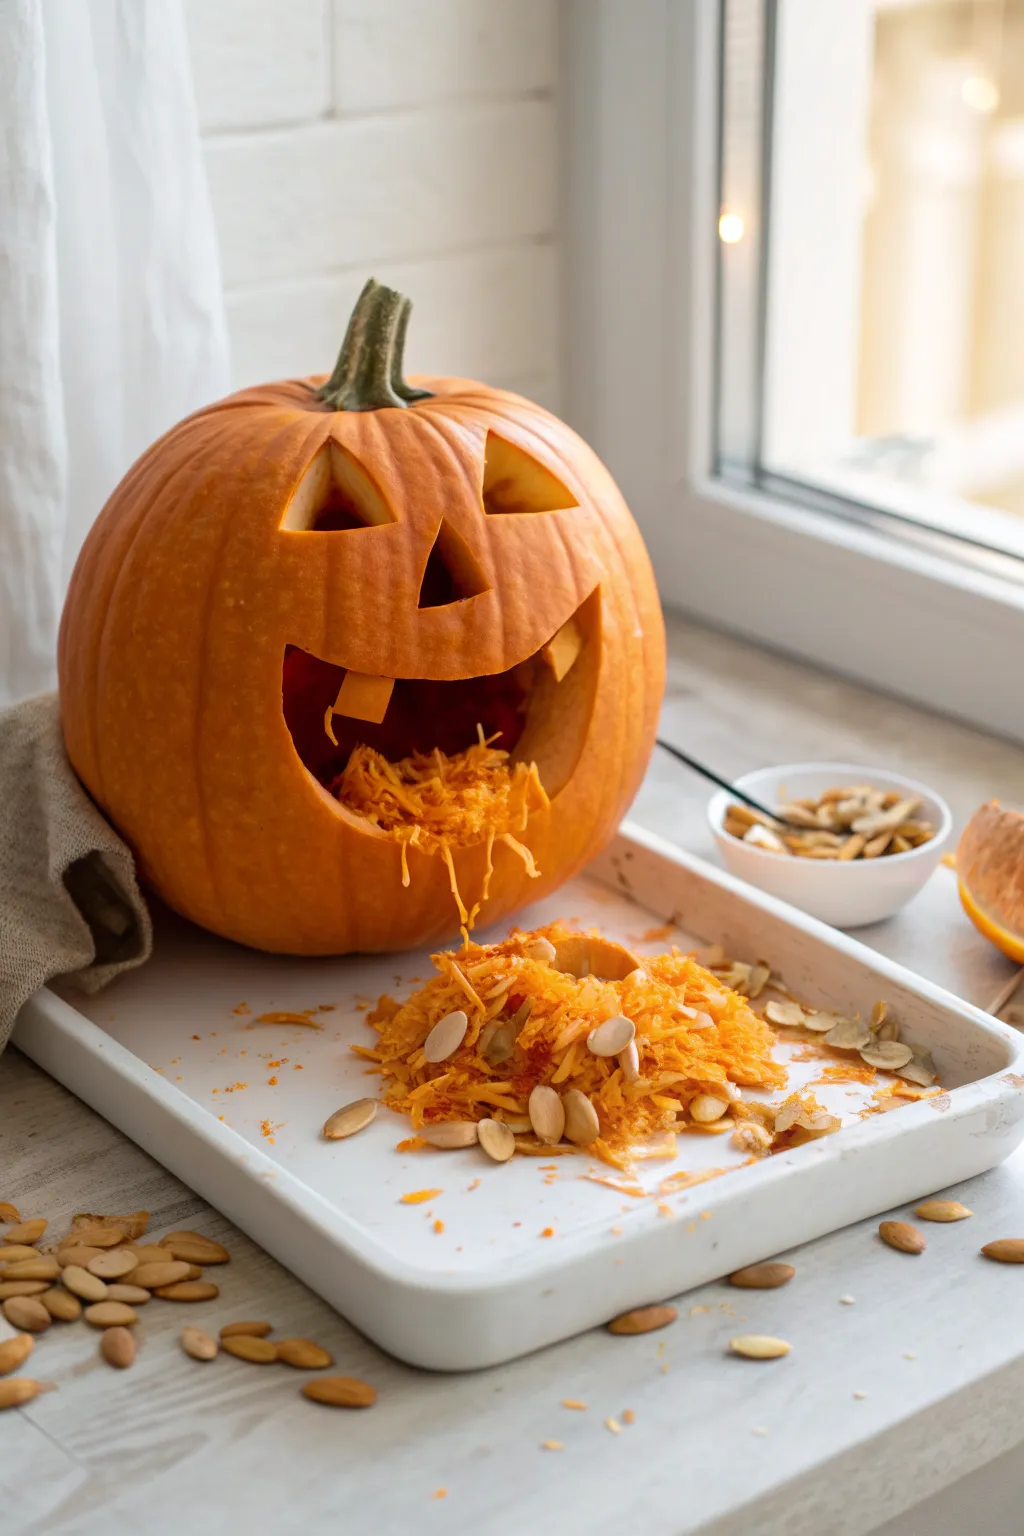
This hilarious gross-out gag transforms a standard Jack-o’-lantern into a memorable centerpiece that kids absolutely love. By cleverly arranging the pumpkin guts instead of discarding them, you create a scene that is equal parts spooky and silly.
Step-by-Step Guide
Materials
- Medium-sized orange pumpkin
- Carving knife or pumpkin saw
- Large metal spoon or scoop
- White serving tray or platter
- Newspaper or drop cloth
- Marker (dry erase or washable)
- Bowl for sorting seeds
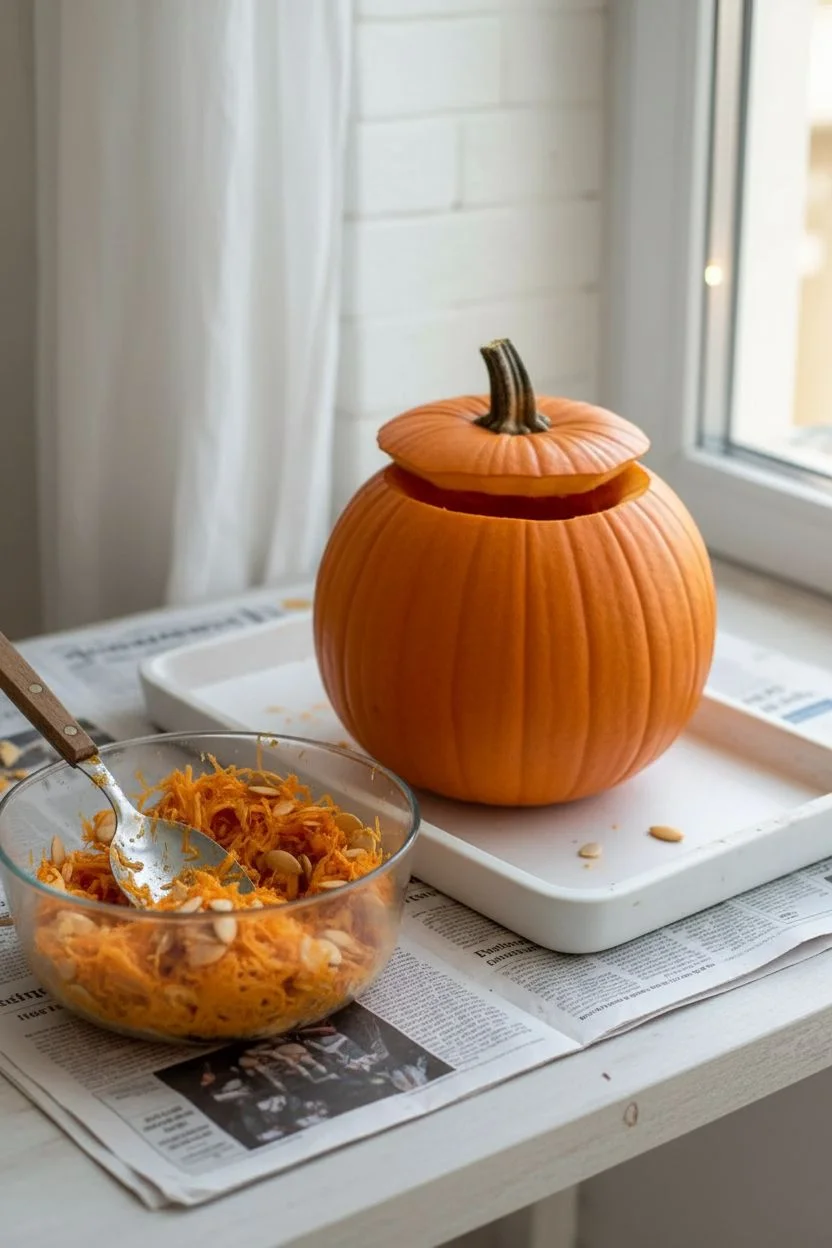
Step 1: Opening and Cleaning
-
Prepare the workspace:
Lay down newspaper or a drop cloth on your table to catch the mess, then position your white serving tray where the final pumpkin will sit. -
Cut the lid:
Using your carving knife, cut a circle around the pumpkin stem to create a lid. Angle the knife inward slightly so the lid won’t fall inside later. -
Remove the top:
Lift the lid off by the stem and trim away the excess pulp hanging from the bottom of it, setting the clean lid aside. -
Scoop the interior:
Reach in with your large metal spoon and begin scraping the inside walls. You want to loosen everything, but—and this is crucial—do not throw anything away. -
Reserve the guts:
Pull out the bulk of the stringy pulp and seeds and place them into a temporary bowl. The messier and stringier, the better for this specific look. -
Selecting the ‘vomit’:
Look through your pile of guts. I like to separate the most vibrant orange strands from the pale seeds, keeping a mix of both for texture.
Freshness Tip
Pumpkin guts dry out and turn brown quickly. Wait to arrange the ‘vomit’ pile until just an hour before your guests arrive to keep it looking slimy and gross.
Step 2: Carving the Face
-
Draft the design:
With a washable marker, draw two classic triangle eyes and a small triangle nose on the smoothest side of the pumpkin. -
Draw the mouth:
Sketch a wide, open mouth. To make the gag work, the mouth needs to be large and slightly oval-shaped, with a square tooth biting down from the top and perhaps one on the bottom. -
Carve the features:
Carefully cut out the eye and nose triangles first, popping the pumpkin pieces out from the inside to keep the edges sharp. -
Carve the mouth:
Cut along your mouth outline. Take your time around the teeth, as these can easily snap off if you rush. -
Clean the edges:
Use a smaller knife or a paring tool to scrape away any small burrs or loose skin around the carved openings for a clean look. -
Wipe it down:
Take a damp cloth and wipe away any remaining marker lines from the face.
Step 3: Staging the Scene
-
Position the pumpkin:
Place your finished carved pumpkin onto the back edge of the white tray. -
Begin the flow:
Take a handful of the reserved stringy pulp and stuff it into the bottom of the mouth opening, letting it hang over the carved lip. -
Create the pile:
Take the remaining bulk of pulp and seeds and arrange a messy pile directly on the tray in front of the mouth. Ensure it physically connects to the strands hanging from the mouth. -
Add volume:
Keep piling the ‘guts’ until it looks substantial. Use your fingers to fluff up the orange strands so they don’t look too flat. -
Sprinkle the seeds:
Scatter extra pumpkin seeds around the edges of the pile and a few stray ones further out on the tray to simulate a splatter effect. -
Replace the lid:
Place the pumpkin lid back on top. -
Final adjustment:
Step back and check the angle. If the pumpkin looks too upright, you can prop the back up slightly with a small wedge so it leans forward, looking more like it’s heaving.
Green Effect
Mix a few drops of green food coloring into the pulp pile to give the ‘sick’ pumpkin a cartoonishly nauseous look that stands out against the orange.
Now you have a delightfully disgusting decoration that is sure to get a laugh from trick-or-treaters
Chomping Pumpkin Eating a Smaller One
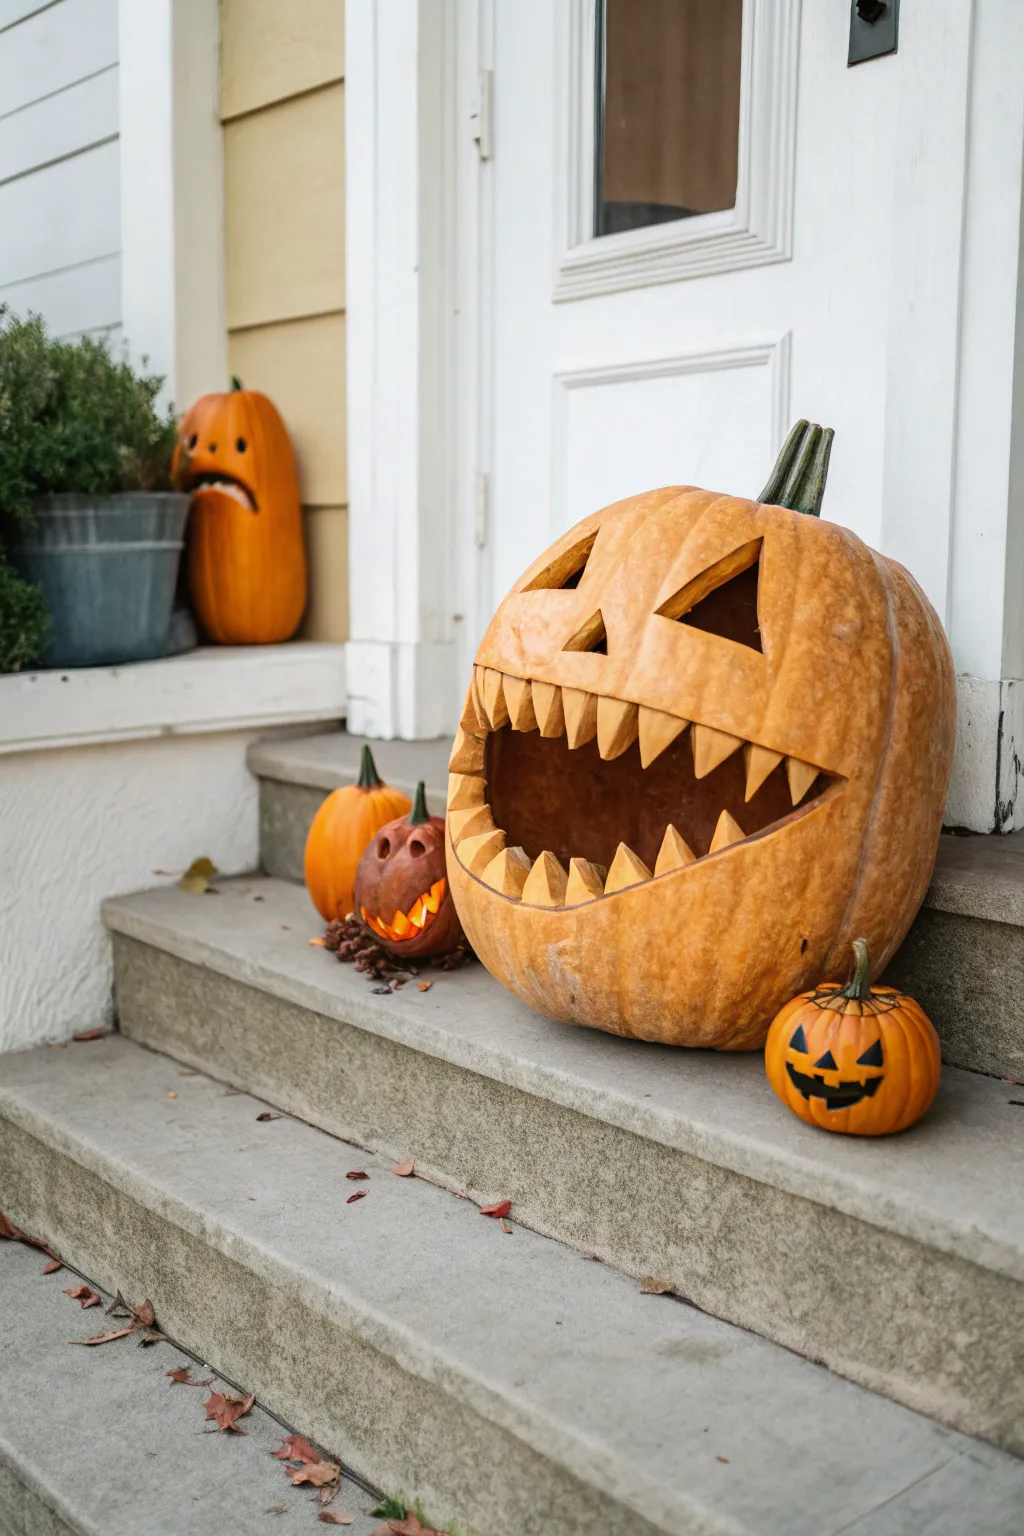

Transform your porch into a playful scene with this clever display featuring a massive jack-o’-lantern devouring its smaller kin. The main pumpkin boasts a wide, scary grin filled with jagged teeth, while smaller pumpkins sit nearby, one even sporting a nervous expression as it awaits its fate.
Step-by-Step
Materials
- One extra-large pumpkin (for the eater)
- One small pie pumpkin (for the snack)
- One medium pumpkin (for the background friend)
- Small decorative gourds or mini pumpkins
- Carving kit (large serrated saw, small detail saw, scoop)
- Linoleum cutter or clay loop tool (for etching)
- Dry erase marker or grease pencil
- Petroleum jelly or vegetable oil
- Battery-operated LED lights or candles
Step 1: Preparing the Giant
-
Select the perfect pumpkin:
Choose the largest pumpkin you can find that sits upright steadily. Look for a surface area that is relatively smooth and flat on one side to accommodate the large mouth design. -
Clean and gut:
Cut a lid around the stem at an inward angle so it doesn’t fall through later. Remove the top and thoroughly scoop out all seeds and stringy pulp, scraping the inner walls until they are clean and about an inch thick. -
Draft the face:
Using a dry erase marker, sketch the face directly onto the pumpkin’s surface. Draw two large, triangular eyes set high up. Below them, sketch an extremely wide, exaggerated mouth that stretches across the entire width of the pumpkin.
Keep It Fresh
Soak your carved pumpkins in a bath of cold water with a splash of bleach for an hour before display. This kills bacteria and keeps them firm for days.
Step 2: Carving the Features
-
Outline the teeth:
Inside the wide mouth shape you drew, sketch a row of sharp, triangular teeth along the top and bottom jawlines. Ensure the gap between the jaws is large enough to fit your smaller pumpkin later. -
Cut the main opening:
Use a large serrated saw to cut out the main opening of the mouth, carefully working around the outline of the teeth. Remove the large chunk of pumpkin flesh from the mouth area, leaving the teeth attached to the rind. -
Refine the teeth:
Switch to a smaller detail saw to clean up the edges of the teeth. You want them to look sharp and jagged. I prefer to undercut them slightly from behind to make them look more three-dimensional. -
Etch the eyes:
Instead of cutting the eyes all the way through, use a linoleum cutter or clay loop tool to shave off just the top layer of orange skin. This creates a translucent effect that glows softly when lit.
Step 3: Creating the Victims
-
Prepare the snack:
Take your small pie pumpkin and clean it out just like the large one, though you can leave the bottom intact and cut the opening from the top. -
Carve the frightened face:
On the small pumpkin, carve a simple distressed face—widened circular eyes and a small, O-shaped mouth work perfectly to convey shock. -
Detail the background friend:
For the medium pumpkin sitting nearby (the tall one in the back), carve a sad or worried expression with a downturned mouth, adding to the storytelling of the scene.
Gore Factor
Scatter the gutted pumpkin seeds and pulp coming out of the large pumpkin’s mouth around the smaller pumpkin for a messy, ‘active eating’ effect.
Step 4: Assembly and Display
-
Preserve the cuts:
Rub a thin layer of petroleum jelly or vegetable oil over all cut edges. This helps lock in moisture and delays shriveling so your masterpiece lasts longer. -
Position the meal:
Place the large pumpkin in its final spot on your steps. Insert the small, shocked pumpkin into the large mouth opening. You may need to wedge a small piece of scrap pumpkin underneath inside the mouth to angle the small one perfectly outward. -
Arrange the scene:
Place the worried medium pumpkin behind or to the side of the main eater. Scatter a few tiny gourds or pinecones around the base for texture. -
Light it up:
Place lights inside all the carved pumpkins. Since the ‘eater’ has a huge open mouth, ensure its light is pushed back far enough so it isn’t directly visible, creating a glow from within.
Step back and enjoy the amusingly grim story you’ve created on your front porch
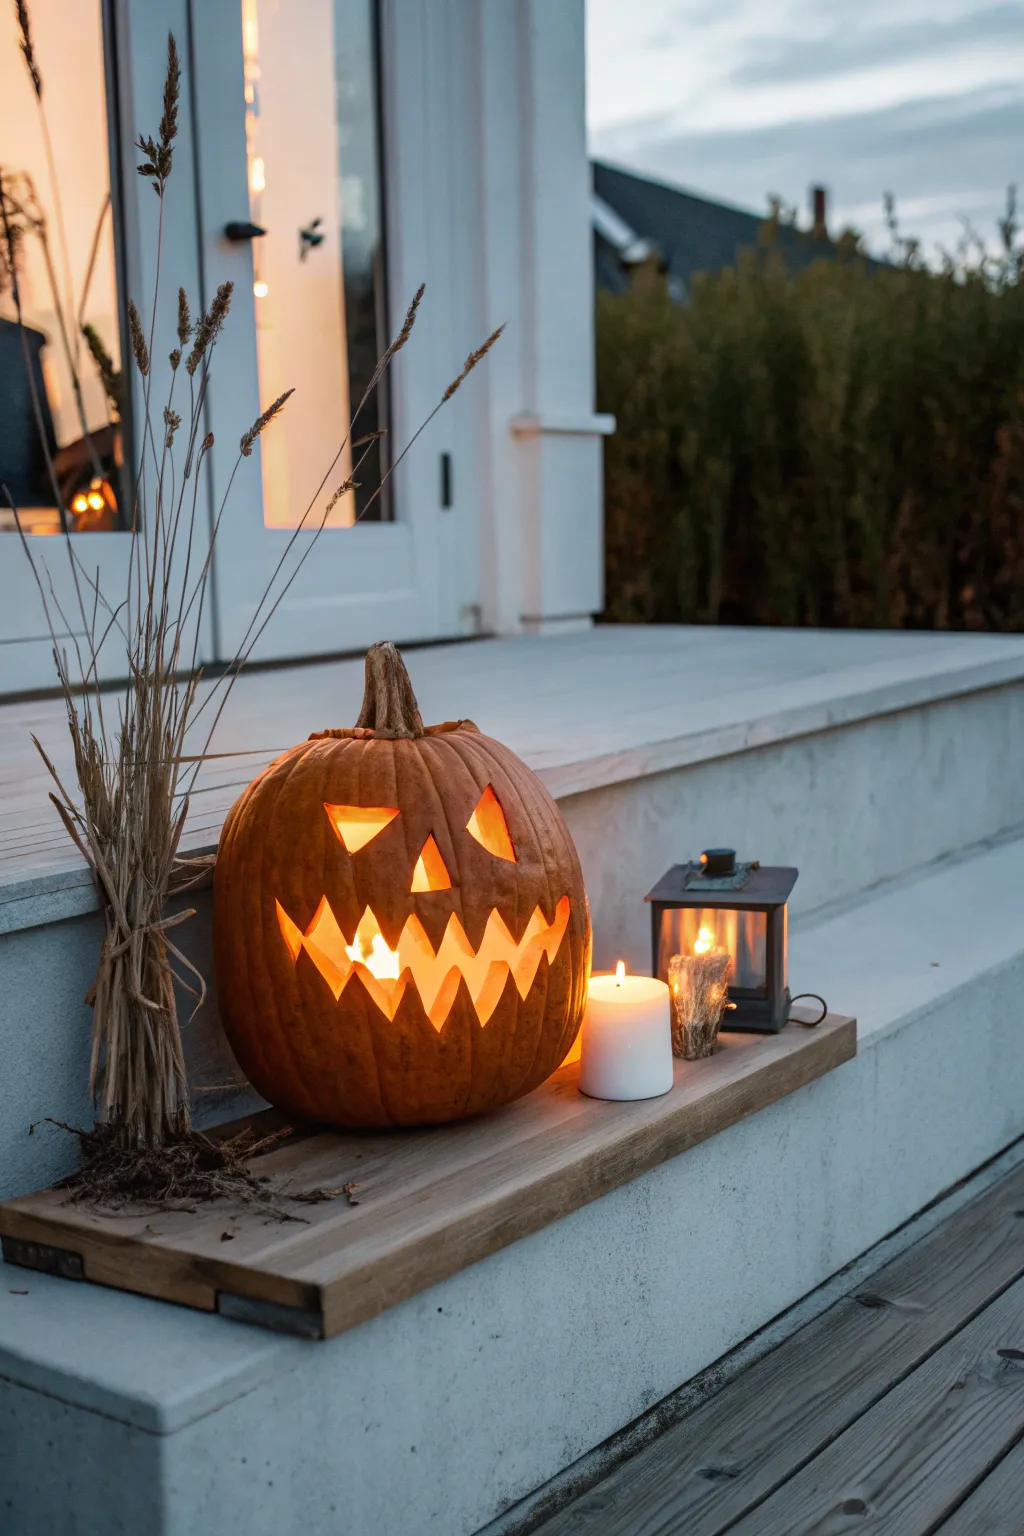
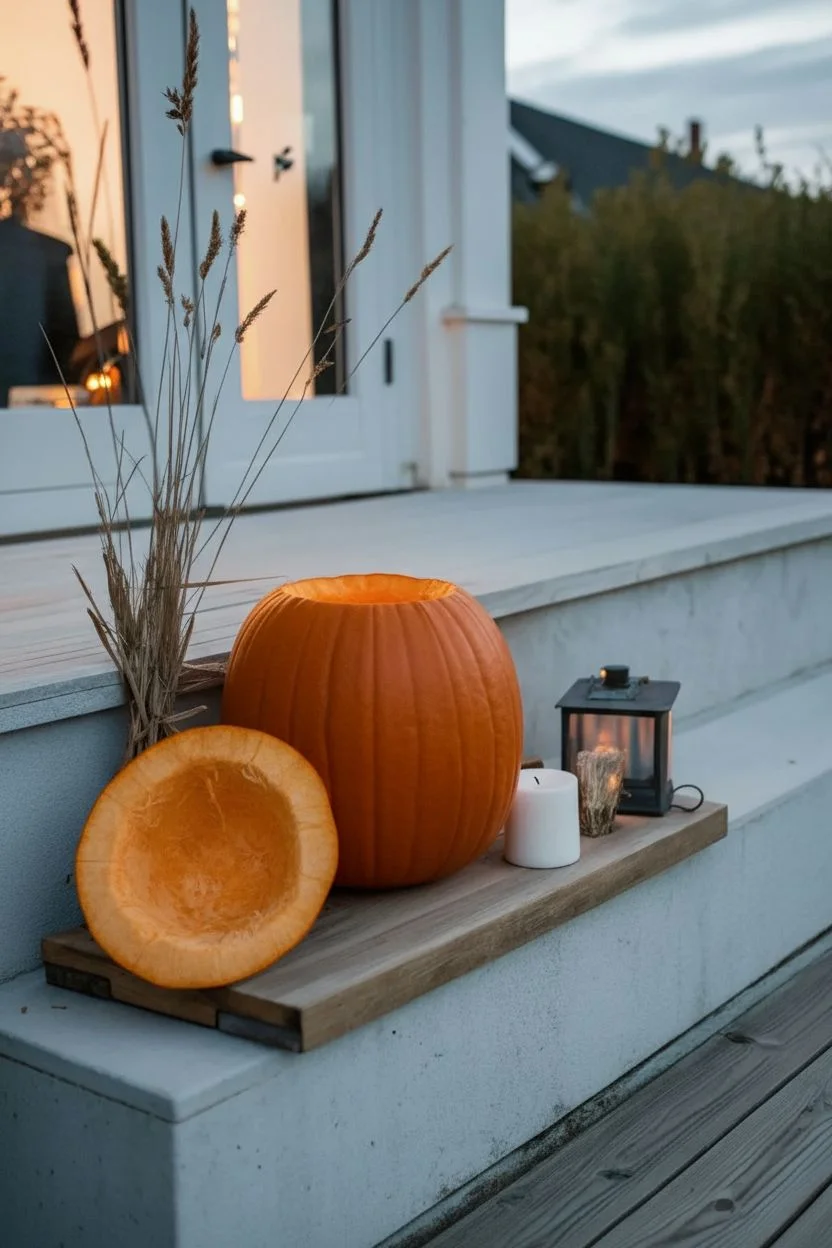
Glow-in-the-Dark Lightning Face

Create a timeless Halloween centerpiece with this classic lightning-grin pumpkin project. The sharp, angular features and warm inner glow invoke the quintessential spooky spirit, perfect for lighting up a porch or window.
How-To Guide
Materials
- Medium to large orange pumpkin
- Serrated pumpkin carving knife or saw
- Large metal spoon or pumpkin scraper
- Water-soluble marker or grease pencil
- Bowl for seeds/pulp
- Paper towels
- Tea light candle or LED votive
- Long-reach lighter (if using real flame)
- Newspaper or drop cloth
Step 1: Preparation & Gutting
-
Workspace Setup:
Begin by laying down newspaper or a drop cloth on a sturdy table to catch the mess. Pumpkins are naturally slippery, so I find placing a damp towel underneath helps keep it stable. -
Clean surface:
Wipe the exterior of the pumpkin with a damp paper towel to remove any dirt or field dust, ensuring a clean surface for drawing. -
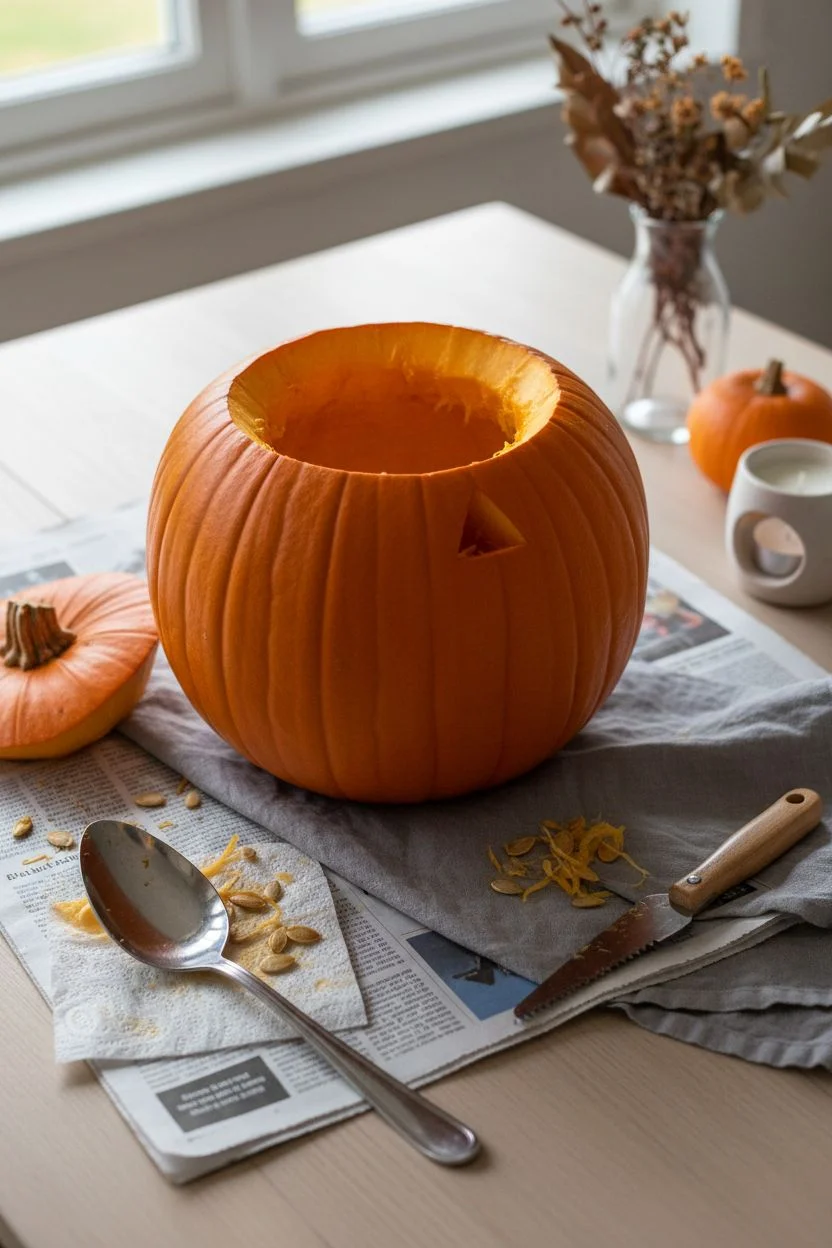
Planning the lid:
Draw a circle around the stem for the lid. Make sure it’s wide enough for your hand to fit through comfortably. -
Adding a notch:
Include a small triangular notch in your lid circle drawing. This acts as a key so you always know exactly how to fit the lid back on later. -
Cutting the lid:
Using a serrated knife, cut along your line. Angle the knife inward toward the center of the pumpkin to create a shelf that prevents the lid from falling inside. -
removing the seeds:
Pull the top off and use your hands to pull out the large clumps of stringy seeds. Place these in your discard bowl. -
Scraping the walls:
Take your metal spoon or scraper and thin out the inner walls. Scrape until the inside is smooth and the wall thickness is roughly one inch thick, which makes carving easier.
Rot Prevention
To keep your pumpkin fresh longer, rub exposed cut edges with petroleum jelly or spray the inside with a diluted bleach solution daily.
Step 2: Designing the Face
-
Drafting the eyes:
Using a water-soluble marker, draw two large, equilateral triangles for the eyes about a third of the way down the pumpkin face. -
Adding the nose:
Draw a smaller triangle centered below the eyes for the nose. Orientation can vary, but pointing it upward gives a classic look. -
Sketching the mouth:
Sketch a wide grin. Instead of a smooth curve, draw a jagged, lightning-bolt style line for the upper lip, followed by a mirrored jagged line for the bottom lip. -
Reviewing the design:
Step back and look at the face. Wipe away and redraw any lines if the proportions feel off before you start cutting.
Step 3: Carving & Finishing
-
Carving the eyes:
Insert your serrated saw perpendicular to the pumpkin skin. Use a gentle up-and-down sawing motion to cut out the triangle eyes first. -
Popping out pieces:
Once a shape is fully cut, push the piece gently from the inside out to pop it free without tearing the skin. -
Carving the nose:
Carefully saw out the small nose triangle. Go slow here, as smaller detailed areas can be more fragile. -
Tackling the mouth:
Start at the center of the mouth and work outward toward the corners. Sawing the jagged teeth requires patience; turn the blade slightly at the sharp corners rather than forcing it. -
Cleaning edges:
After all pieces are removed, use a small knife to trim away any dangling pumpkin strings or rough edges inside the cutouts for a cleaner silhouette. -
Cleanup:
Wipe off any remaining marker lines with a damp cloth. -
Lighting it up:
Place your tea light or LED candle inside the center of the pumpkin base. -
Venting (Optional):
If using a real candle, check if the lid gets blackened. If so, carve a tiny chimney hole in the back of the lid to let heat escape.
Eerie Atmosphere
Sprinkle a dash of cinnamon or pumpkin spice inside the lid. When the candle warms it up, your porch will smell amazing.
Place your masterpiece on the doorstep and enjoy the warm, spooky glow.


Have a question or want to share your own experience? I'd love to hear from you in the comments below!