Cacti are basically the perfect drawing subject: simple shapes you can sketch fast, but with enough texture and personality to keep you hooked. Here are my favorite cactus drawing ideas, starting with the classic, easy wins and building up to the more playful, “how did you think of that?” styles.
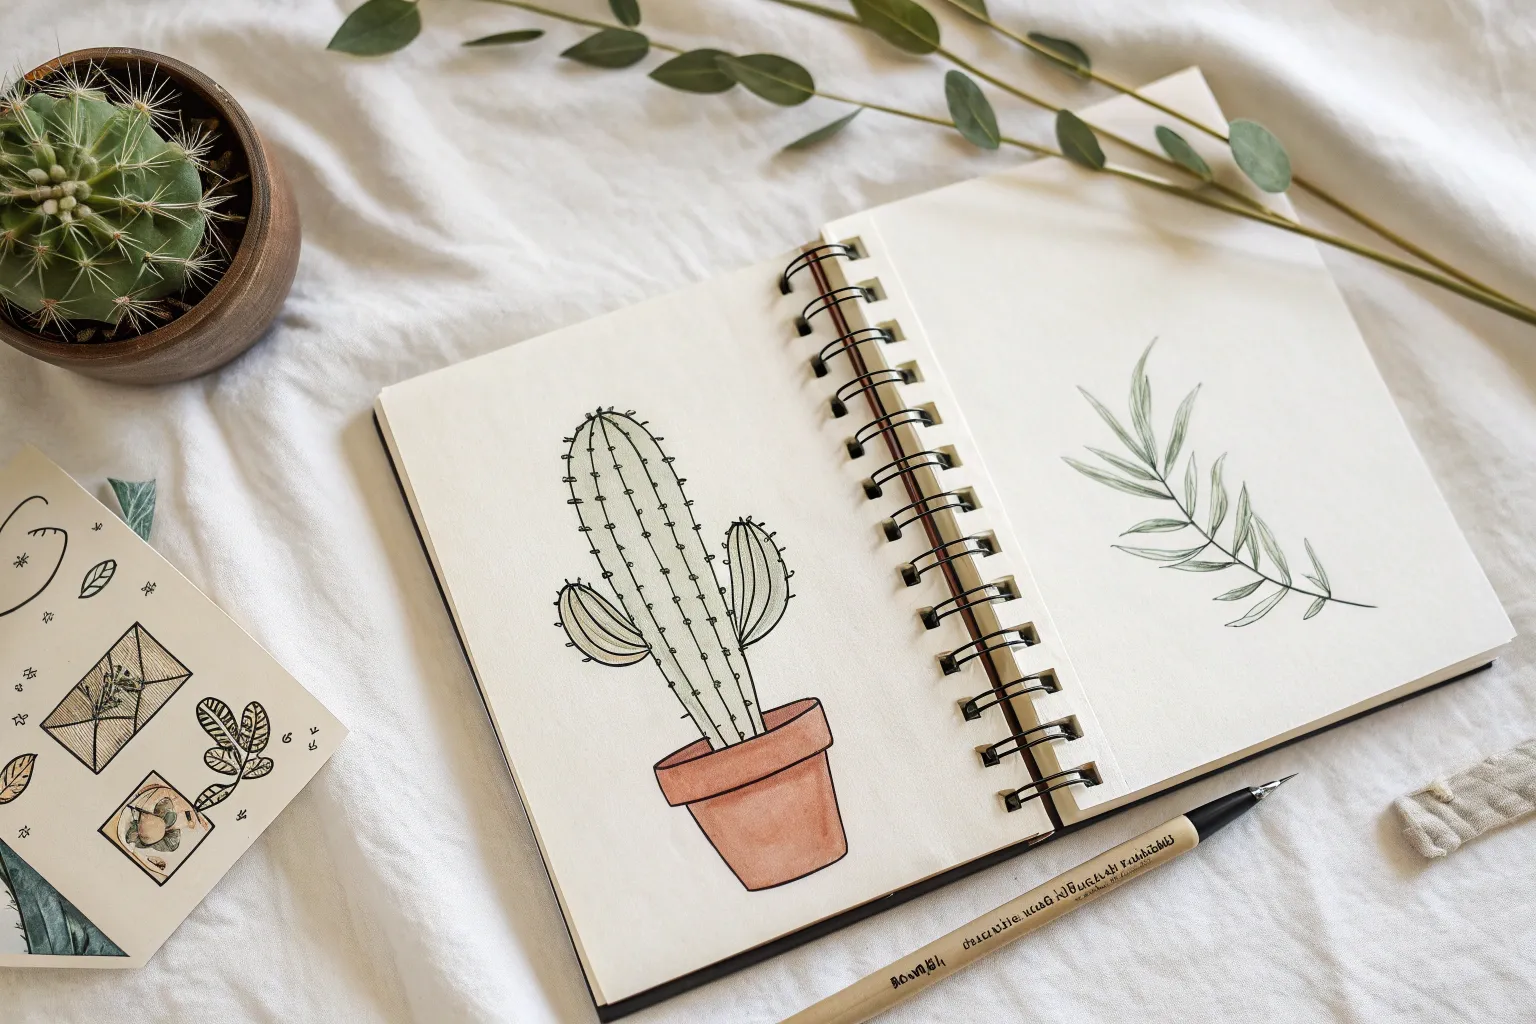
Simple Potted Cactus Doodle
This charmingly simple cactus illustration relies on clean lines and negative space to create a modern, minimalist aesthetic. It’s a perfect beginner project that captures the character of a desert plant without needing complex shading or color.
Step-by-Step
Materials
- Textured off-white cardstock or watercolor paper
- Fine-point black drawing pen (size 03 or 05)
- Pencil (HB or H)
- Soft eraser
- Ruler (optional)
Step 1: Sketching the Guidelines
-
Outline the pot shape:
Start near the bottom of your paper by lightly sketching a slightly curved horizontal line for the rim’s top edge. Draw a parallel curved line just below it to create the thickness of the rim. -
Form the pot’s body:
From the bottom of your rim shape, draw two lines angling slightly inward as they go down. Connect them at the bottom with a curve that matches the curve of the rim. -
Define the main stem:
Draw the central cactus stem rising from the center of the pot. Make it a tall, elongated oval shape that is slightly wider at the top than naturally rounded at the very tip. -
Add side arms:
Sketch two smaller arms coming off the main stem. Place the left arm lower and the right arm slightly higher for asymmetry. Each should curve upward in a ‘U’ shape and connect smoothly to the main body. -
Position the flower:
At the very top of the central stem, sketch a small cluster of oval loops to represent a blooming flower.
Wobbly Lines?
If your lines shake, try drawing faster. Confident, quick strokes are often smoother than slow, hesitant ones. Use your whole arm, not just your wrist.
Step 2: Inking the Structure
-
Ink the pot outline:
Using your black drawing pen, trace over your pencil lines for the pot. Keep your hand steady to get a clean, continuous line. -
Add the rim detail:
Carefully close the shape of the pot’s rim. Inside the top opening, draw a small arc just inside the back edge to suggest the soil line or depth. -
Trace the cactus outline:
Go over the main stem and side arms with your pen. Don’t worry if the line isn’t perfectly smooth; a little organic wobble adds character to a succulent. -
Ink the flower:
Trace the flower petals at the top. You can add a tiny central petal peeking out from behind the front ones to give it dimension.
Pro Tip: Line Weight
Use a thicker pen (0.8) for the main outline and a thinner pen (0.1) for the interior spines and texture. This variation adds instant professional depth.
Step 3: Adding Texture and Detail
-
Draw vertical ribs:
Inside the main stem, draw three vertical lines that follow the curve of the plant’s shape. These represent the ribs of the cactus. Do the same for the side arms, adding one or two lines depending on width. -
Create the spines:
Along the outer edges of the cactus, draw short, sharp ticks sticking outward. Space them fairly evenly. -
Add interior spines:
I like to add small ticks along the internal rib lines as well. Draw these tiny dashes perpendicular to the vertical lines to look like prickly spines. -
Detail the ribs:
Add tiny dots or very short dashes in the blank spaces between the ribs to suggest texture without overwhelming the clean look. -
Final Cleanup:
Wait at least 5-10 minutes for the ink to dry completely to avoid smudging. Then, gently erase all visible pencil marks to reveal your crisp illustration.
Now you have a stylish piece of botanical art ready to frame or gift


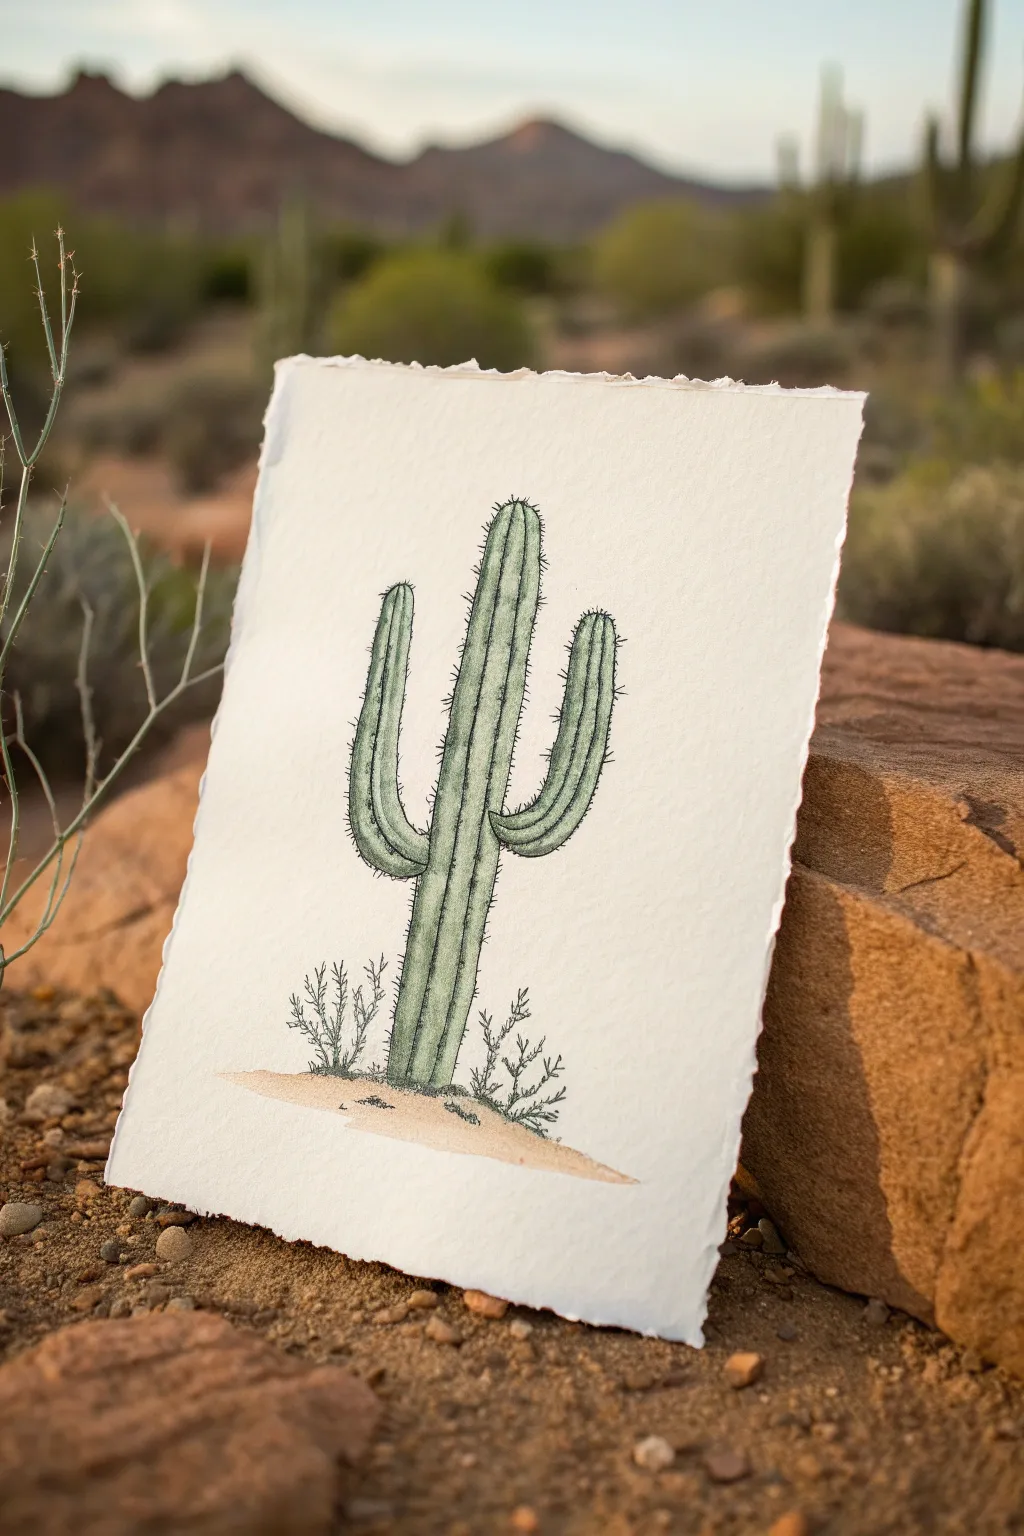
Classic Saguaro With Arms
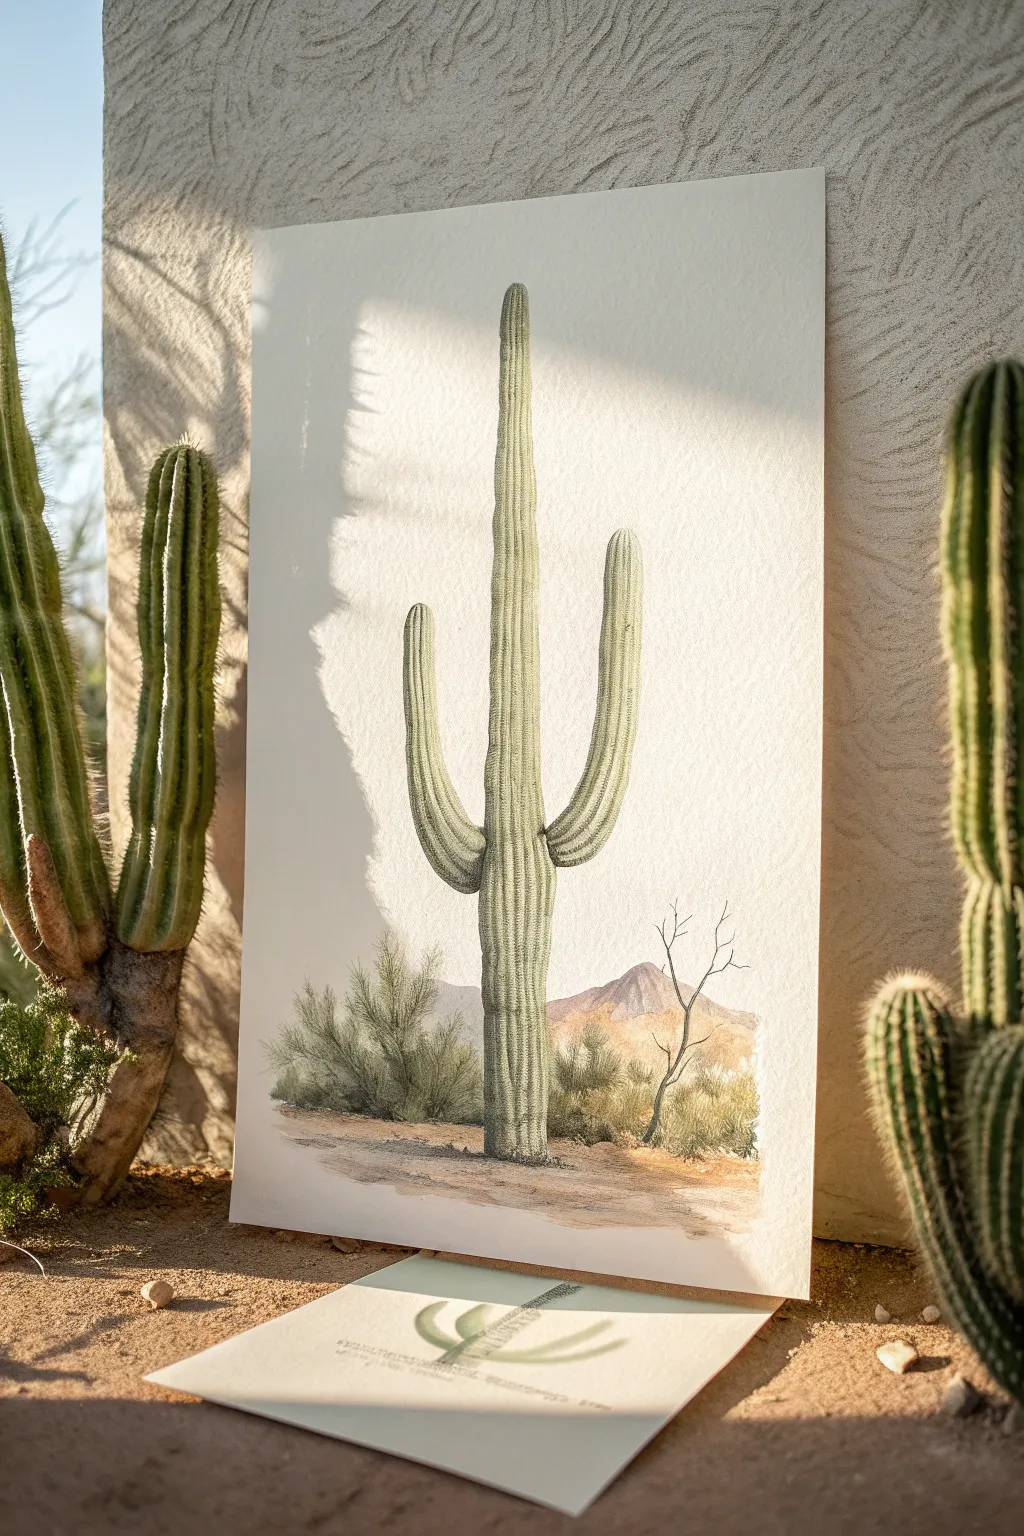
Capture the solemn beauty of the Sonoran desert with this detailed watercolor study of a Saguaro cactus. By combining precise line work with layered washes, you’ll create a striking botanical portrait that feels both realistic and artistic.
Detailed Instructions
Materials
- Hot press watercolor paper (300 gsm)
- HB pencil for sketching
- Fine liner or archival ink pen (0.1mm)
- Watercolor paints (Sap Green, Olive Green, Burnt Sienna, Yellow Ochre, Ultramarine Blue, Alizarin Crimson)
- Round brushes (sizing 2, 4, and 8)
- Mixing palette
- Jar of water
- Paper towels
Step 1: Drafting the Skeleton
-
Establish the dominant line:
Begin by lightly sketching a tall, vertical line slightly right of the center of your paper. This will be the main trunk of your Saguaro. Ensure it tapers very subtly at the top. -
Add the signature arms:
Draw the two prominent arms. Place the left arm lower on the trunk, curving sharply upward in a ‘U’ shape. Position the right arm higher up, branching out and curving upward more gently. They should feel balanced but not perfectly symmetrical. -
Outline the ribs:
Saguaros define themselves by their vertical ribs. Sketch vertical lines running the length of the trunk and arms. These lines should follow the form, curving slightly near the edges to suggest cylindrical volume. -
Sketch the horizon:
Lightly pencil in the background elements. Draw a low horizon line with a rugged mountain silhouette in the distance behind the cactus, and mark rough areas for the foreground scrub bushes.
Step 2: Painting the Saguaro
-
Base wash:
Mix a diluted wash of Sap Green with a touch of Yellow Ochre. Using your size 8 brush, apply this pale green to the entire cactus body. Keep it light; this is just the underpainting. -
Shadowing the ribs:
Once the base layer is dry, mix a darker Olive Green. With the size 4 brush, paint vertical stripes along the shadowed side of each rib line you engaged earlier. This creates the ‘accordion’ texture. -
Adding depth:
Deepen your green mixture with a tiny bit of Ultramarine Blue. Apply this to the right side of the main trunk and the undersides of the arms to establish a light source coming from the left. -
Defining the edges:
Use your smallest brush (size 2) and a concentrated mix of earthy green to sharpen the edges of the cactus and the deepest crevices between the ribs.
Muddy Greens?
If your cactus shadows look muddy, avoid using black to darken the green. Instead, mix red into your green paint. Being opposites on the color wheel, red deepens green naturally.
Step 3: The Landscape & Details
-
Mountain backdrop:
For the distant mountain, mix a watery wash of Burnt Sienna and Alizarin Crimson to get a dusty purple-brown. Paint the mountain shape, letting the color fade out near the bottom. -
Foreground scrub:
Use loose, stippling motions with your size 4 brush to create the bushes at the base. Use varying shades of dull green and brown to suggest texture without painting every leaf. -
Structural branches:
If you look closely at the reference, there’s a dead, leafless branch to the right. Paint this with a fine line of dark brown/black, keeping the lines jagged and thin. -
Grounding the scene:
Wash a mix of Yellow Ochre and Burnt Sienna horizontally across the bottom of the paper for the sandy soil. I like to let the colors bleed slightly into the bottom of the bushes for a natural look. -
Cast shadows:
Paint horizontal shadows stretching to the right of the cactus base and bushes using a cool grey-brown mix. This anchors the floating objects to the ground. -
Final texture:
Once everything is bone dry, you can use a very sharp colored pencil or the 0.1mm pen to selectively add tiny prickles along the outer edges of the cactus ribs.
Add Subtle Texture
Sprinkle a tiny pinch of table salt onto the wet paint of the sandy foreground. Let it dry completely, then brush it off to create a speckled, sandy texture perfect for the desert floor.
Frame your desert study in a simple wood frame to complement the earthy tones of your painting


Prickly Pear Paddle Stack
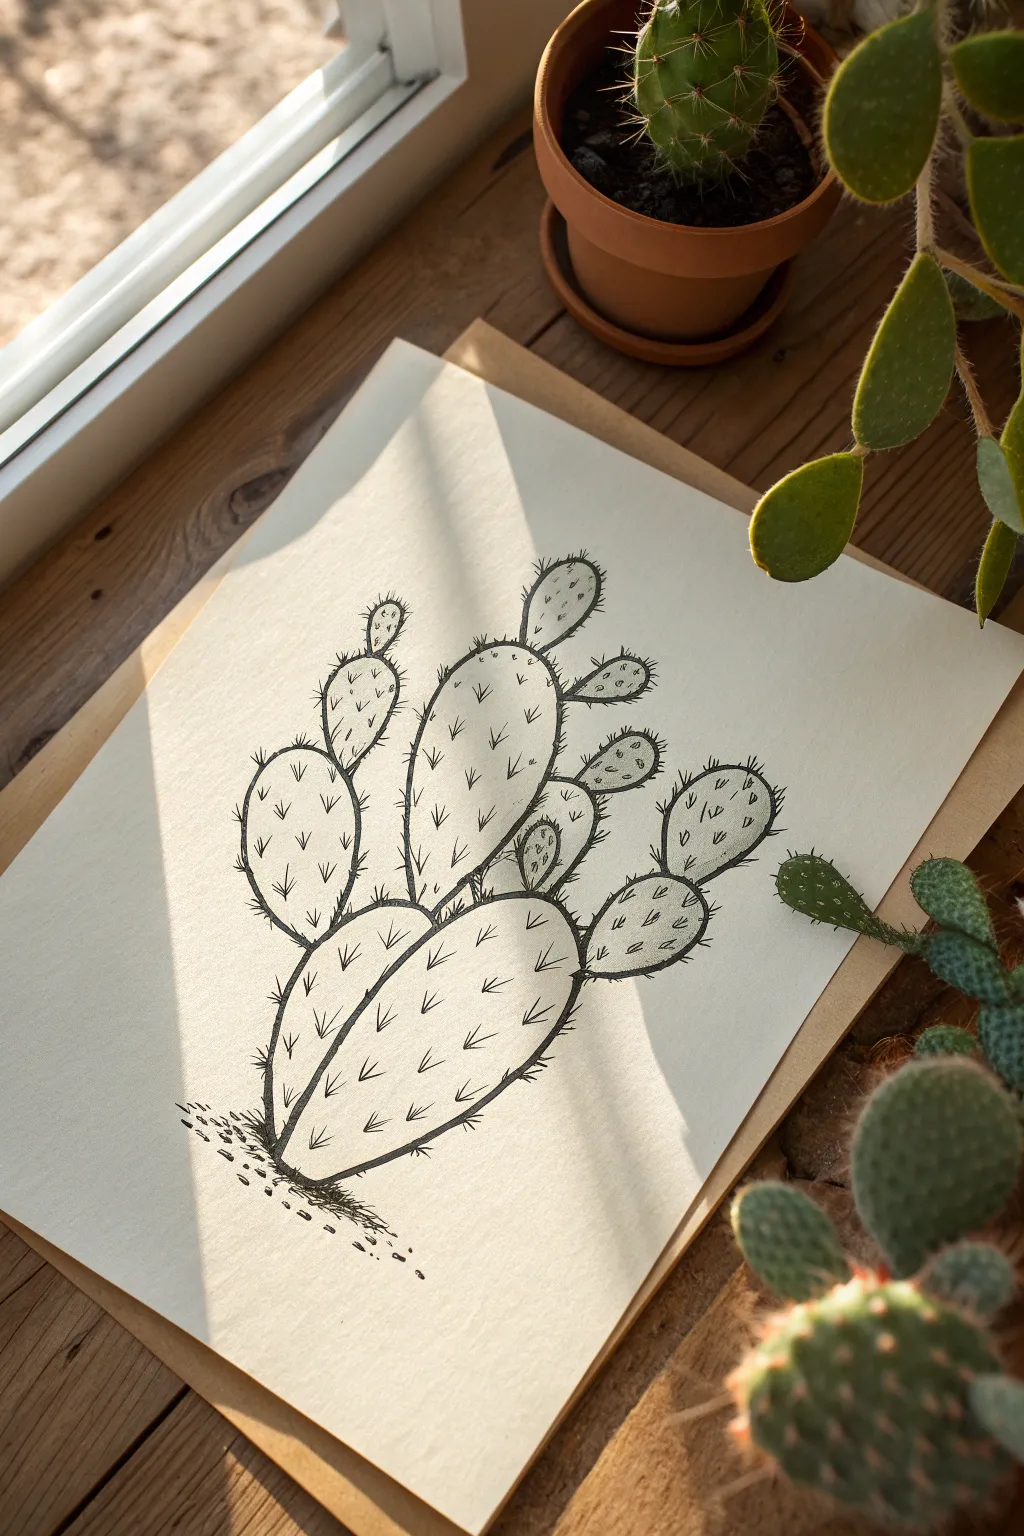
This charming ink drawing captures the organic, segmented growth of a prickly pear cactus with crisp lines and delicate details. Using simple fineliners on warm-toned paper, you’ll build a towering stack of paddle shapes filled with character and texture.
Step-by-Step
Materials
- Cream or off-white drawing paper (smooth bristol or mixed media)
- Pencil (HB or H)
- Kneaded eraser
- Black fineliner pen (0.5mm for outlines)
- Black fineliner pen (0.1mm or 0.2mm for details)
- Ruler (optional, for placement)
Step 1: Drafting the Structure
-
Anchor the base:
Start lightly with your pencil. Near the bottom center of your page, draw two large, overlapping paddle shapes (ovals that are slightly narrower at the bottom) leaning away from each other like a ‘V’. These form the heavy base of your cactus plant. -
Stack the middle tier:
Add a central, tall paddle growing directly out of the crevice between the bottom two. It should be the largest segment. Then, add a medium-sized paddle curving off the left base paddle. -
Add upper growth:
Continue building upwards. Sketch smaller paddles sprouting from the tops and sides of the existing ones. Vary the angles—have some tilt left and others right to mimic natural, unbalanced growth. -
Include tiny buds:
Finally, draw very small, circular or tear-drop shaped buds on the very tips of the highest paddles. This variation in size creates a sense of scale and new growth. -
Refine the contour:
Go back over your pencil ovals and give them slightly irregular edges. Real cactus pads aren’t perfect geometrical shapes; slight wobbles make them look organic.
Step 2: Inking outlines and Spines
-
Ink the main outlines:
Switch to your 0.5mm fineliner. Trace the perimeter of each paddle. Where one paddle attaches to another, don’t close the shape fully—leave the connection point open or use a slight curve to show they represent fused plant matter. -
Add the edge texture:
Using a thinner 0.1mm or 0.2mm pen, add tiny, hair-like strokes perpendicular to the outline. Group them in little clusters of 3-5 lines along the outer curves of the paddles. This mimics the fuzzy glochids found on prickly pears. -
Place spine clusters:
Inside the paddles, map out where the spines will go. Imagine invisible diagonal grid lines wrapping around the rounded form. Mark small dots or tiny ‘v’ shapes to establish the pattern. -
Draw the main spines:
With the finer pen, draw the spines. Create small ‘V’ or bird-foot shapes (three lines converging). Keep the lines quick and sharp, not sluggish. -
Adjust spine perspective:
Pay attention to direction. Near the center of a paddle, spines should face forward (looking like a star or dot). As you move to the edges, flattened the ‘V’ shapes so they look like they are wrapping around the side.
Wobbly Lines?
Don’t stress if your outlines aren’t perfectly smooth. A shaky hand actually adds organic realism to cactus pads. Embrace the imperfections as natural texture.
Step 3: Finishing Touches
-
Ground the subject:
Beneath the bottom-most paddles, use stippling (lots of small dots) and short, horizontal scratches to create a patch of dirt. This nests the drawing so it doesn’t feel like it is floating in white space. -
Let the ink set:
Wait at least 5-10 minutes to ensure the ink is completely dry. The thicker outlines can stay wet longer than you expect. -
Erase guidelines:
Gently gently rub your kneaded eraser over the entire drawing to lift the graphite pencil lines, leaving only the crisp black ink. -
Review and refine:
Step back and look at the balance. If a paddle looks too empty, add a few more small spine clusters. I usually find that adding a few extra dots near the base of the spines adds nice depth.
Pro Tip: Volume Trick
Make spine clusters smaller and closer together near the edges of the paddles. This visual compression tricks the eye into seeing a rounded, 3D form.
Frame your new botanical illustration or gift it to a plant-loving friend for a handmade touch


Round Barrel Cactus Study
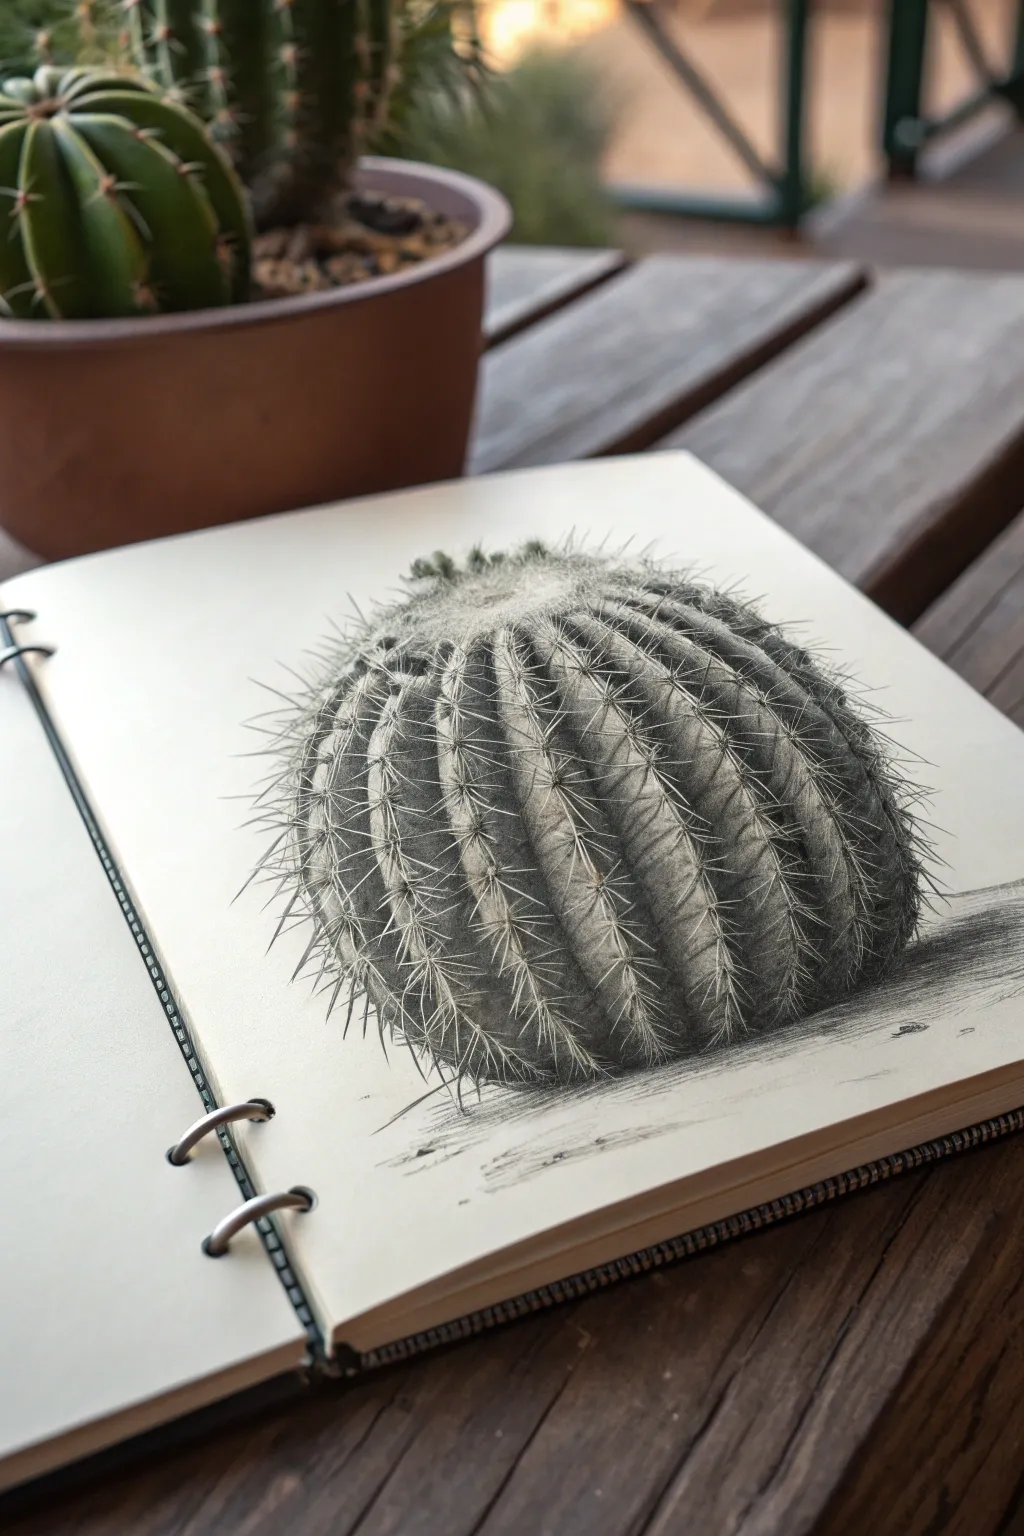
This project focuses on capturing the impressive spherical geometry and intricate spine patterns of a barrel cactus using graphite pencils. The result is a highly realistic, dimensional sketch that emphasizes texture and dramatic lighting.
Step-by-Step Guide
Materials
- High-quality sketchbook paper (smooth or vellum finish)
- Graphite pencils (H, HB, 2B, 4B, 6B)
- Mechanical pencil (0.5mm HB for fine details)
- Kneaded eraser
- Blending stump or tortillon
- Pencil sharpener
Step 1: Establishing Form and Structure
-
Outline the basic sphere:
Begin with your H pencil, sketching a light, imperfect circle. It doesn’t need to be geometrically perfect; a slightly flattened sphere often looks more organic. -
Map the center point:
Mark a small, slightly off-center point near the top of your circle. This will act as the growth center where all the ribs will converge, giving the cactus its perspective. -
Draw the main ribs:
Draw curved lines radiating from that top center point down to the bottom edge, like longitude lines on a globe. Keep the spacing consistent but vary the width slightly to show perspective as the sphere curves away. -
Refine the rib shapes:
Transform those guide lines into 3D ridges. Sketch a jagged, sawtooth-like edge along each rib line to represent the areoles (the bumps where spines grow).
Pro Tip: Negative Space
For realistic white spines against dark shadows, don’t draw the spine! Instead, shade the dark area *around* the spine shape, leaving the paper white. It’s much brighter than erasing later.
Step 2: Adding Tone and Volume
-
Establish the light source:
Decide on a light source; in this study, the light comes from the left. This means the right side of the cactus will be in deep shadow. -
Shade the deep crevices:
Using an HB or 2B pencil, darken the valleys between the ribs. These shadows should be darkest at the bottom of the ‘V’ shape where the ribs meet. -
Create cylindrical volume:
Buld the form of individual ribs by shading the side facing away from the light. Keep the side facing the light (the left edge of each rib) bright or white. -
Deepen the shadows:
Switch to your 4B pencil to push the contrast on the shadowed side of the entire sphere. Create a smooth gradient from the light left side to the dark right side using hatching techniques. -
Blend for smoothness:
Gently use a blending stump to soften your graphite shading on the ribs, but be careful not to smudge your crisp highlight edges.
Step 3: Detailing the Spines
-
Position the areoles:
Along the ridge of each rib, mark the specific spots where spine clusters will grow using small, dark ovals. -
Draw the central spines first:
With a sharp mechanical pencil, draw the prominent control spines sticking straight out. Press firmly at the base and flick the pencil outward to create a sharp, tapered tip. -
Add radial spines:
Draw the smaller spines that fan out from the center of each areole. Overlap these spines across the valleys between ribs to create depth and complexity. -
Highlight the spines:
This is crucial: most spines catch light. Use your kneaded eraser to lift tiny slivers of graphite off the sunlit side of the thicker spines, or draw around them initially to leave them white. -
Cast shadows from spines:
Use a 2B pencil to add tiny drop shadows where the spines cast a shadow onto the cactus body. This small detail separates the spine from the ‘skin’ visually.
Troubleshooting: Flatness
If your cactus looks flat, your mid-tones are likely too uniform. Erase a strong highlight on the sun-facing side and significantly darken the opposite edge to force the 3D spherical illusion.
Step 4: Final Touches
-
Enhance the focal point:
Darken the area right at the top center growth point with a 6B pencil, making it look recessed and dense with new growth. -
Ground the subject:
Sketch a horizontal cast shadow underneath and to the right of the cactus. The shadow should be darkest immediately touching the cactus and fade as it stretches out. -
Rough up the texture:
Add subtle stippling or tiny dashes on the lit side of the ribs to suggest the rough, waxy texture of the plant skin. -
Final contrast check:
Stand back and look at your drawing. I usually find I need to go back with my darkest 6B pencil one last time to deepen the darkest crevices for maximum pop.
Enjoy the satisfaction of seeing your simple sphere transform into a complex, prickly botanical study
BRUSH GUIDE
The Right Brush for Every Stroke
From clean lines to bold texture — master brush choice, stroke control, and essential techniques.
Explore the Full Guide
Step-by-Step Grid Cactus Breakdown
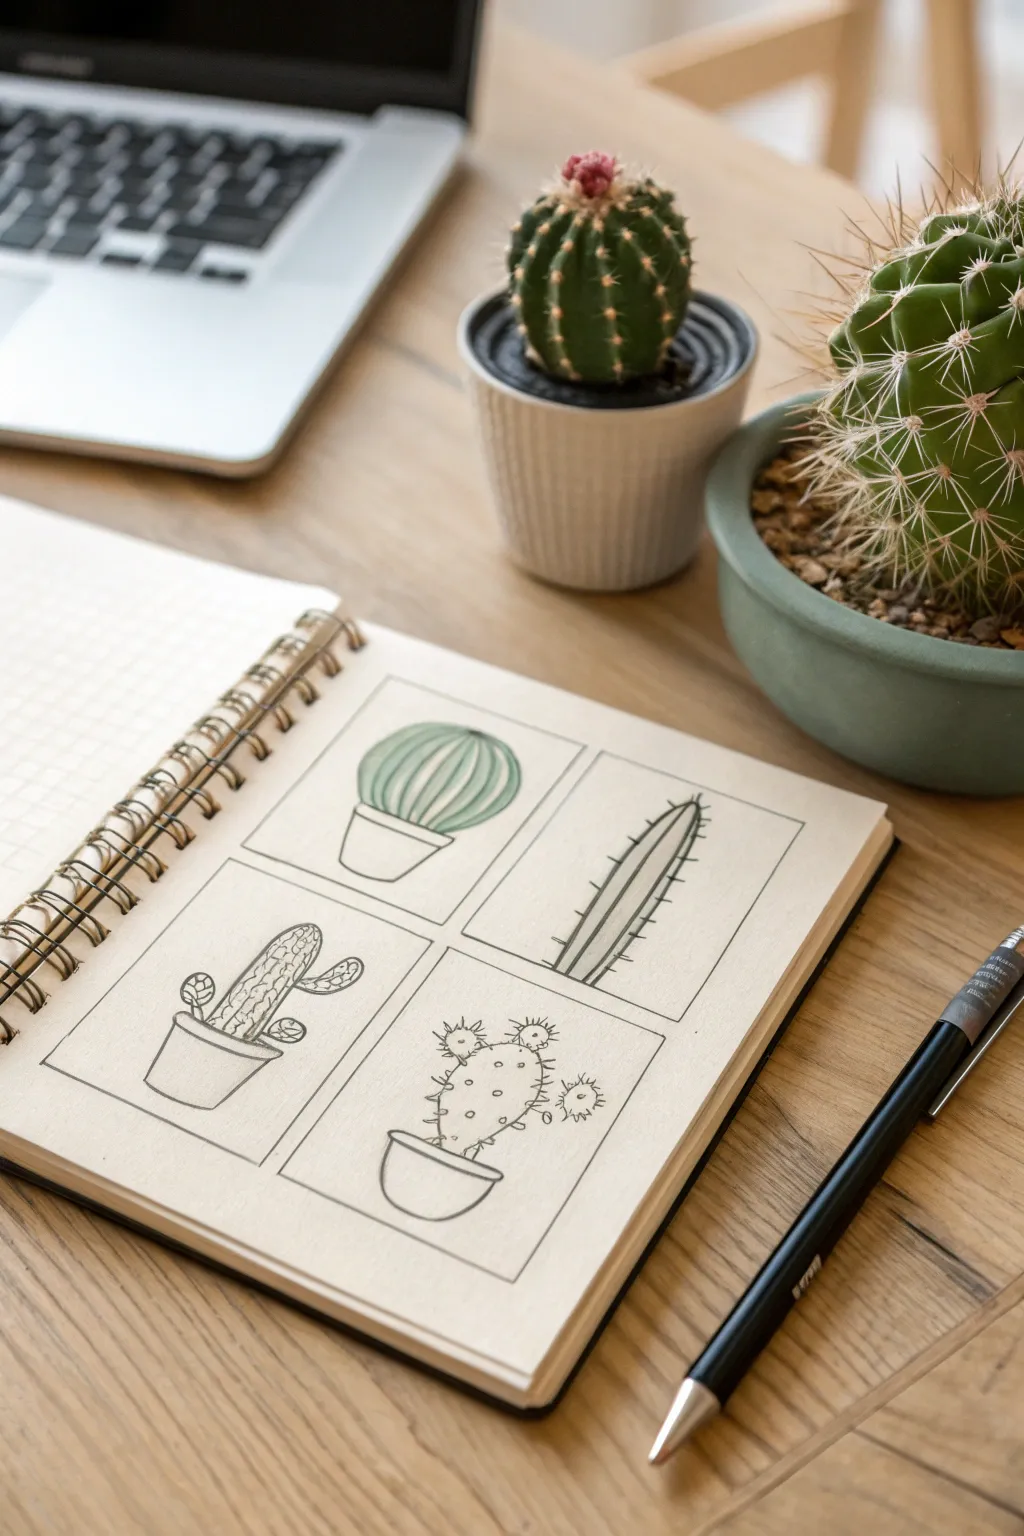
This sketchbook exercise divides your page into a neat grid to practice four distinct cactus shapes and textures in one sitting. It creates a clean, botanical-illustration layout that captures the charming variety of desert flora using simple line work.
Step-by-Step
Materials
- Spiral-bound sketchbook or drawing paper
- Ruler
- Pencil (HB or 2B)
- Black fine-liner pen (0.3mm to 0.5mm)
- Eraser
- Optional: Colored pencils or markers (green)
Step 1: Setting the Grid
-
Measure the Boundaries:
Start by lightly drawing a large square or rectangle in the center of your sketchbook page using a pencil and ruler. Leave a comfortable margin of white space around the edges. -
Create the Quadrants:
Find the center point of both the horizontal and vertical sides of your large box. Connect these midpoints to divide the large shape into four equal, smaller rectangular panels. -
Refine the Frames:
Go over your pencil grid with a fine-liner pen to create crisp borders. I like to use a ruler here to keep looking professional, but freehand lines can add a nice organic feel if you prefer.
Step 2: Top Left: The Ribbed Barrel
-
Base Pot:
Draw a simple pot shape at the bottom center of the first quadrant. Keep lines slightly curved at the top rim to suggest volume. -
Round Shape:
Sketch a large circle sitting immediately inside the pot rim. It should almost fill the frame but leave a little breathing room at the top. -
Vertical Ribs:
Draw curved lines running from the top center down to the bottom. These should follow the contour of the sphere, getting closer together near the edges to show the roundness. -
Subtle Shading:
If you wish, add very light green shading, keeping the center lighter for a highlight effect.
Ink Smudging?
If your fine-liner smears when erasing, switch to a harder lead (H) for sketching so lines are lighter and require less pressure to remove later.
Step 3: Top Right: The Tall Saguaro
-
Central Column:
In the second box, draw a tall, thin oscillating shape rising from the bottom edge. It should be slightly wider at the base and taper gently at the rounded top. -
Spine Texture:
Add vertical lines running up the length of the cactus. Along the outer edges, draw small horizontal ticks or tiny spikes to represent the needles.
Level Up: Watercolor Wash
Use watercolor pencils for the green tones. After coloring, lightly brush over them with water to create a soft, painted look inside the inked lines.
Step 4: Bottom Left: The Branching Cactus
-
Drawing the Base:
Sketch another small pot, slightly tapering downwards, in the lower third of the box. -
Main Stems:
Draw a central, finger-like stem rising from the pot. Add two smaller arms branching out from the sides—one lower and one higher. -
Detailing:
Fill the stems with a dense, scribbly texture or tiny vertical dashes to mimic a rougher, more chaotic surface texture compared to the smooth barrel cactus.
Step 5: Bottom Right: The Prickly Pear
-
Pot Foundation:
Draw your final pot shape, perhaps making this one slightly wider at the rim than the base like a bowl. -
Paddle Shapes:
Stack oval or teardrop shapes on top of each other. Start with one large paddle connecting to the pot, then attach smaller paddles to its top and sides. -
Needle Clusters:
Dot the surface of the paddles with small circles or points. From these points, draw tiny starburst lines to indicate clusters of sharp spines. -
Spiky Edges:
Add small spikes along the very top edges of the paddles to emphasize the prickly silhouette.
Step 6: Final Touches
-
Inking:
Trace over your pencil sketches with the fine-liner. Use confident strokes, and don’t worry about wobbles—cacti are naturally imperfect. -
Clean Up:
Wait at least five minutes for the ink to fully set, then gently erase all underlying pencil guidelines to leave a crisp, clean illustration.
You now have a delightful botanical study showcasing four unique desert personalities on a single page
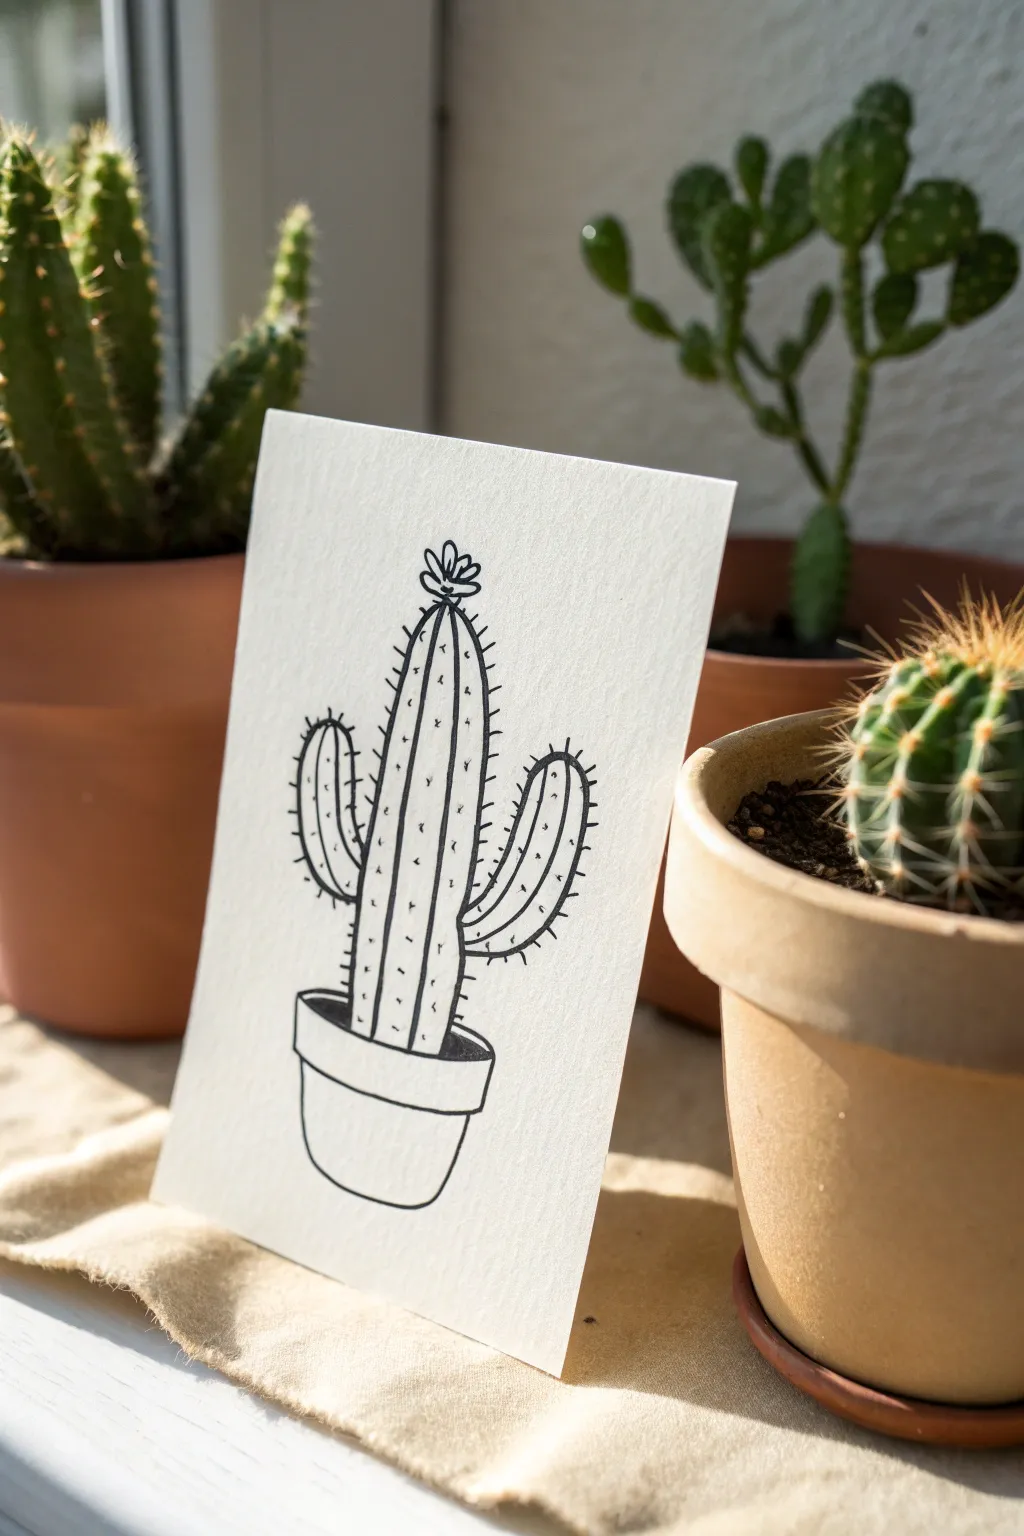
Four Styles of the Same Cactus
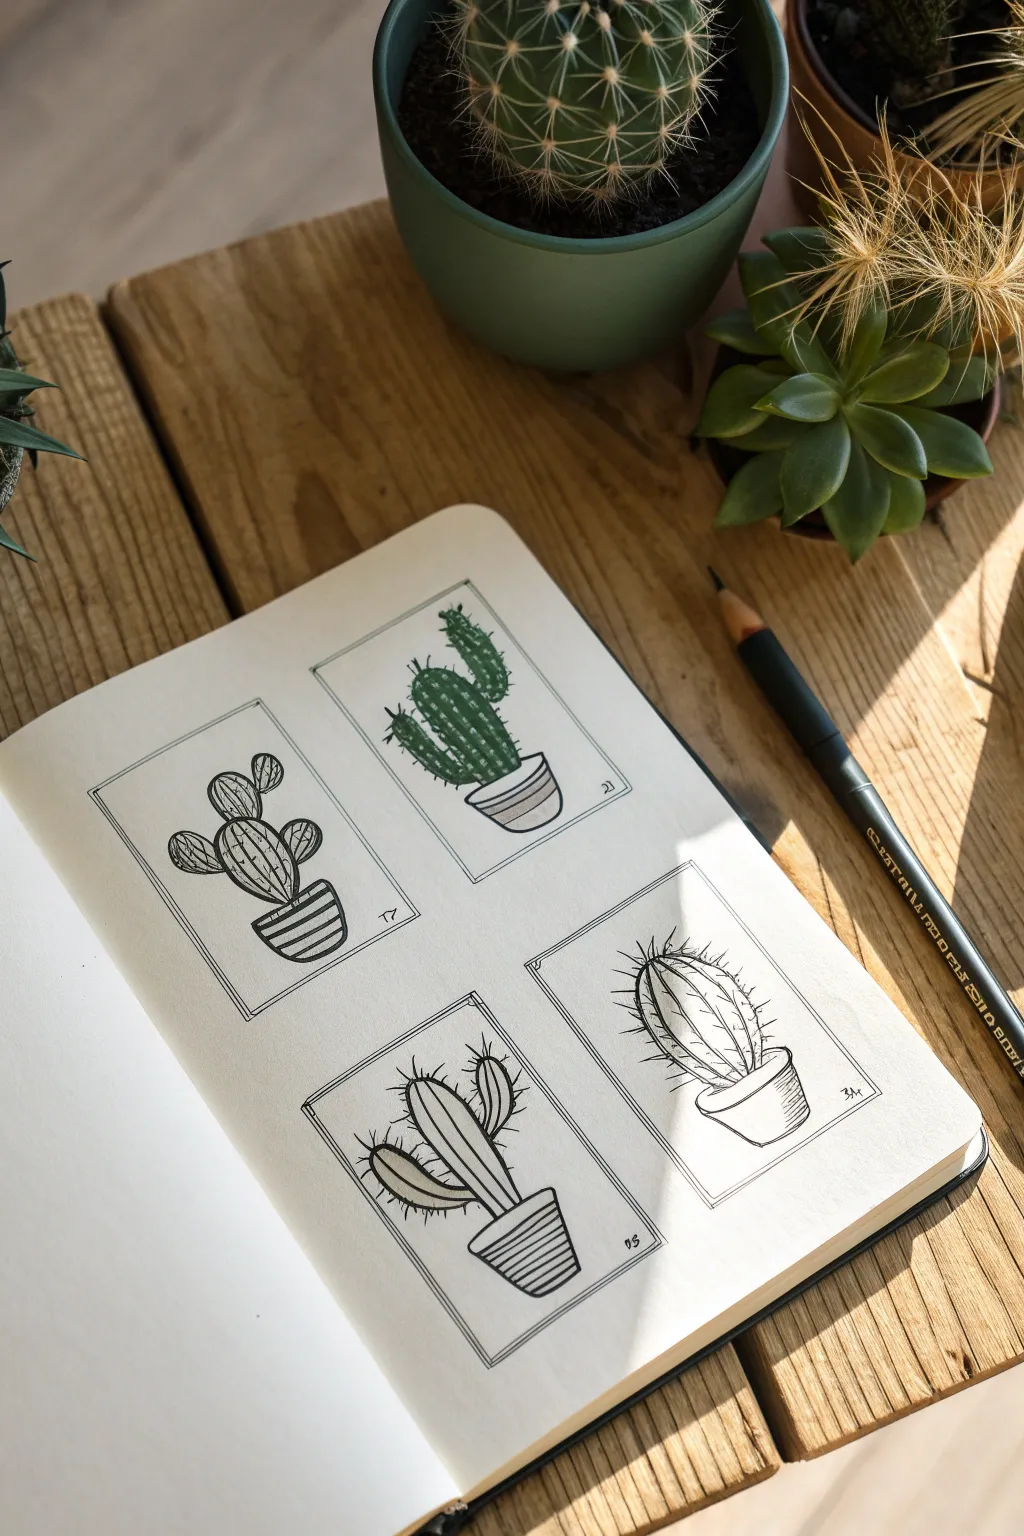
This charming sketchbook spread features four distinct cactus designs, each framed in its own tidy rectangle for a gallery-like effect. By mixing simple line work with bold textures and a pop of green, you’ll create a cohesive collection of botanical illustrations.
Step-by-Step Tutorial
Materials
- Sketchbook or drawing paper (heavyweight preferred)
- Pencil (HB or 2B)
- Fine liner pen (0.3mm or 0.5mm, black)
- Felt-tipped marker or colored pencil (dark green)
- Ruler or straight edge
- Eraser
Step 1: Setting the Scene
-
Create the frames:
Begin by using your ruler to draw four equal-sized rectangles on your page. Arrange them in a 2×2 grid, leaving a comfortable margin between each box. Keep your pencil pressure light so these lines can be inked later without smudging. -
Add inner details:
Create a subtle double-border effect by drawing a second, slightly smaller rectangle inside each of the main frames, just a millimeter or two from the edge. I find this small detail instantly makes the drawings look more professional.
Keep it Steady
When inking the long straight lines of the frames, don’t hesitate to use your ruler again with the pen. It keeps the gallery look crisp and intentional.
Step 2: The Rounded Bunny Ear
-
Sketch the outline:
In the top-left frame, draw a rounded cactus shape (resembling an Opuntia) with one main paddle and two smaller offshoots. Keep the shapes soft and circular. -
Draw the pot:
Anchor the cactus with a simple, rounded pot base. Add horizontal stripes to the pot for texture. -
Ink and texture:
Trace your outlines with the fine liner. Fill the cactus paddles with vertical curved lines to mimic the plant’s volume, leaving small gaps for highlights.
Mix Media
Try using watercolor for the green sections instead of marker. A light wash of distinctive greens can make that one colored frame pop even more.
Step 3: The Green Columnar
-
Outline the form:
In the top-right frame, sketch a taller, columnar cactus with three vertical sections of varying heights. -
Apply color:
Using your green marker or colored pencil, color in the cactus body. The application doesn’t need to be perfectly solid; a little sketchiness adds character. -
Add spikes:
Once the color is down, use your black pen to draw small ‘x’ or star shapes scattered across the green surface to represent spines. -
Finish the pot:
Draw a simple bowl-shaped pot at the bottom. Leave it uncolored, but add a simple rim detail.
Step 4: The Spiky Branch
-
Draft the structure:
Moving to the bottom-left frame, sketch a branching cactus style with longer, finger-like stems extending upward. -
Detail the ribs:
Draw vertical lines running up the center of each stem to show the ribbed structure of the plant. -
Add heavy spines:
Along the outer edges of the stems, draw prominent, slightly curved spikes pointing outward. Ink the pot with tight horizontal hatching.
Step 5: The Classic Barrel
-
Draw the globe:
In the final bottom-right frame, draw a single, large oval shape representing a barrel cactus. -
Create dimension:
Draw curved vertical lines from the top of the globe to the bottom, following the contour of the shape to create a sphere-like 3D effect. -
Add radial spines:
Draw long, needle-like spines sticking straight out from the sides of the cactus, extending past the main outline. -
Finalize ink work:
Go over all your frame borders with the black pen. Once the ink is totally dry, carefully erase all your pencil guide lines.
You now have a beautiful botanical study focusing on shape and texture variations

PENCIL GUIDE
Understanding Pencil Grades from H to B
From first sketch to finished drawing — learn pencil grades, line control, and shading techniques.
Explore the Full Guide
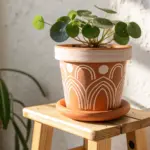
Tiny Cactus Icons for Margins
Transform plain paper into bespoke wrapping or liner paper with this charming, repeatable cactus pattern. The tiny, minimalist icons create a soothing rhythm perfect for journaling margins or custom stationery.
Detailed Instructions
Materials
- A roll of white craft paper or heavy drawing paper
- Fine liner pens (black, 0.3mm and 0.5mm)
- Alcohol-based markers or watercolors (sage green, forest green, terracotta, light beige)
- Pencil and eraser
- Ruler (optional for spacing guides)
Step 1: Setting the Grid
-
Prepare your surface:
Unroll a section of your paper on a flat, clean surface. Weigh down the corners so it doesn’t curl back up while you work. -
Lightly pencil a guide grid:
To keep the pattern consistent, use your pencil and ruler to mark faint horizontal lines about 2 inches apart down the length of the paper. You don’t need vertical lines; staggering the doodles by eye looks more organic. -
Test your layout:
On a scrap piece of paper, practice drawing 3 or 4 different cactus shapes to establish the size. Aim for icons about 1.5 inches tall so they remain ‘tiny’ and don’t overwhelm the page.
Step 2: Inking the Outlines
-
Start the first row:
Begin at the top left. Using the 0.3mm fine liner, draw your first cactus. A simple saguaro shape (tall body with two arms) is a classic starter. -
Add variety:
Move about 2 inches to the right and draw a different cactus, perhaps a round barrel cactus sitting low in a pot. Continue across the row, mixing up tall, round, and branching shapes. -
Stagger the second row:
Move to the next pencil guide line. Instead of drawing directly below the first cactus, shift your starting point to the right so this cactus sits in the gap between the two above it. -
Incorporate planters:
For every cactus, draw a simple pot base. Vary these too—some can be square buckets, others rounded bowls or classic tapered terracotta shapes. Don’t worry about perfection; wobbly lines add charm. -
Fill the gaps:
Continue this staggered brick-lay pattern down the sheet. If a space feels too empty, sketch a tiny pebble or a fallen flower to balance the negative space. -
Add details:
Go back over your drawings with the 0.1mm or 0.3mm pen to add texture. Draw small ‘v’ shapes for spines, vertical lines for ribs on the cactus body, or patterns on the pots.
Variation Pro-Tip
Rotate the orientation of just a few icons—like a fallen cactus or a sideways pot—to make the pattern feel more playful and less rigid.
Step 3: Adding Color
-
Select a limited palette:
Choose two shades of green (one muted sage, one deeper forest) and a terracotta orange for the pots. A limited palette keeps the busy pattern cohesive. -
Color the greenery:
Use your markers or watercolor brush to fill in the cactus bodies. I like to leave a tiny sliver of white space on one side of each cactus to act as a highlight, which gives them a bit of dimension. -
Paint the pots:
Fill the planters with the terracotta color. If you are using watercolors, keep the wash transparent so the black ink lines underneath remain crisp. -
Add accent colors:
If you drew any flowers on the cactus tips, dab a tiny bit of pink or yellow there. Use a beige or light grey for the pebbles scattered between the plants. -
Erase guides:
Once the ink and paint are completely dry—give it a good 20 minutes to be safe—gently erase the pencil guide lines from the first phase. -
Final touches:
Step back and look at the overall pattern. If any cactus feels too light, go back in with the darker green to add shadow lines on the side away from your light source.
Mistake Fix
If you smudge ink or dislike a specific doodle, turn it into a large rock or a patch of dense ground cover to hide the error seamlessly.
You now have a custom roll of desert-themed paper ready for your next creative project
Cute Cactus With Simple Face
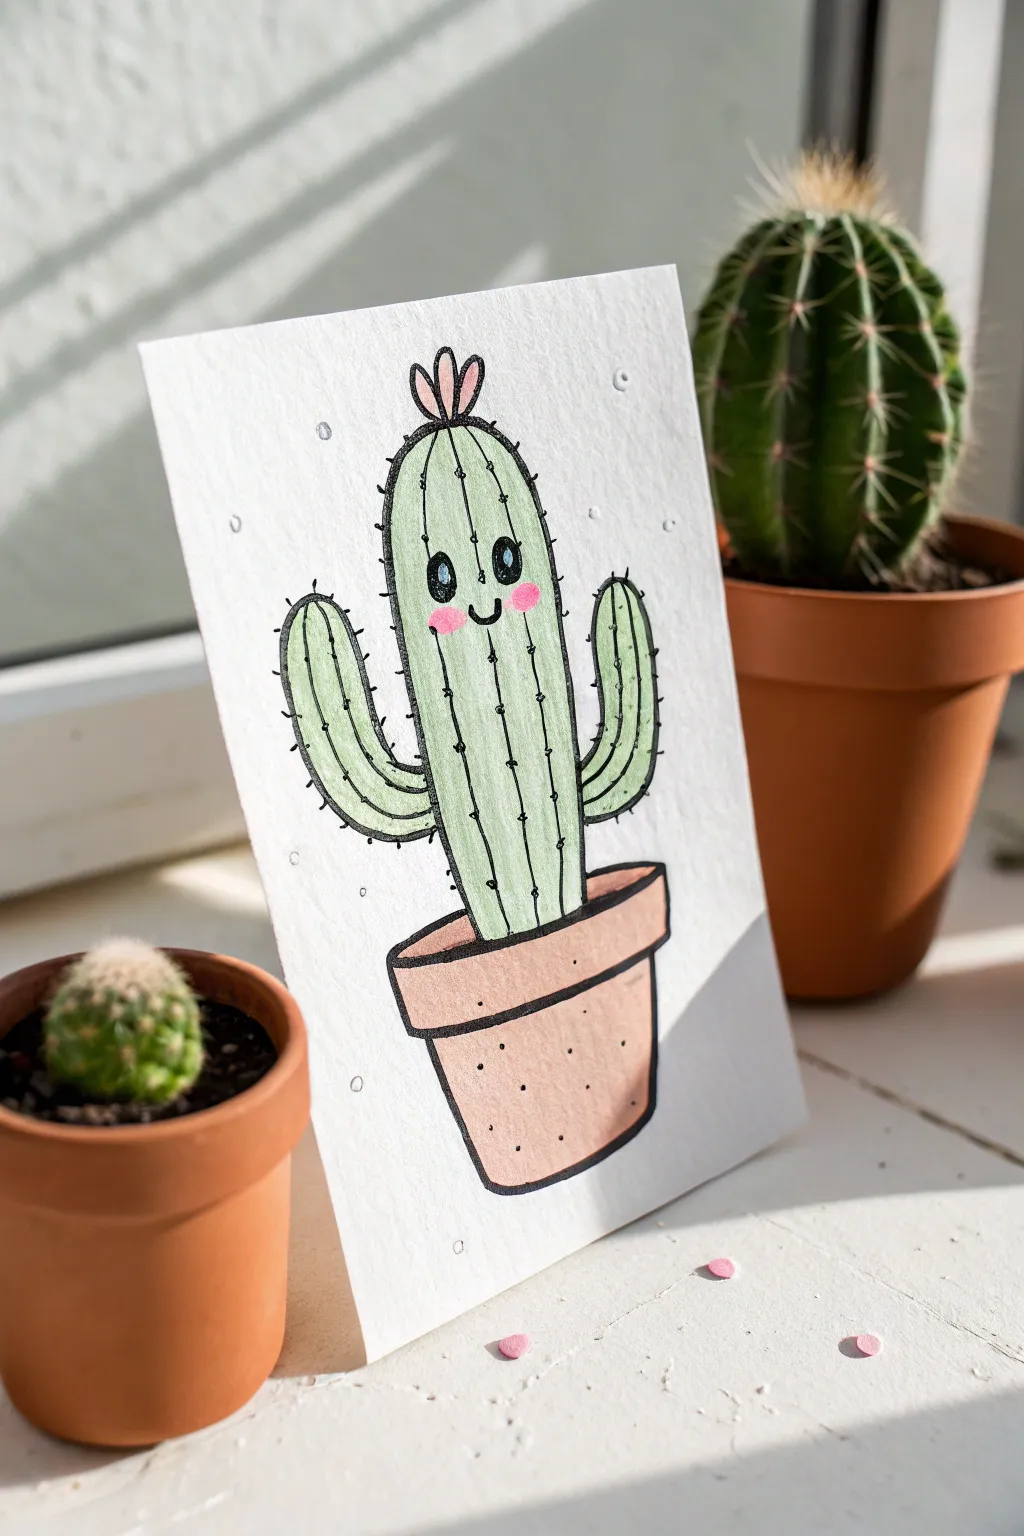
This cheerful little cactus illustration features soft colors and a clean illustrative style that adds a pop of joy to any surface. It combines simple shapes with expressive line work for a charming finished piece.
How-To Guide
Materials
- Cold press watercolor paper (A5 size)
- Black fineliner pens (0.3mm and 0.5mm)
- Watercolor paints or watercolor pencils (sage green, bright pink, terracotta)
- Small round paintbrush (size 2 or 4)
- Graphite pencil
- Eraser
- White gel pen
Step 1: Sketching the Shapes
-
Base sketch:
Start with a light pencil sketch. Draw a tall, rounded oval shape in the center of your paper for the main cactus body. -
Adding arms:
Sketch two U-shaped arms coming out from the sides. Place the left arm slightly lower than the right one to give the character a bit of movement. -
Drawing the pot:
Below the cactus, draw the pot rim as a thin, horizontal rectangle with rounded corners that slightly overlaps the bottom of the cactus. -
Pot base:
Draw the base of the pot as a tapered square shape extending downward from the rim. -
Face details:
lightly mark where the eyes and mouth will go. Place two large circles for eyes near the top third of the main body, and a small smiley mouth between them. -
Review proportions:
Take a moment to check your spacing. The cactus should feel comfortably seated in the pot, not too top-heavy.
Step 2: Inking the Lines
-
Main outlines:
Using your 0.5mm fineliner, trace over your pencil lines for the cactus body and arms. Use a confident, steady hand for smooth curves. -
Pot structure:
Ink the pot outline. Make the lines slightly thicker at the base to suggest weight. -
Vertical texture:
Switch to the thinner 0.3mm pen. Draw vertical lines running down the length of the cactus body and arms to create the ridges. -
Facial features:
Color in the pupils of the eyes solid black, leaving a tiny white circle uncolored for a highlight if you wish (or add it later with gel pen). -
Erase guidelines:
Once the ink is completely dry—I usually wait at least five minutes to prevent smudging—erase all visible pencil marks.
Uneven Watercolors?
If your paint dries with hard edges, you might be using too little water. Rewet the area slightly with a clean damp brush to soften gradients.
Step 3: Adding Color & Details
-
Green wash:
Mix a watery sage green watercolor. Paint the cactus body and arms, keeping the color fairly light and even. -
Terracotta tones:
While the green dries, paint the pot with a warm terracotta or light brown shade. The rim can be slightly darker for contrast. -
Rosy cheeks:
Once the green is dry, dab two small ovals of bright pink just below the eyes for flushed cheeks. -
Flower accent:
Paint a tiny three-petaled flower on top of the cactus head using the same pink or a contrasting purple. -
Spines:
Using the 0.3mm pen again, draw tiny dashes along the vertical ridge lines and outline of the cactus to represent spines. -
Pot texture:
Add tiny stippled dots to the terracotta pot to give it a convincing clay texture. -
White highlights:
Use a white gel pen to add highlights to the eyes (if you didn’t leave paper white) and add subtle decorative dots around the background for atmosphere.
Sparkle Effect
Add tiny ‘floating’ circles or stars in the background with a silver gel pen or grey marker to give the illustration a magical, airy feel.
Now you have a sweet desert friend ready to brighten up a card or frame on your desk


Expressive Cactus Mood Set
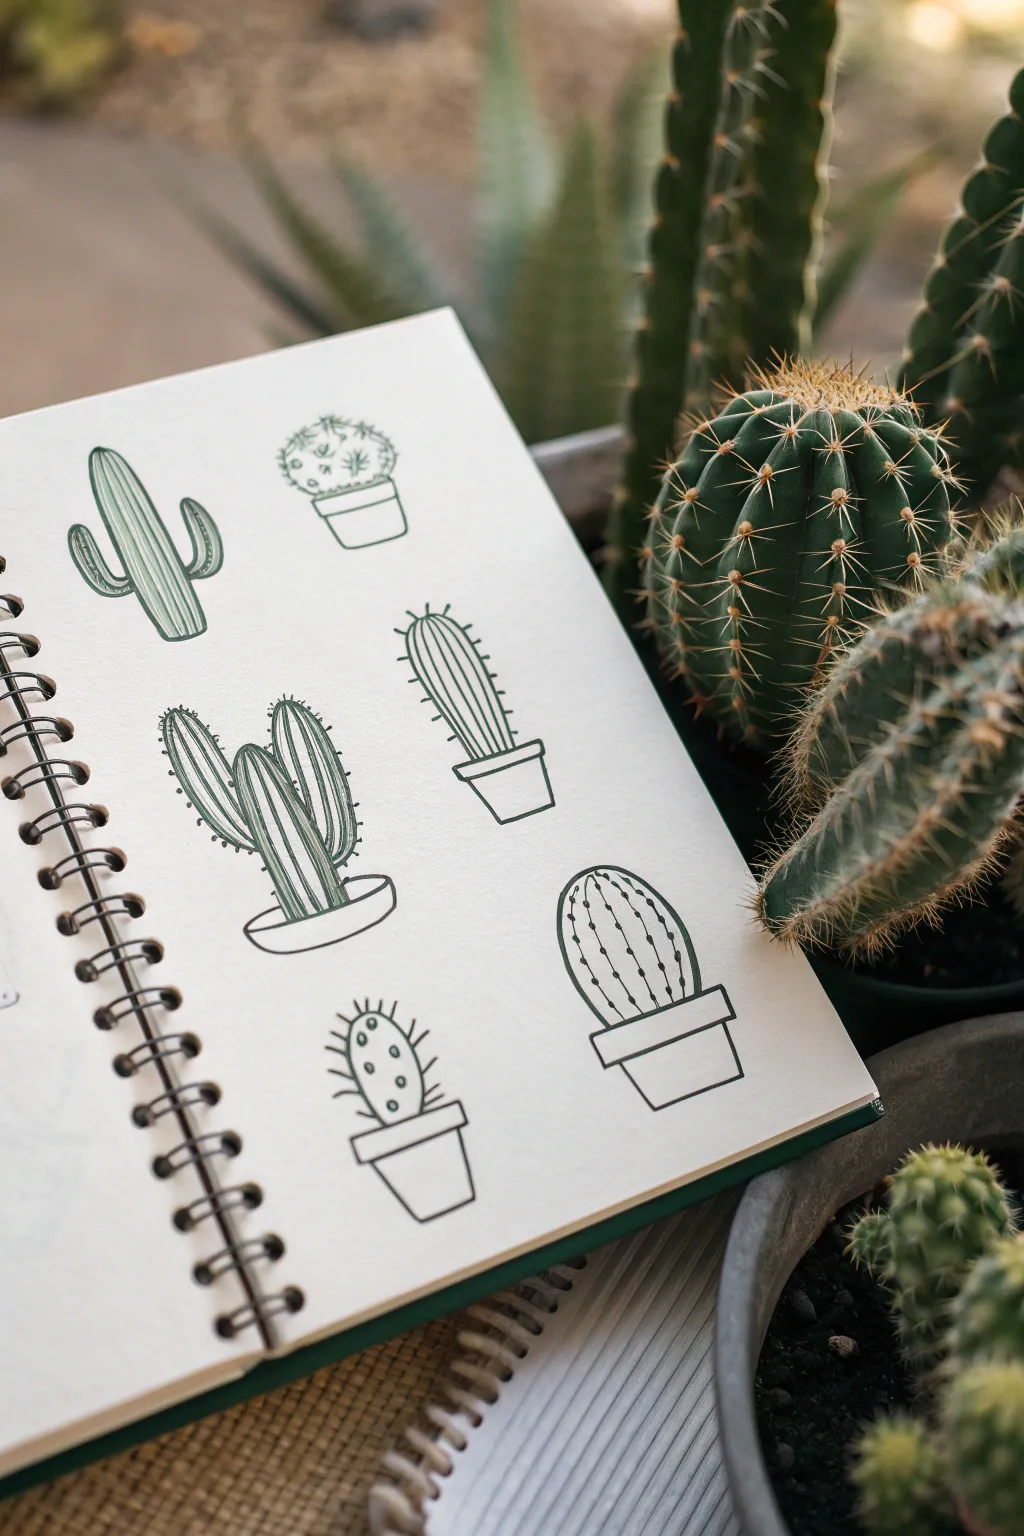
Capture the charming personality of six unique cacti with this simple yet expressive drawing guide. Using a dark green fine liner, you’ll practice essential texture techniques like hatching and stippling to bring these cute potted plants to life.
Detailed Instructions
Materials
- A5 or A4 Sketchbook (spiral bound)
- Pencil (HB or 2B)
- Eraser
- Dark Green Fine Liner Pen (0.3mm or 0.5mm)
- Ruler (optional)
Step 1: Planning the Layout
-
Grid the Page:
Visualize your page divided into a 2×3 grid to evenly space out the six plants. You can lightly sketch these boxes with a pencil if you need guidance, or just eyeball the spacing to keep things organic. -
Sketch the Basic Shapes:
Using your pencil, lightly draw the skeleton shapes for each cactus. Start with simple geometric forms: ovals for the barrel cactus, tall cylinders for the saguaro types, and simple rectangles or trapezoids for the pots.
Step 2: Drawing the Big Saguaro
-
Outline the Saguaro:
On the top left, ink the outline of the classic saguaro shape—one tall central column with two arms curving upward. Keep the lines smooth but not perfectly rigid. -
Add Vertical Ribs:
Draw vertical lines following the curve of the plant’s body. These shouldn’t be perfectly straight; let them bend with the arms to show volume. -
Texture with Hatching:
Fill the space between the ribs with tight, diagonal hatching lines. This creates that darker, shadowed look characteristic of this specific doodle.
Ink Confidence
Don’t worry about shaky lines. In nature, cactus ribs are rarely perfectly straight. A little wobble adds organic character.
Step 3: Creating the Potted Globe
-
Outline the Globe:
For the top middle plant, draw a rough circle sitting inside a simple trapezoid pot. -
Detail the Spines:
Instead of straight lines, use short, scattered dashes and little star-burst shapes to simulate clusters of spines all over the globe’s surface. -
Define the Pot:
Ink the pot using clean lines, adding a rim at the top for dimension.
Add a Splash
Once the ink is dry, use watercolor or markers to add a soft wash of sage green or terracotta to the pots for a pop of color.
Step 4: Inking the Tall Barrel
-
Draw the Column:
Middle right features a tall, singular column cactus. Outline an elongated oval shape sitting in a pot. -
Add Spiny Ridges:
Draw vertical lines down the length of the cactus. Along the outer edges, add small repeating thorns pointing outward. -
Detail the Interior:
Inside the vertical stripes, add short horizontal tick marks to suggest texture and depth.
Step 5: Illustrating the Tri-Branch
-
Form the Trio:
On the middle left, draw three distinct columns rising from a shallow, wide pot. The middle one is usually the tallest, flanked by two shorter ones. -
Add Deep Texture:
Draw heavy vertical lines on each branch. Between these lines, use dense hatching or cross-hatching to make this cactus appear darker than the others. -
Finish Spines:
Dot the very tops of each column with tiny perpendicular lines to represent the tufts of needles found at growth points.
Step 6: Final Touches
-
Draw the Prickly Pear Style:
Bottom left features a segmented cactus. Draw a pot, then a central oval body. Add small, stubby ovals growing from the top. -
Stipple the Surface:
Use small circles and dots randomly spaced across the surface to mimic the areoles (spine bumps) rather than lines. -
Ink the Last Barrel:
For the bottom right, draw a plump oval in a standard pot. Draw vertical curved lines to segment it like a pumpkin. -
Complete with Dots:
Run lines of tiny dots down the center of each segment to suggest rows of spines without drawing every single needle. -
Erase and Clean:
Once the green ink is completely dry (give it a few minutes to avoid smudging), gently erase all your pencil guidelines to reveal the crisp illustrations.
Now you have a full page of desert personality ready to be framed or gifted
Bold Ink Linework and Stippling
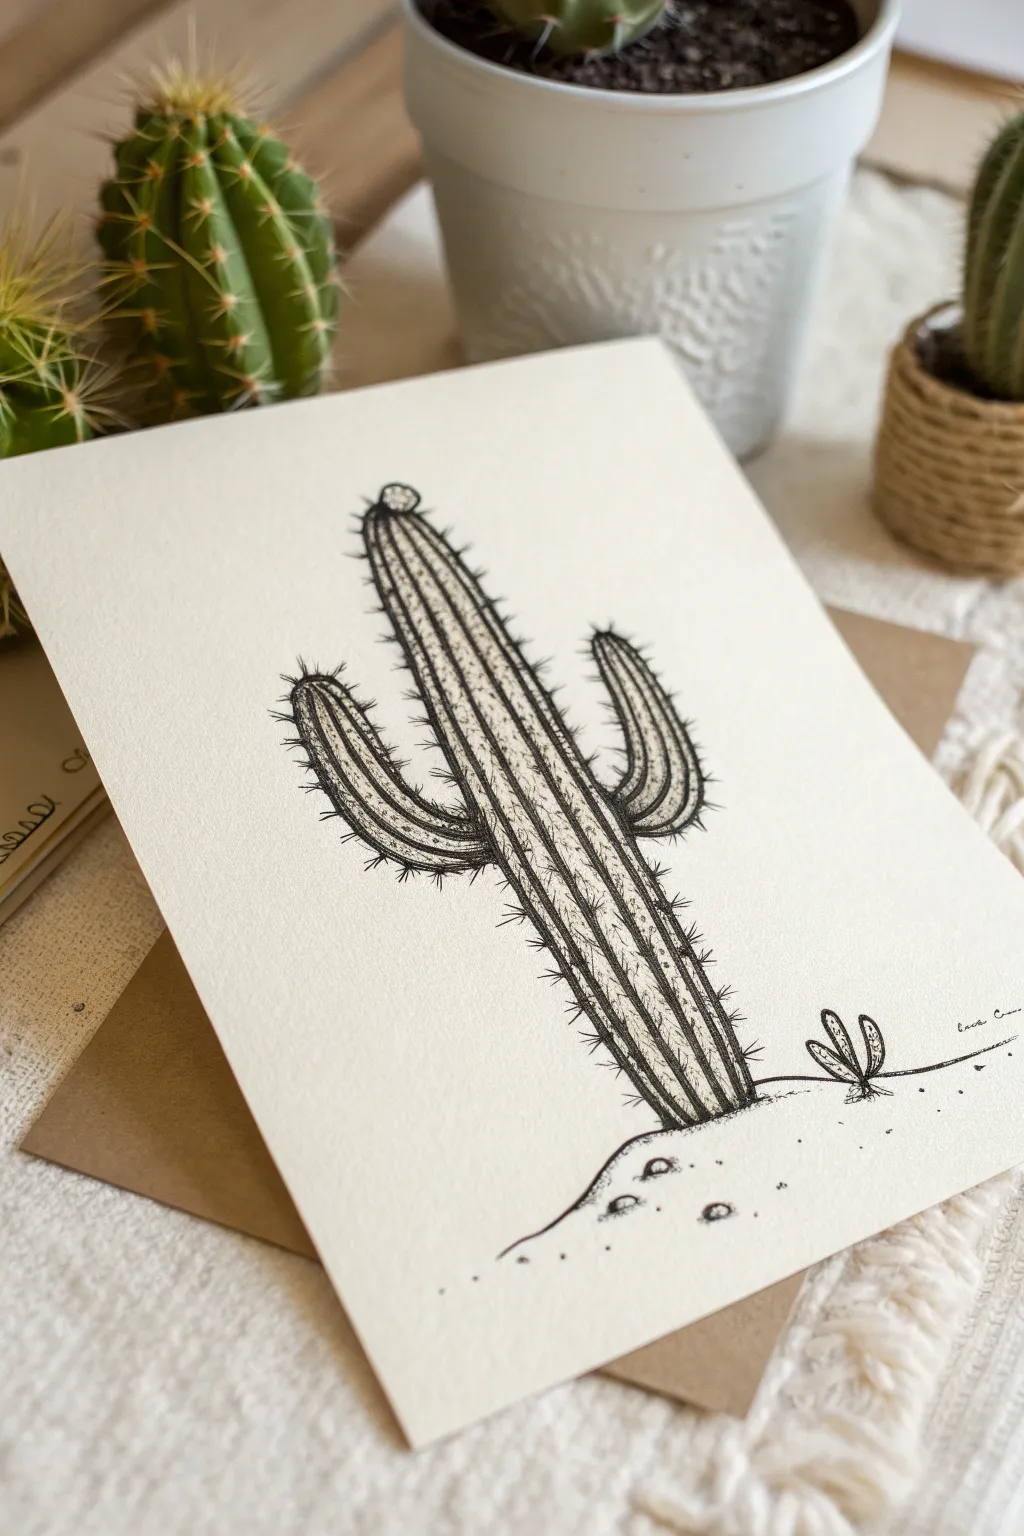
Master the art of texture with this striking Saguaro cactus study, relying on bold ink lines and delicate stippling to create depth. The high contrast of black pigment liner against textured off-white paper gives this piece a classic, scientific illustration feel.
How-To Guide
Materials
- High-quality off-white or cream cardstock (smooth or cold-press)
- Black pigment liners (sizes 0.1, 0.3, and 0.5)
- HB Drawing pencil
- Kneaded eraser
Step 1: Pencil Sketching
-
Establish the main column:
Begin by lightly sketching a tall, slightly tapered cylinder for the main body of the cactus. The top should be rounded. -
Add the arms:
Sketch two arms branching out from the main trunk. Place the left arm lower, curving upward in a ‘U’ shape, and the right arm slightly higher and shorter. Keep the joints smooth. -
Create the ribs:
Draw vertical lines running down the length of the cactus body and arms. These lines define the ribbed structure of the plant. Allow them to curve naturally with the form. -
Ground the subject:
Sketch a small, uneven mound of earth at the base. Add a tiny, separate cactus sprout to the right side for scale and interest.
Step 2: Inking the Foundation
-
Outline the silhouette:
Using a 0.5 pen, trace the heavy outer outline of the cactus. Make this line slightly organic and bumpy, rather than perfectly smooth, to mimic plant tissue. -
Ink the ribs:
Switch to a 0.3 pen to ink the internal vertical ribs. Break these lines occasionally rather than drawing them solid from top to bottom; this suggests light hitting the ridges. -
Add the spines:
along the outer edges of the silhouette, use the 0.3 pen to flick short, sharp lines outward. Group them in clusters of two or three. -
Detail the internal spines:
Along the internal rib lines, draw small clusters of spines pointing in various directions. Keep these shorter than the outline spines to simulate perspective.
Randomize Your Hand
When drawing spines, avoid making them uniform. Flick your wrist quickly and vary the angles. The chaos makes the cactus look organic rather than manufactured.
Step 3: Texture and Stippling
-
Shadow mapping:
Identifty the light source (coming from the left). On the right side of the main trunk and the underside of the arms, begin placing dots with your 0.1 pen. -
Build the gradient:
Increase the density of dots in the shadowed areas to create darkness. As you move toward the highlighted center of the ribs, spread the dots apart until they disappear. -
Texture the ribs:
Add very sparse, random stippling on the lit sides of the cactus to give the surface a gritty, realistic texture, avoiding pure white space. -
Darken the crevices:
I find it helpful to go back with the 0.1 pen and add extra dots right where the arms meet the trunk, emphasizing the deep crease. -
Detail the flower bud:
If you sketched a small bud or imperfection at the very top, define it now with tight, dense stippling to make it look fuzzy.
Ink Smudges?
Stippling takes longer to dry because the ink pools in the dots. If you smear it, turn it into a shadow or add extra stippling to camouflage the mistake.
Step 4: Finishing Touches
-
Ink the ground:
Use the 0.5 pen to draw the ground line. Keep it simple and fluid. -
Create sand and rocks:
Draw a few small, oval shapes for pebbles on the ground mound. Stipple heavily on one side of each pebble to give them 3D volume. -
Ground texture:
Add scattered dots in the sand area to suggest loose dirt, concentrating them near the base of the cactus. -
Final Erasure:
Wait at least 15 minutes for the ink to fully cure, then gently erase all pencil guidelines with the kneaded eraser. -
Assess contrast:
Step back and look at the drawing. If the shadowed side doesn’t look dark enough, go back for one final layer of stippling to boost the contrast.
Now you have a piece of desert art ready to be framed or gifted
Graphite Shading for Ribs and Spines
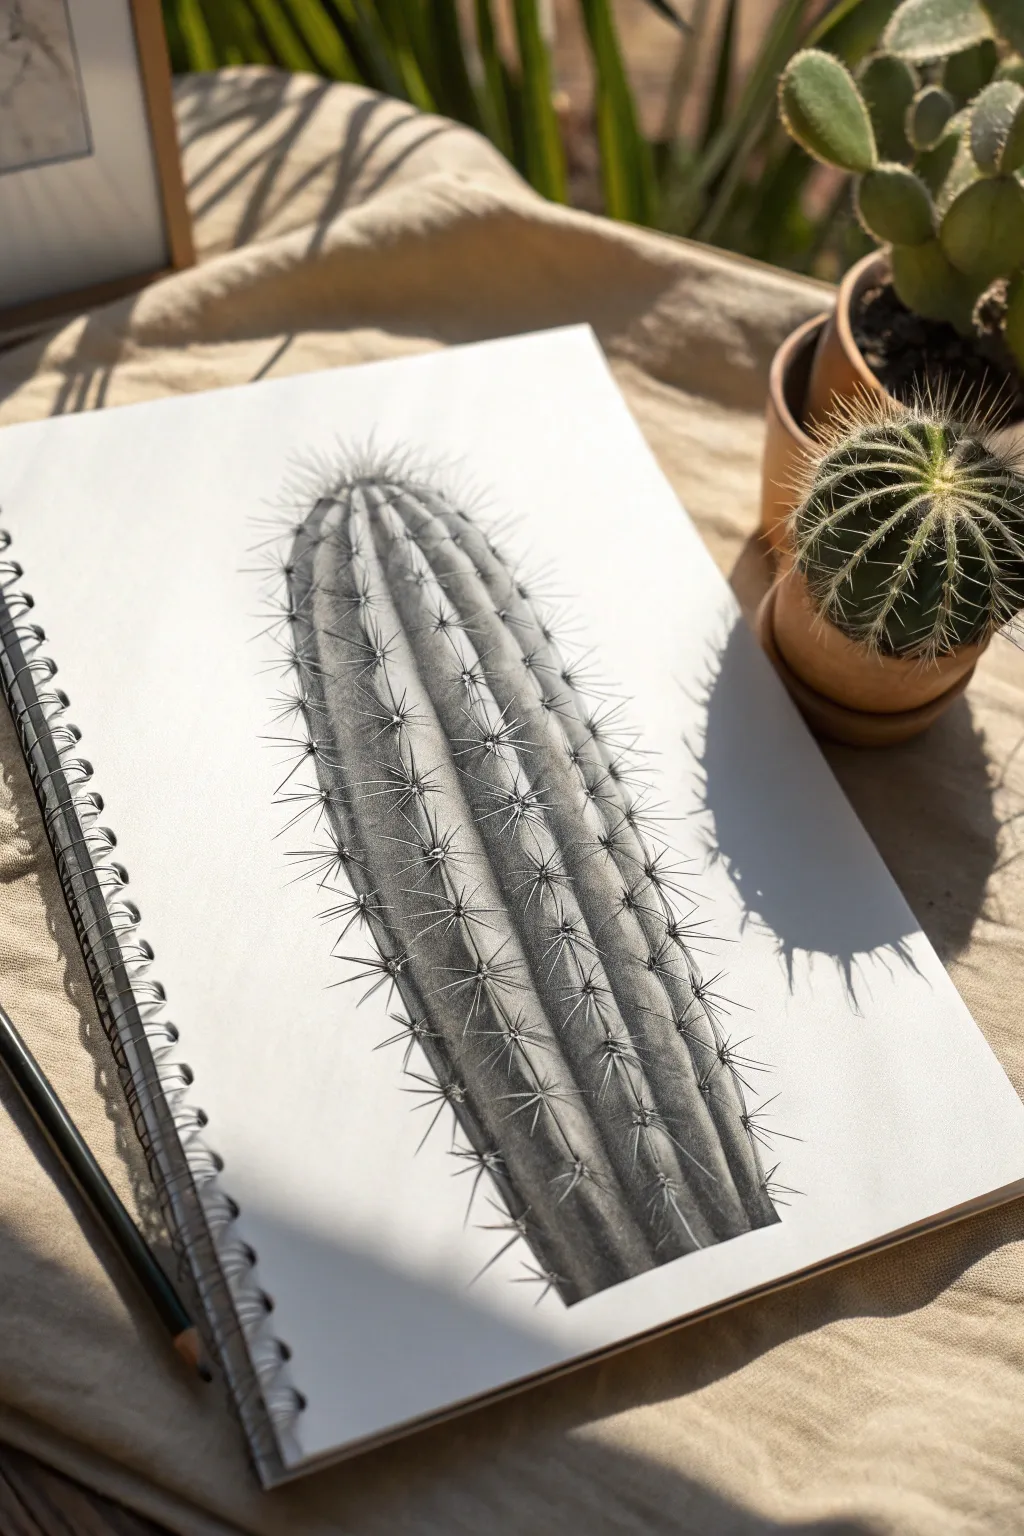
Capture the structural beauty of a columnar cactus with this detailed graphite study. By focusing on the interplay of deep shadows and sharp spines, you can create a striking monochrome illustration that pops off the page.
Step-by-Step
Materials
- Spiral-bound sketchbook or drawing paper (medium tooth)
- Graphite pencils (ranges: 2H, HB, 2B, 4B, 6B)
- Pencil sharpener
- Kneaded eraser
- Precision eraser or eraser stick (optional)
- Blending stump or tortillon
- Ruler (optional, for guidelines)
Step 1: Structural Outline
-
Establish the main shape:
Begin with your HB pencil and very lightly sketch a tall, slightly tapered cylindrical shape in the center of your page. The top should be rounded like a dome. -
Divide into ribs:
Draw vertical, slightly curved lines running from the top curve down to the bottom to represent the ribs. These lines should curve outward slightly to show the cactus’s volume, tighter together at the sides and wider in the center. -
Mark the areoles:
Along the crest of each rib, make small, faint tick marks where the spines will eventually grow. Space them evenly, but stagger them slightly relative to neighboring ribs to keep the drawing looking organic.
Spines Look Flat?
If spines look like 2D stars, check your foreshortening. Spines in the center should be short dots or lines coming ‘at’ the viewer, not long lines spreading sideways.
Step 2: Shading and Form
-
Define the light source:
Determine where your light is coming from; in the reference, the light hits from the left. This means the left sides of the ribs will be highlighted, and the right sides will fall into shadow. -
Lay down initial tone:
Using a 2B pencil, lightly shade the ‘valley’ between each rib. Keep your strokes vertical to follow the direction of growth. -
Deepen the shadows:
Switch to a 4B pencil to darken the deepest parts of the grooves between the ribs. Press harder in the crevices and fade out as you move up the slope of the rib. -
Create cylindrical volume:
Shade the entire right side of the main cactus body darker than the left side to give the whole object a 3D cylindrical weight. The ribs on the far right should be significantly darker than those on the lit left side. -
Blend for smoothness:
Use a blending stump to gently smudge the graphite within the ribs. This softens the pencil strokes and makes the cactus skin look smooth and waxy. -
Lift highlights:
Take your kneaded eraser and tap or drag it along the highest ridge of each rib on the left side. This lifts away graphite to create a crisp, bright highlight where the sun hits directly.
Clean Highlights
Keep a piece of scrap paper under your drawing hand. This prevents your palm from smearing the graphite into the highlighted areas you want to keep crisp white.
Step 3: Detailing the Spines
-
Start the spine clusters:
Switch to a sharp 2H or HB pencil. At each tick mark you made earlier, draw a small, dark center point (the areole). -
Draw radiating spines:
From each center point, flick your pencil outward to create the spines. Draw 5-8 spines per cluster, varying their lengths. I find it helpful to make the central spine slightly longer and pointing outward/downward. -
Directionality is key:
Pay attention to perspective. Spines on the center ribs should come straight out at you (foreshortened), while spines on the side ribs should be drawn in profile, sticking out to the sides. -
Add spine shadows:
To make the spines look real, use a sharp 2B pencil to add a tiny cast shadow beneath or to the right of each spine where it touches the cactus skin. -
Highlight the spines:
Some spines catch the light. You can leave a tiny gap of white paper in the middle of a spine or use a precision eraser to lift a thin line on the sun-facing spines.
Step 4: Final Contrast
-
Darkest darks:
Take your 6B pencil and reinforce the deepest shadows, particularly at the bottom of the cactus and in the deepest valleys between ribs on the shadowed side. -
Clean up edges:
Use your eraser to clean up any smudges around the outside of the cactus to ensure a crisp silhouette against the white paper.
Now you have a striking botanical study that showcases the dramatic textures of desert flora
Watercolor Wash Over Ink Cactus
Capture the stark beauty of the desert with this elegant mixed-media illustration. By combining crisp ink linework with loose, watery washes of green, you’ll create a piece that feels both precise and organically soft.
How-To Guide
Materials
- Cold press watercolor paper (deckled edge optional)
- Waterproof fine liner pens (0.1mm and 0.3mm)
- Pencil (HB or H)
- Kneaded eraser
- Watercolor paints (Sap Green, Hooker’s Green, Burnt Sienna, Yellow Ochre)
- Round watercolor brush (size 4 or 6)
- Small detail brush (size 0 or 1)
- Jar of clean water
- Paper towels
Step 1: Sketching the Skeleton
-
Outline the central column:
Start by lightly sketching a tall, vertical rectangle with your pencil to form the main body of the cactus. Round off the top gently so it isn’t flat. -
Add the distinct arms:
Draw the left arm first, curving it out from the lower third of the body like a ‘U’ shape pointing upward. Repeat on the right side, but place this arm slightly higher to create a natural, asymmetrical look. -
Define the ribs:
Cacti have vertical ridges or ‘ribs’. Sketch faint vertical lines running down the length of the main column and following the curves of the arms. These guidelines will be crucial for shading later. -
Sketch the ground:
Add a simple, uneven horizon line at the base involving a few small, jagged shapes to represent rocks or scrub brush.
Step 2: Inking the Details
-
Outline the main shape:
Switch to your 0.3mm waterproof pen. Go over your pencil outline, using a slightly broken or ‘shaky’ line rather than a perfect ruler-straight one. This adds organic texture. -
Draw the ribbed texture:
Using the finer 0.1mm pen, trace those internal vertical rib lines. I like to keep these lines very thin and occasionally broken to suggest light hitting the ridges. -
Add the spines:
Along the outer edges and the internal rib lines, draw tiny clusters of thorns. Make small ‘V’ shapes or ticks. Ensure the thorns on the edges point outward against the background. -
Ink the foreground:
Use quick, scribbly strokes to ink the small bushes at the base. These don’t need leaves; just scratchy, branching lines suggest dried desert flora. -
Erase pencil marks:
Wait at least 15 minutes for the ink to fully cure, then gently lift all graphite lines with your kneaded eraser.
Natural Edges
To get the torn look without buying expensive paper, fold heavy watercolor paper back and forth firmly, run a damp brush along the fold, and tear slowly.
Step 3: The Watercolor Wash
-
Mix your base green:
Create a dilute wash of Sap Green with plenty of water. You want a pale, translucent tea-like consistency. -
Apply the first layer:
Paint the entire body of the cactus with this pale green mix. Don’t worry about staying perfectly in the lines; a little bleed adds charm. -
Deepen the shadows:
While the paper is still slightly damp, mix a darker green using Hooker’s Green. Paint thin stripes along the shadowed side of each vertical rib. -
Blend the gradients:
Use a clean, damp brush to soften the hard edges of your darker stripes, blending them into the lighter base color to create a cylindrical 3D effect. -
Paint the ground:
Mix Burnt Sienna with a touch of Yellow Ochre. Paint a loose, horizontal wash at the base of the cactus to anchor it. -
Add ground texture:
While the ground wash is wet, drop in tiny dots of concentrated brown paint to simulate pebbles and grit. -
Final touches:
Once everything is bone dry, look for areas that feel too flat. You can glaze a very sheer layer of blue-green over the shadowed side of the arms for extra depth. -
Preserve the edges:
If you are using deckled edge paper like the example, leave a generous amount of white space around the illustration to let the paper texture shine.
Ink Smearing?
Even ‘waterproof’ pens need time to settle. If your ink smears when you erase or paint, wait for 30 full minutes or heat-set it briefly with a hair dryer.
Now step back and admire how the delicate ink details structure the softness of the watercolor wash
Minimal Desert Landscape With One Cactus
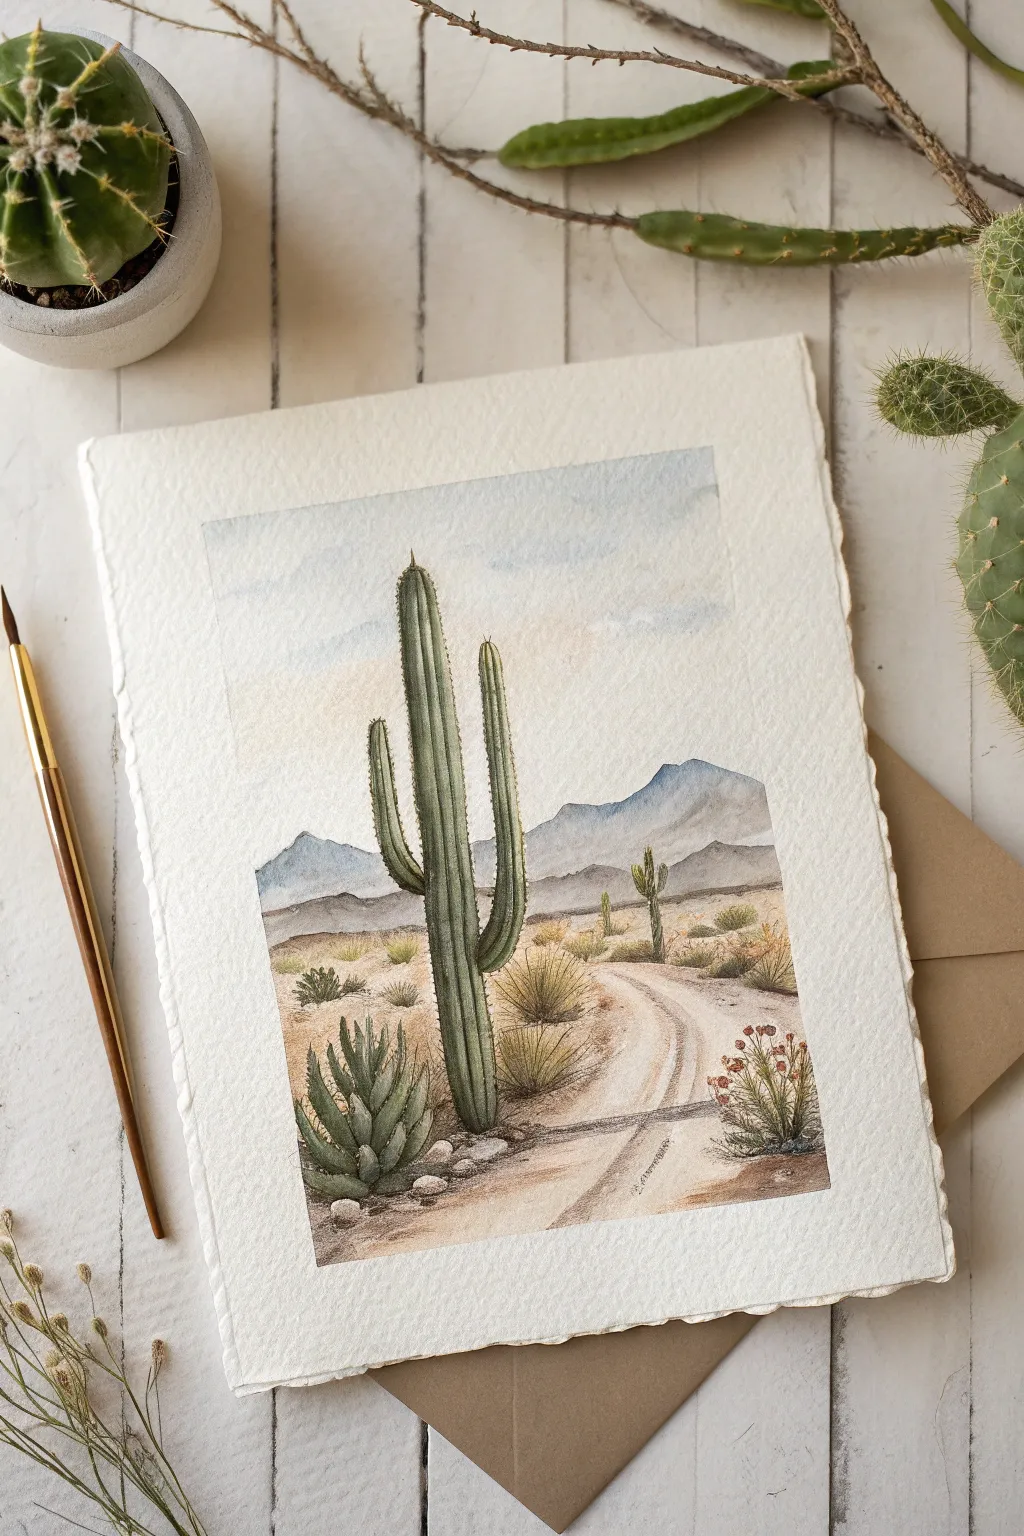
Capture the quiet beauty of the desert with this detailed watercolor landscape featuring a majestic Saguaro cactus standing guard over a winding dirt path. Using soft washes and careful layering, you’ll create a sense of depth and atmospheric perspective that transports the viewer straight to the arid southwest.
Step-by-Step
Materials
- Cold press watercolor paper (deckle edge optional)
- Watercolor paints (Sap Green, Hooker’s Green, Burnt Sienna, Yellow Ochre, Ultramarine Blue, Alizarin Crimson, Sepia)
- Round watercolor brushes (sizes 2, 6, and 10)
- Pencil (HB or 2H)
- Kneaded eraser
- Masking tape
- Two jars of water
- Paper towels
Step 1: Sketching and Preparation
-
Define the Horizon:
Begin by lightly sketching a horizon line about one-third of the way up the paper. This doesn’t need to be perfectly straight; a slight undulation suggests natural terrain. -
Outline the Mountains:
Above the horizon, sketch a range of mountains. Keep the lines irregular and jagged to mimic rocky peaks, ensuring they vary in height. -
Place the Hero Cactus:
Draw the main Saguaro cactus slightly off-center to the left. It should be tall, extending past the mountains into the sky area. Add two arms: one lower on the left curving up, and one slightly higher on the right. -
Sketch the Foreground Details:
Lightly outline a winding dirt path that starts wide at the bottom right and narrows as it curves toward the center. Add rough shapes for an agave plant in the bottom left corner and a small flowering bush on the bottom right.
Step 2: Painting the Background
-
Sky Wash:
Wet the sky area with clean water using your size 10 brush. Drop in a very dilute mix of Ultramarine Blue, concentrating the pigment slightly at the top and letting it fade to near white as it touches the mountains. -
Mountain Layers:
Once the sky is dry, mix a watery grey-blue using Ultramarine and a touch of Burnt Sienna. Paint the mountains, keeping the wash transparent to make them look distant. -
Desert Floor Base:
Mix Yellow Ochre with a tiny bit of Burnt Sienna. Apply a variegated wash to the ground area, leaving the path lighter (use more water or lift color with a paper towel) and making the shadowed areas under bushes slightly darker.
Muddy colors?
If your desert floor looks muddy, let layers dry completely before adding new ones. Watercolors turn opaque and dull if worked too much while damp.
Step 3: Developing the Cactus
-
First Green Layer:
Mix sap green with a little yellow ochre for a warm, sunlit green. Paint the entire cactus shape, ensuring you stay within your pencil lines. -
Adding Ribs and Shadows:
While the first layer is dry, use a size 2 brush and a darker mix (add sepia or blue to your green) to paint thin vertical lines representing the ribs of the cactus. -
Deepening Values:
Apply the shadow color to the right side of the main trunk and the undersides of the cactus arms to create a 3D cylindrical form. I find that blending this edge slightly with a damp brush keeps it from looking too harsh. -
Needle Details:
Using the very tip of your smallest brush and a dark brown mix, add tiny dots or short dashes along the vertical rib lines to suggest spines.
Level Up: Deckle Edge
To get the torn paper look shown in the photo, fold your paper repeatedly along the edge, lick the fold or wet it with a brush, and gently tear it by hand.
Step 4: Foreground and Final Touches
-
Painting the Agave:
For the bottom-left agave, use a cooler green (mix in some blue). Paint distinct, pointed leaves radiating from a center point, letting each leaf dry before painting its neighbor to avoid bleeding. -
Defining the Path:
Use a dilute Burnt Sienna to paint the tire tracks and shadows on the dirt road. Keep these strokes loose and dry-brushed to mimic the texture of dust and dirt. -
Adding Vegetation:
Use a stippling motion with your size 6 brush to create the texture of shrubbery. Use varying shades of ochre and olive green for the bushes scattered in the mid-ground. -
Flowering Bush Detail:
On the bottom right bush, dab tiny spots of Alizarin Crimson mixed with Burnt Sienna to create the dried desert flowers. -
Ground Shadows:
Mix a purple-grey shadow color. Paint cast shadows extending to the right of the cactus base, the agave, and the bushes to anchor them to the ground. -
Texture Splatter:
Load a toothbrush or stiff brush with brown paint and flick tiny speckles onto the bottom foreground to create the look of sand and pebbles.
Frame your new desert masterpiece in a simple wood frame to complement the natural tones
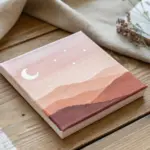
Sunset Silhouette Cactus Scene
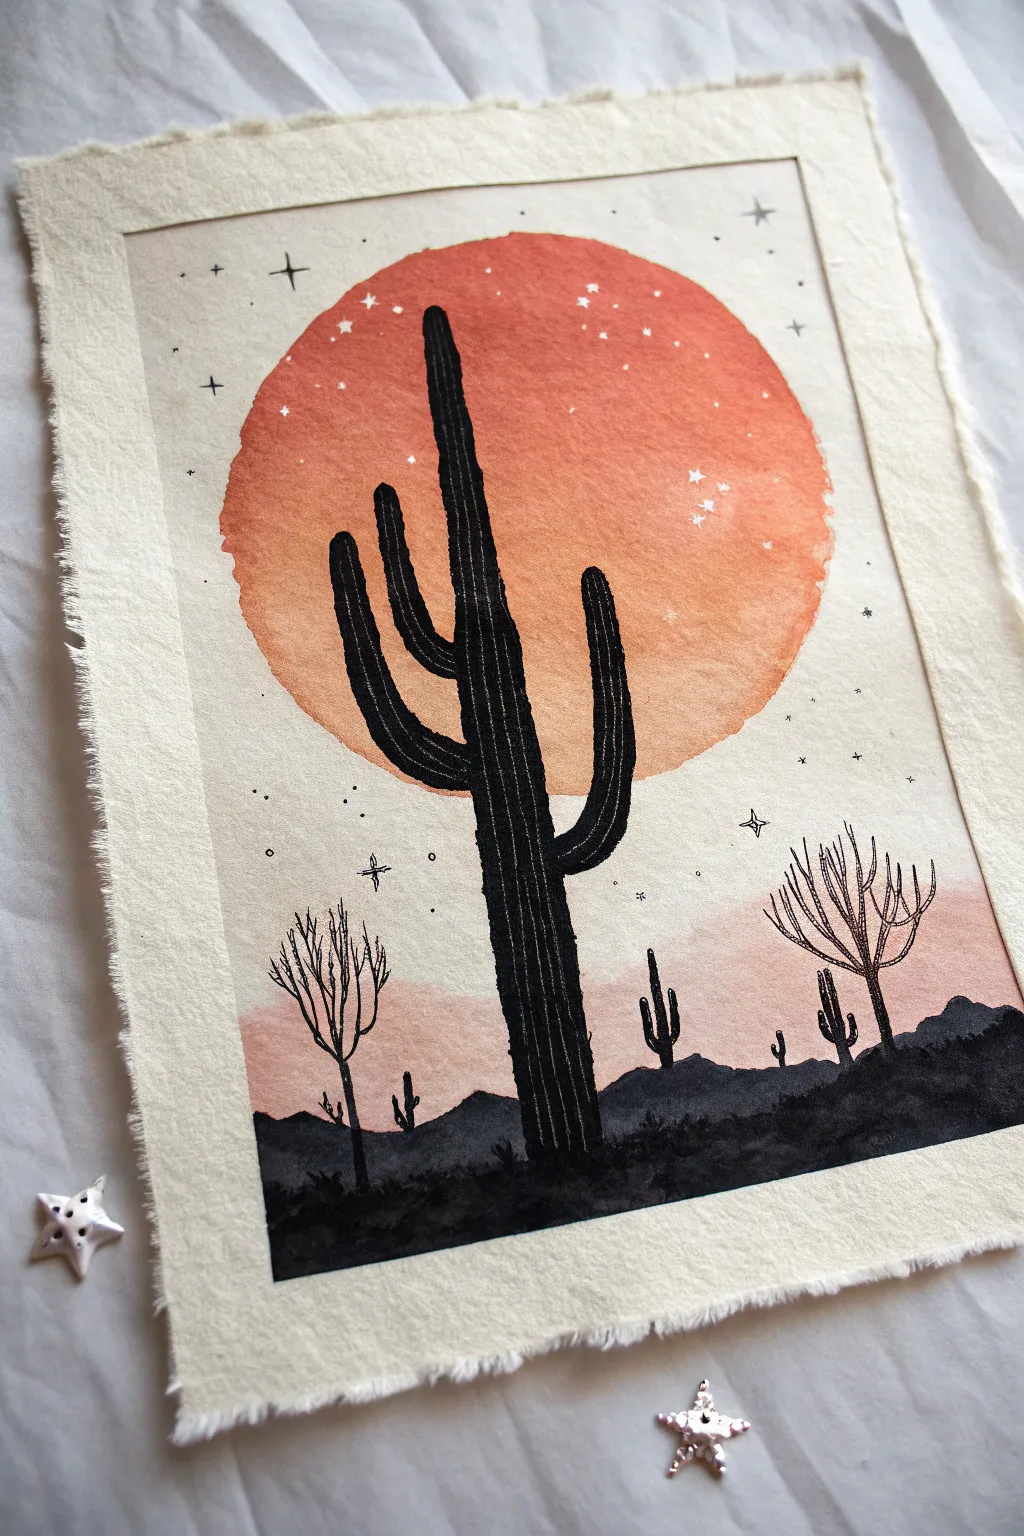
This striking mixed-media piece combines the warm, organic flow of watercolor with the sharp precision of ink to capture a serene desert evening. The bold silhouette of a saguaro cactus stands tall against a vibrant, oversized sun, creating a dramatic contrast that is surprisingly simple to achieve.
Step-by-Step Guide
Materials
- Cold press watercolor paper (deckled edge preferred)
- Black ink fineliners (sizes 005, 01, 05, and 08)
- Black India ink or black gouache
- Small round watercolor brush (size 2 or 4)
- Watercolor paints (burnt orange, vermilion, light pink, and yellow ochre)
- White gel pen or acrylic white ink
- Pencil and eraser
- Compass or a large circular object (like a bowl) for tracing
- Masking tape (optional)
Step 1: Setting the Scene
-
Prepare your paper:
Start with a high-quality watercolor paper piece. If your paper doesn’t have a deckled edge, you can create a faux vintage look by carefully tearing the edges against a ruler rather than cutting them. -
Outline the sun:
Using a compass or a rounded bowl as a template, lightly trace a large circle in the upper two-thirds of the paper. This will be your sunset focal point. -
Sketch the horizon:
Beneath the sun, lightly sketch a low, uneven horizon line. Add a second, fainter line slightly above it to indicate distant mountains.
Bleeding Lines?
If your ink feathers into the paper, the watercolor wasn’t dry enough. Wait longer or use a waterproof fineliner which is less likely to seep.
Step 2: Painting the Sky
-
Mix the sun color:
Creating a gradient adds depth, so start by mixing a vibrant orange-red (vermilion) and a slightly softer burnt orange on your palette. -
Paint the sun:
Fill the circle with your orange mix. While the paint is still wet, drop in hints of yellow ochre near the bottom and darker red near the top to create a natural, spherical glow. -
Paint the background wash:
Dilute a light pink or coral color with plenty of water. Paint a soft, horizontal wash across the lower horizon area, letting it fade out as it goes up, implying the last light of dusk hitting the distant hills. -
Let it dry completely:
Wait for the paint to be bone dry. If the paper feels cool to the touch, it’s still damp. I usually use a hairdryer on a low setting here to speed things up so the ink won’t bleed later.
Step 3: Inking the Silhouette
-
Sketch the main cactus:
Lightly use a pencil to plan the main saguaro cactus in the foreground. It should be tall, extending past the top of the sun, with a few distinctive arms branching upward. -
Outline the form:
Using a thicker pen (05 or 08), carefully outline your cactus shape. Don’t worry about the texture just yet, focus on getting a solid, organic outline. -
Fill with black:
Fill in the cactus shape. You can use a thick marker, but for a solid, opaque matte finish, painting it in with black India ink or black gouache is often best. -
Add texture lines:
Once the black fill is dry, take a white gel pen or a very fine brush with white ink. Draw vertical dashed lines down the length of the cactus and its arms to represent the ribs and needles catching the moonlight. -
Create the ground:
Fill in the bottom foreground area with solid black ink or paint. Give the top edge of this ground layer a bumpy, uneven texture to simulate rocks and desert scrub.
Starry sparkle
Dip an old toothbrush in white acrylic ink and flick it over the dried painting for a natural galaxy spray effect.
Step 4: Adding Details
-
Draw distant elements:
Using a thinner pen (01 or 005), draw smaller cacti and bare, spindly trees in the background. Place them along the horizon line to create a sense of scale and distance. -
Add mountain shadows:
Paint a faint, translucent grey or very watered-down black wash over the distant mountain range line you sketched earlier. This creates atmospheric perspective behind the solid black foreground. -
Detail the sky:
Switch to your finest pen (005). Add tiny dots, small crosses, and four-pointed star shapes scattered across the sky. -
Add stars to the sun:
Use your white gel pen to continue the star pattern inside the orange sun circle. This makes the sun feel transparent and magical. -
Final touches:
Review your ink lines. If the black of the main cactus looks patchy, add a second coat of ink to ensure it is a true, deep silhouette.
Once framed, the contrast between the warm sun and the stark black ink creates a captivating window into the desert night
Seamless Cactus Pattern Page
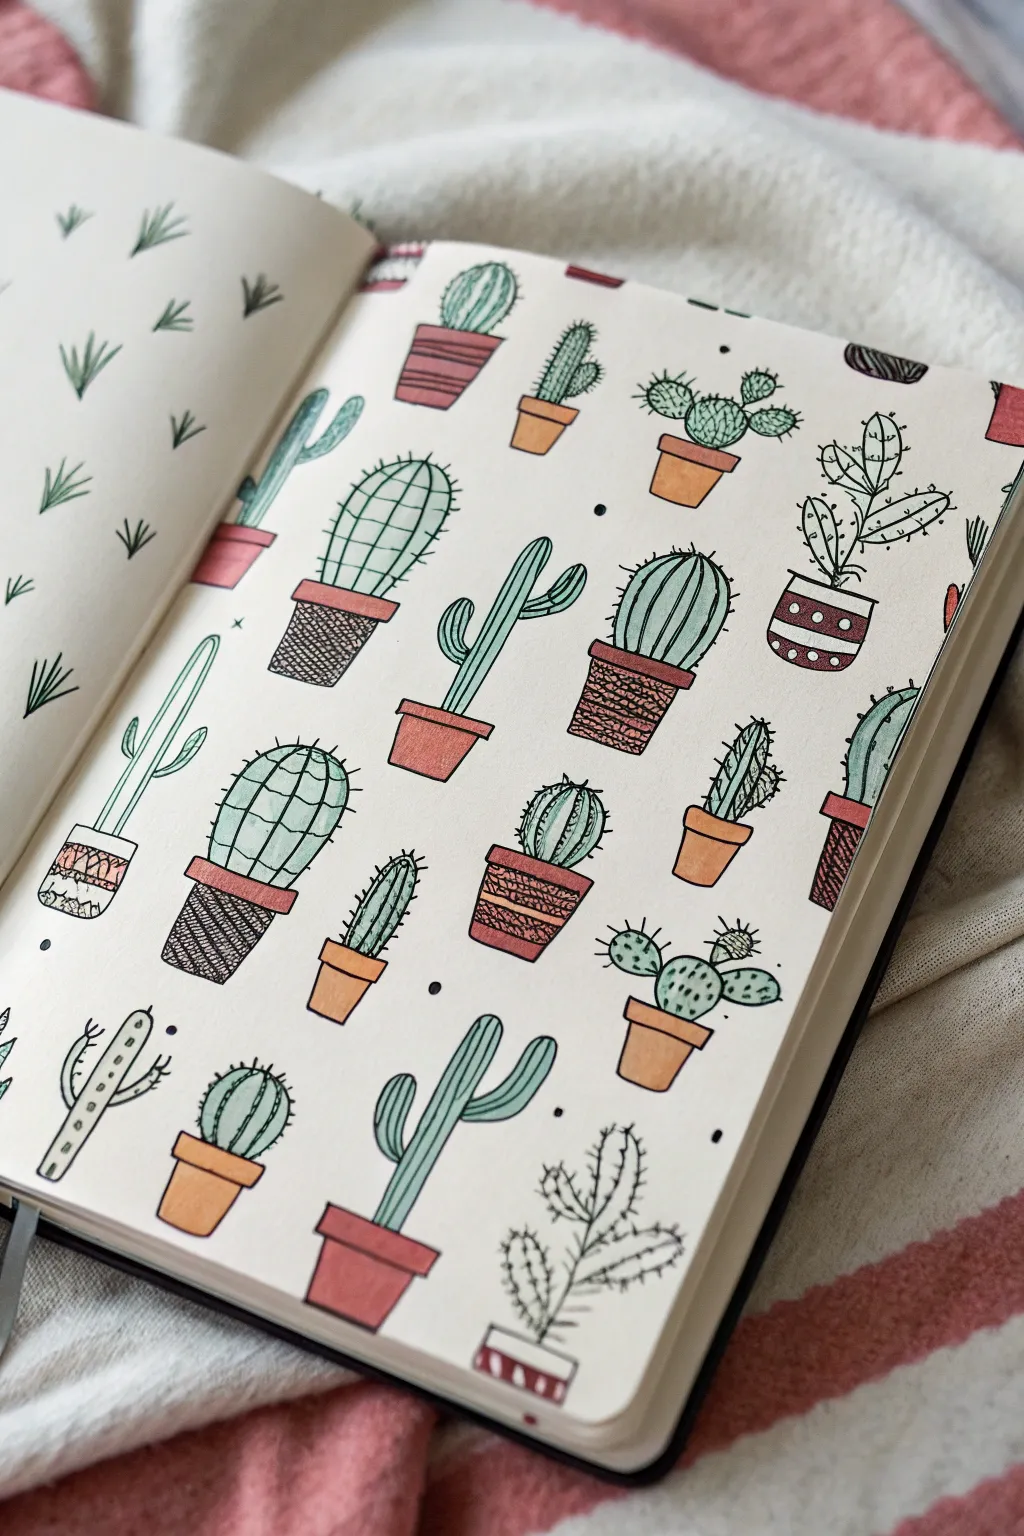
Fill an entire page of your sketchbook with this lively assortment of potted cacti and succulents. The charm lies in the variety of shapes and the warm, desert-inspired color palette that brings the whole spread to life.
Step-by-Step
Materials
- A5 Sketchbook or Dot Grid Notebook
- Fine liner pens (Black, sizes 0.1 and 0.3)
- Colored pencils or water-based markers (Light Green, Dark Green, Teal, Terracotta, Brown)
- Pencil
- Eraser
Step 1: Drafting the Layout
-
Establish the grid:
Start by lightly sketching a loose grid of horizontal rows across your page with a pencil. Aim for about 5 to 6 rows depending on your page size, leaving equal space between them to ensure your pattern feels balanced. -
Position the pots:
Along each row, sketch diverse pot shapes. Alternate between simple tapered pots, rounded bowls, and rectangular planters. Stagger the positions from row to row so the cacti aren’t perfectly aligned vertically, creating a more organic ‘wallpaper’ feel. -
Sketch the cactus bodies:
Lightly draw the main shapes of the plants coming out of the pots. Mix it up: draw tall saguaros, round barrel cacti, prickly pears with bunny ear pads, and thinner columnar types. -
Add variety:
Ensure no two neighbors look exactly the same. If you have a tall cactus next to a short round one, the page will look more dynamic. Keep your pencil pressure light so these lines are easy to erase later.
Ink Smudge Prevention
Place a scrap piece of paper under your drawing hand while you ink. This prevents oils from your hand transferring to the paper and stops you from smearing fresh ink.
Step 2: Inking the Silhouettes
-
Outline the pots:
Switch to your 0.3 fine liner. Carefully trace over your pot sketches. Give the rims of the pots a slight curve to suggest dimension, rather than drawing a flat straight line across. -
Decorate the planters:
Before moving on, draw patterns on some of the pots. Horizontal stripes, zig-zags, or a simple woven basket texture work beautifully to add character to the containers. -
Outline the plants:
Inking the cacti requires a steady hand. For smooth column cacti, use long, continuous strokes. For the rounder barrel cacti, outline the main balloon shape clearly. -
Erase pencil guides:
Once the ink is completely dry—and I mean completely—gently erase all your pencil lines. This reveals a crisp, clean black-and-white coloring page layout.
Step 3: Adding Details & Texture
-
Draw the ribs:
Using a thinner 0.1 pen, draw vertical lines down the length of the columnar cacti to create ribs. For round cacti, draw curved lines that follow the spherical contour. -
Add the spines:
This is the tedious but rewarding part. Add small ‘v’ shapes or tiny dashes along the ribs of your cacti. Vary the direction of the spines to make them look uniform yet natural. -
Create dots and dashes:
For the prickly pear styles (the ones with flat pads), add clusters of tiny dots instead of spikes to represent the glochids. This textual contrast makes the page interesting. -
Ground the pots:
Add tiny soil lines inside the rim of the pots so the plants don’t look like they are floating in mid-air.
Try Watercolor Washes
Instead of markers, use watercolor paints loosely over waterproof ink. Let the color bleed slightly outside the lines for a trendy, artistic vibe.
Step 4: Bringing it to Life with Color
-
Color the greenery:
Select three shades of green: a minty light green, a standard true green, and a blue-leaning teal. Randomly distribute these colors across the page so you don’t have clumps of the same color. -
Blend the greens:
Color smoothly within the lines. For a little depth, you can go over the sides of the cactus a second time with the same marker to create a subtle shadow effect. -
Color the terracotta:
Use a warm terracotta or rust-orange color for the majority of the pots. This classic clay look ties the whole pattern together. -
Add accent colors:
Use a darker brown or a muted yellow for the patterned details on the pots. Drawing simple stripes or coloring in the woven textures breaks up the orange. -
Fill the gaps:
Look at the negative space between the cacti. If there are large empty white spots, draw tiny black dots or small stars with your fine liner to act as playful filler. -
Final check:
Scan the page for any missed spots or lines that need thickening. Deepen the shadows on the soil or the side of the pots if the page feels too flat.
Flip the page and start a new theme, or simply admire your resilient garden that never needs watering
Hanging Planter Cactus Drawing
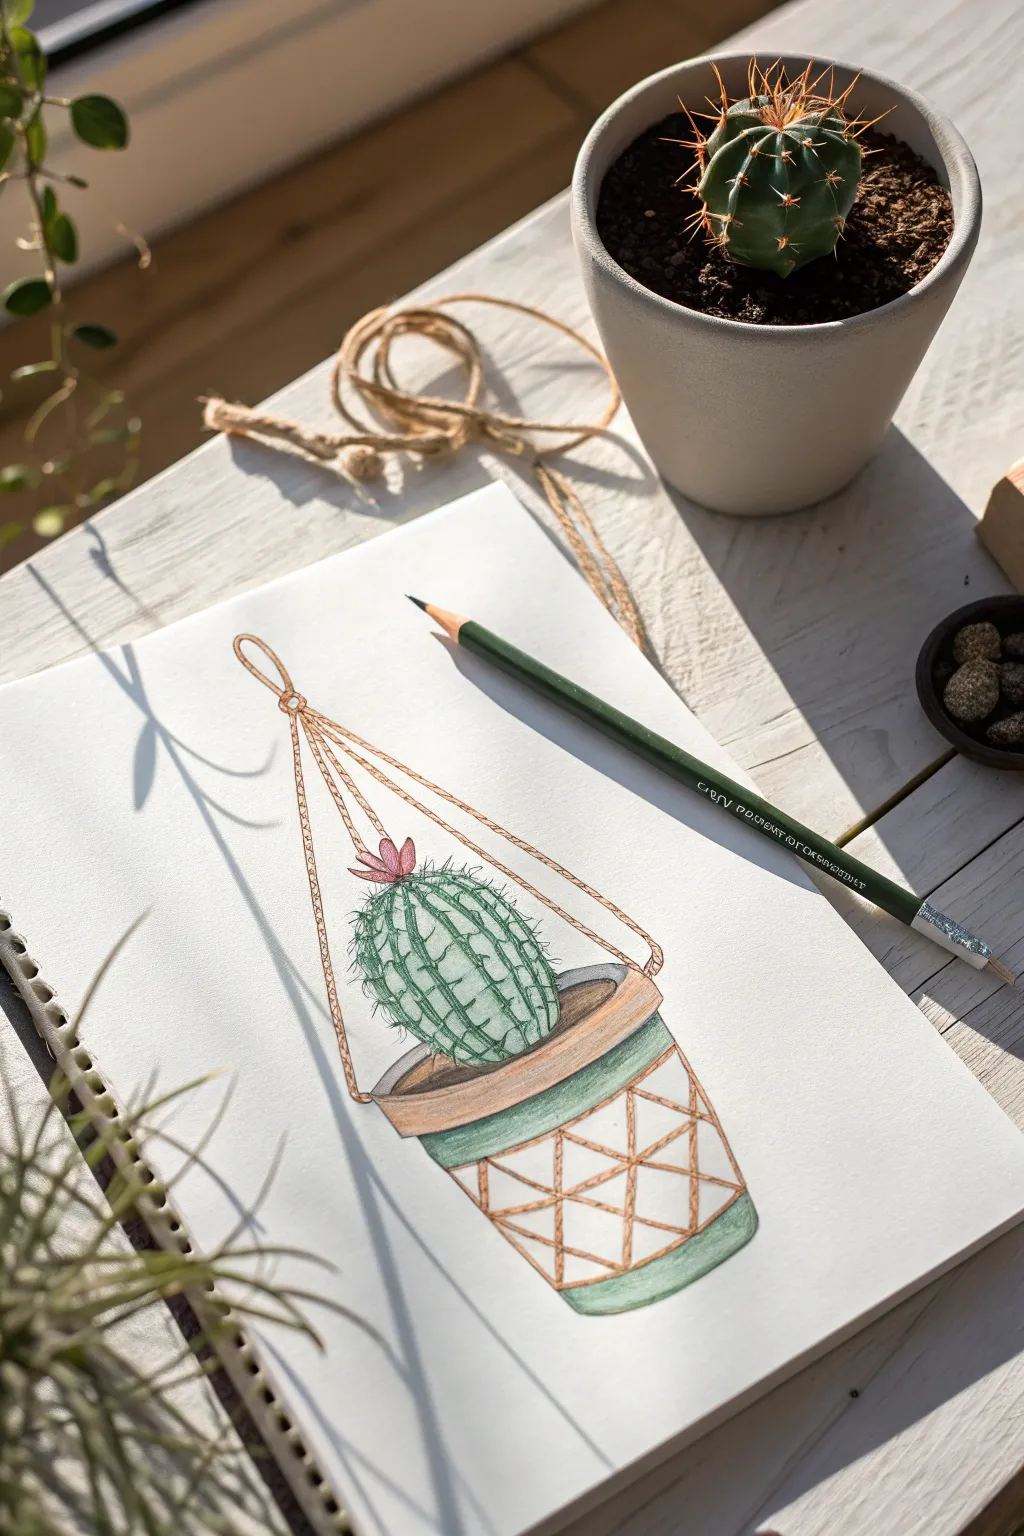
Capture the charm of indoor greenery with this delightful colored pencil drawing of a cactus nestled in a macramé hanger. This tutorial guides you through sketching the organic form of the plant and adding geometric twine details for a balanced, bohemian composition.
Step-by-Step Guide
Materials
- Sketchbook or heavyweight drawing paper
- HB or H graphite pencil
- Eraser
- Colored pencils (various shades of green, terra cotta/brown, tan)
- Pencil sharpener
Step 1: Sketching the Outline
-
Draw the pot’s rim:
Begin by drawing a thin, horizontal oval roughly below the center of your page to represent the top opening of the pot. Since the perspective is slightly from above, keep the oval narrow. Just below it, draw a second, identical curve to create the thickness of the rim. -
Form the pot base:
From the sides of your rim, draw two lines tapering slightly inward as they go down. Connect them at the bottom with a curve that mirrors the curve of the top rim. This creates a standard terra cotta pot shape. -
Outline the cactus shape:
Sketch a large, rounded shape rising out of the pot. It should be slightly taller than its width, sitting comfortably inside the rim. Imagine a balloon that is slightly inflated but still round. -
Add the vertical ribs:
Draw curved vertical lines running from the top center of the cactus down to the base where it meets the soil. These lines create the ‘ribs’ of the cactus. Make sure they curve with the round shape of the plant to give it volume. -
Sketch the macramé hanger:
From the top corners of your pot rim, draw two lines angling outward and upward toward a central point high above the cactus. This forms the main suspension ropes. Sketch a small loop at the very top where these lines meet. -
Add macramé details:
On the body of the pot, draw a diamond pattern using diagonal lines. Imagine the rope wrapping around the pot; draw vertical lines connecting the diamonds to indicate where the rope runs down the sides.
Sharpness Matters
Keep your pencil point extremely sharp when drawing the spines and rope texture. A dull point will make the delicate details look muddy and thick.
Step 2: Coloring the Cactus
-
Base layer of green:
Using a light green colored pencil, fill in the vertical sections between the ribs of the cactus. Use gentle, even pressure to create a smooth base layer. -
Define the shadows:
With a darker green pencil, shade along the edges of each vertical rib. This creates depth and makes the ribs look puffed out. I usually focus the darkest shading near the bottom and sides of the sphere. -
Add the spine details:
Switch to a very sharp, dark green or charcoal pencil. Along the vertical rib lines, make short, small tick marks or tiny crosses to represent the spines. Group them in evenly spaced clusters down each line. -
Blooming top:
If you want a flower like the reference, sketch a small, star-shaped bloom at the very top center using pink or light purple. Add a tiny yellow dot in the middle for contrast.
Step 3: Pot and Macramé Finishing
-
Color the pot rim:
Use a light brown or tan pencil for the rim of the pot. Keep the top surface slightly lighter than the side of the rim to show where the light hits. -
Fill the lower pot:
Color the main body of the pot. In this example, we use a muted teal or mint green to contrast with the terracotta rim, but you can choose any color. Leave the diamond-shaped spaces blank for the rope. -
Color the ropes:
Using a golden-brown or tan pencil, carefully fill in the diamond shapes and the vertical hanging lines. Press firmly to make them stand out against the pot color. -
Add rope texture:
With a sharper, darker brown pencil, draw tiny diagonal lines or twists inside the rope sections to mimic the texture of twisted twine. -
Final shading touches:
Add a little shadow under the rim of the pot using a dark grey or brown to make it look 3D. Inspect your drawing and deepen any green shadows on the cactus to make it pop off the page.
Creative Twist
Swap the geometric macramé pattern for simple horizontal stripes or polka dots on the pot for a more modern, minimal look.
Now you have a charming botanical sketch that requires absolutely no watering
Geometric Stained-Glass Style Cactus
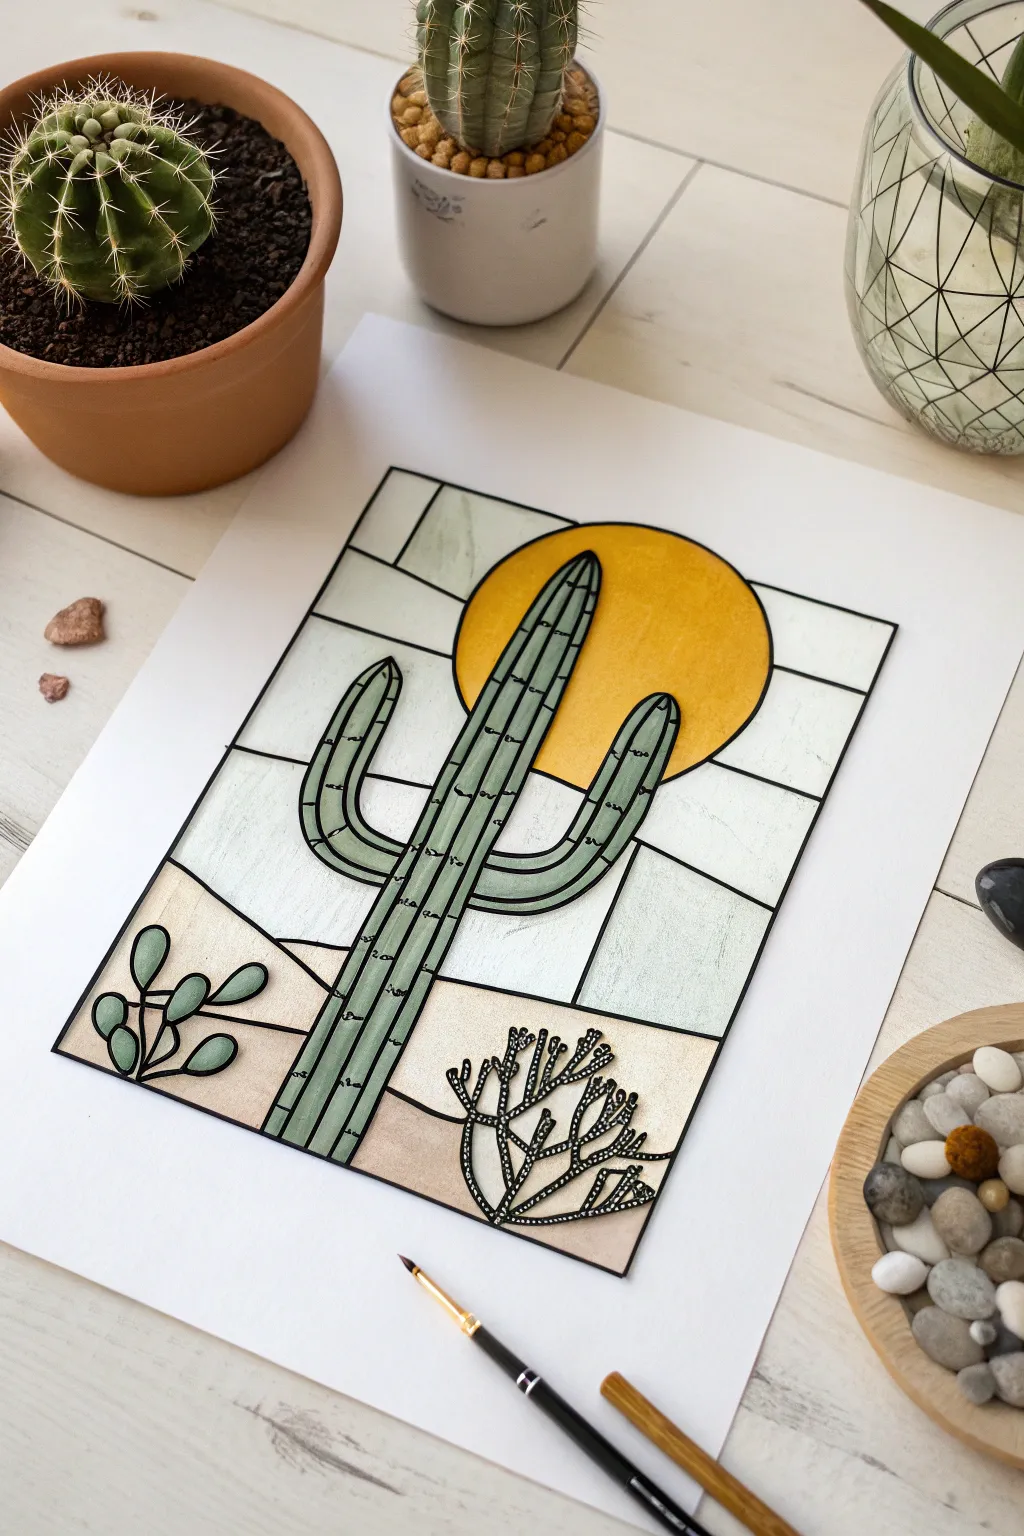
Capture the warmth of the desert with this unique stained-glass style illustration. Using bold, structured outlines and soft washes of color, you will create a modern geometric design that brings a sunny aesthetic to any room.
Detailed Instructions
Materials
- High-quality watercolor paper or hot-pressed illustration board
- Pencil (HB) and eraser
- Ruler
- Black waterproof fine liner pen (0.5mm)
- Thick black felt-tip marker or brush pen (for lead lines)
- Watercolor paints or alcohol-based markers (Sage Green, Mustard Yellow, Sand/Beige, Light Blue)
- Small round brushes (if using watercolor)
- White gel pen (optional for highlights)
Step 1: Drafting the Design
-
Initial Sketch:
Start by lightly sketching a large rectangle in the center of your paper to serve as the border. This framing is crucial for the stained-glass look. -
Placing the Cactus:
Draw the main vertical trunk of the Saguaro cactus slightly off-center. Add two curved arms branching upward—one lower on the left and one higher on the right. -
Adding specific details:
Below the main cactus, sketch a small prickly pear cluster on the bottom left and a branching shrub on the bottom right to balance the composition. -
Creating the Sun:
Using a compass or a circular object like a masking tape roll, trace a large circle behind the upper portion of the cactus to represent the sun. -
Geometric Background:
Use your ruler to draw horizontal lines across the background, breaking them where they hit the cactus or sun. These lines create the ‘glass pane’ effect. -
Refining Lines:
Lightly erase your sketch until it is barely visible, preparing the surface for the ink work.
Bleeding Lines?
If your black ink bleeds when painting, ensure you are using waterproof ink. If not available, paint the color first, let it fully dry, then add the black outlines over the top.
Step 2: Creating the Lead Lines
-
Inking the Frame:
Take your thick black marker and trace the outer rectangular border. The line needs to be bold and consistent, imitating heavy lead soldering. -
Outlining Shapes:
Trace the outline of the main cactus and the sun with the same thick marker. The thick line weight is what sells the stained-glass illusion. -
Inner details:
Switch to a slightly thinner fineliner to draw the horizontal background lines and the smaller desert plants at the bottom. -
Adding Texture:
Draw dashed lines running vertically down the cactus trunk and arms. I find this creates the perfect stylization of ribs and spines without cluttering the design. -
Dotted Accents:
Add tiny dot details to the smaller shrub on the bottom right to give it a distinct texture.
Step 3: Applying Color
-
Painting the Sun:
Load your brush with a rich mustard yellow. Fill in the sun circle carefully, trying to keep the color even and flat. -
Coloring the Cactus:
Paint the main cactus with a muted sage green. If you want depth, add a second coat to the edges while the center remains slightly lighter. -
Desert Floor:
Mix a diluted sand or beige color and apply it to the bottom framing sections to represent the desert ground. -
Sky Panes:
For the background sky sections, use a very watery light blue or grey. Keep this wash extremely subtle so the cactus remains the focal point. -
Drying Time:
Allow the paint to dry completely. If the paper buckles slightly, you can place it under a heavy book overnight once it is dry to the touch. -
Final Touches:
Once fully dry, use the thin black pen to re-trace any lines that might have been faded by the paint, ensuring a crisp, finished look.
Pro Tip: Glass Effect
To make the ‘panes’ look like real stained glass, keep the color slightly uneven. Let the paint pool slightly in the corners to mimic varying glass thickness.
Frame your new desert artwork in a simple black frame to enhance the modern geometric style


Have a question or want to share your own experience? I'd love to hear from you in the comments below!