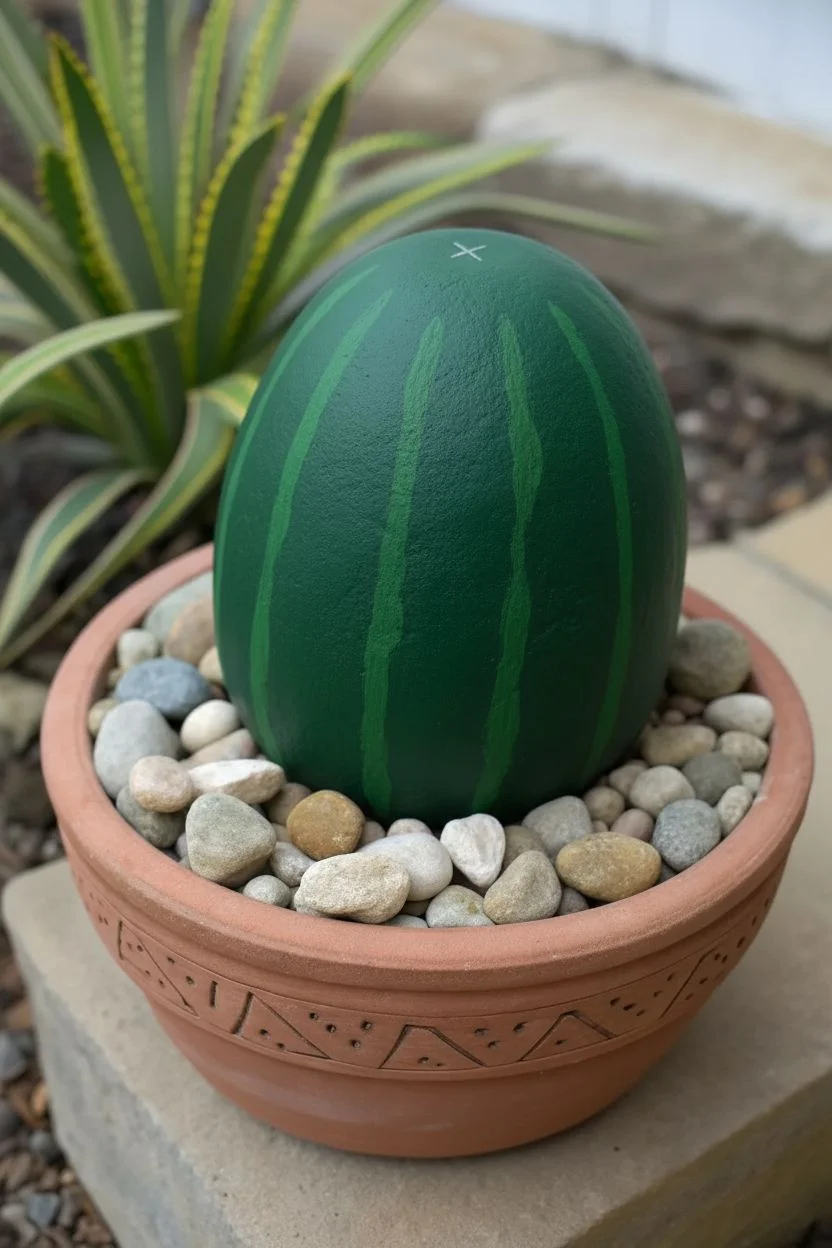
If you love the look of cacti but want the zero-maintenance version, cactus rock painting is such a satisfying little project. I’m sharing my favorite cactus rock painting ideas that turn smooth stones into a cute, display-ready mini garden you’ll actually want to keep out year-round.
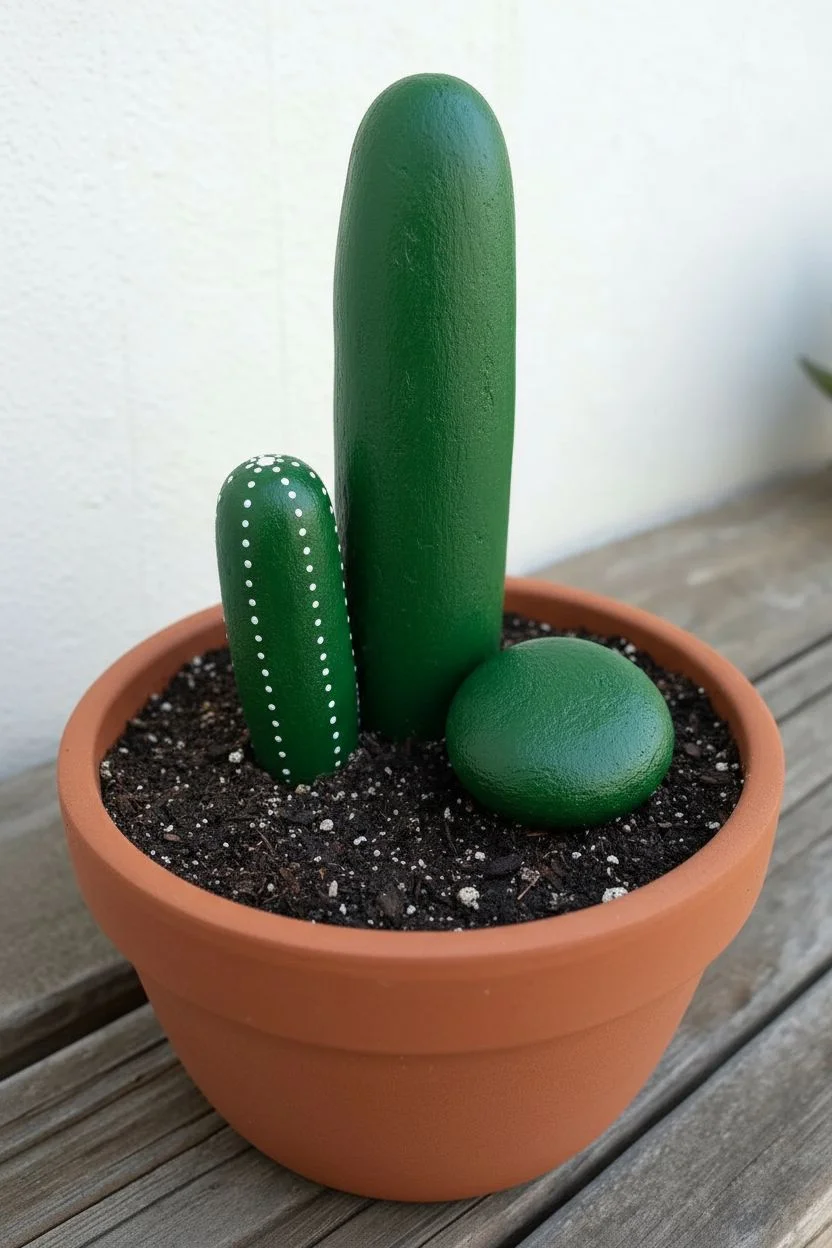
Classic Potted Cactus Rock Garden
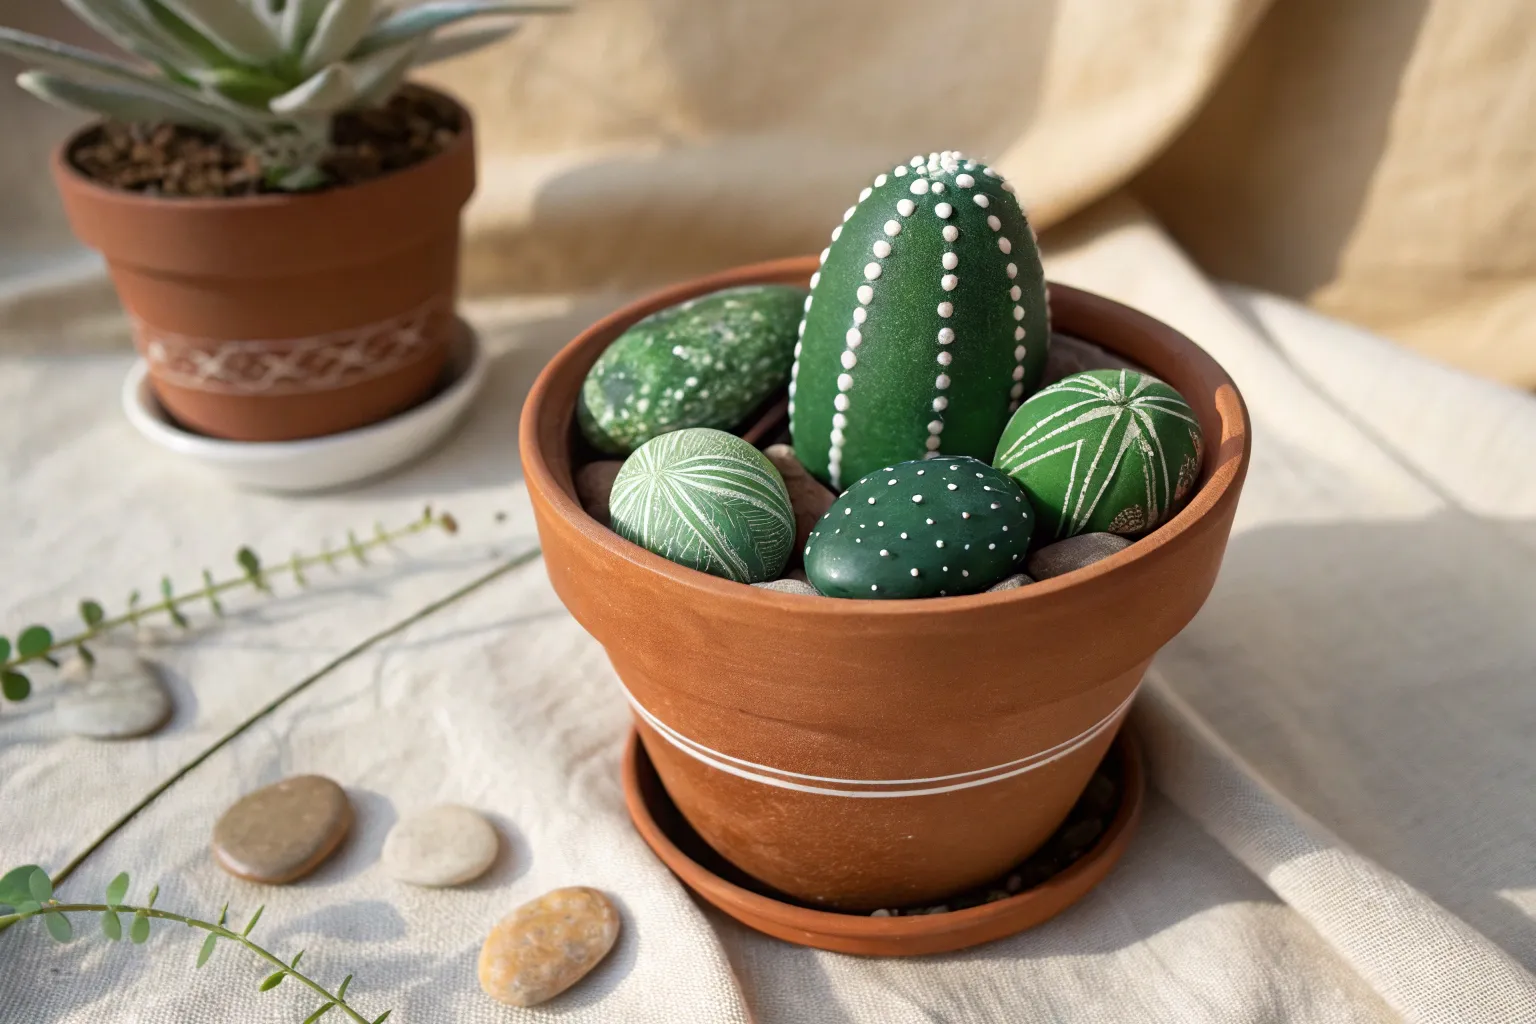
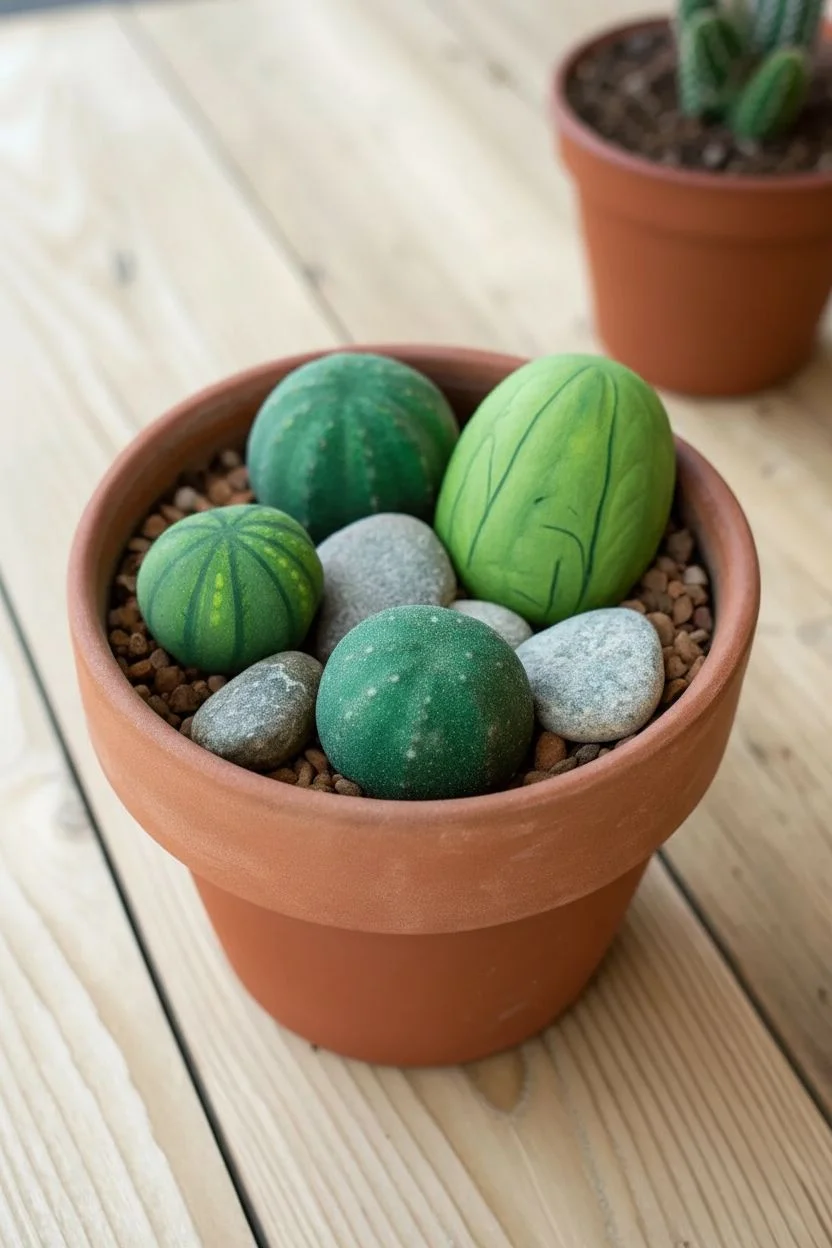
Transform smooth river rocks into an everlasting succulent garden that requires zero water. This charming project combines deep greens and precise white detailing to mimic the look of real potted cacti sitting in a sunny window.
Detailed Instructions
Materials
- Smooth river stones (various shapes: round, oval, and one elongated)
- Terracotta pot (medium depth)
- Small gravel or decorative pebbles
- Acrylic paint (dark hunter green, medium leaf green, white)
- Paintbrushes (flat shader brush, fine liner brush, and a dotting tool or toothpick)
- Sealant (matte or satin finish)
- Optional: One plain grey stone for contrast
Step 1: Preparation & Base Coat
-
Clean the canvas:
Begin by washing your selected rocks thoroughly with soap and water to remove any dirt or oils. Let them dry completely, as moisture will prevent the acrylics from adhering properly. -
Mix your greens:
On your palette, prepare two shades of green. You want a deep hunter green for the shaded areas and a slightly lighter leaf green for the main body. I sometimes mix a tiny drop of black into the hunter green for extra depth. -
Apply the first coat:
Paint the entire top surface of each rock with your base green color. For the tall, column-like rock, use a vertical stroke. For the round rocks, follow the curve of the stone. -
Layering for opacity:
Acrylics can be translucent on dark stones. Allow the first coat to dry for about 15 minutes, then apply a second coat to ensure a rich, solid color foundation. -
Adding dimension:
While the second coat is slightly tacky, blend a little of the darker green along the bottom edges or ‘ribs’ of the cactus to create a subtle 3D shadow effect.
Step 2: Detailing the Cacti
-
Mapping the ribs:
Using a very fine liner brush and your lighter green (or a mix of green and white), lightly paint vertical stripes on the tall rock and curved meridian lines on the round rocks. These will guide your spine placement. -
Creating the tall cactus spines:
For the elongated rock, switch to white paint. Use a fine dotting tool to place small, evenly spaced dots along the vertical ribs you just painted. -
Clustering the dots:
On the round, barrel-style rocks, you want to create ‘areoles’ (the clusters where spines grow). Instead of single dots, paint tiny clusters of 3-4 white specks close together. -
Star bust patterns:
For the largest round rock, try painting tiny starburst shapes or ‘x’ shapes with white paint to simulate longer spines radiating from a center point. -
Varying the patterns:
To make the garden look realistic, give each rock a slightly different pattern. Leave one with just simple rows of dots, while another gets distinct white stripes separating the green sections. -
Highlighting the ridges:
Mix a very pale green (almost white). Use a dry-brush technique to lightly sweep over the center of the ribbed sections. This highlights the ‘plump’ part of the cactus. -
Drying time:
Let all your detailed dot work dry completely. This creates the crisp texture we are looking for.
Uneven Dots?
If your white dots look messy or varied in size, try using the flat end of different sized drill bits or a designated nail-art dotting tool instead of a brush tip.
Step 3: Assembly & Finishing
-
Sealing the art:
Once dry, apply a coat of matte or satin sealant. Avoid high-gloss finishes, as real cacti usually have a dull, waxy texture rather than a shiny one. -
Prepping the pot:
Fill your terracotta pot about 3/4 of the way full with newspaper or scrap fillers, then top it with a layer of your small gravel or pebbles. -
Arranging the garden:
Nestle your painted rocks into the gravel. Place the tall column cactus in the back or slightly off-center as an anchor. -
Adding variety:
Group the round barrel cacti around the tall one. I like to tilt them slightly at different angles so they don’t look too uniform. -
The final touch:
Add one unpainted, smooth grey river stone to the arrangement. This natural element tricks the eye and makes the painted rocks look even more convincing by contrast.
Bloom Factor
Glue a small faux flower or a tiny pom-pom in pink or yellow to the top of one of round rocks to mimic a cactus in full bloom.
Place your new rock garden on a sunny sill and enjoy the greenery all year round


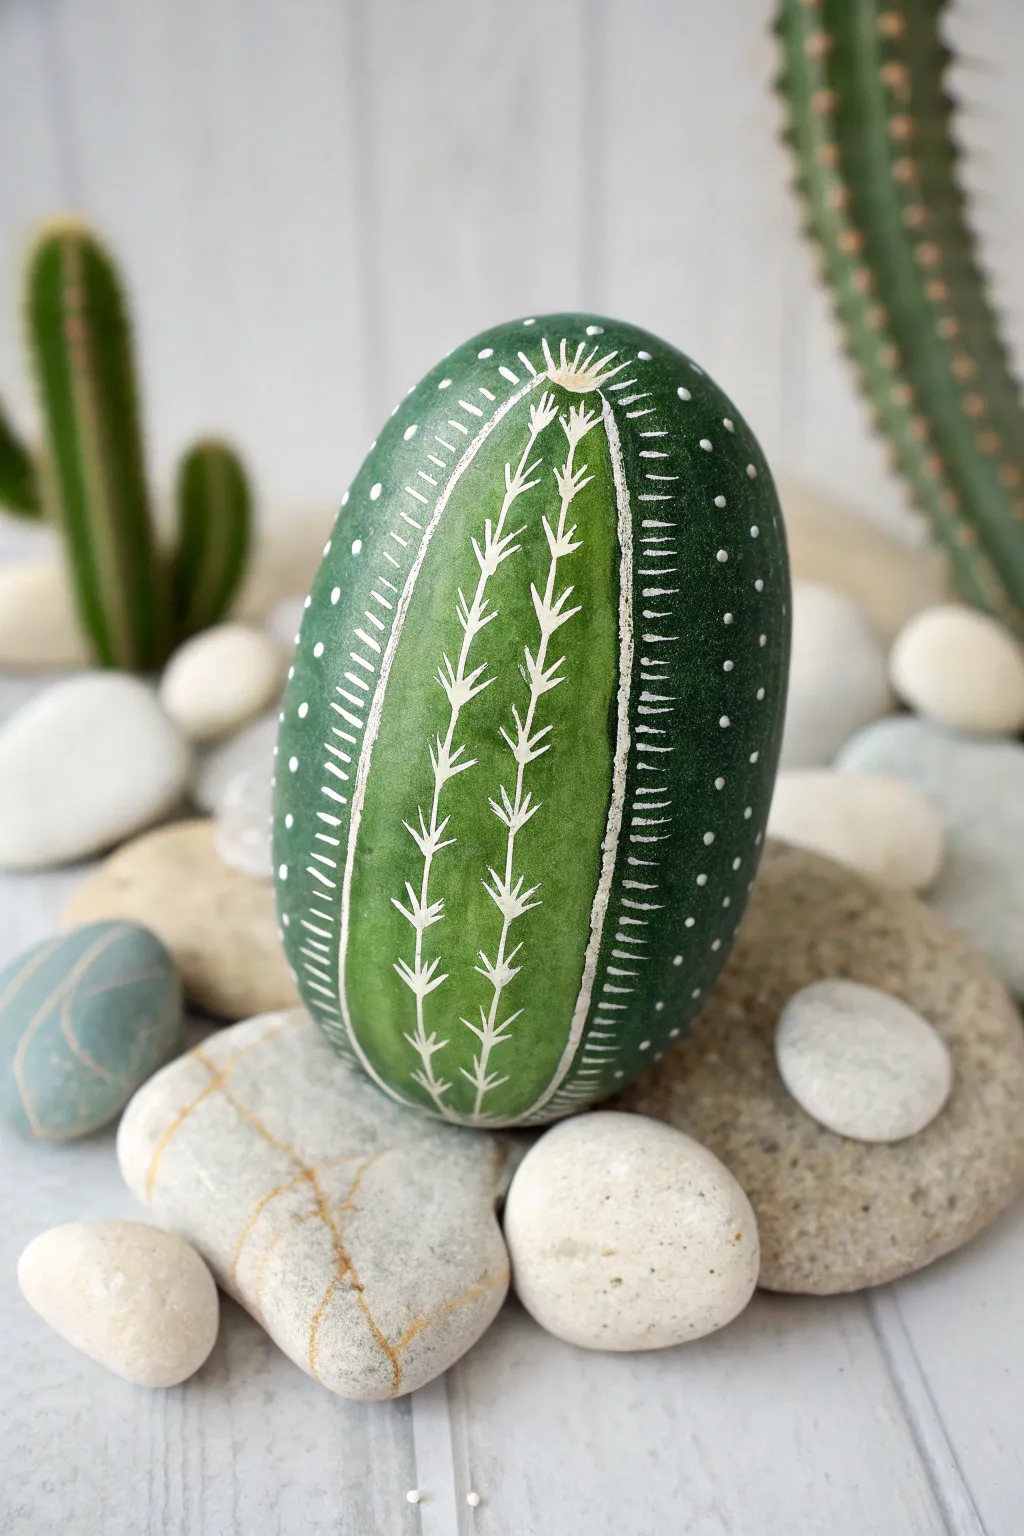
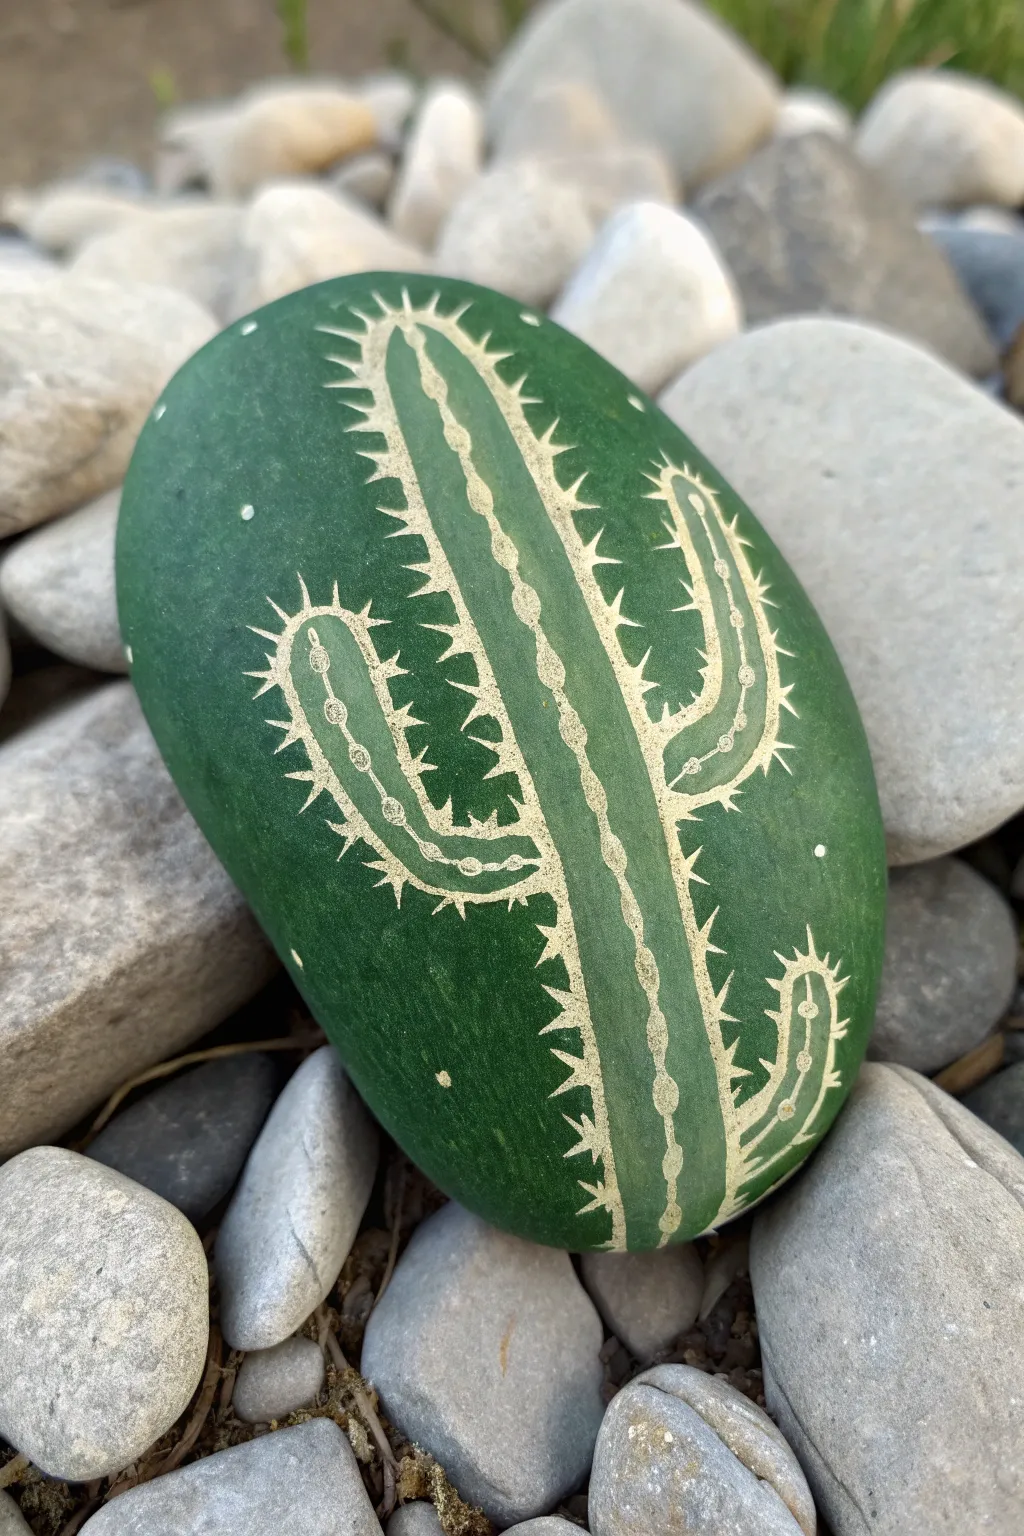
Barrel Cactus With Vertical Ribs
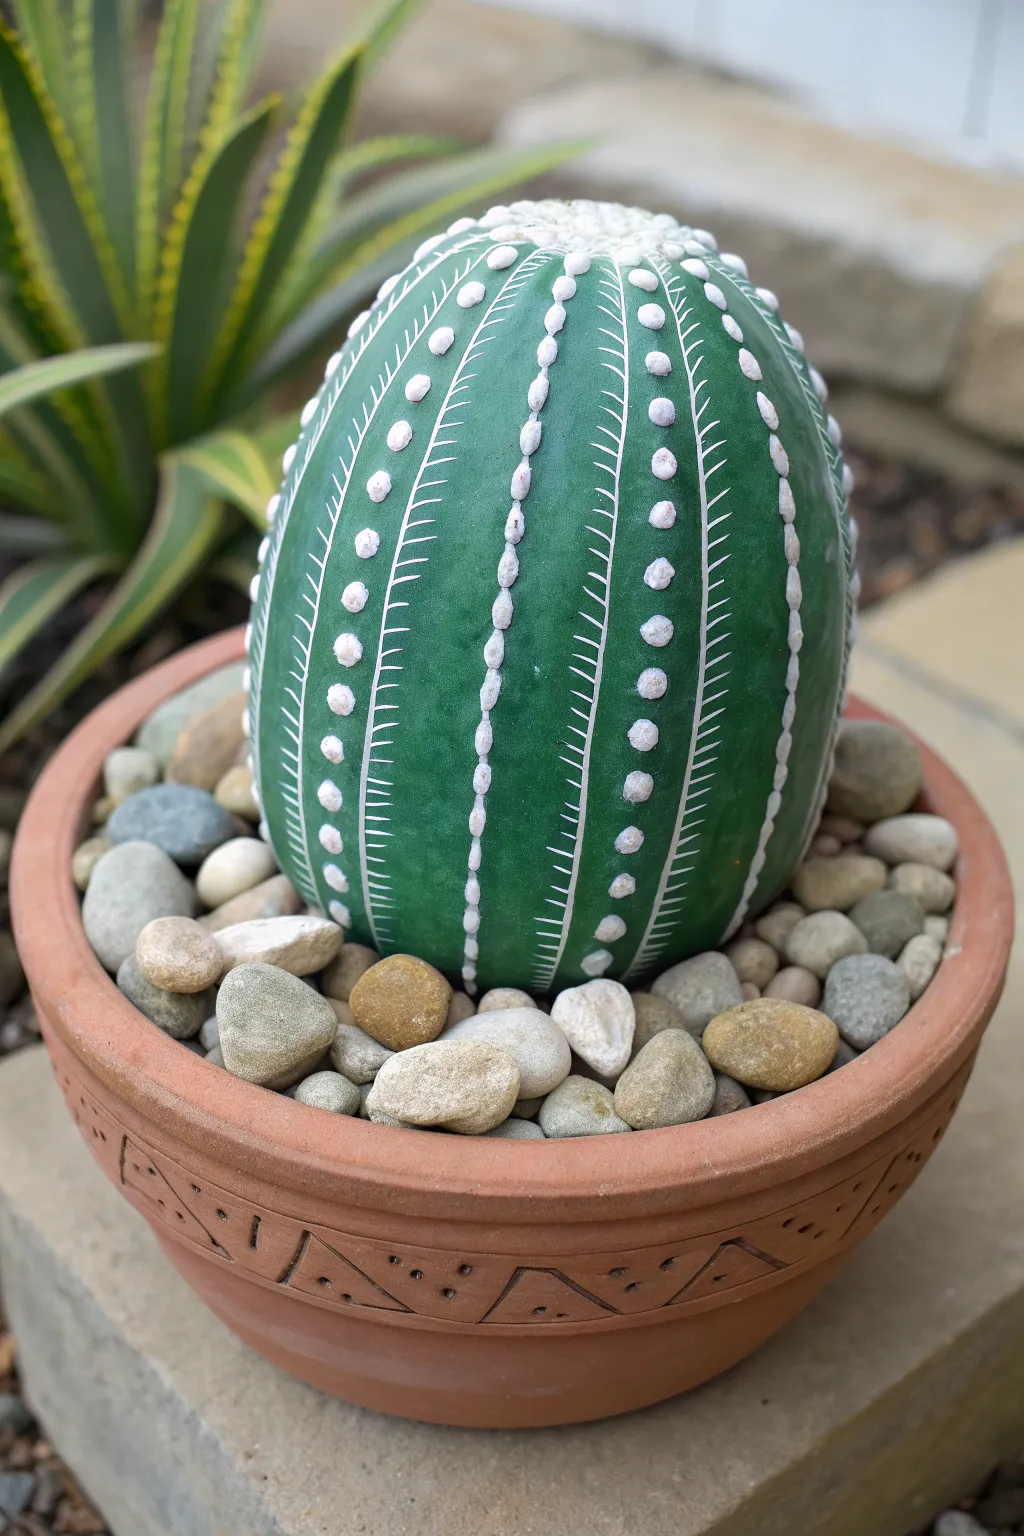
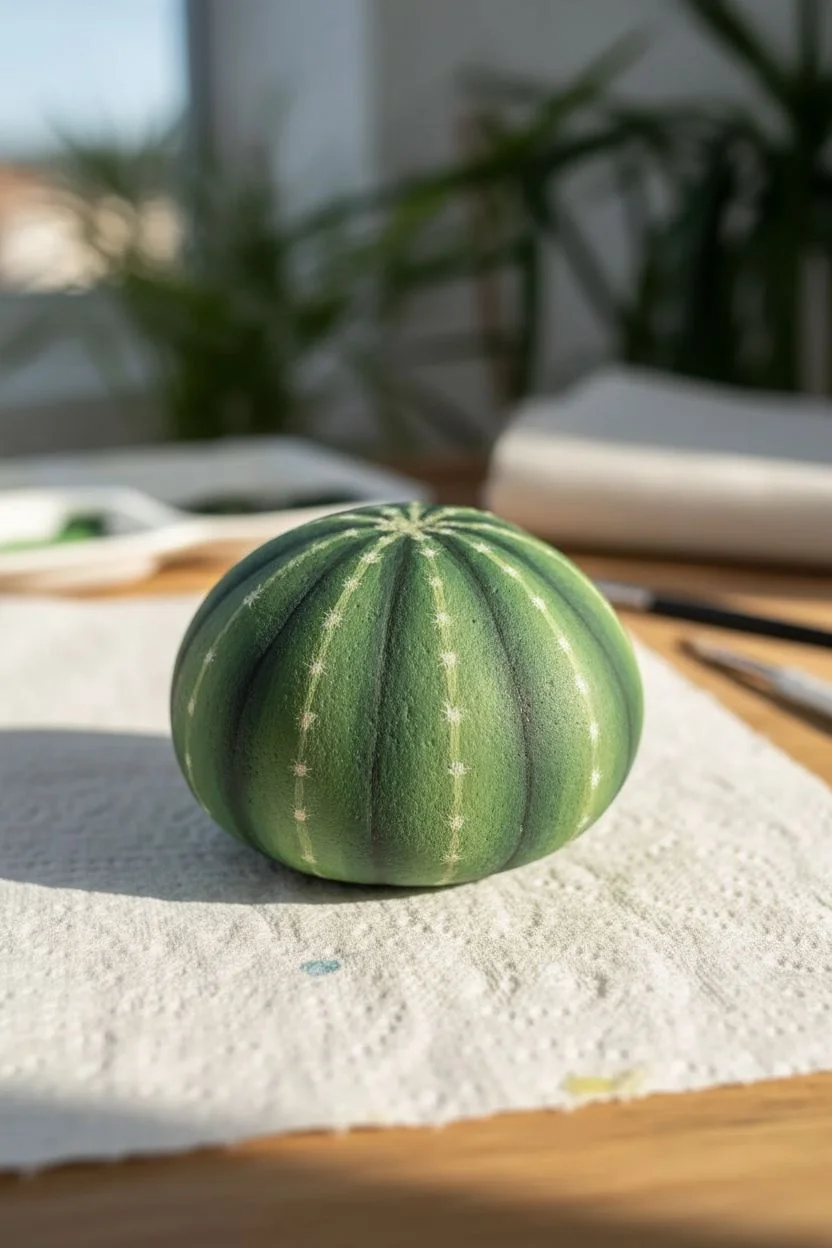
Transform a simple oval-shaped stone into a strikingly lifelike barrel cactus with this clever painting technique. By layering crisp white details over a rich green base, you’ll create the illusion of dimensional ribs and sharp spines without any prickly consequences.
How-To Guide
Materials
- Smooth, oval-shaped river rock (approximately 4-6 inches tall)
- Dark forest green acrylic paint
- Medium green acrylic paint (for subtle variation)
- White or off-white acrylic paint
- Wide flat paintbrush
- Fine detail paintbrush (liner brush or size 0)
- Small round paintbrush
- Dotting tool or toothpick
- Terracotta pot
- Small pebbles or gravel for filling
- Matte or satin spray sealer
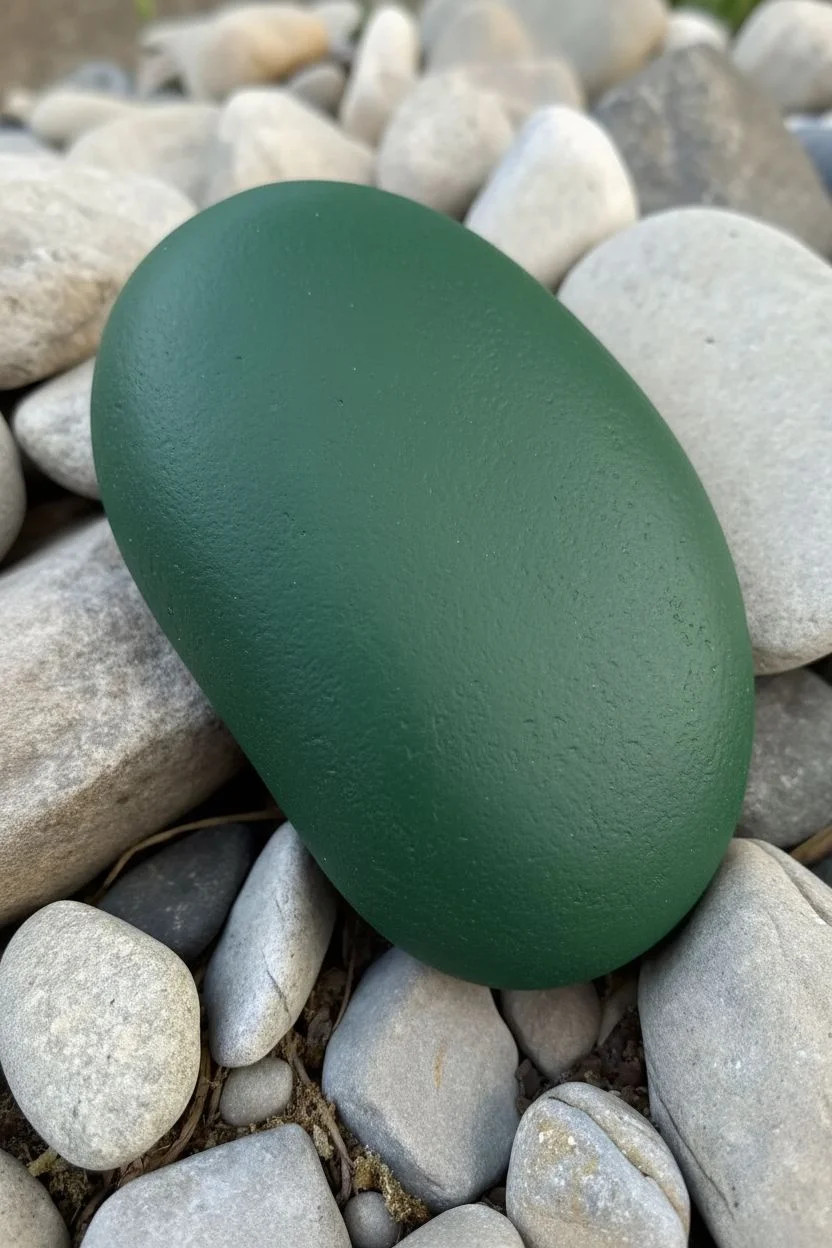
Step 1: Base and Foundation
-
Clean the canvas:
Start by scrubbing your river rock with warm soapy water to remove any dirt or grease. Allow it to dry completely so the paint adheres properly. -
Apply the base coat:
Using your wide flat brush, cover the entire rock with dark forest green acrylic paint. You may need two coats to ensure opaque coverage, letting the first layer dry before applying the second. -
Add subtle dimension:
While the green is still slightly tacky or just after drying, I like to dry-brush a tiny amount of medium green vertically down the rock. This isn’t strictly necessary, but it gives the ‘skin’ of the cactus a bit more organic depth. -
Mark the center:
Identify the top center of your rock where the ribs will converge. This will act as your anchor point for all the vertical lines.
Stay Steady
Rest your painting hand on the table and rotate the rock with your other hand. This stabilizes your brush strokes for straighter vertical lines throughout.
Step 2: Creating the Ribs
-
Draft the spine lines:
Switch to your fine liner brush and white paint. Paint thin, vertical lines running from the top center down to the bottom of the rock. Space them evenly around the circumference. -
Create the areoles:
Along each vertical white line, paint small, slightly raised white dots. These represent the areoles (the fuzzy bumps where spines grow). Space them about half an inch apart. -
Shape the dots:
Make the dots slightly larger and closer together near the very top of the rock to mimic how the cactus ribs converge at the apex. -
Thicken the areoles:
Go back over your dots with a second layer of white paint or a dotting tool to give them a slightly puffy, 3D texture. This raised paint adds to the realism. -
Add the crown:
At the very top center of the rock, cluster many small white dots tightly together to form the fuzzy ‘crown’ of the barrel cactus.
Blooms & Blossoms
Glue a small faux flower or a pom-pom to the top crown section. Bright yellow or hot pink complements the dark green beautifully.
Step 3: Adding the Spines
-
Paint the side spines:
Using your finest liner brush, paint tiny, horizontal tick marks extending outward from each areole dot. These should look like little needles poking out sideways. -
Vary the angle:
Ideally, paint two or three tiny spines per dot—one pointing left, one right, and perhaps a smaller one pointing downward. -
Refine the lines:
You can add tiny parallel hatch marks between the areoles on the vertical lines to create the texture of the cactus ridge, as seen in the reference photo. -
Seal the artwork:
Once the paint is fully cured (give it a few hours), spray the entire rock with a matte or satin sealer to protect the design from chipping.
Step 4: Potted Assembly
-
Prepare the pot:
Take a terracotta pot that is slightly wider than your rock. Fill the bottom half with gravel or newspaper to create a base. -
Position the cactus:
Place your painted rock in the center of the pot. Ensure it sits straight and shows off your best-painted side. -
Fill with pebbles:
Pour small river stones or decorative gravel around the base of the rock until the pot is filled to the rim, securing the ‘cactus’ in place.
Place your new everlasting plant on a sunny windowsill where it can be admired without needing a single drop of water


Tall Column Cactus Rock Trio

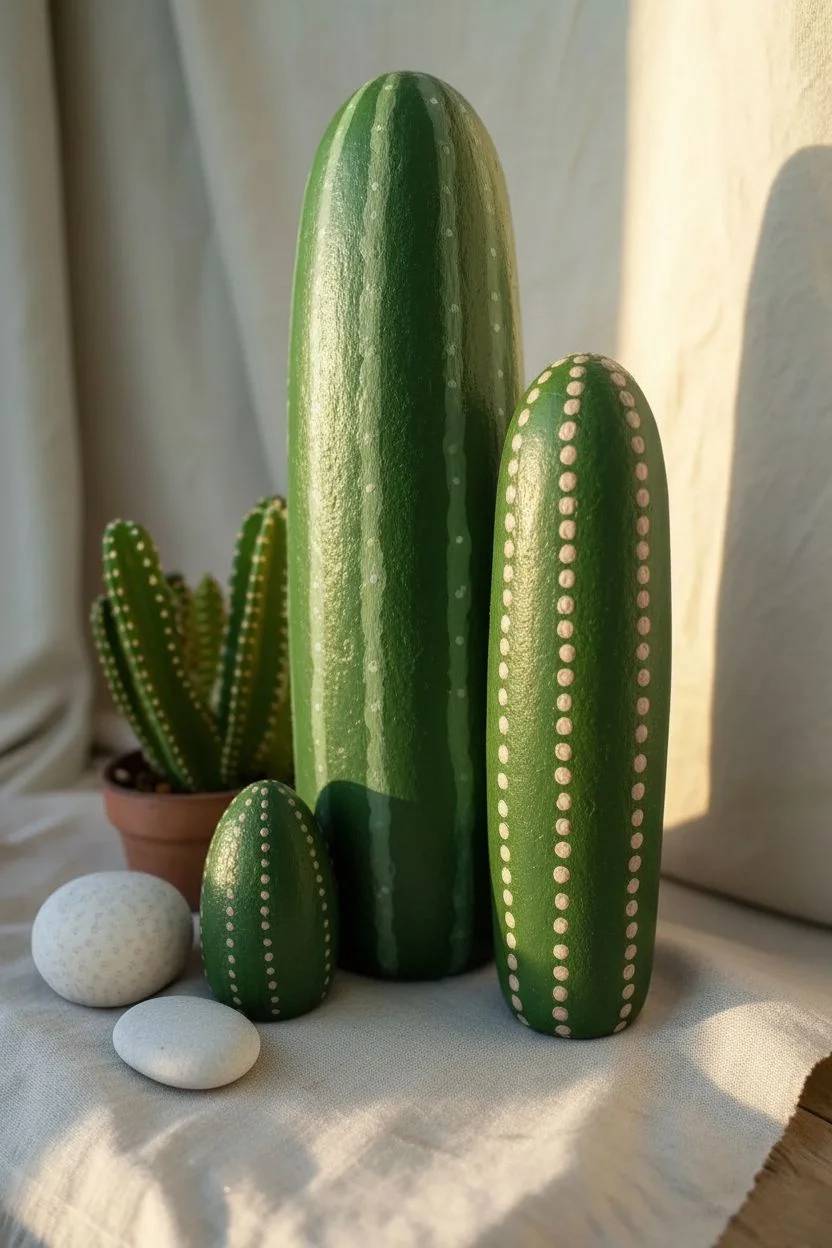
Transform smooth, elongated river stones into a striking desert sculptural element with these column cactus designs. This project uses precise liner work and strategic dotting to mimic the ribbed texture and spines of real cacti, creating a zero-maintenance botanical display.
Step-by-Step
Materials
- Smooth, elongated river rocks (various heights)
- Acrylic paints: Dark forest green, olive green, white, pale yellow, beige
- Gesso or white acrylic primer
- Flat brush (medium)
- Fine liner brush (size 0 or 00)
- Dotting tools (various sizes)
- Matte spray varnish
- Palette or mixing plate
- Water cup and paper towels
Step 1: Base Coat and Gradient
-
Prime the Surface:
Before adding color, scrub your rocks clean and let them dry completely. Apply a coat of white gesso or primer to ensure your green hues pop and the paint adheres properly. -
Apply the Base Green:
Mix your forest green with just a touch of olive to warm it up. Paint the entire surface of your elongated rocks. You may need two coats for full opacity, allowing the first to handle dry to the touch before adding the second. -
Add Subtle Highlights:
While the second coat is still slightly tacky, I like to mix a tiny bit of white into my green and lightly brush it down the center ‘spine’ area of the rock. This creates a soft highlight that enhances the cylindrical form.
Wobbly Lines?
Steady your hand by resting your pinky finger on the dry part of the rock while painting vertical lines. It acts as an anchor for smoother strokes.
Step 2: Painting the Ribs
-
Drafting the Lines:
Using your fine liner brush and very diluted white or pale beige paint, sketch faint vertical lines from the top center down to the base. Space them evenly to represent the cactus ribs. -
Strengthening the Lines:
Load your liner brush with creamy, opaque white paint. Go over your draft lines with confident strokes. For the tallest cactus, create distinct double lines or a thick central line with feathering edges to mimic a spiny ridge. -
Creating Texture:
On the largest rock shown, varying the line style helps. Try small, angled hash marks branching off the main vertical line, pointing slightly upward like arrow fletchings.
Make it Bloom
Glue a small, brightly colored tissue paper flower or a pre-made fabric blossom to the very top of one rock to mimic a cactus in full bloom.
Step 3: Adding Spines and Areoles
-
Dotting the Rows:
For the medium-sized cactus, use a dotting tool to place evenly spaced beige or pale pink dots along the vertical imaginary ribs. These represent the areoles (the bumps where spines grow). -
Layering Dots:
Once the base dots dry, add a slightly smaller dot of a lighter shade directly in the center of them to create dimension. -
Painting Needle Spines:
Switch back to your smallest liner brush. On the tallest cactus, instead of large dots, paint tiny white clusters of dots or very short dashes along the vertical stripes. -
Detailing the Small Cactus:
For the smallest, egg-shaped rock, create bolder vertical stripes using a series of close-set, large beige dots. This gives it a distinct texture compared to the tall columns.
Step 4: Finishing Touches
-
Intermediate Highlights:
Using a very dry brush with a tiny amount of pale yellow, gently whisk in between the vertical rib lines to suggest sun-bleached skin. -
Defining the Edges:
Add tiny white specks randomly between the ribs on the largest cactus to simulate natural imperfections and surface texture. -
Painting the Flower Rock:
If you have a flat, smaller stone remaining, paint a simple stylized flower using yellow and green strokes to accompany your arrangement. -
Sealing the Set:
Ensure all paint is bone dry—usually overnight is safest. In a well-ventilated area, seal your cacti with a matte spray varnish to protect the paint without adding an unnatural glossy shine.
Arrange your finished stone trio near a sunny window for a touch of greenery that never needs water


Prickly Spines Using Tiny X and Dash Marks
Transform an ordinary oval stone into a striking botanical art piece using simple geometric marks. This design features a central lighter panel framed by darker green, with delicate white details that mimic the texture of a real cactus.
Step-by-Step Guide
Materials
- Smooth oval river rock (fist-sized)
- Acrylic paints (Dark hunter green, medium grass green, white)
- Flat shader brush (size 6 or 8)
- Fine liner brush (size 0 or 00)
- Dotting tool or toothpick
- Matte or satin spray sealant
- Palette or paper plate
- Water cup and paper towels
Step 1: Base Coloring
-
Clean the surface:
Begin by washing your rock with soapy water and drying it completely. Dust or dirt will prevent the paint from adhering smoothly. -
Paint the background:
Using the flat shader brush, coat the entire top surface of the rock with your dark hunter green paint. You may need two coats for opaque coverage; let the first coat dry fully before adding the second. -
Create the central stripe:
Mix a small amount of white into your medium grass green to create a soft, lighter lime shade. Paint a wide, vertical panel down the center of the rock, tapering slightly at the top and bottom to follow the stone’s curve. -
Soften the edges:
While the lighter green panel is drying, ensure the edges are relatively clean, though they will be covered by white lines later. Let this base layer dry completely for at least 15-20 minutes.
Step 2: Adding the Spines
-
Outline the panel:
Load your fine liner brush with bright white paint. For better flow, you can thin the paint slightly with a drop of water. Carefully paint thin vertical lines bordering the central light green panel on both sides. -
Paint the central spine column:
Down the exact center of the light green panel, paint a column of small, inverted ‘V’ shapes or ‘arrowhead’ marks. Connect them with a very thin vertical line running through the middle. -
Add side details to the center:
From that central vertical line, paint small diagonal lines extending outward between the V-shapes, creating a prickly, skeletal look. -
Create the outer dashes:
Moving to the border lines you painted in step 1 of this phase, paint short, horizontal dashes extending outward into the dark green background. Keep these dashes evenly spaced. -
Add the inner dashes:
Repeat the dashing process on the inside of the border lines, painting short dashes that point inward toward the light green center. -
Paint the top cluster:
At the very apex of the rock, where your central panel ends, paint a small sunburst or star shape using outwardly radiating lines to mimic the growing tip of the cactus.
Brush Flow Tip
If your fine lines look scratchy or break often, add a tiny drop of water to your white paint. It should have the consistency of heavy cream to flow smoothly off the liner brush.
Step 3: Finishing Touches
-
Dot the dark background:
Dip your dotting tool or the tip of a toothpick into white paint. Add rows of tiny dots running vertically down the dark green sides of the rock, spacing them out to look like areoles. -
Refine the lines:
Check your white lines for opacity. If the green is showing through significantly, carefully re-trace the thickest parts of the design with a second layer of white. -
Dry thoroughly:
Allow the rock to sit undisturbed for at least an hour to ensure the thick white paint is cured all the way through. -
Seal the artwork:
Take the rock outside and spray it with a matte or satin sealant. This protects the paint from chipping and gives the stone a unified, professional finish.
Wobbly Lines?
Rest your pinky finger on the dry part of the rock while painting. This anchors your hand and acts as a stabilizer, giving you much more control over fine details.
Place your finished stone in a planter or on a windowsill for a succulent that never needs watering
BRUSH GUIDE
The Right Brush for Every Stroke
From clean lines to bold texture — master brush choice, stroke control, and essential techniques.
Explore the Full Guide
Gradient Greens for Realistic Dimension
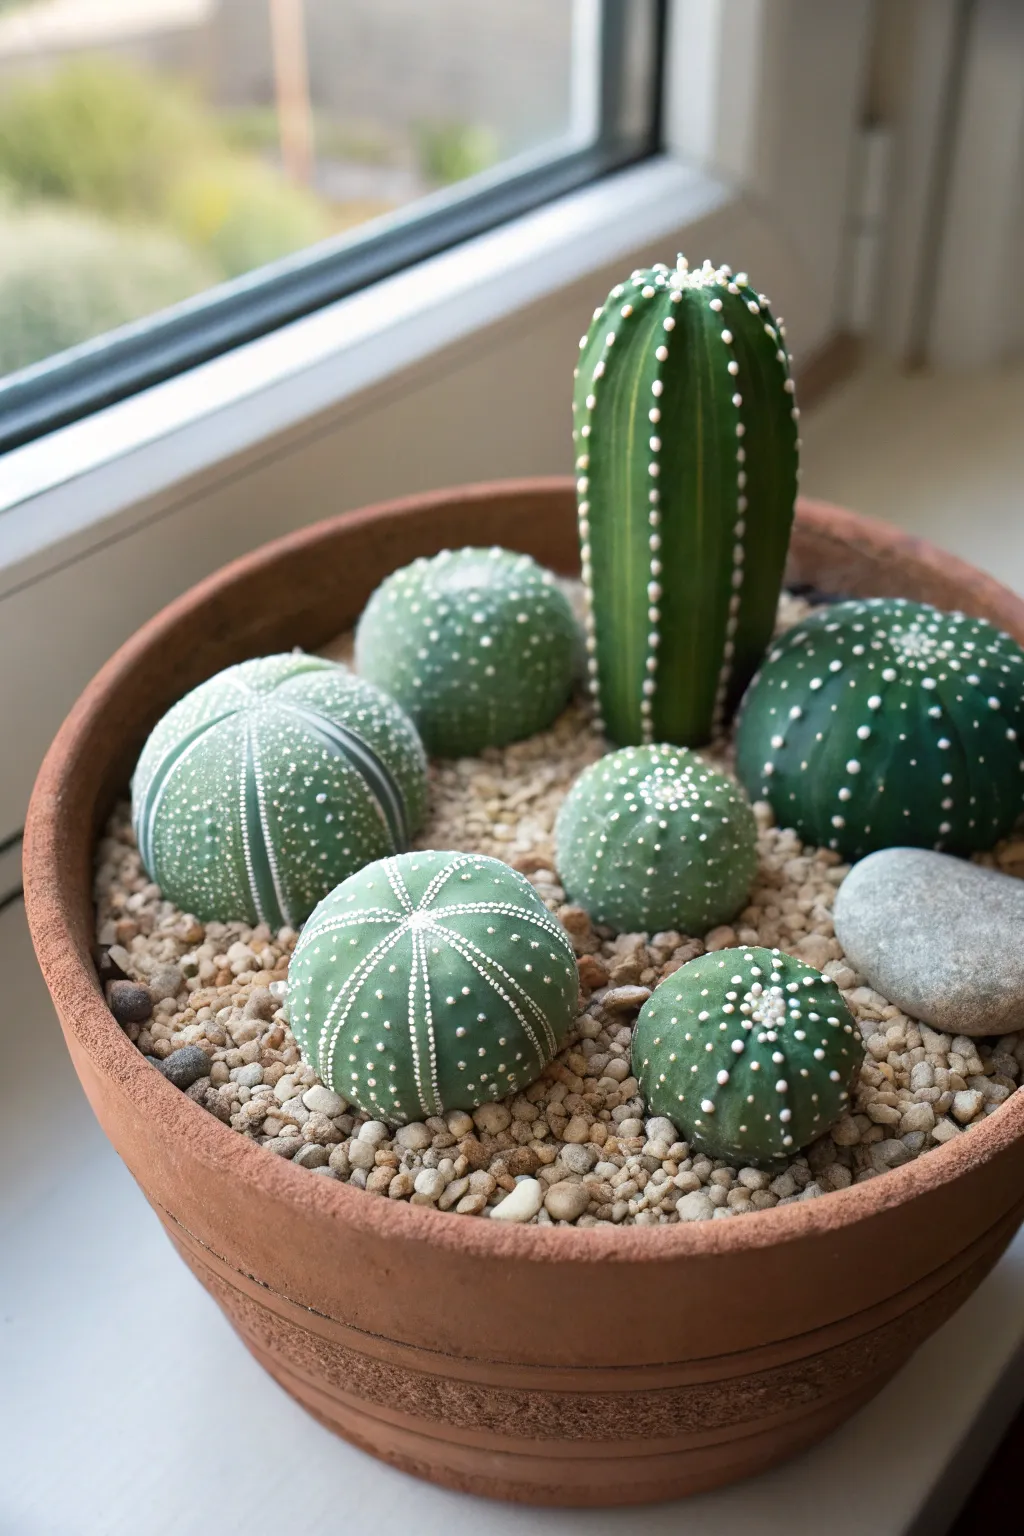
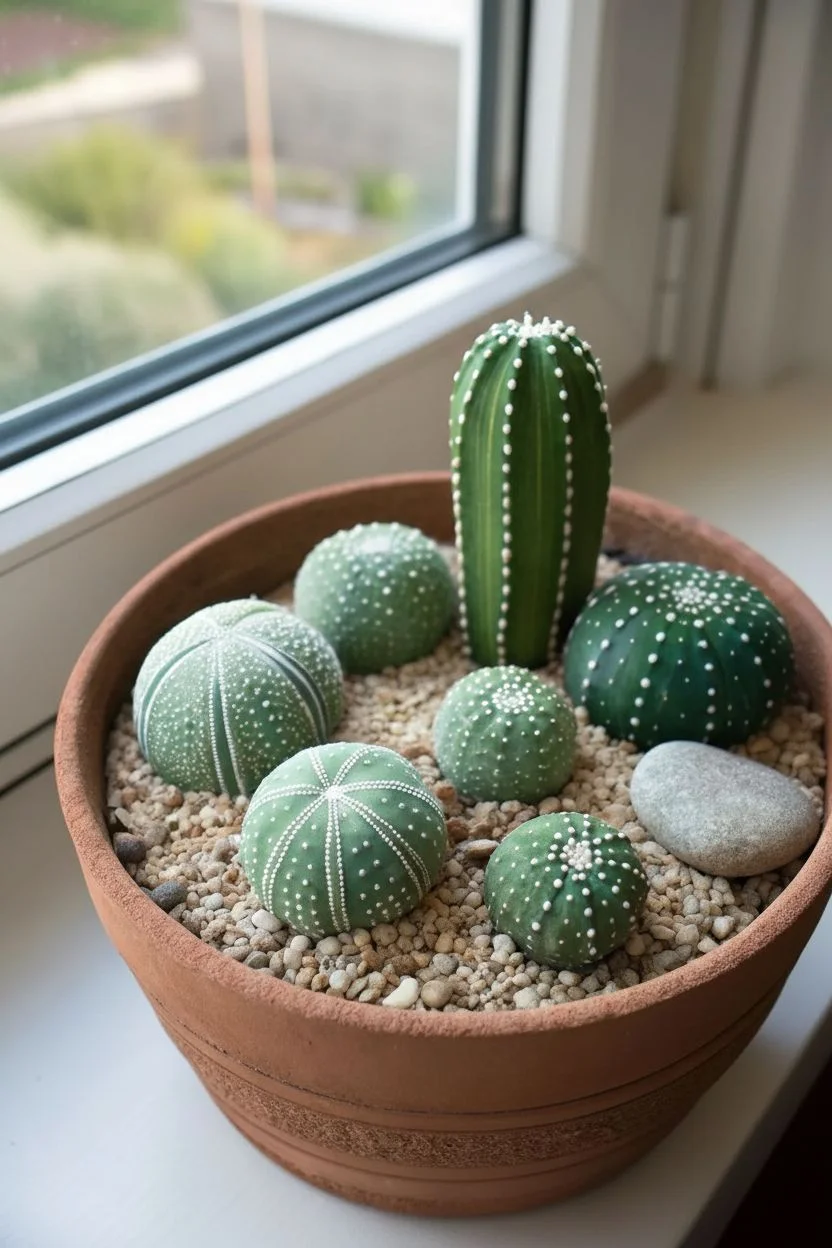
Transform smooth river stones into a charming, prickly-free succulent garden that never needs watering. By using gradient greens and precise white detailing, you’ll create a realistic potted arrangement perfect for adding greenery to dark corners.
How-To Guide
Materials
- Smooth, round river stones (various sizes)
- Elongated, oval stone (for tall cactus)
- Small grey filler pebbles
- Terracotta pot (4-6 inch diameter)
- Brown gravel or aquarium substrate
- Acrylic paints (Dark Green, Leaf Green, Lime Green, White, Yellow)
- Paintbrushes (Flat shader, detail liner, dotting tool)
- Acrylic matte sealer spray
- Palette for mixing
Step 1: Base Coating & Gradient
-
Clean the canvas:
Begin by washing your stones thoroughly with soap and water to remove any dirt or oils. Let them dry completely, or speed up the process with a hair dryer if you’re eager to start. -
Mix your greens:
Prepare a palette with three shades of green: a dark forest green, a standard leaf green, and a lighter lime green. If you only have one green, mix it with black for shadows and yellow for highlights. -
Apply base coat:
Paint the entire surface of your cactus rocks with the standard leaf green. This may need two coats for opaque coverage. Let this dry fully. -
Create vertical dimension:
For the round cacti, imagine vertical segments like a pumpkin. Paint vertical stripes of the darker green to act as the recessed areas between the cactus ribs. -
Highlight the ribs:
Down the center of the lighter green sections, dry brush a little bit of the lime green or a yellow-green mix. This creates a rounded, 3D effect where the ‘sun’ would hit the cactus. -
Soften the blend:
While the paint is still slightly tacky, use a damp brush to gently feather the edges where the dark and light greens meet, creating a smooth gradient rather than harsh stripes. -
Seal the base:
Once you are happy with the green dimension, let the rocks dry for at least 30 minutes. I usually apply a quick coat of spray sealer here so my white details don’t smudge the green paint underneath.
Wobbly Lines?
If your hand shakes while painting thin spines, rest your pinky finger on the dry part of the rock for stability. Using a paint marker instead of a brush also offers better control.
Step 2: Detailing the Cacti
-
Plan the spines:
Decide on different patterns for each rock to create variety. One can have vertical lines of spines, another can be scattered dots, and the tall one can have stylized ridges. -
Paint starburst spines:
For the first round cactus, use a fine liner brush and white paint to create small star-shaped clusters. Draw 5-6 tiny lines radiating from a single center point, spaced evenly in vertical rows. -
Add dot details:
For the second round cactus, switch to a dotting tool or the back of a paintbrush. Dip it in white paint and press gently to create uniform dots along the vertical ridges of the ‘ribs’. -
Detail the tall cactus:
On the elongated stone, paint long, thin vertical lines using a pale green or off-white. Add evenly spaced white dots along these lines to simulate the areoles where spines grow. -
Add depth to markings:
Mix a tiny drop of yellow into your white paint. Re-dot the very centers of your spine clusters to make them pop and look three-dimensional. -
Let it cure:
Allow the white detailing to dry completely. Since the dots can be thick, give them extra time so they don’t flatten or smear.
Pro Tip: Matte Finish
Real cacti aren’t usually glossy. Always use a matte varnish spray to finish your rocks. Glossy finishes destroy the illusion and make them look like ceramic instead of organic matter.
Step 3: Assembly
-
Prep the pot:
If your terracotta pot is deep, fill the bottom with crumpled newspaper or floral foam to save on gravel. Leave about 2 inches of depth at the top. -
Add base gravel:
Pour a layer of brown gravel or small aquarium rocks over your filler material to create a flat, earthy surface. -
Arrange the main rocks:
Nestle your painted cactus rocks into the gravel. Contrast the shapes by placing the tall stone next to the round ones. -
Fill the gaps:
Take your unpainted grey filler stones and tuck them into the gaps between the painted cacti. This adds realism and helps prop up the painted stones at the right angles. -
Final touch-ups:
Brush off any dust from the stones and adjust the gravel so it covers the bottom edges of the rocks, making them look naturally rooted in the soil.
Place your new rock garden on a sunny windowsill or a desk for a touch of desert beauty that lasts forever
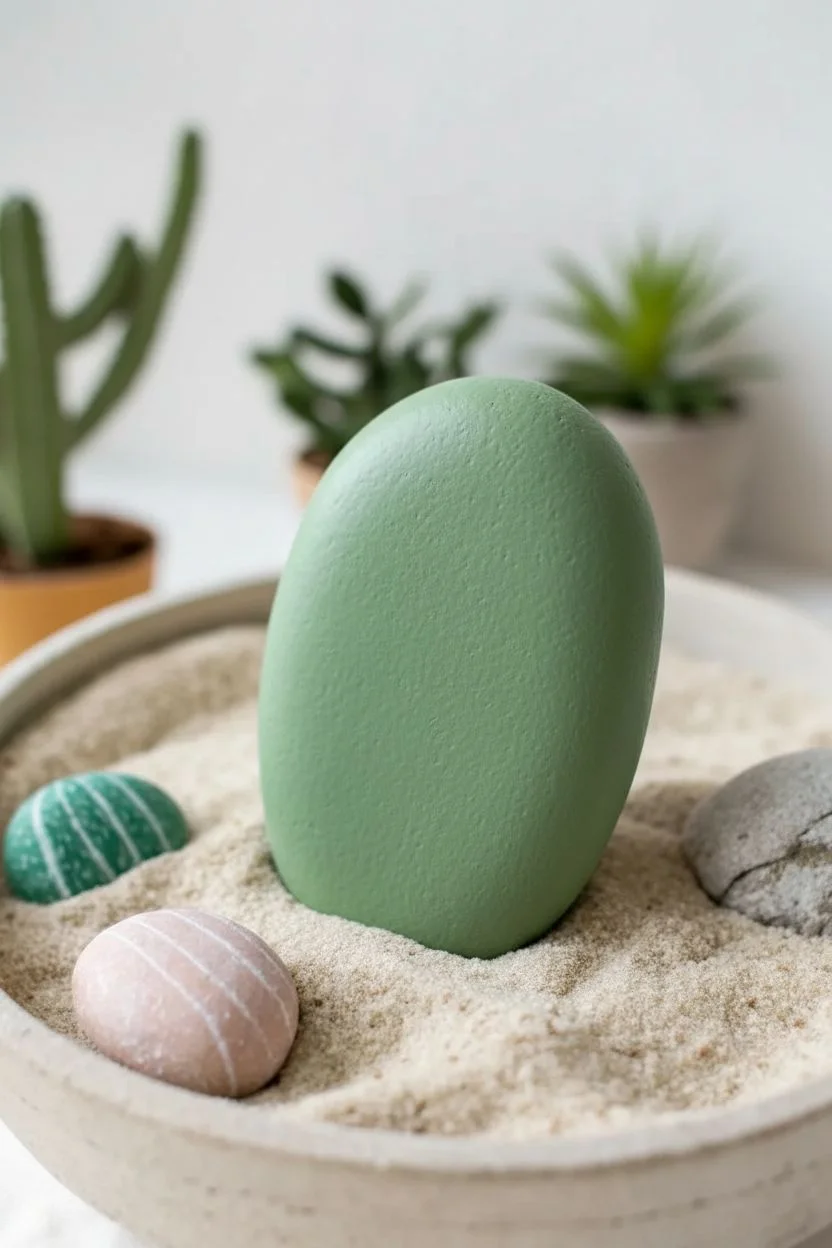
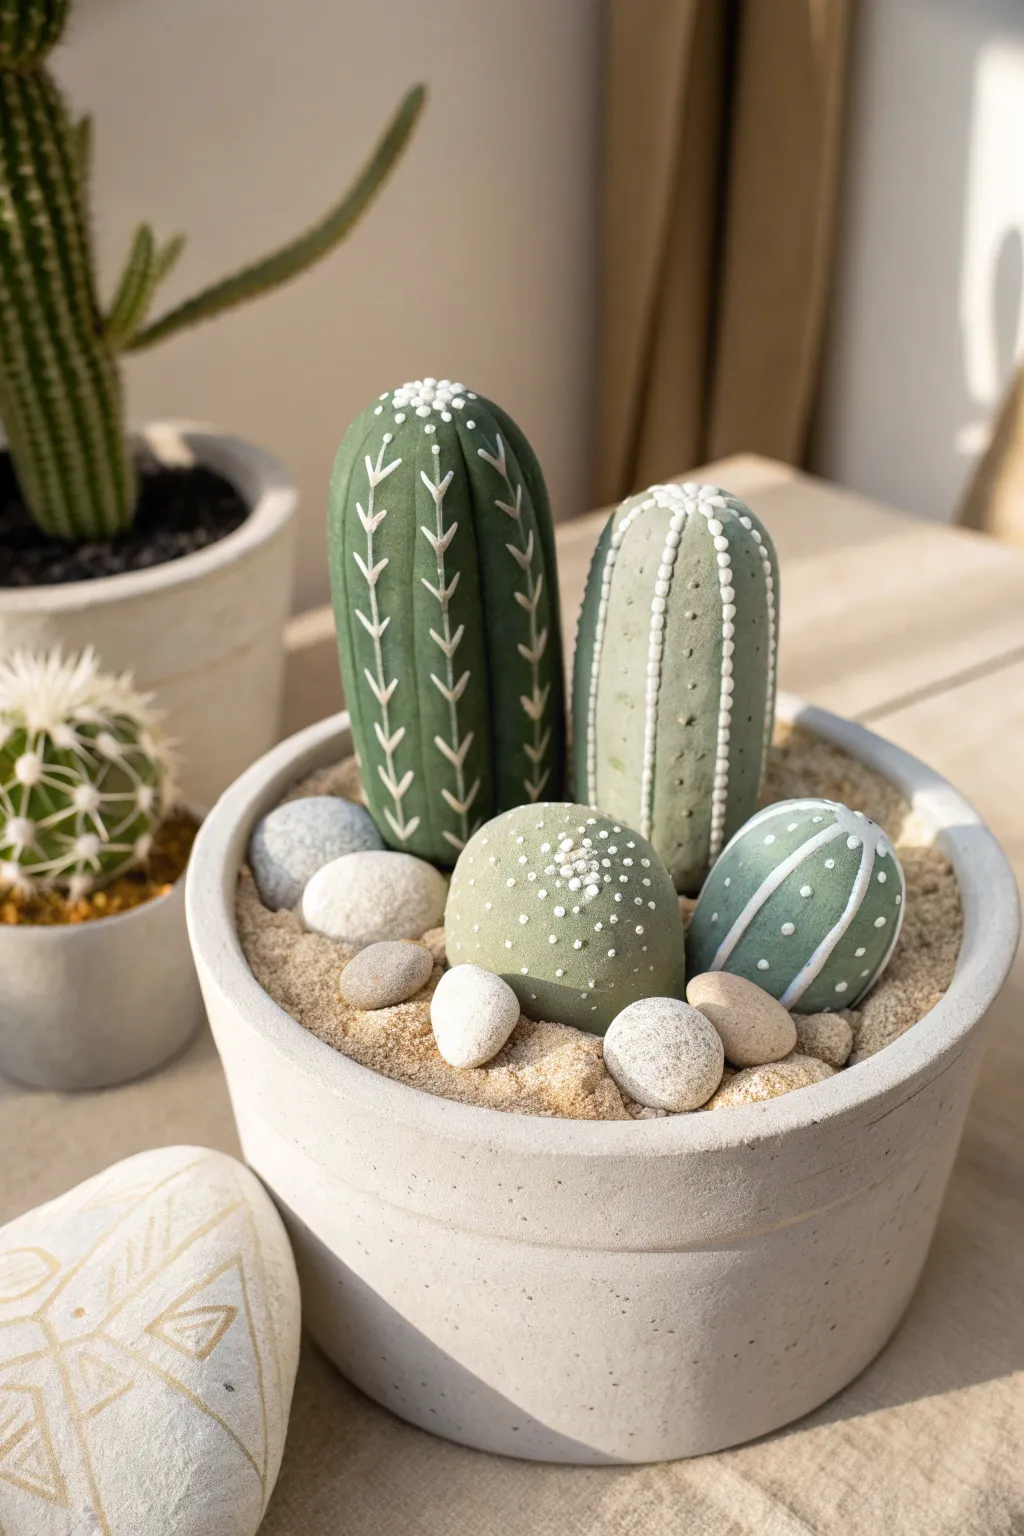
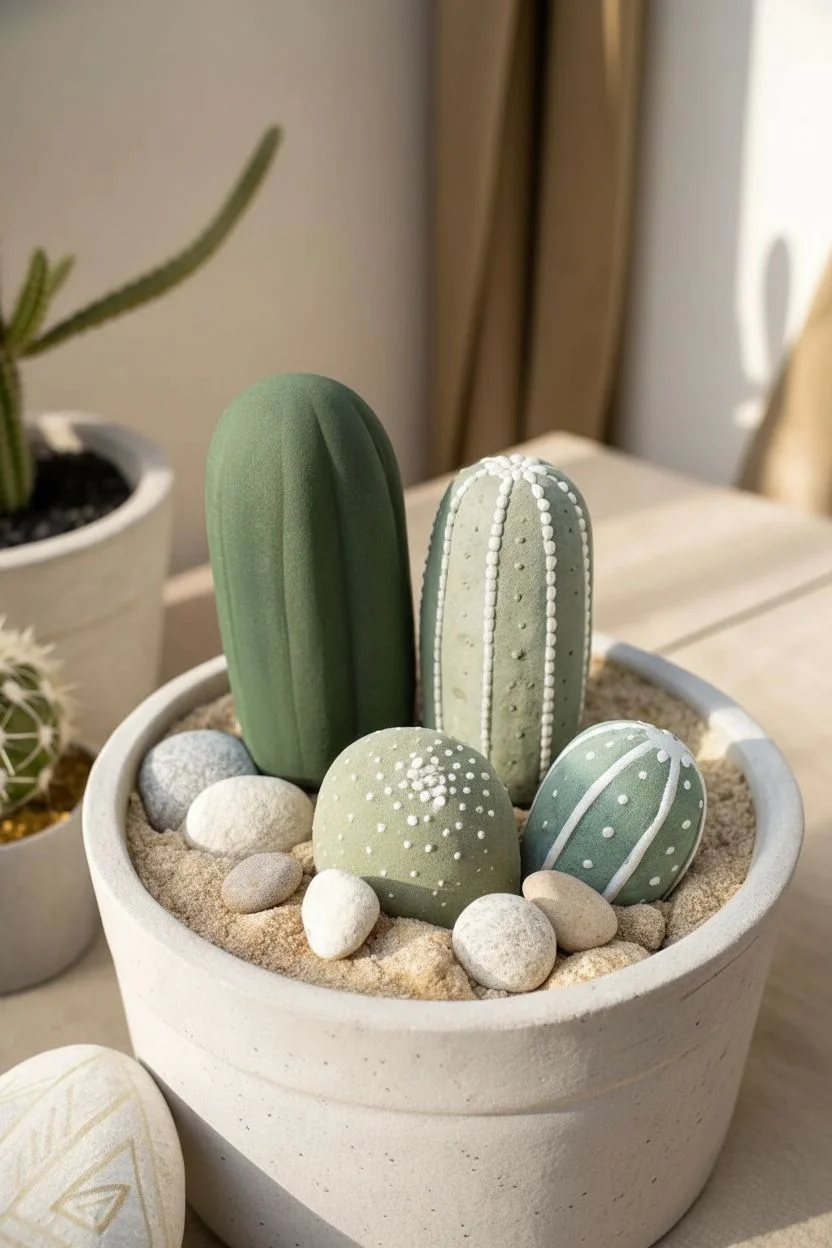
White Sand “Soil” for a Desert Look
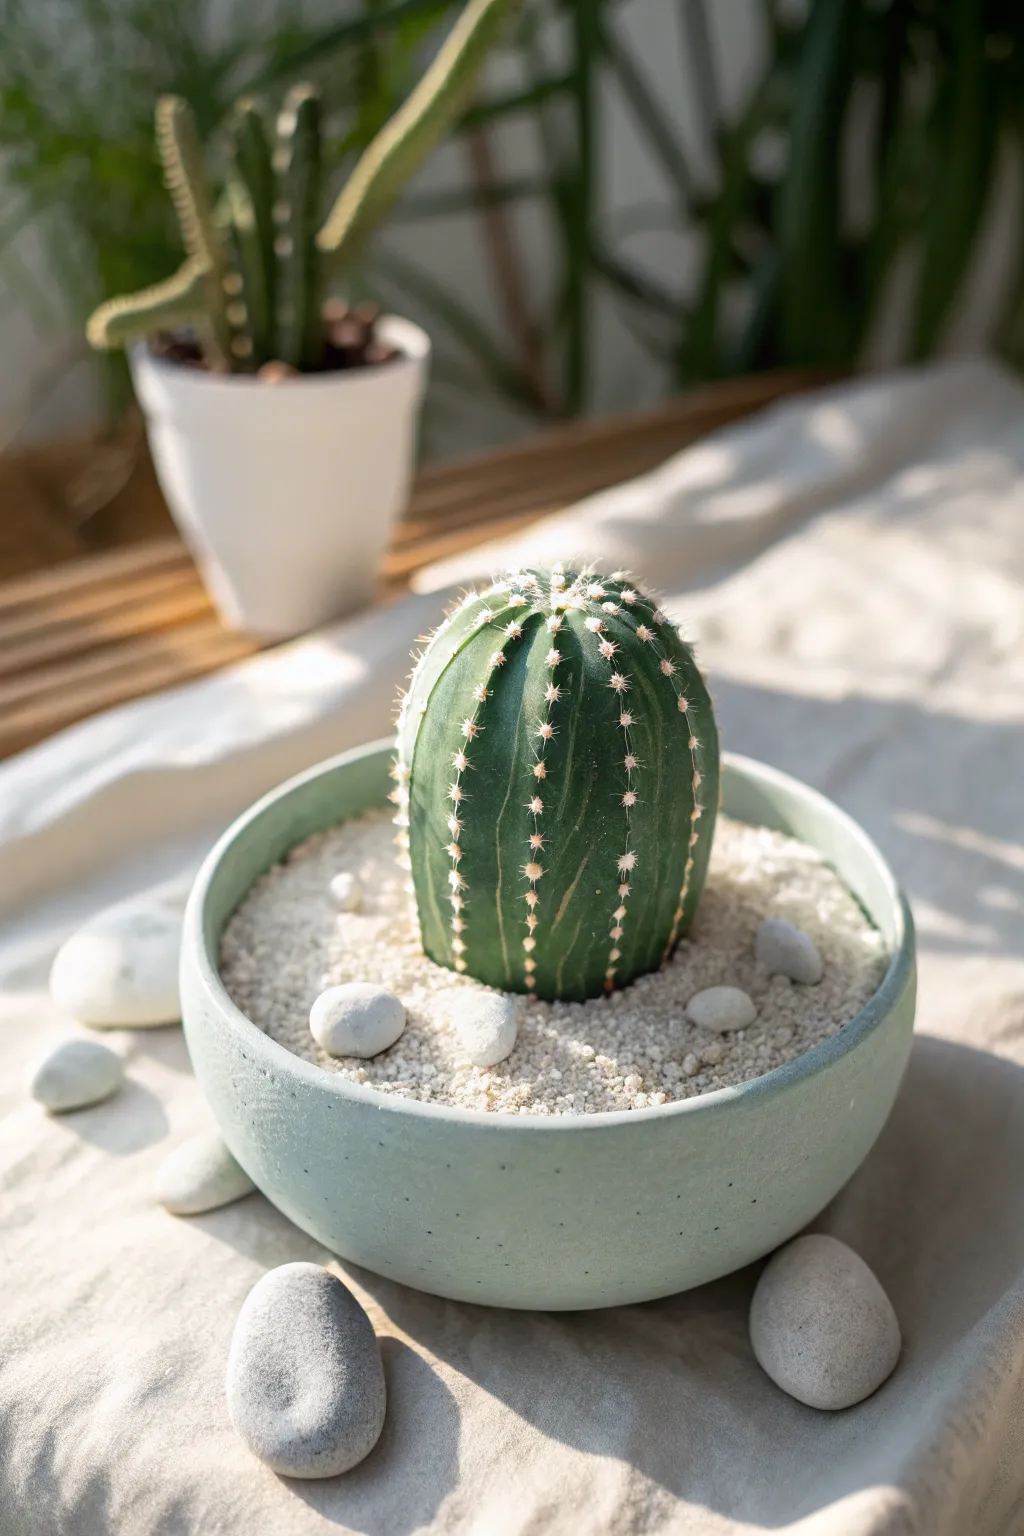
Transform a simple smooth river rock into a surprisingly realistic cactus that never needs watering. Set in a bed of pristine white sand, this project uses clever shading and highlighting to create a 3D illusion that brings a touch of the desert to your desk.
Step-by-Step Tutorial
Materials
- Smooth, round river rock (approx. 3-4 inches tall)
- Wide, shallow ceramic bowl or planter (light green or neutral)
- Acrylic paints: dark green, Phthalo green, titanium white, pale yellow, ochre
- Fine white sand or white aquarium gravel
- Various small white decorative pebbles
- Flat shader brush (size 6 or 8)
- Fine liner brush (size 0 or 00)
- Small round brush (size 2)
- Palette or paper plate
- Water cup and paper towels
- Matte or satin varnish spray
Step 1: Painting the Cactus Base
-
Clean the Stone:
Begin by scrubbing your main river rock with soap and warm water to remove any dirt or oils. Let it dry completely so the paint adheres properly. -
Base Coat:
Mix a medium green shade using dark green and a touch of white. Cover the entire rock with this base color. You may need two coats for full opacity, allowing the first layer to dry for about 15 minutes before applying the second. -
Sketch the Ribs:
Once the base is dry, lightly visualize or pencil in vertical lines running from the top center down to the bottom. These will act as guides for the cactus ribs. -
Creating Depth:
Mix a darker shadow green using dark green and a tiny drop of black or blue. Paint vertical stripes in the ‘valleys’ between your planned ribs. I like to feather the edges of these dark stripes slightly so they blend softy. -
Adding Highlights:
Mix a lighter green by adding more white and a little yellow to your base green. Paint vertical highlights down the center of each ‘rib’ area, right between the shadow lines. This creates the illusion of a bulging, rounded surface. -
Blending the Form:
With a slightly damp, clean brush, gently blend the transition between your dark shadows and light highlights while the paint is still tacky to smooth out the rib shapes.
Uneven Stripes?
If your vertical ribs look wobbly, don’t worry. Real cacti are organic and imperfect. Just widen the highlight slightly to correct the visual balance.
Step 2: Details and Assembly
-
Painting the Areoles:
Using a small round brush and an ochre or pale brown mix, dab small dots down the center of each highlighted rib. Space them evenly, about half an inch apart. -
Drawing Spines:
Switch to your fine liner brush and thin down some white or pale yellow paint with a drop of water. Carefully paint small ‘star’ shapes or clusters of 3-4 thin lines radiating out from each areole dot. -
Top Cluster:
At the very top apex of the rock, cluster the spines closer together to mimic the natural growth pattern of a cactus crown. -
Protect the Art:
Once the paint is fully cured (give it at least an hour), spray the rock with a matte or satin varnish to seal the paint and protect it from chipping. -
Prepare the Pot:
Fill your shallow bowl almost to the brim with fine white sand or white aquarium gravel. Shake the bowl gently to level the surface. -
Planting:
Nestle your painted rock securely into the center of the sand. Push it down slightly so the bottom edge is buried, making it look like it’s growing out of the soil. -
Adding Pebbles:
Arrange a few larger, smooth white pebbles around the base of your faux cactus. Scattering 3-5 stones randomly creates a natural, Zen-garden aesthetic. -
Final Touch:
Use a soft, dry brush to dust off any wayward grains of sand that might have stuck to the side of your painted cactus.
Ultra-Fine Spines
For the sharpest looking needles, use a flow-improver medium instead of water to thin your white paint. It helps the paint glide off the liner brush seamlessly.
Place your zero-maintenance botanical creation on a sunny shelf and enjoy the desert vibe all year round

PENCIL GUIDE
Understanding Pencil Grades from H to B
From first sketch to finished drawing — learn pencil grades, line control, and shading techniques.
Explore the Full Guide
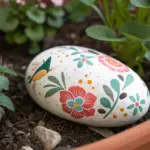
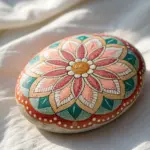
Pebble Bloom “Topper” Flowers
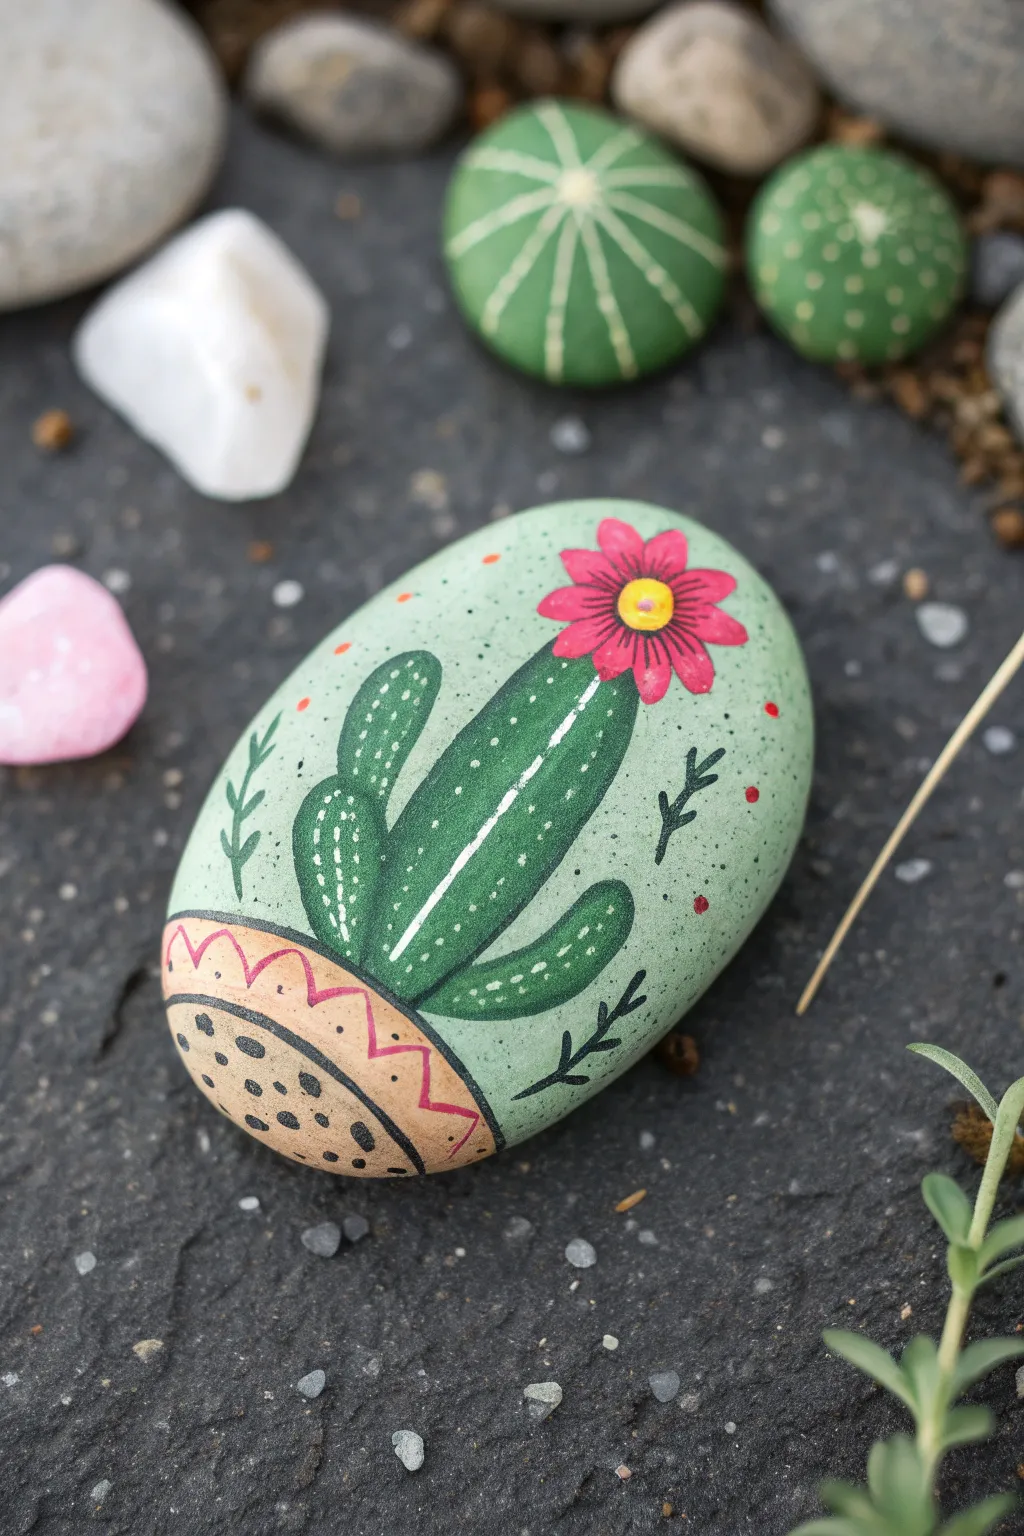
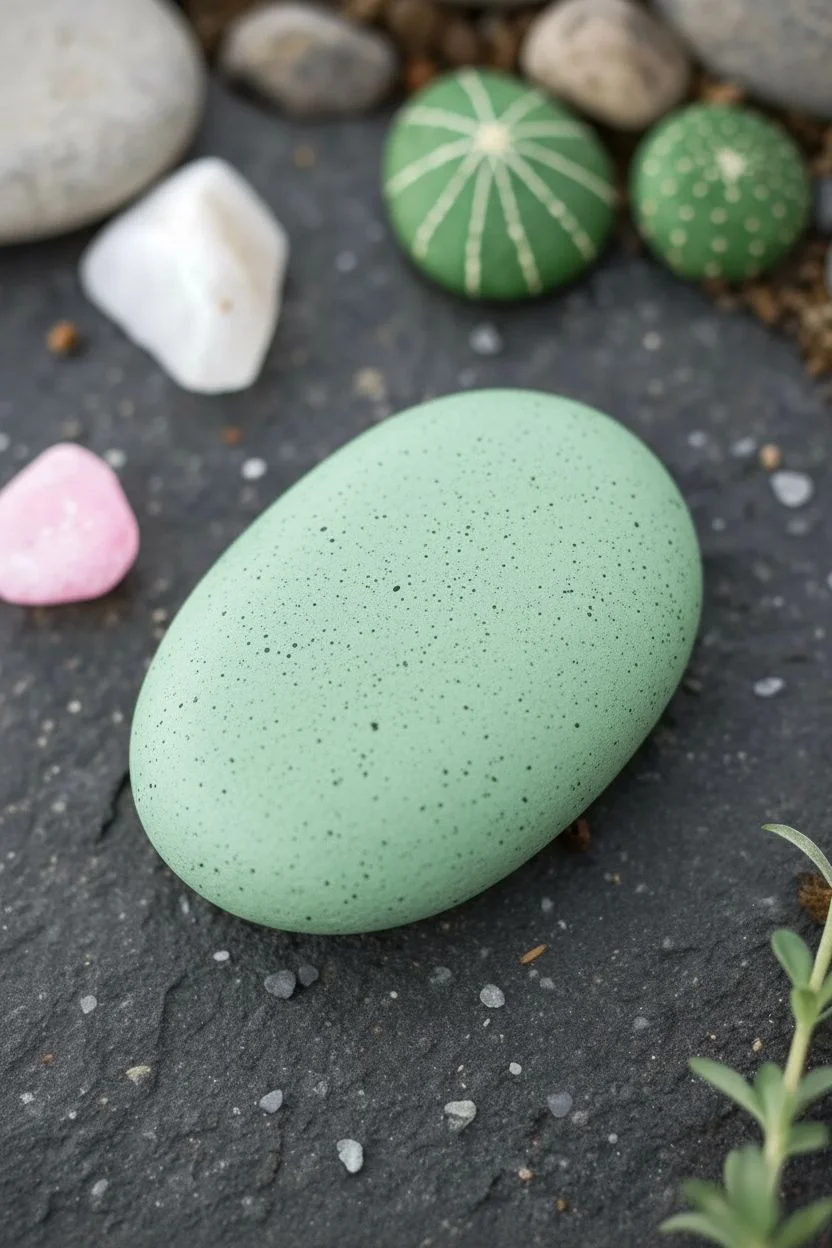
This delightful pebble art features a stylized saguaro cactus nestled in a patterned pot, topped with a vibrant pink blossom. The gentle mint green background and speckled details give it a charming, illustrative feel perfect for garden decor.
Step-by-Step
Materials
- Smooth, oval river rock (medium size)
- Acrylic paints: Mint green, dark forest green, white, bright pink, yellow, tan/beige, black
- Paintbrushes: Flat shader brush (small), fine liner brush (0 or 00)
- Dotting tool or toothpick
- Spray sealer or varnish (matte or satin finish)
- Palette or paper plate
- Cup of water and paper towels
Step 1: Base and Background
-
Clean and prep:
Begin by washing your stone with warm soapy water to remove any dirt or oils. Let it dry completely before starting your painting. -
Apply the base coat:
Mix a soft mint green by combining white with a tiny drop of green and a touch of yellow. Paint the entire top surface of the stone with this mixture. You might need two layers for full opacity. -
Create the speckles:
Once the mint base is dry, load an old toothbrush or a stiff bristled brush with watered-down black paint. Gently flick the bristles to create a fine mist of speckles across the green background for texture.
Steady Hand Pro-Tip
For the tiny white spines and lines, anchor your pinky finger on the table or a dry part of the rock to stabilize your hand while painting.
Step 2: Painting the Cactus
-
Outline the pot:
Using a small flat brush and tan or beige paint, create a semi-circle shape at the very bottom of the rock to serve as the planter pot. Let this dry. -
Block in the cactus shape:
Switch to your dark forest green paint. Paint a tall, elongated oval rising from the center of the pot. -
Add the arms:
While you still have the dark green loaded, paint two curved arms coming off the main stem—one on the left pointing up, and a smaller one on the right. -
Define the pot details:
Outline the tan pot with a thin black line using your fine liner brush. Draw a curved line across the top of the pot to create a rim, separating the rim area from the decorative bowl. -
Add pot decoration:
Inside the pot rim, paint a pink zig-zag line. On the lower part of the pot, add small black dots using your liner brush or a toothpick for a textured look.
Step 3: Finer Details
-
Highlight the cactus:
Mix a slightly lighter green or use white paint on a very fine brush. Paint thin, curved vertical lines down the center of the main cactus body and the arms to suggest ribs and dimension. -
Add the spines:
Using white paint and your finest brush (or a needle point), add tiny clusters of dots or dashes along the edges of the cactus and the internal rib lines to represent spines. -
Paint the flower silhouette:
At the very top of the main cactus stem, paint a circle of bright pink petals radiating outward. Make the petals slightly pointed at the tips. -
Detail the flower center:
Once the pink is dry, add a solid yellow circle in the center of the flower. Outline the yellow center with a thin black ring. -
final flower touches:
Draw faint black lines radiating from the yellow center into each pink petal to give them definition. -
Fill the empty space:
To balance the composition, paint simple black branch or leaf sprig doodles floating in the empty mint green space on either side of the cactus. -
Add emphasis dots:
Using the handle end of a paintbrush, place a few random bright orange or red dots in the background for a pop of contrasting color. -
Seal the artwork:
Allow the rock to cure for at least 24 hours. Finish with a spray sealer to protect your design from chipping and weather.
Bloom Variations
Change the flower color to match your mood! A bright orange or deep violet bloom looks just as striking against the dark green cactus.
Now you have a permanent, water-free plant to carry a little joy in your pocket or garden
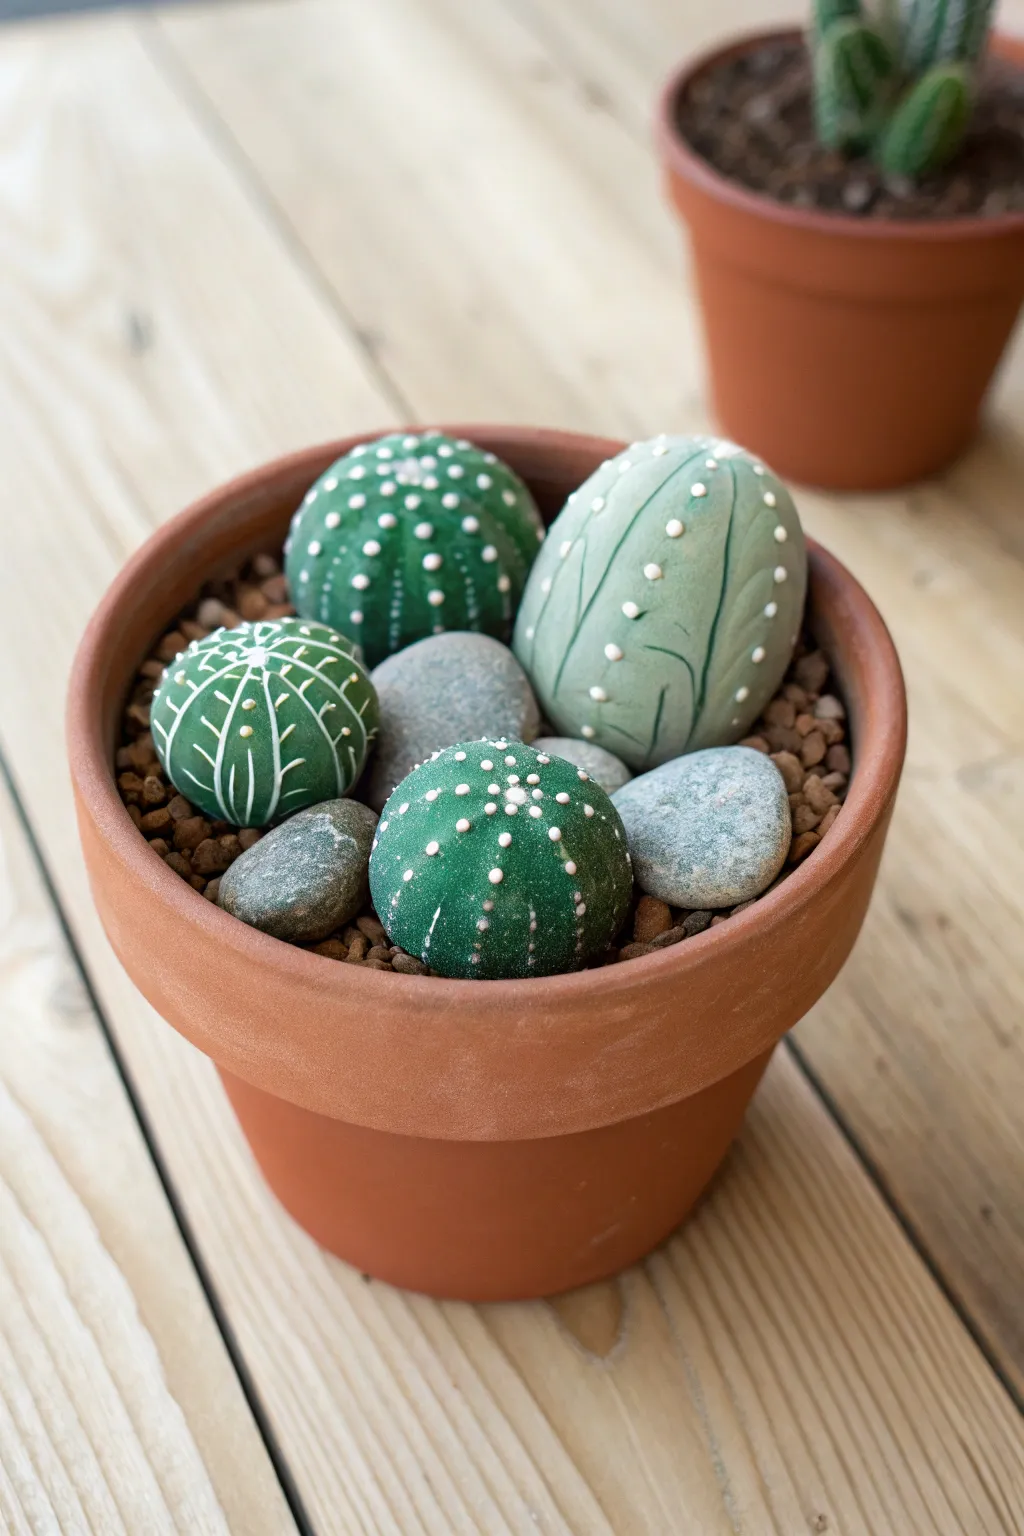
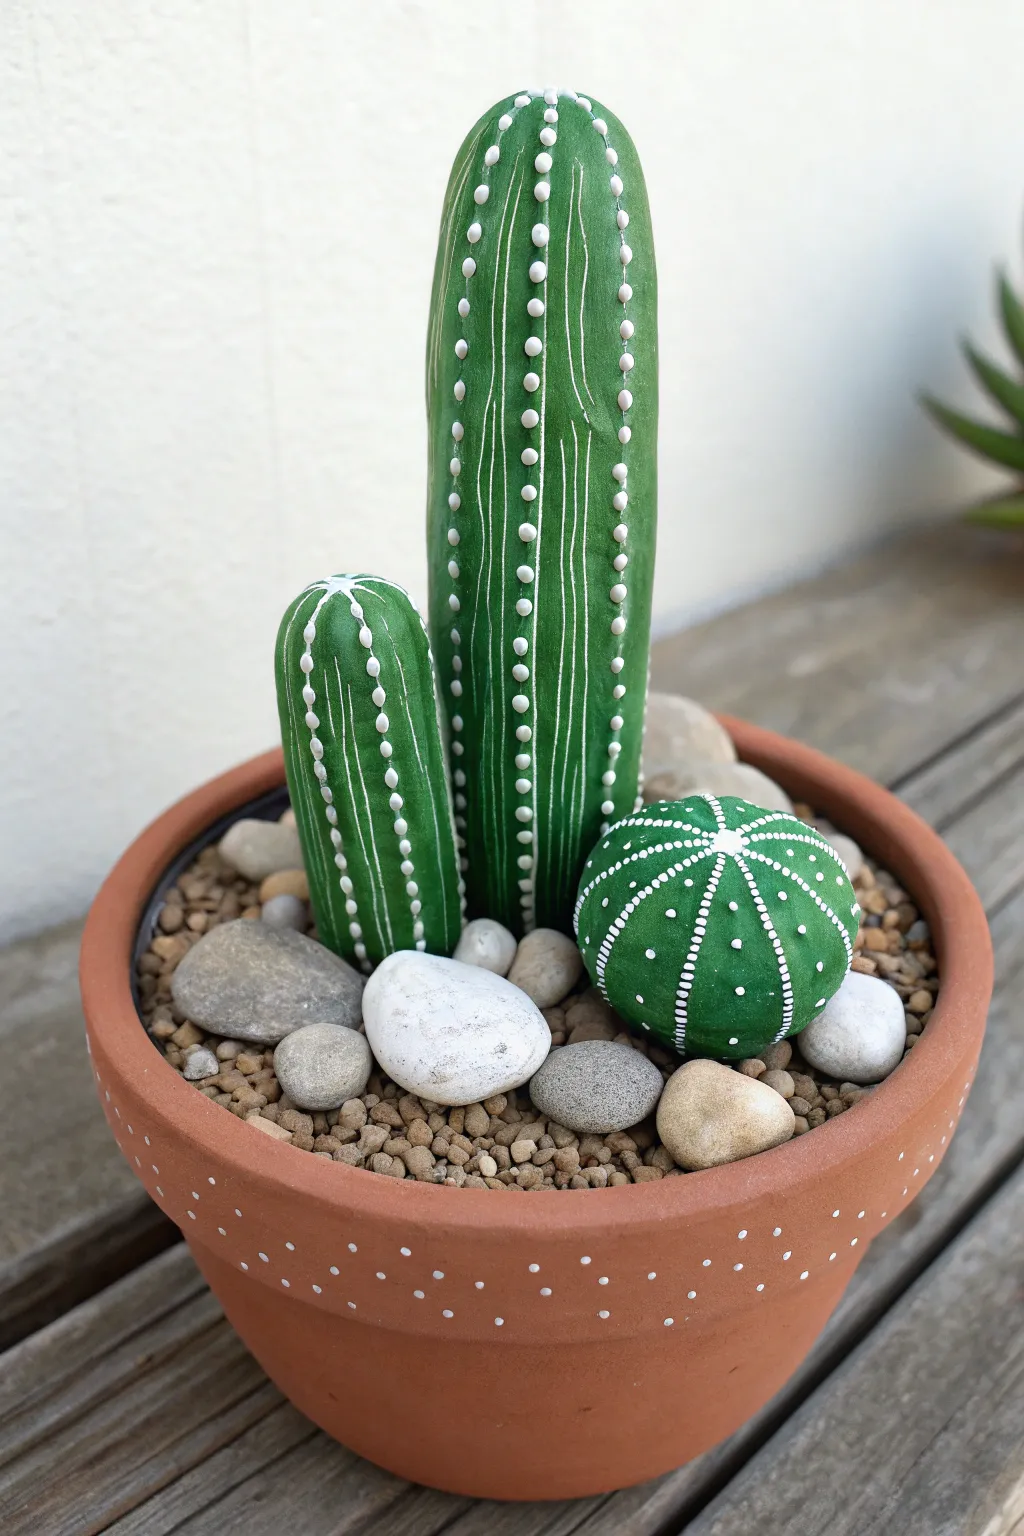
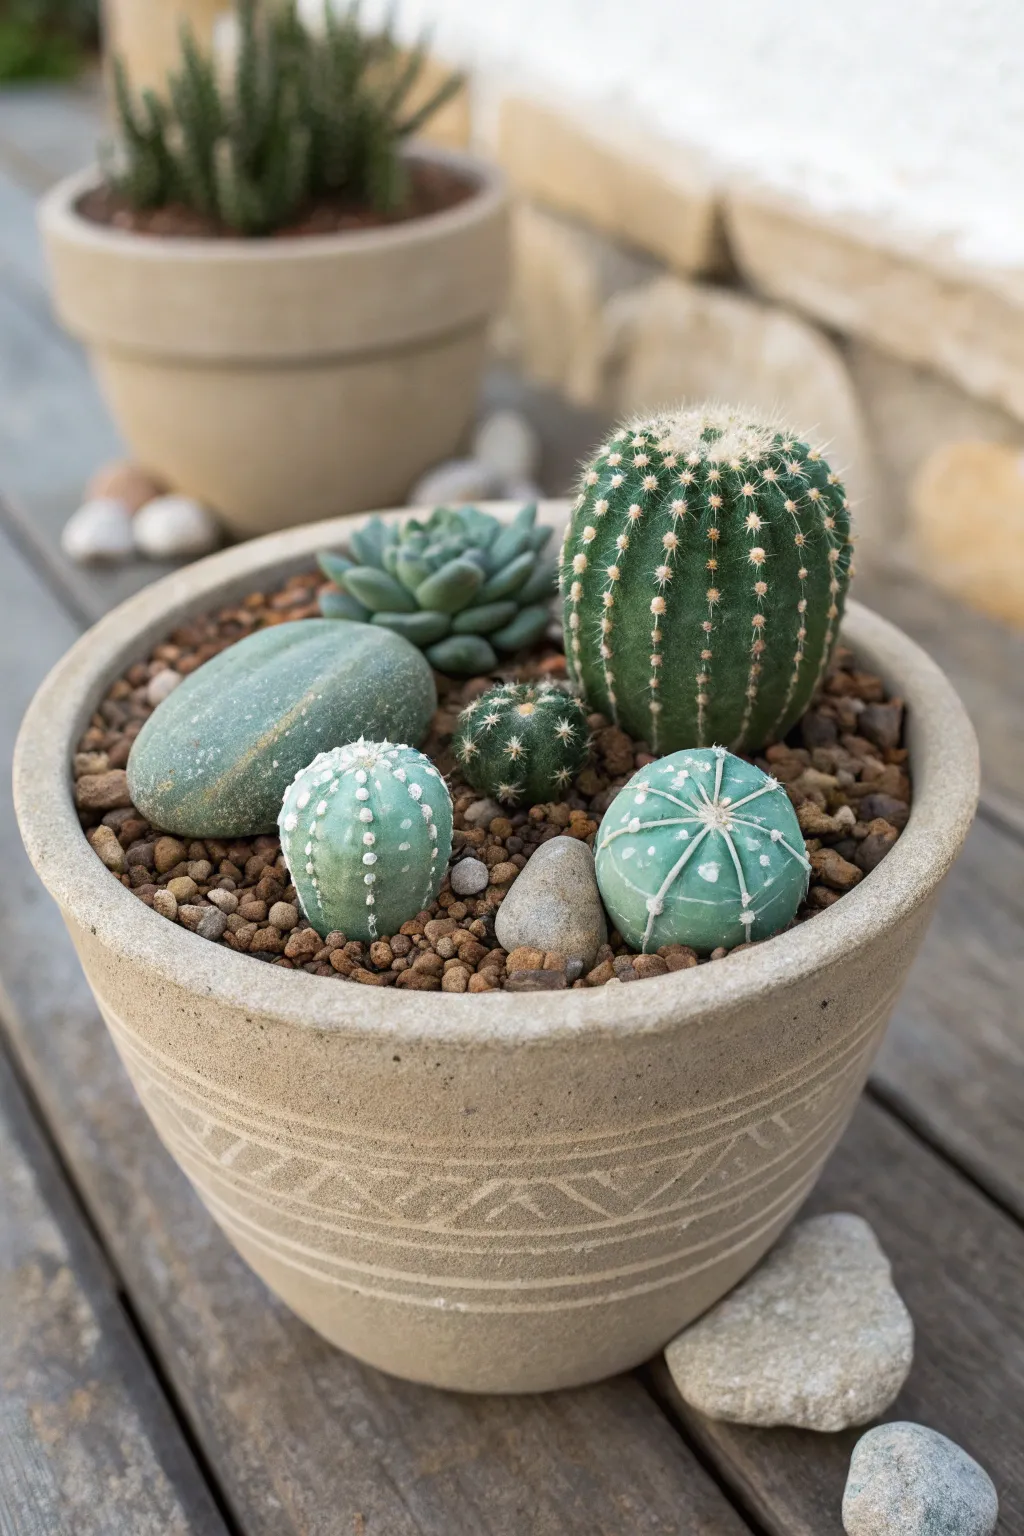
Mini Cluster Pot With Mixed Cactus Shapes

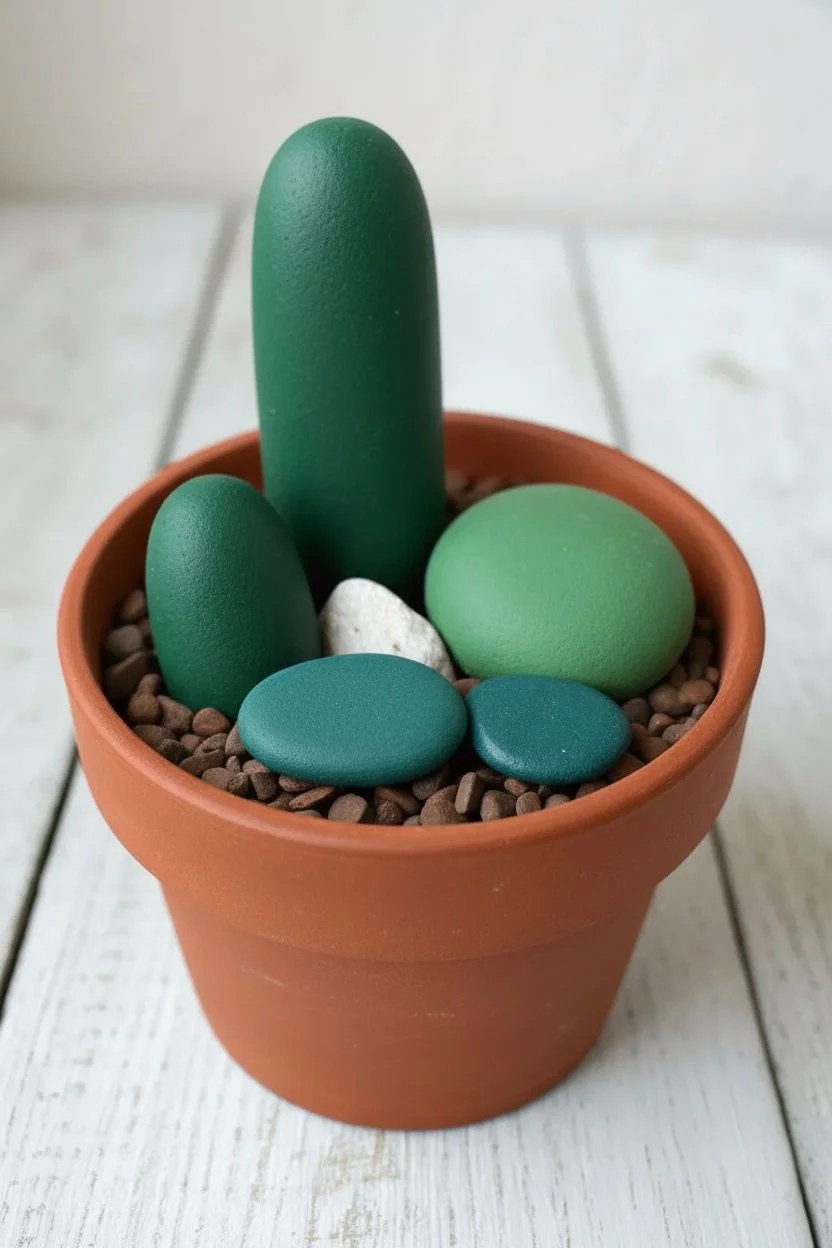
Create a delightful, maintenance-free desert oasis right on your windowsill with this mixed grouping of painted stone cacti. By varying the rock shapes and painting patterns, you can mimic the diversity of a real succulent garden without ever needing to water it.
Detailed Instructions
Materials
- Smooth river rocks in various shapes (1 tall oblong, 1 round, 1 oval, 1 small flat)
- Small terracotta pot (4-inch diameter)
- Acrylic paint (dark hunter green, bluish-green, teal, bright red, orange, white)
- Fine detail paintbrushes (size 0 and 00)
- Medium flat paintbrush
- Dotting tool or toothpick
- Small pea gravel or aquarium stones (dark brown)
- Two unpainted accent stones (one white, one reddish-brown)
- Newspaper or paper plate for palette
- Clear matte sealant spray (optional)
Step 1: Base Coating
-
Select your stones:
Choose your stones carefully to match the shapes in the photo. Look for one tall, finger-like stone for the columnar cactus, a perfectly round one for the barrel cactus, a slightly flatter oval for the prickly pear style, and a small smooth one for the flowering base. -
Clean surface:
Wash the rocks thoroughly with warm soapy water and let them dry completely. This ensures the paint adheres properly without peeling later. -
Paint the tall cactus:
Mix a deep hunter green. Using the medium flat brush, coat the entire tall oblong stone. It may need two thin coats for full opacity; let the first dry before applying the second. -
Paint the round cactus:
For the round stone, use a slightly lighter, grass-green shade. Paint the entire surface, rolling it over once the top is dry to get the bottom, ensuring no raw stone shows. -
Paint the front cactus:
Paint the smaller oval stone with a bluish-green or teal acrylic. This variation in hues adds realistic depth to your arrangement. -
Paint the flowering cactus:
Coat the smallest flat stone in a deep teal or dark turquoise color to serve as the base for the red flowers.
Wobbly Lines?
If painting spines is tough, use a white paint pen or gel pen instead of a brush. It offers much better control for fine needles.
Step 2: Adding Details
-
Detail the tall cactus:
Once the dark green base is fully dry, take your finest brush or a dotting tool dipped in white paint. Create vertical lines of small, evenly spaced dots running from the top of the stone down to the bottom. I find spacing them about a half-inch apart looks best. -
Detail the round cactus:
Using a very fine liner brush and white paint, draw star-shaped clusters on the round green stone. Start with a central point and flick the brush outward to create 5-7 spines per cluster. Connect these clusters with faint vertical lines if desired, or leave them floating. -
Detail the teal cactus:
On the bluish-green oval stone, paint thin vertical ribs using white. Then, create the ‘needles’ by painting tiny V-shapes or cross-hatches all along these vertical lines to create a fuzzy texture. -
Start the flowers:
On the small dark turquoise stone, use a medium dotting tool to place five or six bright red dots scattered across the surface. -
Add flower centers:
Once the red dots are dry, place a smaller orange or yellow dot in the direct center of each red circle. -
Finish the flowers:
Using your smallest detail brush or a toothpick, add tiny white dots around the perimeter of each red circle to define the petals. -
Seal the rocks:
Allow all paint to cure for at least 24 hours. For longevity, spray them with a clear matte sealant, which protects the paint without making the rocks look unnaturally shiny.
Step 3: Assembly
-
Prepare the pot:
Fill your terracotta pot about two-thirds full with newspaper or filler stones to save weight and material. -
Add gravel layer:
Pour the small brown pea gravel over the filler until it is about half an inch from the rim of the pot. -
Arrange the main cacti:
Nestle the tall cactus in the back and the round barrel cactus slightly to the side. Wiggle them into the gravel so they sit securely. -
Place front stones:
Position the prickly pear oval stone and the small flowering stone in the front. Angle them slightly outward for better visibility. -
Final touches:
Tuck the two unpainted accent stones (the white one and the reddish-brown one) into any gaps to add contrast and stabilize the painted rocks.
Blossom Boost
Glue a small faux flower or a tiny pom-pom to the top of the tall cactus for a pop of 3D color and realism.
Place your new creation on a desk or shelf to enjoy a bit of desert greenery that stays vibrant all year round


Paint-Pen Details for Crisp Lines and Dots
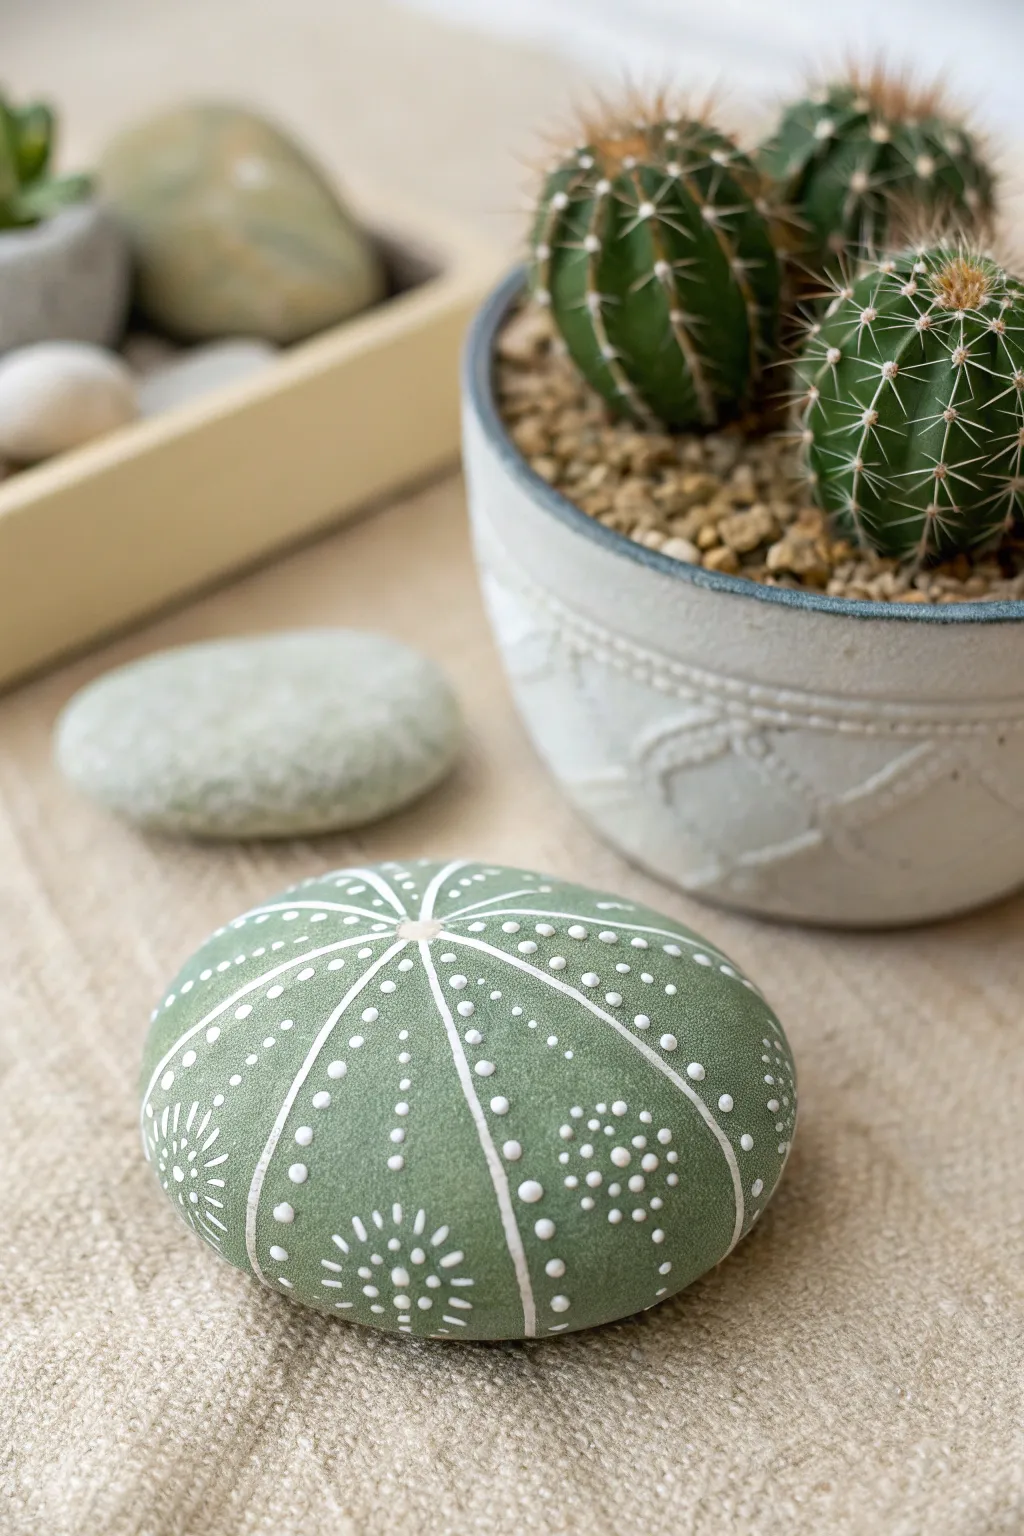
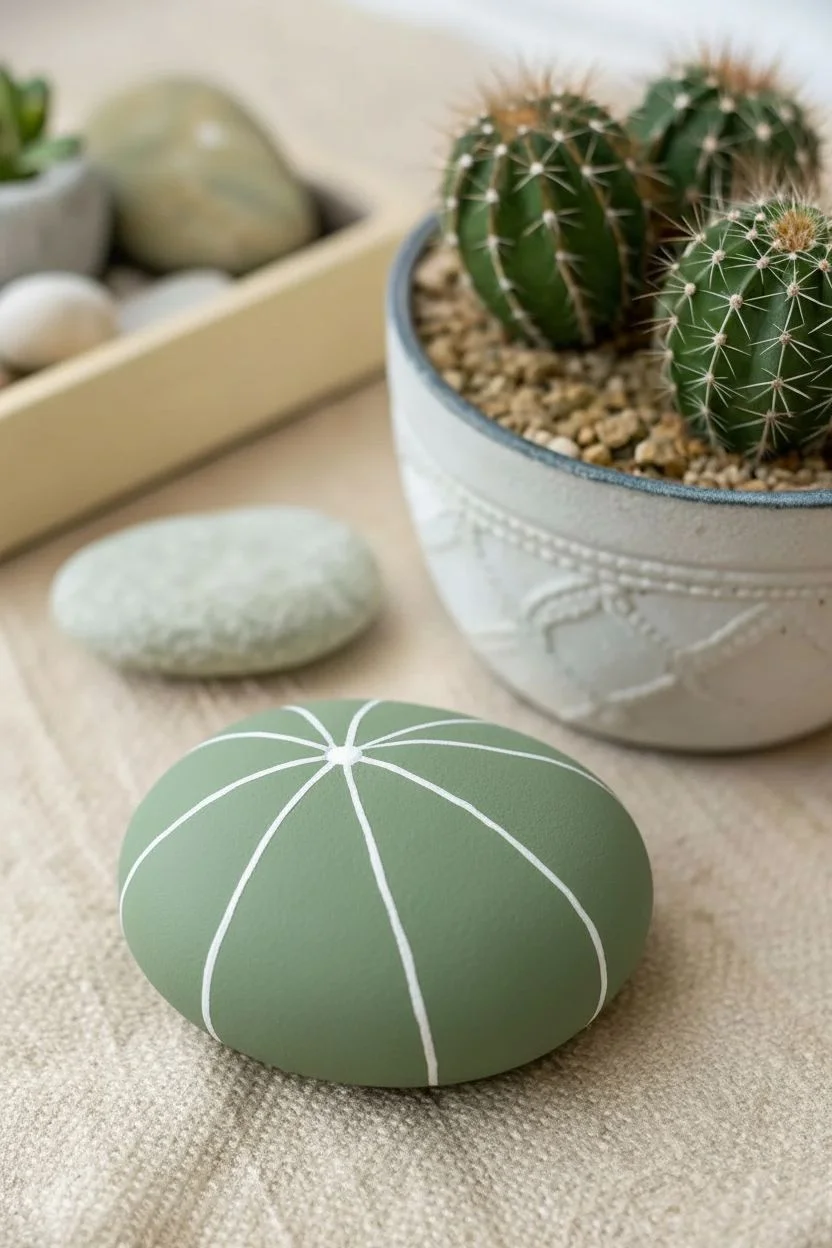
Transform a smooth, round stone into a stunning faux-botanical piece using simple dotting techniques and steady lines. This radiating pattern mimics the intricate skeleton of a sea urchin or a stylized cactus top, offering a sophisticated look with minimal supplies.
How-To Guide
Materials
- Smooth, round river rock (palm-sized)
- Sage or olive green acrylic paint (matte finish)
- Wide flat paintbrush
- White or cream paint pen (extra fine tip, 0.7mm or similar)
- Pencil (optional)
- Clear spray sealant (matte)
Step 1: Base Coating
-
Clean the surface:
Begin by washing your stone with warm soapy water to remove any dirt or oils. Let it dry completely before starting, as paint adheres poorly to damp or dusty surfaces. -
Apply the first coat:
Using a wide flat brush, cover the top and sides of the rock with your sage green acrylic paint. Brush in one direction for a smoother finish. -
Let it dry:
Wait for the first layer to dry to the touch. This usually takes about 15-20 minutes, depending on the thickness of the paint. -
Apply a second coat:
Paint a second layer of green to ensure full opacity. You shouldn’t see any of the original rock color showing through. Allow this base to cure fully for at least an hour.
Fixing Wobbly Lines
If a line goes crooked, wait for the white ink to dry fully. Then, use a small brush and your original green base paint to ‘erase’ the mistake by painting over it carefully.
Step 2: Drawing the Structure
-
Find the center point:
For the skeleton design, I find it helpful to visually locate the very top center of the rock. You can mark this lightly with a pencil if needed. -
Draw the center circle:
Using your fine-tip white paint pen, draw a small, solid circle at that center point. This acts as the hub for all radiating lines. -
Create primary dividing lines:
Draw four long lines radiating outward from the center circle, diving the rock into quarters. Extend these lines down the sides of the stone. -
Add secondary lines:
Bisect each of those quarters with another radiating line. You should now have approximately eight sections resembling slices of a pie. -
Smooth the lines:
Go over your white lines a second time carefully to make them solid and opaque, fixing any shaky areas.
Step 3: Adding Dotted Details
-
Dot the main spines:
Along perfectly straight lines, place tiny dots on either side of the white spine. Keep them closely spaced and symmetrical. -
Create midway focal points:
In the widest part of each green section (between the lines), choose a spot about halfway down the rock’s curve to create a ‘starburst’ detail. -
Form the starburst center:
Start this detail with a slightly larger central dot. -
Expand the starburst:
Surround that central dot with a ring of smaller dots. Add a second, wider ring if space permits. -
Add radiating dashes:
Finish the starburst by drawing short, tiny dashes radiating outward from the dot rings, like sun rays. -
Fill the gaps:
If there is significant empty green space near the bottom edges, add a few stray single dots for texture.
Glow in the Dark
Swap the standard white paint pen for a glow-in-the-dark acrylic puffy paint or marker. Your cactus skeleton pattern will illuminate beautifully at night.
Step 4: Finishing Up
-
Dry the ink:
Allow the paint pen ink to dry completely. This is crucial before sealing, as wet ink will smear instantly. -
Seal the artwork:
Take the rock to a well-ventilated area and apply a light coat of matte spray sealant. This protects the delicate white lines from chipping.
Now you have a serene, nature-inspired decor piece that adds a touch of greenery without any watering required
Cute Cactus Faces on Rock Cacti
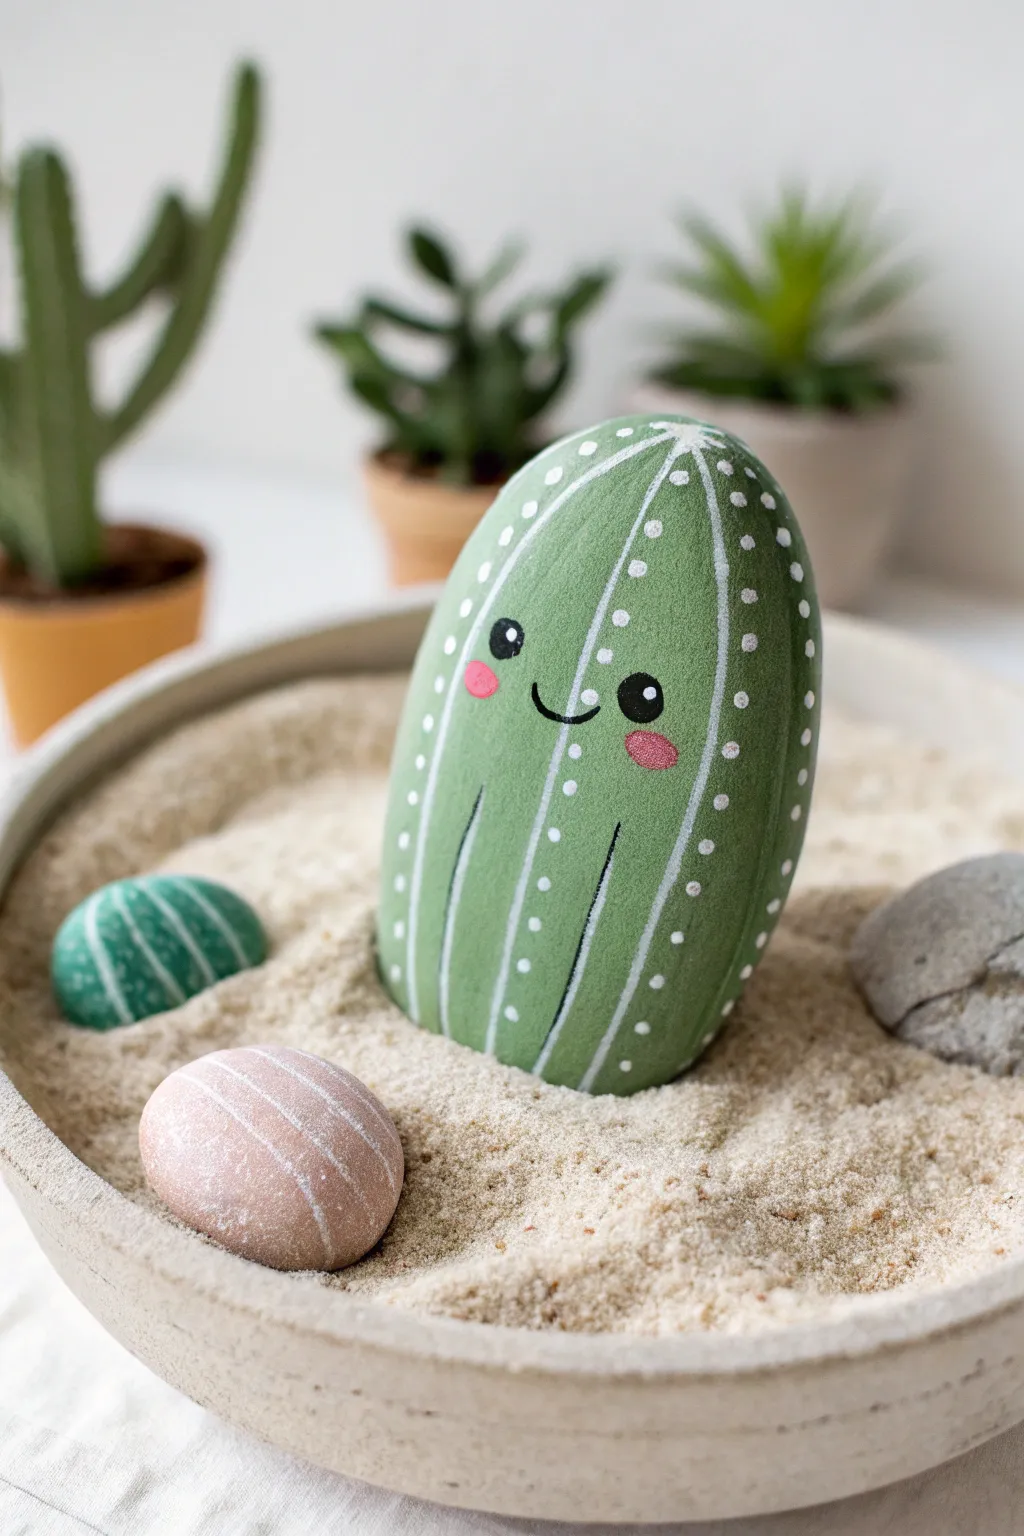
Transform a simple river stone into an adorable, never-wilting desert friend with this charming rock painting project. The bright green base and sweet, simple face make this a perfect addition to a desk garden or windowsill display.
Detailed Instructions
Materials
- Smooth, oval-shaped river rock (standing orientation)
- Acrylic paint: Sage Green or Medium Green
- Acrylic paint: White
- Acrylic paint: Black
- Acrylic paint: Soft Pink
- Medium flat paintbrush
- Fine detail paintbrush (size 0 or 00)
- Dotting tool or toothpick
- Matte spray sealant (optional)
- Pencil for sketching
- Small bowl of sand for display
Step 1: Base Coat Application
-
Clean the stone:
Begin by thoroughly washing your rock with soap and warm water to remove any dirt or oils. Scrub it well and let it dry completely before starting; paint won’t stick to a dusty surface. -
Mix your green:
Squeeze out your sage green acrylic paint. If the color feels too dark, mix in a tiny drop of white to soften it. You want a natural, fresh cactus tone rather than a deep forest green. -
Apply the first coat:
Using your medium flat brush, paint the entire surface of the rock green. Don’t worry if it looks streaky at first; acrylics are forgiving and buildable. -
Let it dry:
Allow the first coat to dry for about 15-20 minutes. Touching wet paint will just lift it off the rock, so patience is key here. -
Second coat:
Apply a second layer of green paint to ensure solid, opaque coverage where no gray stone shows through. Let this layer dry completely.
Steady Hand Trick
When painting the thin white vertical lines, rest your pinky finger on the table or even on a dry part of the rock to stabilize your hand for smoother strokes.
Step 2: Adding Texture and Spines
-
Light pencil sketch:
Very lightly sketch several vertical curved lines running from the top center of the rock down to the bottom. These will guide your spine placement. -
Paint vertical stripes:
Take your fine detail brush and dip it in white paint. Paint thin, continuous lines following your pencil guides. I find it easier to pull the brush from top to bottom in one smooth motion. -
Add the dots:
Using a dotting tool or the tip of a toothpick dipped in white paint, place small dots along the white lines you just painted. -
Spacing the dots:
Space the dots evenly, leaving about a quarter-inch between each one. These represent the cactus spines or areoles. -
Secondary lines:
For added dimension, paint shorter, unconnected vertical lines between the main striations near the bottom half of the rock. This gives it a more organic look.
Step 3: Creating the Face
-
Position the face:
visualized where the face should go—aim for the center or slightly above the center of the rock to give it a ‘cute’ proportion. -
Paint the eyes:
Use the handle end of a paintbrush or a larger dotting tool dipped in black paint to create two solid black circles for eyes on either side of a central white stripe. -
Draw the mouth:
With your finest brush and black paint, draw a small ‘U’ shape exactly between the eyes. Add tiny ticks at the ends of the smile for a cheerful expression. -
Add eye highlights:
Once the black eye circles are dry, dip a toothpick in white paint and add a tiny white dot to the upper right corner of each eye. This ‘sparkle’ brings the character to life. -
Blush cheeks:
Dip a pinky finger or a small round brush into the pink paint. Dab off most of the paint on a paper towel, then gently stamp pink oval cheeks just below and outside the eyes.
Oops! Wobbly Lines?
If your white lines get too thick or wobbly, let them dry, then use the green base color to ‘erase’ the edges and thin the line back down.
Step 4: Finishing Touches
-
Clean up lines:
Check your white spine lines. If the face painting overlapped them messily, carefully touch them up with a bit of white paint. -
Seal the rock:
Once absolutely everything is dry (give it an hour), spray the rock with a matte sealant to protect the paint from chipping and fading over time. -
Create the display:
Fill a shallow bowl or saucer with sand. Nestle your new cactus friend into the sand so it stands upright, perhaps accompanied by a few smaller, plain painted stones.
Enjoy the zero-maintenance greenery of your new stone succulent collection
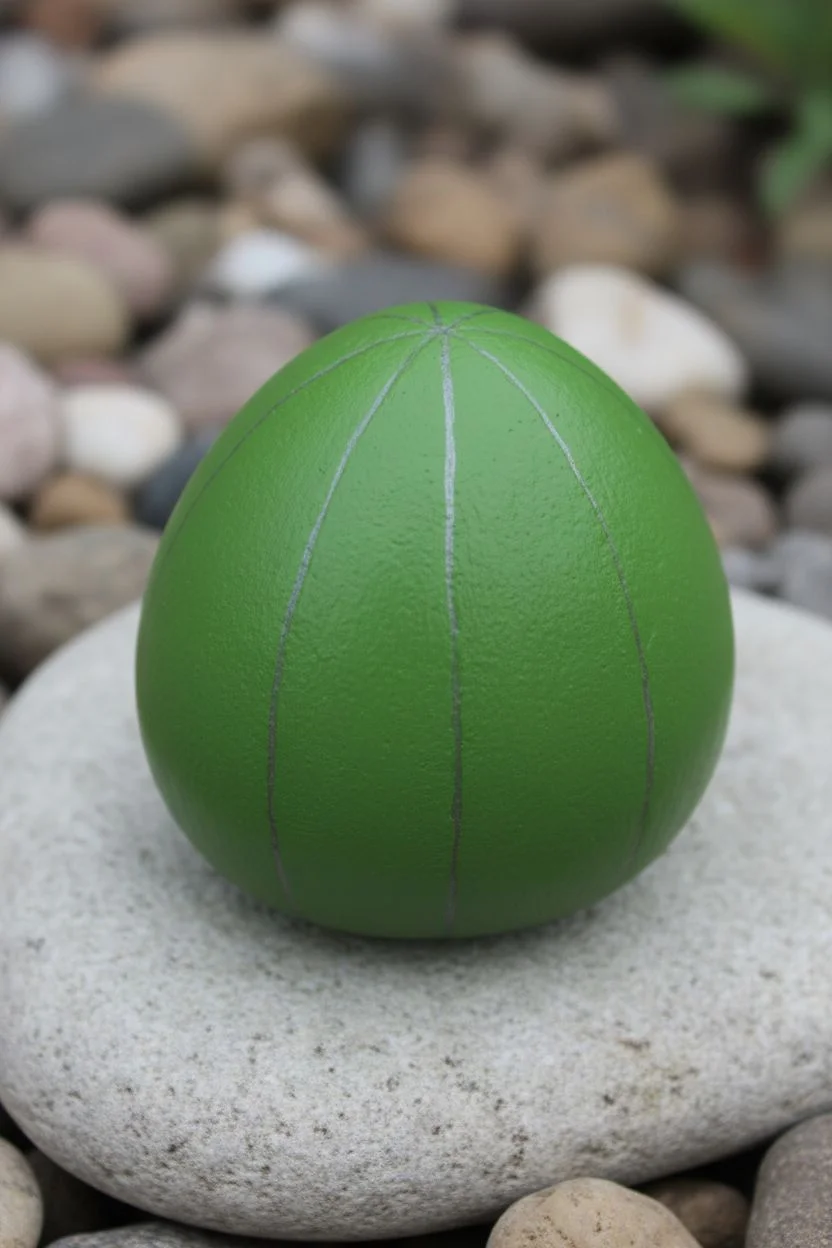
Geometric Cactus Patterns on Rocks
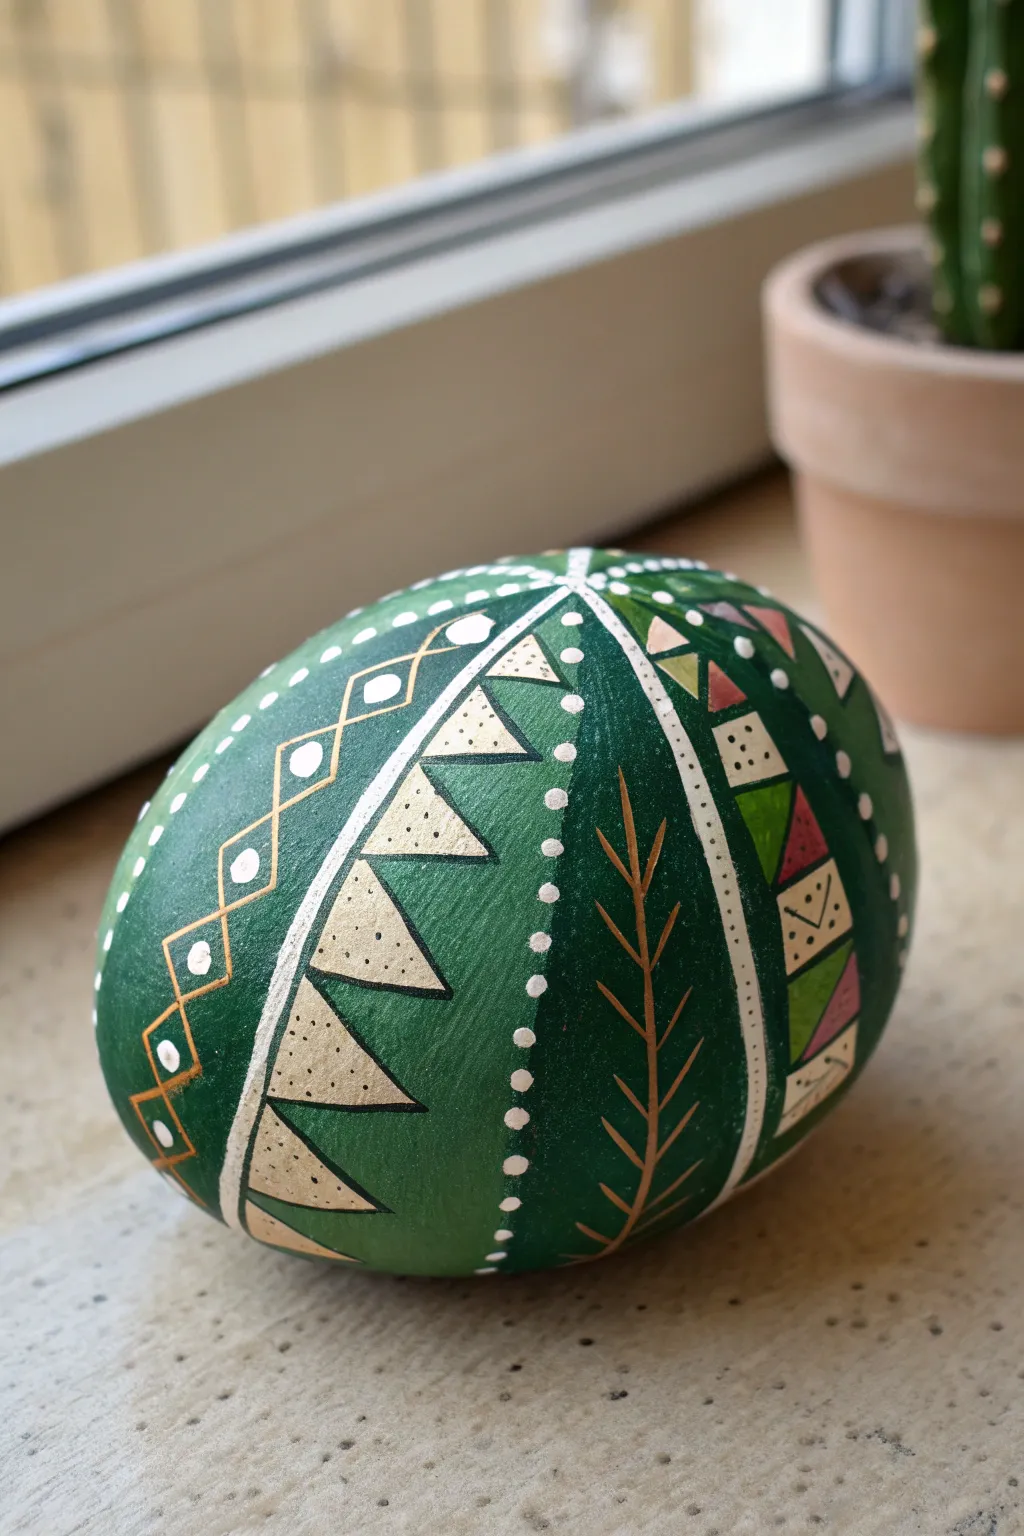

Transform a smooth, round stone into a stylized piece of desert decor with this detailed geometric cactus pattern. The design divides the rock’s surface into sections filled with contrasting triangles, diamonds, and delicate botanical lines for a striking, modern look.
Step-by-Step Tutorial
Materials
- Smooth, egg-shaped rock (roughly 3-4 inches)
- Acrylic paints: Dark forest green, light sage green, white, gold/bronze, rusty pink
- Fine detail brushes (sizes 0 and 00)
- Medium flat brush
- Pencil (for sketching)
- White paint pen (extra fine tip, optional but helpful)
- Matte or satin varnish
Step 1: Preparation and Base Coat
-
Clean the surface:
Start by scrubbing your rock with warm soapy water to remove any dirt or grease. Let it dry completely in the sun or with a hair dryer. -
Apply the base color:
Using a medium flat brush, paint the entire rock with dark forest green acrylic. -
Ensure solid coverage:
You will likely need two or three coats to get a solid, opaque look without streaks. Allow the paint to dry fully between coats.
Straight Line Struggles?
If painting straight geometric lines on a curved rock is difficult, use thin strips of painter’s tape or washi tape to mask off the shapes before filling them in.
Step 2: Segmenting the Cactus
-
Sketch the segments:
Lightly use a pencil to draw vertical curved lines running from the top center of the rock down to the bottom, similar to the segments of a peeled orange. -
Create the white spines:
Paint over your pencil lines using white paint and a fine brush. Instead of solid lines, paint them as rows of tiny, closely spaced dots to mimic cactus spines. -
Thicken the primary dividers:
For the main vertical lines separating the biggest sections, you can make the white dots slightly larger or create a double row of tiny dots for emphasis.
Step 3: Painting the Geometric Patterns
-
Sketch the inner designs:
Within the vertical segments you’ve created, lightly sketch different geometric motifs. One section can have stacked triangles, another diamonds, and another a simple branch. -
Paint the triangle section:
Fill one segment with a column of triangles pointing outward. Paint the interiors with a light sage or beige color. -
Add texture to triangles:
Once the beige paint is dry, use a very fine brush or toothpick to add tiny black or dark green speckles inside the triangles for visual texture. -
Create the diamond lattice:
In the adjacent segment, paint a diamond pattern using thin gold or bronze lines. Connect the diamonds vertically. -
Fill the diamonds:
Inside each gold diamond, add a small white dot in the center to brighten the metallic tone. -
Paint the botanical branch:
In a wider green segment, use your gold or bronze paint to create a simple, long vertical stem with thin V-shaped lines branching off upwards. -
Details for the multi-colored segment:
If you have space for a more colorful strip, paint alternating small triangles in sage green and rusty pink. -
Add definitions:
Outline your colorful triangles with very thin white or gold lines to make them pop against the dark green background.
Make it Bloom
Glue a small, bright pink silk flower or a pom-pom to the very top center of the rock to simulate a cactus in full bloom.
Step 4: Finishing Touches
-
Clean up lines:
Go back with your dark forest green paint to tidy up any edges where the geometric shapes might have spilled over. -
Refresh white dots:
If any of your initial white dotted lines got covered by the pattern work, carefully re-apply bright white dots on top to restore the segment borders. -
Varnish the rock:
Let the paint cure for at least 24 hours. Apply a coat of matte or satin varnish to seal the design and protect it from scratches.
Now you have a botanical masterpiece that requires zero water and adds a perfect geometric touch to your shelf
Saguaro-Inspired Arms With Rock Pairing
Transform smooth river stones into a charming, water-free garden with this clever rock painting project. By selecting stones with varied shapes and using precise dot-work, you’ll create a convincing trio of cacti nestled in a real terracotta pot.
How-To Guide
Materials
- Three smooth river rocks (one tall/oblong, one medium cylindrical, one round/flat)
- Acrylic paint (Deep Green, Forest Green, White)
- Terracotta pot (medium size)
- Potting soil or floral foam (as filler)
- Small pea gravel or aquarium gravel (tan/brown mix)
- Decorative white and grey stones (golf ball size)
- Fine detail paintbrush (size 0 or 00)
- Flat shader paintbrush (size 6 or 8)
- Acrylic matte varnish or sealant
- Pencil (optional)
Step 1: Base Coating the Cacti
-
Clean your canvas:
Begin by thoroughly washing your selected rocks with warm soapy water to remove any dirt or oils. Let them dry completely, as moisture will prevent the acrylics from adhering properly. -
Prime the surface:
Apply a base coat of white acrylic paint if your rocks are dark grey or black. This optional step helps the green pop, but if your stones are light-colored, you can skip right to the green. -
Apply the green base:
Using your flat shader brush, paint the entire surface of all three rocks with a rich Deep Green. I find that brushing in the direction of the intended plant growth (vertically) adds a subtle texture. -
Add a second coat:
Once the first layer is dry to the touch, apply a second coat of green to ensure opacity. Aim for a solid, even color without streaks.
Pro Tip: Dot Consistency
For perfectly round cactus spines, dip the non-brush end (the handle) of your paintbrush into the white paint and stamp it onto the rock. It works like a dotting tool!
Step 2: Detailing the Tall & Medium Column Cacti
-
Draft the ribs:
Visualize vertical lines running from the top center of the rock down to the base. You can lightly sketch these guide lines with a pencil if you’re worried about spacing. -
Painting the spines:
Load your fine detail brush with white paint. Starting at the top center, paint thin, continuous vertical lines down the length of the rock to represent the cactus ribs. -
Create the areoles:
Along every other white line, paint small, raised white dots spaced evenly apart. These represent the fuzzy areoles where spines grow. -
Add texture stripes:
Between the main rib lines, add very faint, thin, or broken white lines. This mimics the natural striations found on Saguaro cacti skin. -
Repeat for the medium rock:
Apply the same technique to your medium-sized cylindrical rock, perhaps varying the spacing of the dots slightly to give it a unique character.
Step 3: Detailing the Round Barrel Cactus
-
Map the center point:
For the round rock, identify the very top center point. All your lines will radiate outward from here, like spokes on a wheel. -
Paint radial lines:
Using the fine brush and white paint, draw lines curving from that center point down to the bottom edge of the stone. Space them somewhat tightly to mimic a barrel cactus structure. -
Add cross-hatching:
Instead of dots, paint tiny horizontal dashes across the white lines, creating a ladder-like or cross-hatched effect. This gives the illusion of dense spines. -
Intersperse dots:
randomly place a few tiny white dots between the lines near the top center to suggest fresh growth.
Level Up: Flowering Cacti
Glue a small faux flower or a pom-pom to the top of the round barrel cactus rock to mimic a blooming desert plant.
Step 4: Assembly and Potting
-
Seal the artwork:
Once all paint is fully dry (give it at least an hour), apply a coat of matte varnish. This protects the paint from chipping and gives the rocks a consistent, non-shiny finish that looks more like plant matter. -
Prepare the pot:
Fill your terracotta pot mostly to the top with soil or floral foam blocks. You want a stable base that sits about an inch below the rim. -
Position the cacti:
Place your three painted rocks into the pot. Ideally, push them slightly into the soil or foam so they stand upright securely. Arrange them with the tallest in the back and the round one in front. -
Add the gravel layer:
Pour the small pea gravel around the base of the rocks, covering the soil completely. Use a spoon to get the gravel into tight spaces between the ‘cacti’. -
Place feature stones:
Nestle the larger decorative white and grey stones on top of the gravel. I like to place a large white one near the front to contrast with the dark green paint. -
Final decorative touches:
Using the end of a paintbrush dipped in white paint, add a simple rim of dots around the outer edge of the terracotta pot to tie the whole design together.
Place your new unkillable garden on a sunny windowsill or desk for a touch of greenery that never needs watering.
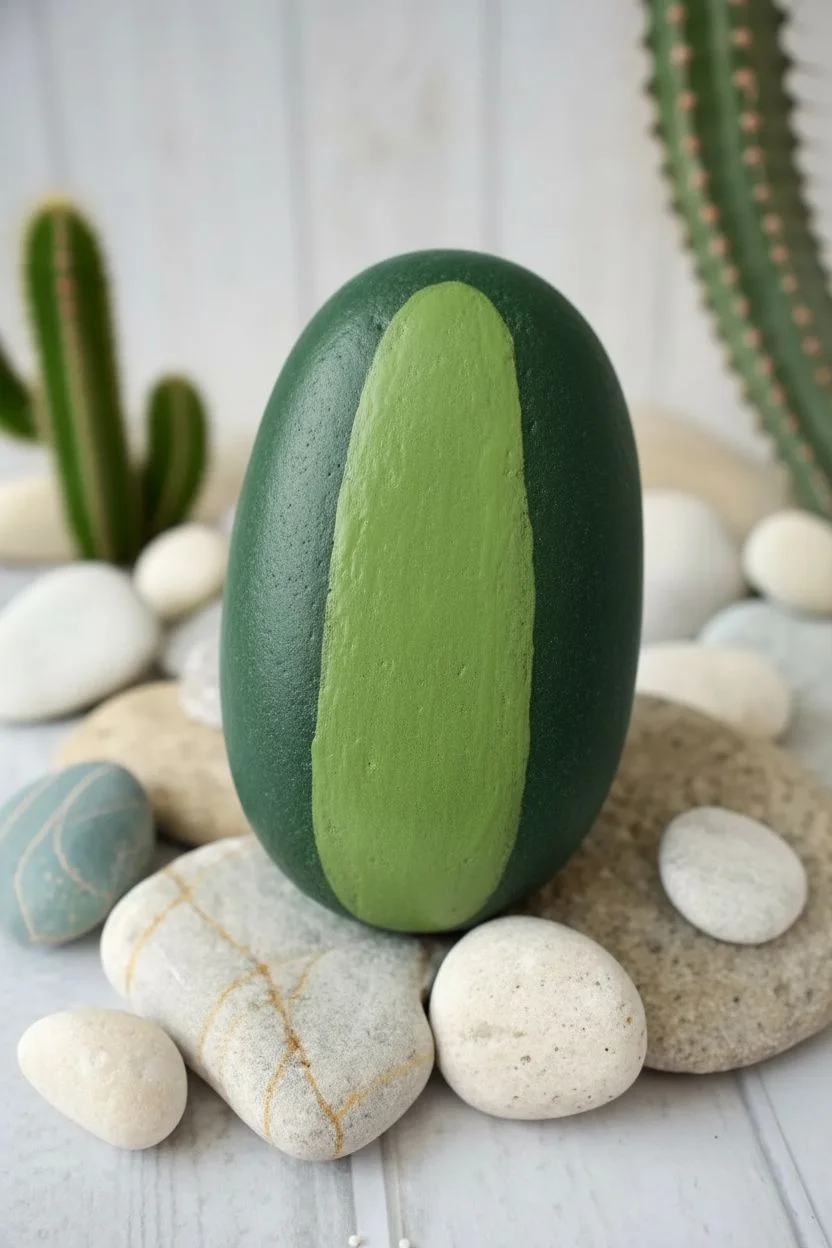
Two-Tone Cactus With Highlight Edge
This stunning rock painting mimics the look of an intricate etching or lino-cut print. Using a deep forest green base and fine beige linework, you’ll create a stylized cactus that stands out beautifully against the dark background.
Step-by-Step
Materials
- Smooth, oval river rock
- Deep forest green acrylic paint
- Light beige or parchment-colored acrylic paint (or fine paint pen)
- Wide flat paintbrush
- Detail liner brush (size 0 or 00)
- Pencil (optional)
- Matte sealer spray
Step 1: Base Preparation
-
Clean the Stone:
Begin by washing your stone with warm soapy water to remove any dirt or oils. Scrub well and let it dry completely in the sun. -
Apply Green Base:
Coat the entire top surface of the rock with deep forest green acrylic paint. Use your wide flat brush for smooth coverage. -
Second Coat:
Once the first layer is touch-dry, apply a second coat of green to ensure full opacity. You want a consistent, dark canvas for the light lines to pop against. -
Full Cure:
Allow the base color to dry completely for at least an hour. If the base is tacky, your fine lines might drag and smear.
Shaky Hands?
If using a brush is difficult for the tiny spikes, switch to a fine-point acrylic paint pen (0.7mm) in beige or white. It gives excellent control for sharp details.
Step 2: Outlining the Shape
-
Sketching (Optional):
If you are nervous about freehand painting, lightly sketch the main cactus column and two side arms using a pencil. Keep the pressure very light so you don’t scratch the paint. -
Paint the Central Column:
Load your detail liner brush with the light beige paint. Paint a long, vertical oval shape in the center of the rock. Keep the line thin and steady. -
Add Side Arms:
Paint a curved arm coming off the left side, bending upwards. Repeat on the right side, but I find placing one arm slightly higher than the other adds a natural look. -
Add a Small Pup:
Near the bottom right, paint a small, nub-like arm curving slightly upward to balance the composition.
Step 3: Detailed Line Work
-
Inner Contours:
Paint a smaller, concentric oval inside the main column, leaving a few millimeters of green space between this new line and the outer edge. -
Arm Contours:
Repeat this process for the arms, painting inner lines that follow the shape of the outer outlines. -
Central Veins:
Inside the innermost oval of the main column, paint a central vertical line. Add small dots or tiny circles along this line to represent the ribs of the cactus. -
Arm Veins:
Add similar central lines with dots inside the inner shapes of the arms.
Pro Tip: Consistency
Thin your beige paint with a tiny drop of water until it has an ink-like consistency. This helps the paint flow smoothly off a liner brush for crisp, unbroken lines.
Step 4: Spikes and Finishing
-
Triangle Spikes:
Along the *outer* edge of the main cactus shape, paint small, sharp triangles pointing outward. Imagine the face of a clock and space them evenly. -
Sharp Tips:
Extend the tip of each triangle into a fine point. This creates the ‘thorny’ silhouette. -
Arm Spikes:
Continue painting these triangular spikes along the outer edges of the cactus arms and the small pup at the bottom. -
Connecting Lines:
Draw very thin, perpendicular lines connecting the inner vein line to the outer contour line at regular intervals, creating a segmented look. -
Clean Up:
Check your linework. If any beige lines look too faint, carefully retrace them to brighten the color. -
Sealing:
Once the artwork is thoroughly dry (overnight is best), spray with a matte sealer to protect the design and unify the sheen.
Now you have a striking botanical art piece that looks great on a desk or in the garden
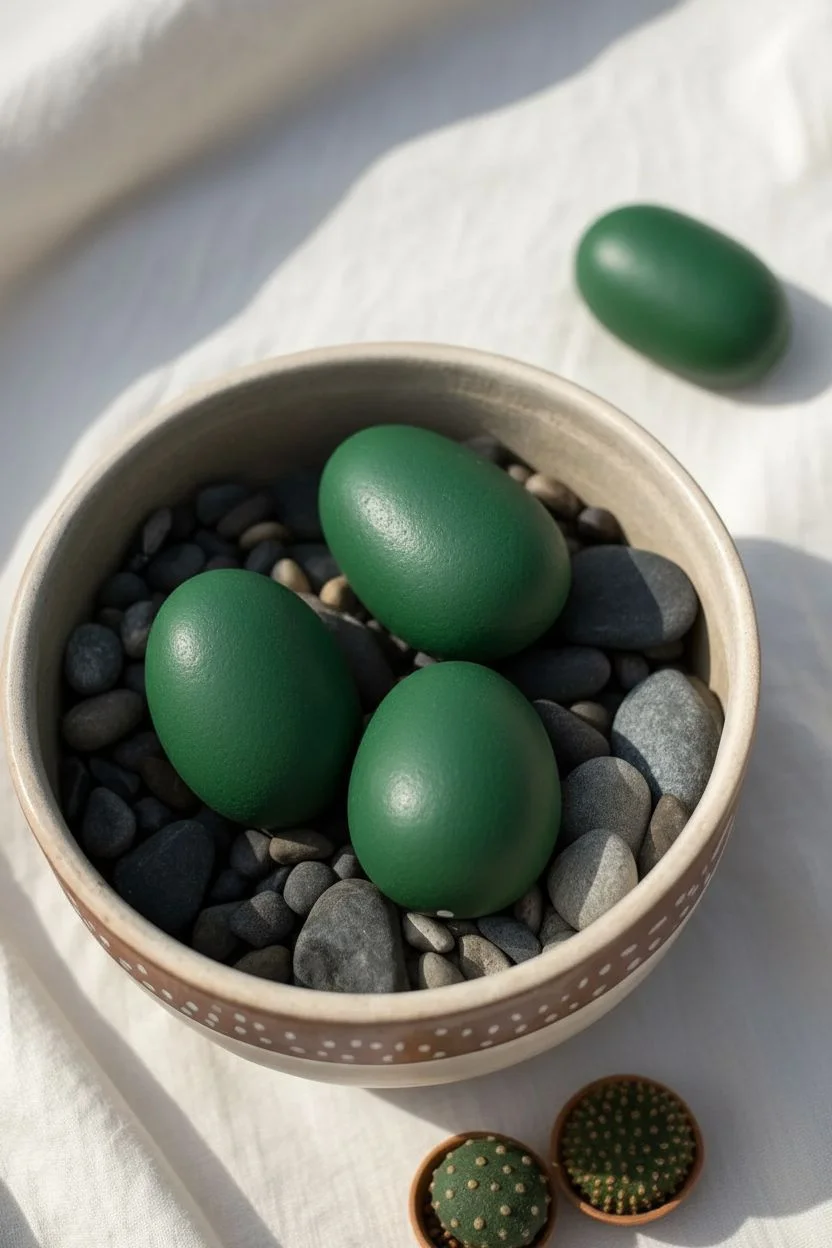
Speckled Succulent-Cactus Hybrid Rocks

Transform smooth river stones into a remarkably realistic desert display that never needs watering. By layering shades of green and adding delicate white details, you can mimic the prickly texture of cacti and the smooth skin of succulents on simple stones.
How-To Guide
Materials
- Smooth river rocks (various sizes and shapes)
- Round, flat stones (for different cactus varieties)
- Acrylic paints (dark green, sage green, teal, white, yellow)
- Fine detail paintbrushes (00 or 000 size)
- Medium flat paintbrush
- Dotting tool or toothpick
- Matte varnish or sealant
- Terracotta pot
- Small pebbles or gravel (for filling the pot)
Step 1: Base Coating
-
Clean and Prep:
Begin by scrubbing your collected rocks with soapy water to remove any dirt or oily residue. Let them dry completely, as trapped moisture can cause the paint to bubble later. -
Select Shapes:
Look for stones that naturally mimic plant shapes—tall, oblong rocks work well for barrel cacti, while rounder, flatter stones are perfect for small button cacti. -
Mix Base Greens:
Prepare a few different shades of green on your palette. For a realistic look, mix a standard forest green with a touch of yellow for a brighter cactus, or add a bit of white and blue to create a dusty sage hue. -
Apply First Layer:
Coat each rock entirely in your chosen base green shade. I find it helpful to paint one side, let it dry for 15 minutes, and then flip it to paint the bottom so you don’t get fingerprints. -
Second Coat:
Apply a second layer of the base color to ensure opaque, solid coverage where the stone’s natural color doesn’t show through.
Step 2: Detailing the Barrel Cactus
-
Vertical Ribs:
Take a lighter shade of green (mix your base green with a little white) and paint vertical stripes running from the top of the rock down to the bottom to simulate the cactus ribs. -
Spine Clusters:
Using a fine detail brush and white or pale yellow paint, create small star-shaped clusters along the vertical ribs. These tiny strokes mimic the sharp spines. -
Top Tuft:
Dab a concentration of small white dots or tiny lines at the very apex of the rock to create the fuzzy ‘crown’ often seen on barrel cacti.
Natural Texture
Mix a tiny pinch of baking soda into your green acrylic paint before applying the base coat. This adds a gritty, realistic texture to the ‘skin’ of the cactus.
Step 3: Creating the Speckled Buttons
-
Subsection Lines:
For the rounder rocks, use a very thin brush with white paint to draw lines that divide the ‘plant’ into sections, radiating from the center like a sliced orange. -
Dotting Detail:
Dip a dotting tool or the tip of a toothpick into white paint. Gently press rows of dots along the dividing lines you just painted to create the bumpy areoles of the cactus. -
Fuzzy Texture:
On other round stones, skip the lines and simply stipple tiny white groupings of dots randomly across the surface for a more speckled, organic appearance.
Desert Bloom
Glue a small, bright tissue paper flower or a pre-made plastic blossom to the top of one of your rock cacti to simulate a rare desert bloom.
Step 4: Assembly
-
Seal the Art:
Once all paint is thoroughly dry, apply a coat of matte varnish. This protects the paint from chipping and gives the rocks a non-glossy, plant-like finish. -
Prepare the Pot:
Fill your terracotta pot about three-quarters full with filler stones or standard gravel to create a base height. -
Arrangement:
Place your painted cactus rocks into the pot. I like to nestle the largest ones in the back and the smaller ‘button’ cacti in the front for depth. -
Final Fill:
Pour smaller, decorative pebbles or aquarium gravel around the base of your rock cacti to hold them securely in place and hide the filler stones underneath.
Enjoy your zero-maintenance garden piece that adds a touch of greenery to any corner of your home
Night Desert Cactus Rocks With Starry Accents
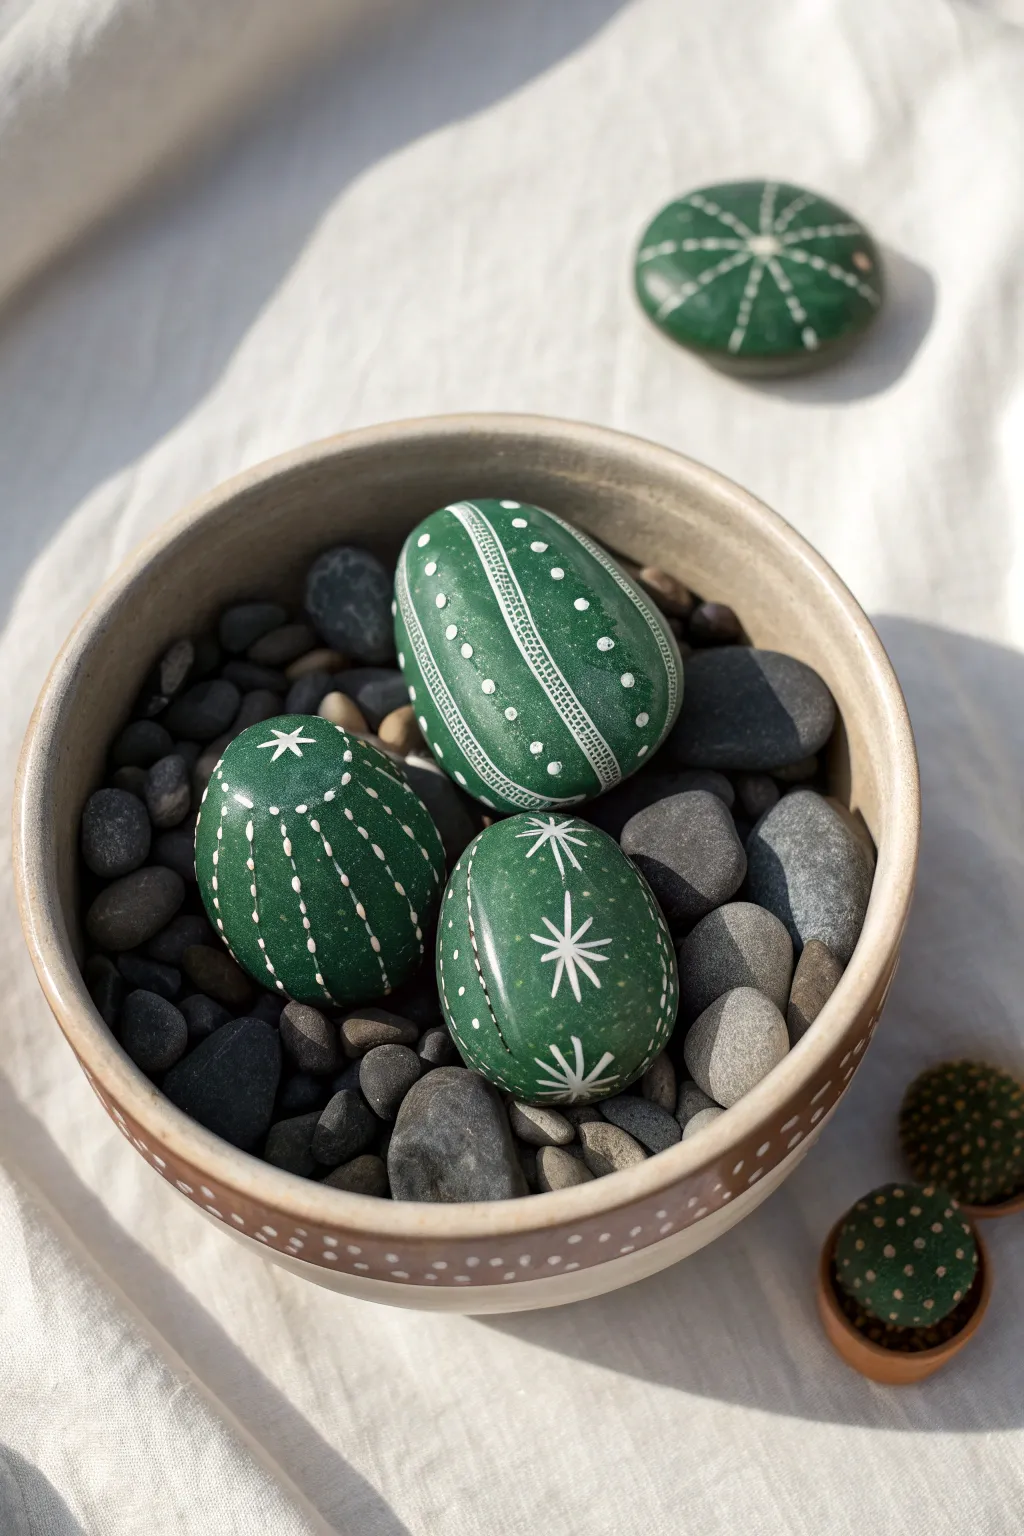
Transform smooth river stones into a maintenance-free succulent garden with deep forest greens and delicate white detailing. These cactus rocks feature starry accents and geometric spines that evoke a calm desert night, perfect for adding a touch of nature to your desk or shelf.
Detailed Instructions
Materials
- Smooth, egg-shaped river rocks (various sizes)
- Acrylic paint (deep forest green, leaf green, white)
- Fine-point paintbrush (size 0 or 00)
- Extra-fine white paint pen (0.7mm tip)
- Matte or satin varnish
- Ceramic bowl or planter
- Small pea gravel or decorative stones for filling
Step 1: Base Preparation
-
Clean and dry:
Begin by thoroughly washing your river rocks with warm soapy water to remove any dirt or oils. Let them dry completely, as any moisture will prevent the paint from adhering properly to the stone surface. -
Mix your greens:
Squeeze out your deep forest green acrylic paint. If you want a slightly more vibrant cactus look, mix a tiny drop of leaf green into the forest green on your palette to create a rich, organic shade. -
Apply the base coat:
Paint the entire surface of the rock with your green mixture. You may find it easier to paint the top half, let it dry, and then flip it over to paint the bottom. Aim for a smooth, opaque coverage. -
Add a second coat:
Once the first layer is dry to the touch, apply a second coat of green. This ensures the natural color of the stone doesn’t show through and gives you a solid canvas for the fine details.
Steady Hand Trick
Rest your painting wrist on a stable surface or the table edge while applying the white details. This anchors your hand for straighter lines.
Step 2: Detailing the Cacti
-
Plan your patterns:
Observe the different patterns in the reference image. One rock features vertical dotted ridges, another has decorative geometric lines, and the third has large starburst spines. Choose which design matches the shape of your rock best. -
Paint the Starburst Rock: Main stars:
For the star-patterned rock, use your fine brush or white paint pen to draw a six-pointed asterisk shape in the center. Use confident, outwardly flicking strokes to mimic sharp spines. -
Paint the Starburst Rock: Fill gaps:
Add smaller three or four-pointed stars in the spaces around the main ones. Keep the spacing somewhat random but balanced to look organic. -
Design the Ridged Rock: Vertical guides:
For the classic cactus look, visualize vertical lines running from the top center of the rock down to the bottom. Lightly sketch these with a pencil if you need a guide. -
Design the Ridged Rock: Adding spines:
Along your imaginary vertical lines, paint pairs of tiny V-shapes or ticks using the white paint pen. Space these ticks evenly, moving down the rock. -
Create the ‘Areoles’:
Between each set of V-shaped spines, place a tiny white dot. This represents the ‘areole’ where spines grow from on a real cactus. -
Craft the Geometric Rock: Banding:
For the most intricate rock, start by painting two parallel vertical lines about a quarter-inch apart. -
Craft the Geometric Rock: Cross-hatching:
Fill the space between those parallel lines with tiny diagonal hash marks or zig-zags to create a woven texture. -
Craft the Geometric Rock: Side details:
Flank your central band with rows of larger polka dots. I like to use the back end of my paintbrush dipped in white paint to stamp perfectly round dots.
Step 3: Finishing Touches
-
Let it cure:
Allow all the white detailed paint to dry completely. If you used a paint pen, this should be quick, but bottle acrylics may need an hour to fully set. -
Seal the artwork:
Apply a coat of satin or matte varnish over the painted rocks. This protects the paint from chipping and gives the ‘cacti’ a realistic, slightly waxy sheen. -
Prepare the planter:
Fill your ceramic bowl or shallow planter with the small pea gravel or unpainted decorative stones. -
Arrange the garden:
Nestle your painted cactus rocks into the gravel. Angle them slightly differently—tilted or upright—to create a natural-looking arrangement. -
Final adjustment:
Make sure the bottoms of the painted rocks are buried slightly in the gravel so they look like they are growing out of the ground, rather than just sitting on top.
Add a Bloom
Glue a small pink or yellow tissue paper pom-pom to the top of one rock to mimic a cactus flower in full bloom.
Enjoy your everlasting desert garden that brings a pop of greenery to your space without ever needing water
Cactus Rock Garden in a Shallow Bowl
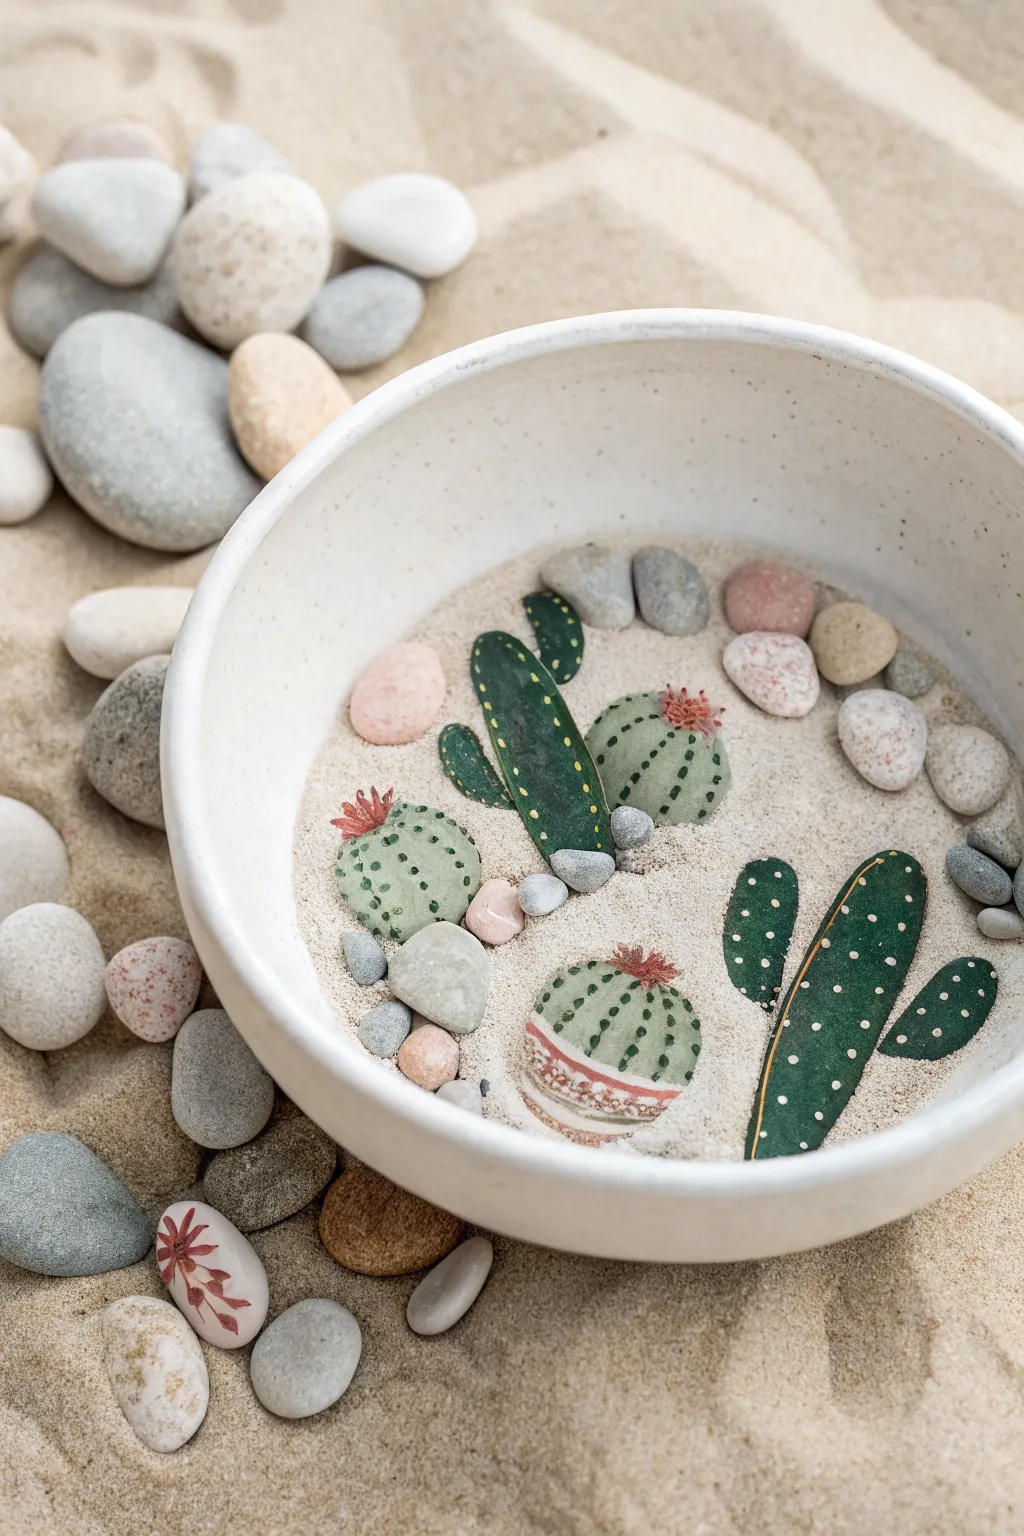
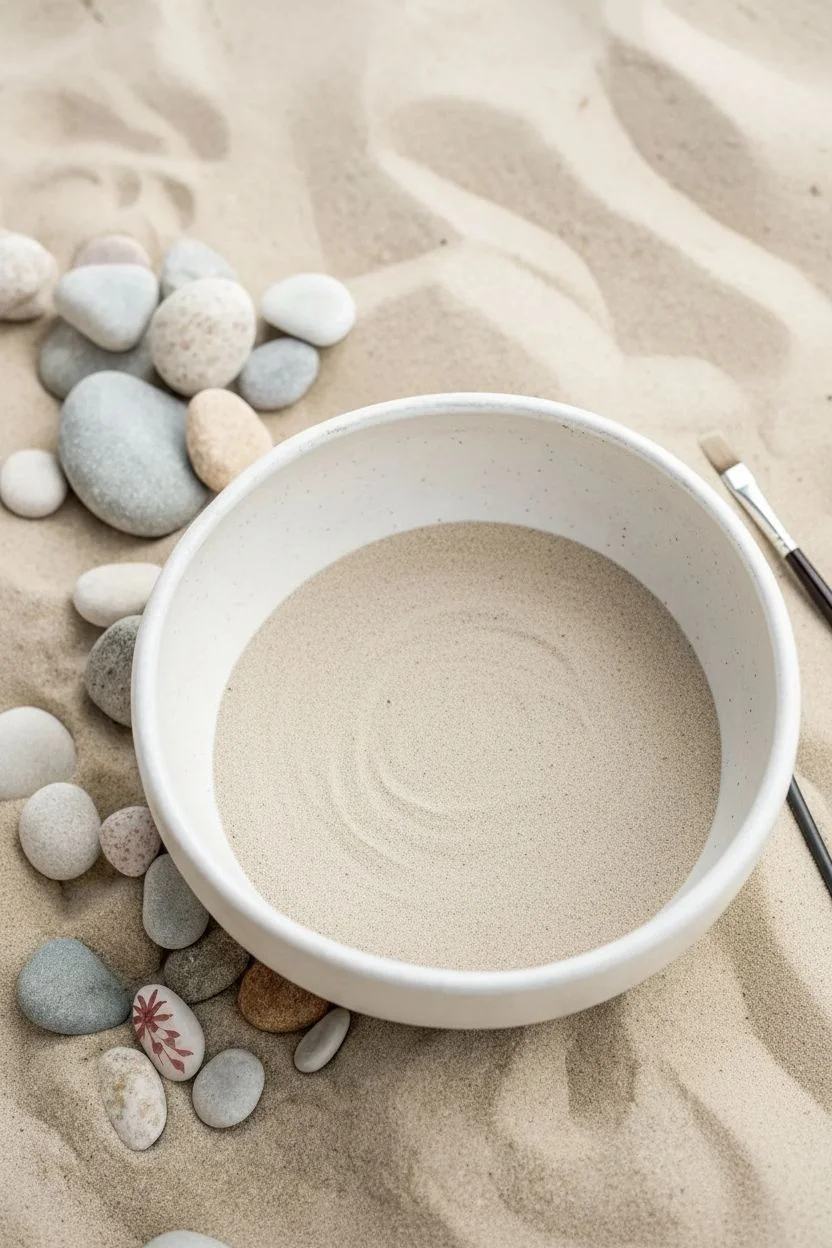
Bring the arid beauty of the desert indoors without the prickly thorns by creating this serene rock garden. This project combines flat illustration techniques with natural textures, resulting in a trompe-l’oeil effect where painted cacti seem to grow right out of the sand.
Step-by-Step Tutorial
Materials
- Shallow white ceramic bowl (approx. 6-8 inches diameter)
- Fine grain craft sand (light beige or white)
- Assorted small river rocks and pebbles (smooth, varying colors)
- Acrylic paints (dark green, sage green, white, pink, terracotta)
- Small flat brushes (size 2-4)
- Fine detail liner brush (size 00 or 000)
- Clear matte varnish spray (optional)
- Pencil for sketching
- Cardstock or heavy watercolor paper (if painting cutouts) OR flat oblong river stones (if painting directly on rocks)
Step 1: Preparation and Base
-
Select the vessel:
Choose a clean, shallow ceramic bowl with a wide opening. A matte white finish works best to frame the colors of the stones and paint. -
Create the foundation:
Pour fine grain sand into the bowl until it is about half full. Shake the bowl gently side-to-side to level the surface completely flat. -
Plan the composition:
Before painting, visualize where you want your cacti to ‘grow.’ You’ll need space for two tall column cacti and two or three round barrel cacti.
Step 2: Painting the Cacti
-
The tall cactus technique:
If painting on flat stones: Select two long, skinny stones. Paint them entirely with a deep forest green acrylic. Let this base coat dry completely. -
Adding dimension:
For the taller cacti, mix a slightly lighter green and paint a thin strip along one edge to simulate a highlight, giving the flat shape a suggestion of volume. -
The barrel cactus base:
Select rounder, flatter stones for the barrel cacti. Paint these with a lighter sage or mint green base coat. -
Defining the ribs:
Once the sage green is dry, use a small brush to paint vertical curved stripes using a darker green. These lines create the segmenting ribs of the barrel cactus. -
Adding texture details:
Using your finest liner brush and white paint, create rows of tiny dots along the dark green stripes of the barrel cacti to represent spines. -
Detailing the tall cactus:
Switch back to your dark green tall cacti. Use a yellow-ochre or cream paint to add small dotted clusters or tiny dashes along the edges and down the center. -
Painting the blooms:
On the top of the barrel cacti, dab a small amount of pink or terracotta paint. Use a dry brush to flick the paint outward slightly, mimicking fuzzy desert flowers. -
Adding the pot detail:
For one of the barrel cacti, you can paint a decorative band at the bottom using terracotta and white stripes to make it look like it’s sitting in a decorative planter. -
Sealing the work:
Once all paint is perfectly dry, I usually give the stones a light misting of matte varnish differently to protect the acrylic from chipping against the sand.
Paint Slipping?
If acrylic paint slides off smooth river rocks, wash the stones with soapy water and dry them well. A layer of white gesso primer helps the color stick.
Step 3: Assembly
-
Placing the main subjects:
Carefully nestle your painted cactus stones into the sand. Push them down slightly so they look planted rather than just sitting on top. -
Adding the hardscape:
Arrange your unpainted river rocks around the cacti. Group a few grey and beige stones near the ‘roots’ of the cacti to anchor them visually. -
Creating balance:
Add a few pinkish or reddish stones to the mix to echo the color of the cactus flowers. -
Final touches:
Use the handle of a paintbrush to smooth out any sand disturbed during placement. -
Surrounding:
If displaying on a table, you can scatter a few larger river stones outside the bowl to integrate the piece with its environment.
Go 3D
Glue smaller pebbles onto the main cactus stones before painting to create actual raised bumps, making a truly tactile 3D texture for the spines.
Enjoy the calming presence of your maintenance-free desert garden on your desk or coffee table
Textured Cactus Look With Stippled Paint

Transform a smooth river stone into a convincing desert succulent with some clever shading techniques. This project uses vertical bands of color and stippled texture to create a 3D ribbed effect that looks surprisingly realistic sitting in your garden.
Step-by-Step Guide
Materials
- Smooth, oval river rock (roughly egg or potato shaped)
- Acrylic paints: Dark forest green, bright leaf green, yellowish-lime green, white, silver (optional)
- Flat paintbrushes (medium size)
- Small round detail brush (size 0 or 1)
- Fine liner brush
- Pencil or white chalk pencil
- Paint palette or mixing plate
- Clear acrylic sealer (spray or brush-on)
Step 1: Preparation and Base Layout
-
Clean surface:
Begin by scrubbing your rock with soap and water to remove any dirt or oily residue. Let it dry completely before starting, as moisture will trap under the paint. -
Base coat:
Apply a base coat of your medium leaf green paint over the entire visible surface of the rock. You might need two layers to ensure solid coverage. Let this dry fully. -
Mapping the ribs:
Using a pencil or faint chalk line, draw vertical lines running from the top center of the rock down to the base. Imagine dividing the rock into orange segments; these will become the ribs of your cactus.
Uneven Lines?
If your vertical lines are shaky, try resting your pinky finger on a dry part of the rock to stabilize your hand while painting the long strokes.
Step 2: Creating the Ribbed Texture
-
Mixing greens:
Prepare your palette with three shades of green: your base medium green, a darker forest green, and a lighter lime green. -
Shading the edges:
On each vertical segment you drew, paint the outer edges (where the lines are) with the dark forest green. This creates the illusion of depth where the cactus ribs recede. -
Highlighting the center:
Paint the center of each vertical strip with the lighter lime green. Blending is key here; while the paint is still slightly wet, use a clean brush to feather the light center into the dark edges for a smooth gradient. -
Adding stippled texture:
To get that realistic plant skin texture, take a stiff brush with a very small amount of the lighter green paint. Tap or ‘stipple’ it gently over the transition areas between the dark and light greens. -
Enhancing the separation:
Once the green gradients are dry, mix a thin wash of black or very dark green. Carefully re-trace the original vertical dividing lines to deepen the shadows between the ribs.
Level Up: Texture
Mix a tiny bit of baking soda into your green paint for the base coat. It creates a gritty, organic texture that looks even more like real cactus skin.
Step 3: Refining the Details
-
Painting the spines:
Using your finest liner brush and white (or mixed silver) paint, draw thin lines directly over the dark shadow lines separating the ribs. These represent the ridge of the cactus spines. -
Adding the prickles:
Along the white vertical lines you just painted, add small, short tick marks branching outward. Angle them slightly downward or upward, consistent on each rib. I find doing all the left-side ticks first, then the right, helps maintain rhythm. -
Creating areoles:
Dip the back end of your paintbrush (or a dotting tool) into white paint. Place small dots down the center of each lighter green rib segment. These are the areoles where spines grow. -
Adding texture to dots:
If you want extra detail, add a tiny dot of silver or light grey in the center of the larger white dots to give them dimension. -
Final highlights:
Add extremely subtle, thin scratches of white or pale yellow on the fleshy green parts to mimic imperfections or light catching the skin. -
Sealing the work:
Allow the rock to dry overnight to ensure all thick dots of paint are cured. Finish with a clear acrylic sealer to protect your art from the elements.
Set your finished rock in a pot with real sand or gravel to complete the illusion
Monochrome Cactus Rocks in Modern Neutrals
Transform smooth river stones into a sophisticated desert oasis using a muted palette of sage greens and crisp whites. This project focuses on clean lines and simple geometric patterns to achieve a sleek, modern aesthetic that looks perfect on any sunny windowsill.
Step-by-Step Guide
Materials
- Smooth, oval-shaped river rocks (various sizes)
- Acrylic craft paints (sage green, olive green, grey-green, white)
- Matte acrylic sealer or varnish
- Fine detail paintbrushes (size 0 and 00)
- Flat shader brush (size 6 or 8)
- Pencil (optional)
- Wide, shallow planter pot (concrete style works best)
- Sand or fine gravel for potting
Step 1: Planning and Base Coating
-
Rock selection:
Choose smooth, oblong stones that naturally mimic the shape of cactus pads. Select a variety of heights—tall and thin for columnar cacti, and shorter, rounder ones for barrel cacti—to create visual interest in your final arrangement. -
Clean the surface:
Wash your stones thoroughly with warm, soapy water to remove any dirt or oils. Let them dry completely before you begin painting, as this ensures the acrylic adheres properly. -
Mix your greens:
Create a palette of muted, earthy greens. You don’t want bright neon colors here; mix olive green with a touch of white or grey to achieve that trendy sage tone seen in the reference. -
Apply the base coat:
Using your flat shader brush, paint the entire surface of each rock with your chosen green shades. I like to paint one side, let it dry for about 20 minutes, and then flip it to paint the other side. -
Second coat:
Apply a second layer of green paint to ensure solid, opaque coverage where no original stone color shows through. Allow this layer to dry fully.
Step 2: Detailing the Cacti
-
Sketching guidelines:
If you’re nervous about freehanding, lightly sketch vertical lines down the length of your painted rocks with a pencil to mark where the cactus ribs will go. -
Painting the ribs:
For the tall, dark green cactus, use a lighter green shade and a fine brush (size 0) to paint thin vertical lines from top to bottom. These simulate the ridges of the plant. -
Adding the ‘V’ spines:
On the darker cactus, use white paint and your finest detail brush (size 00) to paint small, inverted ‘V’ shapes along the vertical lines. Space them evenly to mimic spines. -
Dotted barrel cactus:
For the rounder, lighter green rock, create texture by painting clusters of tiny white dots. Group them in small circles or scatter them randomly to look like areoles. -
Striped variations:
On another rock, paint solid, bold white vertical stripes. Once dry, you can dot over these lines or leave them solid for a graphic look. -
Top details:
Don’t forget the tops of the rocks. Add a cluster of white dots at the very apex of your columnar cactus to represent new growth or a flowering point. -
Clean up:
If any white lines look shaky, use your original green base color to gently cut back in and tidy up the edges once the white is dry.
Uneven Lines?
If your hand shakes while painting thin stripes, try using a white paint marker instead of a brush. It offers much more control for fine details.
Step 3: Finishing and Assembly
-
Sealing the work:
Once all paint is completely dry (give it at least an hour), apply a coat of matte acrylic sealer. A glossy finish can look artificial, so matte is best for that natural, modern stone look. -
Prepare the pot:
Fill your shallow planter with sand or fine gravel until it is about an inch from the rim. -
Arrangement strategy:
Place your painted rocks into the sand, burying the bottoms slightly for stability. Arrange them in a cluster, placing the tallest rocks in the back and shorter ones in front. -
Adding texture:
Tuck a few small, unpainted pebbles around the base of your ‘cacti’ to add contrast and make the scene look more realistic.
Bloom It Up
Glue small pink or yellow pom-poms or tissue paper balls to the top of a cactus to mimic a desert flower in bloom.
Enjoy your maintenance-free garden that brings a touch of calm greenery to your space without ever needing water
Metallic Spine Highlights for Subtle Shine
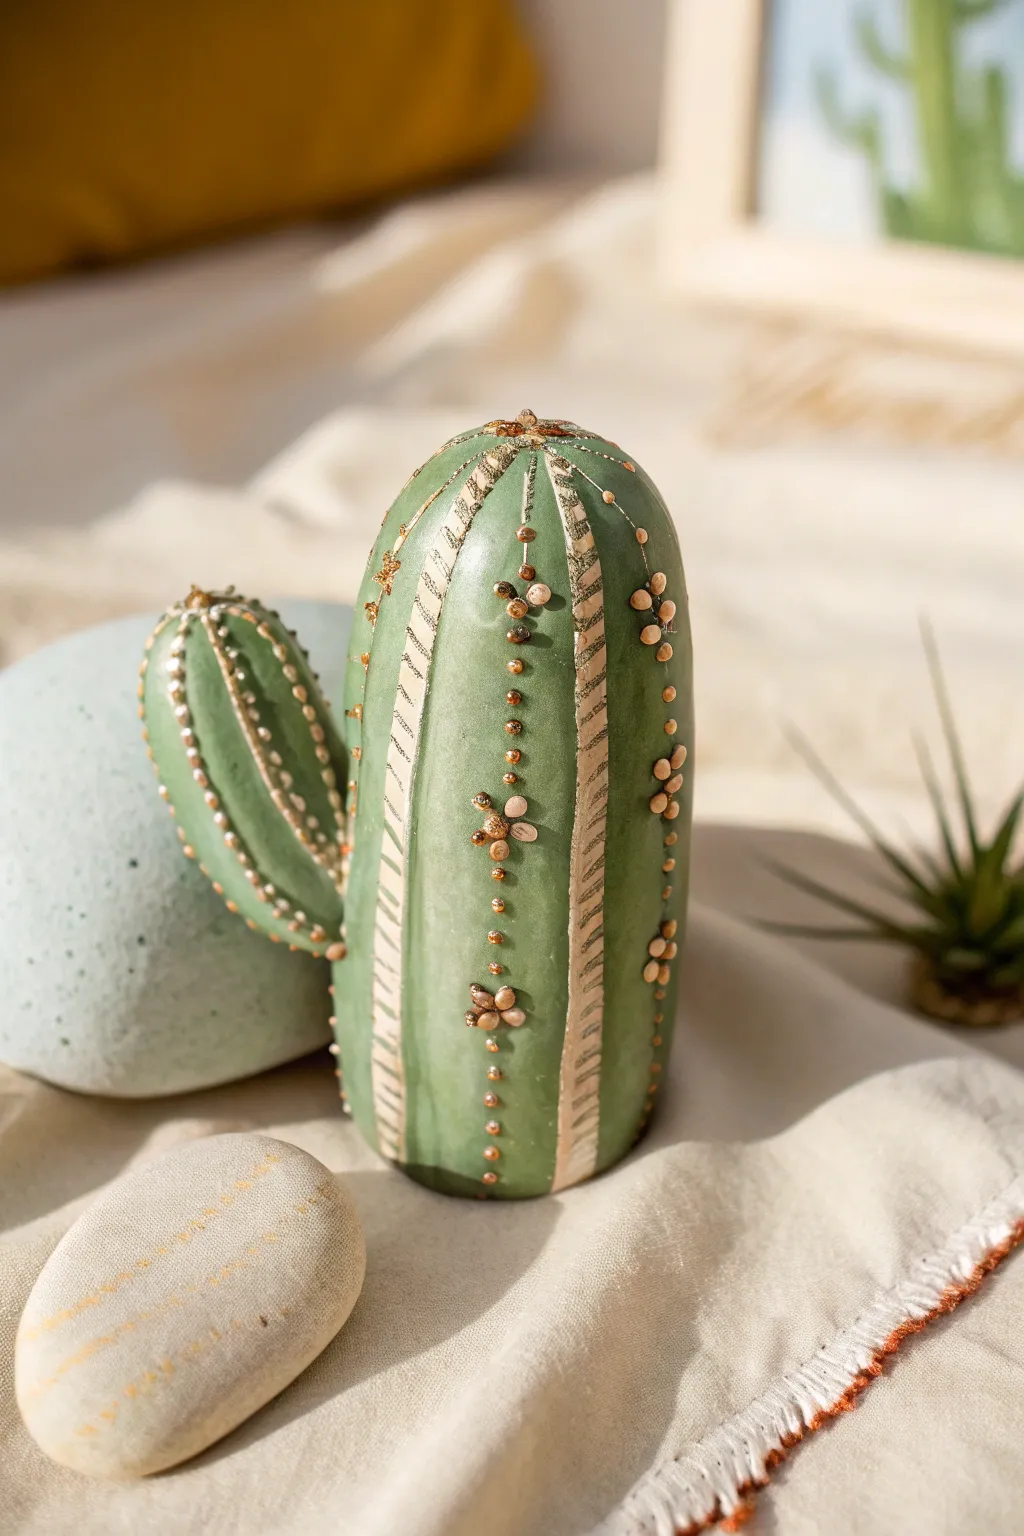
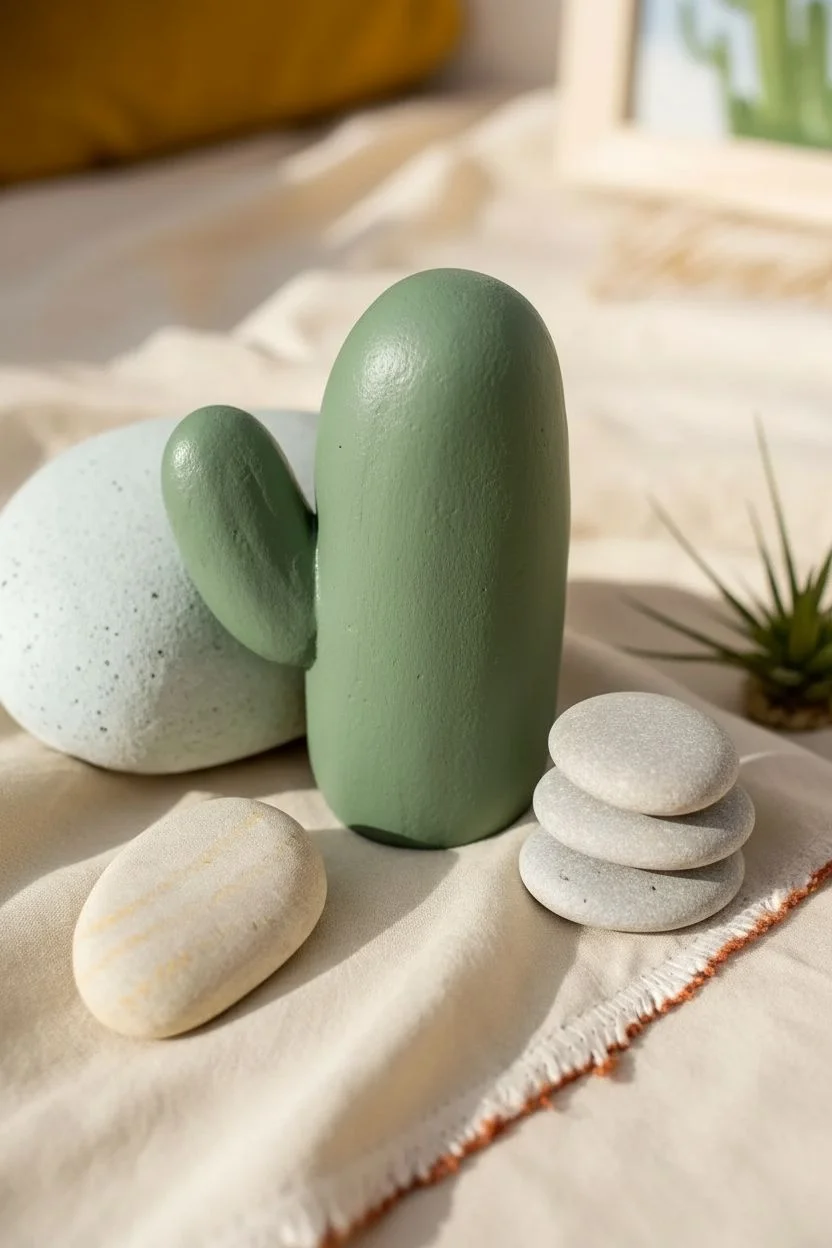
Transform ordinary river stones into elegant desert decor with this sophisticated take on rock painting. Using metallic accents and dimensional textures, you’ll create a cactus that catches the sunlight just like the real thing.
Step-by-Step Tutorial
Materials
- Smooth, elongated river rocks (cactus shape)
- Rounder rocks (optional, for side arms)
- Acrylic paint (Sage Green, Light Olive, Titanium White)
- Metallic Gold acrylic paint or paint pen
- Dimensional fabric paint (Gold, Copper, or Pearl White)
- Strong craft glue (e.g., E6000)
- Fine detail paintbrush (size 0 or 00)
- Flat paintbrush (size 4 or 6)
- Matte spray sealant
Step 1: Base Structure & Color
-
Select your stones:
Choose an elongated, smooth stone for the main cactus body. If you want a branching cactus, find smaller, flatter stones that nestle partly against the main body. -
Clean and prep:
Wash your rocks thoroughly with soap and water to remove any dirt or oils that might repel paint. Let them dry completely, preferably in the sun. -
Mix your green:
Create a soft, dusty sage color by mixing your green acrylic with a touch of white. I like to keep the mixing slightly imperfect so the stone has natural variations in hue. -
Apply the base coat:
Paint the entire surface of your cactus rocks with the sage green mixture. Apply two to three thin coats for solid opacity, allowing full drying time between layers. -
Assemble the shape:
Once the green base is fully dry, glue the smaller arm stones onto the main body using a strong adhesive like E6000. Use props to hold the heavy stones in place while the glue cures overnight.
Dry Brushing Trick
Dab your gold-loaded brush on a paper towel until it’s almost dry before painting stripes. This creates a weathered, organic texture.
Step 2: Adding Metallic Spines
-
Map the ridges:
Visualize vertical lines running from the top of the cactus down to the base. You can lightly pencil these in if you need a guide. -
Paint the gold stripes:
Using your fine brush and metallic gold paint, create vertical stripes along your planned ridges. These don’t need to be solid lines; a scratchy, dry-brush texture mimics organic cactus skin beautifully. -
Vary the line width:
Make some gold stripes slightly wider and others thinner. This variation adds depth and makes the ‘cactus’ look more three-dimensional. -
Add cross-hatching:
On the wider gold stripes, use a very fine brush to add tiny diagonal slash marks or cross-hatching. This creates the illusion of texture found on real cacti.
Tiny Terrarium
Place your finished rock cactus in a small pot filled with sand or fine gravel to complete the illusion of a potted plant.
Step 3: Dimensional Details
-
Create spine clusters:
Using dimensional fabric paint (puff paint) in a metallic or pearl shade, squeeze tiny dots along the non-striped green areas. -
Form flower shapes:
Group four or five tiny dots together in a circle to create small flower-like areoles. Place these randomly but vertically aligned between the gold stripes. -
Add distinct spines:
For the defined single spines, apply a slightly larger dot of dimensional paint. While it’s wet, use a toothpick to gently pull the paint outward to form a small point. -
Highlight the arm joins:
Add a few extra dots or gold lines where the small rock arms meet the main body to visually blend the transition. -
Let it cure:
Dimensional paint takes much longer to dry than acrylic. Set the project in a safe, dust-free place for at least 24 hours. -
Seal the artwork:
Finish with a light coat of matte spray sealant. Avoid glossy sprays, as you want the metallic paint to be the only thing that shines.
Now you have a zero-maintenance botanical sculpture that adds a touch of glamour to your shelf
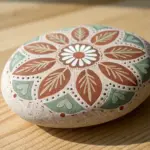


Have a question or want to share your own experience? I'd love to hear from you in the comments below!