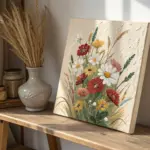
If a blank canvas makes you freeze, abstract painting is my favorite way to get you unstuck fast. These canvas abstract painting ideas are meant to feel doable, playful, and totally hang-on-your-wall worthy.
Bold Color-Block Fields

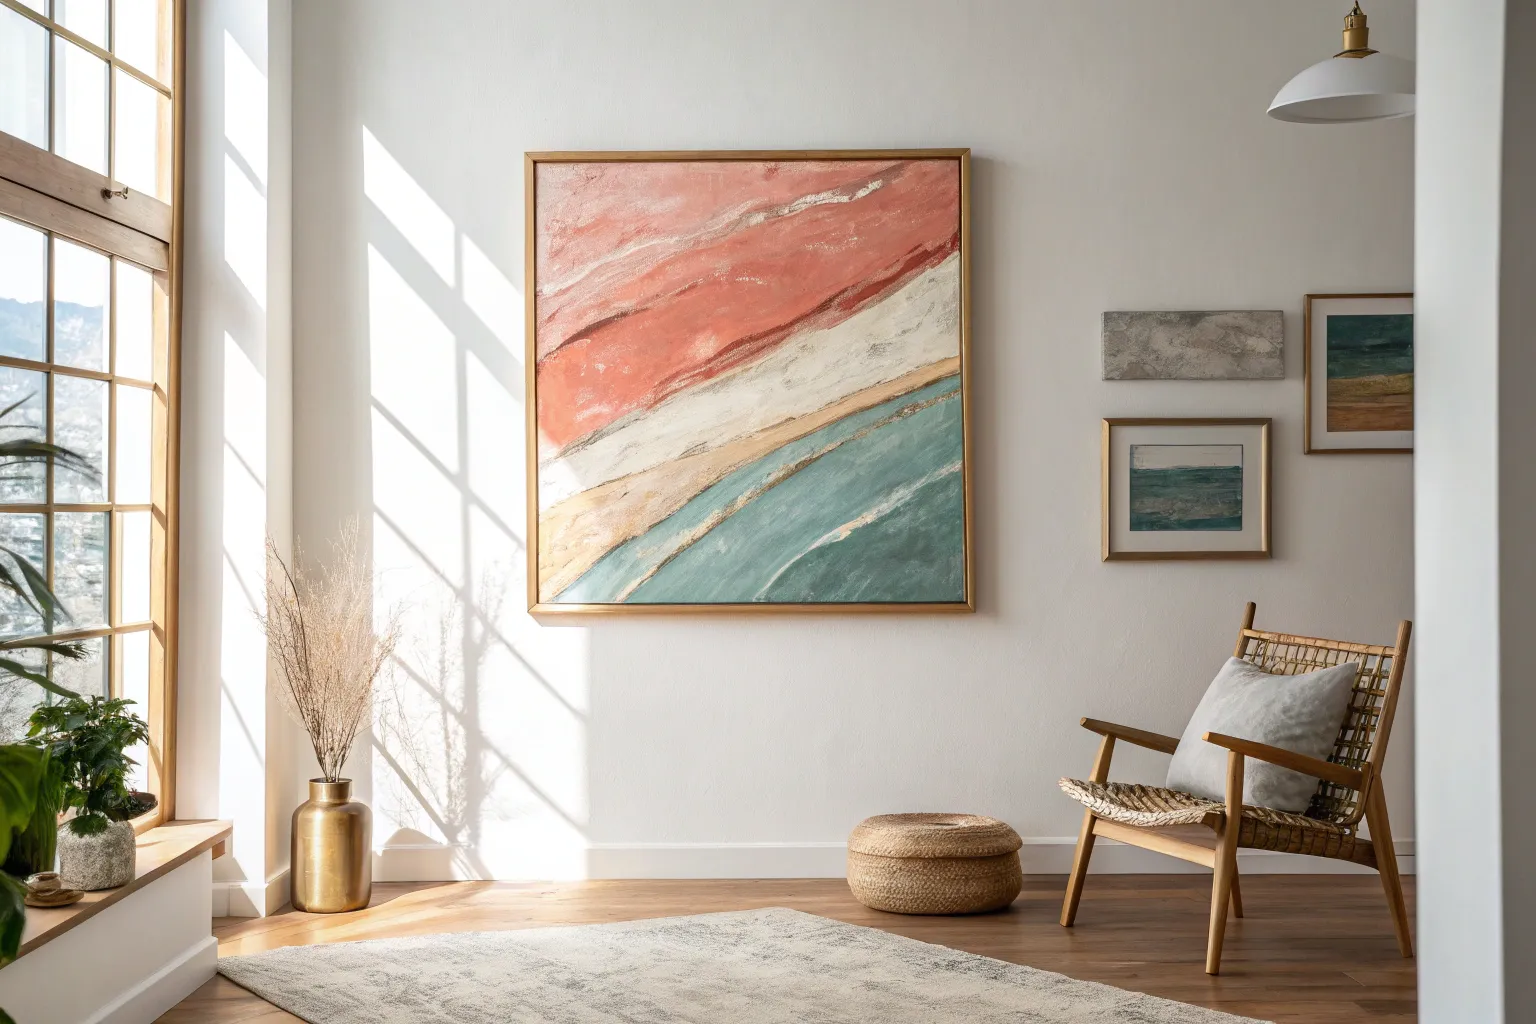
This grand-scale abstract piece anchors any room with its warm, grounded palette and striking geometric composition. By combining textured modeling paste with rich acrylics, you’ll create a sophisticated artwork that feels both modern and organic.
Step-by-Step Tutorial
Materials
- Large canvas (48″x48″ or 48″x60″)
- Acrylic paints (Titanium White, Burnt Sienna, Yellow Ochre, Deep Emerald Green, Terra Cotta)
- Medium or heavy modeling paste
- Palette knives (large and small)
- Painters tape (1″ and 2″ widths)
- Wide flat synthetic brush (2″ to 3″)
- Pencil
- Ruler or straight edge
- Carving tool or stylus (for the green texture)
- Large palette or mixing plate
Step 1: Preparation & Layout
-
Map out the design:
Begin by sketching your geometric layout directly onto the canvas with a light pencil. Draw a vertical line about one-third of the way from the left edge to define the left column. Divide that left column horizontally to create the top vertical sections. -
Define the diagonals:
Use a long straight edge to draw the diagonal lines that sweep across the bottom half of the canvas. These lines should slope downwards from left to right, creating wide bands for your ochre and rust tones. -
Tape the boundaries:
Apply painters tape firmly along the pencil lines of the first sections you intend to paint. I usually start with the distinct vertical blocks at the top to establish the structure. Ensure the tape edges are sealed tight to prevent bleeding.
Clean Lines
To get razor-sharp edges on textured canvas, apply a thin layer of matte medium over the tape edge before painting. This seals the gap so color won’t bleed underneath.
Step 2: Creating Texture
-
Mix texture for the green field:
Scoop a generous amount of modeling paste onto your palette. Tint it slightly with a drop of green paint so you can see where you are applying it, though we will do the final bold coat later. -
Apply paste to the top right:
Using a large palette knife, spread the modeling paste evenly into the large top-right quadrant. Aim for a thickness of about 1/8 inch—thick enough to carve into but not so heavy that it cracks. -
Etch the curves:
While the paste is still wet, take your stylus or the handle of a paintbrush and carve sweeping, curved lines into the paste. Start from the top left corner of the green section and arc outwards like ripples. Wipe your tool clean after each stroke. -
Apply texture to other sections:
For the blush and terracotta sections, apply a thinner layer of modeling paste with a palette knife to create a subtle, stucco-like surface. Let all paste dry completely, ideally overnight.
Gilded Touch
Mix a small amount of metallic gold powder into the ochre paint for the middle diagonal band. It adds a subtle shimmer that catches the light beautifully.
Step 3: Painting the Fields
-
Paint the Deep Emerald:
Once dry, load your wide brush with Deep Emerald Green. Paint the textured top-right section, working the paint into the carved grooves. You may need two coats to get that velvety saturation. -
Mix the Blush Tone:
Combine Titanium White with a tiny touch of Burnt Sienna and a dot of Terra Cotta. You want a very pale, warm neutral. Paint the top-left vertical rectangle, keeping strokes vertical to mimic the shape. -
Add the Rust accent:
Paint the narrow vertical strip next to the blush section with pure Terra Cotta mixed with a little Burnt Sienna for depth. This darker tone acts as a bridge between the light blush and the dark green. -
Create the Ochre diagonal:
Mix Yellow Ochre with Titanium White to soften it into a golden wheat color. Apply this to the middle diagonal band. Use a dry-brush technique near the edges to enhance the textural feel. -
Finish with the base diagonal:
For the bottom-most large triangle, mix a shade slightly lighter than the rust vertical strip—think a muted clay orange. Paint this section solidly.
Step 4: Finishing Touches
-
Remove tape carefully:
Peel away the painters tape slowly at a 45-degree angle. If the paint bridged over the tape, score the edge lightly with a craft knife first to prevent tearing. -
Refine the edges:
Use a small angled brush to touch up any lines where paint might have bled or where the canvas shows through between sections. -
Frame the piece:
This style of art looks best in a floating frame. Construct or buy a simple wooden float frame in light oak to complement the warm tones in the painting.
Hang your new masterpiece in a well-lit spot to let those textured curves cast their own shadows


Loose Layered Brushstrokes
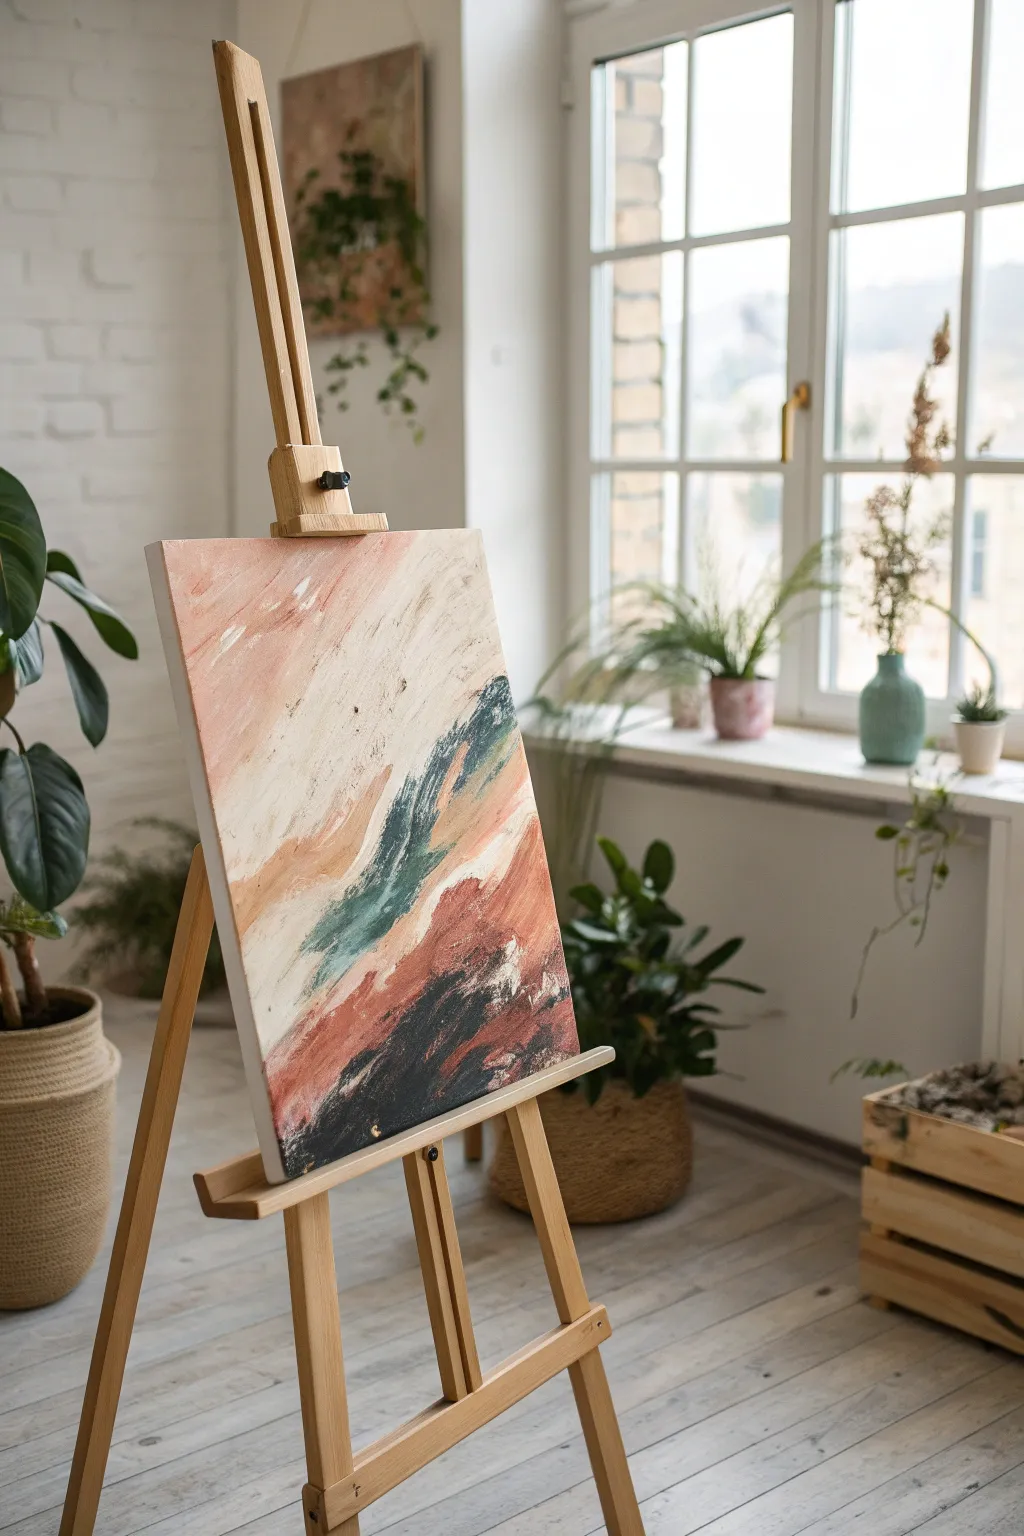
Capture the raw beauty of organic movement with this abstract canvas project, featuring sweeping, directional brushstrokes and a grounded color palette. The interplay of cream, terracotta, and deep evergreen creates a soothing yet dynamic piece perfect for modern interiors.
Step-by-Step Guide
Materials
- Stretched canvas (16×20 or 18×24 inches recommended)
- Acrylic paints: Titanium White, Unbleached Titanium (cream), Burnt Sienna, Terra Cotta, Hooker’s Green, Phthalo Green, Mars Black
- Large flat paintbrush (2-inch width)
- Medium filbert brush
- Palette knife (optional, for mixing)
- Cup of water
- Paper towels or rag
- Palette or paper plate
Step 1: Setting the Background
-
Prepare the canvas:
Ensure your canvas is clean and free of dust. If you prefer a smoother surface, apply a quick coat of gesso and let it dry, though the raw canvas texture helps grip these heavy strokes. -
Mix the base cream:
On your palette, mix a large amount of Titanium White with a touch of Unbleached Titanium. You want a warm, milky off-white color that isn’t too stark. -
Apply the first sweep:
Using your large flat brush, load it generously with the cream mixture. Start at the top left corner and sweep diagonally down towards the center. -
Create texture:
Don’t aim for perfect coverage; let the brush drag slightly so some canvas might peek through, or allow the paint to ridge up on the edges of the stroke. -
Add subtle variation:
While the cream paint is still wet, dip just the corner of your brush into a tiny bit of Burnt Sienna. Streak this lightly into the upper left area to create soft, peachy undertones within the white.
Muddy colors?
If your colors are turning gray or brown where they meet, you are over-blending wet paint. Let the bottom layer dry to the touch (about 10-15 mins) before dragging a new color over it.
Step 2: Building the Earth Tones
-
Mix the terracotta:
Combine Terra Cotta paint with a little Titanium White to soften it. You want a robust, clay-like hue. -
Apply the warm band:
Using the same large brush (wipe it but don’t rinse thoroughly for better blending), apply a broad stroke of the terracotta mix starting from the middle left edge, sweeping diagonally upward toward the center. -
Introduce the rust accent:
Load your medium filbert brush with pure Burnt Sienna. Add concentrated strokes into the terracotta area, particularly near the bottom right quadrant of the canvas. -
Blend edges gently:
Use a dry, clean brush to lightly feather the edges where the terracotta meets the cream background. You want a distinct shift in color, but not a hard, cutout line.
Loose Loosifier
Hold your paintbrush by the very end of the handle, not near the bristles. This forces you to lose control slightly, resulting in more expressive, painterly strokes.
Step 3: Adding Depth and Contrast
-
Create the green mixture:
Mix Hooker’s Green with a dab of Phthalo Green and a touch of white. This should create a deep, slightly muted teal-evergreen shade. -
Paint the central flow:
Paint a curved, swooping motion right through the center of the composition, seemingly emerging from beneath the terracotta layer. Follow the same diagonal upward energy. -
Add dark depth:
Mix Mars Black with a little bit of the green mixture to create a very dark, rich charcoal color. -
Anchor the composition:
Apply this dark mixture to the bottom center and bottom right corner. Use heavy, meaningful strokes that feel like the ‘ground’ of the painting. -
Connect the layers:
Lightly drag some of this dark charcoal color upward so it interacts with the rust and green sections. Use a ‘dry brush’ technique here—where your brush has very little paint on it—to create scratchy, textured transitions.
Step 4: Final Details
-
Evaluate the balance:
Step back from the easel. Look for areas that feel too empty or too heavy. The composition should feel like it’s flowing upward from left to right. -
Highlighting:
Take a clean brush with pure White. Add a few very sharp, quick dashes near the center where the green meets the cream to make the layers pop. -
Soften harsh lines:
If any lines look too manufactured, dampen your finger and smudge them slightly to maintain that organic, loose aesthetic. -
Final texture check:
I like to take a palette knife at this stage and scrape a tiny bit of the thickest paint here and there to reveal layers underneath, adding that weathered look. -
Dry and seal:
Allow the painting to dry completely for at least 24 hours. Because the paint is applied thickly in areas, it needs time before you consider varnishing.
Place your finished artwork in a bright spot to let the natural textures catch the light


Horizontal “Landscape” Bands
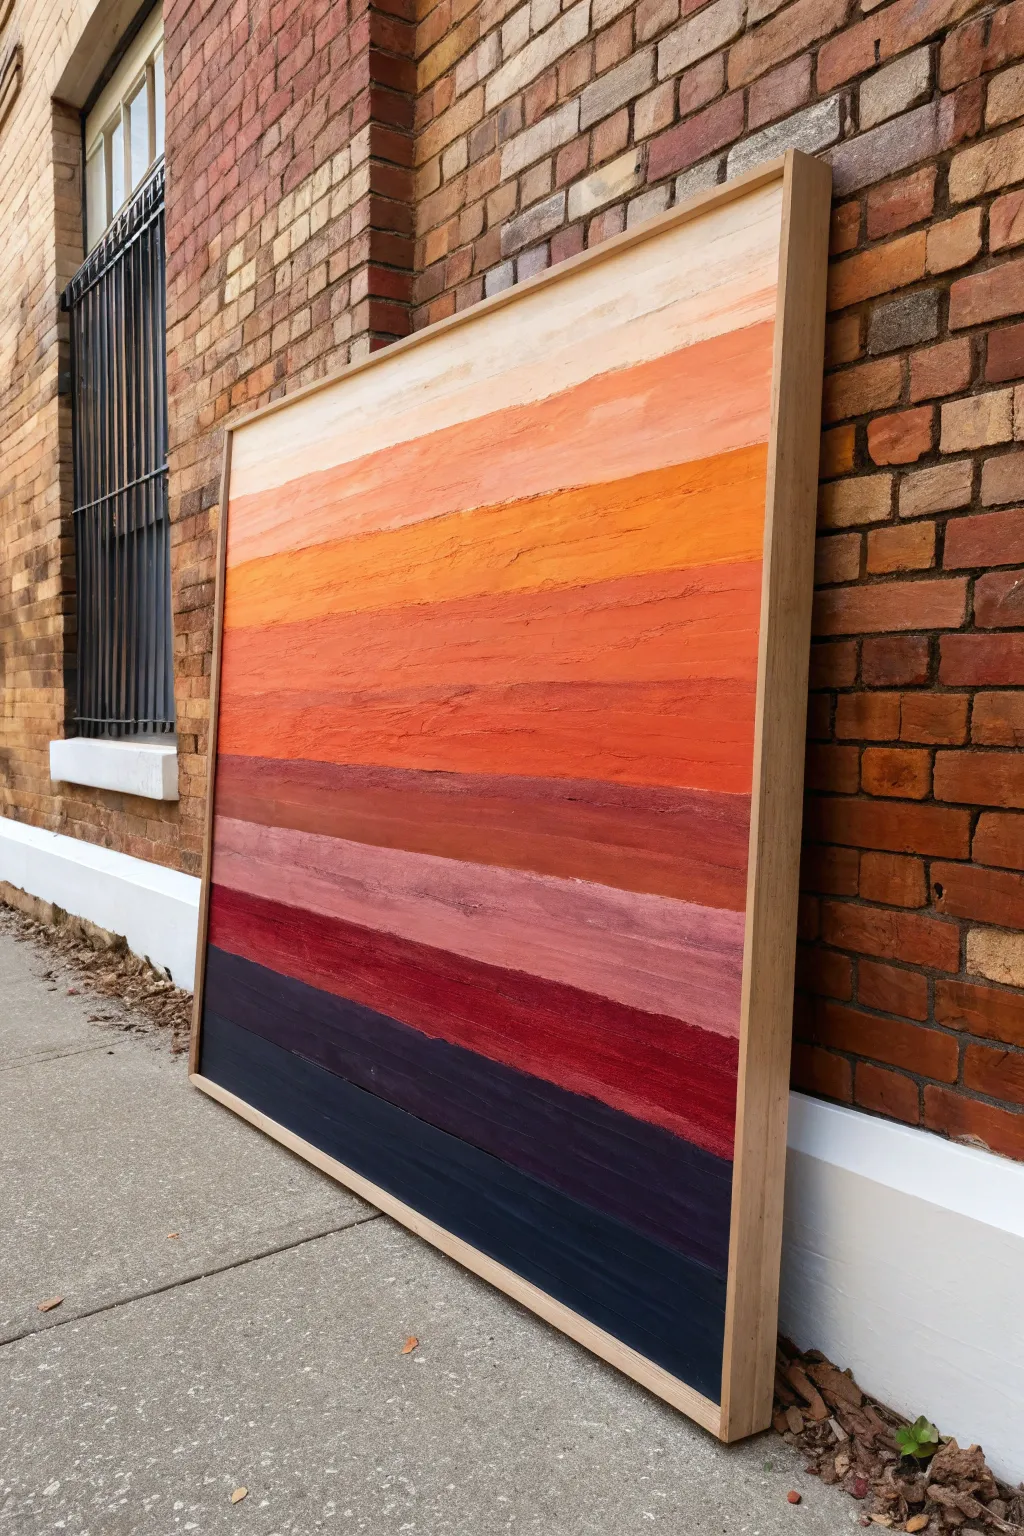
Capture the warmth of a fading sunset with this striking horizontal band painting. Using heavy body acrylics and a simple blending technique, you’ll create a textured gradient that transitions seamlessly from deep indigo to pale cream.
Step-by-Step Tutorial
Materials
- Large square canvas (e.g., 36×36 inches)
- Heavy body acrylic paints (Navy Blue, Black, Deep Red, Burnt Sienna, Orange, Yellow Ochre, Titanium White)
- Texture paste or modeling paste
- Wide flat synthetic brushes (2-3 inches)
- Palette knives (assorted sizes)
- Large mixing palette or disposable plates
- Painter’s tape or masking tape
- Pencil and ruler
- Floating frame (optional, for finishing)
Step 1: Preparation and Texture
-
Plan your bands:
Lay your canvas flat on a protected surface. Using your ruler and pencil, lightly mark horizontal lines to divide the canvas into roughly 8 to 10 equal sections. These don’t need to be perfectly straight, as a little organic wave adds character. -
Mix the texture base:
In a mixing bowl, combine a generous amount of modeling paste with a small amount of white gesso or acrylic paint. This creates a solid base that holds peaks and ridges better than paint alone. -
Apply initial texture:
Using a palette knife, spread the texture paste mixture across the entire canvas. Don’t smooth it out perfectly; deliberately create horizontal ridges and bumps to mimic the rough surface shown in the reference image. -
Let it cure:
Allow the texture layer to dry completely. Depending on the thickness of your paste, this could take anywhere from 12 to 24 hours. The surface should be hard to the touch before painting.
Step 2: Painting the Gradient
-
Mix the darkest shade:
On your palette, mix Navy Blue with a touch of Black to create a deep, midnight indigo. This will be the anchor for the bottom of your painting. -
Paint the bottom band:
Apply the dark indigo mix to the bottom section using a wide flat brush. Work the paint into the crevices of the dried texture paste. -
Create the deep red transition:
Mix Deep Red with a tiny bit of the indigo mixture. Apply this to the section immediately above the bottom band. While the paint is still wet, gently brush slightly downward into the indigo to soften the line. -
Move to burnt hues:
Clean your brush or switch to a new one. Apply pure Deep Red or a Burnt Red mix to the third band up. Ensure the brushstrokes run horizontally to maintain the banded look. -
Introduce earthy orange:
Mix Burnt Sienna with a little Orange. Paint the next section, blending the lower edge slightly with the red band below it. The texture ridges will help catch the light and separate the colors naturally. -
Brighten with orange:
For the middle sections, use a vibrant Orange mixed with a touch of Yellow Ochre for warmth. Apply this thickly, allowing the brush bristles to leave visible streak marks. -
Shift to peach tones:
Begin adding Titanium White to your Orange mix to create a soft peach or salmon color. Paint the next band, continuing to blend the edges gently while keeping the distinct horizontal structure. -
Lighten the mixture:
Add significantly more White to your peach mixture. Apply this pale, sandy color to the second-to-last band near the top. -
Finish with cream:
For the final top band, use Titanium White with just a tiny speck of Yellow Ochre or the peach mix to create a warm cream. Paint the top edge, ensuring full coverage.
Pro Tip: Consistency
Don’t over-mix your paints on the palette. Leaving the paint slight ‘marbled’ creates beautiful, natural variations within each color band on the canvas.
Step 3: Refinement and Framing
-
Dry brush blending:
Once the main layers are down but slightly tacky, take a clean, dry brush. Very lightly sweep it horizontally across the transition lines between colors to blur any harsh separations, creating a subtle ombré effect. -
Highlight the texture:
I prefer to take a small palette knife with a lighter shade of each band’s color and skim it over the raised texture ridges. This enhances the 3D effect seen in the original artwork. -
Final drying time:
Let the entire painting cure for at least 24 hours. Because heavy body acrylics are thick, the inner layers need time to harden. -
Frame the artwork:
To achieve the project’s exact look, install the canvas into a light wood floating frame. Secure it from the back so there is a small gap between the canvas edge and the frame.
Troubleshooting: Muddy Colors
If your gradient looks muddy where colors meet, stop blending immediately. Let it dry completely, then dry-brush the transition color over the seam.
Hang your new textural masterpiece in a brightly lit room to see the shadows play across the ridges


Soft Ombre Gradients
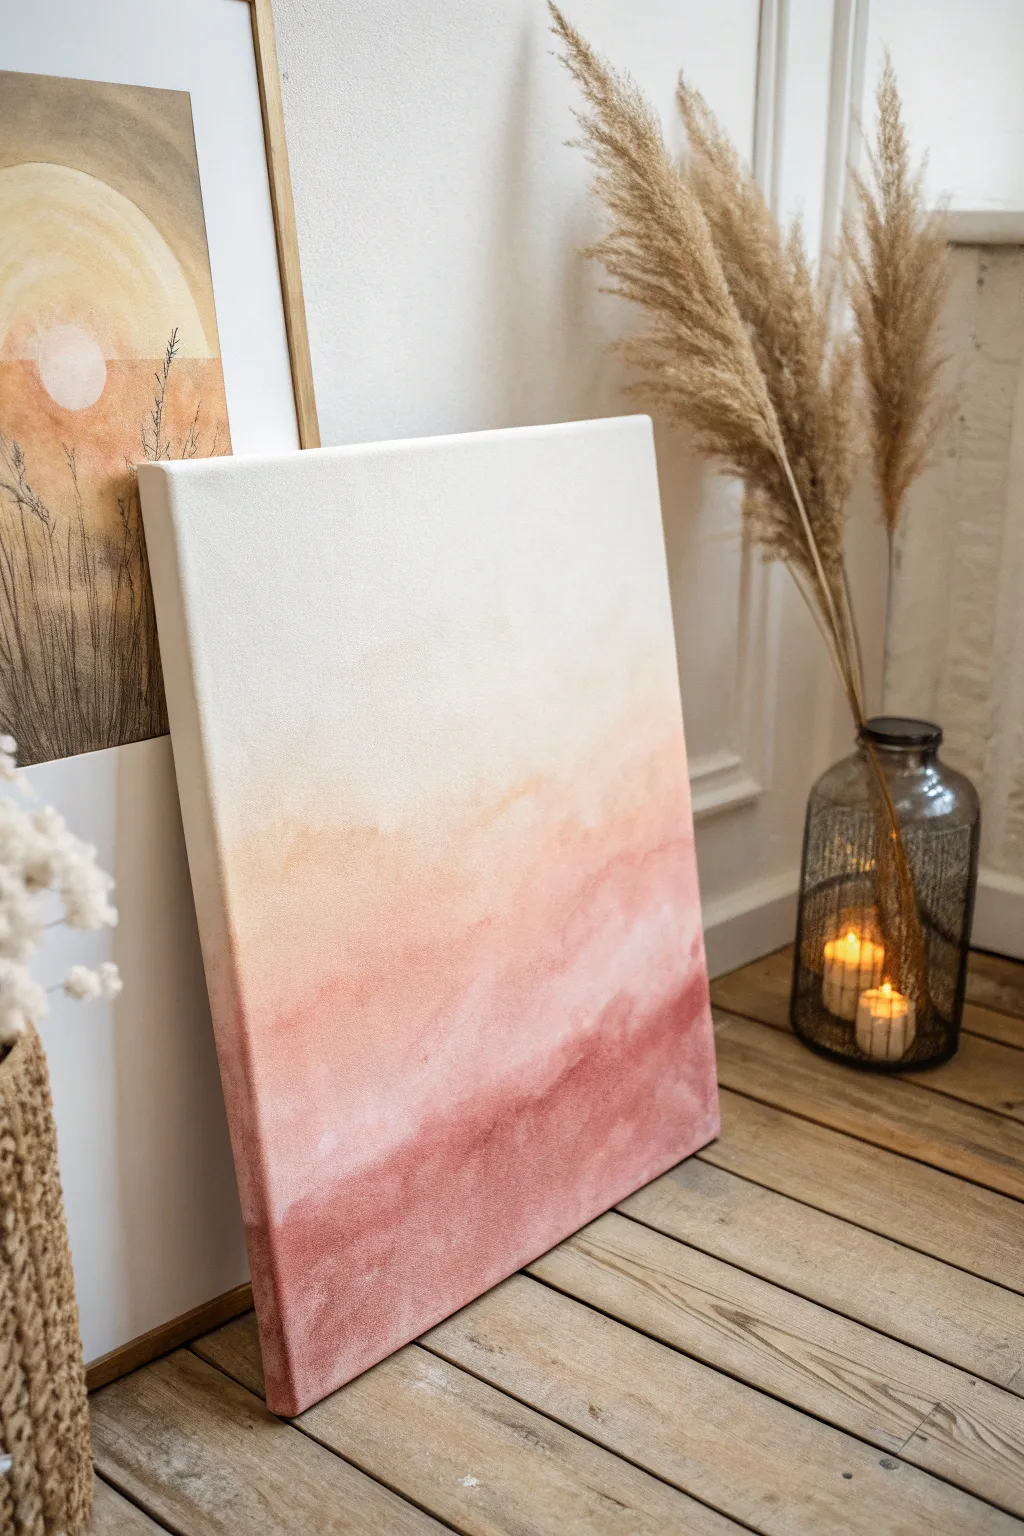
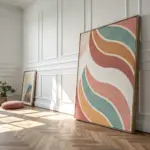
Master the art of the subtle transition with this serene ombre canvas that fades from creamy white into warm peach and deep terracotta. The look mimics the softness of watercolor while using acrylics for a durable, textured finish.
Detailed Instructions
Materials
- Stretched canvas (rectangular)
- White acrylic paint (heavy body)
- Titanium buff or Cream acrylic paint
- Peach or pale orange acrylic paint
- Terracotta or dusty rose acrylic paint
- Deep reddish-brown acrylic paint
- Wide flat brush (2-3 inch)
- Medium filbert brush
- Spray mister bottle with water
- Palette or mixing plate
- Paper towels
- Easel or wall prop
Step 1: Base Preparation
-
Prime the Surface:
Begin by applying a generous coat of plain white acrylic paint over the entire canvas. This seals the weave and creates a slick surface that helps subsequent layers blend more easily. -
Keep It Wet:
Do not let this base layer dry completely. The key to that misty, watercolor effect on canvas is working wet-on-wet. -
Mist the Canvas:
Before adding color, give the wet white layer a very light misting of water from your spray bottle. The surface should be glistening but not dripping.
Paint drying too fast?
If acrylics are drying before you can blend, mix in a ‘slow-drying medium’ or ‘retarder’ fluid. This keeps the paint open longer, giving you time for perfect transitions.
Step 2: Layering the Gradient
-
Apply the Top Cream:
Mix a large amount of white with a touch of Titanium Buff. Using your wide flat brush, paint the top third of the canvas using long, horizontal strokes. -
Introduce the Peach:
On your palette, mix white with your peach paint to create a very pastel tone. Apply this right below the cream section, filling the middle third of the canvas. -
Blend the Transition:
While both sections are wet, use a clean, slightly damp brush to lightly stroke back and forth where the cream meets the peach until the line disappears. -
Deepen the Bottom:
Mix your terracotta or dusty rose color. Paint the bottom third of the canvas, ensuring solid coverage near the bottom edge. -
Merge the Lower Colors:
Use the same horizontal blending technique to marry the peach section into the terracotta section. Mist with water if the paint starts to drag or feel sticky. -
Add Depth:
Along the very bottom edge, add a small amount of the deep reddish-brown mixed with terracotta to anchor the gradient.
Add Metallic Touches
Once fully dry, dry-brush a tiny amount of rose gold or copper paint along the transition line between the peach and terracotta for a subtle, shimmering highlight.
Step 3: Creating Texture
-
Scumble the Edges:
Switch to a dry filbert brush. I find that lightly tapping (scumbling) over the blended areas creates those soft clouds of color seen in the inspiration image. -
Add Organic Blotches:
Dip the brush into a watery mix of the terracotta. Gently blot random areas in the lower section to simulate water stains. -
Soften Hard Lines:
If any brushstrokes look too mechanical, mist the canvas lightly and use a soft, dry brush to feather them out. -
Review Distance:
Step back five feet from the canvas. Ombre gradients often look messy close up but perfect from a distance.
Step 4: Final Touches
-
Paint the Sides:
Don’t forget the edges of the canvas. Extend the gradient colors around the sides for a professional, gallery-wrapped look. -
Dry Time:
Allow the painting to dry flat for at least 24 hours. Because we used water to thin the acrylics, it needs ample time to set. -
Varnish (Optional):
Once fully cured, apply a matte varnish if you want to protect the surface without adding unwanted shine.
Hang your new artwork in a well-lit spot to let the gentle color shift truly shine
BRUSH GUIDE
The Right Brush for Every Stroke
From clean lines to bold texture — master brush choice, stroke control, and essential techniques.
Explore the Full Guide
Wavy Ribbon Swirls
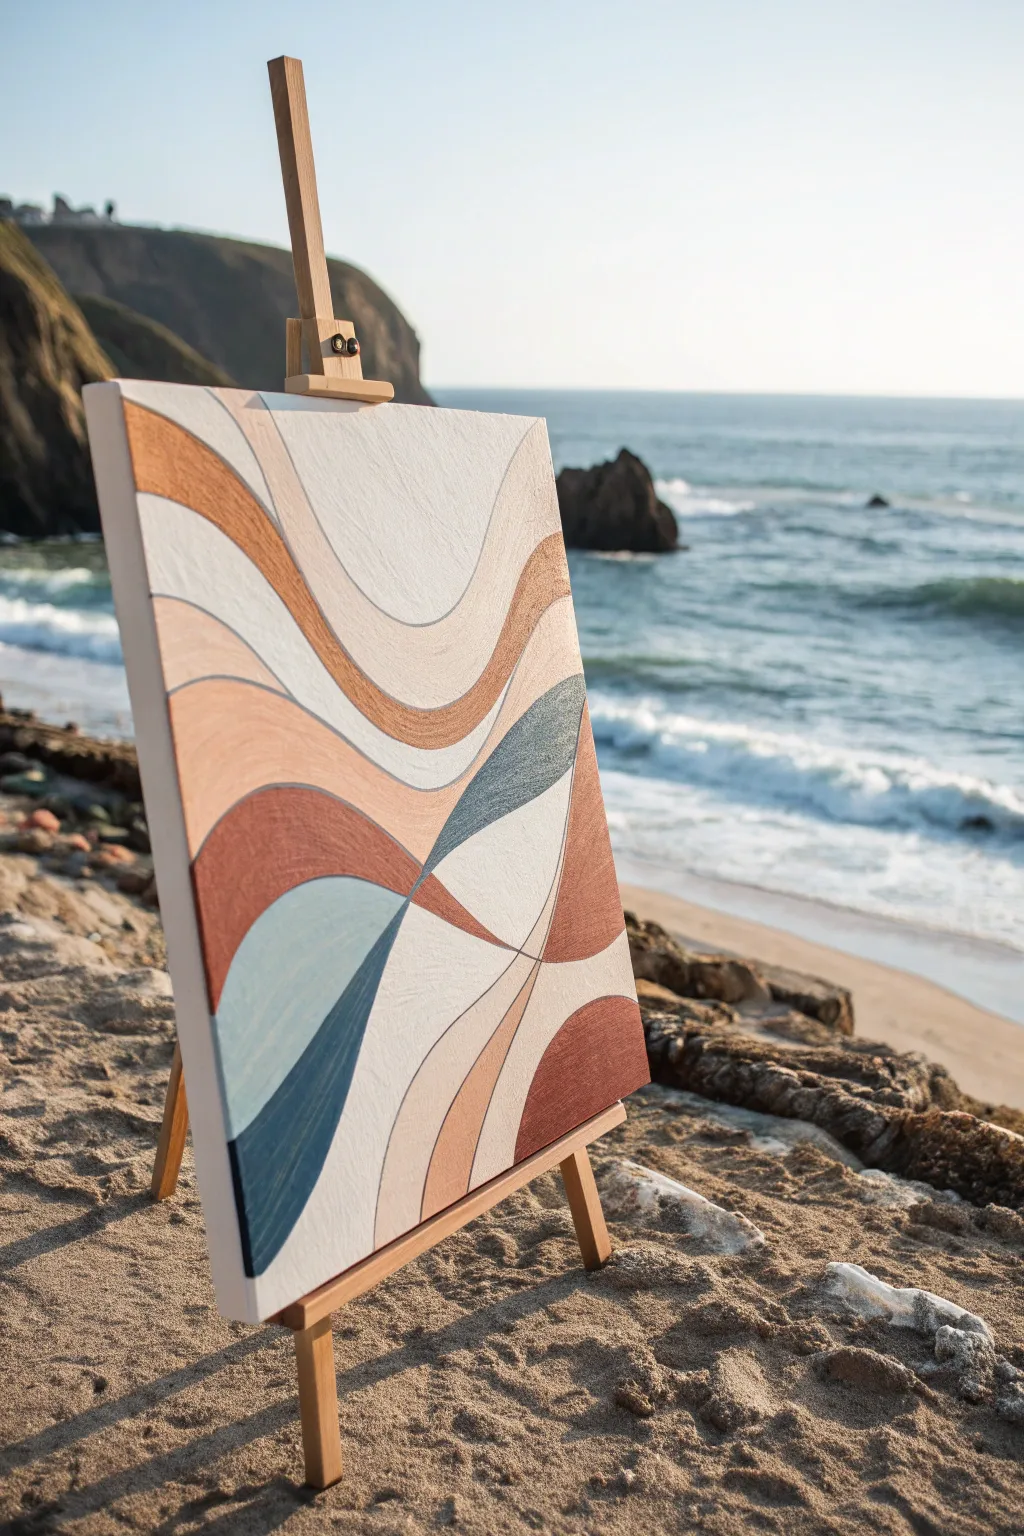
Capture the rhythm of rolling tides and sandy dunes with this serene abstract composition. Using a palette of warm earth tones balanced by cool blues, you will create gentle, interlocking curves that evoke a sense of continuous movement.
How-To Guide
Materials
- Stretched canvas (18×24 inches or similar)
- Acrylic paints (Titanium White, Unbleached Titanium/Cream, Terracotta/Burnt Sienna, Navy Blue/Payne’s Grey, Dusty Blue)
- Pencil for sketching
- Medium flat brush (approx. 1 inch)
- Small round detail brush
- Palette or paper plate
- Cup of water
- Paper towels
Step 1: Drafting the Design
-
Base preparation:
Begin by ensuring your canvas surface is clean. If your canvas isn’t pre-primed, apply two coats of white gesso and let it dry completely to create a smooth surface for your lines. -
Map the primary curve:
Starting from the bottom left quadrant, lightly sketch a large, sweeping ‘S’ curve that flows toward the upper right. This will serve as the spine of your composition. -
Add flowing ribbons:
Draw parallel lines following that first curve, varying the width between them. Some sections should pinch together tightly, while others fan out widely to create dynamic movement. -
Interlocking shapes:
Sketch a secondary set of curves coming from the bottom right, intersecting your first set. Think of these as two waves meeting; create distinct, enclosed shapes where the lines overlap or touch. -
Refining the edges:
Go over your sketch to ensure every shape is closed and distinct. The vibe should be fluid and organic, so soften any sharp corners into gentle bends.
Step 2: Color Blocking
-
Mixing the cream:
Mix Titanium White with a tiny dot of Unbleached Titanium or yellow oxide. You want a very pale, warm off-white. -
Painting the negative space:
Identify the largest ‘background’ ribbons in your sketch—usually the widest central paths. Fill these in with your cream mixture using the flat brush. -
Terracotta warmth:
Load your brush with pure Terracotta or Burnt Sienna. Paint two or three dedicated sections, balancing them across the canvas so the visual weight is distributed evenly. -
Integrating the beige:
Mix a light beige by adding more white to your Terracotta tone. Fill in the transitions next to the darker rust colors to create a soft gradient effect. -
Anchoring with navy:
Use your darkest navy blue to paint the bottom-most curve or a focal point shape. This dark value acts as an anchor for the lighter, airier colors above. -
Soft blue accents:
Apply the dusty blue shade to one or two medium-sized shapes. This cool tone breaks up the warmth and connects the piece to the coastal theme.
Clean Lines Hack
Use thin painter’s tape or masking fluid over your pencil lines before painting. Peel it off when dry to reveal perfect, crisp boundaries between colors.
Step 3: Refinement and Detail
-
Second coats:
Acrylics can sometimes look streaky after one pass. I find it’s always worth the time to apply a second coat to solid color areas for a truly opaque, professional finish. -
Clean connection points:
Switch to your small round detail brush. Carefully paint along the internal borders where colors meet to ensure the lines are crisp and don’t bleed into each other. -
Painting the sides:
Don’t forget the edges of the canvas. Extend your lines and colors around the sides for a gallery-wrapped look that doesn’t require a frame. -
Adding texture (optional):
If you want the painting to feel more organic, lightly dry-brush a slightly lighter shade over the terracotta areas to mimic the texture of sandstone. -
Final crisp lines:
If any transitions look messy, use a thin liner brush with the adjacent color to tidy up the boundary. A steady hand here makes the whole piece look polished. -
Protective finish:
Once fully dry (give it at least 24 hours), apply a satin varnish to protect the colors and give the painting a unified sheen.
Level Up: Texture Pop
Mix modeling paste or sand into just one of your paint colors (like the terracotta). This adds physical dimension to specific ribbons.
Step back and enjoy the calming flow of your new coastal masterpiece
Drip-and-Drag Waterfall Marks
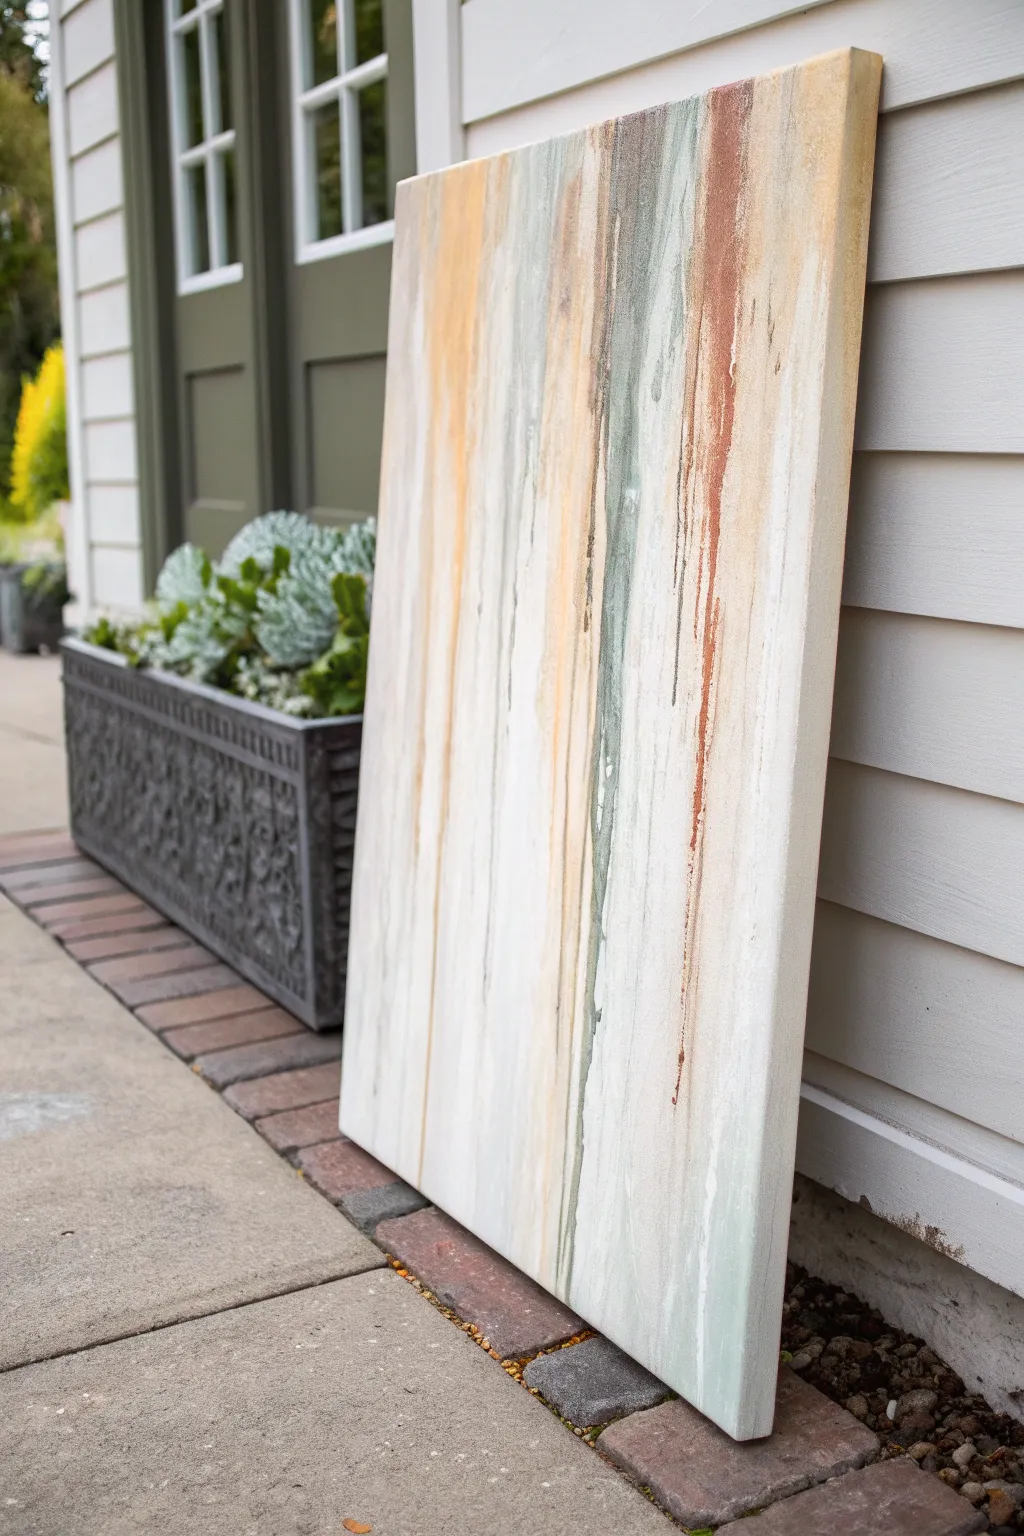
Capture the serene beauty of falling water with this muted, earth-toned abstract piece. By using gravity and fluid paints to create vertical streaks, you will achieve a sophisticated weathered look that feels both modern and organic.
Step-by-Step Tutorial
Materials
- Large stretched canvas (24×36 inches or larger)
- Acrylic paints (Cream, Beige, Sage Green, Terracotta, Burnt Sienna, White)
- Acrylic glazing medium
- Water spray bottle
- Wide flat brush (2-3 inches)
- Palette knife or old credit card
- Drop cloth or plastic sheeting
- Cups for mixing paint
Step 1: Base Preparation
-
Prepare your space:
Since this technique can get messy, lay down a drop cloth. Prop your canvas up vertically against a wall or easel; gravity is the main tool you’ll be using for this project. -
Apply the base coat:
Mix a generous amount of warm white or cream acrylic paint. Use your wide flat brush to cover the entire canvas with this neutral base. -
Create texture:
While the base coat is still wet, use the bristles of your brush to drag vertical lines from top to bottom. This establishes a subtle grain that will guide your drips later. -
Let it dry:
Wait for the base layer to dry completely to the touch. This ensures your subsequent colors sit on top rather than blending into a muddy gray.
Gravity Guide
Tilt the canvas slightly forward or backward to control the speed of the drips. A steeper angle makes fast, thin lines; a shallow angle creates slow, wide paths.
Step 2: Mixing and Pouring
-
Mix your fluid colors:
In separate cups, mix your Sage Green, Beige, and Terracotta paints. Add glazing medium and water to each until they reach a consistency similar to heavy cream or melted ice cream. -
Test the viscosity:
Dip a stick into the paint; if it runs off smoothly in a steady stream without breaking, it’s ready. If it drips too fast, add more paint; too slow, add more water. -
Draft the first streaks:
Starting at the very top edge of the canvas, gently pour a small amount of the Beige mixture. Let it naturally find its way down. -
Encourage the flow:
If the paint stops midway, mist it lightly with your water spray bottle to encourage it to travel further down the canvas.
Metallic Touch
Mix a small amount of gold or bronze metallic powder into your glazing medium for a subtle shimmer that only appears when light hits the texture.
Step 3: The Drag Technique
-
Introduce the green tones:
Pour a line of the Sage Green fluid near the top, slightly overlapping with the beige areas. -
Drag the paint:
Before the paint runs all the way down, take a dry, wide brush or a palette knife and gently drag the paint downward in a straight vertical motion. This breaks up the solid drip lines. -
Create weathered effects:
Where the paint looks too thick, firmly press and scrape downward with a palette knife to reveal some of the cream base underneath. -
Add accent colors:
Apply the Terracotta and Burnt Sienna sparingly in thin vertical strips. These darker, reddish tones act as striking accents against the muted background. -
Layering the wash:
Create a very watery wash of white paint. Use a large brush to glaze over areas that feel too dark or heavy, softening the overall look. -
Feather the edges:
Use a damp rag or dry brush to feather the edges of your vertical stripes so they blend softly into the background rather than having hard lines.
Step 4: Final Details
-
Review contrast:
Step back and look for balance. If the piece looks too uniform, add distinct, thin drips of your darkest color for contrast. -
Dry brush highlights:
Dip a dry brush into pure, un-thinned white paint. Lightly skim it over the raised textures of the canvas to highlight the vertical movement. -
Clean the bottom edge:
Wipe away any pooling paint at the bottom of the canvas to prevent thicker globs from drying there. -
Final drying time:
Because you used water and medium, allow at least 24 hours for the painting to cure completely before moving or hanging it.
Hang your new textural masterpiece in a well-lit area to let the vertical lines mimic the calming effect of falling rain

PENCIL GUIDE
Understanding Pencil Grades from H to B
From first sketch to finished drawing — learn pencil grades, line control, and shading techniques.
Explore the Full Guide
Simple Acrylic Pour Pools
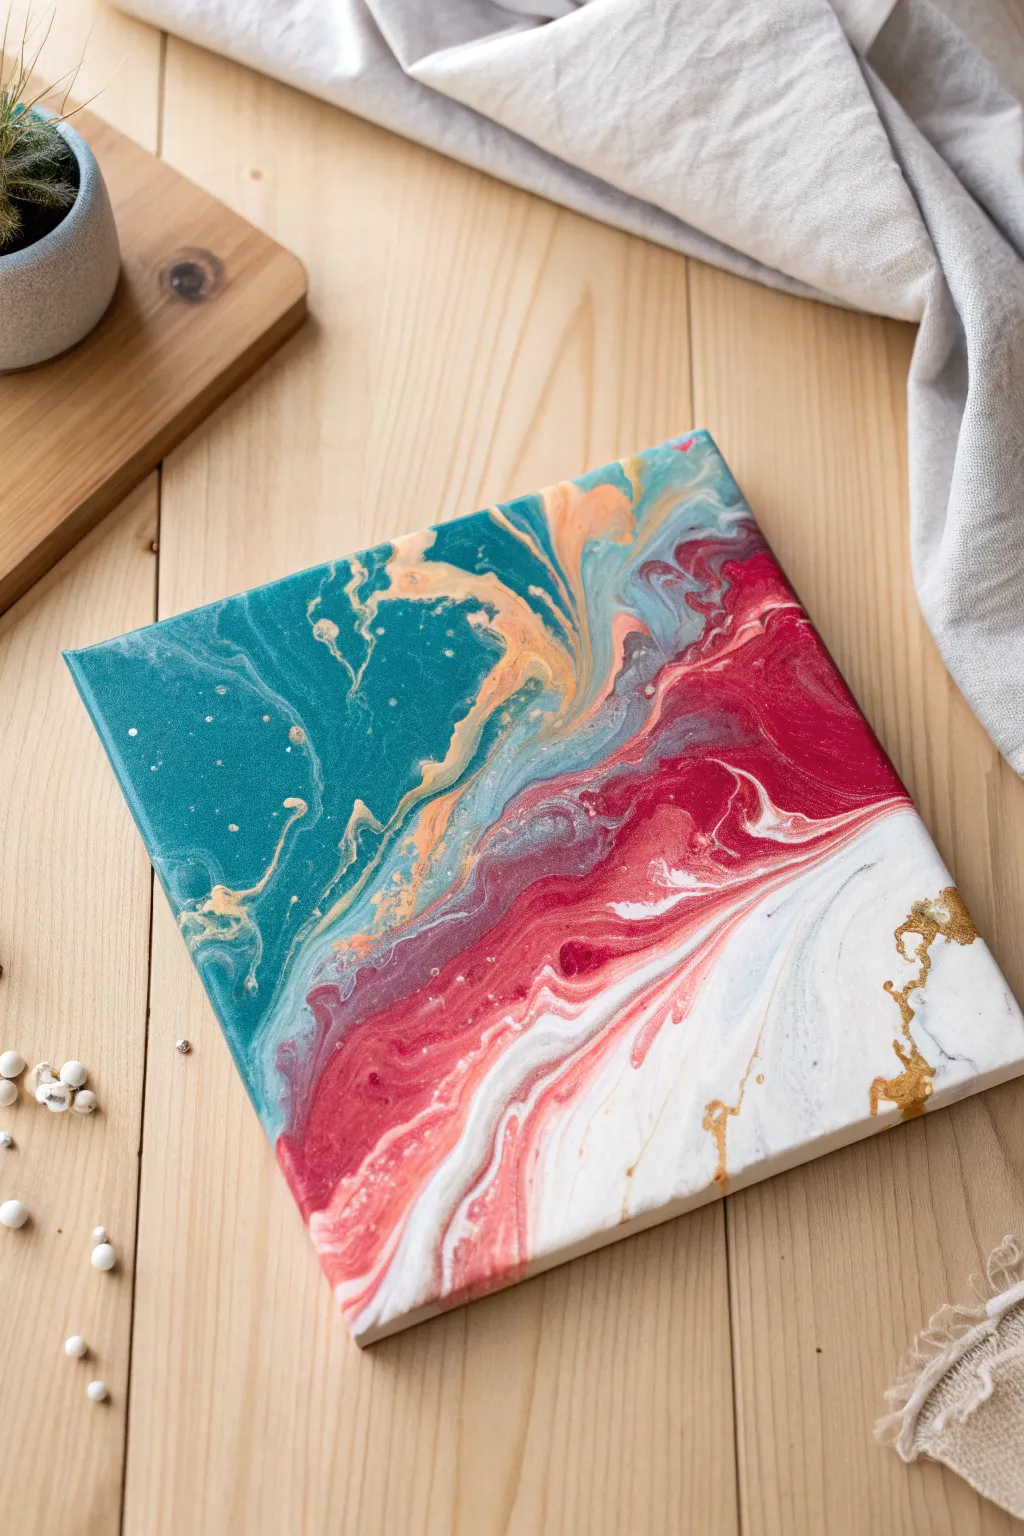
Capture the fluid elegance of a coral reef meeting a sandy shore with this vibrant acrylic pour. This simple technique creates organic pools of teal, crimson, and white, highlighted by luxurious ribbons of metallic gold.
Detailed Instructions
Materials
- Small square stretched canvas (e.g., 8×8 or 10×10 inches)
- Acrylic fluid paints (Teal/Turquoise, Deep Crimson/Magenta, White, Metallic Gold, Peach/Coral)
- Pouring medium (like Floetrol or Liquitex)
- Silicone oil (optional, for cells)
- Plastic cups for mixing
- Stir sticks
- Heat gun or torch (optional)
- Drop cloth or plastic sheet
- Gloves
- Push pins (to elevate canvas)
Step 1: Preparation & Mixing
-
Prepare the workspace:
Lay down your plastic sheet to protect your table. Acrylic pouring is messy, so ensure you have a wide, covered area. -
Elevate the canvas:
Insert large push pins into the four corners of the back of your canvas wood frame. This lifts the canvas off the table, allowing paint to drip freely over the edges. -
Mix the pouring medium:
In separate cups, mix your acrylic paints with the pouring medium. A standard ratio is 1 part paint to 2 parts medium, but check your specific medium’s instructions. You want a consistency similar to warm honey. -
Add metallic accents:
Pay special attention to your gold paint. Metallic pigments are heavier, so I sometimes make this mixture slightly thicker so it doesn’t sink immediately. -
Optional cell creation:
If you want small cells or bubbles (like the tiny white specks in the teal section of the reference image), add 1-2 drops of silicone oil to the teal and crimson cups only. Stir very gently.
Don’t Over-Tilt
Stop tilting once you like the composition. Over-tilting can stretch the cells too much or cause the distinct colors to blend into a muddy brown, losing the crisp separation.
Step 2: The Pouring Process
-
Create the base puddles:
Pour a puddle of the Teal paint onto the top left corner of the canvas. Don’t worry about covering everything yet. -
Pour the opposing color:
Pour a puddle of the Crimson/Magenta paint near the center-right area, letting it touch the teal puddle slightly. -
Add the white negative space:
Pour white paint generously into the bottom right corner. This will act as the ‘shoreline’ and provide brightness to the composition. -
Introduce transitions:
Drizzle the Peach/Coral color between the teal and crimson sections to create a softer transition zone. -
Inject the gold veins:
Pour thin streams of the Metallic Gold along the borders where the different color pools meet. Let it cut through the colors to create those distinct veins.
Resin Finish
For a glass-like, professional finish, pour a layer of clear epoxy resin over the painting once it is fully cured (usually after 2-3 weeks). This makes the metallics pop.
Step 3: Tilting & Composition
-
Begin the tilt:
Gently lift the canvas. Slowly tilt it diagonally so the colors start to stretch and interact. Move the paint towards the corners first. -
Guide the flow:
Tilt the canvas back and forth to encourage the colors to marbleize without becoming muddy. Aim to keep distinct bands of teal, red, and white. -
Cover the edges:
Ensure the paint runs over the sides of the canvas. You can use your finger to dab paint onto any dry spots on the edges. -
Refine the composition:
Look at the patterns forming. If you lose too much gold, you can drizzle a tiny bit more on top now and tilt slightly to integrate it. -
Pop air bubbles:
If you see air bubbles, quickly pass a heat gun or torch over the surface. This will pop them and may bring up small cells if you used silicone. -
Let it settle:
Check that the canvas is level before leaving it. If it isn’t level, the paint will slowly slide off one side while drying. -
The drying phase:
Allow the painting to dry undisturbed for at least 24-48 hours. Acrylic pours take longer to cure than standard paintings because of the thick paint volume.
Once dry, display your glossy, marble-like creation on a stand or hang it to bring a splash of fluid color to your room
Minimal Neutrals With One Pop
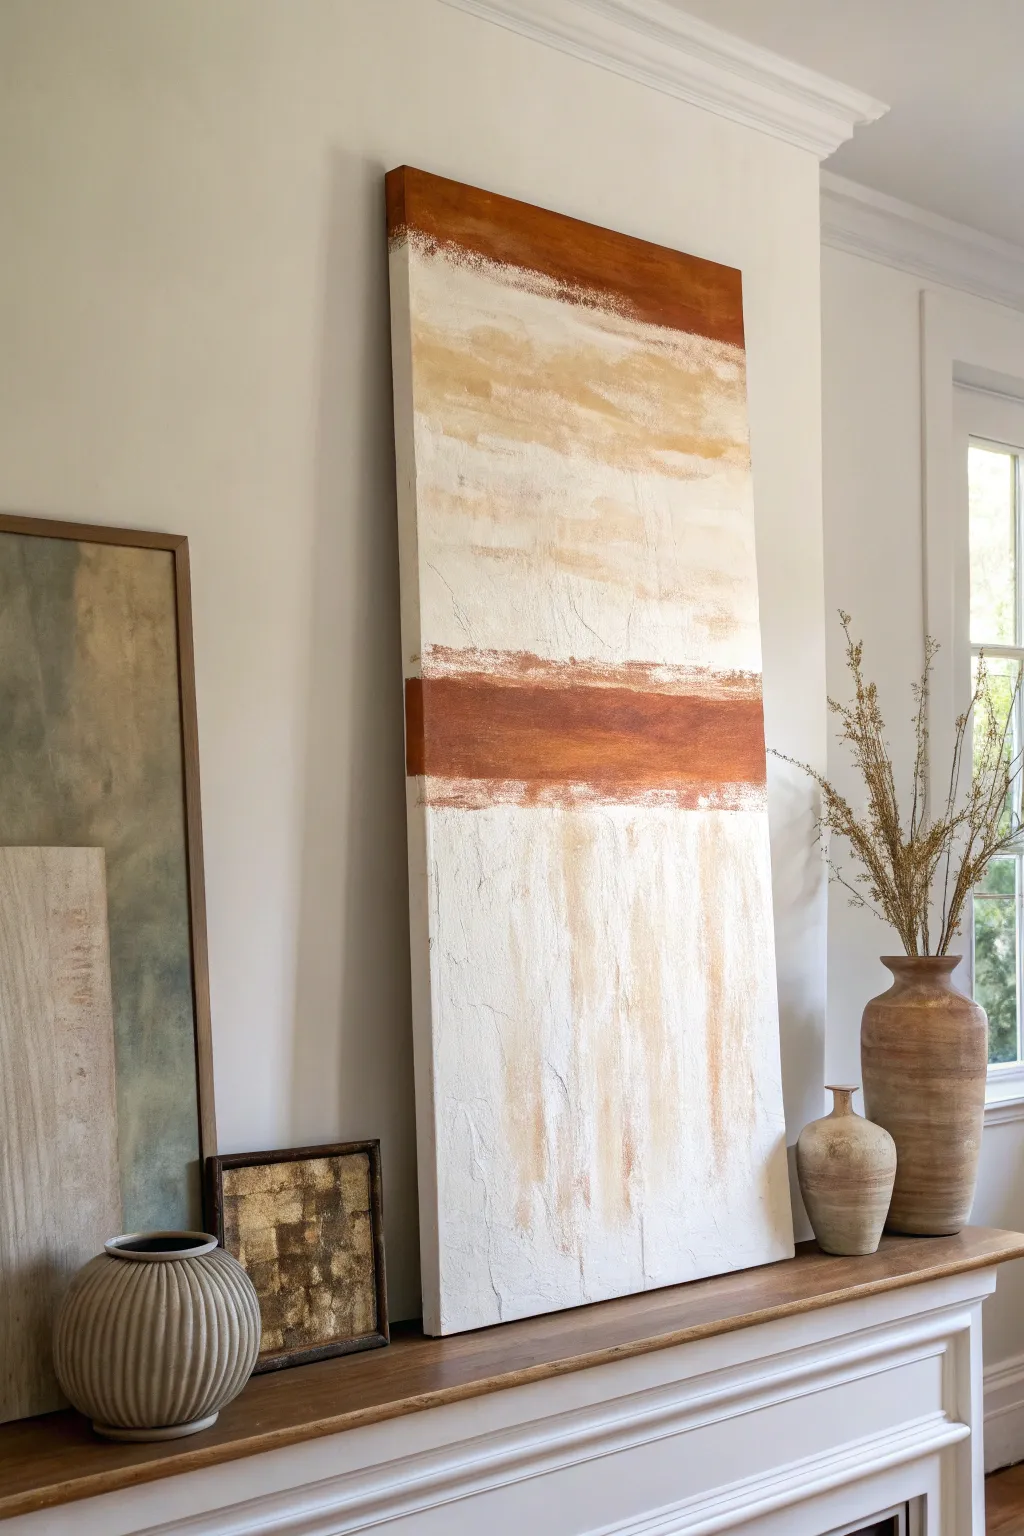
Embrace the warmth of minimalist neutrals with this striking large-scale abstract painting. Featuring heavy texture and bold bands of burnt sienna, this piece adds a sophisticated, earthy focal point to any mantel or feature wall.
Detailed Instructions
Materials
- Large rectangular canvas (approx. 24×48 inches)
- Heavy body acrylic paints: Titanium White, Burnt Sienna, Unbleached Titanium, Raw Umber
- Modeling paste or joint compound
- Large palette knife or putty knife
- Wide flat brush (2-3 inch)
- Smaller flat brush (1 inch)
- Spray bottle with water
- Sandpaper (medium grit)
- Matte varnish
Step 1: Building the Foundation
-
Prepare the canvas:
Lay your large canvas on a flat, protected surface. If the canvas weave is very smooth, you might want to give it a quick scuff with sandpaper to help the heavy texture adhere better. -
Apply the texture base:
Using a large palette knife or putty knife, spread a generous layer of modeling paste across the entire canvas. Don’t try to make it smooth; inconsistent scrapes and ridges are exactly what we want. -
Create directional marks:
While the paste is wet, drag your knife vertically in the bottom third to create rain-like streaks. In the upper sections, subtle horizontal swipes will mimic the horizon lines we’ll paint later. -
Let it cure:
This thick layer needs significant drying time. Let it sit overnight or up to 24 hours until hard to the touch. -
Base coat application:
Mix Titanium White with a tiny drop of Unbleached Titanium to create a warm off-white. Paint the entire textured surface using your wide brush, working the paint into all the crevices.
Palette Knife Tip
Don’t overmix your paints on the palette before loading the knife. Having streaks of unmixed white and brown on the blade creates beautiful, natural color variation in a single swipe.
Step 2: Layering the Warmth
-
Establish the top stripes:
Mix a light wash of Unbleached Titanium and a touch of Burnt Sienna. Apply two wide, soft horizontal bands in the upper half of the canvas. -
Distress the bands:
While the paint is wet, spritz it lightly with water and use a clean rag to blot patches, making the bands look weathered and faded rather than solid. -
Paint the anchor stripe:
Load your palette knife with pure Burnt Sienna. About two-thirds of the way down the canvas, scrape a thick, bold horizontal band across the width. -
Add the top accent:
Repeat the knife technique with Burnt Sienna at the very top edge of the canvas, creating a thinner, slightly broken line to frame the composition. -
Create the vertical wash:
Mix a very watery glaze of Burnt Sienna and Raw Umber. In the bottom white section, paint vertical streaks that drip downwards from the main rust band. -
Soften the drips:
Immediately use a dry brush to feather these vertical streaks out, blending them into the white texture so they look like soft staining rather than hard stripes.
Level Up: Gold Leaf
For a luxe touch, apply small flecks of gold leaf along the edges of the dark rust band. The metallic shy will catch the light and complement the warm earth tones.
Step 3: Defining Details
-
Enhance texturing:
Once dry, dry-brush pure Titanium White over the darkest rust areas. The white will catch only the raised ridges of the texture, creating a beautiful weathered effect. -
Deepen the contrast:
Add a tiny bit of Raw Umber to your Burnt Sienna. Re-apply this darker mix specifically to the center of the main rust band to give it visual weight and depth. -
Refine the edges:
Check the sides of your canvas to ensure the design wraps around or stands out cleanly. I prefer painting the edges the same off-white as the background for a gallery look. -
Final curing:
Allow the paint layers to dry completely, ideally for another 24 hours, to ensure no moisture is trapped in the thick texture. -
Seal the artwork:
Apply a coat of matte varnish to protect the surface without adding an unwanted glossy shine.
Place your finished textural masterpiece on a mantel or lean it against a wall for an effortless, modern gallery vibe


Concentric Shapes for Easy Structure
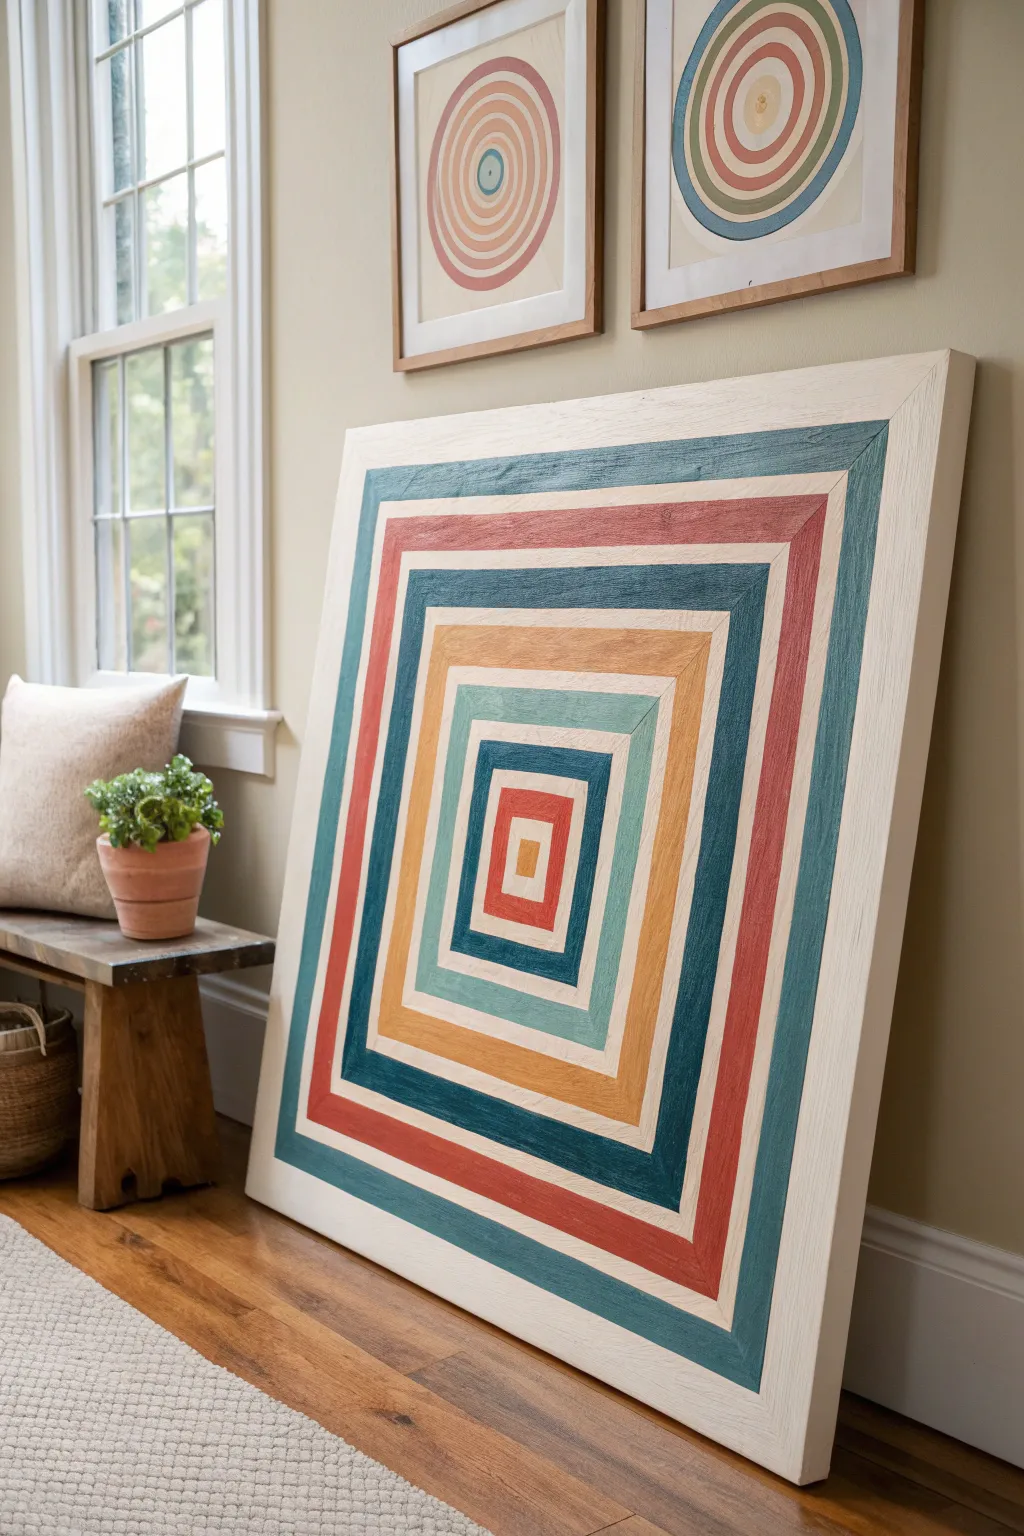
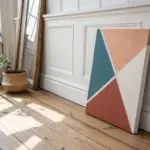
Create a bold focal point for any room with this striking geometric project that plays with depth and color. By layering concentric squares in a warm, muted palette, you’ll achieve a modern optical illusion effect that feels both structured and organic.
Detailed Instructions
Materials
- Large square wooden panel or deep-edge canvas (36×36 inches recommended)
- White gesso or primer
- Acrylic paints (Teal, Terracotta, Navy, Mustard, Light Blue, Burnt Orange, Cream)
- Painter’s tape (various widths, 1-inch and 2-inch)
- Ruler or T-square
- Pencil
- Flat synthetic paintbrushes (1-inch and 2-inch)
- Fine grit sandpaper
- Matte varsh (optional)
Step 1: Preparation and Base
-
Surface Preparation:
Since this artwork has a distinct wood-grain texture in the inspiration image, using a plywood panel is ideal. Sand the surface lightly with fine-grit sandpaper to remove any splinters while keeping the grain visible. -
Prime the Surface:
Apply a coat of white gesso to the entire panel. If you are using wood, don’t apply it too thickly; let the texture of the wood grain show through the brushstrokes for that rustic, tactile look. -
Find the Center:
Using a ruler or T-square, measure and mark the exact center of your panel with a light pencil dot. This central point is crucial for keeping your squares symmetrical. -
Draw Design Lines:
The design relies on diagonal lines connecting the corners. Use your straight edge to draw a light pencil line from the top-left corner to the bottom-right corner, and another from top-right to bottom-left, forming a large ‘X’ through the center.
Seal Prior to Paint
A huge pro move: After applying tape, paint a thin layer of your base color (white) over the tape edge. This seals the gap, so any bleeding is just clear base coat, ensuring perfect lines.
Step 2: Drafting the Geometry
-
Marking Intervals:
Along one of the diagonal lines, start from the center point and measure outward. Make a mark every 1.5 to 2 inches (depending on how many rings you want). Repeat this on all four diagonal arms to ensure even spacing. -
Connect the Squares:
Connect the marks you just made to form your squares. Draw lines connecting the first mark on each diagonal arm to create the central square, then move to the second set of marks for the next square, continuing until you reach the outer edge. -
Double Check Angles:
Step back and verify that your lines are straight and parallel. The beauty of this piece relies on precision, so fix any wavering lines now before paint touches the canvas.
Wobbly Lines?
If your taped lines look crooked after peeling, don’t panic. Use a ‘line-correction pen’ or a paint marker in the matching color to act as a ruler-guided eraser for crisp edges.
Step 3: Painting the Rings
-
Taping Strategy:
To get crisp lines, tape off every *other* ring. Firmly press down the edges of the painter’s tape to prevent bleed-under. I find running a credit card over the tape edge helps seal it perfectly. -
Painting the Outer Ring:
Start with the outermost ring using a muted teal color. Use a flat brush and paint in the direction of the square’s sides to emphasize the geometric structure. -
Adding Warmth:
Move inward to the third ring (skipping one) and paint it a rich terracotta or rust red. Apply two thin coats rather than one thick coat for better coverage and texture control. -
Deep Contrast:
For the fifth ring in, switch to a deep navy blue. This dark value helps anchor the lighter colors that will follow. -
Filling the Alternates:
Painting the remaining ‘skipped’ rings (mustard yellow, light blue, burnt orange) requires patience. Wait for the first set to be completely dry to the touch before carefully peeling up the tape. -
Re-taping:
Once the first set of rings is fully cured (give it at least an hour), tape over the painted lines to protect them and expose the empty rings. Seal the tape edges again. -
Complete the Palette:
Paint the remaining rings. Work your way inward toward the smallest central square. The center block should be a bright pop, like a creamy yellow or ochre.
Step 4: Finishing Touches
-
Remove Tape:
Peel the tape away slowly at a 45-degree angle while the paint is still slightly tacky to avoid pulling up dried paint chips. -
Touch Ups:
Use a small angled brush and your white background color (or the specific ring color) to tidy up any spots where paint might have bled under the tape. -
Create the Border:
The inspiration image shows a wide white border. Ensure you leave or paint a crisp 2-3 inch border of cream or off-white around the entire painted design to frame it. -
Protect the Piece:
Once fully dry (wait 24 hours), apply a clear matte varnish. This unifies the sheen of the different paint colors and protects that lovely texture you’ve maintained.
Hang your stunning new geometric masterpiece and enjoy the modern warmth it brings to your space
Split Composition: Half-and-Half Drama
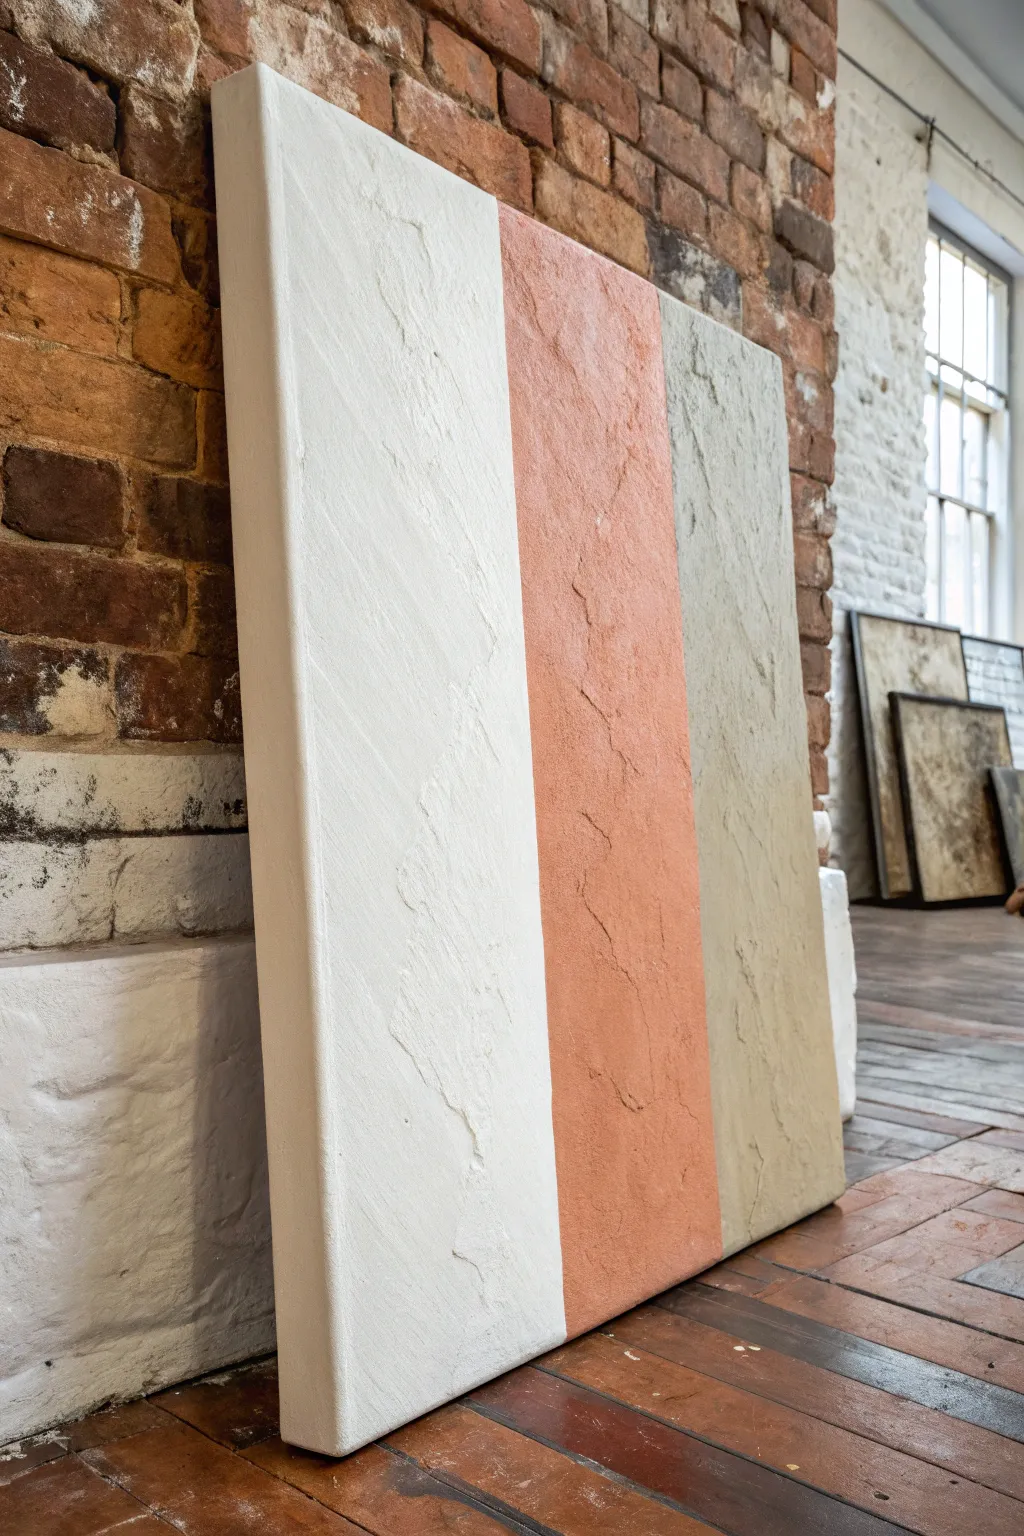
Embrace the beauty of raw texture and muted tones with this substantial vertical triptych. This project uses modeling paste or plaster to create a stone-like surface, divided into three calming bands of cream, terracotta, and sage for a modern, architectural look.
Step-by-Step
Materials
- Large rectangular stretched canvas (deep edge profile recommended)
- Texture paste, modeling paste, or fine-grit plaster medium
- Gesso (white)
- Wide palette knife or drywall taping knife
- Painter’s tape or masking tape (wide width)
- Acrylic paints (Titanium White, Unbleached Titanium, Burnt Sienna, Raw Umber, Yellow Oxide, Olive Green)
- Large flat paintbrush or chip brush
- Matte varnish
- Fine-grit sandpaper (optional)
- Drop cloth
- Ruler or measuring tape
- Pencil
Step 1: Preparing the Base
-
Prime the surface:
Begin by applying a generous coat of white gesso to your entire canvas. Even if your canvas comes pre-primed, this extra layer ensures a sturdy foundation for the heavy texture medium. -
Measure the thirds:
Using your ruler, measure the total width of your canvas. Divide this number by three to determine the width of each vertical stripe. -
Mark the lines:
Lightly mark these vertical division points with a pencil at the top and bottom of the canvas, but don’t draw the full lines yet to keep the surface clean.
Step 2: Building the Texture
-
Apply the first layer:
Scoop out a large amount of texture paste onto the canvas. Using a wide palette knife or drywall taping knife, spread the paste across the entire surface. -
Create movement:
Work the paste in various directions. Don’t aim for perfect smoothness; the goal is to create ridges, slight peaks, and valleys that mimic natural stone or rough plaster. -
Refine the edges:
Pay special attention to the deep sides of the canvas. Carry the texture over the edges so the artwork looks finished from every angle. -
Dry completely:
Let this texture layer dry fully. Depending on the thickness and your room’s humidity, this could take anywhere from 12 to 24 hours. The paste must be hard to the touch. -
Optional sanding:
If there are any dangerously sharp peaks or unwanted clumps, lightly sand them down with fine-grit sandpaper. Wipe away any dust with a dry cloth.
Seal the Edge
To prevent paint bleeding under the tape on textured surfaces, paint a thin layer of the base color (or clear matte medium) over the tape edge first to seal it.
Step 3: Creating the Color Block
-
Tape the first section:
Align your painter’s tape vertically based on your pencil marks from earlier. Tape off the middle and right sections so only the left third is exposed. -
Mix the cream tone:
Mix Titanium White with a touch of Unbleached Titanium. You want a warm, chalky white rather than a stark bright white. -
Paint the left stripe:
Apply the cream paint to the left section. Use a dry brush technique—loading a small amount of paint and dragging it over the texture—to highlight the ridges while letting some shadows remain in the crevasses. -
Remove tape and dry:
Gently peel back the tape while the paint is still slightly tacky to ensure a crisp line. Allow this section to dry completely. -
Tape for the center:
Once the cream section is dry, apply fresh tape over the edge of the cream stripe and over the right third, isolating the middle stripe. -
Mix the terracotta tone:
Combine Burnt Sienna, a tiny dot of Red, and plenty of Titanium White. Add a hint of Yellow Oxide to warm it up until you reach a soft, earthy salmon or terracotta hue. -
Paint the middle stripe:
Paint the center section with your terracotta mix. Push the paint into the texture but keep the application somewhat uneven to enhance the organic stone look. -
Reveal the center:
Remove the tape carefully and let the middle stripe dry. -
Isolate the final section:
Tape over the dried edge of the middle terracotta stripe to protect it, leaving the right third exposed. -
Mix the sage tone:
Mix Unbleached Titanium with a small amount of Raw Umber and a tiny touch of Olive Green. You are aiming for a desaturated, greyish-sage concrete color. -
Paint the right stripe:
Apply the sage mix to the final section. Ensure you paint the right-side edge of the canvas as well. -
Final reveal:
Remove the final piece of tape. You should now have three distinct, textured vertical bands. -
Seal the work:
Once all paint is fully cured, apply a coat of matte varnish. This protects the textured surface from dust and seals the acrylics without adding unwanted shine.
Add Metallic Veins
For a luxe touch, mix gold leaf flakes or gold paint into the valleys of the texture before applying your main colors, creating subtle metallic veins in the ‘stone’.
Hang your new textured masterpiece in a well-lit spot to let the shadows play across the surface all day long
Three-Panel Flow Across Canvases

Create a stunning statement wall with this three-panel canvas art that mimics the organic movement of sand dunes and ocean waves. Using texture paste and a cohesive palette, you’ll design a continuous flow that travels seamlessly across all three surfaces.
How-To Guide
Materials
- 3 large tall formatted canvases (e.g., 24×60 inches)
- Modeling paste or texture gel (heavy body)
- Palette knives (varying sizes, including wide)
- Acrylic paints: Titanium White, Unbleached Titanium, Raw Sienna, Ochre, Gold Metallic, Paynes Grey, Teal
- Large flat paintbrush (2-3 inch)
- Medium round brush
- Pencil
- Painters tape or masking tape
- Drop cloth
- Sandpaper (fine grit)
Step 1: Preparation & Mapping
-
Set the Stage:
Lay your drop cloth down and place the three canvases side-by-side on the floor or a large work table. Push them together so they are touching; this is crucial for ensuring the design flows correctly. -
Sketch the Flow:
Using a pencil, lightly sketch your wavy lines across all three canvases simultaneously. Think of them as one giant canvas. Create sloping hills and valleys that start on the left panel, dip through the middle, and rise on the right. -
Define Zones:
Mark the specific color zones lightly with your pencil (e.g., ‘white sky top’, ‘gold band’, ‘teal wave’). This acts as your paint-by-number guide later. -
Separate Canvases:
Once sketched, pull the canvases apart slightly (about 1-2 inches) so you can work on the edges without gluing them together.
Cracked Paste?
Thick texture paste can crack while drying. If this happens, mix a little more paste with white paint and fill the cracks, then smooth over.
Step 2: Building Texture
-
Apply Base Texture:
Scoop out a generous amount of modeling paste with a palette knife. Begin applying it to the ‘white’ and ‘cream’ sections of your design. -
Directional Stroking:
Drag the palette knife horizontally along your wave lines to create ridges. I find that varying the pressure creates distinct ‘dune-like’ textures that catch the light wonderfully. -
Create Rough Patches:
For the darker bands (the teal and ochre areas), apply the paste a bit more roughly. Tap the flat side of the knife against the wet paste to create a stippled, rock-like surface. -
Edge Work:
Ensure the texture wraps slightly around the sides of the canvas so the art looks finished from an angle. -
Dry Time:
Allow the texture paste to dry completely. This usually takes 12-24 hours depending on thickness. It must be hard to the touch before painting.
Step 3: Layering Color
-
Base Coat White:
Start at the top. Mix Titanium White with a touch of Unbleached Titanium and paint the upper sky section, scrubbing the brush into the texture crevices. -
Adding Warmth:
Mix Raw Sienna and White to create a sandy beige. Apply this to the bands below the white, blending the transition slightly while the paint is wet. -
The Gold Vein:
Using your Ochre and Metallic Gold, paint the thin, distinct accent lines. Use a smaller brush here to keep these lines sharp and intentional. -
Deep Ocean Tones:
Mix Paynes Grey and Teal to create a moody blue-green. Apply this to the lowest sweeping curves of your design to anchor the composition. -
Dry Brushing Highlights:
Once the base colors are dry, take a dry brush with a tiny amount of pure white paint. Lightly skim it over the textured ridges of the colored sections to make the texture pop. -
Connecting the Panels:
Step back and look at the three panels together. If a line looks disconnected, mix a little more paint and adjust the edges so the eye travels smoothly from one canvas to the next.
Metallic Leaf Accent
Instead of metallic paint, use gold leaf adhesive and foil sheets on the thinnest wave lines for a genuine, high-shine luxury finish.
Hang your trio with equal spacing between them and enjoy the serene, flowing movement of your new artwork
Metallic Accents for Instant Glow
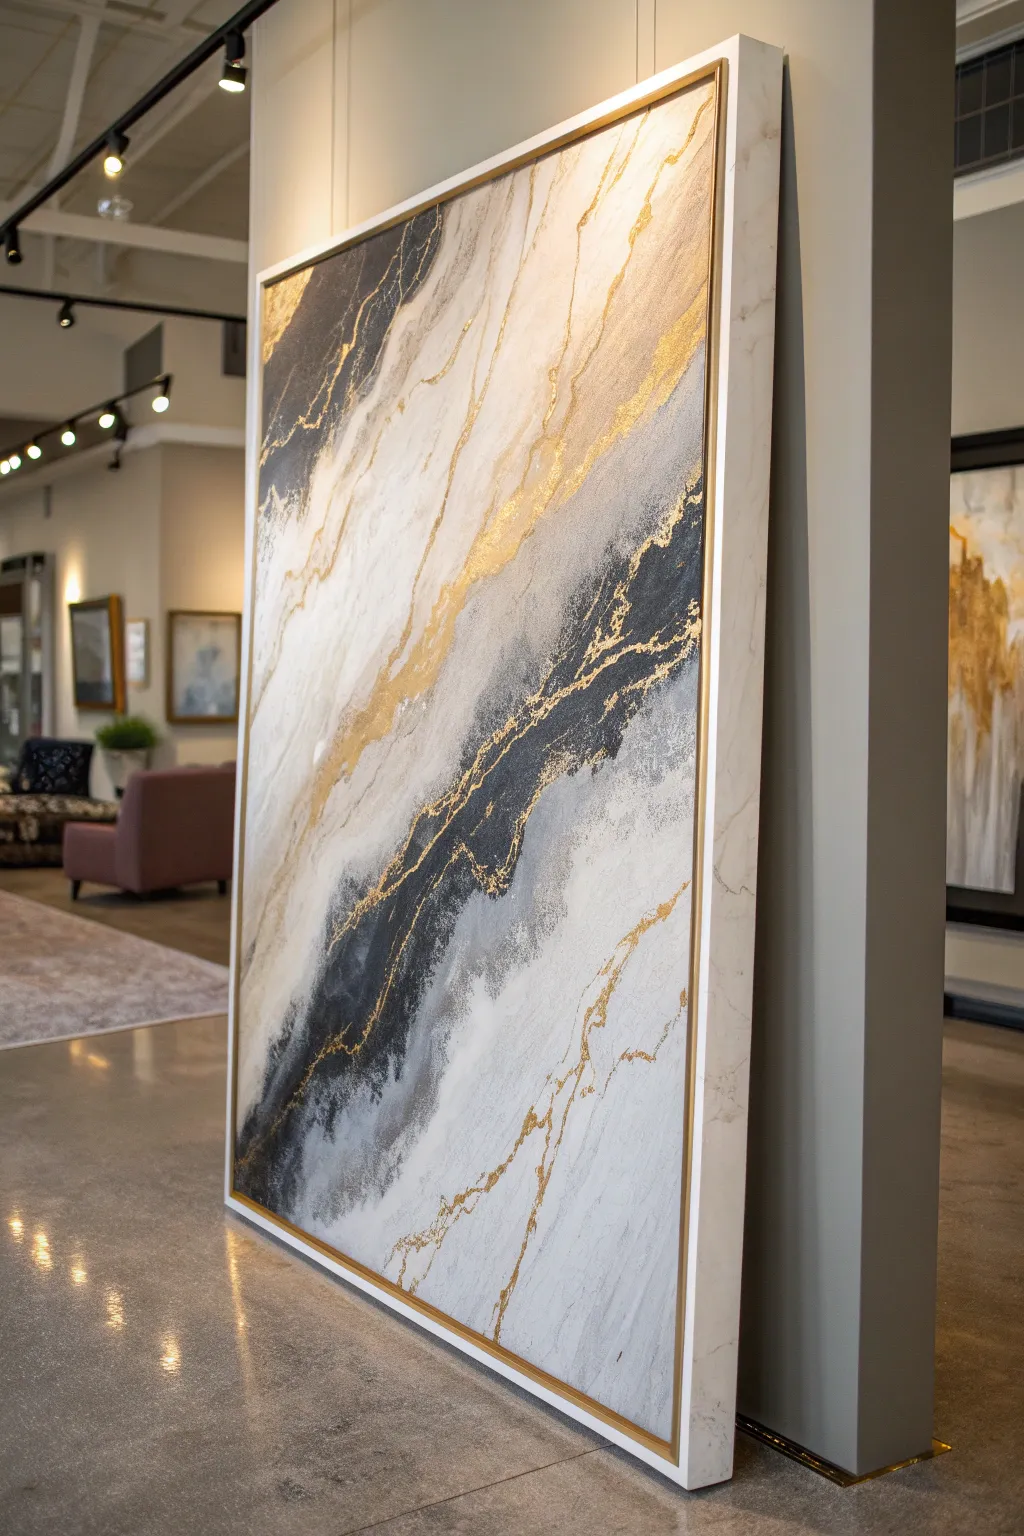
Transform a blank canvas into a stunning, high-end statement piece that mimics the natural elegance of marble stone. This abstract technique layers fluid acrylics with striking gold metallic veins to create a sophisticated focal point for any modern interior.
Step-by-Step Tutorial
Materials
- Large gallery-wrapped canvas (approx. 36×48 or larger)
- White acrylic paint (heavy body)
- Black acrylic paint
- Grey acrylic paint (or mix black and white)
- Metallic gold leaf or gold liquid gilding paint
- Pouring medium or slow-drying glazing medium
- Large flat paintbrush (2-3 inch)
- Small liner brush or rigger brush
- Palette knives (assorted sizes)
- Spray bottle with water
- Floating frame (optional, for finishing)
- High-gloss varnish
Step 1: Base Layer Composition
-
Prime the Surface:
Even if your canvas is pre-primed, apply a fresh coat of white acrylic paint across the entire surface to ensure a smooth, consistent working area. Let this dry completely before starting the marble effect. -
Mix Your Greys:
Prepare three distinct shades of grey on your palette: a very light, misty grey; a medium charcoal; and a deep slate. Keep your pure black and pure white separate for high-contrast areas. -
Establish the Flow:
Visualize a diagonal composition, flowing from top-left to bottom-right. This creates dynamic movement. Using a large brush, apply broad, sweeping strokes of white and off-white paint roughly following this diagonal path. -
Introduce the Dark Tones:
While the white is still tacky, take your medium grey and black paints. Use a palette knife to scrape and drag these darker colors in jagged, organic shapes along your chosen diagonal line. Don’t overthink it; natural stone is random. -
Soften the Edges:
Use a damp brush or a light mist of water from your spray bottle to blur the boundaries where the black meets the white. You want a smoky, diffused transition rather than sharp, cartoonish lines. This mimics the cloudy depth of real marble. -
Layering the Mid-Tones:
I like to come back in with the light grey paint and feather it over parts of the dark black sections. This creates the illusion of depth, making some dark veins look like they are receding beneath the surface.
Natural Flow Pro-Tip
Rotate your canvas while painting. Natural stone has no ‘up’ or ‘down.’ Viewing it from different angles helps prevent you from subconsciously painting recognizable shapes or patterns.
Step 2: Creating the Veins
-
Define the Cracks:
Once the background is mostly dry, switch to a smaller brush or the edge of a palette knife. Load it with dark charcoal paint mixed with a little water to make it inky. Draw thin, trembling lines that branch off the main dark sections. -
Add Texture:
For a more tactile feel, mix clear heavy gel medium with some white paint and apply it sporadically with a knife. This physical texture will catch the light later. -
The Gold Foundation:
Identify the primary ‘fault line’ of your composition—the darkest, most dramatic diagonal crack. Paint a thin, fluid line of ochre or yellow paint along this crack as a base for your gold; this adds warmth underneath the metallic layer.
Muddy Color Solution
If your greys turn to mud, stop blending wet-on-wet. Let the layer dry completely, then apply a thin glaze of white over the top to push the messy area into the background.
Step 3: Gilding and Finishing
-
Applying the Gold:
Using liquid gold gilding or metallic paint, trace over your ochre lines. Be deliberate but shaky; perfect straight lines look artificial. Let the brush ‘skip’ in some areas to create broken veins. -
Adding Spider Veins:
Switch to your finest rigger brush. Dilute the gold paint slightly and drag tiny, hair-thin gold tendrils branching out into the white space. These delicate inclusions make the piece look expensive and detailed. -
Splatters and Organic Marks:
Dip a stiff brush in gold paint and flick the bristles to create tiny metallic speckles around the main vein. This mimics mineral deposits found in nature. -
Highlight the Frame:
If you are framing the piece yourself, painting the floating frame in the same gold tone ties the entire artwork together beautifully. -
Varnish and Protect:
Wait at least 24 hours for all layers, especially the thick metallic paint, to cure. Apply a high-gloss varnish to seal the piece. The gloss finish is crucial as it replicates the polished sheen of real marble.
Hang your finished masterpiece in a well-lit area where natural light can dance across the gold accents and reveal the subtle depths of your marble effect
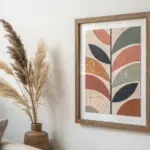
Abstract Botanical Stems
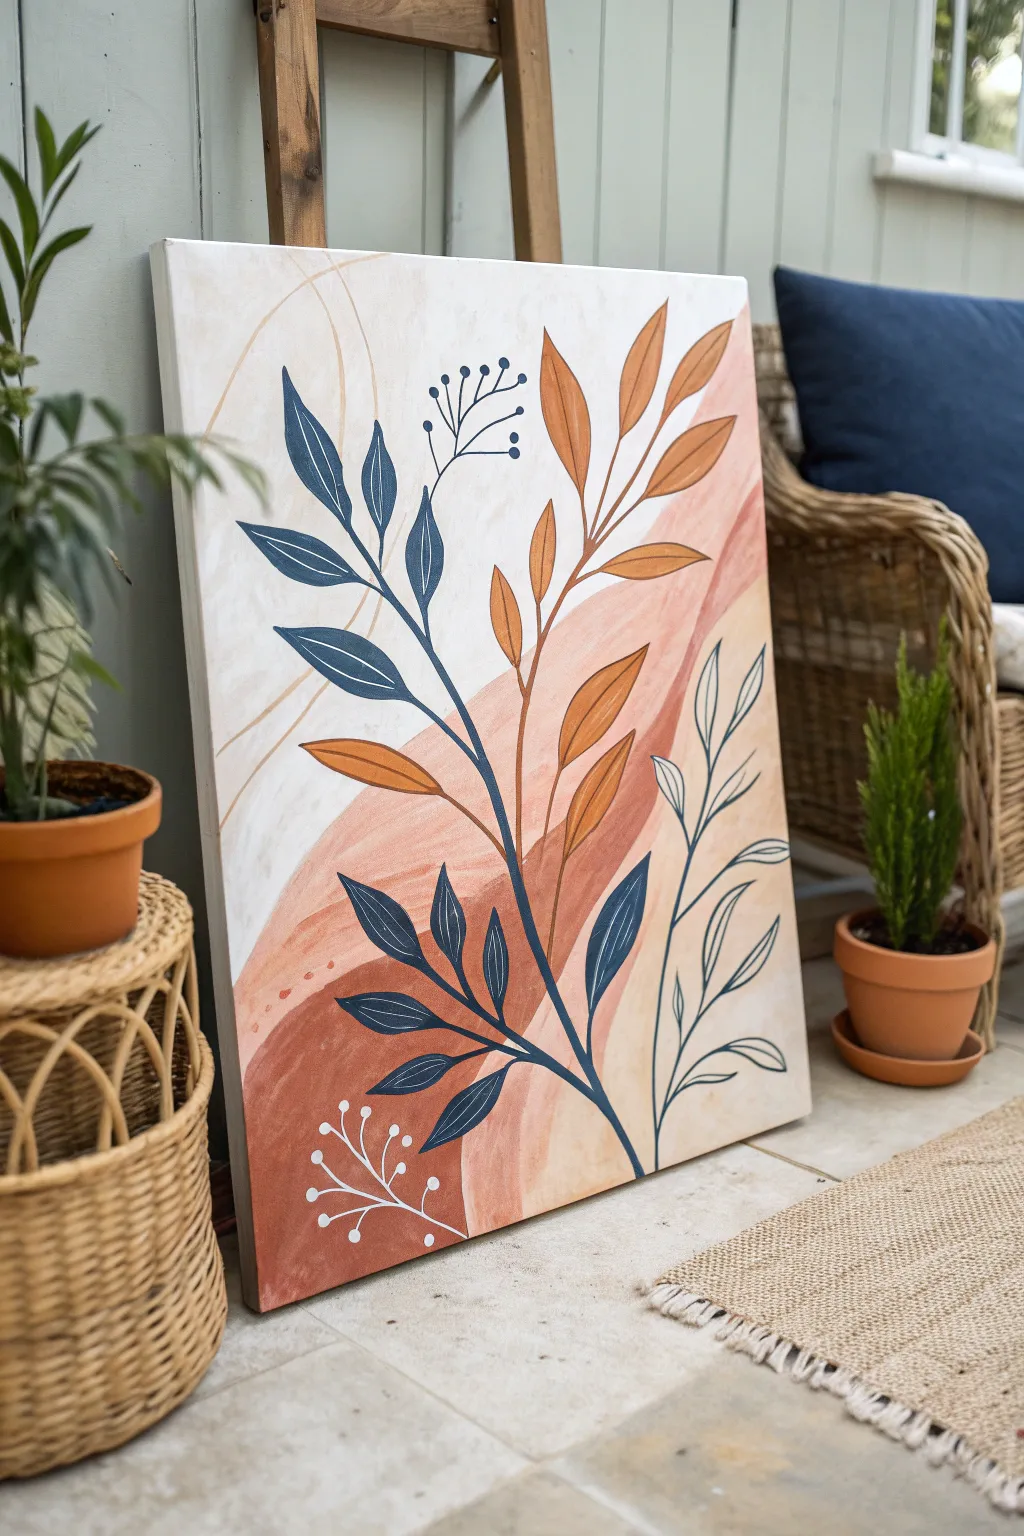
This project blends flowing abstract curves with structured botanical illustrations for a modern, earthy piece of wall art. The combination of deep navy, warm terracotta, and creamy beige creates a balanced palette that feels both grounded and airy.
Step-by-Step Guide
Materials
- Large stretched canvas (at least 18×24 inches)
- Acrylic paints: Titanium White, Burnt Sienna, Yellow Ochre, Navy Blue, and Black
- Large flat brush (1-2 inch)
- Medium round brush (size 6 or 8)
- Small liner brush (size 0 or 1)
- Palette or mixing plate
- Pencil and eraser
- Jar of water
- Paper towels
Step 1: Planning the Background
-
Sketch the abstract zones:
Start by lightly sketching large, sweeping curves across your canvas with a pencil. Aim for three main sections: a bottom left corner, a diagonal middle band, and a top right section. These don’t need to be perfect; they are just guides for your color blocking. -
Mix your base colors:
Prepare three main background shades. For the lightest shade, mix Titanium White with a tiny dot of Yellow Ochre for a creamy off-white. For the mid-tone, mix White with a little Burnt Sienna and Ochre to get a soft beige. For the darkest tone, create a muted terracotta by mixing Burnt Sienna with White and a touch of Black to desaturate it. -
Paint the bottom section:
Using your large flat brush, fill the bottom left sweeping curve with your terracotta mixture. Use long, smooth strokes to keep the texture relatively flat. -
Fill the middle band:
While the first section dries, paint the middle diagonal band with your soft beige mixture. Let the edges meet the terracotta section gently; you don’t need to blend them, a hard edge works well for this graphical style. -
Complete the background:
Fill the remaining top left and right areas with your creamy off-white mixture. Don’t worry if the paint looks slightly streaky; a little texture adds character to the abstract base. -
Add abstract details:
Once the base layers are tacky but not fully dry, use a clean brush to add a few ghost-like curve lines in the top left corner using a slightly darker beige. This adds subtle depth without overwhelming the composition.
Smooth Operator
To get super crisp lines on your stems without wobbles, dilute your acrylic paint slightly with water until it has an ink-like consistency.
Step 2: Drawing the Botanicals
-
Sketch the main stem:
When the background is completely dry, lightly pencil in the main stem structure. Draw a long, slightly curved line starting from bottom center, reaching up towards the top right. Add branching lines coming off the main stem. -
Outline the leaves:
Draw football-shaped leaves attached to your branches. Vary their sizes, placing larger leaves towards the bottom and smaller ones near the top tips. Leave space for two smaller, secondary floral elements. -
Sketch secondary elements:
Add a delicate line drawing of a leafy sprig on the bottom right and a berry sprig near the top center. Also, sketch a small decorative sprig in white at the very bottom left.
Texture Twist
Mix a little baking soda into your background beige paint before applying it. This creates a gritty, plaster-like texture that makes the piece feel expensive.
Step 3: Painting the Foliage
-
Mix the leaf colors:
You’ll need two main leaf colors. Refresh your terracotta mix from earlier (make it slightly more saturated this time) and prepare a deep navy blue by mixing Navy Blue with a touch of Black. -
Paint the blue leaves:
Using your medium round brush, carefully fill in the leaves on the left side of the main stem with the navy blue mix. For the leaf veins, use the liner brush and the creamy off-white background color to paint a thin line down the center. -
Paint the terracotta leaves:
Switch to a clean brush and fill the leaves on the right side of the main stem with the terracotta paint. Once dry, add central veins using the liner brush, but use a darker burnt sienna shade for subtle contrast. -
Connect the stems:
With the liner brush and navy paint, trace over your main stem pencil line. I find it helps to pull the brush towards you for a smoother line. Connect all the painted leaves to the main branch.
Step 4: Fine Details
-
Outline the line-art leaves:
For the botanical sprig on the bottom right, use your liner brush and navy paint to simply outline the leaves without filling them in. Keep your hand loose to mimic an ink illustration. -
Create the berry sprig:
paints the thin stems of the top center sprig with navy blue. Add small dots at the ends of the stems to create berries. -
Paint the white accent:
Finally, use pure Titanium White and your smallest brush to paint the delicate sprig detail at the bottom left over the dark terracotta background. This high contrast pops beautifully. -
Erase and seal:
Check for any visible pencil marks and gently erase them if the paint is bone dry. If desired, apply a matte varnish to protect your work.
Hang this serene botanical piece in a spot that gets natural light to highlight the differing paint textures
Matte-Gloss Monochrome Contrast
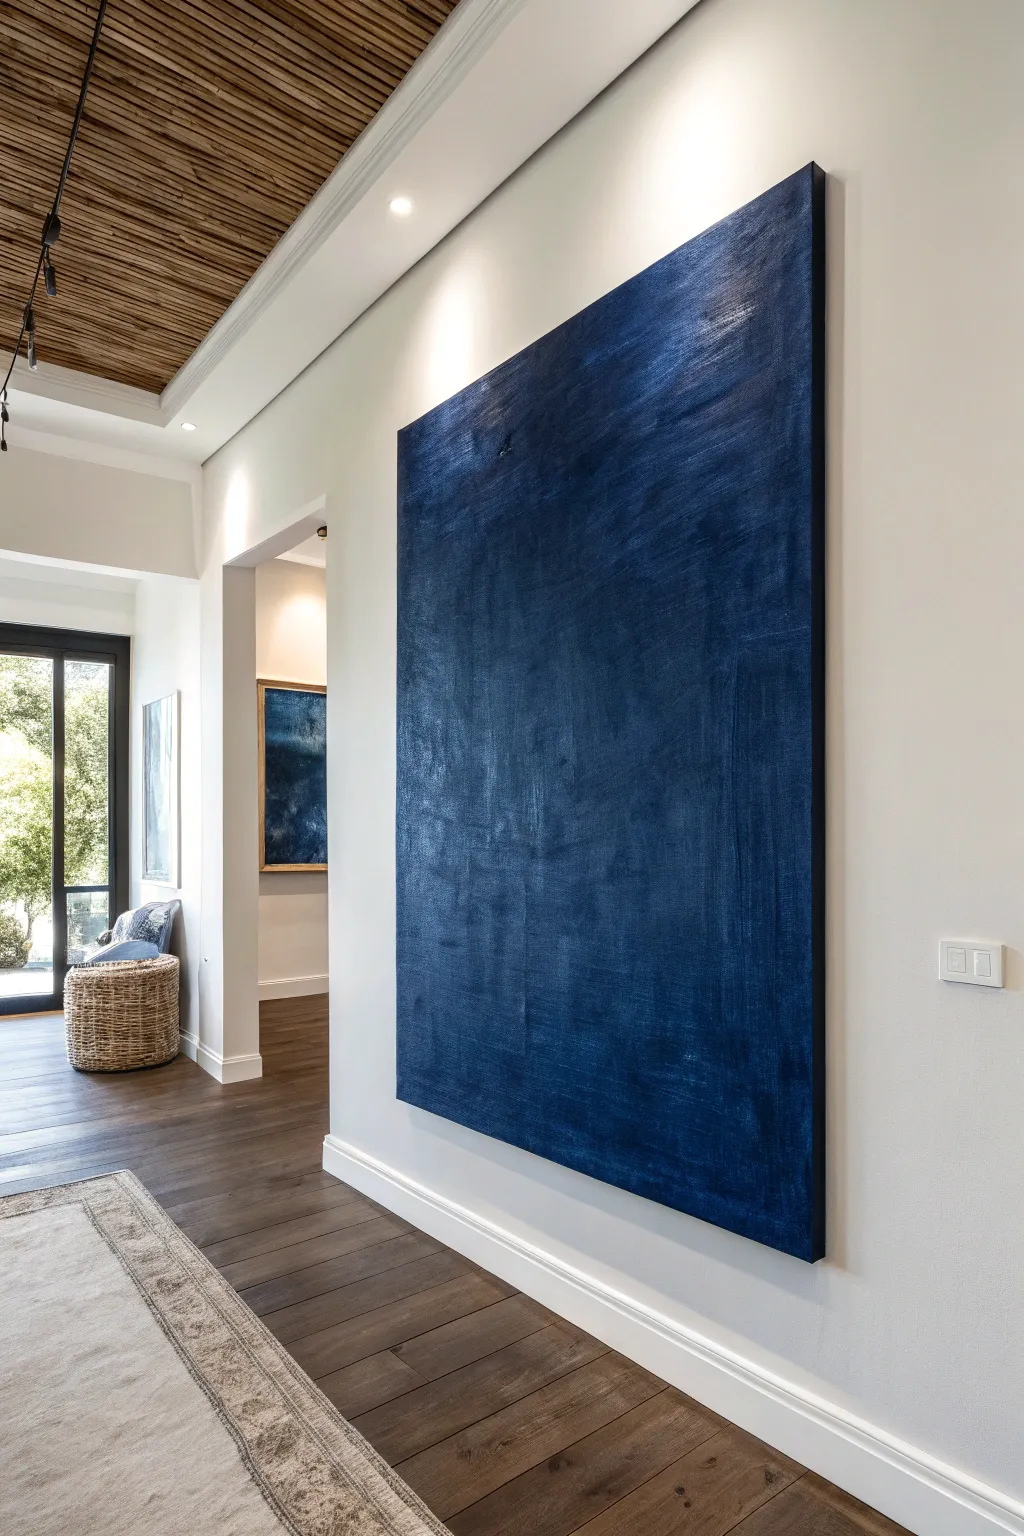
This striking, large-scale abstract piece relies on the subtle interplay of light and texture rather than bold patterns. By layering shades of deep indigo and navy with varying sheens, you create a sophisticated, velvet-like surface that shifts beautifully as you move past it.
Step-by-Step Tutorial
Materials
- Large stretched canvas (gallery wrapped, at least 48×60 inches recommended)
- Acrylic gesso (black or dark grey)
- Heavy body acrylic paint (Ultramarine Blue)
- Heavy body acrylic paint (Payne’s Grey or Carbon Black)
- Matte medium
- Gloss medium or high-gloss varnish
- Large framing brush (4-inch width)
- Wide palette knife or trowel
- Spray bottle with water
- Drop cloth
- Fine-grit sandpaper (220 grit)
Step 1: Preparing the Darkness
-
Prime the Surface:
Because this painting relies on depth, start with a dark base. Apply two coats of black or dark grey gesso to the entire canvas. This prevents white specks from showing through later and gives the blue topcoats a richer foundation. -
Establish Texture:
Before adding color, we want physical texture. Mix a small amount of heavy body paint with a thickening gel or modeling paste if you have it, or simply use the gesso thickly. Use a large brush to apply it in cross-hatch motions, creating subtle ridges. -
Sand for Distressing:
Once the textured base is rock solid dry, lightly run 220-grit sandpaper over the highest ridges. This knocks down any sharp peaks and creates a ‘worn denim’ surface for the next layers to grab onto.
Uneven Sheen?
If the gloss layer looks patchy rather than textured, apply a final isolation coat of semi-gloss varnish over the whole piece to unify it while keeping the depth.
Step 2: Layering the Monochrome
-
Mix the Base Blue:
Create your primary deep blue by mixing Ultramarine Blue with a touch of Payne’s Grey. You want a color that is almost black but clearly reads as blue under light. -
First Matte Layer:
Mix your dark blue paint with a generous amount of matte medium (about a 50/50 ratio). This dulled finish will serve as the background ‘fabric’ of the piece. -
Apply with Cross-Hatching:
Using your large 4-inch brush, apply the matte blue mixture using distinct vertical and horizontal strokes. Keep the paint relatively thin so the underlying texture influences the brushstrokes. -
Create Varied Tones:
While the first layer is still tacky, mix a slightly lighter version of the blue (just pure Ultramarine without the grey). Dry brush this randomly in patches to break up the color field. -
Dry Completely:
Let this foundational color layer dry for at least 6 to 12 hours. The matte medium needs to cure fully so the gloss step contrasts effectively.
Step 3: The Sheen Technique
-
Prepare the Gloss Glaze:
In a clean container, mix a small amount of your original dark blue paint with a large amount of gloss medium or glazing liquid. The ratio should be about 1 part paint to 4 parts medium. -
Applying the Sheen:
I like to work vertically for this step. Drag the gloss glaze down the canvas in long, continuous strokes. The gloss catches the ridges of the canvas differently than the matte depressions. -
Scraping Back:
Immediately after applying a section of gloss, use a wide palette knife or trowel to scrape downward firmly. This pushes the glossy paint into the weave and pulls it off the high points, enhancing the matte-gloss contrast. -
Feather Out Edges:
Check the edges of your canvas. Wrap the dark blue around the sides for the gallery-wrapped look, ensuring no white canvas is visible on the returns. -
Final Detail Work:
Step back five feet. If any area looks too flat, take a tiny bit of pure dark paint on a dry brush and scumble it over the area to add ‘noise’ and visual vibration. -
Curing:
Acrylics dry fast but cure slowly. Leave the painting in a dust-free area for 24 hours before hanging or varnishing to ensure the different sheens settle permanently.
Add Metallic Depth
Mix a tiny drop of iridescent pearl medium into your final gloss glaze. It won’t look glittery, but it will make the deep blue glow beautifully under gallery lights.
The result is a moody, substantial piece of art that transforms completely depending on the time of day and angle of view


Have a question or want to share your own experience? I'd love to hear from you in the comments below!