A good canvas frame can take your artwork from “fresh off the easel” to “ready for the wall” in one simple upgrade. Here are my favorite canvas frame ideas—starting with the classics and working into the fun, unexpected twists.
Classic Floating Frame With a Shadow Gap

Elevate your canvas art with this sophisticated floating frame design in light oak. The distinctive shadow gap creates a stunning illusion of suspension, adding depth and professional polish to any standard stretched canvas.
Detailed Instructions
Materials
- Light oak L-profile molding (specifically designed for floater frames)
- Stretched canvas (artwork ready)
- Wood glue
- Painter’s tape
- Corner clamps (strap clamp or 4 corner clamps)
- Miter saw or miter box with hand saw
- Sandpaper (120 and 220 grit)
- Clear matte or satin varnish
- Offset clips or canvas mounting screws
- Drill with small pilot bit
- Cardboard spacers (approx. 5mm thickness)
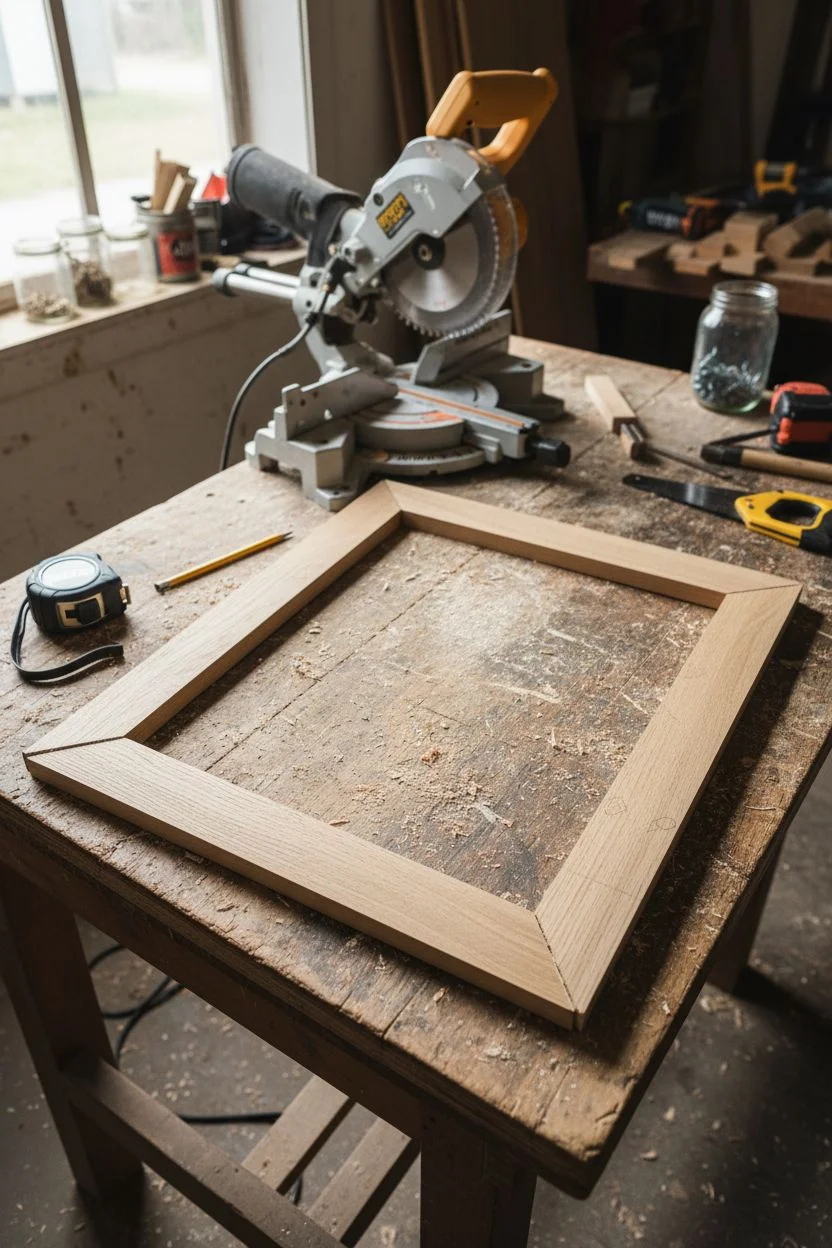
Step 1: Measuring and Cutting
-
Measure your canvas:
Start by measuring the exact length and width of your stretched canvas. Don’t assume it’s perfectly square or faithful to the package dimensions. -
Calculate the gap:
Decide on your shadow gap size—standard is about 5mm (3/16 inch). Add this gap dimension twice (for both sides) to your canvas measurements to get the inside dimension of your frame. -
Mark the molding:
Transfer your total measurements to the oak molding. Remember that for a floater frame, you are measuring the inside ‘bed’ where the canvas sits, not the outer edge. -
Set up the saw:
Adjust your miter saw to a precise 45-degree angle. Test the cut on a scrap piece of wood first to ensure the angle is true. -
Cut the miters:
Cut your four frame pieces. When cutting the second piece of each pair (top/bottom and sides), hold them back-to-back to ensure they are identical in length. -
Dry fit the frame:
Arrange the four pieces on a flat surface to check the corners. If a gap appears, sand the mitered face gently to correct the angle.
Step 2: Assembly and Finishing
-
Prepare for gluing:
Lay out your clamps. I find strap clamps are easiest for beginners, but four individual corner clamps offer more precision if you have them. -
Apply glue:
Apply a thin, even layer of wood glue to one side of each miter joint. Too much glue will squeeze out and stain the raw wood. -
Clamp the frame:
Bring the corners together and tighten your clamps. Ensure the frame remains flat on your work surface so it doesn’t twist while drying. -
Wipe excess glue:
Immediately wipe away any glue squeeze-out with a damp cloth. Glue spots will resist the varnish later, creating ugly blemishes. -
Sand the frame:
Once fully dry (usually overnight), sand the entire frame with 120 grit paper, paying special attention to smoothening the sharp corners. Follow up with 220 grit for a silky finish. -
Apply finish:
Brush on a coat of clear matte or satin varnish to protect the oak and bring out the grain. Let it dry, lightly sand with 220 grit, and apply a final second coat.
Clean Corner Trick
Before gluing, rub the mitered cuts with a screwdriver shaft to burnish the wood fibers slightly. This crushes them down and helps create an invisible, tight seam when clamped.
Step 3: Mounting the Canvas
-
Position the spacers:
Place your frame face down on a clean surface, then insert the canvas face down into it. Wedge your cardboard spacers firmly between the canvas and frame to create an even gap all around. -
Drill pilot holes:
Identify where you will attach the canvas. Most specific floater moldings have a predetermined thicker section for screws. Drill shallow pilot holes here to prevent splitting. -
Secure the canvas:
Use offset clips or screw directly through the back of the frame into the stretcher bars of the canvas. Check the front occasionally to ensure the gap remains even. -
Final inspection:
Remove the spacers and flip the artwork over. Check the shadow gap is consistent and the corners are flush.
Darken the Gap
Paint the inside ‘step’ of the frame black before mounting the canvas. This deepens the shadow effect, making the artwork pop even more against the light oak.
Hang your newly framed piece and enjoy the modern gallery aesthetic you’ve created right at home.


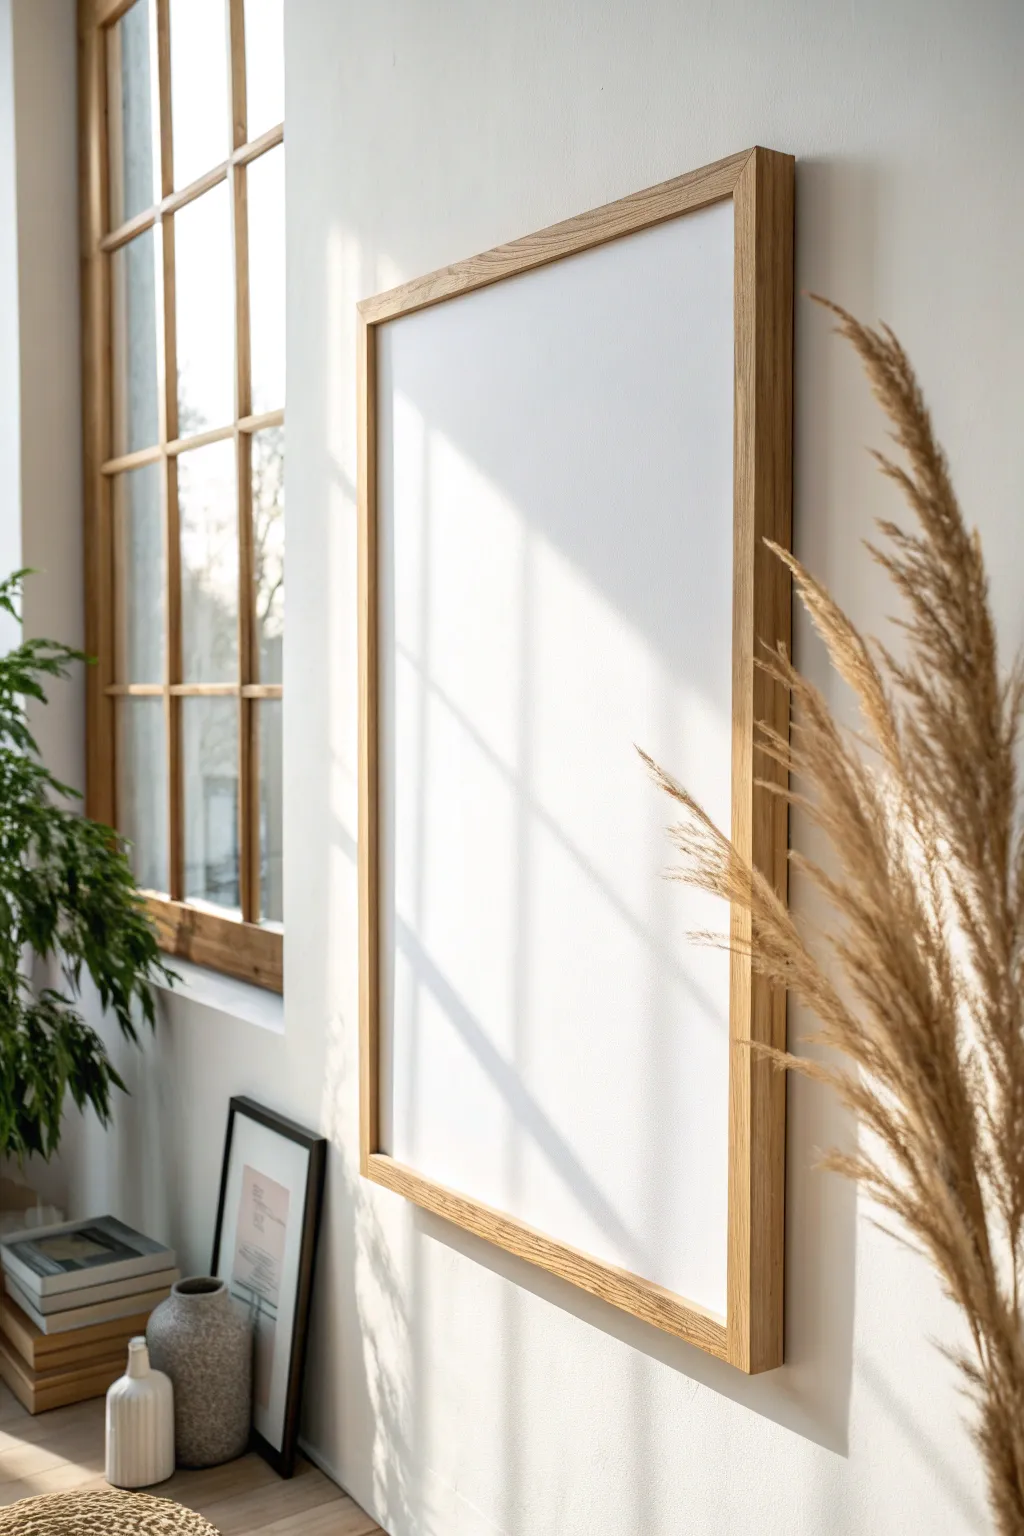
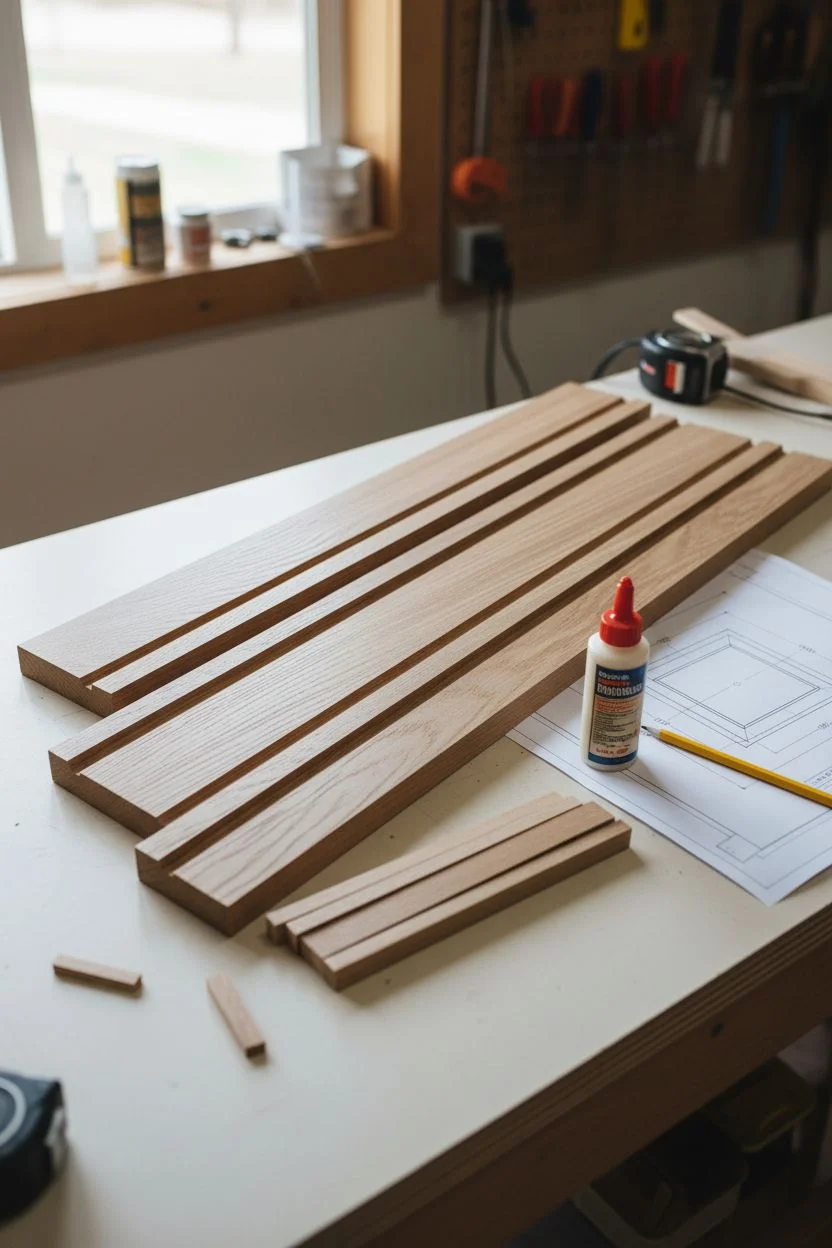
Flush-Mount Frame That Hugs the Canvas Edge
Achieve a gallery-worthy look with this sleek, solid wood frame that sits perfectly flush against your canvas edge. This design highlights the texture of natural oak while providing a clean, modern border that doesn’t distract from the artwork itself.
Step-by-Step Guide
Materials
- Pre-stretched canvas (e.g., 16×20 inches)
- 1×2 inch oak lumber (or similar hardwood)
- Wood glue
- Miter saw or miter box with hand saw
- Simple corner clamps or strap clamp
- Sandpaper (120, 220, and 400 grit)
- Wood finish (e.g., Danish oil, matte varnish, or stain)
- Clean lint-free rags
- Brad nailer or finishing nails with hammer
- Offset clips or z-clips with screws
- Tape measure
- Pencil
Step 1: Preparation & Cutting
-
Measure the Artwork:
Measure the exact exterior dimensions of your stretched canvas. Since this is a flush-mount frame, we want a snug fit, so measure to the closest 1/16th of an inch rather than leaving a gap. -
Inspect the Lumber:
Examine your oak board for the best grain pattern. Select the straightest sections without large knots for the visible front faces of the frame. -
Set the Miter Angle:
Adjust your miter saw to precisely 45 degrees. I always like to make a test cut on a scrap piece first to ensure the angle is dead-on before cutting into the expensive hardwood. -
Cut the First Long Side:
Cut the first side of the frame. The *inside* edge of the miter cut should match the length of your canvas side exactly. -
Cut Remaining Pieces:
Cut the opposing long side and the two short sides. Use the first cut pieces as templates for their partners to ensure they are perfectly identical in length. -
Dry Fit the Frame:
Arrange the four pieces around your canvas on a flat surface without glue. Check that the corners meet tightly and the canvas fits inside snugly without forcing the wood apart.
Step 2: Assembly & Finishing
-
Apply Glue:
Apply a thin, even layer of wood glue to the mitered ends of each board. Avoid using too much, as squeeze-out inside the sharp corners is difficult to clean later. -
Clamp the Corners:
Bring the corners together and secure them using corner clamps or a strap clamp. Tighten slowly, ensuring the top surfaces remain perfectly flush with each other. -
Reinforce the Joints:
While clamped, drive finish nails or brad nails through the corners from the top and bottom sides (the sides less visible when hanging) to add mechanical strength to the glue joint. -
Wipe Excess Glue:
Immediately wipe away any glue squeeze-out with a damp rag. Pay special attention to the inner corners. -
Sand the Frame:
Once dry, sand the entire frame. Start with 120 grit to smooth joints, move to 220 for general smoothing, and finish with 400 grit for a silky feel. -
Ease the Edges:
Gently run the sandpaper along the sharp outer and inner edges of the frame to break the corner slightly, making it soft to the touch. -
Apply Finish:
Using a clean rag, rub your chosen finish (like Danish oil) into the wood, following the direction of the grain. This brings out the rich color of the oak. -
Let it Cure:
Allow the finish to dry completely according to the manufacturer’s instructions. A second coat can be applied if a deeper sheen is desired.
Grain Matching Pro-Tip
When cutting your four pieces from a single board, cut them in continuous order (top, right, bottom, left). This allows the wood grain to ‘wrap’ around the corners visually for a seamless look.
Step 3: Mounting
-
Insert the Canvas:
Place the frame face down on a soft surface and lay the canvas inside it, also face down. The back of the canvas should be flush with or slightly recessed from the back of the frame. -
Attach Offset Clips:
Position offset clips or z-clips on the back of the frame so they overlap onto the wooden stretcher bars of the canvas. -
Secure with Screws:
Screw the clips into both the frame and the canvas stretcher bars. This holds the artwork firmly in place without damaging the canvas surface.
Level Up: Depth Play
For a ‘shadow box’ effect, use lumber that is 1/2 inch deeper than your canvas. Install the canvas flush with the back, creating a recessed reveal at the front.
Hang your newly framed piece and enjoy the warmth natural wood brings to your space


Thin Minimal Frame for a Clean Modern Look
Achieve that gallery-worthy aesthetic with this DIY thin wood frame project. The clean lines of natural oak combined with a simple build process create a timeless, modern border that lets your artwork shine without distraction.
Step-by-Step
Materials
- 1×2 inch oak lumber (or 1×1 for ultra-thin profile)
- Stretched canvas (standard depth)
- Wood glue
- Miter saw or miter box with hand saw
- Corner clamps (straps or 90-degree clamps)
- Sandpaper (120, 220, and 320 grit)
- Matte clear polyurethane or wax finish
- Pin nailer or finish nails
- Wood filler (oak tint)
- Measuring tape
- Offset clips or framing points
Step 1: Measuring & Cutting
-
Measure the canvas:
Start by measuring the exact dimensions of your stretched canvas. Don’t rely on the label size; measure the actual width and height to the millimeter to ensure a snug fit. -
Calculate the cuts:
Add approximately 1/8 inch or 3mm to your measurements for a tiny bit of ‘breathing room’ so the canvas doesn’t buckle inside the frame. -
Set up the miter saw:
Adjust your miter saw to a sharp 45-degree angle. Test the cut on a scrap piece of wood first to verify the angle is perfectly accurate. -
Cut the first side:
Cut the first framing piece, measuring from the ‘short point’ of the miter (the inside edge) to match your canvas dimension plus the clearance allowance. -
Cut matching pairs:
Cut the second piece for the opposite side. A great trick I use is to clamp the first cut piece to the uncut stock to use it as a physical template, ensuring identical lengths. -
Complete the set:
Repeat the process for the top and bottom pieces. You should now have four pieces of oak with 45-degree miters on both ends.
Grain Matching
For a seamless look, cut all four sides from a single long board in sequential order. The grain pattern will ‘flow’ around the corners continuously.
Step 2: Assembly & Joining
-
Dry fit the frame:
Lay the four pieces out on a flat workshop table to form a rectangle. Check closely at the corners to ensure the miters close up tight without gaps. -
Apply glue:
Apply a generous amount of high-quality wood glue to the mitered faces. Spread it evenly with a small brush or your finger to cover the entire grain. -
Clamp the corners:
Bring the corners together and secure them using a strap clamp wrapped around the perimeter, or individual 90-degree corner clamps. Tighten until glue squeezes out slightly. -
Reinforce the joints:
While clamped, drive a few pin nails or small finish nails into the corners from the top and bottom edges (if possible) or the side for extra strength. -
Clean up glue:
Wait about 20-30 minutes for the glue to skin over, then scrape off the excess squeeze-out with a chisel or damp cloth before it hardens completely.
Floater Variation
Make this a ‘floater frame’ by using L-shaped molding stock. This leaves a visible gap between canvas and frame, creating a sense of suspension.
Step 3: Finishing Touches
-
Initial sanding:
Once the glue draws fully (usually overnight), sand the frame starting with 120-grit paper to level out any uneven joints at the corners. -
Refine the surface:
Switch to 220-grit sandpaper and go over the entire frame, smoothing the faces and slightly rounding over the sharp outer edges for a softer feel. -
Polish sanding:
Finish with a quick pass of 320-grit paper. Wipe away all sawdust with a tacky cloth or a rag dampened with mineral spirits. -
Apply the finish:
Apply a clear matte polyurethane or a wood wax using a lint-free cloth. This protects the wood while keeping that raw, natural oak look seen in the photo. -
Buff and dry:
Let the finish dry according to the can’s instructions, then lightly buff it with a clean cloth to remove any dust nibs. -
Install the canvas:
Place the frame face down and drop the canvas into it face down. Use offset clips or framing points on the back to secure the canvas wooden stretcher to the new oak frame.
Hang your newly framed canvas near a window to let the natural light highlight the beautiful wood tones


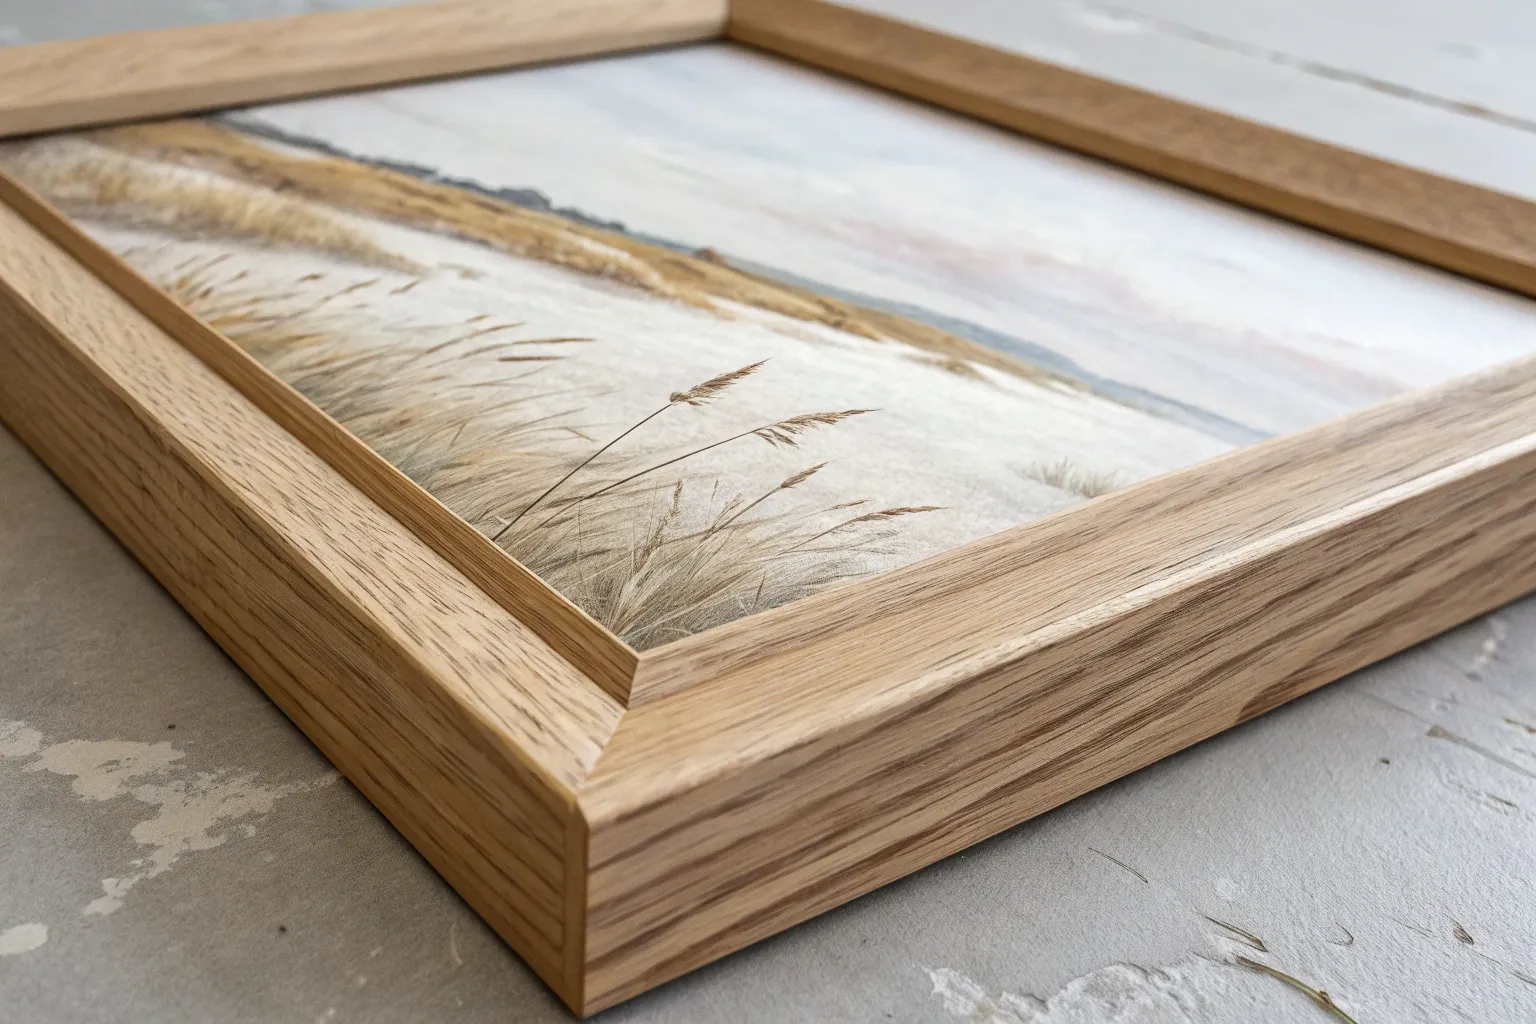
Natural Wood Frame to Warm Up the Canvas
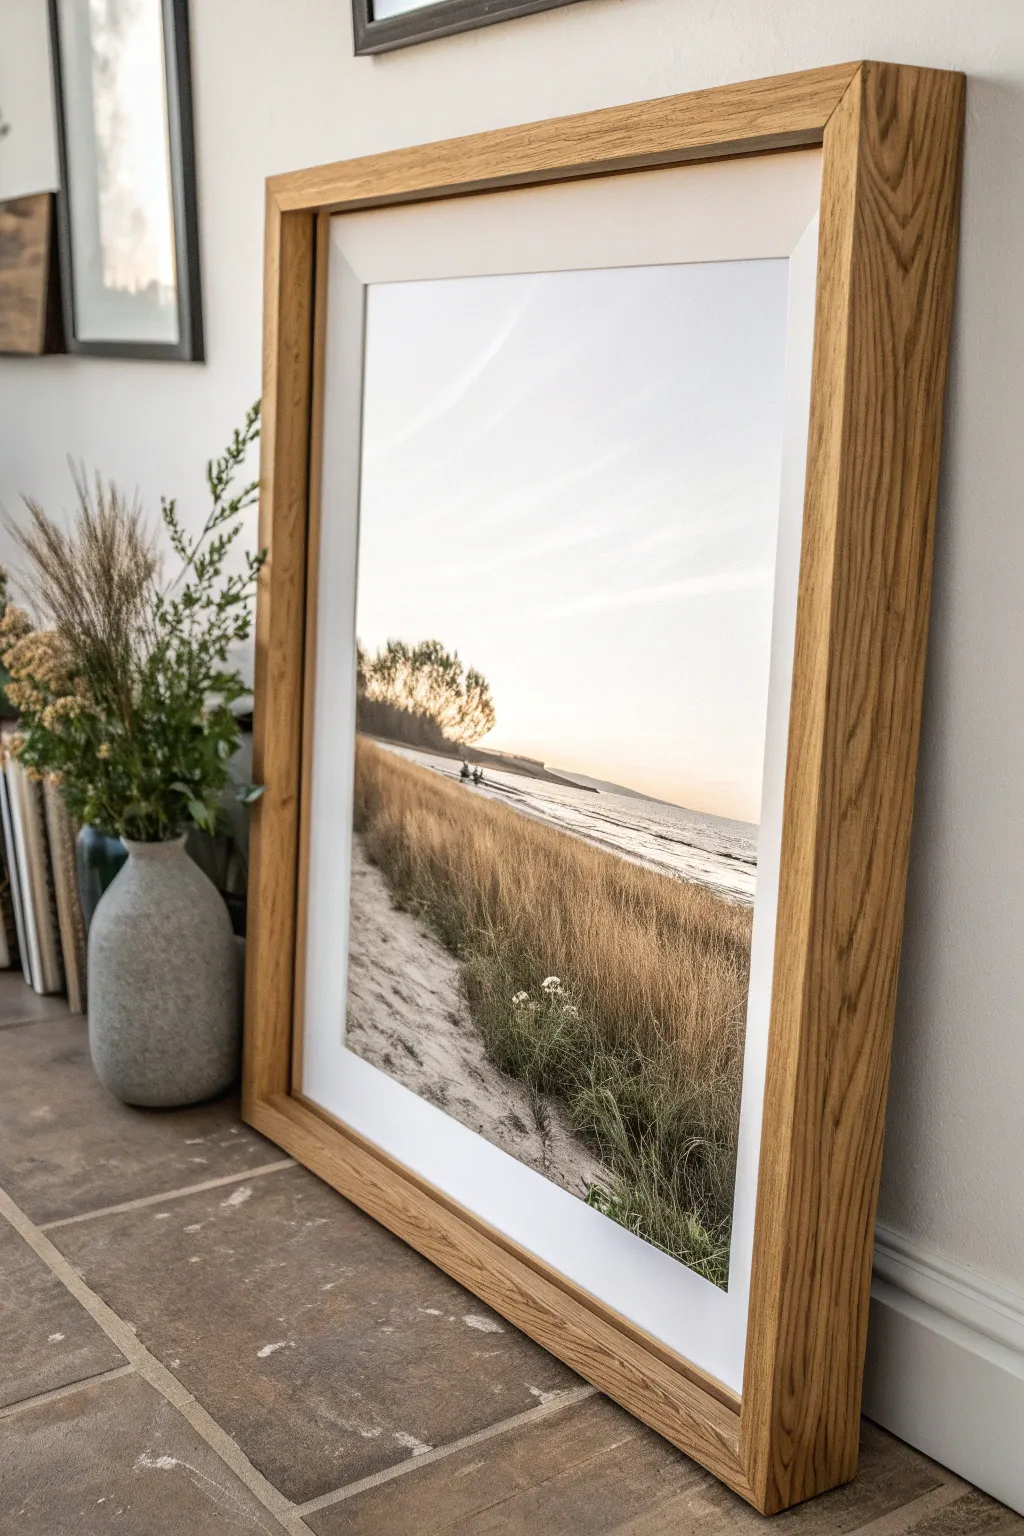
Embrace the natural warmth of timber by building a deep-set oak frame that gives your coastal photography breathing room. This project creates a gallery-worthy shadow box effect, where the light wood tones perfectly complement the serene hues of beach landscapes.
Step-by-Step Tutorial
Materials
- Solid oak lumber (1×2 inches or similar, enough for perimeter)
- Square dowels (1/2 inch) or wood strips for the inner rabbet
- Large format coastal art print
- Pre-cut white mat board (mount)
- Foam board backing
- Glass or acrylic glazing cut to size
- Wood glue
- Miter saw or miter box
- Band clamp or corner clamps
- Sandpaper (120, 220, and 320 grit)
- Natural finishing oil (Danish oil or Tung oil)
- Clean lint-free rags
- Flathead framing points or glazing points
- Point driver or flathead screwdriver
Step 1: Preparing the Wood Stock
-
Measure the Artwork:
Begin by measuring the total dimensions of your matted print or artwork. You’ll need these precise numbers to determine your interior frame dimensions. -
Calculate Frame Size:
For the main frame structure, add about 1/8 inch to the total height and width of your glass and backing stack to allow for thermal expansion. -
Select the Grain:
Examine your oak boards closely. I find it best to orient the most interesting grain patterns so they face outward on the sides, as this is what you’ll see most often. -
Create the Rabbet (Option A):
If you have a router table, cut a rabbet (ledge) 1/2 inch deep on the inside back edge of your oak stock to hold the artwork. -
Create the Rabbet (Option B):
Alternatively, you can glue thin square dowels or wood strips along the inside bottom edge of your main boards to create a ledge for the glass and art to rest against.
Gaps in the Corners?
If your miters aren’t perfect, rub a metal screwdriver shank firmly over the corner joint. This burnishing technique crushes the wood fibers slightly to close small visible gaps.
Step 2: Construction and Assembly
-
Miter the Corners:
Set your miter saw to exactly 45 degrees. Cut the four sides of your frame, double-checking lengths against your measurements to ensure the pairs match perfectly. -
Dry Fit the Frame:
Assemble the four pieces without glue first to check that the corners close tightly and the structure is square. -
Glue Up:
Apply a generous amount of high-quality wood glue to the mitered ends. Bring the corners together carefully. -
Clamp and Cure:
Secure the frame using a band clamp or four corner clamps. Wipe away any glue squeeze-out immediately with a damp rag before it dries. -
Wait for Stability:
Let the frame sit undisturbed for at least 24 hours to ensure the bond is completely cured.
Pro Tip: The Floating Look
To get the deep shadow look seen in the photo, create a deeper frame rebate and place a spacer between the glass and the mat board to push the art backward.
Step 3: Finishing the Wood
-
Initial Sanding:
Start sanding the entire frame with 120-grit paper to level out the joints and remove machine marks. -
Refining the Surface:
Progress to 220-grit sandpaper, smoothing the wood until it feels soft to the touch. Pay special attention to easing the sharp corners slightly. -
Final Polish:
Finish with a quick pass of 320-grit paper for a furniture-grade smoothness. -
Apply Oil:
Flood the surface with a natural finishing oil like Danish oil. Let it penetrate the grain for about 10 minutes. -
Buff Dry:
Wipe off all excess oil with a clean rag. The oak should look matte and warm, not glossy or wet.
Step 4: Final Assembly
-
Clean the Glazing:
Clean your glass or acrylic thoroughly on both sides to remove dust and fingerprints. -
Stack the Art:
Place the frame face down. Insert the glass first, followed by the white mat, the print, and finally the foam backing board. -
Secure the Back:
Use a point driver or push glazing points into the frame edge behind the backing board to hold everything tightly in place. -
Add Hardware:
Install D-rings and framing wire on the back about one-third of the way down from the top edge.
Lean your finished masterpiece against a neutral wall to let the natural wood grain shine.
BRUSH GUIDE
The Right Brush for Every Stroke
From clean lines to bold texture — master brush choice, stroke control, and essential techniques.
Explore the Full Guide
Matte Black Frame for High Contrast and Drama
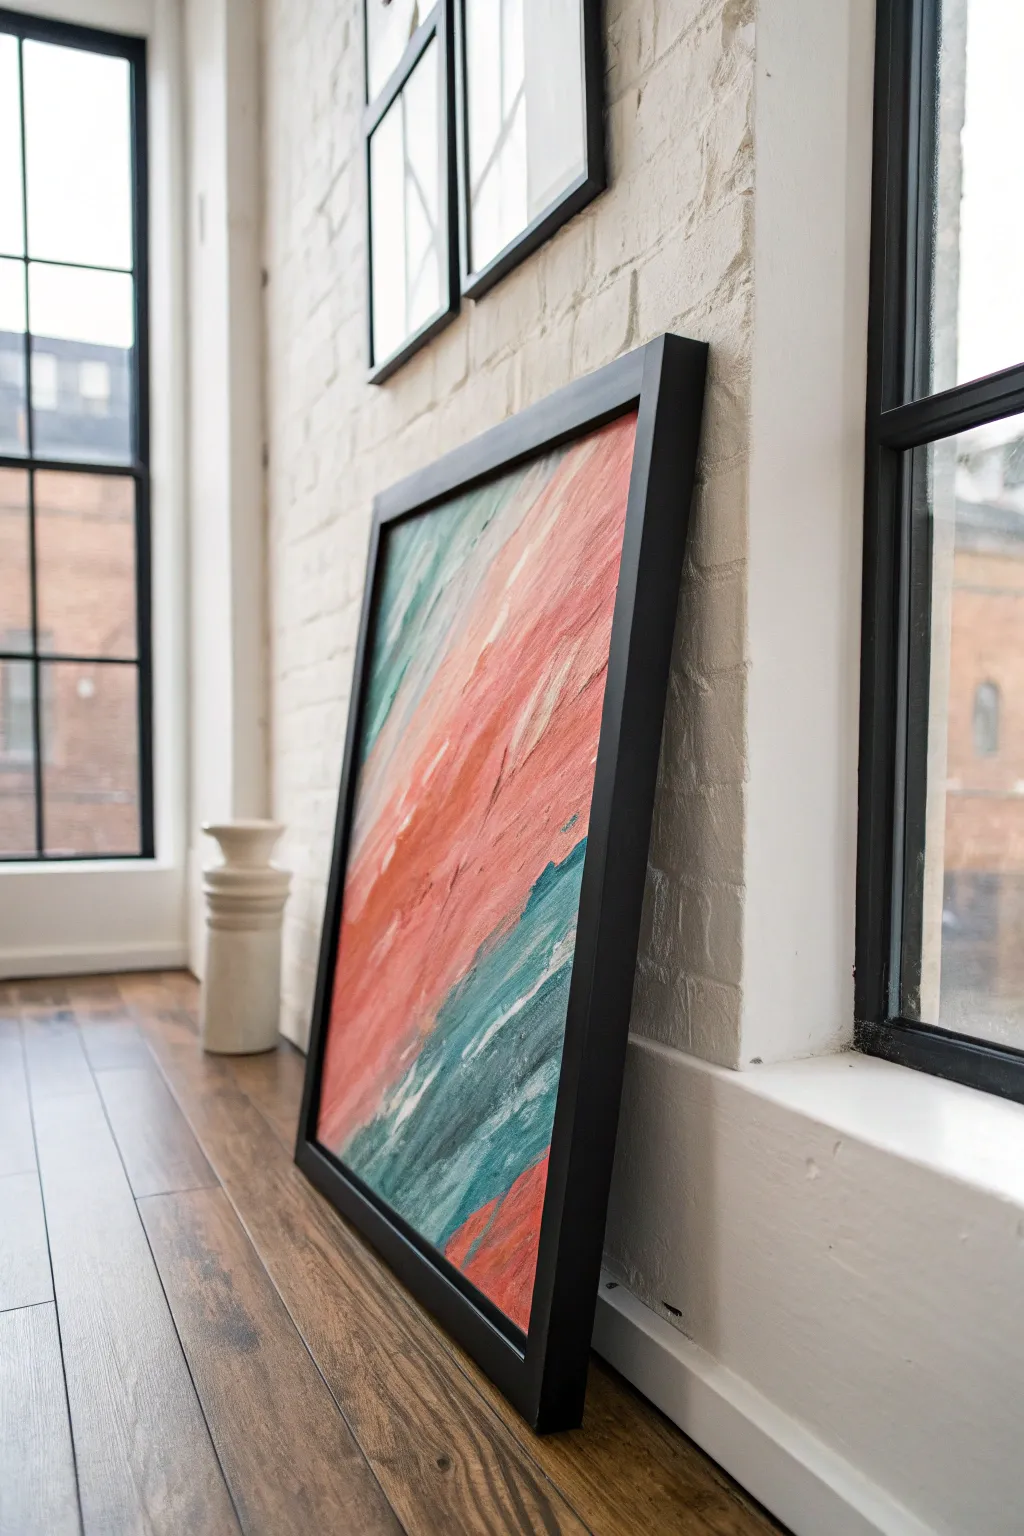
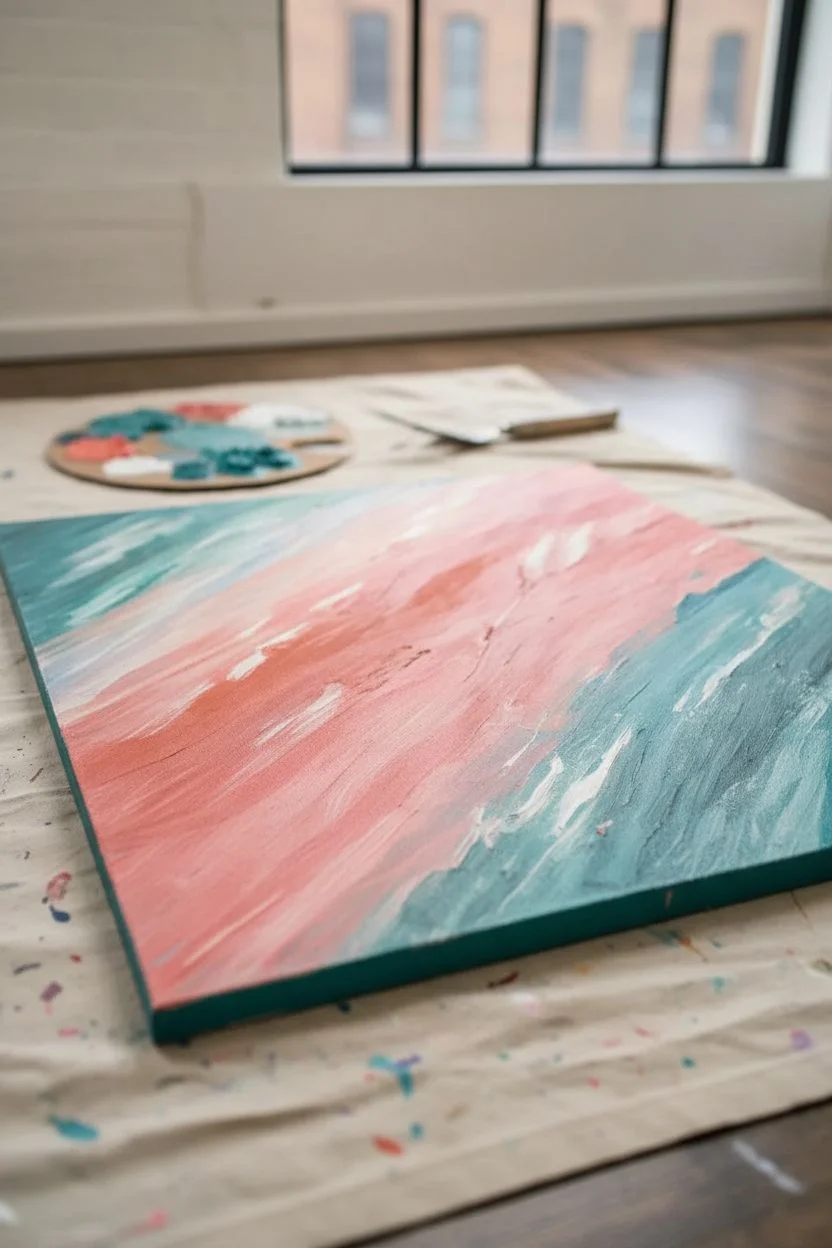
This project combines bold, sweeping strokes of teal and coral with a substantial matte black frame to create a striking piece of modern art. The deep frame adds immediate gallery-quality drama, making simple abstract techniques look sophisticated and intentional.
Step-by-Step Guide
Materials
- Large stretched canvas (approx. 24×30 inches)
- Heavy body acrylic paints (Teal/Turquoise, Salmon/Coral Pink, Titanium White)
- Wide flat paintbrush (2-3 inches)
- Palette knife
- Matte medium or texture paste (optional)
- Pre-made deep matte black float frame or gallery frame
- Framing clips or offset clips
- Screwdriver
- Drop cloth
Step 1: Creating the Abstract Art
-
Prep the workspace:
Lay down your drop cloth and set up your canvas on a flat surface or easel. Ensure the surface is stable, as you’ll be applying some pressure with broad strokes. -
Mix your colors:
On your palette, prepare generous amounts of teal, coral, and white. Keep them separate initially, but allow room for blending. If you want more texture, mix a little matte medium or texture paste into the colors. -
Start the teal diagonal:
Using the wide flat brush, load up the teal paint. Starting from the bottom left corner, sweep upwards towards the top left in a diagonal motion. Don’t aim for perfect coverage; let the brush texture show. -
Add the coral section:
Clean your brush thoroughly. Now, load it with the coral pink paint. Apply this color in the center of the canvas, mirroring the diagonal direction of the teal. Let the edges overlap slightly with the teal areas to create organic transitions. -
Establish the white highlights:
Introduce Titanium White into the composition. Focus on the upper right section and areas between the coral and teal. The white adds brightness and breaks up the solid blocks of color. -
Encourage streaking:
While the paint is still wet, use dry brush techniques to drag colors into one another. The goal is to create a dynamic, wind-swept look where the colors streak together rather than blend into a new muddy color. -
Layer for depth:
Once the first layer is tacky but not fully dry, go back in with your palette knife. Scrape distinct lines of pure white or coral over the existing paint to add sharp, textured accents. -
Let it cure:
Allow the painting to dry strictly according to the paint manufacturer’s instructions. Thick acrylics can take 24 hours to fully cure, which is essential before framing.
Clean Edges Trick
Apply painter’s tape to the sides of your canvas before painting. Peel it off for a crisp, white edge that looks professional inside a float frame.
Step 2: The Matte Black Frame
-
Inspect the frame:
Examine your matte black frame. If you are refurbishing an old frame, ensure you have sanded and painted it with a flat black spray paint to achieve that light-absorbing, dramatic finish shown in the photo. -
Clean everything:
Wipe down the frame and ensure your dried canvas is free of dust. Use a microfiber cloth to gently clean the frame’s surface to prevent fingerprints. -
Position the artwork:
Place the frame face down on a soft surface (like a towel) to protect the finish. Carefully lower your canvas face down into the frame recess. -
Check the gap:
If using a float frame, turn it over briefly to ensure the gap between the canvas edge and the frame is even on all four sides. I like to use playing cards as spacers to keep the gap consistent. -
Secure the back:
Flip perfectly back over. Using your offset clips or framing hardware, secure the canvas to the frame. Place clips about 6-8 inches apart for a sturdy hold. -
Verify stability:
Gently shake the frame to make sure the canvas doesn’t rattle. Tighten screws if there is any movement. -
Add felt pads:
Stick small felt pads to the bottom corners of the frame backing. This protects your floor or wall, especially if you plan to lean the art casually as pictured. -
Final wipe down:
Give the matte black frame one last wipe to remove any dust that settled during assembly. The matte finish looks best when absolutely pristine.
Texture Boost
Before painting, apply a layer of coarse molding paste with a palette knife in diagonal ridges. This physical texture will catch the light beautifully.
Now you have a bold statement piece ready to bring contrast and color to your space
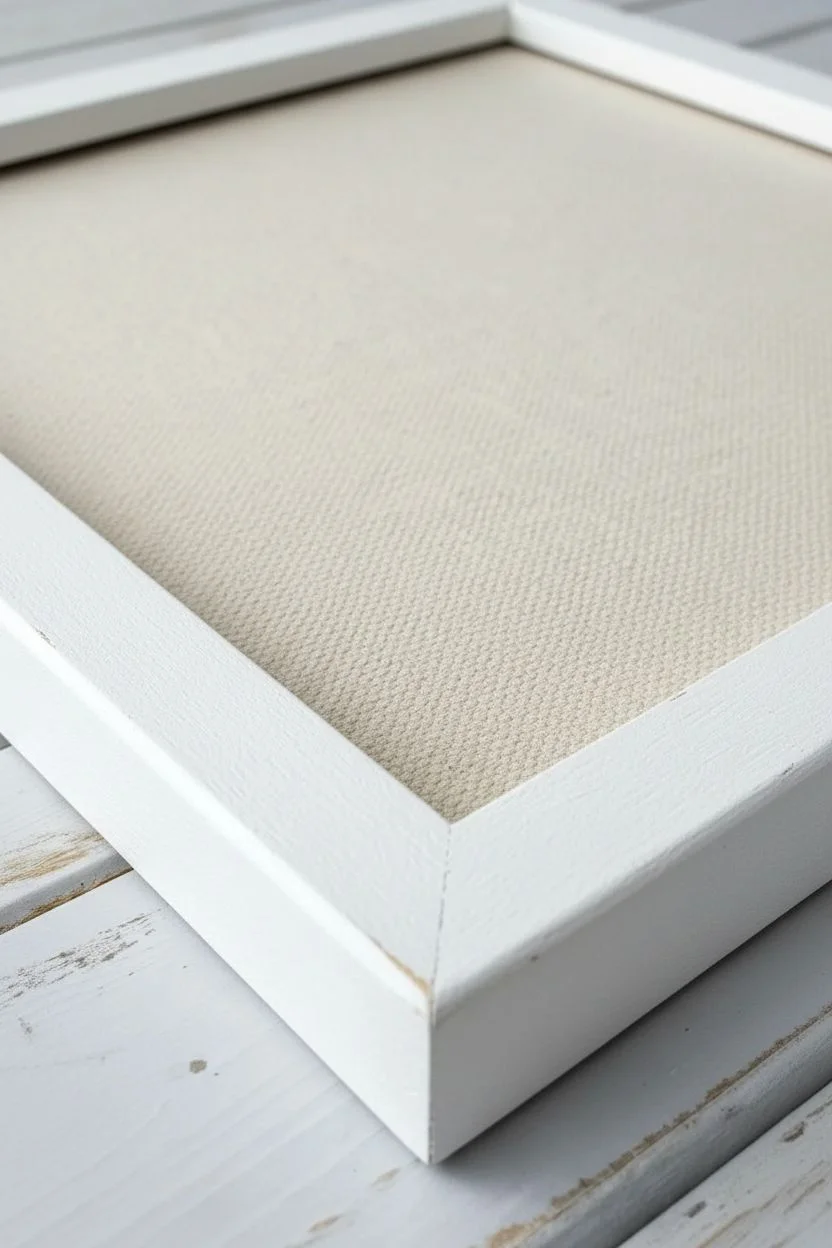
Bright White Frame for an Airy Gallery Vibe
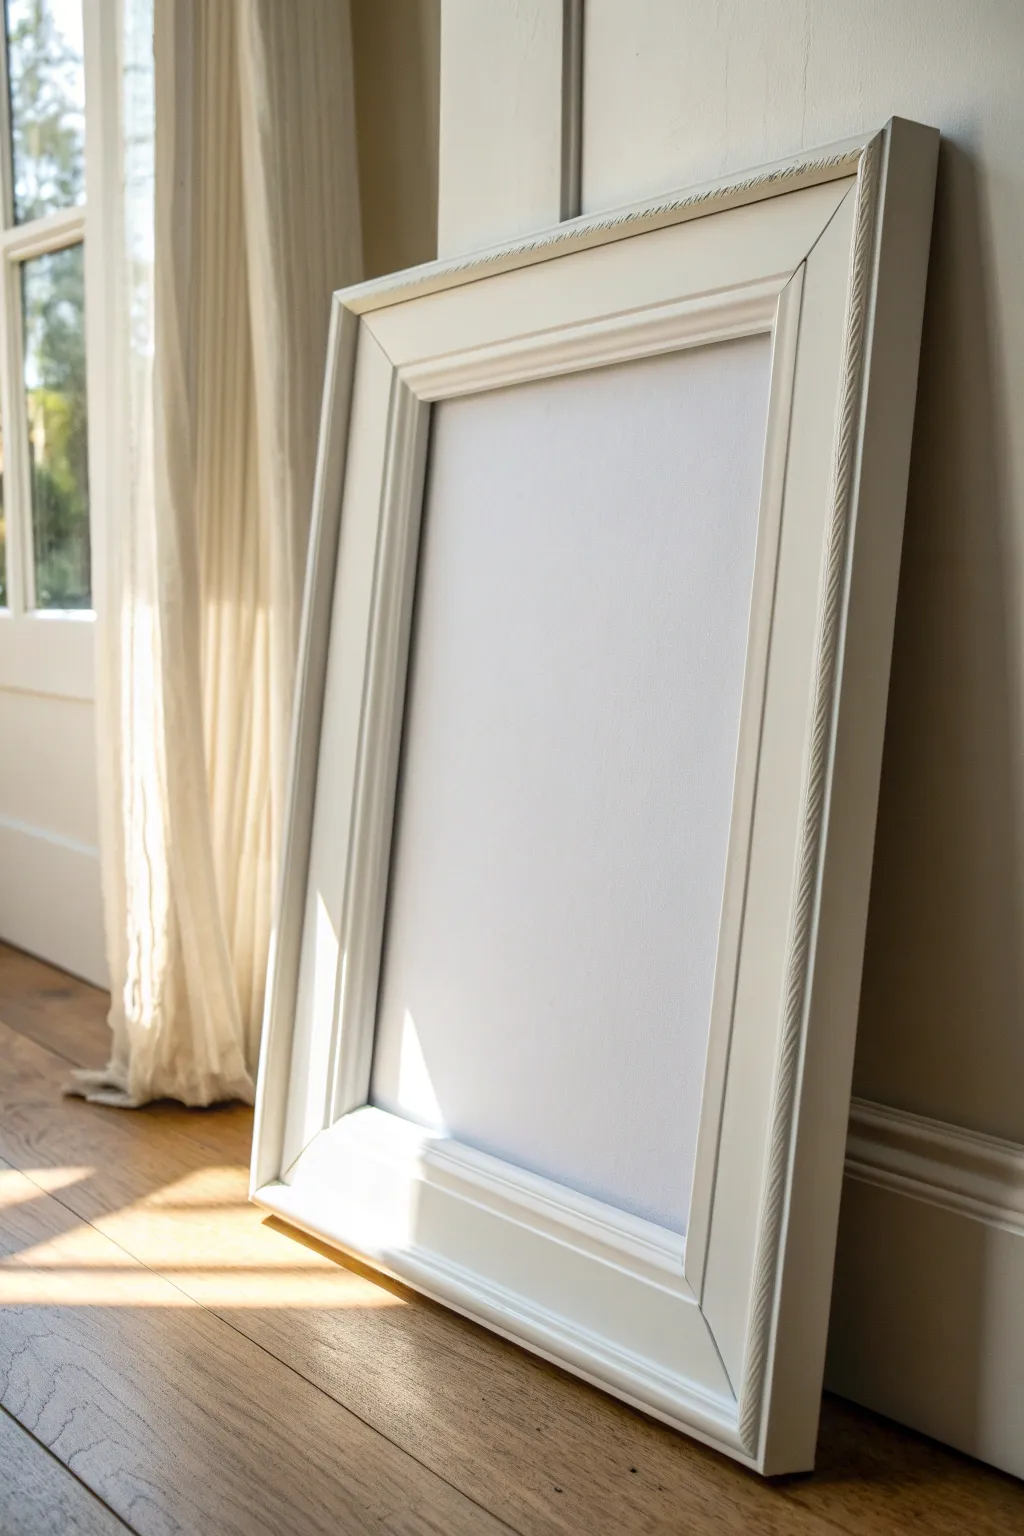

Achieve that high-end art gallery aesthetic right at home with this pristine white frame project. Its substantial molding and bright finish create an airy, sophisticated border that makes any canvas pop against a neutral wall.
Step-by-Step Tutorial
Materials
- Large wooden picture frame (wide profile molding)
- Sandpaper (120 and 220 grit)
- Tack cloth
- Wood filler
- Primer (high-adhesion, white)
- Semi-gloss or satin white acrylic latex paint
- High-quality synthetic bristle brush (2-inch)
- Small foam roller (optional for flat surfaces)
- Drop cloth
- Painter’s pyramids or wooden blocks
Step 1: Preparation
-
Clean the surface:
Begin by wiping down your wooden frame with a damp cloth to remove any dust or grime. If you are repurposing an old thrift store frame, ensure you remove any existing backing, glass, or hardware first. -
Fill imperfections:
inspect the frame for any deep scratches, nail holes, or gaps in the mitered corners. Apply a small amount of wood filler to these areas with your finger or a putty knife, smoothing it out as best as you can. -
First sand:
Once the filler is completely dry, take your 120-grit sandpaper and sand the filled areas until they are flush with the wood. Then, lightly sand the entire frame to scuff up the surface, which helps the primer adhere better. -
Remove dust:
Thoroughly wipe the entire frame with a tack cloth. It’s crucial to remove every speck of sawdust, as any debris left behind will show up in your smooth white finish. -
Set up workspace:
Lay down a drop cloth in a well-ventilated area. Elevate the frame using painter’s pyramids or simple scrap wood blocks; this allows you to paint the edges without the frame sticking to the drop cloth.
Fix Sticky Situations
If paint bridges across the corners or details, run a clean, dry brush over the area while wet to soak up excess. If it dries with a drip, slice it off with a razor blade and touch up.
Step 2: Priming
-
Apply first coat of primer:
Stir your white primer well. Using your synthetic brush, apply a thin, even coat over the entire frame. Don’t worry if the wood grain shows through slightly; the goal is adhesion, not full coverage yet. -
Check the corners:
Pay special attention to the inner corners and detailed molding grooves. Use the tip of your brush to ensure primer gets into these crevices without pooling. -
Let it dry:
Allow the primer to dry according to the manufacturer’s instructions, usually about an hour. It should feel dry to the touch and not tacky. -
Light sanding:
Once dry, very lightly run 220-grit sandpaper over the primed surface. This knocks down any raised wood grain or brush marks. Wipe away the dust with your tack cloth again.
Add Vintage Charm
For a less modern look, once the white paint is dry, lightly sand the raised edges of the molding to reveal a bit of the wood underneath, then seal with clear wax.
Step 3: Painting
-
First coat of white:
Stir your semi-gloss or satin white paint. Apply the first coat using long, smooth strokes. If the frame has wide, flat sections, I like to use a small foam roller here for an ultra-smooth finish, following up with a brush for the details. -
Watch for drips:
As you work around the frame, keep an eye on the edges and corners for paint buildup. Gently brush out any drips immediately before they have a chance to set. -
Dry thoroughly:
Let this first coat dry completely. White paint can be unforgiving if you rush, so patience is key for that flawless gallery look. -
Assess coverage:
Check if the wood color is still bleeding through. If you’re covering dark wood, you might need a second or even third light coat. It is always better to apply multiple thin coats than one thick, gloppy one. -
Final coat:
Apply your final coat of paint, moving continuously around the frame to keep a ‘wet edge.’ This minimizes brush marks. Allow this coat to cure fully for at least 24 hours before handling.
Step 4: Assembly
-
Insert artwork:
Once the paint is fully cured and hardened, turn the frame face down on a soft towel. Place your canvas or artwork into the recess. -
Secure the back:
Use glazier points or offset clips to secure the canvas into the frame. Ensure it sits tight against the front lip of the frame. -
Add hanging hardware:
If you plan to hang it, attach D-rings and wire to the back of the frame, positioning them about one-third of the way down from the top.
Now you have a stunning, professional-looking frame ready to showcase your favorite art or stand beautifully on its own against the wall

PENCIL GUIDE
Understanding Pencil Grades from H to B
From first sketch to finished drawing — learn pencil grades, line control, and shading techniques.
Explore the Full Guide
Metallic Leaf Finish for a Luxe Canvas Border
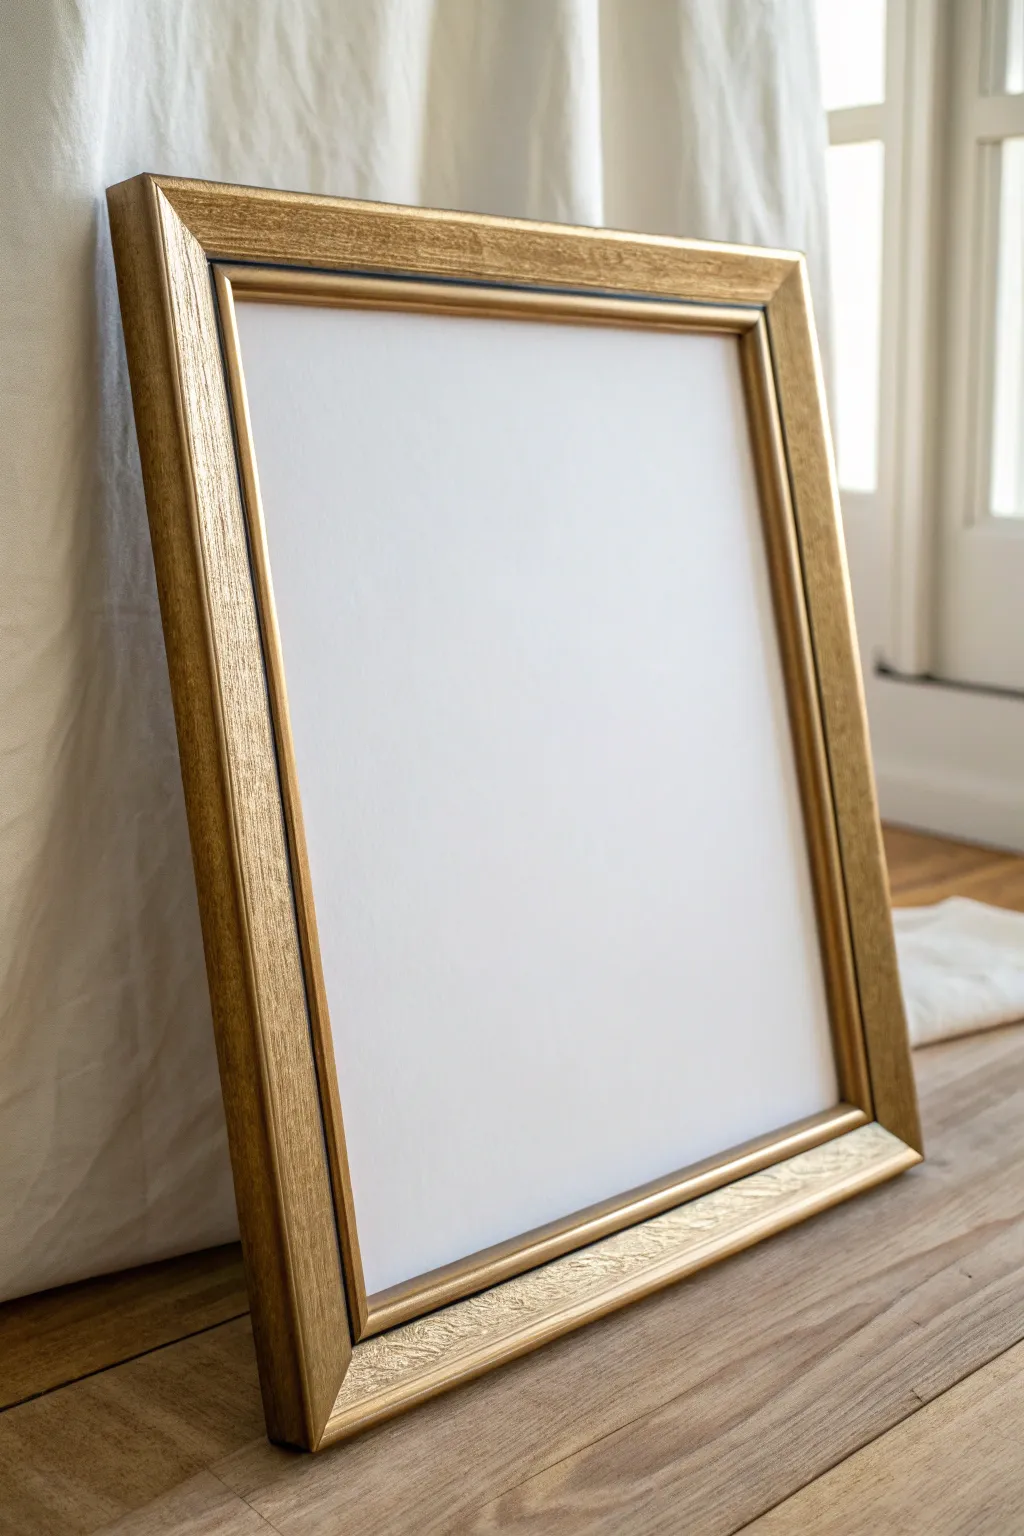
Transform a plain wooden canvas frame into a high-end statement piece using the timeless technique of metallic leafing. This project adds a textured, luxurious gold finish that catches the light beautifully, elevating even the simplest artwork.
Detailed Instructions
Materials
- Unfinished wood canvas floater frame or standard frame
- Fine-grit sandpaper (220 grit)
- Red or ochre acrylic base coat paint
- Flat paintbrush
- Metal leaf adhesive size (water-based)
- Imitation gold or copper leaf sheets
- Small soft bristle brush (for adhesive)
- Large fluffy brush (for smoothing leaf)
- Cotton gloves (optional)
- Soft cloth
- Clear acrylic sealer (spray or brush-on)
Step 1: Preparation
-
Sand the surface:
Begin by lightly sanding your raw wood frame with 220-grit sandpaper. You want to remove any splinters or rough patches, but don’t aim for glass-smooth perfection; a little texture helps the leaf look more organic. -
Wipe it down:
Use a damp cloth or tack cloth to remove every speck of sanding dust. Dust particles can create bumps under the delicate metal leaf later. -
Apply the warm base coat:
Paint the entire front and sides of the frame with a red oxide, terracotta, or ochre acrylic paint. This traditional underlying color adds warmth and depth if the gold leaf cracks slightly or is distressed. -
Let the base dry:
Allow the base coat to dry completely. If the wood was very thirsty and the coverage looks splotchy, apply a second coat for a solid, rich background color.
Sticky Situation?
If the leaf tears too much while applying, your adhesive was likely still too wet. Wait longer next time until it feels tacky but dry.
Step 2: Applying the Size
-
Brush on adhesive size:
Using a dedicated brush, apply a thin, even layer of metal leaf adhesive size over the painted areas. Avoid pooling the liquid in corners. -
Wait for the tack:
Let the adhesive sit for about 15 to 30 minutes. It needs to transition from wet and milky to clear and tacky. Test it with a knuckle—it should feel sticky like tape, but not wet to the touch.
Step 3: Gilding Process
-
Place the first sheet:
Carefully pick up a sheet of gold leaf. I find wearing cotton gloves helps prevent the natural oils on my fingers from tarnishing the metal. Lay the sheet gently onto the sticky frame surface. -
Smooth gently:
Use a very soft, dry brush to lightly pat the leaf down onto the adhesive. Don’t drag the brush yet; just ensure contact is made. -
Continue layering:
Overlap the next sheet of leaf slightly with the previous one. Continue this process until the entire face and outer edge of the frame are covered. -
Address the sides:
Don’t forget the inner and outer sides of the frame. Use smaller scraps of leaf to fill in these narrower sections to avoid waste. -
Burnish the leaf:
Once covered, use a large, fluffy makeup brush or soft gilding brush to rub the surface in circular motions. This removes the excess loose bits (skewings) and polishes the leaf onto the wood.
Vintage Patina
After sealing, wipe a dark brown glazing medium into the corners and wipe back the excess for an aged, museum-quality antique look.
Step 4: Finishing Touches
-
Inspect for gaps:
Look closely for any missed spots. If you see the red base showing through too much, dab a tiny bit of adhesive size, wait for it to get tacky, and press a scrap of leaf over the hole. -
Optional distressing:
For an antique look similar to the inspiration image, use a stiff-bristle brush or fine steel wool to gently scratch away small areas of leaf, revealing the red base coat underneath. -
Clean up:
Brush away all the fine gold dust from the nooks and crannies of the frame profile. -
Seal the work:
Metal leaf can tarnish over time due to oxidation. Apply a coat of clear acrylic sealer or shellac to protect the shine and lock everything in place. -
Dry and assemble:
Let the sealer cure for at least 24 hours before inserting your canvas or artwork.
Now you have a stunning, light-catching frame ready to display your favorite art
Deep Tray Frame for Thick Gallery-Wrapped Canvas
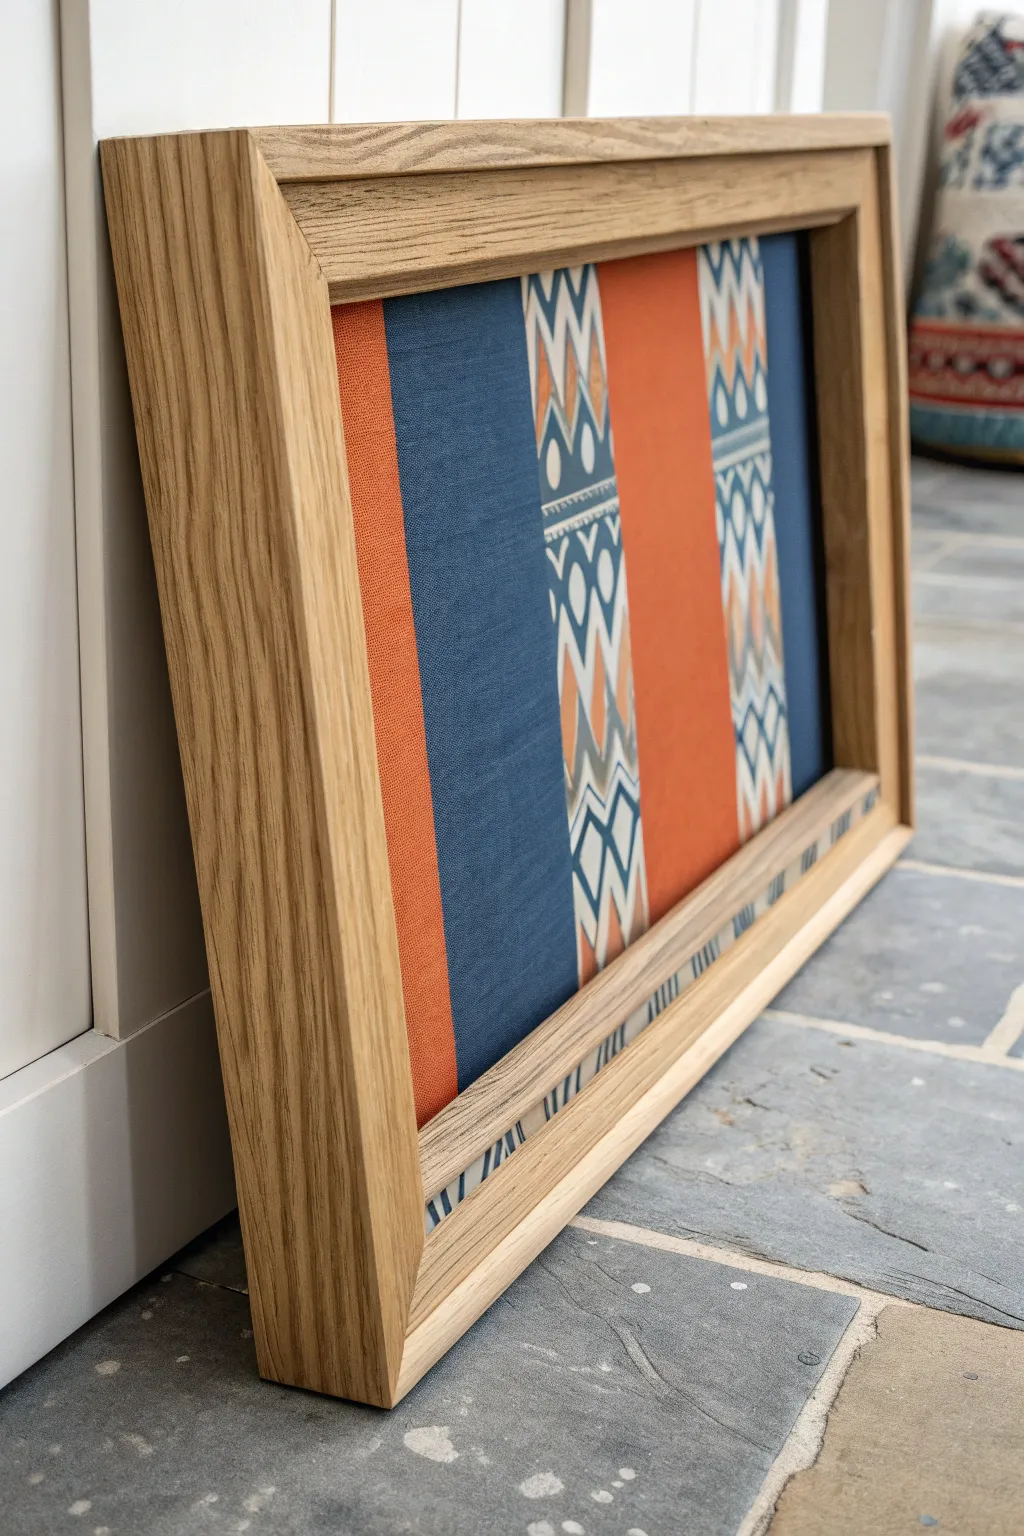
This project elevates a simple canvas by wrapping it in bold, patterned fabric and encasing it within a chunky, deep-set oak tray frame. The gap between the canvas and the frame edge adds a professional gallery feel, allowing the texture and color of the fabric to truly pop against the natural wood grain.
Step-by-Step
Materials
- Deep-edge canvas or wooden panel (approx. 1-1.5 inches thick)
- Solid oak planed timber (1-inch thickness)
- Striped fabric (orange, blue, and ikat pattern)
- Fabric glue or spray adhesive
- Heavy-duty staple gun and staples
- Fabric scissors
- Miter saw or miter box with hand saw
- Wood glue
- Corner clamps or strap clamp
- Sandpaper (120, 180, and 220 grit)
- Small L-brackets or offset clips with screws
- Drill with pilot bit
- Clear wood finish (oil or matte varnish)
- Lint-free cloth
- Measuring tape
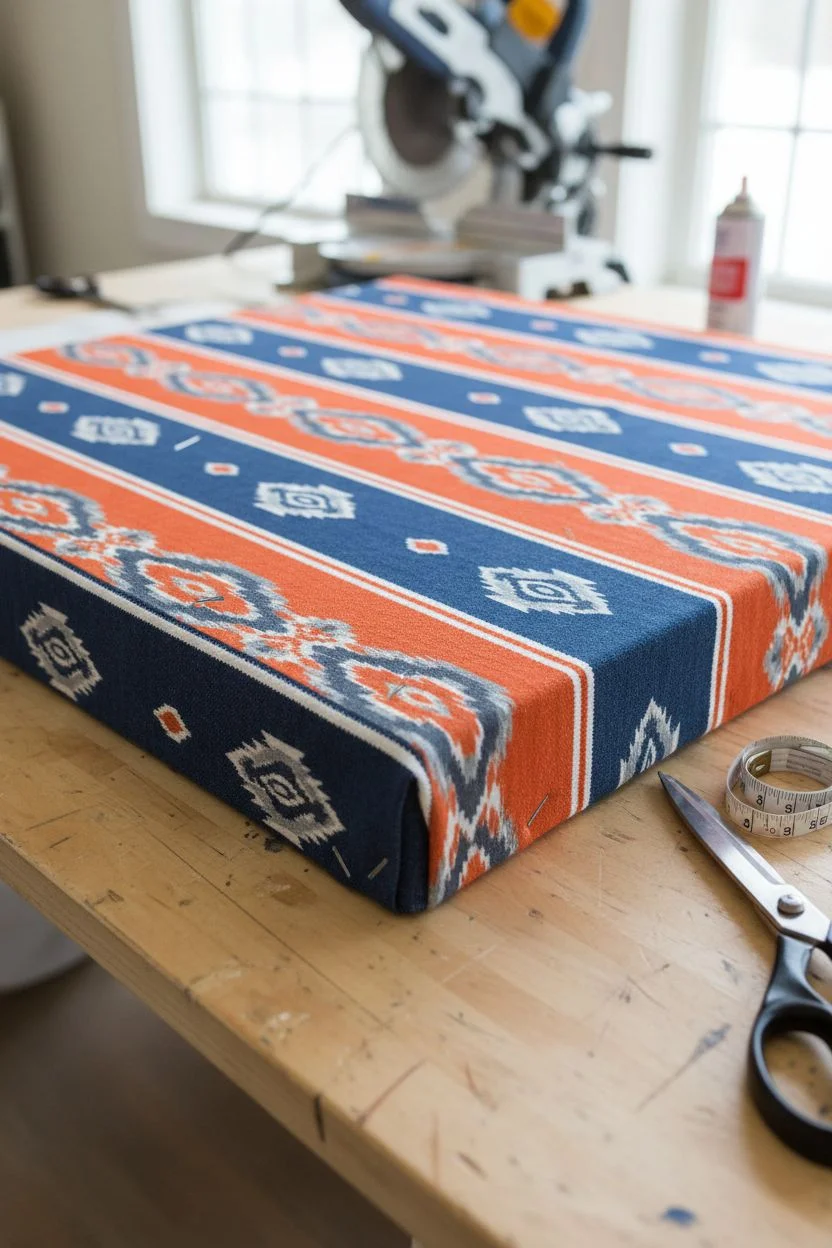
Step 1: Preparing the Fabric Artwork
-
Select your textile:
Choose a heavy-weight cotton or upholstery fabric with distinct vertical stripes. The pattern in the image uses alternating blocks of solid orange, denim blue, and a geometric ikat design. -
Measure and cut fabric:
Lay your fabric face down on a clean surface. Place the canvas face down on top of it. Measure enough fabric to wrap around the front, cover the deep sides, and fold onto the back by at least 2 inches. Cut the fabric to size. -
Position the pattern:
Check the alignment carefully before attaching anything. Ensure the stripes run perfectly vertical and parallel to the canvas edges so the final piece doesn’t look crooked. -
Anchor the fabric:
Apply a light mist of spray adhesive to the front of the canvas to hold the fabric in place (optional but helpful). Pull the fabric tight over one long side and staple it to the back frame in the center. -
Staple and stretch:
Pull the fabric taut on the opposite side and place a staple in the center. Continue this process, working from the center outwards to the corners on all four sides, ensuring tension is even. -
Fold neat corners:
For the corners, fold the fabric similarly to gift wrapping ‘hospital corners.’ Tuck the excess fabric neatly to create a sharp 90-degree angle and staple securely on the back to minimize bulk.
Clean Corner Cuts
If your miter cuts have tiny gaps after gluing, rub a little sawdust from your sanding step mixed with wood glue into the crack. Sand it flush once dry for an invisible fix.
Step 2: Building the Deep Tray Frame
-
Calculate frame dimensions:
Measure the outer dimensions of your wrapped canvas. To create the floating ‘tray’ effect, add approximately 1/4 inch (6mm) to these measurements for a small shadow gap between the canvas and the frame. -
Measure the timber depth:
The oak timber needs to be deeper than the canvas. If your canvas is 1.5 inches thick, aim for timber that is at least 2 inches wide to create that recessed look visible in the photo. -
Cut the miters:
Set your miter saw to a precise 45-degree angle. Cut the four sides of the frame from your oak timber, ensuring the inner edge of the miter corresponds to your calculated dimensions (canvas size + gap). -
Test the fit:
Dry-assemble the four pieces around your fabric canvas on a flat surface. Check that the gap is even on all sides and the corners meet cleanly. -
Glue the frame:
Apply a high-quality wood glue to the mitered faces. Join the corners together. I find using a strap clamp is the best way to apply even pressure to all four corners at once while the glue sets. -
Sand the surfaces:
Once the glue is completely dry, remove the clamps. Sand the frame thoroughly, starting with 120 grit to smooth any uneven joints, then moving to 180 and finally 220 for a silky finish. -
Apply finish:
Wipe away all dust with a lint-free cloth or tack cloth. Apply a clear matte varnish or Danish oil to the oak to protect it and bring out the grain warmth without altering the color too drastically.
Step 3: Assembly
-
Position spacers:
Place the frame face down. Insert the artwork face down into the frame. Use small scraps of cardboard or 1/8 inch spacers between the canvas and the frame to ensure the shadow gap is perfectly centered. -
Install the backing:
Since this is a tray frame, the canvas sits inside it without a rebate. You’ll need to secure it from the back. -
Drill pilot holes:
Select locations for your offset clips or L-brackets. Drill tiny pilot holes into the frame and the back of the canvas stretcher bars to prevent the wood from splitting. -
Secure the artwork:
Screw the offset clips in place, bridging the gap between the frame and the canvas stretcher. Ensure you don’t use screws that are too long, or they might poke through the front of your artwork.
Add a Floating Illumination
Install a thin strip of battery-operated LED lights along the inner bottom edge of the frame to cast a soft upward glow on the fabric texture at night.
Now you have a substantial, gallery-worthy piece that adds texture and warmth to any room


Distressed or Weathered Frame for Rustic Texture
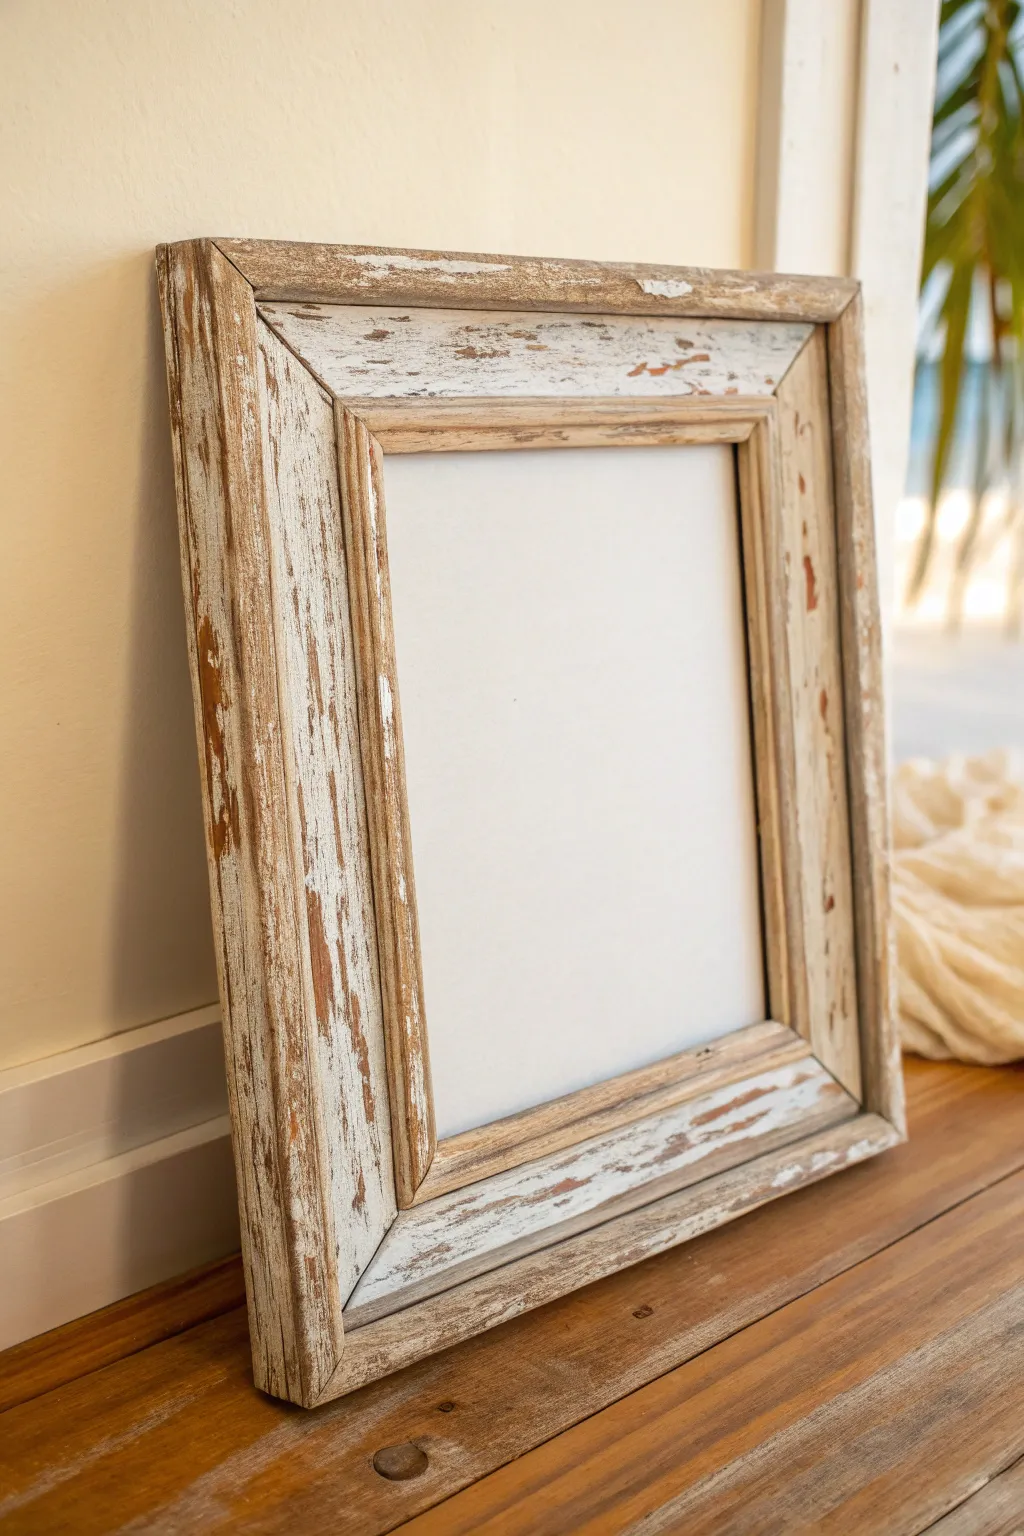
Achieve the charm of sun-bleached driftwood or salvaged barn wood with this rustic frame makeover. By layering paint and strategically sanding it away, you can transform a pristine wooden frame into a textured, coastal-inspired piece with authentic character.
Detailed Instructions
Materials
- Unfinished wide wooden frame
- Dark walnut or mahogany wood stain
- Cream or off-white chalk paint
- Paintbrushes (one foam, one bristle)
- Candle wax or petroleum jelly (optional)
- Sandpaper (80-grit and 120-grit)
- Clean rags
- Steel wool (optional)
- Matte clear sealer spray
Step 1: Base Preparation
-
Clean the surface:
Begin by wiping down your wooden frame with a clean, slightly damp rag to remove any dust or manufacturing residue. -
Rough sanding:
Scuff the surface lightly with 120-grit sandpaper to open up the wood grain; this helps the stain penetrate deeper for a richer base color. -
Apply the stain:
Using a foam brush or rag, apply a generous coat of dark walnut wood stain to the entire frame, ensuring you reach into the corners and crevices. -
Wipe excess stain:
Allow the stain to sit for about 5-10 minutes, then wipe away the excess with a clean cloth, leaving a deep, consistent dark brown tone. -
Dry completely:
Let the stained frame dry fully, usually overnight, to prevent the stain from bleeding into your top coat of paint later.
Uneven Distressing?
If sanding isn’t stripping enough paint, wet a rag and rub the paint vigorously. This ‘wet distressing’ technique removes chalk paint smoothly without scratch marks.
Step 2: Creating the Distressed Look
-
Apply resist (optional):
For easier chipping later, I like to rub a small amount of candle wax or petroleum jelly on the corners and edges where natural wear would occur. -
The dry brush technique:
Dip just the tip of a bristle brush into your cream chalk paint and dab off the excess on a paper towel until the brush is almost dry. -
First paint layer:
Lightly drag the brush along the length of the frame, following the wood grain. You want the coverage to be streaky and imperfect, not solid. -
Build coverage:
Apply a slightly heavier coat of paint to the flat, central areas of the frame molding, leaving the recessed grooves and edges thinner or exposed. -
Drying time:
Allow the paint to dry until it is chalky to the touch; chalk paint dries quickly, so 1-2 hours should be sufficient. -
Aggressive sanding:
Take your coarse 80-grit sandpaper and firmly sand the edges, corners, and raised molding details to rip through the paint and reveal the dark stained wood. -
Refine the texture:
Switch to 120-grit sandpaper for the flat areas, scratching vertical lines into the white paint to mimic cracked, aged timber. -
Expose the grain:
Focus on areas where the wood has knots or deep grain; sand these spots until the texture of the wood is visibly interrupting the paint layer. -
Clean up dust:
Use a tack cloth or vacuum to thoroughly remove all the sanding dust from the crevices before sealing. -
Final seal:
Spray the entire frame with a matte clear coat to lock in the paint and prevent further chipping while maintaining that raw, rustic look.
Add Age & Grime
For an antique look, brush a diluted brown wax or watered-down brown paint into the crevices after sanding, then wipe the high points clean.
Place your favorite photo or artwork inside to complete this beautifully aged display piece
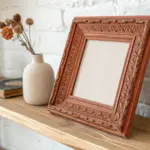
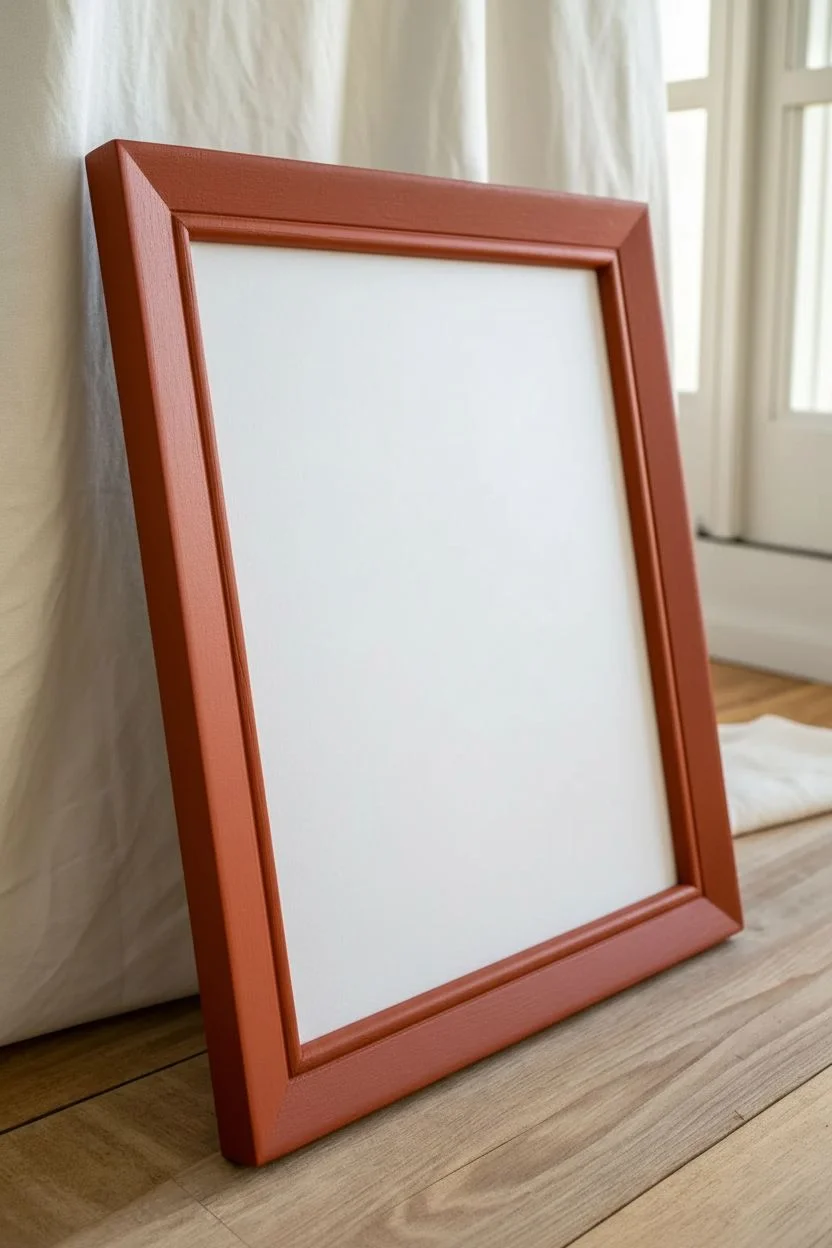
Painted Frame That Matches a Color in the Artwork
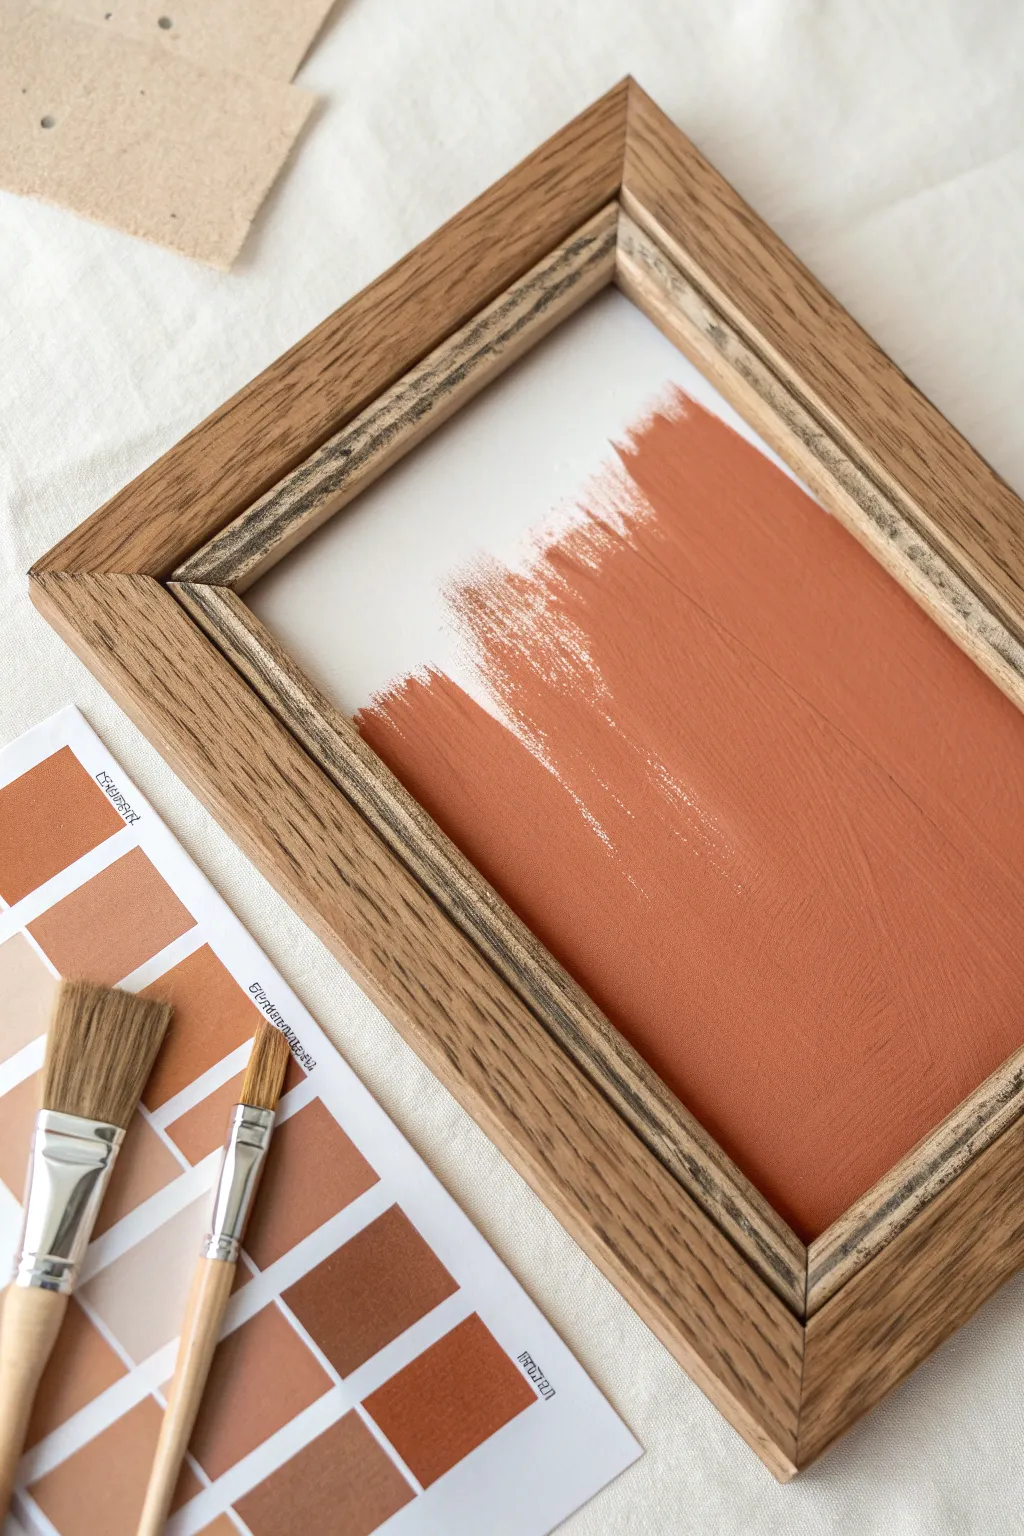
Create a harmonious piece of wall art by intentionally pairing a raw wood frame with a warm, monochromatic abstract painting. This project focuses on selecting a single, impactful color and applying it with textured strokes that echo the rustic feel of the frame.
Step-by-Step Tutorial
Materials
- Raw oak or light wood picture frame (8×10 or similar)
- Heavyweight mixed media paper or flat canvas panel
- Terracotta or rust orange acrylic paint
- Flat bristle brush (medium width)
- Round synthetic brush (for color testing/cleanup)
- Palette paper or color swatch card
- Painter’s tape (optional)
- Gesso (if priming is needed)
Step 1: Planning the Palette
-
Finish the wood frame:
Before painting your artwork, prepare your frame. If it’s unfinished raw wood like the example, you might want to leave it natural or apply a very light matte varnish to protect it without darkening the grain. -
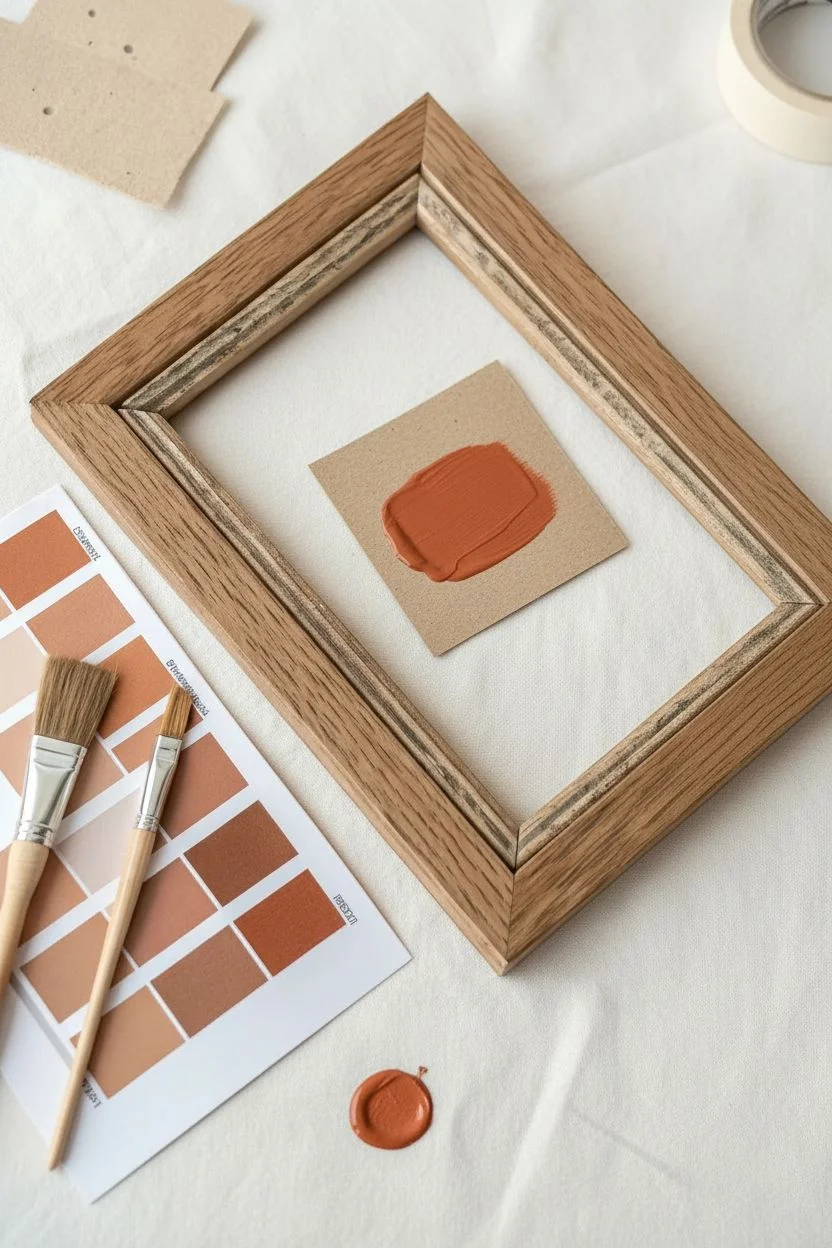
Select your core color:
Using a color swatch card or mixing paints on a palette, find a shade of terracotta that complements the warm undertones of your wood frame. The goal isn’t an exact match to the wood, but a harmonious companion. -
Test the swatch:
Paint a small tester square on a scrap piece of paper and hold it next to the frame. The paint usually dries slightly darker, so ensure the dried result is the vibrant rust tone you are looking for. -
Prepare the surface:
Cut your heavyweight paper or canvas panel to fit perfectly inside the frame. If the paper has a texture, ensure the grain is running vertically to help with the brushstroke effect.
Paint looking too flat?
If the orange looks too solid, mix a tiny drop of white or dark brown into the paint on the palette, but don’t blend fully. This creates subtle streaks for depth.
Step 2: Creating the Abstract Art
-
Load the flat brush:
Squeeze a generous amount of your terracotta acrylic paint onto your palette. Dip your flat bristle brush in, but don’t overload it; you want enough paint to cover, but not so much that you lose the bristle texture. -
Create the first upward stroke:
Starting near the bottom right of your paper, pull the brush firmly upward. Let the paint run out naturally towards the top, creating a broken, feathered edge. -
Add a overlapping stroke:
Reload your brush slightly and place it to the left of your first stroke. Pull upwards again, starting slightly lower this time to create an asymmetrical base. -
Feather the edges:
Using a drier brush (wipe some paint off if needed), gently flick the top edges of your wet paint upward. This ‘dry brush’ technique is what creates the airy, textural look at the peak of the shape. -
Fill the body:
Ensure the bottom portion of the painted area—the solid block of color—is opaque. You can go back over the lower section with a second coat if the first layer looks too streaky. -
Refine the texture:
While the paint is tacky, I find dragging the dry bristle brush lightly vertically through the main body adds a lovely wood-grain effect to the paint itself. -
Let it dry completely:
Allow the artwork to sit undisturbed for at least an hour. Acrylics dry fast, but thick applications need time to settle.
Pro Tip: Custom Glaze
To connect the frame and art further, water down a tiny bit of your terracotta paint and wash it over the raw wood frame for a subtle tinted stain effect.
Step 3: Assembly and Framing
-
Check the fit:
Place your dry artwork into the frame without the glass first, just to see how the color interacts with the wood without any glare. -
Clean the glass:
If your frame includes glass, wipe it down thoroughly on both sides with glass cleaner to remove fingerprints or dust specs. -
Secure the backing:
Insert the glass (optional, some prefer the raw texture exposed), then the artwork, and finally the backing board. Secure the tabs or points on the back of the frame. -
Final wipe down:
Give the wooden frame a quick dust with a soft cloth to ensure no sawdust or debris is clinging to the grain before hanging.
Hang your new textural masterpiece in a sunny spot to let the warm tones glow
L-Channel Floater Look With a Crisp Inner Lip

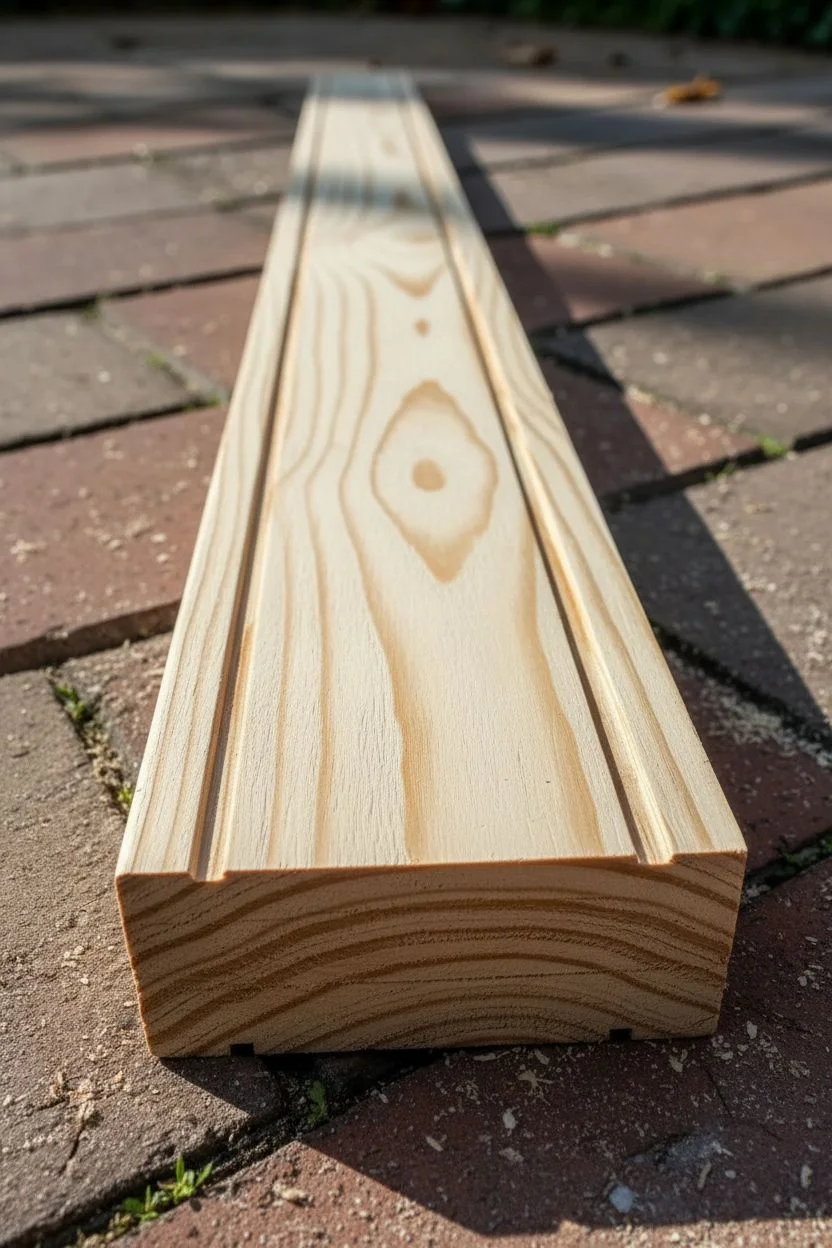
This project showcases the clean elegance of an L-channel floater frame, designed to give your canvas the illusion of floating within a crisp wooden border. The design features a distinct inner lip that creates a sophisticated shadow line, perfect for highlighting texture without overwhelming the art.
Step-by-Step
Materials
- 1×2 inch pine lumber (or similar softwood)
- Wood glue
- Measuring tape
- Miter saw or miter box
- Corner clamps (a band clamp works too)
- Fine-grit sandpaper (220 grit)
- Router with sheer rabbeting bit (optional but recommended for the ‘lip’)
- Table saw (for cutting the L-profile)
- Brad nailer or finishing nails
- Clear matte varnish or wood finish
- Drill with small bits
- Offset clips or Z-clips for mounting
Step 1: Creating the L-Profile
-
Measure your canvas:
Start by measuring the exact outer dimensions of your stretched canvas. Add about 1/4 inch to both the length and width to account for the ‘float’ gap—this creates that desirable shadow space around the artwork. -
Set up the table saw:
To create the L-shape from your standard 1×2 lumber, you’ll need to cut a rabbet (a notch) out of the wood. Set your table saw blade height to roughly half the thickness of the board. -
Make the first pass:
Run the lumber through the saw on its edge to make the vertical cut of the rabbet. Use a featherboard to keep the stock tight against the fence for safety and accuracy. -
Make the second pass:
Lay the board flat and adjust the fence to cut the horizontal part of the rabbet, meeting your first cut. This removes a square section of wood, leaving you with that distinct L-profile needed to cradle the canvas. -
Refine the inner lip:
If you want the specific ‘crisp inner lip’ look shown in the image, use a router or make a very shallow additional pass on the table saw to slightly bevel or step the inner edge that faces the canvas. This subtle detail catches the light beautifully.
Closing the corner gaps
If your miters have tiny gaps, rub a metal screwdriver shank firmly over the corner wood fibers. This ‘burnishing’ crushes the fibers together to hide small seams.
Step 2: Cutting and Assembly
-
Calculate cut lengths:
Take your measurements (canvas size + gap) and mark your wood. Remember that for a mitered frame, the *inside* dimension of the rabbet is your critical measurement, not the outside edge. -
Cut the miters:
Set your miter saw to exactly 45 degrees. Cut one end of your first piece, measure carefully to your mark, and cut the other end. I always double-check the angle on a scrap piece first to ensure a seamless corner. -
Dry fit the frame:
Arrange your four cut pieces on a flat surface to check the joints. Bringing the corners together now lets you see if any angles are slightly off before glue touches the wood. -
Apply glue:
Apply a generous amount of high-quality wood glue to the mitered faces. Spread it evenly with a small brush or your finger to ensure full coverage. -
Clamp the corners:
Using corner clamps or a strap clamp, pull the frame tightly together. Wipe away any glue squeeze-out immediately with a damp rag; dried glue will resist your finish later and look blotchy. -
Secure with nails:
While clamped, drive a brad nail or finishing nail through the corners from the outside edge to lock the joint mechanically. For a cleaner look, you can countersink these nails.
Add a dark reveal
Before mounting the canvas, paint the inside ‘floor’ of the L-channel matte black. This increases the visual depth and makes the floating effect much more dramatic.
Step 3: Sanding and Finishing
-
Sand the joints:
Once the glue is fully cured, sand the corners flush. Start with a medium grit if there’s unevenness, then move to 220-grit sandpaper for a smooth feel. -
Soften the edges:
Run your sandpaper lightly along the sharp outer edges of the frame to ‘break’ them slightly. This prevents splintering and gives the frame a more professional, finished hand-feel. -
Dust off thoroughly:
Use a tack cloth or compressed air to remove every speck of sawdust from the grain, especially in the inside corners of the L-channel. -
Apply the finish:
Brush on a clear matte varnish or polyurethane. This protects the pine without darkening it too much, preserving that airy, natural Scandinavian look. -
Install the canvas:
Place your canvas into the frame from the front. Flip the assembly over (placing it on a soft towel) and center the canvas perfectly. -
Attach hardware:
Screw offset clips or Z-clips into the back of the frame, extending over to screw into the canvas stretcher bars. This holds the artwork securely while maintaining that floating gap.
Now you have a gallery-worthy frame that enhances your art with beautiful natural wood grain
Oversized Frame Border for a Bold Statement
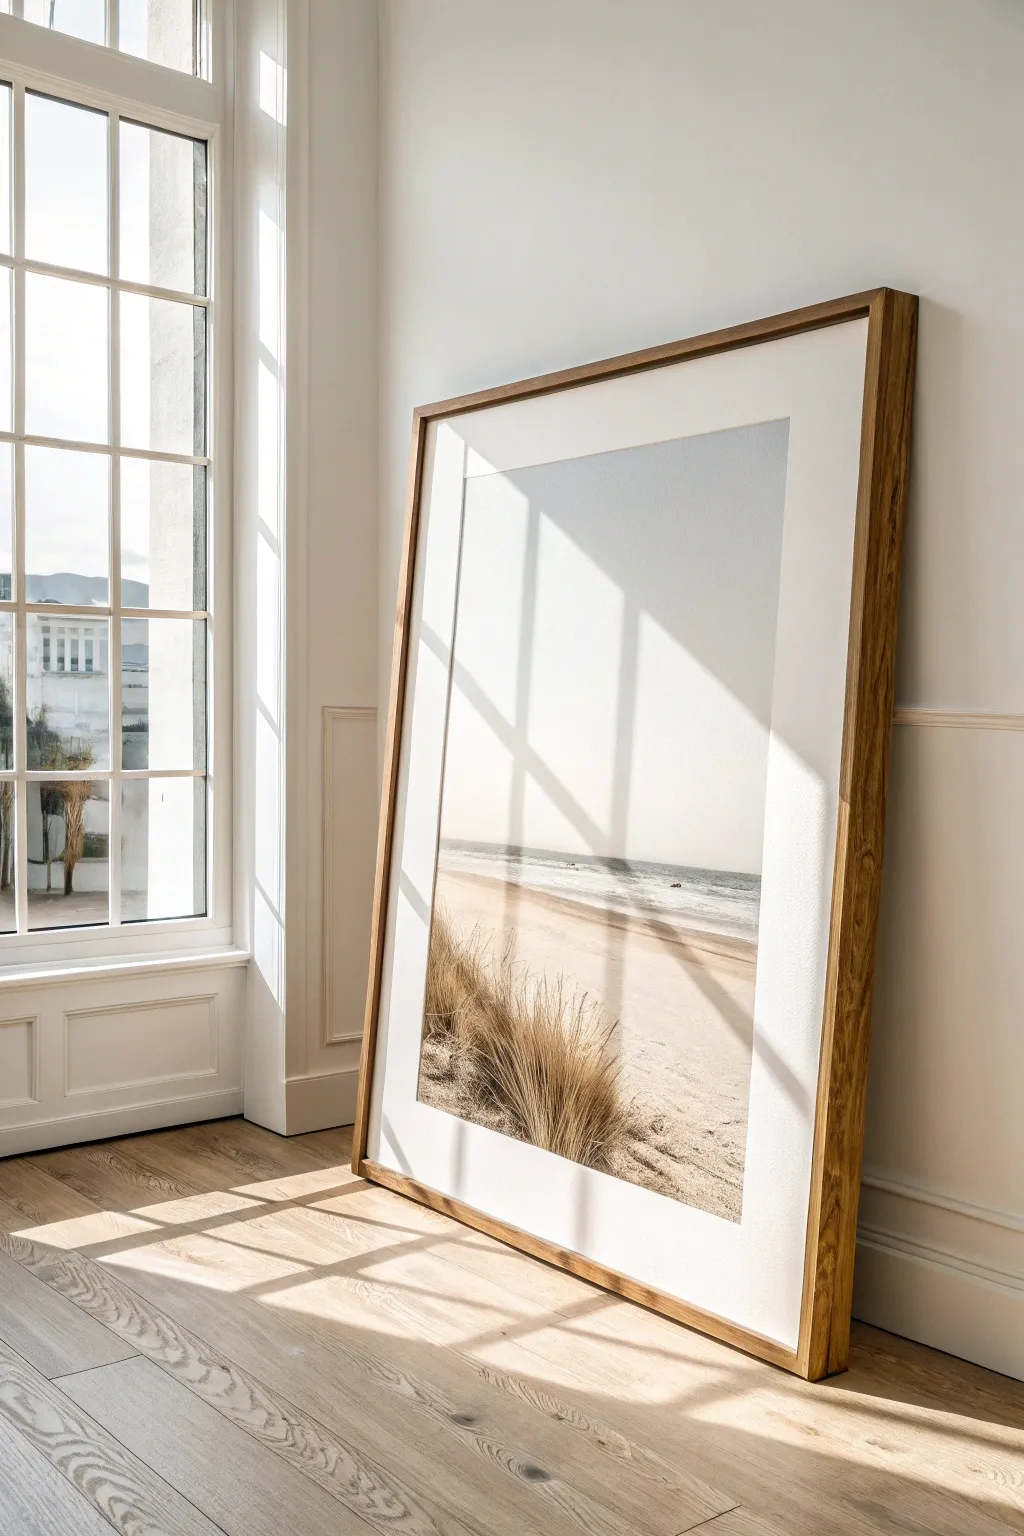
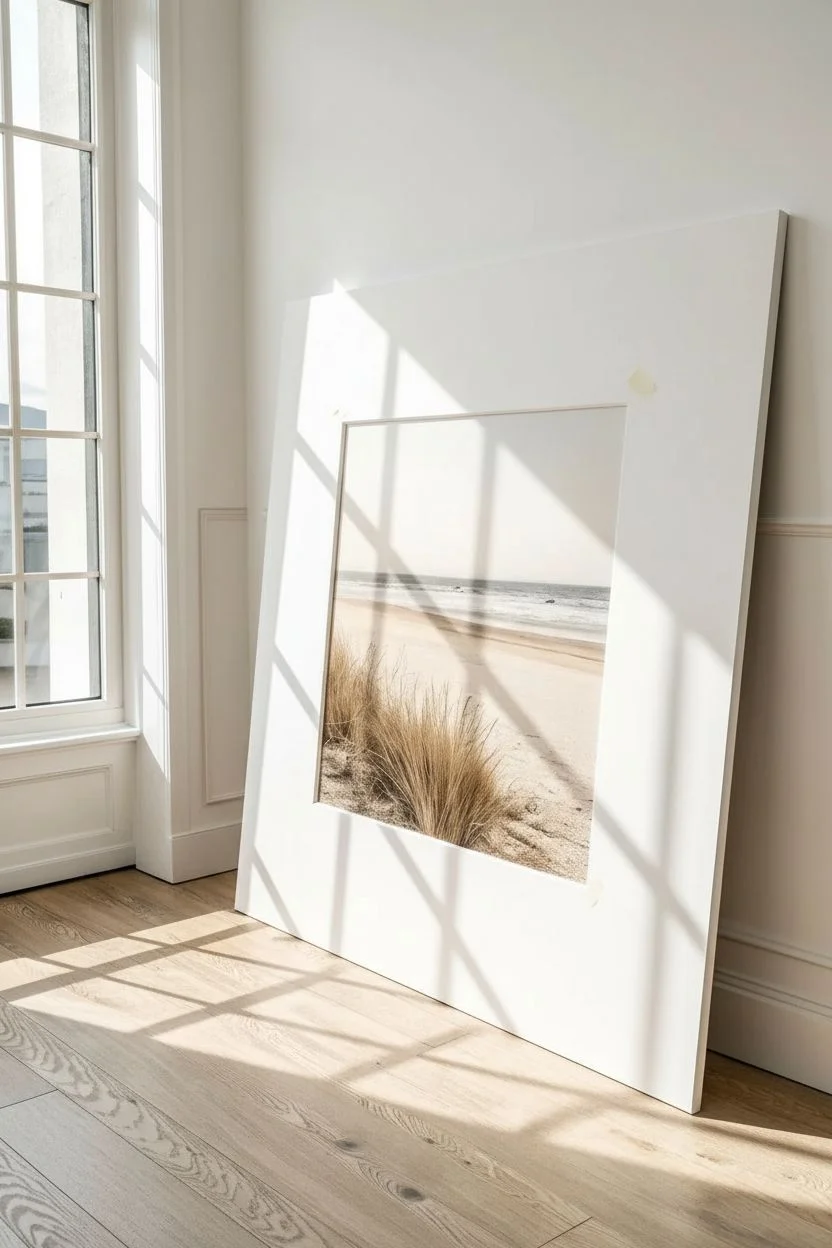
Embrace the drama of scale with this impressive oversized framed art piece that transforms any room without ever touching a nail. This project combines a serene, minimalist beach photograph with an exaggerated white mat and a warm wood frame to create a gallery-worthy statement right on your floor.
How-To Guide
Materials
- High-resolution digital photo (beach/dune scene)
- Large format printing service
- Oversized white mat board (4-inch border minimum)
- Light oak or teak wood moulding (1.5 – 2 inch deep)
- Wood glue
- Miter saw or miter box
- Corner clamps (strap clamp recommended)
- Backing board (foam core or MDF)
- Acid-free mounting tape
- Flex point driver and flex points
- Clear acrylic sheet or framing glass (custom cut)
- Sandpaper (220 grit)
- Clear matte wood varnish
- Paintbrush
Step 1: Preparing the Image and Mat
-
Select your image:
Choose a high-resolution photograph with a minimalist aesthetic. A beach scene with tall grasses in the foreground work best because the vertical lines of the grass draw the eye up, complementing the tall frame. -
Order the print:
Send your file to a large-format printer. Ask for a matte fine art paper finish to avoid glare, especially since this piece will sit near a window. Ensure the print size is at least 6-8 inches smaller than your intended frame size. -
Measure the mat:
The key to this look is the generous white space. Measure your mat board to have a wide, equal border on all sides—I recommend at least 5 to 6 inches for maximum impact. -
Cut the mat window:
Using a mat cutter on a stable surface, carefully cut the window for your image. If you aren’t comfortable cutting such a large piece, most framing shops will cut a custom mat for a small fee. -
Mount the artwork:
Position your photo behind the mat window. Use acid-free mounting tape to secure the top edge of the photo to the back of the mat, allowing the paper to hang freely and expand without buckling.
Glazing Too Heavy?
If real glass feels too heavy or fragile for a frame of this magnitude, swap it for 3mm framing-grade acrylic. It is lighter, shatter-resistant, and clearer than standard glass.
Step 2: Building the Oversized Frame
-
Measure the moulding:
Calculate the outer dimensions of your mat board plus the allowance for the frame rebate. Mark your lengths on the light oak moulding. -
Cut the miters:
Set your miter saw to exactly 45 degrees. Cut the four sides of the frame, ensuring the opposite sides are perfectly identical in length to avoid a skewed frame. -
Test the fit:
Dry-assemble the pieces on a flat floor to ensure the corners meet tightly. Large frames can be unforgiving, so perfect cuts are essential here. -
Glue and clamp:
Apply high-quality wood glue to the mitered ends. Join the corners and secure the entire frame with a strap clamp (band clamp), which applies even pressure around a large perimeter. -
V-nail the corners:
Once the glue is tacky, drive v-nails into the back of each corner for structural reinforcement. For a frame this heavy, use at least two v-nails per corner. -
Sand and finish:
Once the glue is fully cured, lightly sand the wood with 220-grit paper to smooth any rough edges. Wipe away dust with a tack cloth. -
Apply varnish:
Brush on a clear matte wood varnish to protect the oak while keeping its natural look. Let it dry completely according to the manufacturer’s instructions.
Level Up: Double Matting
Add depth by using a double mat technique. Place a thin, slightly off-white inner mat under the main thick white mat to create a subtle, elegant recessed effect.
Step 3: Final Assembly
-
Clean the glazing:
Peel the protective film off your acrylic sheet or clean your glass thoroughly with a microfiber cloth to remove all dust and fingerprints. -
Stack the layers:
Place the frame face down on a clean surface. Insert the glazing first, followed by the matted artwork, and finally the backing board. -
Secure the back:
Use a flex point driver to shoot flexible points into the inside edge of the frame, holding the backing board tight against the glass. Space them every 4 inches. -
Tape the back:
Seal the gap between the frame and backing board with framing tape to prevent dust and small insects from getting inside over time. -
Position the piece:
Carefully lift your masterpiece and lean it against the wall near a source of natural light to capture those beautiful shadow lines.
You now have a sophisticated focal point that brings a calming, gallery-like atmosphere to your living space
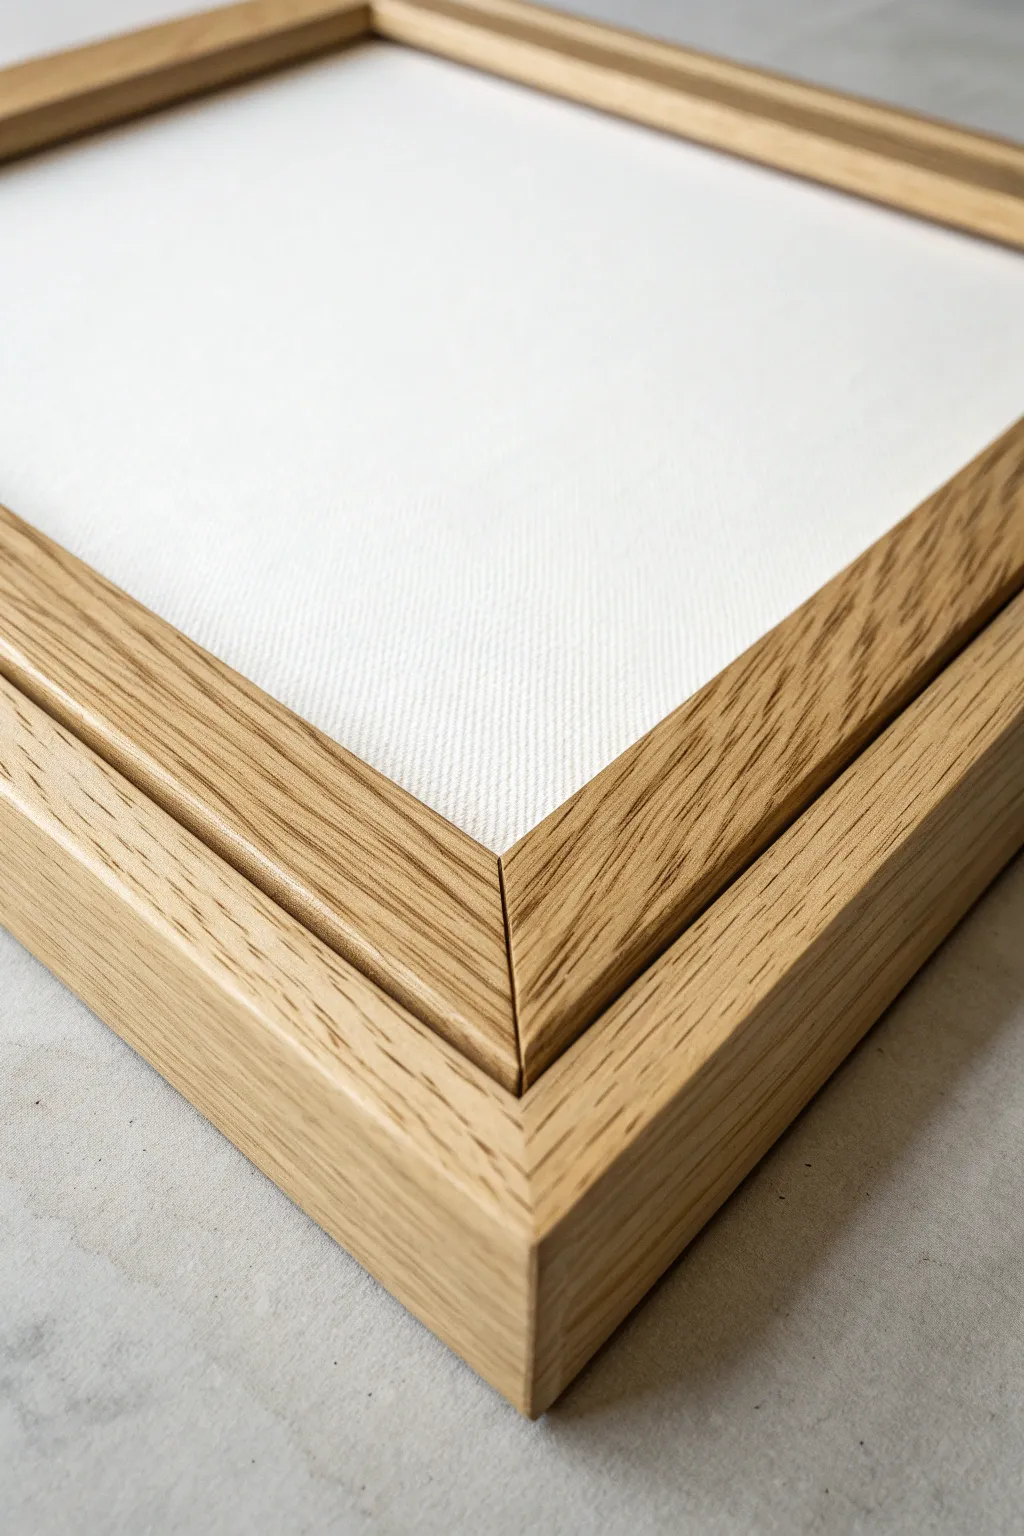
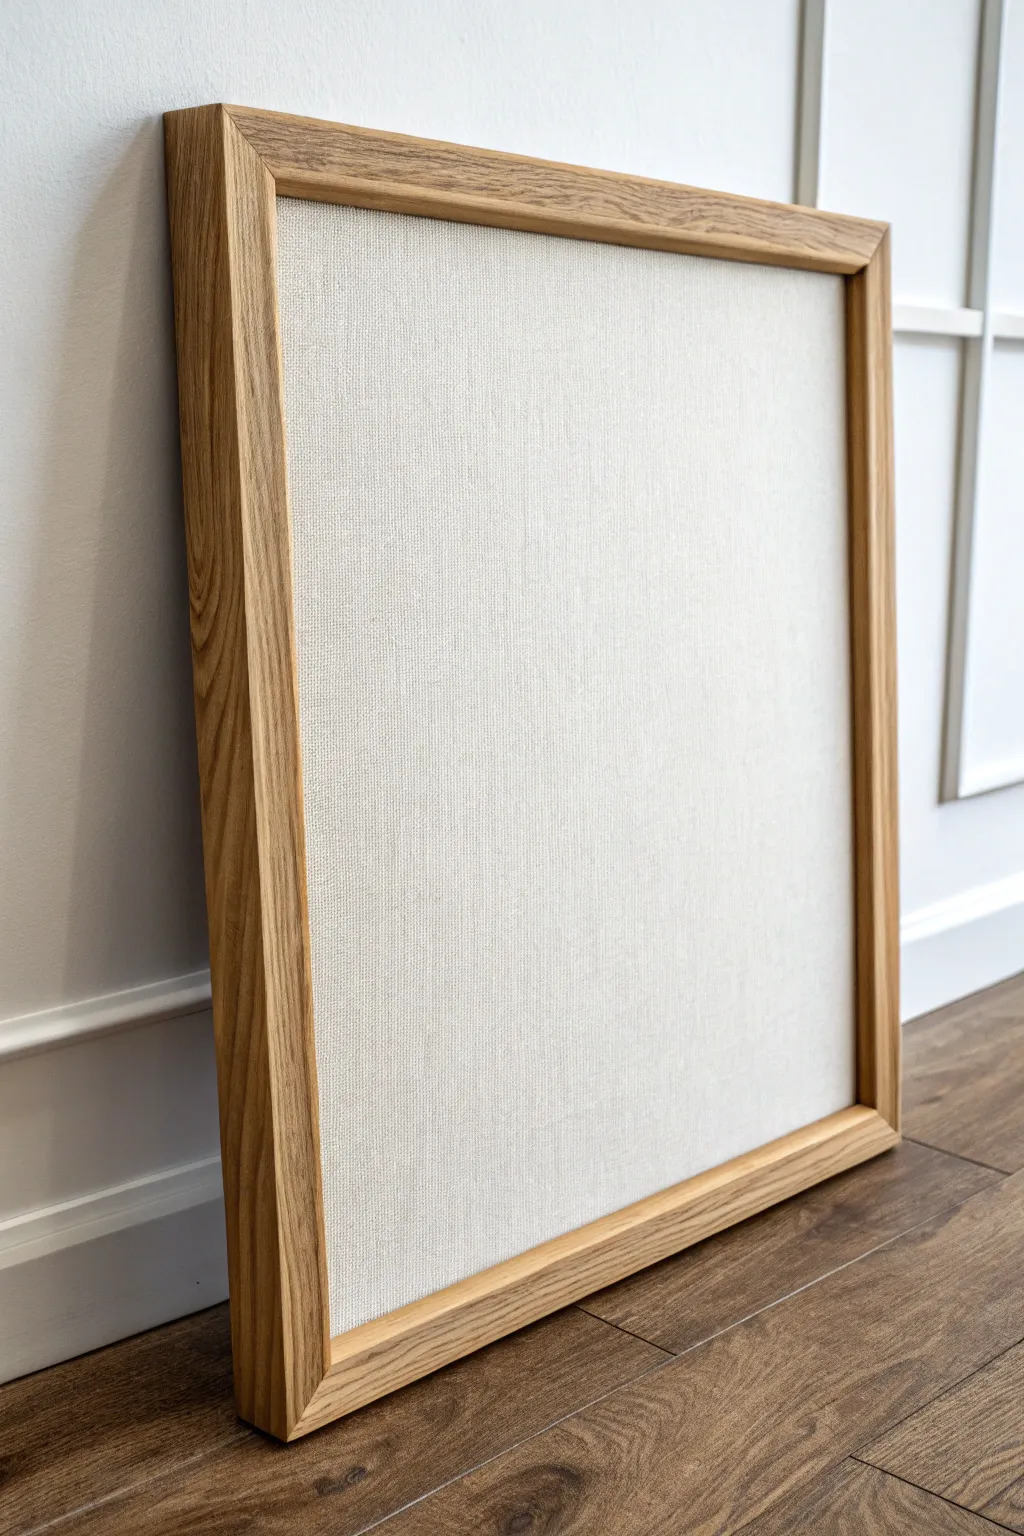
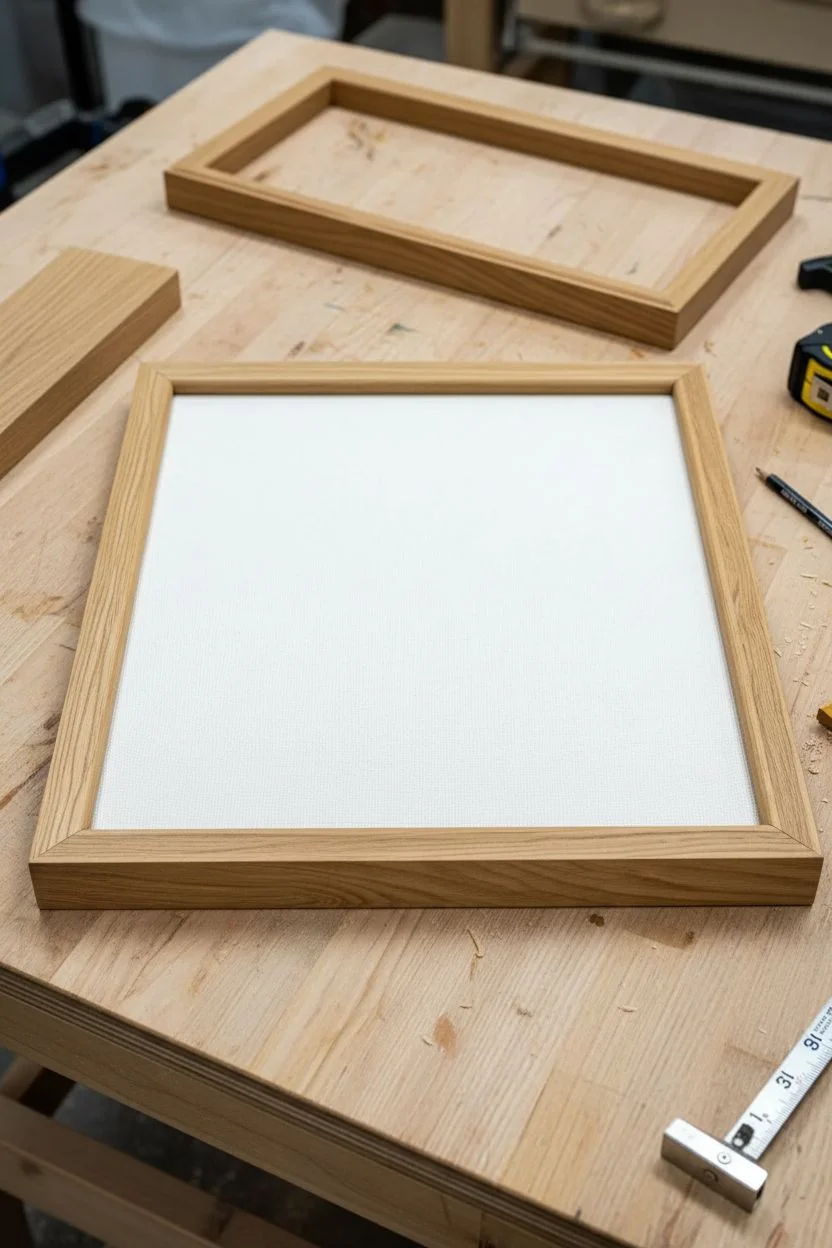
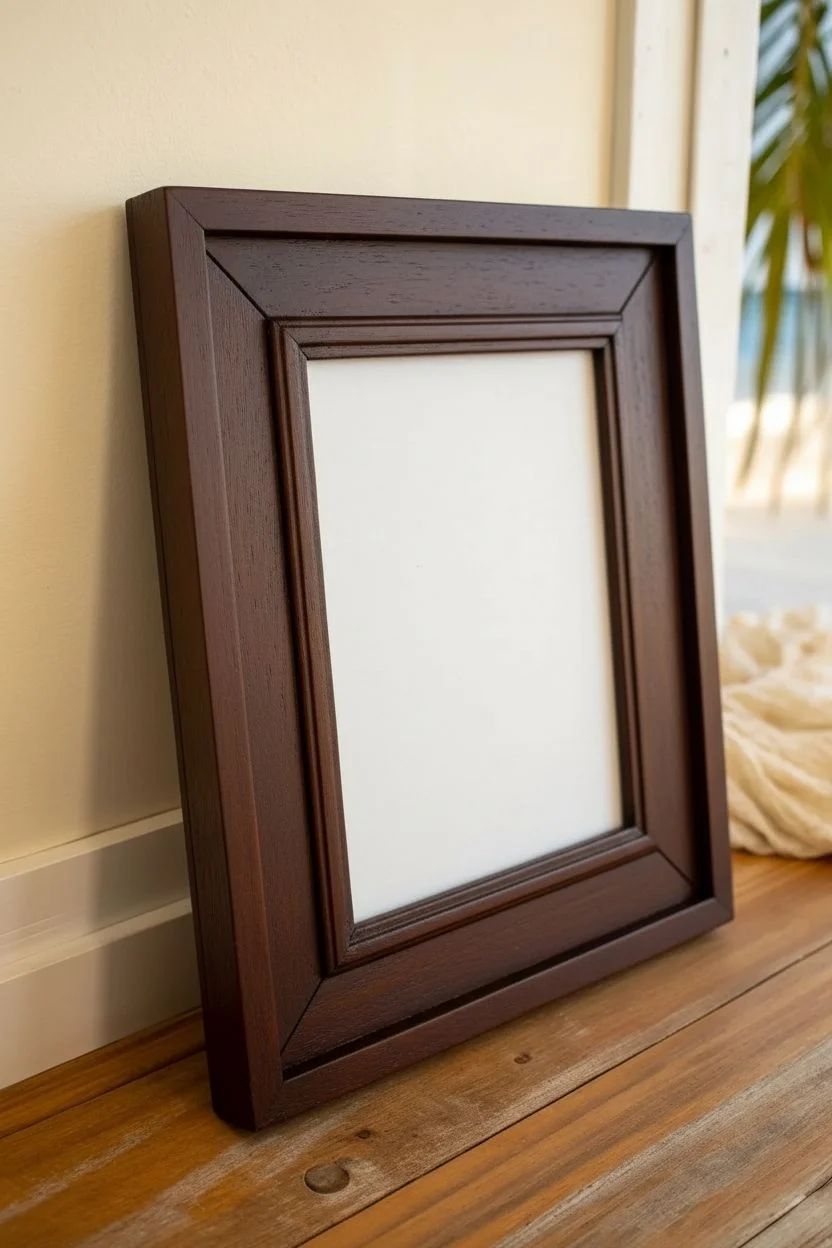
Canvas-on-Panel Inside a Standard Frame Look
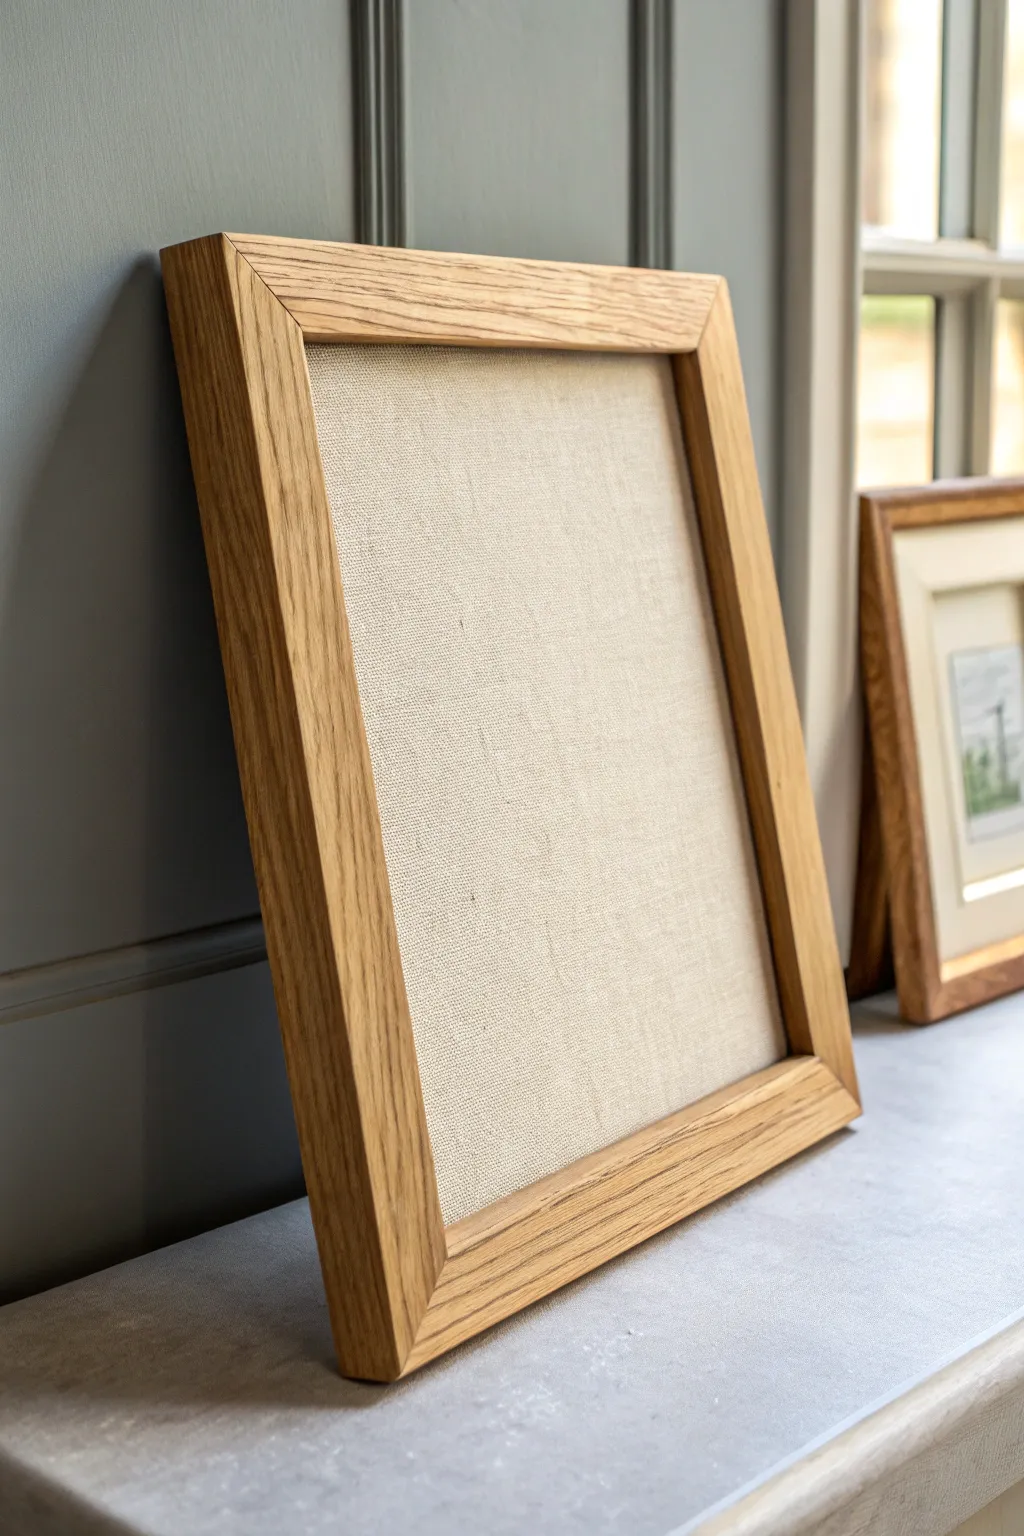
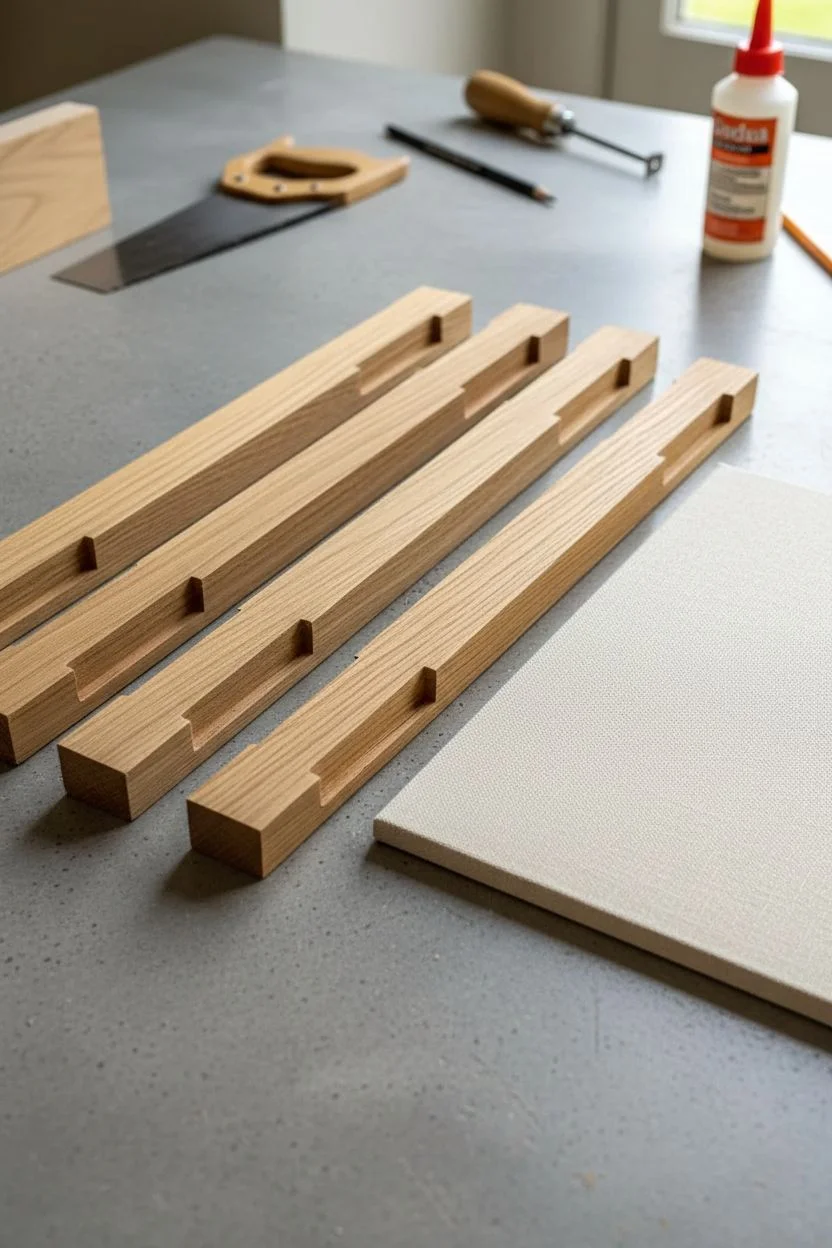
Achieve a high-end, gallery-ready aesthetic by framing a canvas-covered panel directly within a minimalist oak moulding. This project creates a warm, textured focal point that looks sophisticated even before you add your art, relying on the natural beauty of wood grain and linen.
Step-by-Step
Materials
- Solid oak lumber (approx. 1×2 inch dimensional)
- Canvas panel board (neutral linen or cotton)
- Miter saw or miter box with hand saw
- Wood glue
- Ratchet strap clamp or corner clamps
- Sandpaper (120, 220, and 320 grit)
- Clear matte polyurethane or Danish oil
- Glazier push points or offset clips
- Screwdriver
- Clean rag or tack cloth
- Tape measure
- Pencil
Step 1: Preparing the Wood Frame
-
Measure your canvas panel:
Place your canvas panel on a flat surface and measure the exact height and width. Add about 1/8 inch to each dimension to allow for a slight gap, ensuring the panel fits easily without forcing it later. -
Mark the wood lengths:
Using your oak lumber, mark out the four sides of your frame based on the measurements you just took. Remember that for a mitered frame, the *inside* edge of the miter needs to match your canvas dimensions. -
Set your saw angle:
Adjust your miter saw to a precise 45-degree angle. Getting this angle exact is crucial for tight corners, so make a test cut on a scrap piece first if needed. -
Cut the mitered ends:
Cut the four pieces of oak at the marked 45-degree angles. Ensure opposing sides are perfectly identical in length to keep the frame square. -
Create the rebate (optional but recommended):
If you have a router or table saw, cut a ‘rabbet’ or rebate (a small L-shaped groove) along the inside back edge of each piece. This gives the canvas panel a shelf to sit in. If you lack these tools, you can simply mount the panel flush to the back later using offset clips.
Step 2: Assembling the Frame
-
Test the fit:
Dry-assemble the four pieces on a flat surface to check that the corners meet cleanly without gaps. Square them up with a carpenter’s square. -
Apply wood glue:
Apply a generous amount of high-quality wood glue to each mitered face. Spread it evenly with your finger or a small brush to ensure full coverage. -
Clamp the frame:
Bring the corners together and secure the entire assembly using a ratchet strap clamp. This applies even pressure to all four corners at once. -
Wipe excess glue:
While the glue is wet, immediately wipe away squeeze-out from the corners with a damp rag. Dried glue will resist the finish later and leave unsightly marks. -
Let it cure:
Allow the glue to dry completely according to the manufacturer’s instructions, usually overnight, to ensure a strong structural bond.
Corner Perfection
If you have tiny gaps in your miter joints after gluing, rub sawdust from your sanding step into the wet glue within the gap. It acts as an instant, perfectly color-matched wood filler.
Step 3: Finishing and Mounting
-
Sand the surfaces:
Start sanding with 120-grit paper to smooth out any uneven joints, then progress to 220-grit. Finish with 320-grit for an ultra-smooth, professional feel. -
Clean the dust:
Use a tack cloth or a slightly damp rag to remove every speck of sawdust. This step is vital for a clear, speck-free finish. -
Apply the finish:
Rub in a coat of Danish oil or brush on a clear matte polyurethane. I find that rubbing oil in with a cloth highlights the oak grain beautifully without creating a plastic-like film. -
Insert the canvas panel:
Once the frame is fully dry, place it face down on a soft towel. Lay your canvas panel into the back of the frame. -
Secure the panel:
Using a screwdriver or a point driver tool, insert glazier points or screw in offset clips to hold the canvas panel firmly against the frame’s front lip or rebate.
Float Frame Effect
To create a ‘floating’ look, cut the frame dimensions 1/4 inch larger than the canvas. Center the canvas inside and attach it to a backing board painted black for a shadow gap.
Now you have a timeless, solid wood frame ready to showcase your next masterpiece with gallery-quality style
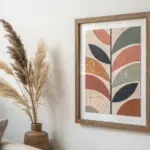
Layered Frame-Within-a-Frame for Extra Depth
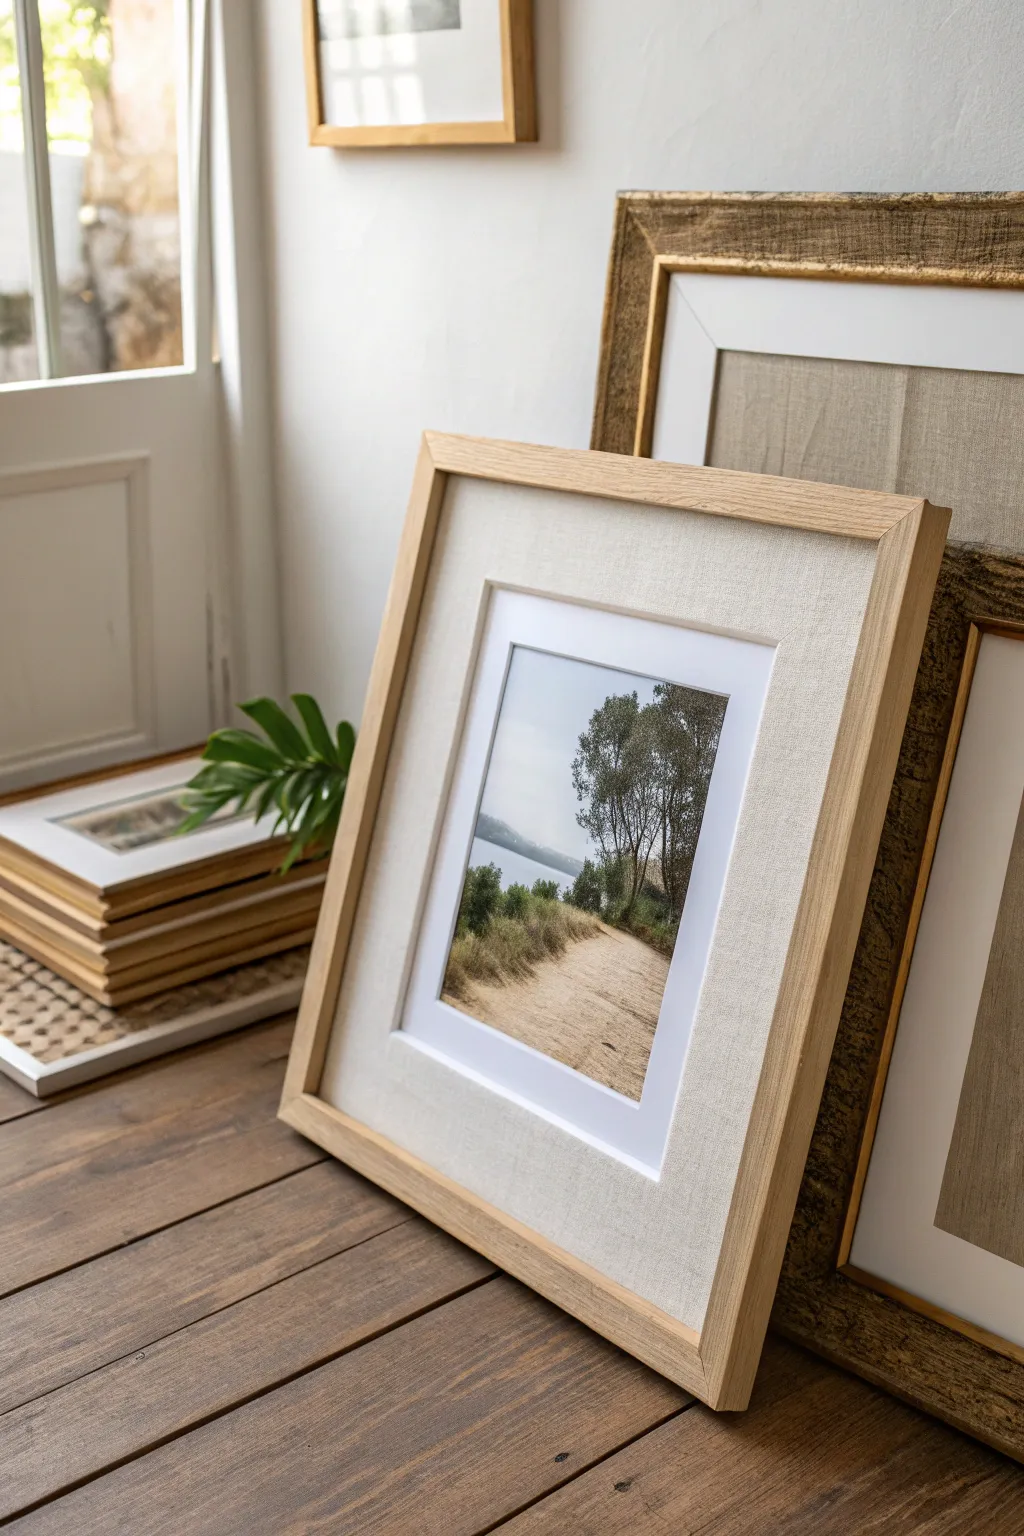
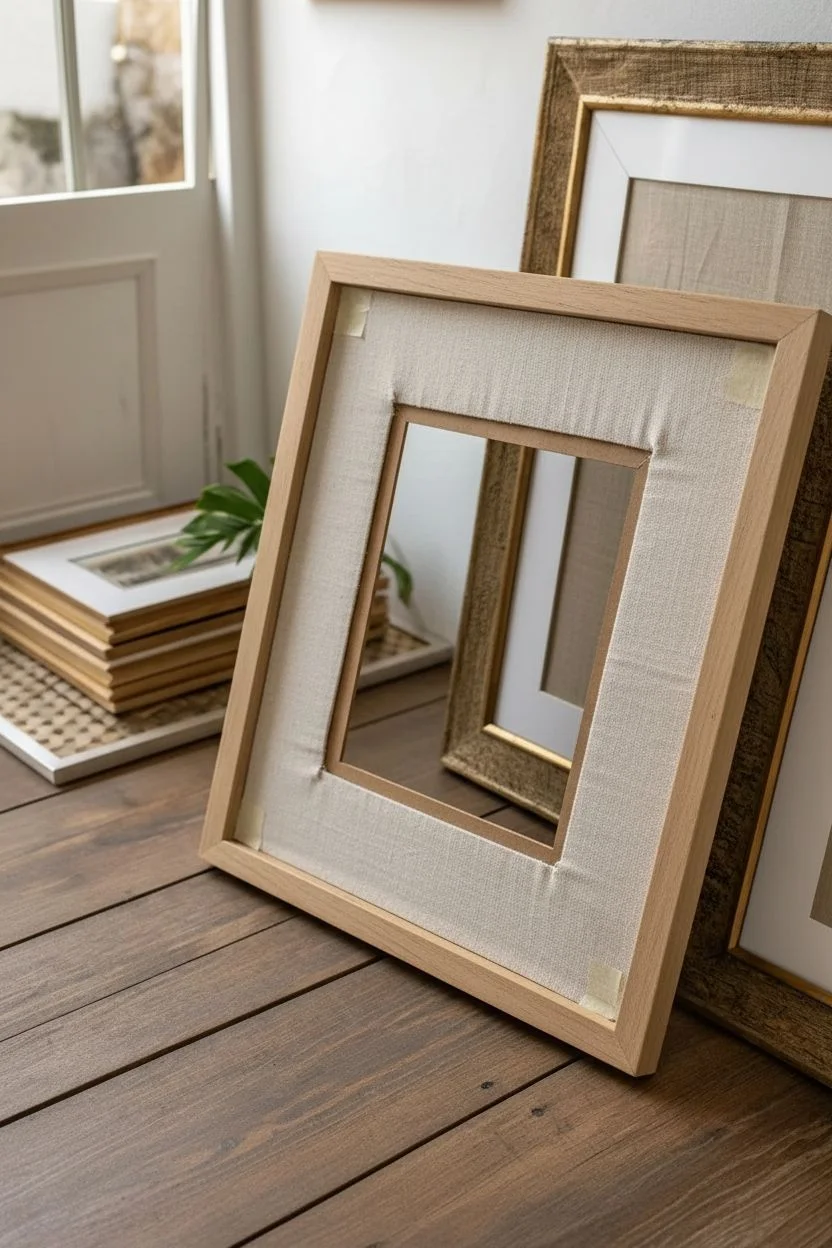
Elevate a simple landscape photo by creating a sophisticated gallery look with a fabric-wrapped mat. This project mimics high-end custom framing by layering a canvas texture between a natural wood frame and an inner white border, adding warmth and substantial depth to your artwork.
Step-by-Step Guide
Materials
- Unfinished light wood frame (shadow box style preferred)
- Wide mat board (cut to fit frame)
- Inner mat board (white, slightly smaller opening)
- Landscape photograph
- Natural linen or canvas fabric (oatmeal or off-white color)
- Spray adhesive (heavy duty)
- Fabric scissors
- Double-sided framing tape or ATG gun
- Bone folder
- Metal ruler
- Craft knife and fresh blades
- Self-healing cutting mat
- Framing points or glazier’s points
- Glass or acrylic glazing (optional)
Step 1: Preparing the Fabric Mat
-
Cut the base mat:
Begin by measuring your outer frame’s dimensions. Cut your thickest mat board to fit snugly within this frame. This will act as the substrate for your canvas fabric. -
Measure the opening:
Determine the size of your photo. Mark a window in the center of your mat board that is significantly larger than the photo—aim for at least a 3-inch border to really show off the fabric texture. -
Cut the window:
Using a metal ruler and a sharp craft knife, cut out the central window. Keep your cuts straight and precise, though rough edges will eventually be covered. -
Cut the fabric:
Lay your linen or canvas fabric face down on a clean surface. Place your cut mat board on top. Trim the fabric so there is approximately 1.5 inches of excess material on all outer sides. -
Apply adhesive:
Move the mat board to a well-ventilated area. Apply an even coat of heavy-duty spray adhesive to the *front* face of the mat board. I like to wait about 15 seconds for it to get tacky before proceeding. -
Adhere the fabric:
Carefully place the mat board, sticky side down, onto the fabric. Press firmly from the center outwards to smooth out any air bubbles or wrinkles. -
Cut the fabric window:
Flip the assembly over so the fabric is facing down. Inside the mat window, cut an ‘X’ shape in the fabric from corner to corner using your craft knife.
Loose Fabric?
If the fabric ripples after gluing, don’t peel it off. Use an iron on low heat (no steam) with a protective cloth to re-activate the glue and smooth it down.
Step 2: Wrapping and Assembly
-
Wrap the inner window:
Pull the triangular flaps of fabric through the window opening to the back of the board. Pull them taut so the fabric wraps cleanly around the inner edge. -
Secure the inner flaps:
Use double-sided framing tape or a hot glue gun to secure these flaps to the back of the mat board. Trim away excess bulk if the fabric overlaps too much. -
Wrap the outer edges:
Repeat the wrapping process for the outer edges of the mat board. Fold corners neatly (like wrapping a gift) to avoid lumps that might prevent the frame from closing properly. -
Cut the inner mat:
Now, tackle the second, inner mat (the white layer). Cut a white mat board that is slightly larger than your photo but smaller than the canvas mat opening, creating a ‘step’ effect. -
Mount the photo:
Center your landscape photograph behind the white inner mat window. Secure it using T-hinges or archival framing tape along the top edge of the photo only. -
Stack the layers:
Flip the canvas-wrapped mat face down. Position the white inner mat (with the photo attached) face down onto the back of the canvas mat. The white mat should cover the raw fabric edges of the window. -
Join the mats:
Secure the two mats together from the back using strips of framing tape. Ensure the reveal—the amount of white mat showing from the front—is even on all sides. -
Clean the glass:
If using glass, clean it thoroughly on both sides to remove dust and fingerprints. Dry it completely to avoid trapping moisture. -
Final assembly:
Place the glass into the wooden frame, followed by your layered mat-and-photo sandwich. Use a point driver or glazier’s points to lock everything into the back of the frame.
Add a Gold Accent
Before adding the inner white mat, paint the bevel edge of that mat with gold leaf paint. This adds a tiny, luxurious metallic flicker between the photo and the canvas.
Hang your textured masterpiece in a well-lit spot to let the shadows play across the linen fabric
Mixed-Material Frame With Fabric or Rope Wrapped Sides
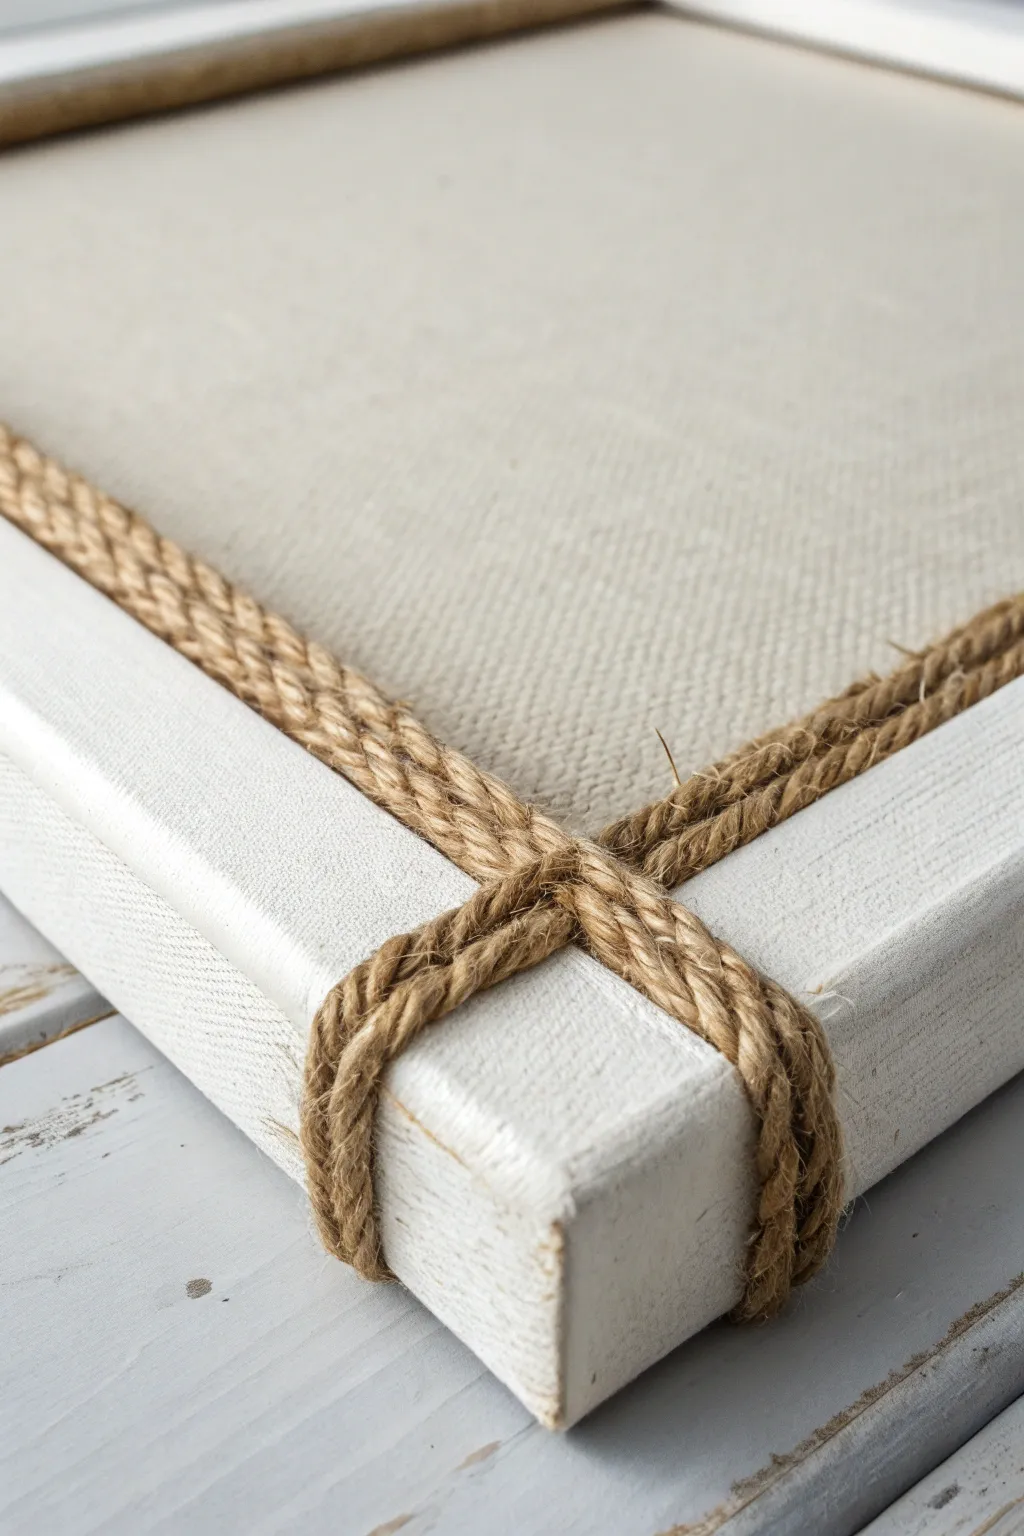
Transform a basic wooden frame into a textured, nautical-inspired piece perfect for coastal decor. By combining bright white paint with the rustic warmth of jute rope, you’ll create a sophisticated mixed-material border that elevates simple canvas art.
Step-by-Step
Materials
- Wooden picture frame (flat profile work best)
- White acrylic or chalk paint
- Paintbrush (foam or bristle)
- Fine-grit sandpaper
- Jute rope (approx. 5-6mm thickness)
- Hot glue gun and clear glue sticks
- Canvas board or heavy linen fabric
- Scissors
- Staple gun (optional, backing attachment)
Step 1: Preparing the Frame
-
Assess and Sand:
Begin with a plain wooden frame. If it has a glossy finish, lightly sand the surface with fine-grit sandpaper to create a tooth for the paint to adhere to. -
Clean the Surface:
Wipe away all the sanding dust with a damp cloth or tack cloth. A clean surface is crucial for a smooth paint application. -
Painting the Base Coat:
Apply an even coat of white paint to the entire frame, including the inner and outer edges. Don’t worry if the wood grain shows through slightly; this adds to the rustic charm. -
Apply Second Coat:
Allow the first coat to dry completely. Apply a second coat for a more opaque, crisp white finish. Let the frame dry fully before handling, usually 1-2 hours depending on your paint type. -
Distress Edges (Optional):
For a weathered look similar to the inspiration image, very lightly sand the corners or edges after the paint is dry to reveal a tiny bit of wood underneath.
Glue String Woes?
If stubborn glue threads remain on the rope, blast them quickly with a hair dryer. They will disappear instantly without damaging the jute texture.
Step 2: Installing the Rope Detail
-
Measure the Perimeter:
Lay your jute rope along the inner recessed edge of the frame to estimate the length needed, but don’t cut it yet—working from the spool is often easier. -
Start the Inner Border:
Apply a thin line of hot glue along the very inside edge of the frame (where the frame meets the canvas area). Press the rope firmly into the glue, starting at the center of one side rather than a corner. -
Secure the Corners:
Continue gluing the rope until you reach a corner. Instead of cutting, guide the rope to follow the 90-degree angle, pressing it tightly into the corner crease. -
Create the Wrap Effect:
Once you have completed the full inner rectangle, cut the rope and glue the ends seamlessly together. Now, cut two separate, shorter pieces of rope for the corner wraps shown in the image. -
First Horizontal Wrap:
Take a short piece of rope. Glue one end to the back of the frame, pull it tightly across the front corner horizontally, and glue the other end to the back. -
Second Vertical Wrap:
Using another short piece, repeat the process vertically so it crosses over the first piece at the corner. This creates that distinctive ‘X’ or cross-bound look. -
Tighten the Weave:
As you glue these overlapping corner pieces, ensure they sit snugly against the inner rope border you created earlier. The tension should look functional, even though it’s decorative. -
Repeat on All Corners:
Execute these cross-wraps on all remaining corners of the frame. I find it helps to hold the rope in place for ten seconds while the glue sets to prevent slipping.
Step 3: Mounting the Canvas
-
Prepare the Backing:
Take your canvas board or fabric-covered cardboard. Ensure it is cut to the exact dimensions of your frame’s opening. -
Insert the Art:
Place the canvas into the frame from the back. The textured surface should be visible through the front opening. -
Secure the Back:
Use a staple gun or glazier points to secure the canvas board into the wooden frame from the back side. -
Clean Up Glue:
Inspect the front of your frame for any stray hot glue strings (often called ‘angel hair’). Pick these off or use a hairdryer on low heat to melt them away for a clean finish.
Corner Precision
When wrapping the corners, flatten the rope slightly with your thumb as you glue it down. This prevents the corners from becoming too bulky against the wall.
Now you have a beautifully textured frame that adds tactile interest to any wall display


Have a question or want to share your own experience? I'd love to hear from you in the comments below!