Canvas shoes are basically tiny blank canvases you get to wear, and that’s my favorite kind of art—practical and playful. If you’ve got a plain pair sitting around, these canvas shoe painting ideas will help you turn them into something that feels totally you.
Classic Tie-Dye Swirls on Canvas Shoes
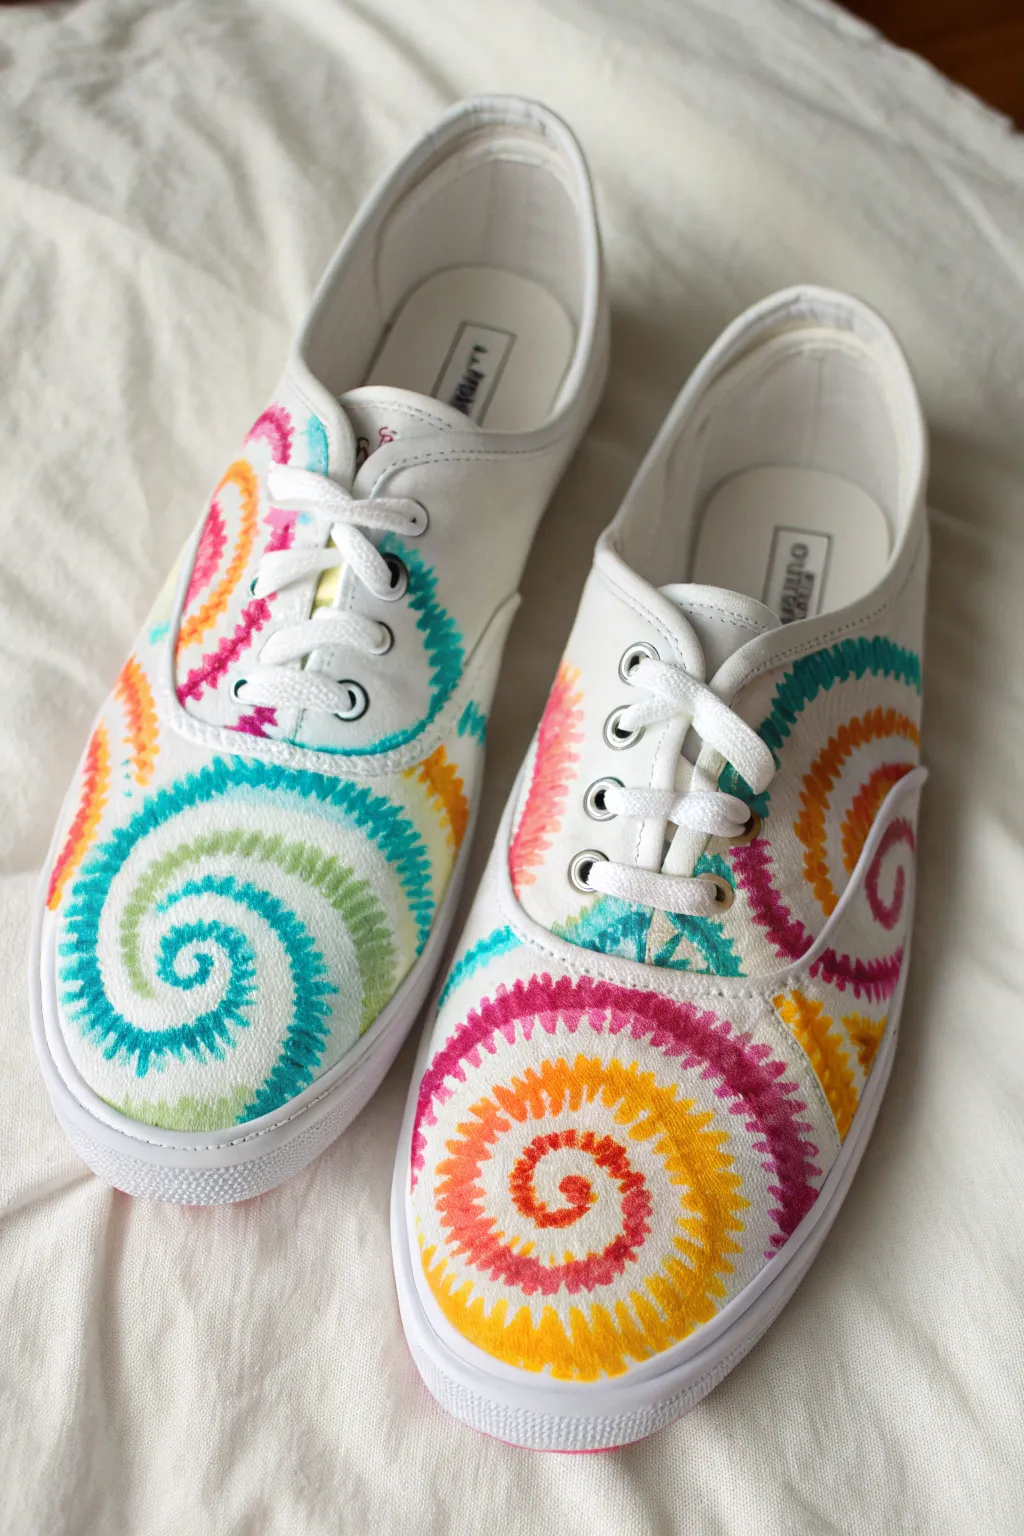
Bring the psychedelic vibes of the ’60s to your feet with these vibrant, tie-dye inspired canvas shoes. Using sharpies or fabric markers, you’ll create intricate spiral patterns that mimic the look of dyed fabric without the messy water bucket.
Step-by-Step Tutorial
Materials
- Clean white canvas sneakers (laces removed)
- Pencil for sketching
- Fabric markers or Sharpie markers (Neon pink, orange, yellow, teal, magenta)
- Rubbing alcohol (70% or higher)
- Small dropper or fine paintbrush
- Cotton swabs
- Paper towels
- Masking tape
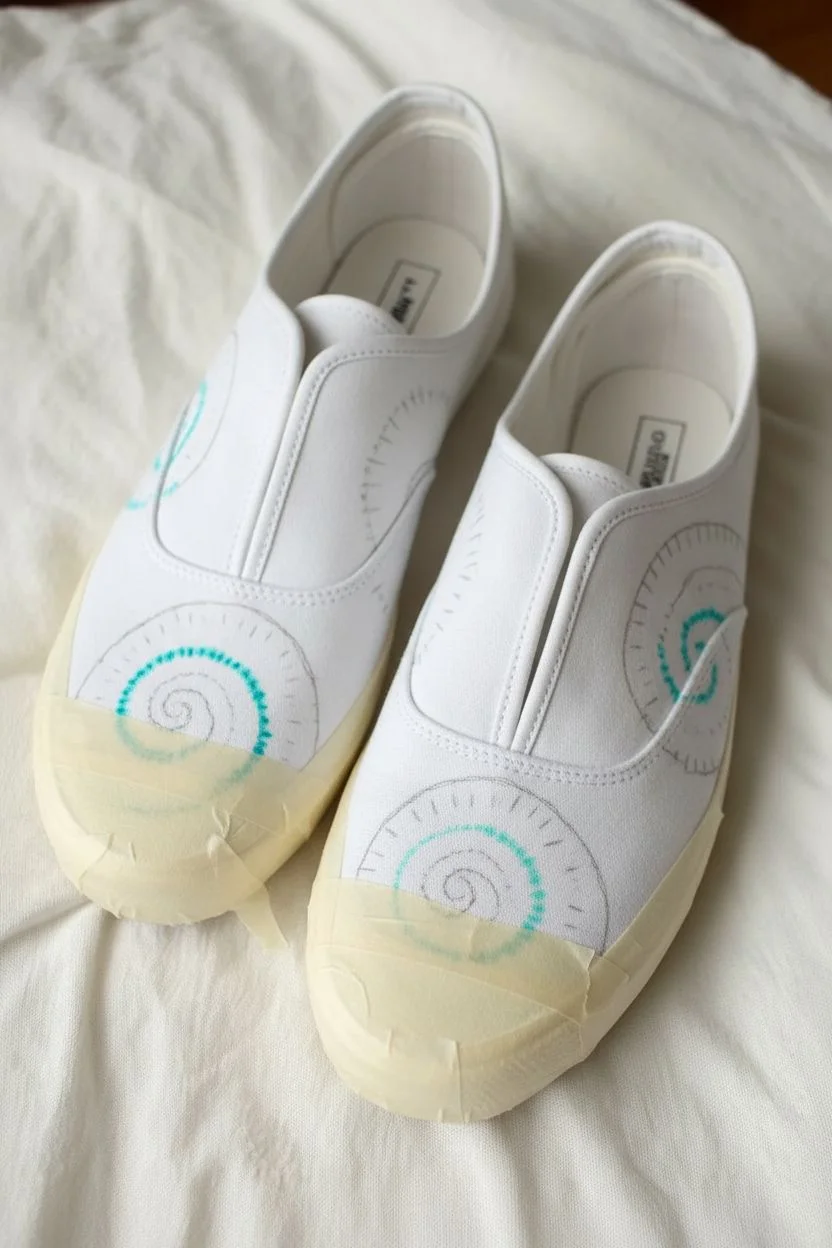
Step 1: Preparation & Planning
-
Prep the canvas:
Remove the shoelaces completely and stuff the toe of each shoe with paper towels or newspaper. This creates a firm surface to draw on and prevents ink from bleeding through to the inside lining. -
Protect the soles:
Carefully apply masking tape along the rubber midsoles. Run your fingernail along the edge where the fabric meets the rubber to ensure a tight seal, keeping the white rubber pristine. -
Sketch the spirals:
Lightly sketch the center points for your tie-dye swirls using a pencil. I like to place one large spiral on the toe box and a partial spiral wrapping around the side heel area for balanced asymmetry. -
Draft the guidelines:
Extend faint spiral lines outward from your center points. These don’t need to be perfect; they just serve as a map for where your color transitions will happen.
Step 2: Creating the Texture
-
Start the center:
Begin with the toe spiral on the left shoe. Using a teal marker, draw short, dashed lines following the curve of your first inner spiral guideline. Make the strokes look fibrous, like threads, rather than solid lines. -
Layer the second color:
Switch to a light green or yellow marker. Draw the next ring of the spiral, slightly overlapping the teal strokes. The overlap is crucial for that blended tie-dye effect. -
Mirror the pattern:
On the right shoe, start the toe spiral with a warm color like orange or deep yellow. Use the same short, dashed stroke technique to create a sunburst center. -
Building the gradient:
Continue expanding the spirals outward. For the left shoe (cool tones), transition from teal to green to white space to teal again. For the right shoe (warm tones), move from yellow to orange to magenta. -
Varying stroke density:
As your spiral gets wider, make your dashed lines slightly longer and less dense. This mimics how tie-dye fades slightly as it expands. -
Adding contrast:
Introduce a contrasting color ring. On the cool-toned shoe, add a thin ring of pink or orange between teal layers. On the warm shoe, throw in a curve of teal or purple. -
Side details:
Move to the side panels near the lace eyelets. Recreate smaller sections of spirals here, ensuring colors flow naturally from the toe design. -
Heel work:
Don’t forget the back. Continue the spiral pattern so it wraps around the heel, making the design viewable from all angles.
Bleed Control
Use 91% alcohol for less bleeding and sharper lines. 70% alcohol contains more water, creating a softer, more watercolor-like wash.
Step 3: Blending & Finishing
-
Initial bleeding:
Dip a cotton swab or fine brush into rubbing alcohol. Extremely gently, dab (don’t rub) the areas where colors meet. This will cause the ink to spread slightly and blur the hard edges of your marker strokes. -
Control the spread:
Work in very small sections. You want the texture of the strokes to remain visible, just slightly softened, not completely washed out into a watercolor mess. -
Let it dry:
Allow the shoes to air dry completely for at least 2 hours. Alcohol evaporates quickly, but the pigment needs to settle. -
Re-define texture:
Once dry, go back over the pattern with your markers. Add fresh, sharp hatched lines on top of the blurred layer to bring back that detailed, embroidered look. -
Final crisping:
Use a white gel pen or white fabric paint to add tiny highlights or ‘negative space’ between the spiral arms if the blending got too dark. -
Heat set:
If using fabric markers, toss the shoes in a clean dryer on high heat for 15 minutes, or use a hairdryer on the hottest setting for 5-10 minutes per shoe to lock in the color. -
Remove tape:
Peel off the masking tape from the soles and re-lace your shoes with clean white laces.
Neon Pop
Swap standard laces for neon orange or teal ones that match a specific ring in your spiral to tie the whole color scheme together visually.
Step out in your new custom kicks and enjoy the swirl of colors with every stride


Checkerboard Toes for Instant Pop
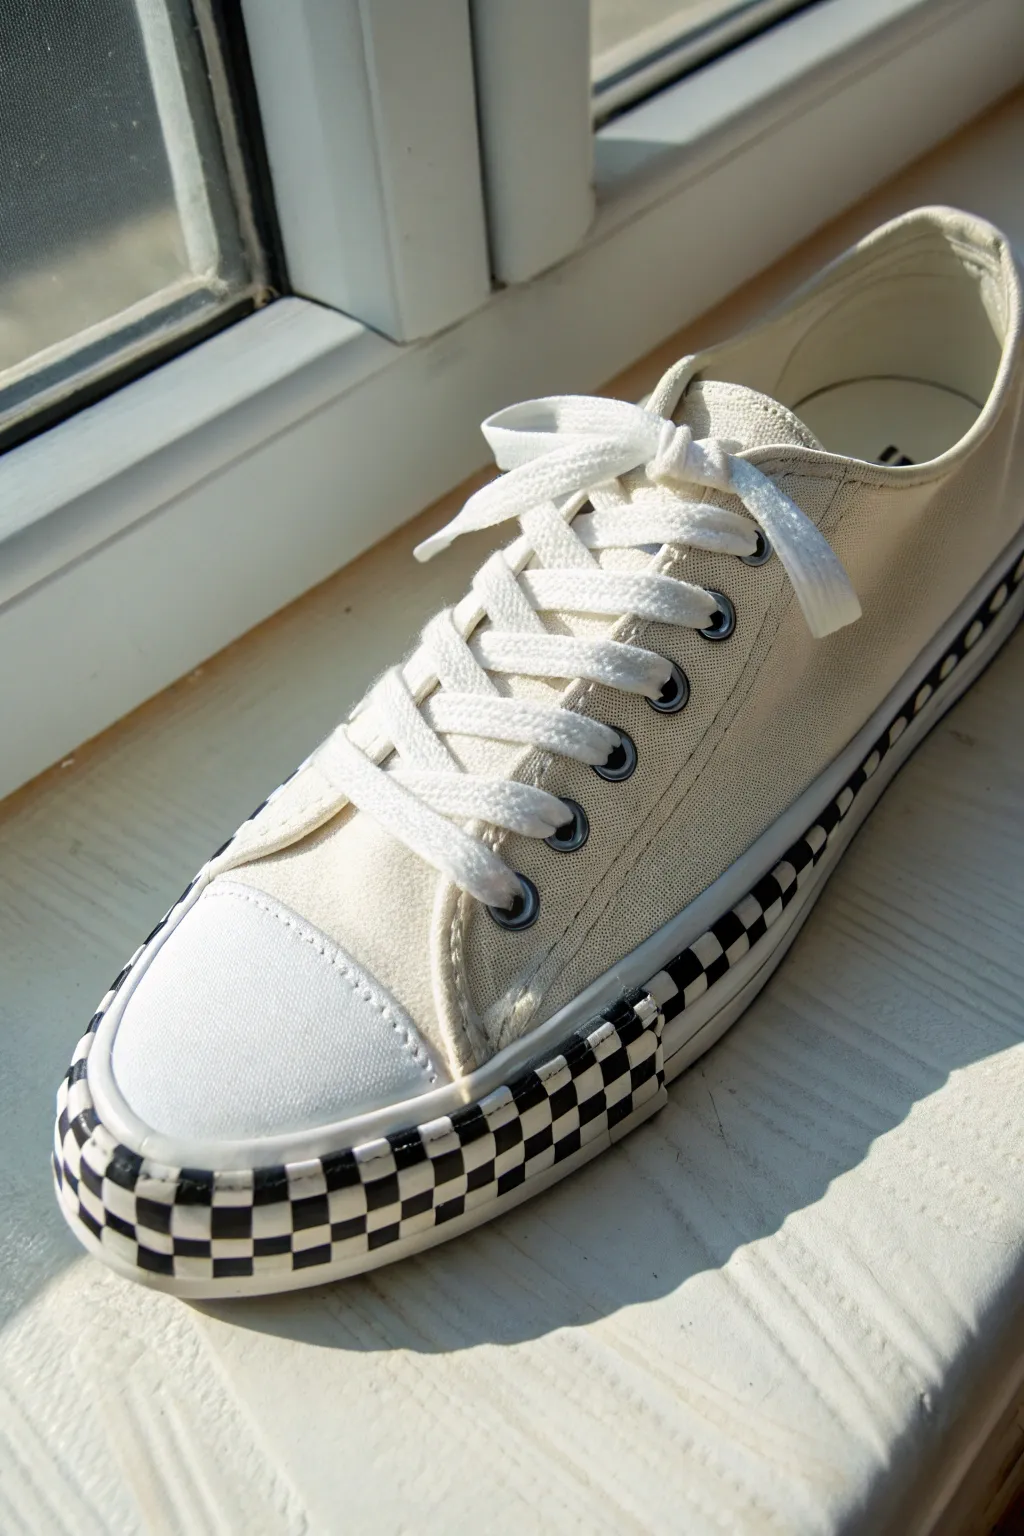
Transform a basic pair of canvas sneakers into a statement piece with this high-contrast midsole upgrade. By adding a classic checkerboard pattern to the foxing tape, you create a bold, ska-inspired look that gives ordinary kicks an instant edge.
Step-by-Step Tutorial
Materials
- White low-top canvas sneakers (with thick rubber midsoles)
- Black acrylic leather paint (e.g., Angelus)
- Painter’s tape or masking tape (1/4 inch width is ideal)
- Small flat paintbrush (approx. size 2 or 4)
- Isopropyl alcohol and cotton pads
- Matte or satin acrylic finisher
- Pencil
- Ruler or measuring tape
- X-Acto knife or craft blade
Step 1: Preparation
-
Clean the surface:
Before any paint touches the shoe, you need a pristine surface. Wipe down the rubber midsole thoroughly with a cotton pad soaked in isopropyl alcohol. This removes factory glazes and oils that prevent paint adhesion. -
Remove laces:
Take out the shoelaces completely to ensure they don’t get stray paint on them and to allow easier access to the tongue area if needed. -
Tape off the canvas:
Apply painter’s tape along the bottom edge of the canvas upper, right where it meets the rubber sole. Press it down firmly to create a tight seal so no black paint bleeds onto the fabric.
Paint Prep Pro Tip
Mix a tiny amount of 2-Hard or weird a bonding agent into your acrylic paint. It helps the pigment flex with the rubber instead of cracking when you walk.
Step 2: Drafting the Grid
-
Measure the vertical:
Measure the height of your rubber midsole. Divide this number by three to determine the height of your checkerboard squares. For most standard soles, this will be roughly 1 centimeter per row. -
Draw horizontal guides:
Using a pencil and a steady hand (or flexible ruler), lightly draw two horizontal lines around the entire perimeter of the midsole, creating three equal horizontal bands. -
Mark vertical intervals:
Starting from the toe cap seam, use your ruler to mark vertical intervals along the midsole. Taper the width slightly as you round the toe curve to match the perspective, but keep the side sections uniform. -
Connect the lines:
Draw vertical lines connecting top to bottom at your marked intervals, essentially creating a grid all around the rubber sole. -
Mark the black squares:
To avoid confusion while painting, place a tiny ‘x’ inside every other square on your grid. This visual guide ensures you maintain the alternating pattern correctly.
Level Up: Color Pop
Swap the classic black paint for a neon color like slime green or hot pink for a vibrant 90s skater vibe, or use a metallic gold for a luxe finish.
Step 3: Painting the Pattern
-
Paint the outline:
For the first black square, take your small flat brush and carefully paint the outline of the box first. Using the flat edge of the brush helps create sharp, straight lines. -
Fill the center:
Once outlined, fill in the center of the square with smooth strokes. Apply the paint thinly—thick globs will crack when the shoe flexes. -
Continue the first row:
Work your way around the top row first, painting every alternating square. I find it easier to complete one horizontal band before moving to the next to keep the rhythm steady. -
Paint the second row:
Move to the middle band. Remember that the black squares here must be offset from the row above. If the square above is black, the one below it must be white. -
Complete the bottom row:
Finish the pattern by painting the bottom row, which should vertically align with the top row’s black squares. Be careful near the very bottom edge of the sole. -
Clean up edges:
If any lines look wobbly, use a craft knife to gently scrape away excess dried paint, or use a fine brush with white paint to touch up the negative space. -
Apply a second coat:
Once the first layer is dry (about 15-20 minutes), apply a second thin coat of black to ensure full opacity and varied depth.
Step 4: Finishing Touches
-
Remove the tape:
Slowly peel off the painter’s tape while the paint is dry to the touch but hasn’t fully cured overnight. Pulling at a 45-degree angle usually gives the cleanest line. -
Seal the deal:
Apply a clear acrylic finisher over the painted areas. This is crucial for rubber soles as it protects against scuffs and water damage. -
Re-lace:
Thread your fresh white laces back through the eyelets once the sealer is fully dry.
Step out in your newly customized kicks and enjoy the graphic impact of your handiwork


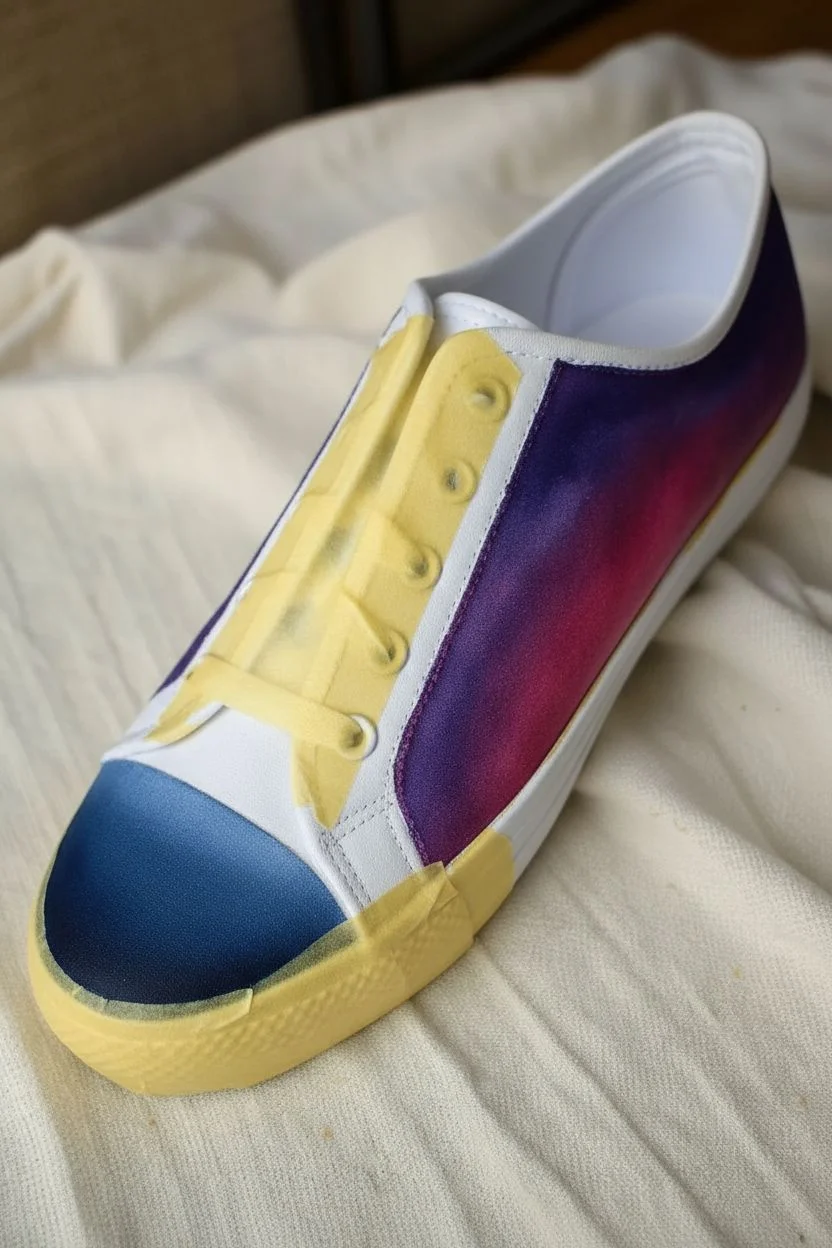
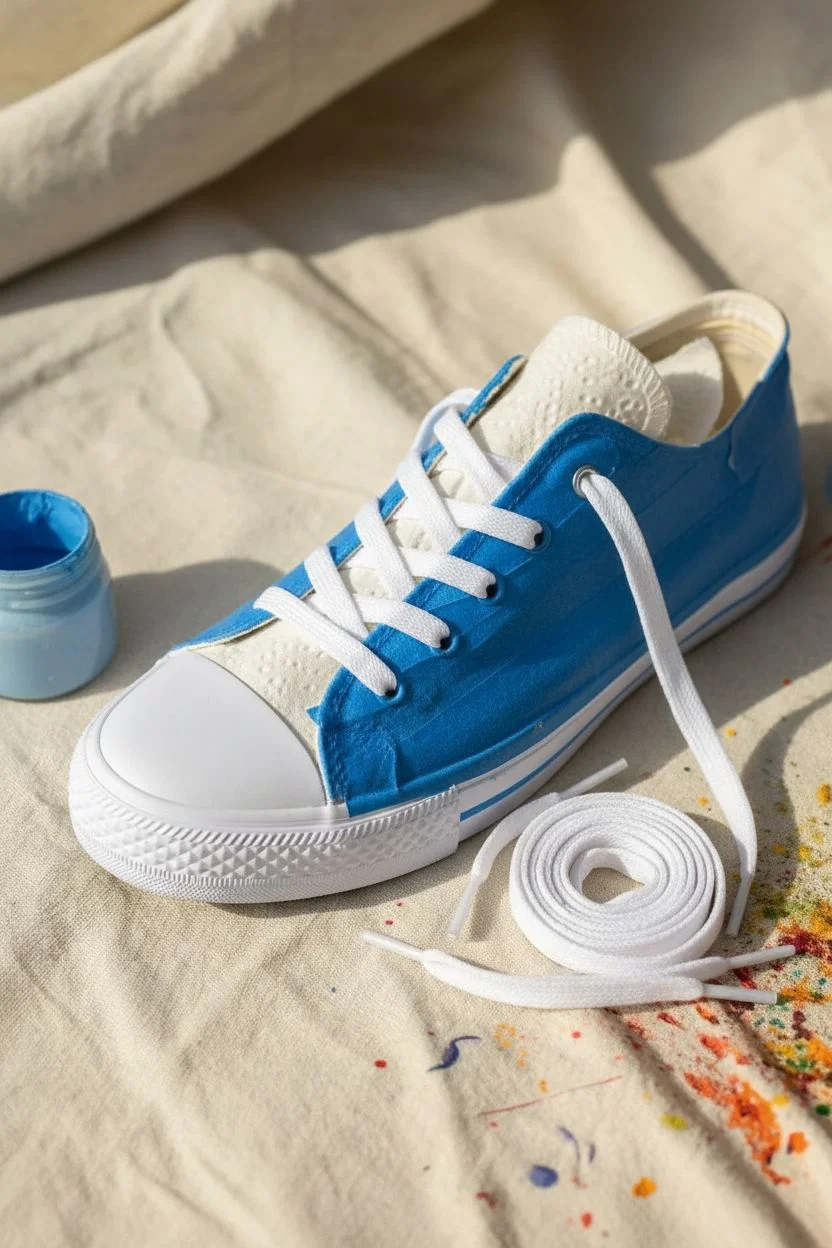
Rainbow Ombre Fade from Heel to Toe
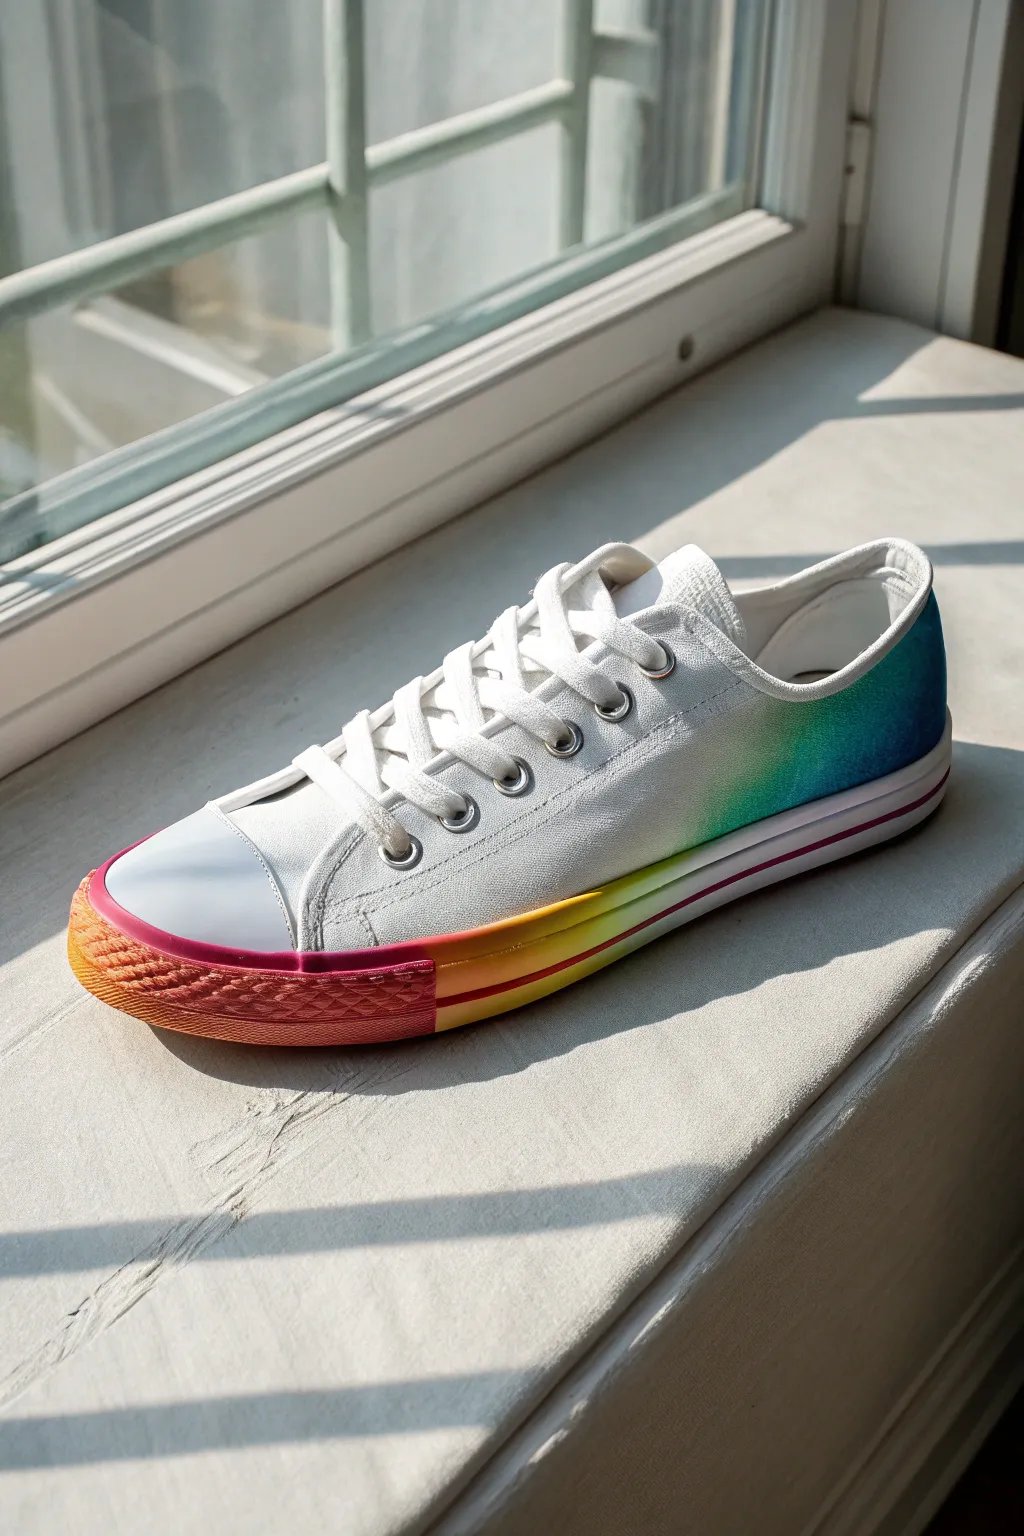
Transform plain white canvas sneakers into a vibrant statement piece with this clever dual-technique gradient. By combining fabric paint on the upper canvas with durable acrylics on the rubber sole, you’ll create a seamless rainbow that flows from a cool blue heel to a fiery red toe.
Step-by-Step Guide
Materials
- White canvas sneakers
- Fabric paint or acrylic paint mixed with textile medium
- Acrylic paint (for the rubber sole)
- Acrylic matte sealer or clear coat
- Painter’s tape or masking tape
- Small sponges or makeup sponges
- Small flat paintbrush
- Small detail paintbrush
- Palette or paper plate
- Water cup
Step 1: Preparation
-
Remove the Laces:
Start by completely unlacing both shoes. This prevents accidental paint splatters on the laces and gives you full access to the tongue and eyelet areas. -
Clean surface:
Wipe down the rubber soles with a little rubbing alcohol or soapy water to remove any factory oils or dust, ensuring the paint adheres perfectly. -
Stuff the shoes:
Pack the inside of the shoes tightly with newspaper or plastic bags. This creates a firm surface to paint against and stops paint from seeping through to the lining.
Uneven Gradients?
If your color transitions look blocky, use a clean, slightly damp sponge to dab the boundary between colors while they are still wet. This feathers the edges together softly.
Step 2: Painting the Canvas Upper
-
Tape the Sole (Partially):
Apply painter’s tape along the rubber sole edge where the canvas meets the rubber, but only for the front half of the shoe. We want to protect the front rubber initially while leaving the back heel area accessible. -
Mix Your Blues:
On your palette, prepare a deep blue and a teal shade of fabric paint. If you are using standard acrylics, mix them 1:1 with textile medium to ensure flexibility. -
Apply the Heel Color:
Using a sponge, dab the deep blue paint onto the very back heel of the canvas. Press the paint into the weave rather than brushing it on top. -
Start the Canvas Gradient:
While the blue is still wet, sponge the teal color next to it, moving forward toward the middle of the shoe. Blend the overlap gently by tapping the sponge to soften the line between blue and teal. -
Fade to White:
As you move past the ankle area, lightly fade the teal out into the white canvas. The goal is for the color to disappear before it reaches the toe cap area, leaving the front canvas stark white. -
Dry the Canvas:
Allow the fabric paint to dry completely. A hair dryer on a low setting can speed this up, but be careful not to overheat the rubber glue.
Add Some Sparkle
Mix a tiny amount of textile glitter medium into your blue and teal paint for the heel. It adds a subtle shimmer that catches the light beautifully when you walk
Step 3: Painting the Rubber Sole
-
Remove Tape:
Peel off the tape you applied earlier. Now we will work on the rubber sections. -
Tape the Canvas:
Apply a new strip of tape on the canvas itself, right along the edge where it meets the rubber sole. This step is crucial to get a crisp line on the rubber without ruining your white canvas or the fade you just painted. -
Paint the Toe Cap:
Mix a vibrant pinkish-red acrylic paint. Apply this solidly to the textured rubber toe bumper at the very front. You may need two coats for full opacity. -
Start the Sole Gradient:
Next to the pink toe cap, paint a band of orange on the smooth rubber sidewall. While wet, blend it slightly into the red edge. -
Add the Yellow:
Continue painting backward along the stripe of the sole with bright yellow. Blend the meeting point with the orange while the paint is still wet to create a smooth transition. -
Finish with Green:
As the yellow moves toward the back of the shoe, transition into a lime green. This green section should align roughly with where your teal fade on the canvas above is disappearing. -
Clean Edges:
Before the paint fully sets, peel off your tape carefully. Use a damp Q-tip to immediately wipe away any tiny mistakes on the rubber or canvas.
Step 4: Sealing and Finishing
-
Seal the Rubber:
Once the rubber paint is thoroughly dry, apply a coat of matte or satin acrylic sealer over the painted rubber parts. This prevents cracking and peeling as you walk. -
Heat Set the Canvas:
If your fabric paint instructions require it, use a hair dryer or an iron (with a cloth in between) to heat set the pigment on the canvas heel for washability. -
Re-lace:
Once everything is cured (usually 24 hours is safest), re-lace your sneakers with fresh white laces to make the colors pop.
Wear your new custom kicks with pride and watch as they brighten up every step you take


Tiny Hearts and Doodles All Over Canvas Shoes
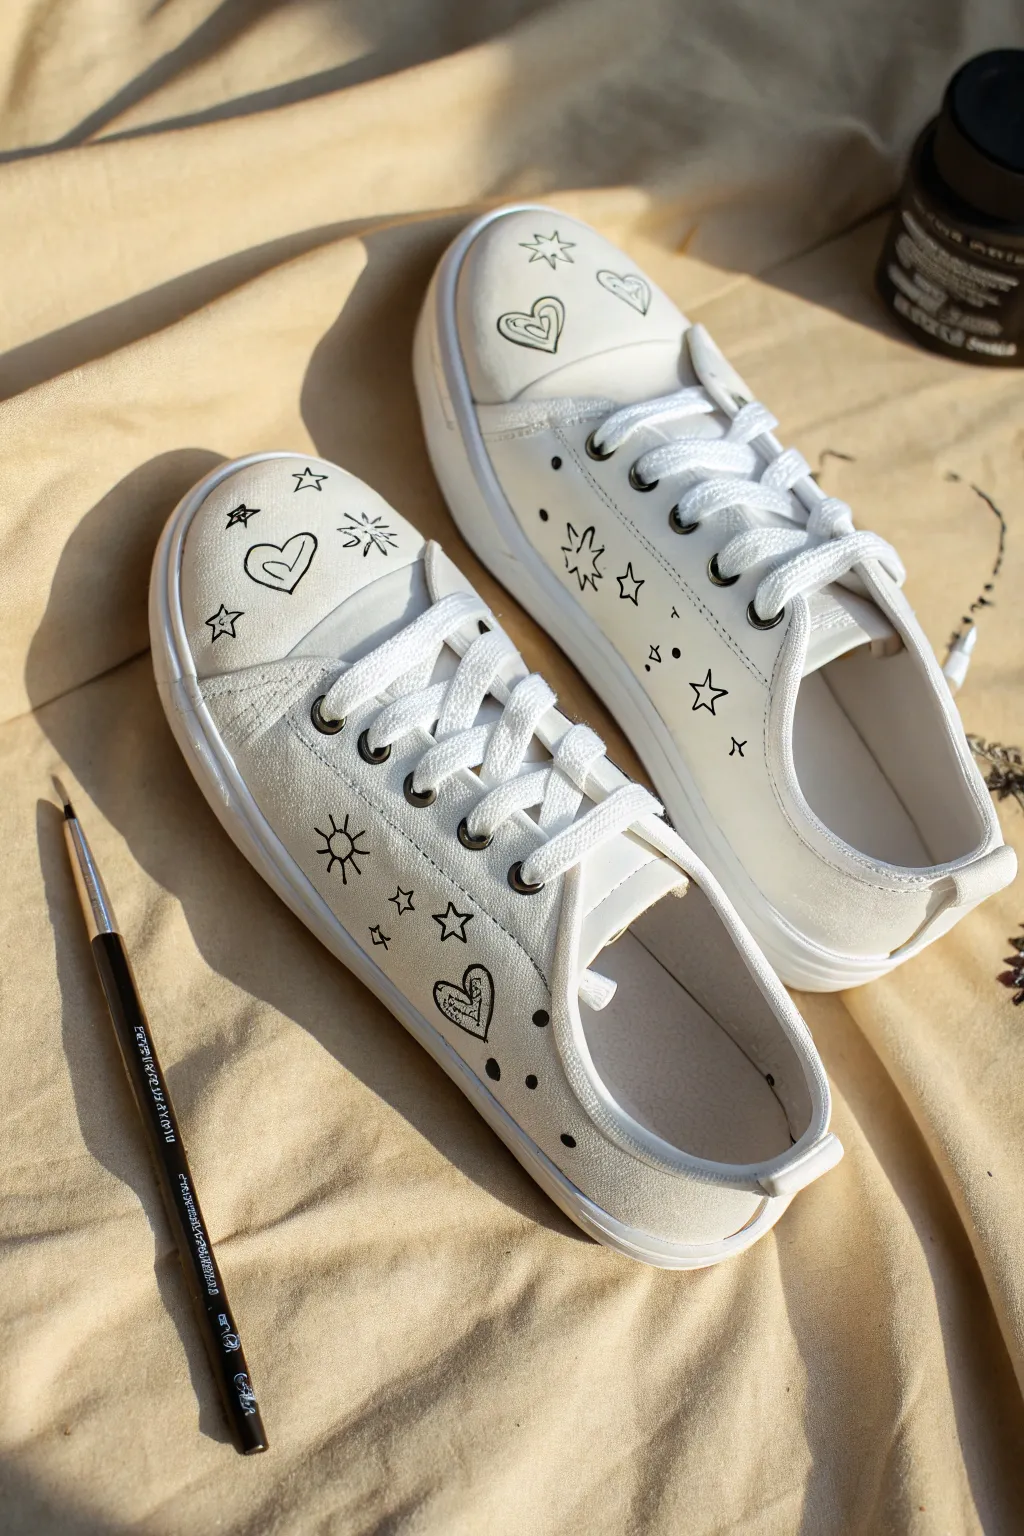
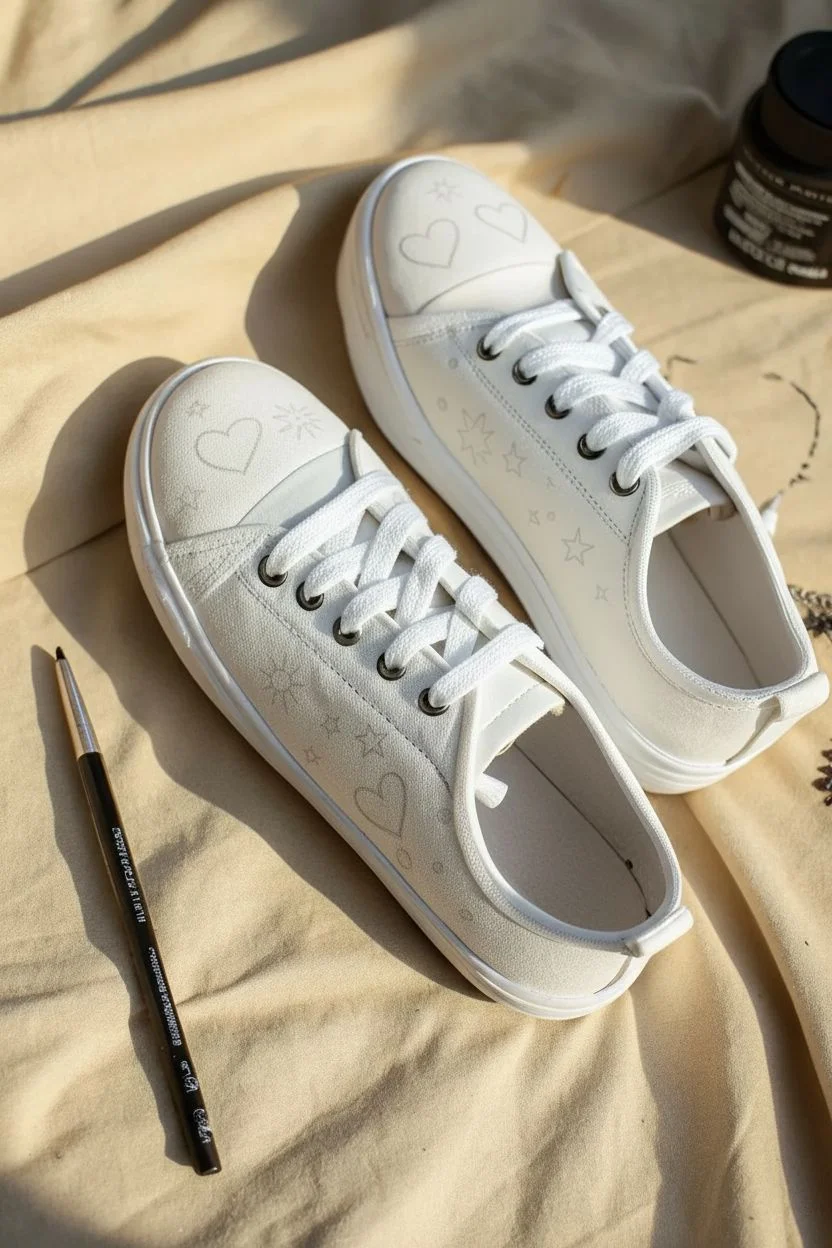
Transform a plain pair of white everyday sneakers into a whimsical statement piece with nothing more than a steady hand and some black ink. This minimalist design features scattered hearts, stars, and celestial doodles for a playful, hand-drawn aesthetic that looks effortlessly cool.
Detailed Instructions
Materials
- White canvas sneakers (clean and dry)
- Black fabric marker (fine tip) or fine liner pen suitable for fabric
- Pencil (HB or lighter)
- Eraser
- Optional: Waterproof sealant spray
- Optional: Small piece of scrap paper or fabric for testing
Step 1: Preparation & Planning
-
Prepare the canvas:
Ensure your sneakers are completely clean and dry before starting. Remove the shoelaces to give yourself a clear, unobstructed canvas to work on, especially around the eyelets and tongue. -
Sketch the focal points:
Using a light pencil, lightly sketch the largest motifs first. Place the main heart shapes on the toe box area where they will be most visible. Keep your lines faint so they are easy to erase later if needed. -
Add celestial elements:
Still using your pencil, sketch in a few larger stars key locations. Try placing a starburst or sun motif on the side panel to break up the empty space. -
Test your marker:
Before committing to ink, test your fabric marker on a scrap piece of fabric or paper. Check that the ink flows smoothly and isn’t bleeding too heavily, which can happen with certain canvas textures.
Step 2: Inking the Designs
-
Outline the hearts:
Begin inking with your black fabric marker. Start with the main hearts on the toe. For a stylistic touch, draw a second, smaller heart inside the first one, slightly off-center for a sketchy look. -
Draw the stars:
Move onto the star shapes. Draw simple five-point stars, but keep the lines open and disconnected at the tips or purposely uneven to maintain that hand-drawn doodle vibe. -
Create the sparkle motifs:
Draw the ‘sparkle’ stars, which look like an asterisk or a cross with varying line lengths. I find that grouping a sparkle next to a standard star creates a nice visual balance. -
Ink the sun doodles:
On the side of the shoe, ink your sun design. Draw a small circle and add simple stick-lines radiating outward. Variation in the length of the rays adds charm. -
Add filler details:
Look for empty spaces between your main drawings. Add tiny dots, small circles, or very small four-point stars to fill these gaps without overcrowding the design. -
Mirror the design (loosely):
Repeat the process on the second shoe. Don’t worry about making it a perfect mirror image; slight asymmetry makes custom shoes feel more authentic and artistic.
Ink Control Pro-Tip
Work from the center of the shoe outward to avoid smudging wet ink with your hand. If you’re right-handed, move left to right; if left-handed, go right to left.
Step 3: Finishing Touches
-
Let the ink set:
Allow the ink to dry completely. Depending on your marker brand, this might take anywhere from 12 to 24 hours. Refer to the manufacturer’s instructions for specific drying times. -
Erase pencil guides:
Once the ink is fully dry and set, gently use an eraser to remove any visible pencil lines that weren’t covered by the black ink. -
Heat set (optional):
Some fabric markers require heat setting. If yours does, use a blow dryer on high heat or throw the shoes in the dryer for a short cycle (check shoe care instructions first) to lock in the color. -
Protect your work:
Spray a light coat of waterproof sealant over the canvas area to protect your doodles from rain and dirt. -
Re-lace:
Once the sealant is dry, lace your shoes back up. You can use standard white laces or switch to something colorful.
Level Up: Color Pop
Fill in just the tiny inner hearts with a bright red or neon pink fabric marker. The splash of color against the black doodles makes the design significantly bolder.
Step out in style knowing your footwear is truly one-of-a-kind
BRUSH GUIDE
The Right Brush for Every Stroke
From clean lines to bold texture — master brush choice, stroke control, and essential techniques.
Explore the Full Guide
Minimal Line Art Faces on Canvas Shoes
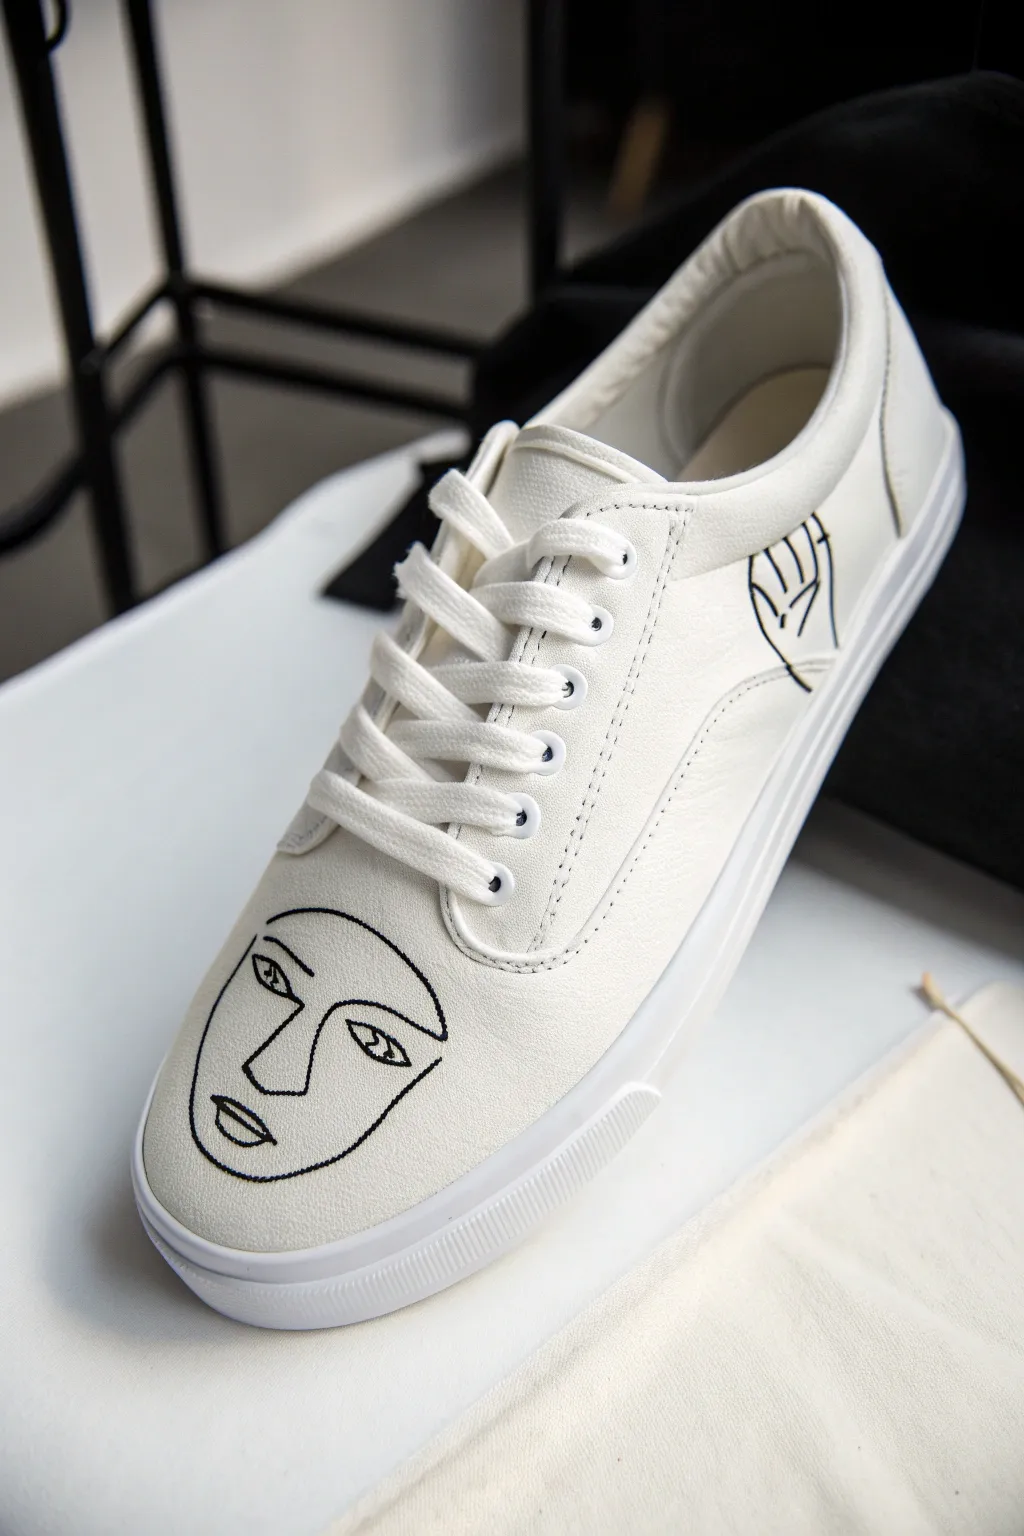
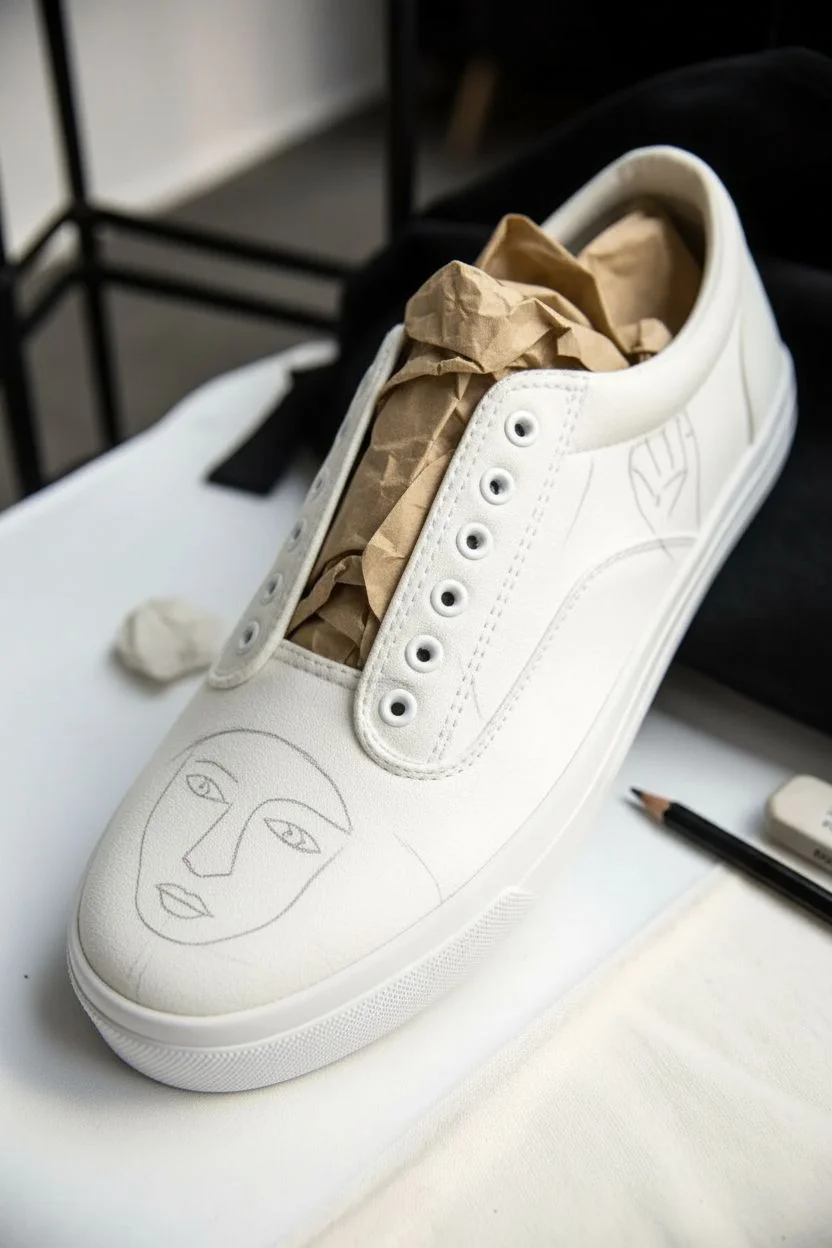
Transform a plain pair of white plimsolls into a wearable gallery piece with this minimal line art design. Inspired by modern abstract sketches, this project uses bold black lines to create a striking face motif on the toe and subtle details on the heel.
Step-by-Step Tutorial
Materials
- White canvas sneakers (low-top plimsolls)
- Black fabric marker (fine tip)
- Black fabric marker (medium tip or brush tip)
- Pencil (HB or lighter)
- Eraser
- Paper towels or scrap fabric
- Waterproofing spray or fabric sealant
- Tracing paper (optional)
- Small piece of cardboard (to stuff the shoe)
Step 1: Preparation & Sketching
-
Clean surface:
Ensure your canvas shoes are clean and dry. If they are brand new, you can start immediately. If they’ve been worn, wipe them down with a damp cloth and let them dry completely. -
Remove laces:
Take the laces off both shoes. This gives you unobstructed access to the tongue and eyelet areas and prevents accidental ink smudges on the laces. -
Stuff the toe:
Push a small ball of paper towels or a piece of cardboard into the toe box of the shoe. This creates a firm, even surface for drawing and prevents the canvas from collapsing while you work. -
Draft the face outline:
Using your pencil very lightly, sketch the outline of the face on the toe. Start with the U-shape of the jawline, keeping it centered but slightly organic in shape. -
Add facial features:
Sketch the nose as a continuous L-shaped line connecting from the brow. Add the almond-shaped eyes—one slightly higher than the other adds character—and finish with the lips. -
Draft the side detail:
Move to the outer heel area of the shoe. Lightly sketch the secondary motif, which in this design looks like a stylized hand or abstract geometric shape. Keep it simple to match the minimal aesthetic. -
Review and refine:
Take a step back and look at your pencil marks. The beauty of line art is in the flow, so ensure your curves look smooth. Erase any lines that feel too cluttered.
Step 2: Inking the Design
-
Test your marker:
Before touching the shoe, test your black fabric marker on a scrap piece of fabric to check the ink flow. I always do this to avoid sudden ink blobs. -
Trace the jawline:
Using the medium-tip fabric marker, carefully trace over your pencil line for the jaw. Use a slow, confident stroke rather than short sketchy ones to get a clean look. -
Ink the eyes:
Switch to a finer tip marker if available for the eyes. Outline the almond shapes first, then carefully fill in the pupils, leaving a tiny spot of white if you want a highlight. -
Connect the nose and brow:
Draw the nose line. Start from the eyebrow area and bring the line down and across to form the nose tip. Maintain consistent pressure so the line thickness matches the jaw. -
Define the lips:
Ink the lips. A simple outline works best; avoid filling them in completely to keep the design airy and light. -
Ink the side motif:
Rotate the shoe and trace over your side sketch. Ensure the lines here are just as bold as the face on the toe to balance the visual weight of the shoe. -
Let ink set:
Allow the ink to dry for at least 15 to 20 minutes. Be careful not to smudge wet ink with your hand while handling the shoe.
Clean Lines Hack
Work from the center outwards to avoid smudging your own drawing with your palm. Resting your pinky on a dry spot creates a steady anchor.
Step 3: Finishing Touches
-
Erase guidelines:
Once the ink is fully dry, gently erase any visible pencil marks. Be gentle so you don’t roughen the canvas texture excessively. -
Seal the design:
In a well-ventilated area, spray a light coat of waterproofing spray or fabric sealant over the shoes. This protects your artwork from dirt and water. -
Re-lace:
Once the sealant is dry, lace your shoes back up. Bright white laces provide a crisp contrast to the black ink.
Add a Pop
Try using a single color of embroidery thread to stitch over just one line, like the lips or an eye, for a mixed-media 3D effect.
Now step out in style with your unique, gallery-worthy custom kicks
Sunset Sky Gradient with Silhouette Details
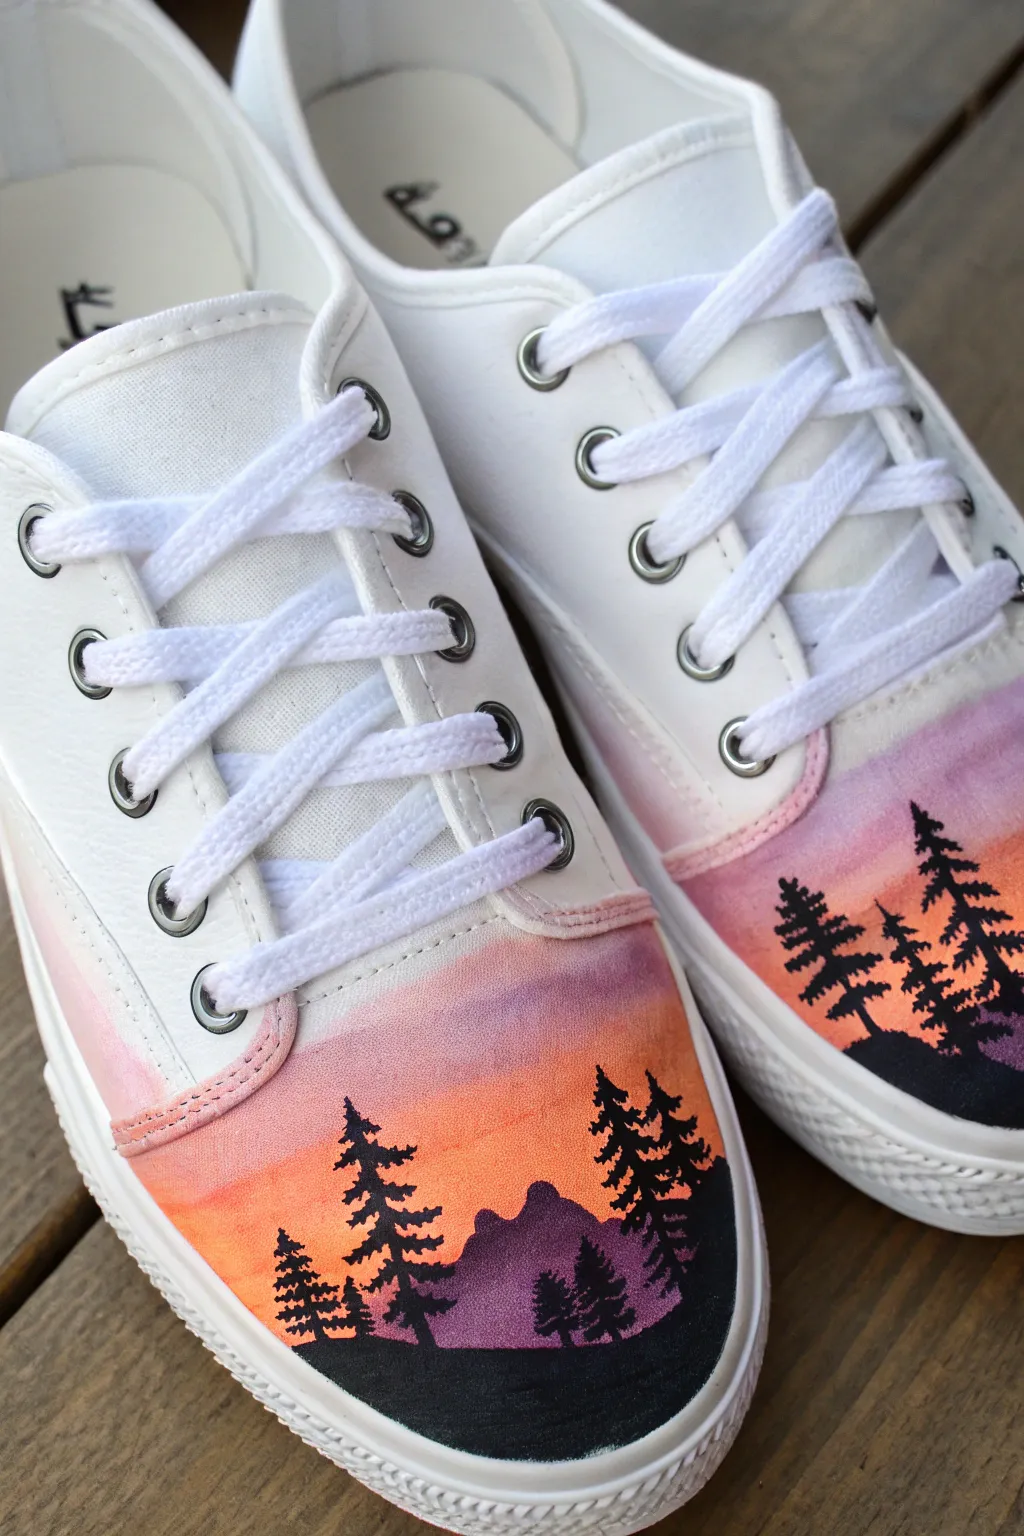
Transform plain white sneakers into wearable art with this vibrant sunset sky design. Featuring a smooth gradient of warm hues and crisp black forest silhouettes, these shoes capture the serene beauty of twilight in a stylish, custom package.
Detailed Instructions
Materials
- White canvas sneakers (clean and dry)
- Fabric medium
- Acrylic paints: Titanium White, Magenta/Pink, Orange, Cadmium Yellow, Black, Deep Purple
- Soft synthetic flat brushes (small and medium)
- Fine liner brush (size 0 or 00)
- Painter’s tape or masking tape
- Water cup and palette
- Waterproofing spray or fabric sealer
Step 1: Prepping and Priming
-
Tape off the boundaries:
Use painter’s tape to carefully mask off the rubber soles and any areas of the shoe you want to keep pristine white, like the eyelet area or tongue. Press the edges down firmly to prevent paint seepage. -
Prepare the fabric medium mix:
Mix your acrylic paints with fabric medium according to the bottle’s instructions (usually a 1:1 or 2:1 ratio). This step is crucial because it keeps the paint flexible, preventing cracks when you walk. -
Base coat application:
Apply a thin layer of white acrylic mixed with fabric medium over the toe area where you will be painting. This acts as a primer to make the sunset colors pop vibrantly against the canvas.
Wet-on-Wet Blending
Work quickly on the sky! Acrylics dry fast. If the paint drags, dip your brush in a tiny bit of water to keep the gradient smooth and buttery.
Step 2: Creating the Sunset Gradient
-
Start with the sky top:
Begin at the top edge of the toe section (near the laces) with a soft pink or light magenta shade. Brush horizontally in smooth strokes. -
Introduce the purple tones:
While the pink is still wet, blend in a very small amount of purple just at the transition zone to deepen the sky, keeping the color light and dreamy. -
Transition to orange:
Below the pink section, apply your bright orange paint. Use a clean, slightly damp flat brush to blend the meeting point between the pink and orange while both are wet to create a seamless gradient. -
Finish with yellow warmth:
Near the bottom of the toe area (where the horizon will be), blend in your yellow or peach tones, merging them upwards into the orange for a glowing horizon effect. -
Paint the background mountains:
Mix purple with a tiny dot of black to get a muted violet color. Paint a simple, lumpy mountain shape near the bottom, letting the orange sky show behind it. This creates atmospheric perspective. -
Allow to dry:
Let the gradient and mountain layer dry completely. I prefer to wait at least 20 minutes here so the crisp black silhouettes don’t bleed into the sky.
Step 3: Adding the Silhouette Details
-
Establish the ground line:
Using pure black paint mixed with fabric medium, paint a solid, slightly wavy line across the very bottom of the toe cap to serve as the foreground earth. -
Draft the tree trunks:
Switch to your fine liner brush. Paint thin, vertical lines extending up from the black ground line to establish the heights of your pine trees. Vary the heights for a natural look. -
Stipple the foliage:
Using the very tip of the liner brush or a small stippling brush, tap small horizontal dashes across the tree trunks. Start narrow at the top and get wider as you move down the trunk. -
Refine the tree shapes:
Go back over your trees to fill in gaps, making the branches look irregular and organic. Don’t make them perfect triangles; nature is messy. -
Add side details:
Depending on the shoe’s construction, you might want to extend a few small trees or the gradient slightly onto the side panels for continuity, just as seen in the inspiration image.
Starry Night Upgrade
Once the sky is dry, flick a stiff toothbrush dipped in watered-down white paint over the upper purple section to add tiny stars.
Step 4: Finishing Touches
-
Remove the tape:
Carefully peel away the masking tape while the paint is dry to the touch but not fully cured, which helps prevent peeling up chunks of paint. -
Cleanup edges:
If any paint bled onto the rubber sole, use a cotton swab dipped in rubbing alcohol or acetone to wipe it away immediately. -
Seal the deal:
Once the shoes have cured for at least 24 hours, spray them with a waterproofing fabric sealer to protect your artwork from dirt and rain.
Lace up your new custom kicks and enjoy the view wherever you walk

PENCIL GUIDE
Understanding Pencil Grades from H to B
From first sketch to finished drawing — learn pencil grades, line control, and shading techniques.
Explore the Full Guide
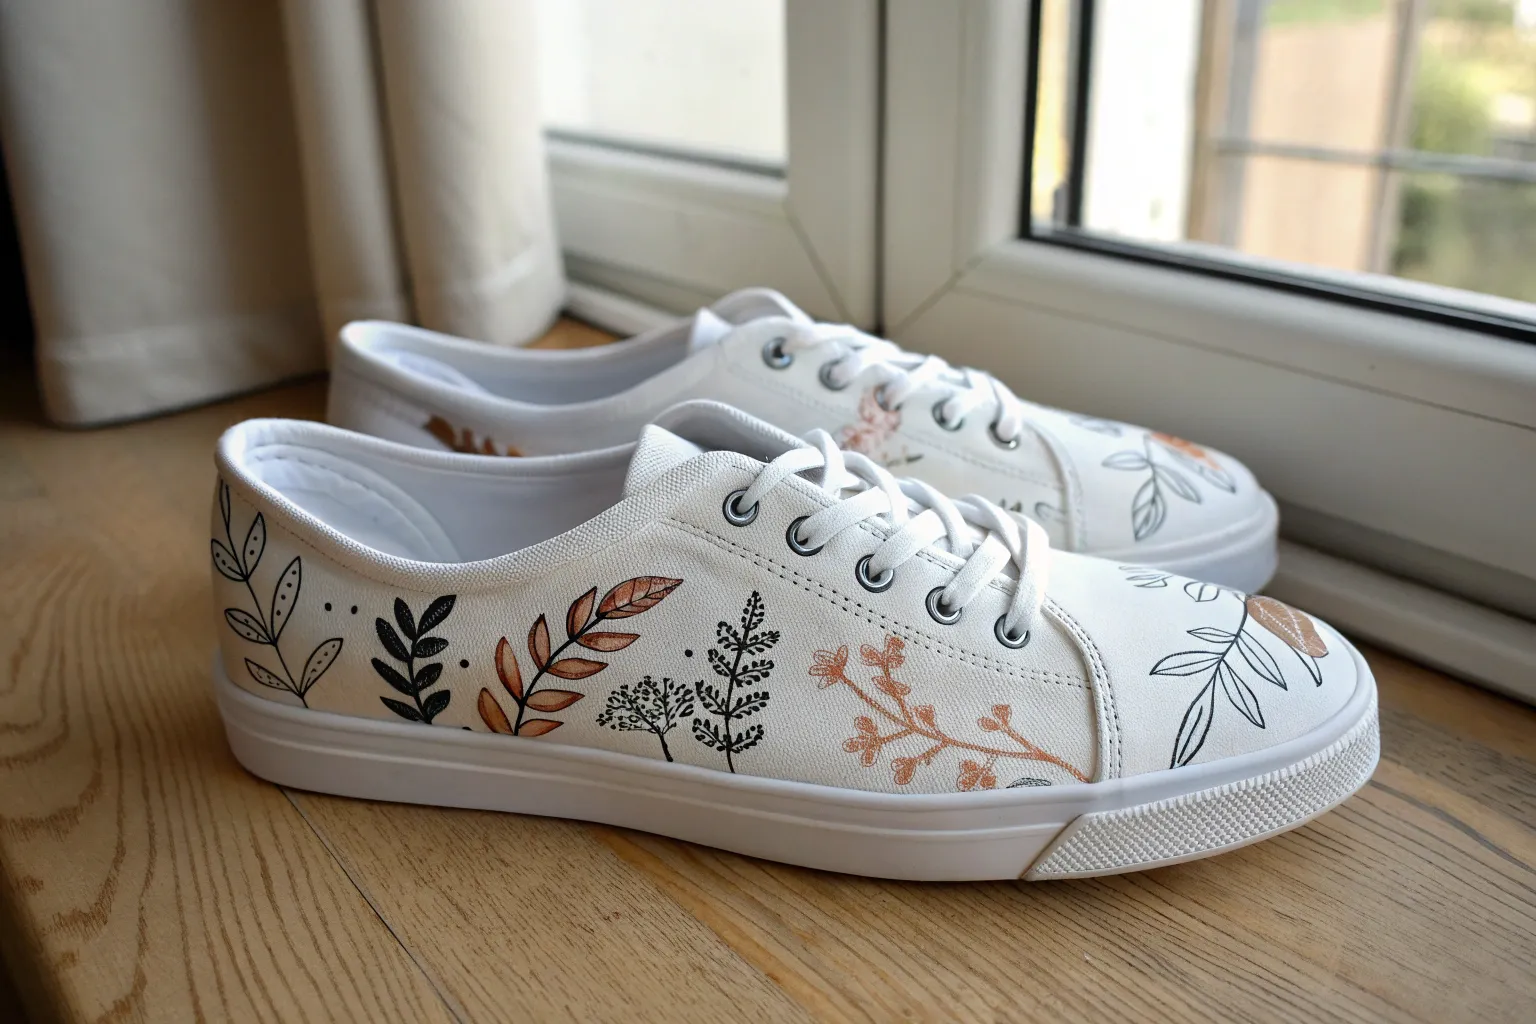
Botanical Vines Wrapping Around the Canvas
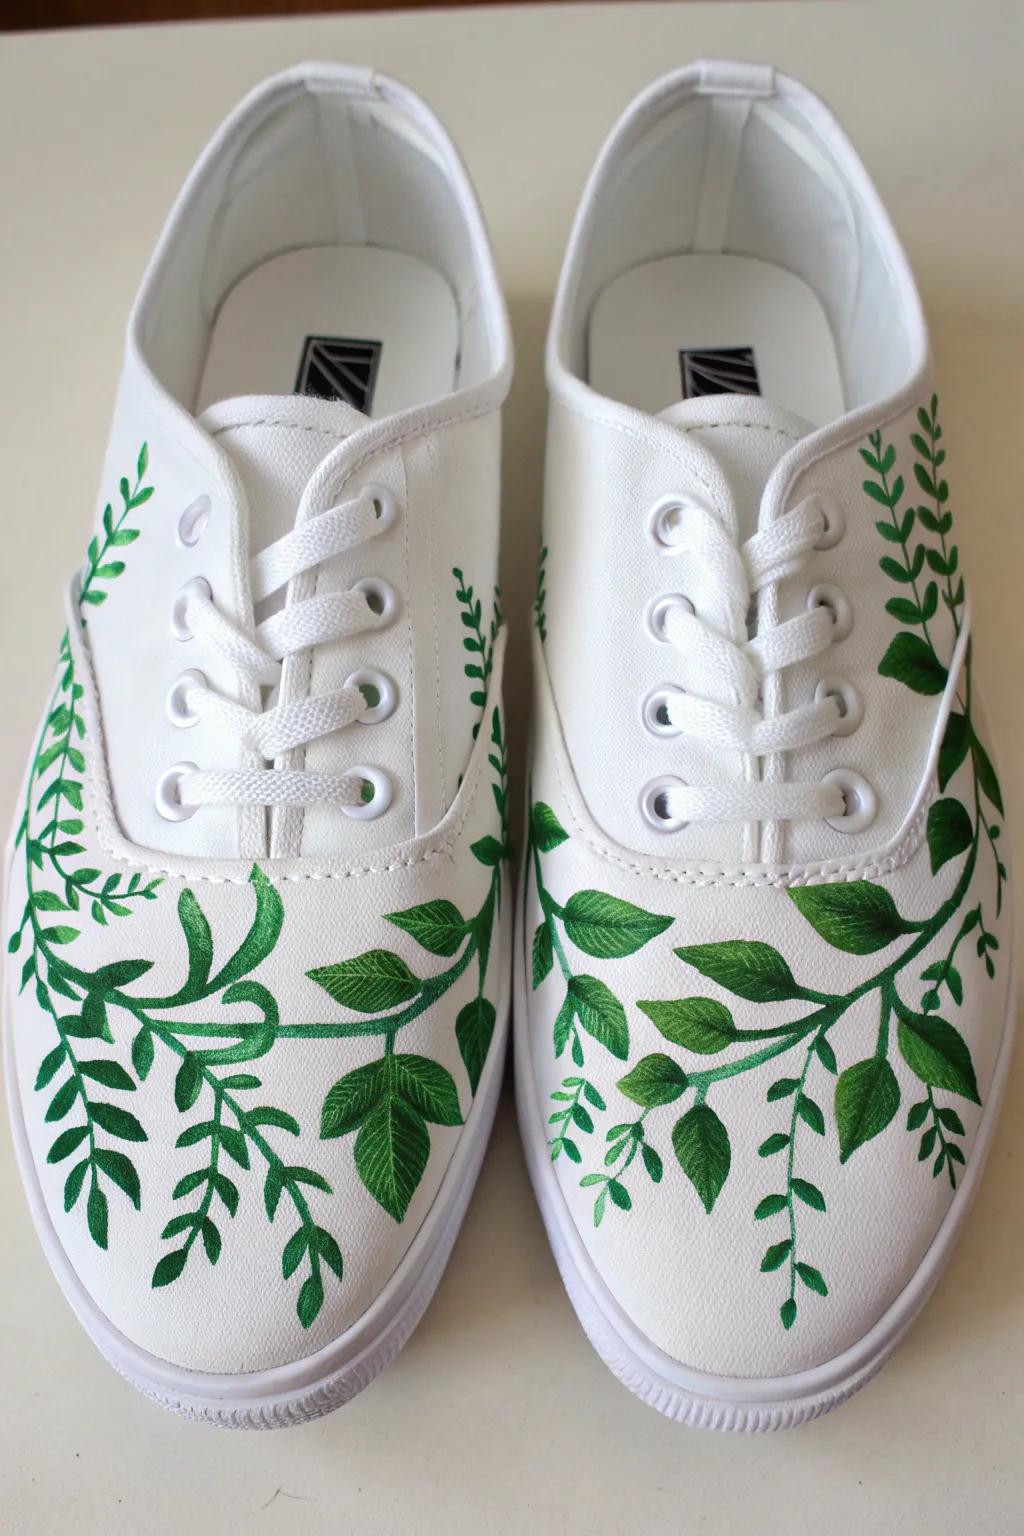
Transform a plain pair of white plimsolls into a walking garden with these elegant botanical designs. The crawling vines feature a beautiful mix of broad, shaded leaves and delicate fern-like sprigs that wrap organically around the shoe’s contours.
Step-by-Step Tutorial
Materials
- White canvas sneakers (clean and dry)
- Fabric medium
- Acrylic paints (Dark hunter green, medium grass green, light lime green, and white)
- Round synthetic brushes (sizes 0, 2, and 4)
- Linear or detail brush (size 00)
- Pencil for sketching
- Palette or paper plate
- Water cup and paper towels
- Waterproofing spray or matte finisher
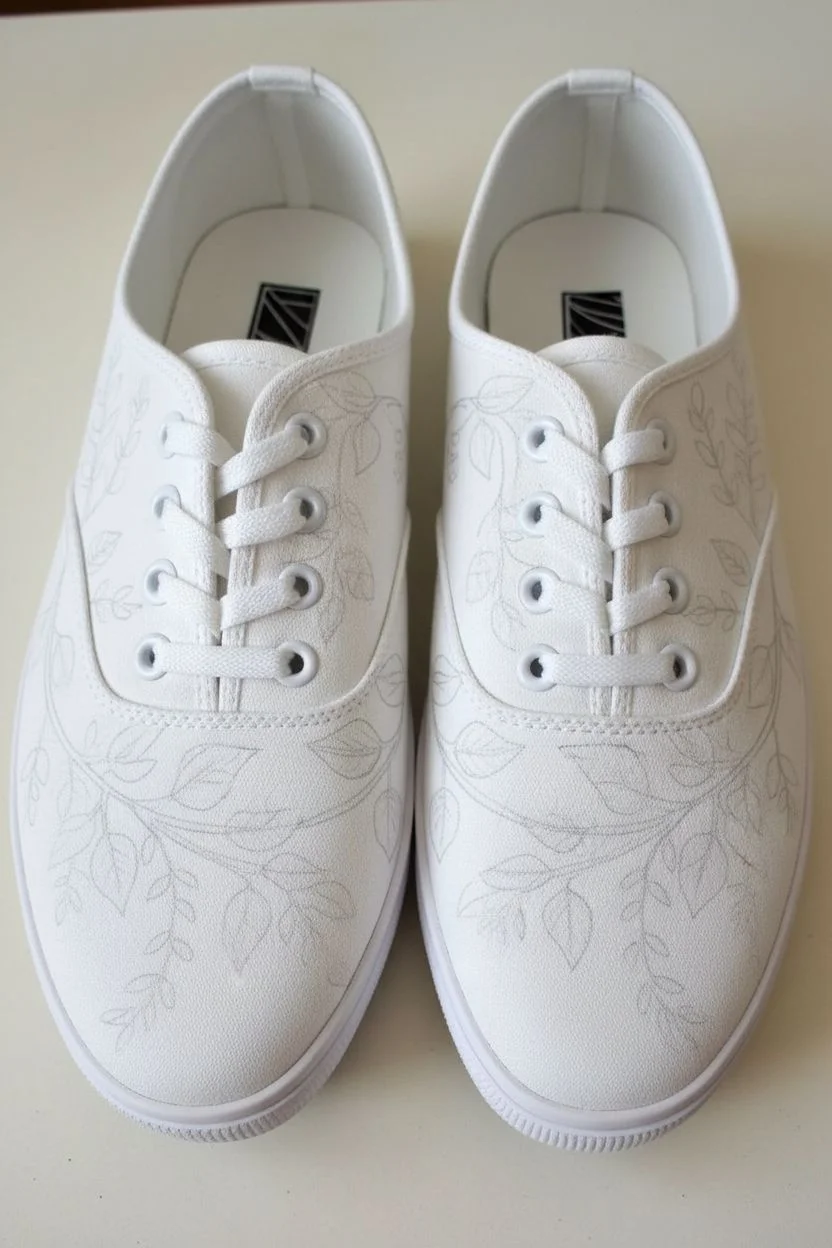
Step 1: Preparation & Mapping
-
Prep the surface:
If your shoes are new, give them a quick wipe with a clean, damp cloth to remove any factory sizing or dust, which helps the paint adhere better. -
Mix your medium:
Mix your acrylic paints with fabric medium according to the bottle instructions (usually 1:1 or 2:1 paint to medium). This is crucial for preventing cracks when the shoe flexes. -
Sketch the main vine:
Lightly sketch the primary vine stem using a pencil. Start from the outer heel, curve deeply towards the sole near the middle of the shoe, and then sweep calmly up towards the toe box area. -
Draw secondary branches:
Add smaller offshoot lines branching from your main stem. Aim for an organic flow where some stems curve up towards the laces and others trail down towards the rubber sole.
Fixing Wobbly Lines
Hand slip? Don’t panic. If paint is wet, wipe with a damp Q-tip. If dry, paint over the mistake with white acrylic mixed with fabric medium to act as an eraser.
Step 2: Painting the Base Layer
-
Paint the stems:
Using your size 0 or liner brush and your darkest hunter green, carefully trace over your pencil lines to establish the permanent vine structure. Keep the pressure light for thin, elegant stems. -
Block in large leaves:
Identify where the largest leaves will go—mainly in the center foreground. Use the size 4 brush to paint the basic leaf shape in a medium grass green. Don’t worry about shading yet; just get the silhouette right. -
Add fern sprigs:
Switch back to the size 0 or 00 brush. At the ends of the smaller vine branches, paint tiny, tear-drop shaped leaves in pairs to create a fern or wreath-like effect using the hunter green. -
Fill the toe box:
Continue the pattern onto the toe area. I find it looks best if these leaves are slightly smaller than the ones on the side, creating a sense of distance or delicacy.
Level Up: Hidden Critters
Hide a tiny painted ladybug or bumblebee on one of the leaves near the heel for a whimsical surprise that people will only notice upon closer inspection.
Step 3: Adding Depth & Detail
-
Mix a shadow shade:
Create a deep shadow color by mixing a tiny dot of black or dark blue into your hunter green. -
Shade the large leaves:
On the large medium-green leaves you painted earlier, add this shadow color to the base of the leaf and along one side of the central vein. Blend it slightly wet-into-wet if the base paint is still tacky. -
Mix a highlight shade:
Mix your light lime green with a touch of white to create a bright, fresh highlight color. -
Highlight leaf tips:
Apply this lighter green to the tips and the upper edges of the large leaves. This gradient from dark base to light tip gives the foliage a realistic, 3D volume. -
Add vein details:
Using your finest liner brush and the highlight mixture (or pure white for high contrast), paint incredibly thin veins inside the large leaves. A steady hand is key here. -
Detail the fern leaves:
Go back to the tiny dark fern leaves. Add a minuscule dot or line of the lighter green to just one side of each tiny leaf to suggest light hitting the texture.
Step 4: Finishing Touches
-
Refine edges:
Look for any blurred edges or uneven spots. Use the background white (or whatever color your shoe is) to carefully clean up the outline of any leaves that got messy. -
Mirror the design:
Repeat the process on the second shoe. Remember, nature isn’t symmetrical, so create a mirror image that feels balanced rather than an exact carbon copy. -
Let it cure:
Allow the paint to dry completely. For fabric paint, leaving it for 24 hours is usually best to ensure the bond is secure. -
Seal the deal:
Spray the painted areas with a waterproofing spray or a clear matte finisher to protect your artwork from puddles and dirt.
Lace up your new custom kicks and enjoy walking through your day with a touch of nature at your feet
Fruit Slices and Bright Summer Motifs
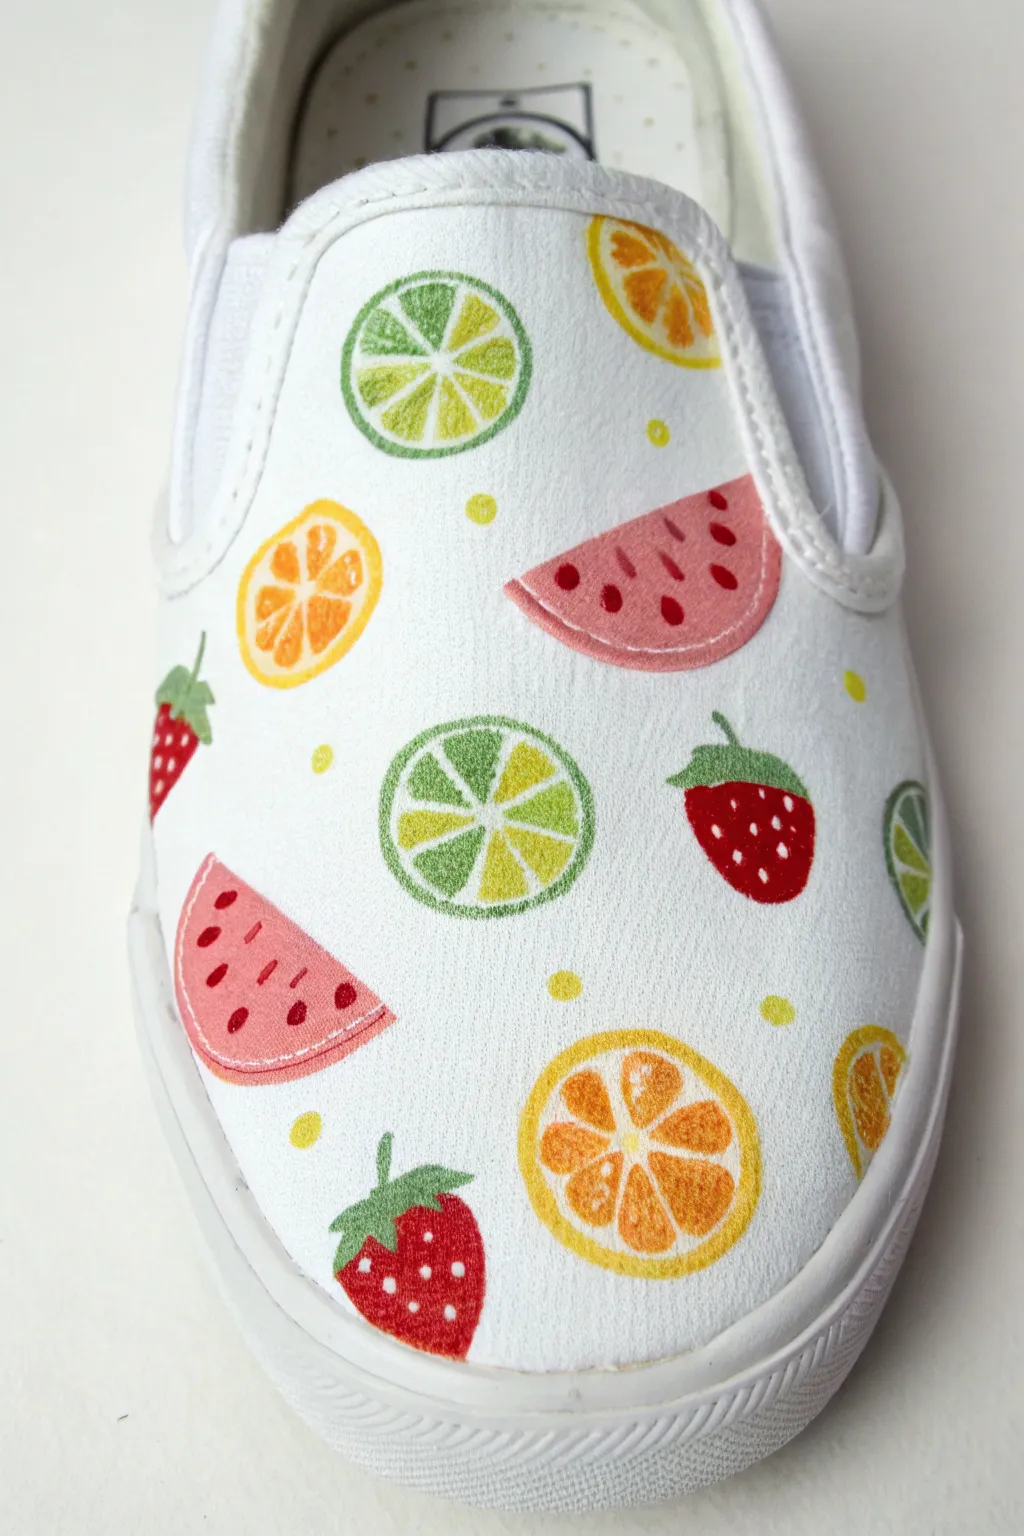
Step into summer with these vibrant, fruit-patterned slip-ons that look fresh enough to eat. Featuring juicy watermelon slices, zesty citrus wheels, and bright strawberries on a crisp white background, this project transforms plain canvas shoes into a statement piece.
Detailed Instructions
Materials
- White canvas slip-on shoes
- Fabric paint or soft body acrylics (Red, Orange, Yellow, Light Green, Dark Green, White, Black)
- Fabric painting medium (if using standard acrylics)
- Small round brushes (sizes 0, 2, and 4)
- Pencil for sketching
- Palette for mixing
- Water cup and paper towels
- Masking tape or painter’s tape (optional)
- Heat gun or hairdryer (optional for faster drying)
- Waterproofing shoe spray
Step 1: Preparation and Planning
-
Prep the Surface:
Before you start, make sure your shoes are clean and free of dust. If they are brand new, you can dive right in, but stuffing the toes with paper towels or newspaper can help create a firm surface to paint on while keeping the shape. -
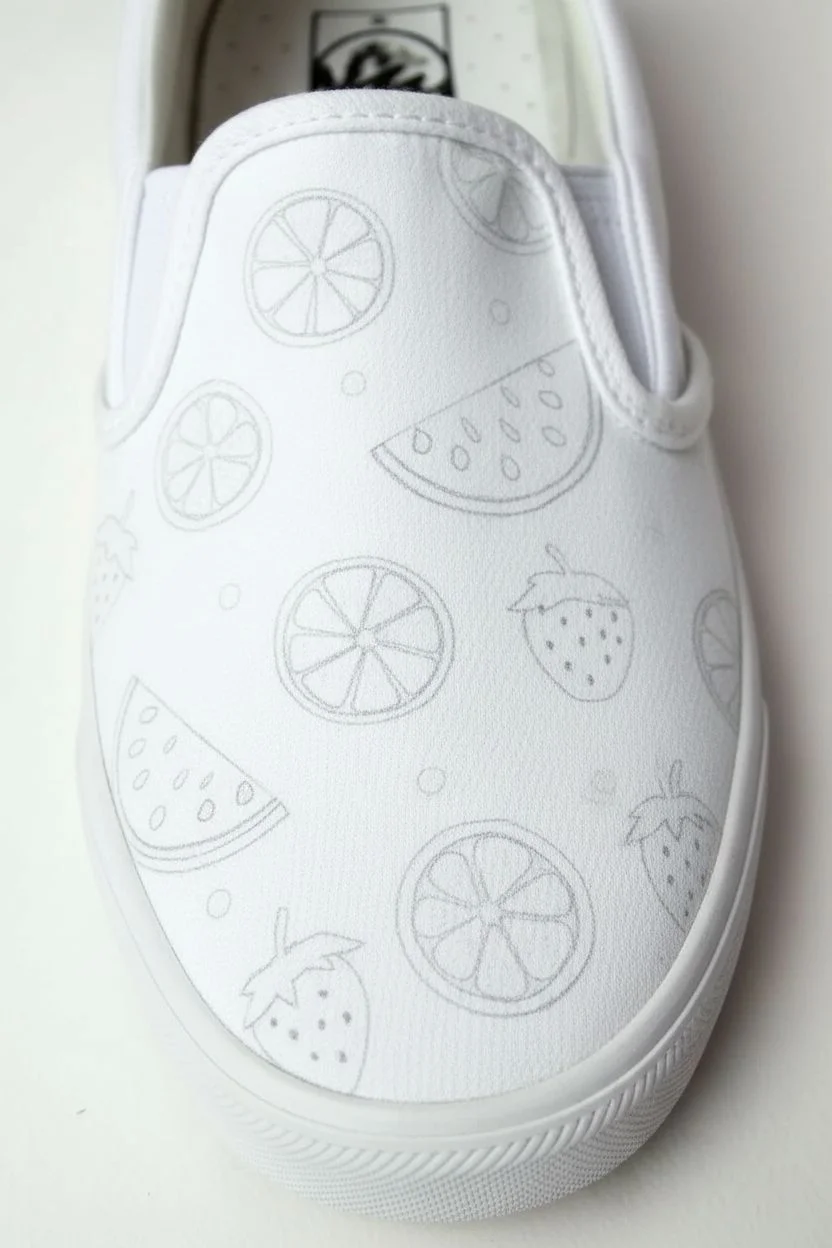
Sketch the Layout:
Using a pencil, lightly sketch your fruit placement. Aim for a random, scattered pattern. Draw semicircles for watermelons, full circles for citrus slices, and rounded triangles for strawberries. Leave plenty of negative white space between them to keep the look airy. -
Add Small Cutouts:
Don’t forget to draw a few ‘cut’ versions of the fruits, like half-circles for orange slices or wedges of watermelon, especially near the edges of the shoe where the pattern would naturally drop off.
Step 2: Painting the Citrus Slices
-
Base Base for Citrus:
Start with your citrus wheels (lemons, limes, oranges). Paint the main circle shape with a very pale, almost white mixture of your chosen color (yellow, green, or orange). This represents the pith. -
Define the Rind:
Using a size 2 brush, paint a thin ring around the outside edge of your circle in the darker, saturated version of the fruit color (e.g., bright orange for an orange slice). -
Paint the Segments:
Inside the pith circle, paint triangular wedges using the bright fruit color. Leave thin lines of the pale base color showing between the wedges to create the segment separation. This step really brings the citrus to life. -
Texture the Segments:
While the paint is still slightly tacky, I like to stipple (tap repeatedly) with a nearly dry brush to give the fruit flesh a bit of texture rather than a flat, solid look.
Fuzzy Lines?
If your pencil sketch is too dark and smudging into the paint, gently dab it with a kneaded eraser before painting. Always paint slightly over the pencil line to hide it completely.
Step 3: Painting Watermelons and Strawberries
-
Watermelon Base:
Fill in your watermelon semicircles with a soft, pinkish-red paint. Keep the paint relatively thin so it soaks into the canvas rather than sitting on top. -
Watermelon Rind:
Paint a thin strip of white along the curved bottom edge of the pink shape. Below that white strip, add a thin line of light green to complete the rind. -
Strawberry Bodies:
Fill in your strawberry shapes with a classic, bold red. Ensure the coverage is solid, applying a second coat if the white canvas shows through significantly. -
Strawberry Leaves:
Use a small brush and green paint to add the leafy calyx at the top of each strawberry. Use jagged, short strokes to mimic leaf edges.
Add Subtle Shading
Mix a tiny drop of white into your fruit colors and paint a small highlight on the upper left of each fruit slice. This simple step adds instant dimension and makes the fruit look juicy.
Step 4: Details and Finishing
-
Seeds for Watermelon:
Once the pink paint is fully dry, use a size 0 detail brush and dark brownish-black paint to add small teardrop-shaped seeds to the watermelon slices. -
Seeds for Strawberries:
For the strawberry seeds, use white or very pale yellow paint. Add tiny dots in a staggered pattern across the red body of the berry. -
Adding Filler Dots:
To tie the whole design together, paint small, random yellow or lime green polka dots in the empty white spaces. This adds energy and fills awkward gaps without cluttering the design. -
Set the Paint:
Allow the shoes to dry for at least 24 hours. To make the design permanent, heat set the paint by blowing hot air from a hairdryer over the surface for a few minutes. -
Protect Your Art:
Finally, seal your artwork with a waterproofing spray or fabric protector to keep your fruit slices looking fresh and prevent dirt from staining the white background.
Lace up your juicy new creations and enjoy a burst of summer color with every step you take


Polka Dot Patterns with Clean Masked Edges
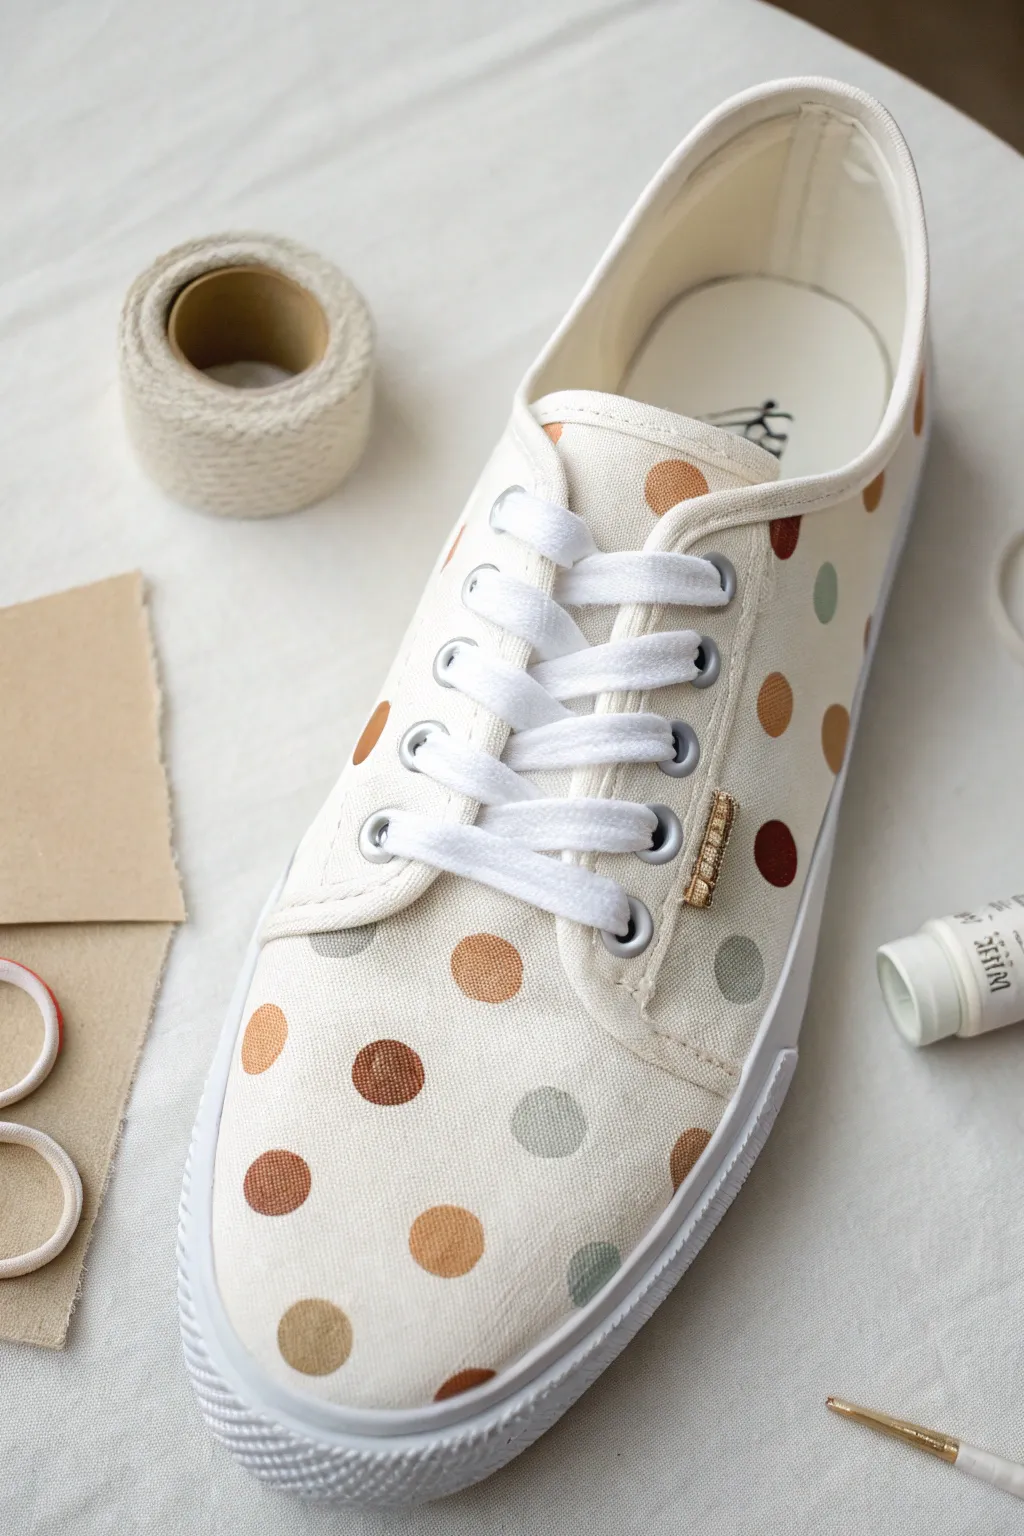
Transform a plain pair of white canvas sneakers into a sophisticated statement piece with this muted, earthy polka dot design. The use of round foam pouncers or masking techniques creates crisp, perfect circles that mimic a high-end printed fabric look.
Step-by-Step
Materials
- White canvas sneakers
- Fabric paint (burnt orange, tan, olive green, deep burgundy)
- Round foam pouncers (varying sizes, or small circular stencils)
- Small fine-tip paintbrush
- Painter’s tape or masking tape
- Cardboard scraps (to insert into shoes)
- Small palette or plate
- Fabric sealant spray (optional)
Step 1: Preparation & Planning
-
Prep the Shoes:
Remove the laces completely from your white canvas sneakers. This ensures you can paint uninterrupted surfaces near the eyelets without obstruction. -
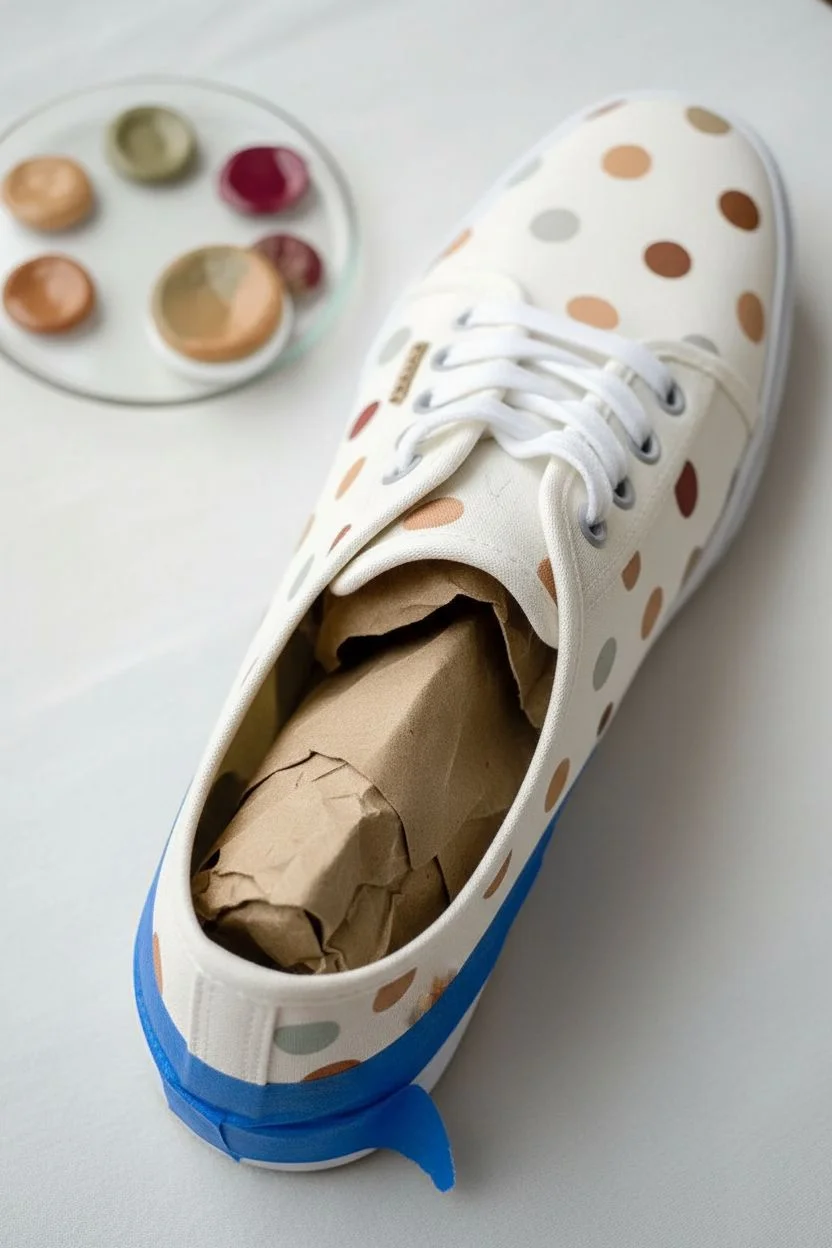
Stuff It:
Stuff the toe box and main body of the shoe tightly with crumpled paper or some of the cardboard scraps. This creates a firm surface to press against while painting, preventing the canvas from denting inwards. -
Protect the Rubber:
Carefully apply painter’s tape along the rubber sole edges (the foxing tape) where the fabric meets the sole. Run your fingernail along the edge to ensure a tight seal so no paint bleeds onto the rubber. -
Plan Your Palette:
Squeeze dime-sized amounts of your fabric paint colors onto a palette. Aim for an autumn-inspired mix: burnt orange, warm tan, olive green, and a deep maroon.
Crisp Circle Secret
Don’t press too hard with the foam pouncer. Too much pressure squeezes paint out the sides, creating a messy rim. Use a light, even tap and reload paint more often for opaque coverage.
Step 2: Painting the Dots
-
Load the Pouncer:
Select a foam pouncer that matches your desired dot size (approx. 1/2 inch works well). Dip it into your lightest color first, like the tan, dabbing off excess paint on a clean part of the palette to prevent globs. -
First Color Application:
Press the pouncer firmly onto the canvas with a slight twisting motion to transfer the paint evenly. Place these tan dots randomly around the shoe, leaving plenty of white space between them for other colors. -
Add Warmth:
Switch to a clean pouncer (or wash and dry the first one) and load it with the burnt orange paint. Add these dots into the gaps, keeping the spacing somewhat irregular for a playful look. -
Introduce Depth:
Repeat the process with the olive green paint. I like to let the dots encroach slightly on seams or edges, as if the pattern continues off the shoe, rather than perfectly centering every dot. -
Final Accents:
Finish with the deep burgundy or maroon paint. These darker dots act as anchors for the design, so place them thoughtfully to balance the lighter tones. -
Handling Edges:
For dots that ‘fall off’ the edge of the shoe near the sole or the heel, tilt the pouncer so only half of it makes contact with the canvas, ensuring the circle shape looks cut off naturally.
Bleeding Paint Fix
If paint bleeds under your stencil or pouncer, let it dry completely. Then, use a small stiff brush with white opaque fabric paint to carefully correct the shape from the outside in.
Step 3: Refining & Finishing
-
Touch Up Edges:
Sometimes foam pouncers leave a slightly fuzzy edge. Use a very small fine-tip brush dipped in the matching color to carefully smooth out the circumference of any dots that look uneven. -
Fill the Gaps:
Step back and look at the shoe from a distance. If any areas look too sparse, add a partial dot or a small dot to balance the composition. -
Clean the Eyelets:
If any paint accidentally got onto the metal eyelets, wipe it away immediately with a damp detailing swab before it dries and hardens. -
Dry Time:
Allow the shoes to dry completely for at least 24 hours. Keep them in a well-ventilated area away from direct moisture. -
Remove Tape:
Once dry, slowly peel off the masking tape from the soles. Pull the tape at a 45-degree angle away from the canvas to ensure a clean line. -
Heat Set:
Most fabric paints require heat setting. Use a hairdryer on a high heat setting, holding it a few inches from the surface for several minutes, or follow your specific paint bottle’s instructions. -
Re-lace:
Thread your crisp white laces back through the eyelets. The clean laces against the new pattern will make the colors pop.
Enjoy your customized kicks, knowing you have a totally unique pattern that’s ready for any casual outing
Bold Color-Block Panels on Canvas Shoes
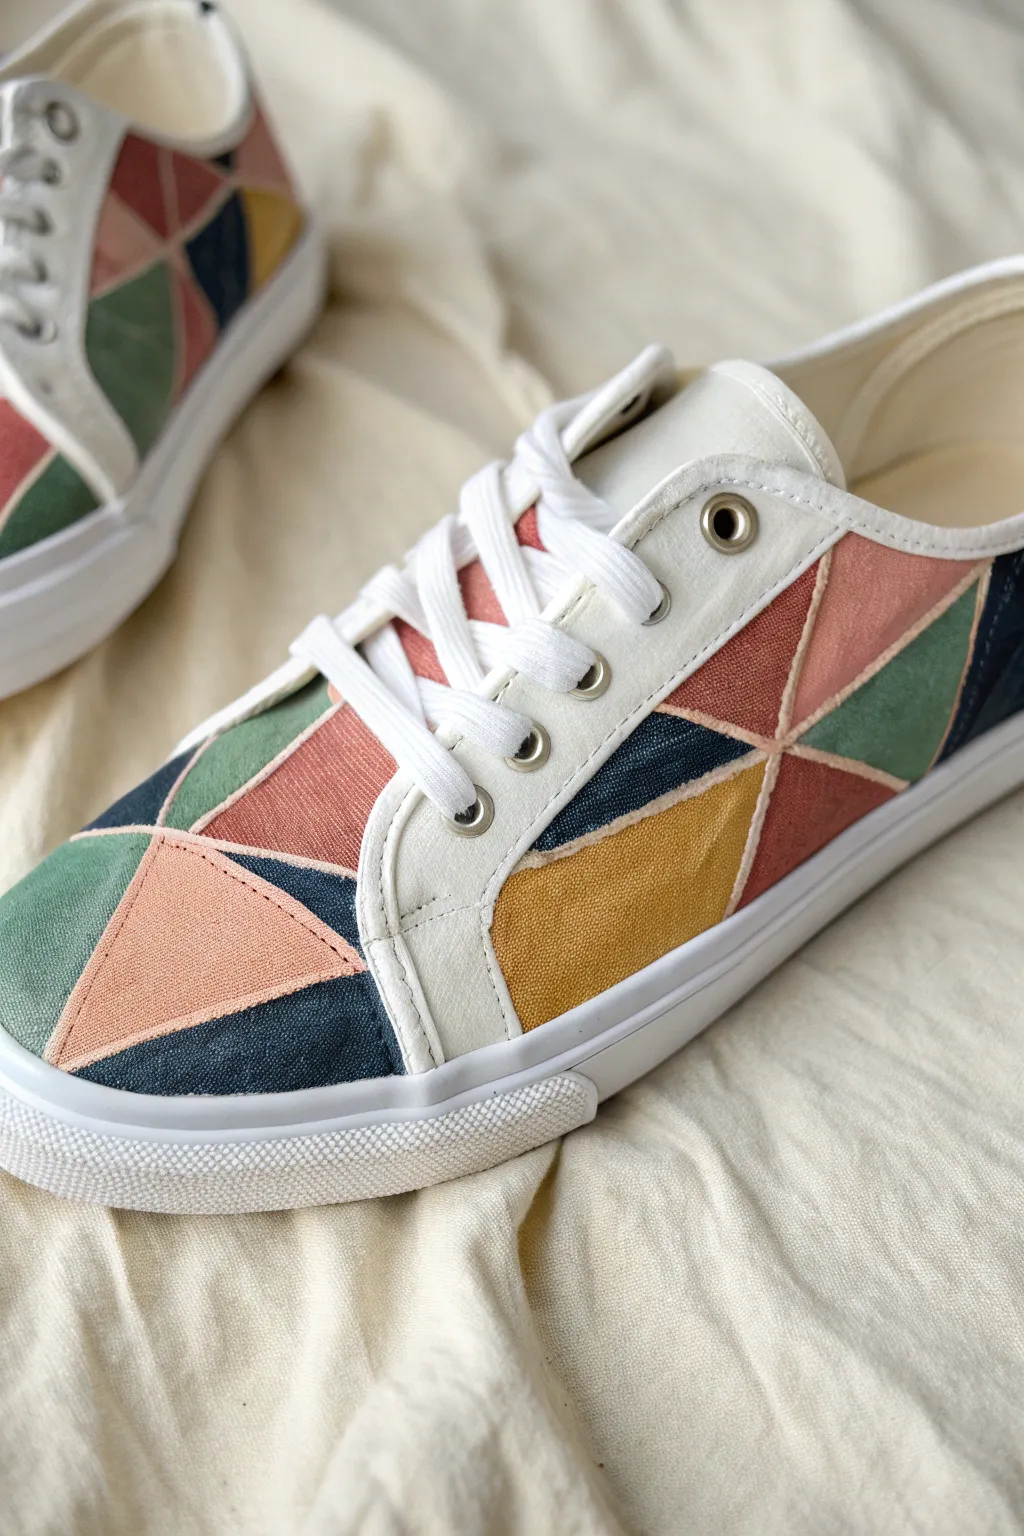
Transform plain white canvas sneakers into a modern art statement with this striking geometric design. Using a palette of muted earth tones like salmon, sage, navy, and mustard creates a sophisticated look that feels custom-made rather than just a DIY craft.
How-To Guide
Materials
- White canvas sneakers (lace-up style)
- Fabric paint or acrylic paint mixed with textile medium
- Paint colors: Salmon pink, deep navy blue, forest green, mustard yellow
- Painter’s tape or thin masking tape (1/4 inch width is best)
- Small flat angled brush
- Fine detail brush (size 0 or 1)
- Pencil or disappearing fabric marker
- Ruler
- Water cup and paper towels
- Sealant or fabric protector spray (optional)
Step 1: Preparation and Mapping
-
Prep the surface:
Remove the shoelaces completely from both shoes to ensure you have unobstructed access to the canvas panels. If the shoes are new, you might want to wipe them down with a slightly damp cloth to remove any factory sizing or dust. -
Stuff the shoes:
Pack the inside of the shoes tightly with newspaper or plastic bags. This provides a solid surface to paint against and helps the shoe maintain its shape while you work on the geometric lines. -
Plan the geometry:
Using a ruler and a pencil, lightly draw a series of intersecting lines across the main canvas areas (the toe box and the side panels). Aim for a mix of triangles and trapezoids. -
Create focal points:
I like to create a few ‘starburst’ points where several triangles meet at a single vertex, like the design shown on the side panel. Keep your lines straight for that sharp, color-block aesthetic. -
Mask the soles:
Apply painter’s tape carefully along the rubber soles to protect them from stray brushstrokes. Run a fingernail along the tape edge to ensure a tight seal against the canvas.
Use Tape for Straight Lines
For super crisp white lines between colors, use 1/8 inch striping tape (autobody tape) to mask off the grid before painting. Peel it off when the paint is wet.
Step 2: Painting the Panels
-
Mix your medium:
If you are using standard acrylics, mix them with a textile medium according to the bottle instructions (usually 1:1 or 2:1). This keeps the paint flexible so it won’t crack when you walk. -
Outline the first shape:
Start with your darkest color, the deep navy blue. Use the fine detail brush to carefully outline the edges of a specific triangle, creating a crisp border between the shape and the planned white space (if any) or adjacent shapes. -
Fill in the navy sections:
Switch to the small flat brush to fill in the rest of the navy triangle. Paint in thin, even layers. Don’t worry if the first coat looks streaky; coverage improves with the second layer. -
Apply the green tones:
Moving to adjacent sections, apply the forest green paint. Try to space out colors so that two sections of the same color never touch each other directly. -
Add warmth with pink:
Paint the salmon pink sections next. This lighter color might require three thin coats to get the opaque, solid look visible in the photo. -
Incorporate the yellow:
Fill remaining designated spaces with mustard yellow. This bright pop contrasts beautifully with the navy and green. -
Leave white lines:
The key to this specific look is the thin white lines separating the shapes. As you paint adjacent colors, be extremely careful to leave a consistent 1-2mm gap of unpainted white canvas between them. This creates the ‘grouted’ look.
Step 3: Finishing Touches
-
Refine the edges:
Once the main blocks are dry to the touch, go back in with your tiniest brush and touch up any wobbly edges. The white gaps should look deliberate and clean. -
Second coat:
Assess the opacity. If any canvas texture is showing through too much or the colors look washed out, apply a second coat to those specific blocks. -
Clean the hardware:
If any paint accidentally got onto the metal eyelets, use a toothpick or a damp q-tip to scrape it off before it fully cures. -
Remove tape:
Peel off the tape protecting the soles. If any paint bled onto the rubber, you can usually wipe it away with a little rubbing alcohol or nail polish remover while it’s fresh. -
Set the paint:
Allow the shoes to dry for at least 24 hours. To make the design truly permanent, heat set the paint by blowing a hair dryer on high heat over the painted areas for a few minutes. -
Final protection:
Spray a light coat of fabric protector or clear sealant over the shoes to help them resist dirt and water. -
Re-lace specifically:
Once fully dry, re-lace your sneakers. Crisp white laces look best to match the white borders between your painted shapes.
Metallic Accent Upgrade
Swap the white separation lines for gold! Use a fine-tip metallic gold fabric marker to trace the white gaps between your colored blocks for a luxe finish.
Now you have a pair of custom geometrically-designed sneakers ready for a walk in the park
Galaxy Night Sky with Splatter Stars
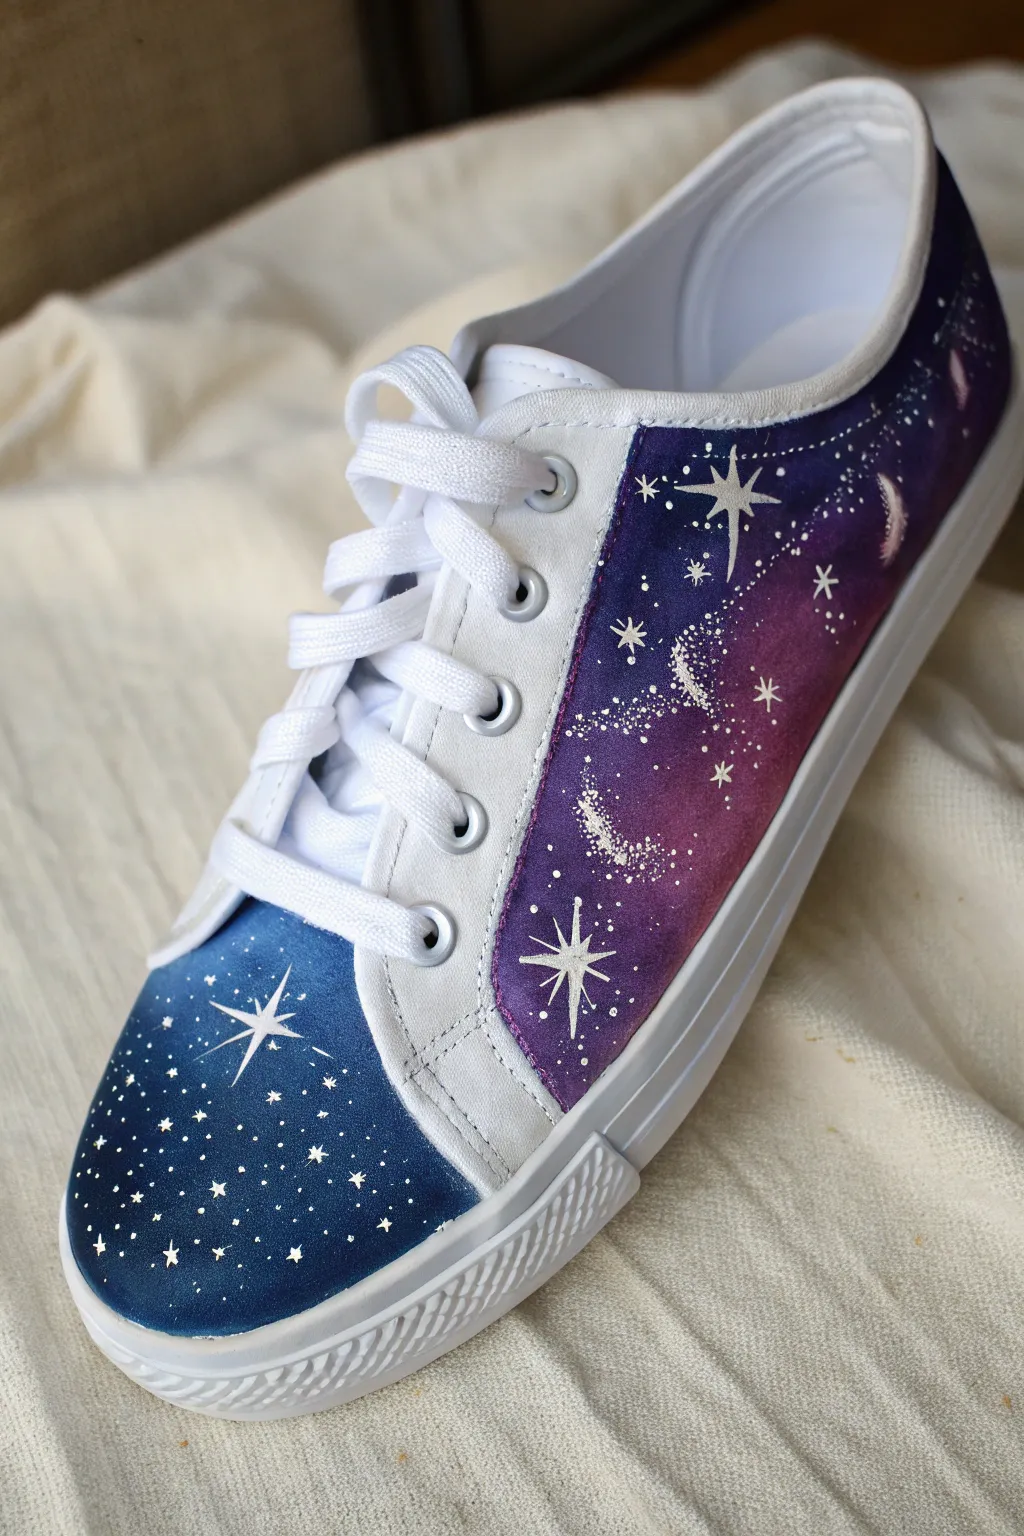
Transform ordinary white canvas kicks into a window to the cosmos with this stunning galaxy design. By blending deep blues and vibrant purples, you’ll create a rich, nebula-filled background perfect for crisp white constellation details.
Step-by-Step Tutorial
Materials
- White canvas sneakers (clean and dry)
- Painter’s tape or masking tape
- Fabric medium (mixed with acrylics) or specialized acrylic leather/fabric paint
- Acrylic paints: Navy Blue, Royal Blue, Violet or Deep Purple, Magenta, White
- Small flat shader brush
- Fine detail liner brush (size 0 or 00)
- Small piece of sponge (makeup sponge works best)
- Cup of water and paper towels
- Old toothbrush (optional for splatter)
- Matte or glossy acrylic finisher/sealer
Step 1: Preparation & Base Colors
-
Protect the essentials:
Begin by removing the shoelaces completely. Use painter’s tape to carefully mask off the rubber soles, the eyelet area (where the laces go), and the inner lining. Press the tape edges down firmly to prevent paint bleeding. -
Apply the toe cap base:
Mix your navy blue paint with fabric medium if necessary. Using the flat shader brush, apply an opaque coat of navy blue to the entire toe cap area. Don’t worry about gradients yet; just get solid, even coverage. -
Paint the side nebula:
Moving to the side panels of the shoe, start near the heel with a deep violet or purple. Apply this color to the upper and lower edges of the triangular canvas section, leaving the middle slightly empty for lighter colors. -
Adding dimension:
While the violet is still wet, introduce magenta or a reddish-purple into the center of the side panel. Use your brush to blend the edges where the magenta meets the violet, creating a seamless transition. -
Deepening the night sky:
Return to the toe cap. Add a touch of black or very dark blue to the very tip of the toe and the outer edges to create depth, blending it inward towards the slightly lighter navy center. -
Sponge blending texture:
To make the paint look like a galaxy cloud rather than brushstrokes, take a small damp sponge and dab gently over the transition areas on both the side panel and the toe. This softens the look significantly.
Paint Bleeding?
If acrylic paint bleeds under your tape onto the rubber sole, use a Q-tip dipped in rubbing alcohol or acetone to clean it up while the paint is still tacky.
Step 2: Creating the Stars
-
The stardust splatter:
Dilute a small mount of white paint with water until it’s the consistency of thin ink. Dip an old toothbrush or a stiff brush into it. Running your thumb across the bristles, flick tiny specks of ‘distant stars’ onto the dried blue and purple backgrounds. Keep the spray light. -
Drafting major stars:
Switch to your fine liner brush and pure, undiluted white paint. Identify where you want your ‘hero’ stars. On the toe cap, place a small white dot slightly off-center to serve as the anchor for the largest star. -
Painting the 8-point flare:
From that central dot on the toe, pull four long, thin lines outward (North, South, East, West). Then, paint four shorter diagonals in between them. Taper the ends of the lines to sharp points for a twinkling effect. -
Side panel constellations:
Repeat the 8-point star technique on the upper part of the side purple panel. Make this one slightly smaller than the toe star to vary the scale. -
Adding mid-sized stars:
Scatter 5-7 medium-sized 4-point stars (just a simple cross shape) randomly around the larger ones. I find that varying the size of these crosses adds realistic depth to the galaxy. -
Connecting the dots:
Near the heel or top edge of the side panel, paint a few tiny dots in a specific arrangement and connect them with delicate, whisper-thin lines to mimic constellations. -
Cluster detailing:
Using the very tip of your liner brush, add concentrated clusters of tiny dots in the lighter magenta areas of the side panel. These look like dense star clusters deep in the nebula.
Step 3: Finishing Touches
-
Clean up edges:
Once the paint is fully dry (give it at least an hour), carefully peel away the masking tape. If any paint seeped onto the rubber sole, wipe it immediately with a damp cloth or scratch it off gently with a fingernail. -
Sealing the work:
Apply a thin layer of acrylic finisher or sealer over the painted areas. This protects your artwork from cracking, water, and dirt. -
Restringing:
Wait 24 hours for the sealer to cure completely before re-lacing your shoes with crisp white laces.
Make It Sparkle
Mix a tiny amount of iridescent glitter medium or silver metallic paint into your final sealer coat for a subtle shimmer that catches the light like real stardust.
Now you are ready to walk on the stars with your custom footwear masterpiece
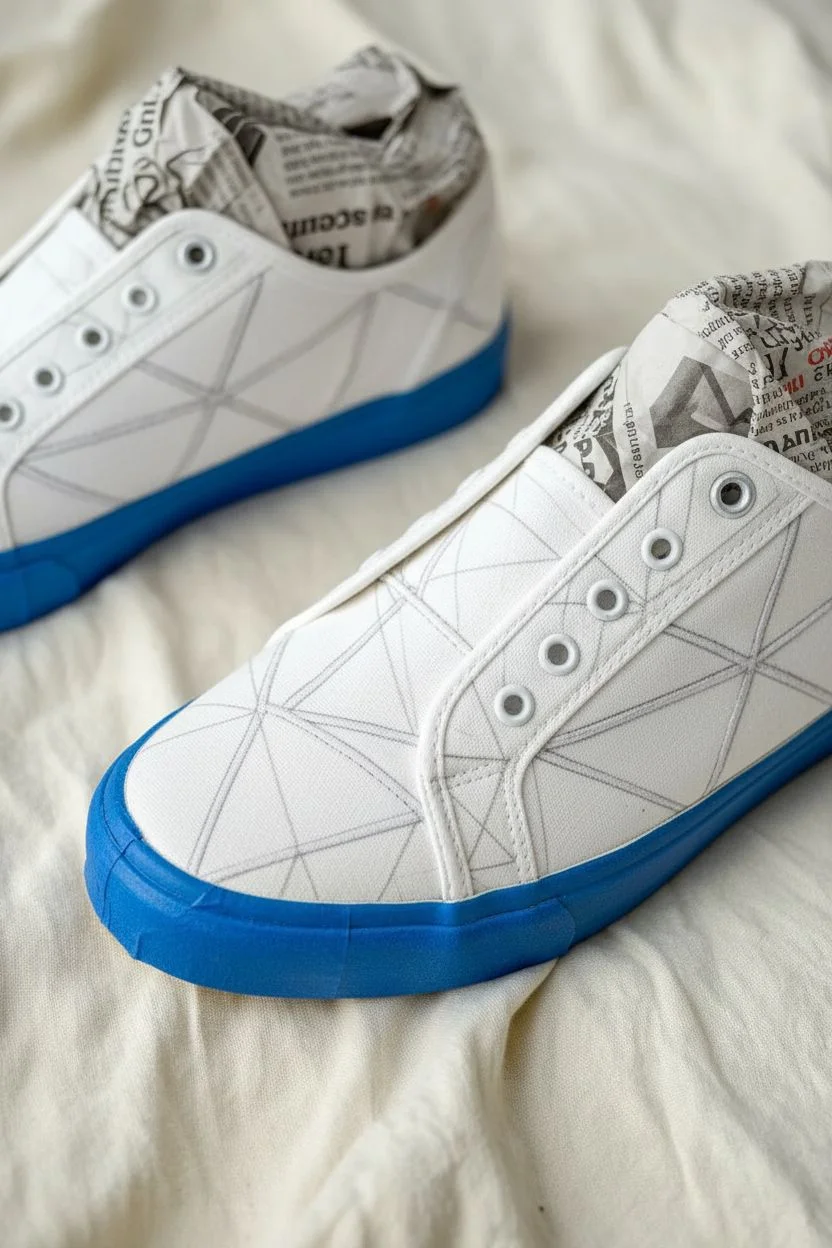
Paint Splatter Over a Crisp White Base
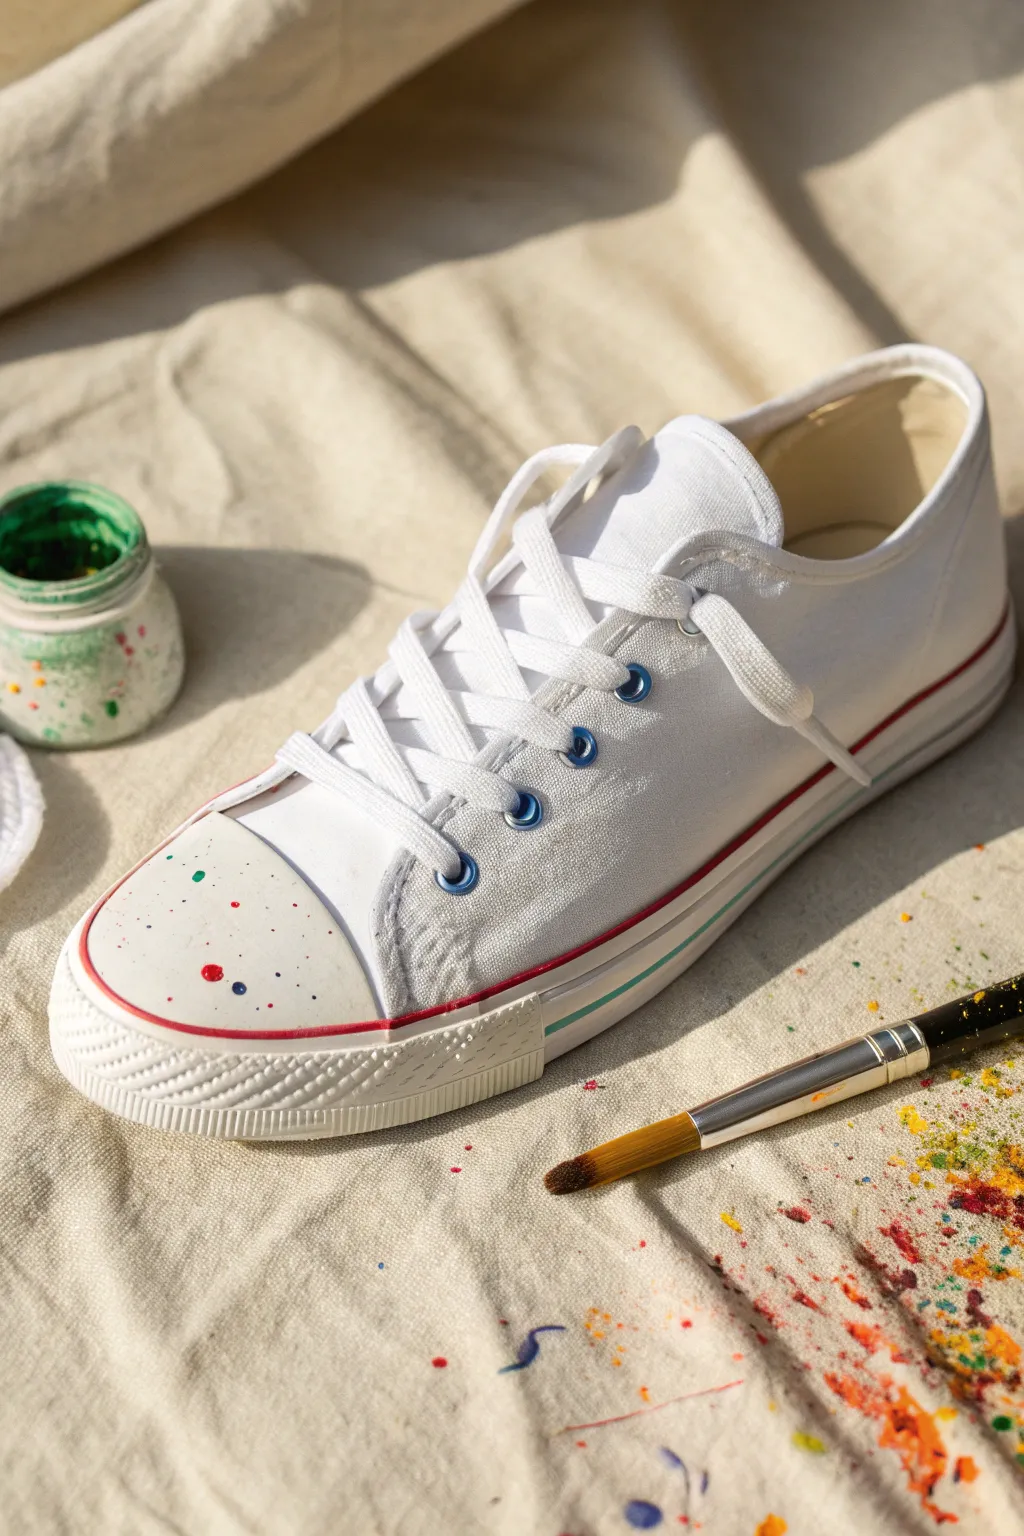
Transform a plain white plimsoll into a minimalist masterpiece with this restrained splatter technique. The design features a crisp white body accented by delicate, colorful flecks on the toe cap and custom-colored eyelets for a customized, high-end look.
Step-by-Step Guide
Materials
- White canvas sneakers (plimsoll style)
- Acrylic fabric paint (red, blue, green, yellow)
- Small round paintbrush (size 2 or 4)
- Stiff bristle brush or toothbrush (for splattering)
- Painter’s tape or masking tape
- Small cup of water
- Paper towels
- Palette or small dish
- Fabric medium (optional, if using regular acrylics)
Step 1: Preparation & Masking
-
Clean the Shoes:
Ensure your canvas shoes are completely clean and dry. If they are brand new, give them a quick wipe with a damp cloth to remove any sizing or dust, then let them air dry fully. -
Remove Laces:
Unlace the shoes completely. This is crucial to prevent accidental paint splatters on the laces and allows you to access the eyelets easily. -
Mask the Sole:
Apply painter’s tape carefully along the rubber sidewall of the shoe sole. Press the edge of the tape firmly against the canvas line to prevent paint from bleeding onto the rubber. -
Protect the Uppers:
Since we are focusing the splatter mainly on the toe cap, use additional tape or a piece of paper towel to loosely cover the main canvas body of the shoe, leaving just the rubber toe cap exposed.
Uneven Splatters?
If a splatter lands too big or smears, don’t wipe it! Let it dry completely, then gently scrape it off the rubber toe cap with a fingernail or craft knife.
Step 2: Customizing the Eyelets
-
Prepare Blue Paint:
Mix a small amount of bright blue acrylic paint. If you are using standard acrylics, mix in a drop of fabric medium to ensure flexibility. -
Paint the Metal Eyelets:
Using your small round brush, carefully paint the metal rim of each eyelet. You want a solid, opaque coat. -
Clean Excess Paint:
If any blue paint gets onto the white canvas around the eyelet, quickly wipe it away with a damp Q-tip before it dries. -
Add a Second Coat:
Once the first layer is dry to the touch, apply a second coat of blue to the eyelets for a vibrant, glossy finish.
Step 3: Creating the Foxing Stripes
-
Reveal the Sole:
Peel back the tape you applied to the sole earlier. We want to paint the rubber foxing stripe (the line that goes around the midsole). -
Paint the Top Stripe:
Using a steady hand and a detail brush loaded with red paint, trace the molded line near the top of the rubber sole. Move slowly to keep the line crisp. -
Paint the Lower Stripe:
Wash your brush thoroughly, then switch to a teal or light green shade. Paint a second thin line parallel to the red one, slightly lower down on the rubber sidewall. -
Clean Edges:
Use a damp cotton swab or the edge of a paper towel to tidy up any wobbles in your lines while the paint is still wet.
Pro Tip: Seal the Deal
Apply a thin layer of clear acrylic sealer or Mod Podge over the painted eyelets and rubber stripes. This prevents chipping from daily wear and tear.
Step 4: The Splatter Technique
-
Prepare the Splatter station:
Cover your work surface with newspaper or a drop cloth. Re-cover the main canvas body of the shoe with paper towels so only the rubber toe cap is exposed. -
Select Colors:
Squeeze small blobs of red, green, and blue paint onto your palette. You want the paint to be fluid but not watery. -
Focus Big Drops:
Dip the handle end of your paintbrush into the red paint. Gently touch it to the toe cap to create a few distinct, larger round dots. -
Load the Bristles:
Load a stiff brush or old toothbrush with a small amount of green paint. Run your thumb across the bristles to flick tiny specks onto the toe cap. -
Add Secondary Splatters:
Repeat the flicking motion with blue paint. I like to keep the splatter focused centrally on the toe cap rather than covering the whole area evenly. -
Review Balance:
Step back and look at the density of the specks. Add a few more tiny dots manually with a toothpick if you need to fill empty spaces.
Step 5: Finishing Up
-
Remove Masking:
Once the toe cap paint is semi-dry (about 10 minutes), carefully remove all masking tape and paper towels. -
Full Cure:
Let the shoes sit undisturbed for at least 24 hours to allow all the paint layers to cure completely. -
Re-lace:
Thread your crisp white laces back through the newly painted blue eyelets.
Step out in style with your freshly customized kicks that look effortlessly artistic
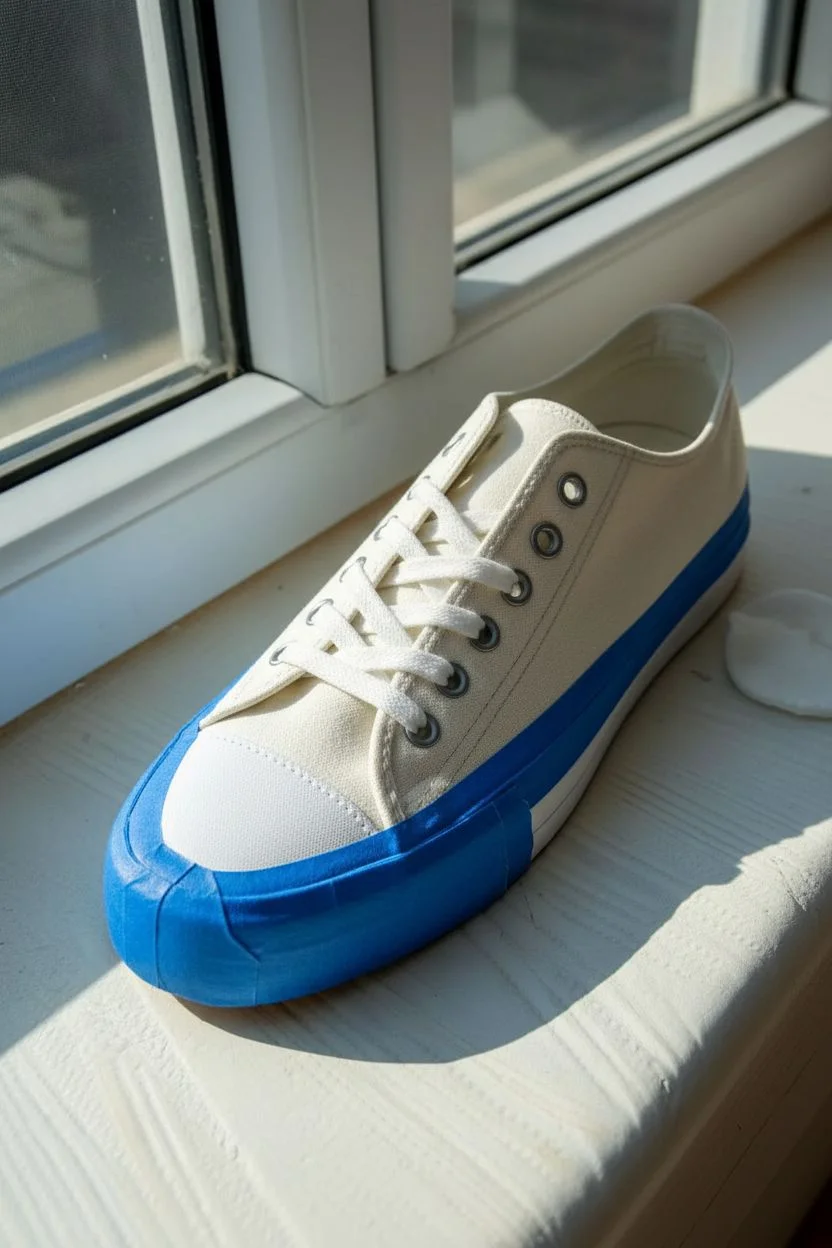
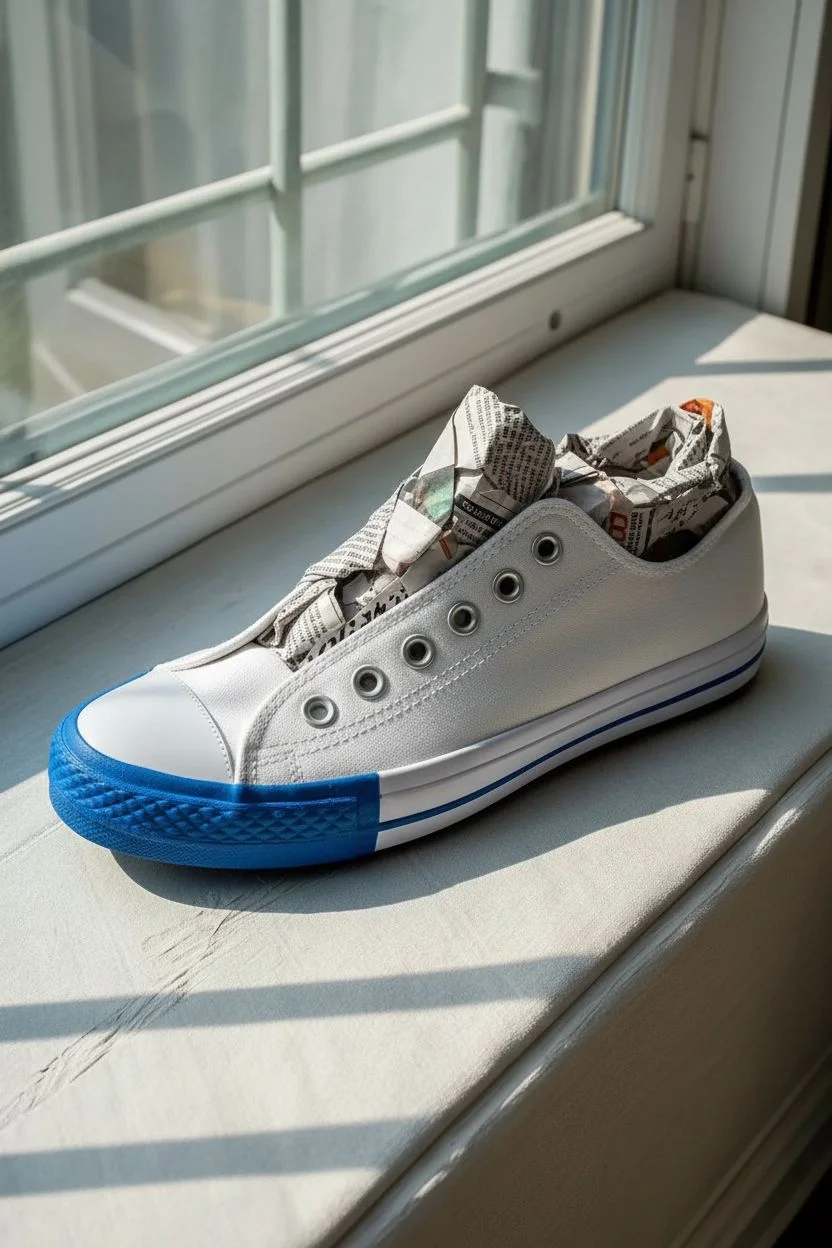
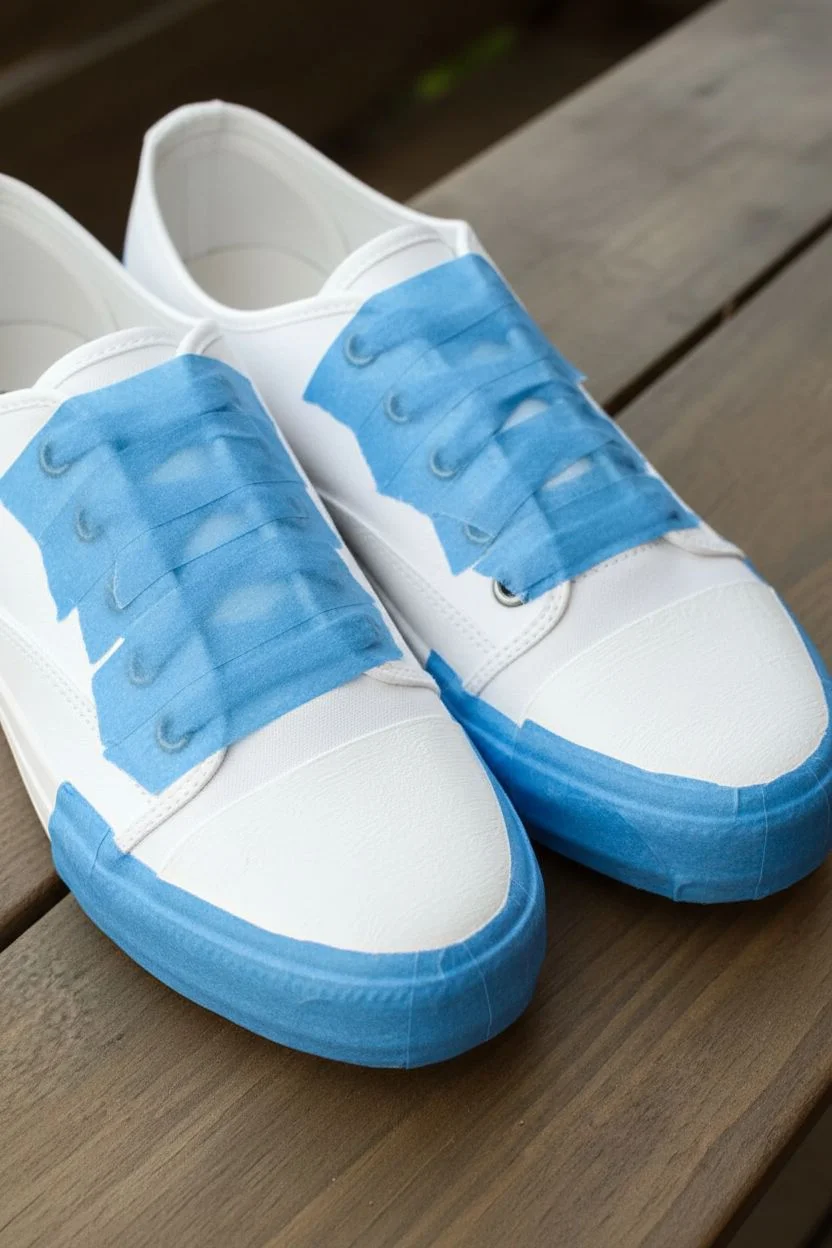
Dripping Paint Effect Along the Sole Line
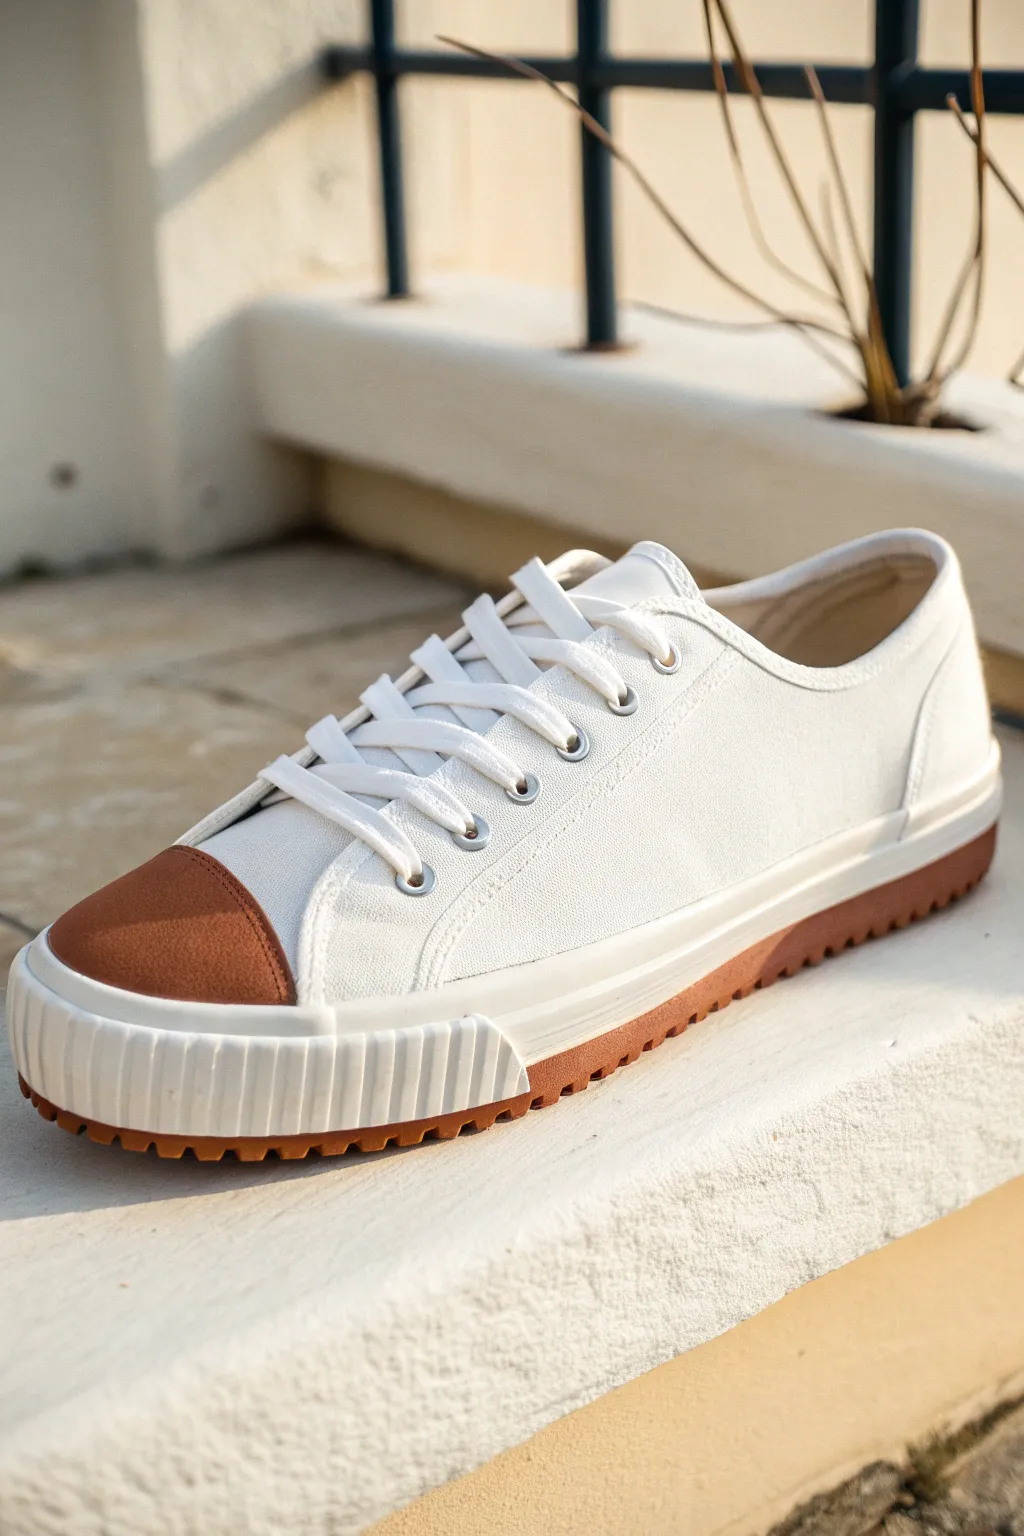
Transform a standard pair of white canvas sneakers into a modern, minimalist statement piece by adding a striking brown accent to the toe and sole. This project focuses on clean lines and precise painting to mimic a high-end, rubber-dipped aesthetic commonly seen in designer streetwear.
Detailed Instructions
Materials
- White canvas sneakers
- Angelus leather paint (or high-quality acrylic geared for fabric/rubber)
- Warm brown paint color (e.g., cognac or caramel)
- Fabric medium (if using standard acrylics)
- Painter’s tape (high adhesion)
- Small flat paintbrush
- Detail brush (size 0 or 1)
- Matte finisher or sealer
- Isopropyl alcohol
- Cotton rounds
Step 1: Preparation & Sole Modification
-
Clean the surface:
Before laying down any color, wipe down the rubber toe cap and the bottom edge of the sole with isopropyl alcohol and a cotton round. This removes factory finishes and oils, ensuring your paint adheres properly to the rubber. -
Remove laces:
Take the laces out completely to avoid accidental splashes and to give yourself unrestricted access to the tongue and eyelet areas. -
Tape the toe line:
Apply a strip of painter’s tape across the canvas part of the toe box. The goal is to create a messy-free boundary where the rubber toe cap meets the fabric. Press the edge of the tape down firmly with your fingernail. -
Tape the sole line:
Run a continuous line of tape around the upper edge of the rubber midsole, right where it meets the canvas body. This protects the white fabric while we work on the lower rubber sections.
Sticky Situation
Paint peeling off the rubber? Sand the rubber toe cap lightly with fine-grit sandpaper (400+) before painting to give the surface more ‘tooth’ for adhesion.
Step 2: Painting the Toe Cap
-
Mix your color:
If you aren’t using a pre-mixed leather paint, mix your warm brown acrylic with a fabric or flow medium. I prefer a slightly thinner consistency here to avoid brush strokes on the smooth rubber. -
First coat on toe:
Using a small flat brush, apply a thin, even layer of brown paint to the rubber toe cap. Don’t worry about full opacity yet; just establish the shape. -
Refine the edges:
Switch to your detail brush to carefully paint right up to the tape line on the toe. Go slow to ensure a crisp, sharp curve. -
Dry and repeat:
Allow the first coat to dry for about 20 minutes. Apply 2-3 additional thin coats until the brown is solid and rich, letting each layer dry completely in between.
Step 3: Creating the Dipped Sole Effect
-
Identify the ridges:
Look closely at the textured midsole of your shoe. This specific look relies on painting the *bottom* ridges brown while keeping the upper vertical ridges white. -
Paint the outsole edge:
Use your flat brush to paint the very bottom edge of the sole (the tread that is visible from the side) with the same brown mixture. -
Detail the ridges:
This is the patience test. Use the detail brush to carefully paint the valleys between the bottom ridges if your shoe has deep tread texture like the example. Keep the paint only on the bottom-most section to simulate a colored sole. -
Clean up mistakes:
If you accidentally get brown paint on the white vertical ridges of the midsole, quickly wipe it away with a damp Q-tip before it sets.
Texture Twist
Mix a tiny amount of baking soda into your brown paint for the toe cap. This creates a suede-like texture that mimics real leather instead of flat paint.
Step 4: Finishing Touches
-
Remove the tape:
Once the final coat is tacky but not fully hardened, slowly peel back the painter’s tape at a 45-degree angle. This prevents the paint from chipping at the edges. -
Seal the rubber:
Apply a matte finisher over the brown painted areas (toe cap and sole edge). This is crucial for durability, as rubber flexes when you walk and paint can crack without a sealer. -
Re-lace:
Wait at least 24 hours for the paint and sealer to fully cure. Re-lace your shoes with clean white laces to maintain that crisp contrast.
Step out in your customized kicks knowing you have a unique pair designed precisely by you
One Continuous Mural Split Across Both Shoes
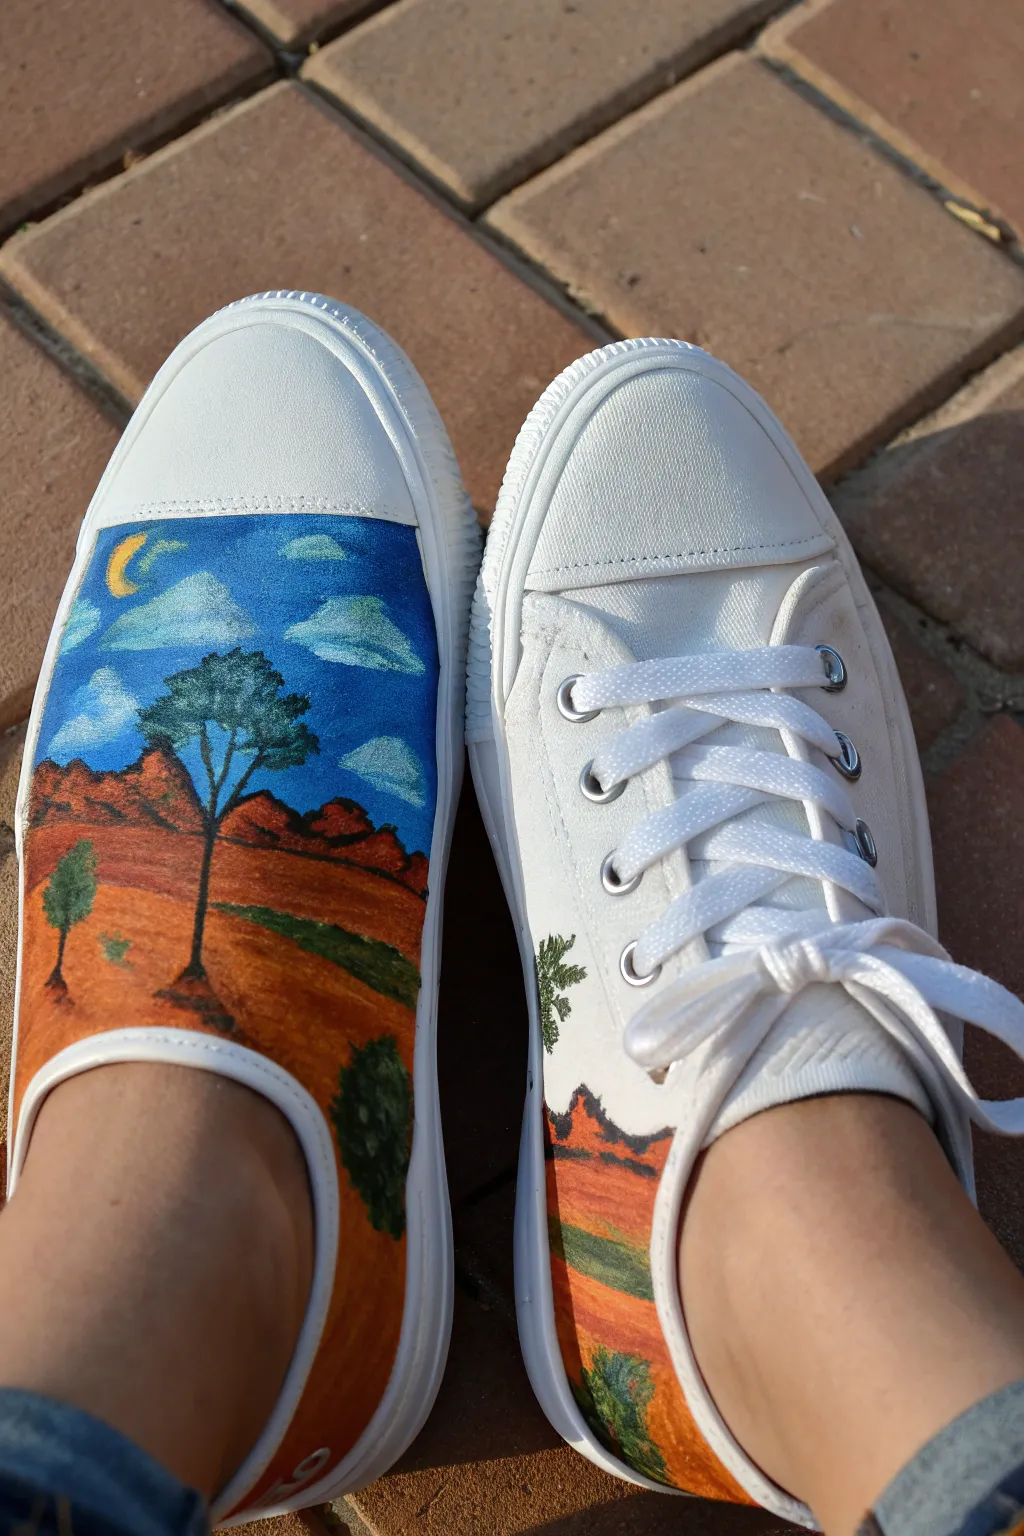
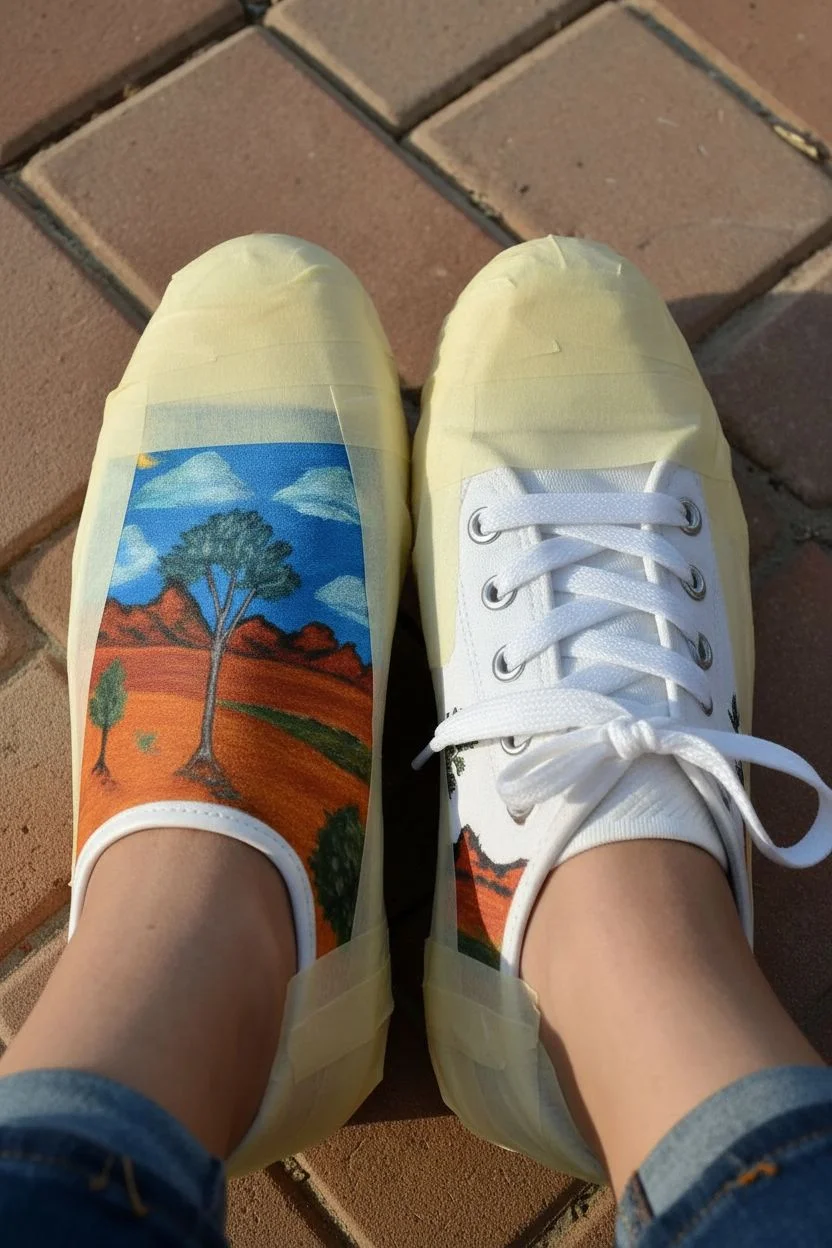
Transform a plain pair of white canvas sneakers into a cohesive landscape mural that spans across both feet. This project features a vibrant desert scene with a rich blue sky, silhouetted trees, and warm terracotta earth tones.
How-To Guide
Materials
- White canvas sneakers
- Fabric medium
- Acrylic paints (Phthalo Blue, White, Burnt Sienna, Yellow Ochre, Sap Green, Black)
- Set of small synthetic paintbrushes (detail rounds and small flats)
- Masking tape or painter’s tape
- Pencil for sketching
- Water cup and palette
- Hairdryer (optional, for speed drying)
- Waterproofing spray or acrylic sealer
Step 1: Preparation & Sketching
-
Tape the soles:
Begin by carefully applying masking tape to the rubber soles. Press the edges down firmly to prevent any paint from bleeding onto the white rubber. -
Remove laces:
Take the laces off both shoes completely. This gives you unobstructed access to the canvas tongue and side panels where the design will flow. -
Mix fabric medium:
On your palette, mix your acrylic paints with fabric medium according to the bottle’s ratio (usually 1:1 or 2:1 paint to medium). I find this crucial because it keeps the paint flexible so it won’t crack when you walk. -
Draft the horizon:
Place the shoes side-by-side as if you were wearing them. Sketch a continuous horizon line that starts on the main panel of the left shoe and carries over to the inner side panel of the right shoe. -
Outline main elements:
Lightly sketch the position of the main tree on the left shoe and the moon in the upper left corner. Mark where the landscape features will continue onto the second shoe.
Step 2: Painting the Background
-
Paint the sky base:
Start with the sky area on the left shoe. Use a bright blue mixed with a touch of white to fill the upper section, stopping at your sketched horizon line. -
Add clouds:
While the blue is still slightly tacky, use a small round brush with white paint to dab in fluffy clouds. Soften the bottom edges of the clouds to blend them into the blue. -
Paint the moon:
In the top left corner, paint a crescent moon using bright yellow. If the blue background is too dark, paint a layer of white first, let it dry, and then add the yellow on top for vibrancy. -
Fill the earth tones:
Mix Burnt Sienna with a little Yellow Ochre to create a warm desert orange. Paint the ground section below the horizon line, ensuring you cover the weave of the canvas thoroughly. -
Create depth in the ground:
Add shadows to the ground using a darker brown mix, particularly near the bottom of the shoe and under where the trees will sit. This creates undulation in your landscape.
Uneven Coverage?
If the canvas texture shows through too much after the first coat, don’t glob on thick paint. Apply 2-3 thin layers instead for a smoother, crack-resistant finish.
Step 3: Detailing & Continuity
-
Paint the main tree trunk:
Using a fine liner brush and black paint (or dark brown), carefully paint the thin trunk and branches of the tree on the left shoe. -
Add foliage:
Stipple Sap Green mixed with a darker shade onto the branches to create the tree’s canopy. Keep the texture loose to mimic leaves. -
Continue to the second shoe:
Move to the right shoe. Paint the side panel to match the horizon line of the left shoe, extending the orange ground and a sliver of blue sky if visible. -
Add secondary vegetation:
Paint smaller shrubs or partial trees on the side of the right shoe to show the landscape continuing off-frame. -
Refine the edges:
Check the edges where the paint meets unpainted canvas (like near the stitching). Use a very small brush to ensure clean, crisp lines.
Go Glow-in-the-Dark
Mix phosphorescent powder into your moon paint or use glow-in-the-dark acrylic for the stars to make your shoes stand out at night.
Step 4: Finishing Touches
-
Dry completely:
Let the paint cure for at least 24 hours. Don’t rush this part, or the sealer might react with wet paint. -
Heat set:
Run a hairdryer over the painted areas for a few minutes to help set the fabric medium and bond the pigment to the fibers. -
Seal the artwork:
Spray the painted areas with a waterproofing acrylic sealer to protect your mural from dirt and puddles. -
Re-lace:
Once the sealer is dry to the touch, remove the masking tape from the soles and lace up your new wearable art.
Step out in style knowing you have a unique landscape right at your feet
Negative Space Lettering with Hidden Messages
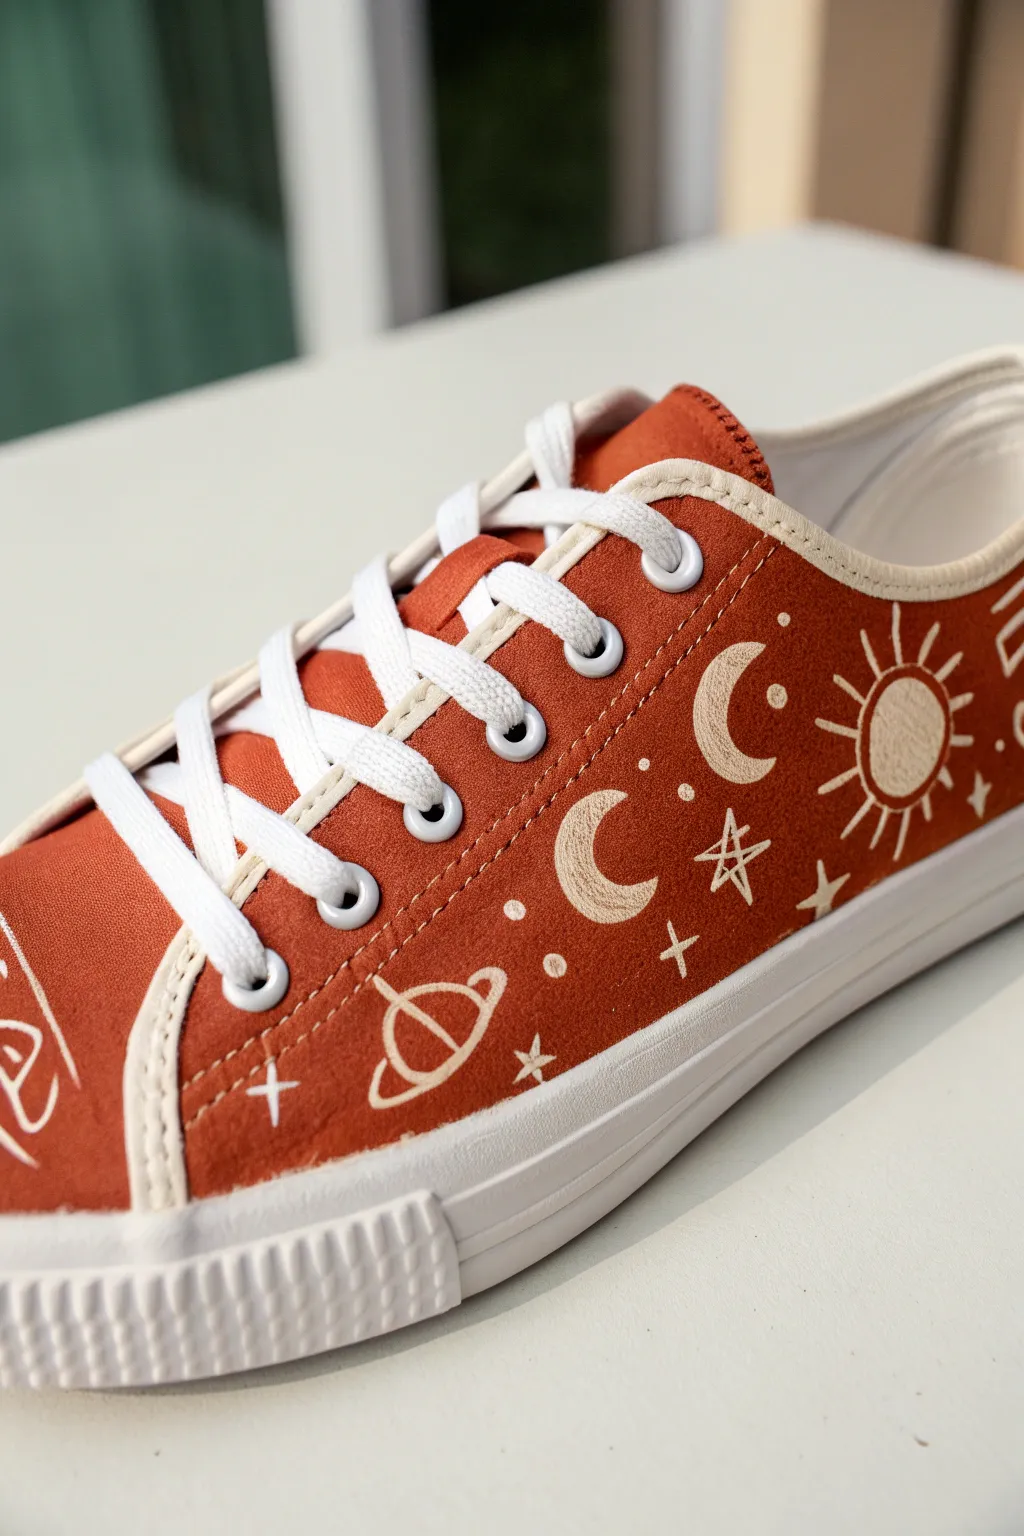
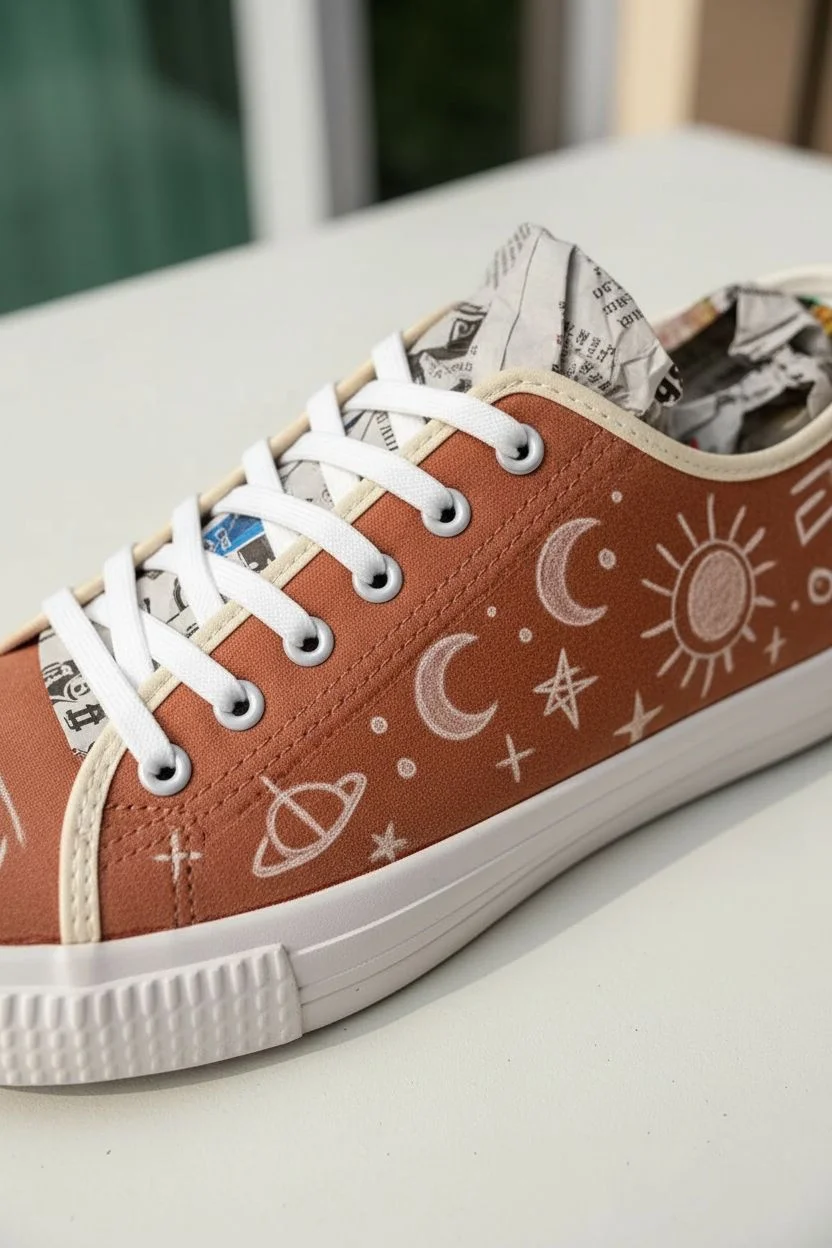
Transform a plain pair of rust-colored canvas sneakers into a dreamy celestial accessory with simple hand-painted details. The contrast of creamy off-white paint against the warm earth tone creates a striking, bohemian look featuring suns, moons, and stars.
Step-by-Step Guide
Materials
- Rust or burnt orange canvas sneakers
- White or cream fabric paint (or acrylic paint mixed with fabric medium)
- Fine detail paintbrush (size 0 or 00)
- White chalk pencil or disappearing fabric marker
- Small paint palette or dish
- Paper towels
- Water cup
- Waterproofing shoe spray (optional but recommended)
Step 1: Preparation and Sketching
-
Clean the surface:
Before starting, ensure your sneakers are clean and free of dust. If they are new, giving them a quick wipe with a damp cloth can remove any factory residue that might repel paint. -
Prepare your workspace:
Remove the shoelaces to give yourself full access to the canvas panels. Stuff the inside of the shoe with crumpled newspaper or washcloths to create a firm surface to paint on. -
Plan the layout:
Using a white chalk pencil or a disappearing fabric marker, lightly sketch your celestial design directly onto the shoe. Start by placing the largest elements first: a crescent moon on the side, a sun near the heel or toe, and a ringed planet. -
Fill in the gaps:
Once your main icons are placed, sketch smaller filler elements in the empty spaces. Draw simple four-point stars, tiny crosses, and small circles to act as distant stars or stardust. -
Refine the sketch:
Step back and look at the shoe from a distance to ensure the pattern looks balanced. Adjust any spacing issues now before you commit with paint.
Brush Control Trick
Rest your pinky finger on a dry part of the shoe while you paint. It stabilizes your hand like a tripod, preventing shakes and giving you crisper lines.
Step 2: Painting the Design
-
Mix your paint:
Squeeze a small amount of fabric paint onto your palette. If you are using pure white, consider mixing in a tiny drop of yellow ochre or brown to achieve that warm, creamy off-white tone seen in the photo. -
Test consistency:
I like to test the paint consistency on a scrap piece of fabric or paper first. It should flow smoothly from the brush without being too watery, similar to heavy cream. -
Outline the main shapes:
Dip your fine detail brush into the paint and carefully trace over your chalk lines. Start with the crescent moons and the ringed planet. -
Paint the sun:
Move on to the sun design. Paint the central circle first, then carefully add the rays. Use light pressure at the tip of the rays to make them taper off naturally. -
Fill solid areas:
For thicker shapes like the body of the crescent moon, go back and fill them in. You may need two thin coats rather than one thick one to get opaque coverage without cracking. -
Paint the stars:
Using the very tip of your brush, paint the four-pointed stars. Start from the center and flick outwards for sharp points. -
Add connecting details:
Paint the small crosses and dots scattered between the larger shapes. These tiny details are crucial for tying the whole design together and making it look cohesive. -
Review and touch up:
Look over the entire shoe for any faint spots. Adding a second layer to the brightest parts of the design will make them pop against the dark canvas.
Glow Up Idea
Mix a small amount of glow-in-the-dark medium into your white paint for the stars and moons. Your celestial design will subtly light up at night.
Step 3: Finishing Touches
-
Let it dry completely:
Allow the paint to dry undisturbed for at least 24 hours. Fabric paint needs ample time to cure properly. -
Heat set the paint:
Once fully dry, you can heat set the design to make it permanent. Use a hairdryer on high heat for a few minutes, or iron the shoes (covering the design with a cloth) if the shape allows. -
Clean up guidelines:
If any chalk lines are still visible, gently wipe them away with a slightly damp cloth or a soft brush. -
Seal the deal:
Spray the shoes with a waterproofing spray or fabric protector. This extra step helps repel dirt and water, keeping your crisp white lines looking fresh longer. -
Re-lace:
Lace your sneakers back up with clean white laces to complement the new paint job, and you are ready to wear them.
Wear your customized kicks with pride knowing you’ve created a unique piece of wearable art
Mixed-Media Look with Stencils and Hand-Painted Overlays
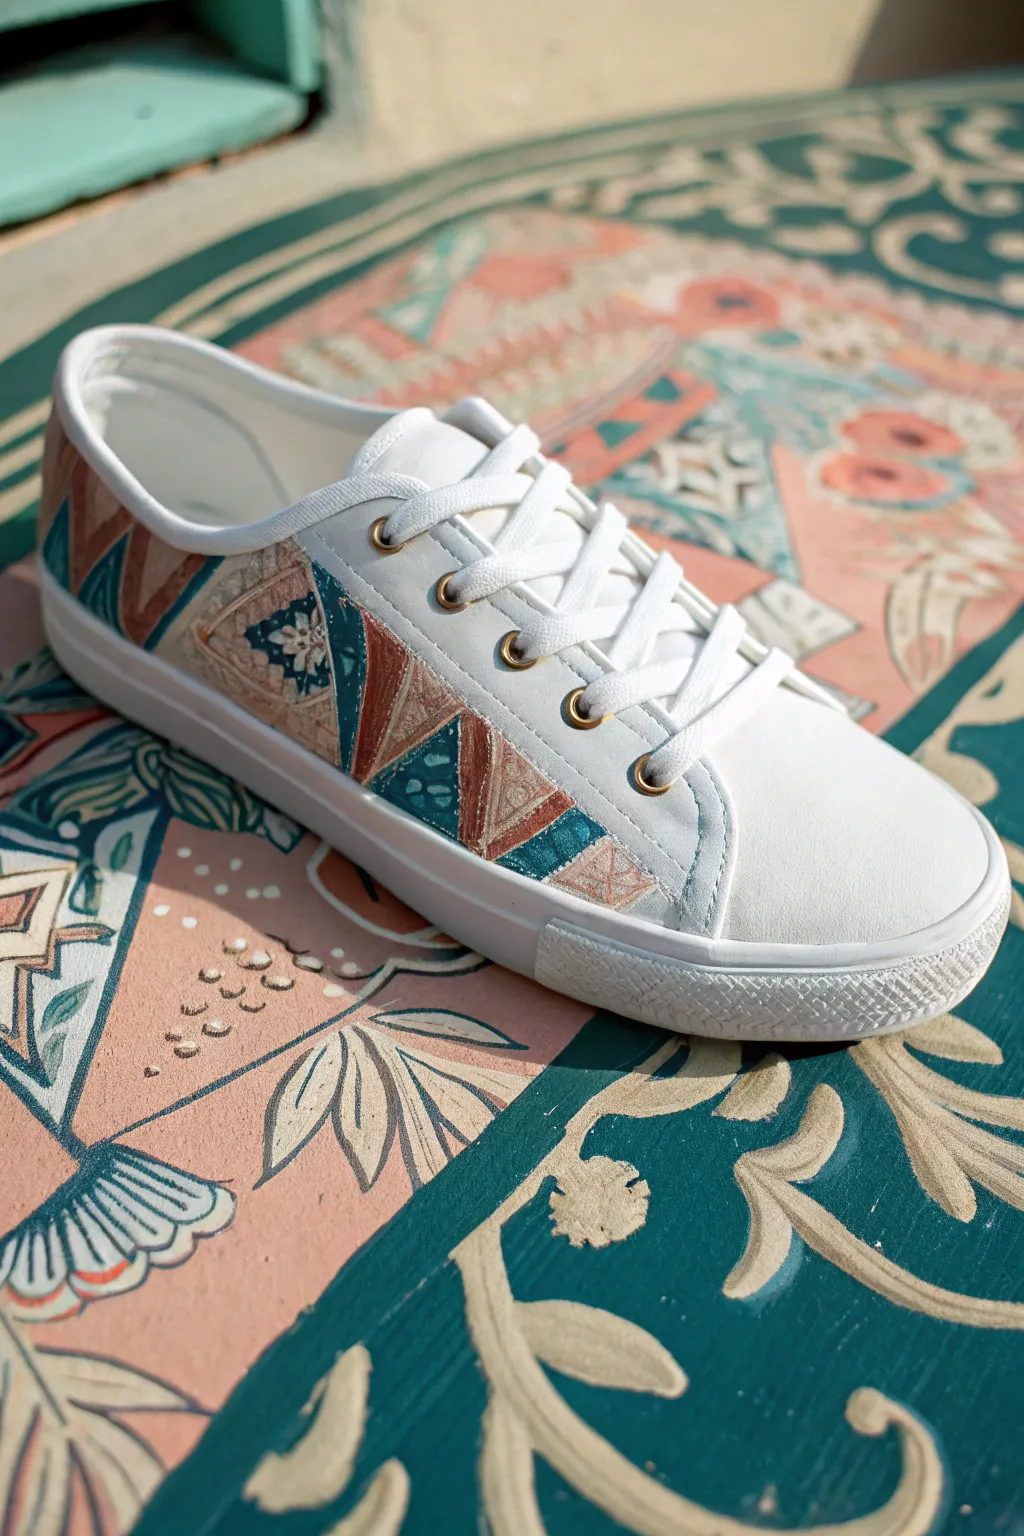
Transform plain white canvas sneakers into a piece of wearable art with this mixed-media inspired design. By combining crisp stenciled geometric shapes with freehand painted accents, you’ll achieve a layered, textile-like aesthetic that mimics woven fabrics and embroidery.
Step-by-Step Tutorial
Materials
- White canvas sneakers
- Fabric medium
- Acrylic paints (Teal/Dark Turquoise, Terracotta/Rust, Beige/Sand, White)
- Painter’s tape or masking tape (low tack)
- Small triangle stencil (or cardstock to make one)
- Fine detail brush (size 00 or 0)
- Small flat shader brush (size 2 or 4)
- Pencil
- Water cup and palette
Step 1: Preparation and Mapping
-
Prepare the surface:
Remove the shoelaces from your sneakers to prevent accidental splatter and to give yourself better access to the side panels. If the shoes are new, give them a quick wipe with a damp cloth to remove any factory sizing. -
Mix your medium:
Mix your acrylic paints with fabric medium according to the bottle instructions (usually 2:1 paint to medium). This ensures the paint remains flexible and doesn’t crack as you walk. -
Create the boundary:
Apply a strip of painter’s tape along the rubber sole to protect it. You want a crisp line where the canvas meets the rubber. -
Sketch the layout:
Using a pencil, lightly sketch a zigzag or sawtooth line across the side panel of the shoe. This will serve as the framework for your alternating triangles.
Step 2: Painting the Base Shapes
-
Block in the Terracotta:
Using your small flat shader brush, fill in the downward-pointing triangles with your Terracotta/Rust mixture. Keep your edges as sharp as possible against the white canvas. -
Add the Teal sections:
Clean your brush thoroughly, then fill in alternating triangles with the Teal/Dark Turquoise mix. I like to leave a tiny hairline of white space between the colors to keep things distinct, but you can touch them if you prefer. -
Create the Beige accents:
Paint the remaining larger triangular sections with the Beige/Sand mixture. This lighter color will act as the background for your detailed overlay work later. -
Let it cure:
Allow these base layers to dry completely. Since we are painting small details on top, the base needs to be dry to the touch, which usually takes about 20-30 minutes.
Bleeding Lines?
If paint bleeds into the fabric grain, don’t panic. Use a white Posca pen or opaque white fabric paint to sharpen the edges after the colors dry.
Step 3: Adding Detail and Texture
-
Detailing the Teal:
Switch to your fine detail brush. On the Teal triangles, paint small, random geometric shapes or angular lines in a slightly lighter shade of teal or a diluted white to mimic a batik print. -
Texturing the Terracotta:
Add visual texture to the rust-colored triangles by dry-brushing vertical lines using unmixed Terracotta paint. This gives it a raw, woven fabric appearance. -
Overlay designs on Beige:
On the beige sections, paint a smaller internal triangle using a very thin wash of the Terracotta color. Inside that, paint a tiny four-petaled flower or starburst design in dark teal. -
Simulate embroidery:
Using white paint and your finest brush, add tiny dash marks along the edges of the main triangles. These dashes simulate stitching thread, enhancing the mixed-media textile vibe. -
Refine the edges:
Check the perimeter of your painted area. If any lines look wobbly, use the white paint to carefully clean up the negative space around the design.
Add Dimension
Mix a tiny bit of metallic gold paint into your beige sections or use it for the ‘stitch’ marks to give the design a subtle shimmer in the sunlight.
Step 4: Finishing Up
-
Seal the deal:
Once the paint is fully cured (give it 24 hours if possible), apply a thin coat of clear flexible acrylic sealer over the painted areas for extra durability against rain and dirt. -
Remove tape:
Peel off the painter’s tape from the soles slowly. If any paint seeped under, scratch it off gently with a toothpick while it’s still somewhat fresh. -
Re-lace:
Lace your shoes back up. Bright white laces look crisp, or you could swap them for beige laces to match your new color palette.
Enjoy walking around in your custom, gallery-worthy footwear


Have a question or want to share your own experience? I'd love to hear from you in the comments below!