
If you’re wearing a cast, you’ve basically been handed a tiny, wearable canvas—so let’s make it feel like you. These cast drawing ideas are meant to be easy to start, fun to build on, and totally customizable to your style.
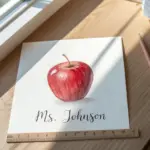
Classic Signature Wall
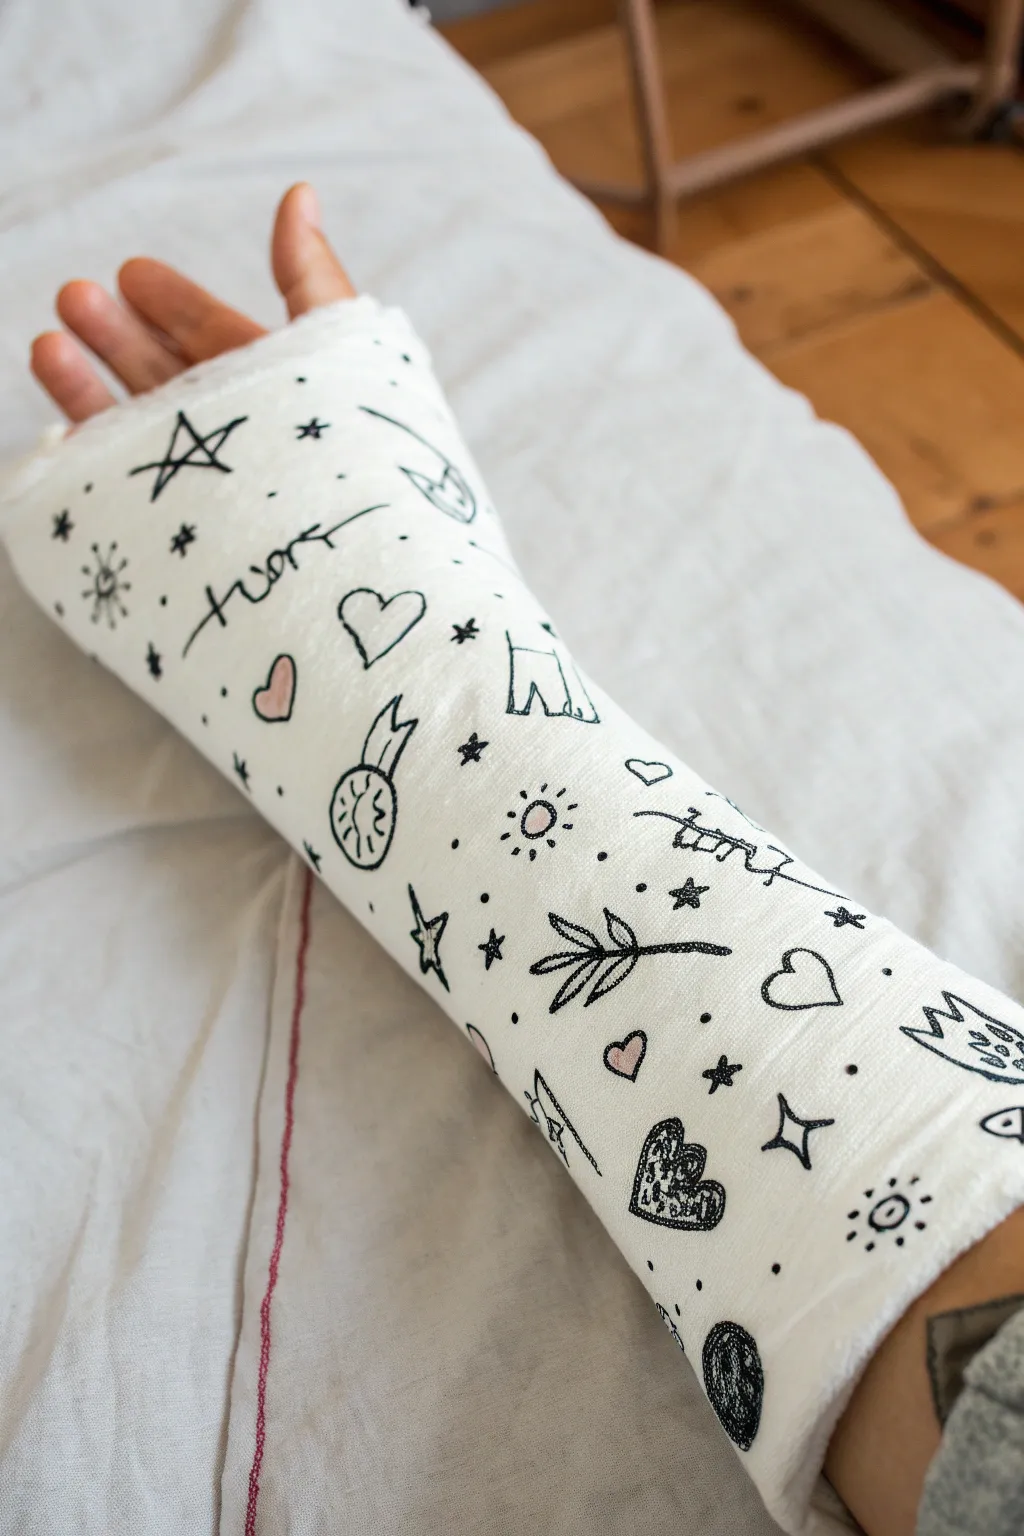
Transform a plain white medical cast into a canvas of whimsical charm with this doodle-heavy design. Featuring a scattered mix of celestial icons, hearts, and nature motifs, this style turns an injury into a playful and visually engaging art piece.
Step-by-Step
Materials
- White fiberglass or plaster cast (clean and dry)
- Black permanent marker (fine point)
- Black permanent marker (ultra-fine point)
- Pencil (HB or lighter)
- Eraser (soft, white vinyl)
- Optional: Pink highlighter or marker for accents
Step 1: Preparation & Planning
-
Clean surface:
Ensure the surface of the cast is completely dry and free of any loose plaster dust or oils. A quick wipe with a dry cloth helps the ink adhere better. -
Sketch placement:
Using a light pencil, tentatively mark out where the larger elements will go. Think about spacing—you want a scattered, random look rather than rigid rows. Don’t press too hard, as cast surfaces can be tricky to erase.
Step 2: Drawing Main Motifs
-
Draw open stars:
Start with the classic five-pointed stars. Draw these with the fine point marker directly over your pencil guides. Leave the insides empty for a crisp, outlined look. -
Add hearts:
Scatter several heart shapes across the arm. Vary their orientation; some should be upright, others tilted. Keep the lines smooth and continuous. -
Create the signature:
The central focal point is a stylized signature or name. Write this in a loose, cursive script near the wrist area using the fine point marker to give it some weight. -
Draft the sun:
Draw a small circle with short, radiating lines for a sun motif. I like to alternate the length of the rays slightly for a hand-drawn feel. -
Illustrate the branch:
Sketch a simple stem with leaves paired on either side. This botanical doodle adds a nice organic break from the geometric shapes. -
Add the medal:
Draw a circular medal with a ribbon top. Inside the circle, add diverse scribbles or lines to give it texture without specific detail.
Ink Control
On porous rough casts, markers can bleed. Test your pen on a tiny area near the edge or bottom (like the palm side) to see how the ink spreads before starting.
Step 3: Texture & Filler
-
Switch markers:
Pick up your ultra-fine point marker now. This phase is about adding delicacy and filling the gaps. -
Fill with ‘starbursts’:
In the empty spaces between larger drawings, add tiny asterisks or 8-pointed starbursts. These act as confetti to tie the design together. -
Add dots and specs:
Randomly place single dots around your main drawings. This stippling effect reduces the starkness of the white background. -
Draw mini-moons:
Create small crescent moon shapes. You can leave them white or color them in solid black for contrast. -
Incorporate geometric fillers:
doodles like small triangles, diamonds, or the ‘shorts’ shape seen in the reference add fun variety. Keep these smaller than the main hearts and stars.
Fixing Smudges
Did the ink smear? Don’t panic. Turn the smudge into a shaded cloud or a solid black geometric shape. Mistakes are just new doodles in disguise.
Step 4: Detailing & Color
-
Add scribbled texture:
Select one or two hearts or shapes (like the dark heart near the bottom) and color them in with a messy, scribbled texture rather than solid black. This adds artistic depth. -
Refine lines:
Go back over any main outlines that look too thin. A slightly bolder line on the major stars helps them pop against the smaller doodles. -
Apply accents:
If you’re using the optional pink marker, carefully shade in just a few select hearts. Don’t overdo it; just one or two pops of color keep the aesthetic clean. -
Let it cure:
Allow the ink to dry for at least 10 minutes before touching or resting the arm against fabric to prevent smudging.
You now have a customized, cheerful cast that makes the healing process a little more stylish


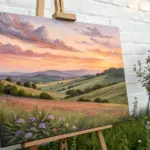
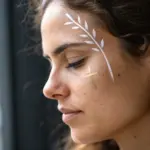
Simple Floral Vine Wrap
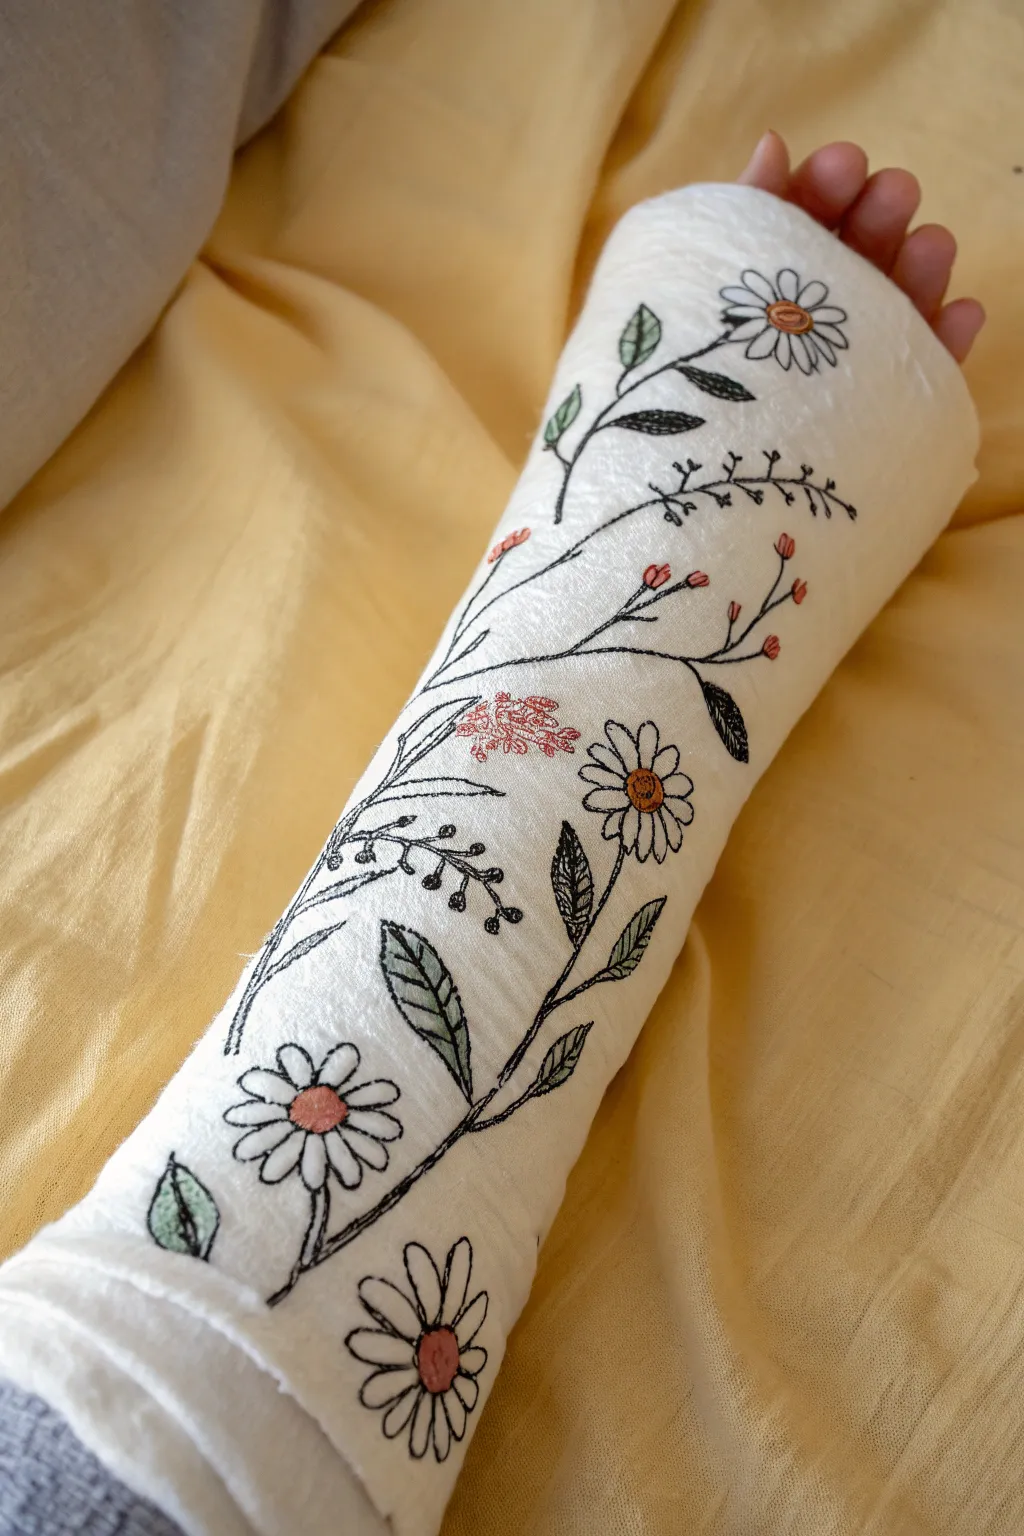
Transform a stark medical cast into a blooming garden with this delicate floral vine design. Using simple permanent markers, you will wrap climbing stems, leaves, and charming daisies around the arm for a look that feels both organic and uplifting.
Step-by-Step Guide
Materials
- Fine-point permanent markers (Black, Dark Green, Olive Green)
- Medium-point permanent markers (Mustard Yellow, Muted Red/Pink)
- Pencil (optional, for light sketching)
- Soft hi-polymer eraser
- A clean, dry fiberglass or plaster cast
Step 1: Planning and Foundation
-
Identify the primary vine path:
Visualize a gentle ‘S’ curve or spiral that wraps around the forearm. You want the main stem to flow naturally from the wrist area up towards the elbow, allowing space for branching off on either side. -
Sketch the main stems:
Using a pencil lightly, or going straight in with a fine-point black marker if you are confident, draw the primary vine lines. Keep the lines somewhat jagged and organic rather than perfectly smooth, mimicking real plant stems. -
Add secondary branches:
Draw shorter offshoot stems coming from your main vine. Angle them upwards as if they are reaching for sunlight. Vary the lengths to keep the composition interesting.
Step 2: Drawing the Leaves
-
Outline the leaves:
Along your black stems, draw teardrop-shaped leaf outlines. Place some in pairs and others as single leaves. Create a mix of sizes, placing larger leaves near the bottom and tinier ones near the top of the delicate branches. -
Add leaf details:
Draw a central vein down the middle of each leaf. For visual variety, shade one half of some leaves with fine diagonal hatch marks, leaving the other half white. This mimics the ‘woodcut’ style shown in the reference. -
Color the leaves:
Select your olive green or muted green marker. Carefully color in a few selected leaves fully, or add soft strokes of color to the unhatched sides of your leaves. Don’t color every single leaf; leaving some black and white adds an artistic touch.
Bleeding Lines?
Cast material is porous. If your marker lines are fuzzing or spreading, switch to an ‘ultra-fine’ tip and move the pen faster. Don’t hold the tip in one spot.
Step 3: Adding the Flowers
-
Draw daisy centers:
Scattered along the vine, draw small circles for the flower heads. I usually place the largest one near the wrist or top hand area as a focal point. -
Create the petals:
Draw long, slightly irregular oval petals radiating from the centers. Make sure the petals overlap slightly or have gaps to look natural. Don’t worry about perfection; wobbly lines add character here. -
Add berry clusters:
On the thinner, upper branches, draw tiny clusters of small circles to represent buds or berries. These fill empty negative space beautifully. -
Sketch filler botanicals:
Draw small sprigs that look like wheat or lavender. These are just single lines with tiny ‘V’ shapes or dots running up the sides, adding texture without heaviness.
Make it Metallic
Once the matte colors are dry, use a gold or silver metallic marker to add tiny dots to the flower centers or trace the leaf veins for a bit of shimmer.
Step 4: Refining and Coloring
-
Color the flower centers:
Take your mustard yellow or orange marker and fill in the circular centers of the daisies. You can add a tiny dot of brown or black in the middle for depth. -
Detail the berries:
Use a muted red or pink marker to color the small berry clusters. A light touch is best here so the ink doesn’t bleed too much into the porous cast material. -
Add sprig accents:
If you drew fern-like or feathery sprigs, you can gently trace over them with a colored fine-line marker or leave them stark black for contrast. -
Review contrast:
Look at the overall design. If a leaf feels too light, go back with your fine black marker and thicken the outline slightly to make it pop against the white cast. -
Final drying time:
Allow the design to sit untouched for at least 15 minutes. This ensures the ink fully sets into the cast texture and prevents smudging on clothing.
Now you have a charming piece of wearable art that makes the healing process a little more beautiful

All-Over Doodle Patchwork
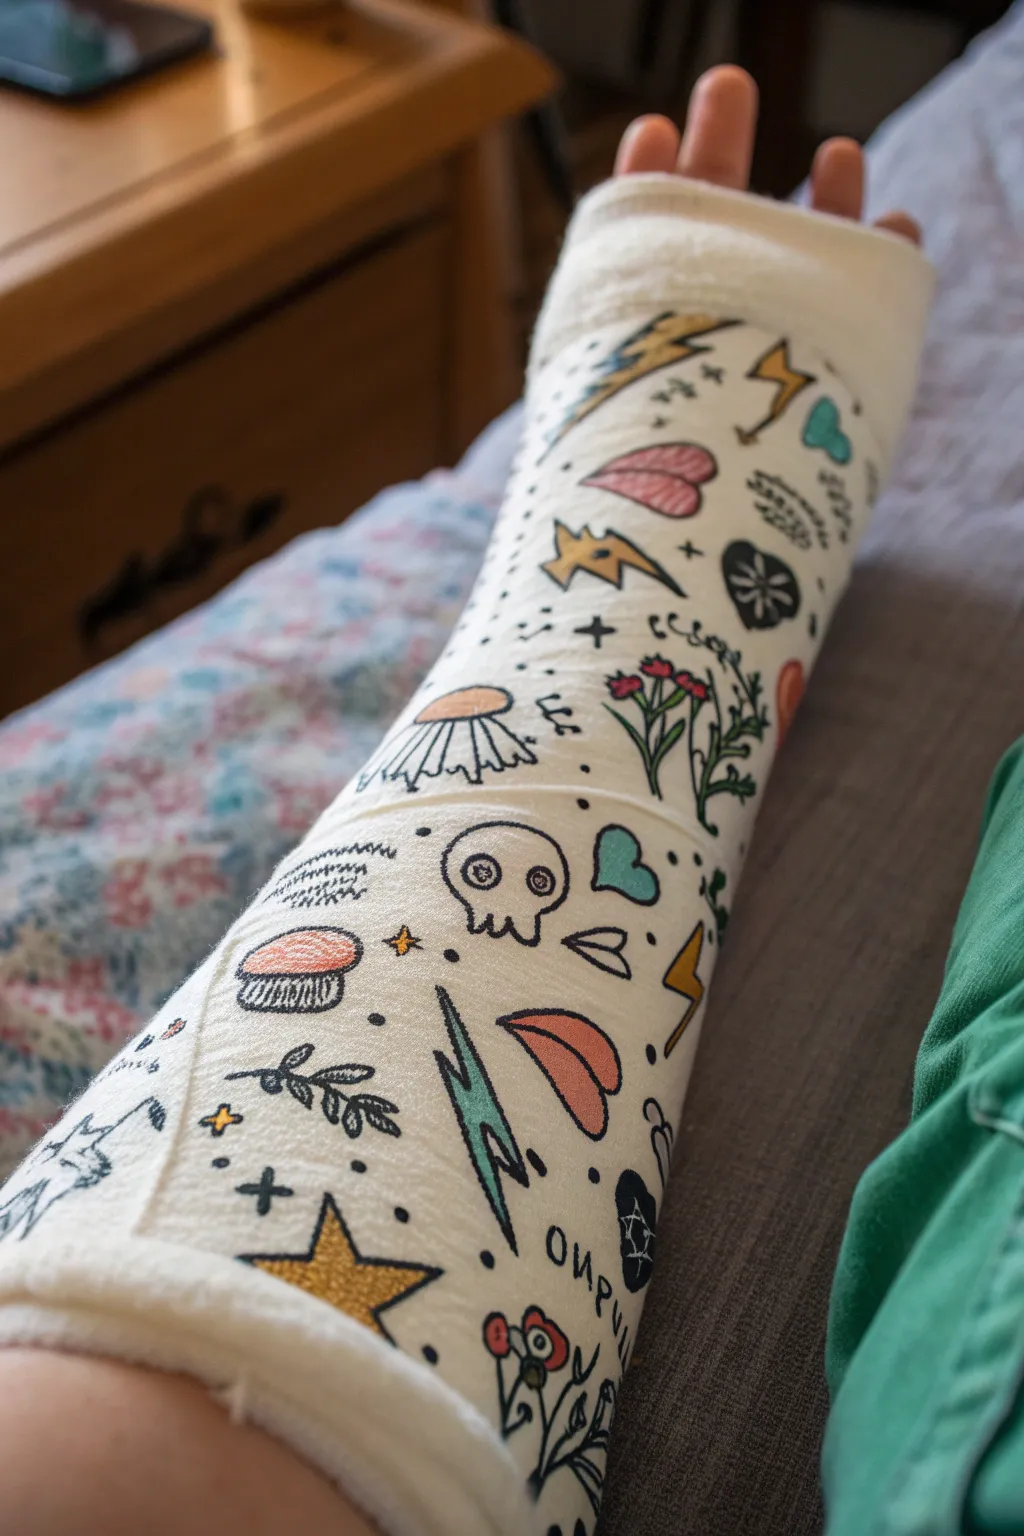
Transform a blank white cast into a patchwork of personality with this all-over doodle design. Inspired by classic tattoo flash sheets, this look combines small, edgy motifs like skulls, lightning bolts, and flowers for a busy yet cohesive aesthetic.
Detailed Instructions
Materials
- Fine-point permanent markers (black)
- Medium-point permanent markers (black, yellow/gold, red/pink, teal)
- Pencil and eraser (optional for sketching)
- Scrap paper for testing designs
Step 1: Preparation & Planning
-
Brainstorm motifs:
Before touching the cast, grab a piece of scrap paper and sketch out a variety of small, simple icons. Think about classic ‘flash’ imagery: lightning bolts, hearts, skulls, lips, stars, daisies, mushrooms, and leafy sprigs. -
Establish a color palette:
Limit your color selection to maintain a cohesive look. In our example, we’re sticking to black outlines with primary-adjacent fills: a dark teal, a warm red-pink, and a golden yellow. -
Clean surface check:
Ensure the cast is dry and free of any loose plaster dust. A quick, gentle brush-off with a dry cloth works well to prevent your markers from getting clogged.
Ink Flow Hack
Cast material is absorbent and rough. Use a light touch instead of pressing hard to save your marker tips from fraying too quickly.
Step 2: Core Motifs
-
Draw the skull:
Start with a larger focal point like the skull. Using your black fine-point marker, draw a rounded cranium shape with a squiggly jawline. Add two large circles for eyes and an upside-down heart for the nose. -
Add floating lips:
Nearby, outline a pair of parted lips. Keep the shape simple—an ‘M’ curve for the top lip and a deep ‘U’ for the bottom. Don’t color them yet; just focus on the black linework. -
Sketch lightning bolts:
Disperse a few lightning bolts across the surface. Draw these as jagged, Z-shaped outlines. Orient them in different directions to create a sense of movement. -
Introduce flora:
Draw a few botanical elements. Try a daisy with long, drooping petals, or a sprig of leaves with a simple central stem. Keep the lines crisp and deliberate. -
Add quirky extras:
Fill in medium-sized gaps with fun, random objects like a mushroom cap, a heart, or a circular eye motif. I find it helps to rotate the arm slightly to see where the natural empty spaces are forming.
Step 3: Fillers & Details
-
Tiny filler stars:
Look for small gaps between your main drawings. Add tiny four-pointed stars or simple ‘plus’ sign sparkles to fill the negative space without overcrowding it. -
Texture patches:
Create visual interest by adding patch-like textures. Draw a small area of squiggle lines or short dashes to mimic fabric stitches or rough shading. -
Decorative dots:
Sprinkle single black dots around existing clusters of drawings. This acts like confetti and helps unify the different elements.
Glow Up
Outline your favorite doodles with a silver or gold metallic marker to make them pop and catch the light.
Step 4: Coloring
-
Fill the bolts:
Take your yellow or gold marker and fill in the lightning bolts and any large stars. You don’t need to fill every shape completely; leaving a little white space can look stylistic. -
Color the lips and hearts:
Use the red or pink marker to color the lips and any hearts. Apply the ink gently; rough cast surfaces can sometimes bleed, so stay just inside your black lines. -
Add teal accents:
Use the teal marker for specific details, like the shading on a lightning bolt, a leaf, or a heart. This cool tone balances the warm yellows and reds. -
Shade the skull:
Instead of coloring the skull fully, use the fine black marker to add tiny stippling (dots) or hatching lines around the edges to give it shadow and depth. -
Review and refine:
Spin the arm around and look for any unbalanced areas. If you see a large white spot, add a quick lightning bolt or star. Go over any black outlines that might have faded during coloring.
Now you have a custom piece of wearable art that makes healing a little more stylish
Geometric Bands and Angles
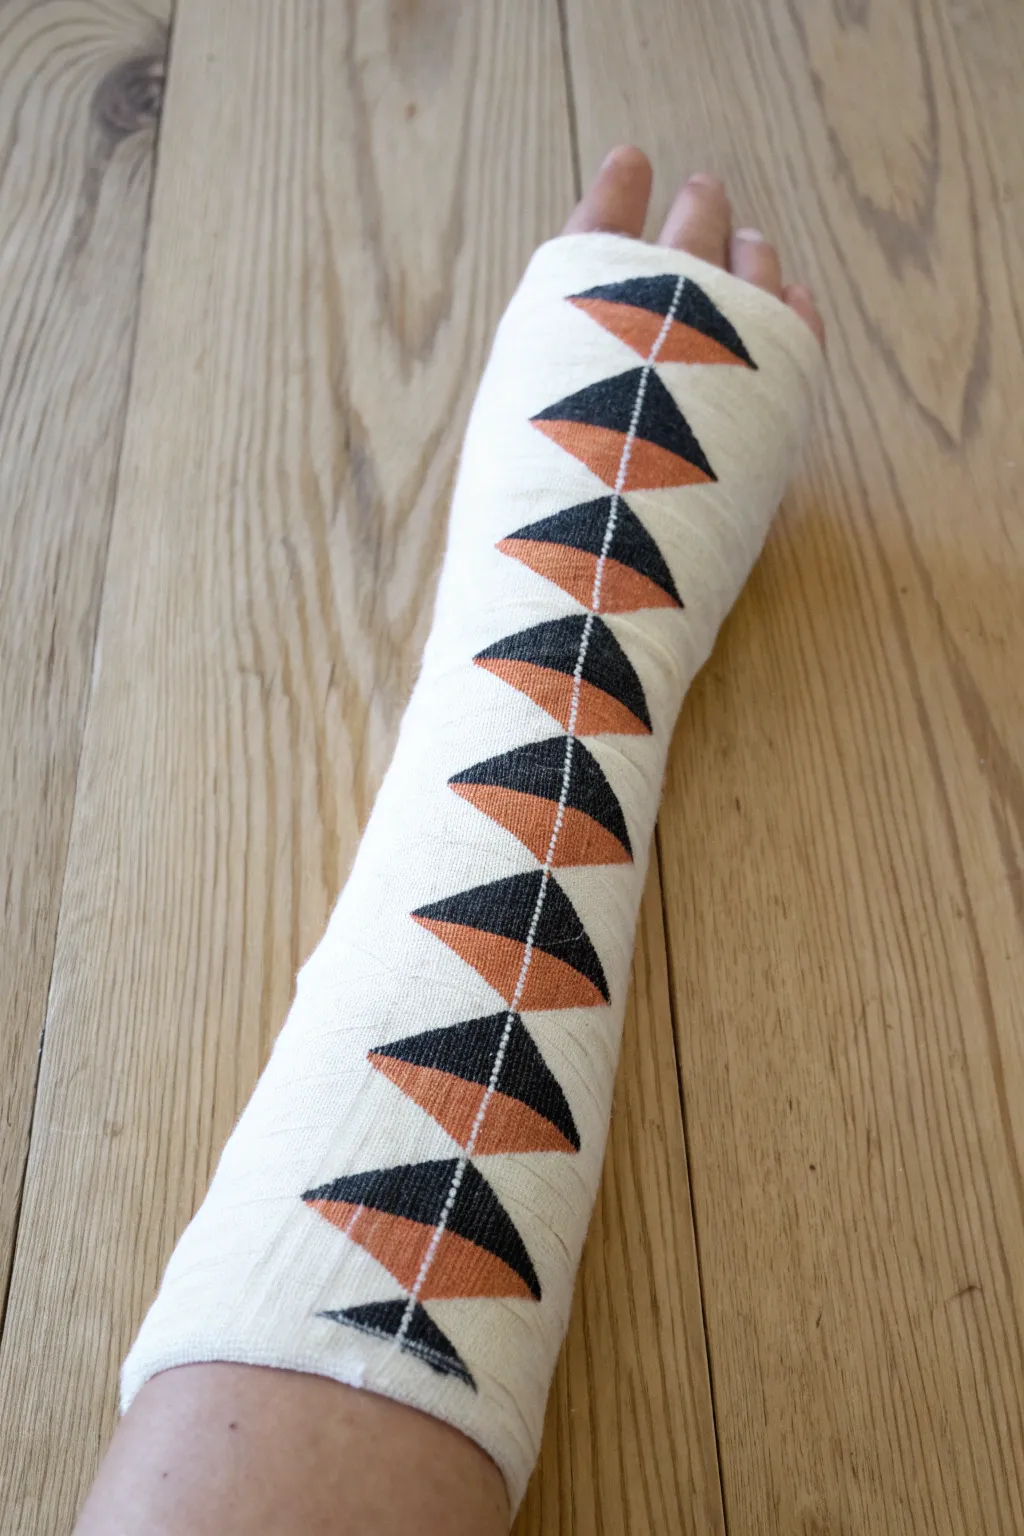
Transform a plain white cast into a work of modern art with this striking geometric design. The alternating black and terracotta triangles create a clean, linear spine that adds sophistication without overwhelming the surface.
How-To Guide
Materials
- A clean, dry white cast
- Pencil (HB or lighter)
- Flexible ruler or measuring tape
- Black permanent marker (fine tip and bold tip)
- Terracotta or rust-orange fabric marker or permanent marker
- Eraser (gentle)
- Masking tape (optional, for guidelines)
Step 1: Preparation & Mapping
-
Establish the centerline:
Begin by finding the visual center of the cast facing upwards. Using your flexible ruler, lightly sketch a faint pencil line running from near the wrist up towards the elbow. This spine will be the anchor for your entire design. -
Mark vertical intervals:
Along this centerline, make a small tick mark every 1.5 inches (or roughly 4 cm). These marks represent the points where your diamond shapes will meet tip-to-tip. -
Define the width:
At the midpoint between each vertical tick mark, measure out horizontally to the left and right. Mark a dot about 1 inch (2.5 cm) from the centerline on both sides. This ensures all your triangles will be uniform in width. -
Connect the dots:
Using the ruler, connect your vertical tick marks to the horizontal width dots to form a series of diamond shapes. Each diamond is composed of four smaller triangles meeting at the center cross. -
Review the symmetry:
Take a moment to step back and look at your pencil sketch. The diamonds should look like a continuous chain. If any look lopsided, gently erase and adjust the points now before committing to ink.
Ink Control Pro-Tip
Cast plaster acts like a sponge. To stop ink from bleeding (feathering) outside your lines, draw your outlines quickly and lightly, rather than pressing hard and slow.
Step 2: Outlining & Dividing
-
Trace the centerline:
Take your fine-tip black marker and carefully trace over the main vertical spine line first. This separates the left side of the design from the right. -
Outline the diamonds:
Trace the exterior perimeter of each diamond shape with the fine marker. Keep your hand steady, resting it on a stable surface if possible to avoid jittery lines. -
Create the internal divisions:
Draw the horizontal line across the middle of each diamond. You should now have a vertical stack of diamonds, each divided into four smaller triangular quadrants. -
Add separation detail:
To mimic the ‘stitched’ or segmented look in the photo, draw a tiny gap or break the line slightly where the diamond tips touch each other vertically. This subtle negative space keeps the shapes distinct.
Level-Up: Negative Space
Instead of filling the spine line solid, use a white gel pen to draw tiny dots or dashes over the black center line, creating a stitched fabric appearance.
Step 3: Applying Color
-
Start with black:
Select your bolder black marker. On the first diamond at the top, color in the top-left quadrant and the bottom-right quadrant. This creates a checkerboard effect. -
Alternative pattern:
For the next diamond down, switch the pattern if you like, or maintain consistency. In the reference, the black triangles alternate sides: Top-Left + Bottom-Right for one, then Top-Right + Bottom-Left for the next. -
Fill the length:
Continue filling in the black sections all the way down the arm. I find it easier to do all the black first to prevent picking up the wrong marker by mistake. -
Add the terracotta:
Take your rust-orange or terracotta marker. Fill in the remaining empty triangles. The warm tone contrasts beautifully with the stark black. -
Saturate the color:
Cast material is absorbent. You may need to go over the colored sections a second time to ensure the color looks solid and not patchy. -
Refine the edges:
Use the fine-tip black marker one last time to sharpen the outer edges of the shapes if the colored ink bled slightly outward. -
Clean up:
Once the ink is completely dry (give it roughly 10 minutes), gently erase any visible pencil guidelines that are peeking out from underneath the design.
Now you have a stylish, customized cast that turns a temporary setback into a fashion statement

PENCIL GUIDE
Understanding Pencil Grades from H to B
From first sketch to finished drawing — learn pencil grades, line control, and shading techniques.
Explore the Full Guide
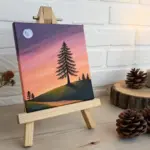
Galaxy Night Sky Cast

Transform a boring medical necessity into a window into the cosmos. This galaxy night sky design uses deep blues, vibrant purples, and stark whites to turn a plain white cast into a deep space masterpiece.
Step-by-Step Guide
Materials
- Acrylic paints (Dark Blue, Phthalo Blue, Purple, Black, White)
- Wide flat brush
- Medium round brush
- Fine detail brush or white paint pen
- Cup of water
- Paper towels
- Palette or paper plate
- Clear acrylic sealer spray (optional but recommended)
Step 1: Setting the Background
-
Clean surface:
Before you begin painting, ensure the cast surface is clean and dry. A quick wipe with a slightly damp cloth can remove any plaster dust that might interfere with paint adhesion. -
Base coat blocking:
Squeeze out your Dark Blue, Purple, and Black acrylics. Using your wide flat brush, start applying the Dark Blue in large, curved sections. Don’t worry about being neat; we want organic shapes. -
Adding the void:
While the blue is still slightly wet, paint irregular patches of Black in between the blue sections. These will serve as the deepest parts of space. -
Blending edges:
Use a slightly damp brush to gently feather the edges where the black and blue meet. This creates a smokey transition rather than a hard line. -
Let it dry:
Acrylics on plaster can soak in quickly, but give this base layer about 10-15 minutes to fully dry before moving on.
Paint Pen Precision
Drawing stars with a brush can be tricky on a rough surface. Use a white acrylic Posca pen (point size #0.7mm) for perfect, sharp star points.
Step 2: Creating the Nebula
-
Purple haze:
Mix a little white into your Purple paint to make it opaque and vibrant. Paint a sweeping band across the middle of the cast, layering it slightly over the dried blue background. -
Nebula streaks:
I like to take a dry brush with a tiny amount of the unmixed darker Purple and drag it through the lighter purple band to add texture and depth. -
Teal transitions:
Mix your Phthalo Blue with a touch of white to create a bright teal. Apply this near the wrist or elbow area in a swooping motion. -
Softening colors:
If any color block looks too solid, dip your brush in water and thinly glaze a transparent layer of Dark Blue over parts of the teal or purple to knock them back into the ‘distance’. -
Dry thoroughly:
Wait until these nebula clouds are completely dry. If the paint is wet, the stars we add next will turn muddy grey instead of bright white.
Step 3: Writing the Stars
-
Four-point stars:
Using a fine detail brush loaded with pure White paint (or a white paint pen), draw several large four-pointed stars. Start with a vertical line, then cross it with a horizontal one. -
Star placement:
Place the largest stars in the darkest areas of the cast for maximum contrast. Avoid clustering them all in one spot. -
Five-point stars:
Draw outline-style five-point stars scattered around the main nebula band. These add a playful, illustrative touch to the realistic background. -
Distant clusters:
Dip the very tip of your brush or a toothpick into white paint. Dot tiny specks around the larger stars to represent distant galaxies. -
Varying sizes:
Ensure your dots vary in size. Some should be barely visible pinpricks, while others can be bold punctuation marks in the sky. -
Adding twinkle:
For the largest four-point stars, drag the paint out very thinly at the tips to make them look like they are gleaming. -
Final seal:
Once absolutely dry, you can spray a clear acrylic sealer over the cast. This protects your artwork from scuffs and keeps the colors distinct.
Too Much Water?
Avoid soaking the cast. If your paint is too watery, the plaster will absorb it and soften. Use undiluted heavy body acrylics for safer coverage.
Now you have a cosmic creation that captures the wonder of the night sky right on your arm
Superhero-Inspired Webbing
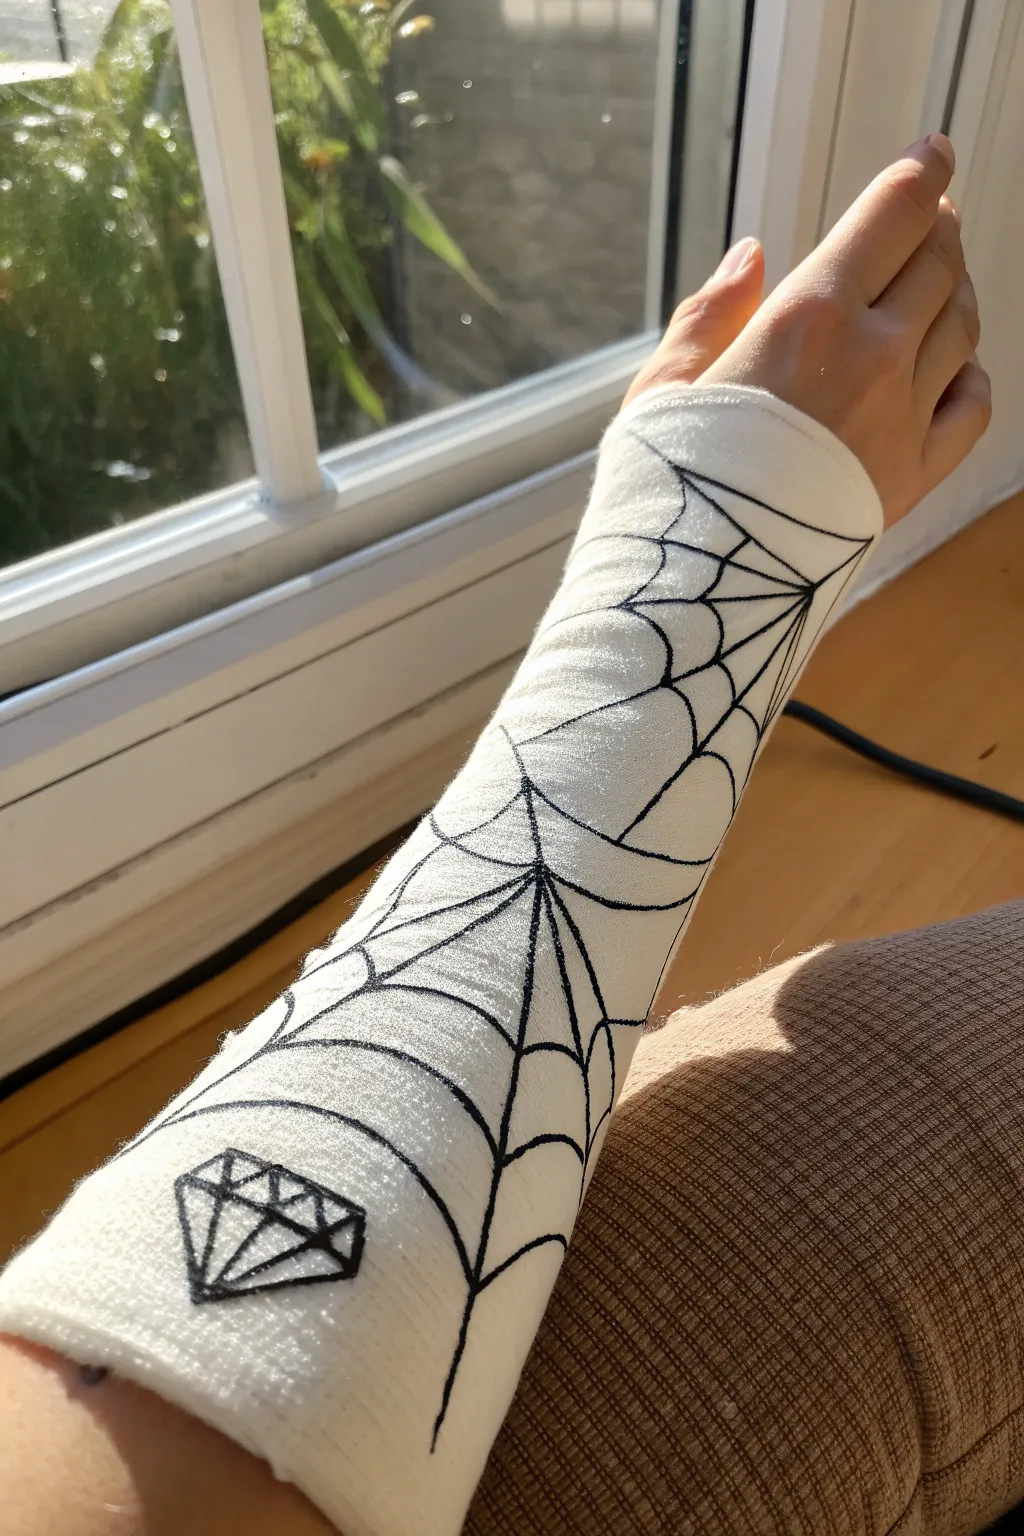
Turn a boring white cast into a superhero statement piece with this bold, high-contrast design. Featuring extensive spiderwebbing and a classic diamond accent, this easy-to-execute drawing brings a bit of comic book flair to the healing process.
Step-by-Step Tutorial
Materials
- White fiberglass or plaster arm cast
- Fine-point black permanent marker (e.g., Sharpie)
- Ultra-fine point black permanent marker
- Pencil (optional, for sketching)
- Eraser (if using pencil)
Step 1: Planning the Web Structure
-
Clean surface:
Ensure the cast is clean and dry. If it’s been worn for a while, wipe the surface gently with a slightly damp cloth and let it dry completely to ensure the marker ink adheres well. -
Locate focal points:
Identify where you want the center of your webs to be. In the reference image, the main web centers originate from the side of the forearm, creating a sweeping effect across the top. -
Draw the radial lines:
Using your fine-point marker (or pencil first if you’re nervous), draw long straight lines radiating outward from your chosen focal point. Space them out somewhat unevenly to give it a natural, organic look rather than perfectly geometric slices. -
Extend to the edges:
Continue these radial lines until they wrap around the curve of the arm or hit the edge of the cast. Imagine the web is draped over the arm, so lines should follow the contour.
Smooth Operator
Drawing on rough fiberglass is tricky. Use a light touch and slow strokes to prevent the marker tip from shredding or snagging on the texture.
Step 2: Weaving the Web
-
Start the cross-lines:
Begin connecting your radial lines with curved ‘scalloped’ lines. Start closest to the center point and work your way outward. -
Create the curve:
When drawing the cross-lines, curve them inward toward the center point (concave). This gives the web that classic sticky, drooping appearance. -
Vary the spacing:
As you move further away from the center of the web, make the spaces between your cross-lines slightly larger. This adds depth and perspective to the drawing. -
Connect sections:
If you have a large cast surface, you might need a second web center. Draw a second set of radial lines elsewhere and let the two web patterns merge where they meet. -
Thicken main lines:
Once your basic web structure is drawn, go back over the main radial lines with the fine-point marker to make them slightly bolder than the cross-lines. This adds visual hierarchy.
Comic Book Burst
Add small red spider silhouettes crawling on the web, or color in the diamond with bright blue to make the design really stand out.
Step 3: Adding the Diamond Detail
-
Position the diamond:
Locate an open space near the elbow or the end of the cast where the webbing is less dense. This will be the spot for your diamond icon. -
Draw the top table:
Draw a horizontal straight line. This will be the flat top of the diamond. -
Create the crown:
Draw angled lines down and out from the ends of your horizontal line, then connect them with a longer horizontal line below. This forms the trapezoid top section. -
Form the pavilion:
From the bottom corners of the trapezoid, draw two lines angling inward to meet at a sharp point at the bottom, forming a V shape. -
Add facets:
Draw a small triangle or trapezoid in the center of the top section. Connect the corners of this shape to the outer corners of the diamond to create the faceted look. -
Bold outline:
Retrace the outer perimeter of the diamond with a heavier hand or multiple passes to make it pop against the white background.
Step 4: Finishing Touches
-
Refine the lines:
Scan the entire cast for any faint or skipped spots where the marker moved over the textured cast material. Fill these in carefully. -
Textural check:
Because casts are bumpy, your lines might look jagged. I find it helpful to use the ultra-fine point marker to smooth out the edges of thicker lines for a cleaner finish. -
Let it set:
Allow the ink to dry for at least 10-15 minutes to prevent smudging against clothing or furniture.
Now you have a custom piece of art that makes recovery look heroic
BRUSH GUIDE
The Right Brush for Every Stroke
From clean lines to bold texture — master brush choice, stroke control, and essential techniques.
Explore the Full Guide
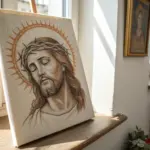
Mini Mural Scene Wraparound
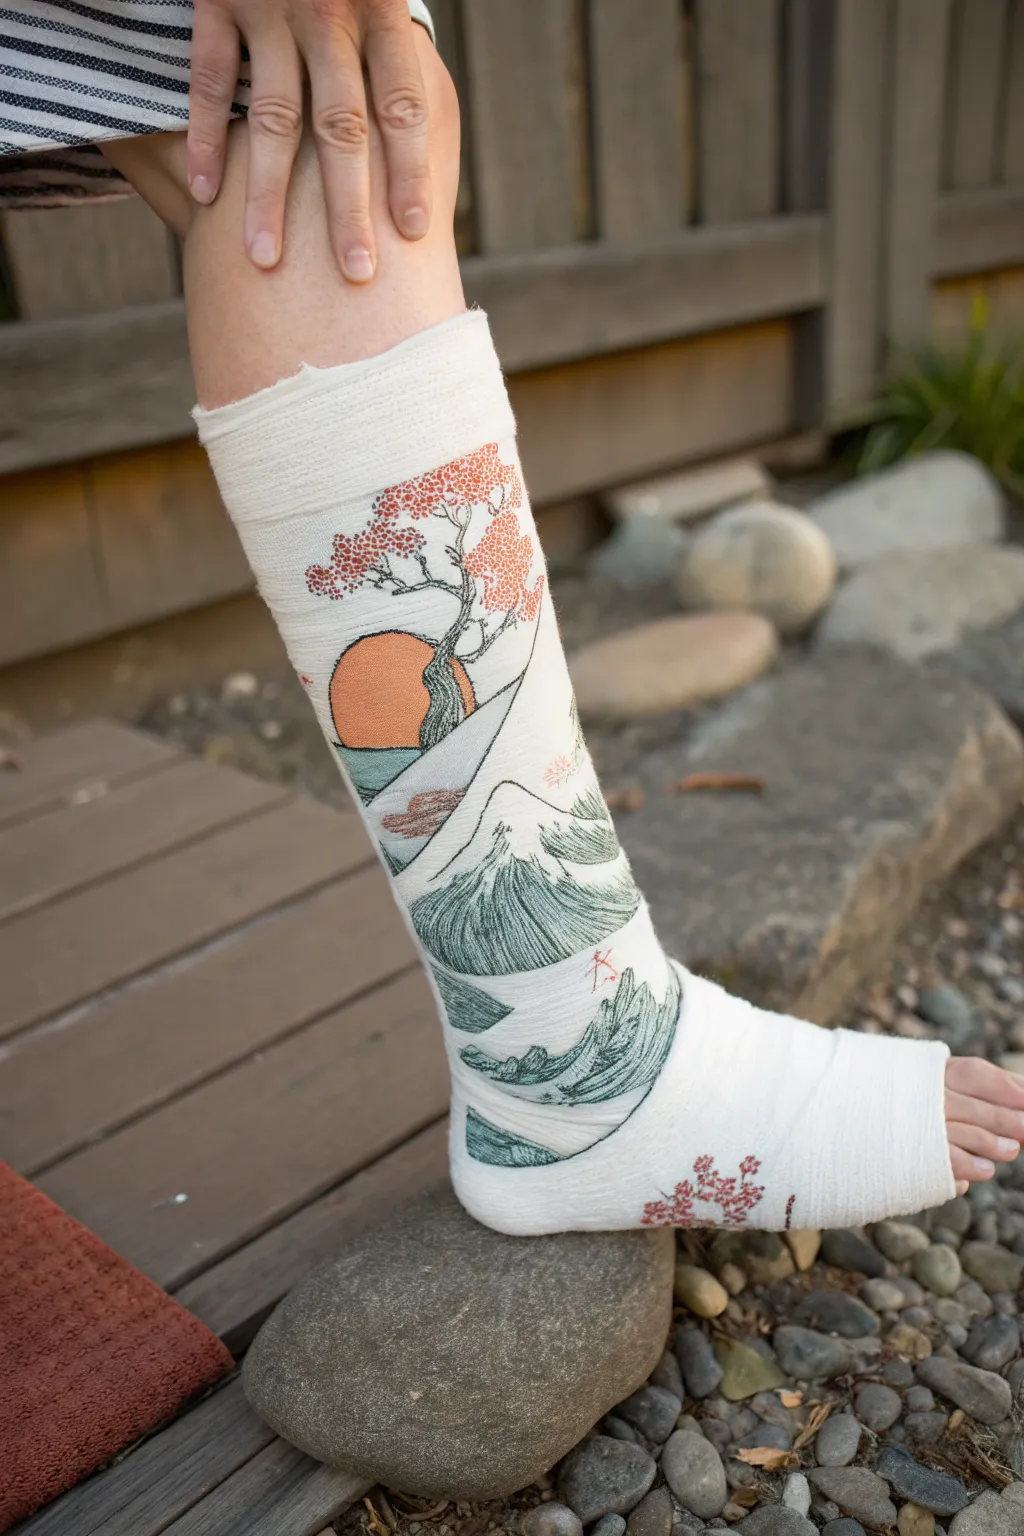
Transform a blank medical cast into a stunning piece of wearable art with this serene Japanese-inspired landscape. Featuring stylized waves, a rising sun, delicate cherry blossoms, and Mount Fuji, this project turns a temporary injury into a beautiful canvas.
Step-by-Step Tutorial
Materials
- Fine-point permanent markers (black, gray)
- Acrylic paint markers (orange, teal/sage green, red, white)
- Pencil (HB or lighter)
- White eraser
- Clear matte acrylic sealer spray (optional)
- Reference image of ‘The Great Wave off Kanagawa’ or similar Ukiyo-e art
Step 1: Preparation & Sketching
-
Clean surface:
Ensure the cast surface is clean and dry. Gently brush away any loose fibers or plaster dust that might snag your pen tip. -
Map the horizon:
Using a light pencil, sketch a diagonal horizon line that wraps around the cast. This adds dynamic movement compared to a flat horizontal line. -
Outline main elements:
Sketch the triangular shape of Mount Fuji near the center. Add a large circle for the sun peeking out from behind the mountain slope. -
Position the tree:
Draw the twisting trunk of a bonsai-style cherry tree extending from the top of the mountain/hills, letting the branches reach upward toward the knee.
Step 2: Line Work & Details
-
Ink the outlines:
Go over your pencil sketches with a fine-point black permanent marker. Keep your hand steady but allow for organic variations in line thickness, especially on the tree trunk. -
Create texture on the mountain:
Use thin, vertical hatching lines in black to shade the slopes of the mountain, leaving the snow-capped peak completely white. -
Draw the waves:
At the bottom of the cast, sketch rolling, claw-like waves inspired by Hokusai’s art. Use sweeping, curved lines to imply motion. -
Add tree bark details:
Fill in the tree trunk with wiggly, textured lines to simulate rough bark, shading the underside of branches for depth.
Cast Texture Tip
Fiberglass casts are bumpy. Use markers with felt tips rather than hard plastic nibs, as they glide over the uneven weaving much easier without splattering.
Step 3: Adding Color
-
Paint the sun:
Use an orange acrylic paint marker to fill in the sun circle. Apply in smooth, horizontal strokes to cover the cast’s texture. -
Fill the landscape:
Color the lower mountain slopes and rolling hills with a muted sage green or teal marker. Leave some white space or black ink hatching visible for a stylized look. -
Detail the waves:
Add touches of the same green/teal to the underside of the waves, keeping the crests white. -
Create cherry blossoms:
Using a red or coral marker, stipple small dots in clusters at the ends of the tree branches. Make the clusters dense near the branch and sparse further out.
Add Gold Accents
Use a metallic gold paint pen to outline the sun or highlight the edges of the clouds for a luxurious, illuminated manuscript effect.
Step 4: Finishing Touches
-
Add falling petals:
Dot a few stray red petals floating in the empty white space or ‘wind’ areas to connect the top and bottom of the composition. -
Refine contrast:
I like to go back with the black pen and re-outline the sun and mountain edges if the paint marker overlapped the original lines. -
Optional kanji:
If desired, add small red faux-stamps or Japanese characters near the bottom wave for an authentic print look. -
Seal the work:
Once completely dry (wait at least an hour), lightly mist with a clear matte sealer to prevent the marker from smudging against clothing.
Enjoy your customized healing accessory as you recover


Have a question or want to share your own experience? I'd love to hear from you in the comments below!